Tag Archives: finished projects

Again!

Again!

Again!

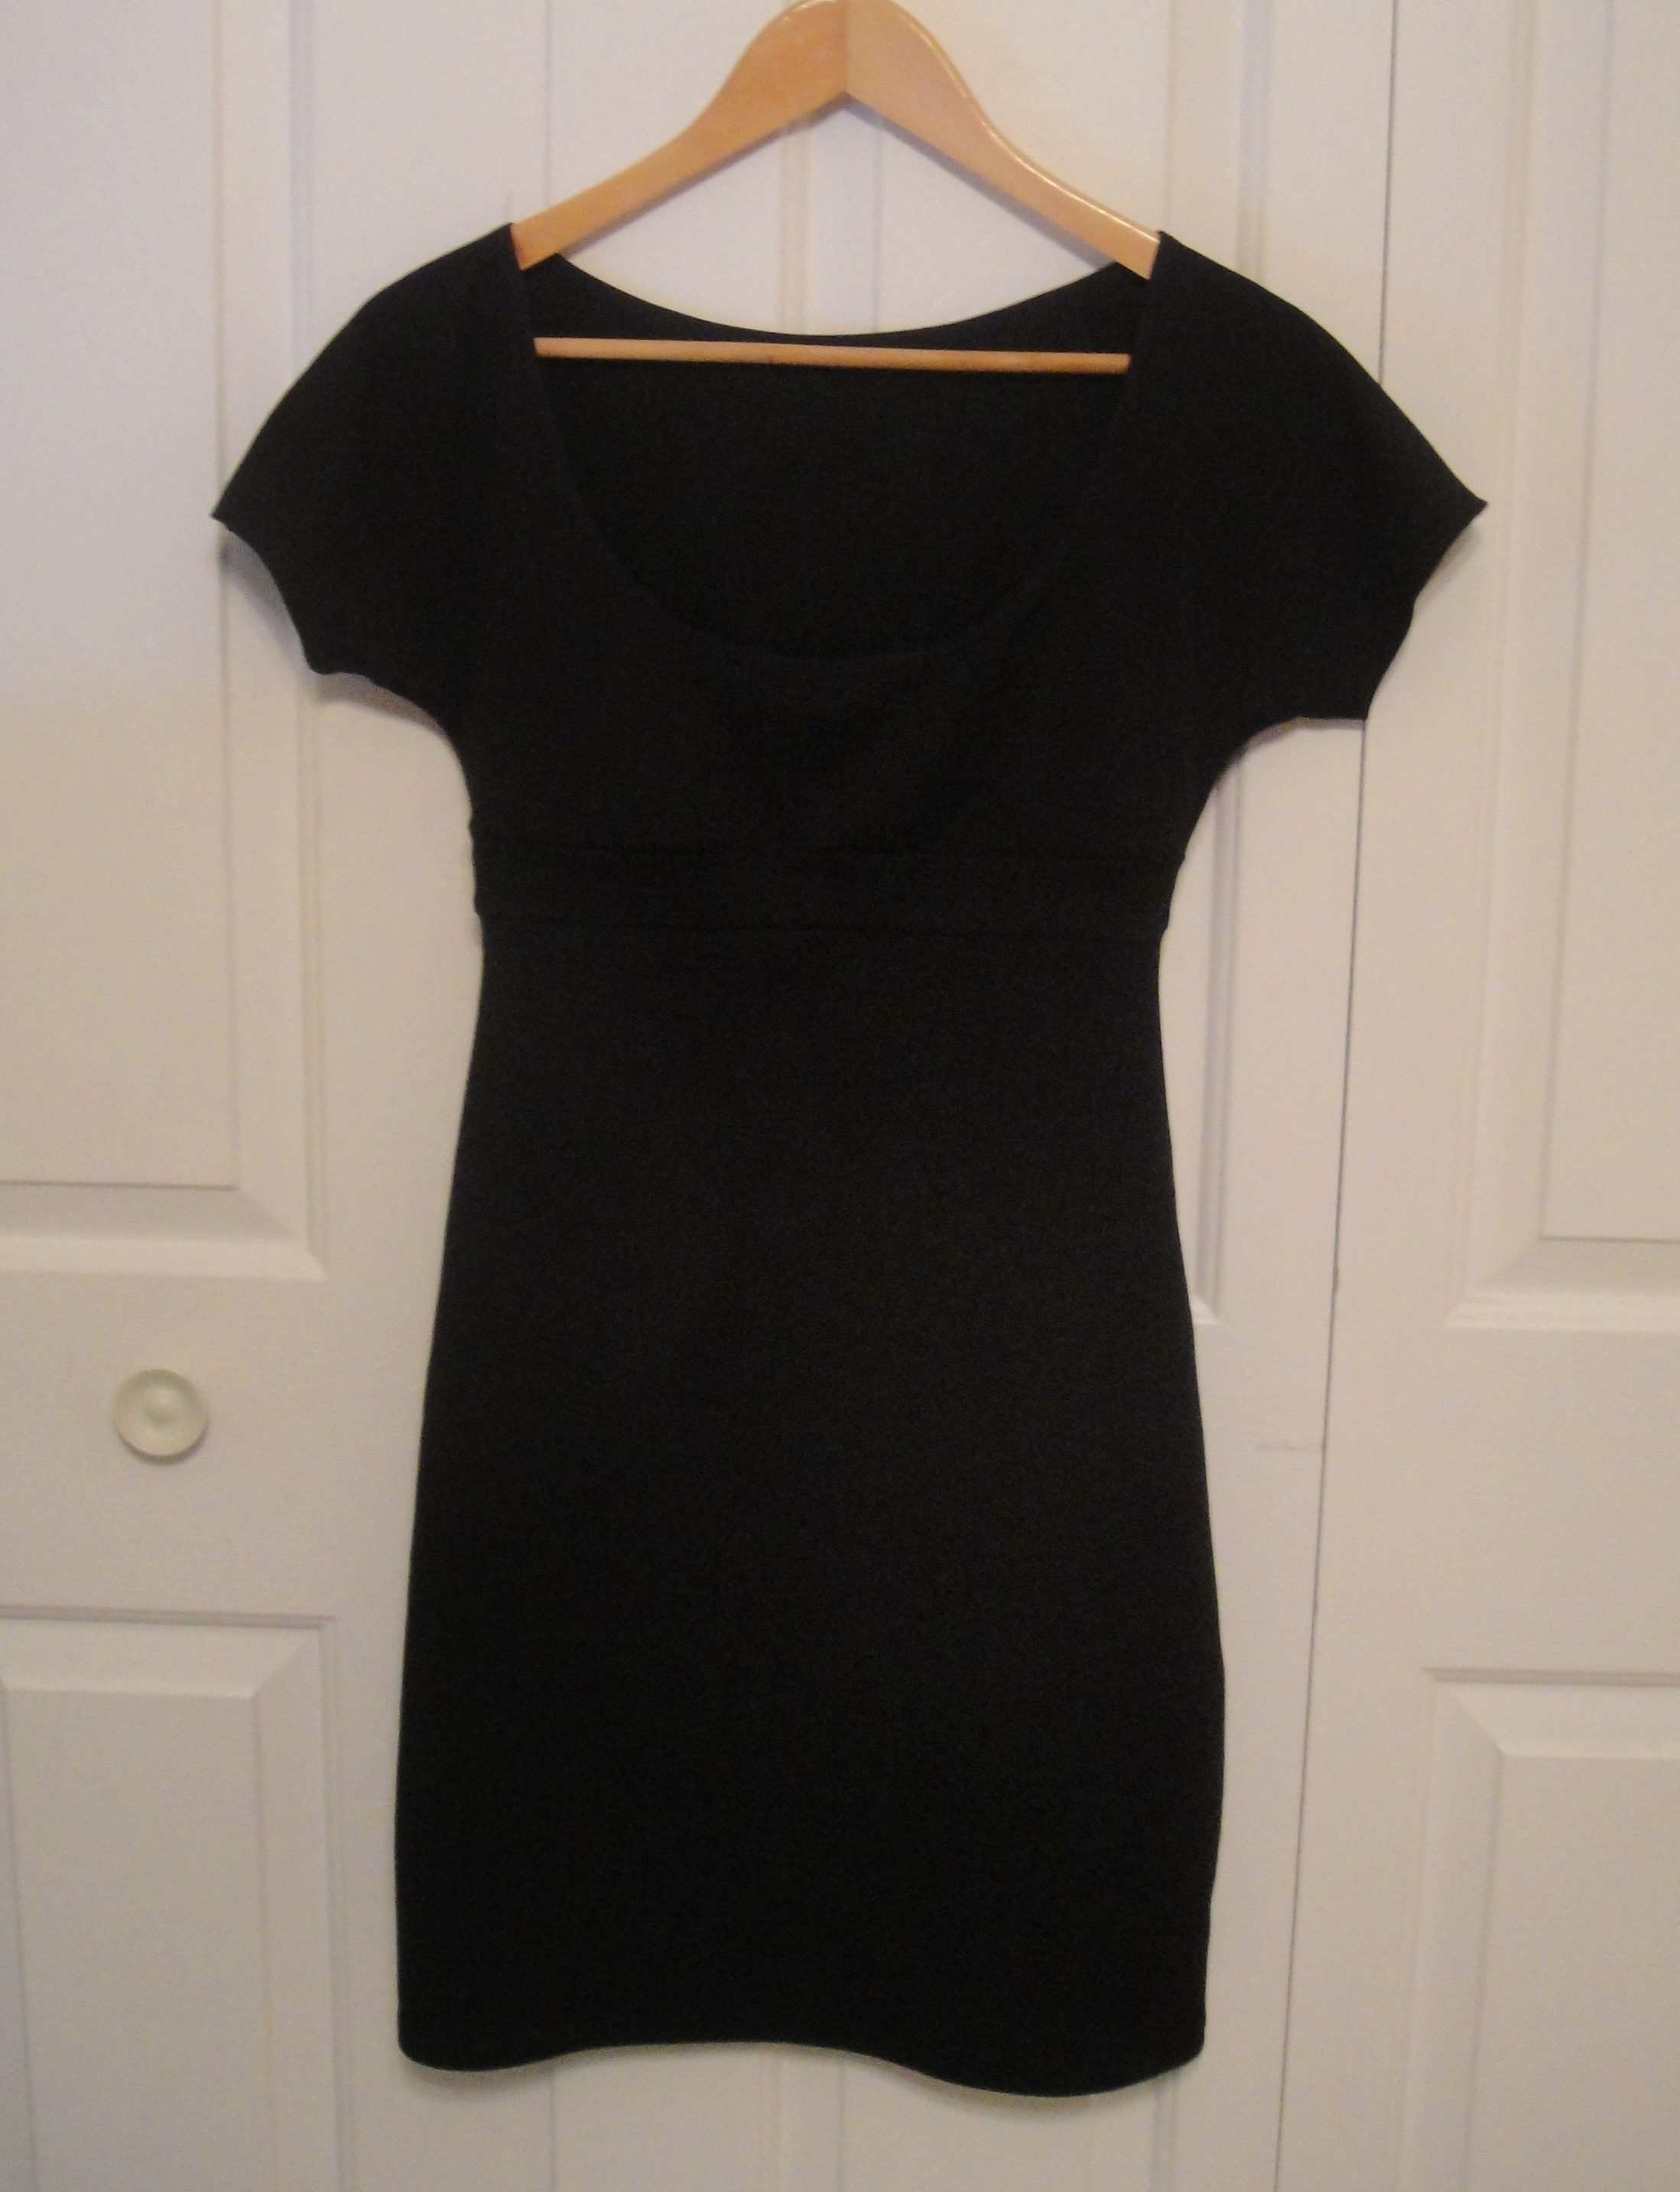
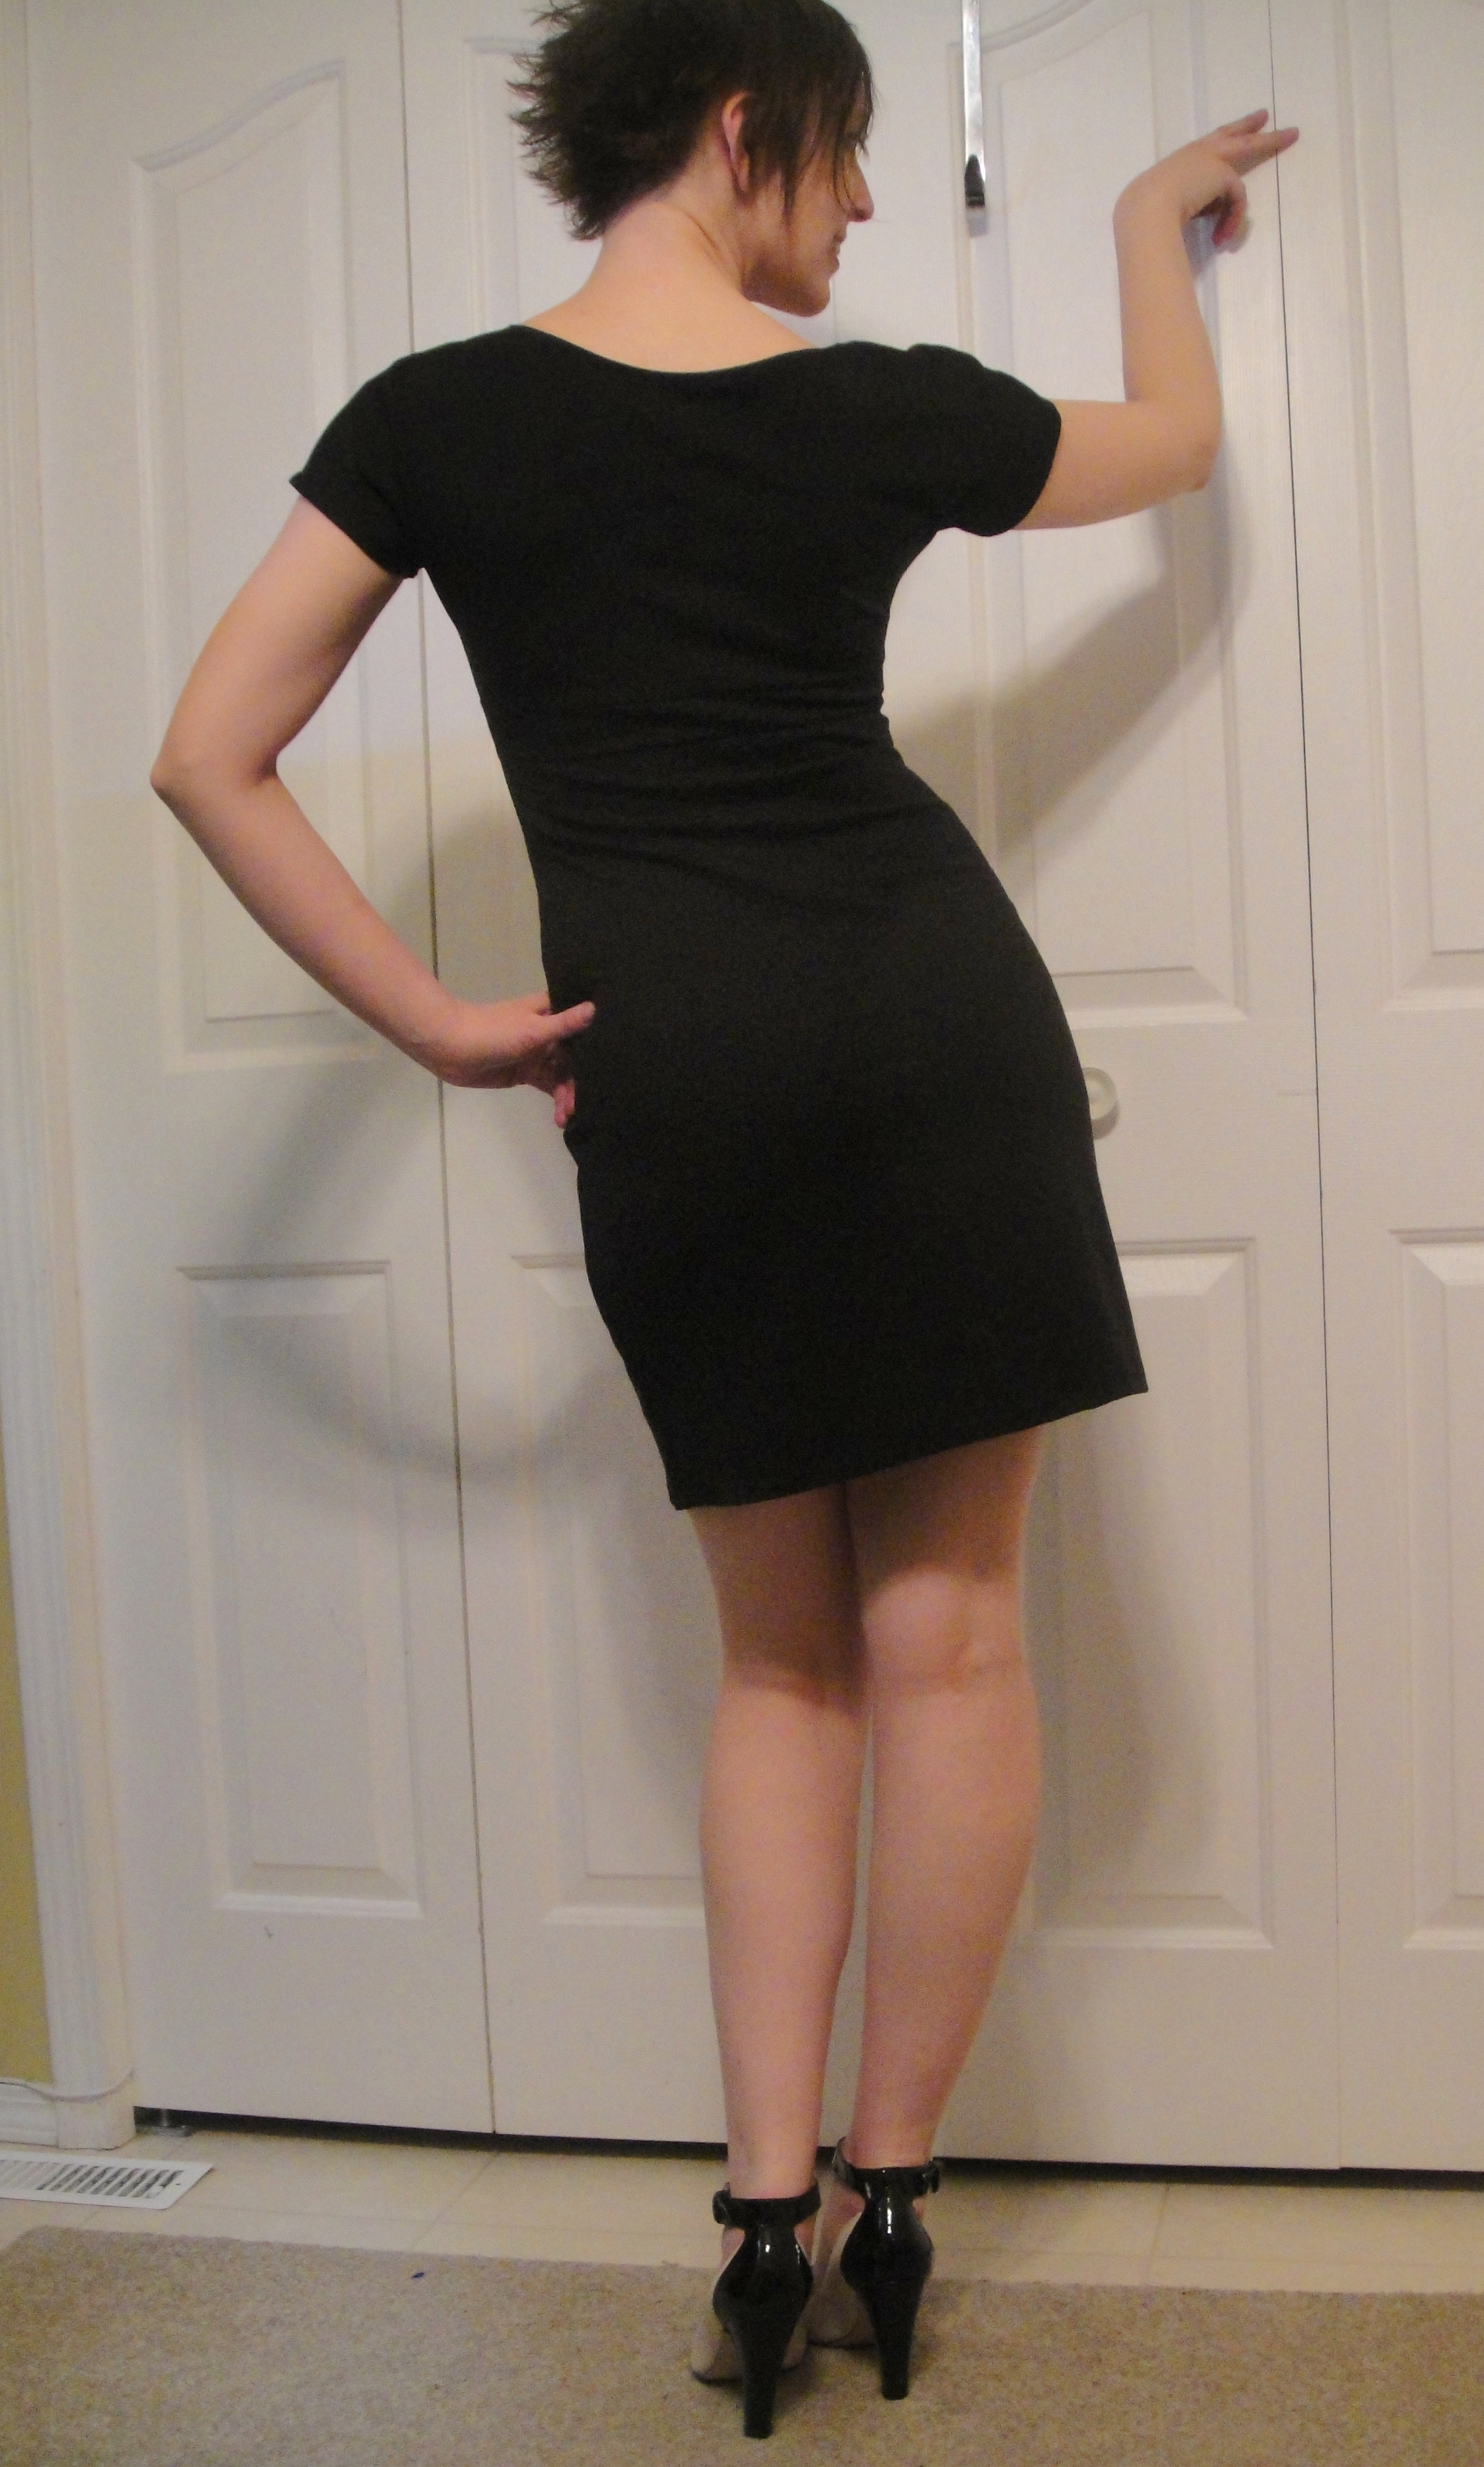
I couldn’t stop myself. I made another Jalie 3024.

Cute with shoes. Black photographs for shit.

Cute with shoes. Black photographs for shit.

The part where it only takes about two hours from first cut to hemming helps. This version is made of a heavy ponte, which I managed to nab a remnant of the other day. (It being prohibitively expensive otherwise.) I love that I can make this dress from a 1m remnant with room to spare. I made the neckline scoop a little lower this time (I think I overshot a wee bit… Maybe 1/2″ higher next time?).

Light!

Light!

Here’s an overexposed view of the front so you can maybe kinda sorta see the detail, not that it’s a surprise.

I finished it with some more of the narrow fold over elastic Mary of Hey Beautiful picked up for me in one of those rare and perfect moments of internet/real world synchronicity. It’s perfect. Thank you!!! Of course, it’s also black, so all of my attempts to photograph a closeup failed miserably.

Back view. Of which you can see absolutely nothing!

Back view. Of which you can see absolutely nothing!

No back-seam on the skirt this time, just swayback wedges removed from the skirt and bodice pieces in the back.  It’s not overly smooth in the back, but tolerable. I also took it in under the arms a wee bit, as it was sticking out in the heavier fabric. It’s an easy dress to alter. My husband has been mourning the absence of a little black dress from my wardrobe for over a decade now, so he’s actually quite approving of the make. 🙂

And again!

And again!

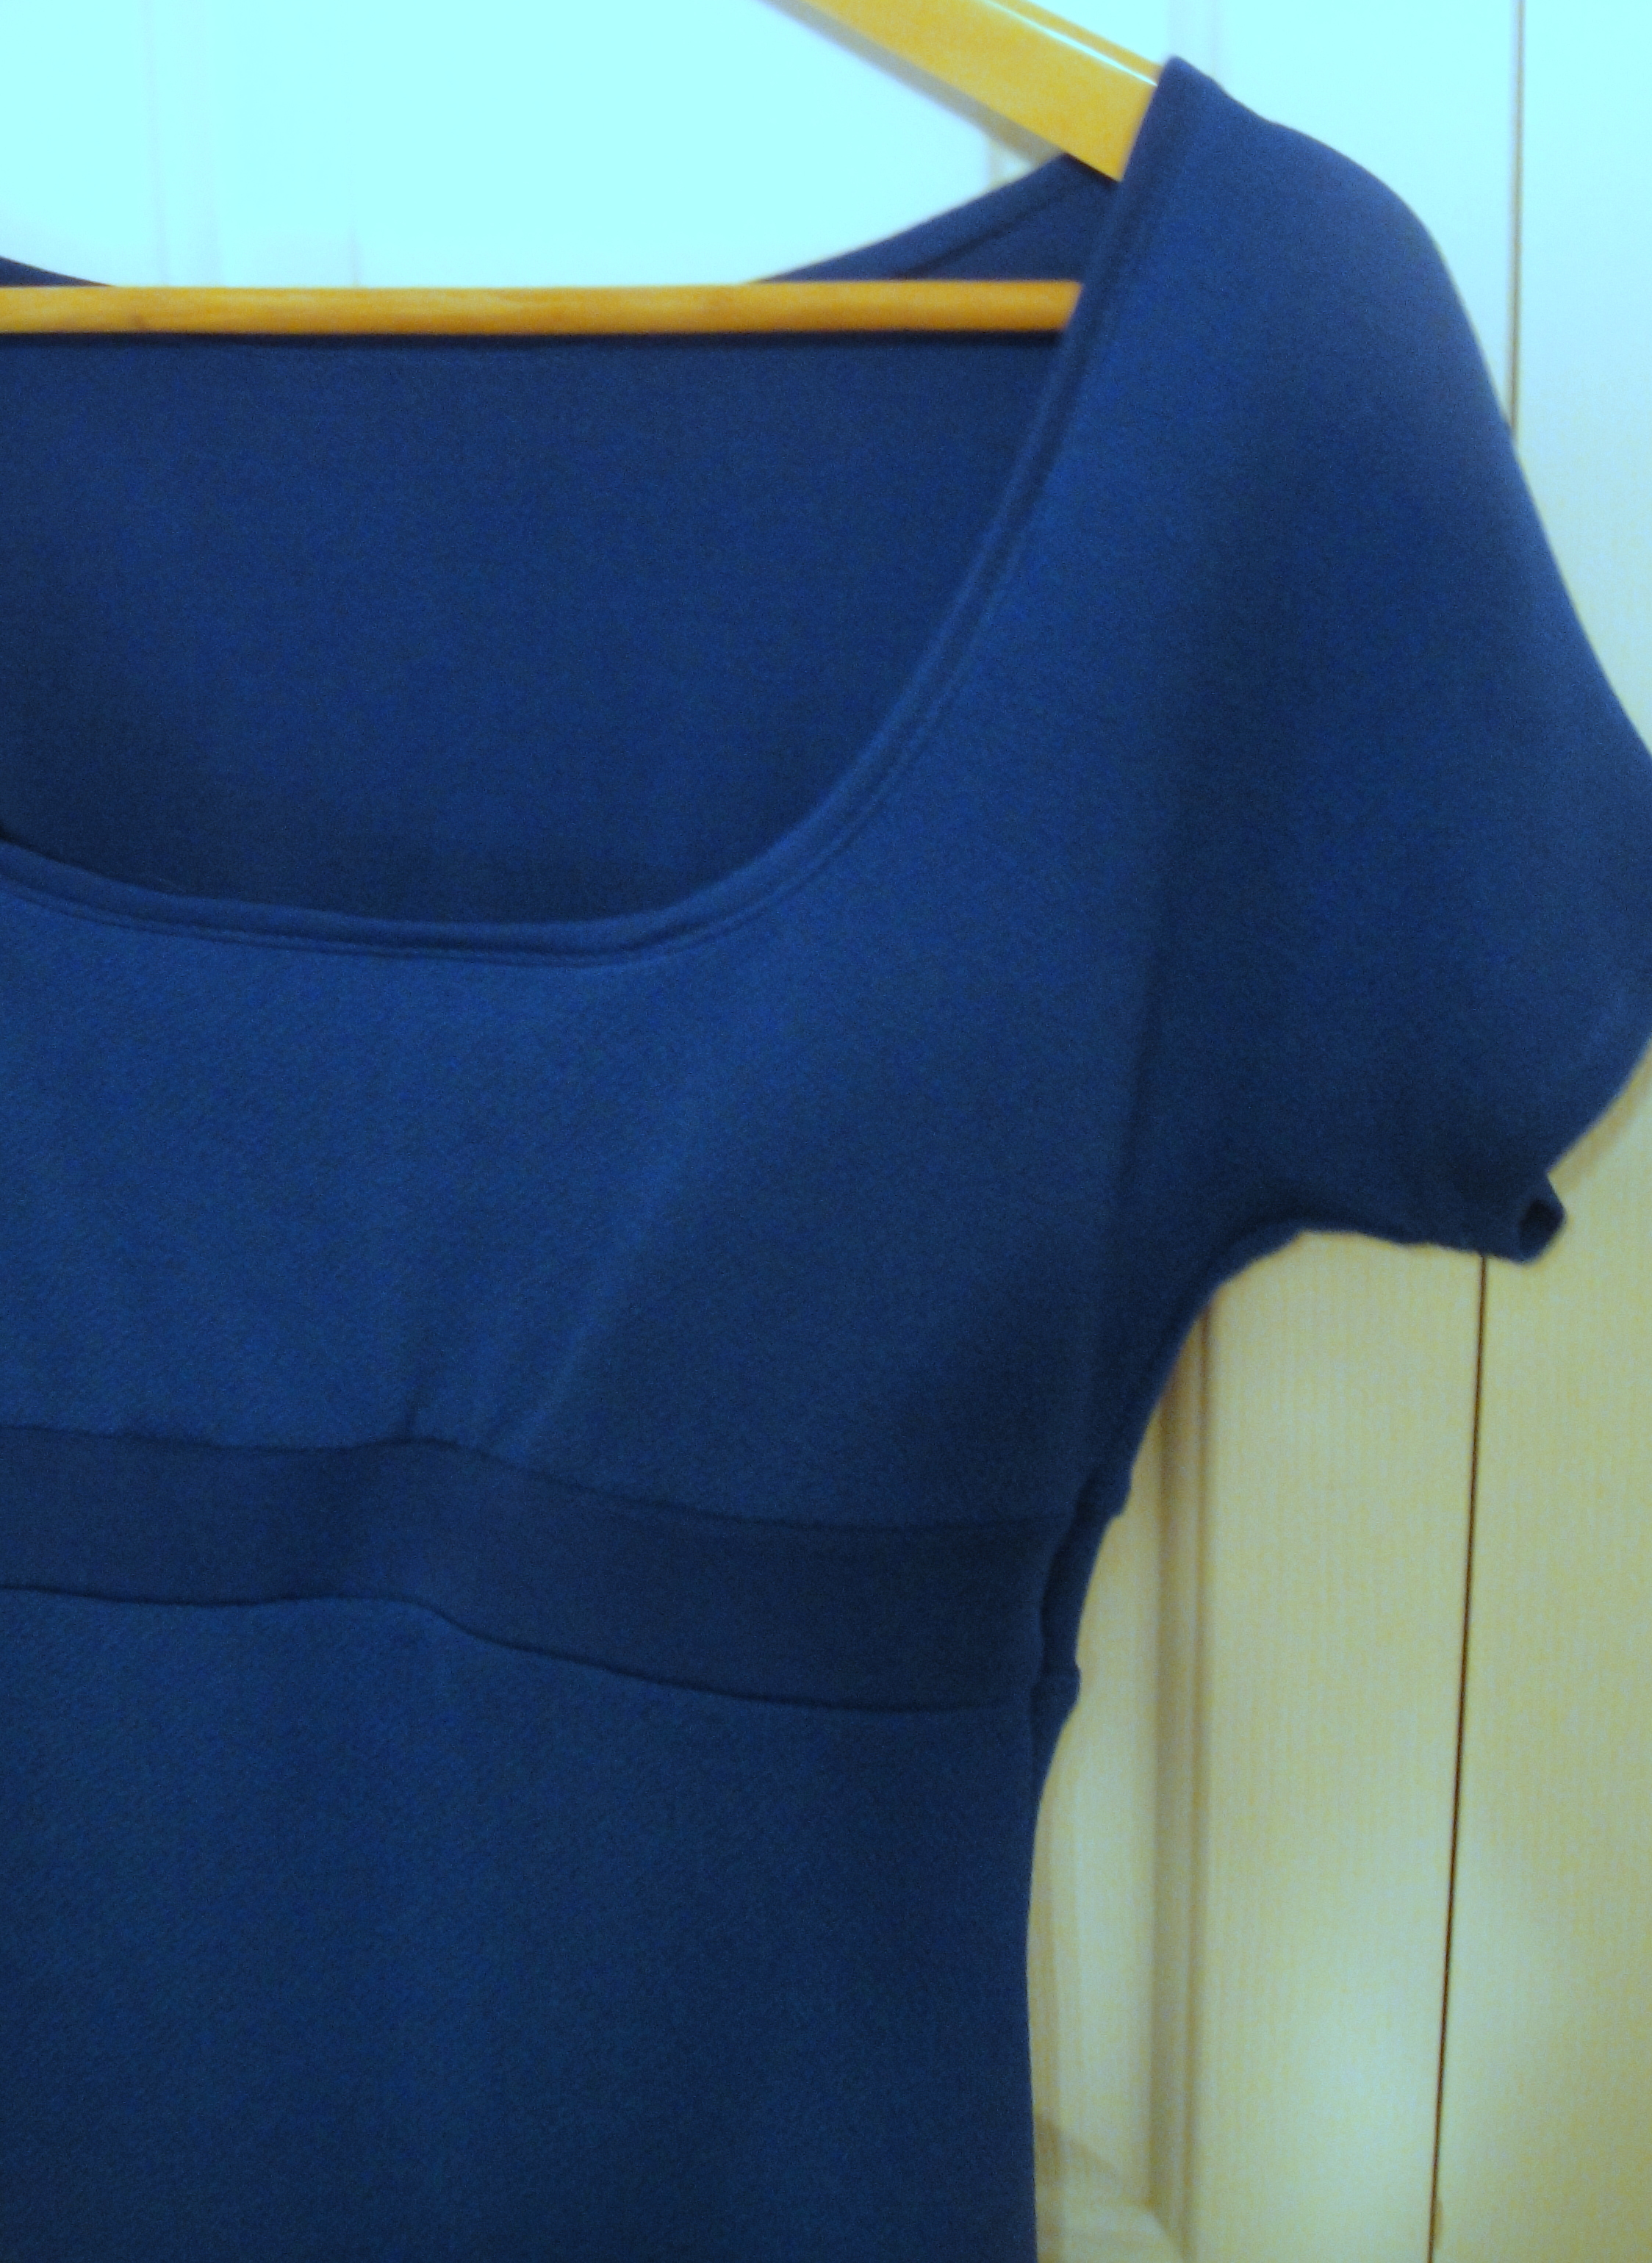
And then I made another. This one in a blue knit advertised as “crepe,” although it’s really a heavier knit with one side that’s textured to vaguely resemble crepe.

Playing with textures.

Playing with textures, which you can’t really see. (Tweaked to show the actual, royal blue colour. I HATE INDOOR LIGHT.)

The other side is quite shiny and spandexy. I used the shiny side for the waistband and the neck binding on this version. I like the contrast, subtle as it is. To reduce bulk, after I put the first pass of the binding on, I trimmed the binding’s seam-allowance close to the stitching line. This definitely reduced the bulk—here’s hoping that it doesn’t result in a binding failure later on. This knit is stretchier (especially lengthwise) than the pontes I’ve been using, so I made it up more-or-less as the pattern dictates, aside from my scoop neck (I had a wild moment where I thought about hacking a cowl neck, but those can be pretty hit-or-miss and I love a nice, wide scoop of pretty much any flavour. Maybe next time.)

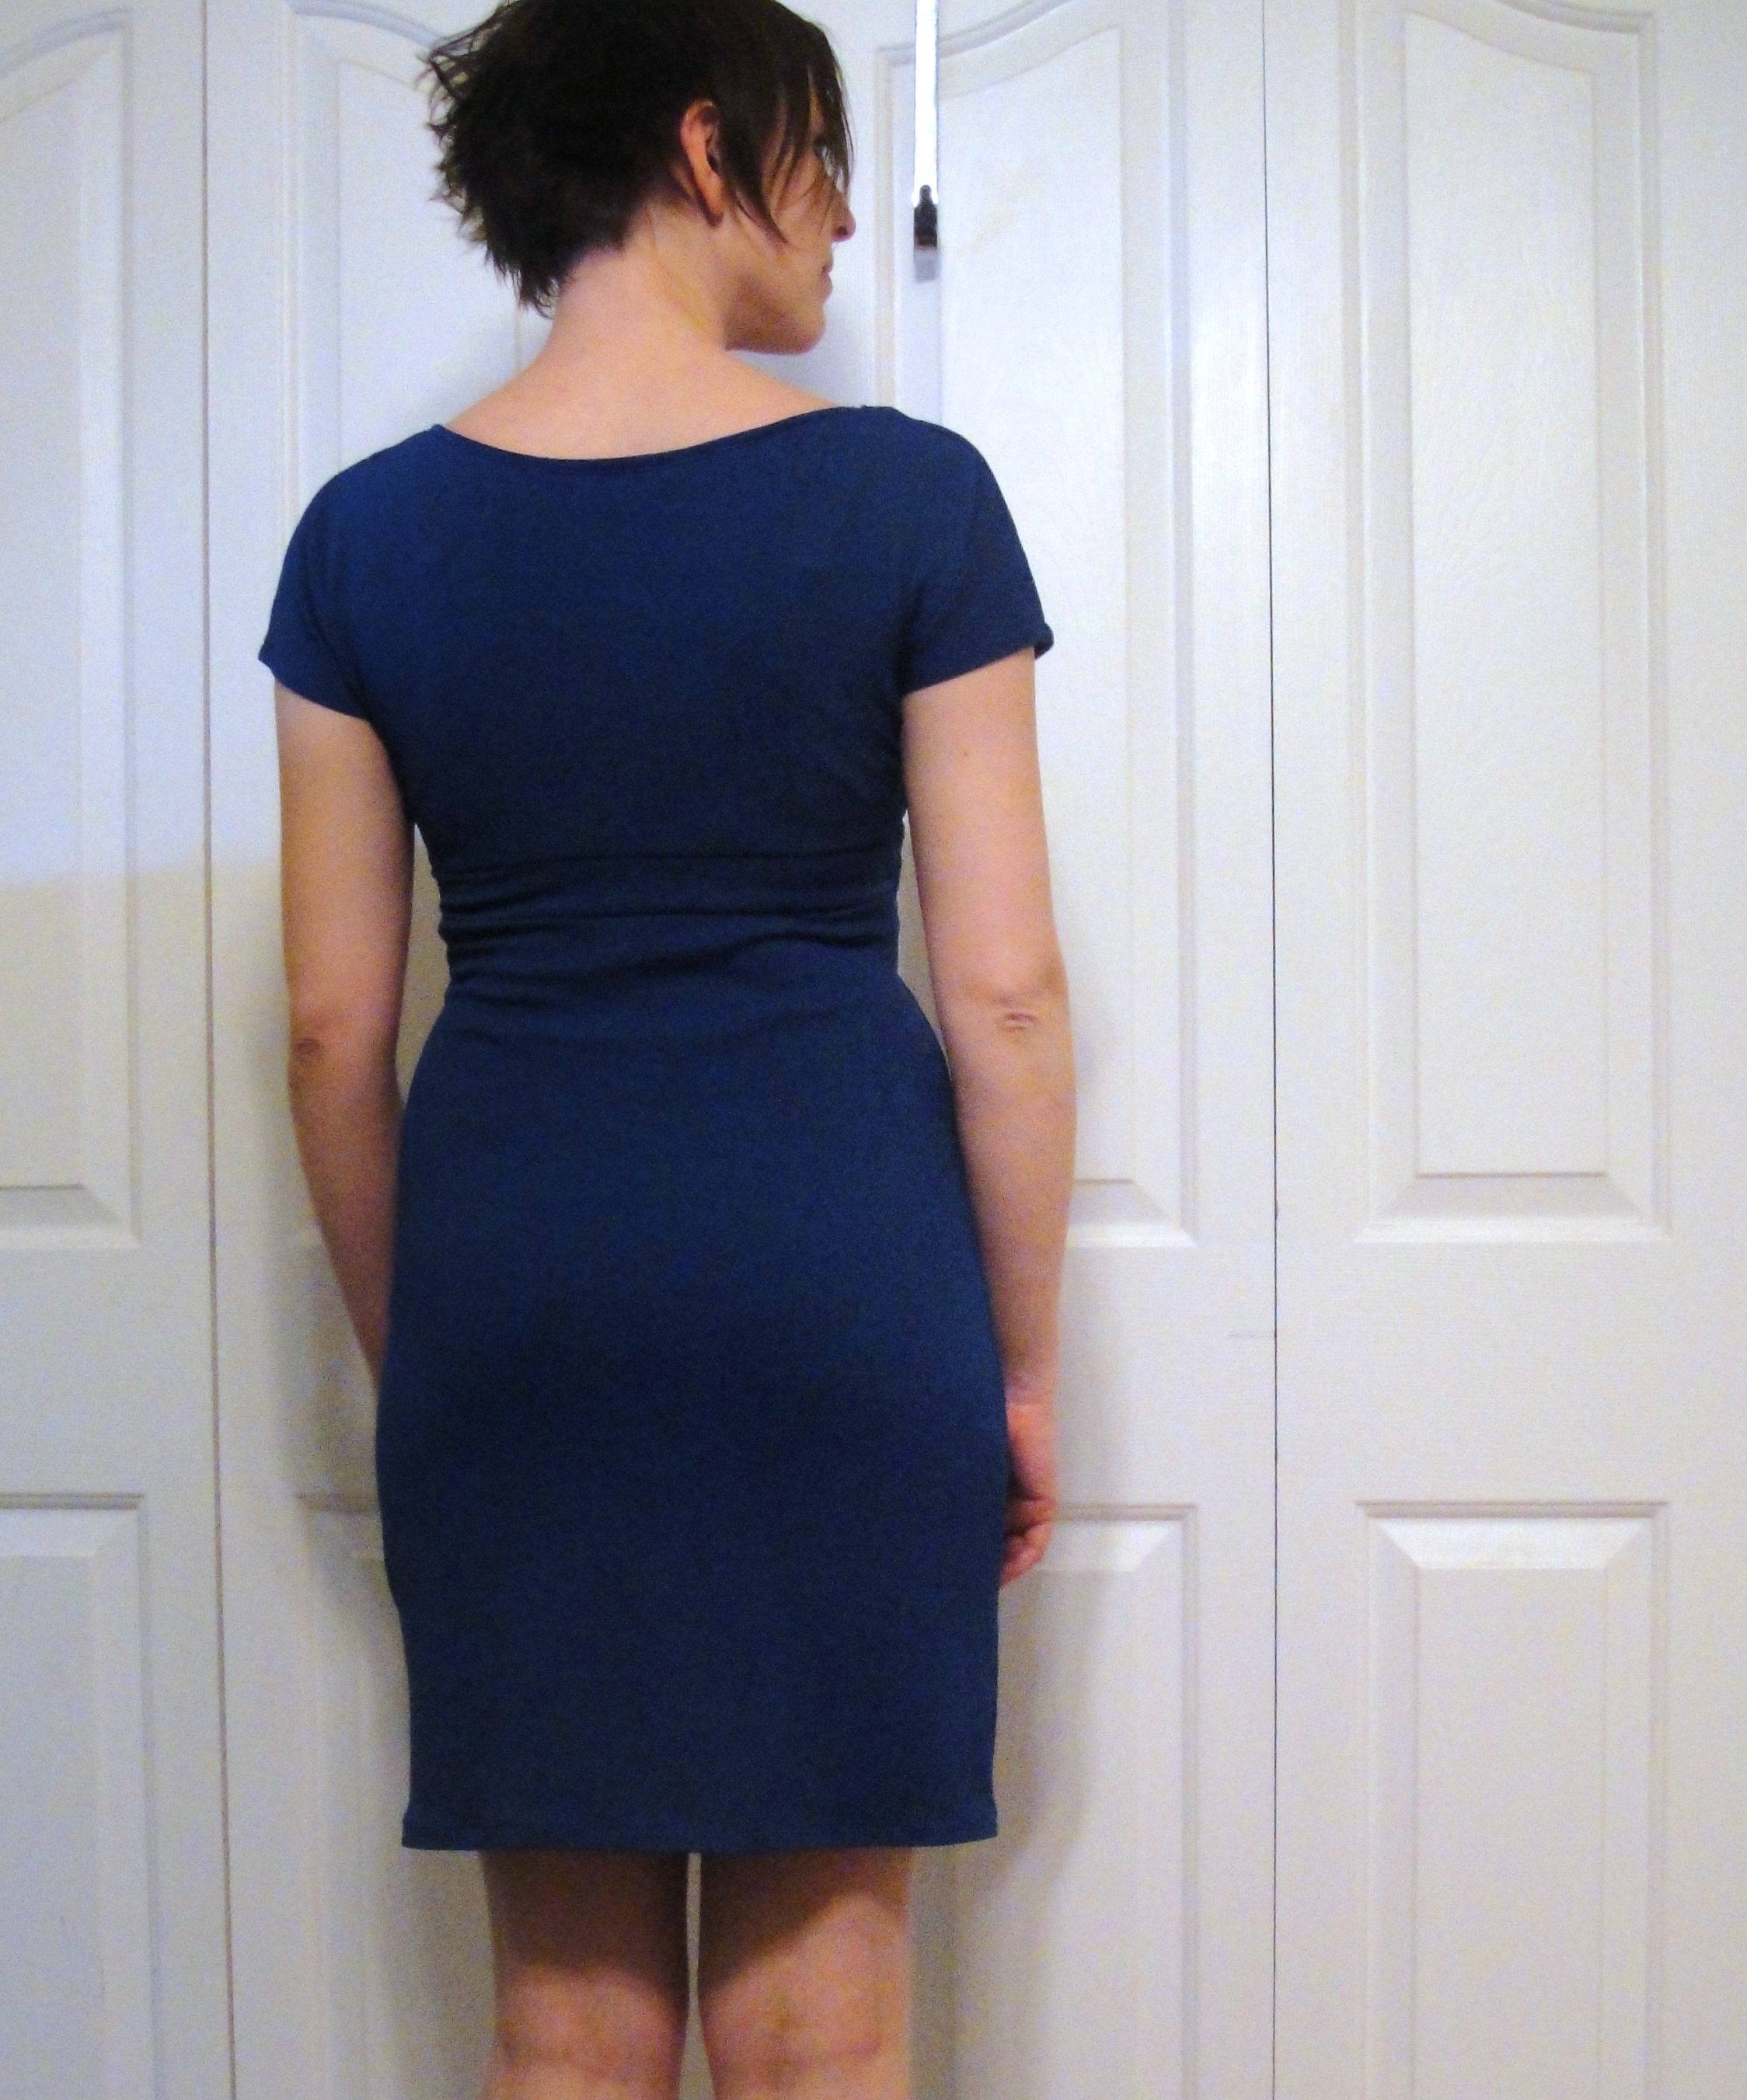
Back. Remains bunchy.

Back. Remains bunchy.

I thought I made my swayback adjustments even more extreme, but it’s still kinda bunchy. Doesn’t bother me in the actual wearing, mind you, since I can’t see it. 😉 Because this is a clingier knit than the others (even though it’s still quite heavy), I had a bad moment while trying it on where it was clinging to every lump and bump in a way that was not a good look at all. Then I threw my Gertie slip on underneath, and all of a sudden everything was just fine. YAY! Which reminds me, man I love that slip.

Ciao!

Ciao!

I still want a red one, and there are some scuba prints at Fabricland that would be absolutely to die for in one of these and why didn’t I scoop some up last month when they were 60% off?!?!?! But I think I may be close to being satisfied… maybe… 🙂

6 Comments

Filed under Sewing

Cream Lace Ensemble

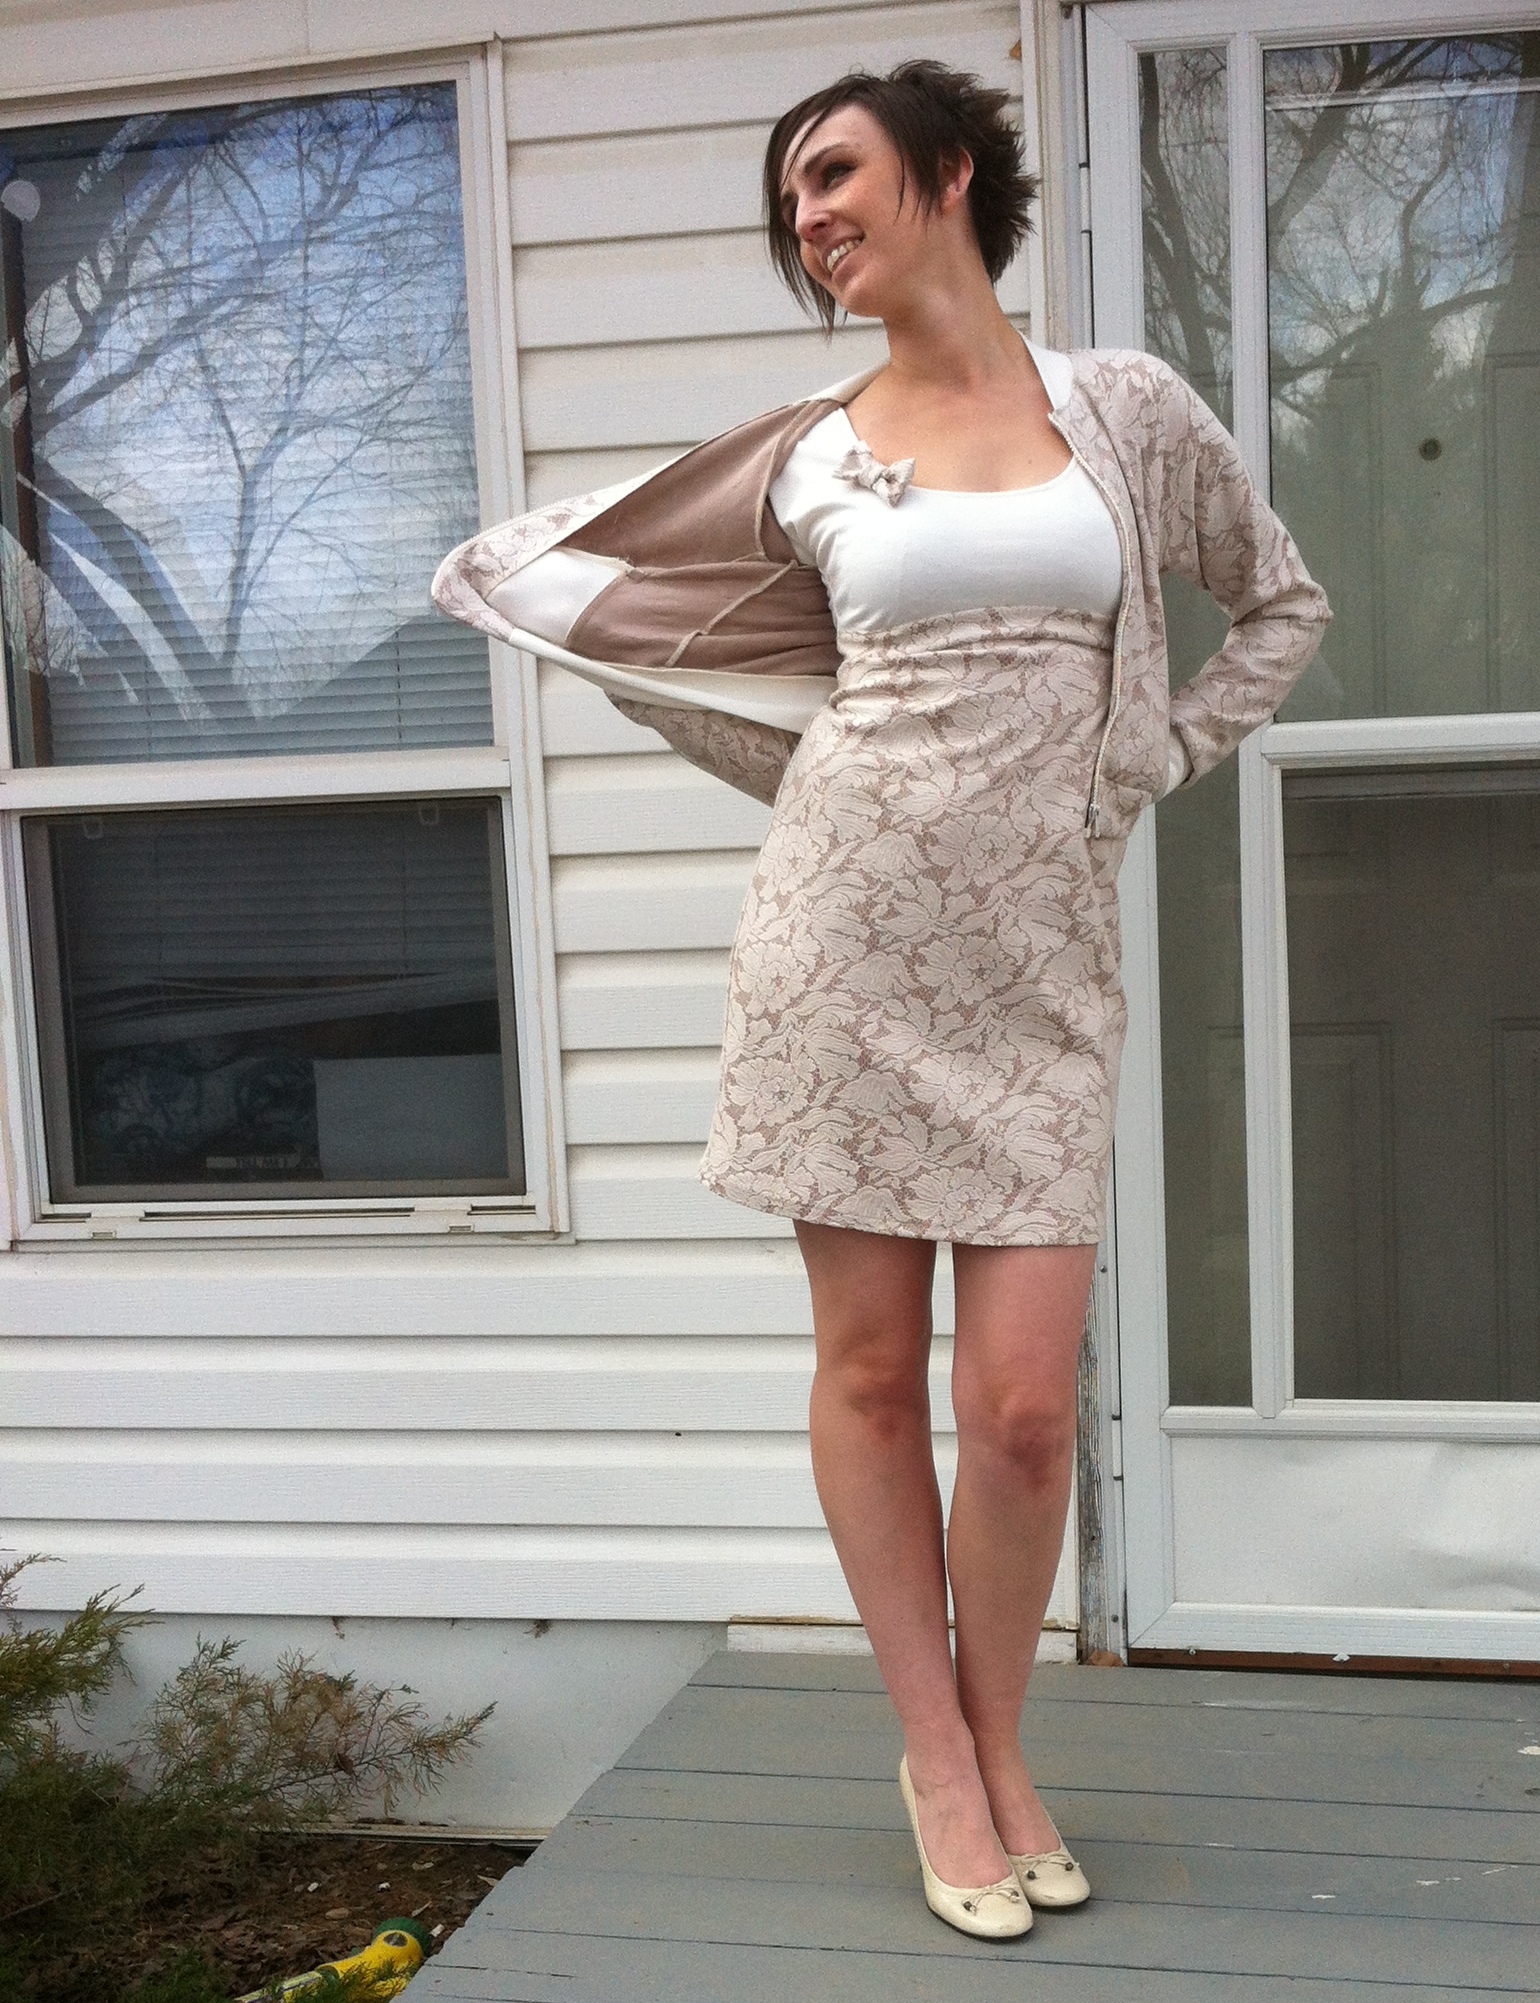
Ensemble.


Wrenching myself forcefully away from historical costuming (who knew petticoats could be so riveting)…I do like cream, and I do like lace. As the whole blog theme may suggest.

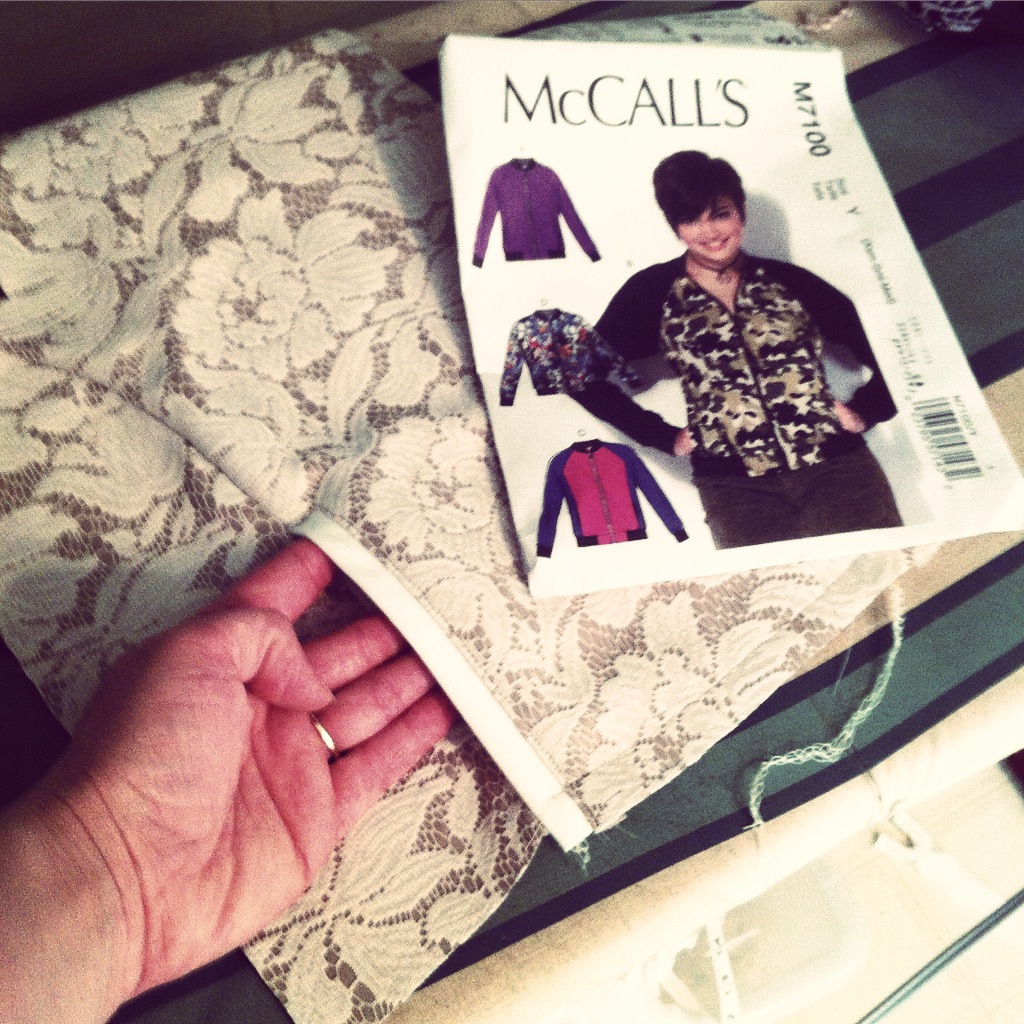
I’m not quite sure what to say about my inspiration here. Bombers have been bouncing around the blogs for, well, awhile now, even if the cool kids are sewing the Papercut Patterns Rigel and not the boring old McCall’s 7100. And I totally missed Rigel Bomber January, anyway. I’m not a bomber girl, mind you. Boxy has never been one of my favourite looks. But, well, even I can be swayed by a trend… and I was curious about modifying the usual bomber into a cropped look, because I love me a cropped jacket. I made it as short as I thought I could get away with and still have (semi) functional pockets, but it’s still an inch or so longer than my “prime” cropped zone—but I actually think it may be pretty fun, and a practical throw-on-over-cute-whatever layer, which as an office-dweller I am often sorely in need of.

McCall's 7100

McCall’s 7100

As for nuts and bolts—the pattern is McCall’s 7100. The fabric is a beige scuba-knit bonded to a lace, which has the effect of nearly nullifying the stretch in both fabrics. For my bands, I picked an ivory Ponte di Roma which is stretchier than the base fabric, but also not really stretchy enough for what it is supposed to do (although the pattern calls for “moderate stretch knits” for the bands, not psychotically stretchy ribbing. I checked.) I made the size 10, since I wanted a fairly close-fitting jacket. I shortened all the bodice pieces by about 3.5″, mostly at the hem except for the side-front panel which has a wee bit more shaping than the other pieces, so I took a tuck from the lower part of it. I also lengthened the sleeves about 5″, though I did take 1″ off afterwards. Though I kinda wish I hadn’t.


Jacket.

Jacket.

I didn’t particularly like the way the McCall’s pattern has you construct the pocket welts—it’s simple but not the cleanest look. I wanted my welts inset into the seam, which I’ve done before… but not since I made Jalie 2795 for Tyo. Um, that was a while ago (like, it’s been handed down twice since). And I should really have re-read the instructions for that rather than just bumbling along. I feel like I’m doing a lot of bumbling along lately, mostly due to not having the time/energy/focus to actually think through, research, and practice a technique. Not the best for personal growth as a stitcher, /sigh. But I did manage it, give or take a bit of seam-ripping and  rippling and a few seams finished in the wrong order (or not at all).

Ugly inside band attachment. Closeup declined. ;)

Ugly inside band attachment. Closeup declined. 😉

Where i mostly fell apart was actually in attaching the bottom band. I love the little panel of the main fabric at the zipper, and they have a pretty neat method of attaching it, but I couldn’t quite wrap my head around how to mesh that with the stretch band around the rest of the bottom. I mean, it’s together, but the join is ugly as hell inside, and this is an unlined jacket. Blerg. Need to re-read/rethink that a bit. A lot. Before I try it again.

Pockets!

Pockets!

But otherwise, it went together quite easily and I’m quite happy with the fit. The pockets (after all my shortening) are pretty teeny but just barely large enough to put hands in, at least. It’s funny, I don’t really love the shape when I look at it in the mirror, but I feel like it’s better “in motion.” I think I like it.

Jalie Dress


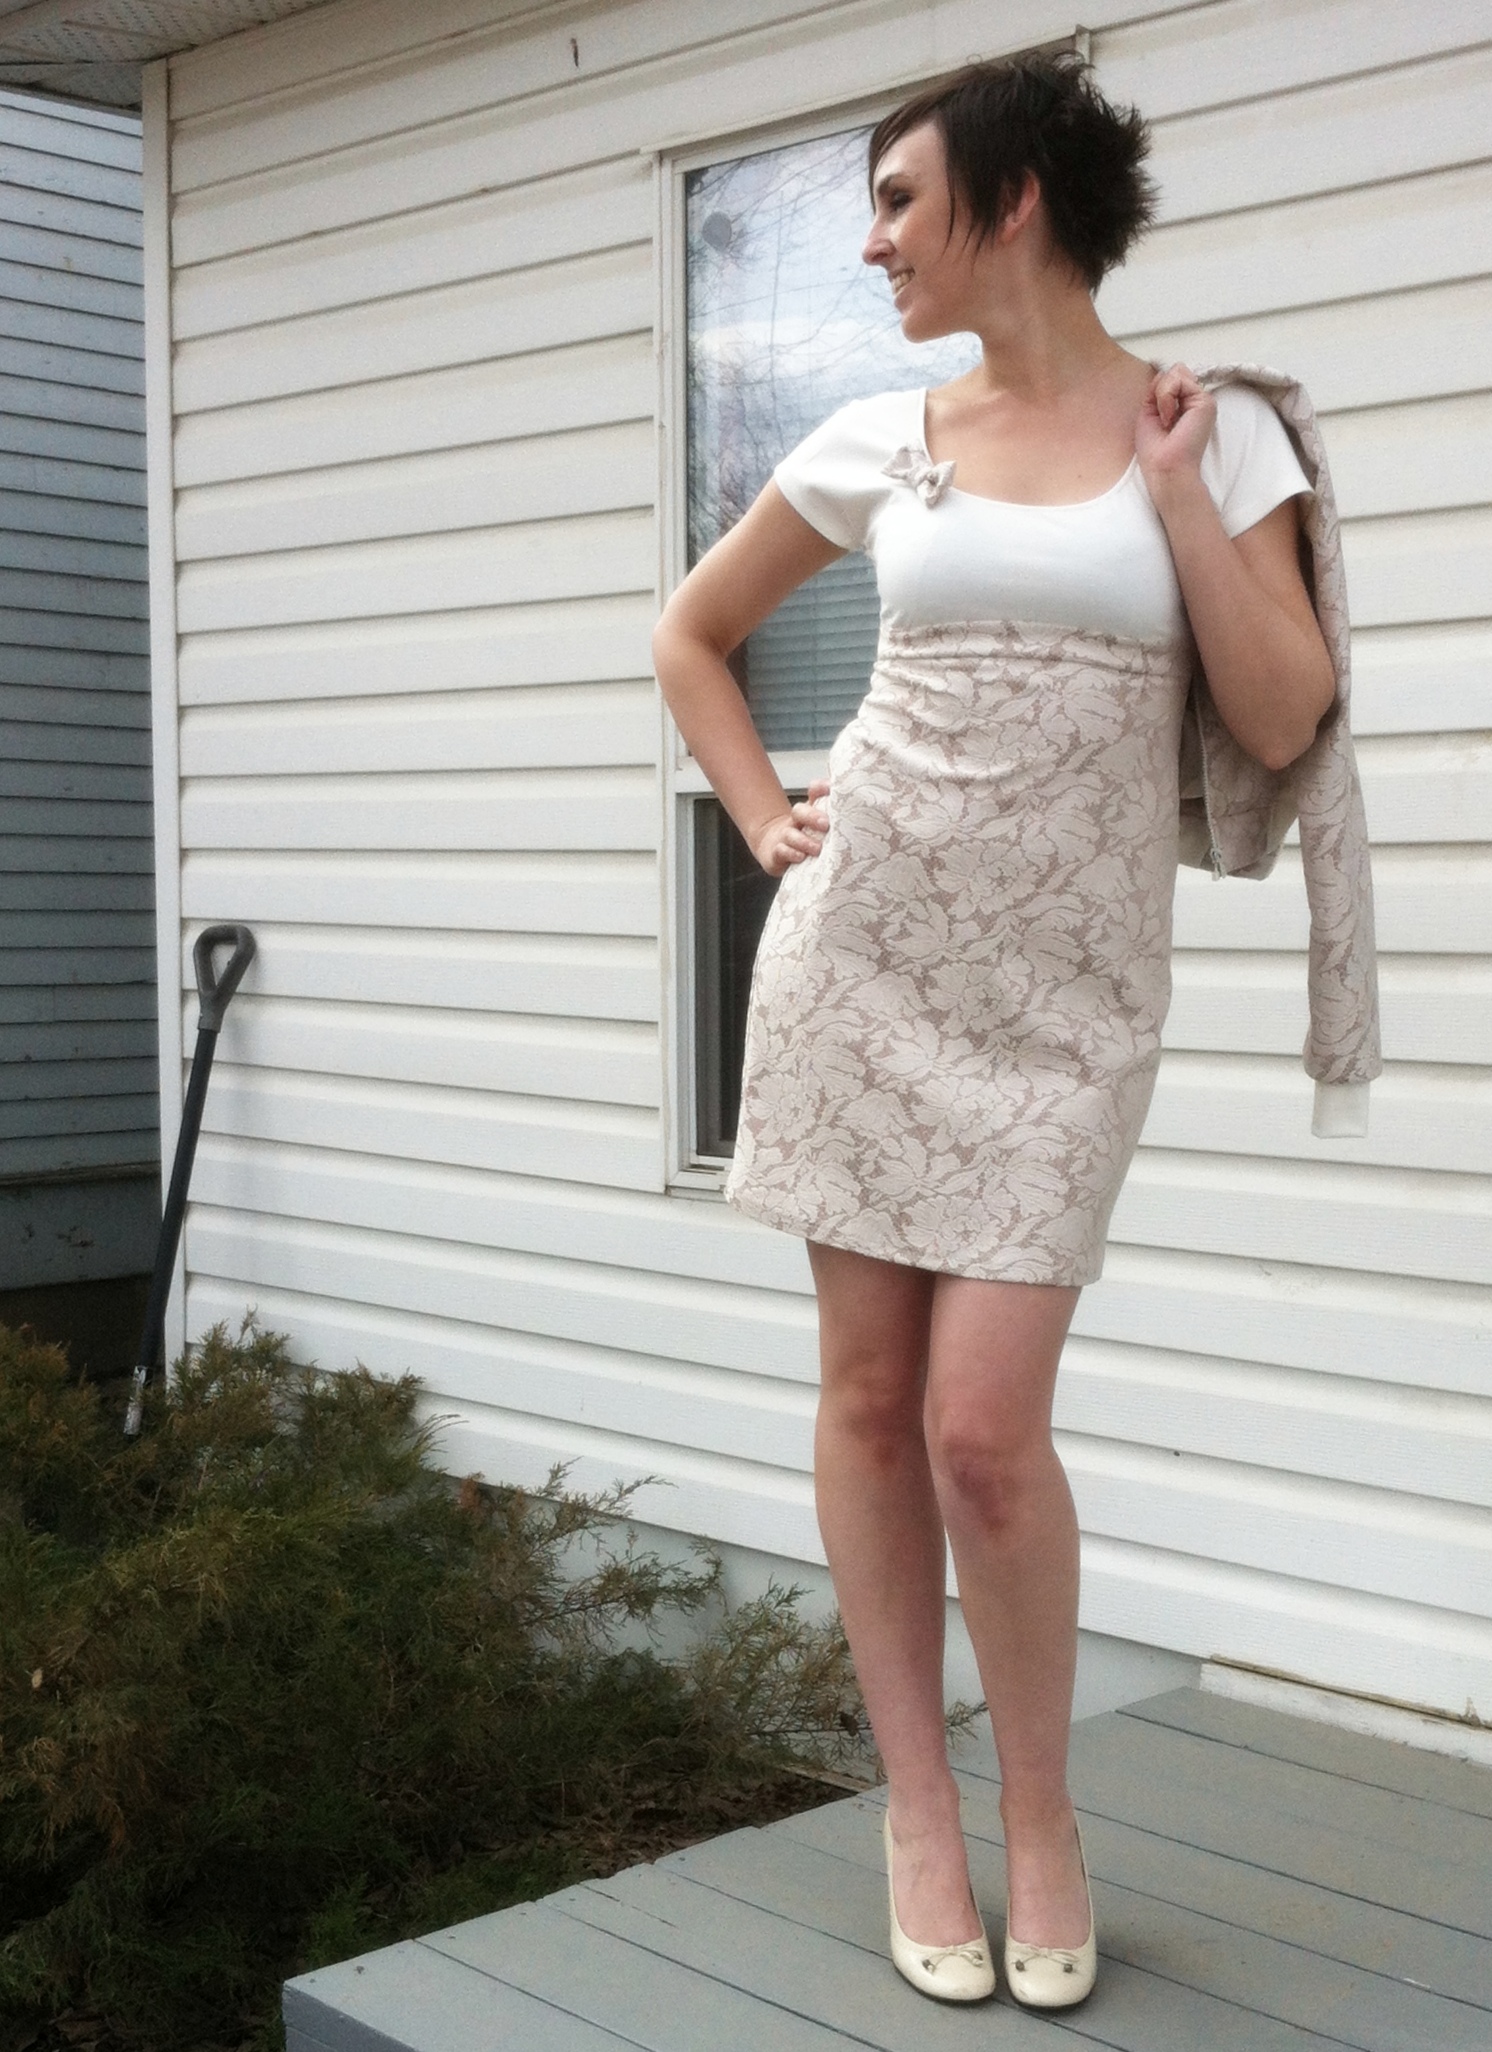
Now, I’m pretty sure in actual wardrobe rotation the bomber will be pretty much a standalone piece, but I still had fabric left over, and a hankering for a matching little dress. Tis the season (or almost the season) for cute little dresses, after all. After wrangling bomber most of the day, I didn’t have much energy left, though—all I really wanted was a T-shirt type dress. (Speaking of which, I wonder where my lacy T-shirt-dress is…). After paging through my patterns, I really was feeling Jalie 3024, a cute pullover knit dress I haven’t gotten around to before.

Cute dress.

Cute dress.

The only problem? Jalie 3024 is designed for four-way stretch knits with rather more stretch than either of my fabrics.

After some thinking, though, I settled on some fairly simple alterations.

Tyo catches some good "transition" shots. ;)

Tyo catches some good “transition” shots. 😉

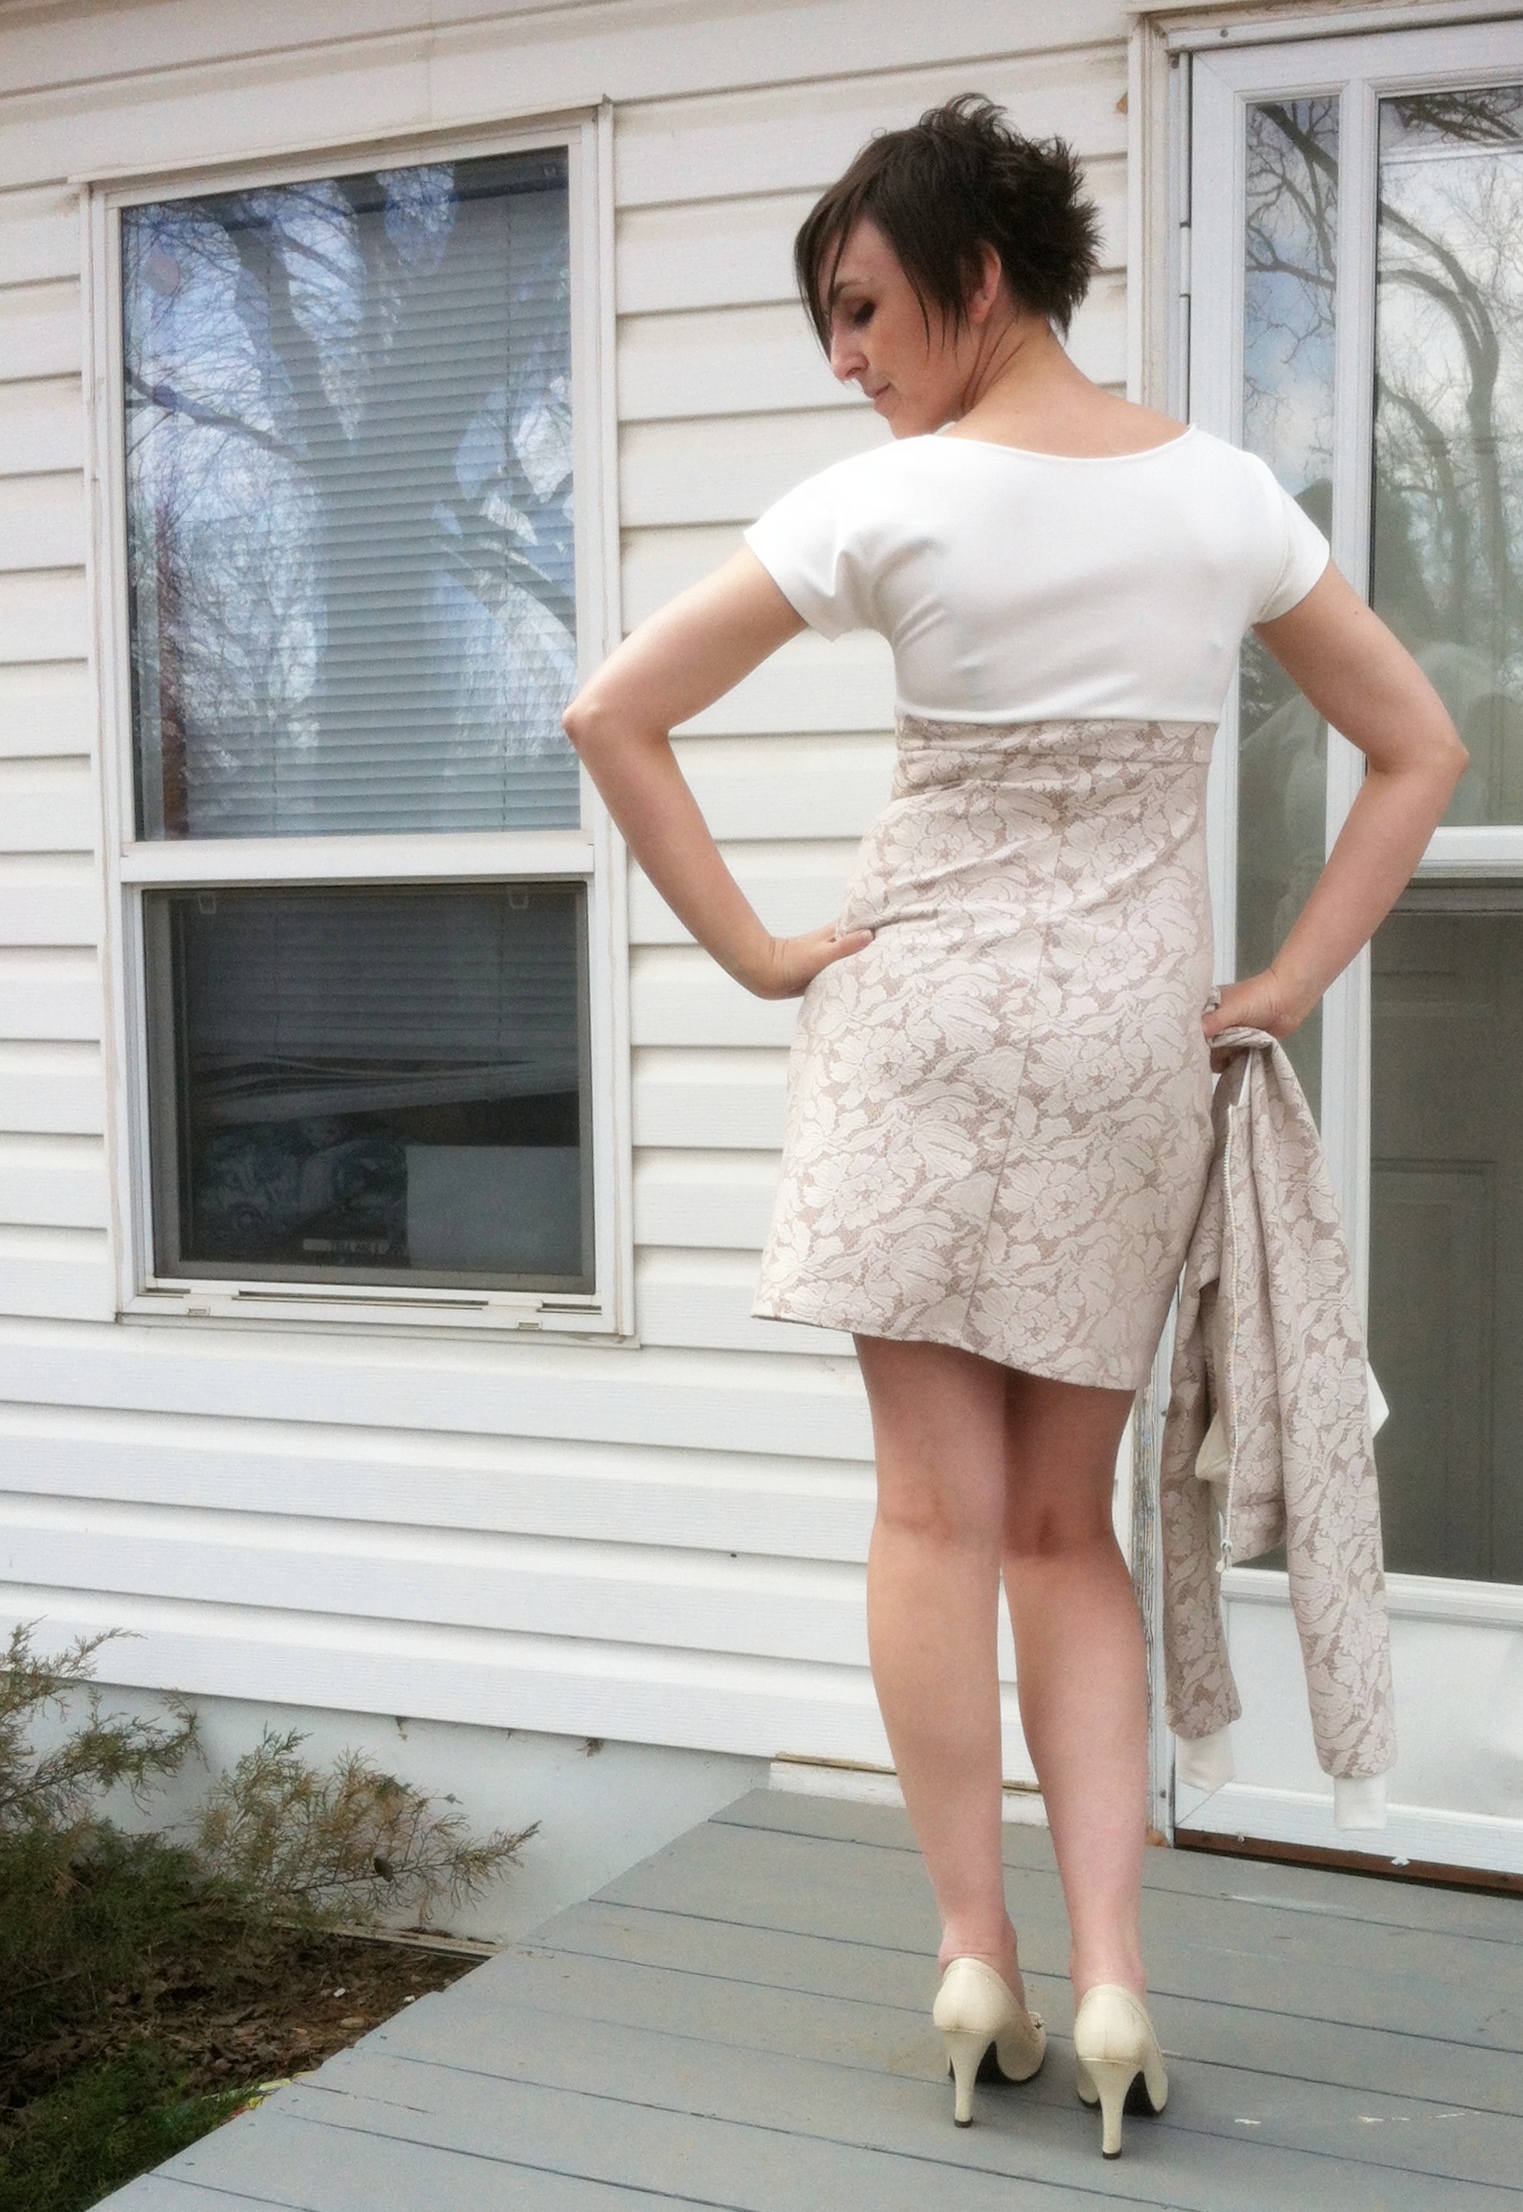
I cut the skirt and waistband pieces (out of the bonded lace) with about an inch extra ease both front and back, and added seam allowance for a seam at the CB skirt so I could add some swayback/butt shaping. I didn’t make any changes at all to the back bodice, but for the front bodice I lengthened about an inch and added a dip below the bust, basically a big fat FBA. (Muahahahah!) I used the ponte for the top as it has a bit more stretch than the bonded lace. I also gave it a scoop neckline because I like them so much better. All of these alterations played hell with the seam lines, but ponte is a forgiving knit and I was able to ease everything together quite nicely.

Back view. Centre seam added for butt shaping.

Back view. Centre seam added for butt shaping.

I’m not usually a big fan of the “dress that looks like skirt and top” but I’m kinda liking it in this case. It needed a bow, though. I’m not quite 100% sure on the location, but it definitely needed it.

As with most Jalie patterns, I’m now feeling the urge to make five more…

PS: First outdoor photo shoot of the year!!!! Hooray for crappy cell-phone-pics with actual good lighting. (I fully intended to use the “good” camera, and pulled the battery out to charge it… then couldn’t remember where I’d actually put the camera when the time came. /headdesk) Also, miraculously the beige colour of the skirt makes my legs look pink rather than fish-belly-white, so I’ll call that a major win. 🙂

7 Comments

Filed under Sewing

Remedial Corsetology II

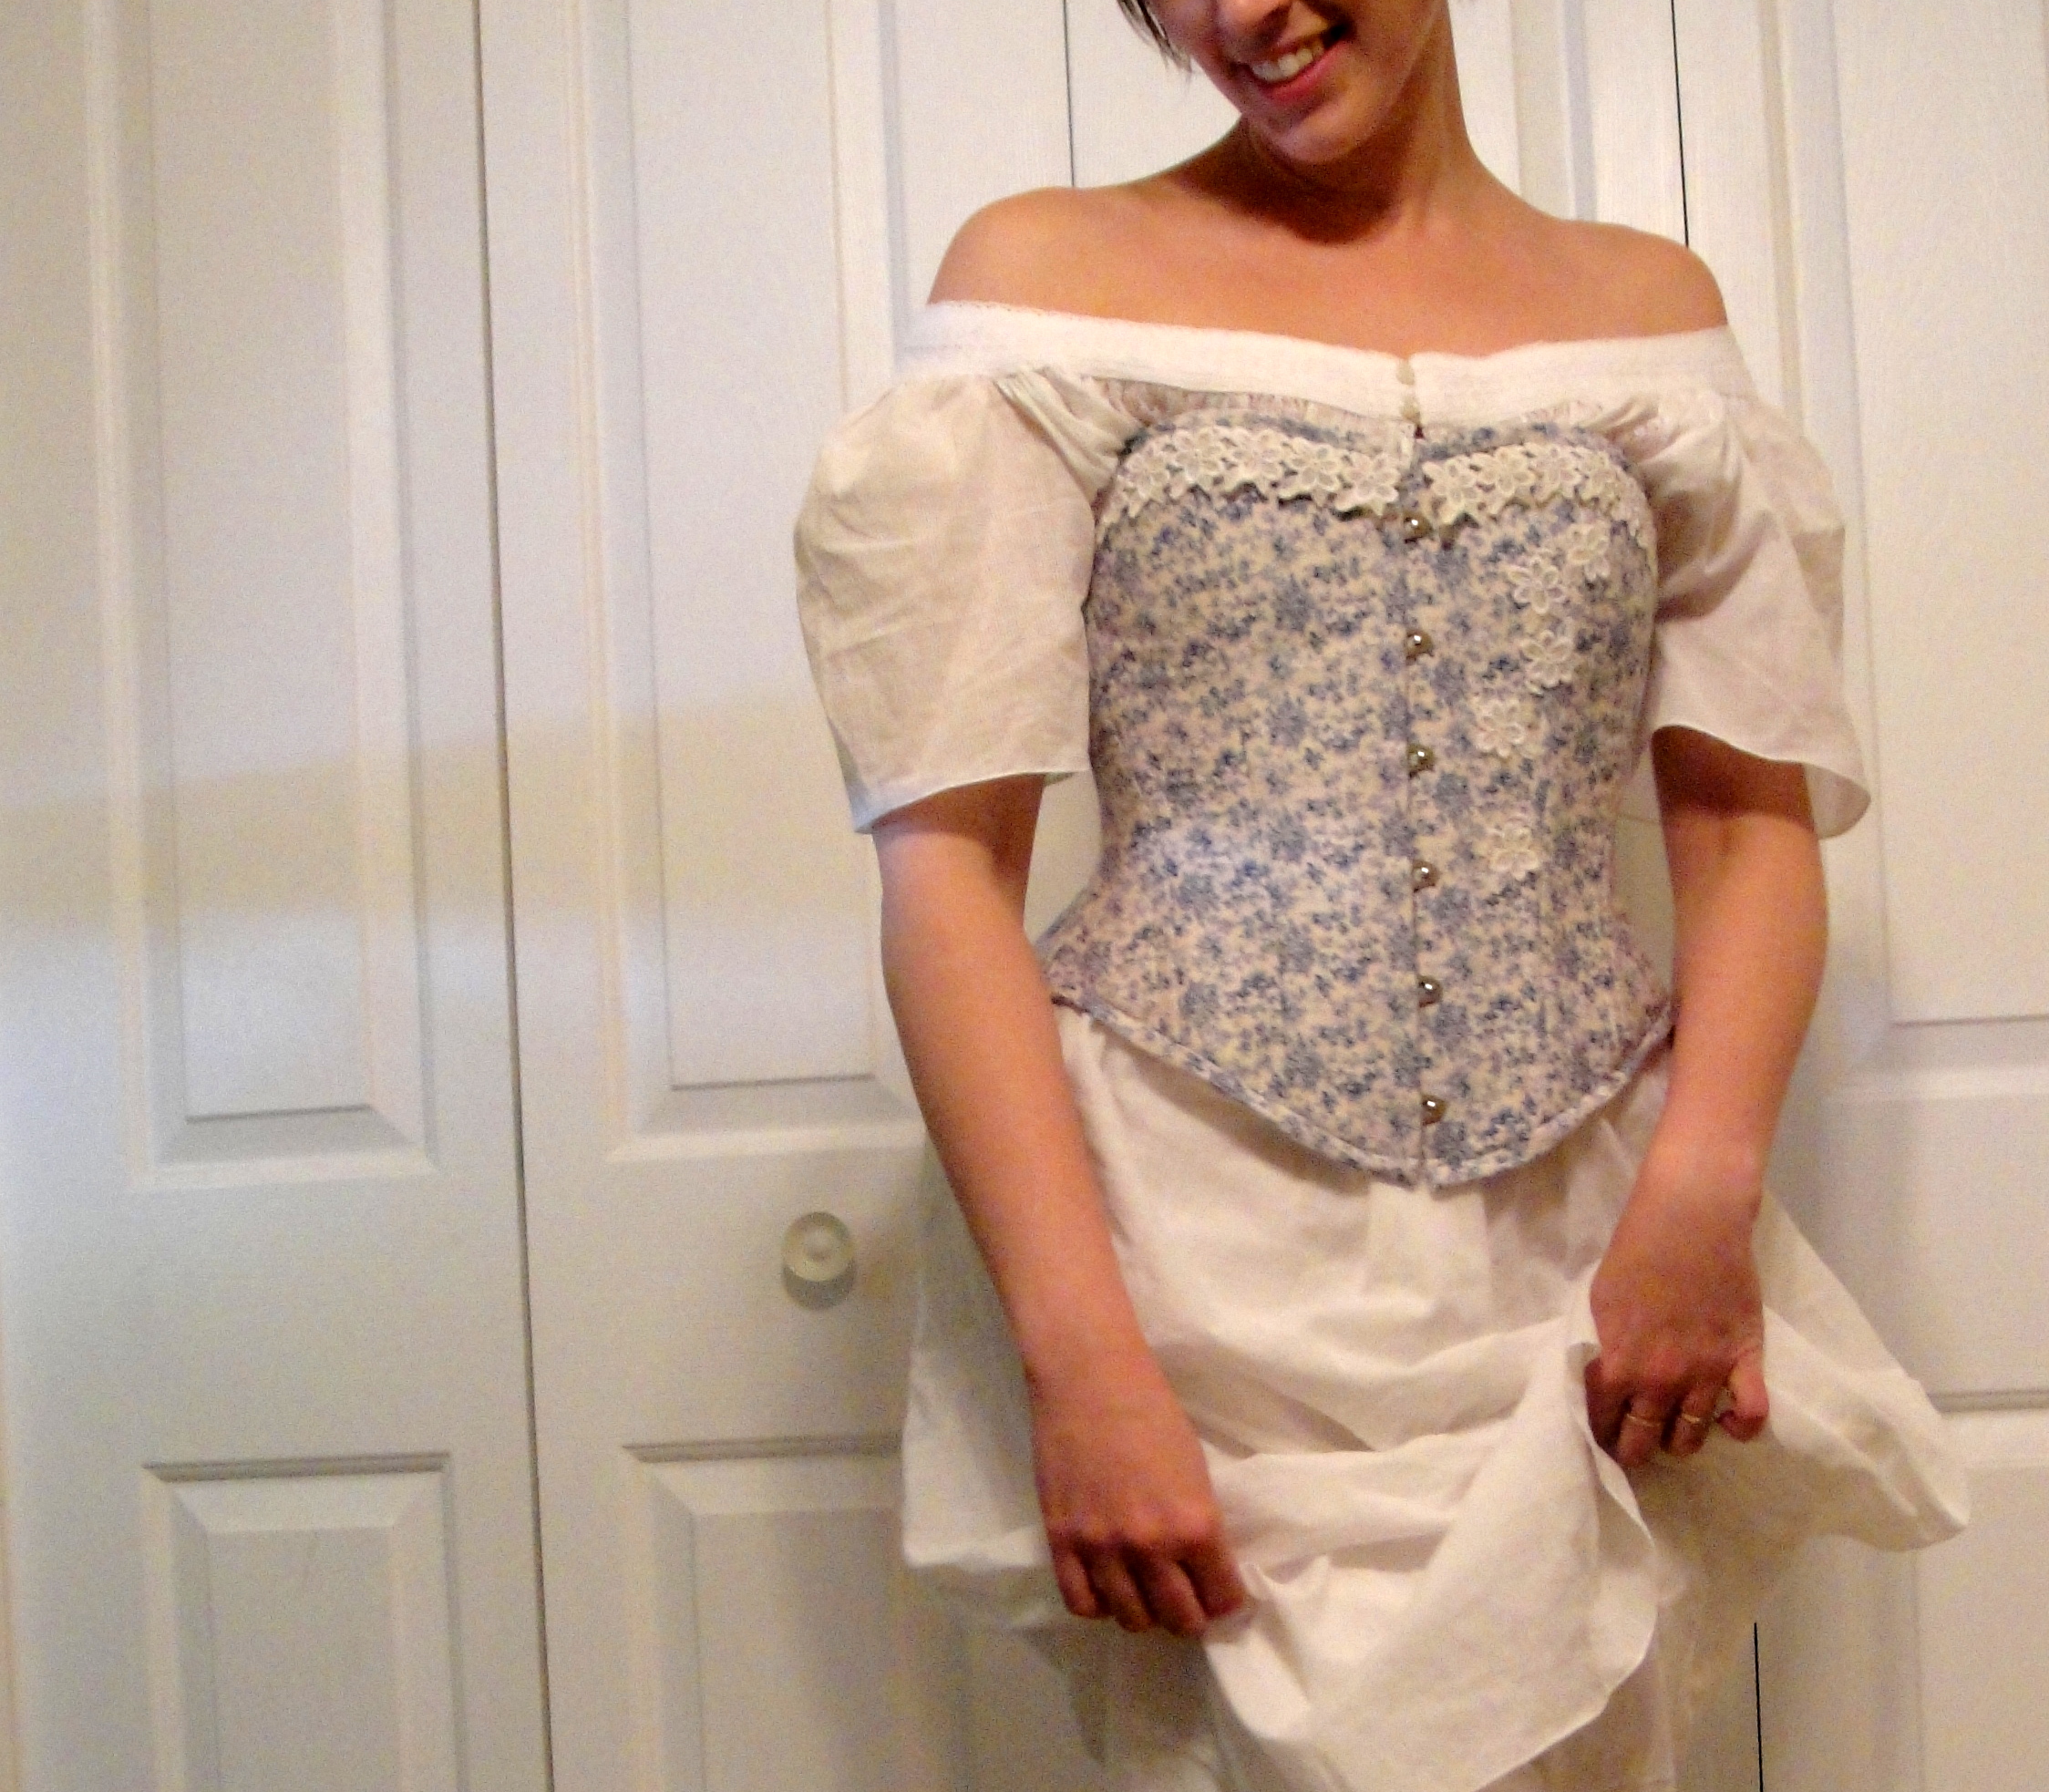
Victorian Underoos

Victorian Underoos

I probably don’t need to say a lot here.

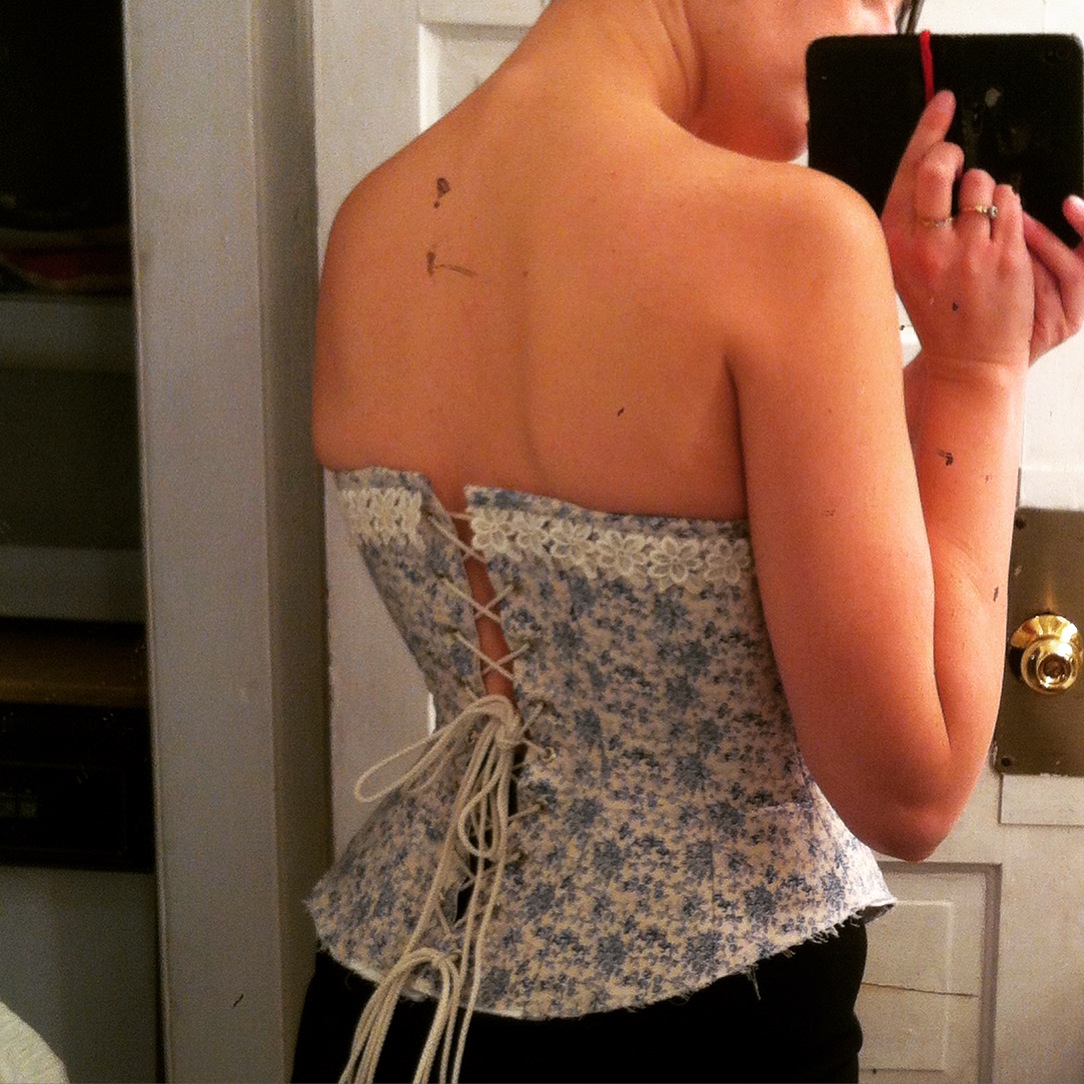
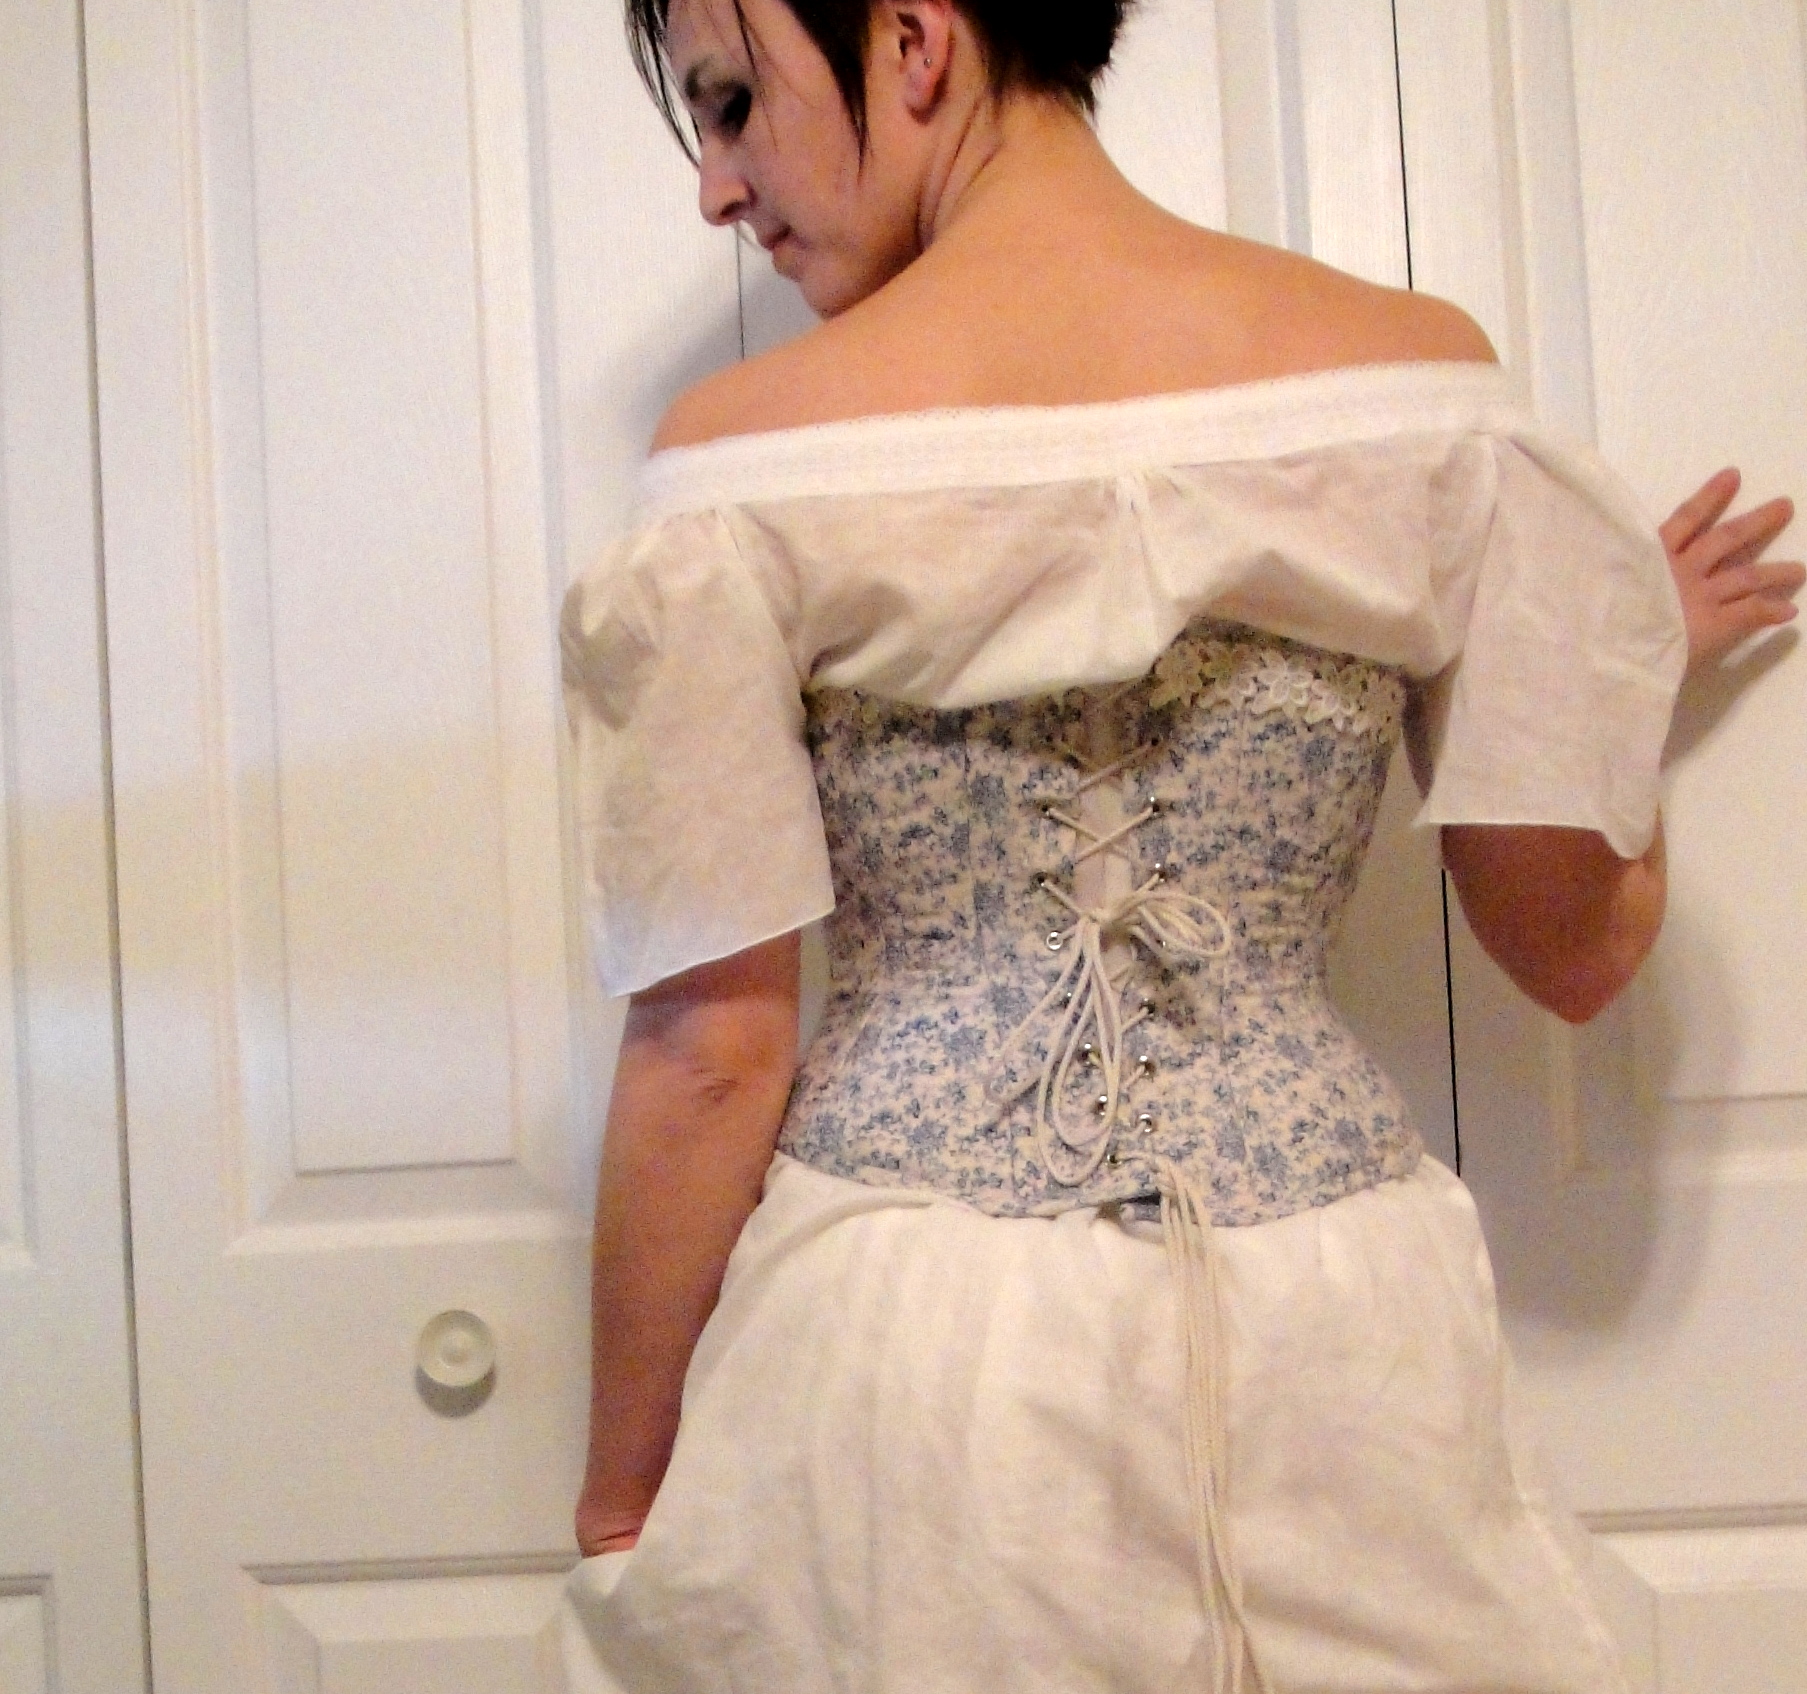
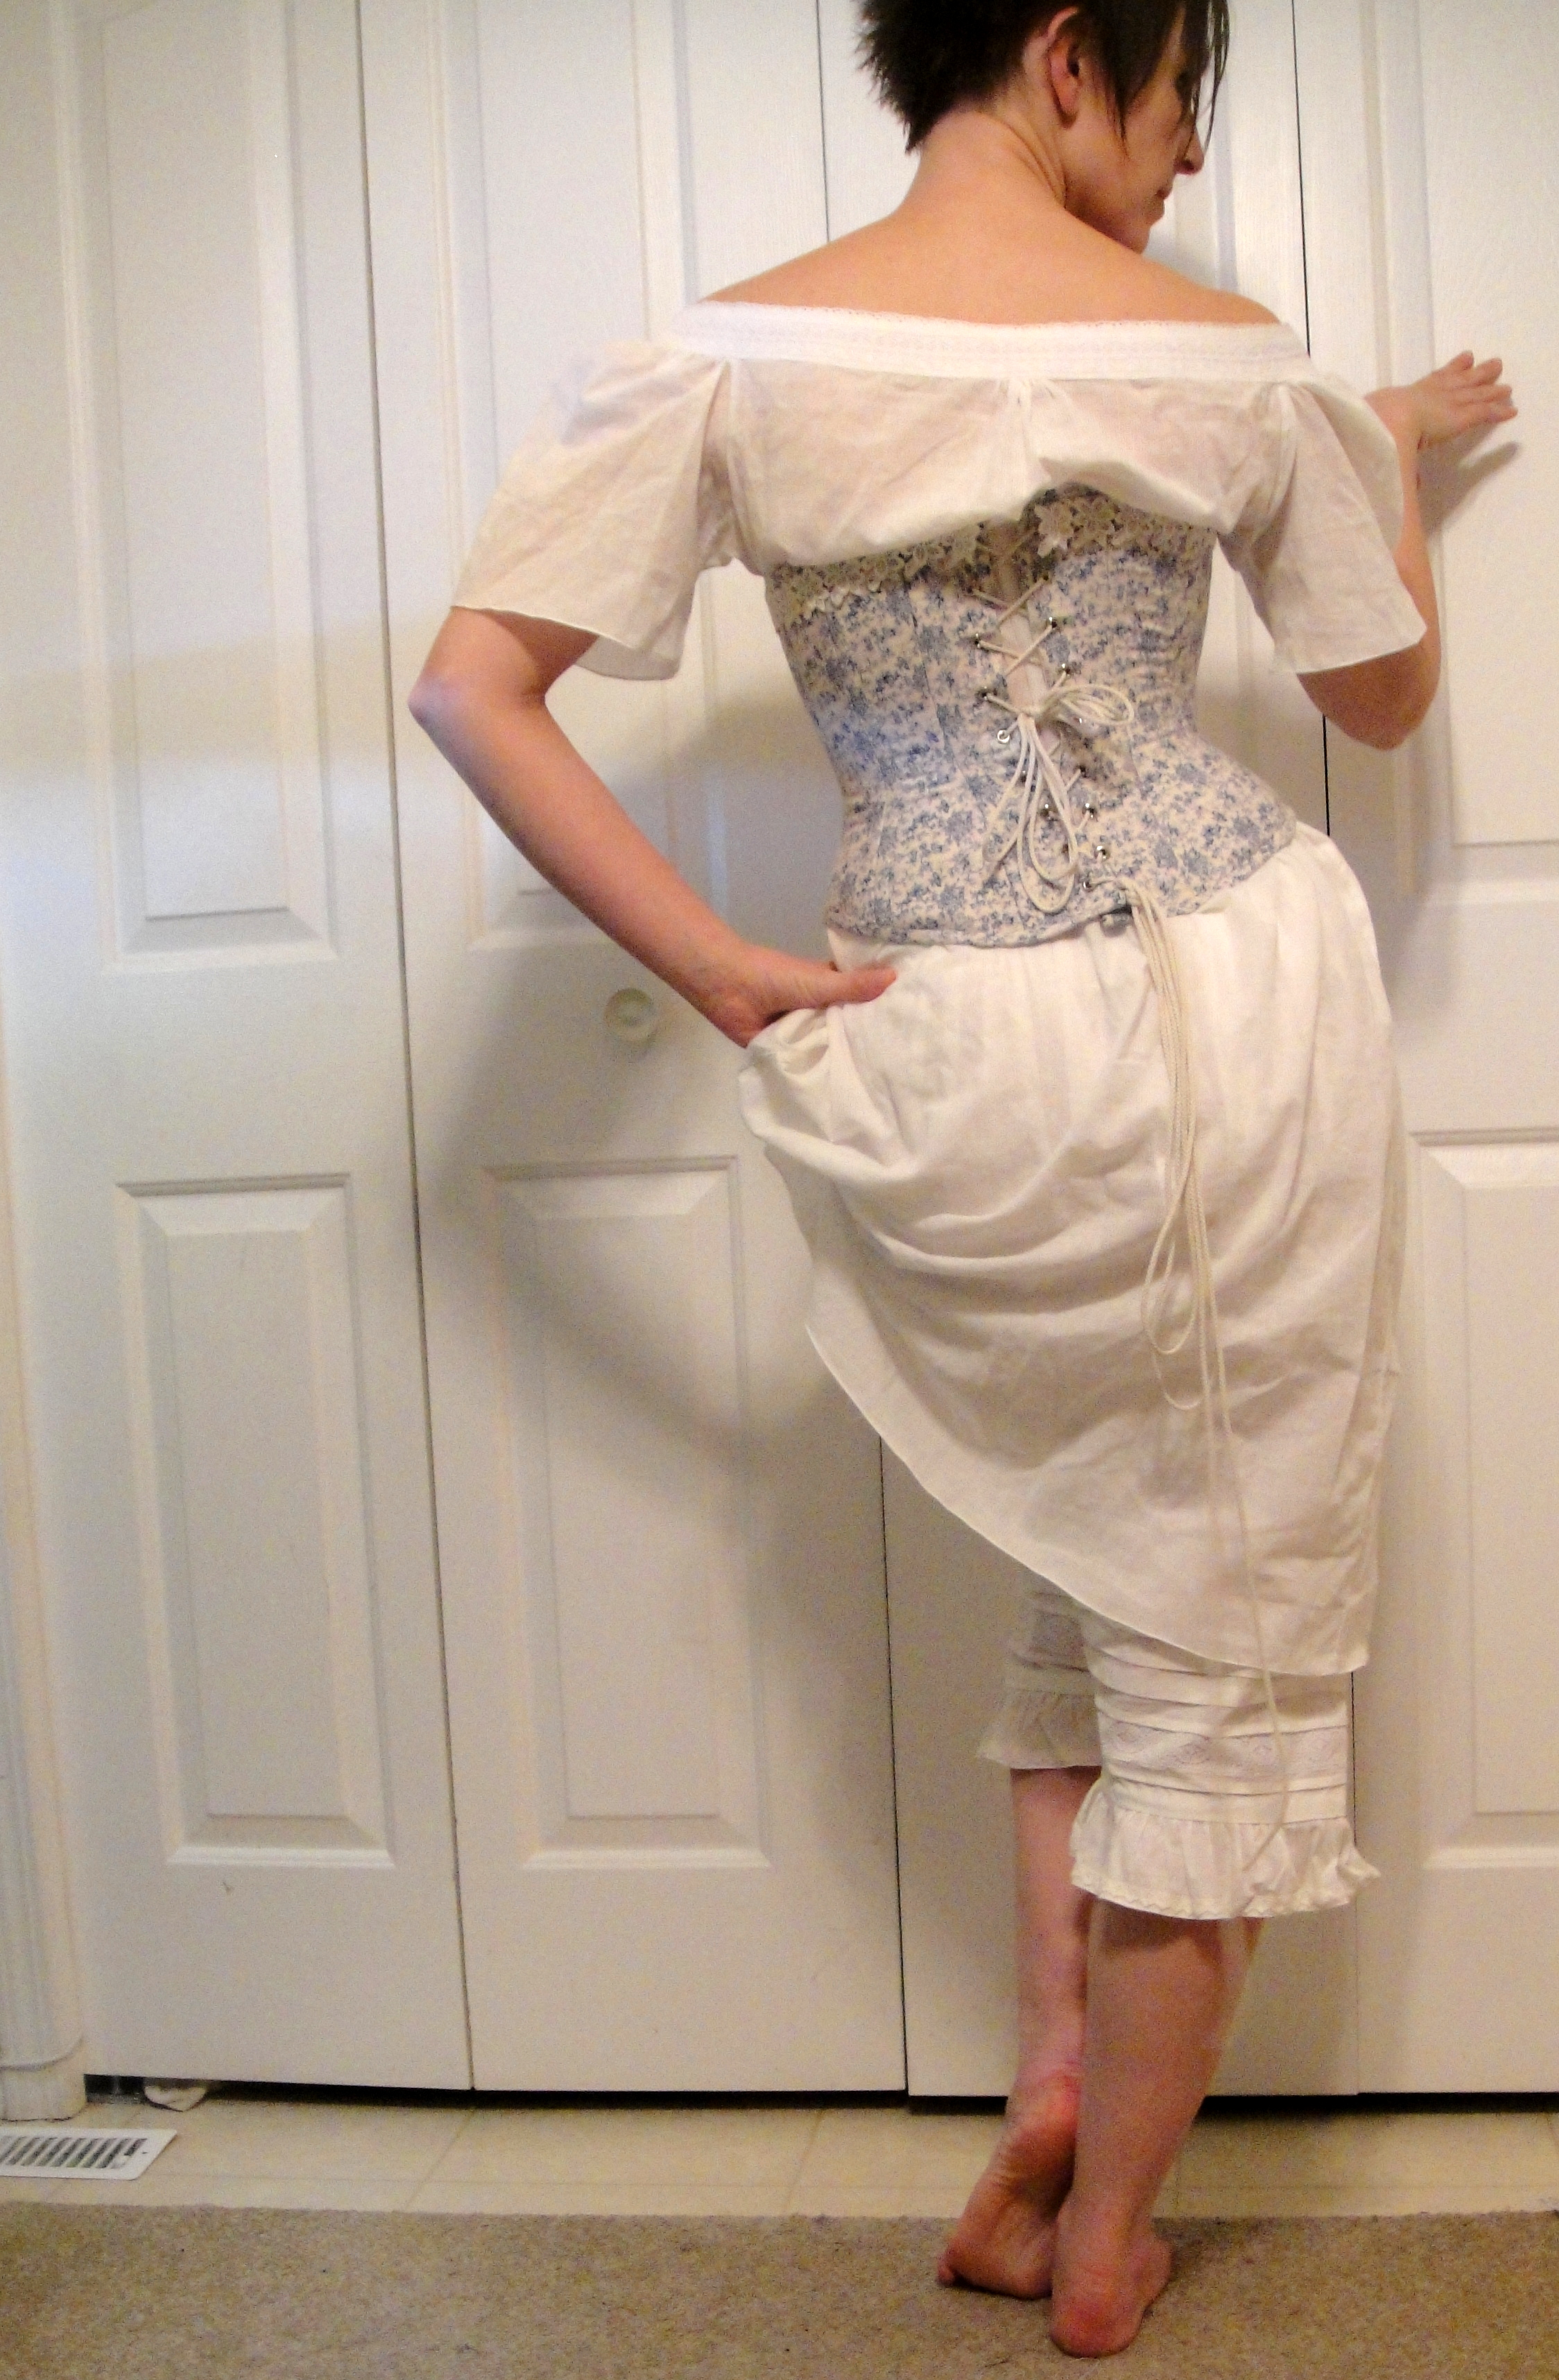
Back, with lacing.

First try-on.

I got lacing. (poly cord from Fabricland. Historically accurate? no. Functional? Absolutely.)

As Laurianna noticed in my last post, I forgot to allow space for boning outside of the back grommets. This is what I get for leapfrogging between different instructions, and not paying attention to details. I added some cording to the area for a bit of reinforcement (better than nothing?), but there is definitely some buckling along the lacing that could have been avoided. Lesson learned, hopefully to be applied next time. (Honestly, this is the kind of lesson I learn best from making mistakes. >_<)

Lacing grommets, cording, and bottom binding.

Lacing grommets, cording, and bottom binding.

I added self-bias binding along top and bottom, pulling it fairly tight to bring in the looseness along the bottom. I was a little worried halfway through that this would backfire and just look bunchy or lumpy, but it seems to be fine.

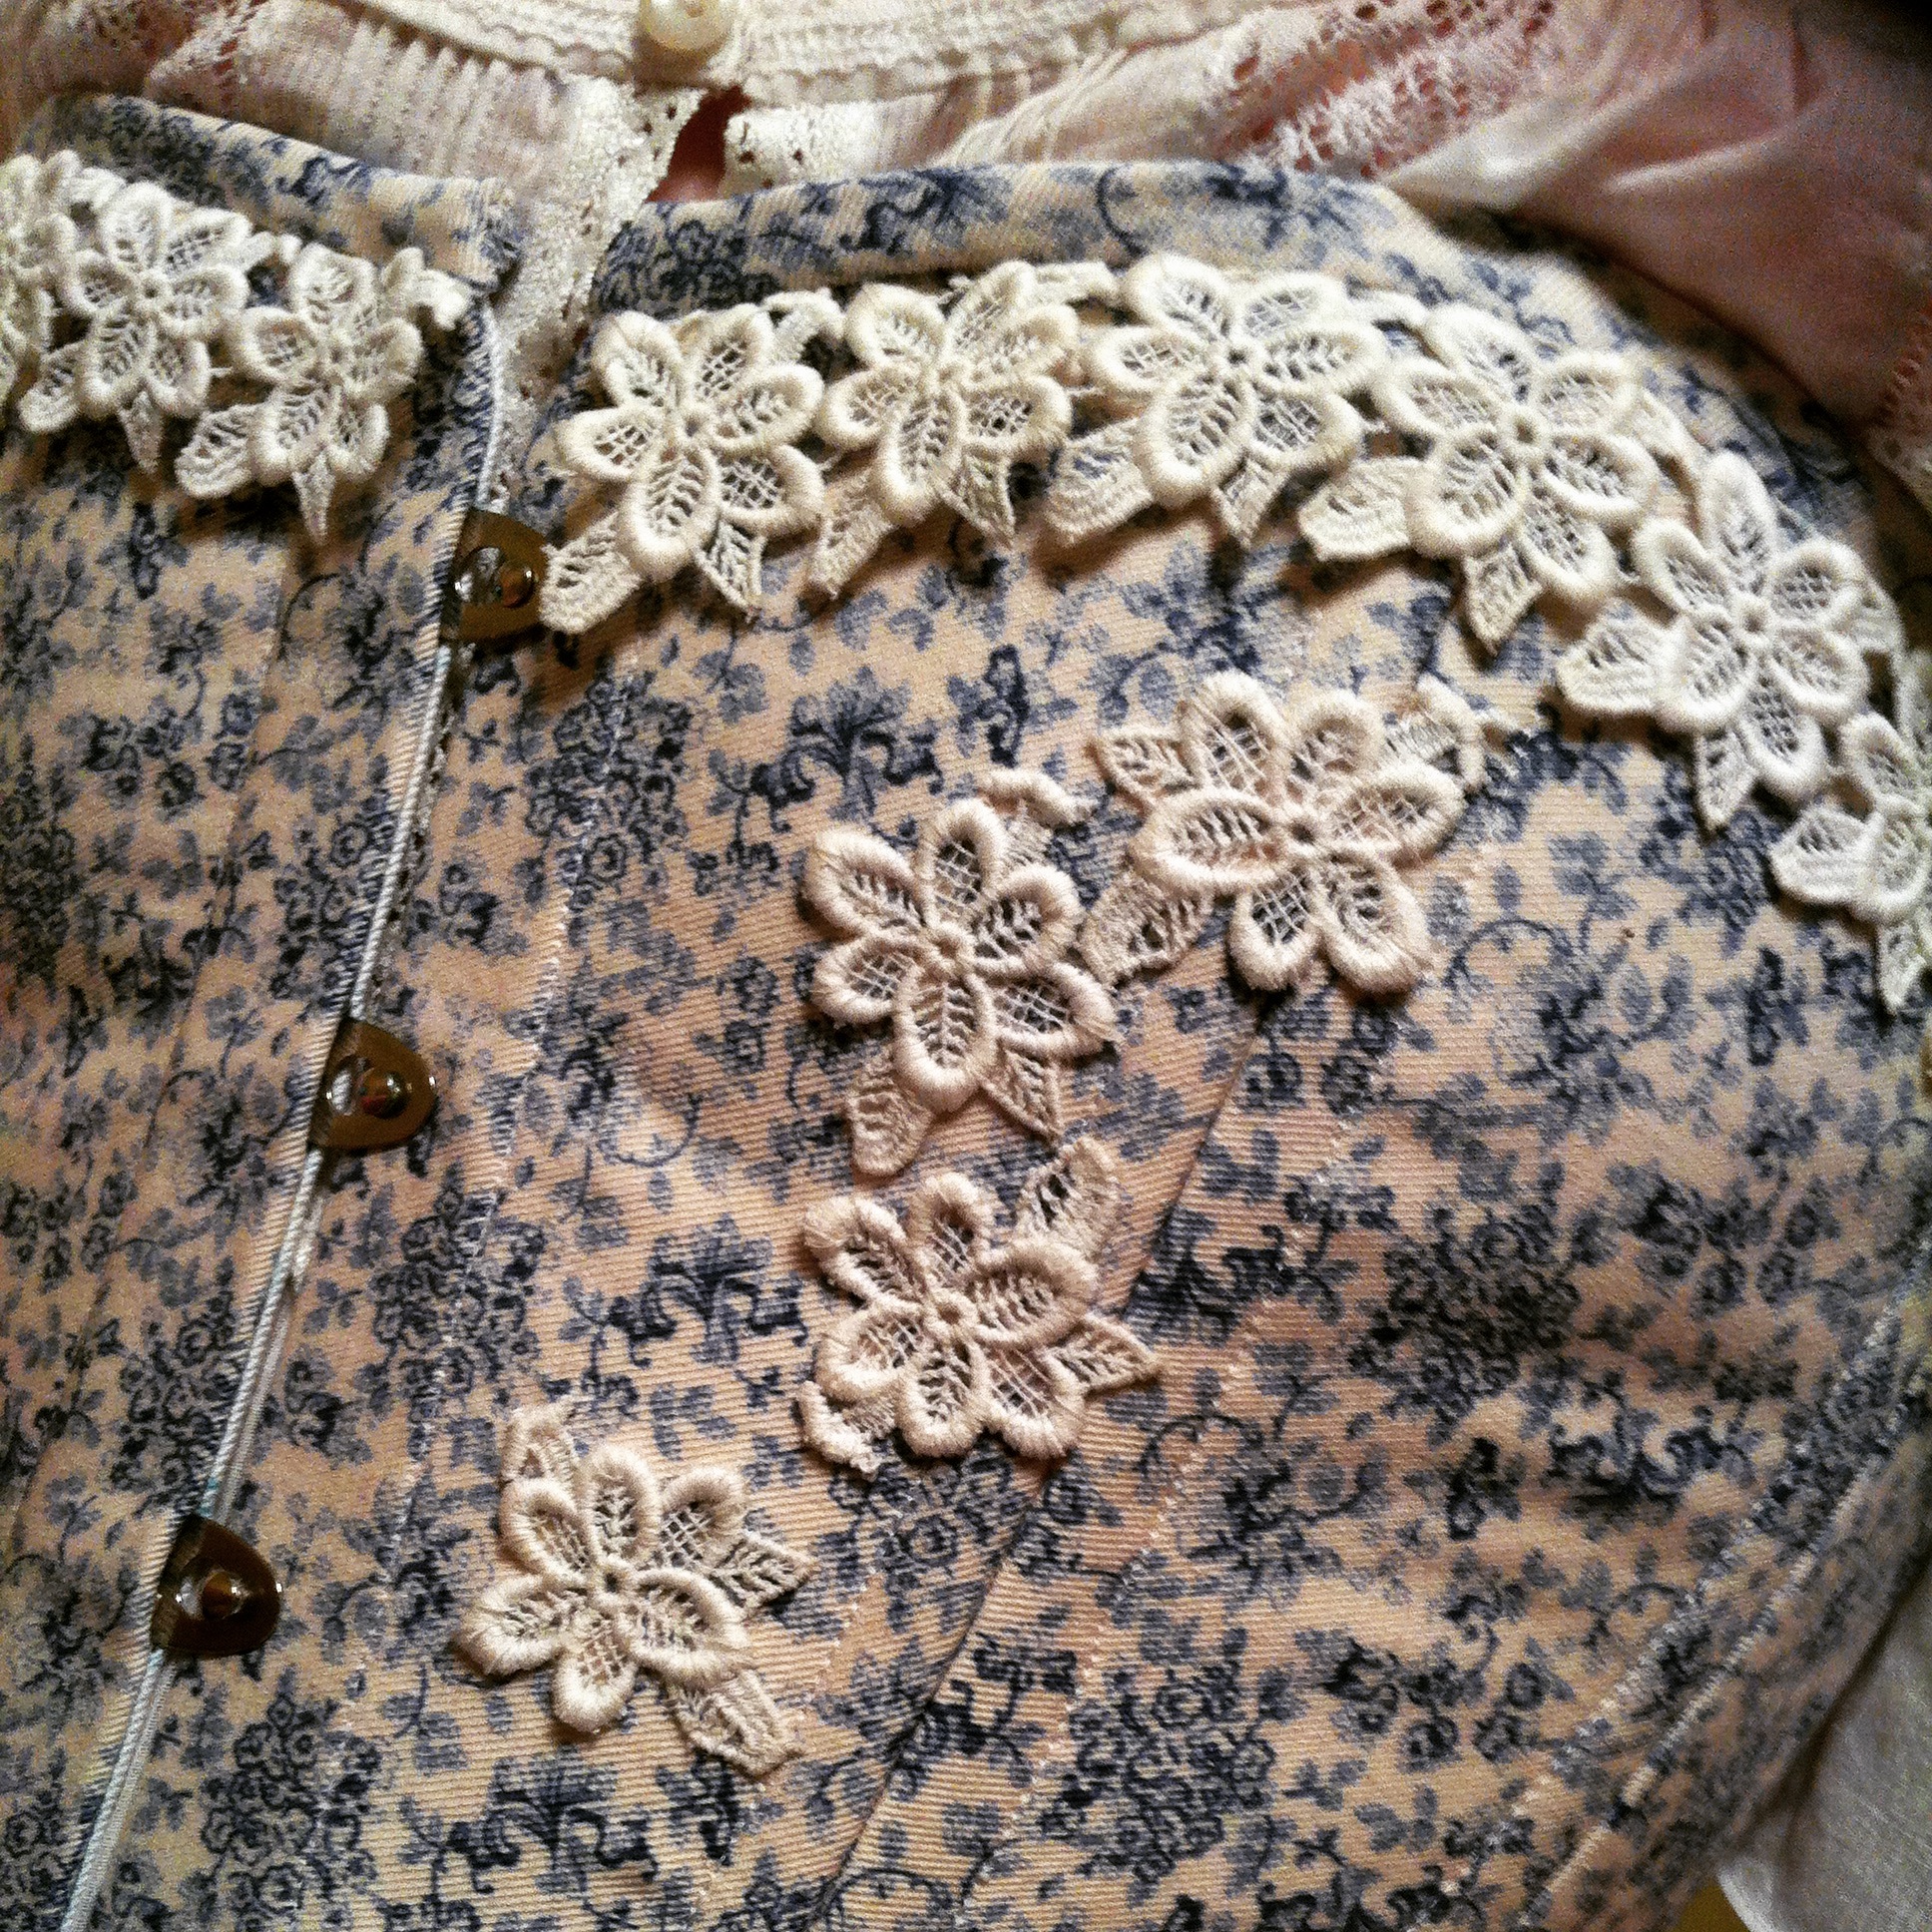
Lace flowers.

Lace flowers.

Since I had exactly five little lace flowers left over, I opted to add them to the front of the corset. I just cut them apart and  hand-tacked them down. I think they’re cute (though maybe not very Victorian with that random asymmetrical design. Ah, well. At this point I’m going for impression, not detail.)

Corset back. Lace job by the fourteen-year-old.

Corset back. Lace job by the fourteen-year-old.

The corset is, technically, a little bit big. The two-inch lacing gap I used in my try-ons disappears pretty much entirely without too much difficulty, and I think I could stand tighter lacing at the waist. (Despite the above photo. However, if I wait to take new photos with the lacing done a bit better, you may never get this post, so, wonky lacing it is.) I love how it flares out over my hips, though, and I love the shape it has around the bottom, even though it isn’t, strictly speaking, really long enough over the hips.

The bust isn’t exactly too small, but I think if it were a bit larger, and shaped a bit differently (i.e. more defined), it would look better. It is technically alterable, should I choose to unpick and re-stitch the seams and boning-channels, but I’m going to leave it for the moment, partly because I hate alteration and partly because I want to test how it feels when worn for more than a few minutes of trying-on.

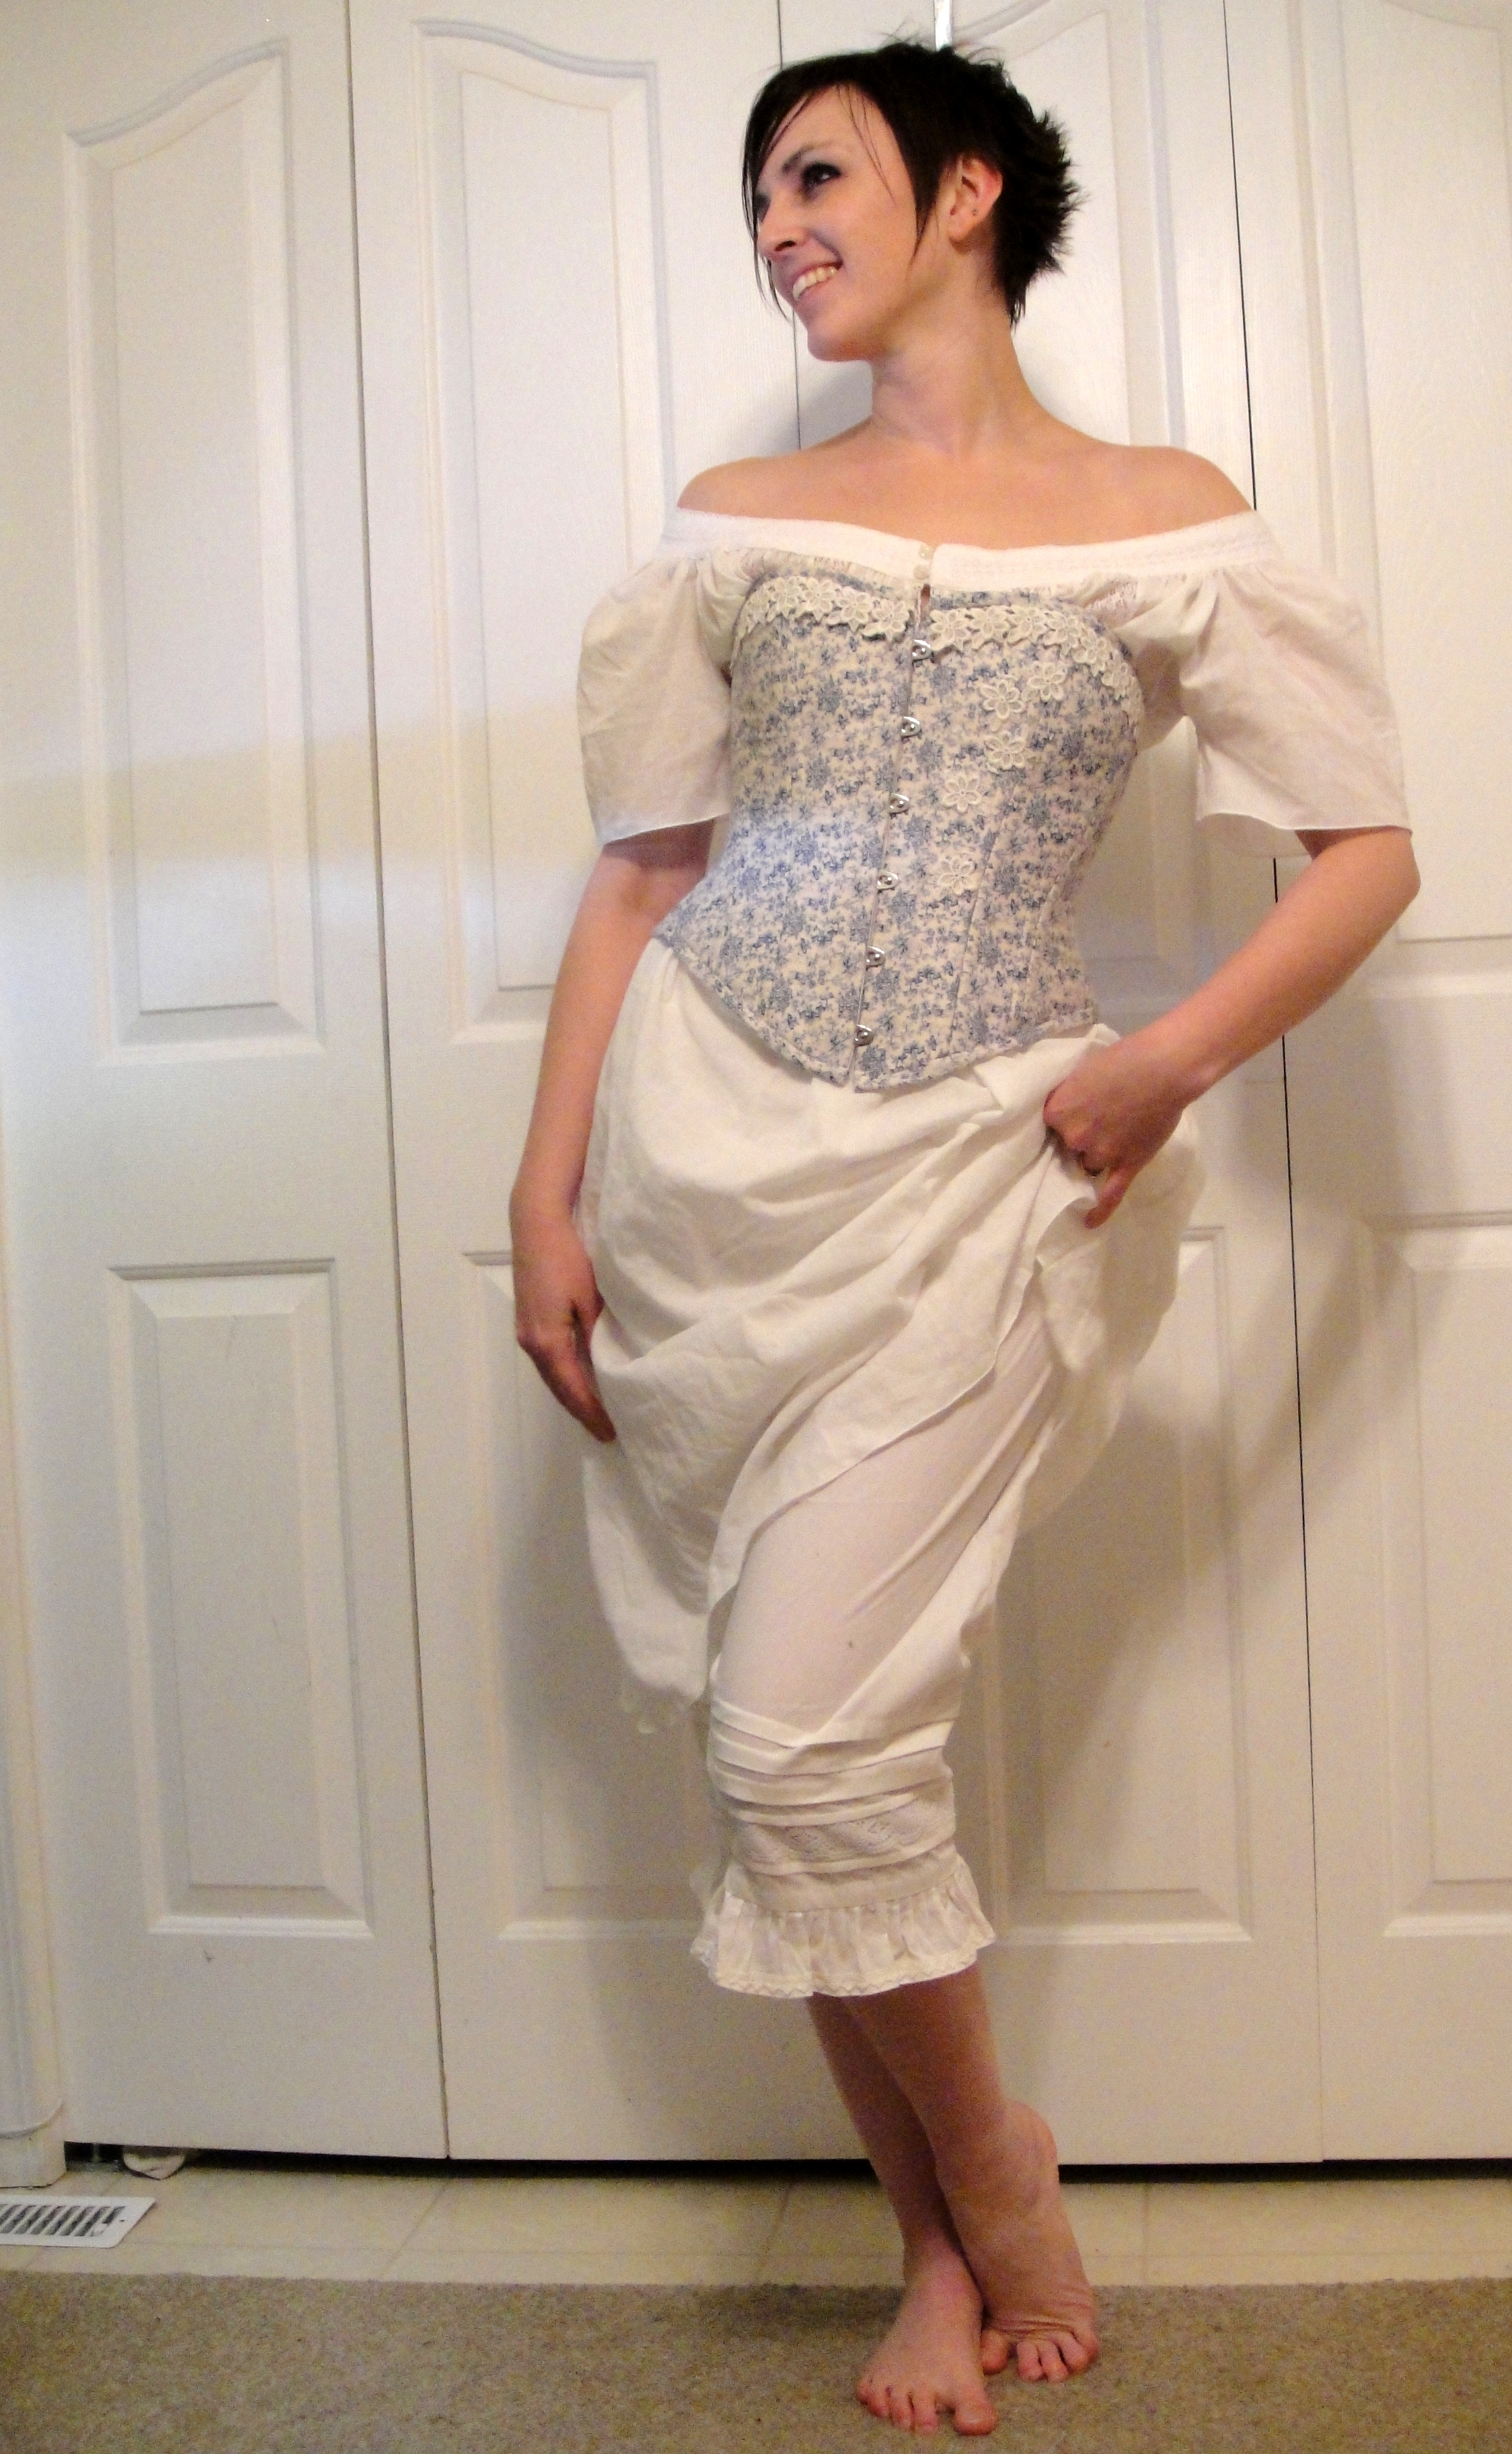
Full view

Full view

I haven’t really talked much about the chemise, have I? (I covered the drawers here.)

Closeup, with chemise.

Closeup, with chemise.

I used the yoke piece from Simplicity 9769 (If I’d had this pattern when I first started the corset-testing I would probably have used it rather than Butterick 4254, as it seems to have somewhat better reviews, but anyway….) This is more of an 1860s pattern than 1880s but, well, I like it , so there. 😉 The rest I kinda offroaded, based on the instructions in The Home Needle and a fair bit of poetic license. I sewed up the yoke, with lace, fairly conventionally, but then I wound up taking the project with me to my mom’s family farm for a few family events over the winter, and while I can’t really run off to play with a sewing machine while I’m out there, I can definitely sit in the kitchen and hand-stitch and visit while everyone else around me cooks and cleans and does actual useful work. So the flat-felled seams of the main garment were all done by hand, as were the teeny little pin-tucks (facilitated by the woven-in stripe of the fabric, though they still aren’t perfect, which is fairly unforgivable given the stripe) and the lace-insertion.

A photo posted by Tanit-Isis (@tanitisis) on Dec 27, 2014 at 5:31pm PST

(Hmm. This attempt to embed from Instagram does not seem to be displaying on my browser. I will attempt to fix it when I get home. Sorry all!)

Full back.

Full back.

Then I got home and impatiently finished the hems using the teeniest rolled hem foot on my Pfaff. I love the teensyness of it, but kinda wish I’d stuck with the hand stitching just for, oh, I dunno, excessive old-fashioned-y-ness.

I think it's cute, anyway.

I think it’s cute, anyway.

I was pretty pleasantly surprised by how the look works all together. (OK, I think it’s cute, anyway.) I like the three together better than any of the individual pieces (well, except maybe the corset.)

Next up: the petticoat(s)! (OMG I might actually have to start thinking about the actual dress. (But not before I tackle bustles. Ooooh, scary!)

8 Comments

Filed under Sewing

Jammie Pants

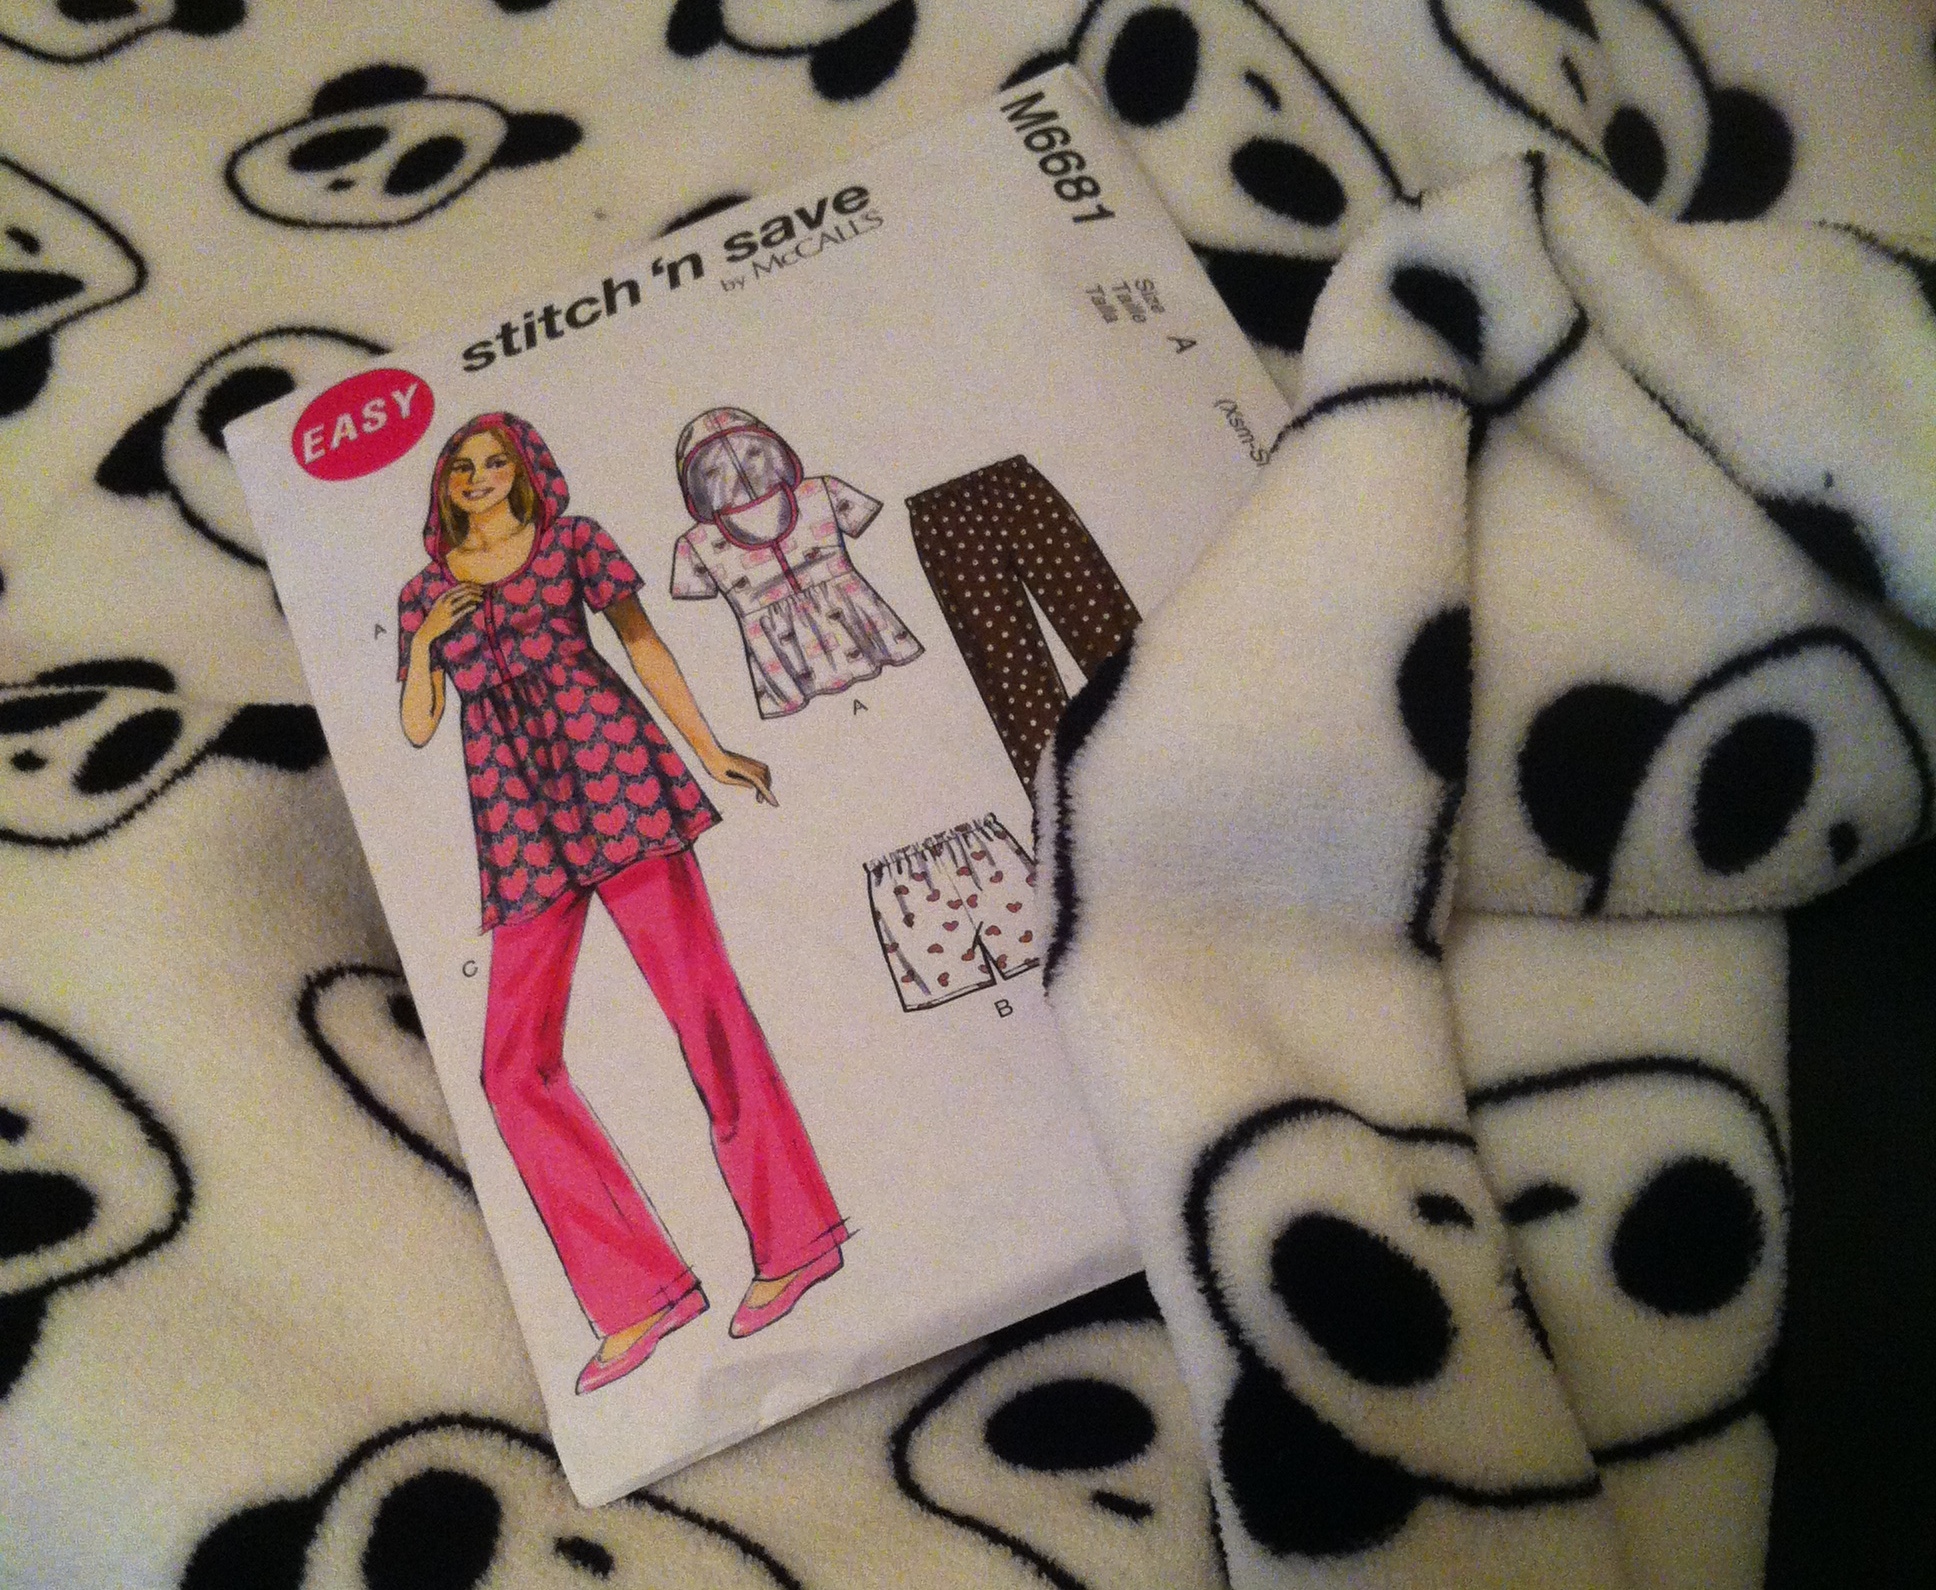
McCall's 6641

McCall’s 6681

Over Christmas, I was wanting to do a wee bit of sewing for my children, but by wee I do mean wee since I had about as much free time as I ever do lately, which is on the order of a few hours ever other week. For Tyo, stretchy cozy PJ pants seemed to fit the bill, but they needed to be as simple as possible. Even the Sewaholic Tofino pattern, which has to be one of the cutest PJ-pants patterns out there, and is sitting patiently in my stash, seemed too complicated.

So, after a bit of stash rummaging, I settled on McCall’s 6681, a Stitch ‘n Save pattern that I can’t quite decide if it’s cute, or just dated and butt-ugly. Anyway, the bottoms were a completely basic PJ trouser, which is what I was looking for. As it turned out they’re a teeny bit tapered, which I thought might suit the kids these days.

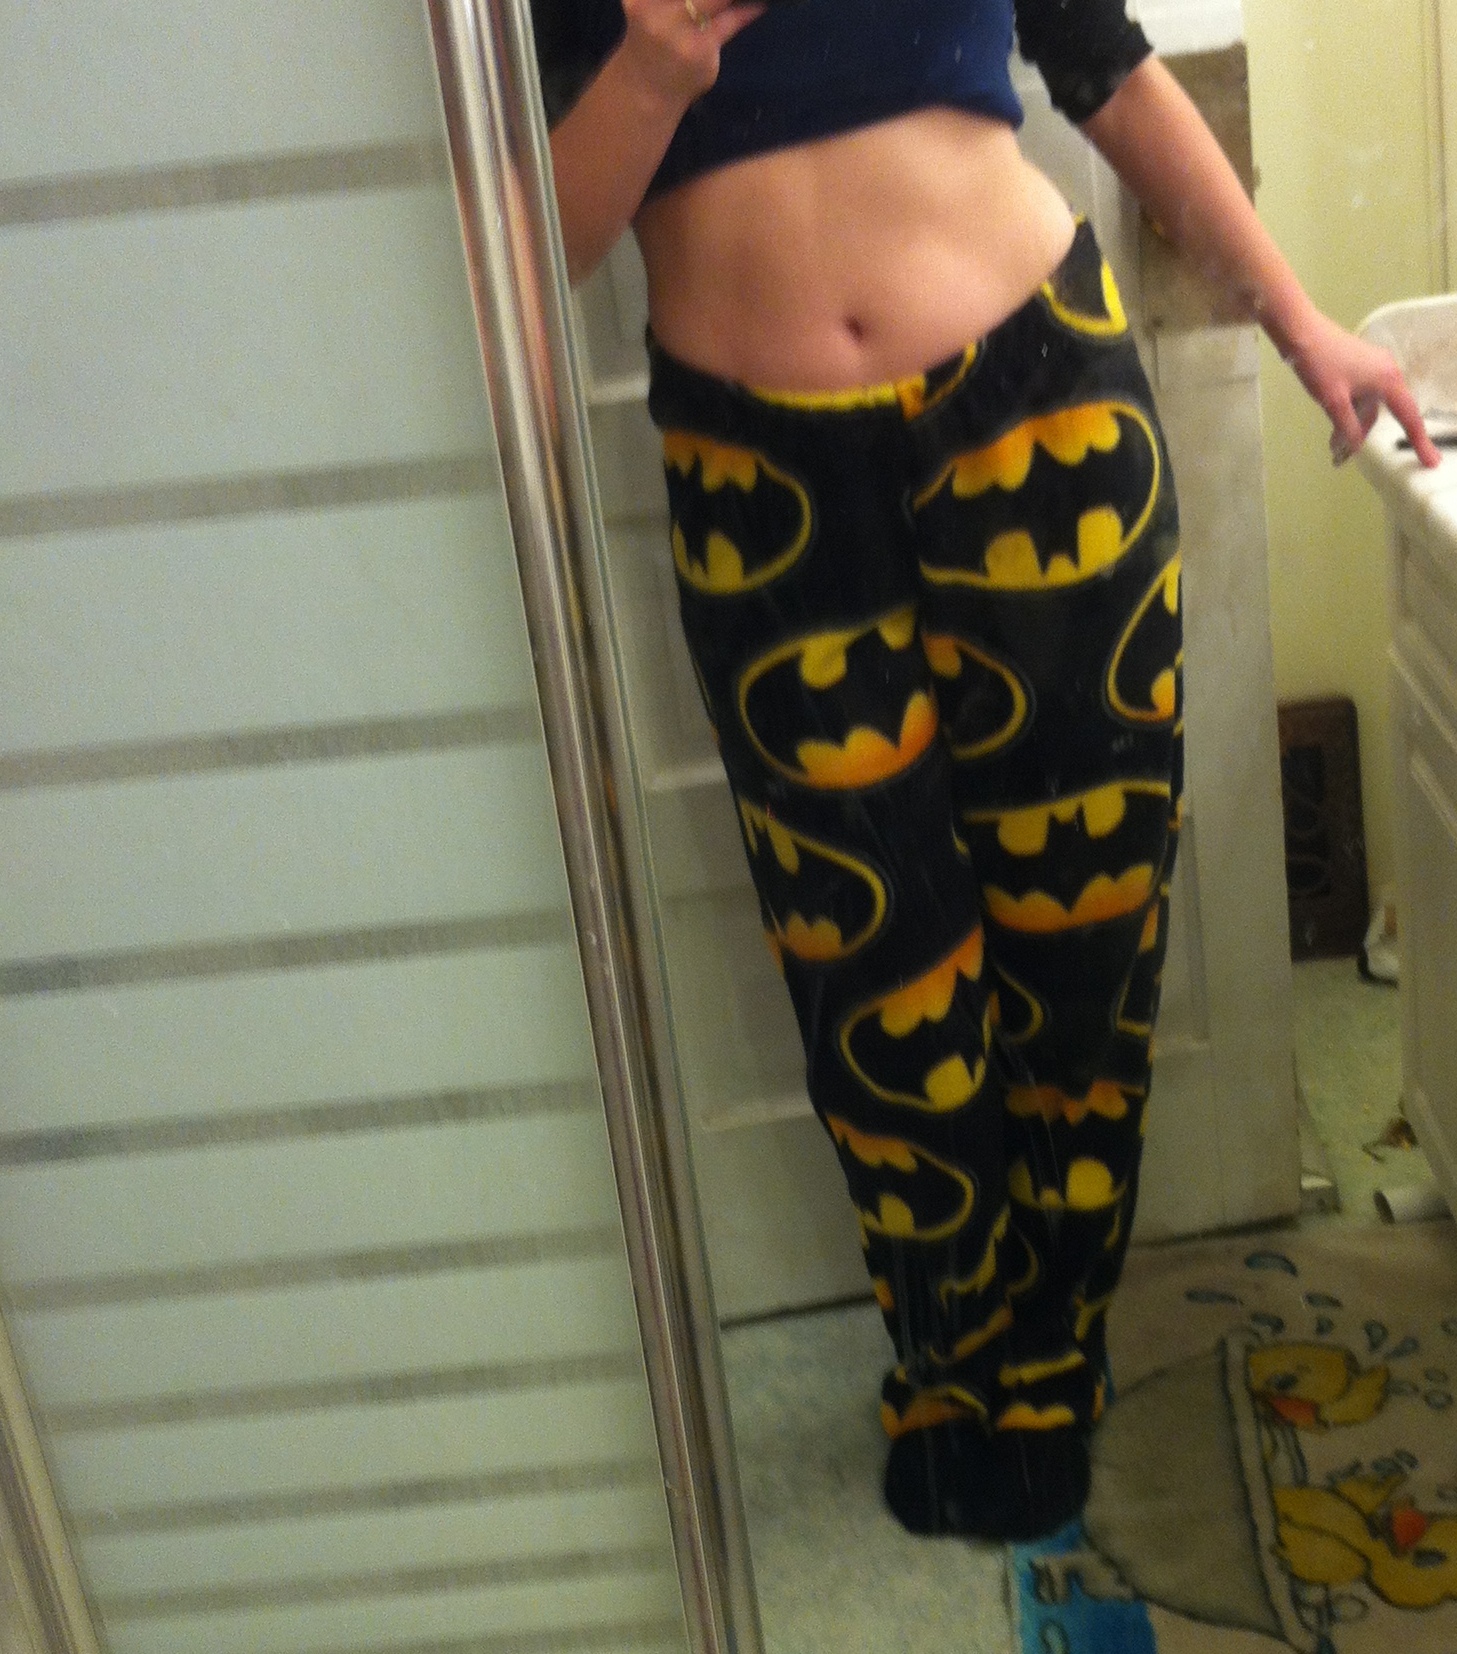
Batpants!

Batpants!

Despite the deliciously-soft panda fabric featured throughout this post, the first Christmas pair was made with Batman fleece. This was a rare score, indeed, since Fabricland has had mostly bugger all for licensed anything the last couple of years, so I had to snaffle it up when I saw it, since this year Tyo is All Batman All The Time. I’m not terribly into taking on pop-culture as totem or mascot, myself, but, well, I suppose there are worse mascots she could adopt than Batman. And this was a LOT easier than the Pikachu onesie.

Now, while one of the major downsides of having a teenage daughter is her ability to steal your clothes, in making these as a present, it became a bit of a boon—I made them to fit me, just a little bit shorter. It worked fairly well, though I should’ve made the waist a bit more snug—not sure if that’s to be blamed on my comparatively-larger waist (do you see the hips on that kid?), or the way the elastic stretches out a bit in sewing. Anyway, they aren’t going to fall off. And she was very, very happy with them.

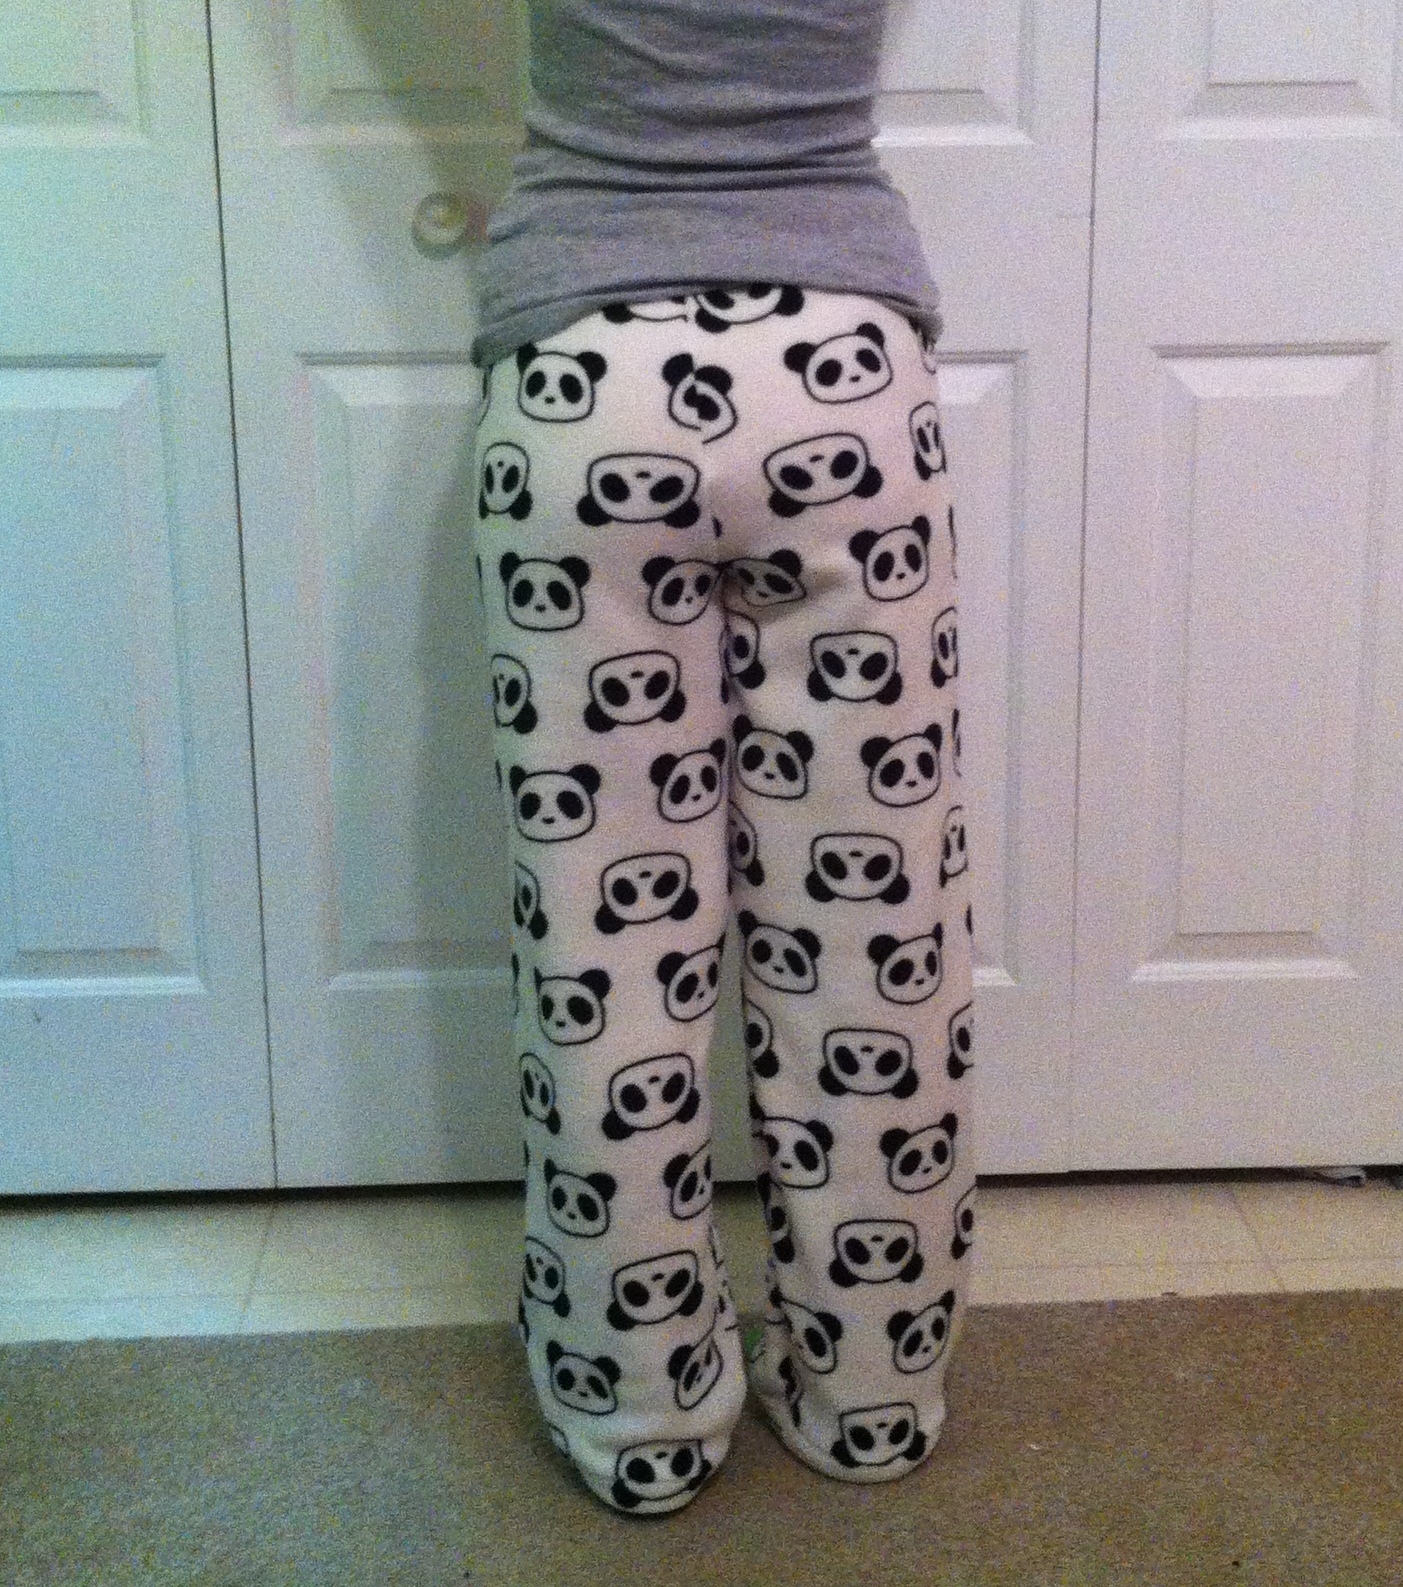
So, when I finally dug out this panda fleece (purchased a year ago last fall, originally for Tyo before she came down with a bade case of Pikachuitis) to make a pair of comfy pants for Fyon’s birthday (who is eight now, by the way, how the hell did that happen?), I figured I should make Tyo a pair too, for old time’s sake, even if pandas are so year-before-last. Since I had the pattern all ready to go ‘n everything.

The pandas will get you if you don't watch out!

The pandas will get you if you don’t watch out!

So I did.

Tyo-fitting pattern changes

Tyo-fitting pattern changes

Being the second make, I tweaked the pattern a bit, finalizing the changes I’d made to the rise the first time. I make these changes kinda preemptively to a lot of pants patterns, especially when I know they were designed for a higher rise in the front than I like. (I’ve become comfortable with a very uneven rise, nice and high for lots of coverage in the back, dipping low in the front to sit under the belly. Tyo seems to like it too, but it makes it really hard to wear most storebought pants and leggings. For this pair, I added a bit of length (depth? I always forget which it is) to the back crotch, as well, just for good measure.

The front.

The front. I forgot to get her to hike her shirt so you could actually see the rise.

Now, I’m certainly not going to be a fit-Nazi about some baggy PJ pants, but I am pretty pleased with how they turned out, anyway. No smiles and straining, but not so huge she’s swimming in them. How much can be credited to my alterations and how much to the fact that these are loose PJ pants, I don’t really know (I suspect mostly the latter, though.) And no, I didn’t even try to pattern-match panda-faces across her butt.

The back.

The back. Also, why can’t I have hips like that? /momsulk

The back hangs almost straight, and the rise is nice and high.

The side.

The side. You can kinda see the angle of the waistband under her shirt.

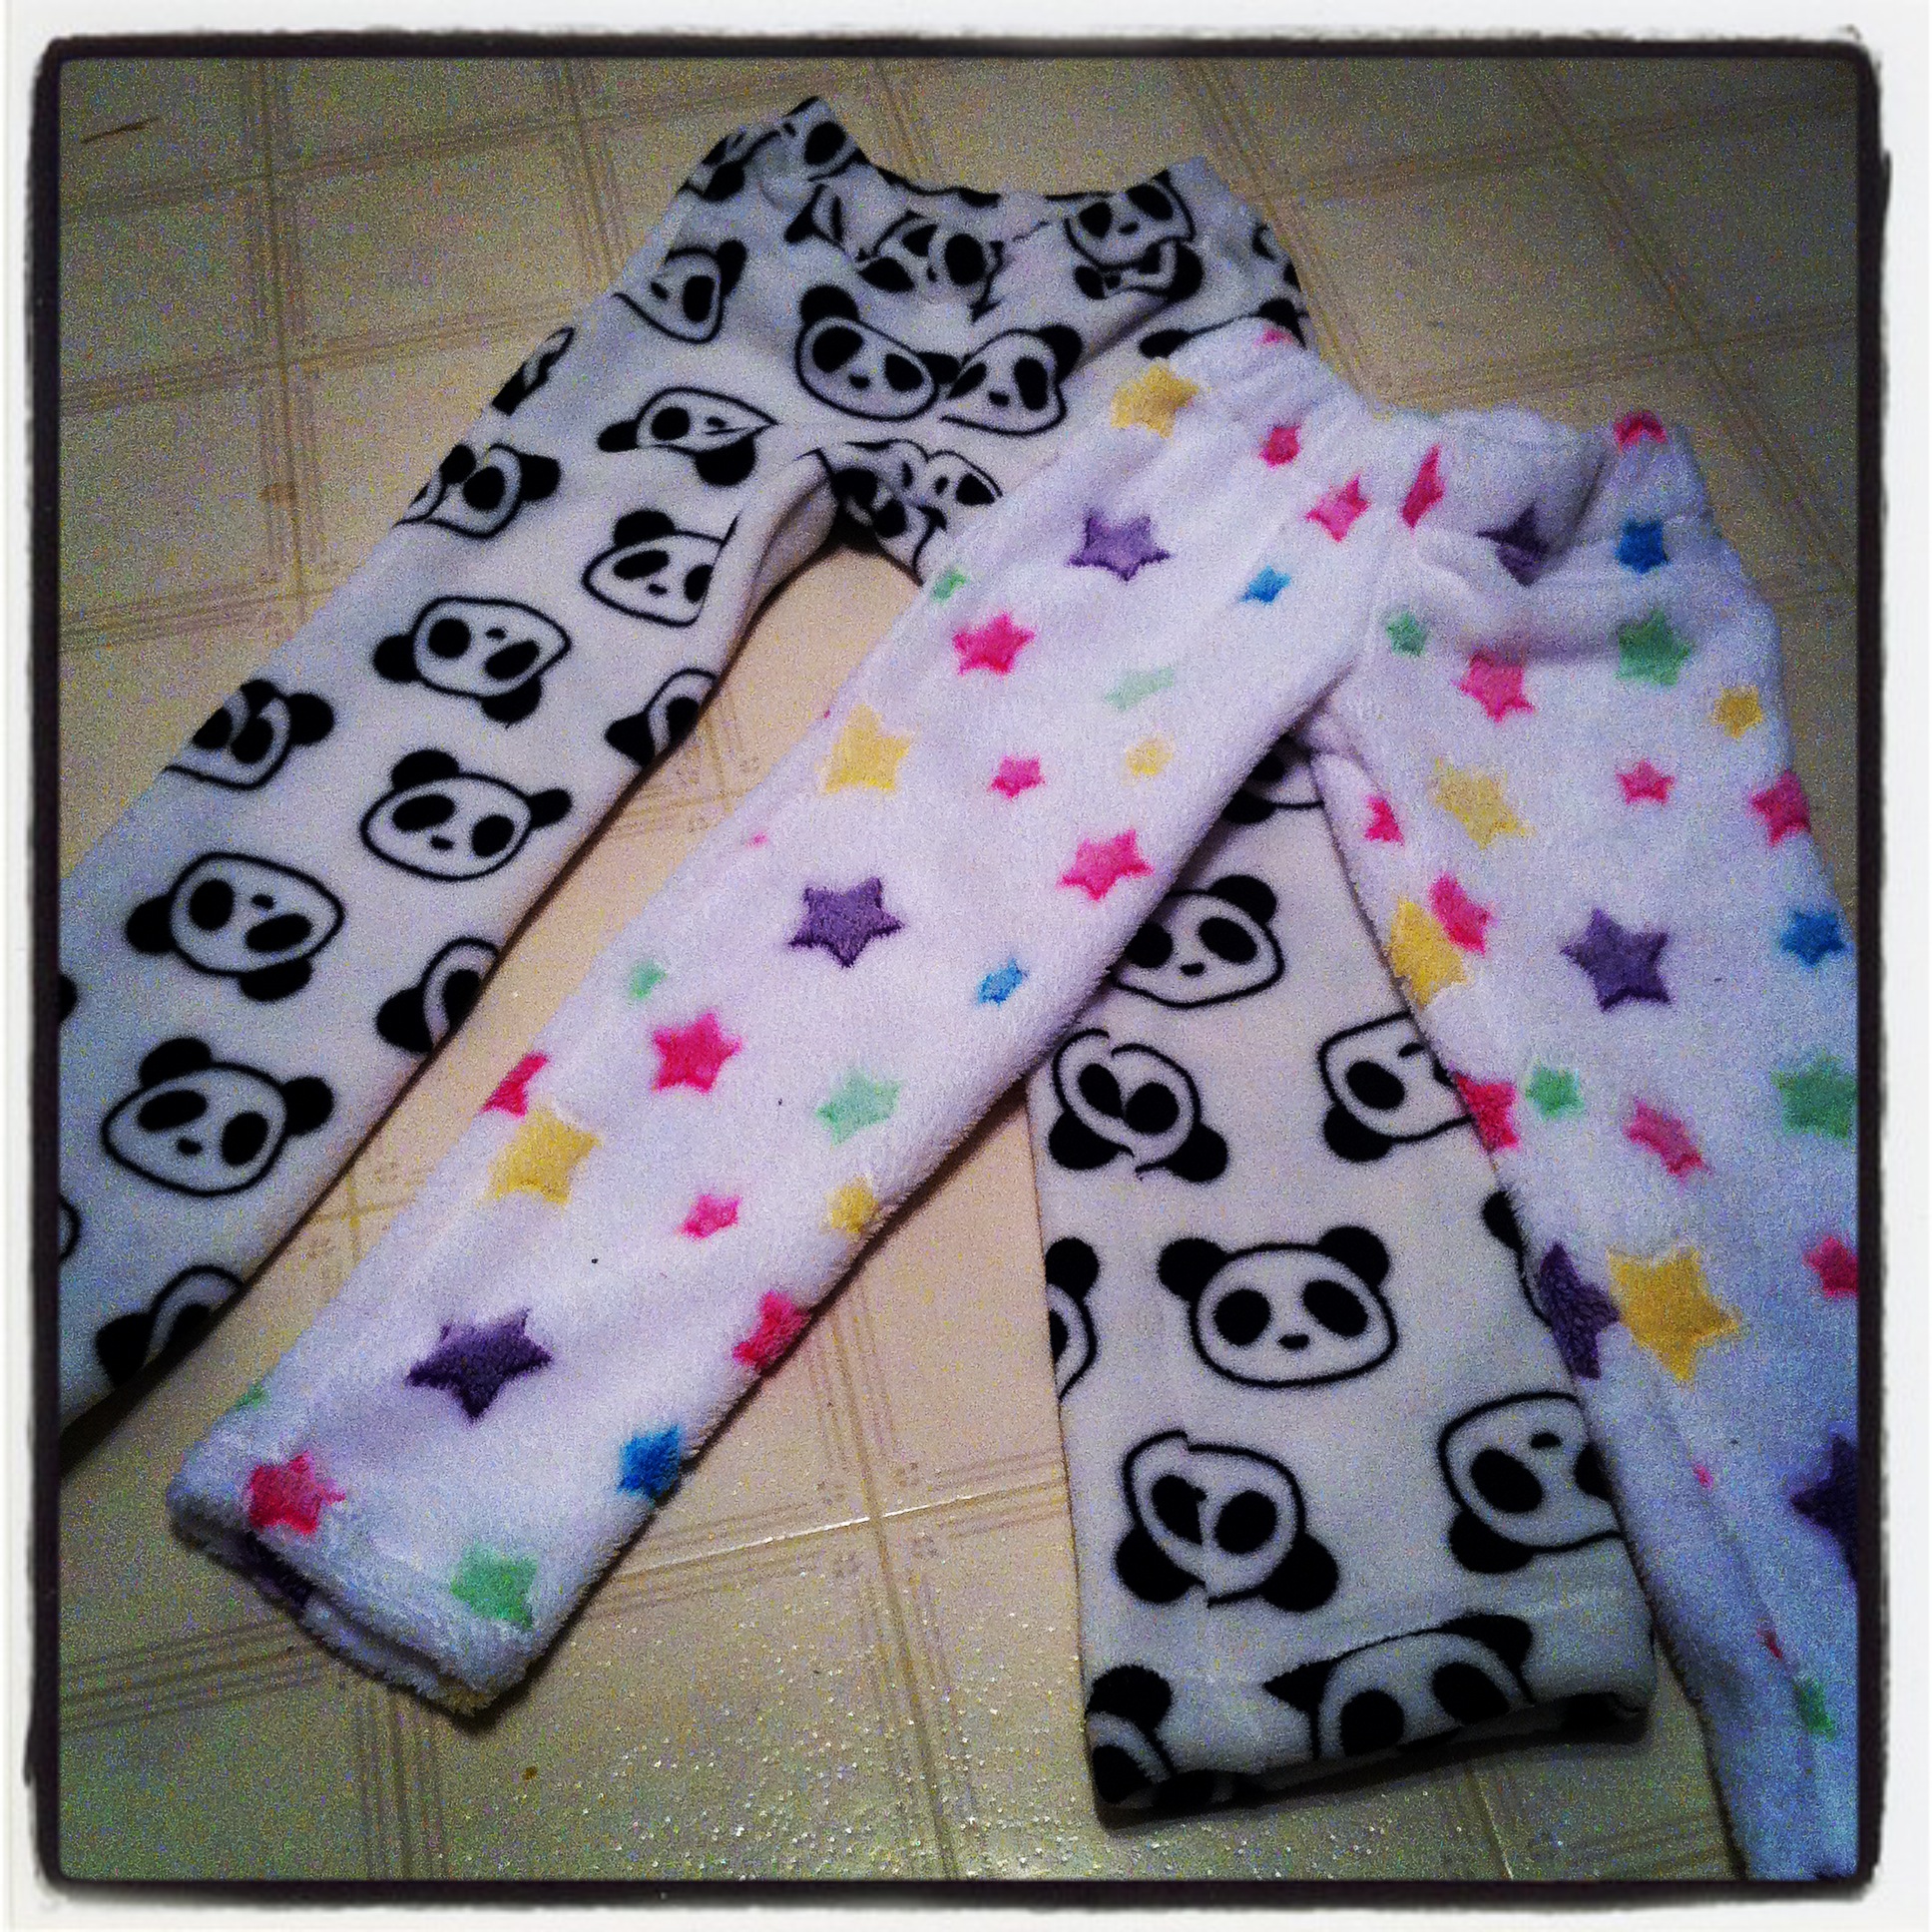
The best thing about PJ pants like these is how damn fast they are to put together. These didn’t take more than an hour all told (it helped that the pattern was ready to go, mind you), and I also managed to churn out a couple of fuzzy pants for Fyon and the Waif. And I think I have just enough panda fabric left to make some 3/4-length comfies for Syo.

Small fuzzy pants

Small fuzzy pants

There’s only one problem: Osiris is now wondering where his panda pants are.

4 Comments

Filed under Sewing

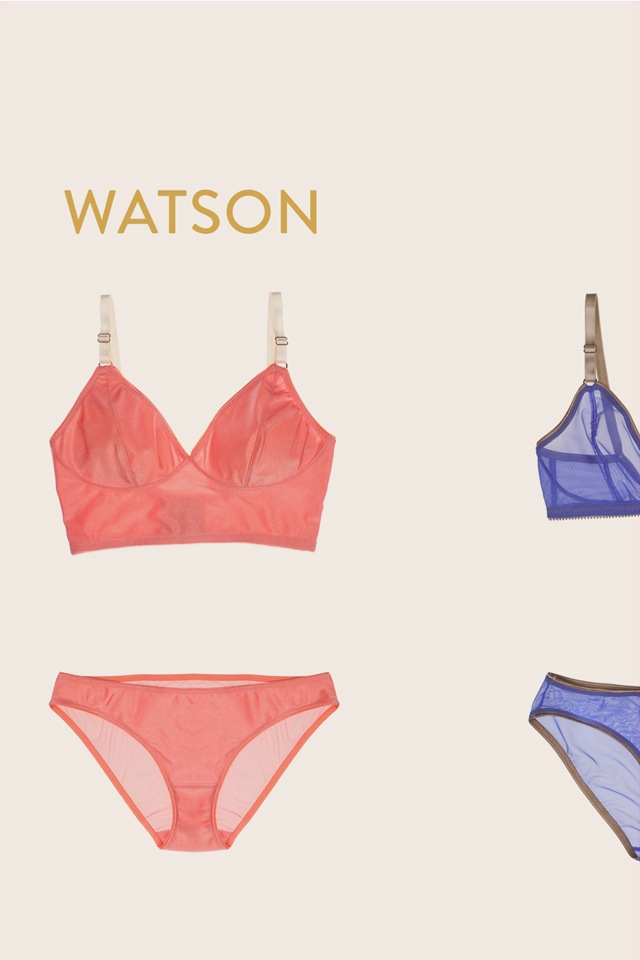
Watson!

IMG_0784.JPG

Watson!


Sometimes ya just gotta jump on the bandwagon, right?

I bought Cloth Habit’s Watson pattern shortly after it came out. Then, of course, realized that my home printer was dead out of ink, so actually making it up had to wait. (Although at one point I was seriously considering tracing the pieces off the computer screen. It’s a small pattern, you could totally do it.)

Once I did get ink, I promptly made up the bikini (panties! Yes, I come from a pantie-saying family.)

My first pair isn’t overly pretty (due entirely to my choice of elastic), but the fit was bang-on; it might be the first pair of home-made undies I haven’t wanted to lower the front on after my first go round*. The only thing I wasn’t over the moon about was the three-piece exterior construction. I know some people love this because it lets you get a really neat finish on the crotch, but I don’t love the look of the front crotch seam. Purely a matter of taste. I would have photos but my kids made fun of me for taking pictures of my underwear so I didn’t take any. Darned kids. As I said, they don’t look terribly pretty anyway, but the fit and feel is great. (Actually, they look fine on, but are kind of scrunchy when not being worn, and I don’t have a chic underwear-modelling-mannequin to demo on.)

IMG_0781.JPG

Watson bra: closeup with elastic and cup seams.


Next up was the bra. Bralette. Softie. Whatever you call those things that look like bras but don’t have underwires. I should confess that I’m not a huge fan of this type of bra; OK, I am not a fan of bras in general, really; as a teen I refused to try one on until I could reasonably fit something that didn’t say “A” for the cup size (that was the end of high school), and then after I had kids I got annoyed again and really didn’t wear them until, well, I started sewing and discovered that a nice, padded foam-cup could shift me from needing small-bust adjustments to being bang-on in pattern-bust-sizing. So basically it was sewing that got me wearing bras again. And of course, if I have to wear it, probably sooner or later I’m going to want to try to sew it, although the bras you can easily sew are, of course, not the kind of hard-cup I usually go for. The first bra pattern I bought was the Marlborough, back in the summer, but though my trial was pretty successful, it keeps getting back-burnered. Watson, not having underwires, was a lot less scary for my first “bra” type experiment.

I will pause to voice one small complaint about sizing. Both the Watson and the Orange Lingerie Marlborough suggest that you find your cup size by taking your full-bust measurement and then subtracting your high bust measurement. I gather this works for many people.

It does not work for shit for me. My high-bust is the same or (at most) 1/2″ smaller than my full bust. Blame it on broad shoulders or well-developed pectorals or who-knows-what, but according to this method I am an AA cup. (I did, however, go with Amy’s recommended band-size based on my ribcage measurement. That worked fine.) For the cup size, I went with the one that corresponds to my “cup volume” for pretty much every storebought bra I’ve ever owned—the one that corresponds with 34B/32C/30D. Now, cup size on this bra is pretty forgiving so maybe I would’ve been just fine in a the 32AA cup, but… I’m kinda doubting it. Anyway, /endrant. If you know your cup volume, just go with that.


IMG_0783.JPG

Emergency mail rescue!

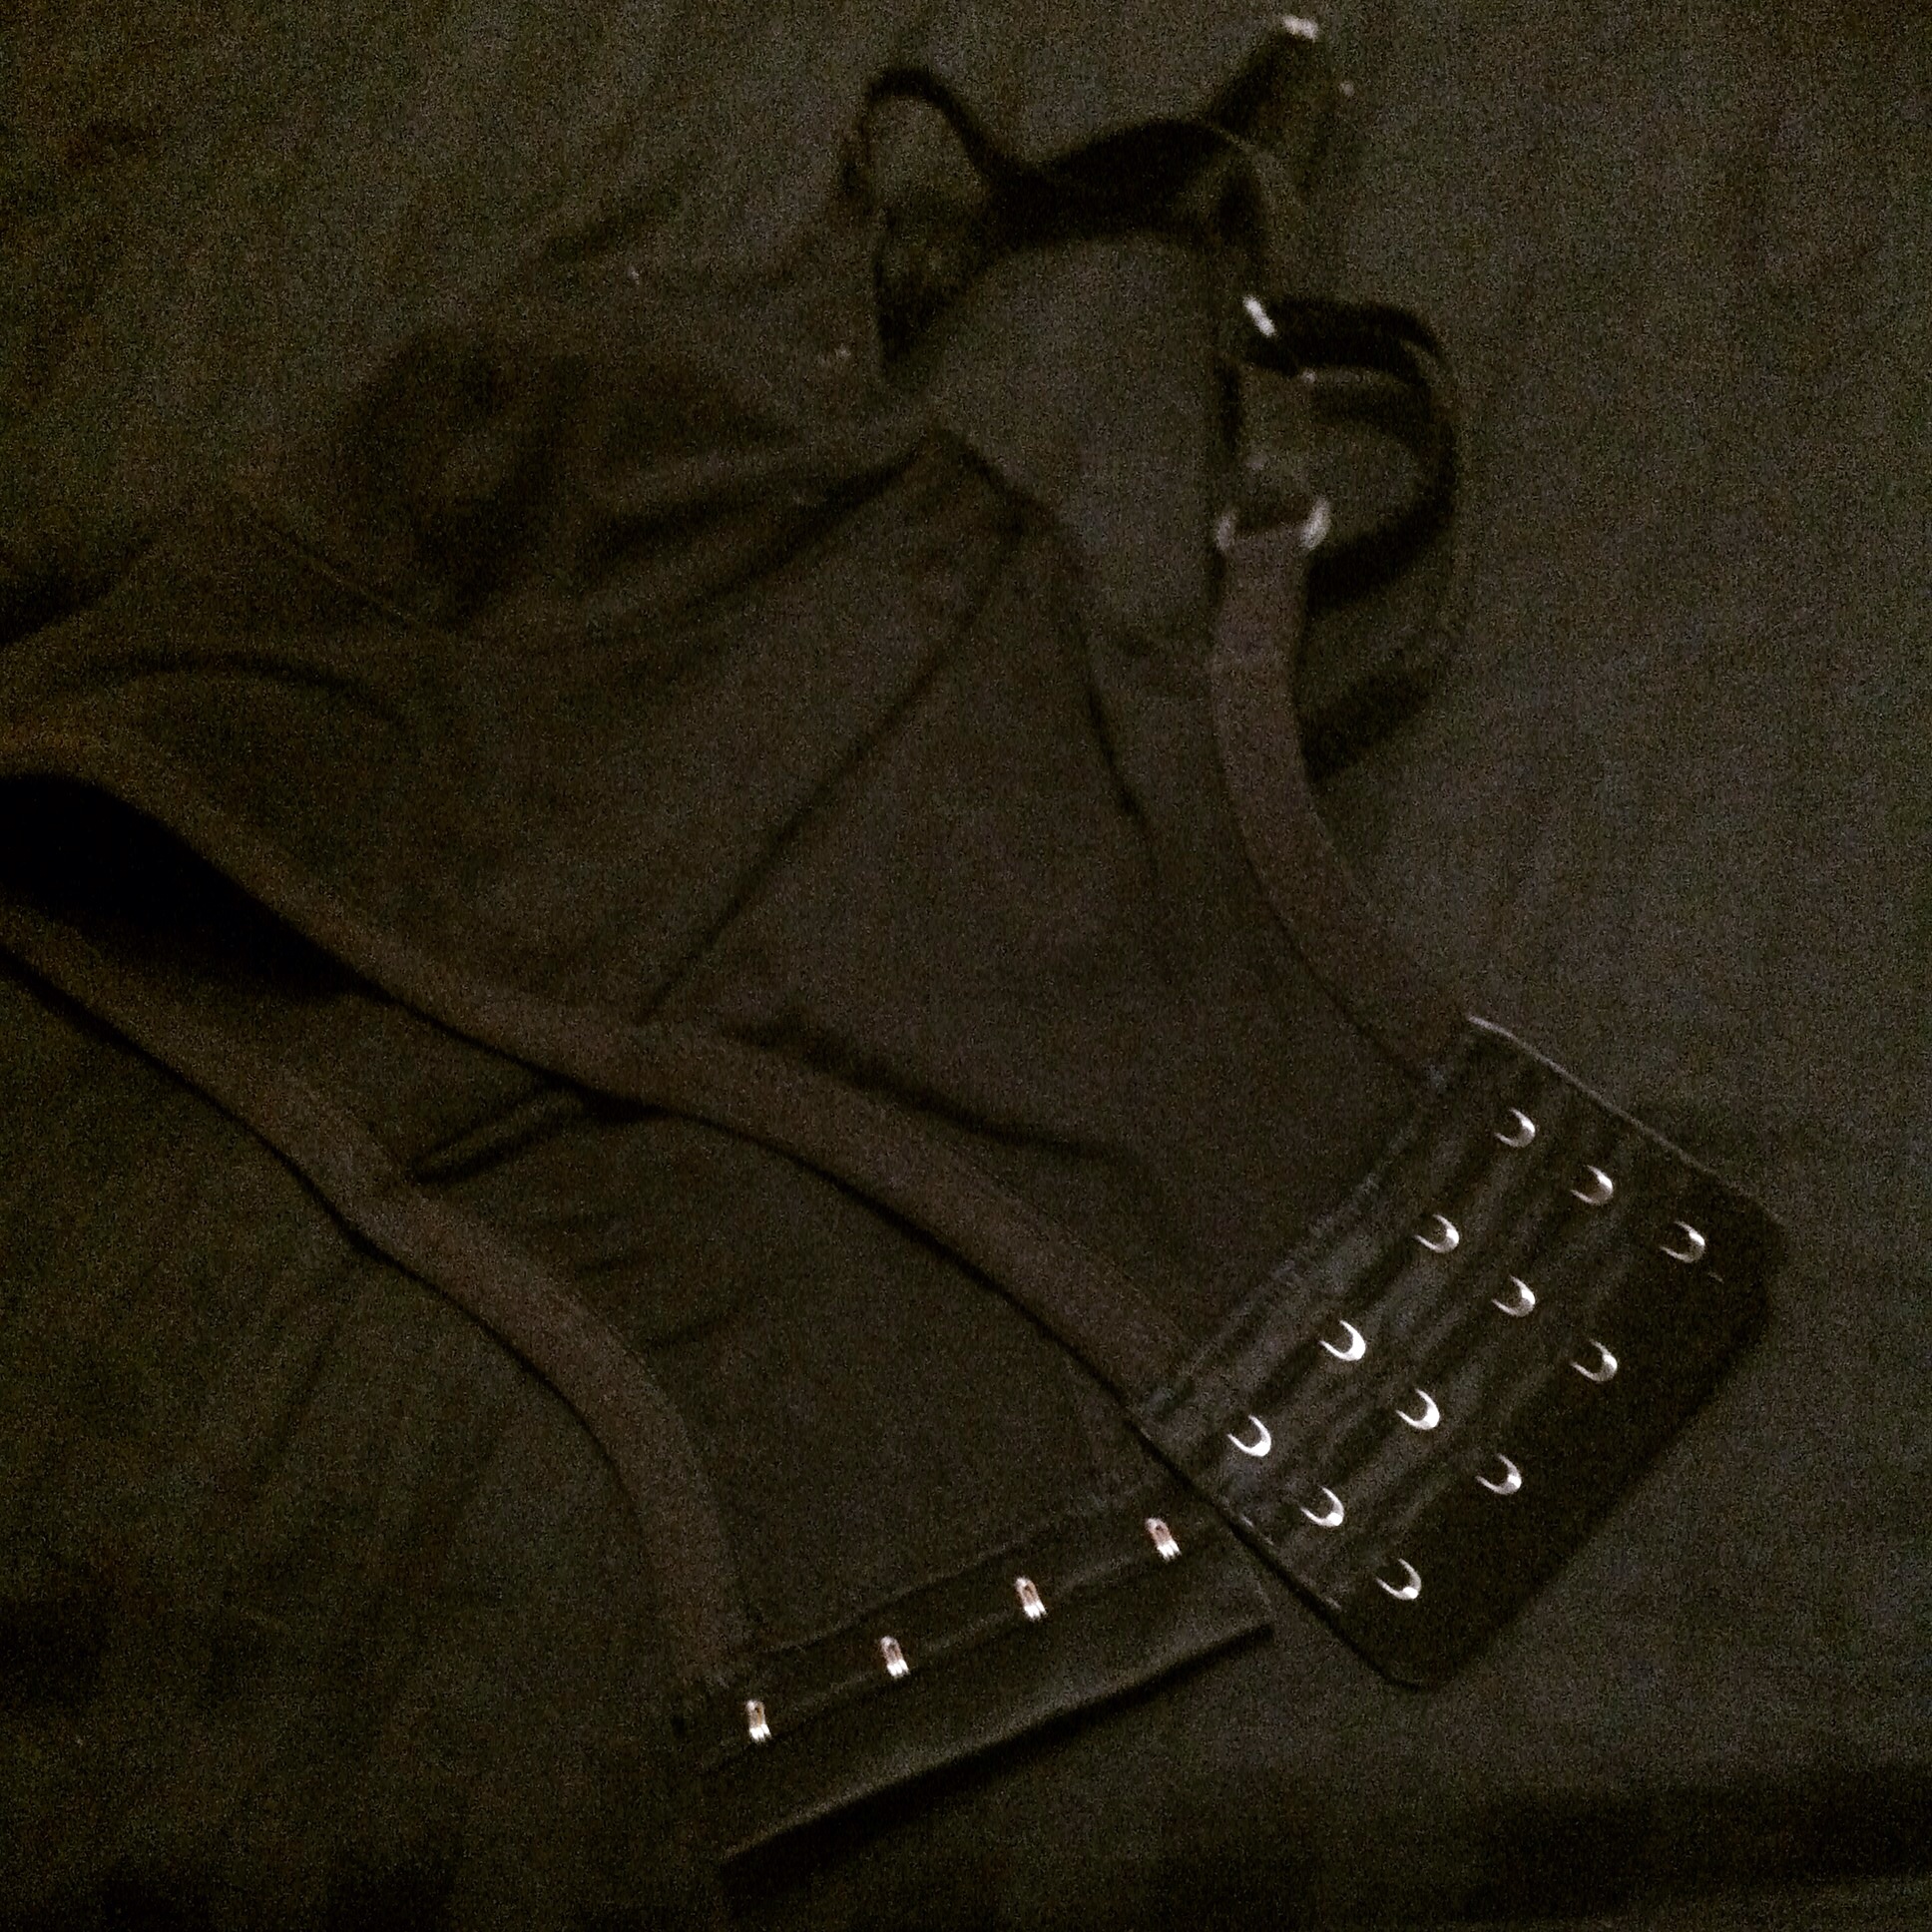
So I made up almost the entire bra, in the long-line view, then realized what I already knew, which was that trying to fit the long-line onto any bra hook sets that I had on hand was not going to even remotely work; with the elastic finishing I had used, my back was a full 3″ (which is about 3/4″ longer than drafted for—I was using foldover elastic to finish the band top and bottom rather than folding it behind, so I wasn’t getting rid of my seam-allowance. It’s not that I was unaware of this so much as that I liked the wider band, until I actually had to think practically about how I was going to finish it off.) So, I got me to the Bra Maker’s Supply website to order some wider bra hooks (and some other doodads while I was at it). (Also, hooray for in-Canada shipping—it got here regular mail from Ontario in three business days! I couldn’t drive the distance in much less than that.)

Why do I keep making stuff in black?

Why do I keep making stuff in black?

Happily, the 4-hook bra-back fit PERFECTLY on my band. I used Tasia’s trick of hand-basting the back bits in place before bar-tacking—genius! Flawless attachment the first time. (Yes, this is my first time attaching any kind of bra back, really.

IMG_0782.JPG

Ermagerdbra!


Since materials are such a big deal when it comes to bra-making, I should probably go over them: I used a standard, fairly heavy and very stretchy cotton-lycra knit, a single layer everywhere except the front band (“cradle.” I’ll figure this bra terminology out one of these days. 😉 ). I had just enough strap elastic left from my Gertie Slip to make the straps, and as mentioned above I used a wide plushy fold-over elastic (1/2″ when finished) to finish the bottom and back of the band. For the top and cups, I used my crappy-but-quick-and-easy method: serge clear elastic on to the inside, fold over, and zig-zag. Not the prettiest, but it works and doesn’t show. For the cradle, I used a double-layer of my cotton knit, and interfaced one side with fusible knit interfacing. I made this side the inside, but in hind-sight I kinda wish I’d made it the outside; since the interfaced side has no vertical stretch, but the un-interfaced side does, the un-interfaced side tends to bubble a little bit. Something to think about next time. 🙂 I didn’t line the cups in any way and I’m a bit torn—I feel like the stretch helps the fit, but on the other hand there isn’t a lot of support or shape. Not that I need much of either, really, so perhaps that’s just me being used to hard-cup bras. But the band feels very solid with the elastic and interfacing and the industrial-grade four-hook back, while the cups feel much softer and lighter. Maybe a double-layer for the cups would’ve been the way to go.

Still, quibbling aside, it was fun to make and is pretty fun to wear. I also made Tyo try it on, and it fit her pretty well on a tighter hook—I’m actually kinda liking the idea of making her bras (especially if I can sell her on simple soft ones like this), since finding storebought ones in her (itty bitty) band-size is either tricky or very expensive.

And now, back to those men’s jeans… >_<

*I like the front low on my underwear—your mileage may vary.

19 Comments

Filed under Sewing

Simple, practical, superfluous.

IMG_0765.JPG

I’ve had Burda 8855 for a long time—it was one of the earlier thrift-store patterns I picked up. And, frankly, it’s pretty damn near perfect: a long, not too full skirt, one of my favourite styles, and one I wear a fair bit when I’m in a “look at me!” point in my fashion cycle. Amidst all the craziness of Hallowe’en sewing, I was yearning to make something for myself, and traced it off. (A 70s vintage pattern, it doesn’t have seam allowances added. Which means I got to add my own, favourite 1cm seam allowance. YAY 🙂 ) Incidentally, the most fun thing about the pattern itself was discovering that it was printed on tissue paper identical in every way to the big Burda-brand tracing sheets I buy by the package at Fabricland, right down to the one shiny side and the precise folding scheme.) As I was auditioning black fabrics for Batgirl’s jacket/cape at Hallowe’en, I pulled out this mystery suiting, a sturdy twill weave that feels like it might have a hint of wool in. While I went with a leather-look knit for Batgirl, I knew this fabric would make a great, sturdy, plain black skirt.

IMG_0772.JPG

I traced and cut a straight size 38, adding a wide hem allowance to the bottom both because I like wide hems and just in case the length as drafted wasn’t enough (though 70s long skirts are generally fine, for some reason). Once I finally got it constructed enough to try on (there was some sewing together of incorrect sides and other humorous blunders) I trimmed a wee bit off the top to allow for the fact that my waist definitely not size 38, and a wee bit more off the top back in a teensy-tiny swayback adjustment. I often do this in dresses with a waist-seam, but it was interesting to see it happen in a solo skirt, especially since it’s not terribly fitted over the hips. Anyway; side-zip and a waistband. On reflection, while I am coming to terms with skirts that hit at my waist (at least if I don’t try to tuck a top in), I still prefer the look of a facing to an actual waistband. Less bulk in the area where I least need to add bulk. 😉 Especially since this pattern has no back seam so the zipper is at the side. Next time I try this pattern, I will try making a facing for it. Or maybe add a back seam to put the zipper in. Or maybe both.

IMG_0761.JPG

Once I had the top finished to my liking, I tried it on and decided that while the length at the back was good (allowing for a nice 2″ hem), the front could be a wee bit shorter. I trimmed about 1″ off the front, tapering to nothing just past the side seams. To make the turn-up on the flared skirt, I tried something new to me: I cranked the differential feed all the way up on my serger and serged the bottom edge of the skirt, gathering it somewhat as I went. This wound up being pretty much perfect for pressing it up; then I hand-stitched the hem, as I usually do. It’s not terribly smooth or pretty on the inside—a seam binding or other tape would help with that—but it was quick and functional. Quick being a big deal these days.

IMG_0762.JPG

It was a deliciously quick project; IIRC, I traced the pattern on Saturday night, cut and sewed on Sunday, and finished the hem Sunday evening, to wear the skirt Monday morning. Now that is a win.

IMG_0774.JPG

I did a lapped zipper. That probably didn’t help with the whole side-bulk thing. >_<

IMG_0759.JPG

So I’m quite happy with the skirt, aside from some funkiness about my buttonhole on the waistband (buttonhole is not centred but button is, which causes some bubbling at the side, just where you don’t want it.) And It’s been worn a number of times since. I was quite pleased with myself for finally adding such a versatile basic piece* to my closet. Then, while digging through that closet for things to wear with the skirt, I found not one, but two long black skirts from my pre-sewing days that, um, I had kinda forgotten about. So apparently it’s a staple that I already possessed.

IMG_0764.JPG

I still like my new skirt best, though.

*your mileage may vary. 😉

9 Comments

Filed under Sewing

Angel Wings

IMG_0005.JPG

It’s been a while since I made anything for Osiris. I think the last thing was a pair of indifferently-fitting fleece pants for last Christmas, distinguished only by the fact that they were the only thing I sewed anyone for Christmas. He’s not really demanding in that department, but he was definitely starting to pout, especially after all the Hallowe’en sewing I did for the kids (hopefully I’ll manage to post about that eventually, if not check my Instagram feed. :P). And it’s certainly not that I don’t have lots of ideas of things to make him. I have the Thread Theory Strathcona henley printed out but still needing taping. I’d still like to try jeans, but I didn’t think I had the energy for a major project. Turns out the joke is on me since this simple sweatshirt spiraled well out of control.

So, why a sweatshirt? Well, Osiris is many things, but foremost among them is an 80s boy. I can’t explain it, but there’s something about that decade that appeals to him. And there are few things he likes better than a warm, cozy sweatshirt.

Which, it turns out, is actually pretty hard to find these days outside of a thrift-store. Everything is hoodies with zippers. On the other hand, though, a sweatshirt is dead simple to make.

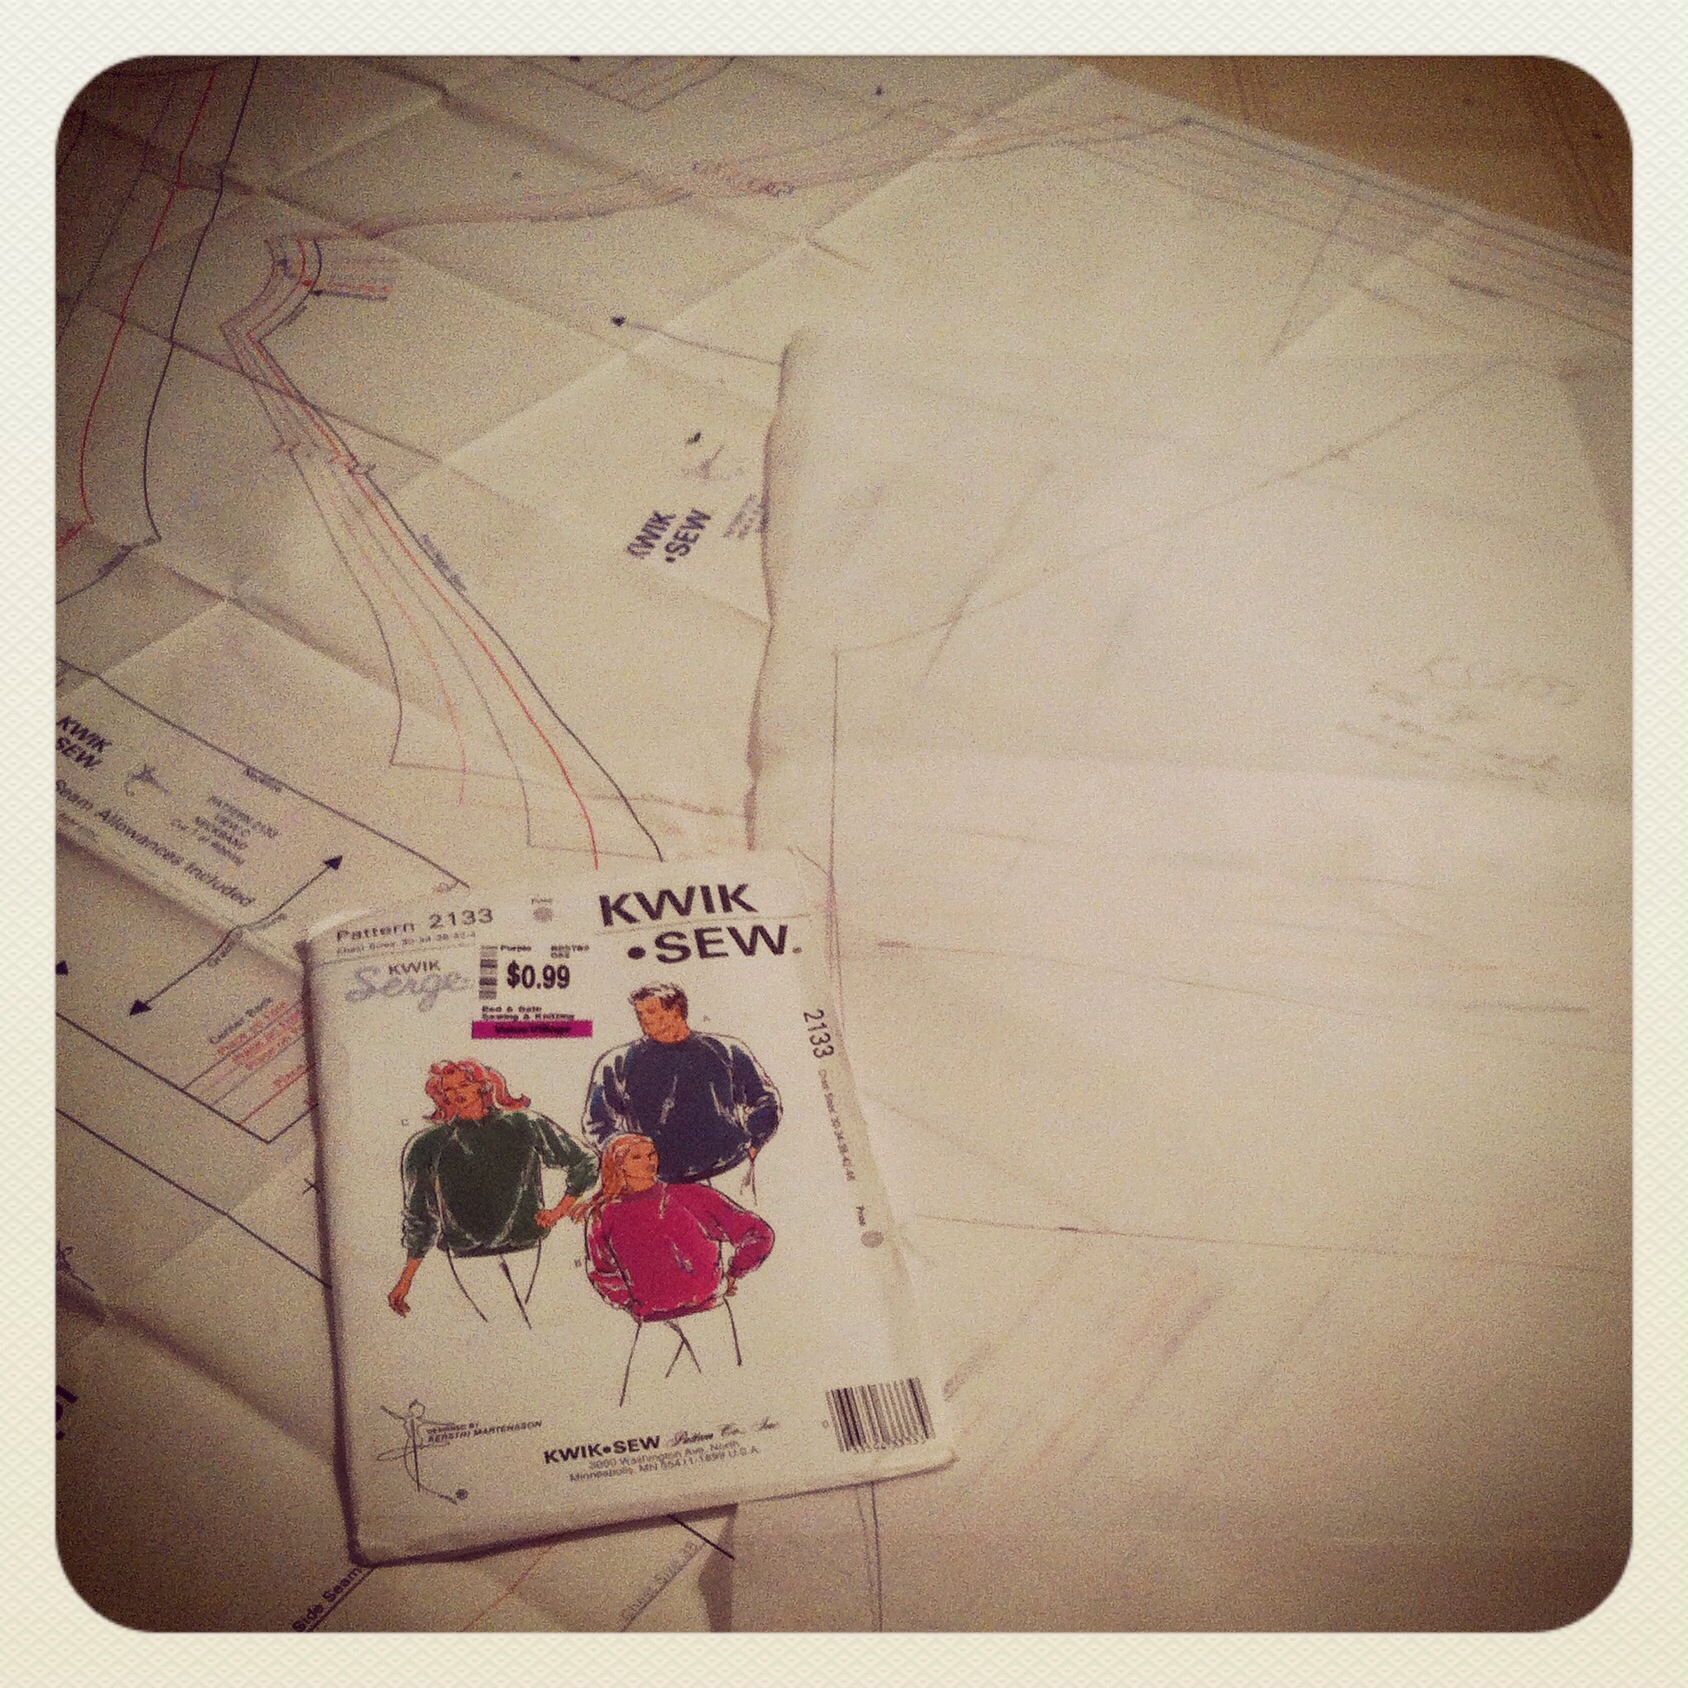
I started out with Kwik Sew 2133, a stylish gem all the way from 1991 (Which, let’s face it, from a style point of view was still firmly 80s.) I wanted the classic raglan-sleeve style, if only because the two other sweatshirts in Osiris’s current collection (yes, both from the thrift store) are set-in-style sleeves.

IMG_0753.JPG

Being (justifiably) wary of late-80s/early 90s sizing, I rounded down and made the size 38 rather than the 42 (Osiris has a 40″ chest), although looking at the finished product I could have gown down another size easily (It occurs to me that I may just prefer seeing him in form-fitting clothes. 😉 ) Like me, Osiris is long-limbed, and I wound up adding a full four inches to the sleeve length—body length was just fine.

Then… things start to go a little sideways. I didn’t want to make just a plain sweatshirt… it needed something a little special. A wee bit of bling. But something subtle, classy*… Maybe some white-on-white appliqué? Something unique, special, Osiris.

IMG_0007.JPG

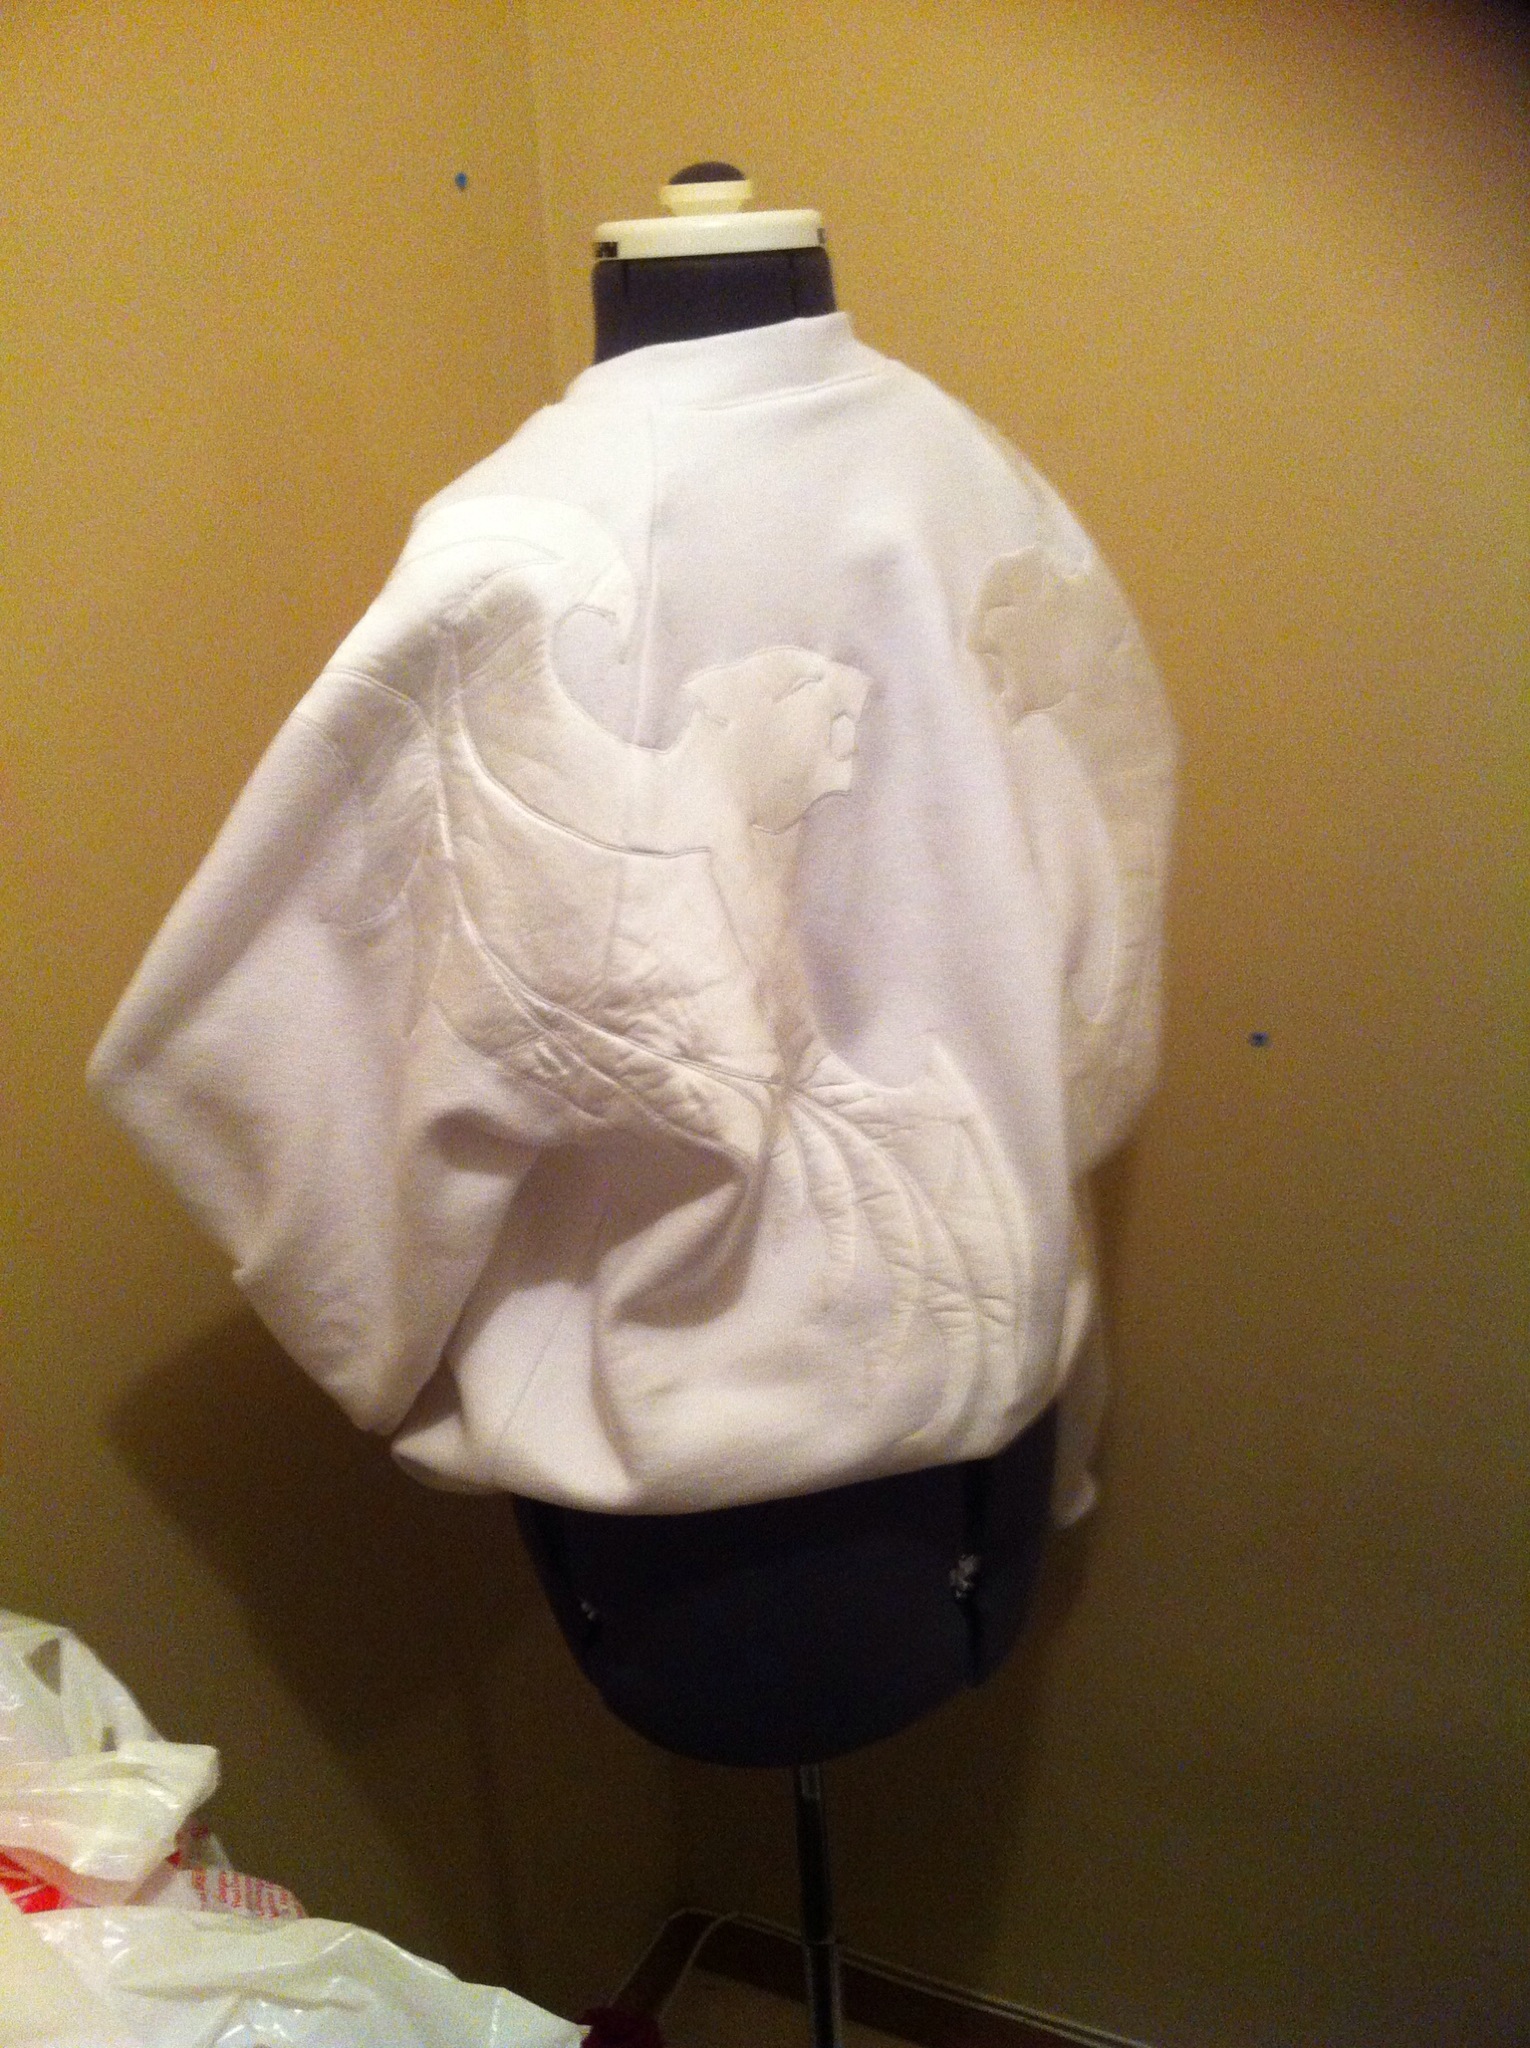
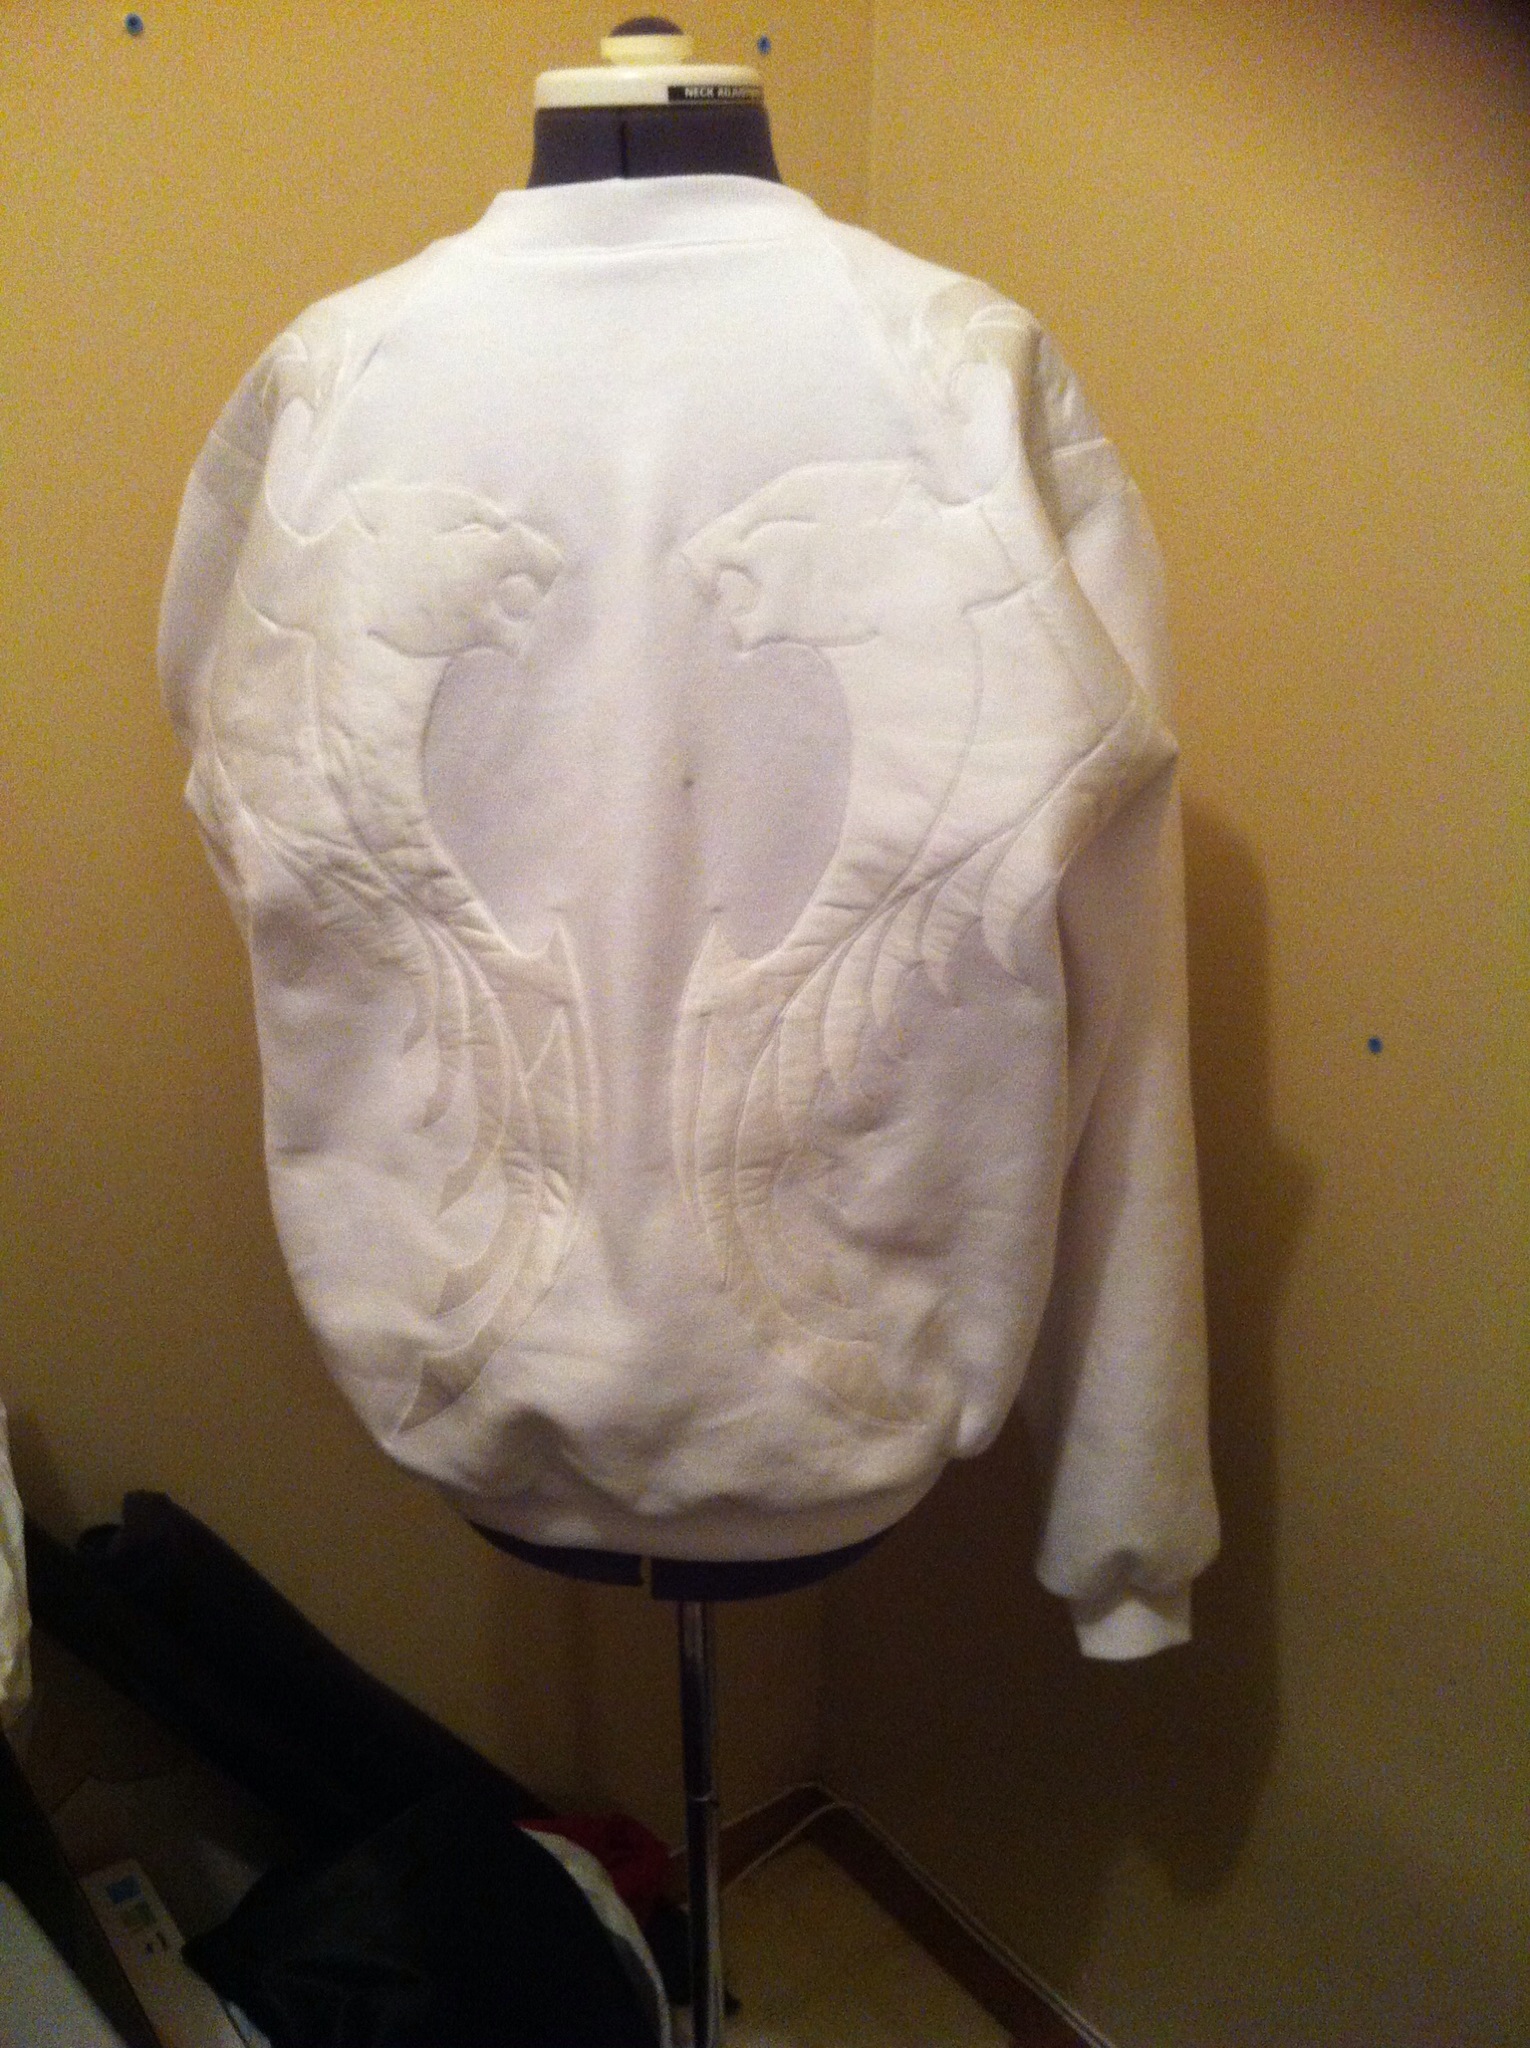
Next thing I know, I’m ogling tribal angel-wing designs on Pinterest and sketching out an angel-wing/cougar design to go down the back of the sweater. That pretty much killed a weekend; then there was another pause when I figured out I was two inches short of having enough steam-a-seam to do both wings.

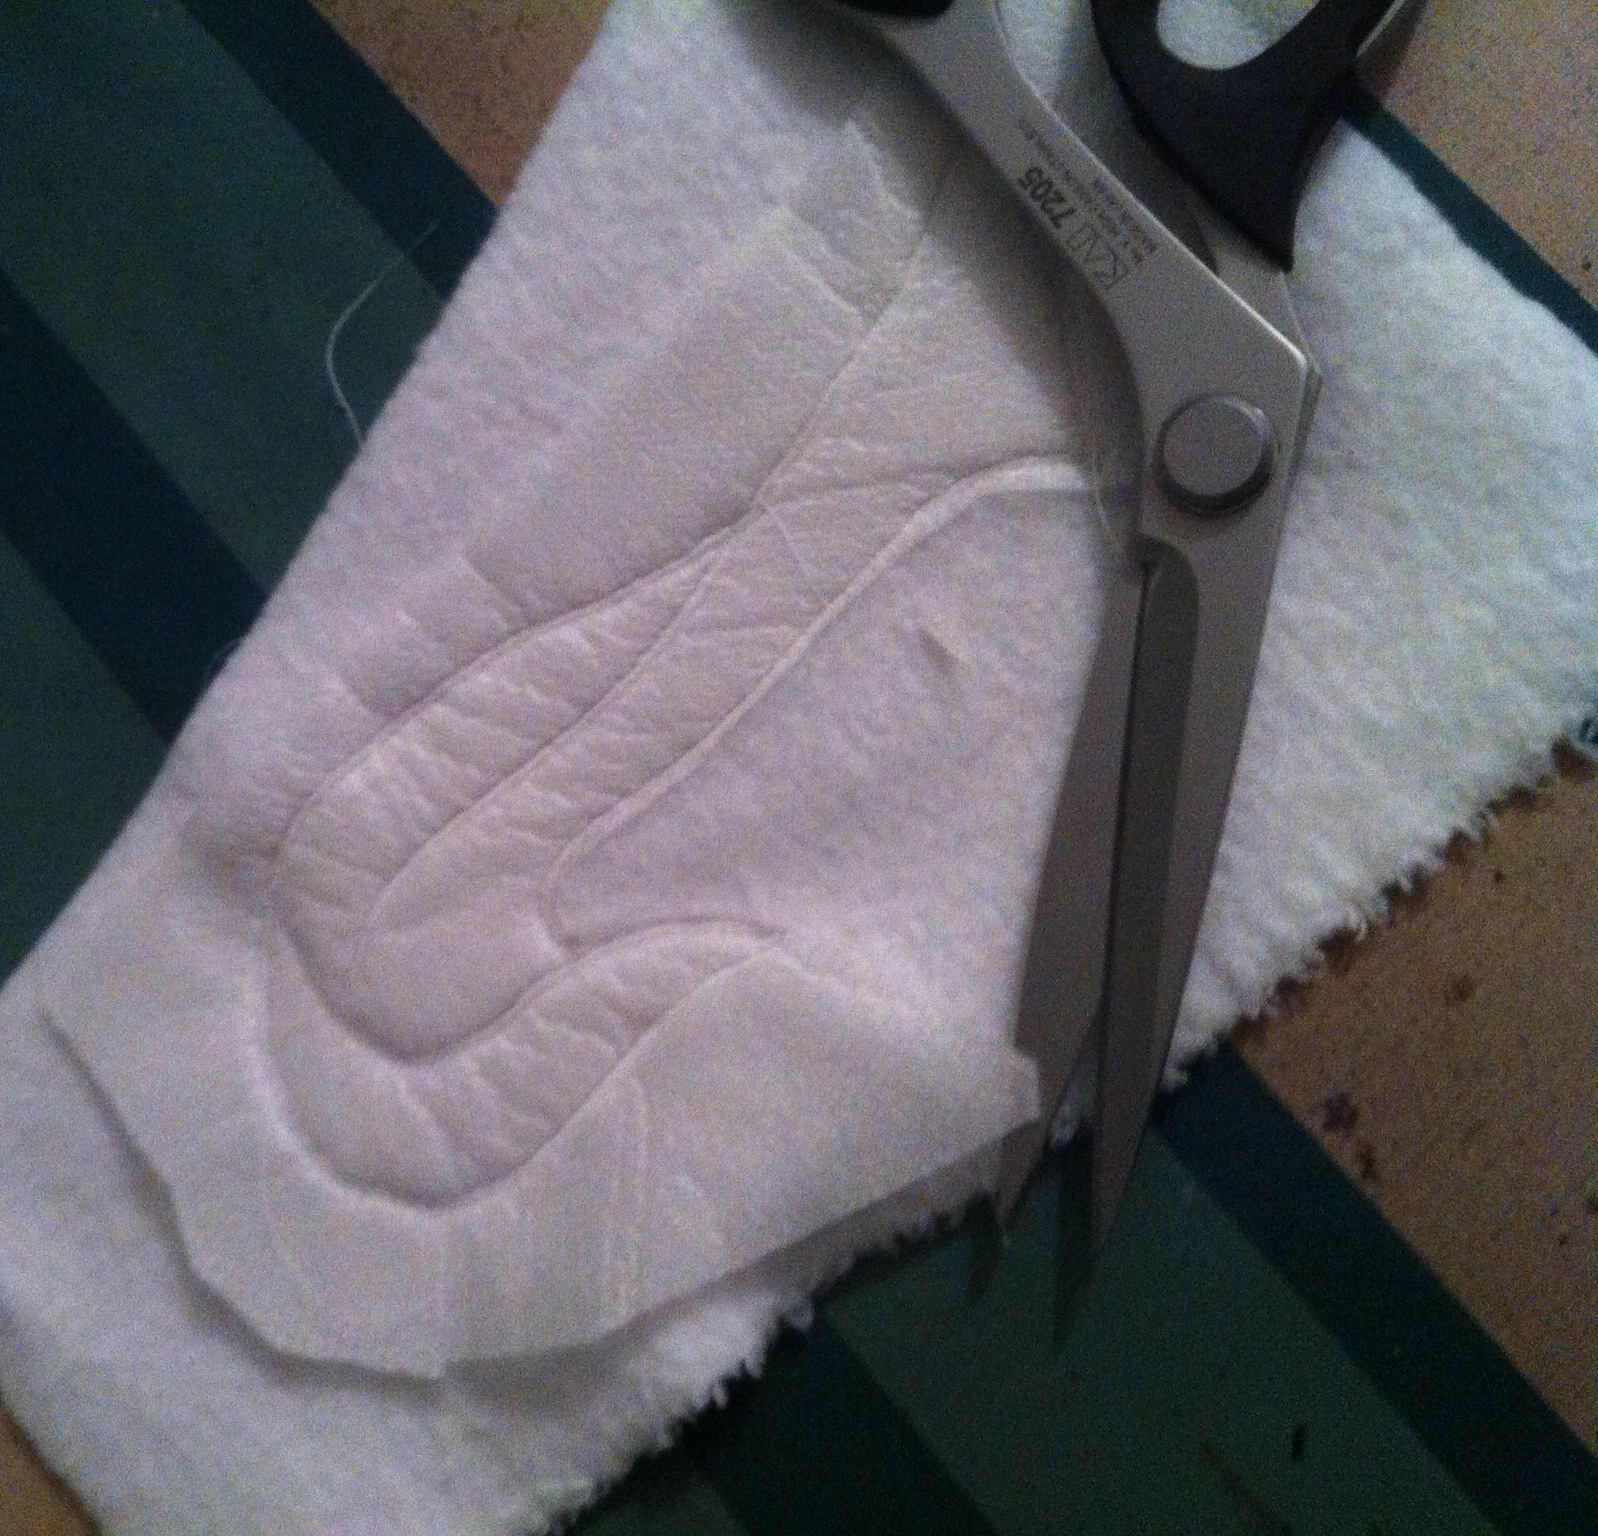
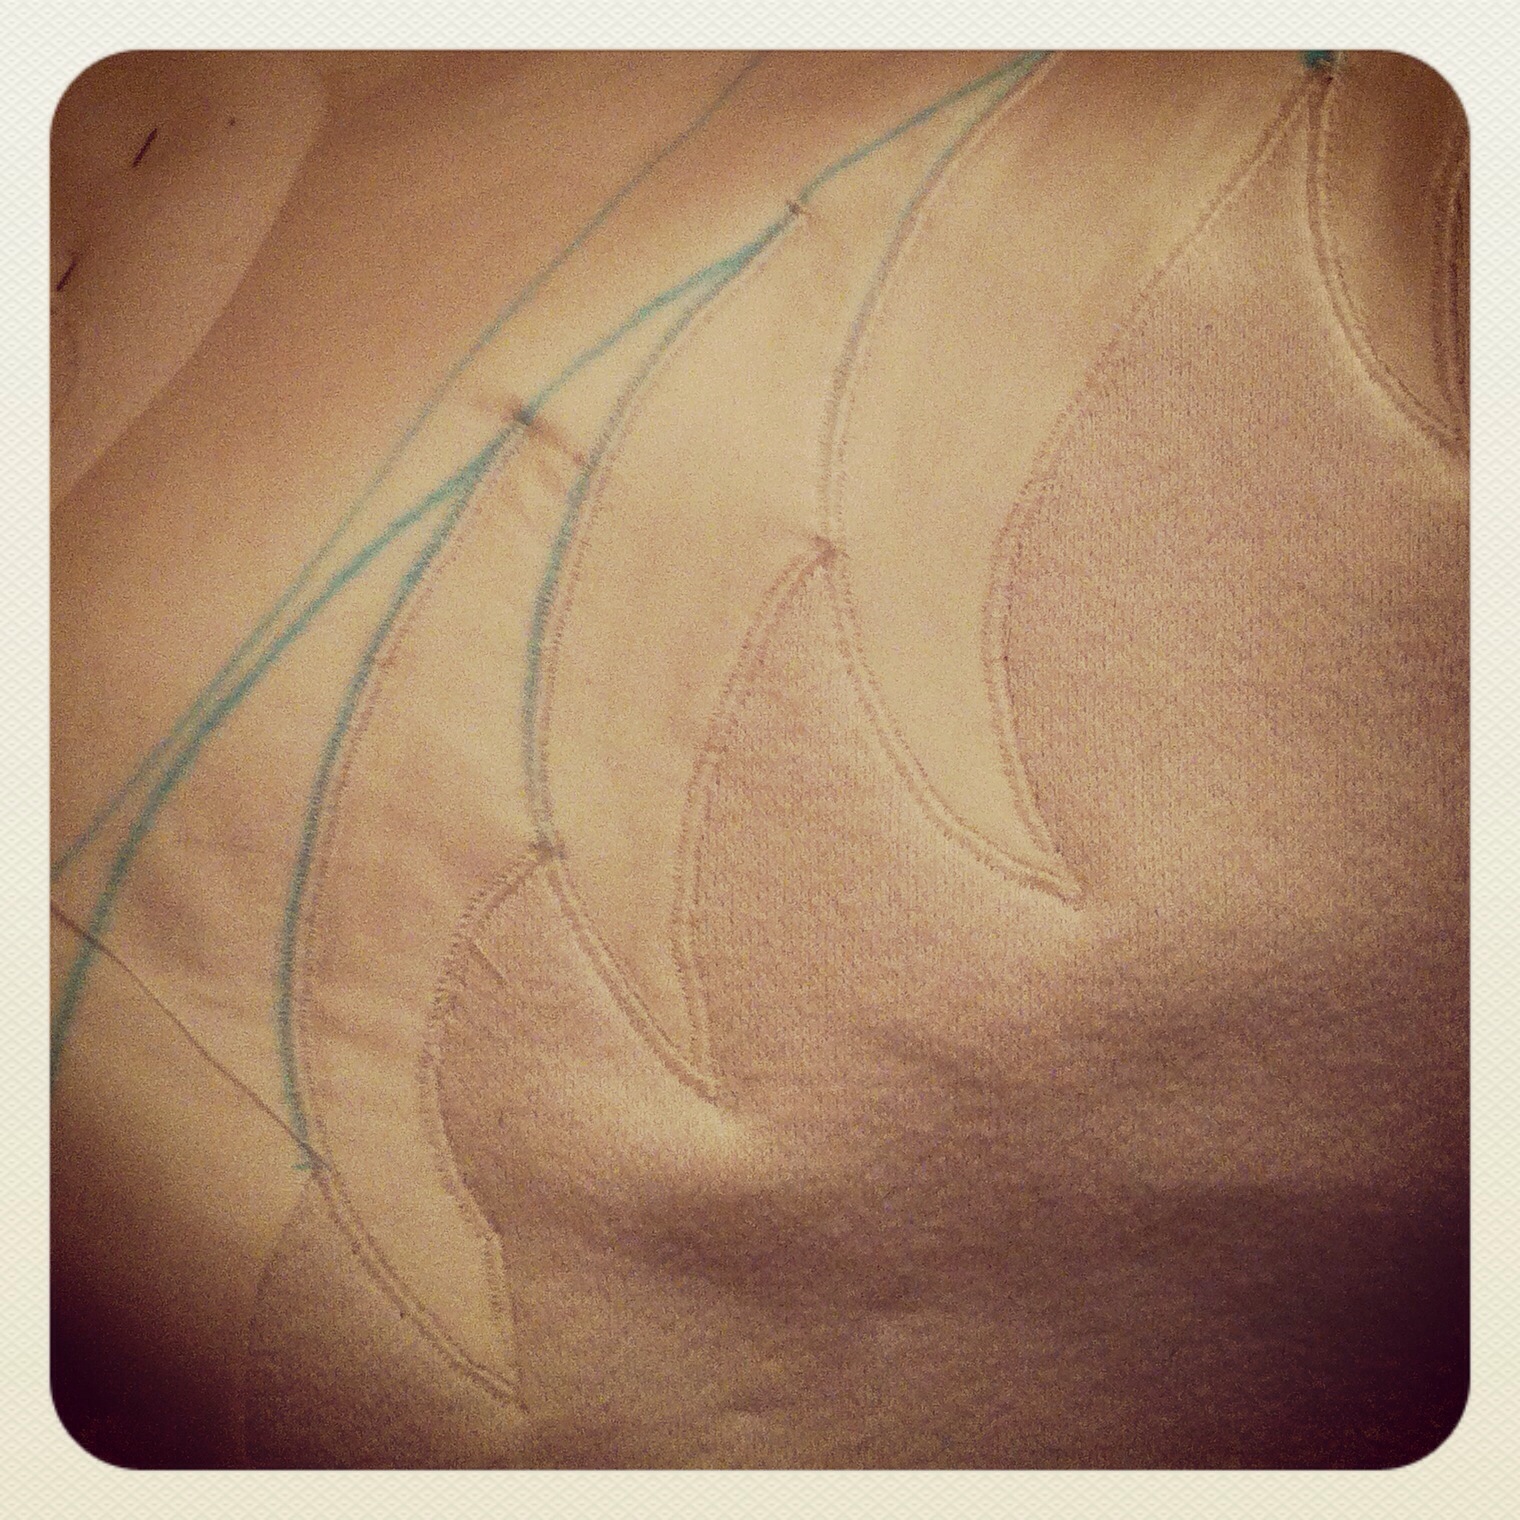
To do the appliqué, I traced out my design on Steam-a-Seam (lite) and fused that to the thin satin I had chosen for the applique (only because it was the best match for colour & sheen in the store. I wish I could have found a beefier satin in the right shade of white, but them’s the breaks.) I traced the internal lines out in my blue wash-away pen. Love that thing. Cut that out and fused it in place on the half-constructed sweatshirt. The design spans the back raglan seams, so I had to sew those ones first. I was a little worried about how my stitching would look when crossing those seams, but it didn’t end up being a huge deal.

IMG_0015.JPG

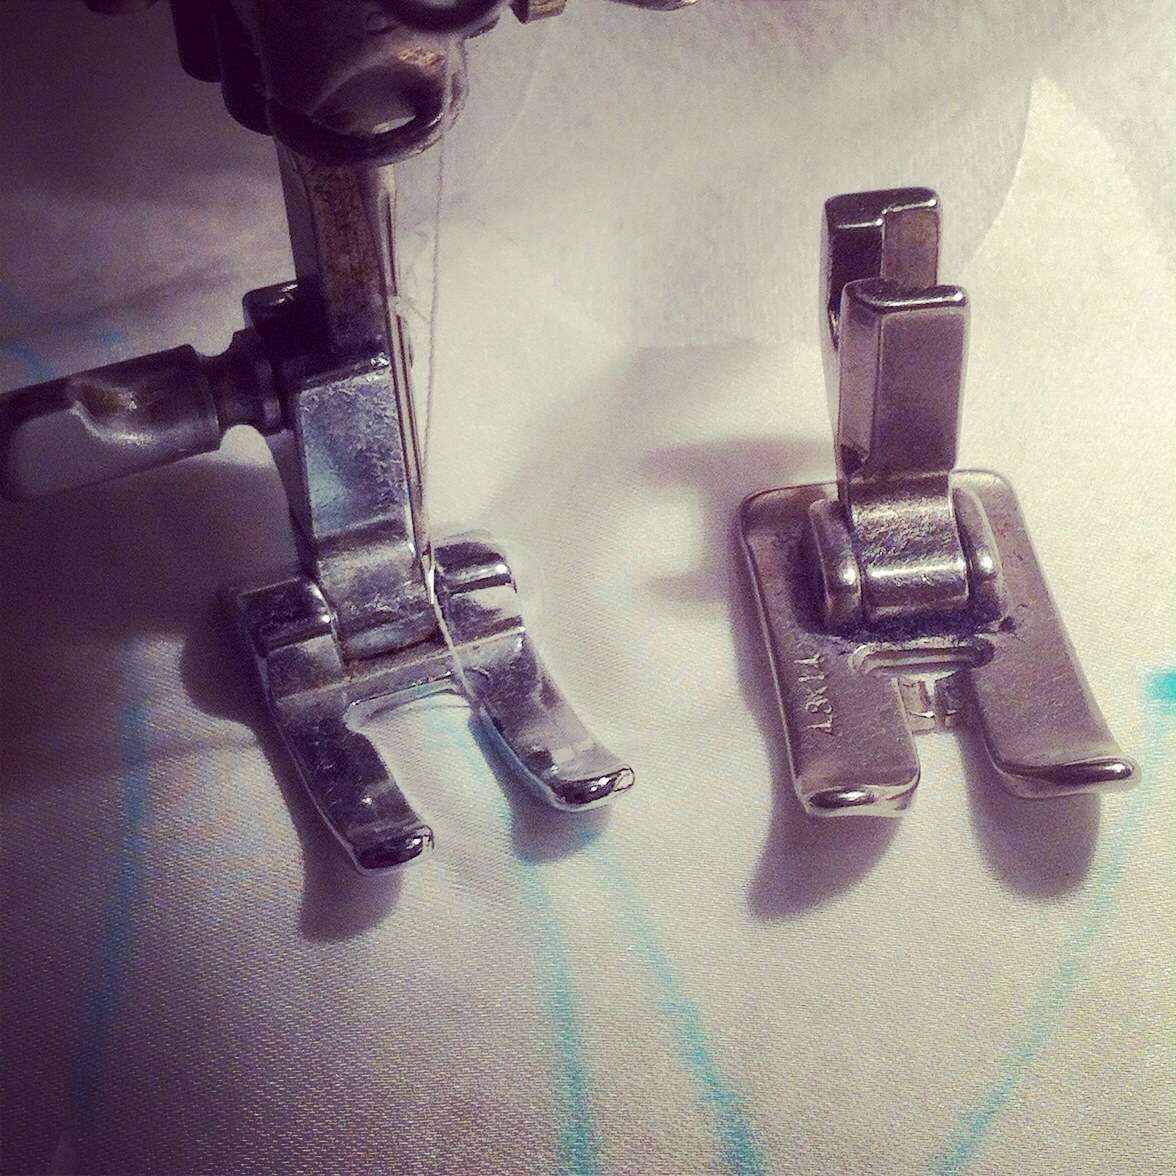
I like this open-toed foot for doing appliqué. You can see everything, and there’s a groove on the bottom for the satin stitch to slide through.

IMG_0754.JPG

For the first time, I tried underlaying the applique with a cut-away stabilizer; in the past when I’ve applique’d on sweatshirt fleece the edges have often been a bit wavy, and this takes care of that nicely, although it does add some stiffness (and probably reduces the cuddly factor of the sweatshirt, too.)

IMG_0010.JPG

After that, it was all over but the zig-zagging. And more zig-zagging. And more zig-zagging. I’d like to think I’m getting a bit better at making my curves smooth… it’s sorta like driving, no sharp corrections, kid.

I used my Pfaff 360, (my main machine now that the White is out of action), which worked quite nicely as it has this handy little lever on the stitch-width control that lets you narrow things down to nothing (or widen them), then pops right back to the set width when you let it go. Very handy when you are applique’ing something with lots of points like, oh, feather-tips.

IMG_0030.JPG

I was pretty relieved once he could actually try it on and the shoulder paw prints fell more or less where I hoped they would and the whole thing seemed fairly proportional. I stitched the little pawprints last, and I was terrified the whole time that I was going to ruin the whole thing, as they’re the smallest bits with the tightest curves. They’re not awesome and they are a little bit wobbly, but I guess they’re ok in the end. (Well, it’s not like I’m going to redo them! 😉

IMG_0029.JPG

I did want to make sure I added the little triangle on the front neckline. Also, I am incapable of sewing white without it getting dirty. >_<

IMG_0032.JPG

Other than that, it’s pretty standard but pretty much what I wanted. The applique has a bit of crinkliness (do I dare say cardboardiness?) to it that I think is due to the satin being too thin for the weight of even the light Steam-a-Seam, but I’ll deal (although I do worry about how it will hold up over time, especially since this is made with the good heavy-duty fleece that will probably be going strong years from now.

IMG_0028.JPG

IMG_0019.JPG

Incidentally, this may be the first time I’ve actually used proper rib-knit for bands with a pattern that called for it. The pieces are TINY compared to the fleece pattern pieces, but they stretch out just fine. It is nice working with the “right” fabrics for a knit pattern… 🙂

IMG_0031.JPG

Anyway, here’s hoping that Osiris is warm and snuggly for a long time to come… (and that he can keep all that white clean. >_<)

*OK, maybe the word I was looking for was kitschy after all?

15 Comments

Filed under Sewing

Quick Weekend Therapy Sewing

IMG_8834.JPG

It was probably inevitable that I would end up with a fabric stash problem. I’m a pack rat by nature, I like to have things around that just might come in handy someday. I don’t mind having some basics (and not-so-basics) kicking around for when the urge strikes. What I have more trouble coming to terms with is the scraps. I can’t seem to throw away anything bigger than a square foot, so a frustrating portion of the stash ends up being these pieces lingering from finished projects. They do come in handy—for contrast details, bias tape making, piping, pocket linings; and the kids will dive through them from time to time, especially when Tyo is in a monster-making mood, but in general the amount generated is more than the amount used, and they’re frustrating.

The best way I’ve found to deal with them (when I have the time) is to just keep making stuff from the fabric leftovers until it’s all gone. This often gets derailed by other priorities, of course, but one can try (and at least the machine is all threaded up in the right colour.)

IMG_0736.JPG

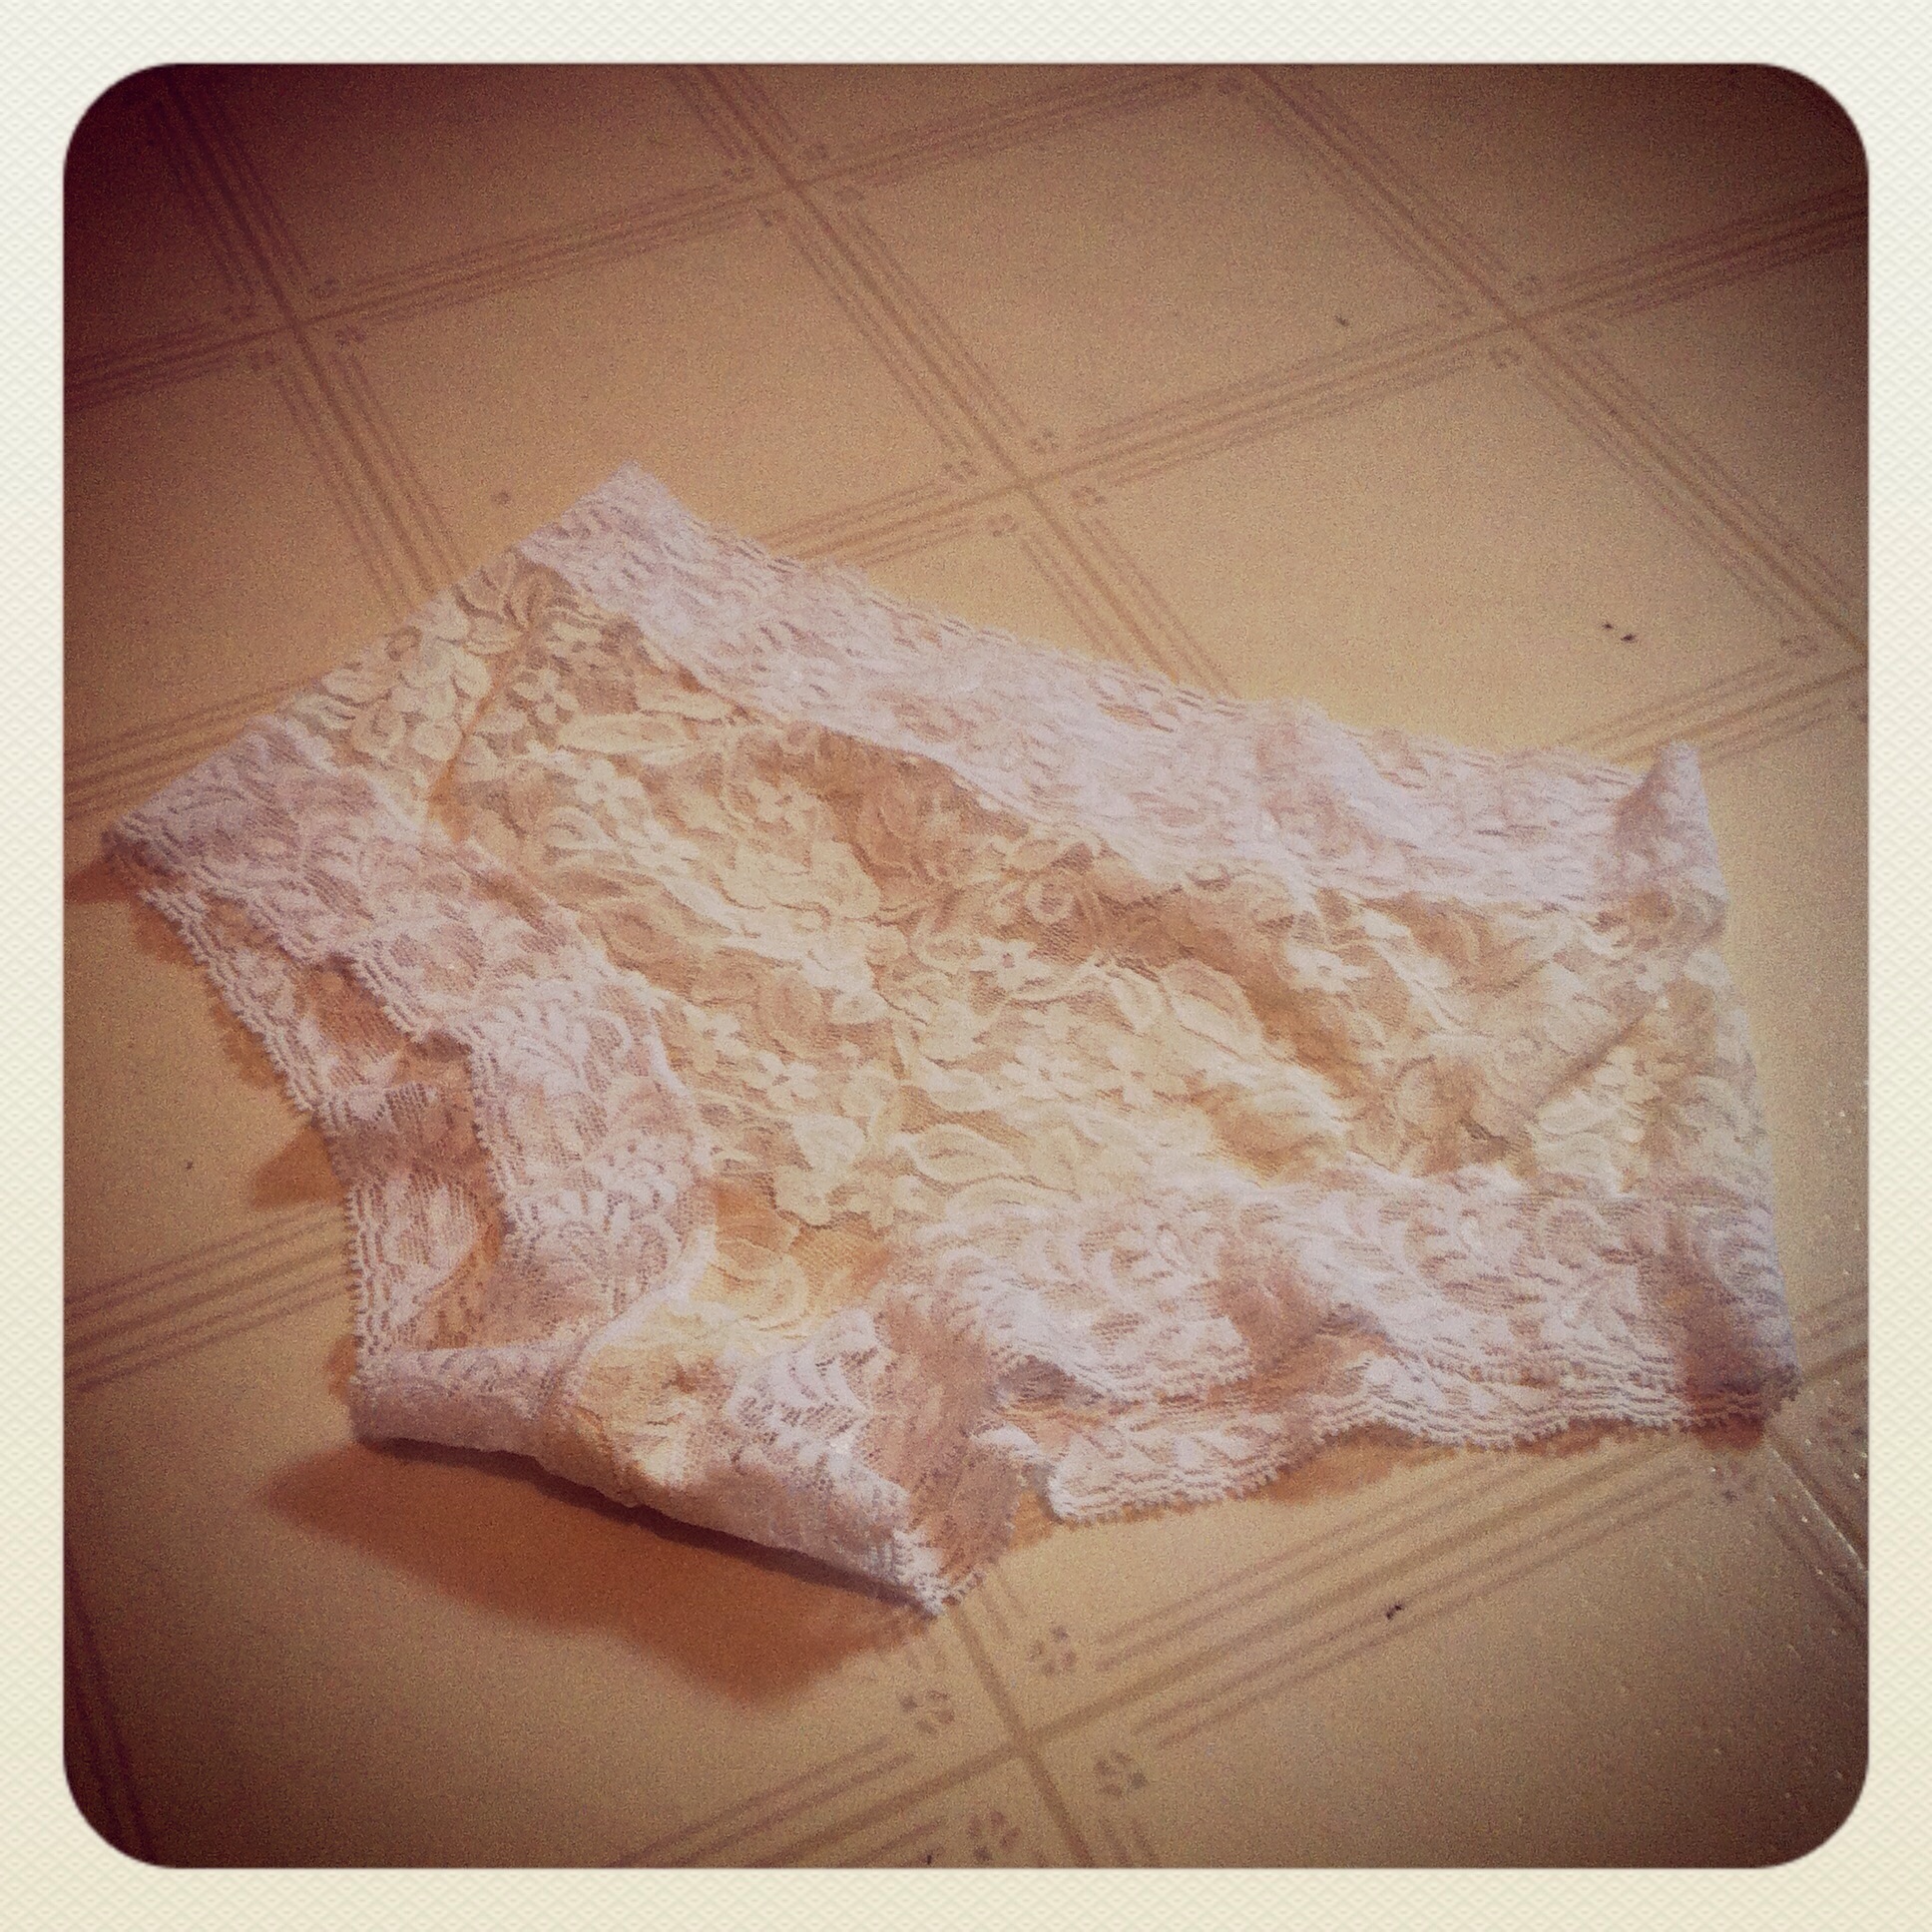
I had not quite a metre (very oddly shaped) of this stretch lace left from a far more exciting yet less practical project that has yet to be blogged, pending a proper photo-shoot. >_< Anyway, I having already cut some Rosy Ladyshorts (cute pattern, free, go make some) from it, I figured I would see if I could squeeze a simple long-sleeved tee out of it using my handy-dandy old knit sloper.

IMG_8835.JPG

Obviously, I could. Not much to say, just a few details—for a light neckline finish I serged a band of white jersey to the neck, folded to the inside, and topstitched down with a zig-zag; it’s soft, a little tidier than just adding clear elastic, but not too heavy, so I think it pretty much hit the mark for what I was going for.

IMG_8836.JPG

The sleeve hems I just serged and folded over and topstitched—nothing special.

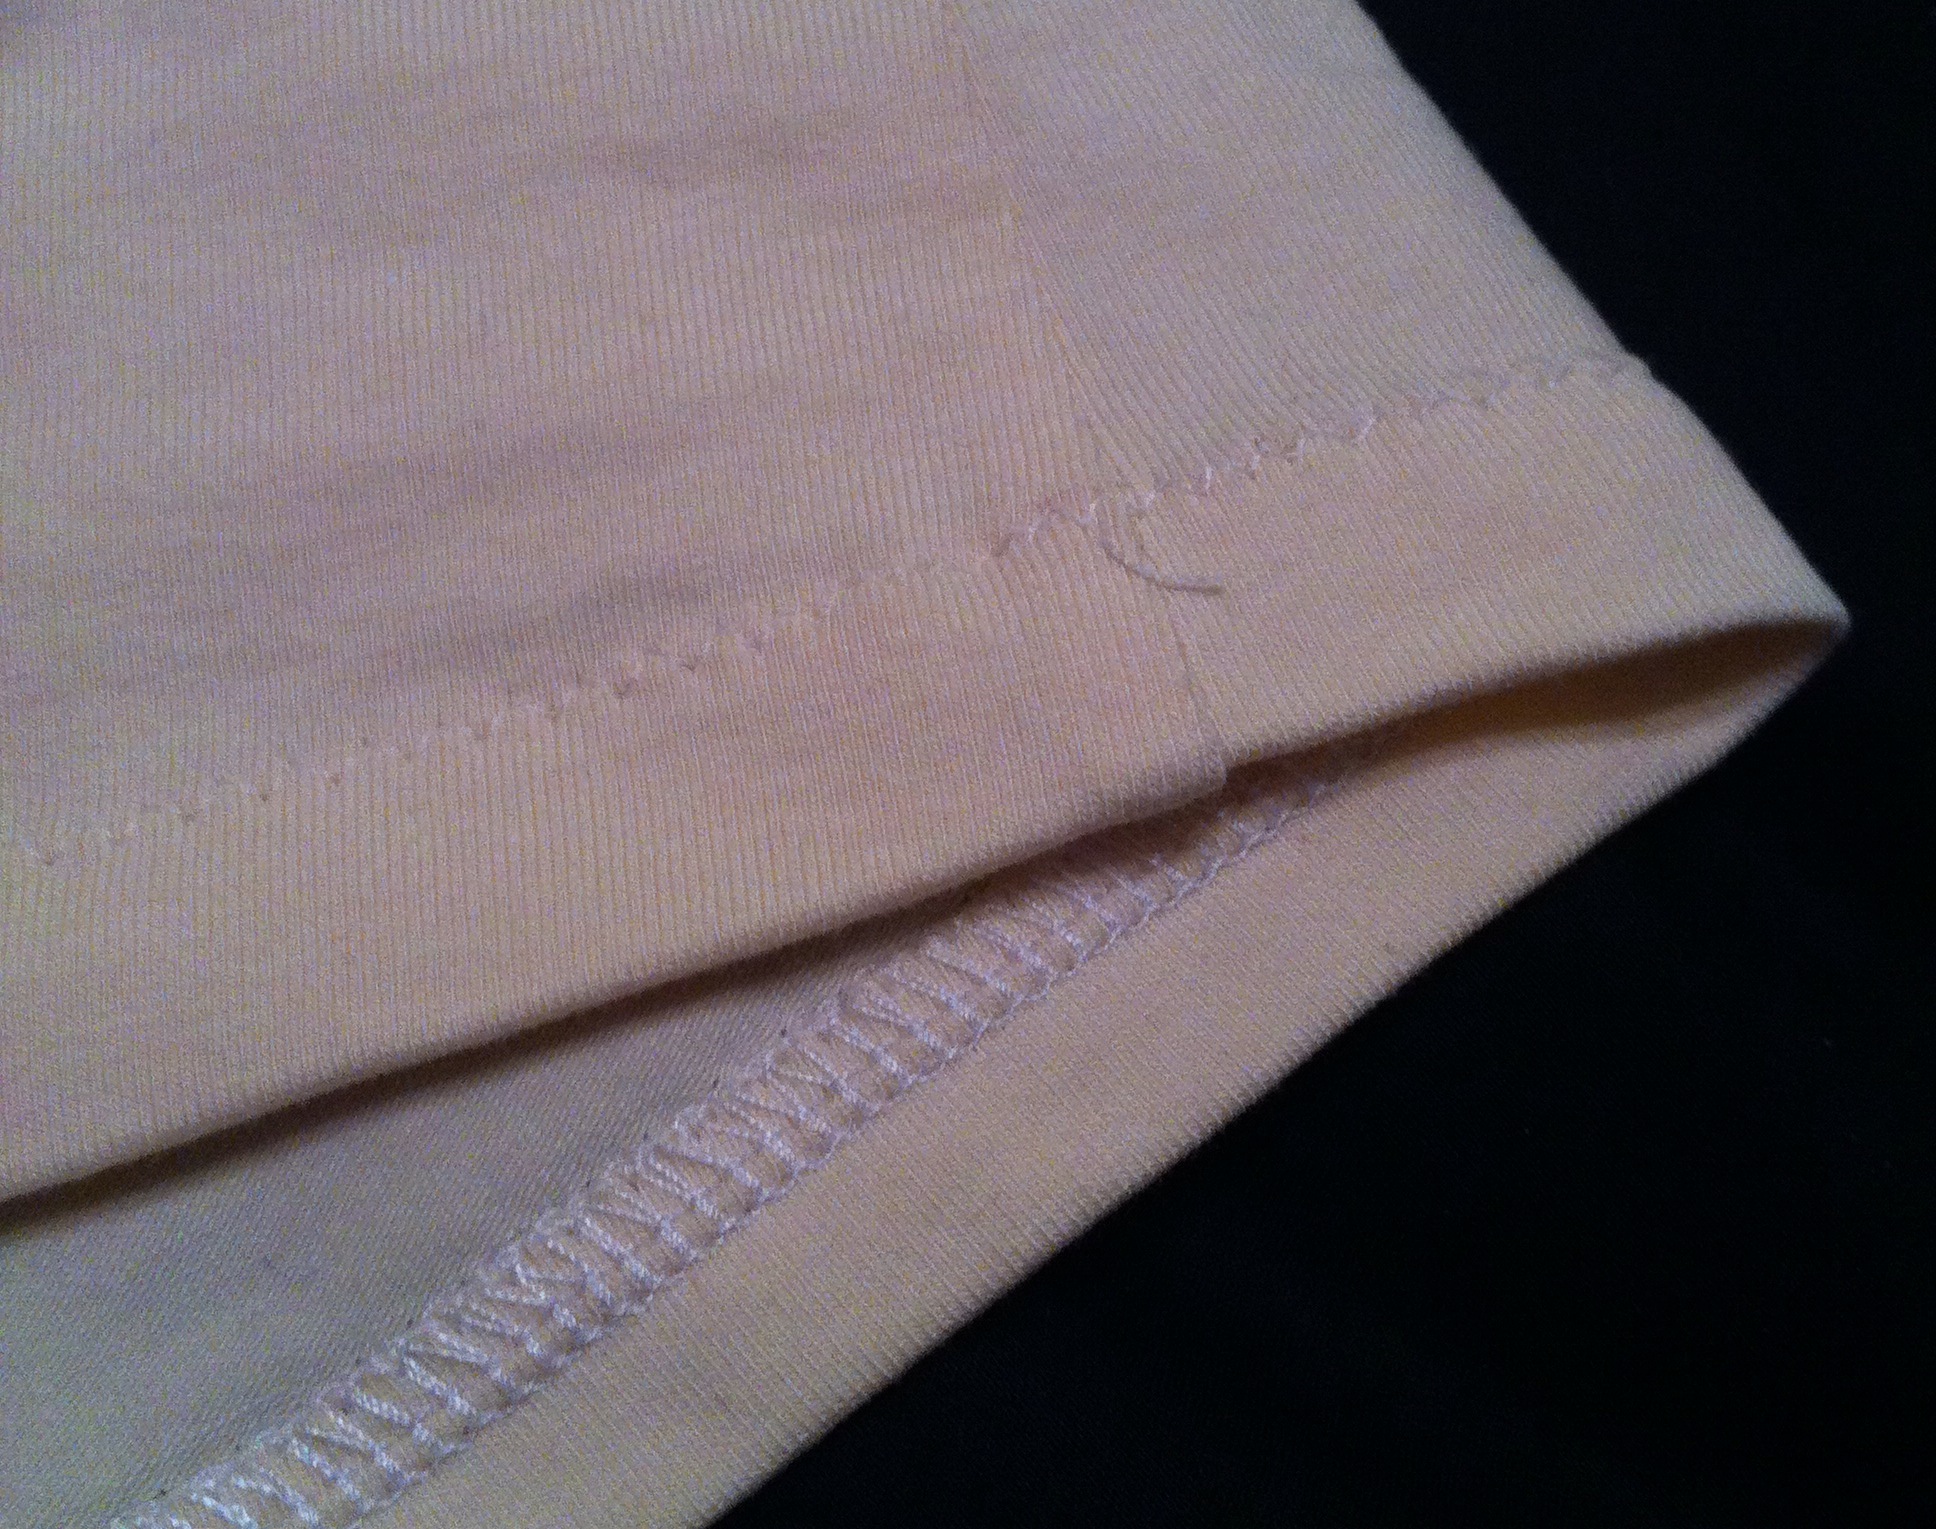
I added a band for the hem, as I have for most of my recent knit-top makes, because it’s both easy and nice-looking, which is a rare combination. 😉

IMG_8837.JPG

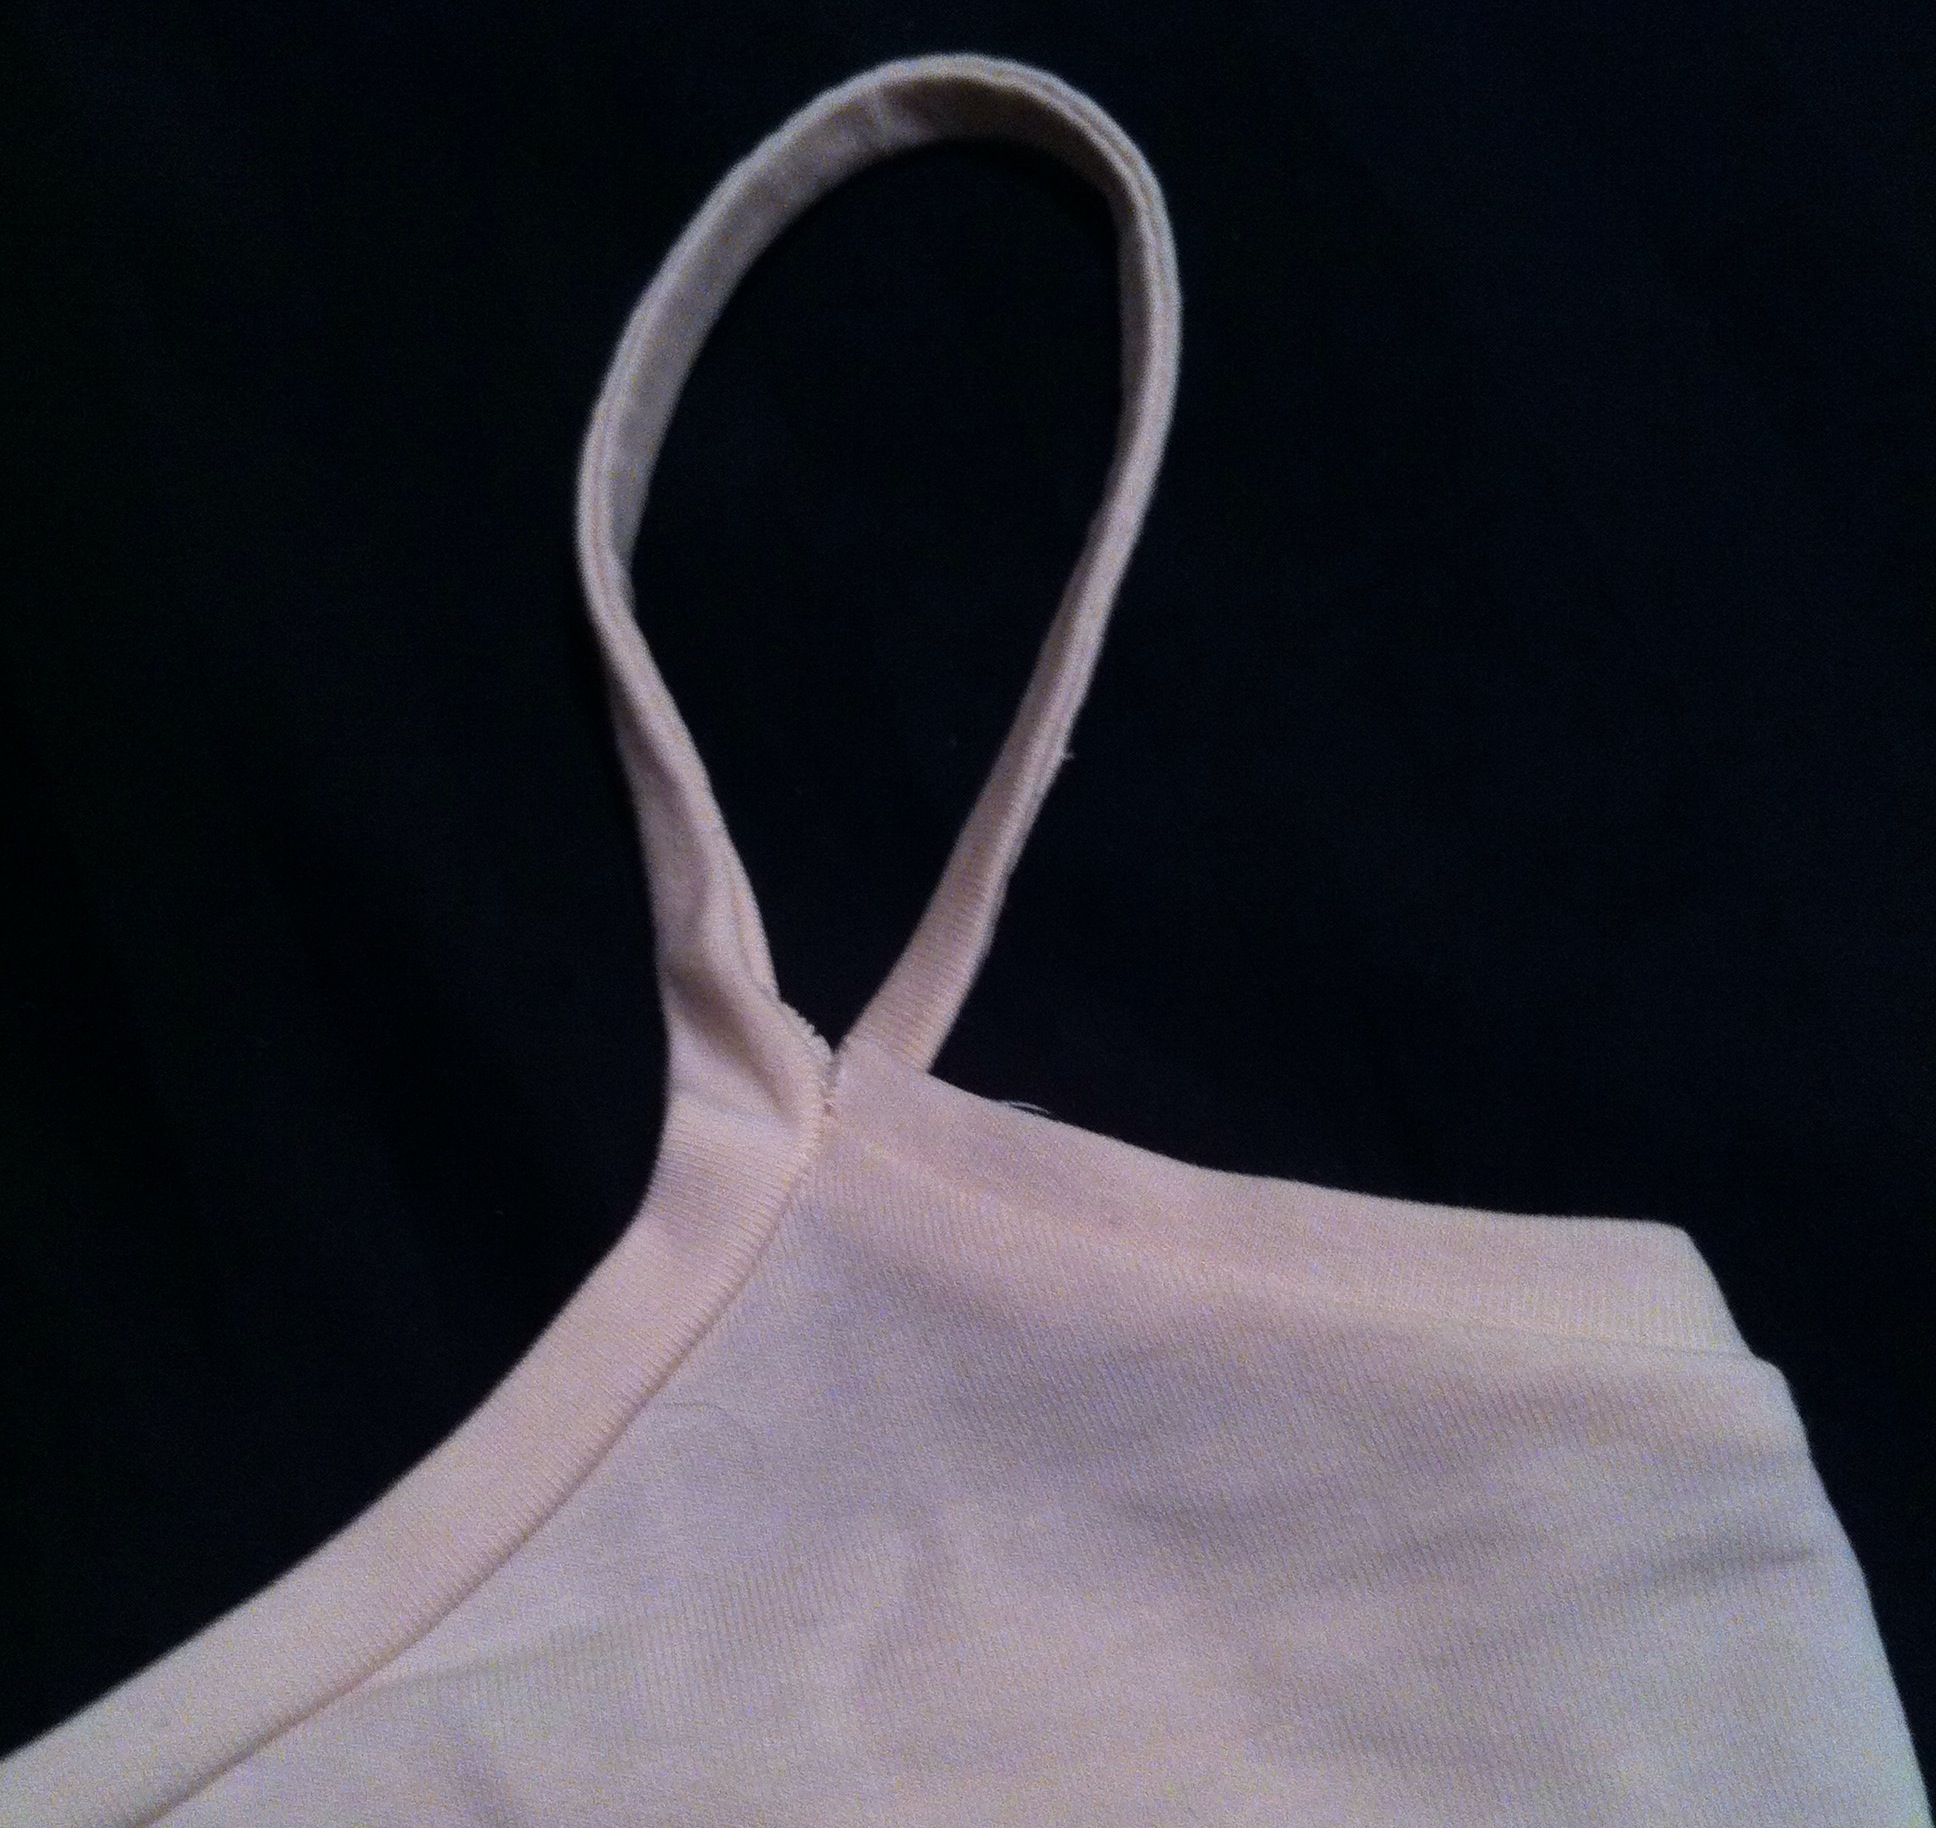
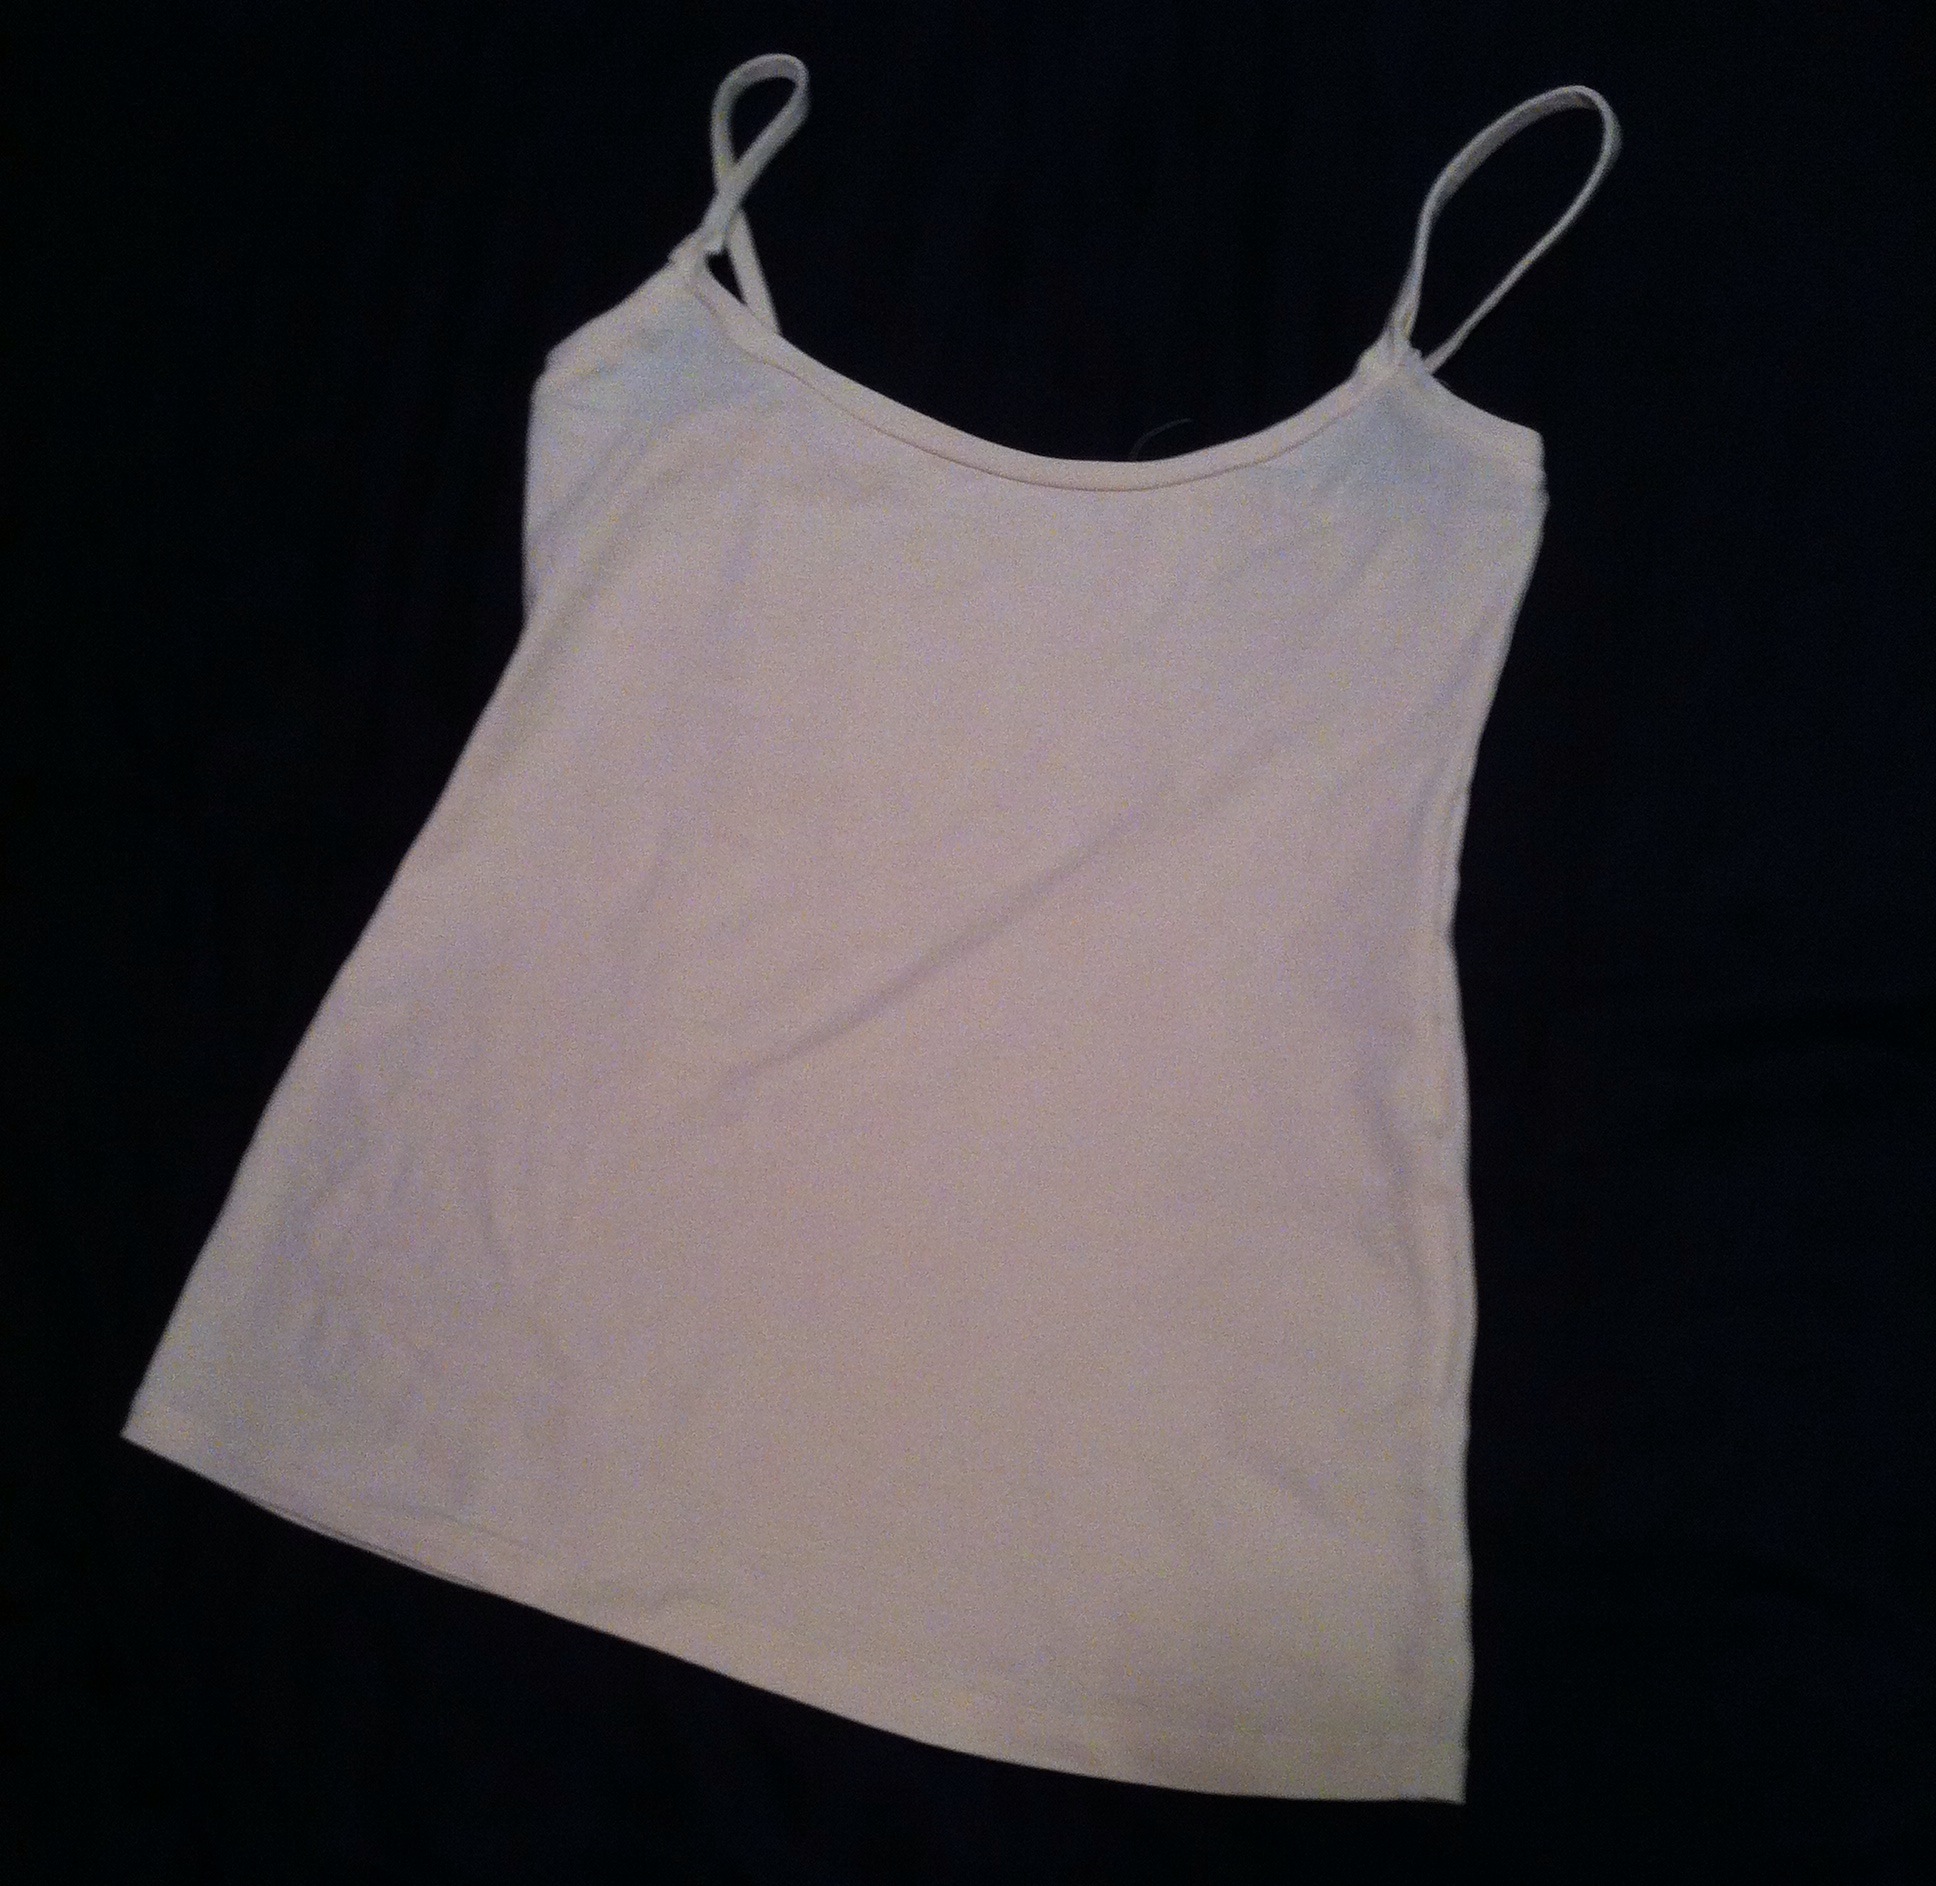
I then needed a camisole of some kind to make the thing wearable. I made one from some cream cotton-lycra jersey; this is really a wardrobe staple I’ve been avoiding making for probably as long as I’ve been making clothes here.

IMG_8839.JPG

IMG_8841.JPG

I hacked my knit sloper into a wide-necked curve, (maybe a little wider than ideal, but it echoes the scooped neckline of the lace overlay well) and made a little tank-top.

IMG_8840.JPG

I didn’t have any fold-over elastic in the right colour, however, so I made bands using strips of jersey. If I had been willing/able to to make them as bindings, with the edges folded in, it would’ve worked really well, but with bands turning into knit tubes for the straps… well, there’s an ugly spot at the join. Some hand-stitching could probably pretty it up, but it’s not an ideal method.

IMG_8838.JPG

On the whole, though, it works, and both will be useful (if not terribly seasonal) wardrobe staples.

The only tragedy is that I burnt out the motor of my White, which is my go-to machine for knits (other than the serger) about halfway round the hem of the camisole. That was a lot of hand-wheeling to get it finished. >_< Next question: is it worth it to fix such a machine? A new motor can be had online for about thirty bucks (although Sew Classic won't ship them to Canada, apparently. Boo.) and my father-in-law has the know-how to attach one if I can get the right size and mounting-brackets. (This is still more money than I spent on the whole machine, by the way.) It's an internal motor, but still belt-driven and looks just like the external ones, to my untutored eye, anyway. /sigh. It was also my favourite machine to do buttonholes with the buttonholer attachment on. Double sigh.

IMG_8829.JPG

Of course, there’s still a little bit of the lace left. Time for another pair of ladyshorts?

23 Comments

Filed under Sewing

Jeans for the Cool Kid

The Happy Teenager

The Happy Teenager

Tyo’s been making out like a bandit this year. I mean, really—Syo got some yoga pants she doesn’t like and a quick stretch-knit birthday suit, and Tyo has racked in a pikachu onesie, an Avengers grad dress, and now this. I realize in terms of project numbers they’re similar (and both low… but my sewing time is at an insane premium these days, peeps), but if you look at hours committed… Tyo is way ahead. Obviously I have some parental imbalance to redress. (In my defense, Syo has benefited from at least a couple of other things that never made it on the blog, but still nothing that required more than a couple of hours to knock out on the serger.)

But anyway, the squeaky wheel gets the grease, and Tyo was so very, very squeaky about this project. She was starting high school (which, in our neck of the woods, starts in Gr. 9, or roundabouts age 14), and very nervous, and determined that she had to make the most badass first impression ever. Her father was committed to drive her to school for the first day on the motorcycle. She campaigned for (although she didn’t get) freshly-blue hair.  (I like the blue hair just fine—it’s the pain in the ass of getting it applied, followed by the days of blue-getting-everywhere (blue towels. Blue bedsheets. Blue bathroom. Blue clothing.) that drive me nuts.)

But she did get a pair of jeans.

I haven’t made Tyo a pair of jeans in, um, a long time. There were these shorts, over two years ago. The last pair of Jalie jeans was 2011. This was around the time Tyo became a reluctant (but eventually fervent) convert to the Cult of the Skinny Jeans, at which point the lifespan of a pair of jeans on a growing child became numbered in months, rather than seasons or years. Handmade disposable pants? Even with a little sister and littler cousins for hand-me-downs, this was Not Happening—I declared a jeans-for-kids moratorium. Actually, I declared a moratorium on any jeans that cost more than $10… thrift store scores only, it was.

But, lately, that pesky growing thing that children do has slowed down for Tyo, and this was a big occasion, and she had a very specific idea she was very excited about. And, well, she’s been stealing all my shorts for months. So I had her go try on my most recent pair of jeans for myself. And, while she’d probably rather be shot than seen on the internet in floral jeans, the fit was pretty much spot on except for length.

It’s a very weird feeling any time someone else puts on your carefully crafted, custom-fitted handmade clothes and they FIT—it’s even weirder, IMO, when it’s your daughter. At least I’m still taller than her, unless she gets a grade-9 growth spurt, anyway.

So the good news was, I didn’t need to trace another copy of my pattern—just take a few inches out of the length. And Tyo wanted her vision completed badly enough she was even willing to help cut the fabric.

The cutter.

The cutter. (In my floral jeans, although you can’t actually assess the fit in this picture)

Which is not a thing that happens, ever. So yeah.

As for the Vision behind the Pants? Well, we don’t have Hot Topic in Canada (at least, not in my backwater corner of things), but Tyo has a dear friend whose parents are, um, a little more well-heeled than we (mind you that does describe a fairly large chunk of the Canadian population) and tend to take their children on cross-border shopping trips of fairly epic proportions (Fellow Canadians should note we are not part of the 80% of Canada’s population that lives within a two-hour drive of the US border. Such trips require hours of driving and hotel stays). And said dear friend had a pair of Hot Topic jeans that were one colour on one side, and another colour on the other side. So we scoured the stash for the best black denim, and then went through all the purples (how on earth did I end up with four different lenghs of purple denim? I may have a Problem.) to find one which best matched, which turned out to be this totally-intense primary (OK, secondary) purple. That I couldn’t photograph in true colour to save my life, but anyway. It’s a very bright, clear purple.

One good thing about cutting jeans this way—you pretty much have to cut in a single layer, which is a good idea anyway if you want jeans that hang straight, but I am lazy and always talk myself into cutting folded. Sometimes I get away with it, sometimes I get really annoying twisty seams.

Other than that, I don’t have much to say about the actual construction, except that I did modify things for a stitched-on fly extension, which I think I prefer to the cut-on one all my other jeans have had to date (storebought jeans always have one that is stitched on—I think the seam gives needed reinforcement to the fly edge, especially in stretchy jeans). It’s obviously not a make-or-break detail, and I’m still not terribly comfortable with how you do a fly this way, since it’s a bit different and I did end up having to do some unpicking… but it’s a thing to work on, anyway.

Back Pockets

Back Pockets

Tyo specified that the main construction should keep colour to its appropriate side—probably a good thing. Left to myself I would probably have colourblocked everything, and it would have ended up looking really busy. As it is, I couldn’t resist swapping the back pockets and the belt-loops, and I’m not sure if it adds to the overall look or takes away. Minimalism might have been a better idea. Oh, well. I do like the doubled belt-loops at the sides as well as the back.
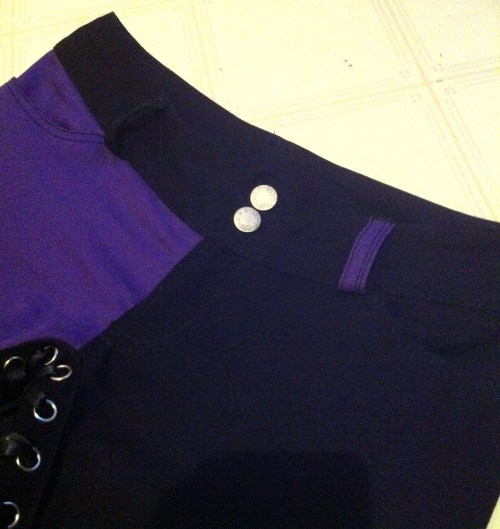
Two buttons

Two buttons

I finally remembered, after regretting it my last couple of projects, that my currently-favourite-waistband pattern piece is a bit wide, and the jeans buttons I can get a hold of here are a bit small, so a single button results in a rather insecure attachment that lets the waistband roll over in weird ways. Two buttons, however, is perfect. (I also made Tyo try them on while I marked the button location, so I don’t THINK I need to move them over, which I still have to do with my flower jeans, because the position that looks like it’s lined up  nicely when the jeans are laying flat is actually too “loose” when the jeans are on a body and the waistband is under tension—leading to chronically-low-flying flies.

One final detail, which you probably noticed in the earlier pictures, was inspired by some jeans a character in one of our favourite family TV shows, Lost Girl, wears. I can’t find any good shots, but I screen-capped this one:


Kenzi's laced-up jeans

Kenzi’s laced-up jeans


The Kenzi character wears at least a couple pairs in this style, with the sneaky inner-thigh lacing, which I knew Tyo loves as much as I do. And, Fabricland recently started carrying some fairly sturdy grommet-tape (where was this stuff two years ago when I was looking for it for the steampunk Hallowe’en costumes?!?)
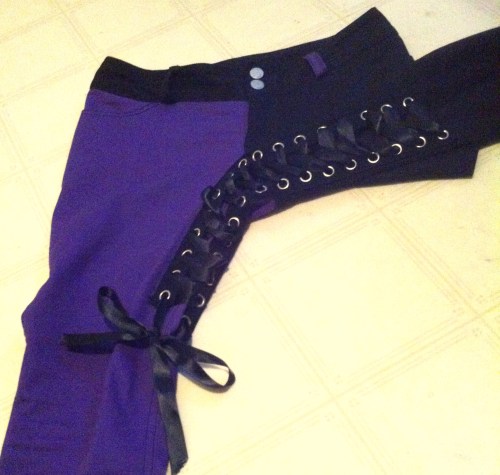
Lacing!

Lacing!

So I added some. It was ridiculously simple to do, although its obviously a bit of a different look than the inspiration. Still, a fun, unique detail, and definitely one no one else has.

We took a bout a bazillion photos of Tyo in the jeans, but it was the end of the day and we were rushed so there was a lot of blur and not a lot that did the jeans justice.

I’ll still subject you to them anyway.

Back view, with pockets and blur.

Back view, with pockets and blur.

I should note one more thing: these are not true “skinnies.” They were made according to my personal favourite leg-style, which I would call a stovepipe—tapered and form-fitting to the knee, absolutely straight below it, which creates jeans that are snug through the calf but not actually skinny in the ankle. I asked Tyo if she wanted them skinnified, but she said she likes this shape, and it doesn’t seem to have decreased the cool factor (although it has its drawbacks when we get to stuffing-pants-into-winter-boots weather).
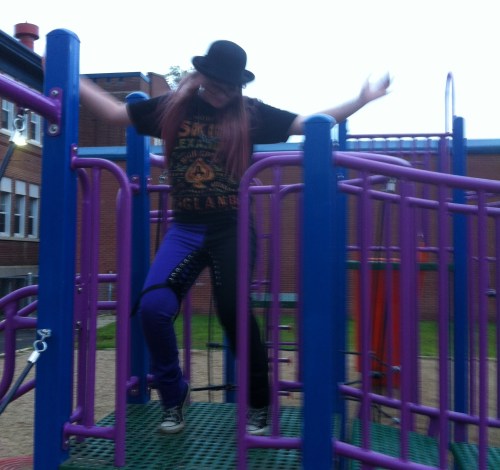
Great pose, plenty of blur.

Great pose, plenty of blur.

'Tude.

‘Tude.

I did try them on, but lucky for Tyo, they’re just a little bit too short. 😛

Obviously this first-day-of-school project is a bit out of date at this point >_<—I’m currently working on a Hallowe’en costume for the Stylish sister-in-law, and hating it mostly because it’s not for MEEEEEE, and dying to work more on ridiculous historical clothing projects that I have no actual need for. Not that I have a need for much clothing, at the moment, other than perhaps warm fuzzy things to get me through the impending winter. Hopefully I’ll manage to blog some of that in a more reasonable time-span… hah.

In the meantime, I’ll just be happy that my kid still thinks the things I make are “cool”.

At least sometimes. 😉

12 Comments

Filed under Sewing

A quickie

IMG_8511.JPG

I’ve been starting a lot of projects but not finishing much. /sigh. Never a good sign. But when this scrap of knit jacquard (can knits be jacquards?) threw itself in my path last week, I thought that maybe it would be something quick enough that I could actually get it out. It was a piece as-is, a cut barely over half a metre, but it had the most gorgeous roses pattern, and it obviously needed to be the world’s simplest knit skirt.

Simple knit skirt.

Simple knit skirt.

It didn’t end up being quite as simple as I might have liked. The wider feature of the roses wasn’t centred on the panel, but I wanted it centred on the skirt—I figured I’d cut the panel so the roses were centred, with a single seam at the back. As it turned out, this wasn’t quite wide enough, so I had to add a narrow panel to the back. We’ll call it a feature.

IMG_8539.JPG

I took the opportunity to use a bit of snuggly-soft grey elastic I’ve been hoarding as an exposed waistband. Possibly black would’ve been a better choice as the grey is a bit lighter than the charcoal in the skirt, but I think it works, and it’s every bit as comfy and snuggly as I had hoped it would be.

Waistband

Waistband

Since it’s visible, I didn’t just want to overlap my elastic; so I sewed it right-sides together and then topstitched the seam allowances down to the sides to flatten them. This may not have been the cleanest way to finish the waistband, but it’s serviceable, and it won’t likely be seen often anyway.

I used Steam-a-Seam in the hem and finished it off by hand with catch-stitches for lots of stretch. And that’s about as complicated as even I can make a simple knit skirt.

IMG_8533-0.JPG

It’s almost nice enough to make me excited for fall…

18 Comments

Filed under Sewing