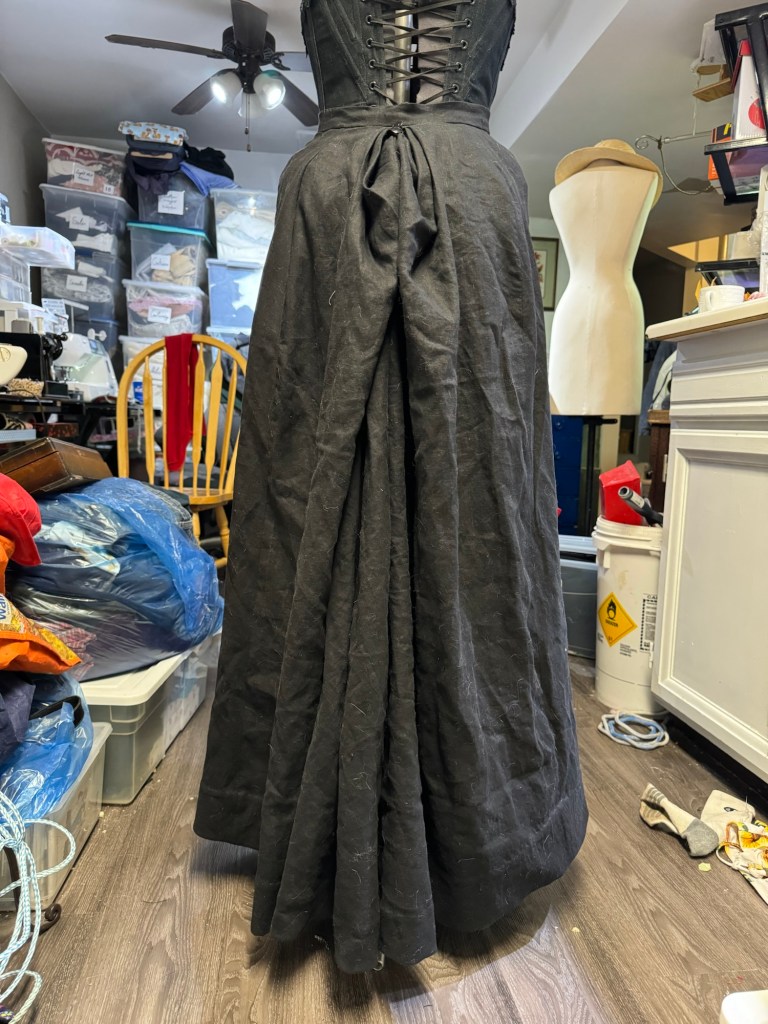
At some point in the last year (November of 2024 but I had to scroll back in my camera roll to co firm that because it feels like it’s always been there) I made a black linen version of the Wearing History 1900 skirt. My only change from my first go at the pattern was to make it button down the front, a not particularly historical detail that I enjoy because it gives me an optional slit and also lets a ruffled petticoat peek out.
It has become a workhorse in my wardrobe because it’s versatile and more basic than a lot of my skirts, which means I don’t try as hard to space out the wearing as I do with a lot of my more, um, striking makes.
Aside from the buttons up the front, I hemmed it with a bit of a sweep in the back, then realized that was really stupid for a skirt I wanted to wear on the regular, so I added a little button and loop to bustle it up just a couple of inches.
Just enough details to make it feel fun and fancy without being too much for regular use.
But, because it’s black, it’s basically impossible to get any good shots of the details without blowing everything out so the wrinkles and stray cat hairs make it look terrible.
Nonetheless, it’s been a workhorse over the winter (with the appropriate petticoats), and I’m hoping it will transition well to breezy linen summer wear.
Black blob.
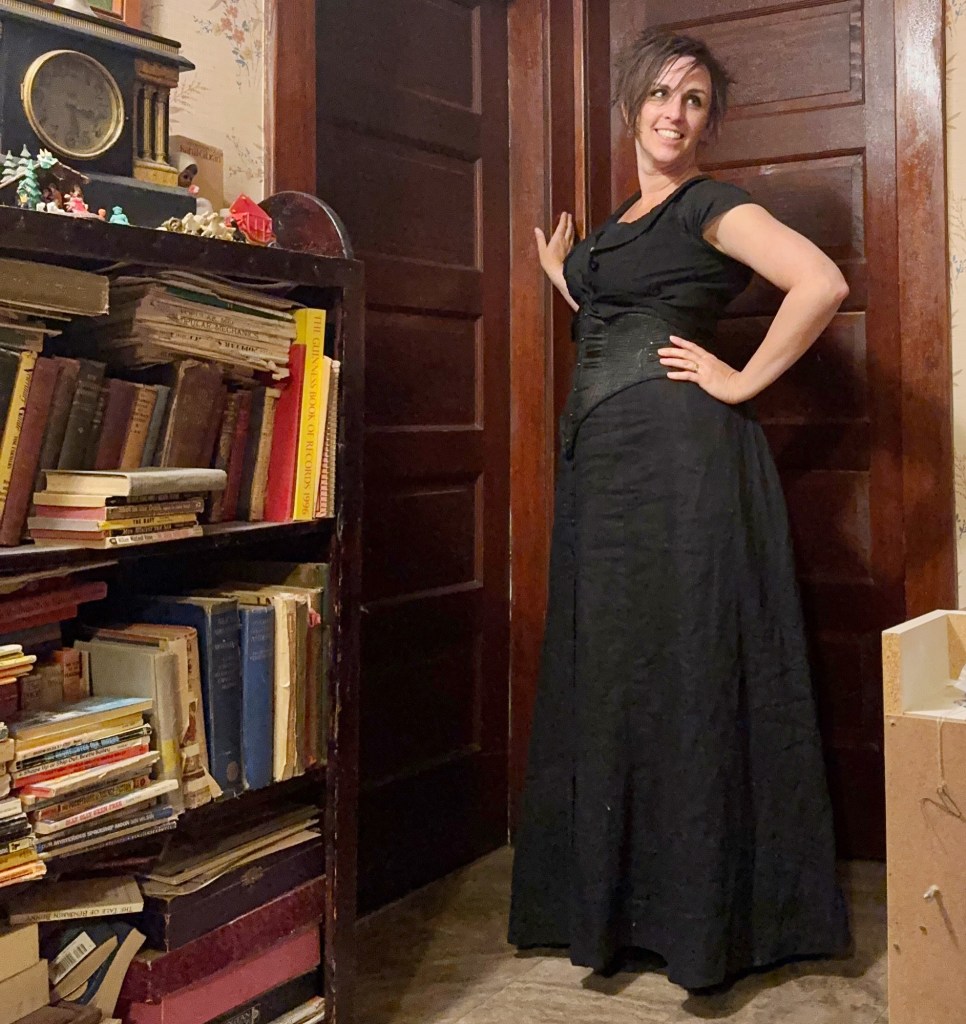
And yes, it has a pocket, although as usual I wish it were a bit bigger. (And in case you’re wondering how often I wear it, all the actual modeled photos in this post are just the times I’ve worn it this month during Me Made May.)
Comments Off on Black, basic, impossible to photograph
My Victorian Sewing Circle group put on a “Victorian chores” day back in July, so I needed some Victorian work clothes.
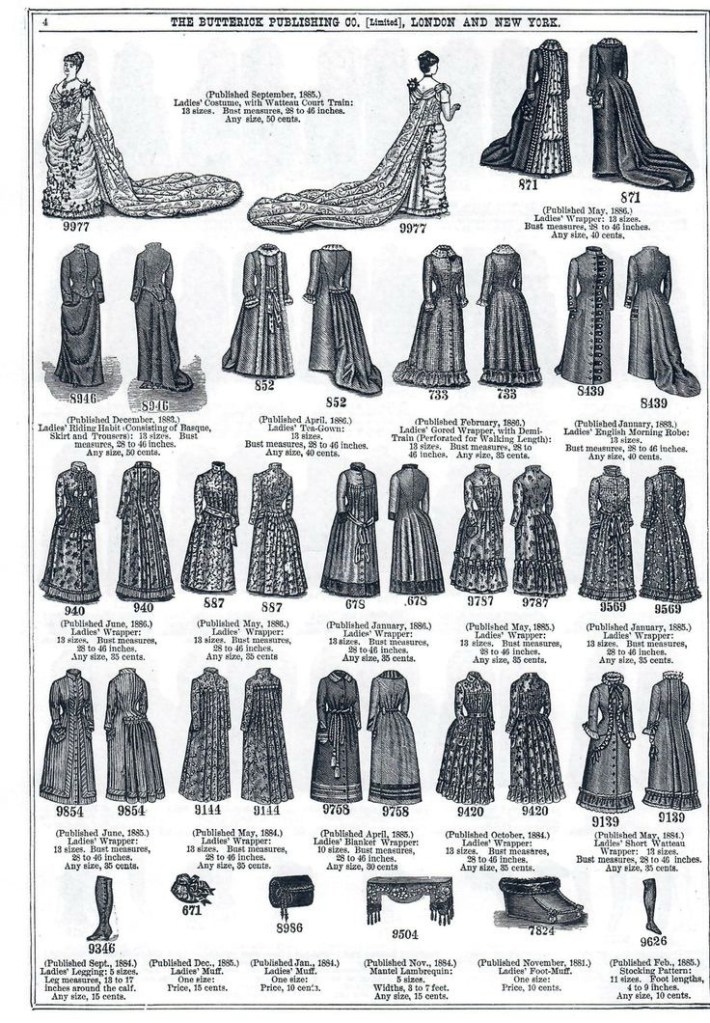
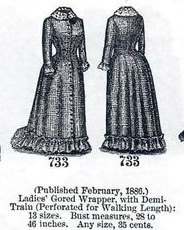
I could’ve gone with the Folkwear Prairie Dress of course, or even the pattern I worked out for the tea gown’s undergown, but instead I decided I needed a “Ladies gored wrapper”… something along the lines of #733 in this Butterick pattern catalogue page.
Ok, a kind of pared down version, anyway. I have a few scraps left that I could maybe turn into ruffles if I get ambitious.
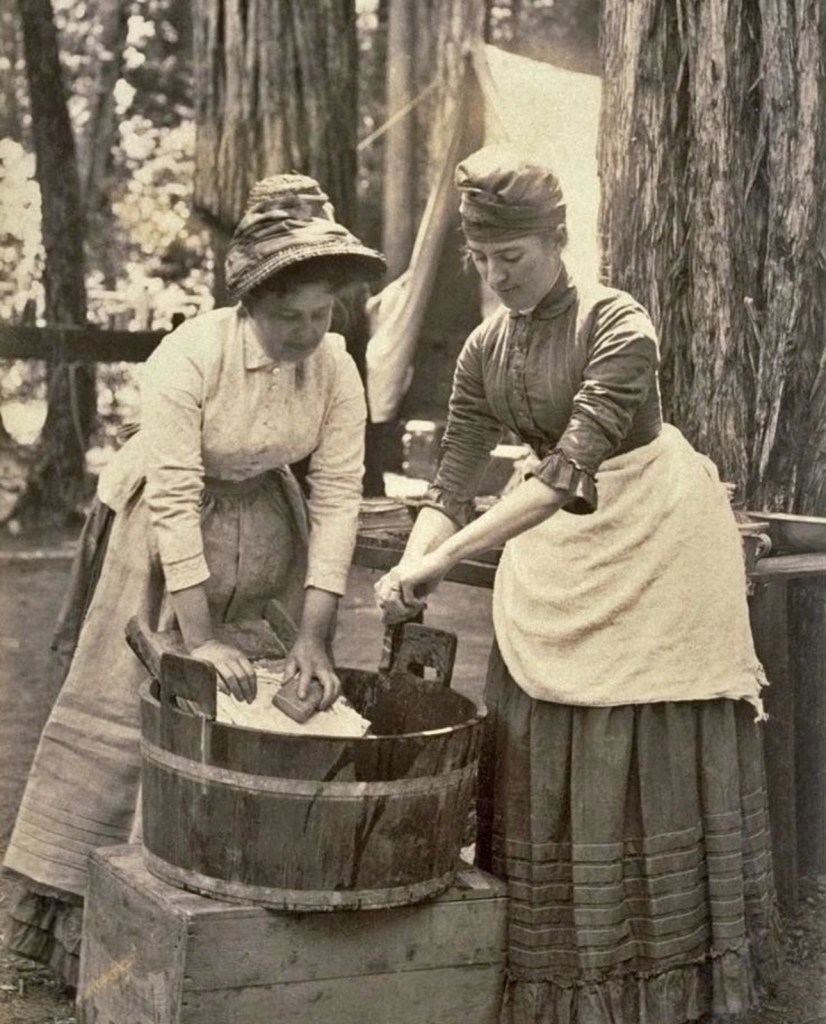
So, a work dress but not a complete sack. I’m inspired by this image, though again I can’t find a very good source:
(Though, I don’t think either woman is actually wearing a wrapper)
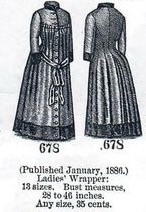
(But what is a wrapper, you ask? Well, aside from the things labeled “wrappers” in the advertisement above, this article has a quick section on them. Basically, it’s a one-piece dress, front fastening, looser than a going out dress and often adjustable. Key for my purposes, they are intended for wearing during breakfast and morning chores. They could also, probably not coincidentally, be worn easily while pregnant, although not so much the style I went with.)
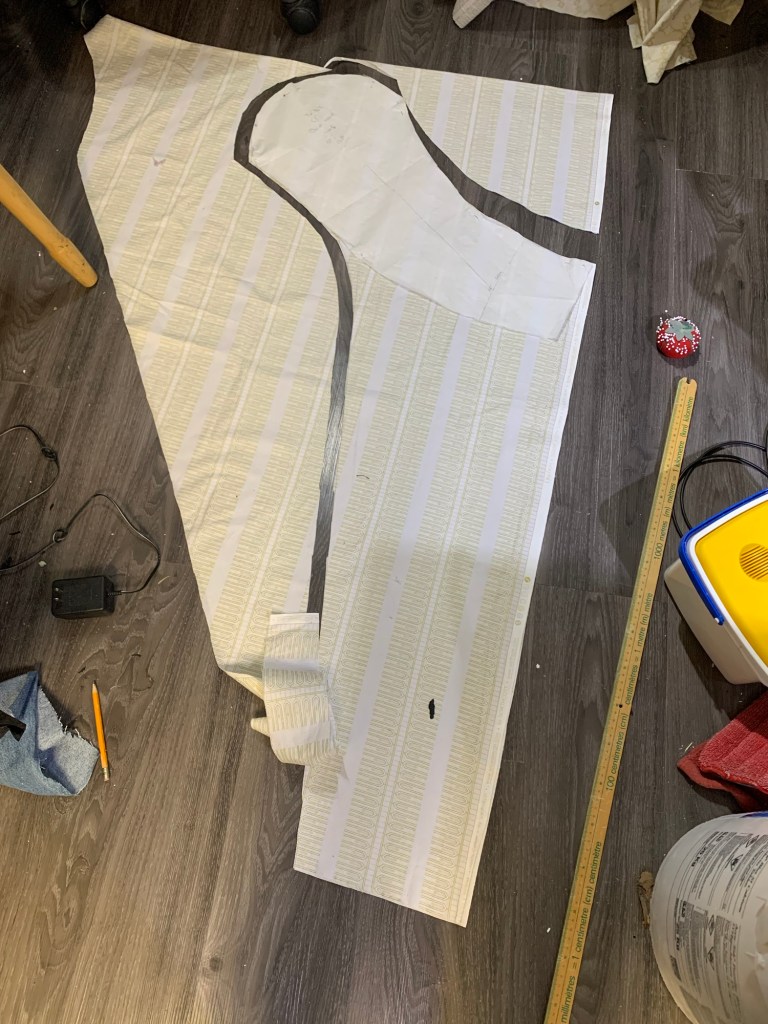
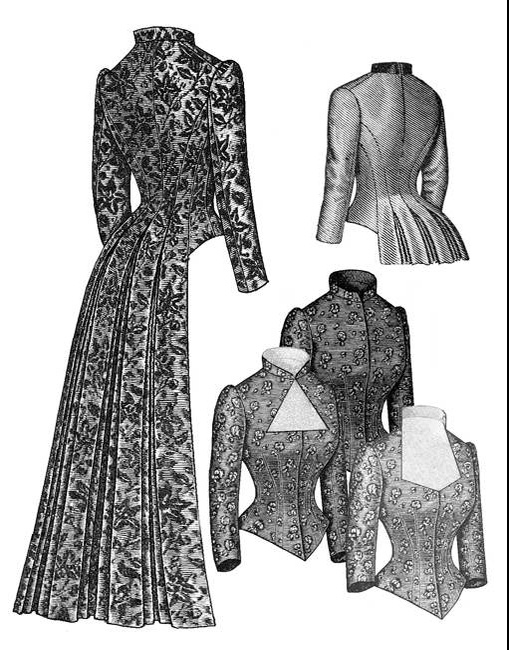
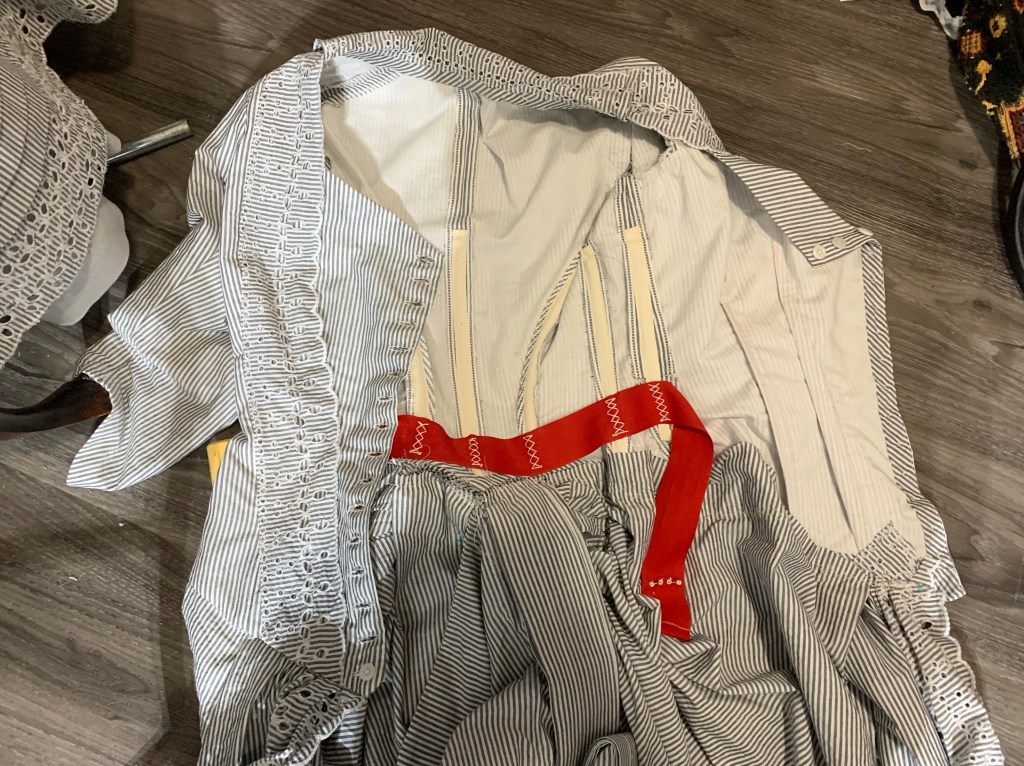
For my pattern I used my same Truly Victorian bodice, but extended into a skirt like I did for the Elven tea gown. I used the diagram above (both pictures are off Pinterest with no particularly helpful source) as inspiration, except looking back I only used it for the front piece, for the back I basically used the tails of my pattern but extended into a full skirt length. (Like #678 in the page above).
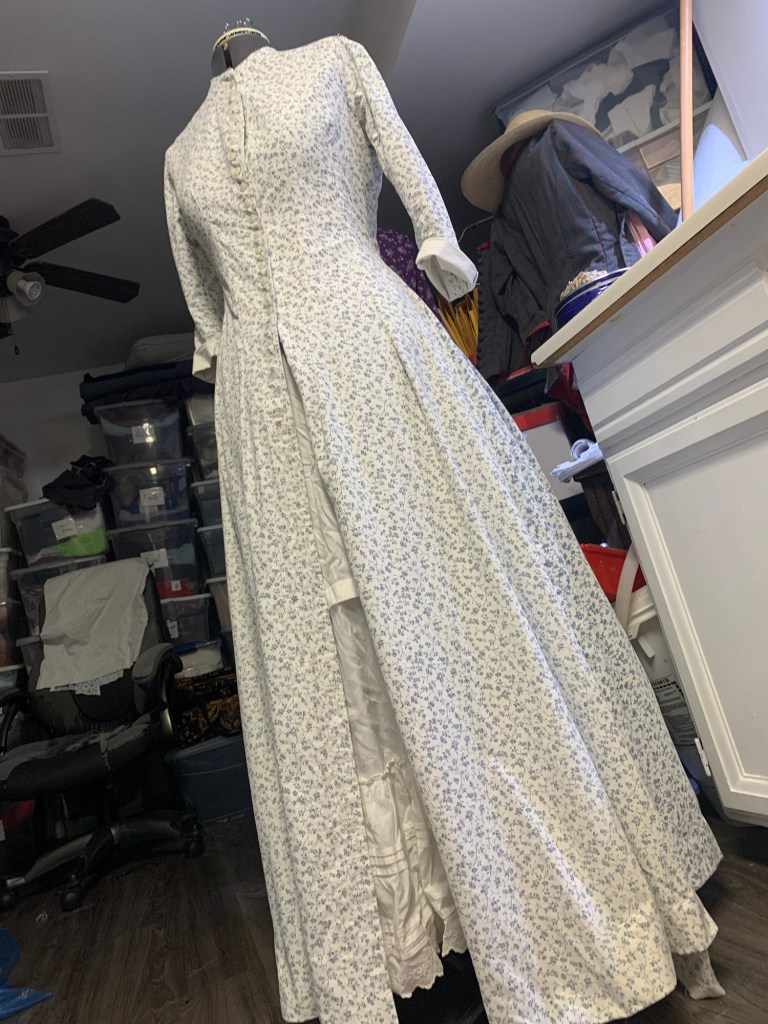
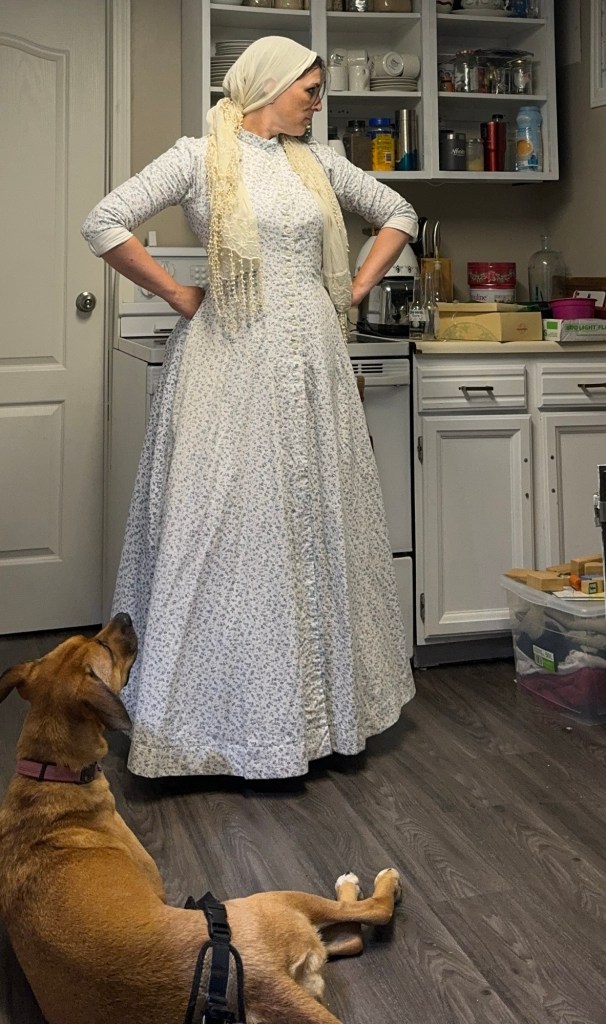
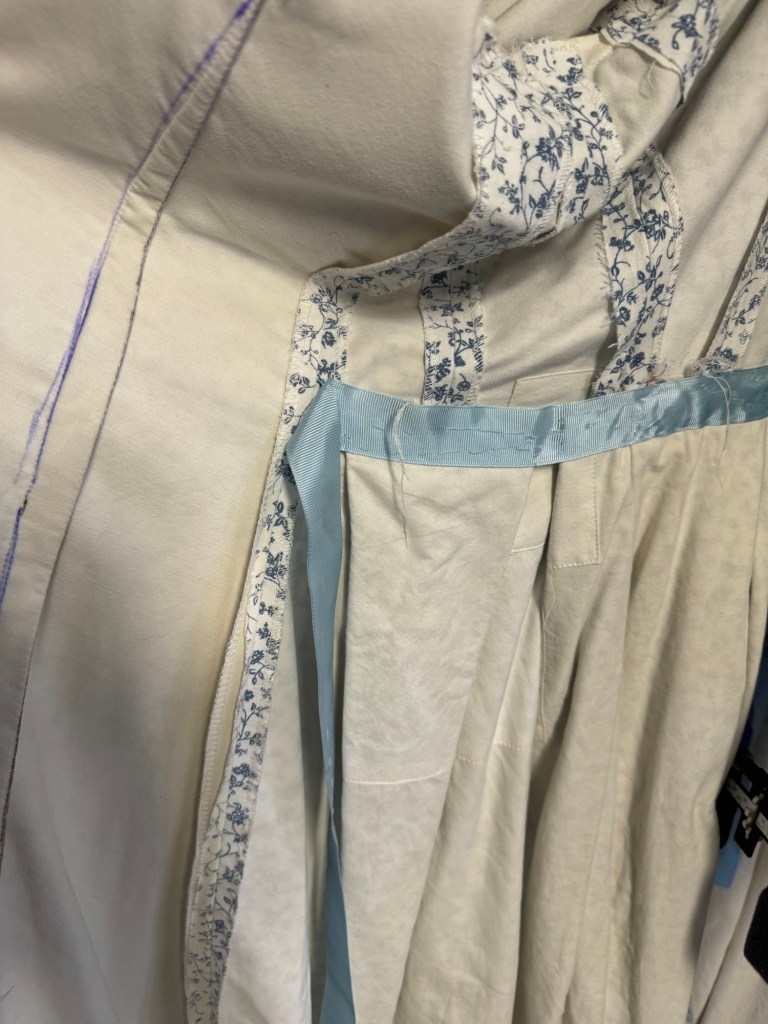
The outer fabric is a cotton Tyo found me a couple of years ago (I think at a thrift store). It came in the form of two panels (bedsheets? Table cloths?) someone had made from regular, probably quilting, cotton, by seaming two widths of narrower cloth together. There was some pretty marked wear on portions of the panels, and while it’s a pretty print and colour and old-fashioned-looking enough to be plausible (at least to me) I wasn’t sure how I would be able to use it for a “real” dress. But for a costume of a work dress it’s pretty much perfect, even if the worn patches don’t really line up with the kind of wear you’d get from being a work garment.
I realized 0.5 seconds after I cut it all out that I could’ve just as easily had the back pleat come all the way up on the outside and had a wateau back like several other dresses on the Butterick page… but anyway. I didn’t. Which probably makes it a better work dress, but a little less fun.
For my lining I used some old (and very, very worn) bedsheets that were really fit only for making muslins and then rags. There was a lot of piecing involved there due to tears and holes in the sheets, and I imagine this will be an ongoing issue in the life of the dress, or would be if it were an actual work dress instead of an impression of a work dress.
I was under a real time crunch making this dress so a lot of things I would normally finish by hand I did by machine, including the blind hem and the front facings, which I topstitched down. It isn’t noticeable on the busy print, fortunately.
I even attached the buttons by machine, something I almost never do. I spaced the buttons pretty closely, which is period but I feel like I could’ve gotten away with just slightly further apart. I put on 24 buttons just between neck and hips (and then decided I would just wear my apron so the skirt could stay buttonless for now. Apparently leaving your wrapper skirt unbuttoned to show a bit of fancy petticoat was also a Look, although maybe not a work dress look.)
Unlike my other Victorian dresses, there is no boning in the seams, as this kind of dress needed to be washable. I did add a waist stay, as much to cover the raw insides of the skirt pleats as anything.
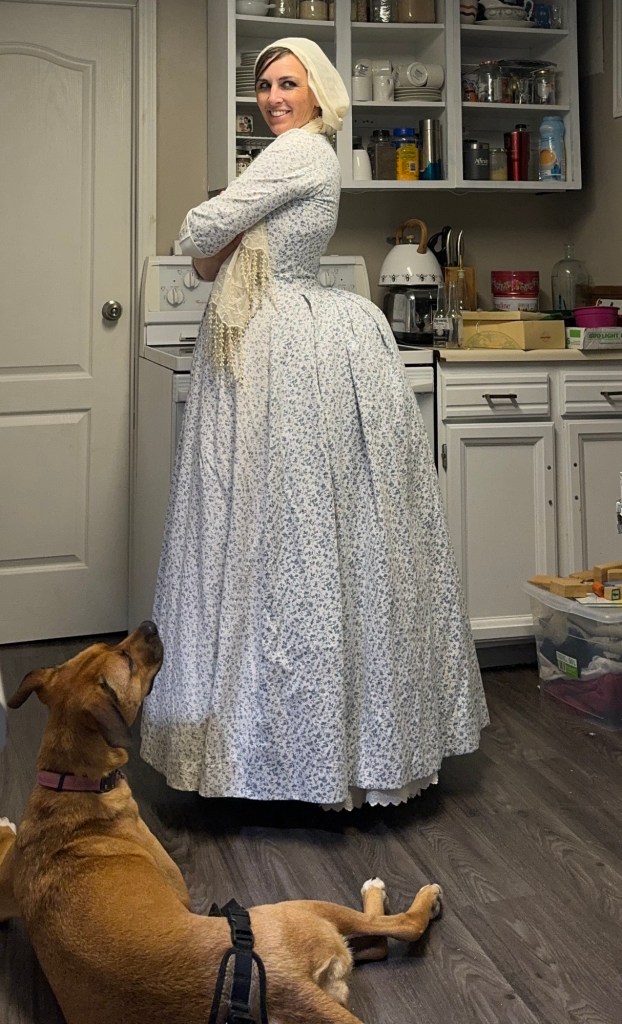
The dress as a whole does fit (snugly) without a corset, but I vastly prefer the look with corset. I also hemmed it to go over the bustle, since I mostly favour 1880s looks. Or I thought I hemmed it for a bustle, it looks like it curves up a bit in the back in these pics. While wearing a wrapper over all the undergarments you would need later in the day was apparently correct, I do rather wonder if a woman on laundry day would’ve bothered.
Other casualties of the hurry: I need to readjust the gathers at the tops of the sleeves. They are concentrated a little too far back which is creating some pulling. Also I didn’t have time to put in a pocket (unforgivable in a work dress), and the sleeves aren’t even hemmed, just rolled up. There is a moderate-sized rectangle of fabric left that I would like to turn into a little ruffle, for the bottom of the skirt if possible but the sleeves if not. (And yes, you’re reading this no earlier than September, so obviously some time has passed since I finished the dress. And have I gone back and fixed these niggles? Of course not!)
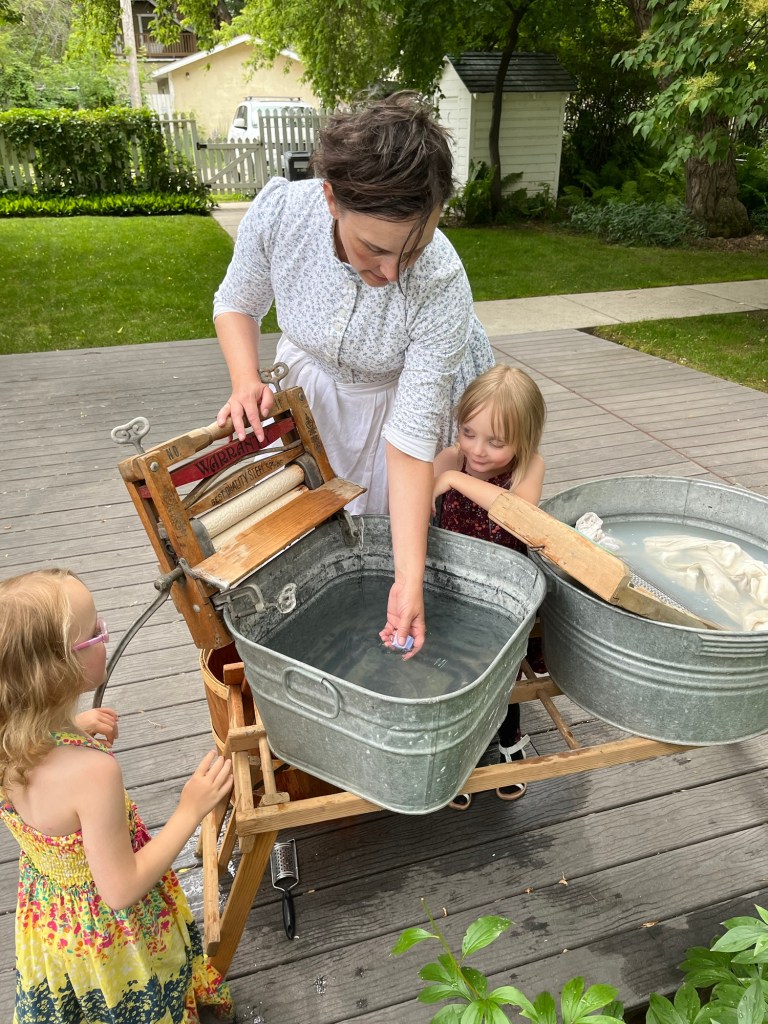
Laundry day itself was fairly successful, at least in that most of the stuff came out cleaner than it went in. It was the first laundry day done at the Marr Residence in ten or more years, I think, and there was a lot of cleaning of the washtubs and other equipment before it could be used to clean clothing. The mangle has a bit of rust in the mechanism that kept dripping reddish water across the rollers, so we had to be sure that was wiped away before running clothes through.
Adding bluing, sewn into a cloth, to the rinse.
The twins had the most fun, running a couple of rags through the mangle endlessly, as well as grating soap and scrubbing on the wash board. Several years of dirt got washed out of my petticoats, particularly the flannel one that I’ve been wearing in real life the last couple of winters. I also did a bit of starching, including testing out a “coffee starch” on my black petticoat, although I didn’t get as far as ironing any of it.
So all in all a successful day, and a nice addition to my 1880s wardrobe. Now I just need a work bonnet.
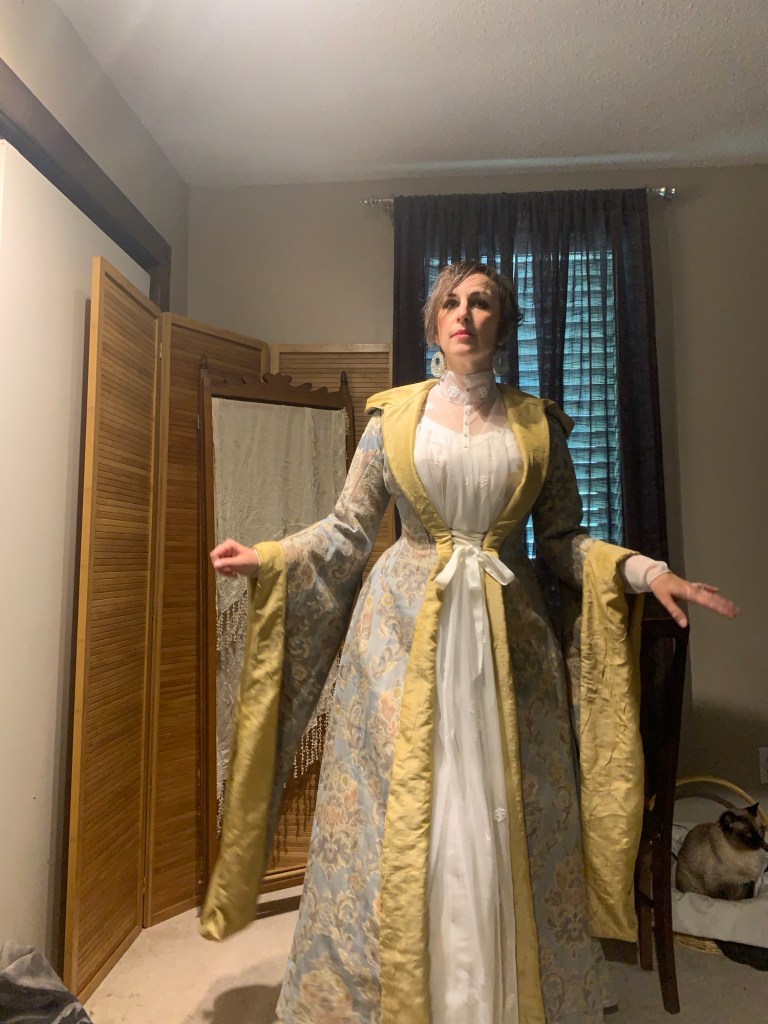
A while ago, maybe a year, maybe more, Cation Designs dropped three words into my brain: “Elven Tea Gown”
And I suddenly couldn’t think of anything else.
In particular, she was thinking of a particular House of Worth tea gown from the early 1900s… but make it Elven. My own inspiration was a bit more all over the place—but I’m not at all mad about it.
Anyway, it’s been a minute since Cation and I sewed joint projects (like, I think, our Spider-Man dresses in 2012, which was basically a lifetime ago for both of us). And we took our time ramping up to this one. But finally, after last Christmas, we took the plunge. If a dive were to play out in the most excruciating slow motion you can imagine, anyway.
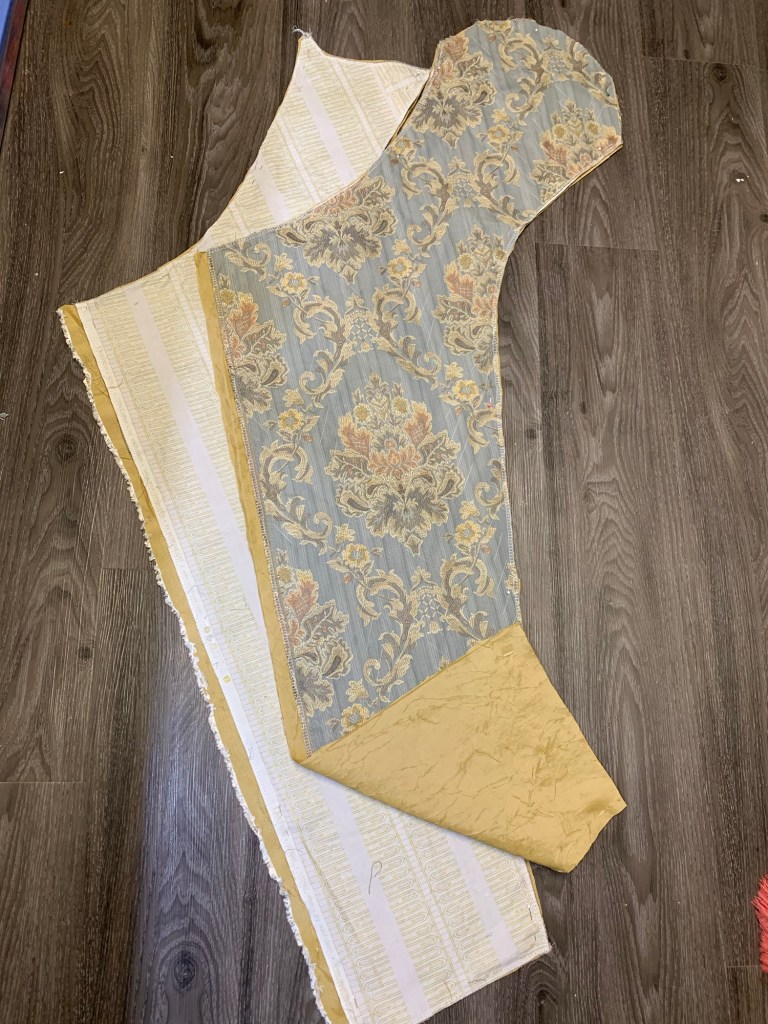
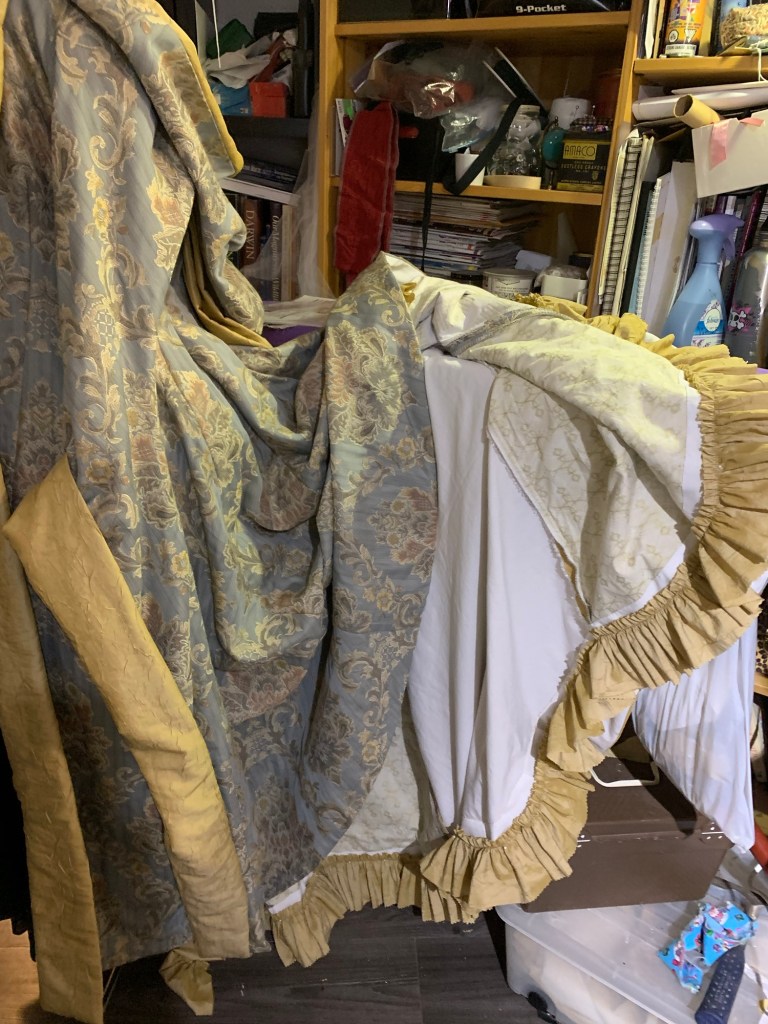
For fabric, I went with this gorgeous blue-grey upholstery jacquard I have been sitting on for YEARS since I got it on a steep sale at Fabricland back when I worked there and haunted all the sales. I did, however, have to go back to find a pale gold lining fabric, which I found in the bargain centre for three dollars/metre, so I’m not going to complain about that, either. The crinkly texture is utterly ahistorical but it’s fun and this is first and foremost a fantasy costume so we’re not going to dwell on it.
It’s all polyester, so this is in no way a light summer project, but it is what it is.
The first phase of planning, for me at least, involved a lot of Pinteresting of original tea gowns with features I liked, on the one hand, and costume things that come up when you search “elven dress” and things like that.
For the tea gown side of things, (and if you’re wondering what or why a tea gown is I’ll direct you to the Dreamstress’s excellent write-up) I wanted a princess-lined over gown using a classic Victorian pattern. After much waffling I decided to just run with my already-fitted Truly Victorian bodice and add a skirt to it. I wanted a slight train (my first ever!) and a Watteau back.
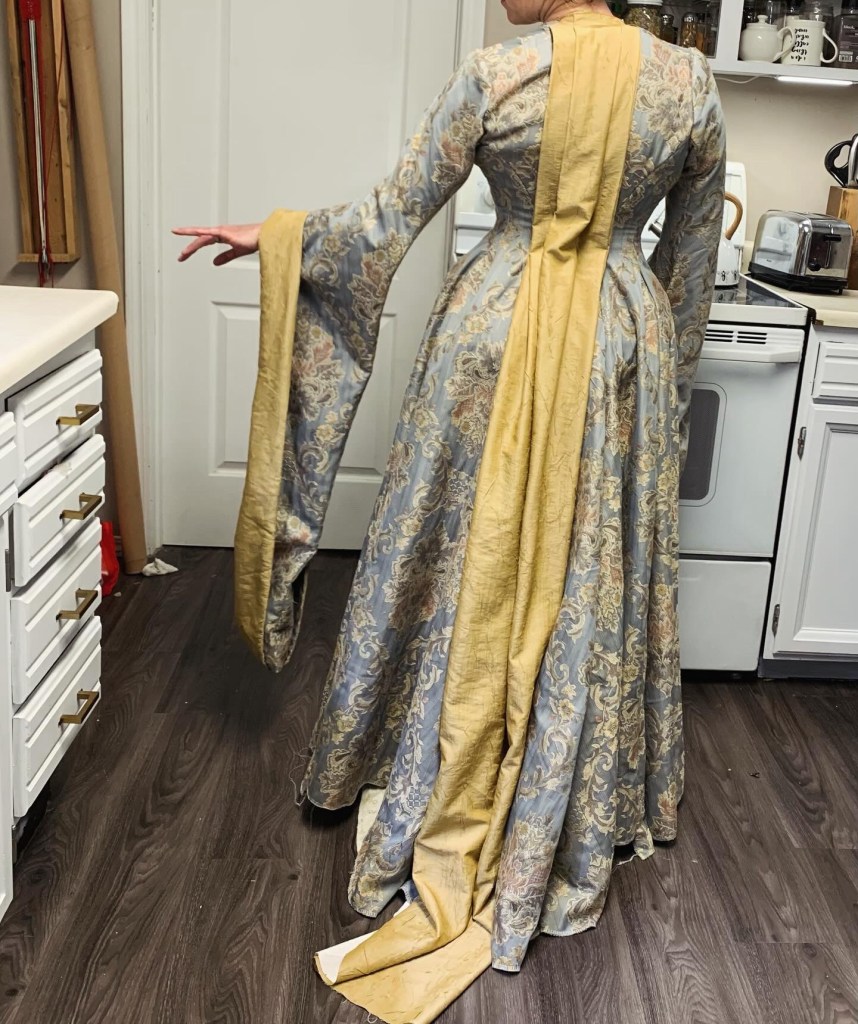
For the elven side of things I whittled it down to the following features: large dramatic sleeves, a laced closure across the front, and a dramatic hood.
Original tea gowns usually (always?) have the look of two garments, an over-robe and an under-gown, but are in fact one garment with the illusion of layers. After a fair bit of waffling I decided to construct mine as two separate garments, mainly for the flexibility of changing up the look in the future. Also because adding the second set of sleeves and collar and front yoke seemed like not significantly less work than making an entirely separate under-gown, although it would have saved me a bit of fabric. So this post will mainly discuss the over-gown.
I decided to live dangerously and cut my skirt directly on the muslin fabric (which I was also hoping to use as my lining.) This worked out fairly well, except that my draft was a little short at the sides; I added extra fabric there when I cut the outer layer, figuring the gap would be covered by my final hem treatment. BUT, then I messed up: to save fabric I had pieced the side-back pieces of the muslin. No problem, except that then when ripping apart the muslin, the bodice portion of the piece got ripped off the skirt portion, and since I didn’t have notches or anything, I re-attached it wrong way around (since I made my gores historically asymmetrical). So I wound up adding my length in the wrong spot, or at least I would’ve needed twice the length I thought I did. So the whole damn thing just isn’t quite as long as I would’ve liked. And I was STILL short of fabric—I pieced several parts (so delightfully historically accurate!) and still had only scraps left. Anyway—-note to self, add 2-3 extra inches everywhere when drafting a skirt, at least you can trim it later!
I drafted the draping mediaeval-inspired sleeves using the two-piece sleeve that goes with my bodice, but extending it down to a long, tapered rectangle. I was completely making this part up, but with some tweaking to the top seam I was able to get it to sorta work, though I’m pretty sure sleeves like this are never actually drafted this way.
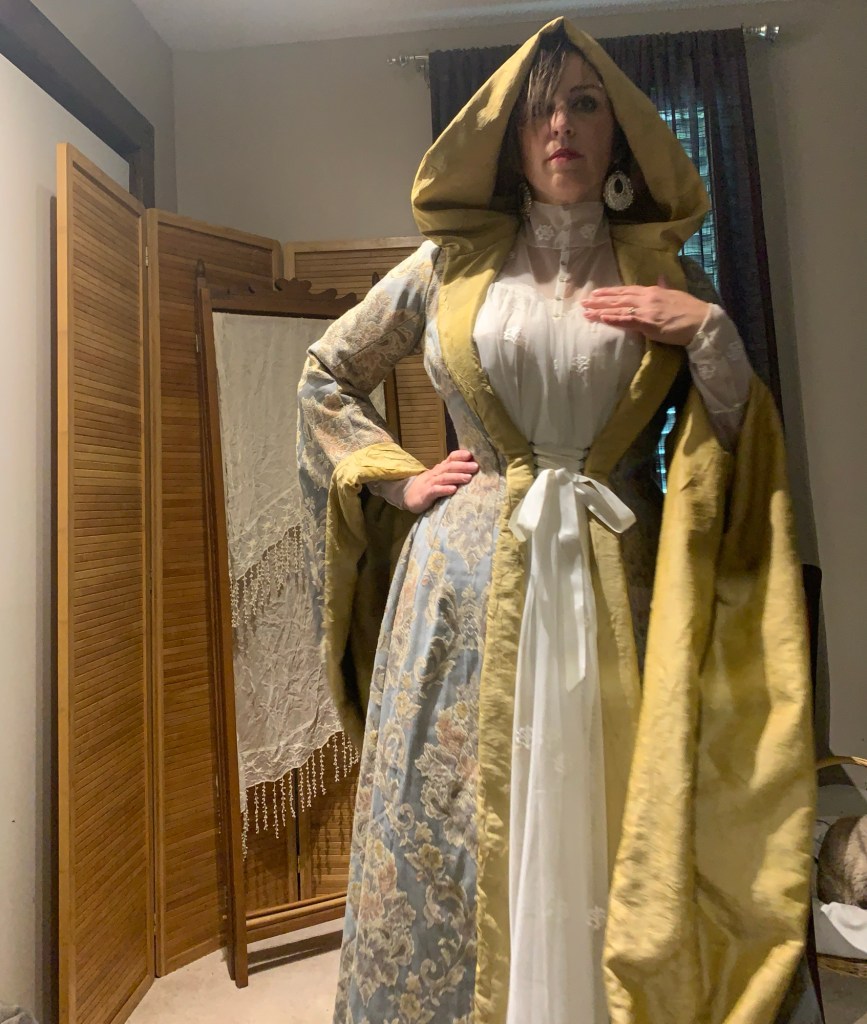
I borrowed the hood pattern piece from Simplicity 5794 that I made last fall, but one of the other views, which had an exaggerated point to the back of the hood. I usually avoid these but it felt appropriate for the elven thing. I would still like to find a nice heavy drapery tassel for the point.
I originally wanted it to blend smooothly into the lapels, the way I rather accidentally got the hood of my denim M6800 jacket to sit. Arguably I should just have dug out that pattern and used that (surprisingly excellent) hood, adding my own point if desired. Although I’m not sure if the issue is the hood itself or the angle of the lapels. Either is possible. Anyway, it’s not quite what I achieved but I have decided to embrace it for what it is.
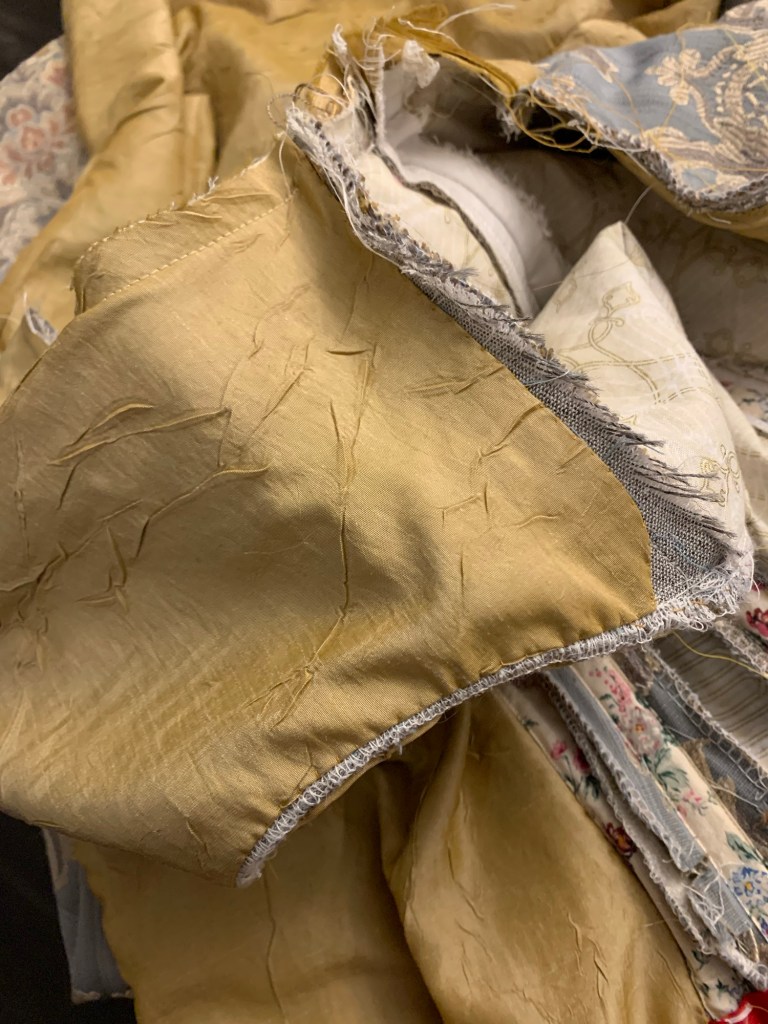
As I cut out my main fabric, it became tragically clear that I wouldn’t have enough for the Watteau pleating I so desperately wanted. However, some perusal of originals identified a few examples where the accent fabric was used to create the pleats, so once I had obtained my gold lining fabric I decided to use that. Initially I went with a full fabric width of pleating, because more is more, but eventually I decided that was just too much.
I ripped out the back seam, cut the excess fabric in half, and added an underlining of some kind of cotton sheeting to it to give it a heft a bit closer to other exterior fabric. At the moment I have the pleats hand-tacked down to keep them well-behaved (which seems typical of a lot of the originals I’ve looked at, or maybe it’s just how they’re arranged on the mannequins) but I might let that out at some point just to see. The only problem is the opulent hood covers a good chunk of it when it’s down.
I haven’t even started talking about all the handsewing I did on this project! Somehow I convinced myself early on in the project that I had to hand-baste the lining (aka underlining aka my muslin) to the outer fabric for construction. Then I talked myself into hand-tailoring the lapels, which meant hand tailoring a truly HUGE swath of hair canvas, since I wanted the lapels to go all the way down to the hem.
While I’m pretty sure these methods are period appropriate for tailored garments (give or take some quibbling—I should’ve used canvas, not hair canvas, but the canvas I have on hand is all really heavy), I’m not at all sure they’re appropriate for a tea gown, but anyway. I haven’t done a crazy amount of padstitching in at least a decade so I was due?
Pad-stitched, with taped edge and roll lines.
It took forever, but I love the shape I got, especially how it let me shrink in the edge of the turned back portion along the waist so that the roll line could bend to fall “properly”
Once the padstitching was done (which only took, oh, two months?) progress sped up a bit. Sewing up the actual garment didn’t take long. Adding in the lining pieces on the sleeves and the fronts took a little more time, especially hand-felling the front lining to the side seams.
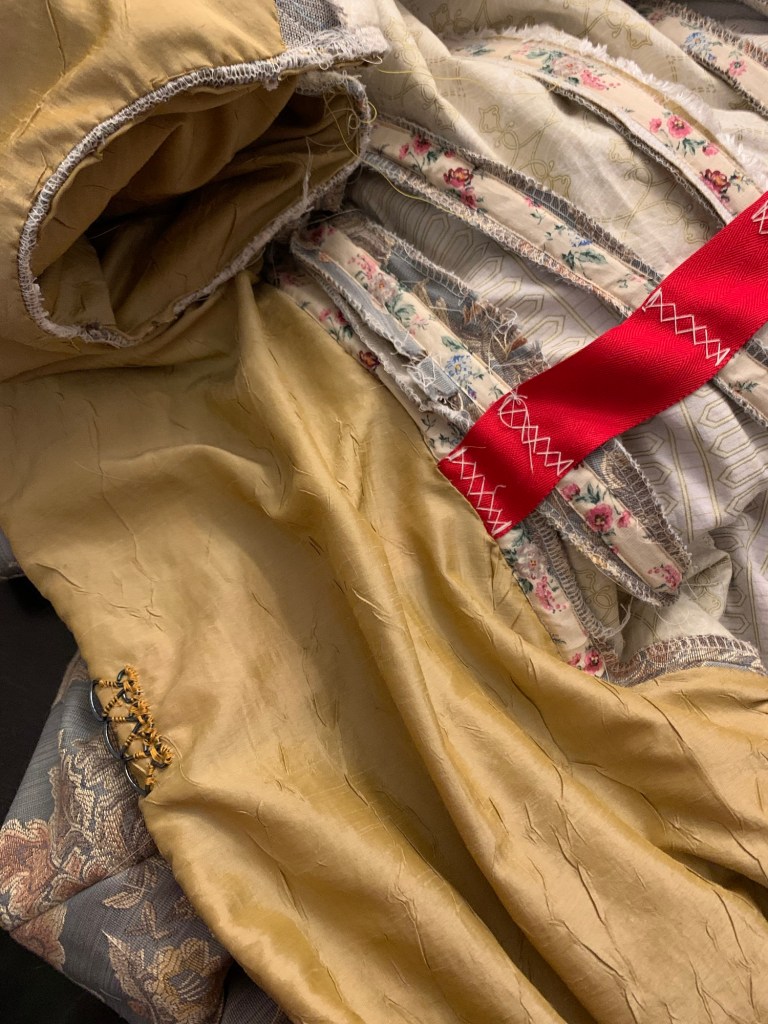
Tea gowns are typically soft garments and are often completely un boned, but of course I wanted boning in mine, because I’m going for a dramatic and structured fantasy look. So I added boning to the various side and back seams. And the waist stay, which runs underneath the front lining all the way to the roll line where the lacing eyes are anchored to it.
Extra width in the front lining because I didn’t sew the darts. Will probably just do a little tuck to control the fullness.
For the hem, I knew I didn’t have the length for a turned up hem. I was planning to use my leftover lining fabric for a facing but after the lining was in there actually wasn’t much left, and I decided to save the remainder for a dust ruffle for the train.
So I dug out some sturdy white polyester that I was happy to sacrifice to a purpose like this and made about a million miles of 5” wide bias tape and added a hem facing. It’s still shorter than I’d like in the front, but we’ll cry about that later.
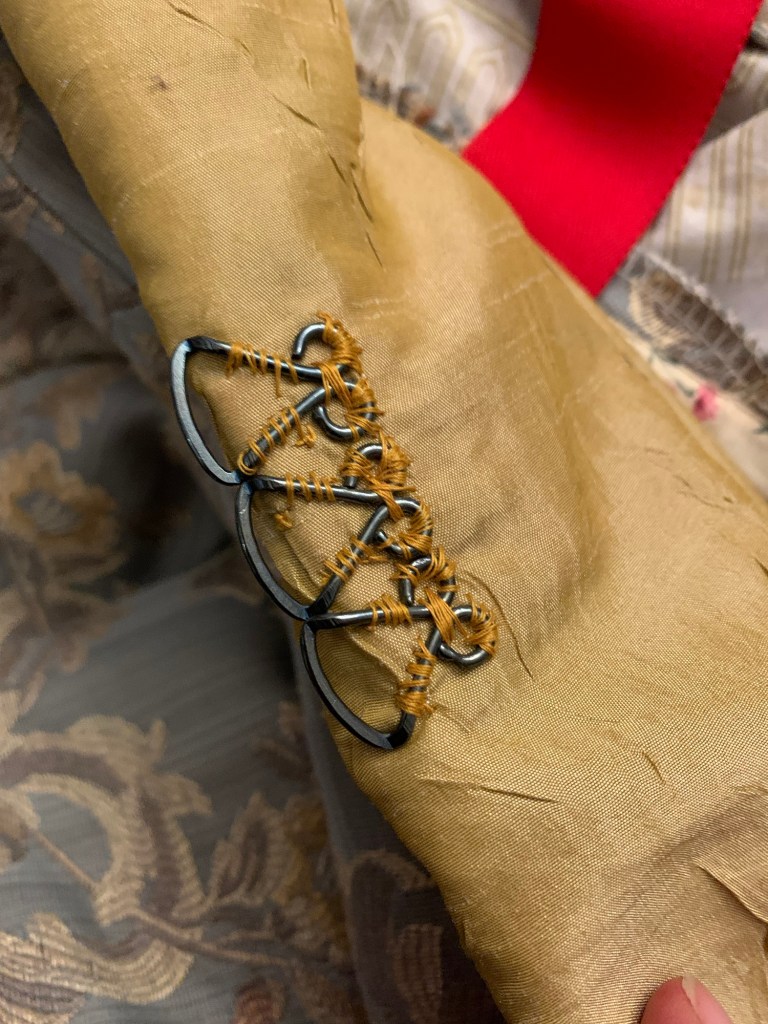
For the laced front, I sacrificed the “eye” side of some gorgeous ornamental hooks and eyes from Farthingales. Hopefully I can use their corresponding hooks with thread bars, or even make my own from wire. Or maybe I’ll find different eyes and swap them out sometime.
For a final touch, I broke out my pinking wheel to make a bunch of straight grain lengths of the lining fabric, gathered up and loosely tacked to the underside of the train as a dust ruffle.
And that, basically, was that. There are a few other touches I might add in the future—a tassel for the hood, trim of some kind, more Elven accessories, long flowing hair—but after all that work I’m so happy to be done. I’d change a few other things, like the fullness of the back skirt (which is a bit excessive), but all in all I’m just super excited to have created such a fun piece!
Next post will cover the under gown.
It was super fun to chat and plan this out together, and I’m so excited (and not a little surprised) that we pulled it off at least somewhat within our projected time frame!
And of course I could not resist abusing the power of photoshop to try to virtually join Cation in a couple of her beautiful photos (by Faes and Photos)! (And thank you Doug for mine!)
The only thing that would make this better would be sitting down for actual tea together! But until I someday get my trailing sleeves to California, I guess photoshop will have to do.
Not so very long ago Wearing History put out a new “Archive Collection” pattern based on a McCall’s original from around 1900. And, rather impulsively, I bought it.
Equally impulsively, I decided to get it printed in time for my little Christmas break. I didn’t get as much sewing done as I might have liked, after one of the twins brought home yet another virus just in time for Christmas, but I did eventually start on a tester version.
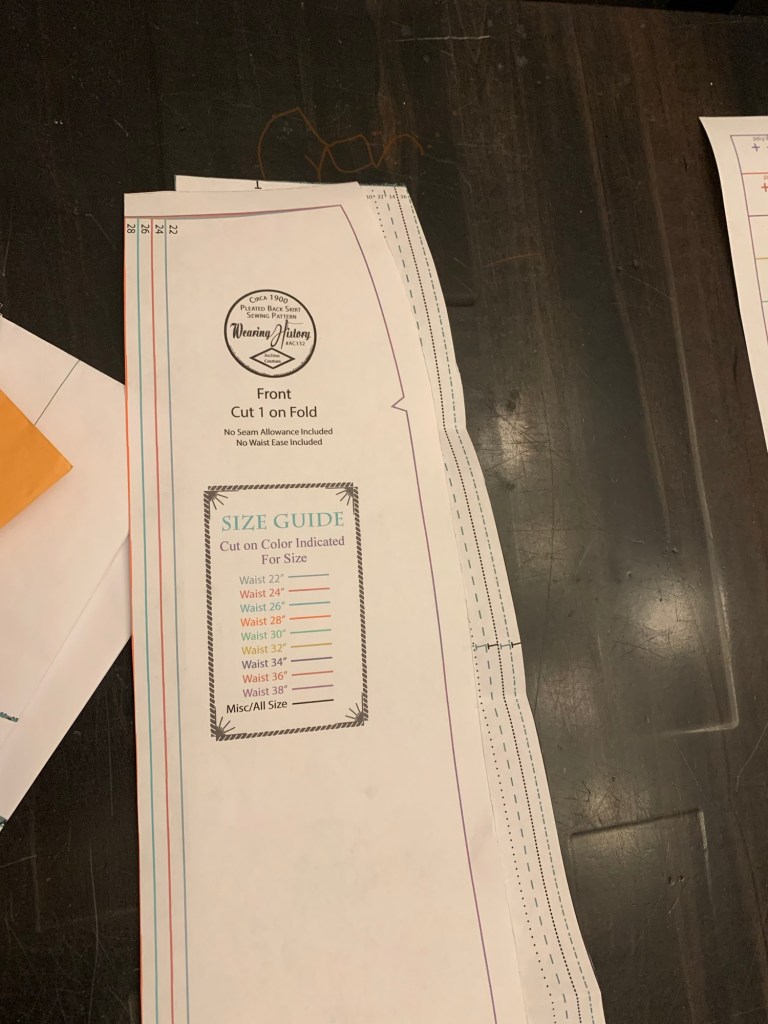
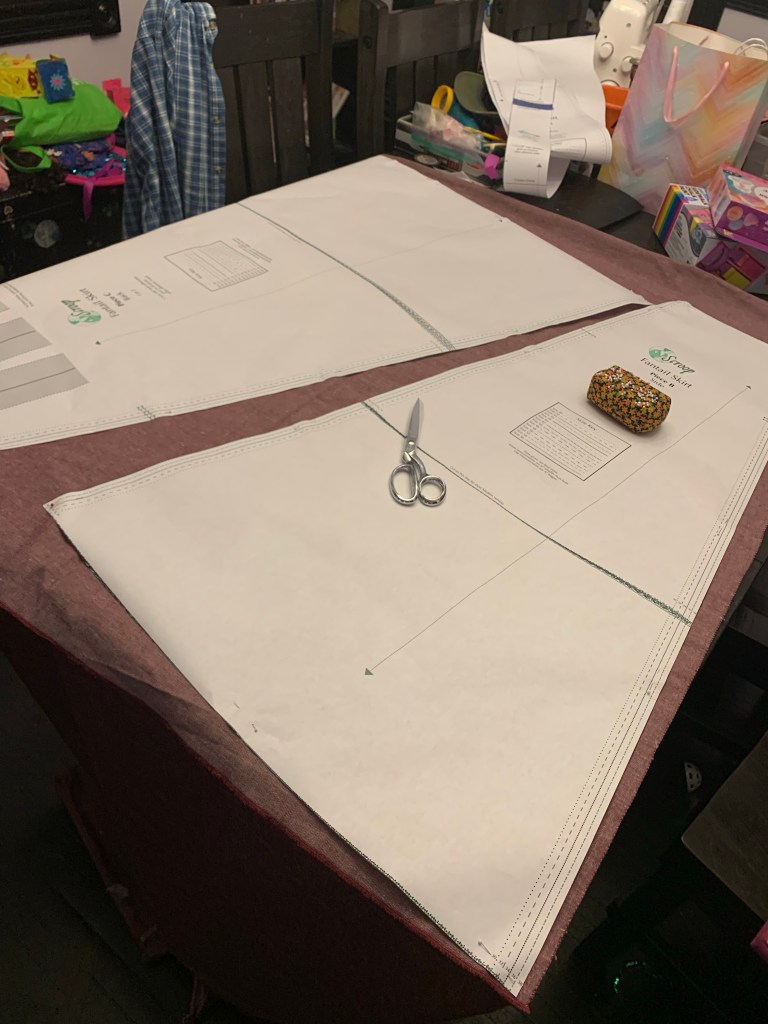
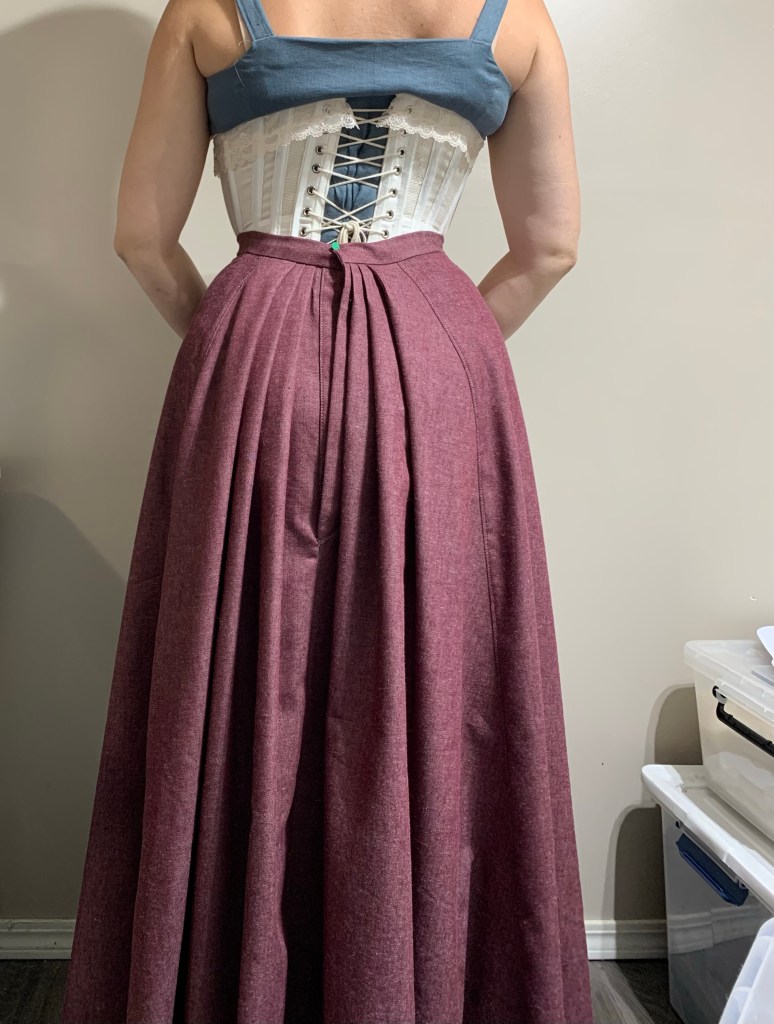
Now, this isn’t exactly a pattern I needed. In particular it’s very similar to the Scroop Fantail skirt I made in September. But I thought a detailed pattern comparison would be fun! So here goes.
See the more intense waist shaping on the Wearing History pattern.
Both patterns are five-gore skirts with smooth fronts and added fullness in the back provided by pleats. Both have narrow straight waistbands and a centre back placket closure. The fullness in front and side panels is almost identical, although the Wearing History pattern is a little more full in the back panel, particularly towards the hem.
The Wearing History pattern differs mainly in three ways: the back placket is cut on, additional shaping for the waist comes from wide side darts, and the shaping of the flare, which is quite straight in the Fantail, and subtly fluted in the Wearing History pattern, narrower through the knees and then flaring slightly more below—though the difference is only a cm or two per pattern piece. There is a lot more shaping from waist to hip in the Wearing History skirt, something I had to increase in my Fantail by grading to a smaller size at the waist.
The grainlines of the patterns also differ, with the Fantail having a more modern style of grainline falling in the middle of the gore while the Wearing History original grainlines are the old fashioned type where they parallel one edge of the gore. However, the Fantail instructions also mention the variability of grainlines in the period, and when I made my version I used “old style” grainlines to get the pattern to fit on my limited yardage.
The side darts, incidentally, are features of my self-drafted 1880s skirts, based on period instructions. It’s neat to see the mix of older features and sharp new skirt shape in this pattern.
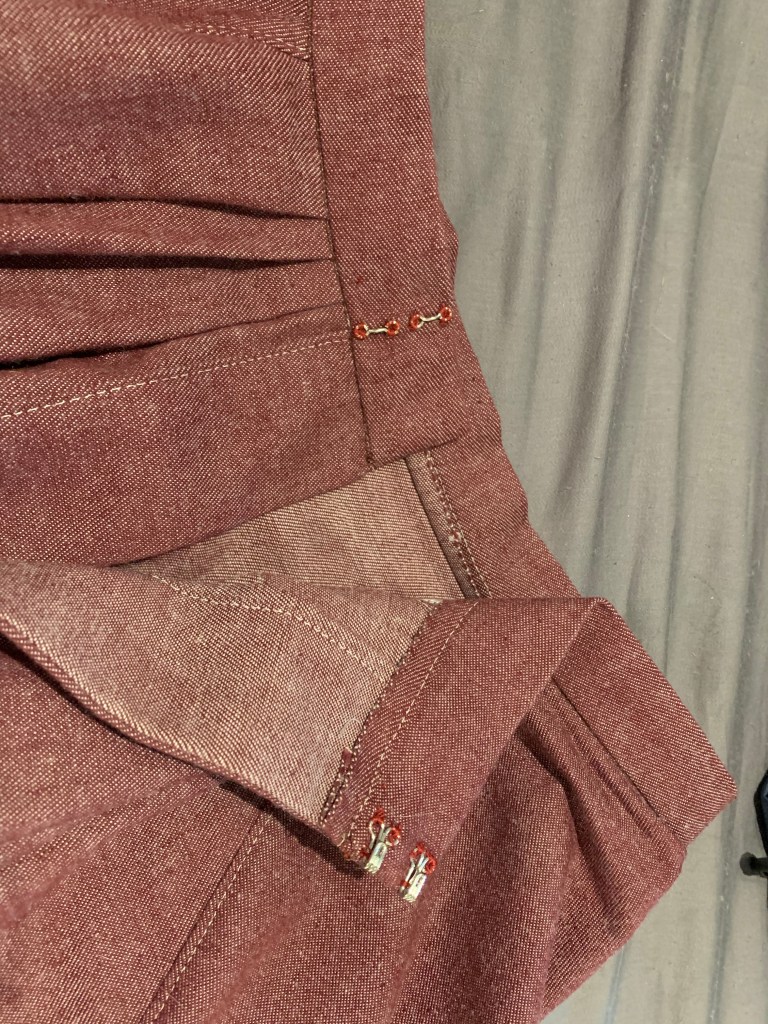
I’d rather the under placket didn’t show here, but that requires a larger waistband.
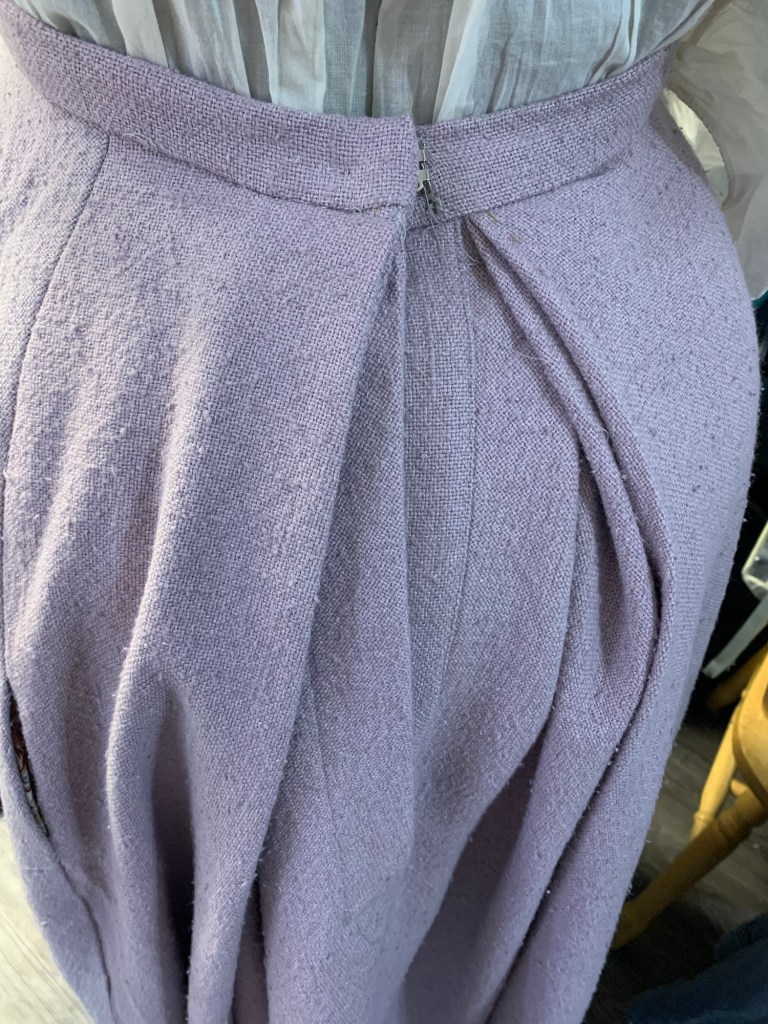
In my version of the Wearing History pattern, I decided to omit the cut on placket and do a sewn on one. This matches the directions I’ve usually read in period sewing manuals. And that whole back seam is on the bias so trying to keep a cut-on placket square just seemed like a nightmare. Instead I did the back placket basically exactly like the Fantail skirt, except for just making it rectangular instead of a fancy angle.
I tweaked the darts quite a bit to get a hip shape I liked, making them longer and a more sinuous shape. I also wound up making them deeper, at least partly because the waist was stretching out in my thick but weirdly soft fabric; I overshot a bit and currently it’s really too small so the back pleats aren’t lining up quite right. If I redo it, I might sub in a different fabric, like a thin cotton, for the waistband. This upholstery fabric is beefy and where all the pleats stack at the centre back my machine completely balked, although not before I had broken three or four needles trying.
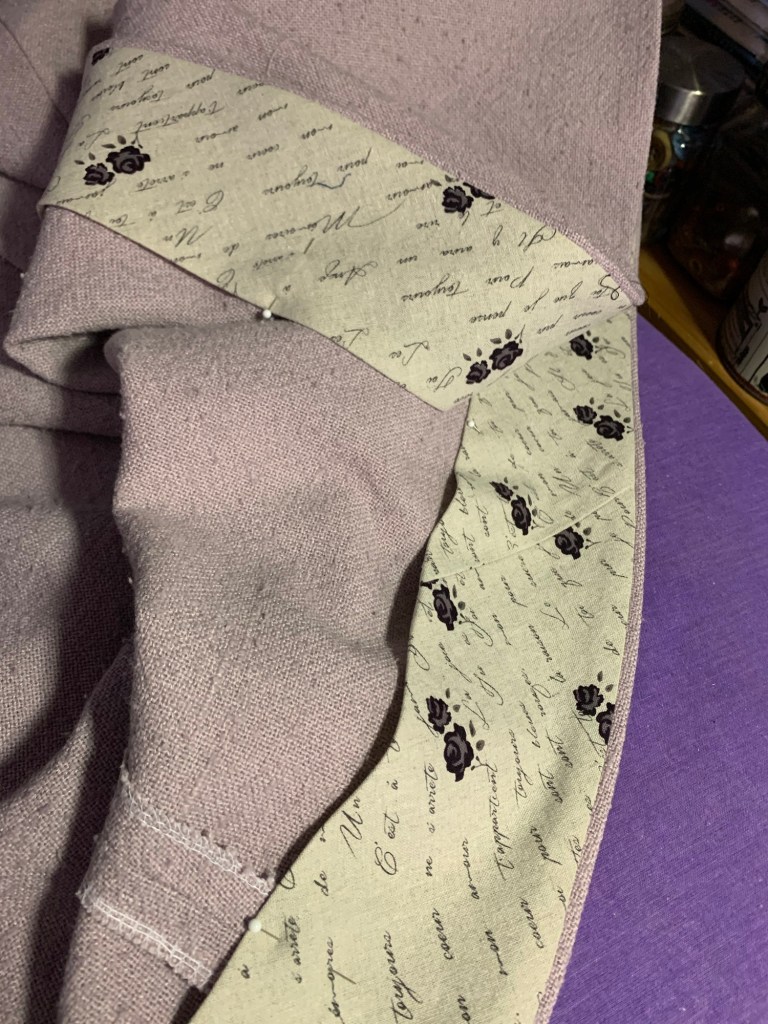
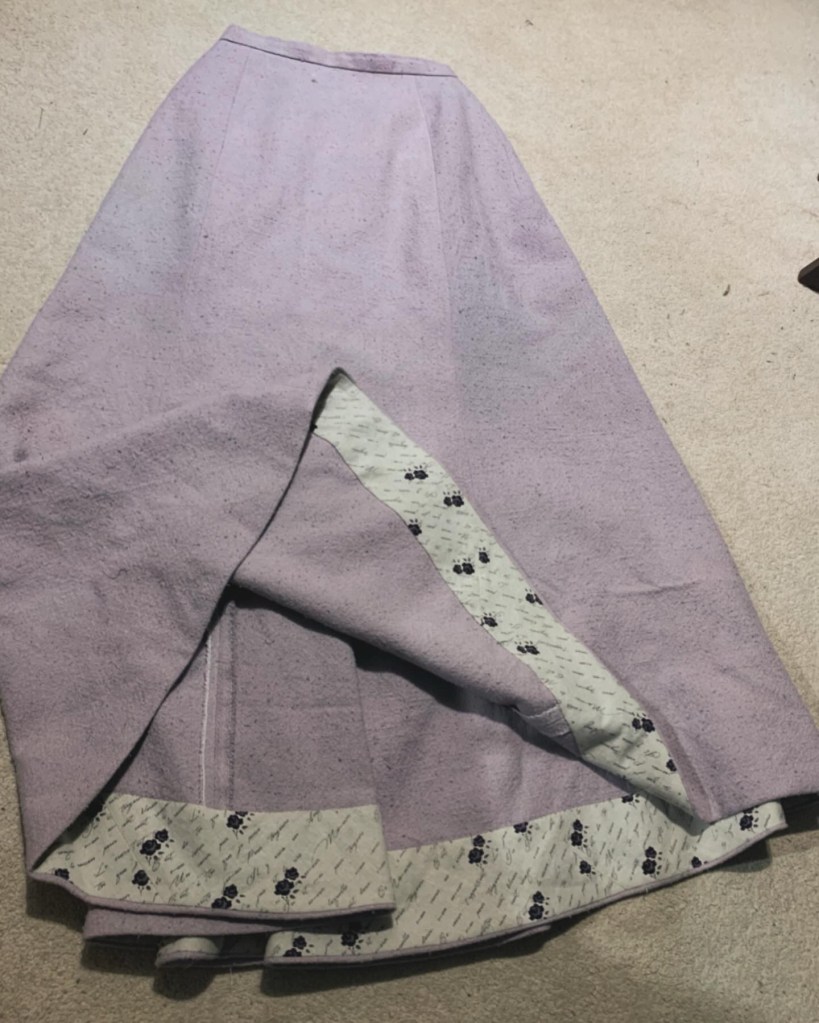
Speaking of the fabric, I almost forgot to mention my favourite feature of the whole skirt. Since the pattern has no seam or hem allowances, you add your own. However, when I was laying my fabric out, I had distinctly less than needed for the skirt, and I wound up basically not being able to add hem allowance.
So, since I basically had no hem allowance, I decided to do a faced hem. This is a legit period way to do it, although mine is a pretty simple facing, and they often jazzed them up in period with additional layers of velveteen binding or stiffening or braid. I would have to double-check if bias was appropriate at this point in history; certainly a little earlier they were perfectly happy to cut their facings straight and just ease or pleat the top edge as necessary to have them fit. But I also serged all my seams here, I wasn’t in the mood to be too precious about historical accuracy.
I dove through scraps and eventually settled on the remnant from this dress (man that was a while ago!), a linen/cotton blend that is beefy but still a lot thinner than my main fabric. I evened my remnant into a nice rectangle, cut off the diagonal on one side and sewed it back on the other… then sewed it into the offset tube and cut a truly massive amount of 10-cm-wide continuous bias. So hopefully there’s another skirt worth of it. Probably it would’ve been faster to cut the strips flat with a rotary cutter and then sew them together, but anyway.
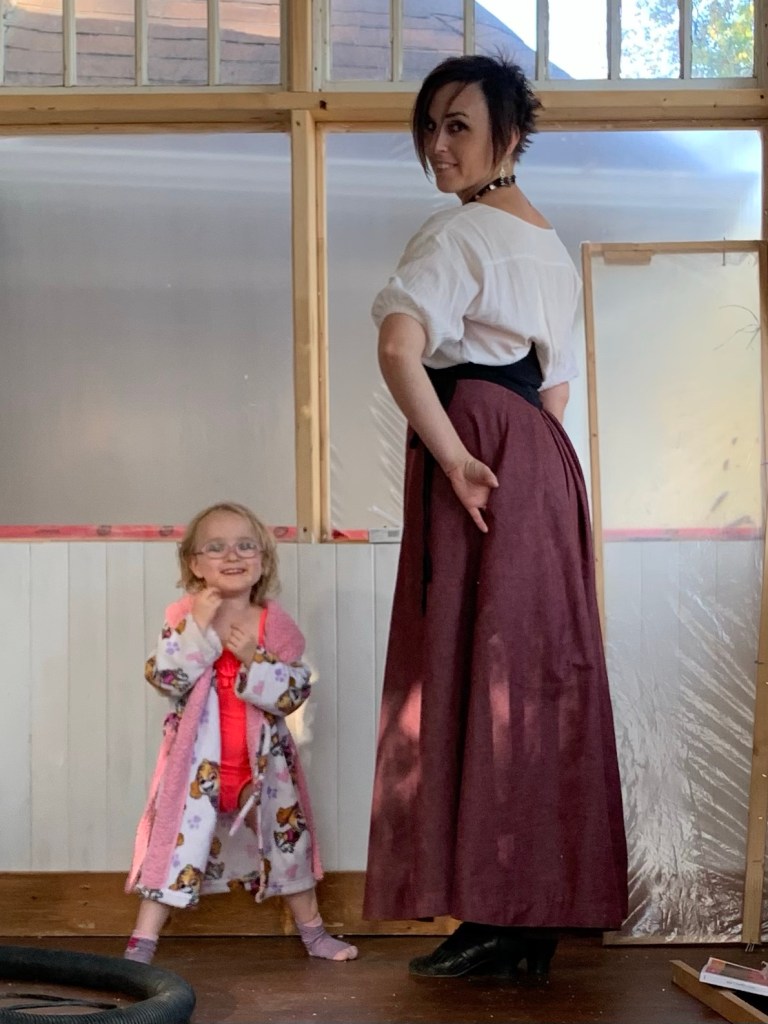
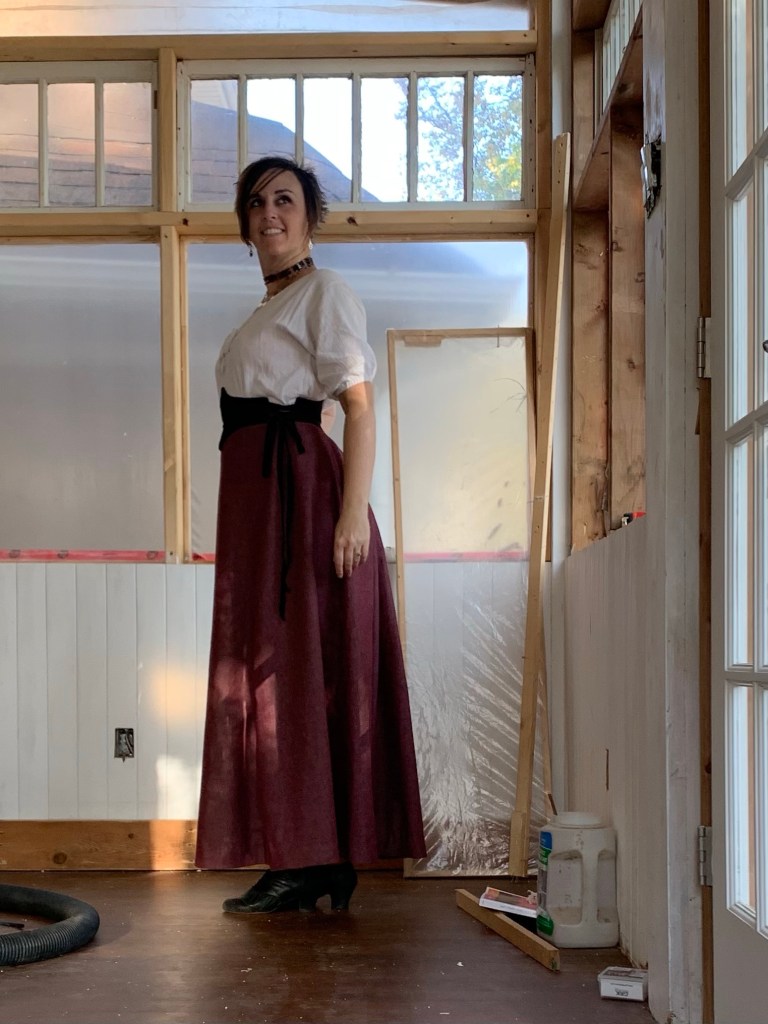
I’ll confess, I wasn’t super sure about the skirt when I first made it. The hefty fabric seemed too sculptural and stiff (despite actually being pretty soft). It sat on the dress form for weeks just waiting for that hem (probably a good idea since there was a lot of bias stretch to work out, but still). But this faced hem makes me love it! it’s such a nice finish. I love the facing fabric and how it makes the hem feel. I think a self-fabric hem in this fabric would just have been bulky.
Oh, and the skirt is drafted for a 41” front length (from the waist) which is pretty much perfect for me but probably a little long for many people. The pattern does actually include original instructions for lengthening or shortening at the hem, but if you want to maintain the fluted shape you should probably shorten by overlapping in two places, above and below the knee. In a perfect world, anyway.
I picked my size based on waist size, mainly out of curiosity as to whether I could make that crazy waist-hip variation work, even if it took padding. And I’m not sad I did, although a more rational way to fit the skirt would be to pick the size by your hip size and just adjust the waist. Those side darts give an immense amount of room to play with the fit, four or five inches, at least, and you can always pick a wider seam allowance if you’re worried about having to let out the waist or adjust the shaping there.
All in all, it was a fun exercise! I wouldn’t mind trying it again in a more appropriate fabric. Though I should really get back to the blouses for this kind of period…
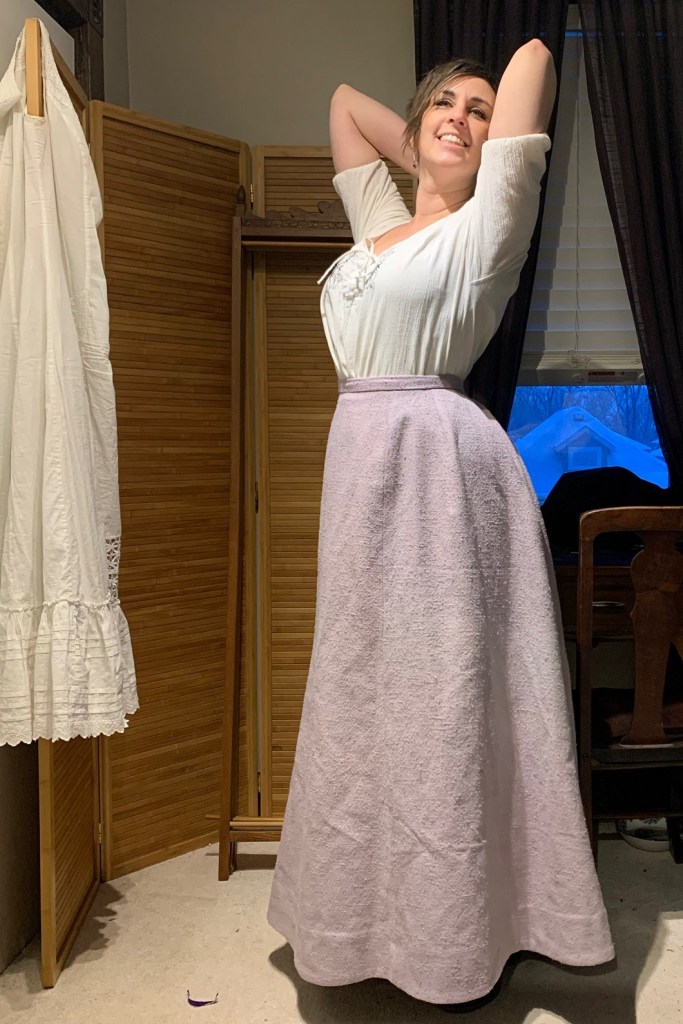
Around this time last year I started puttering gently, barely consciously, toward a mental image—-a romantic, layered, quasi-Victorian-undress look executed in all black. I made my black corset, and then a black petticoat. In between, I also started a black shift, from the same Simplicity 2890 as the corset. Alas, the very first seam I went to sew on the shift, I sewed the yoke piece on upside down. I folded everything up, tucked it in a plastic zip-lock bag, and didn’t look at it again for, well, another year.
But at our Victorian Sewing Circle in September, I finally pulled it out and unpicked the seam, and the damn thing finally started to come together. It’s got a very lovely, shapely yoke, once you finally get the right edges sewed together.
I leaned into the hand-finishing techniques for this piece, if only because the slightly loose-woven fabric has a lovely textured feel to it. I hand-stitched down the underarm facings, and the inner face of the yoke as well. I hand rolled the sleeve hems, and hand-felled the side seams, and hand-stitched a wide bottom hem. I wanted to add lace to the yoke, but had trouble finding one that would follow the elegant curves. Maybe I should just try embroidery.
I find it pretty odd how differently I feel about different hand-stitching processes. Rolling the little hems on the sleeves made me want to kill myself. Hand-felling the (much longer) side seams and bottom hem felt more like an exercise in meditation. And it’s practically the same stitch? Similarly, I can hand-sew the binding of a quilt without a blink, but sewing the binding on a corset fees like torture.
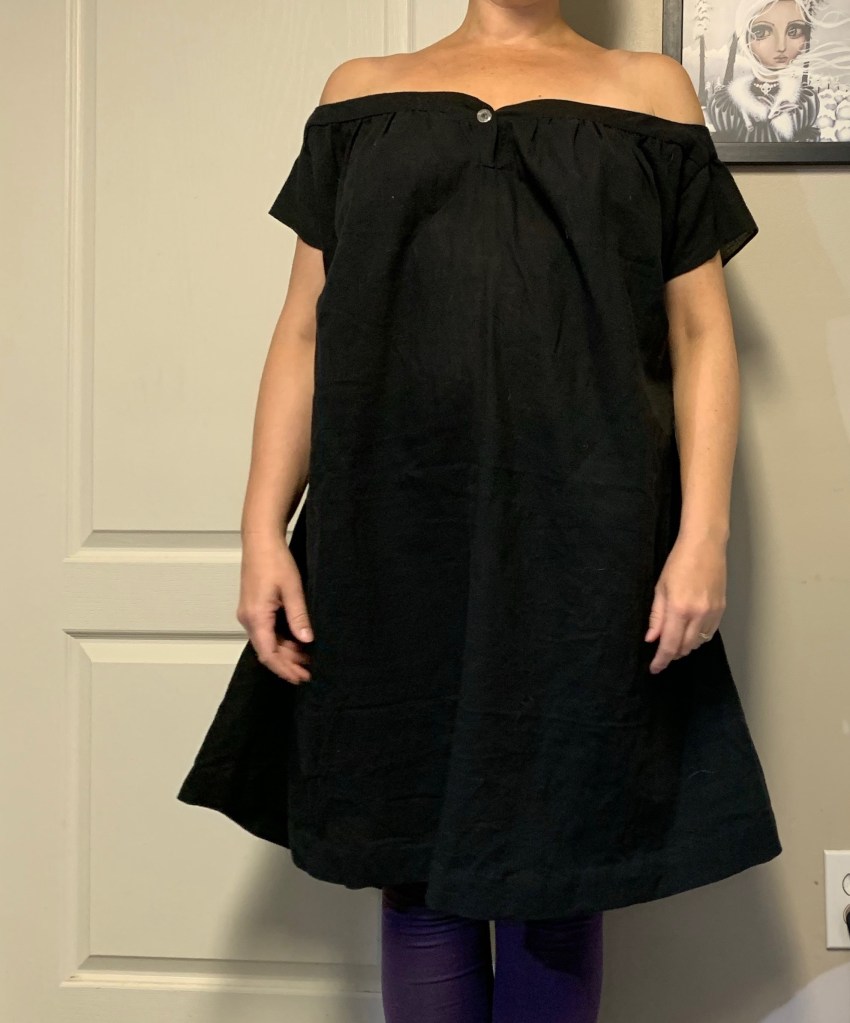
This chemise pattern is geared towards 1860s, and it’s a very off-the-shoulder style. Which I knew, having read several reviews, but still didn’t adjust for. Silly past Tanit. So it’s, um, WAY off the shoulders. I think I may go in and take 4” or so out of the back so it will sit a little better.
Just a LITTLE off the shoulders.
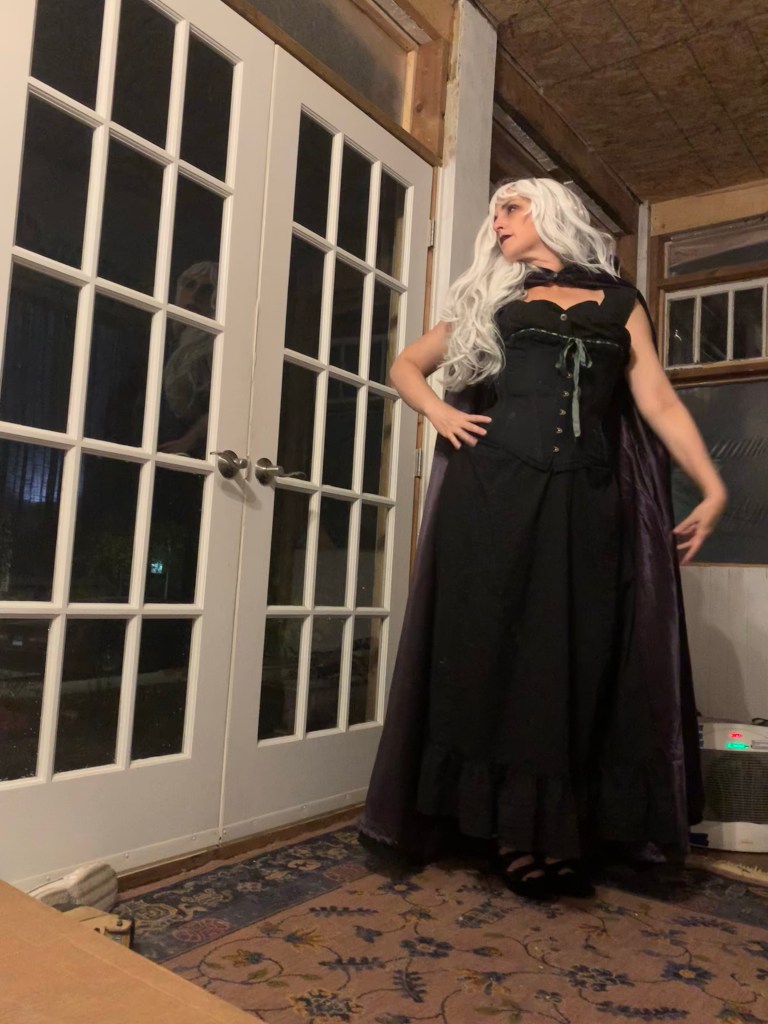
I added a button a little higher up than maybe designed for, in the hopes of keeping it SLIGHTLY in place. (I may go back and change the button, though, this one is glass but it just looks white which wasn’t what I wanted. Now I just need to find my black corset, which has been mysteriously AWOL for several months, so I can model it properly. Though I suppose this too-small costume one will work in a pinch
But no whimsical Hallowe’en ensemble would be complete without…
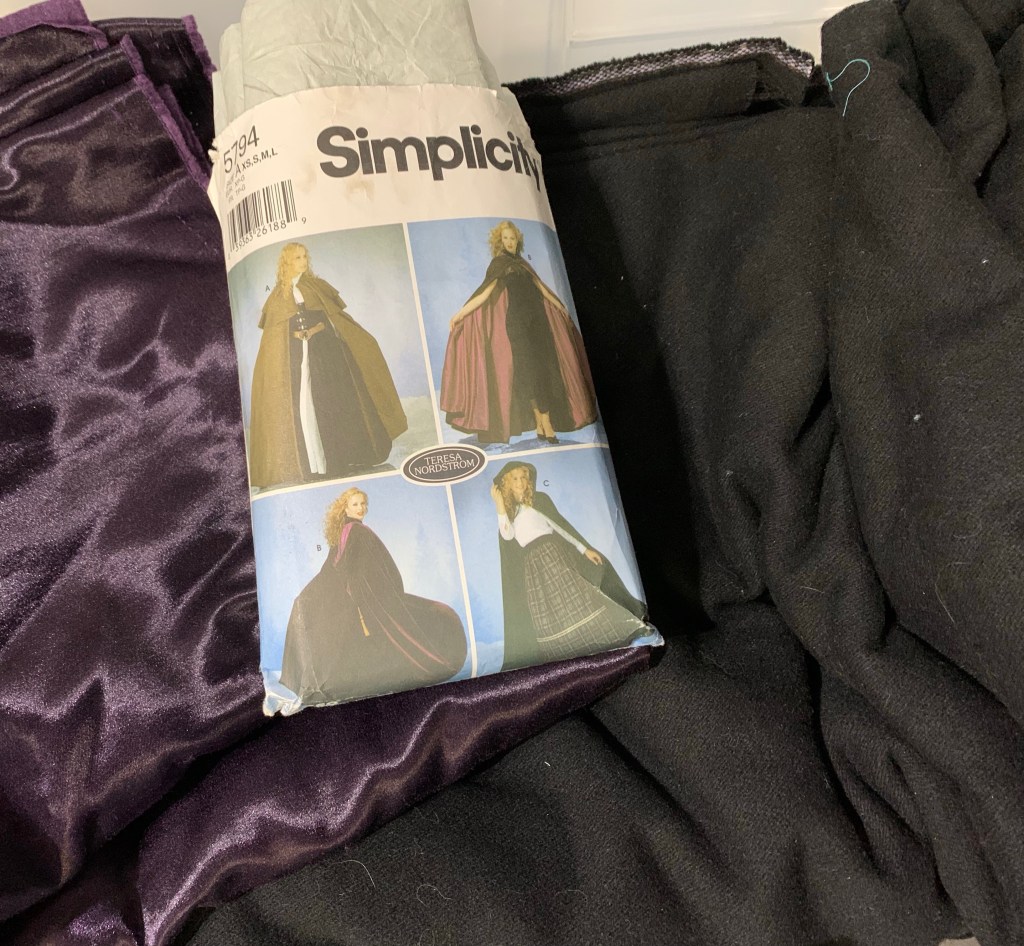
I’m honestly not sure when or where I acquired this pattern. I am quite sure I didn’t purchase it. But it looks like good solid fun.
It is, um, a little quirky.
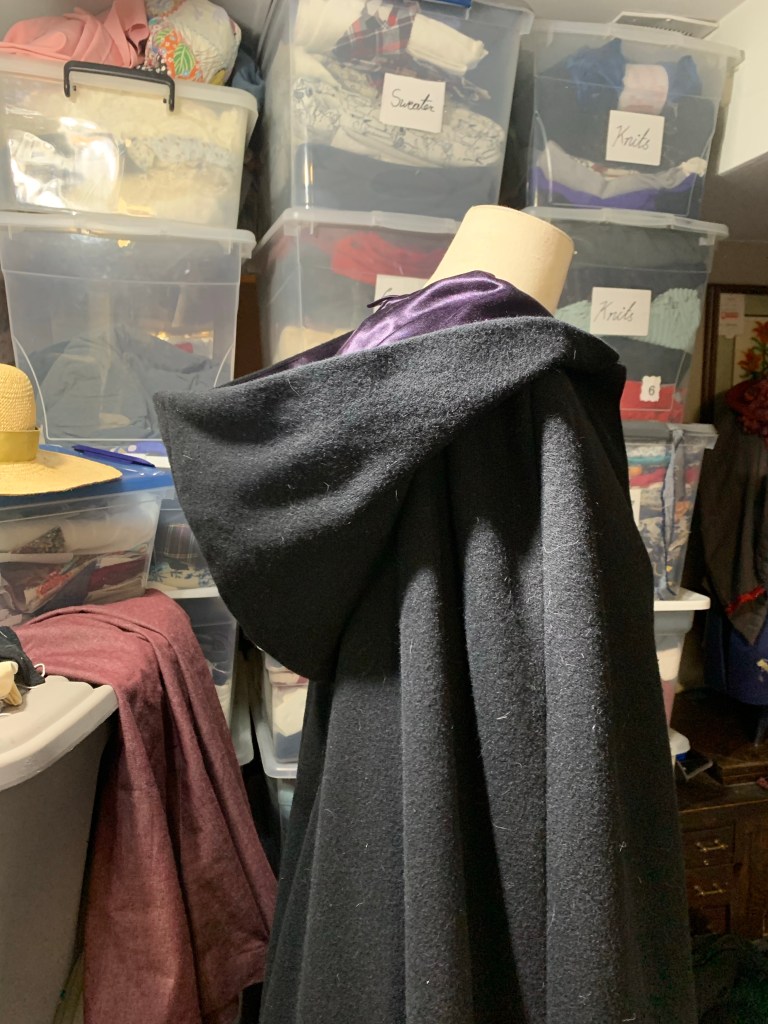
The first glitch came with the cutting layout, where the pattern instructions show it being cut out on the lengthwise fold. These gigantic pattern pieces are not being cut on the fold for any normal-width (by which I mean 60”) fabric. Incidentally, the best idea wound up being to fold my (non-directional, thankfully) fabric in half crosswise, and arrange the two main cloak pieces going in opposite directions, then cut the hood from the remnants. I wound up with around a metre extra for the outer fabric, and the merest scraps of my purple lining.
There are three views, each with its own hood. One has a square back forming a small point, one an exaggerated point with a tassel, and the third is… unlike any hood pattern I have ever seen. It’s shaped more like the petal of a flower. I can only imagine it is meant to create a wide, fluttering kind of hood. I might even try it out sometime. Just not for this one.
Ok the hood is still pretty extra.
I wasn’t super into the square back hood of View A, but I figured I would just round off the little point into a smooth curve and all would be fine. Which it is, but really I should just have pulled out the hood for McCall’s M6800, because that is my favourite hood of all time, and this one ended up being just a little bit short of it. They’re very similar, with a pleat to tuck the extra fullness into the neckline, but the Simplicity hood is just a little less voluminous. It’s fine, just not quite as extra. Which is odd considering this is a costume pattern and McCall’s 6800 is an everyday kind of coat pattern. I do love the body the combination of coating and Kasha lining has.
Oh and I noticed as I was putting away the pattern pieces that the hood I used (view A, again) was actually supposed to be cut on the bias. Weird, but again I can’t help wondering exactly what difference that would’ve made. Something to try in the future, perhaps.
There isn’t much to say about the rest of the cloak construction—it’s a lot of long, straight seams. The shoulders are a wee bit wide but then I was cutting the XL size since it was already cut out and I always hate to lose the larger sizes but also there’s no way I was tracing out those giant pattern pieces. I figured I would narrow them if I felt it was a problem (which wouldn’t be hard) but honestly if I wasn’t looking for the problem I don’t think I would have noticed.
The length is GENEROUS. The envelope pictures show a cloak trailing artistically on the ground and they are not wrong. I’m more likely to be adding at least 2” in length to stuff, and it still trails on the ground on me; I’m wearing 2” heels in these photos and took a roughly 3” hem and it still brushes the ground.
I decided to use some purple bias binding from stash to cover the edge of the hem, since what else am I going to use it for? It’s a lot brighter than the lining, though. I tugged on the binding and eased the wool underneath as I sewed it on by machine, so it gathers my curved hem in nicely (maybe a little too much? My tension wasn’t terribly even, either). Then I took a deep breath and hand-stitched a good 4m of hem. Ouch! I machine stitched the lining about 1/2” shorter than the outer hem, and if I am a good girl I will make some little thread chains to connect the two at the seams, but I haven’t done it yet. I didn’t even look at the pattern instructions for hemming; I opted for separate lining hems as this is what I use in coats with wide, flowing hems and I think it lets the fabrics move the best.
After much waffling, I decided to close it with a button and buttonhole; I didn’t want to do the ties the pattern calls for. I would’ve loved a metal sew-on clasp but didn’t have one on hand, and some kind of tab and button seemed a bit overworked.
You have no idea how much time I spent trying to shoo cats out of this picture.
I’m more used to sewing coats than cloaks (I say as I haven’t sewn a fullblown coat in at least five or six years) so some parts of the construction felt weird, like the lack of interfacing and facings. I’m glad this pattern didn’t have facings, as it’s a huge fabric hog already, but it still felt weird to be understitching the lining right at the edge of the cloak. Yes, it will peek out. Yes, that’s ok.
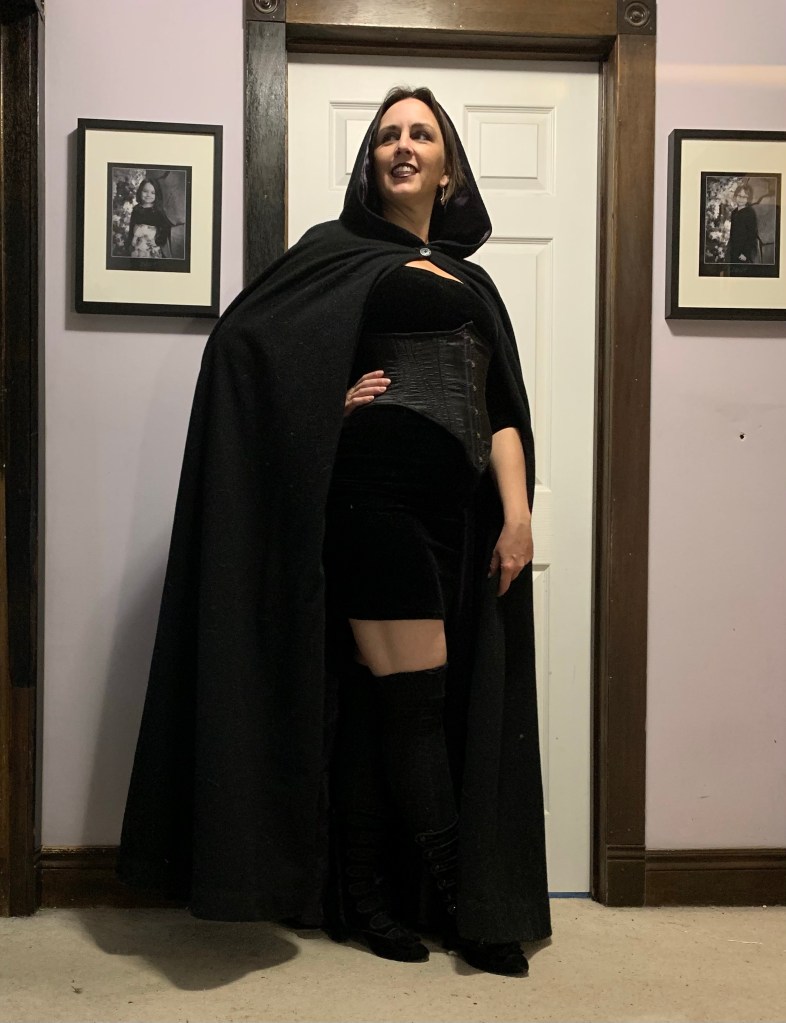
It’s not a very full cloak, actually, despite being a massive fabric hog It’s a half-circle, actually. I don’t even want to think about how much fabric a full circle this size would take). You can’t put your hands on your hips without it gaping open. However, it does hang nicely closed with arms at sides. And looks best thrown back over the shoulders anyway, I discovered.
And now that it’s done it might be making me the happiest I’ve been in a very long time.
The black corset showed up at the last possible second, after I had turned most of the house upside down looking for it, in a place I had checked several times before. So here’s a quick peek at the final look, or something like it:
Still need to decide if I want to add witchy hat or vampire fangs.
And also figure out how to be so extra I can wear this cape in everyday life.
I mean, let’s not get too deep into the definition of “need,” especially when discussing costuming.
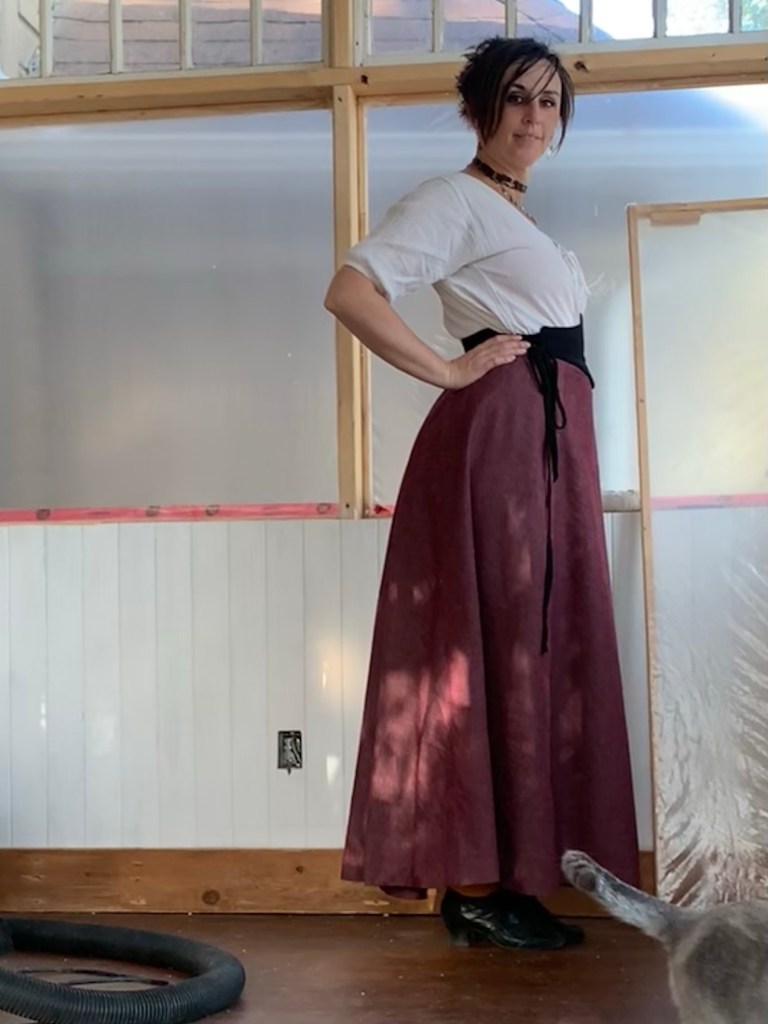
The Fantail is an 1890s-1900s five gored skirt pattern. Which is also totally wearable as an everyday skirt… at least if, like me, you’ve strayed far down the garden path of “WTF is she wearing?”
So wearable, in fact, that I have several others almost exactly like it. The Edwardian Walking Skirt (Folkwear pattern) that my mom made back in the 80s or early 90s, for one. (And yes, i still have the tissue pattern she traced off the original she borrowed from the library.) The grey gored skirt I made a couple of years ago that I wore like crazy last winter, for another. And three or four more long, gored skirts of various iterations.
But it is also a skirt style I wore constantly last winter and, well, winter is coming. And I had purchased the Fantail back in the spring when Scroop had a big sale to raise money for some unexpected expenses. And then one of my Victorian Sewing buddies was destashing some this gorgeous twill “denim” (not really denim, it’s fairly loosely woven and very soft. But it does have a twill weave, and white threads in one direction.) And it just really needed to be this kind of skirt.
So, just before my birthday, I got the pattern printed out. I didn’t actually get to work on it for my birthday, but not too long after I started poking away at the project.
This kind of skirt is really, really simple, and it went together quite quickly. As per the instructions, I graded between my hip size and the waist size I wanted, and I’m glad I did as it meant I didn’t have to fuss with adjusting the perfect pleats to fit a different waist size
The fabric wasn’t overly wide, and I wanted to use it as efficiently as possible. This style of skirt straddles the evolution of grainlines from the gored skirts of the 1880s where it was standard to have one edge of the gore on the straight grain and one on the bias, to something closer to a modern, centred grainline, to allow the fabric to hang better. Maybe I should care more about the hang of my skirts, but as the pattern says, grainlines are suggestions. So I angled my side and back gores so that they fitted best on the un-folded fabric. No regrets so far. It’s not zero waste, but the amount of waste is minimal.
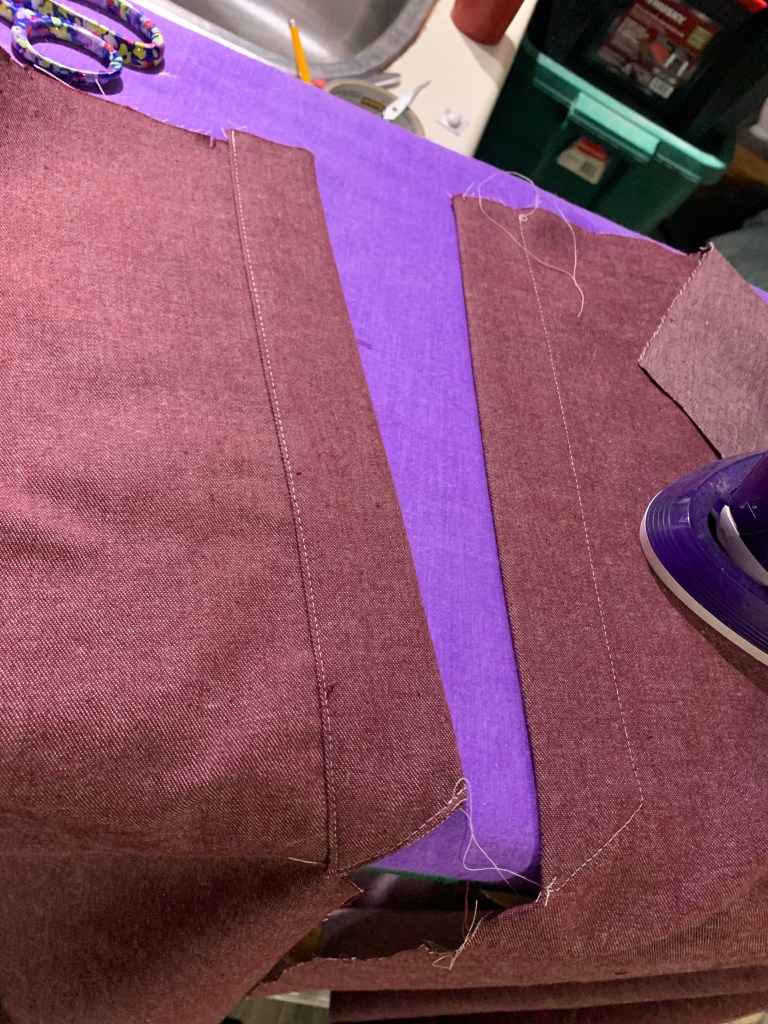
Back placket, two sides.
It took me a bit to figure out the instructions for the back placket, and I did manage to cut one of the facings wrong way round (though it’s on the inside so I didn’t bother to recut it). It isn’t hard, or even unclear, particularly, but everything is very side specific and there are some acronyms in the instructions that aren’t instantly comprehensible. Once I understood what they were getting at it was fine.
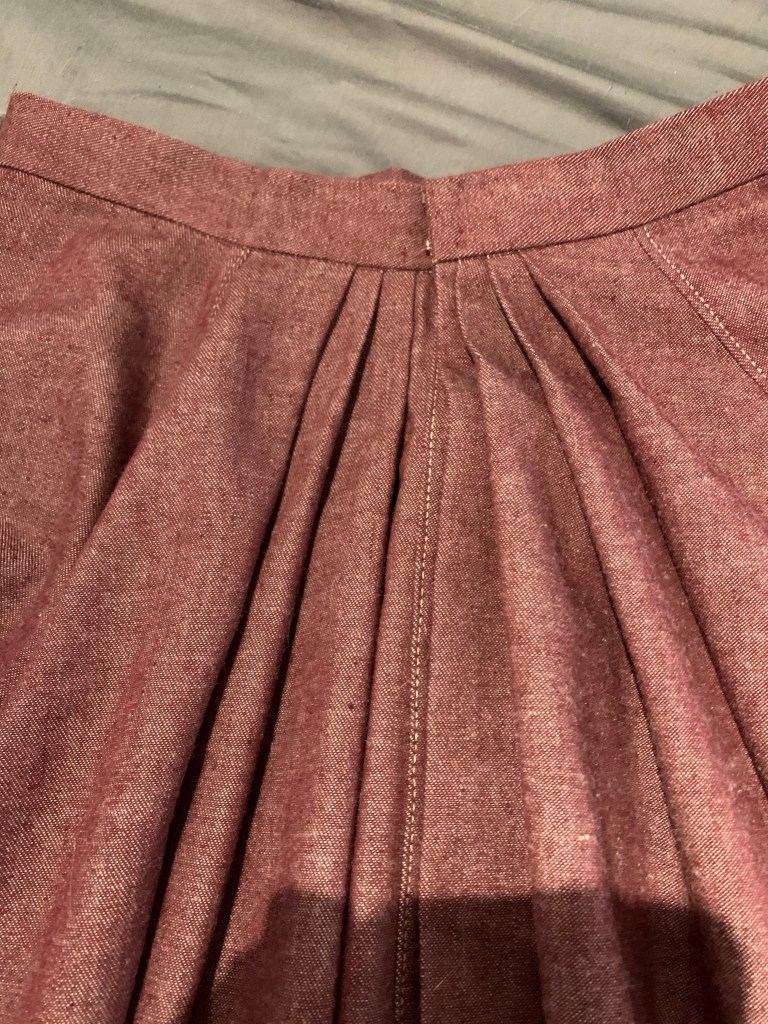
Other than that? Easy peasy. And those back pleats? To die for.
Pinned closed at not quite the right angle in this pic. Still gorgeous pleats.
I did use some very modern construction shortcuts: overlocked seams, machine blind-stitched hem, leaving the selvedge exposed on the inside of the waistband.
We were (are) in the process of moving the whole sewing room, so I didn’t have a lot of bandwidth for authentic detailing.
I also couldn’t find the heavy-duty hooks and bars I bought specifically so I would have them around next time I made a skirt like this, but hopefully these two traditional (and vintage) hook & eyes will do the job. I was waffling a bit about adding a touch of topstitching to the skirt, just as a nod to the denim look of the fabric, so when I realized that topstitching was an integral part of the placket, I just went with it, a little line along each vertical seam (except the centre back.)
To hem, I used my favourite trick (when I don’t feel the need to be historical) and cranked up the differential feed on the serger while finishing the bottom edge. This gathers in the lower edge for you, which makes folding up and easing in the hem super easy. Unfortunately (?) I was doing it on the new-to-me serger handed down from an amazing reader, and the differential feed on this machine is a lot more effective than the one on my old serger, so it wound up gathered in a bit too much, which took some massaging. But it made the machine-blind-stitched hem super easy!
One thing the pattern lacks is a pocket. I’m honestly not sure how common they were in this period, with the narrower skirts clinging over the hips, but there’s still room to tuck one under the pleats in the back, so I did. I used the same method I always do, which comes from an 1887 sewing manual—so potentially a bit dated for this skirt’s era but not unreasonable. I didn’t manage the tidiest insertion (particularly when trying to topstitch along that seam) but it’s tucked around back where I don’t have to look at it so it doesn’t bother me at all.
I did forget a couple of little touches I wanted, including the tape that is supposed to go from the top of the pocket to the waistband, and hanging loops under the waistband. So I will have to go back and add those.
I serged off about 1/4” in length and then did a 2” hem, and I’d say the length is an excellent walking length for me, though I perhaps wouldn’t mind an extra inch if I were going for a more formal historical look.
While I was intending this skirt to fit over a corset, it turns out I can also still wear it without, though it doesn’t lay quite so nice and smoothly over the hips. It does mean it’s another thing I can and will wear to work this winter, though, which has me thrilled to bits.
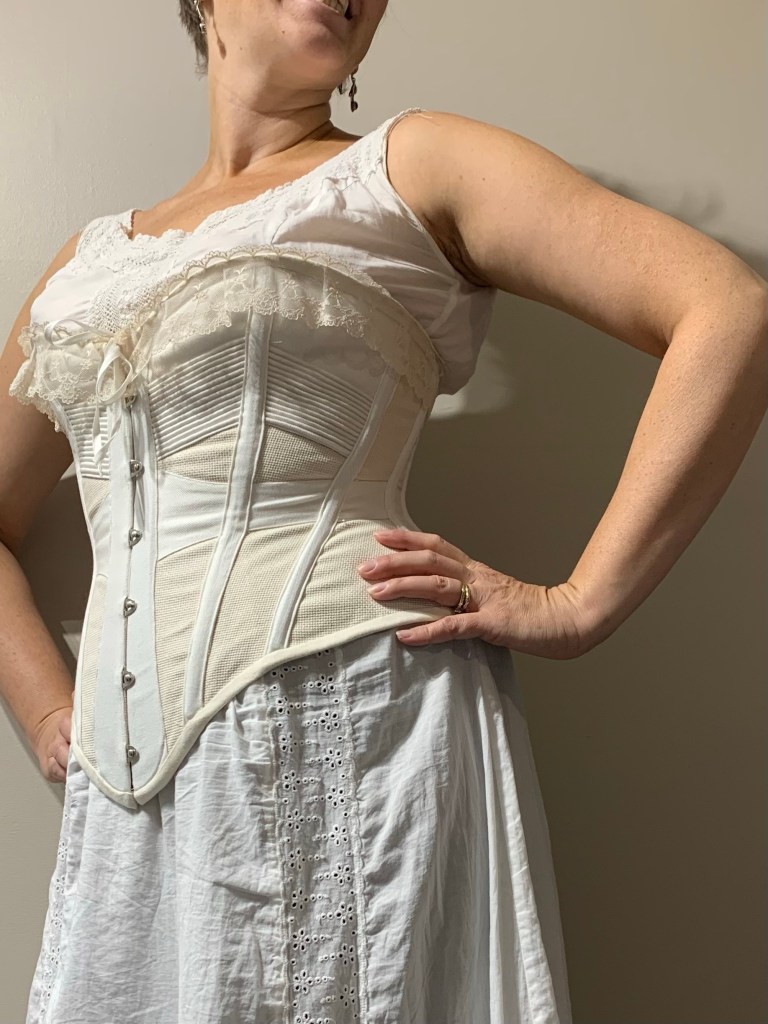
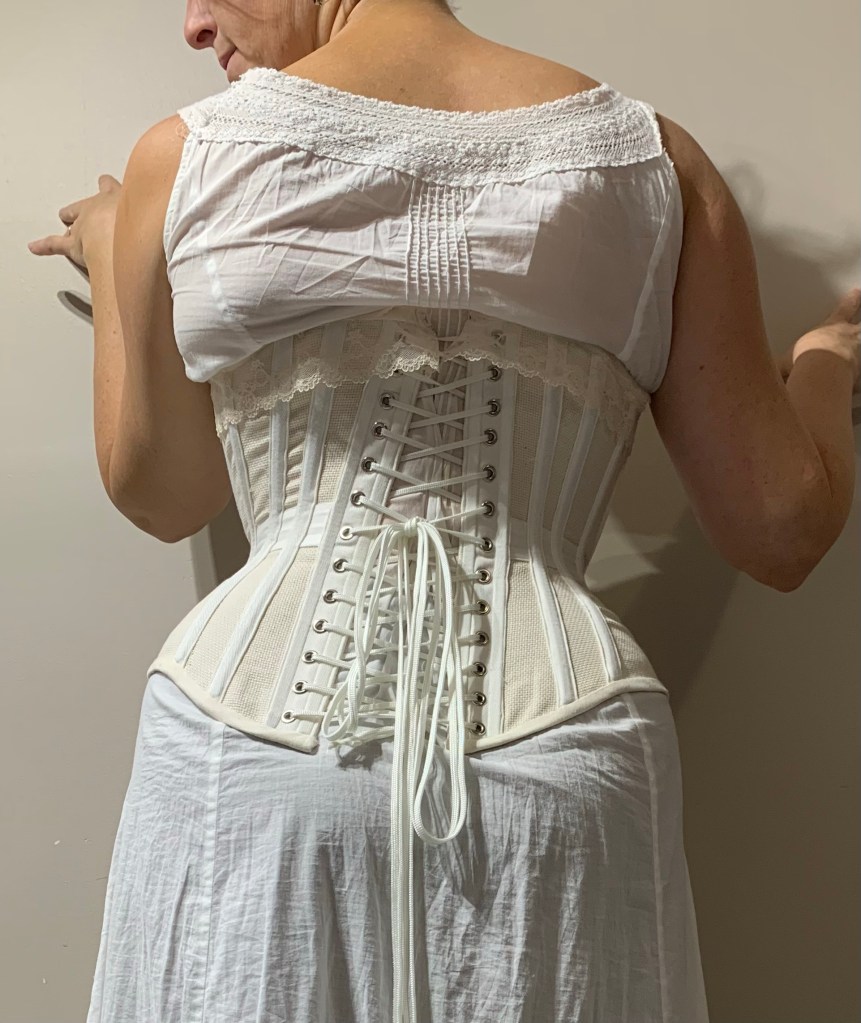
I’ve been in love with the idea of doing a summer, mesh corset for a WHILE. I picked up a chunk of Aida cloth for the exact purpose back circa 2015. And when I made my Victorian Sundress (better pictures still pending) it occurred to me that this might also be the perfect time to make a light, aerated summery corset. So I set to work… and then summer blazed past in a blur of everything-but-sewing, and here it is just in time for the weather to turn chilly.
But back to the inspiration: I swear I saw one in a corset book somewhere, but damned if I could find it when I looked recently. This one from the Victoria & Albert shows the features I was interested in, though: solid bits, mesh panels, “waist belt” piece.
Now, Aida cloth (the stuff for cross-stitching) is nowhere near as open as the mesh used in the inspiration corset, nor is it, frankly, particularly stable. It made this an interesting project, and I’m not at all sure how long-lived the results will be.
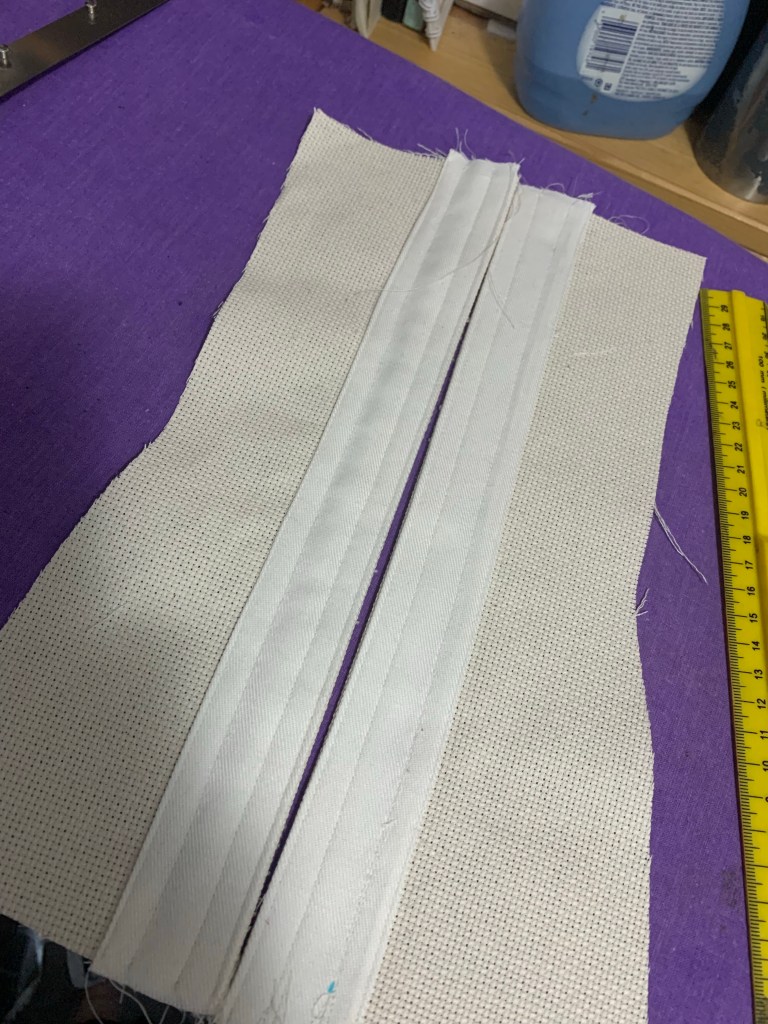
Auditioning materials
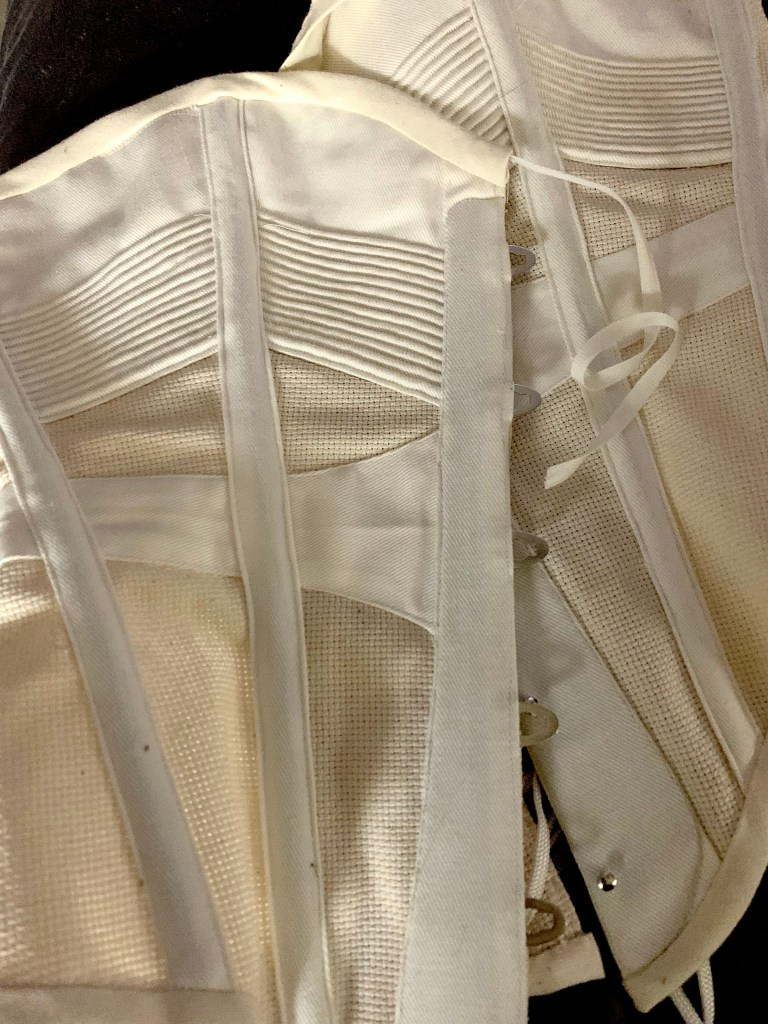
Materials: aside from the Aida cloth, I went with some fairly beefy white denim for the details. I liked the white and cream contrast. Probably coutil would’ve been better for those parts but I was hesitant to sacrifice good coutil when the main fabric was a bit dodgy. I also decided to use my last spoon busk, just to make my life harder; the inspiration piece doesn’t have a spoon busk but it is right for the time period I’m roughly going for. I used 1/4” spring steel boning but given that my boning channels are single and not the double ones I’m used to (and the rather shifty Aida cloth) I’m thinking maybe a slightly wider, more stable boning might have been preferable.
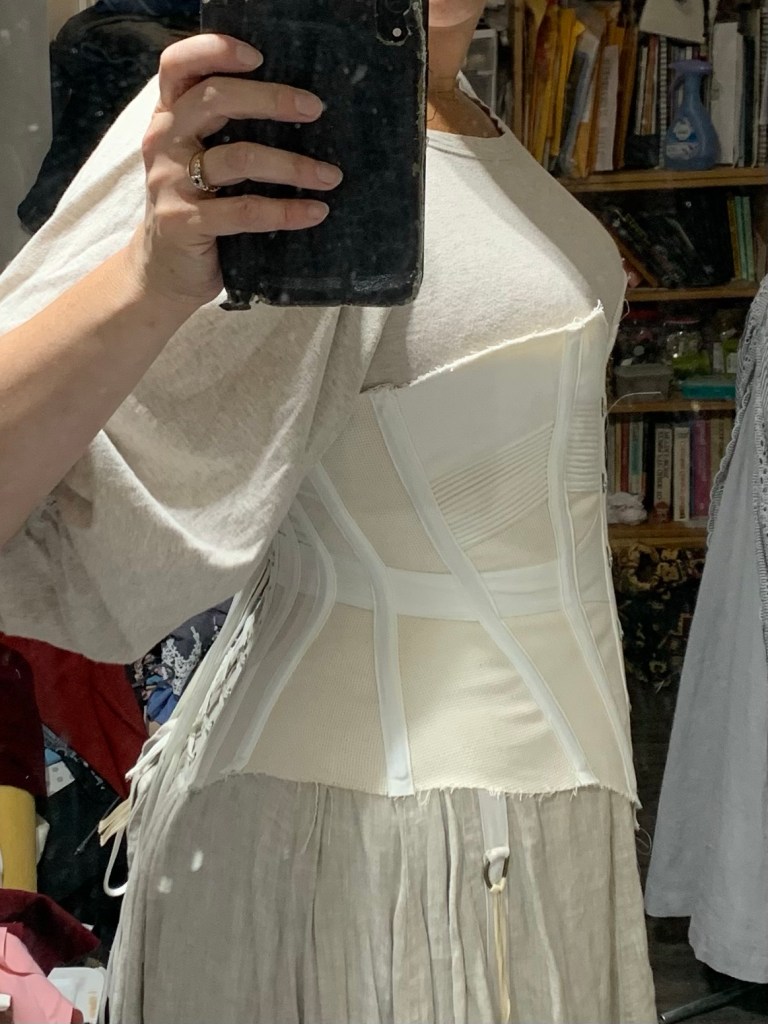
The pattern is a veritable saga of its own. The kernel, as with most of the corsets I’ve ever made, is Butterick 4254 view C, a basic six-panel corset. but over the years I’ve altered, traced off, and re-altered the pattern so much I couldn’t even tell you how much it resembles the original. I still wear my old white corset from this pattern regularly (despite it being technically far too small and, more recently, badly stained with bright blue after an incident involving a gel ice pack and a cat), and the shape is pretty much perfect for me, but I wanted to make sure that the various layers of alteration I’ve added to it over the years were reflected in the pattern I used, while re-sizing to be closer to my current measurements. This involved adding quite a bit of width to the front, and substantially re-shaping the side seam to mimic the effects of a hip gusset I had added to the white corset at some point, as well as an inch or so of height to the top. I had shortened the corset pattern initially, as I’m short waisted, and the top had always been a hair low, but somehow as my bust has gotten larger the last few years this problem got worse (even though I’m pretty sure my bust point is lower than it was). So this latest version aimed to incorporate the added width and side-seam shaping, while adding the missing height to the top.
I don’t think I’ve quite nailed my revamped pattern (and a test in real coutil, or at least ticking, is probably needed to really tell), but I do think it’s a step in the right direction. The bust height is great; the side-seam needs a little more refinement in the shape of the hip flare (which I accomplished in this piece by playing with the seam allowance), and I had to take out some excess width in the back, though I’m not sure if that’s just due to stretching. I might try to adjust the fall of the side seam above the waist forward a little; below the waist it’s perfect.
Construction
Original has solid outer on top of mesh inner at corset front/back
Overlay solid portions over mesh around busk, lacing panels, and bust area, plus shaped waist belt
Seams to the outside, covered by bone casings
Cording on bust solid parts (in hindsight the original may just have been quilted)
Waist belt added after main seams but before adding busk and lacing panel coverings
One bone per seam, in bone casing, applied to the exterior
Extra bone just beside the busk for added support (not necessary for spoon busk)
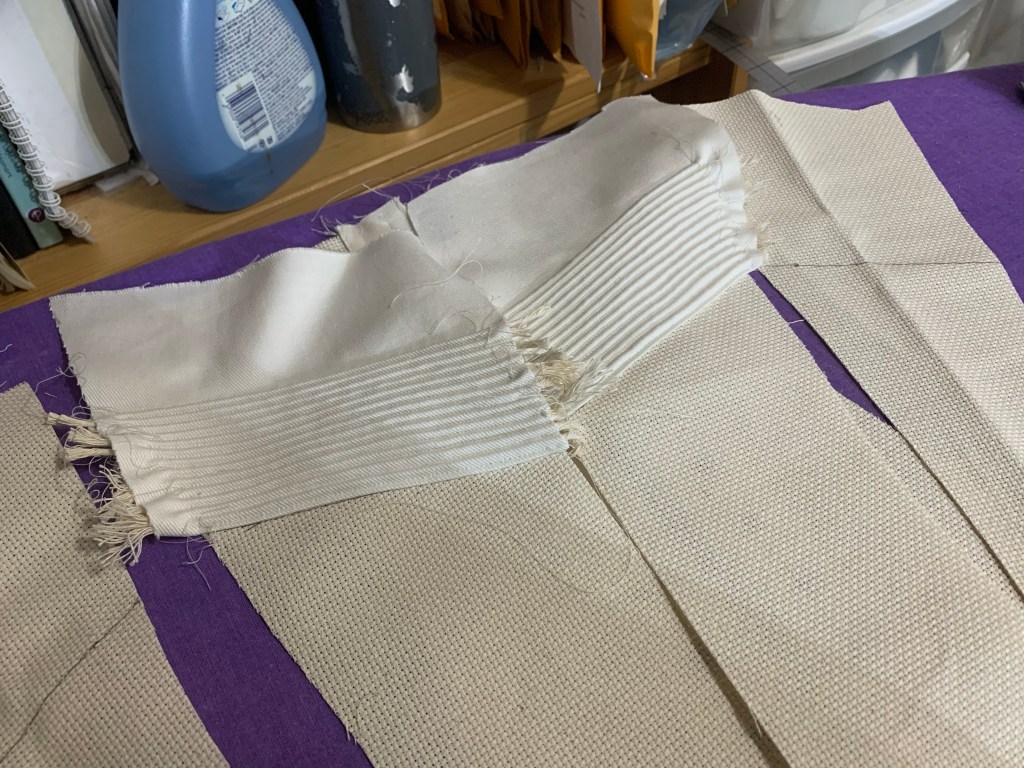
The trickiest part about this project was coming up with the order of operations. (Spoiler: I messed this up, more than once.) I added the “bust cover” patches first, with cording. Then sewed the panels together. Next I should’ve added the waist-stay panel, but instead I did the back lacing area so I could test the fit before I stitched over all those seams. It’s good I did—I had to take the back portion in significantly, and tweak the hip curve at the side seam. I’m not sure if I had added too much or if the Aida cloth just stretched; it definitely wasn’t as stable as would be ideal. But it also meant I had to unpick a portion of the back lacing panel to tuck the waist stay under it.
Cording the bust area wasn’t hard, though it was a tad tedious. I was pretty sure within the first few lines that I should’ve used a thinner cord, as my channels are VERY raised. Looking back at the inspiration piece, they may actually have just been quilted, not actually corded at all. Oh well. If I were to do it again I’d move the entire corded section higher by a good inch, as it mainly sits below my bust. But that was pretty much impossible to determine in advance.
The trickiest part of the construction was wrapping the busk covering panel close around the busk pieces, but still with enough room to edgestitch it down, without breaking a needle. Especially while getting the busk in place over the bulk of the corded patches. I used a fairly thick string for the cording and in hindsight I wish I’d used a thinner one. Those parts are VERY thick and were really hard to sew over, even for my Pfaff 360, and I’m a little worried all the trimming I had to do may have left these seams vulnerable to fraying.
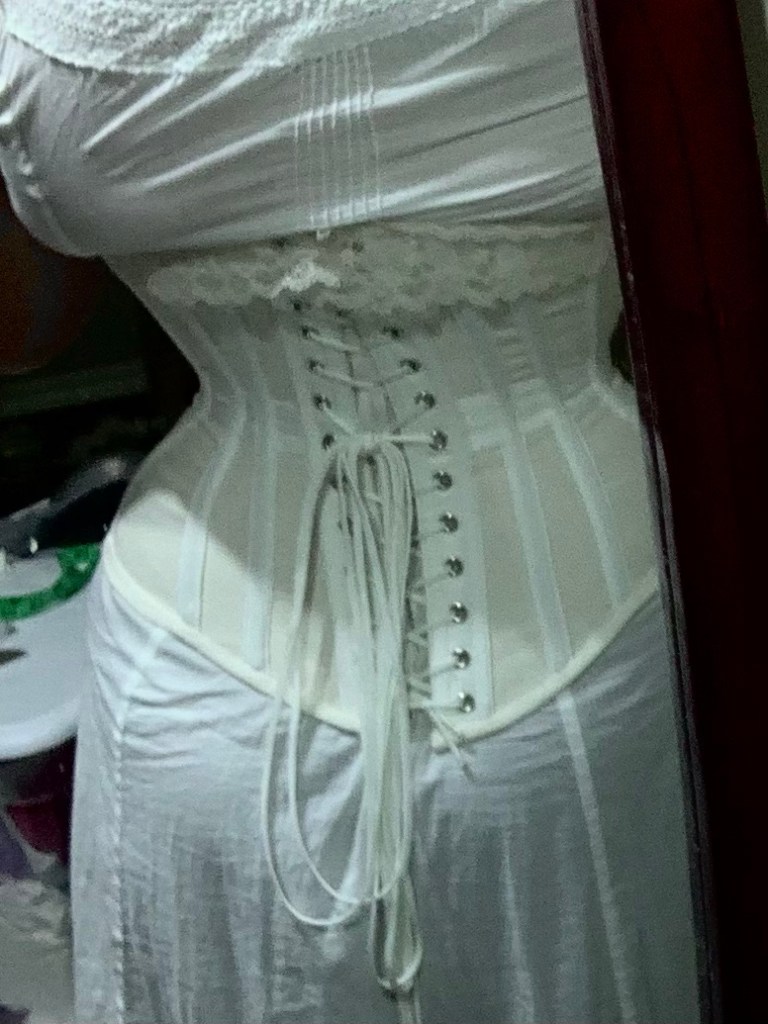
(Laced a little too tight at the upper back. More comfortable when laced more straight.)
Even with the width I removed, the corset is not really “tight”… I can lace it very nearly closed, although I wouldn’t want to wear it like that all day. If it stretches any more with wear it might still become too big. Although, I’ve also lost a little bit of weight this summer; if that reverses come winter I may be glad of a little extra room!
Maximum lacing tightness
I had planned to use the same white denim for my binding, but at the last moment decided to go for a lighter-weight cream twill, for less bulk at the edges of the corset. No regrets, although the texture of the heavier denim would’ve been nice.
I also remembered to add drawstrings in the upper binding, using more of my 1/4” stay tape. Which is possibly my favourite notion at the moment and I may need to just bite the bullet and buy it in bulk.
Anyway, I’m cautiously thrilled with the results, imperfect and experimental though they are in many ways. The shape is very much what I wanted. The bust height is so much better than previous versions. The size is a pleasant change from nearly-too-small corsets. I love the solidity of the spoon busk. How will it be as it breaks in? Don’t know. Will it self-destruct after a few hours of wearing? Could be! Will it be fun to sew? Definitely.
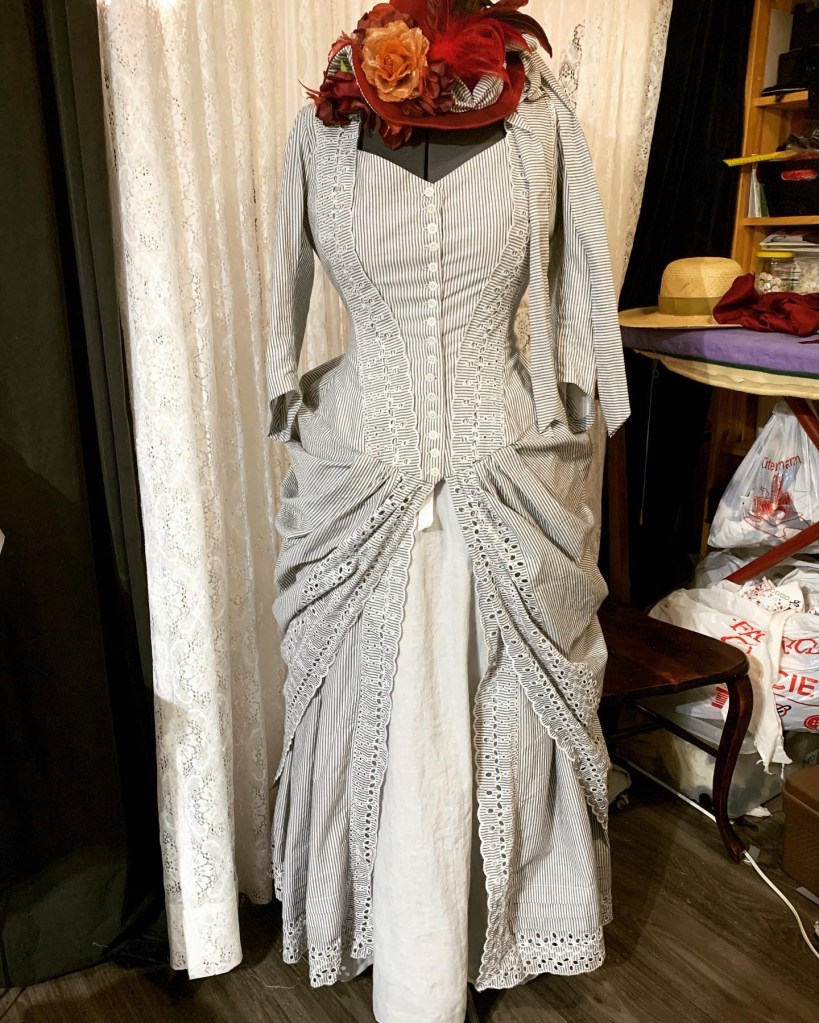
This is part 2 about my “Victorian sundress” project. I drew on two main inspirations for the skirt. One was this blog post from the Fashionable Past, about an extant and very lightweight summer dress (unlined skirt!!!), and the other was this pattern from Etsy, the “Étamine Dress.”
It’s one of those “unimproved” ones based on an original from Harper’s Bazar. No grading, no additional instructions. I didn’t particularly care about the bodice, having just muslined my own, but after a few mind-boggling attempts to work out all that layered pleating on my own based just on the illustration, I bought the pattern.
As I had feared, the pattern piece was LARGELY a rectangle. with a very slight curve at one end. So I was basically paying for the marked pleat points, and about two lines of instructions. Ah well. (Actually the terse instructions were really helpful in clarifying the dizzying array of layers on the dress in the image, even if I wasn’t likely to have enough fabric for all of them. )
The Étamine pattern skirt, as written, contains four layers. From the inside out:
The foundation skirt,
A “tablier front” pleated just across the front, visible in the slit between all the other layers,
The “straight breadths”, a straight, pleated layer (probably meant to be applied to the foundation skirt?), and then finally
The swagged outer layer.
The pattern actually includes a piece only for the final, outer layer—which was the main reason I bought the pattern, and which, it turns out, is also basically a rectangle, curving only very slightly on the top front. (And in hindsight that curve probably only exists to accommodate attaching this layer to the bodice, as per the instructions, which wasn’t my plan until I realized that)
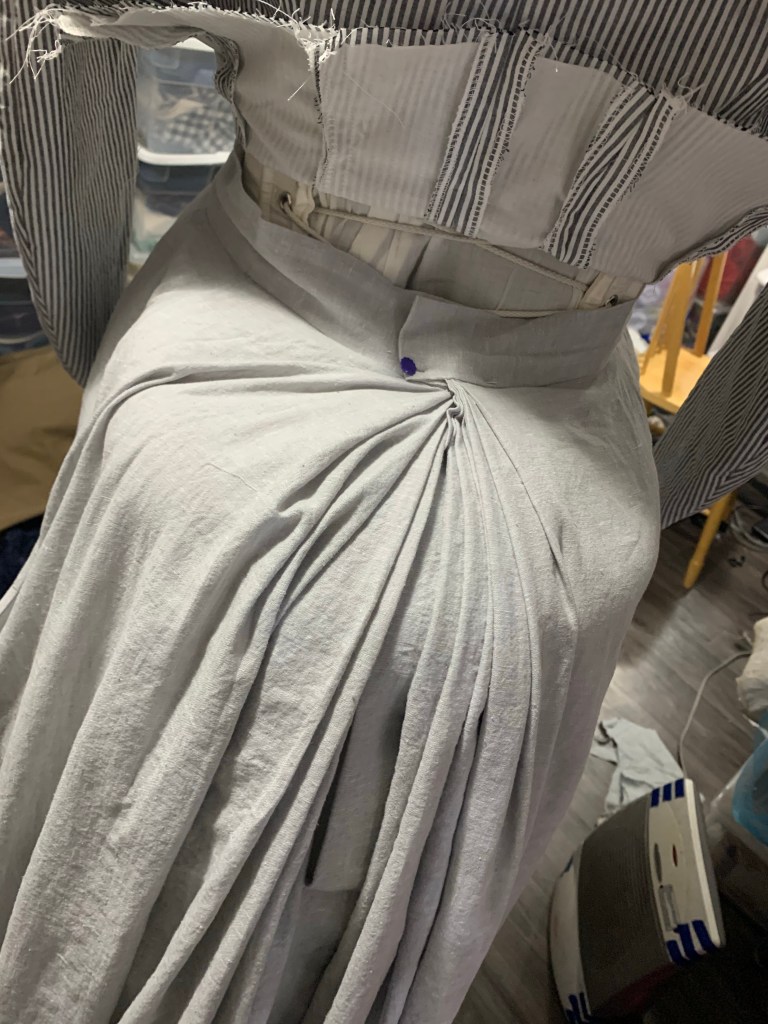
But I’m getting ahead of myself. First I needed to construct the foundation skirt.
Based on both my desire for a maximally light weight dress and this blog post from The Fashionable Past about recreating an extant, and remarkably lightweight, dress in her possession, I decided to throw propriety to the wind and make an unlined foundation skirt. The complete invisibility of the foundation skirt in the Etamine dress illustration did little to dissuade me from this course, and actually, if the “straight breadths” and “tablier front” layers were mounted to the skirt as I suspect the pattern intended, it might very well have been a single layer foundation skirt that was intended.
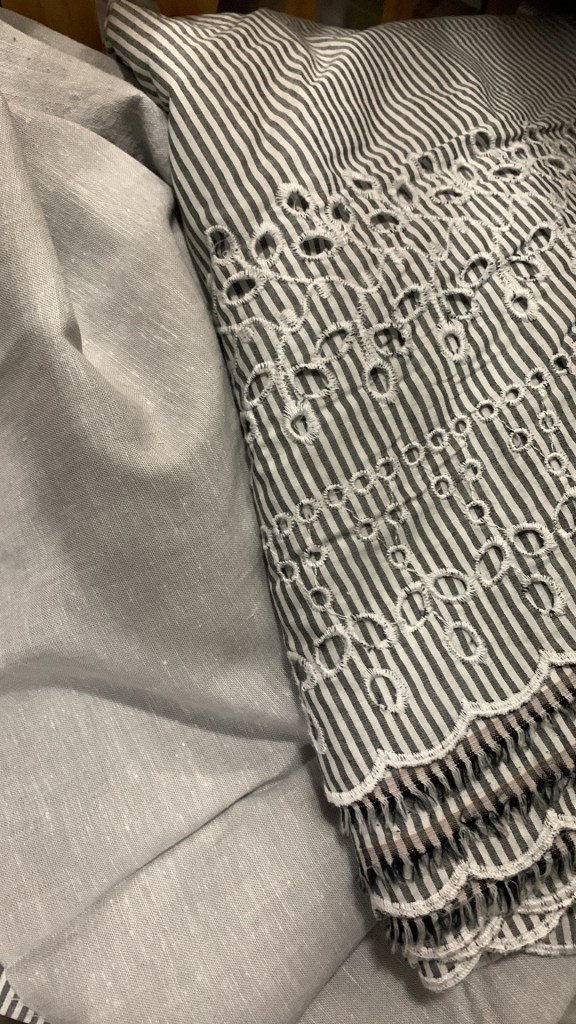
My fabric was about three metres of this grey cotton-linen blend, a long-stashed remnant from this Vintage Vogue dress. The colour coordinated well with my grey striped border embroidery, although if it proved invisible in the final product it wouldn’t matter. It’s not a particularly historical-looking fabric, but it is yummy.
I constructed the foundation skirt in a low-waste gored manner similar to this skirt draft from my 1882 book and this 1903 petticoat draft, although slightly modified to take advantage of my wide modern fabric. I cut both front and side gores from a single length, and then used a further full width to make my back panels. In hindsight the front gore is too flared for this skirt style, making the seams run somewhat diagonally down the skirt. I should’ve cut it narrower at the hem edge, and then had a bit more fullness to pleat in to the back waist. But, see the part about how it’s basically going to be invisible, I’m not too bothered.
For the closure, I made a pleat-placket in the middle of the back breadth, using the same slash method I did for my first petticoat, which according to past Tanit came from Plain Sewing and Amateur Dressmaking (published in 1887). This part was entirely hand sewn. It’s completely covered in the final dress, but somehow was just fun to do.
The Étamine pattern, by the way, barely even mentions the foundation skirt layer in its terse instructions, except to say it has a four-inch box pleating of the fashion fabric at the hem. They were obviously assuming their reader either had a basic foundation skirt pattern they liked, or would just draft their own like I did.
Because I like the look, I decided to try out stacked pleating at the centre back, covering my placket pleat. I didn’t fuss over it too much. The single layer of fabric definitely made this a less bulky feature than it might have been.
My hem is just a very basic machine hem, again based on the Fashionable Past example, although a little narrower.
I also made a pocket, again very much following the same method I’ve used in the past. However, it somehow turned out too small. So I may need to open up the bottom of it and patch on some more. I also initially sewed it in upside down, because you’re never too experienced to make mistakes.
Pocket fail. The pointy end should go up towards the waistband.
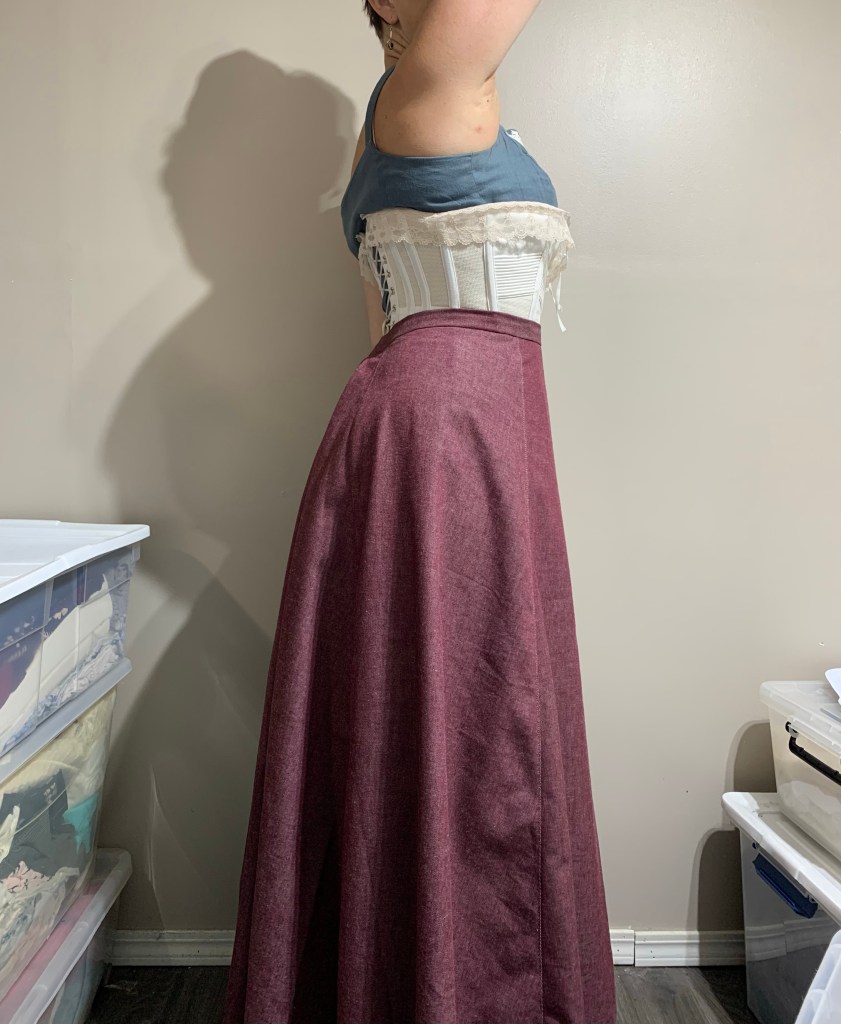
Now, the skirt came out relatively short. This is partly because of fabric limitations and partly because all my Victorian skirts ever have been too long, at least for day wear. I did not want that for this skirt—but I definitely needed to shorten my petticoats.
(This one is still too long though)
I did this by the very inelegant method of adding a 1” tuck just above the bottom ruffles. Because the front and sides are gored (i.e., wider at the bottom than the top) this means that the underside of the tuck needs to be eased to fit. The period manuals talk about basting a gathering stitch along that line and easing it in. I just pressed and hoped. It mostly worked out better than expected, though there are one or two bad spots.
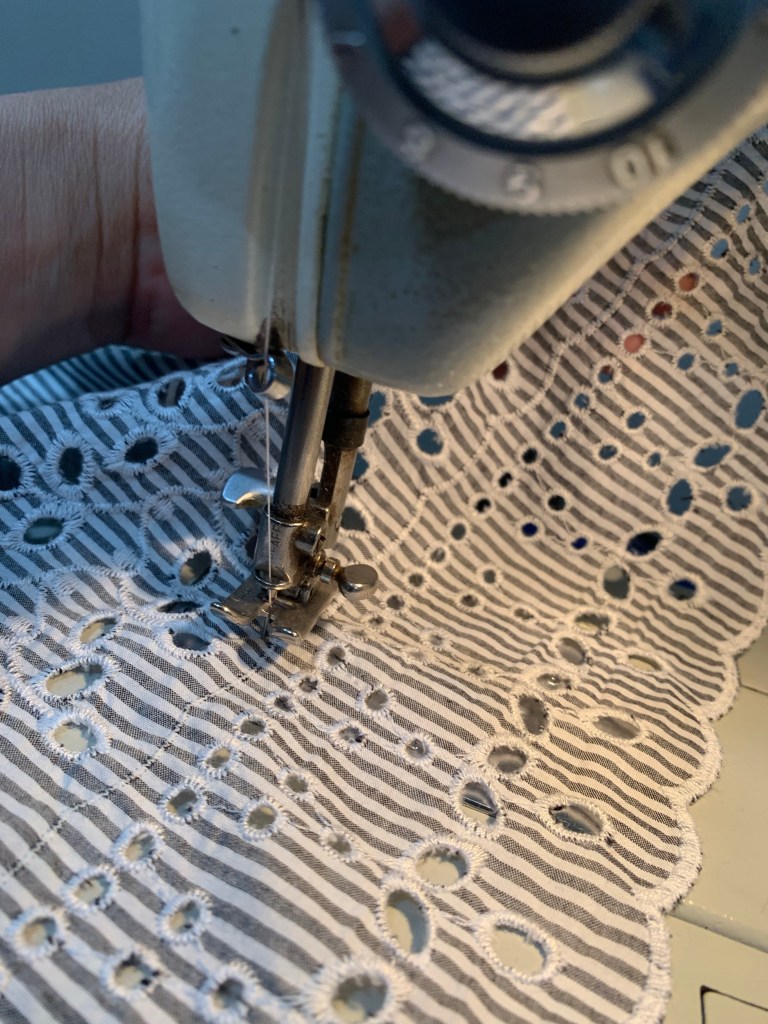
With considerable fussing and measuring, I eventually determined that I did have enough of the border embroidery to do at least the upper two layers of overskirt, although not the tablier front layer. I was content to have my foundation skirt show a tiny bit though. I had enough extra eyelet trim from the making of the bodice to add a vertical piece to the centre fronts of the topmost layer.
There was, however, nothing left for the longer fronts of the middle layer, what the pattern termed “straight breadths.” Never mind any excess for trimming the bodice. I considered for a long, painful while, but I knew what I had to do: make more edging.
You see, as it happened the existing border embroidery was arranged kind of in two rows with a small space between them. This made it possible, with enough patience, to add a scalloped zig-zag in the space between that I could then cut along, instantly doubling the amount of eyelet edge I had available.
I thought the best machine I had for the task would be the Pfaff 360, as its embroidery stitches are customizable to length. However, it has a dodgy tension and hadn’t been out of the carrying case in, um, years.
Eventually, I managed to nerve myself up, pull the Pfaff out, and get to work.
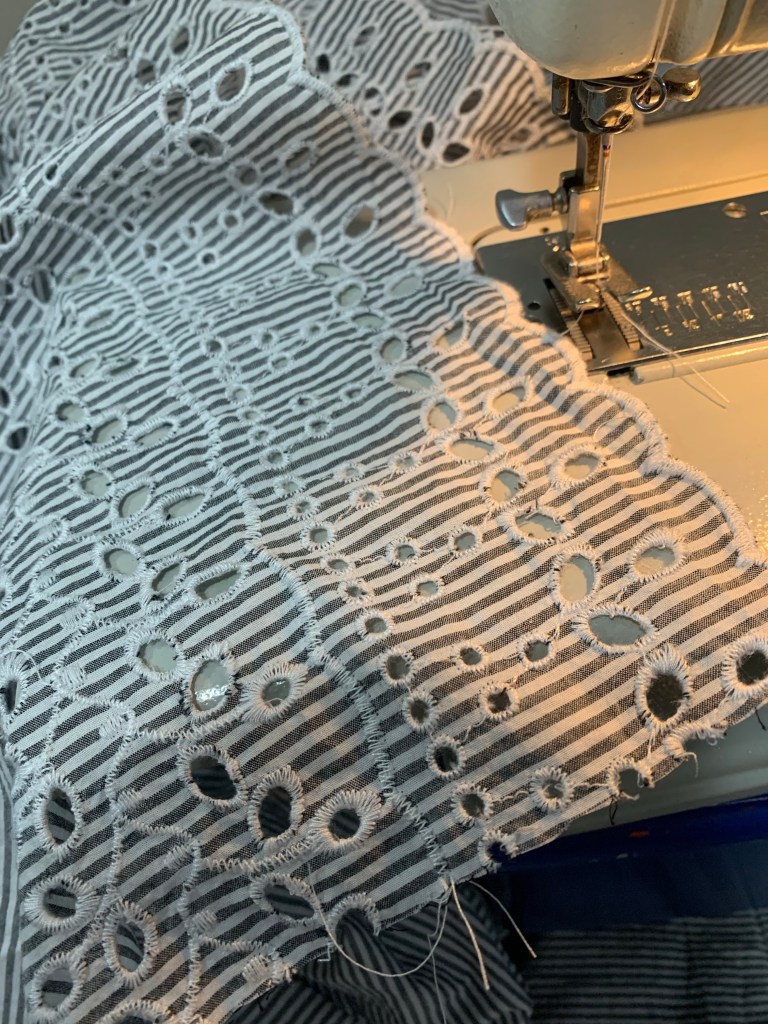
The tension was actually being fairly well behaved, but the embroidery stitches didn’t seem to be engaging, or at least only very randomly. I eventually traced the issue to a series of little levers under the main cover of the machine that are supposed to drop down into slots depending on which stitch option is selected, which were not dropping without manual assistance. So, eventually, I was able to get it to do a scallop the length that I wanted—but there didn’t seem to be a width adjustment available for the scallop setting, and I could only make it do a very narrow zig-zag. I think this is a limitation of the machine, since it has a fairly narrow total stitch width; in the end I went over the automatic scallop with a wider zig-zag freehand, and aside from the tension being a little too low (I had turned it down as that tends to work best for machine embroidery, and it looked great on top and didn’t pucker up the fabric, but it is quite loopy on the back side.) It’s not indistinguishable from the original, but it won’t be noticeable, and I desperately needed that extra length of edging.
I think cutting the strip off the bottom may actually have taken longer than embroidering it. But eventually it was done. Then I remembered I also needed to add three 1” tucks to the “flat breadths” panel before I pieced on the edging at the short ends.
But eventually I got it done. It was easier than the upper layer since the mitered corner was narrower. The removed edging isn’t the same as the remaining piece, but at least their width is similar.
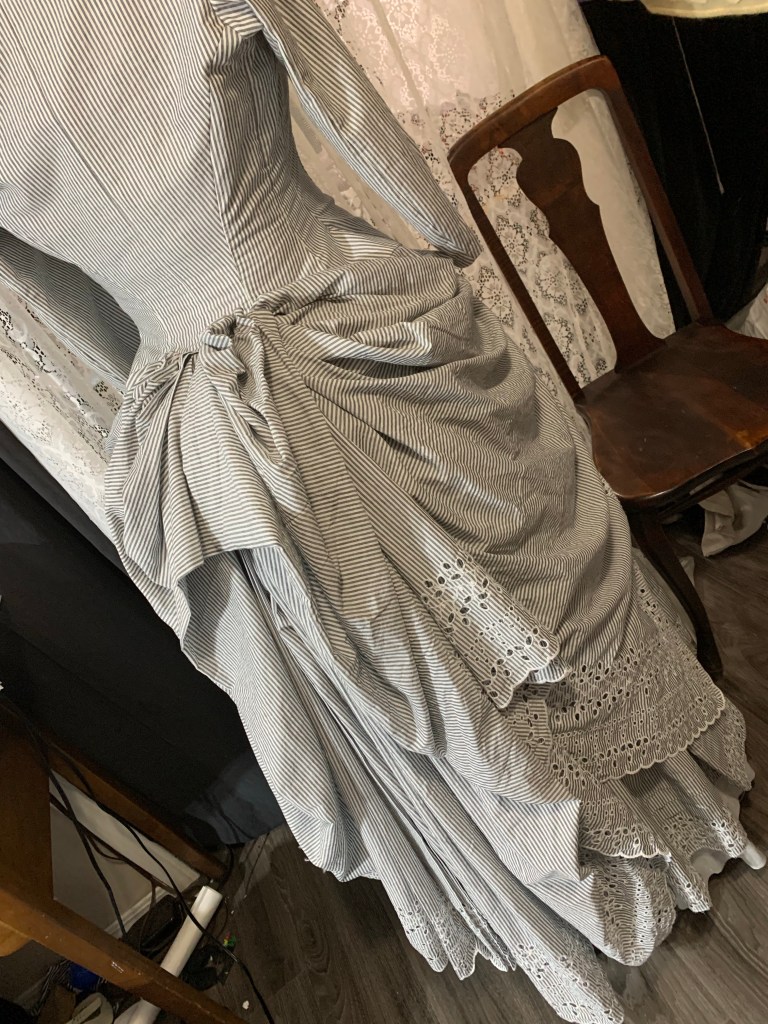
Based on the terse instructions, I actually think the “flat breadths” layer was supposed to be attached directly to the foundation skirt, attaching partway down, even though the illustration doesn’t exactly fit with this idea. But I didn’t want to do it that way, mainly because I feel like I might want to wear the foundation skirt alone for other things. As a result my “straight breadths” are pleated into a twill tape waistband and hike up a bit in the back. If I really wanted I could probably come up with a bit of an upper skirt to mount them to, but at the moment I’m not sure I’ll bother.
At last I could truly play with the upper layer. I was grateful to the pattern for at least clarifying the rough plan for the pleating; I basically used its markers at the front and back edges, and then added some fudging in between to get it to both fit and look how I wanted. I originally tried underlining the fabric with a craft netting to give it more volume, but my smooth fabric didn’t cling to the netting at all so while the netting had big, smooth folds, the fabric just slid over the top. So my folds definitely aren’t as full and thick as in the illustration. (Apparently étamine was a lightweight cotton, loosely-woven, almost mesh like fabric… so I’m not sure how much body it would have had either.) But I think they will do, even if they aren’t quite like what was illustrated.
Arranging the pleats and folds of the upper layer was definitely the longest and most nerve wracking part of this project. Once done, I hand-basted them to the bodice and then carefully hand-stitched from the right side, and then catch-stitched down the seam allowances on the inside. This took forever as I kept having to tackle it in tiny ten minute intervals, but did eventually, and it does make the intricate upper layer very simple to take on and off.
And that’s about that! I’d like to add a big red bow on top of the bustle, and I might just have enough long skinny scraps to add the 4” ruffle the pattern describes to the foundation skirt, if I want to. I’m contemplating some hooks and eyes at the bottom front of the bodice, to keep the various layers all together in the front, since that’s one of the things I like about the original illustration. But on the whole this has been a much bigger project than I had originally envisioned, so I’m happy just to get to wearable!
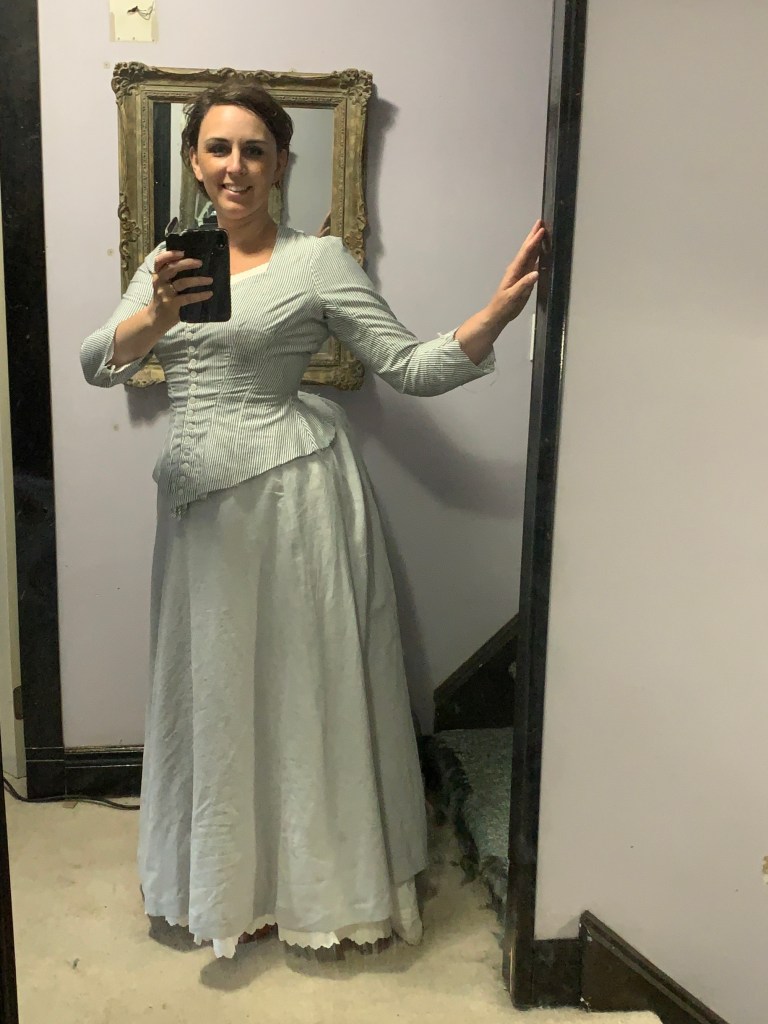
So Victorian Sewing Circle is carrying on through the summer this year. Hooray! Except. The one Victorian outfit I have at the moment is, um, fairly heavy wool. This is not going to be fun come July. (Hopefully it’s still July when you’re reading this. )
So, I decided to pull the trigger on a project I’ve been halfway planning for a long time. What I’ve mentally dubbed a “Victorian sundress”
I had picked up this light cotton border embroidery on clearance ages ago when I was working at Fabricland. I actually got several different colours, though previously I have only used a tiny bit of the red to make these dresses for the twins. The most important thing about it though, was that there was something like nine metres of the grey colourway alone. For a bit of interest (and to stretch my fabric as I only had about 9m of the stripe) I decided to pair it with this grey cotton-linen blend, not historically accurate but yummy nonetheless, for the foundation skirt.
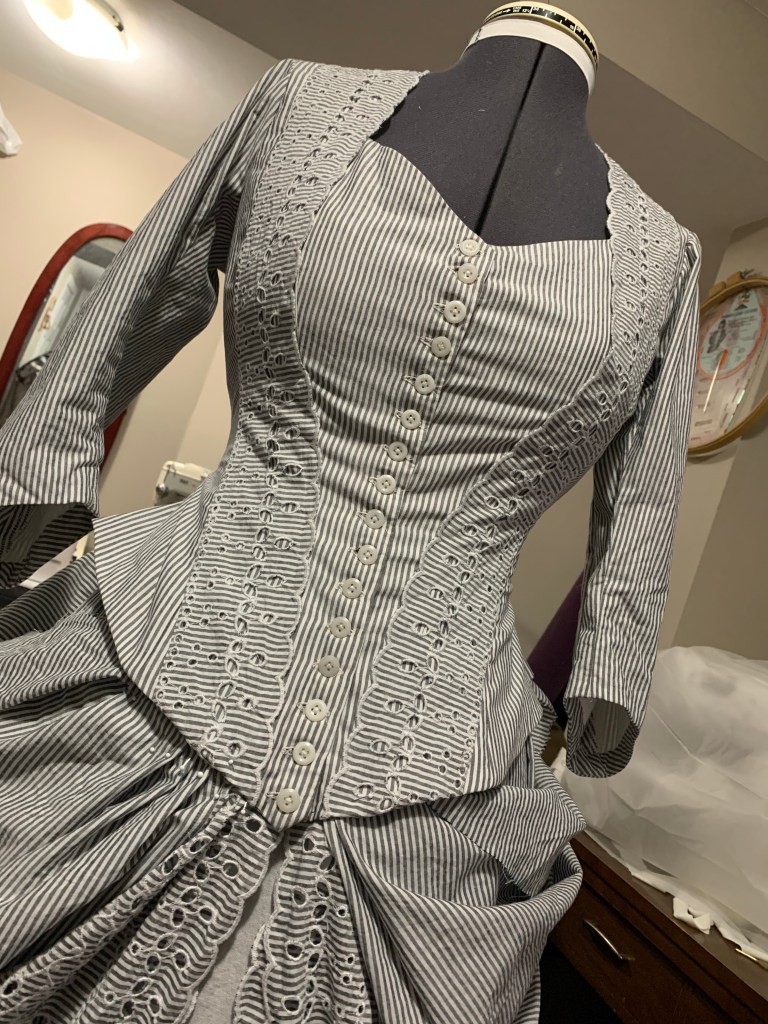
I started with the bodice; the skirt will get its own post.
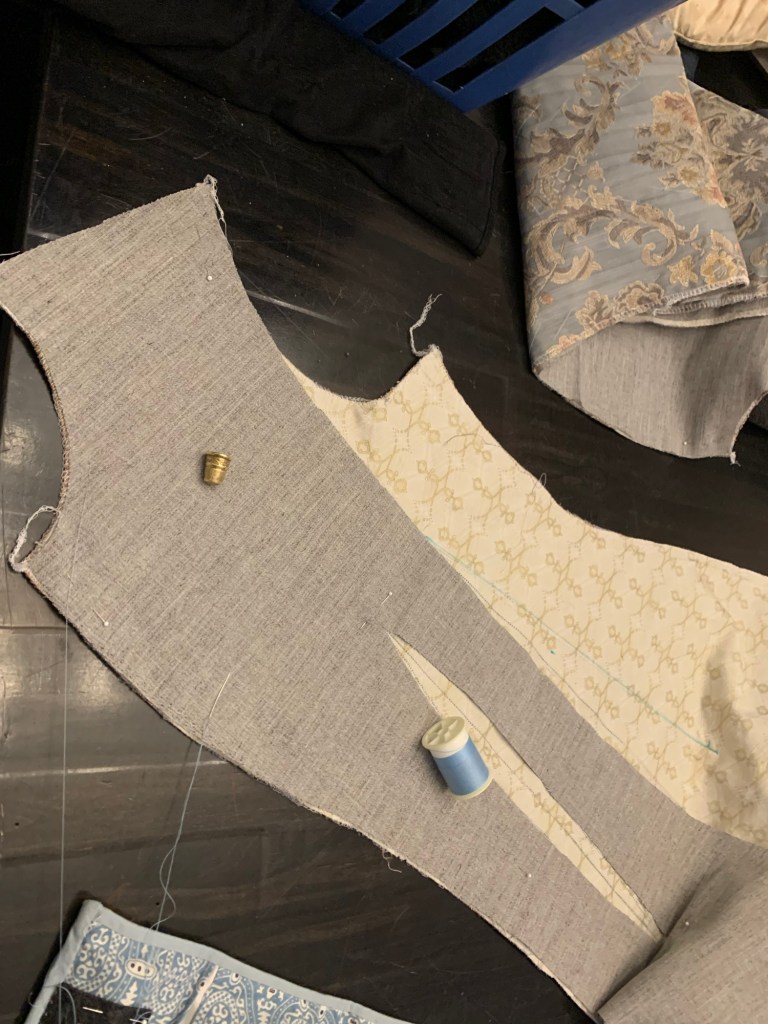
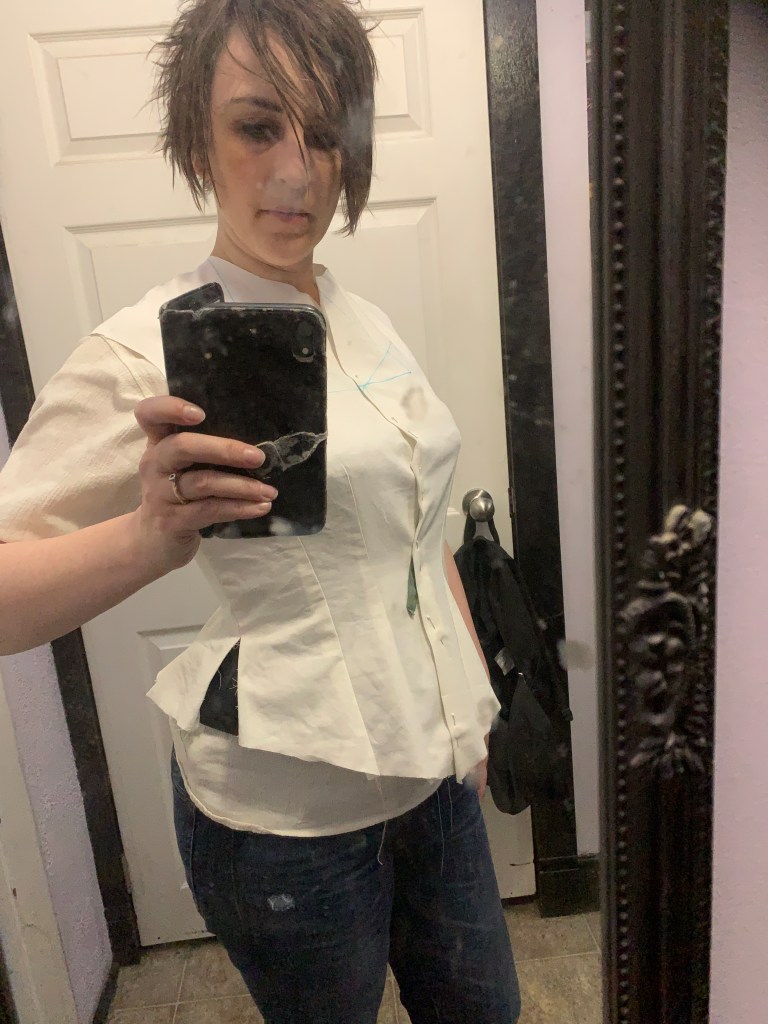
It’s the same pattern I’ve used before, TV 462 although since I’m a very different size than I was in 2016 when I made it the first time, I was basically starting all over again. Which is ok, since I didn’t exactly nail it the first time. I had actually muslined the new size back in the winter. Truly Victorian uses a fairly complicated system of measuring for their bodices where you choose front, back, and sleeve sizes separately and then adjust to make it work. My bust and back were only one size different, so in the end I decided I would make everything the (larger) back size and if I had extra bust room, just pad it out. I still had to narrow the shoulders pretty massively, and I did a lot of vertical length adjustments since these patterns seem to skew long and I have a fairly short torso. I also did my usual preemptive swayback and square shoulder adjustments. When I tried on the muslin I determined that the front was actually pretty darn good, as was the back width across the shoulder area, but there was a lot of extra room in the back waist. I ended up taking 1” out of the side-back piece to get the shape approximately right, which improved the back fit immensely.
Also added width at the side seam below waist. May have overdone it.
One thing I forgot to consider, since there was a bit of a gap between muslining and cutting out my fashion fabric, was the shape of the back hem of my bodice. My pattern is for a tailed bodice, with a non-tailed lining, and to save fabric I had just muslined the lining pieces. At some point between muslin and final fabric, I’d decided on a different overskirt style that didn’t work with a tailed bodice, so I just went ahead and cut the final fabric with the same hem as the lining pieces, without thinking too much about the final shape it would make. If I had it to do over, I would try to draft a slightly longer, more elegant V point in the back. It’s a kind of short, meh shape on its own.
I went for the “closures first” fitting strategy, finishing the front of my bodice with bias tape and then adding the (machine) buttonholes and buttons. This let me try it on without pinning, which makes it a bit easier to fit. I then refined the fit a little, reshaping the side seams (taking in the waist 1/4” on each side and letting out the hips an equal amount.) and also wound up deepening the centremost front darts by about 1/4”. Not unexpected given the size I chose.
I was quite silly about how I positioned the boning in the front darts this time, putting it close to the fold of the dart where it flips around rather than against the stitched edge. But it doesn’t really show in the finished garment.
I added a waist stay, of course, using some of a wide red twill tape I got as a hand-me-down last year. It’s perfect for the job. I was a little worried about show-through on my light fabrics, but it seems to be fine.
I selected the “dinner bodice” neckline again because it’s both my favourite and maybe more cool than a high neck. However, I think I should probably make a high-necked little dickey to go under it, since this is meant to be a day dress.
Once the basic construction was done, it was time to consider embellishments. I had a (very limited) amount of eyelet edging left over from the skirt draperies to contribute to the bodice decoration. After some playing around and an abortive attempt at adding it to the ends of the sleeves, I settled on a strip going down each side of the bodice, coming to a V at the front bottom point. This kind of decorative feature is SUPER common in 1880s illustrations, although usually creating a faux-vest kind of look. I don’t think my variation is beyond reason though. I hand-stitched the trim in place, along the whole length at the straight edge, and tacked down between each scallop on the inner edge. I was a little anxious about getting such a wide flat piece smooth on the rather curvy front of the bodice, but it worked out ok. Did I mention I hand-basted it in place? I did more hand-basting on this project than I’ve done in YEARS.
I had one last tiny bit of trim (the piece I started to attach to the sleeve but didn’t like) so I made that into a small standing collar at the back of the neck. I think it’s cute, but I should probably add a little bit of wire to support the ends.
It turned out that the top layer of the skirt is actually sewn directly to the bodice, creating what the pattern terms a polonaise. I hadn’t planned on doing it that way, but I do like the simplicity of wearing that it gives the resulting dress. There is definitely some extra width in the hips, though I think more in the back—I like where the side-seam falls. I’m unlikely to take it in at this late stage, what with the upper layer of the skirt draperies attached directly to the bodice; I might add some padding to the area to smooth it out.
I also want to add a hint of red, to coordinate more with the hat, which will have a post of its own, too… but for now, at least, it’s wearable!
It’s time. I’ve avoided it for almost a decade of costuming now: Victorian hats.
No Victorian lady’s outfit is complete without a hat. If you left the house, you wore a hat (and gloves, but, one problem at a time). The illusion can never be complete without it. Since I don’t have the right hair anyway, and my illusion was more of an impression, it didn’t seem too urgent. But I’ve dawdled long enough.
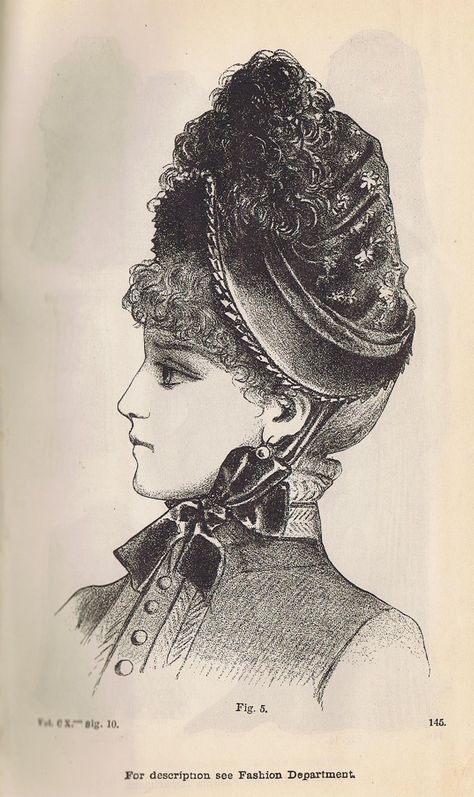
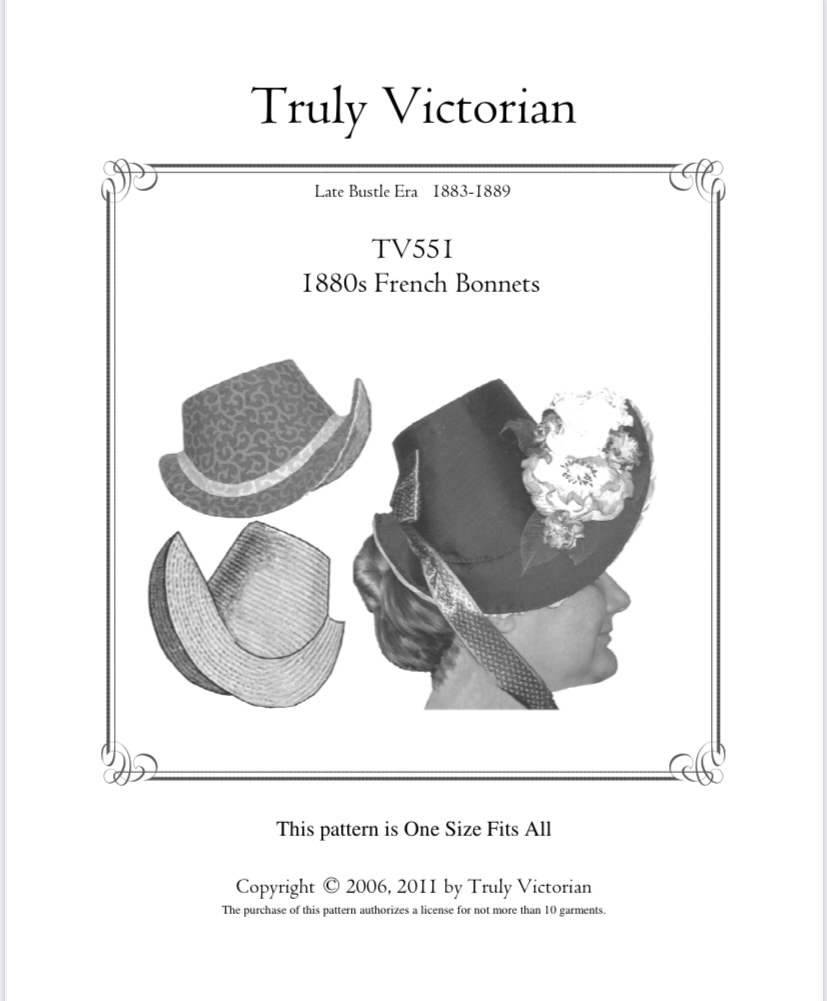
There seem to have been a wide variety of women’s hat-styles in the 1880s, from close-fitting frames to “flowerpot” hats to wide brims approaching, though not reaching, Edwardian levels. But in looking for something SPECIFICALLY 1880s (maybe not the wisest choice), you can’t really beat the distinctiveness of the weird peaked-brim style called a “French Bonnet”. (Or “Conquistador hat”)
I spent a bit of time messing around with a simpler, almost fedora, shape, before deciding to bite the bullet and purchase the Truly Victorian pattern. It was nice to have the instructions on construction to follow, since I’ve never done anything even remotely like this before.
I was hoping for some pointers or suggestions on trimming, the real wild card of hattery, but no such luck.
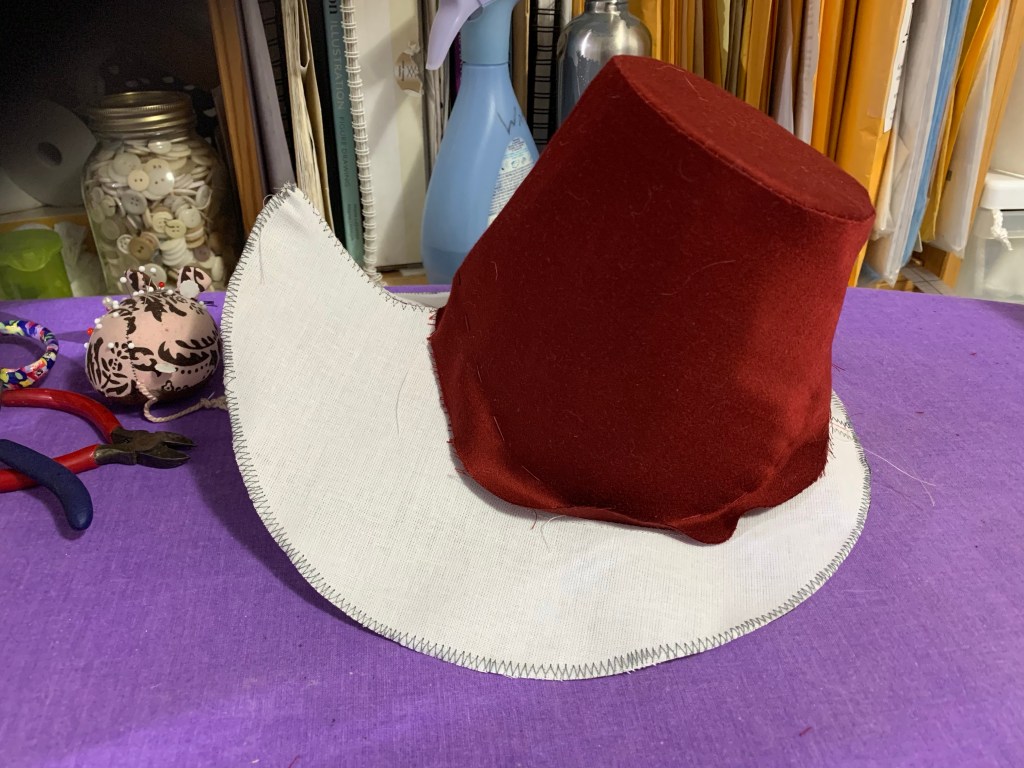
The hat is cut and sewn using buckram and wire, which shouldn’t have posed much of a problem as I have both in stash. Unfortunately I couldn’t find either. Syo was good enough to pick me up some (more) buckram, and I wound up harvesting the wire I had used in the twins’ mushroom capes last year. (It didn’t work super well there and I think plastic boning would probably be a better solution in their capes anyway). The new buckram from Fabricland was pretty floppy so I used a double layer, and I did take advantage of that to sandwich the vertical wires in the crown between the two layers. Otherwise I followed the instructions pretty closely, or regretted when I didn’t. (For example I somehow neglected to have a wire at the CB seam, and there is a bit of an indent in the back portion of the crown because of this. Oops.)
Other than attaching most of the wire by machine, the whole thing is almost entirely hand-sewn. I don’t mind a bit of hand-sewing but i definitely didn’t love trying to hand-sew so many thin layers on a rigid frame. Possibly a curved needle would’ve been helpful?
I tried out layering some quilt batting underneath the top of the crown and I like how it smoothed the look of the hat. The wire frame kind of leaves dints between the wires and this filled that in. However, I also wanted a light summer-weight bonnet, so I didn’t do any more. But if I try this again I will definitely consider it, or at least a flannel underlining or something.
Also, sewing the butted seam at the front of the brim to create the peak was a bit of a trip, and I’m glad I had sewn butted seams before as it’s a completely counterintuitive action.
For the brim, I departed from the instructions slightly and used a straight strip of fabric to line the underside, then pleated it towards the middle, because I’ve always liked this look in bonnets. It didn’t take quite as much pleating as expected.
I was a little stumped about how to put a band on the hat (necessary to cover the hand-stitching that attaches the brim to the crown, at least when following the instructions as written.) The sides of the crown curve down dramatically, making even a flexible bias band impractical. There seemed to be two options—either cutting a shaped band using the same pattern piece as the crown, or using a soft, draped piece of fabric like a sash.
Early test of trimmings. Somehow I didn’t get any pics of just the “hat sash”
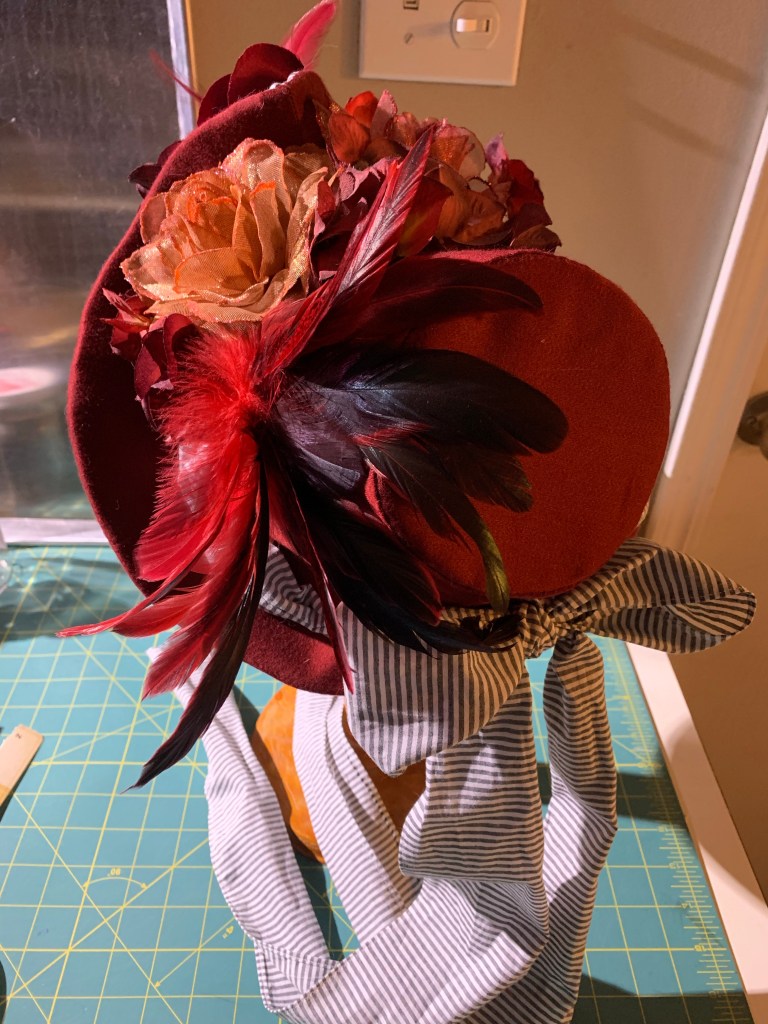
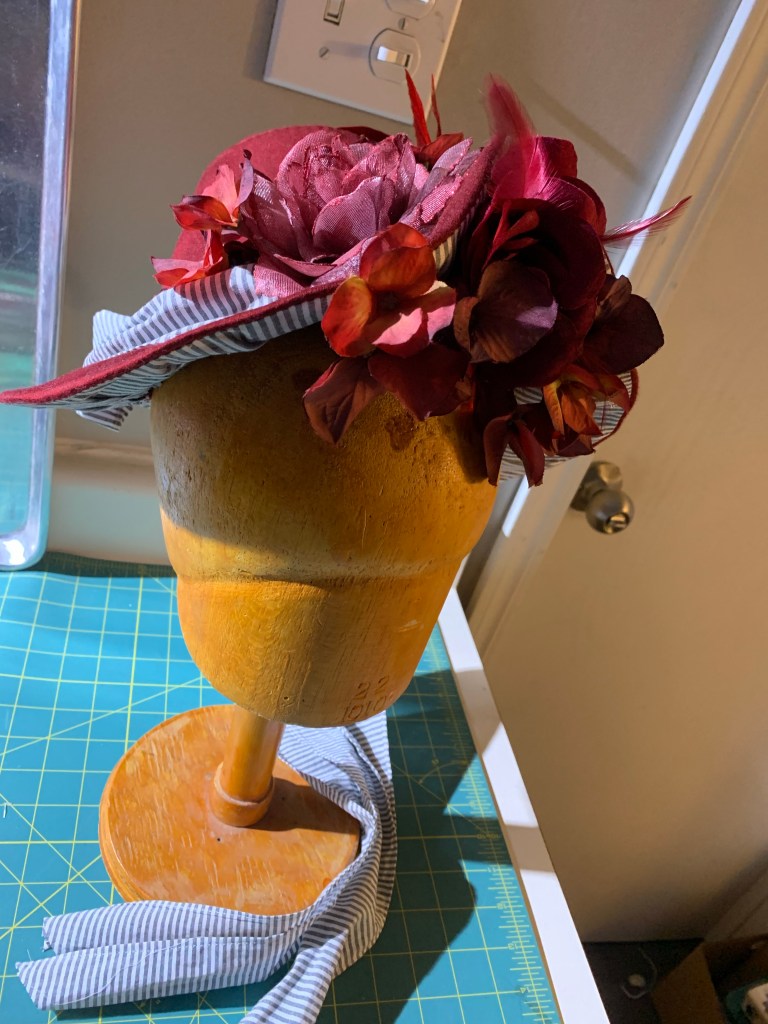
I went with the latter, which seems to be what most of the internet has opted for, and I do like the soft, whimsical look for a soft, whimsical bonnet. Somehow, despite the fact that the hat sat around with just the sash on for over a week, I didn’t take any pictures of that stage.
Needs curly bangs.
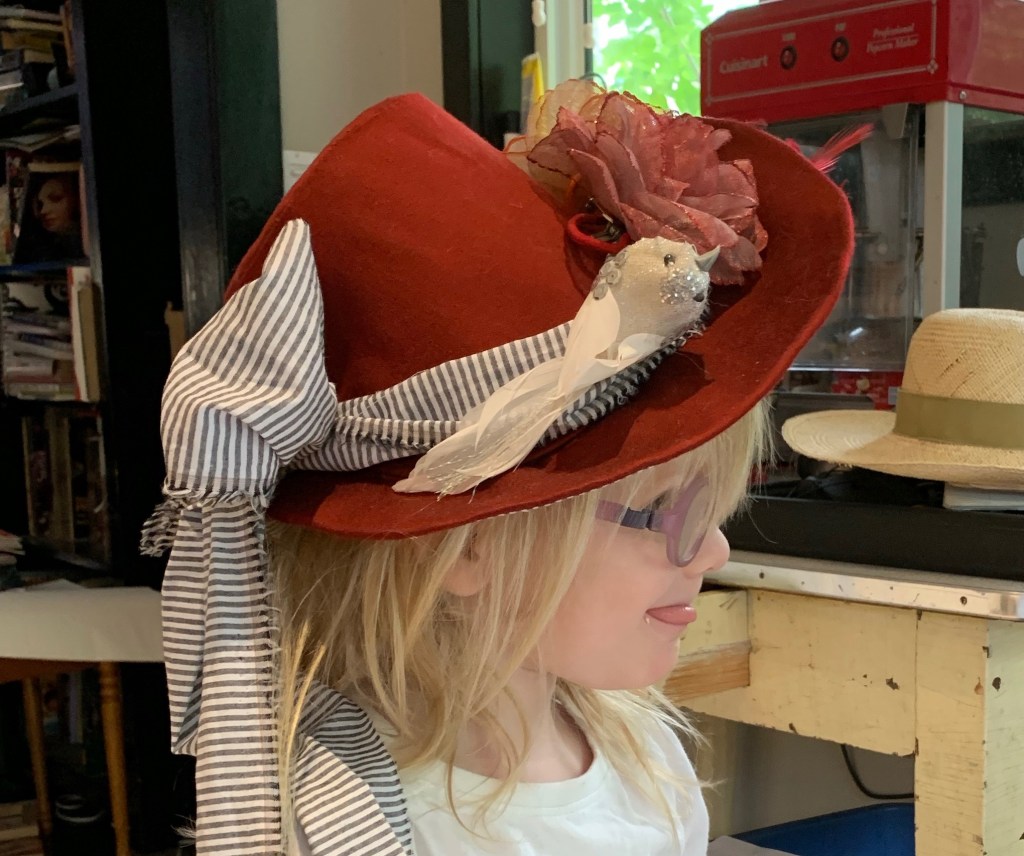
My mother was kind enough to provide a selection of fake flora to help trim the hat. There is one big rose under the brim and two above it, nestled amongst a bunch of other little floral bits. I’m thinking the back bow may need some floral additions. I’d dearly love to add a feathered bird wing, or entire bird if I could find one that doesn’t look quite as derpy as the little one in the pic where Tris is wearing it. (So far no luck, all the fake birds at Michael’s looked just as derpy.)
I actually kinda hated this thing during most of the construction. The shape is just weird. Very far beyond my comfort zone. And not in a way I expected to find cute. Although I don’t think I can quite convey to you how much Tris loves it, so that’s something. It apparently hits exactly the right vibe for a not-quite-four-year-old obsessed with looking like a princess. However, it has weirdly grown on me, particularly as I got more of the trimmings in place. I’m particularly fond of the flowers under the brim.
I eventually made it to Michael’s to look for ostrich plumes. They had exactly one, however it was bright white and I wasn’t prepared to mess around with trying to dye it. I did find a little spray of coordinating feathers, though, so I got that, and I think it finishes off the hat nicely, at least for now.
I will say, it’s growing on me, weird shape and all. It stays on the head surprisingly firmly, although I suspect a hat-pin or two would still be wise, at least if I had the kind of hair one could anchor stuff to with a hat pin. It will make more sense, I think, if I can ever manage a proper hairpiece, since it should really sit over a chunky braided bun, and have curly 1880s bangs to help fill in the top front. Apparently 1880s bangs have a lot in common with 1980s bangs. Who knew.
Now I just need to get the rest of the outfit to go with it finished!