A finished project for me!
OMG SHE MADE SOMETHING FOR HERSELF!
… okay, now that we’ve got that out of our systems…
I MADE SOMETHING FOR MYSELF!
Erm.

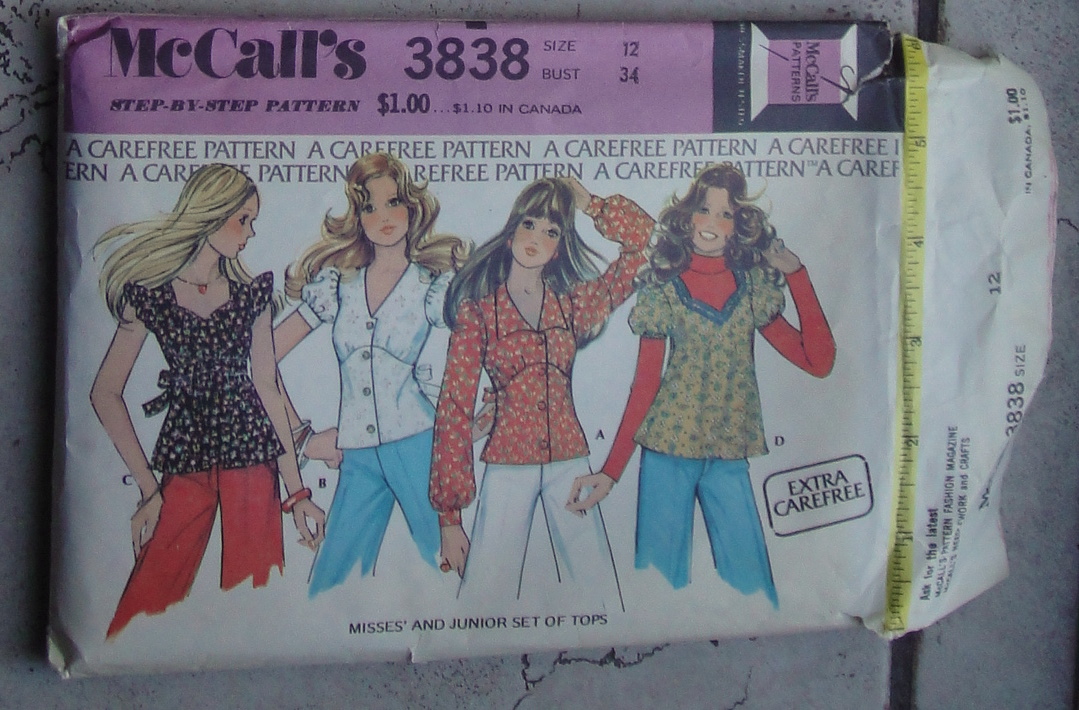
Vintage Patterns
So you may recall that I somewhat wantonly purchased a couple of 50s patterns from New Vintage Lady just before Christmas—a cute dress and a blouse that could’ve been Sencha’s grandmother. Both really adorable, and both a size or two too small.
Well, I was feeling experimental on the weekend (and in the mood for something quick that would use up scrap fabric), and somehow in the digging through of fabric and patterns I settled on this combo: Using the McCall’s 6288 (from 1945, the year my father was born) in combination with the scanty fabric remains from my Birthday Dress.
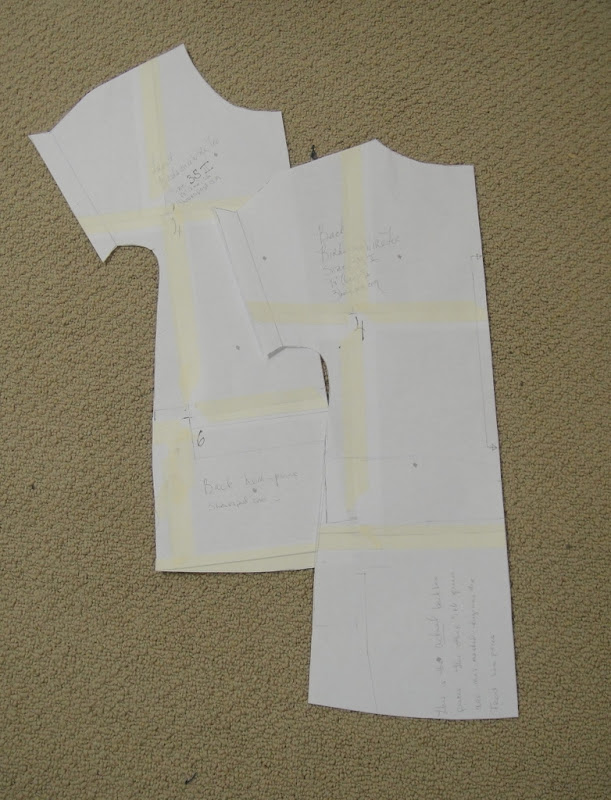
Despite the size 12 (30″ bust) of my copy of the pattern (I’m more a 14-16 in the old sizing), pattern-measurement suggested there would be enough ease in the bust and even in the waist, especially if I omitted the little tucks from the waist. So, feeling bold, I traced off the pattern and set to.

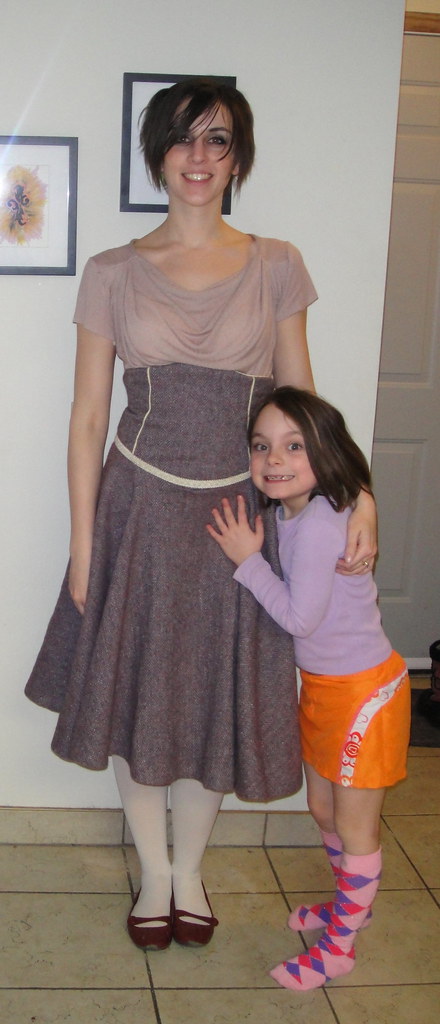
The best styling (click to see full size)
Careful pattern placement, and a certain amount of fudging, allowed me to fit both sides of the shirt on the .5m or so of actual full-width fabric I had left. I will confess, I did something I have not done, I think, EVER—I fudged the grain-line on the back piece so it would fit. I’m hoping that the fact that it’s a small blouse means the off-grain thing won’t be too noticeable—I certainly don’t notice it, but I’m sure the sewing gods are glaring down in disapproval. In hindsight, I could’ve pieced the fold-over portion of the rear button placket in from the huge LONG, THIN piece of the leftover fabric, but anyway. What’s done is done.
I opted not to be stingy with the interfacing, using it on the neck facings and the rear button placket. Not least because I think it’s a really nice way to finish facings. This is the trick that went ’round the blogosphere a while back, where you stitch interfacing and facings right sides together (right side of the interfacing being the non-fusible side) along the outside edge of the facing, and then flip and fuse them. The seam encloses and finishes the facing edge nicely. This is white Armo-weft, by the way, which is far and away my favourite interfacing—lightweight, fuses well, doesn’t shrink or bubble. I mean, there’s probably better out there, but it’s the best I’ve found from what I have available locally. You do need to use a press-cloth, even though I try to pretend you don’t.

Interfacing
Anyway, at this point I had to break for the night, and took the instructions upstairs to read over before bedtime. Erm. Me being me, they promptly evaporated, and I was left to wing the rest of the construction. A bit of a bummer since half the interest of making up a *really vintage* pattern like this is checking out the instructions. They have since resurfaced, actually just as I sat down to write this post, on the computer desk where they were hiding under my daughter’s laptop. Grr.
So, without benefit of instructions, I set to the next morning, starting with stitching the shoulders (french seam) and then the neck facings into place. I even remembered to stitch the ties in place! Of course, no sooner did I have everything nicely understitched, but I flipped it around and discovered a) my neck-facing was showing on the outside of my back button placket rather than being sandwiched between the two folded layers (leaving an unsightly raw and flapping edge) and b) the neck was WAY too tight.
Which, I guess, was a good thing, because it motivated me to fix problem (a) before re-stitching.

Interior
I lowered the neckline by a good 1.5 cm all around, which has brought it to the point of being just-barely-wearable, although it also means that there’s not much left of my facing.
I then decided I would do french seams on the side-seams, which was also not my brightest moment ever, since they don’t play at all well with the way the sleeve is supposed to be finished. It doesn’t really show when wearing, since the fudge is all tucked in the armpit, but it’s definitely not smooth and sleek. You can see it clearly on the interior photo.

Buttonliness
I made the buttonholes using my Greist buttonholer on the White, since I wanted to try the buttonholer on a machine with drop-able feed dogs. I must admit I feel a bit daft using a buttonholer on a zig-zag machine, but anyway. The White is really growing on me as a machine—I wasn’t initially thrilled, but it’s a sturdy workhorse. It took a few samples to get the tension and stitch-width right, but once I had that figured out it made my buttonholes quickly and fairly neatly. It’s the first time I’ve used the buttonholer on such a light-weight material, and it made for a rather different experience. They’re not all perfect, especially the fifth one which I added after and of course messed up, but they’re in and functional. Incidentally, the pattern calls for four buttonholes; the location of the fifth, now that I have the instructions in front of me, calls for a snap, presumably because that would be more comfortable than a button under a waistband.
The pattern also calls for small shoulder-pads. I don’t really mind skipping those. I think I look about as square-shouldered as the envelope girls without them, thanks.

More styling
So, verdict?
Well, it fits remarkably well. The bust is a wee bit tight (especially over a padded bra) but not as bad as I had feared—a pinch test suggests there’s just under 2″ of ease, which is pretty minimal for the bust. The waist fits well, although it would be more interesting with the tucks. The darts are a smidgeon high (like maybe 1 cm) but really not bad at all.
I really wasn’t sold when I first tried it on, but after throwing it together with over half my wardrobe in a shotgun approach to styling, I think it’s growing on me. I really like it with the shrug, I think because I like the brighter colour contrast near my face. The mix of colours in the blouse kinda blends into my skin tone from a distance. I also think it might be great in a more drapy fabric—crepe or rayon or (ulp) silk. For most of my wardrobe needs it’s also a bit short. You’ll notice one way you don’t see it styled here—tucked in. I tried, honestly—with my circle skirts and my Kasia skirt. It almost worked with the Kasia, but the colours are wrong. And, well. Blouses. I have Blouse Issues.
So, all in all, it was a fun experiment. Will I wear it? I’m not convinced—but I’m not quite as skeptical as I was a few days ago, so there may be hope. Especially with my cream capris and the vintage shrug.