
 I’m never exactly on the cutting edge of indie patterns, so everyone and their dog has already made the Deer and Doe Myosotis dress, mostly last summer. If it weren’t for all those versions I probably wouldn’t’ve been drawn to it, because it’s a lot of ruffles and a pretty squat, shapeless look on the face of it. But somewhere in the midst of conversations on Instagram last winter with Grace (@wzrdreams) about our shared nineties nostalgia, I realized that this was a really good base for a revisit of my much-beloved nineties babydoll dress. So, I suggested it as the basis for a Periwinkle Sewing class (running in August). We’ll see if anyone actually takes it, but at least I got a cute dress out of it.
 Now, recreating that dress (why did I get rid of it again?) isn’t exactly what I’ve done here, but I am pretty happy with the results.
 I went with the ruffled skirt but not the sleeve ruffle. I cut the size 40, and added ties because I wanted the adjustability they provide in a loose style like this. The only change I made to the pattern was actually to shorten the (already raised) waist just a bit more.
 Partly because I have a short waist at the best of times, partly for that babydoll look, and partly for the big ol’ maternity belly. In hindsight I should’ve probably lengthened the skirt to compensate, but oh well. It’ll be a good length once it doesn’t have to stretch over the twin belly.
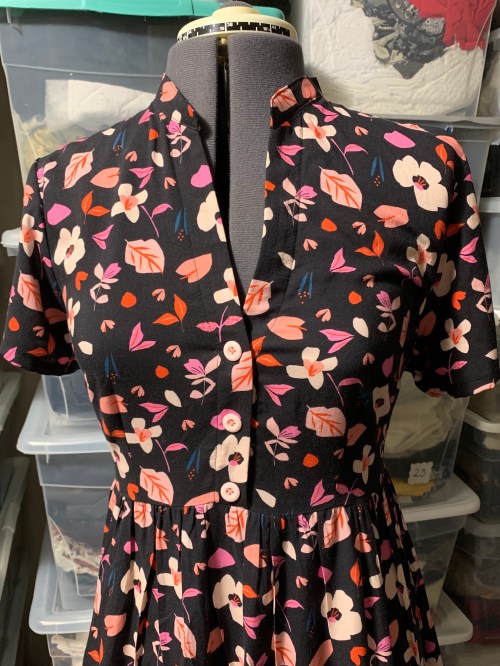 The construction is pretty simple and this is really the easiest take on a shirtdress I’ve run across—and if you’re feeling lazy (which I was since I’m pretty exhausted these days) you can even skip the buttonholes and just sew the buttons on the front through all the placket layers. Although I’m already regretting that as it will limit the nursing-friendliness of the dress, so I’ll probably take the buttons off and put in proper buttonholes at some point. They’re not necessary for putting on and taking off the dress, though.
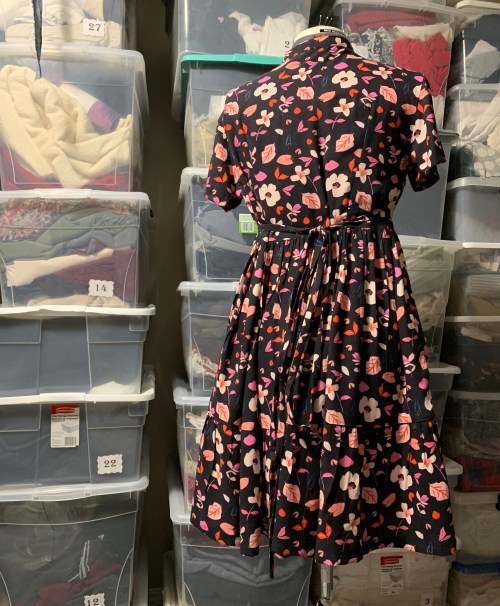
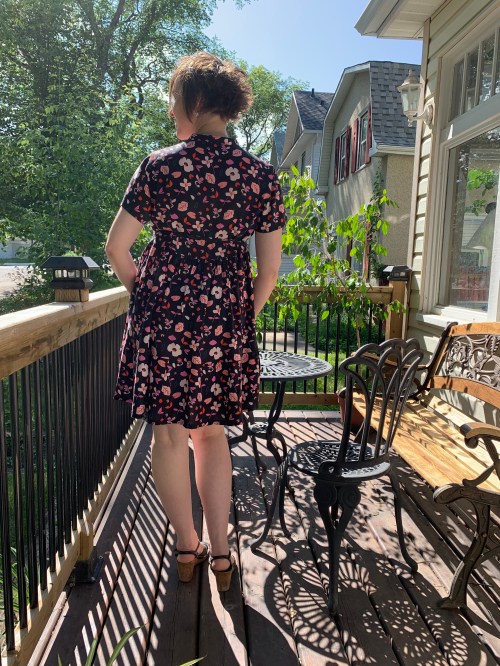 Hmm, pregnancy seems to have deleted my hips. The dress form shows the back view a bit better.
I also love that it has simple inseam pockets included. I’ve been regularly adding them to dresses in my classes, but it’s nice to not have to guess about it.
 My mother found this cute little cast-iron chair and table set at an auction earlier this summer, and my father-in-law repaired and refinished the amazing bench. So now I’m having fun pretending that my front deck is a chic Parisian balcony overlooking a sophisticated French street.
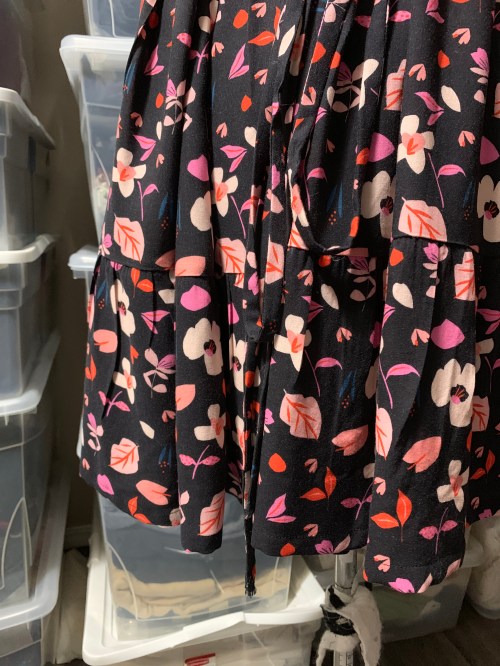 I tried to take some closeups but this print absolutely eats detail, so they don’t look like much. I’m a fan of the “crushed gather” look, so all the gathers got pressed into crinkly minimalism. The amount of fullness in the bottom skirt ruffle is also minimal, which is good. I love how it gives the skirt just a bit of shape.
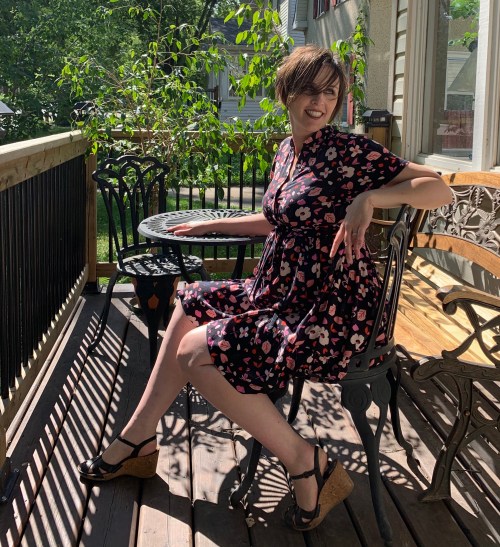 Now I just need some fancy coffee or something to sip while I look cute and sophisticated. Or at least cute.
 Honestly? I’d never have looked twice at the
  Also, I did not pick it with the expectation of being pregnant this summer. But it does work well for that, too.
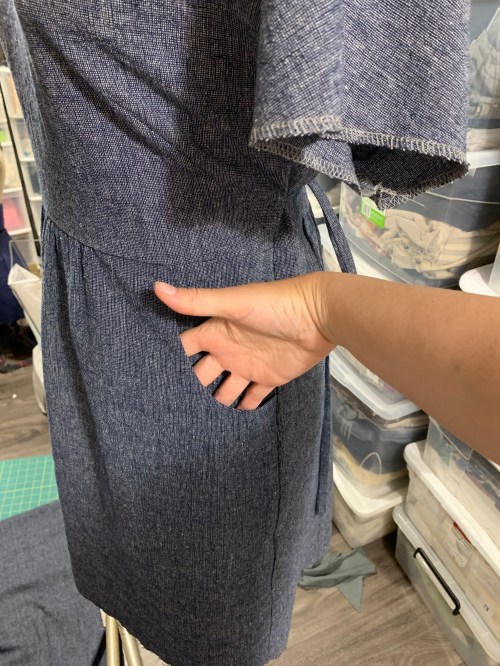 I love the pockets. I’ve been routinely helping my students add pockets to the dresses we make, but it’s especially nice when they’re included already.
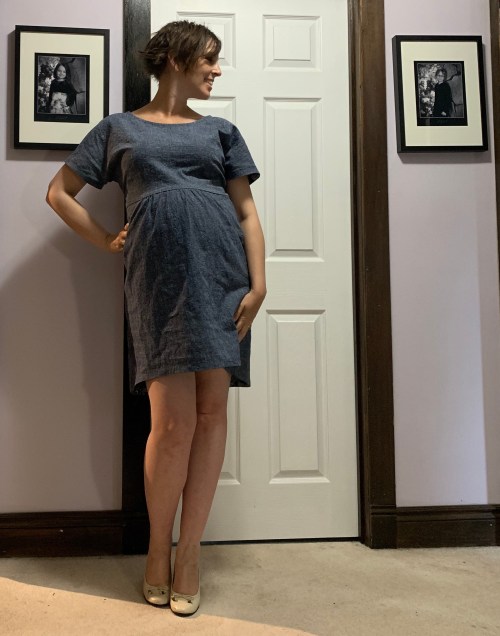 I also like the scoop neckline (which is a little wide because I did not finish it as per the pattern instructions) and the small amount of fabric required. The pattern called for three yards, so I bought three mètres, but I actually had about .8 of a mètre left, plus a long skinny strip on one side that I partially used to make the ties.
 I added ties to the side, for improved adjustability and maternity-friendliness. They definitely help with that, but on the other hand they kind of anchor the dress in place which makes the arm movement a bit restricted, which is one of my pet peeves. It’s not terrible, but to raise your arms over your head the whole dress needs to move up, and it can’t when it’s tied.
 My belly is definitely borrowing fabric from the back, making it sit not great across my butt. But, I don’t have to look at that part so I’m not going to sweat it.
 In the end, it was a fun and quick sew and I think it will make for a fun class project. And not such a bad maternity dress, actually.
 In my head, I’m calling this the Into The Woods Dress.
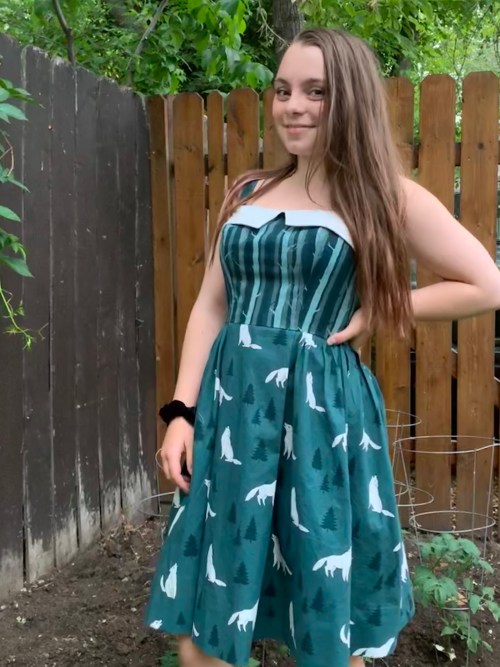 The straps are really wide set on Syo’s frame (which surprised me as I tend to think of her as similar to me in build except shorter); I wound up moving the back straps quite a bit closer to the center, and would’ve moved the front if they weren’t already sewn down and understitched and graded and everything.
 The pattern called for somewhere over 4m of fabric in the narrower width. With a bit of measuring I estimated that about three meters were needed for the skirt alone. However, it turned out the bolt of the wolves and trees print was divided right down the middle into two sections of about 2.6m each. So I took one of them home and resolved to Make It Work. I was fairly sure if I really ran short I could shorten the skirt an inch or two without causing a problem. Which in hindsight I could’ve, but I managed to squeak out all the pieces with only a little fudging, though there was no attempt to refine print placement. It is a pretty fun skirt, though, with subtle shaping and a front panel framed by pleats that’s just begging to be made in a contrast fabric.
 Most of the angst came from the zipper for this project. Last summer I acquired (among other things) a “proper” invisible zipper foot. I’ve always installed them with a regular foot, and I feel most comfortable with that. But I thought I’d try using the proper foot, so I have more experience if any of my students bring one. Heh. My first pass was too far from the zipper teeth; a stripe of black zipper showed. So I adjusted my needle position, but I over-corrected and it was too close. It did up all right on its own, but when I tried to put it on the dress form, the zipper gave and then one half of the slide came right off.
 When I finally came back to it, I was able to get the zipper back into its track, only to promptly have it burst off again when I tried to put the dress on Syo. So I grumblingly unpicked the near-tooth row of stitching, and it seems to be working now, even if I’m not terribly trusting of it. And there’s that stripe of black in the back. I’m going to live with it. (Though I confess, I haven’t closed up the bodice lining yet, in case I do have to completely replace the zipper. Yeah, not laziness at all…)
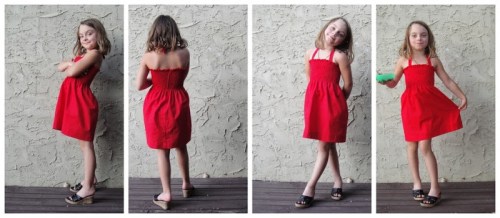

 Apparently I should’ve pressed a little better, but it’s rayon. It’s going to wrinkle.
 Can you see my French seam at the side? No? Oh well. They turned out very nice indeed. In fact, the only thing I used the serger for on this make was the bottom of the half-lining.
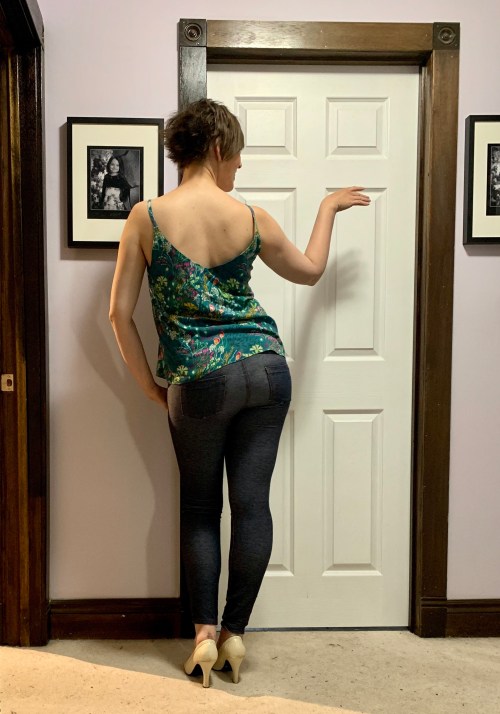 I made a straight size 8, which accommodates both my current bust and my current belly surprisingly well. I didn’t even have to shorten the shoulder straps.
 I did experiment with cutting out the pattern with my rotary cutter, basically my first attempt at such a feat. I am not particularly adept at it, so I don’t think I was really any better off than cutting with scissors, but it’s definitely something I’m willing to play around more with, at least for things that are small enough to fit on my cutting mat. I used a ruler to help me cut out the rectangles for the shoulder straps, and that was definitely a win.
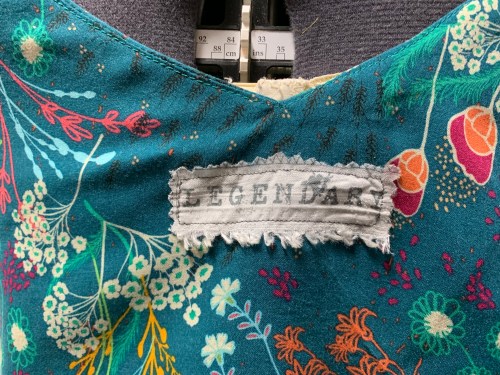 Because it’s virtually impossible to tell the front from the back of this pattern (either in construction or once it’s finished), I hunted along the printed selvedge of this Art Gallery Fabrics rayon for a good chunk, and cut out the bit that said “Legendary” to make a tag. My pinking shears are terrible and kind of made a mess of the edges, but I’m sure after a wash it’ll all be much the same anyway.
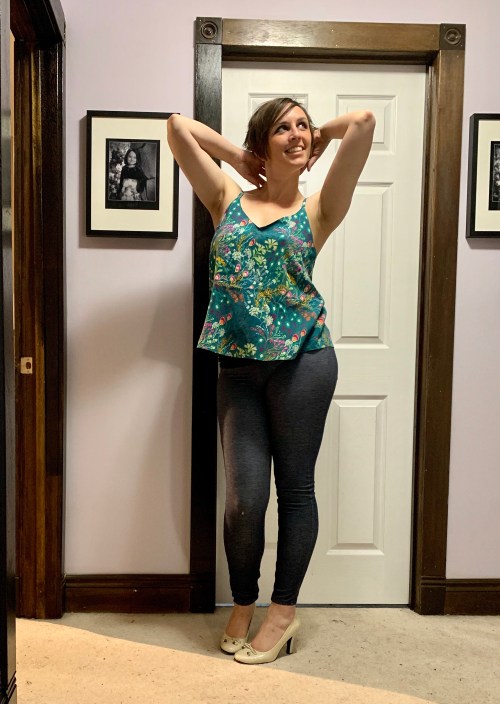 Anyway, I’m definitely charmed by this pattern, and excited to be teaching a class on it this summer. It’s simple enough for a beginner, but also a great opportunity to level up your skills working with fine finishes or a trickier fabric. I’m very tempted to go digging through my seldom-touched “fine fabrics” for the next version….
 I wanted to teach a basic tee shirt class this summer, and Jalie seemed the obvious choice. Their basic fitted tee pattern,
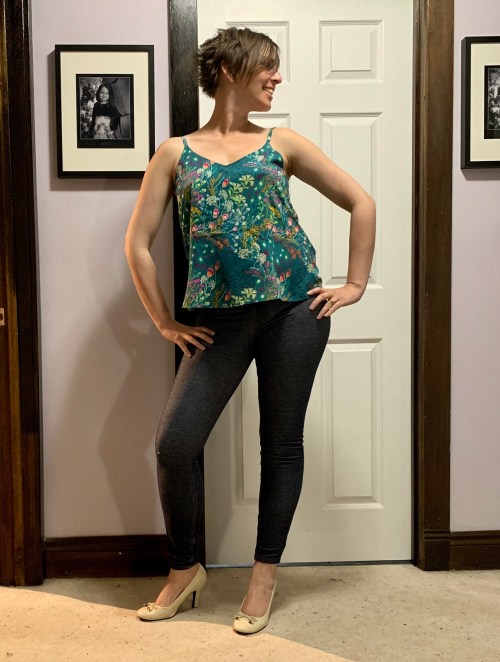
  Speaking of V necks, I’m pretty happy with how it turned out.
 I did the twin needling on the Rocketeer, where I had to relearn the “always test!” lesson again… for only the millionth time. Ah well. After some unpicking and careful testing of stitch length (longer), presser foot pressure (light but not too light or the fabric doesn’t advance well), and tension, I finally got good results. And yes, I used Steam-a-Seam in the hems.
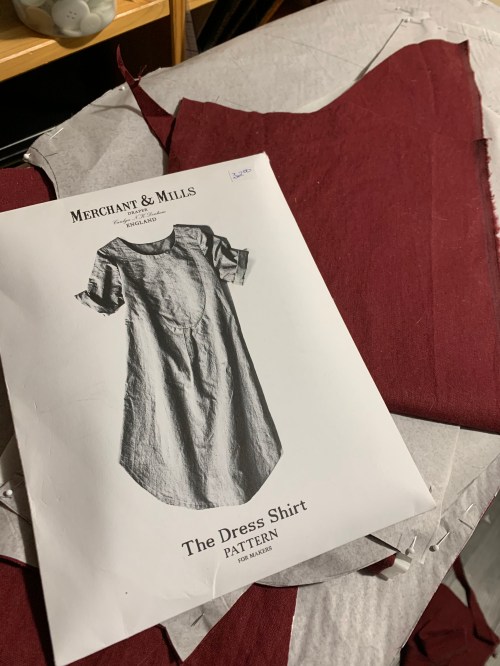 A very eager student asked about a class using this pattern. Curious, I was happy enough to oblige.
 The Dress Shirt is a simple, pared-down take on a shirtdress, and I actually really enjoyed the sewing process, particularly the front bib and how the neckline was finished. Things went a bit awry at the sleeves—my first inclination was to set them in flat, shirt-style, but there’s way too much ease in the sleeve cap for this method—lots of gathers that are difficult to control. So I did the second sleeve in the round, but still didn’t do a great job on the easing. Next time I would pare down the sleeve cap a wee bit.
 On the other hand, the pockets I added worked out fine.
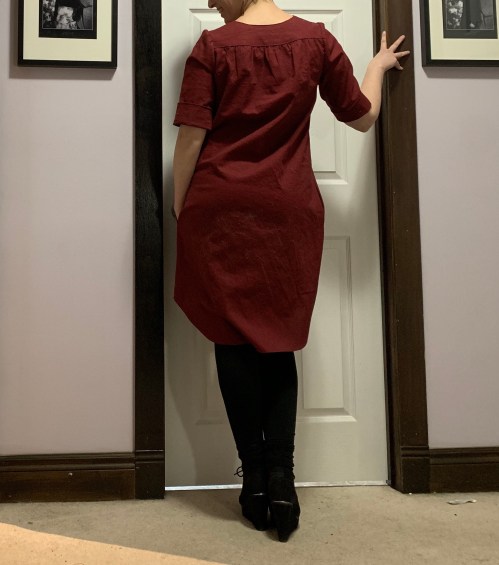 The back view is surprisingly attractive in this picture, at least (these are terrible photos but I had about three minutes to take them in, so it is what it is.)
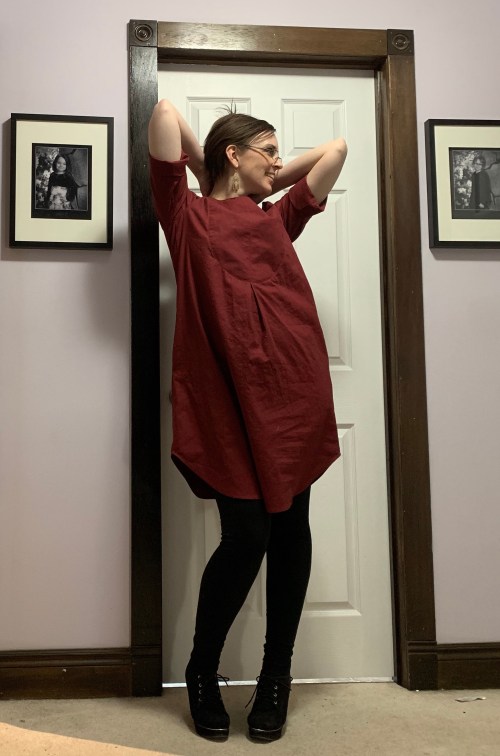
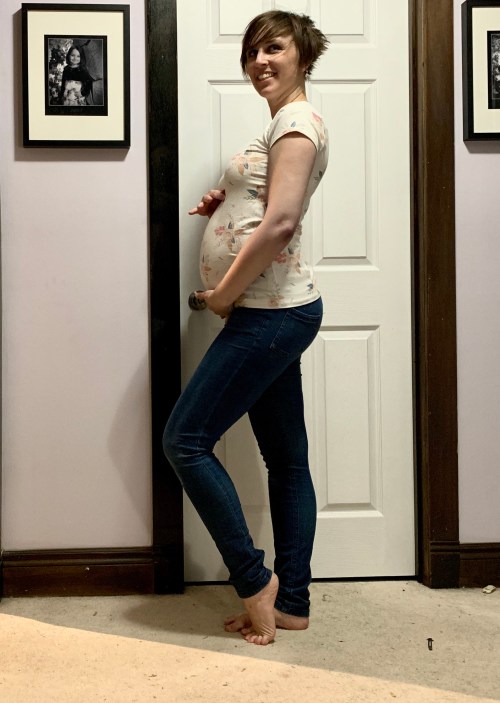
 It’s a bit sweet. And a bit snug right through the bust—I really need to come to terms with my new measurements. But I knew from scouring Instagram that I preferred the “fitted” versions of this dress, so I was at least somewhat intentional in sizing down.
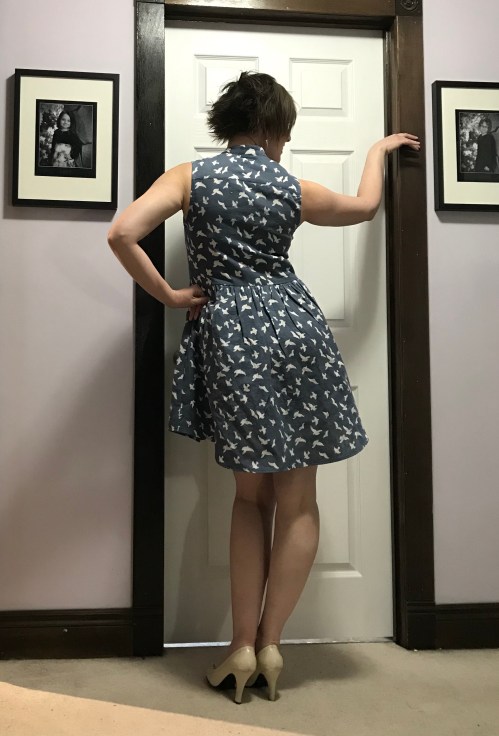
 I went with a mandarin version of the collar. Partly I like them better, partly I’m hoping if I lead some students in that direction it will save some class time. This is only scheduled as a 6 hour class and I’m a little scared. Once it’s don’t being a class sample, I might even cut the neck down to a bound scoop. I’ve seen some hacks like that that I really like. I’m just not really a shirt-collar person, I guess.
 The front patch pockets are teeny weeny. I was a good sample maker and resisted the urge to skip them, but I did add some side-seam pockets, suspended from the gathered skirt seam at the top. This holds them in place a little more nicely than just side pockets.
 The construction went pretty smoothly, without any major and unfixable snafus. Unlike my
  What I completely failed to take was progress and detail shots, except for the one lone pic of the pockets underway. It’s too bad, because I like how the side pockets went together, and I actually managed some very nice inset corners, if I do say so myself. And the hem turned out really nice, too, if I do say so myself. I guess you’ll have to take my word for it…
 I wanted to do a class for a classic fit’n flare, fifties style dress. Well, really, I wanted to do
  On trying it out, a few subtle differences showed up. For one, it’s finished with facings rather than a lining. This was neither here nor there for my purposes, though lined might’ve been better in a white fabric. The most interesting thing is that, while the skirt is indeed a full circle, it’s not evenly divided front and back. The front portion of the skirt is somewhat larger than a half circle, while the back portion is somewhat smaller. I’m not sure what the consequences of that are, but it seems to work out.
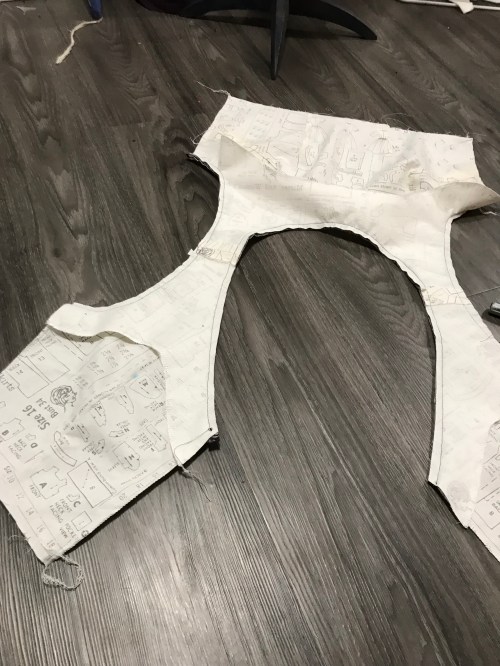 I altered the construction for my favourite sleeveless method, where you stitch the facing to both neck and armscye, then turn it right side out before sewing the side seams.
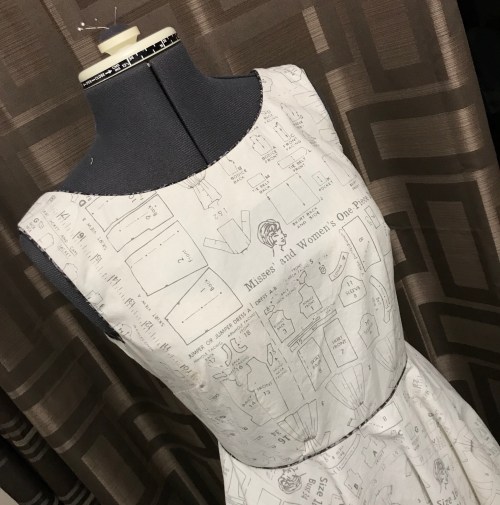 And added piping to give at least a tiny pop of colour to my white and grey fabric. It’s purple, though I’m not sure you can tell. Isn’t this fabric fun though? I had wanted something colourful and novelty for this sample (something about these fit ‘n flare dresses is perfect for a novelty print quilt cotton). I didn’t find colourful, but the novelty was too perfect! I’m very tempted to take some fabric paint to some of the outlines, but I’d hate to blow it at this late stage.
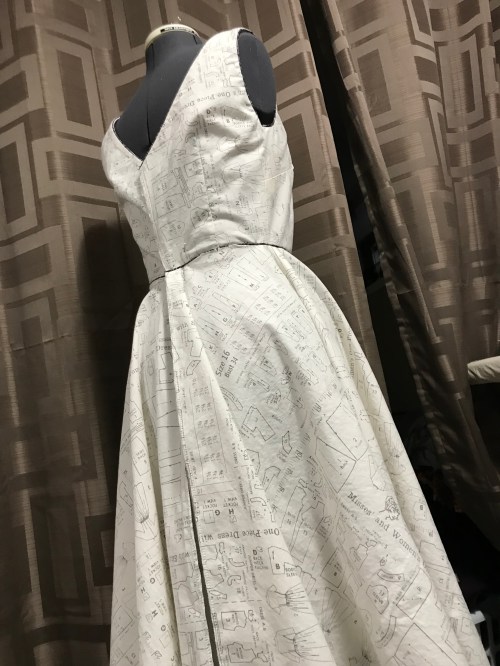 The back is a smooth V
 I added pockets to the side-seams, which worked out well except that I appear to have mis-traced the notches I was using to align the pockets to. So I had to unpick both back pocket pieces (including understitching and serging) and move the pieces up. I’m pretty sure this is a tracing error—it was not the easiest pattern to trace, I will say that, as the lines are all the same solid line, without different dashes for different sizes.
 I tried it on after the skirt was attached, expecting to need to do a swayback adjustment, and to my surprise it didn’t seem to be needed. Looking at the photos, I think a very small adjustment might’ve been good (1/4″ or so?) but it’s still a remarkably good fit right out of the envelope.
 That fabric is such a lot of fun!
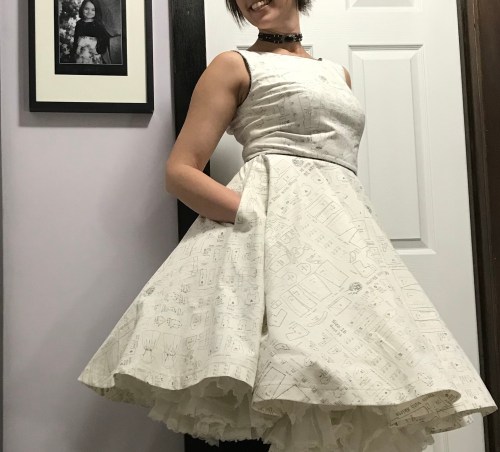 I am a little disappointed it didn’t come with pockets, but they aren’t at all hard to add, and I’ll be happy they’re there every time I wear this.
 I took a lot of these pictures with my Very Fluffy Petticoat, which is an old square-dancing petticoat and way too ridiculous for normal wear but makes great photos! The less insane photos have my black “everyday” petticoat.
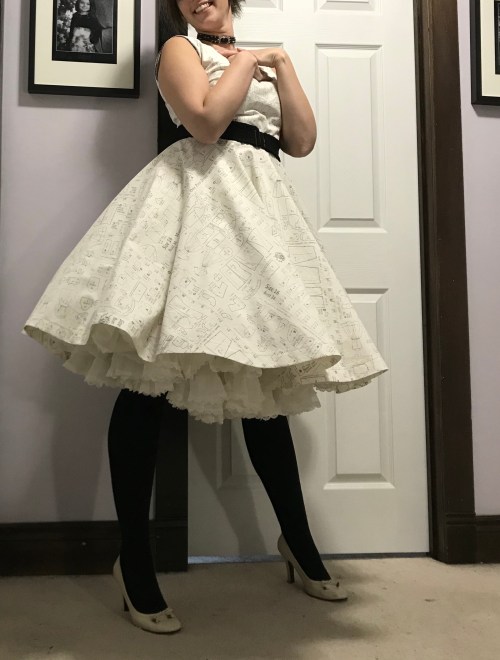 So all in all, I’m really happy with the pattern. It’s basic but a great backdrop for fun fabric, and I can imagine lots of fun mods. I’m still not totally sure about the unequal circle portions in the skirt (it just seems untidy to me) but I didn’t notice any issues once it was together—presumably the side seams fall towards the back a bit, but you’d have to look really hard on a circle skirt to notice that. And I’ve got some novelty Hallowe’en fabric in stash that would be just perfect….
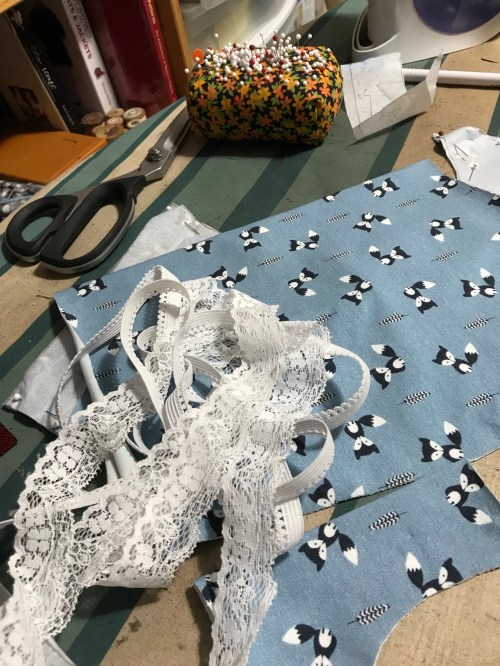 I’ve wanted to do an underwear class for quite a while. It’s one of my favourite things to make, it’s fast, the materials are minimal, but there are lots of little helpful techniques that can be hard to pick up on your own.
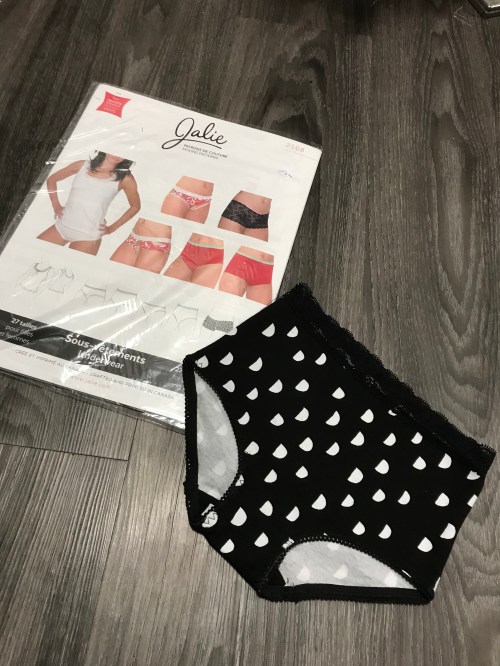 Finally, I decided to go for an oldie I’ve been curious about for a while,
 And with the range of styles (basically high cut and hipster cut with both high and low rise options for each. We won’t go over the tanga pantie view if I can avoid it), I’m hopeful everyone will at least have something in their ballpark.
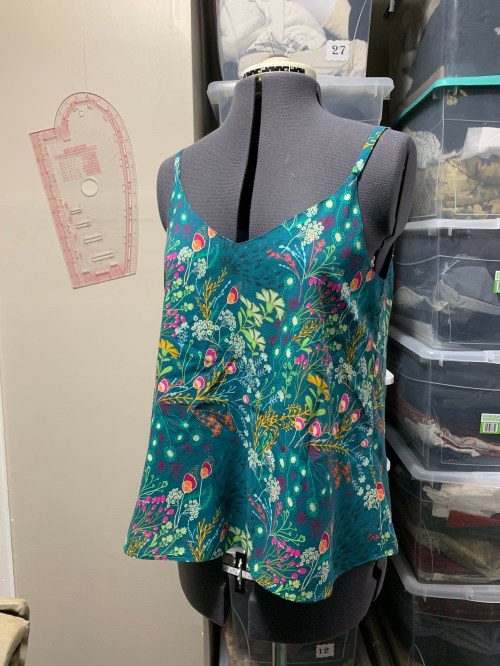
 The camisole is cute, too, although I don’t love how it’s drafted specifically for the wide lace at the front neck. I do like how they use the same techniques for finishing the cami as for the underwear, at least from a teaching perspective.
 My one disappointment from a construction perspective is that they’re single crotch seam underwear. While I do like this look, I prefer the sewing and finishing of an enclosed crotch. Not that it’s hard to convert one style into the other, of course.
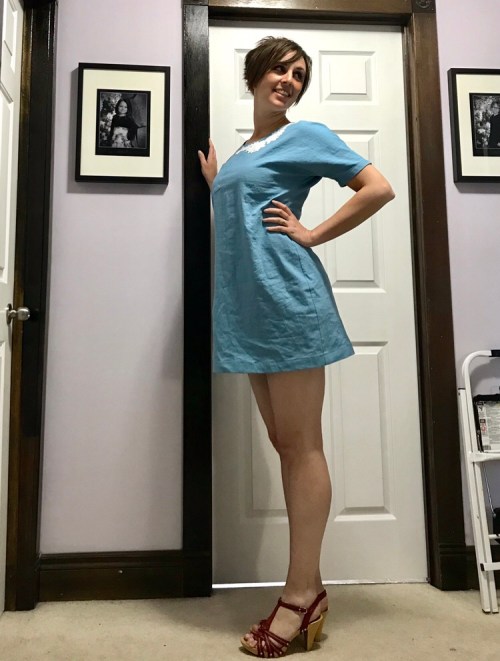 I didn’t really think the
 Until last winter when I went looking for a basic dress to teach a beginner garment-making type class at
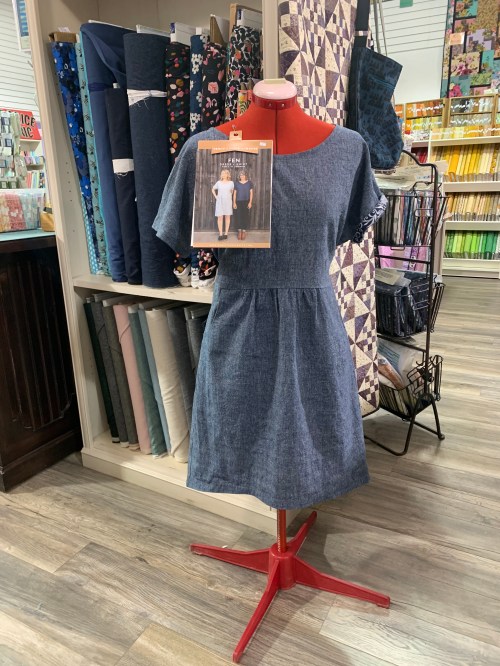
 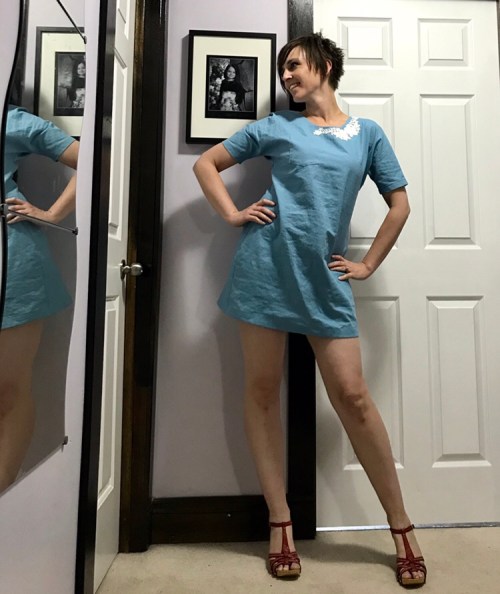 I’m a little less at ease with my choice of fabric. It’s a muted greeny blue that I LOVE but combined with the simple cut it reads dangerously close to hospital gown, which is not helped by the fact that the fabric (a cotton-linen blend) really has a bit too much body for the design. But I’m a sucker for linen.
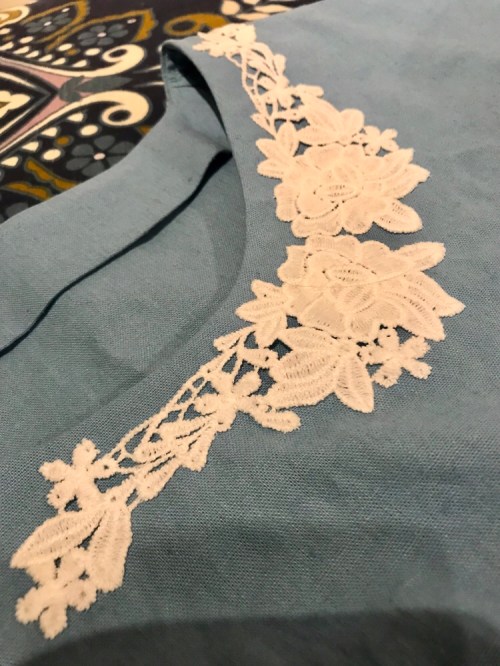 I added some lace motifs at the neck to hopefully distract from this.
 I blended from a 38 in the upper body to a 40 at the hips, and did a swayback adjustment, which I think helps but it’s a bit hard to assess given the loose shape.
 I have mixed feelings about the dolman sleeves. On the plus side they’re super simple and quick—on the minus I think they’re a bit low under the arm (duh, that’s how sleeves like this work). I might try playing around with raising them and adding a gusset in the future, but I didn’t want to go too far off the grid with a class sample.
 Also did I mention it is SHORT? Ok, again in the pattern’s defense I did a one inch hem instead of 3/4″, so it might be slightly shorter than intended, and I am technically taller than most patterns are drafted for… but I rarely have to add length to skirts. It’s technically mini length, but because of the style of sleeves it comes up quite a lot when you raise your arms.
 In the meantime I might have to try another. It was seriously quick and fun to put together.


