
 In my head, I’m calling this the Into The Woods Dress.
Back last winter, when I first floated the notion of teaching a class for the Sew Over I Rosie Dress, I was envisioning a fun, maybe quirky sundress for myself. However, events occurred and this is not a particularly maternity-friendly style. So, when the time came to do up the sample (class is in July), I thought this woodsy set of coordinates would tickle Syo’s fancy. I think I was right. Or possibly she’s just humouring me.
To fit Syo, I made a size 10 with a small (1″ total) full bust adjustment. On trying it on her, though, I wound up taking the bodice in 1/4″ at each side seam. Given that Syo is still just shy of five foot tall, I made a couple of other adjustments, shaving off about 1/2″ at the bottom of the bodice and hemming the skirt up a full four inches. I shortened the straps a bunch as well.
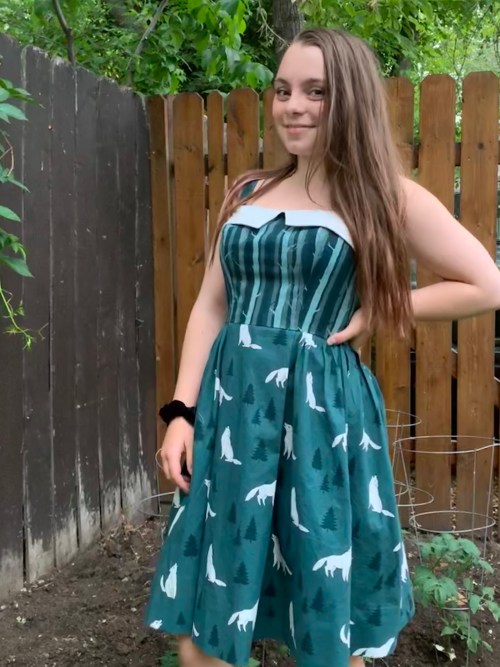 The straps are really wide set on Syo’s frame (which surprised me as I tend to think of her as similar to me in build except shorter); I wound up moving the back straps quite a bit closer to the center, and would’ve moved the front if they weren’t already sewn down and understitched and graded and everything.
 The pattern called for somewhere over 4m of fabric in the narrower width. With a bit of measuring I estimated that about three meters were needed for the skirt alone. However, it turned out the bolt of the wolves and trees print was divided right down the middle into two sections of about 2.6m each. So I took one of them home and resolved to Make It Work. I was fairly sure if I really ran short I could shorten the skirt an inch or two without causing a problem. Which in hindsight I could’ve, but I managed to squeak out all the pieces with only a little fudging, though there was no attempt to refine print placement. It is a pretty fun skirt, though, with subtle shaping and a front panel framed by pleats that’s just begging to be made in a contrast fabric.
 Most of the angst came from the zipper for this project. Last summer I acquired (among other things) a “proper” invisible zipper foot. I’ve always installed them with a regular foot, and I feel most comfortable with that. But I thought I’d try using the proper foot, so I have more experience if any of my students bring one. Heh. My first pass was too far from the zipper teeth; a stripe of black zipper showed. So I adjusted my needle position, but I over-corrected and it was too close. It did up all right on its own, but when I tried to put it on the dress form, the zipper gave and then one half of the slide came right off.
I put the whole bloody thing away for several days at that point.
 When I finally came back to it, I was able to get the zipper back into its track, only to promptly have it burst off again when I tried to put the dress on Syo. So I grumblingly unpicked the near-tooth row of stitching, and it seems to be working now, even if I’m not terribly trusting of it. And there’s that stripe of black in the back. I’m going to live with it. (Though I confess, I haven’t closed up the bodice lining yet, in case I do have to completely replace the zipper. Yeah, not laziness at all…)
In any case this was a fun pattern and project (though maybe a lapped zip would be a better plan). And I’m trying to remember the last time I made Syo an actual dress. Ok, this is why I blog. Are you ready for it?
2011.
I mean, she’s gotten any number of leggings, crop tops, sweaters, and Hallowe’en costumes in the meantime, but not a single dress. So I guess it was time.

 In March I’m teaching a class on the
 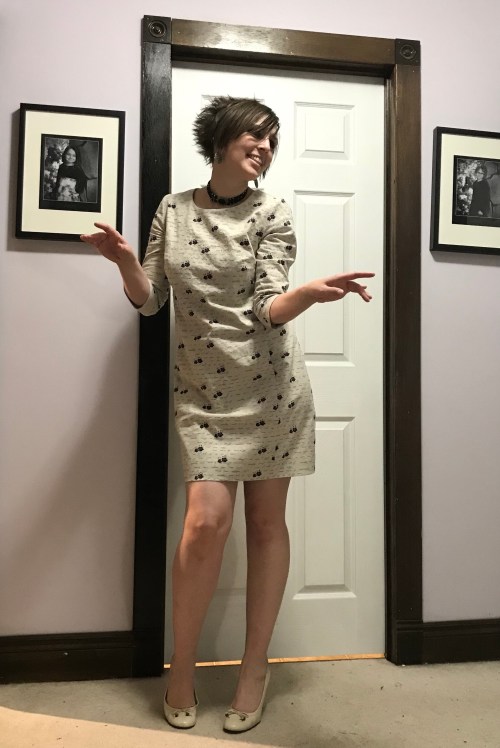 I’m generally a big proponent of tracing when it comes to expensive indie patterns, but I find the SOI patterns really hard to trace. The Betty didn’t have different line styles for the different sizes, which made it hard to pick out the right size, and this one had different line styles, but some of them were really faint, with tiny and spaced out dots, including the size 12 I was tracing for the lower half. Also there’s more notches than you can shake a stick at, and I always miss notches when I trace. So I cut. Based on the Betty, I cut a size 10 for the shoulders and bust and a size 12 for the waist and hip. I didn’t do a petite alteration, but I did add a small swayback adjustment, by shortening the back piece at the waistline and taking a wedge out of the side piece, since the pattern has princess seams but no side seams.
 I tend to like a lot of ease in the hips, so I kinda wish I had gone up another size there. As is, I let out the side back princess seams as much as possible–you can’t adjust the front princess seams because there are pockets in this area (yay pockets), but the back is where I really need the room anyway.
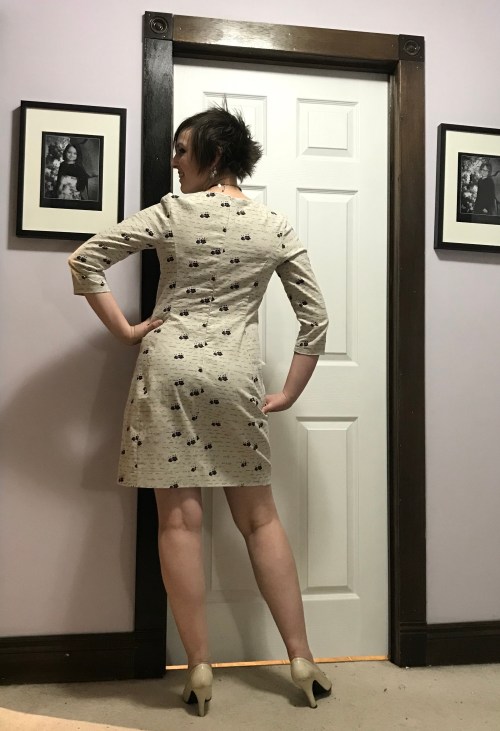
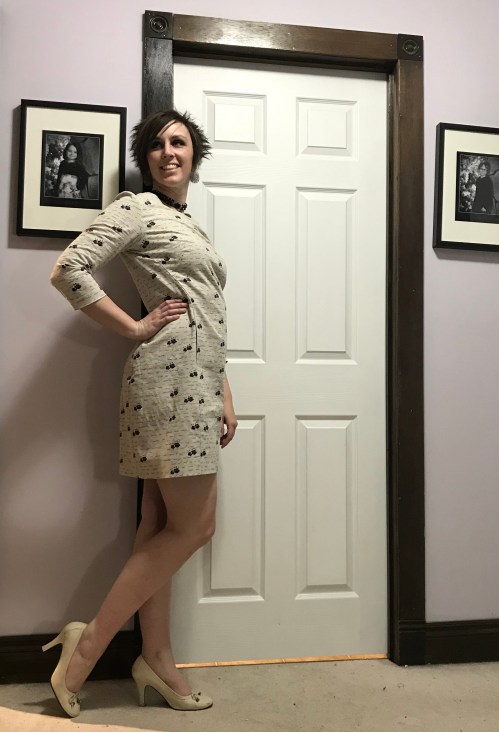 But something is off with the back armscye. The sleeve cap is tall and narrow, which alarmed me a bit, and it definitely works well if I keep my arms down but doesn’t allow a lot of motion. And moving my arms to the front the littlest bit pulls mightily across the back. Fortunately this cotton has quite a bit of give, but it feels like I need a bit of a forward-shoulder adjustment—it’s tight across the back if I try to move my arms forward, but roomy across the chest. Weird because that’s not something I’ve ever needed. Possibly I could let out the seam at the back armscye a wee bit…
 I did raise the underarm a tiny bit, which I almost always do, and that helps with the mobility a bit, but I’m just not totally sold on that armscye. And I’ll definitely be checking back measurements when we do the class.
 All in all, though, it’s pretty cute.
 There. There it is. Do you see? How in the HELL did I not check, when I went to cut it out, which way the print was facing? Of all the STUPID… anyway, I can’t go on or this blog will descend into a string of profanity I’ll probably regret releasing onto the internet.
 On a happier note, the invisible zipper and the facing attachment fully by machine went smooth as butter. After all these years I still think of
 It’s a good sign when you feel the need to repeat a pattern right away, right?
 This year, they’re largely doing their own thing (a tulle-skirted gown got butchered in my sewing room while I was absent, but I’m maintaining plausible deniability and not asking) so I’ve been free to sew my own. And of course this fabric was always meant to be a classic fit ‘n flare dress, so why not repeat my success with the Betty Dress? Especially when
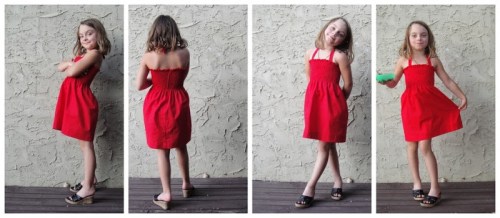
  There’s not much to say about the construction, except that I added a “sash”—attached to the front bodice at side and waist seams, with ties inserted I to the side seam so they can wrap around the back and make a bow in the front.
 Last time I did this was the Star Wars dress, but I didn’t do the front under-sash piece, and I think I like the extra solidity it gives.
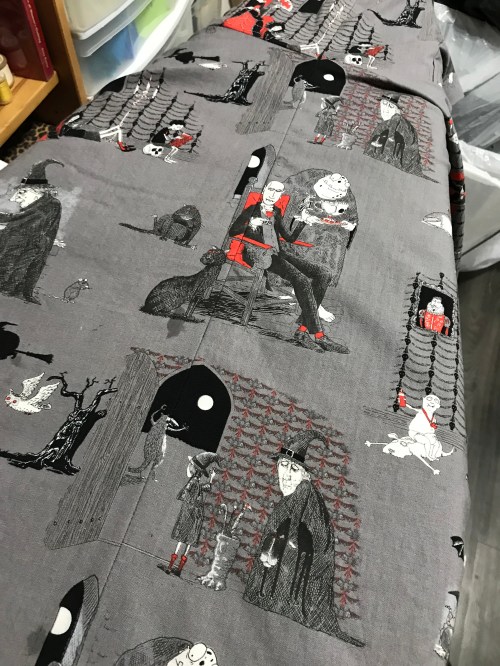
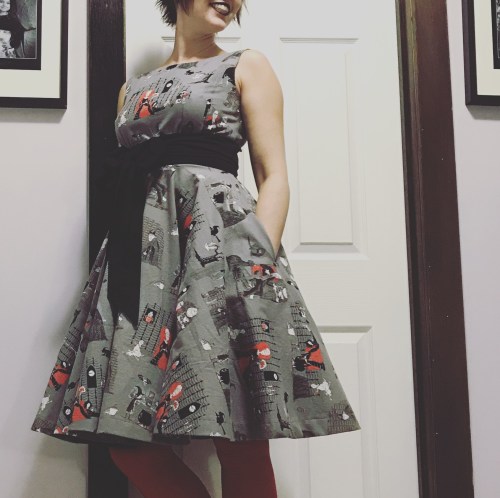 In this case, the two seams I really wanted to match were the CF skirt seam, and the CB seam. There’s not supposed to be a seam on the centre front skirt, of course, and the pattern expects you to cut the skirt on the cross-grain to allow it to fit on 45″ wide fabric. That wasn’t a go with this strongly directional print, so seam it was.
 After my careful cutting (one piece at a time, folding the seam allowance back on the first seam to align the second piece), I pressed the seam allowance under on one piece, lined it up, and marked on the second piece where the seam should go. I pinned my major match points, making sure the pin went through my marked lines both times, and then I sewed. I did not break out my walking foot, though I thought about it. This succeeded in making my horizontal match points reasonably aligned. I did have to take in or let out the seam minutely in a few places to get things lining up more perfectly—a mm makes a difference!—but on the whole I’m really pleased with where I ended up.
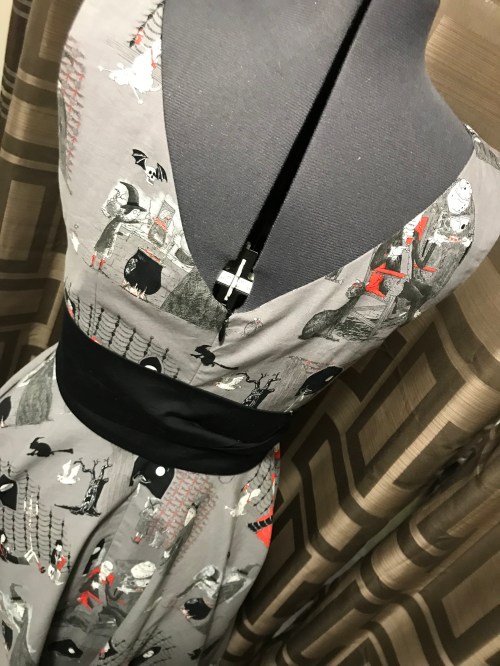 Especially across the back zipper. This is the trickiest part, since you have to align everything to points on the zipper, not to the other fabric directly. Again, I marked my seam-lines and marked match points with pins. Wash-away wonder tape would probably have been helpful, but I haven’t got any at the moment.
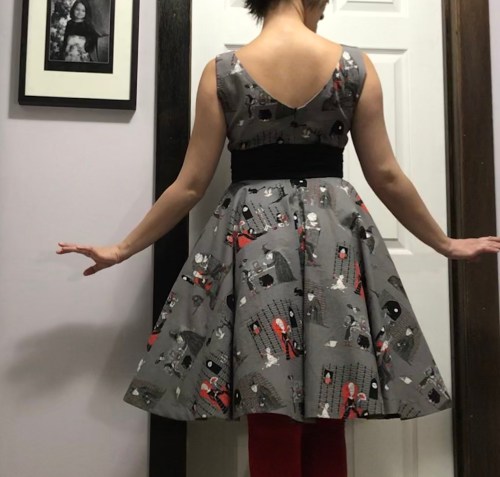 I set my zipper stitch long and first just basted it in, concentrating on getting the vertical locations to match without worrying too much about sewing too close to the teeth. (I DID worry about keeping the teeth aligned over my marked seam-line) Then, once I had things more or less aligned, I went back to stitch closer to the zipper teeth. Oh, and I remembered to stabilize the fabric along the zipper. I think this helped, too.
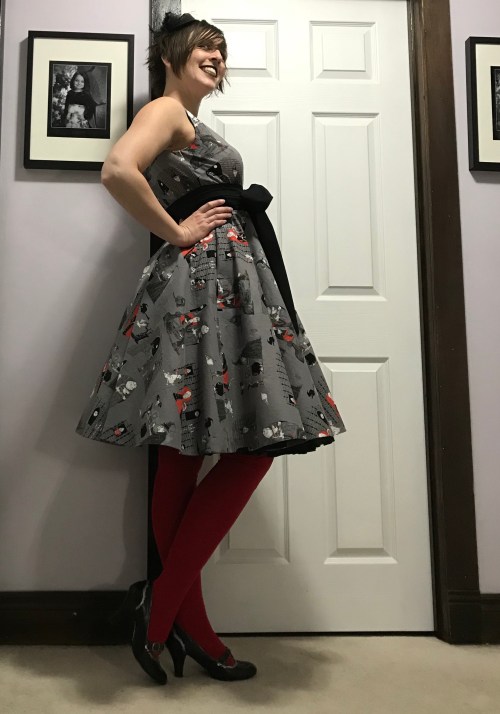 I made a couple of minute fitting tweaks to the pattern this second time—squaring the shoulder slightly and doing a very small swayback adjustment on the bodice back.
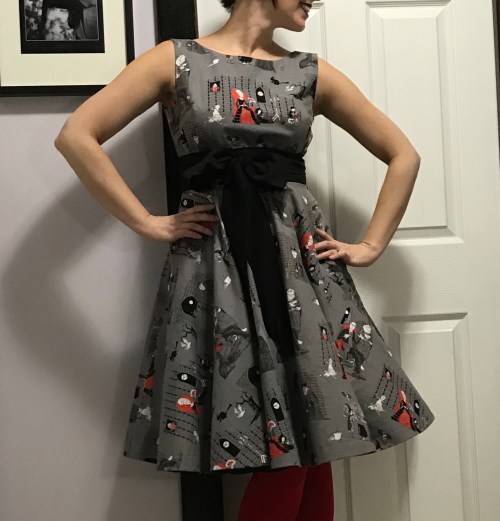 The black fabric for the sash is a lightweight cotton satin from Fabricland a few years ago, leftover from another project. It’s one of my favourite fabrics ever. I had pulled it out when auditioning fabrics for something else last week, but I’m so glad I didn’t pick it because it was perfect for this.
 It’s certainly not my most outlandish or intricate Hallowe’en costume ever, but I was pretty happy with it—glad to get it made, but most especially proud of my construction. And my print matching. I might be crowing about that all month.
 I wanted to do a class for a classic fit’n flare, fifties style dress. Well, really, I wanted to do
  On trying it out, a few subtle differences showed up. For one, it’s finished with facings rather than a lining. This was neither here nor there for my purposes, though lined might’ve been better in a white fabric. The most interesting thing is that, while the skirt is indeed a full circle, it’s not evenly divided front and back. The front portion of the skirt is somewhat larger than a half circle, while the back portion is somewhat smaller. I’m not sure what the consequences of that are, but it seems to work out.
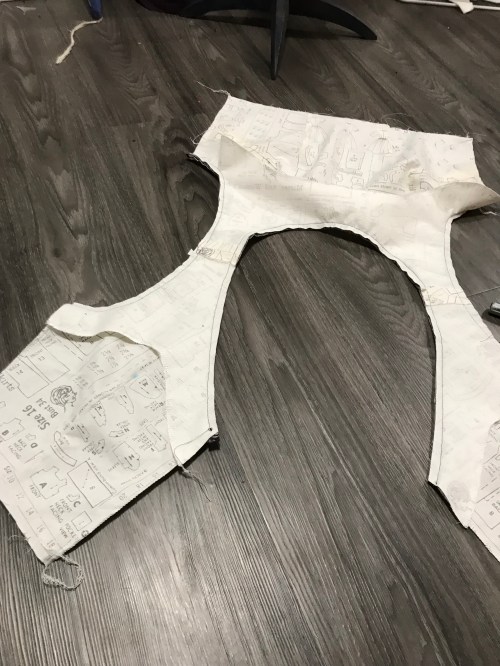 I altered the construction for my favourite sleeveless method, where you stitch the facing to both neck and armscye, then turn it right side out before sewing the side seams.
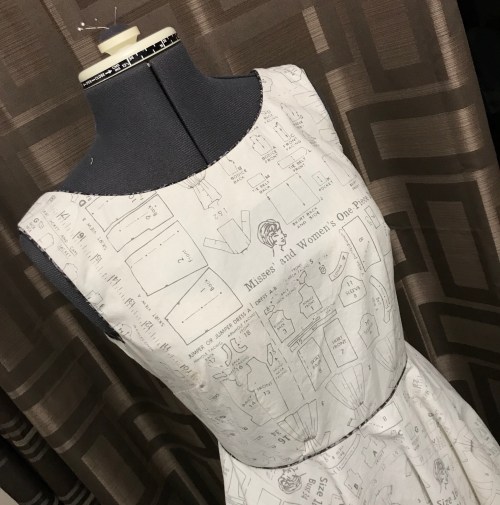 And added piping to give at least a tiny pop of colour to my white and grey fabric. It’s purple, though I’m not sure you can tell. Isn’t this fabric fun though? I had wanted something colourful and novelty for this sample (something about these fit ‘n flare dresses is perfect for a novelty print quilt cotton). I didn’t find colourful, but the novelty was too perfect! I’m very tempted to take some fabric paint to some of the outlines, but I’d hate to blow it at this late stage.
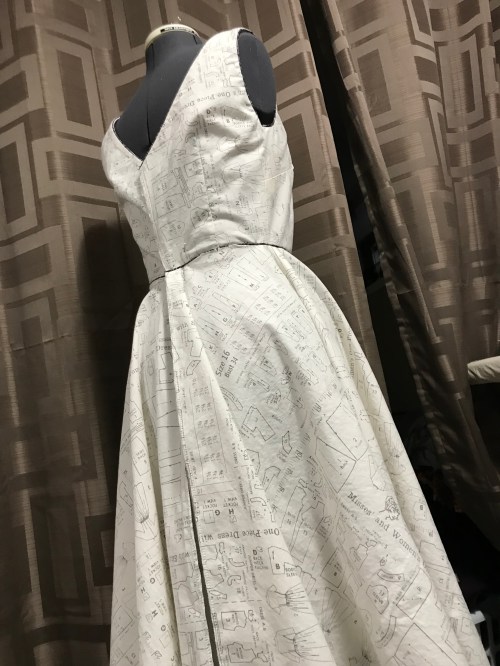 The back is a smooth V
 I added pockets to the side-seams, which worked out well except that I appear to have mis-traced the notches I was using to align the pockets to. So I had to unpick both back pocket pieces (including understitching and serging) and move the pieces up. I’m pretty sure this is a tracing error—it was not the easiest pattern to trace, I will say that, as the lines are all the same solid line, without different dashes for different sizes.
 I tried it on after the skirt was attached, expecting to need to do a swayback adjustment, and to my surprise it didn’t seem to be needed. Looking at the photos, I think a very small adjustment might’ve been good (1/4″ or so?) but it’s still a remarkably good fit right out of the envelope.
 That fabric is such a lot of fun!
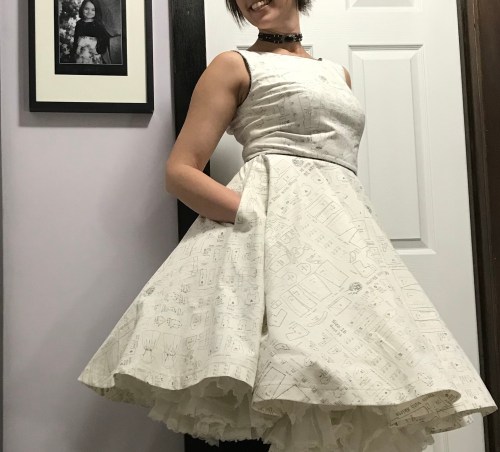 I am a little disappointed it didn’t come with pockets, but they aren’t at all hard to add, and I’ll be happy they’re there every time I wear this.
 I took a lot of these pictures with my Very Fluffy Petticoat, which is an old square-dancing petticoat and way too ridiculous for normal wear but makes great photos! The less insane photos have my black “everyday” petticoat.
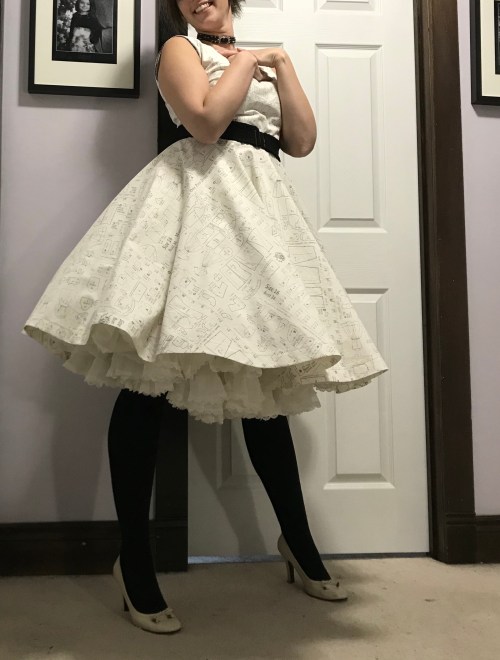 So all in all, I’m really happy with the pattern. It’s basic but a great backdrop for fun fabric, and I can imagine lots of fun mods. I’m still not totally sure about the unequal circle portions in the skirt (it just seems untidy to me) but I didn’t notice any issues once it was together—presumably the side seams fall towards the back a bit, but you’d have to look really hard on a circle skirt to notice that. And I’ve got some novelty Hallowe’en fabric in stash that would be just perfect….


