Tag Archives: Historical Sewing

Fluffy up front

So now that I have an Edwardian skirt, obviously I need a proper blouse to go with it. You know the kind—the ones that are mostly lace. But those are, y’know, notably sheer, and my current corset is, y’know, black, so a corset cover is kind of in order.

Now, ever since I started the Victorian Sewing Circle I’ve been collecting “resources” for attendees. Mainly some reproduction catalogues and a couple of original sewing manuals, some older Folkwear patterns my mom had kicking around, and of course the relevant Janet Arnold book. But we’ve received a few donations as well of odds and ends people have collected—including an Edwardian corset-cover pattern someone had painstakingly hand-traced from a magazine article, and photocopied the instructions, I’m guessing in the 90s if not 80s, allegedly based on a 19-aughts original. It’s also, by the way, the exact opposite of size-inclusive. I sewed up the largest size, which was intended for a 40-42” bust.

Inspiration: Random Pinterest photo with a broken source link.

So since I had that on hand, I used it. But, the pattern is designed for vertical pintucks and lace insertion as decoration, and I wanted the horizontal lace ruffle (bust improving) version.

TVE02

If I were buying a pattern, this Truly Victorian one would be the one. View A, right there.

My pattern is a little different as it goes below the waist and has gathering at the neckline as well, but the ruffle layout was the same.

I also wanted to take this opportunity, because I’m kind of messing around here, and the result won’t be visible, to use up some of the massive stash of questionable lace I’ve somehow accumulated.

Now, on digging through one of the bins of random white fabrics, I settled on a piece of stretch cotton sateen. The stretch is a bit unfortunate, but I already knew I wasn’t going for high historical accuracy here. It’s also a bit on the heavy side, but I figured that would be a bonus for the bust-volumizing I was going for. But most importantly, it was a tiny remnant that was just exactly big enough for a sleeveless pattern like this.

Of course, I didn’t begin diving through the lace stash until after I had cut out the main body pieces. Turns out the wider, ruffled laces I remembered were all beige, rather than white. And I really did not feel like gathering up a flat, nasty polyester lace for this purpose.

So, I wound up going with the nicest, and lightest coloured, of the off-white pre-ruffled lace. And this one is very pretty, not too nasty-feeling, and there was enough for the two ruffles I wanted, with very little left over. It’s a weird lace, with a ruffled top and bottom joined to a flat kind of connecting piece, but I think it will serve its purpose. And if I want to run ribbons through the joining I can.

If I had realized I would end up using the off-white lace before I had cut out the main fabric, I would probably have tried tea-dying the fabric to be a closer match. I might still try with the whole thing, after I test how the lace reacts to a tea dye. (Polyester won’t be affected but if it’s nylon it will take up the tea stain too and might end up even darker). But, I’ll survive either way. The binding I used for the neckline and armscye, and the drawstring casing at the waist, are all ivory, so the whole thing has a tone-on-tone vibe, in theory.

I REALLY wanted beading lace (the flat kind you thread a ribbon through) to finish off the neckline. However, that’s the one kind of lace I do not have in stash, and I just couldn’t make myself spring for the polyester stuff at Fabricland, even if the ruffled lace is already polyester. So I bound the neckline, then realized I had JUST enough lace left to do a third tier right at the neckline. Which solved the issue nicely.

A lil bit goofy all on its own.

Now, on looking at the finished creation, I think my lace might be just a little bit too wide. The ruffles are VERY full-bodied, even allowing for the part where the original inspirations are a little compressed after over a century.

In an attempt to tone them down a bit, I shortened the bottom row of lace, so that doesn’t reach all the way around to the side seam, as it just seemed to make the whole thing look huge.

I kept the pintucks in the back, but I think maybe they should have been 1/8” instead of 1/4” tucks. Also this is the only photo I got of the back, because obviously this piece is all about the front. This is the first time in a long time that I was working with a pattern with pre-marked tucks (as opposed to making the tucks before cutting out the pattern piece, or just doing some calculations and I have decided I much prefer marking my folds one at a time and measuring from each fold to the next. But also this fabric was a bit heavy for all those tucks.

I’m not 100% sure I’m in love with the below-the-waist ruffle created by the drawstring as it’s pretty pronounced in my heavy fabric, but I guess if I hate it I can cut it off later. It was on the pattern, and would be good to have if your skirt didn’t have an above-the-waist portion like mine.

While I’m not so sure I love the piece itself, I THINK I do like it with my skirt, and that it will work well for it’s intended bust-improving purpose. Part of me wants to take the entire bottom row of lace off, but I’ll leave it at least for now.

Because now I can make a blouse!

(Or. Y’know, make the twins that “Elsa mermaid” costume they’ve been desperate for since before Christmas.)

Advertisement

Leave a comment

Filed under Sewing

A long awaited party (dress)

Back in the day…

Way back in 2015, I started coordinating a little monthly get-together I like to call the Victorian Sewing Circle, based out of the Marr Residence, the Oldest House in Town* that the City operates as a sort of mini-museum. I was hoping to indulge my latent interest in historical costuming, meet some like-minded people, and give myself a venue to WEAR at least some historical stuff. Since the house was built in 1884, a mid 1880s outfit seemed like a good goal.

Inspiration dress

I picked an inspiration dress from a reproduction of the 1886 Bloomingdale’s catalogue, acquired a ridiculous amount of discount wool blend suiting in my favourite muted blue colour, and ordered two Truly Victorian patterns for the bodice and overskirt, TV462 and TV368.

I started work on the skirt in October of 2015. Later that winter, I got sidetracked and made a “quick and dirty” version to actually wear to our little meetups… and then my progress on the blue “good copy” slowed to an utter crawl. And then when I got pregnant early in 2019, it stalled completely. And what started as a planned hiatus of a year or so turned into three, and I didn’t dust things off until this past fall.

At which point pretty much every measurement on my body had gone up 4-5”. And the “quick and dirty” outfit (the first pic in this post) no longer even remotely fits, so making the blue version wearable became a lot more urgent.

I was pleasantly startled, actually, when I pulled everything out again, at how close to complete it actually was. The skirt just needed the waistband finalized. The bodice just needed boning—but it also no longer fit, and I had accidentally used a very rigid ticking for my underlining, which wasn’t ideal in any way. And (which I had completely forgotten), the overskirt was complete, just needing a way to connect the back tails to the front apron. And perhaps some trimmings.

New waistband, new waistband pleats

Adjusting the skirt wasn’t going to be a big deal—I had only basted on the waistband, and it needed length taken out at the top. I marked the new length on the front, basted and trimmed down to it, but then for the back I folded the extra down and just stitched the edge of the pleats to the waistband, so the seam allowance doesn’t add bulk to the waistband. This is a technique I’d read of in both historical sources and costuming articles, but never actually tried before. The transition from “seam allowance in” to “seam allowance out” is maybe not perfectly smooth, but every original Victorian skirt I’ve examined (which isn’t a high number, granted) had the most half-ass slapped on waistband, so I have a hard time being too fussy over it.

I had made a whole new corset, back at the end of summer, so all I had to do now was adjust the waistbands of both petticoats. For one petticoat this was no big deal as I had originally made it far too big and had to put in two large tucks in the waistband to make it fit. Ripping those out took about 30 seconds and it was good to go.

The second, on the other hand, was snug even when I first made it, and by the time I last wore it in 2019 I had already added a hair elastic looped through the buttonhole as a makeshift extender. But that no longer did the trick so the only option was to unpick the gathered back portion of the waistband and attach a substantial additional piece, then re-attach my painfully stroked gathers one by one, just spread out over a larger space.

It’s definitely an improvement though. I think even my hand-worked buttonhole is better, not that it’s a thing of great beauty.

And then there was the issue of the bodice.

I had steeled myself, frankly, to make a new bodice from scratch. The seams were only 1/2” and already somewhat frayed from a ridiculous amount of handling, and the rigid ticking underlining made the whole idea of altering just seem unpromising. I had enough fabric left over, just. But every time I went to start tracing out a new size of the pattern, a wave of exhaustion struck me.

I decided to try, just try, and see what happened if I let all of the back and side seams out as much as possible. Some of them, especially the waist, had been taken in quite a bit in my previous fitting adventure. And while 1/2” seams don’t allow for a lot of letting out, there are quite a few of them. I tried the bodice on again… it wasn’t enough. In particular, actually, the BACK just didn’t seem wide enough. Not at the waist, but the upper back, and there was still a stubborn 2” gap all along the front. I did toy with a plan where I could add a panel to the centre front, creating an “open jacket” look that is pretty common for the era. But the back still felt uncomfortably tight. If only I could just add more fabric, right at the centre back seam.

Well, why couldn’t I?

So I ripped open the CB seam, from just below the collar to about mid back. Try on. Rip a little further. Try on again. And lo and behold, after ripping it all open except for about 3” at the bottom, it closed in the front.

So I pulled out my scraps, cut a long, tapered spindle-shape, and set about stitching a panel into the back.

It’s not an ideal fix—it’s added some of its own fit issues and ripples, and makes boning the CB of the bodice difficult. But it’s also saved me an immense amount of work. Which these days, I’ll take.

My joy when the alterations actually allowed me to close the bodice!

After all that, all I had to do was add all the boning to the bodice, which I wound up doing by stitching the casings on by hand since my seam allowances were both narrow and quite irregular. Unfortunately, I also had to pull off the bias facing at the front hem to add the bones to my darts, because past me got ahead of herself in the finishing department. Mistakes like that played a huge role in why this damn thing took forever to make, by the way.

I swear in real life the hem looks symmetrical.

Anyway, the bones definitely help smooth out the look, though I might need to redo my buttons to get a truly smooth front. I’ll face that some other day.

After a fair bit of waffling, I decided to attach the tails to the overskirt apron the same way I did with my first version, with elastic loops and large buttons. It’s not historically accurate, but it’s easy, comfy, and highly adjustable.

And, at last, I finally got to wear it!

There are a few more tweaks that could be made. The back of the skirt, where I had omitted one of the overlay panels, looks a little plain. I’m not sure that my draping of the bodice tails or the back of the overskirt is finalized, and I do have some black tassel trim that might look good there.

But after a saga like this, wearable, in any degree, is a huge step forward. And for the first time in ages, I can actually say to myself “what’s next?”

(Actually, I finished this back in early December, so what’s next was the Edwardian skirt. But I really wanted some pictures that weren’t taken in my hallway. Thank you to my mom for digging out her good camera to take most of these, and for braving the technological minefields of iCloud and Dropbox to get them to me.) Next up… an Edwardian-style blouse to go with the skirt. Unless I get highjacked by one of my children, anyway…

2 Comments

Filed under Sewing

Truly Edwardian

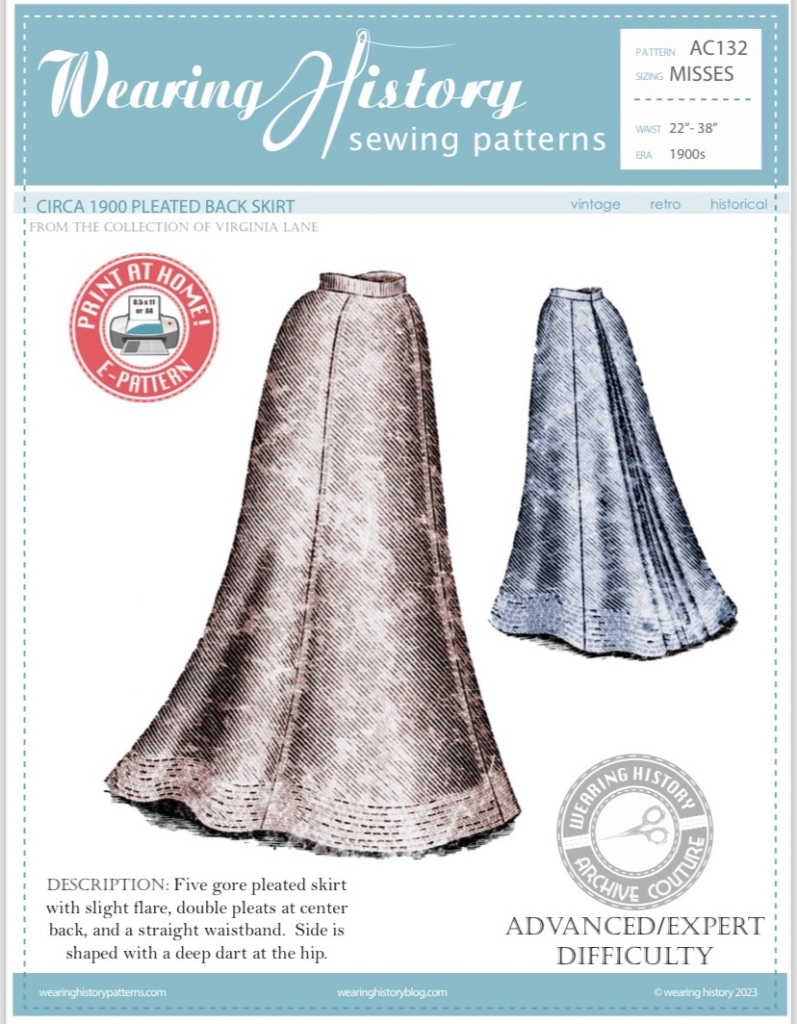
K I’m on a bit of a costuming binge, though a lot of it hasn’t hit the blog due to waiting for pictures (never a smart thing for me to do). Maybe I just like wearing corsets right now, maybe I’m just not feeling mainstream sewing fashion, maybe I actually have enough clothes… anyway. I bought the Truly Victorian 1906 Ten Gore Princess Skirt back in the fall, probably like everyone else who watched Bernadette Banner’s video around that time. I finally got it printed in early December, and over the holidays began very, very slowly poking away at it.

The process began with an epic hunt through the fabric stash. I had a feeling, not even a memory really, that I should have an appropriate length of black suiting somewhere in stash. My (arguably excessive) stash these days lives in a series of clear plastic bins stacked along one wall of my sewing room, and while this isn’t an ideal setup by any means it’s space efficient and protects the fabric from at least some of the hazards of a basement storage space. I usually have a rough idea of where most things are, but in this case I wasn’t even sure that the fabric I was looking for existed.

Anyway, my quest wound up taking me through approximately three quarters of my bins. I (re)discovered a half-forgotten length of black linen, several suiting pieces that would’ve been appropriate except for size, a VERY large length of brocade I had completely forgotten about that wants to become a tea gown of some kind, and several other pieces that would make nice skirts. But then finally, after a couple of hours and creating an impressive amount of mess, I reached the bottom of the last stack of bins (well, technically there were two other stacks, but no way I was tackling them that day)—and there it was. Five metres of soft wool twill suiting, light and drapey and utterly perfect. I can’t describe my exultation.

Anyway, once the fabric was located (and at least some of the mess tidied) the work could begin. I steamed the wool in the dryer. I muslined the lining/corselet pieces for the upper skirt, after doing a small swayback adjustment on the back and side back pieces, and determined (as I expected from the pattern measurements) that I needed to go down a size in the waist. In hindsight I wish I’d gone up a size in the hips, too, because it’s quite fitted over the hips and I always like more room there, but I should probably just let the hip seams out a bit anyway. A small adjustment gets you a fair bit of room when there are ten seams. A slightly larger swayback adjustment might be in order for the next version.

Centre back section with satin lining and hooks applied.

Like most of my sewing this fall (or the last few years) construction has proceeded in incremental fits and starts. I spent a lot of time researching my construction via a number of original sewing manuals, both electronic and paper. Not that there’s anything wrong with the methods the pattern describes, they are historically accurate and in the end my deviations were quite minor.

My biggest curiosity was on how to do the lining. I’ve sort of had it drummed into my head that historical (Western-style) clothes were flat-lined (aka underlined.) This is how Bernadette Banner constructed her lovely version of the skirt. However, that’s not the directions for the pattern, and I was curious about the disparity.

It turns out that in the 1890s, a new method of lining skirts started to gain popularity—the “drop skirt.” This is made by sewing the lining (and materials like taffeta and “lining material” are mentioned rather than cotton) entirely separate as its own skirt/petticoat, or sewing separately then sewing both skirts into the same waistband—aka a modern, free-hanging lining. By the early 1900s, the separate lining is considered the preferred method with flatlining being distinctly old-fashioned, and my 1908 copy of the American System of Dressmaking states the following:

Anyway, eventually I settled on an unlined (except for the waist area) skirt, and hopefully I will make the appropriate “drop skirt” eventually.

To line the waist/hip area I used a heavy crepe-backed satin. A lightweight coutil or heavy cotton might have been better—I thought the black denim I used for my corset was too heavy, and most of the other black fabrics I had around seemed too light. We’ll see how it wears, I guess. On the other hand, having a slippery surface on the inside may come in handy since it’s pretty hard to hook up the back placket behind myself so I often end up turning the skirt around backwards to put it on. I added a tiny red tag to the inside of the front to make it a bit easier to make sure I end up with the right seam in the right place.

I considered binding the seam allowances, as would have been period appropriate. Then I serged them. I didn’t make a lot of concessions to speed in this project, but I feel like I’d still be binding seams if I had take that route. Sometimes speed is just what you need.

I added piping to the top edge as I thought that would be a nice touch, and it is, except for the part where it’s almost invisible since it’s black and this will probably mostly be worn with blousy tops that will cover it anyway. There is a narrow bias facing sewn on the inside of that to finish the top. Potentially it might have been easier and less bulky to just use a wider bias tape for the piping and use that for the facing, but having a bit more structure at the top of the skirt also doesn’t hurt. It is VERY bulky right around the top hook, though, despite some very aggressive trimming of the seam allowances in that area.

I added a piece of spiral steel boning to each seam, more or less the length of the inner corselet/waist lining. This keeps the portion of the skirt above the waist from folding down, and smooths over the upper hips, but it did also cause the skirt to stand out from my corseted waist in a way that the un-boned skirt hadn’t. I added a waist stay to combat this effect, but I’m thinking that either the waist shaping wasn’t an adequate match to the corset or my fabric + lining combo still has too much give. On the other hand it means that even though the skirt was cut with corset-wearing in mind, I can wear it uncorseted as well.

The pattern calls for a bias hem for the facing, made out of self fabric. I wanted to add a velveteen binding to the bottom of my skirt. long story, but basically velveteen seems to have been a material of choice for this purpose. Or braid. I do actually have a length of vintage braid that I think must be similar, but it is only about 3m long and the skirt requires over 5m, so that won’t work. But I did have a lovely little remnant of black velveteen, that turned out to be just enough for what I needed.

Most of the descriptions I read of the velveteen have you apply it after creating the hem, faced or otherwise, but one from 1903 mentioned how the velveteen could serve as a facing. Since the pattern calls for facing the hem anyway, that’s what I went with. And also I’m a lazy 21st century person disinclined to hand stitch around a hem like this three times, which seemed to be what most of the descriptions called for. I will say, intentionally rolling a facing out so that 1/16” of velveteen showed at the bottom of the skirt felt VERY unnatural, and there are definitely places where it doesn’t show as much as it probably should. Will I go back and fix that? I’d like to say yes but, um, probably not.

I wasn’t sure how to finish the top of the velveteen, but eventually decided I didn’t want the bulk of folding over the hem. I didn’t have 6 yards of black seam binding in stash, but I did find a rather lovely red vintage rayon seam binding, so I went with that. It did NOT like being sewn to the velveteen, and stretched it out terribly, despite my best efforts, so it’s incredibly wrinkly and gathered in the final skirt, but I don’t hate the effect.

So the pattern is drafted to have a finished length of 41” at the front, from the waist down. My measurement was 42”, so I added 1” to the skirt length all around when cutting. Now I’m not sure if it’s just that my soft wool fabric is prone to stretching, but when it came time to hem I wound up turning up close to 2”… so I could most likely have saved myself that added effort and fabric. Oh well.

Anyway, I’m super happy to have this in my wardrobe, hopefully bridging the (ever diminishing) gap between costume and everyday wear. Before the twins I had a black wool gored skirt made from a 1970s Burda pattern that was an absolute workhorse, and I have missed it sorely. The only thing this skirt is lacking is pockets, which I may yet decide to add… I don’t want to interfere with the gorgeous line of the hips, but I really, really like to have pockets at work. Next: definitely need to start planning a lacy blouse to go with.

8 Comments

Filed under Sewing

Further diversions

I’ve been fantasizing off and on about making the twins wee little Regency style dresses. I kept talking myself out of it, but the idea kept popping back up to the surface like an old beach ball that just won’t quite sink.

I do have some white fabric in mind possibly, but my mother recently destashed a piece of somewhat vintage cotton with a lovely woven check and (don’t laugh) tiny old-fashioned selvedges. With selvedges like those, it just had to become something quasi-historical, and these aren’t the kind of colours I would wear myself. So.

Although my fantasies kept taking me over to this pattern from Virgil’s Fine Goods, in the end I went ahead and drafted my own, based on the Danish example linked in this post from the Oregon Regency Society. Partly because I was impatient but mainly I’m also cheap. Although I would love the period instructions for hand-sewing that would come with the Virgil’s pattern, which would I’m sure explain that everything I did here is wrong. But I knew I didn’t have time or inclination to fully hand-sew these dresses.

Gorgeous neckline. Less gorgeous waistline.

Anyway, I followed the pattern for the above dress pretty roughly, with several modifications due to the small scale and rapid growth rate of small children. I added gathering via drawstrings to both the front neck and the “waist” of the dress, for maximum adjustability.

Due to fabric limitations, I made the skirts from a single width of the vintage cotton, which in the end didn’t leave much extra gathering at the back, unfortunately. I really wish I’d had enough fabric to do at least two full-width panels for the skirts.

In theory, as the twins grow the drawstrings are loosened and the dresses keep fitting for a lot longer. If I’d had more fabric I would’ve added more length and put in some tucks for growth, too, but as it is they’re already ankle skimming on Tris. Which, I’m not really sure what the correct length for Regency children’s dresses should be—I’ve seen paintings with the dresses very long and others fairly short. Given the nature of children’s growth, I suppose some variation is inevitable anyway. I could also make drawers for underneath as they get taller.

I also made the sleeves puffy, again to accommodate future growth.

My “plan” was to have one version be as historically accurate as I can handle (meaning machine-sewn seams but everything else done by hand, and the other a quick ‘n dirty version with serged seam finish. In the end this actually doesn’t make much of a difference since the bodice seams are the least of the hand-sewing that was involved. But I did hand-overcast them in the second dress.

The most unexpectedly labor-intensive part was rolling the casing for the top drawstring. I knew I wanted to use the 1/4” stay tape for my drawstring, but I wanted to keep the casing as narrow as possible, and if I didn’t want visible machine stitching on the outside I definitely had to roll it by hand. It turned out that this was doable, but required sewing the casing with the tape already in place, and due to the narrowness, I had to check at EACH stitch that I hadn’t caught the tape with my needle. This took forever. And ever. That being said, I’m very pleased with the look it created.

First dress on the right with bulky waist gathering. Second dress on the left, less bulk but very high on the bodice.

I was a lot less pleased with the casing for the waist seam of the first dress, which I machine-stitched to the seam allowance since it didn’t show. I’m not sure if it was just that my casing fabric was a bit stiff, or if it was too many layers of machine stitching, but the whole seam is stiff and doesn’t gather nicely. I can’t imagine it’s too comfortable against the skin, either, but the twins are fairly stoic about their clothes for the most part, thankfully, and haven’t seemed bothered. For the second dress I used a lighter fabric for the casing, with one edge stitched to the seam allowance and the other to the bodice. This is a bit nicer feeling but does shift the gathering a little higher on the bodice—only by the 5/8” width of the casing, but when your bodice is less than 3” long that’s a fairly big shift.

The dress opens in the back and I cut the edges of the back bodice on the selvedge, and of course the skirt is the full width of the fabric again so the entire back seam was selvedge as well—yay to no finishing required, and an opportunity to show off that lovely vintage selvedge, although I have no idea if it’s actually accurate for a Regency time period. This is an easy closure for a kids’ style, but it does tend to leave a bit of a gap at the back, so I should probably make them some kind of little shifts to go underneath. Feel free to place bets on whether that actually happens.

My biggest departure from historical accuracy (other than the machine sewn seams) would probably be that I decided to put elastic in the hems of the sleeves. I considered both gathering to a band (harder to adjust) and adding drawstrings again, but I also wanted these dresses to be comfy to wear for toddlers accustomed to modern clothing, so I went with elastic. It doesn’t show and doesn’t look particularly different than a drawstring would, I think.

After all this work to make the dresses adjustable, I wound up having not quite as much fabric for the skirt length as I had hoped. While they’re long enough now, I had hoped to have a few extra inches of length to put tucks in that could be let out later. I also would’ve liked to have more fullness for the back of the skirt. But, such is life, and I think I made pretty good use of the two yards of fabric.

While they’re not as long or as full or as “historically accurate” as I might have hoped, I think they still turned out pretty cute. And Tris has actually requested to wear one instead of regular clothes at least once, so I’ll call that a major win!

9 Comments

Filed under Sewing

A wee widdle (Swiss) waist

As I toy with historically-inspired and whimsical touches to add to my wardrobe, I decided a modest Swiss waist would be a fun addition, that might make blouses like the shirt refashion something I could actually wear. I’ve never liked how I look in loose tops tucked into a waistband. Or gathered skirts for that matter. It has something to do with the shortness of my not-so-narrow waist. But, the addition of a wide belt can help with this, and a Swiss waist seemed like a very fun way to play with this idea.

This one is inspired by this original and pattern on Koshka the Cat, but definitely scaled down. I also decided to put the lacing on the side instead of the centre front or back, mainly for increased adjustability but also because I couldn’t quite face that many hand-worked eyelets. This choice is probably the least historically-justifiable in the construction, and, it turns out, my least favourite part of this make, but it’s still wearable.

A fair bit actually went into this little thing, not least because I did the vast majority of the sewing by hand. The nice thing about a hand-sewing project, though, especially a little one like this, is that I can pick it up and do a few stitches here and there, while watching TV with the family, whenever the twins are distracted.

I couldn’t find my cotton ticking (my first choice for light-weight corset-type things), so I went with hair canvas for the strength layer. By some miracle, my hunt for scraps of black fabric turned up the last remnants of my tropical-weight wool suiting used in this dress many moons ago, and there was just enough room in the odd-shaped scraps to cut the main pieces on grain and the bias strips for the piping more-or-less on bias.

I used two layers of hair canvas, stitched to create the boning channels. A bone at each short end to support the lacing and two at the centre, although in hindsight I could probably have done just one at the centre. When I made the pattern I was still debating on whether I would want to have it open at centre front or back, so I marked a boning channel on each side there, and didn’t think about it. I used 1/4” spiral steel boning, which is basically my default, although I might’ve gone with spring steel if I could’ve found my tin snips. (My corset-making box has gotten sorely denuded as I haven’t made one in a long while—the needle-nosed pliers also got plundered for other household tasks, forcing me to hunt down replacements, and my good wire-cutters somehow got switched for larger but inferior ones. All of which added time and frustration to what should’ve been a small and simple project. Anyway.

To give my thin wool a more substantial feel, and cover the scratchy hair canvas more effectively, I added a layer of flannel behind the fashion fabric. I added the piping and then catch-stitched top and bottom into place by hand.

The most annoying part (aside from finding my tools) was making the hand-worked eyelets. (According to the Dreamstress, who is much more of an authority than I, Swiss waists and other corset-type garments as outer wear, never had metal eyelets). Not so much the actual stitching of them, as the making and keeping the holes open through two layers each of wool and flannel, and four layers of hair canvas (since I included extra seam allowance of hair canvas at the sides, to support the eyelets. Fortunately my awl hadn’t gone missing, as I basically had to poke my hole open again after each stitch.

Once those were done, the final phase of adding the lining (which again I did by hand, slip-stitching it in place) was positively pleasant. The lining fabric is a slippery poly charmeuse used originally for lining this jacket (where it made me want to set things on fire) and then again for lining my winter walking skirt, where I merely hated working with it. Good thing it’s absolutely gorgeous. I have about a yard left, but I have to say applying it by hand to the insides of the waist was supremely meditative and satisfying. Maybe I need to only sew slippery fabrics like this by hand.

Anyway, the result is cute. The lacing gaps are about the size I planned, but overall look would be better without them. However, I wanted the adjustability. I think it would look nicer with a wider lacing—I was planning a black 5/8” ribbon, but I used up my stash of that on Syo’s grad dress last summer. Not sure if it will make the jump from costume to real-life use, but we shall see!

Leave a comment

Filed under Sewing

A Victorian Skirt Pocket

12568249_927885433970011_304858319_n

Almost skirt!

I haven’t blogged it much, as there hasn’t been much progress, but the skirt for my 1880s ensemble is coming along, finally
. I kinda stalled out before Christmas as I needed to put in the placket and pocket, and I was skeered. But this past session at the Victorian Sewing Circle, I tied on my big-girl apron, did the research (two whole paragraphs of it, as it turns out), and put the pieces in.

I found a quick description of what I was looking for in “Studies in Plain Needlework and Amateur Dressmaking” by Mrs. H. A. Ross. (Published 1887)


 Here’s my source documentation. P. 11 from the above.. It does seem to require a little bit of decoding, however.

“Skirt pockets are cut from. the lining”-ok, check.

“And are heart-shaped when opened flat. Twelve inches long by six wide is a medium size, leaving one side double and straight on the fold; the other wise rounded to a point on the top.”

There are definitely times when a picture is worth a thousand words, and the downside of the old sewing texts is the further back you get, the more scant the illustrations become. It sounds like what she is describing how you would cut out a paper heart for a valentine, but upside down…


Victorian pocket diagram

Pocket, cut on fold

“Sew around the bottom and five inches of the rounding side, leaving the remaining space to be sewed in the skirt seam. Unless covered by the drapery the pocket should be faced. Leave three inches of the pocket at the top, above the place for the hand.


She does like to leave the important bits for last. So the opening for the hand is on the curved side of the half-heart, towards the point, but at least 3″ down from it so the pocket isn’t too narrow for your hand to get into. Also, the pocket opening is sewn into a gap in the side seam, after it’s all complete.

“A tape must be sewn to the point and jointed to the belt (waistband). There is danger of the pocket being so narrow at the top that the hand cannot be inserted, though the pocket was cut plenty large enough.”

pocket and facing

Pocket, unfolded to show facing

“All pockets are sewed in double seam. first sew the seam very narrow upon the right side, the pocket turned and stitched again on the wrong side in an ordinary seam, without taking in the seam first sewed. This makes a strong seam and required no overcasting.” (AKA French seamed. Got it. Except that it’s the last bit and I didn’t read it before I sewed the actual pocket. Oh, well. Overcasting edge it is.)

2016-01-17 16.48.05

Pocket in seam.

Unfortunately I didn’t actually think to get any photos during construction, and I’m a smidgeon too lazy to make another one for demo purposes. 

As implied by the rather terse instructions, I left a gap in my skirt side-seam the length of the pocket opening (and hopefully in about the right place) and stitched the pocket to it after the fact. This wasn’t as slick as a modern inseam pocket but wasn’t as cumbersome as I originally feared it might be.  I think as a method it makes more sense for something hand-stitched, where the fold would decrease the time it took to sew while the stitching it in afterwards wouldn’t be nearly as cumbersome by hand as it could be by machine. (Though as I said it wasn’t as bad as I thought it might be.)

I also did the placket for the skirt opening, which I was also kinda dreading for no good reason. The page above describes about four different methods in about 20 words each; I used the instructions for making the slit version for this petticoat, but for the skirt I planned to have the opening in a seam. In the end I just cut a rectangle of my cloth and used it to face/lap the opening in one piece, down one side and up the other. Not quite what was described, but simple and it will function just fine. It needs hooks, and of course the whole thing needs the waistband, and then I’ve got to start thinking about trim. 

This is where shit gets exciting. Or intimidating. Oh, hell.

  I’m thinking about using the middle skirt for my inspiration, though I also really like the one on the left. This is a picture from a reproduction of an 1886 Bloomingdales catalogue, belonging to my mom. I love the online resources but it’s so amazing to flip through the catalogue. Anyway,  I definitely want an overskirt reminiscent of the two In the picture—I have TV368 (below) for a pattern. 

  Getting mighty ambitious, aren’t I? 😀

And then I will have to start muslining the bodice, I mean waist. O_o somehow compared to that decorating the skirt doesn’t seem so intimidating…


4 Comments

Filed under Sewing

The Real Thing

The real thing

The real thing

I finally got a hold of my mom’s Genuine Article Victorian Drawers (TM).  Well, I can’t actually date them particularly well—but they’re certainly older than 1920s, and they’re almost perfectly in keeping with everything Victorian I’ve read about what drawers should be. Which doesn’t seem to have changed much over time, except possibly for length.

The Originals

The Originals

I gotta tell you, I feel pretty naughty for trying them on. The fabric’s in pretty good shape, but it still feels kinda sacreligeous.

Back view

Back view

They’re a little more snug than my pair.

closeup

closeup

The hem is a gorgeous eyelet lace, not gathered. I don’t think I could find a lace like this if I offered my firstborn child.

side by side

side by side

Here’s the two side by side. Neither of my lace additions are particularly spot on, are they?

that thing

that thing

Now, THAT, my friends, is a hand-worked buttonhole. Well, except for the frayed bit. You’d be a bit frayed, too, if you were over 100 years old.

button

button

I think I got my button just right, though.

Felled seam

Felled seam

I believe this seam was sewn by machine, then hand-felled. Yes, the Victorians are judging me for wimping out.

Length adjustment

Length adjustment

The wide tuck to the left was done before the inseam was stitched, as per all the different instructions. The one I’m holding here, though, was added after. I wonder if the seamstress thought the space needed “something” or if it was intended to shorten the length a bit?

yummy

yummy

I wish I’d done more narrow tucks, rather than three big ones, on my pair. No, I’m not re-doing them. Incidentally, the band of lace above the trimming lace is finishing the hem, exactly like the band finish on my pair except on the outside and pretty. I wish I’d thought of that one, dammit.

fabric and hand-stitching closeup

fabric and hand-stitching closeup

Both of us stitched the outside of the waistband by machine and then hand-stitched the inside. My stitches are not quite as neat and small as the Victorian’s, but they aren’t too bad.

In other news, reader Meadowsweet Child sent me some spoon busks all the way from civilization (aka Ontario*)! Woohoo! And I may have gotten a bit click-happy on Farthingales, so with any luck I’ll have some boning and things soon, too…

*It occurs to me that ordering supplies, for anything really, from Ontario is probably terribly historically accurate for early Saskatoon. Everything, even lumber, had to be shipped from out east. Then, since the railway didn’t even arrive until 1890, it had to be carted up from Moose Jaw, over 200 km.

4 Comments

Filed under Sewing

Sexy lingerie…

This is not. I assume adding a corset will make it better, but I am currently unconvinced. No wonder Victorians were so sexually unenthused (although they did invent the vibrator…)

So, here, only a few weeks late, are some final finished photos of my drawers. I had been holding off, hoping to get comparison shots with an actual pair in my mother’s collection, but I had a few free moments this morning while Osiris was still in bed (and so not around to laugh at me) so I figured I’d better seize them and get some photos. However, my cameria is AWOL (actually, probably somewhere in the bedroom with Osiris, and if I bang around in there I’ll wake him up and lose my opportunity), so you still get iPhone photos. Sorry. 😦

20130929-082742.jpg

Front View

The drawers fit, for a given level of “fit”. The length is about right, or maybe it’s a bit too long. Apparently they should be just below the knee—anything longer is slovenly. And the saggy-baggy-puffy-crotch thing seems to be part of the charm. Or, y’know, something.

Speaking of which, my main source of instruction have been threefold: “The Home Course in Dressmaking and Ladies Tailoring” (copyright 1908), which I actually have in paper copy, whence came the actual draft for these drawers, an ebook, “The Home Needle,” from 1882, by Ella Rodman Church, and the pair of antique drawers in my mom’s collection (hereafter referred to as “the extant pair.”). I love the 1882 book because a) it’s just about my time period (mid 1880s), b), it’s mercifully brief, and c) it’s delightfully opinionated. Mrs. Church starts right in by excoriating the sewing-machine (by the time of my 1908 book, the sewing machine was much more accepted and there is much less emphasis on hand sewing of things like basic seams.), and the state of sewing generally, and she’s full of important tips like the one above about the appropriate length of drawers. Whenever I find myself lacking, seamstresslywise, I remind myself that I keep company with all the half-ass, slipshod Victorian girls just plugging away making shoddy, poorly sewn items purely to annoy mavens of excellence like Mrs. Church. And if she finds my drawers slovenly… well, she’ll never have to see them. 😉

20130929-082757.jpg

Side view. Note puffy butt and tapering waist-band.

Although I based the draft for my drawers on the later Home Course, I did take a couple of details for them from Mrs. Church.

Drawers draft from The Home Needle (1882)

Mrs. Church’s drawers draft has a curved front crotch, and no rear crotch curve at all. This is actually the same as the drawers in Simplicity 9769. I assume this creates an extra-puffy bum, which would be desirable in the bustle era. (I wonder if the front curve has to do with the pattern being designed to have the crotch closed in the front.)

Drawers draft

Drawers draft from Home Course In Dressmaking (1908)

The 1908 draft I used, by contrast, has no curve at either front or back, but both lines angle back in pants-fashion, rather than one angling and one not.  And I departed from both drafts on one thing—when I compared my pattern with my mother’s extant pair (which, of course, I don’t know the precise dating of), I found the leg of the extant pair to be WAY, WAY narrower than my draft. So I narrowed that. Actualy, a lot of the details I wound up picking—the tucks, the lace, the ruffle, even the band finishing the crotch edges—kind of go back to that original pair.

20130929-082812.jpg

Rear view. The “chemise” is a slip left over from a 90s sheer-floral-rayon dress (you remember the ones). It actually kinda works, although the neckline is all wrong.

Although I initially drafted a curved waist-band pattern based on on the 1908 book, by the time I got around to this part of the sewing I had misplaced it and figured I would go with Mrs. Church’s instructions, which are more my proper period, anyway.  She says that although most people make a straight waistband, about an inch folded over, it’s better to make one wider at the back, that tapers to the front, and closes with two buttons rather than one. So I did. It would probably sit better at my actual waist, but despite all the fussing and futzing it turned out a bit large. I could, of course, move my buttons over, but I’m thinking the less bulk at my waist the better, once all the layers start coming together.

20130929-082848.jpg

Phew. OK, let’s stick with hanger shots.

I added a few more small tucks around my rather-ugly lace. I’m more or less okay with it now, although of course I’ve since found several laces in stash that would’ve been better. I did not remove the fabric behind the lace—there’s top-stitched lace exactly like this on the extant pair of drawers. I suppose see-through panels on your drawers might not be quite the thing, or maybe that seamstress was just a bit lazy. Either way, I have precedent.

20130929-082905.jpg

I added a few more small tucks around the wider lace. I like it better now.

I finished my inseam with a French seam, as per the 1908 instructions, contra Mrs. Church and the extant pair, both of which use a felled seam here. I can see why—the fell would be flatter and less likely to, ah, chafe delicate parts, since the low crotch sits pretty much right between your thighs. Since I don’t plan to be wearing these for days on end, well, I’ll live.

20130929-082920.jpg

Inseam, finished with a French seam.

I also finished the crotch with a straight band, as per the 1908 book and the extant pair, contra Mrs. Church, who advises some kind of a shaped facing, wider at the crotch point and narrowing toward the waistband—I couldn’t really make heads or tails of what she was describing, frankly. Which is the downside of the Victorian sewing books, but anyway.

20130929-082935.jpg

Two medium buttons

A few weeks ago my mother handed me two baggies of mixed buttons she had picked up at a garage sale. Ah, the joy. Anyway, I went through these looking for the perfect buttons, and found quite a few plain, smooth white glass buttons that seem just perfect. Medium size buttons, not small, in accordance with Mrs. Church’s instructions.

20130929-082949.jpg

Unbuttoned to show my terrible-ass buttonhole.

I remain impressively terrible at making hand-worked buttonholes (especially when I compare myself to actual examples). For something different this time I used a darning yarn that was in the sewing stuff I recently got with my Grandmother’s machine. I used it doubled and single would’ve been better, and it turns out after the fact that I was using a blanket stitch rather than a buttonhole stitch (they’re much the same except for the directly of the needle), which explains why my knots never end up in the right place. However, they are sturdy. Mrs. Church is rolling over in her grave as we speak.

20130929-083022.jpg

Now you can REALLY see the difference between the front and back waistband width.

These were pretty fun to make, although I must say finishing something and not being able (or even inclined) to immediately wear it out and about is pretty frustrating (and why I have resisted the siren-song of historical costuming in general, the last few years). Next in line: chemise, corset, petticoats, bustle. Not necessarily in that order. At my current rate that should only take, oh, another two years?

29 Comments

Filed under Sewing

Historical Dabbling

20130819-112629.jpg

Old sewing books

I am not, in any way, a historical seamstress. I don’t even think of myself as a particularly “vintage” one, though I definitely have leanings in that direction (I may be in denial.) The Dreamstress I ain’t. However, back in my hometown, I have Connections. In particular, a local history site my mom has been involved with for yonks, has some antique machines that I wanted to play with. They were amenable to me playing around, and wondered was I amenable to doing a program or two on Victorian sewing? (The house, the oldest in my hometown,* does low-stress, small-scale historical programming, everything from Victorian laundry to kids games. Strictly speaking the time period is 1880s**, but they’re not particularly picky about that.)

Originally I had hoped to play around with some antique attachments on the actual machines in the house. There’s a National machine that fits this set of attachments, and a singer Model 12 that’s, frankly, a caveperson of the treadle world. Sadly, the National is missing part of the tension apparatus so isn’t currently usable (although I have hopes of fabricating a replacement piece in the longer-term), and the Model 12 needs some new needles before I can assess whether it’s skipping stitches because it’s old and gunky or whether it’s just that the needle that’s currently in it is about as thick as a tree stump and equally sharp.

20130819-112639.jpg

Drawers.

Anyway, not having the treadle option, I packed up my Featherweight (which has the look and the attachments, even if it’s far from the genuine article) and set about sampling some examples of Victorian embellishment, at least as it occurs on linens and underthings. I figured my goal for the day would be making some samples and, if all went well, starting on a pair of Victorian drawers, which you can see part of in the picture above. To go with the corset I haven’t made yet, you know.

(And to those who are justifiably appalled that I, having just professed myself Not A Historical Sewist, am doing educational programs on historical sewing, well, I did know a tiny bit more than anyone else who showed up that day, and I did read about five different Victorian sewing manuals in the days leading up to the event. If a real re-enactor shows up, though, I’m sunk.)

Drawers draft

Drawers draft

It made for a lovely, low-key afternoon, anyway. I’m oddly thrilled by the experience so far. There’s a lot I could babble on about the styles, my research, and the individual techniques, but a) I didn’t take any good pictures (I did some totally killer lace insertion on a sample, doods. OK, not actually killer, but I’m stoked) and b) I have to go to bed, so I’m going to hit publish and bore you with the obsessive details some other night.

*On its original foundation, which has to be the most annoying footnote to always have to add to a “oldest X” claim.

** People reading in the many, many parts of the world where established human settlement stretches back more than a century and change, feel free to laugh your asses off.

17 Comments

Filed under Sewing