Tag Archives: 70s

Does this dress make me look pregnant?

I gotta tell ya, there’s a level at which I REALLY enjoy the few moments of life when that isn’t a relevant question. Because quite a few of my favourite styles of clothing, um, make me look pregnant. Even when I’m not. I love empire-waisted dresses, including ones with gathered skirts. So, while pregnant seemed like the perfect chance to indulge that love.

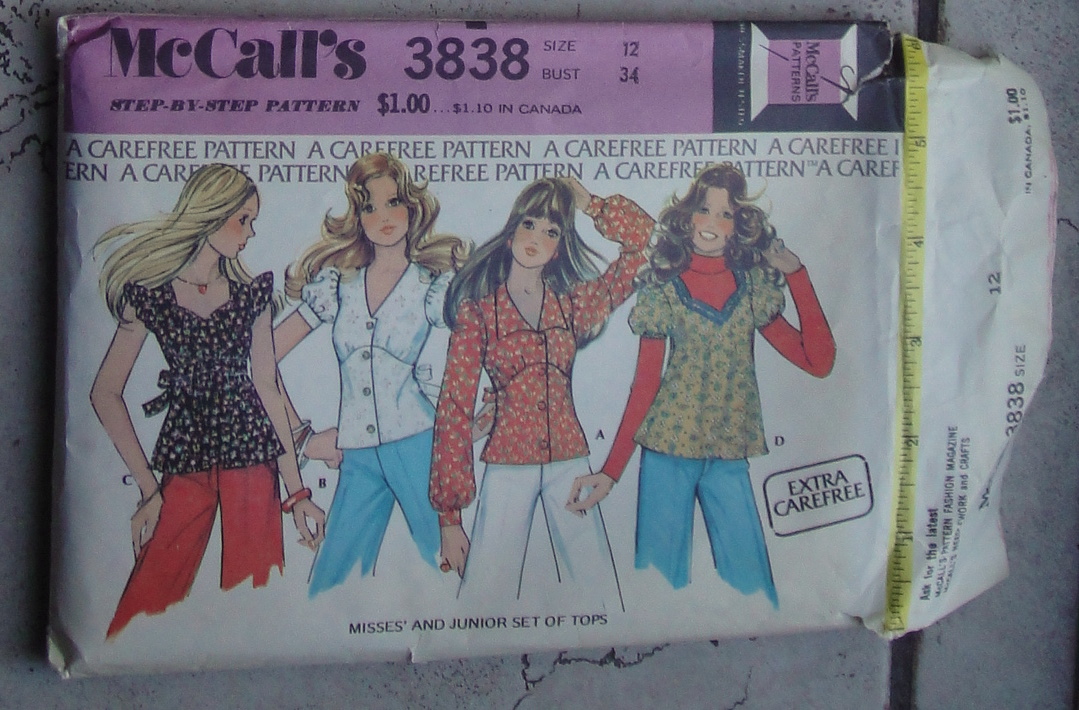
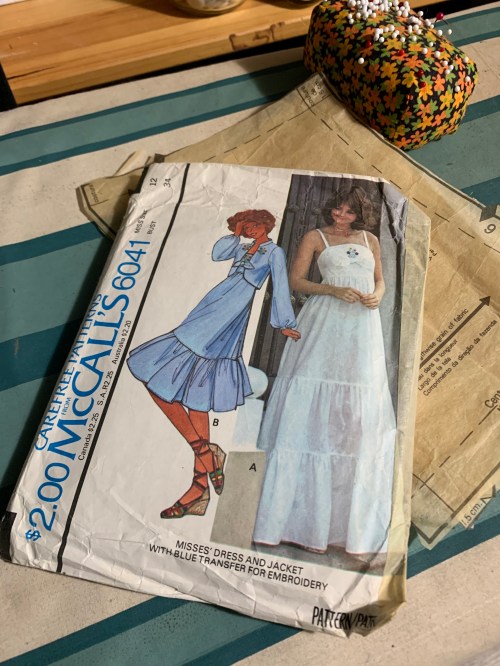
This pattern was a recent donation(among many, many others) from a friend of my mother’s. Thank you, Bernie! We all know I’m a sucker for 70s dresses, and I have a bad case of sundress-on-the-brain, so this was an easy thing to gravitate towards. I have had NO energy for the last several months, but finally just in the last week or so I’ve had a tiny bit of extra jam in the evenings, enough to very, very slowly piece this dress together over the course of the last couple of weeks.

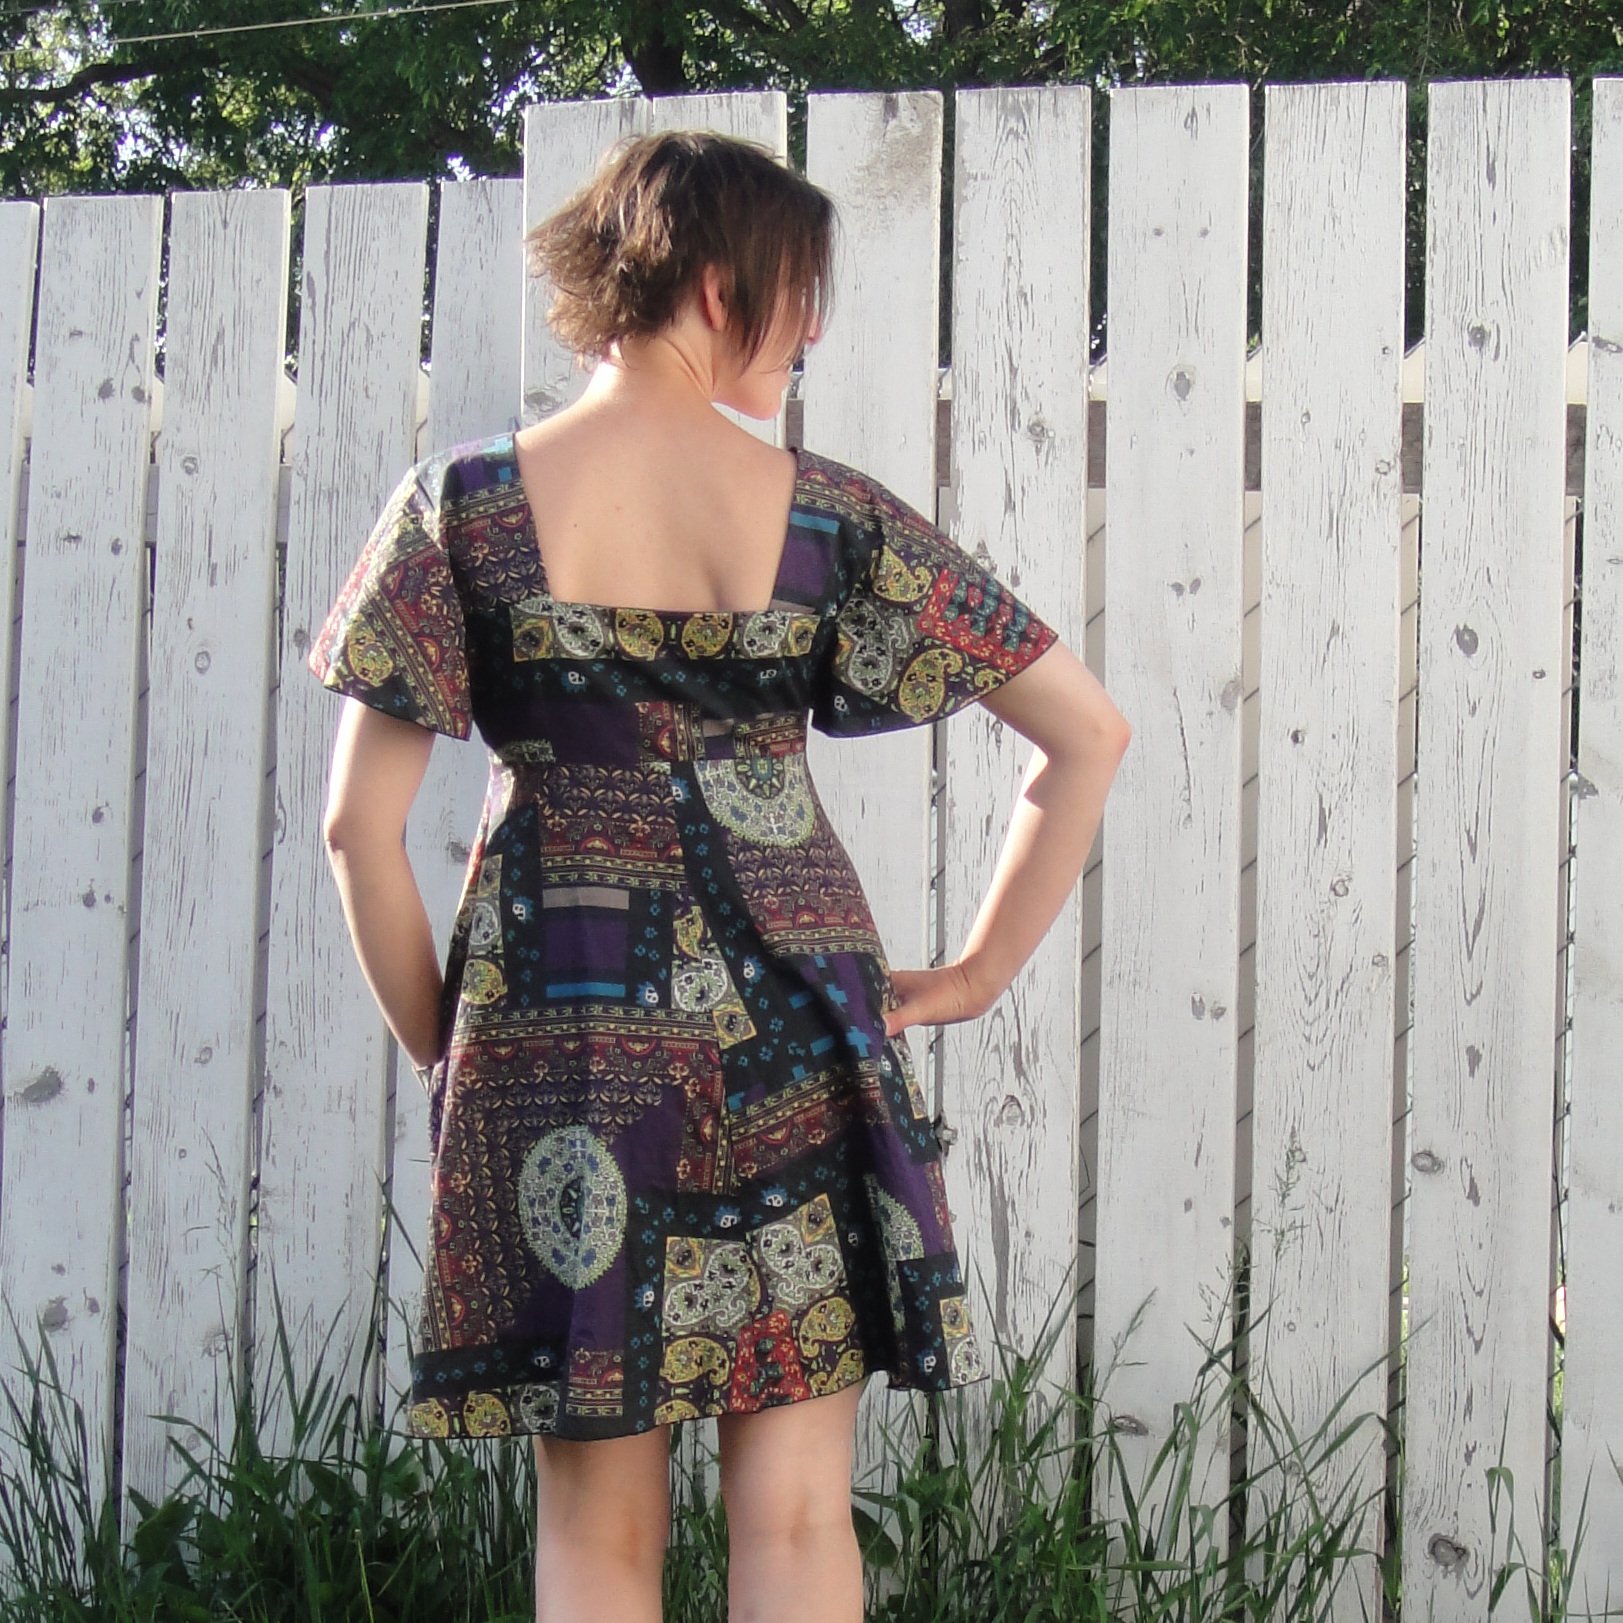
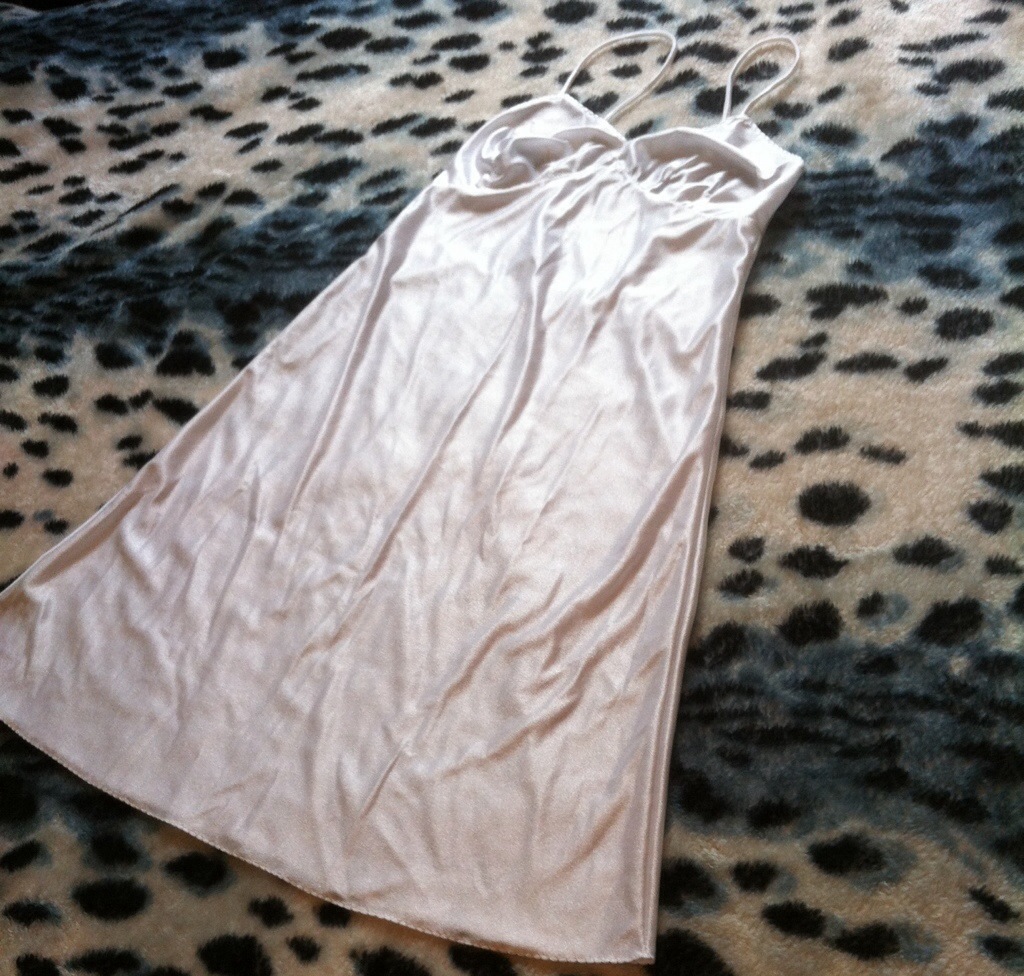
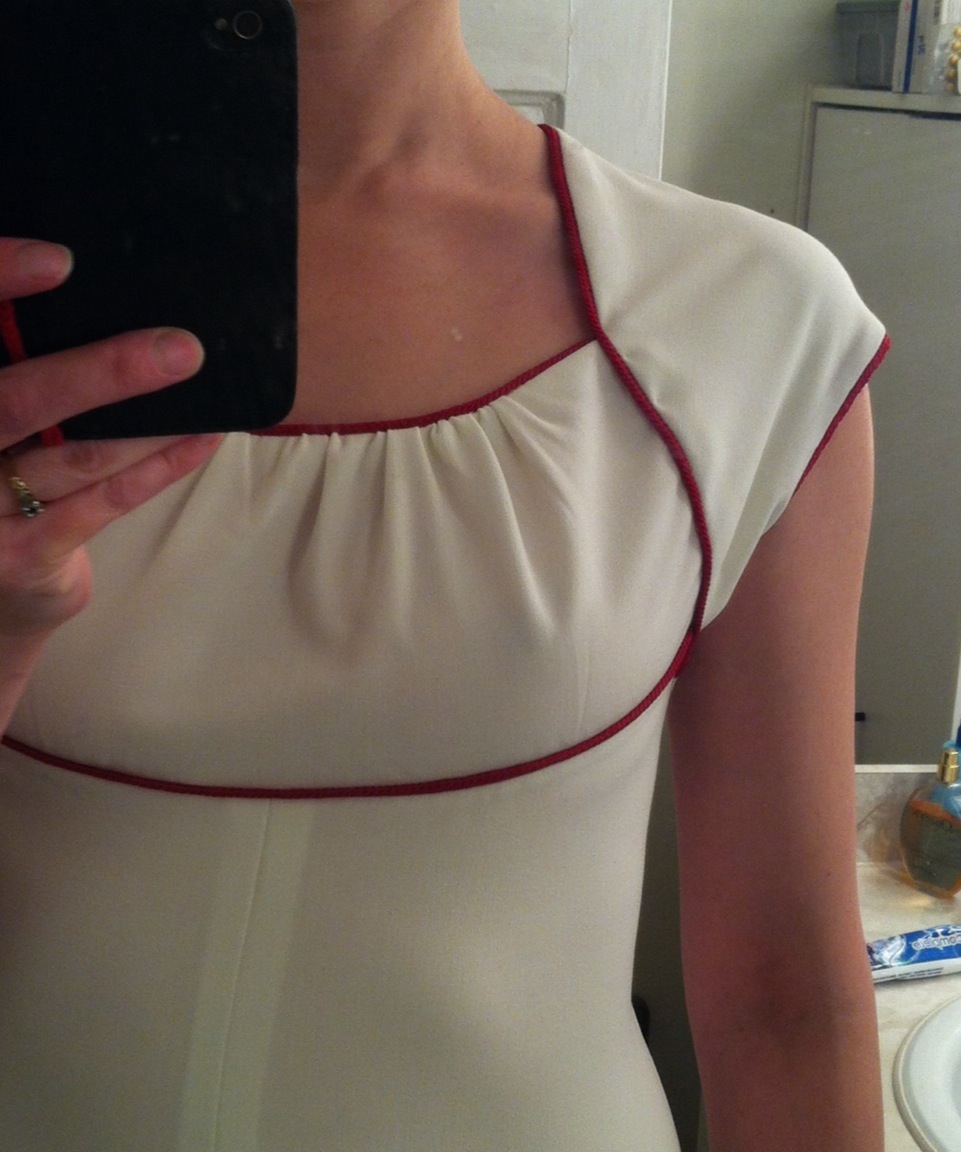
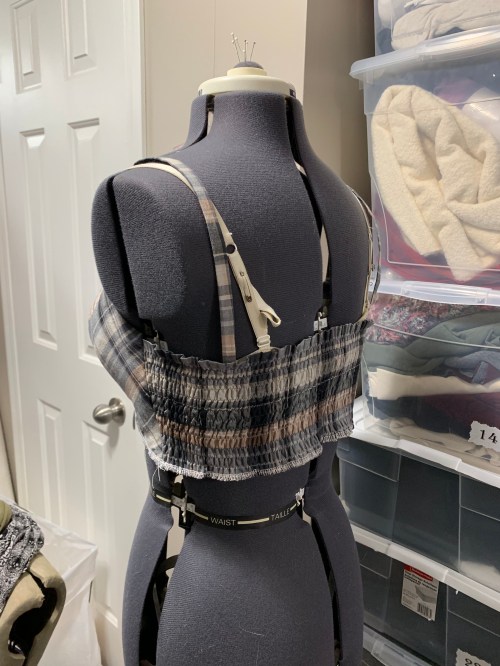
The pattern is in a size 12, which WAS my size, but is now a good three or four inches small. At its core it’s a simple princess seam empire bodice with a lightly gathered tiered skirt; there are some cute ties across the bust, though I almost skipped them. I made quite a few mods on this first version to be more maternity friendly—I prepped a shirred panel to cut the back piece from, and after some measuring made a small FBA on the front.

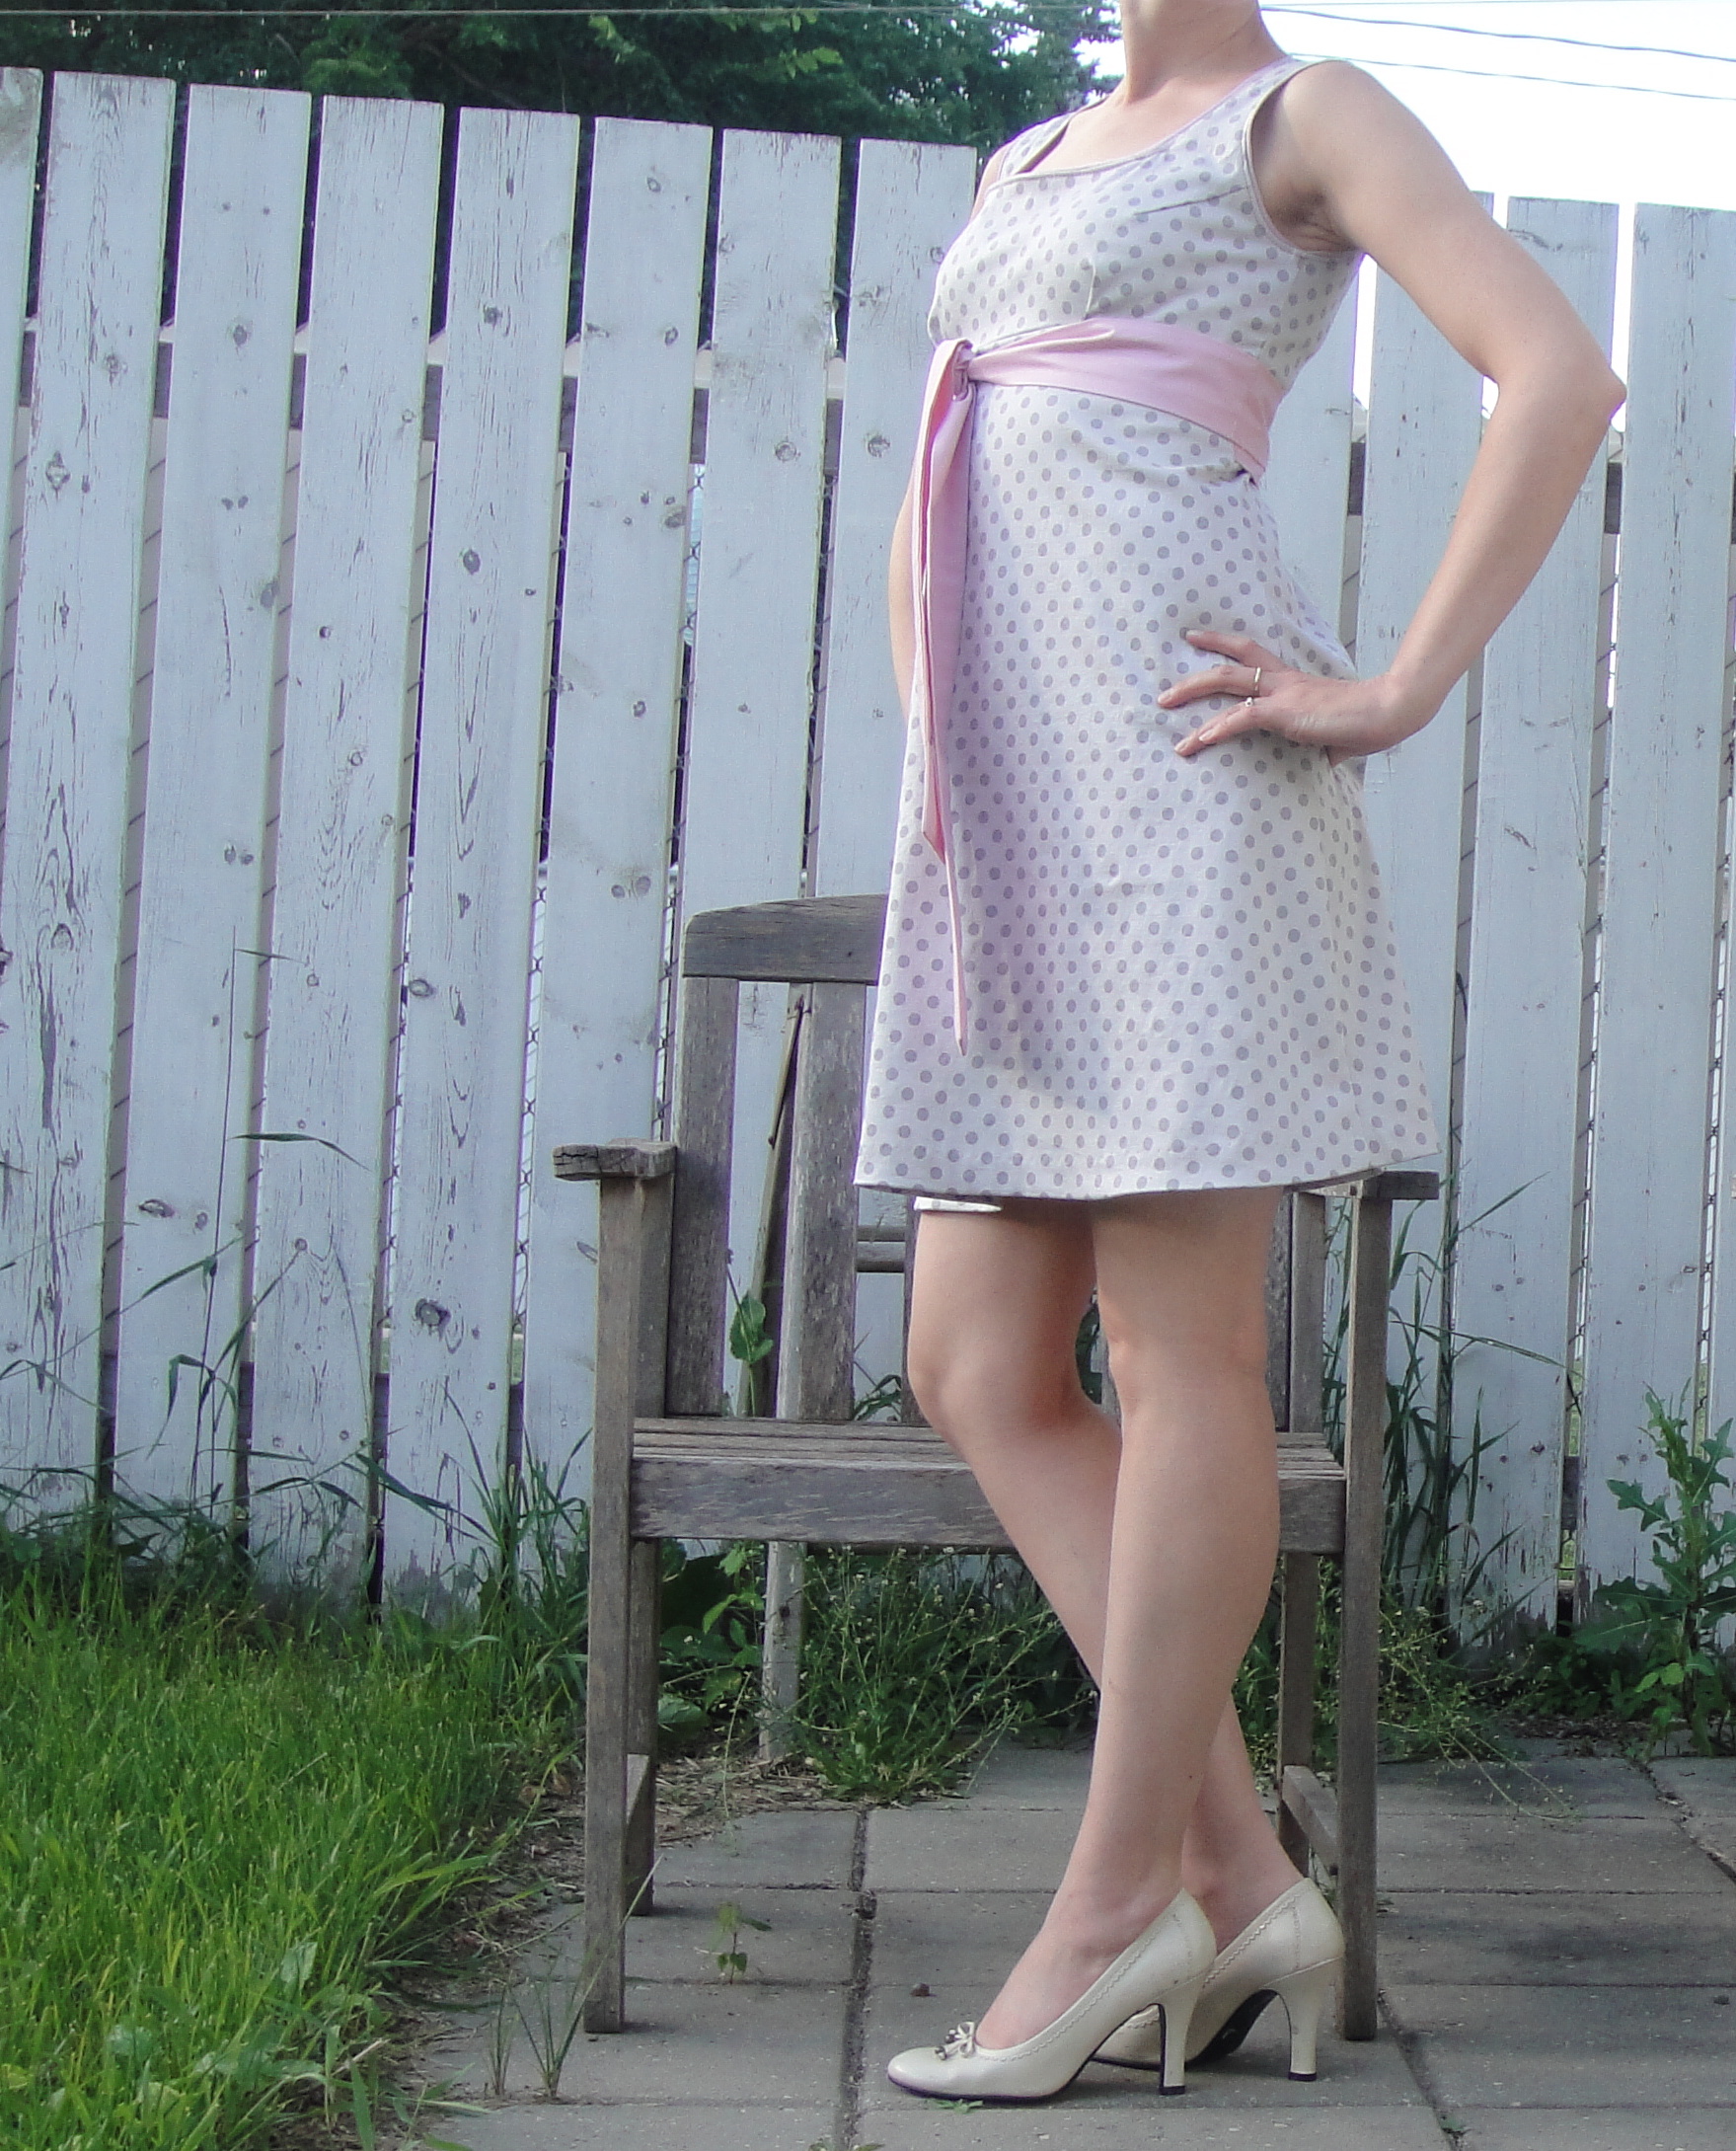
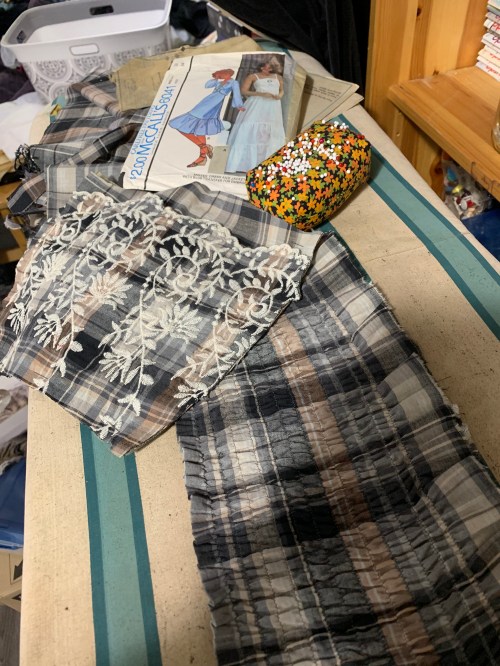
For this particular dress I just used a simple gathered rectangle for the skirt, to take advantage of the border embroidery of my fabric. And it’s probably more full than it needs to be, or would need to be if it weren’t going to be going over twins.

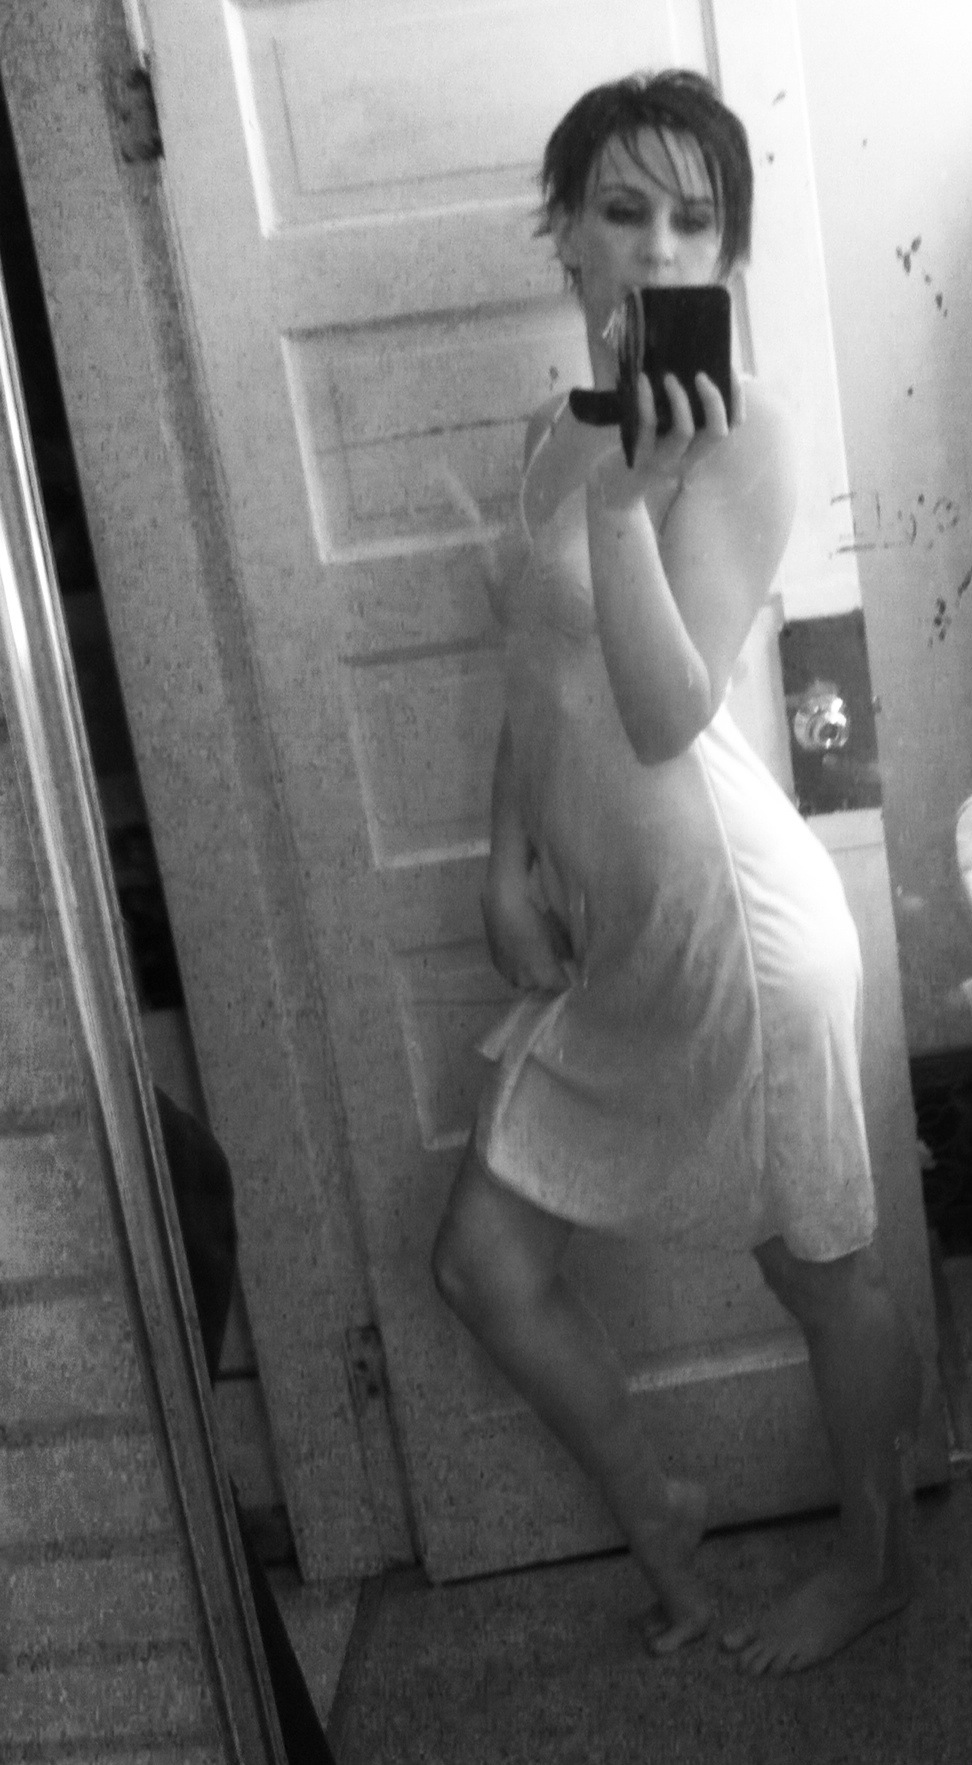
I feel like this is about how big I’ll be by August.

The front hem will certainly go on lifting as the belly expands, but I’m cool with that. It’s a bit long as it is.

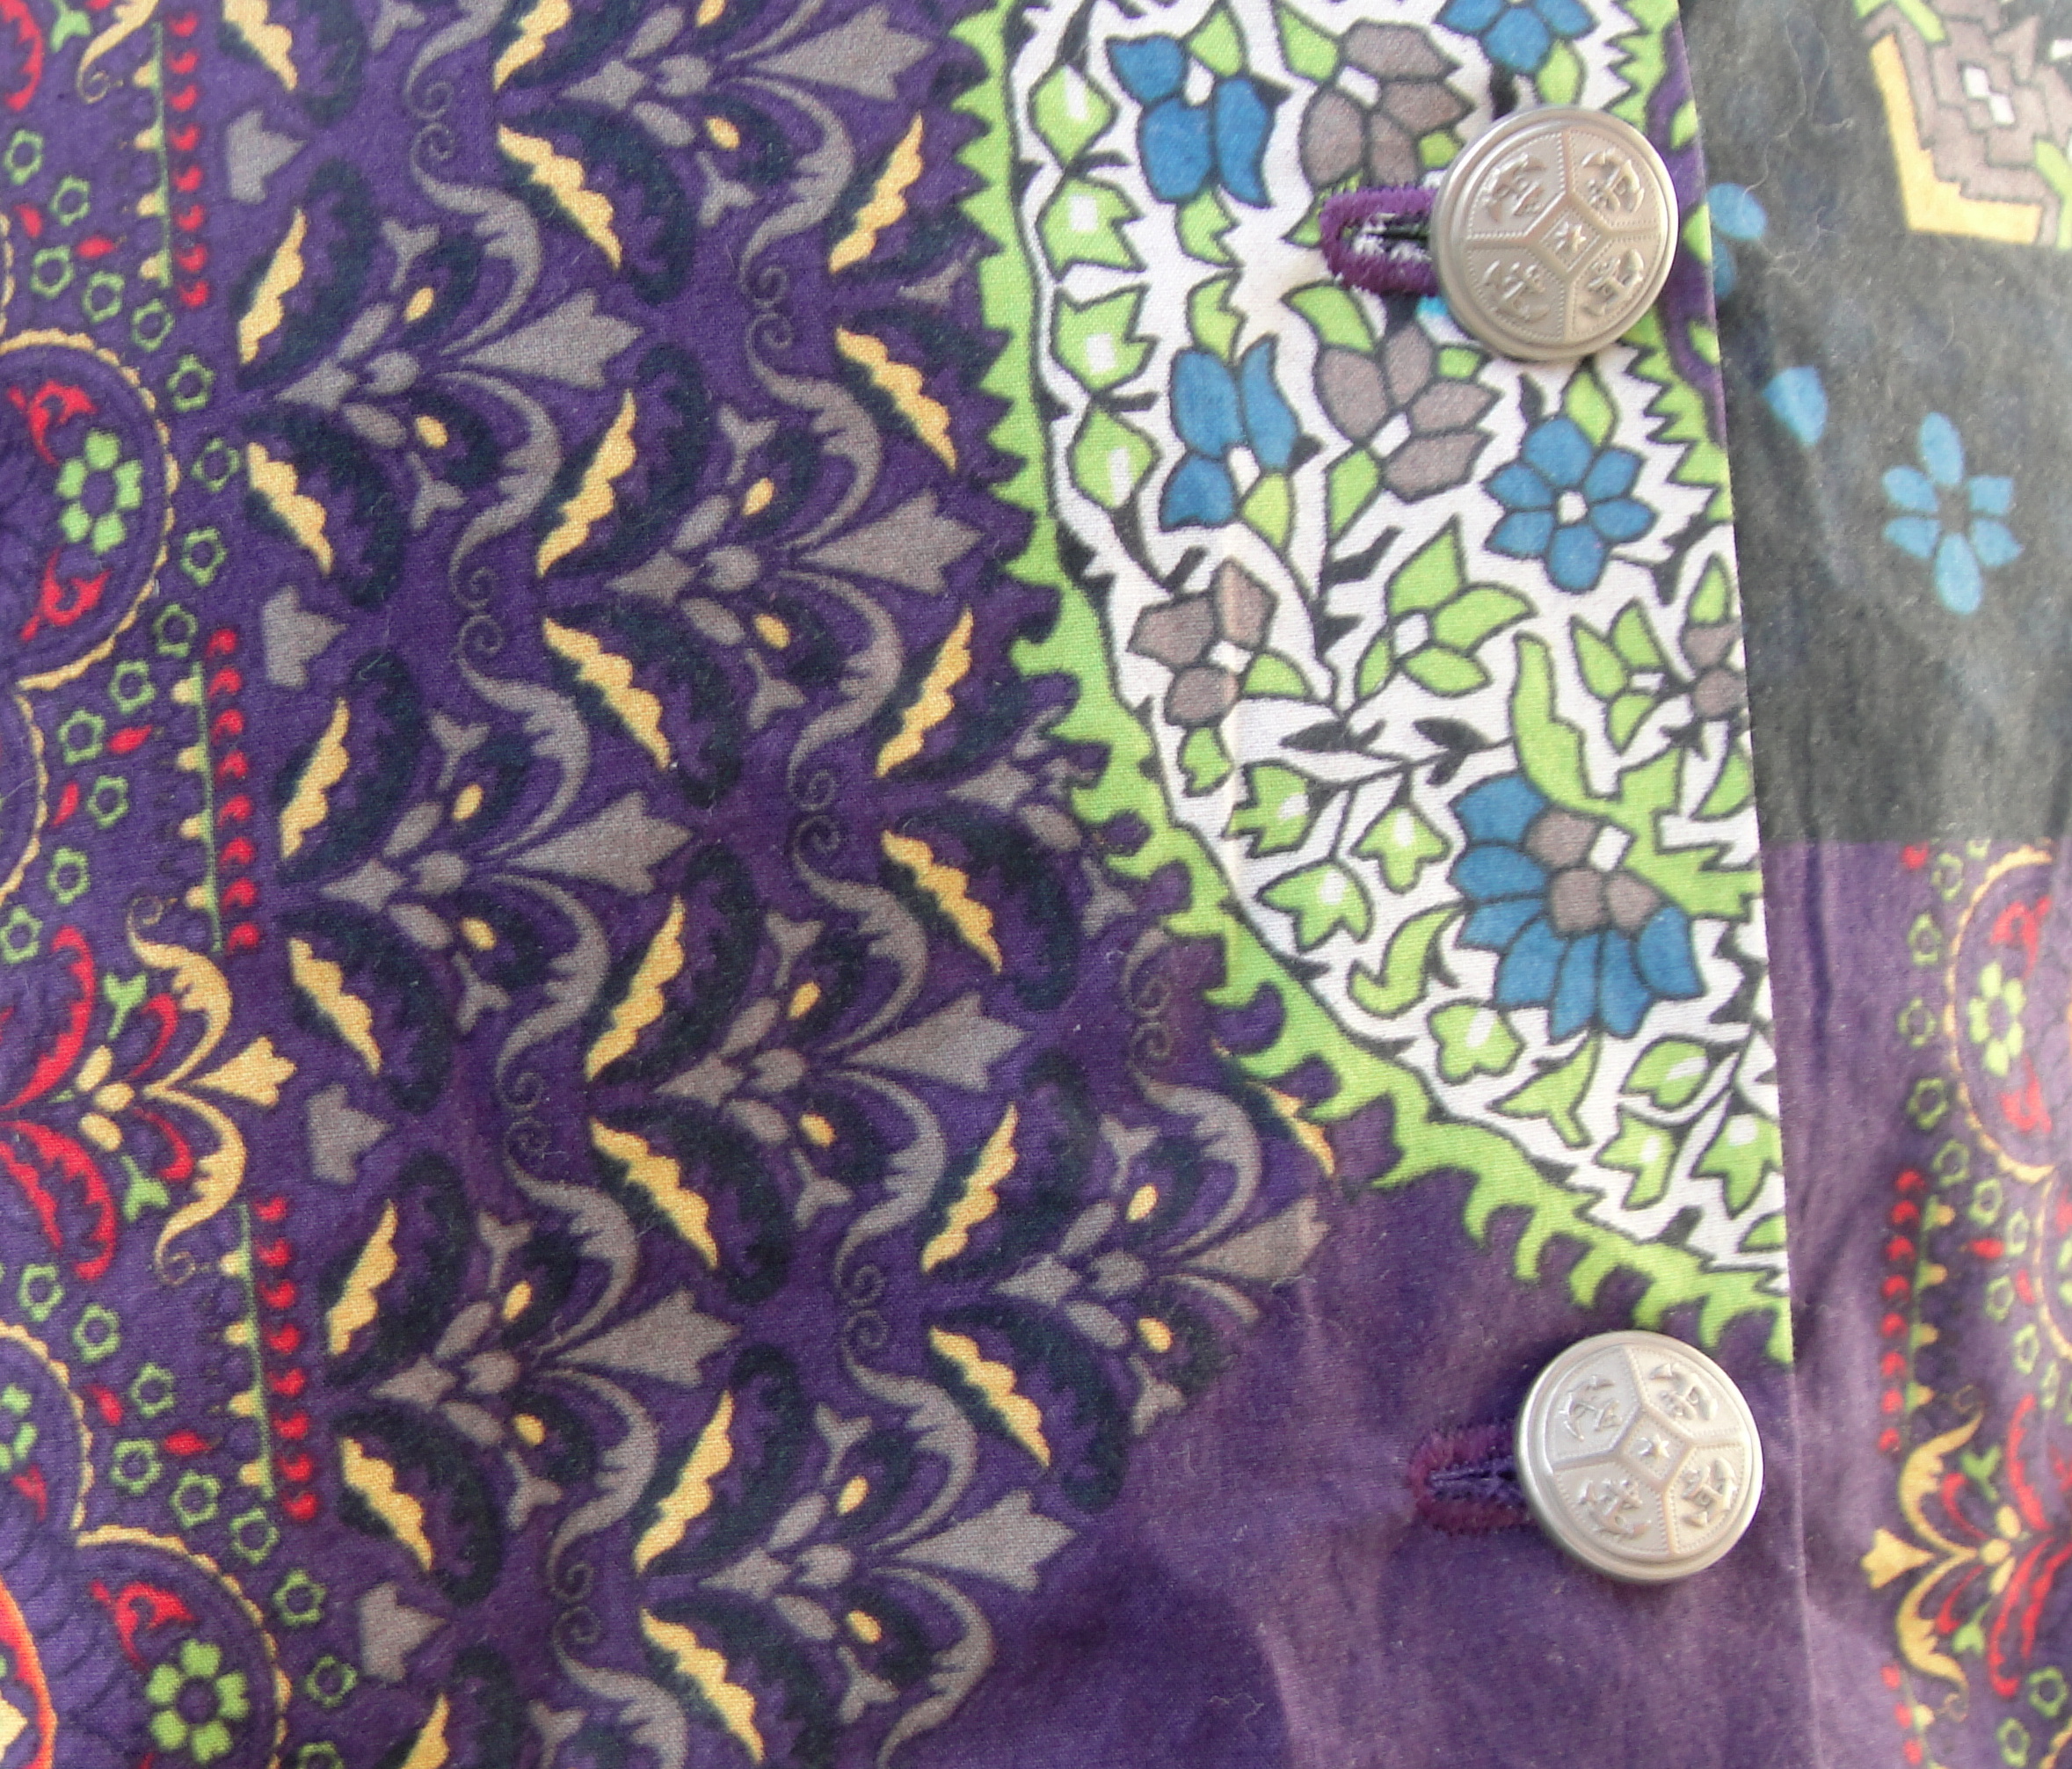
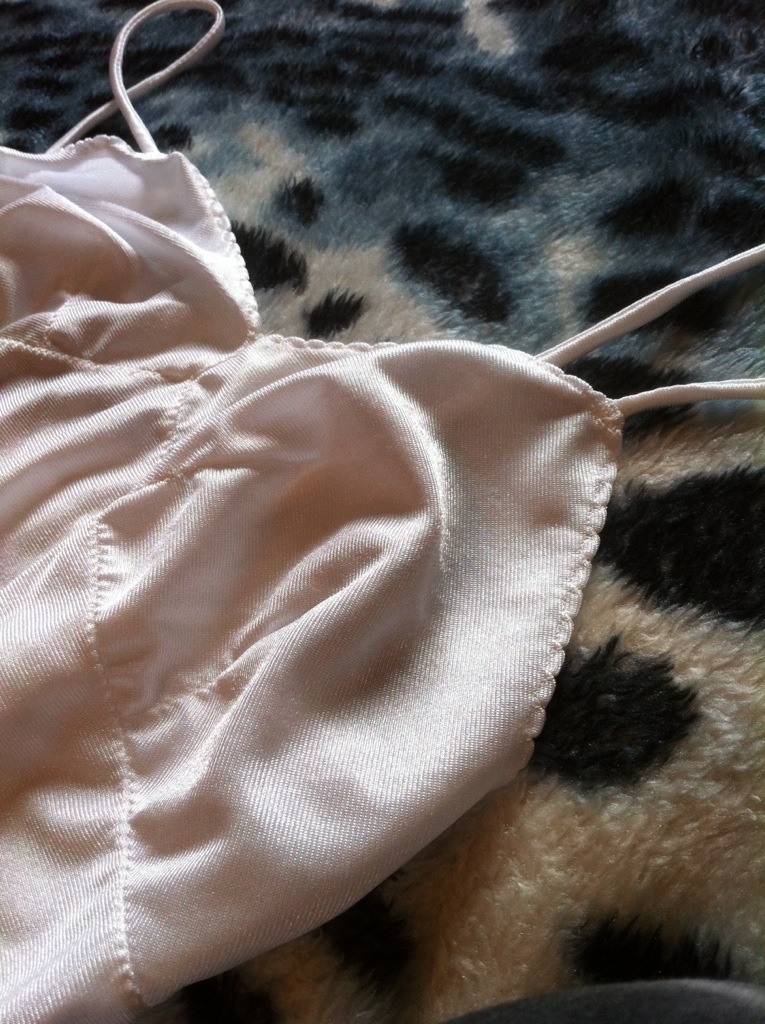
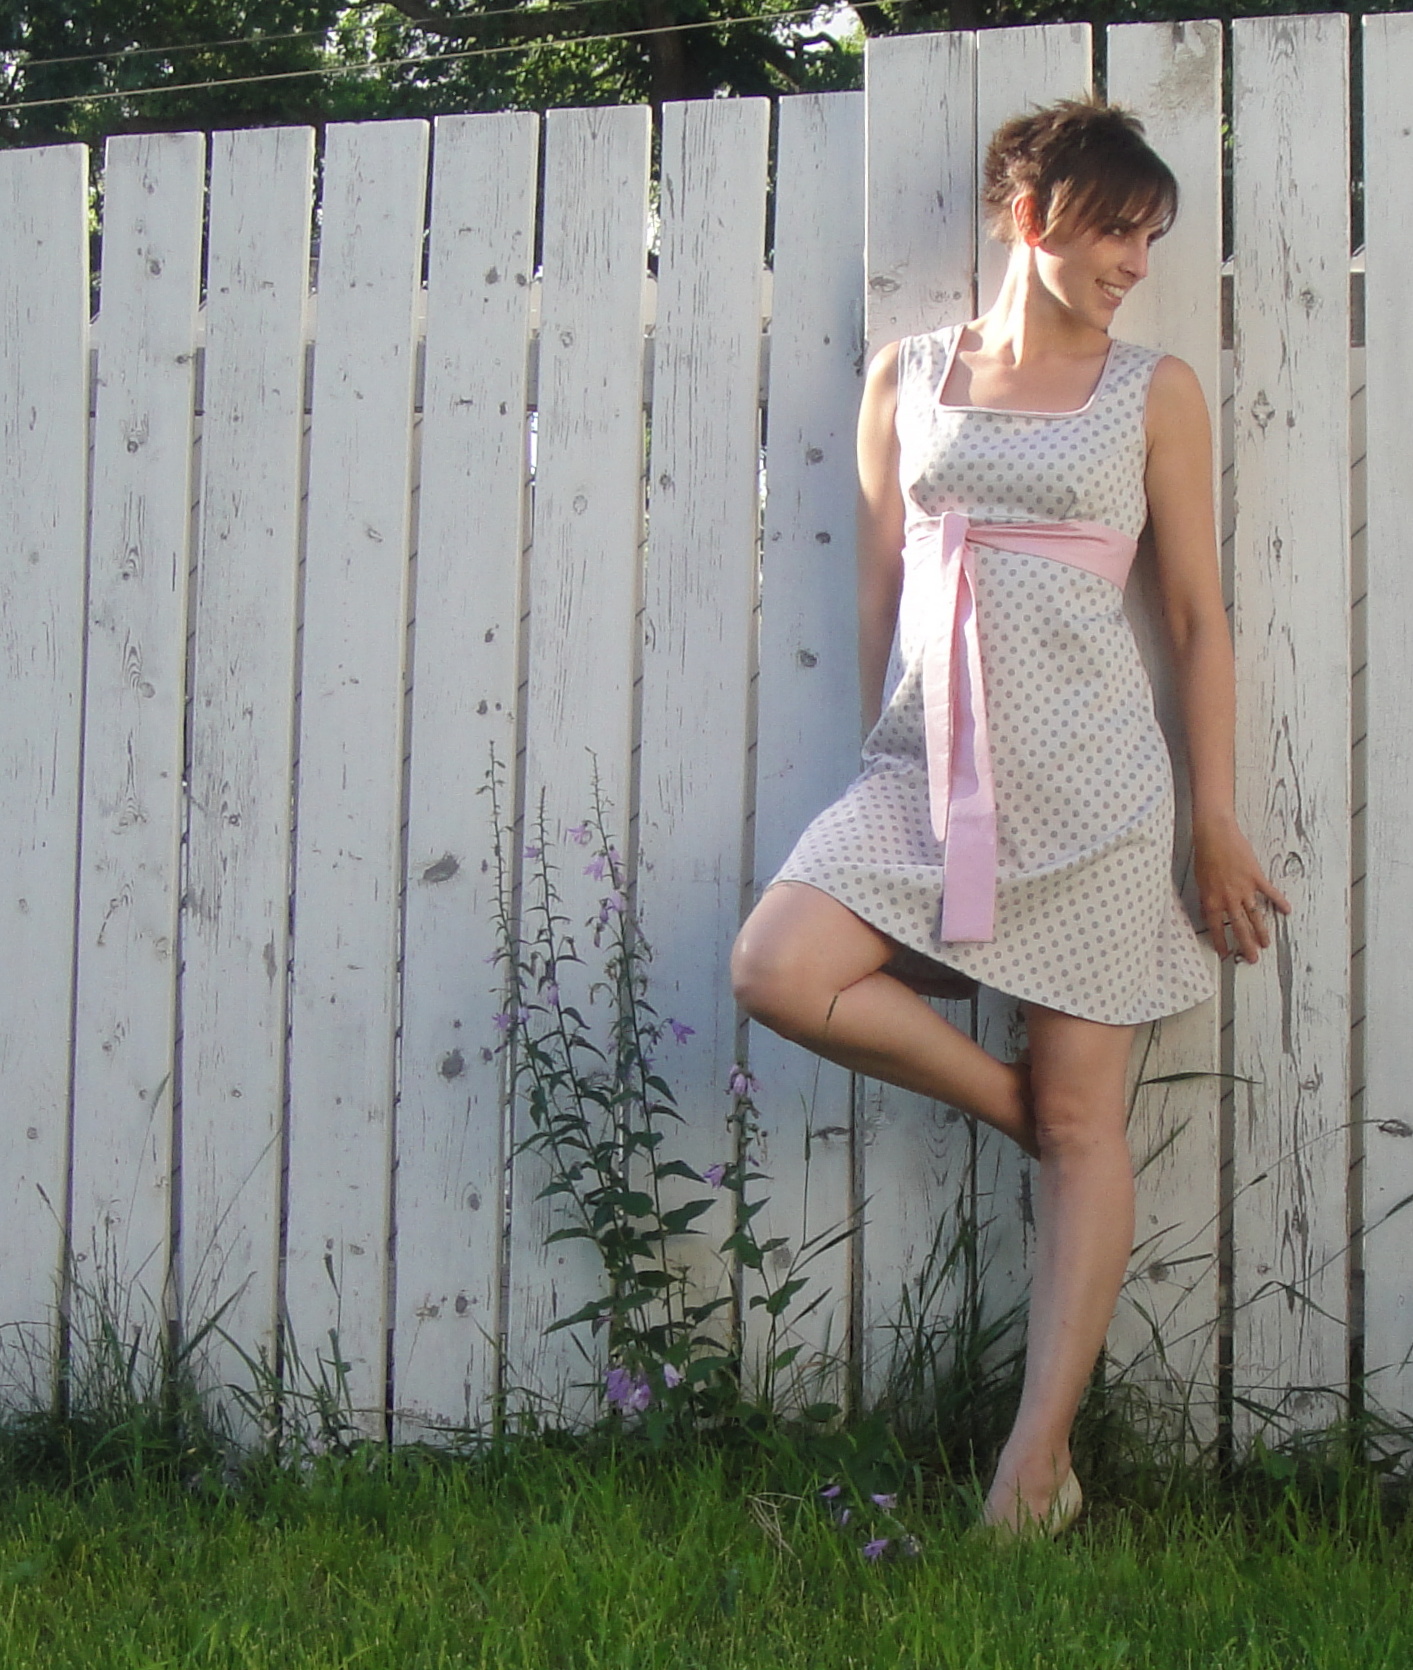
I thought that the front tie provided an opportunity to try out some kind of a nursing access point for the sundress. I never had any nursing-specific clothing with my first two pregnancies, and I did plenty of nursing, so I’m a bit sceptical about the value of such mods, but I thought I’d give it a try, at least.

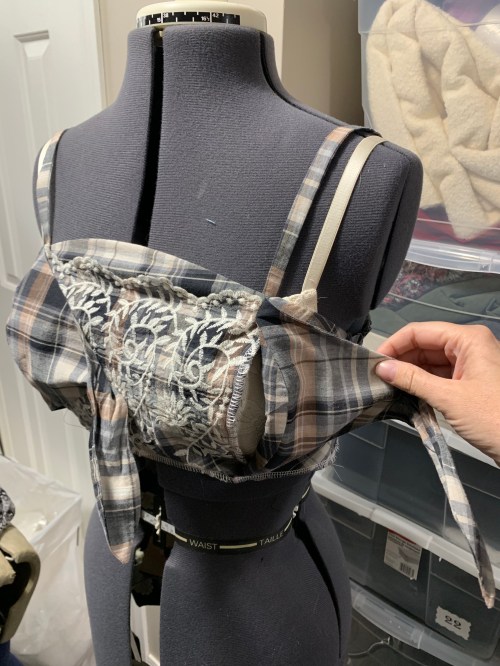
I basically just sewed the CF panel separately from the side front panels + ties, and then lapped the pieces and tacked them at top and bottom. If the ties are tied everything stays securely in place, and if you untie, you can fold it back and access the slit. In theory the other side will stay closed, though if it becomes an issue I can see adding some kind of a belt-loop in the middle to keep the non-nursing side in place. As I said, we’ll see. That particular feature isn’t likely to be tested until next summer, anyway.

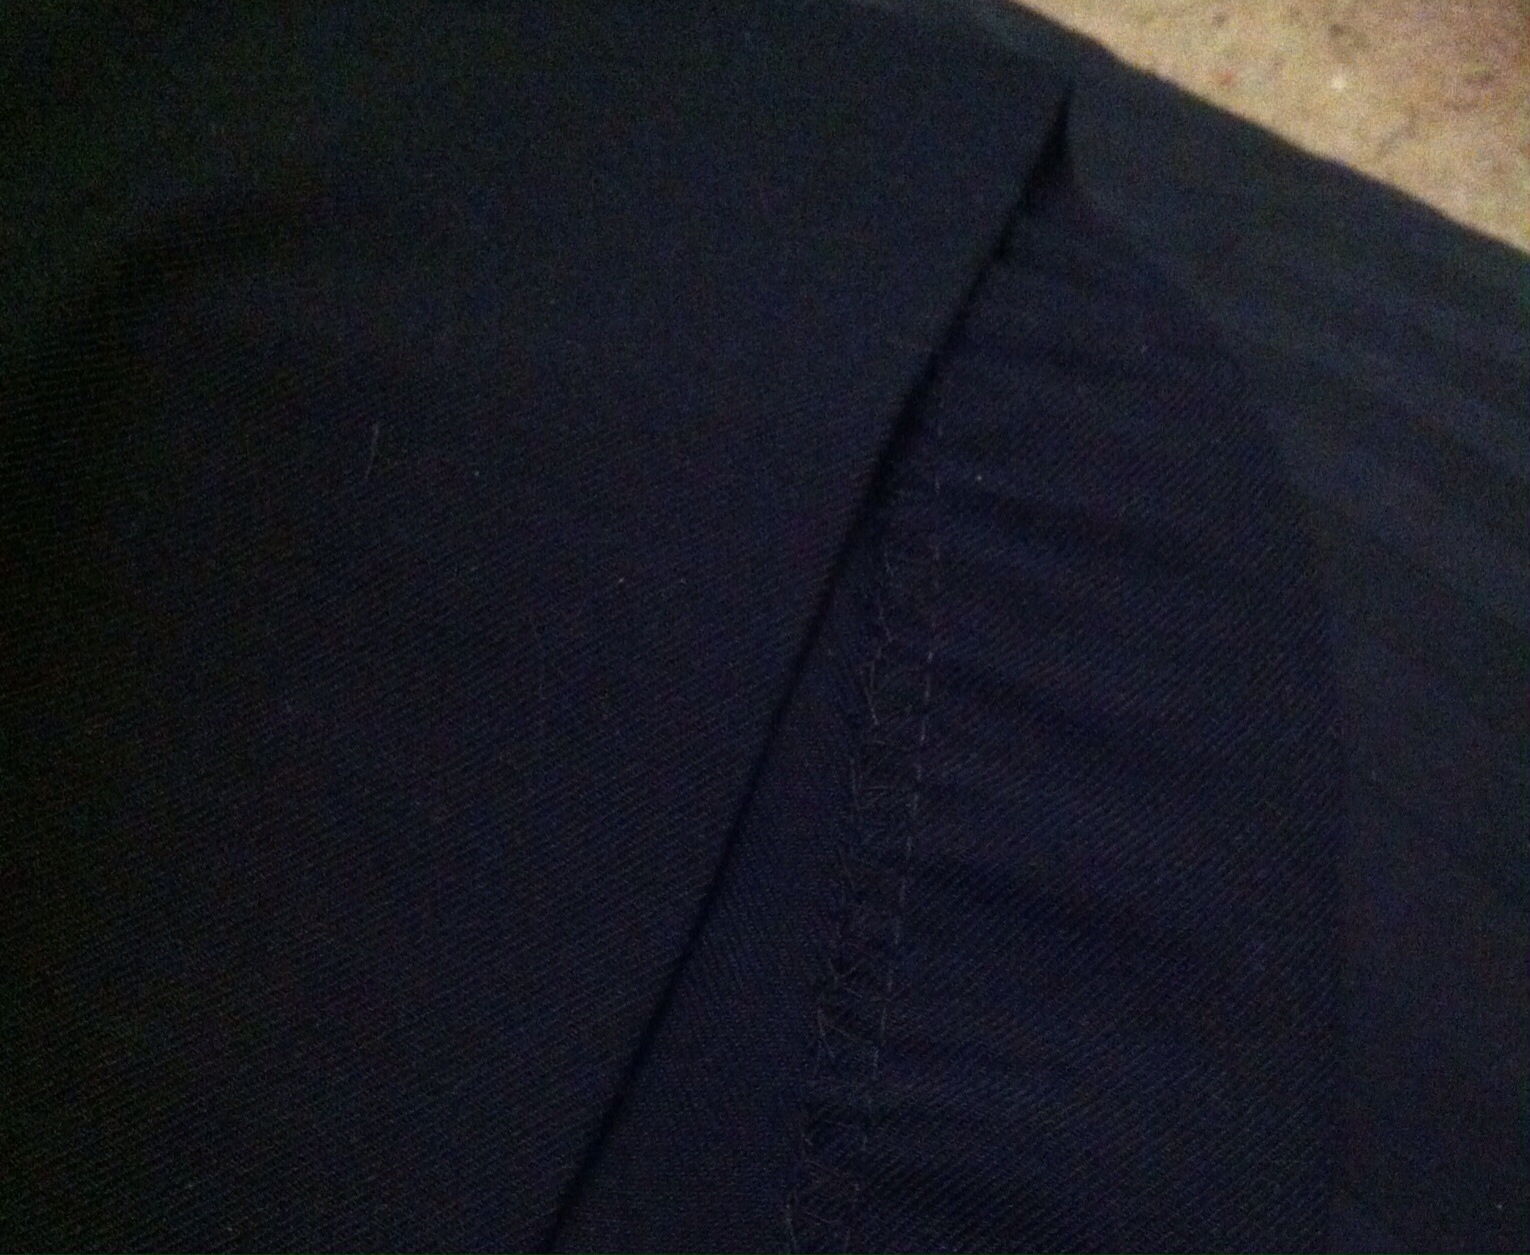
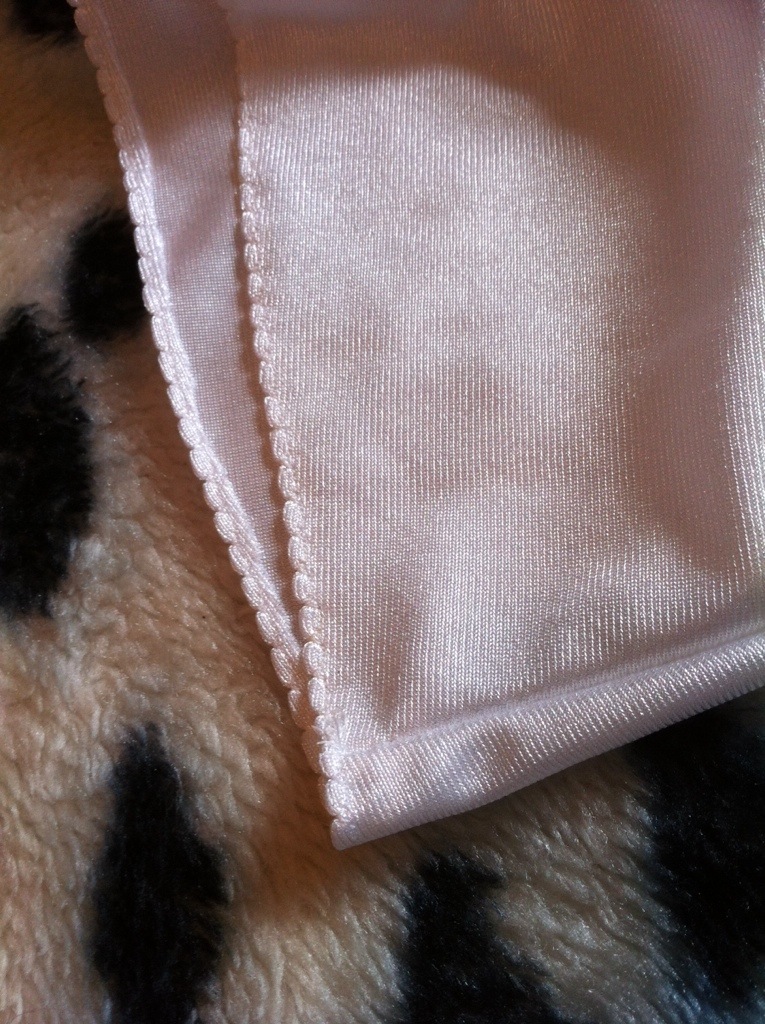
So between the FBA and the little bit I added at the side seam and then the stretchy back, I actually had to take in the side seams, an inch at the under-arm tapering to more like 1 cm at the bottom of the bodice (tricky to do because I made the whole thing very clean-finished inside, pretty to look at but not exactly easy to alter, especially when one of your layers is on the bias. It’s not super pretty up close. I’m very curious to make this without the stretchy back at some point just to see how it would compare. The (2 cm) FBA gave a LOT of projection in the boob area, rather more than I currently need, but it’s somewhat adjustable by tightening the ties, so it seems to work. I’m not sure if I’d do it again, though. And my boobs are likely to get bigger before they get smaller again.

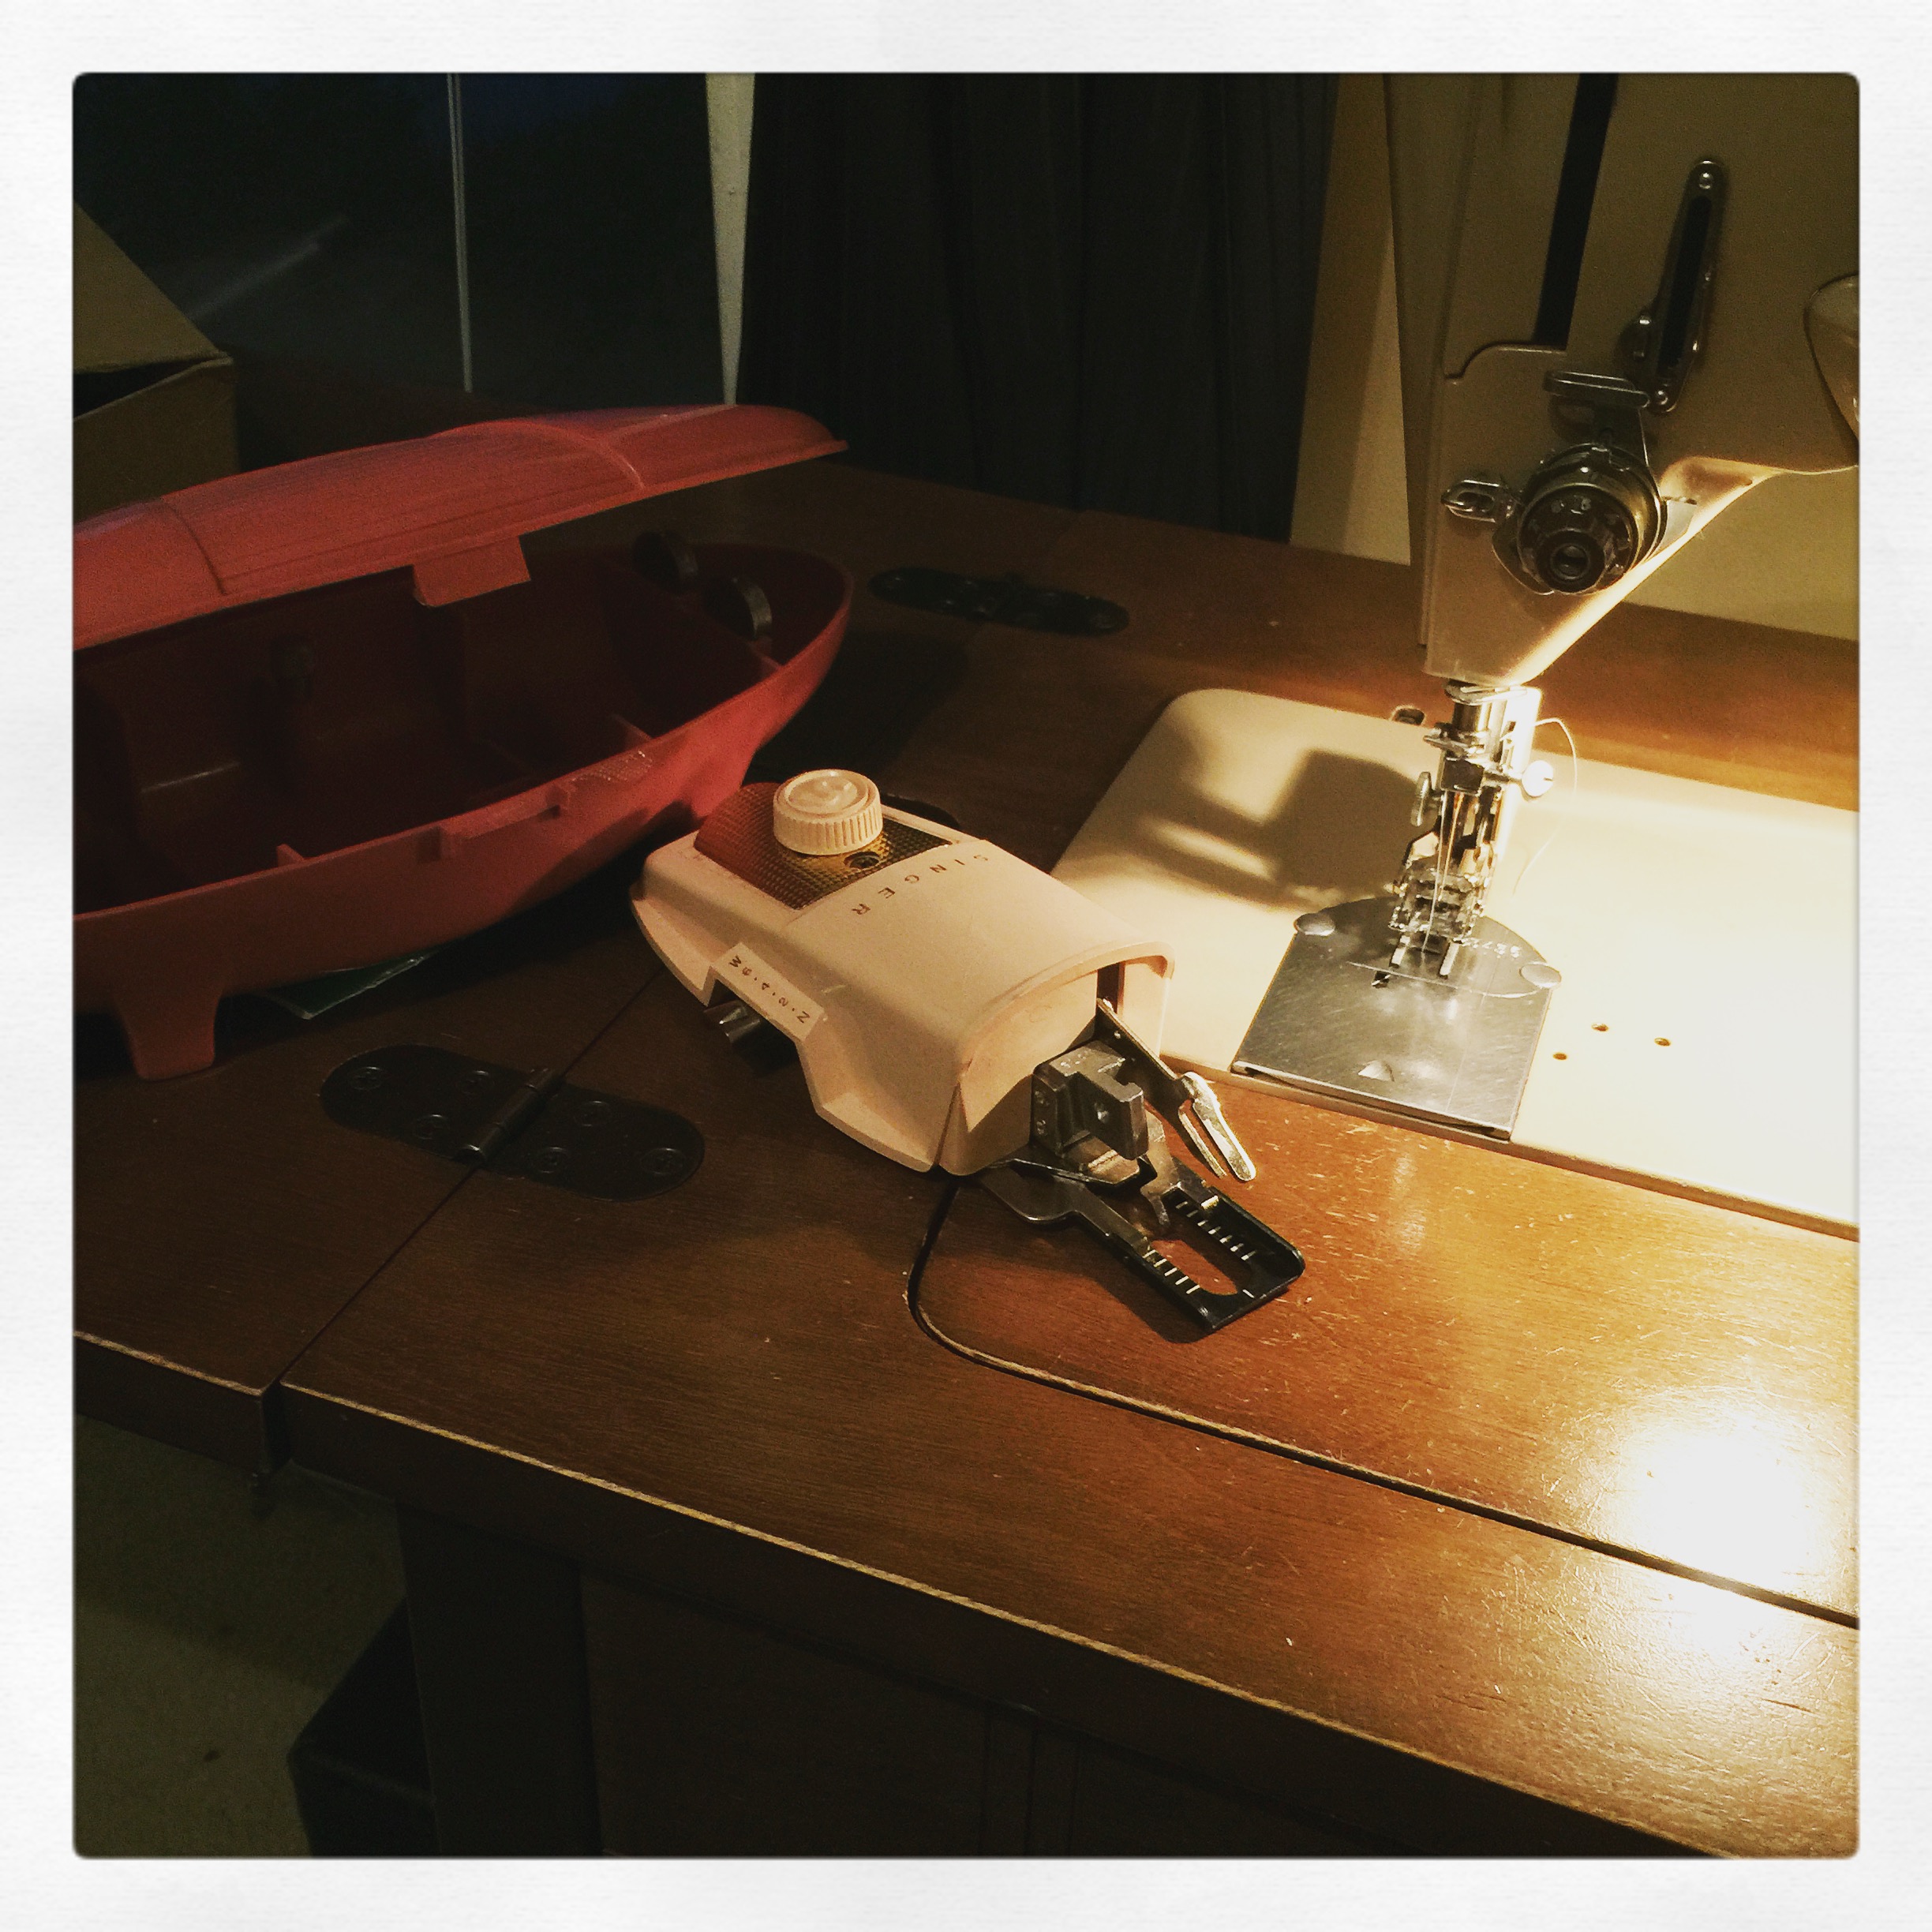
I used my favourite gathering-with-dental-floss method, using a cording foot from a set I bought last summer to keep the dental floss snug in the middle while I zig-zagged over it. This definitely makes it a more foolproof method. I finished the bottom of the bodice and the top of the skirt separately so I can take the skirt off and re-adjust if I want fewer gathers later, though attaching the gathered skirt to the shirred back was kinda hell so I’m not sure I’ll wanna try that again.

All in all I think it’s a pretty cute experiment. I feel like the proportions might be better if the bodice was slightly longer, but on the other hand since my belly starts right below my boobs, I don’t think that would really work very well right now. So it is what it is; i may try styling with an elastic belt below the bust to see how that looks. But for maternity wear, I think I’m pretty happy with it.

Now if only it would get warm enough to wear it!

7 Comments

Filed under Sewing

This is (not) a tent dress. 

See the comments on my last post for LinB’s take on the definition of a tent dress. 😉 Ah, fickle fashion terminology. Also, boo to uniforms. I really really hate imposed uniforms.

13767482_217730211958560_1695701657_n
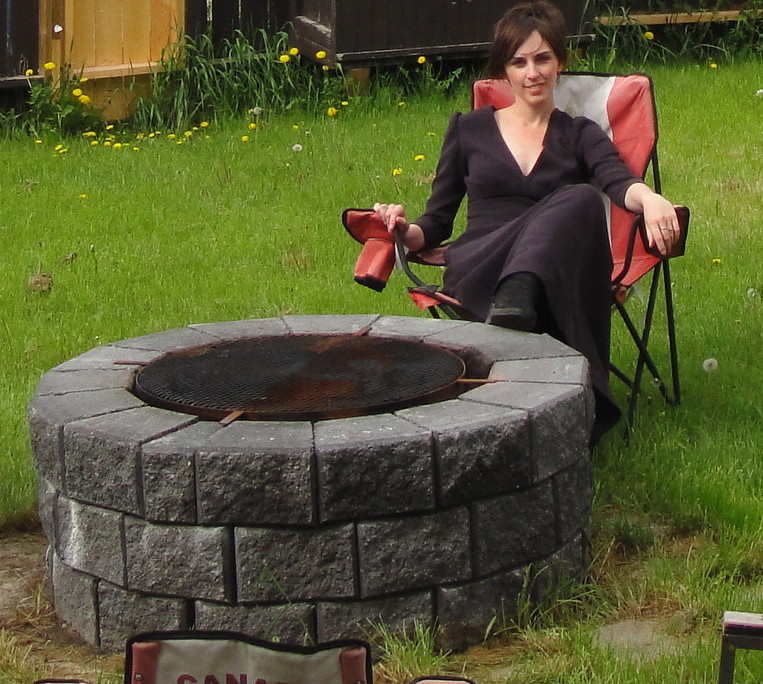
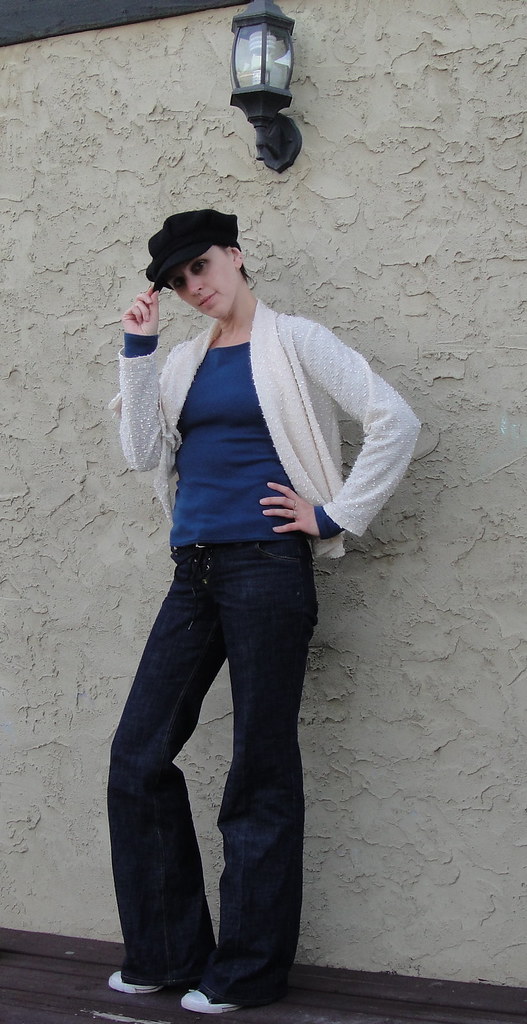
Anyway, I bit the bullet with Butterick 4249 by John Kloss. Incidentally this also reminds me of Daughter Fish’s Future Dress from way back in the mists of blogland. Mine is more fitted, obviously. Though not initially. Hers was more fun.

This dress is a fabric hog. It used the full three and 3/8 yards it called for, easily. (Well, I think it did, I’m not used to measuring in yards.) Although I did end up hacking three or four inches off the bottom, and it’s still pretty long, so I could’ve saved a bit that way. Just for reference I can get one of my Jalie maxi dresses out of about 1.5 m.

img_4528
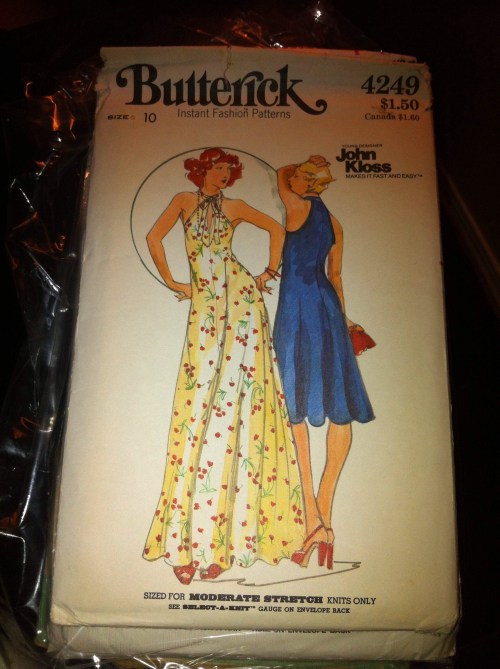
So, um, tent-y it was. I should’ve taken pictures, but, um, no.

Part of the problem is that it’s designed for a “moderate stretch knit” (probably abut 20%, based on the handy little stretch guide on the back), while my fabric of choice is a very modern slinky jersey with about twice that, plus stretch vertically too. More of the problem is my back. Or, arguably, my head. 😉

DSC08585

In hindsight, a slit in the back would’ve been fun, too. But I like how it sits now.

I have a really curvy lower back. I guess I mention that every time I whine about swayback adjustments. 😉 anyway, pre-sewing everything was just always loose and baggy in the back, which was annoying. Almost as annoying as too short sleeves… So yeah. I like things to fit close to my back like, almost always. Partly because my tummy’s fairly prominent (which I’m fairly good at camouflaging in blog pics) so if the back is loose I feel like I look bigger than I am.


So as soon as I tried it on, I knew I would be taking in the back. A bunch. And the sides—less, but still a couple of inches.  Unfortunately to get the back where it wasn’t giving me eye-twitches meant that a lot of that fun swoosh and flow around the tummy and hips also went away. I probably need to work on that (either with a gym membership or some mental health work. I’ll get back to you on which is least likely. 😉 )

DSC08582
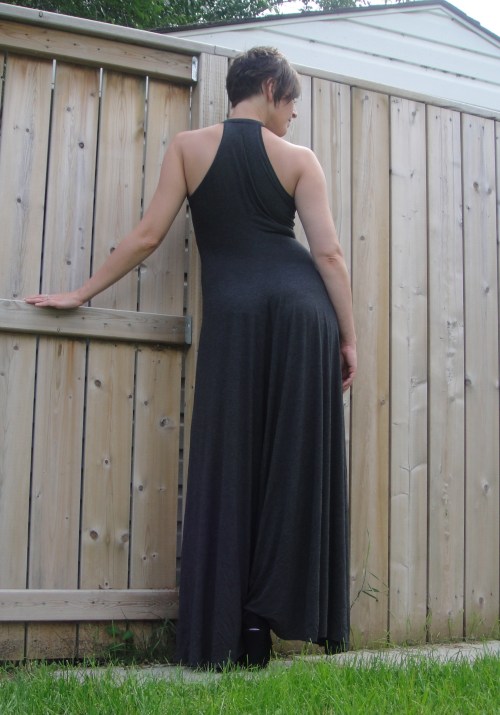
I made a couple of adjustments to the construction. The pattern had faced armholes; I used a band instead. I interfaced the sides of front opening with a fusible knit. Both of these were very good ideas. I cut the neckband on the cross-grain (pattern piece called for it to be on the lengthwise grain, not that that would have helped a whole lot with this stretchy fabric.)

Stretchy neckband was a mistake. I had to go back and fuse interfacing to it, after sewing the back pieces in place with those teeny zig-zag machine stitches that are basically impossible to pull out. Even then, I think I should’ve used the heavier knit fusible, not the featherweight stuff, though I like the weight now that it’s on. It took me a couple of tries to get the neck pieces basted in the right place. Incidentally, I think the neck piece is actually half the length it should be… I think it was probably meant to be two pieces joined at the back with a seam. I guess I could check that, but I kinda like the shorter tie. I’m not really a bows kinda girl. The first time I basted the front portions to the neck tie, it was too big and the whole dress sagged (basically the weight of that whole damn dress is hanging from your neck). I overshot a bit the second time, but I kinda like the wider split that this gives the front opening. I was a bit nervous about the neckline as I don’t usually like high-necked things, but the slit and the tie give plenty of front interest so I don’t feel at all like I have the Great Front Upper Chest of Flat Emptiness.

Stitching the neckband and turning it inside out was a bit touch and go; in theory you should only have to leave a small opening at the centre back, but in practice it got dodgy trying to stitch neatly with part of the dress inside the band—I wound up stitching just the front dangly portions of the ties inside out, then turning them, tucking the seam allowance under and fusing it in place with 1/4″ Steam-a-Seam, and then topstitching around the bottom of the neckband. On the upside, it feels just the right amount of stable now.

DSC08584Anyway, pretty happy with this, despite all the surgery and limited tent-osity. This was the last sewing of my vacation (I kept doing family stuff. Jeez. Darn family, getting in the way of important things), “finished” in the afternoon after we put Tyo on a plain for Vancouver Island, but before I had to go to my first shift back at 5:00 pm. So at least I got to wear a new dress back to work. And then on my first full day back it was nasty and rainy, so I did get to wear my unseasonable wool dress. One of the best things about sewing is having winter (or winter-y) clothes that I actually miss wearing in the summer… I have read about this feeling before, but never actually felt it myself. It’s probably a sign that it’s been a good summer, though I do wish Kristin would send some of that Toronto heat-wave she`s been writing about out this way. A week or two of 40C temperatures are just what I need to get me ready for winter. (Not actually joking. If summer is completely hot and miserable the prospect of winter is much less agonizing. I think this is some bizarre mental adaptation to our severe climate…)

As it is, I’m guessing I get about two more wears out of this before winter. Here’s hoping for a nice fall!

8 Comments

Filed under Sewing

A long time coming.

Simplicity XXXX

Simplicity 5691

It’s been a while since I made a 70s pattern, and this one was a LONG time coming—but I’m so happy it’s finally done. I can’t even remember when I picked up this pattern, though I think I could probably find it in the blog archives since it dates back to the days when I would proudly show off all my new purchases here (as opposed to shamefacedly stuffing them out of sight before my husband finds them, like I tend to these days. The pattern collection is, um, excessive.)

Worst Women’s Pattern Ever?

70s Simplicity patterns are hard to beat for their cuteness, and in my opinion this is one of the cutest. Although, here it is on in Peter’s “Worst Women’s Patterns Ever” Pinterest board. 😉 possibly the tunic version with the wide-legged bell bottoms hasn’t aged as well as the dress version? 😉 I confess this is not the only pattern on that board that I own, and paid real actual money for, too.

I found the perfect fabric amidst a mess of different things at Fabricland labeled “European Fashion Designer Prints”… It’s what I would call a lawn, lovely, close woven cotton, crisp but not at all hard, and surprisingly wrinkle-resistant. The mock-patchwork print is just about my favourite thing ever. And ever so 70s, too. It has all the intricate, geometric/paisley details that make me go all squee over a print, plus that mock-patchwork look. Serious love.

Back View

Back View

Unfortunately, I started this project a little too late last summer—I got the dress nearly complete just in time for the weather to go cold, and then  when I got it to the try on stage, the square shoulder adjustment I didn’t do bit me in the butt and I needed to unpick around some of the unusual sleeve-to-bodice structure. I stalled, and the dress got wadded up and stuffed in a ziplock UFO baggie for the winter.

Buttons closeup!

Buttons closeup!

Finally, a few weeks ago, my craving for a new spring dress with minimal effort finally outweighed my distaste for unpicking and on the fly fit-fudging. I unpicked and cut down the inside-shoulder piece. The visible, fluttery sleeve is no problem, of course, but there was this full-shoulder-covering lining that just wasn’t working. I cut it down to about an inch wide (along the neckline side) and it works much better now. Then I procrastinated for a couple more weeks until I finally put on my big girl panties and did the buttonholes.


Slant-Shank Buttonholer

Slant-Shank Buttonholer

I dug up the Rocketeer to try out my new slant-shank Singer buttonholer, which my crafty sister-in-law found at a big neighbourhood garage-sale this spring. It worked beautifully.  Though that might’ve been the glorious fabric.


Wash-away stabilizer behind buttoholes

Wash-away stabilizer behind buttoholes

Or the wash-away stabilizer I added, because that stuff is my new fave notion. It’s much sturdier than the thin film stuff I’ve used before. Anyway, flawless, even the one over the “waist” seam which was a bit touch and go. My button-attachment is less flawless, and horizontal buttonholes are not very forgiving, so there is a little bit of bunching here and there where my button placement ended up a trifle off. It’s not bothering me enough to actually fix. Oh, and the hems on the sleeves and the bottom are rolled with my serger. Which, while not really a period finish, works really well for this look, I think.

So glad I didn't skip the giant patch pockets!

So glad I didn’t skip the giant patch pockets!

Confession: I still need to hand-stitch down the bottom of the bodice lining, which is a soft, lighter purple voile. And I’ve already worn this more times than I want to admit. It’s great, easy to throw on for work or at home, and perfect since the weather seems to think its July already.

One down from the Dresses list.

Back at the beginning of last summer, I had pulled a trio of summery dress patterns from stash that I wanted to make up—this was going to be the only one in the group that I actually accomplished last summer. Yikes. I wonder what the odds of me getting to another one are? I’m leaning towards the one on the right for summer, and then the middle as we creep up on fall.

I’ll doubtless be distracted by something else along the way, mind you.

30 Comments

Filed under Sewing

Simple, practical, superfluous.

IMG_0765.JPG

I’ve had Burda 8855 for a long time—it was one of the earlier thrift-store patterns I picked up. And, frankly, it’s pretty damn near perfect: a long, not too full skirt, one of my favourite styles, and one I wear a fair bit when I’m in a “look at me!” point in my fashion cycle. Amidst all the craziness of Hallowe’en sewing, I was yearning to make something for myself, and traced it off. (A 70s vintage pattern, it doesn’t have seam allowances added. Which means I got to add my own, favourite 1cm seam allowance. YAY 🙂 ) Incidentally, the most fun thing about the pattern itself was discovering that it was printed on tissue paper identical in every way to the big Burda-brand tracing sheets I buy by the package at Fabricland, right down to the one shiny side and the precise folding scheme.) As I was auditioning black fabrics for Batgirl’s jacket/cape at Hallowe’en, I pulled out this mystery suiting, a sturdy twill weave that feels like it might have a hint of wool in. While I went with a leather-look knit for Batgirl, I knew this fabric would make a great, sturdy, plain black skirt.

IMG_0772.JPG

I traced and cut a straight size 38, adding a wide hem allowance to the bottom both because I like wide hems and just in case the length as drafted wasn’t enough (though 70s long skirts are generally fine, for some reason). Once I finally got it constructed enough to try on (there was some sewing together of incorrect sides and other humorous blunders) I trimmed a wee bit off the top to allow for the fact that my waist definitely not size 38, and a wee bit more off the top back in a teensy-tiny swayback adjustment. I often do this in dresses with a waist-seam, but it was interesting to see it happen in a solo skirt, especially since it’s not terribly fitted over the hips. Anyway; side-zip and a waistband. On reflection, while I am coming to terms with skirts that hit at my waist (at least if I don’t try to tuck a top in), I still prefer the look of a facing to an actual waistband. Less bulk in the area where I least need to add bulk. 😉 Especially since this pattern has no back seam so the zipper is at the side. Next time I try this pattern, I will try making a facing for it. Or maybe add a back seam to put the zipper in. Or maybe both.

IMG_0761.JPG

Once I had the top finished to my liking, I tried it on and decided that while the length at the back was good (allowing for a nice 2″ hem), the front could be a wee bit shorter. I trimmed about 1″ off the front, tapering to nothing just past the side seams. To make the turn-up on the flared skirt, I tried something new to me: I cranked the differential feed all the way up on my serger and serged the bottom edge of the skirt, gathering it somewhat as I went. This wound up being pretty much perfect for pressing it up; then I hand-stitched the hem, as I usually do. It’s not terribly smooth or pretty on the inside—a seam binding or other tape would help with that—but it was quick and functional. Quick being a big deal these days.

IMG_0762.JPG

It was a deliciously quick project; IIRC, I traced the pattern on Saturday night, cut and sewed on Sunday, and finished the hem Sunday evening, to wear the skirt Monday morning. Now that is a win.

IMG_0774.JPG

I did a lapped zipper. That probably didn’t help with the whole side-bulk thing. >_<

IMG_0759.JPG

So I’m quite happy with the skirt, aside from some funkiness about my buttonhole on the waistband (buttonhole is not centred but button is, which causes some bubbling at the side, just where you don’t want it.) And It’s been worn a number of times since. I was quite pleased with myself for finally adding such a versatile basic piece* to my closet. Then, while digging through that closet for things to wear with the skirt, I found not one, but two long black skirts from my pre-sewing days that, um, I had kinda forgotten about. So apparently it’s a staple that I already possessed.

IMG_0764.JPG

I still like my new skirt best, though.

*your mileage may vary. 😉

9 Comments

Filed under Sewing

Once more with feeling!

20140419-134636.jpg

I made another version of Kwik Sew 717, this one with absolutely no lace. Plain jane, pure function. I think I’m almost done with the slips. Almost. Although there’s still a couple of patterns I’d like to try and Funnygrrl sent me some great skin-tone fabric it’d be awesome to use. Cuz she’s awesome that way. Especially her latest post on body image and negative self talk.

20140419-134654.jpg

There isn’t much to say about it. I made a slight small-bust adjustment, removing about half a cm from the width of each cup, and shaving about the same amount off the bottom. I should’ve left out the two funny little darts and kept the gathers, but I didn’t think about this until after the darts were cut and sewn. So the cups aren’t as pretty as they might be otherwise. They do seem to fit better than the first ones, at least sans bra.

20140419-134711.jpg

I used the shell hem, top and bottom. I might be getting good at it.

20140419-134722.jpg

The first slip I had lengthened about four inches; this one I made the original length, just for variety. I didn’t need to take in the side seams on this one. Maybe because the fabric is less stretchy than the lace, maybe because the cups fit better so I didn’t feel the need to pull it as tight to get “fit”. You can still see some puckering on the side seam—I didn’t stretch quite enough, I guess, while sewing them. The Rocketeer is a workhorse, but she may have a few tension issues. Probably a machine spa day would be in order…

20140419-134745.jpg

And you get arty modeled photos because that’s the only filter that didn’t show anything under the slip. Not great but better than dressform pics. I hope.

Happy eggs ‘n bunnies day! We’re off to the farm to enjoy “spring,” which in the last few days has included about four inches of snow and freezing rain, which I think is actually worse than a full-blown blizzard. But hopefully we’ve turned a corner now. Because I have springy dresses to wear with my slip, dammit!

11 Comments

Filed under Sewing

That 70s Dress: Cream & Red edition

Because I am creative with titles.

.20140324-205652.jpg

This isn’t the dress I wanted to make. That is, I figured I would make this other dress: (yes, just exactly like the envelope) but I couldn’t find the pattern. It’s around somewhere. >_<

20140324-205707.jpg

So, fall back. Simplicity 7806 from 1976. Equally cute, and almost as high on the (admittedly rather dusty) “must make” list. The fabric is deep stash, an ivory-coloured stretch suiting bought from a thrift store in my first year of blogging. (I just totally missed my fourth blogiversary last week, by the way.)

20140324-210400.jpg

I think it looks kinda Regency. Which is pretty fun, actually. The pattern is a size 10, a size smaller than I usually make. Since my fabric has a fair bit of stretch (although I didn’t notice until after I had cut it out that there was a lot more stretch lengthwise than widthwise… headdesk), I figured it would be workable. I made my usual bodice-petiting and swayback alterations, and added some extra width on the side-seams of the skirt. I love these 70s A-line skirts, but they need to skim, not cling, and last time I made a size 10 there was, ah, clinging.

Anyway, I got the waist in the right place, but arguably it might’ve been better had I taken less height out of the yoke (which is a single piece that wraps from front to back—now that I’ve made it it’s pretty simple but I was having a hard time visualizing how to alter it beforehand) and more height between bust and waist. Although I think I like where the underbust seam sits, even if it technically is a bit high. It’s hard to say with that curved seam, though—it feels perfect in the middle, high at the sides. But if it were perfect at the sides, it would probably seem too low in the middle? It’s a funny shape, anyway.

20140324-210515.jpg

I paid a bit more attention to fitting the back than I sometimes do; I wound up taking in the back waist by over an inch on each side of the zipper. It clings fairly well, now, and then skims, although the bottoms of those darts could probably use a bit of fussing over. Hard to say—this fabric is heavy on the polyester, and while it presses fairly well, it does love to pucker.

20140324-210530.jpg

I got lazy gave the blind hem stitch on the Rocketeer a try. As with everything on this damn machine, you have to look up the settings—intuitive it is not—but once I figured out the recommended setup it was pretty easy. Although not particularly invisible in this fabric. Except in the places I completely missed the hem. /sigh Wel, it was fast. I love how the manual assures us that the blind stitch is “comparable to hand-finishing.” The hand hem is the gold standard. As it should be. 😉

20140324-210543.jpg

In this photo you can see (maybe) the main fit issue with this dress—pulling across the shoulder. When I saw this my first thought was “I overdid the petiting,” which is certainly possible, but I think actually this is a problem of either a) my size 12 shoulders in a size 10 shoulder-piece, or b) that I didn’t bother with a square shoulder adjustment. I generally try to avoid them in these sort of cap-sleeve styles, especially since I couldn’t really visualize how to do one, but now that I have it finished I think cutting a slash along the shoulder line of the yoke (once I determined where the shoulder line should be) and then adding in a wedge at the outer edge, narrowing to nothing at the neck, would’ve been just what the doctor ordered.

Overall, I’d say this was the perfect fabric for this dress—drapey, with lots of polyester ;). The spandex may not be period, but the pattern does suggest lightweight knits as an option. I used the piping to finish the upper central neckline and back; below you can see my overlocked edges, and the hand-finished interior of the yoke. Overlocking anywhere near the red piping may turn out to have been a really bad idea, as that stuff frays like (words I won’t say on blog). Fray Check was my friend. I didn’t notice the problem so much on the Butterflied dress, where I used the same piping, but then that was more short, straight seams and it all ended up lined anyway. I don’t think I did much grading of seams, which I had to do lots of here.

20140324-210630.jpg

The biggest problem I have is that, being white (ok, ivory), my fabric isn’t, um, quite as opaque as another colour in the same weight would be. I think a white or nude slip is going to be in order before this one leaves the house. Which is too bad, because it really deserves better than headless bathroom selfies. And I will be really pissed with myself if I’ve made another dress I can’t wear, just for lack of proper undergarments.

Of course, now I need more cream stretch suiting, for when that original pattern turns up…

17 Comments

Filed under Sewing

The Home Alone Dress

What's that?

What’s that?

I have fifty million things I’m supposed to be doing (like, um, sewing a wedding dress!). So what did I do when my husband and kids left me behind while they went to the lake for the weekend?

Why, I made something that was barely on the queue!

Butterick 6890 is cute and has been marinating for a while, but there are plenty of patterns ahead of it in the queue. But when I found myself with a house to myself and the itch to sew something selfish, I did something a bit unusual—I started from the fabric.

20130714-011430.jpg

Butterick 6890

My typical MO is to move from pattern to fabric to project. This is mostly because I have my patterns catalogued electronically and it’s easy to paw through them and pick one, whereas I’ve been far more lax about my fabric. The problem with this approach, of course, is that it’s not an optimal way to use up stash fabric, and tends to result in me just buying more fabric for the new project. Anyway, this wasn’t an option on a precious solo Saturday night.

I had a lot of constraining criteria. I wanted a pattern that was pre-cut, one I could use with minimal alterations, and not have to trace. It had to be a pattern I could ACTUALLY find in the flesh. Once I pulled out this piece of glorious polkadot stretch denim, which I picked up just after Christmas and thoughtfully pre-washed at some point (thank you, past Tanit!,) I had only just over a metre of my chosen fabric, so it had to be a SMALL pattern.

Butterick

Butterick 6890

Butterick 6890 fit the bill in a lot of ways. It was short. It was pre-cut. It’s a Junior Teen size which means I didn’t have to petite the bodice. It was a size 11/12, which has a 32″ bust—a bit small for me, but I was pretty sure the stretch would more than make up for that. I did a small square-shoulders adjustment, and a somewhat bigger swayback adjustment, and got cutting. It became obvious almost immediately that while I can sew up a Junior Petite pattern almost without alterations to the bodice, the Junior Teen size-range is pushing it a bit more. I wound up sewing the shoulder-seams and underbust seam with 1/4″ seam allowances to get as much height as I possibly could. It worked, but barely. I am also, ah, rather bustier than the Junior Teen draft. While this is a nice problem to have for once, I had to add some hasty tucks under the bust (perhaps making proper darts would’ve been better, but I was in a hurry), and correspondingly narrow the front skirt. I also added some more shaping to the back seam, which helped a lot. Oh, and the stretch meant I could leave off the zipper, too!

Back

Back

I still didn’t have enough fabric for the sleeves or facings, and the bodice back includes a good chunk of the selvedge. I considered alternative fabrics for the sleeves, but the only colour I liked enough with the grey, a pale pink, I had barely enough to make the sash ties out of. I really, really wanted to do a piped finish on the neckline and arms anyway. I was SO relieved when a scour of my notions stash turned up the bias tape left over from my Last Sundress of last year (which is totally my fave thing to wear when it’s super hot*, and also the perfect dress to wear to the outdoor pool. ) It was the perfect greyish-pink shade, and even not too different from my sash fabric!

20130715-070837.jpg

Piped finish

I made one major booboo early on—when trying on the bodice I didn’t stabilize the neckline first—oops! So it’s a bit stretched out and tends to gape if I don’t stand perfectly straight, especially after the disaster that was my first attempt at finishing the edge (which involved attempting to bind it with straight-grain fabric pieces from the scraps from the sash.)  But once I found the bias tape and did a REAL piped edge, it worked really well. To get a clean (if not couture) finish, I serged the raw edges of neckline + piping, pressed them to thei nside, and topstitched. Voila!

20130715-070855.jpg

Bias-faced hem, hand-stitched

A topstitched hem would probably have been appropriate for denim, but, well, I was in love with the way the pink bias tape worked with the grey. And I’m kinda in love with bias-faced hems… anyway. this is what my finished hem looks like, with a fun peep of pink on the inside.

Lounging

You can see the underbust tucks in this photo.

I don’t think I can describe how much happier and more relaxed I feel, having accomplished a wee bit of selfish sewing. And I’m so glad I got this finished, even if I did stay up rather past my bedtime to get it done.

Posing

Posing. You can see the neckline gape here.

*Super hot by Canadian standards. Which is low 30s C, so far this year. I know this falls short of truly brutal tropical heat. It’s scrumptious.

23 Comments

Filed under Sewing

Splurge

Not so vintage...

While visiting my mom post-Xmas we traipsed down to the trusty local Mennonite thrift shop. I just happened to be wearing the dress from Simplicity 6023 , made from fabric purchased at this same store during my last visit.

I was good about the fabrics—there was nothing screamingly spectacular. It helped that it was New Year’s Eve and they were closing early so I only had half an hour; just time enough for a good rummage through the chest of patterns.

I was not so good about the patterns.

Moreso vintage

I must now pause at this moment to say a sincere thank you to Darlene Ratzlaff (or her heirs), as nine or so of the sixteen patterns I nabbed bear her name (click through to see the full size). Whether or not she is any relation to my high school drama teacher of the same surname, she had good taste in patterns (and was close to my size). The Ratzlaff Collection all date from the latest 60s to mid 70s. I think my fave is the Style 3060 with the Wednesday Addams look in the middle.

Jalie Potpourri

My mom, (who, as I have mentioned before, is a bit of an enabler) had some other goodies to contribute: she was gracious enough to lend me several Jalie patterns: the famous twist-neck and sweetheart-neckline patterns, a really cute jacket, and the slit-neck sweatery thing. I really like the jacket pattern. Because, y’know, I need another jacket project…

Patternmaking in 1908

She had also acquired several vintage sewing books which I have absconded with, and which we shall have to discuss more as I have the leisure to peruse them adequately (how’s that for some excessive verbiage?). The niftiest, perhaps, is a 1908 book on pattern drafting. Sadly the curves and rulers that originally accompanied it (kit price $5) have long since wandered away. Still, pretty neat. I am really curious to find out how it compares with the “Modern block” method of Harriet Pepin and all the more recent pattern-drafting books I’ve read. Unlike some of the other early 1900s sewing books I’ve found online, this one has illustrations, which means I may actually have some idea what they’re talking about.

Butterick Sewing

There’s also a Butterick sewing book, of 50s vintage, which I shall have to compare and contrast with the 70s Simplicity one I nabbed a while back. /sigh. I’m so behind on my sewing-related reading. Someday, over the thesis…

Tailoring

My favourite, though, is the blue-covered book simply titled “Tailoring”. It claims to want to be “an advanced tailoring text that even a beginner can use”, and from my reading of the first few chapters it’s doing a pretty good job. It’s got a REALLY comprehensive section on pattern measurement and ease calculations, too, including a chart I will have to scan and upload…

Oh, and I suppose I should be doing some kind of New Year wrap up/retrospective, but I don’t really feel like it. Maybe if I’m bored later this week, or sometime in the next month when I have nothing actually sewn. I’d rather spend what precious free time I have actually sewing, though. Speaking of which, coming soon: machine darning! (It may be a sign of sewing withdrawal that this was actually really, really fun.)

24 Comments

Filed under Sewing

70s Week

Last weekend, amid the trauma of saying goodbye to my brother, I decided to begin my self-imposed Me-Made 70s Week. Yes, for one week I would pull out the stops and wear every 70s and 70s-inspired garment I owned.

Now, I feel like I should insert a disclaimer here. Because while I may have found “my” vintage decade in the one that preceded my birth, I do not now and never will fully embrace the 70s. The fabric of choice, double-knit polyester, is abominable; the earth-toned colour scheme does nothing for me; and I have a limited tolerance for leisure suits. That being said, properly interpreted, the 70s has some of my favourite styles.

Cold calculation would make it obvious that at least some repetition would be involved. I had (until Saturday) really only six garments made from my various 70s patterns (sad, I know.) Even worse, the weather was not cooperative, so two of my dresses which are particularly summery went unworn. It was also not a great week for getting stuff like, oh, makeup on. So basically, not my best bash at making the 70s look good. Sorry. I’ll do better next time. Maybe in August, when we’re more likely to have something resembling summer.

Dress#1

Dress#2

70s Jacket

Bellbottoms

Dress #3 (unworn) (Style 41 34)

Dress #4 (unworn)

Day 1: June 12

June 12

70s Dress

The first day. With my houseguests gone I didn’t need to worry about frightening them with my outfits. (My brother’s used to me, but I don’t want to scare his girlfriend, or she might never come back.)

Day 2: June 13

June 13

This is an example of my early-morning outfit—that is, what I throw on over breakfast to get hubby and kids out the door in the morning. No makeup, no hair (hence the cap), but it is all me-made (except for the cap)

Winged Cardi
Ruffle-back top
Bellbottoms

Day 3: June 14

June 14

Another 70s dress. Headless due to unforgivably bad hair. My new sewing room is already getting nicely messy.

Day 4 and 5: June 15 & 16

June 15 and 16

This will pass for my outfit for both days, sadly. The only difference was the top. I really like this jacket with the skinnies (which I know is very un-70s), moreso than with other pants I own.

70s Jacket in corduroy
Skinny Jalie Jeans
Day 15 boring shirt
Day 16 boring shirt

Day 6: June 17

June 17

A really awful photo of me, but it was a looking-after-sick-hubby (who absolutely refused to be my photographed loved one) day. Ah, well, the kids out-cute me at the best of times. (I made both their shirts and the vest Syo is wearing, too). You saw the other photos from this series here.

The Bellbottoms
Evil JJ blouse


Although the JJ blouse is contemporary, I feel like it goes well stylistically with the 70s outfits: fitted body, puffed sleeves.

Day 7: June 18

June 18

My daughters have decided they want to be like their daddy and take about computer bits. My husband recently replaced the power supply for our desktop… and now my back deck is littered with the shreds of the old one. Also an impromptu fort made from a plastic picnic table and scrap wood. Aren’t my children ingenious?

70s week was rescued from early termination by a repeat of my day 1 dress, topped this time with the rather-over-the-top cowl-sleeved jacket. This is one of those outfits that pushes even my comfort zone for everyday wear, but I was expecting to go to the local Comic Con today (which got bumped to the 19th), by which standards I’m pretty sure I would be beyond prosaic.

I’m a little disappointed with the amount of recycling I had to do this 70s week. I’ll have to try it again when the weather is better and my wardrobe is a little more well rounded. I certainly have no shortage of appropriate patterns…

9 Comments

Filed under Sewing

California dreaming…

New tunic!

… on such a winter’s day…

Ok, not really winter. It was raining (again), which in these parts denotes NOT winter about as strongly as anything. Yay, liquid water!

But definitely not as summery as I’d like.

Still, I continue to sew hopefully, so today I plugged away with my gauze 70s tunic, trying not to mutter about how much I prefer nice, heavy coating fabrics. Cotton gauze and voile don’t rate too high on the scale of difficult fabrics, but you have to be so careful about the finishing, especially in white. Things I usually ignore, like how evenly I grade my seam allowances or whether my tail threads are getting eaten by the feed-dogs, stick out like a sore thumb.

McCall's 3838

Now, I was aiming for view C, the left-most on the pattern envelope. Since it was a sleeveless (essentially), un-fitted pattern (and I don’t know how McCall’s patterns fit me yet anyway), I omitted my usual swayback and petiting alterations. Instead, I opted for a square shoulder alteration, which I’ve been pondering on my last few tops.

Front view

And I’m quite happy with the results, although I should probably have lowered the neckline the same 1.5 cm I lowered the centre edge of the shoulders. I did that for the back neckline, but didn’t think to do it for the front. If I make this view again (which isn’t certain, as there’s lots of options) I’ll lower the whole neckline at least an inch, anyway.

After some consultation with mommy dearest, I did some seam-finishing experimentation and settled on the lazy stitcher’s French seams, which is where you serge the edge on your first pass, then press and encase the serged edge within the French seam for the second pass. Basically it adds the serger thread, but saves you the trimming stage. I pretty much blow at trimming seams evenly, so this let me get a much narrower French seam than otherwise, so despite the extra thread I end up with less bulk. Although my serger, despite being serviced just at Christmas, has tension issues when dealing with light-weight fabrics; there doesn’t seem to be any middle ground between ultra-loose and loopy and too-tight-and-ruffling. I’ve discovered that if I leave extra-long tails I can usually work the thread in so the thing lies evenly afterwards, but it’s a bit of a pain nonetheless.

Back view

Yes, it’s time for a new serger. One with all the bells and whistles.

Anyway.

I was really, really scared of the sweetheart neckline. Mostly because I felt the fabrics were too light to interface or reinforce, other than stay-stitching. So I stay-stitched, and handled as little (and as carefully) as I could. It did wind out a smidge stretched out, but… decent. And mostly symmetrical, my other fear. Although I used the lining as my facing for the neckline, for the armscyes I bound with bias-tape made out of the voile, and pressed to the inside. I used my machine’s lone decorative topstitch (OK, the only one I like) to topstitch around the neck and the armscyes. Patty is making me very jealous with her decorative topstitching.

Aside from the shoulder alteration, the only other change I made was to add 13 cm (aka 5 inches, but I’m trying to be a good metric girl these days. The search for a metric gridded ruler continues, and I am consciously teaching my kids to sew in metric.), to the hem, bringing it from a blouse length to a tunic length. Somehow when I was thinking about this pattern, the outfit I conceived of was this tunic-almost-dress worn over cutoffs you almost can’t see are there. Voila. Although maybe for the full illusion I should’ve made the top a couple of inches longer still.

Side view

I’m quite satisfied with the fit—none of that bunching up behind my neck that I often get, so I presume the square-shoulder thing did its work. Other than that there’s not much to fit or not fit ;). Side-bust darts might improve the shape a bit, but aren’t actually necessary.

View C has a self-sash stitched in place at the centre front, and I even cut one out, but then I couldn’t resist trying it with my Japonesque fabric sash, and I love it, so I’m going to leave it changeable for now. We’ll see how it stays in place when I ever get a chance to actually wear it.

But all in all, super happy fun!

There’s a bit of the inevitable pregnant pouf that is going to accompany pretty much any take on this style, but this is a look I’m resigned to, as it’s pretty much my natural figure anyway.

This is “officially” my second piece for the Summer Essentials Sewalong. Now, excuse me while I go fantasize about hot, hot sun…*

*I think I should apologize about the amount I whine about the weather. I’m not sure if it’s human nature or a Canadian specialty, or just that I’m a wimp (I am a major weather wimp, especially about the cold). The weather we are getting right now is a kajillion times better than what I was complaining about in, say, March. So really I should STFU.

32 Comments

Filed under Sewing