Tag Archives: coat

Love and Loathing for red lace

Ok, I am so done with this coat. I can’t even. It was half done when the store closed  (it’s a shop project of course) and I totally lost steam and, well, blerg.  

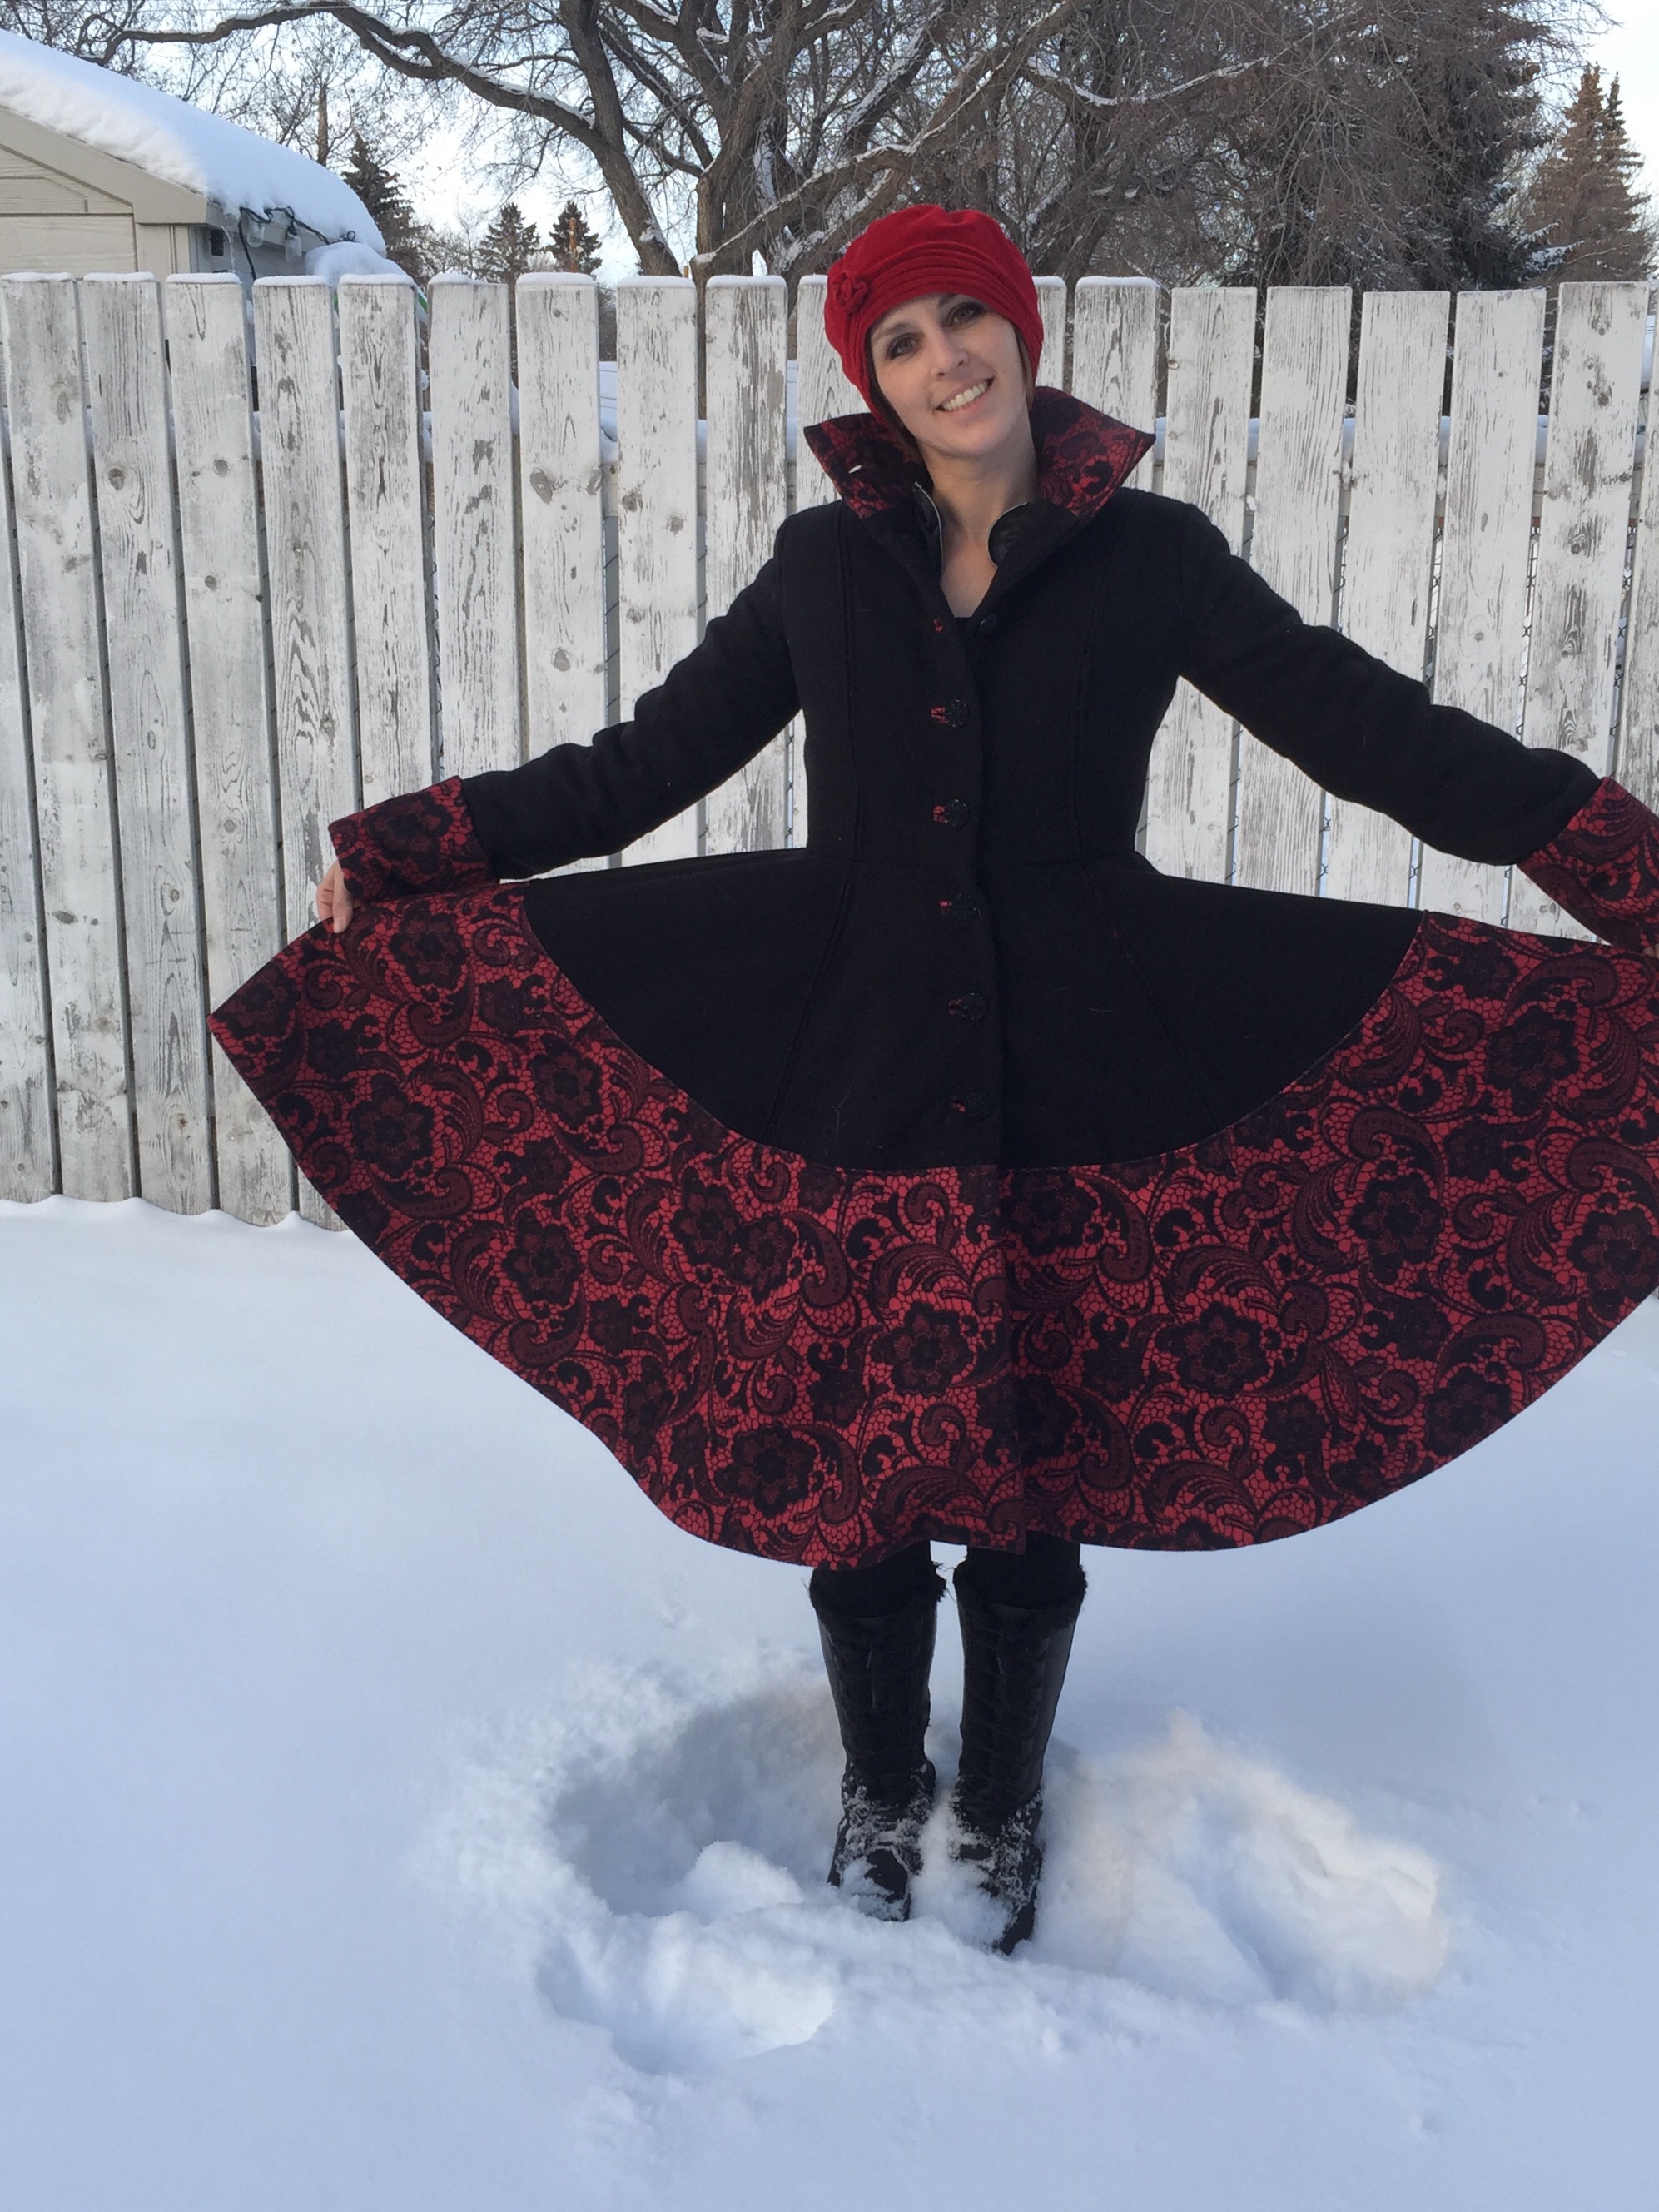
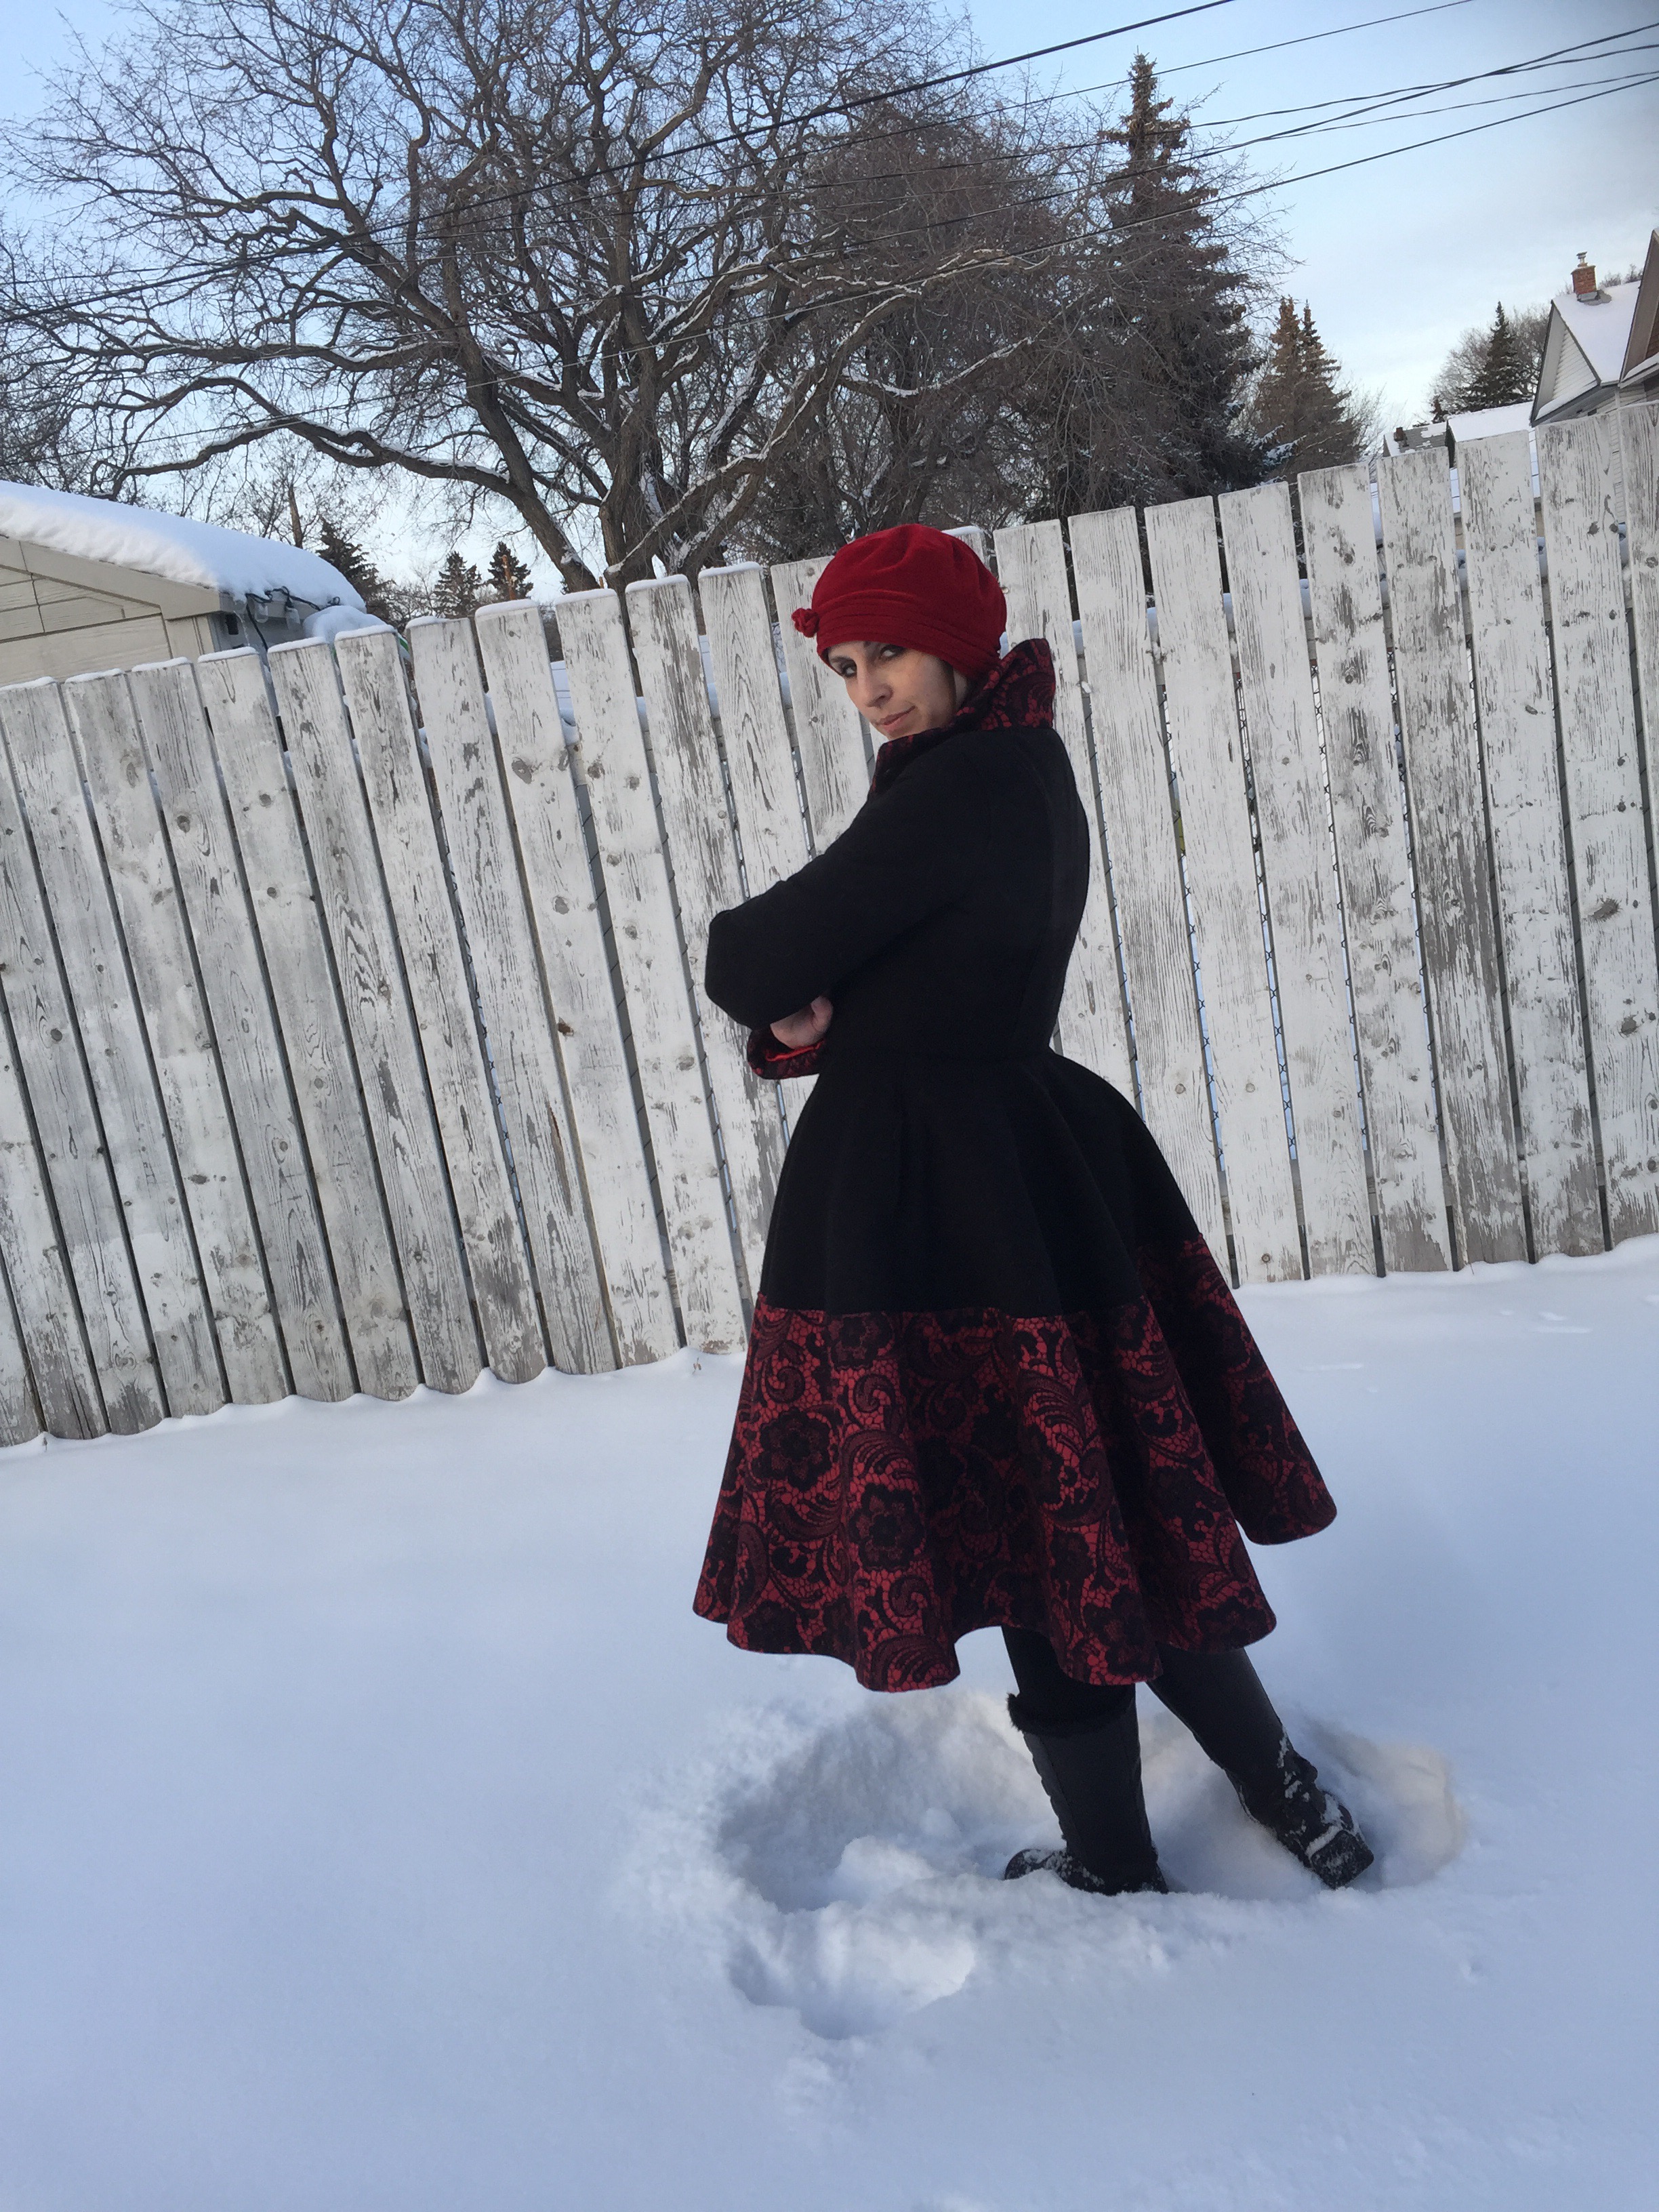
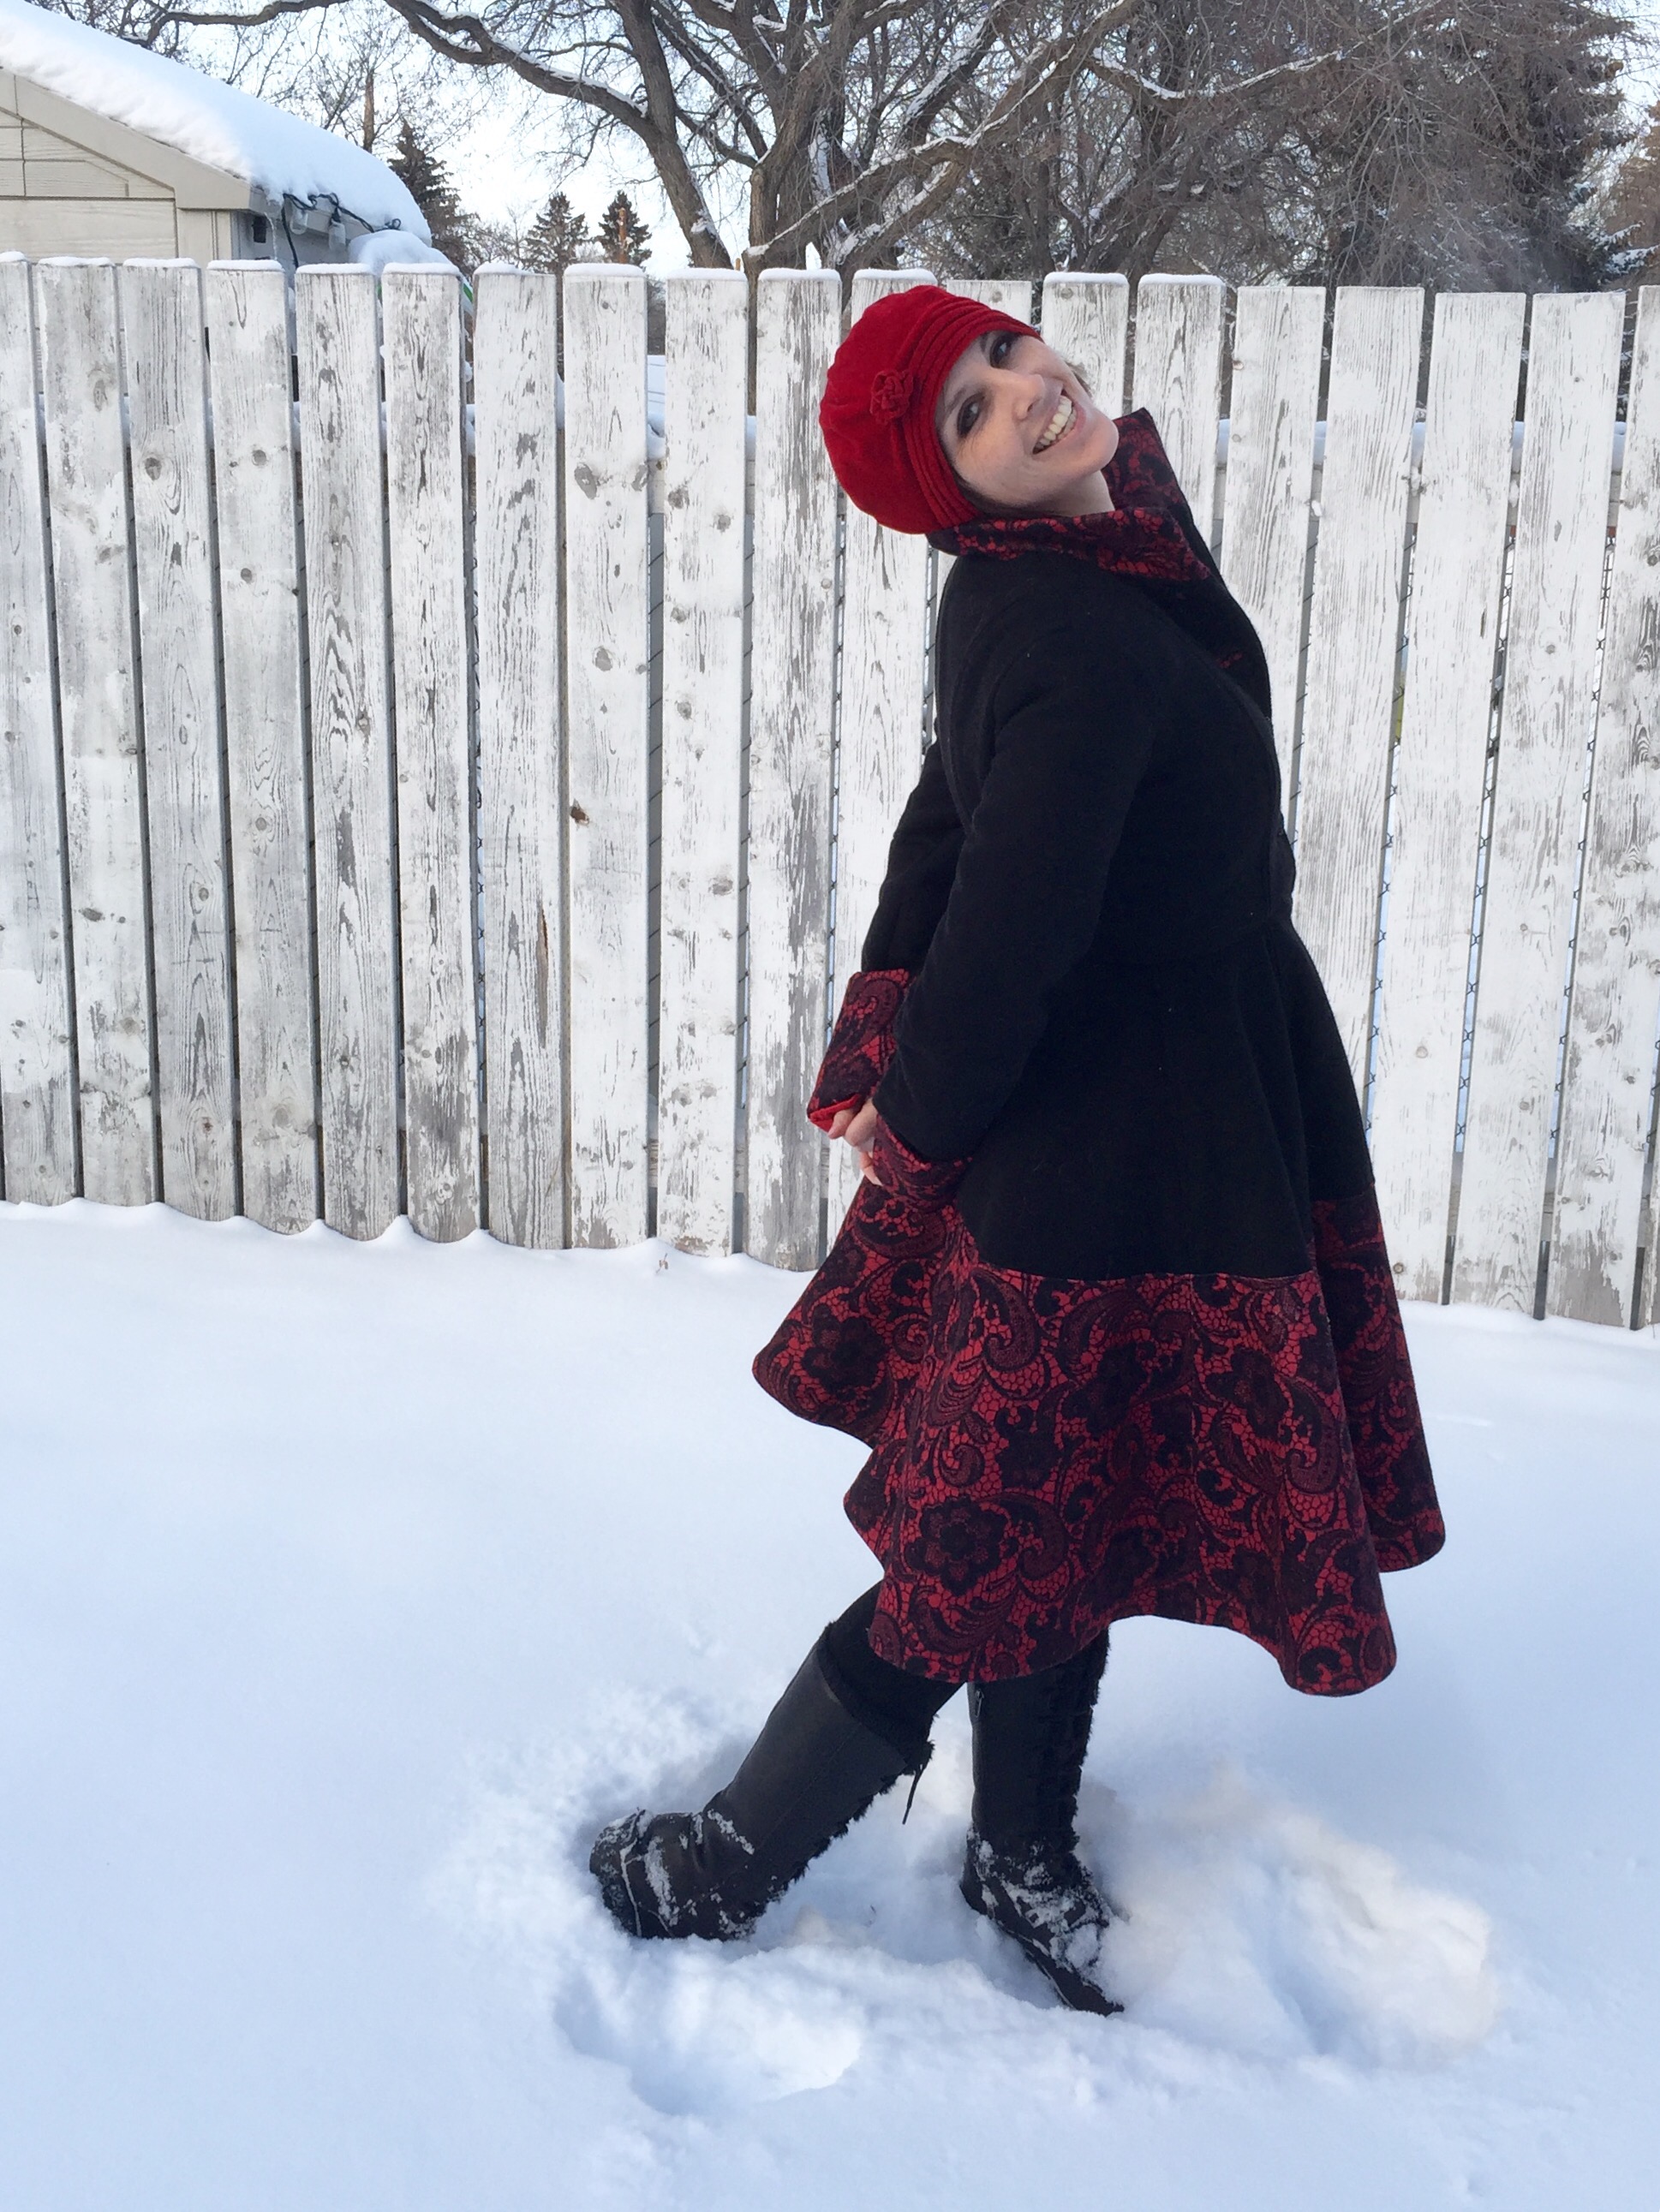
There’s nothing really wrong. The pattern is McCalls’ M7025. The fabric is a polyester coating printed with this gorgeous lace pattern. I am such a sucker for lace print! And a black to match. Neither are particularly great quality, and I’m dubious about how the print will hold up to wear as there’s a lot of white behind the thin surface printing. 

I skipped the giant patch pockets.


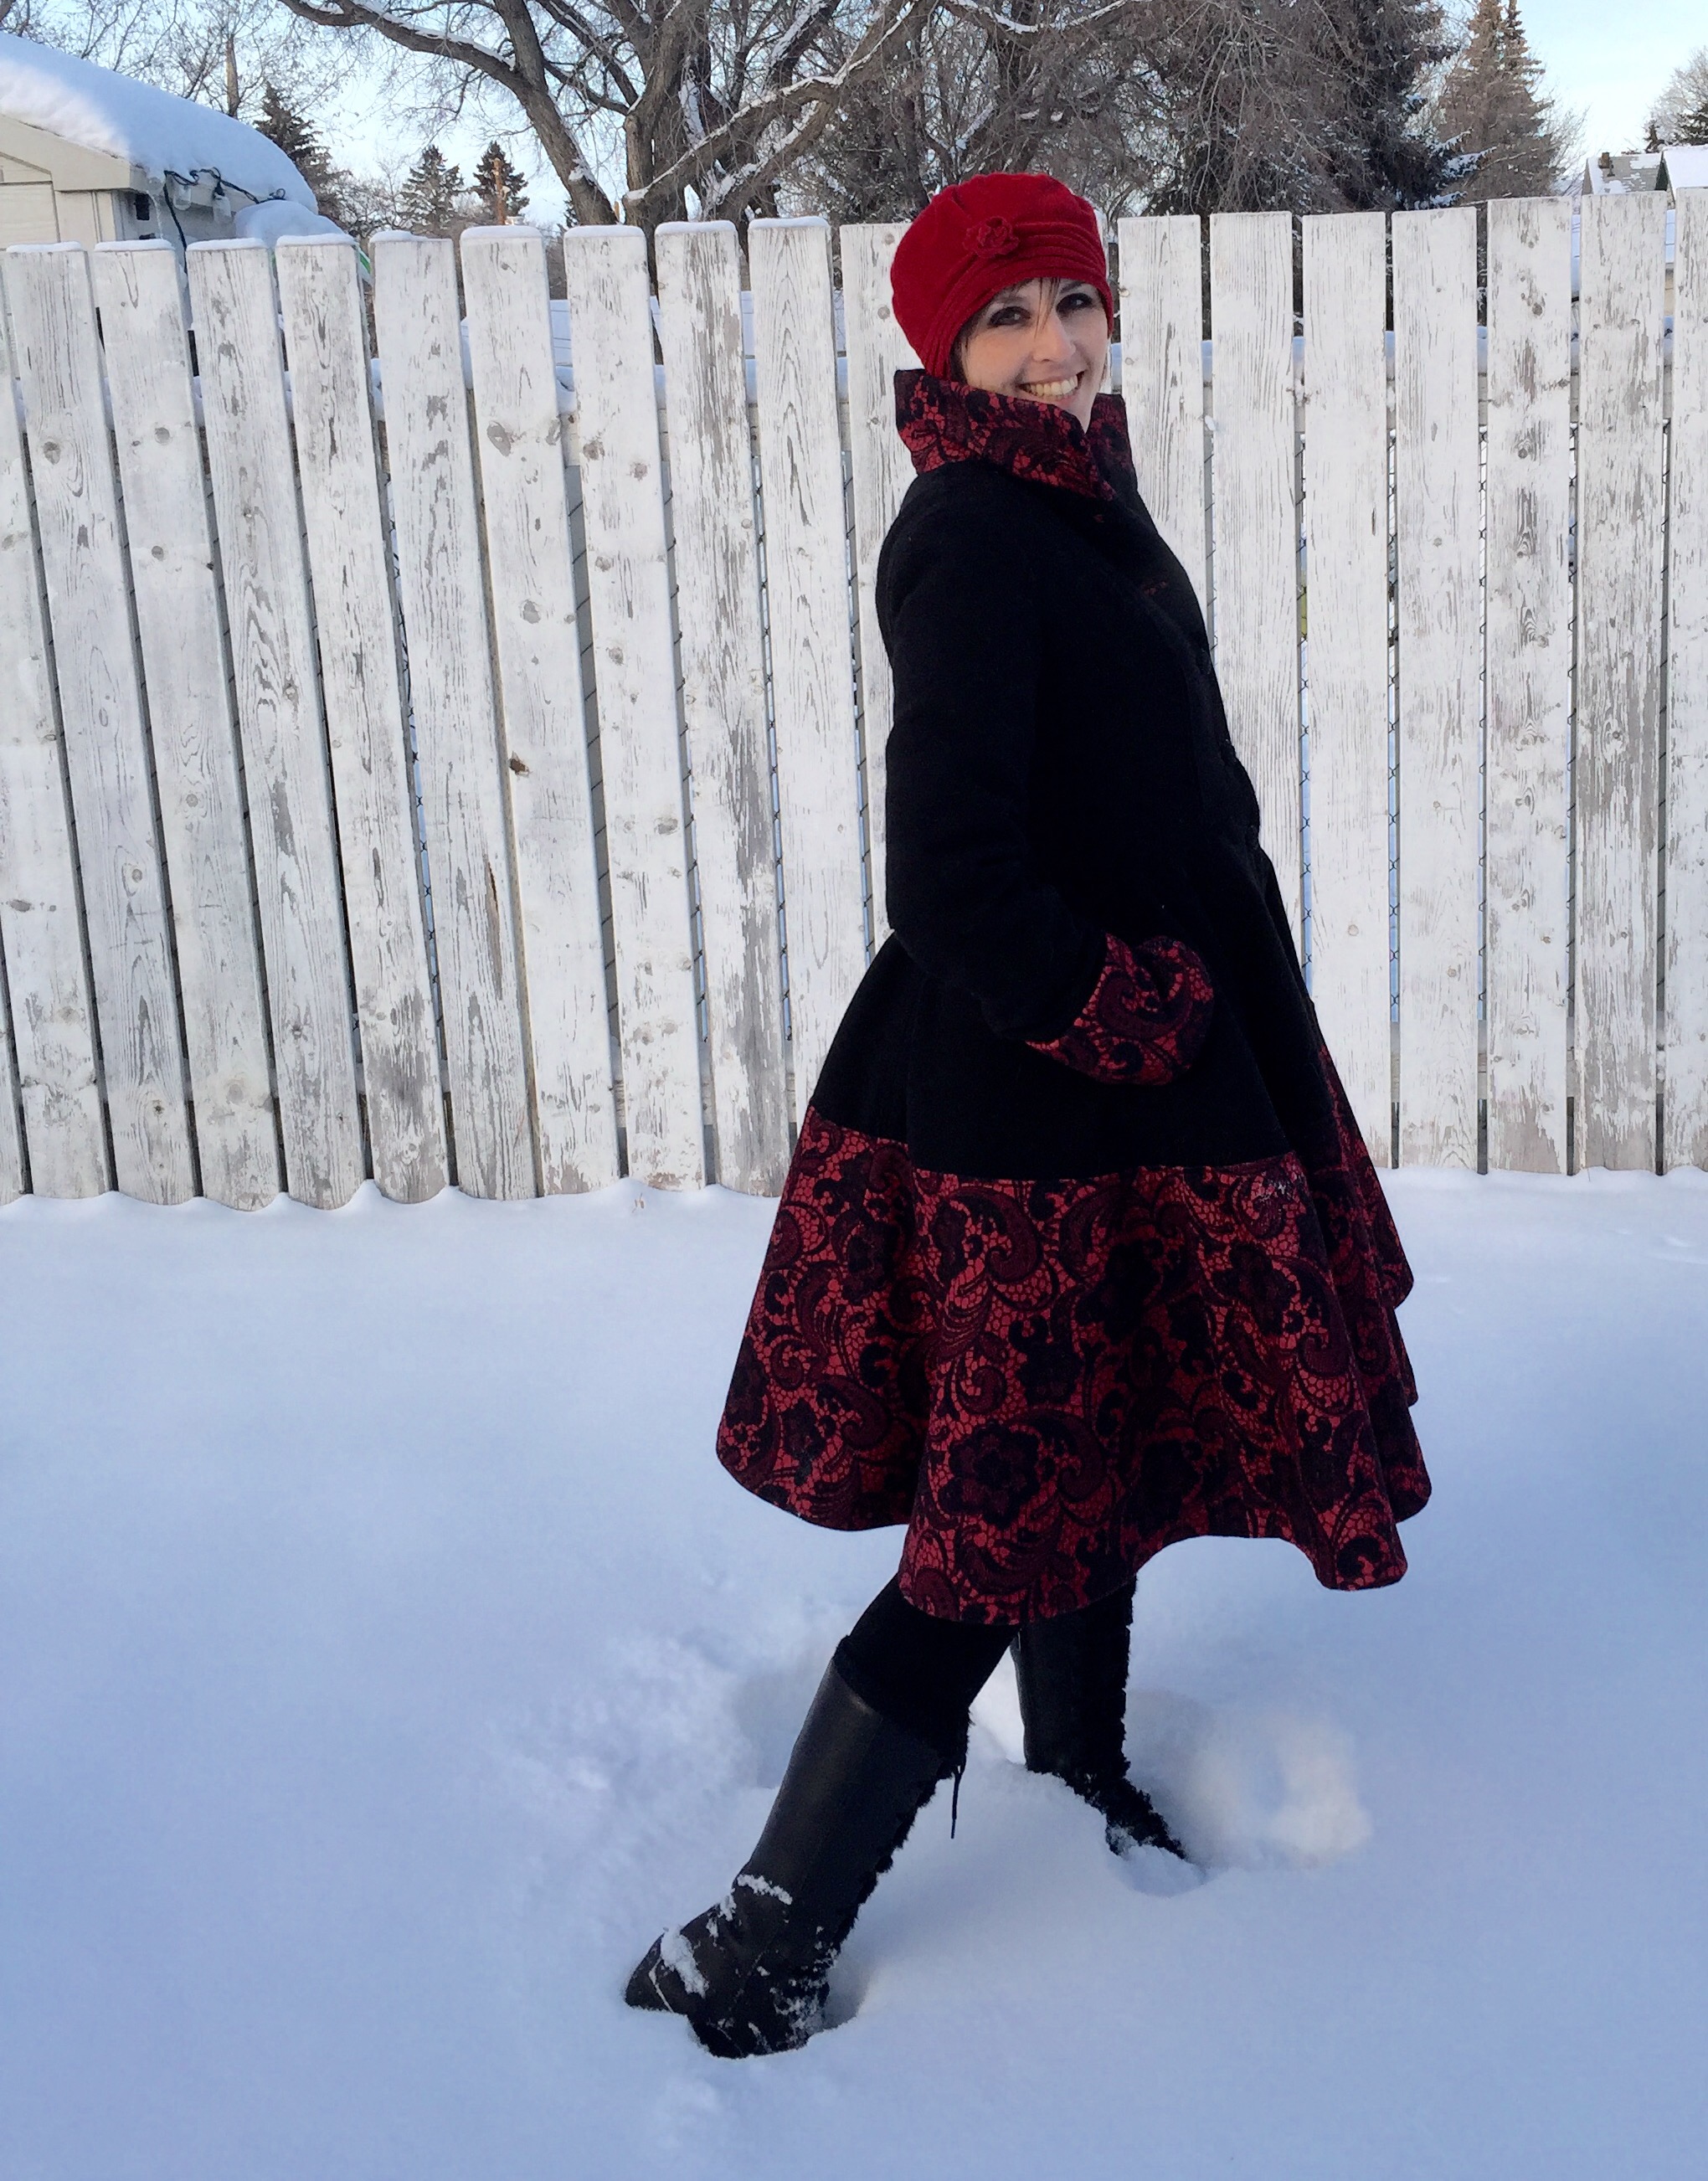
The fit is good, if a little snug with all my interlining and stuff. I made the size 12 grading to a 10 only at the shoulders. (I raised it under the armpits a bit too much but that’s easy enough to adjust after the fact.) I thought the amount of length I added to the sleeves was completely ridiculous, but now that they’re on, they’re nearly perfect. My definition of perfect is probably an inch longer than normal people’s, but that’s the result of a lifetime of too-short sleeve trauma. 

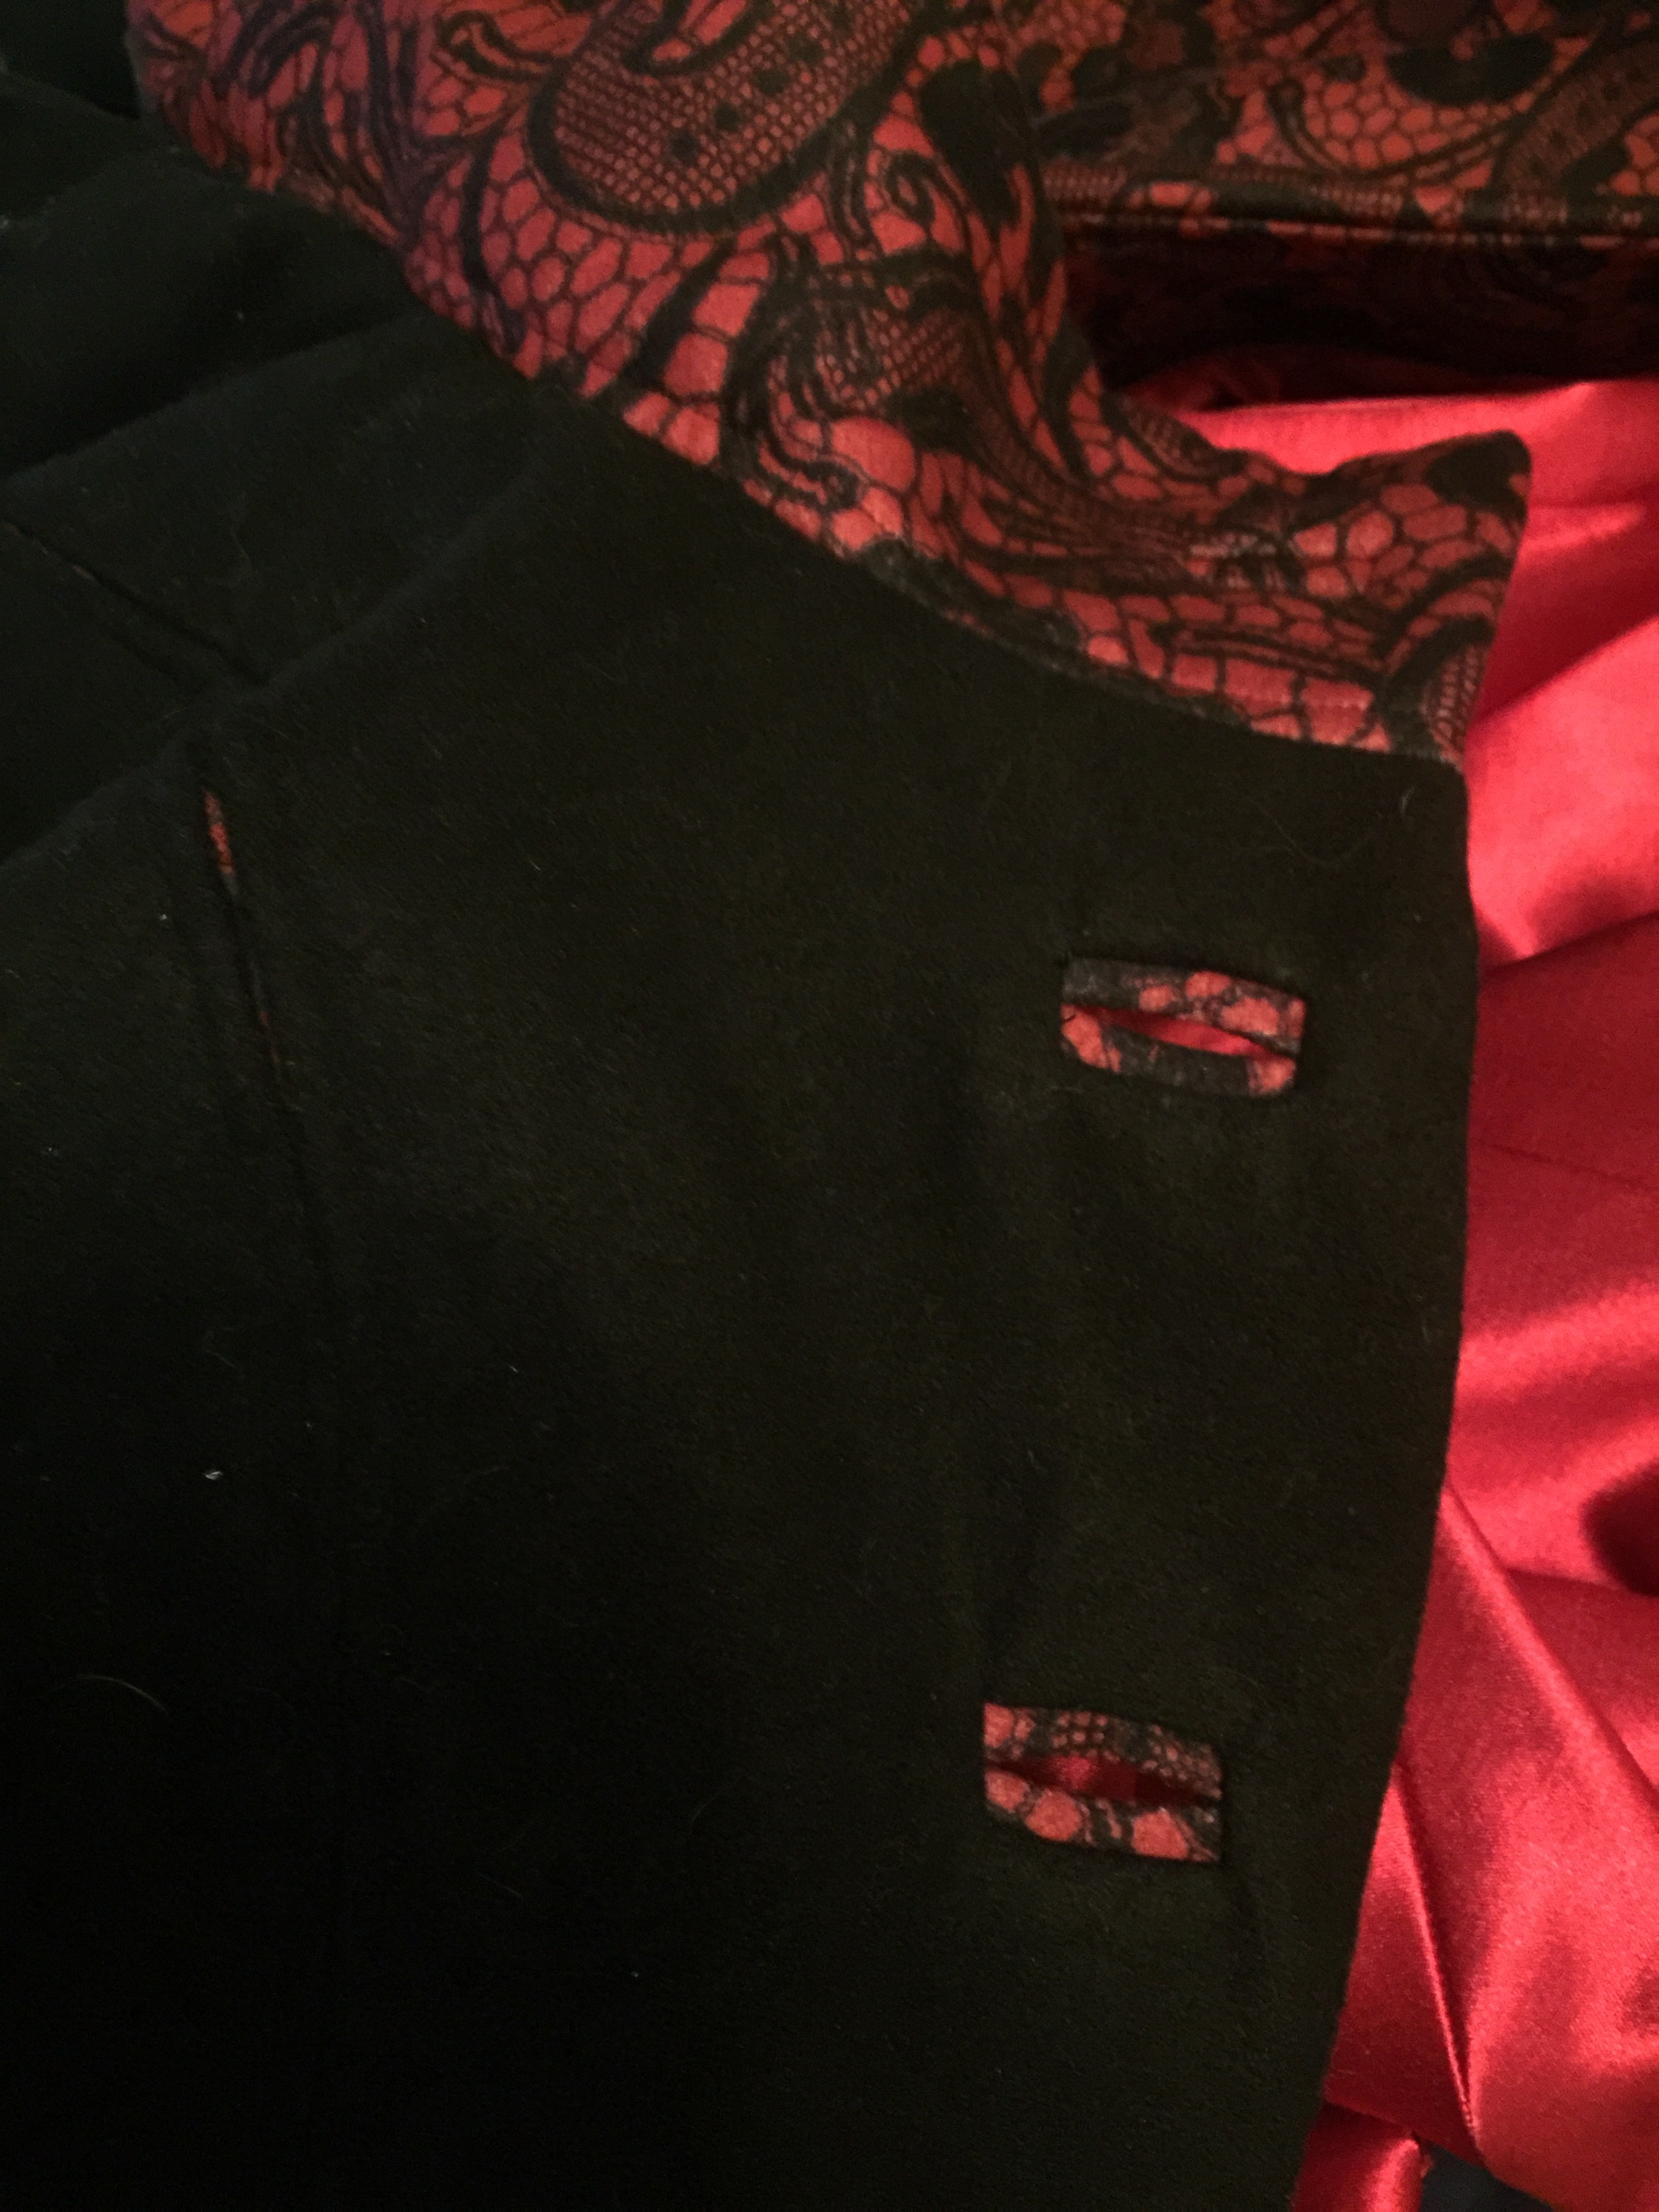
The bound buttonholes were a bit of an afterthought, and they’re not perfect, and I feel like they nearly killed me but actually it wasn’t that bad, just nerve wracking. Trying to do  conventional buttonholes on a regular machine would’ve been even worse, though. And they look amazing so there’s that. 

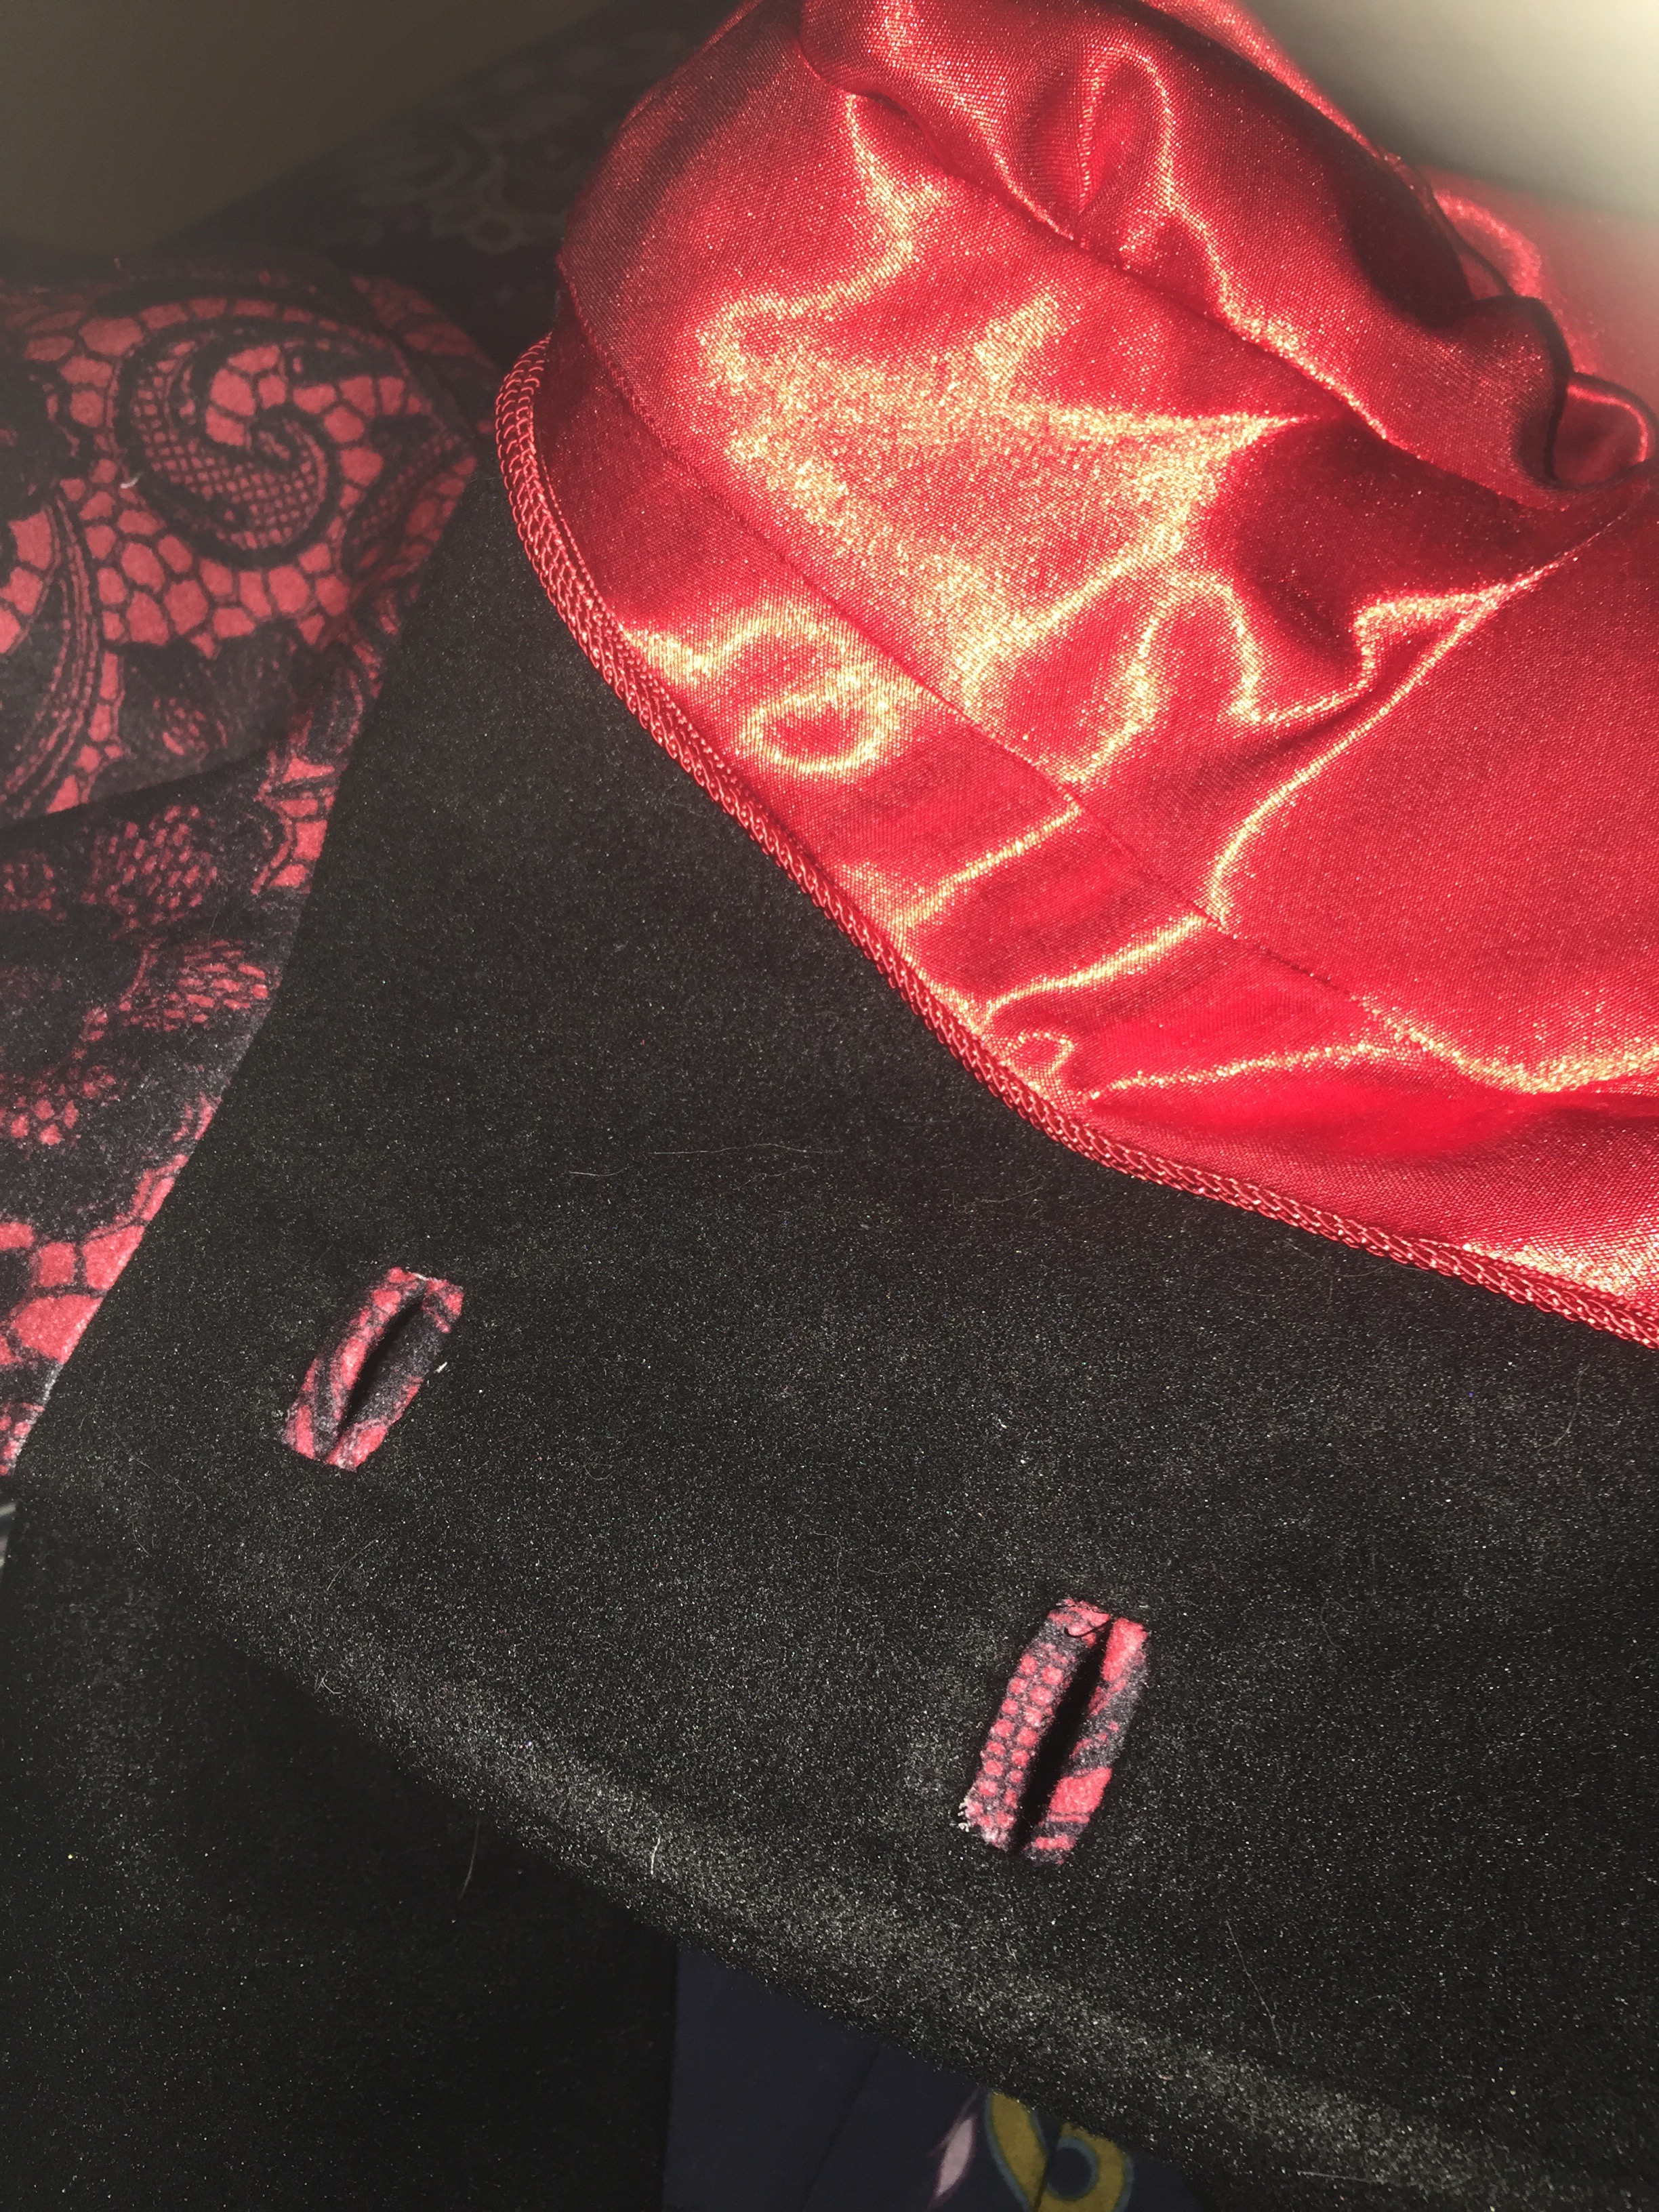
Oh, yeah, added braid piping between lining and facings.


And maybe I just didn’t have the energy for a really elaborate project. But I’ve been ogling this pattern since it came out and the red lace-printed coating was just too unique and perfect and, well, shop projects always seem like a good idea when you first take them out…

Anyway, it’s done now. 

My favourite touch is the slotted seams I added along the princess lines, though it is hard to see in the photos. 

I did a neat alteration to the back neck facing that I completely failed to photograph, too. 

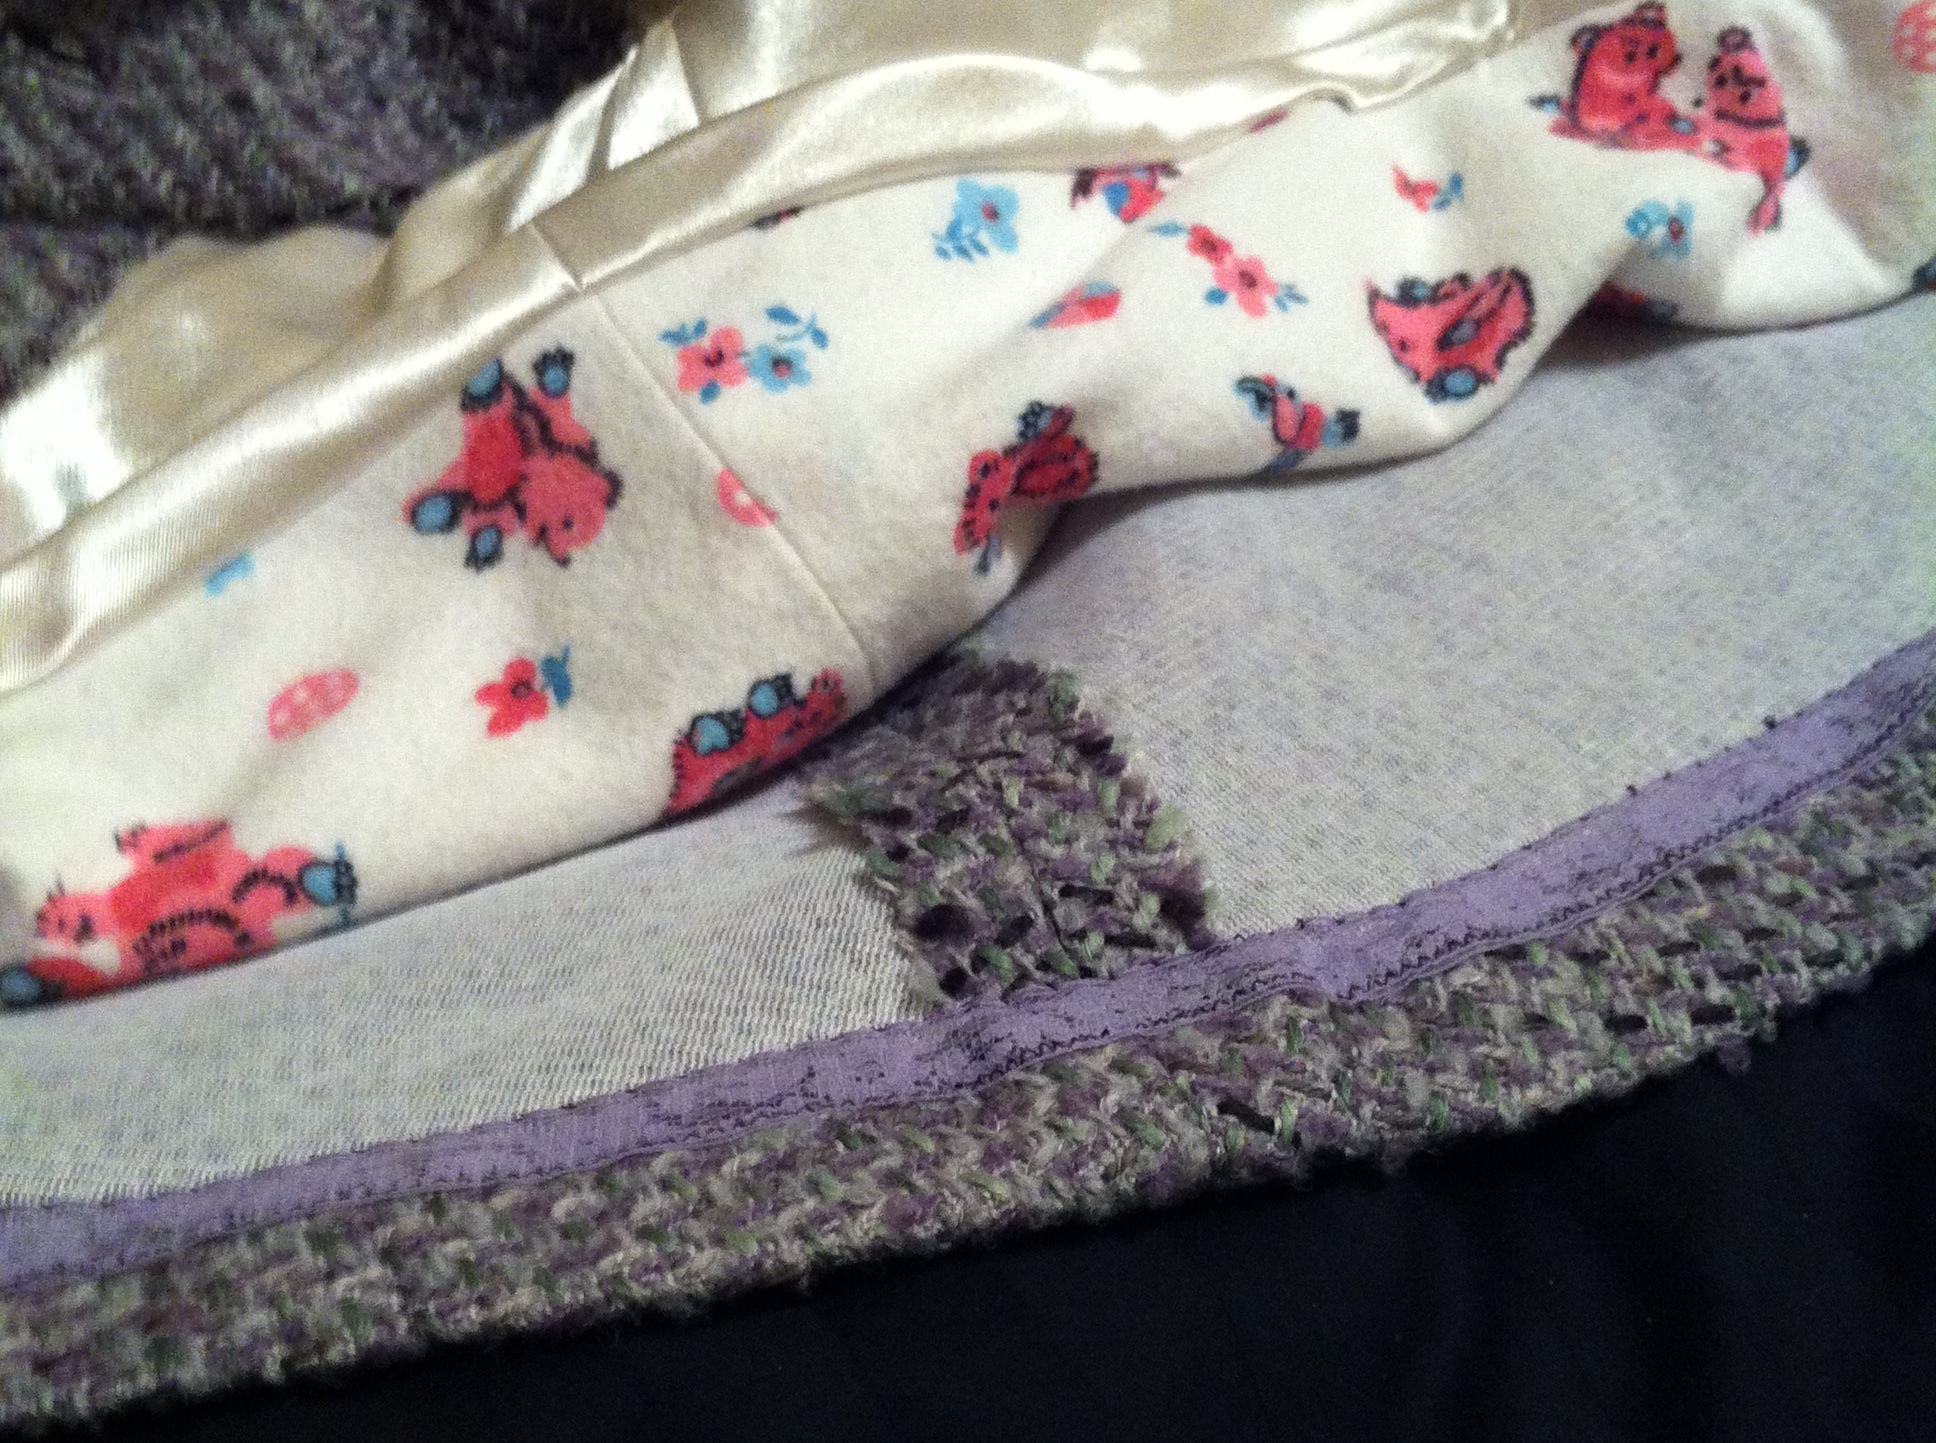
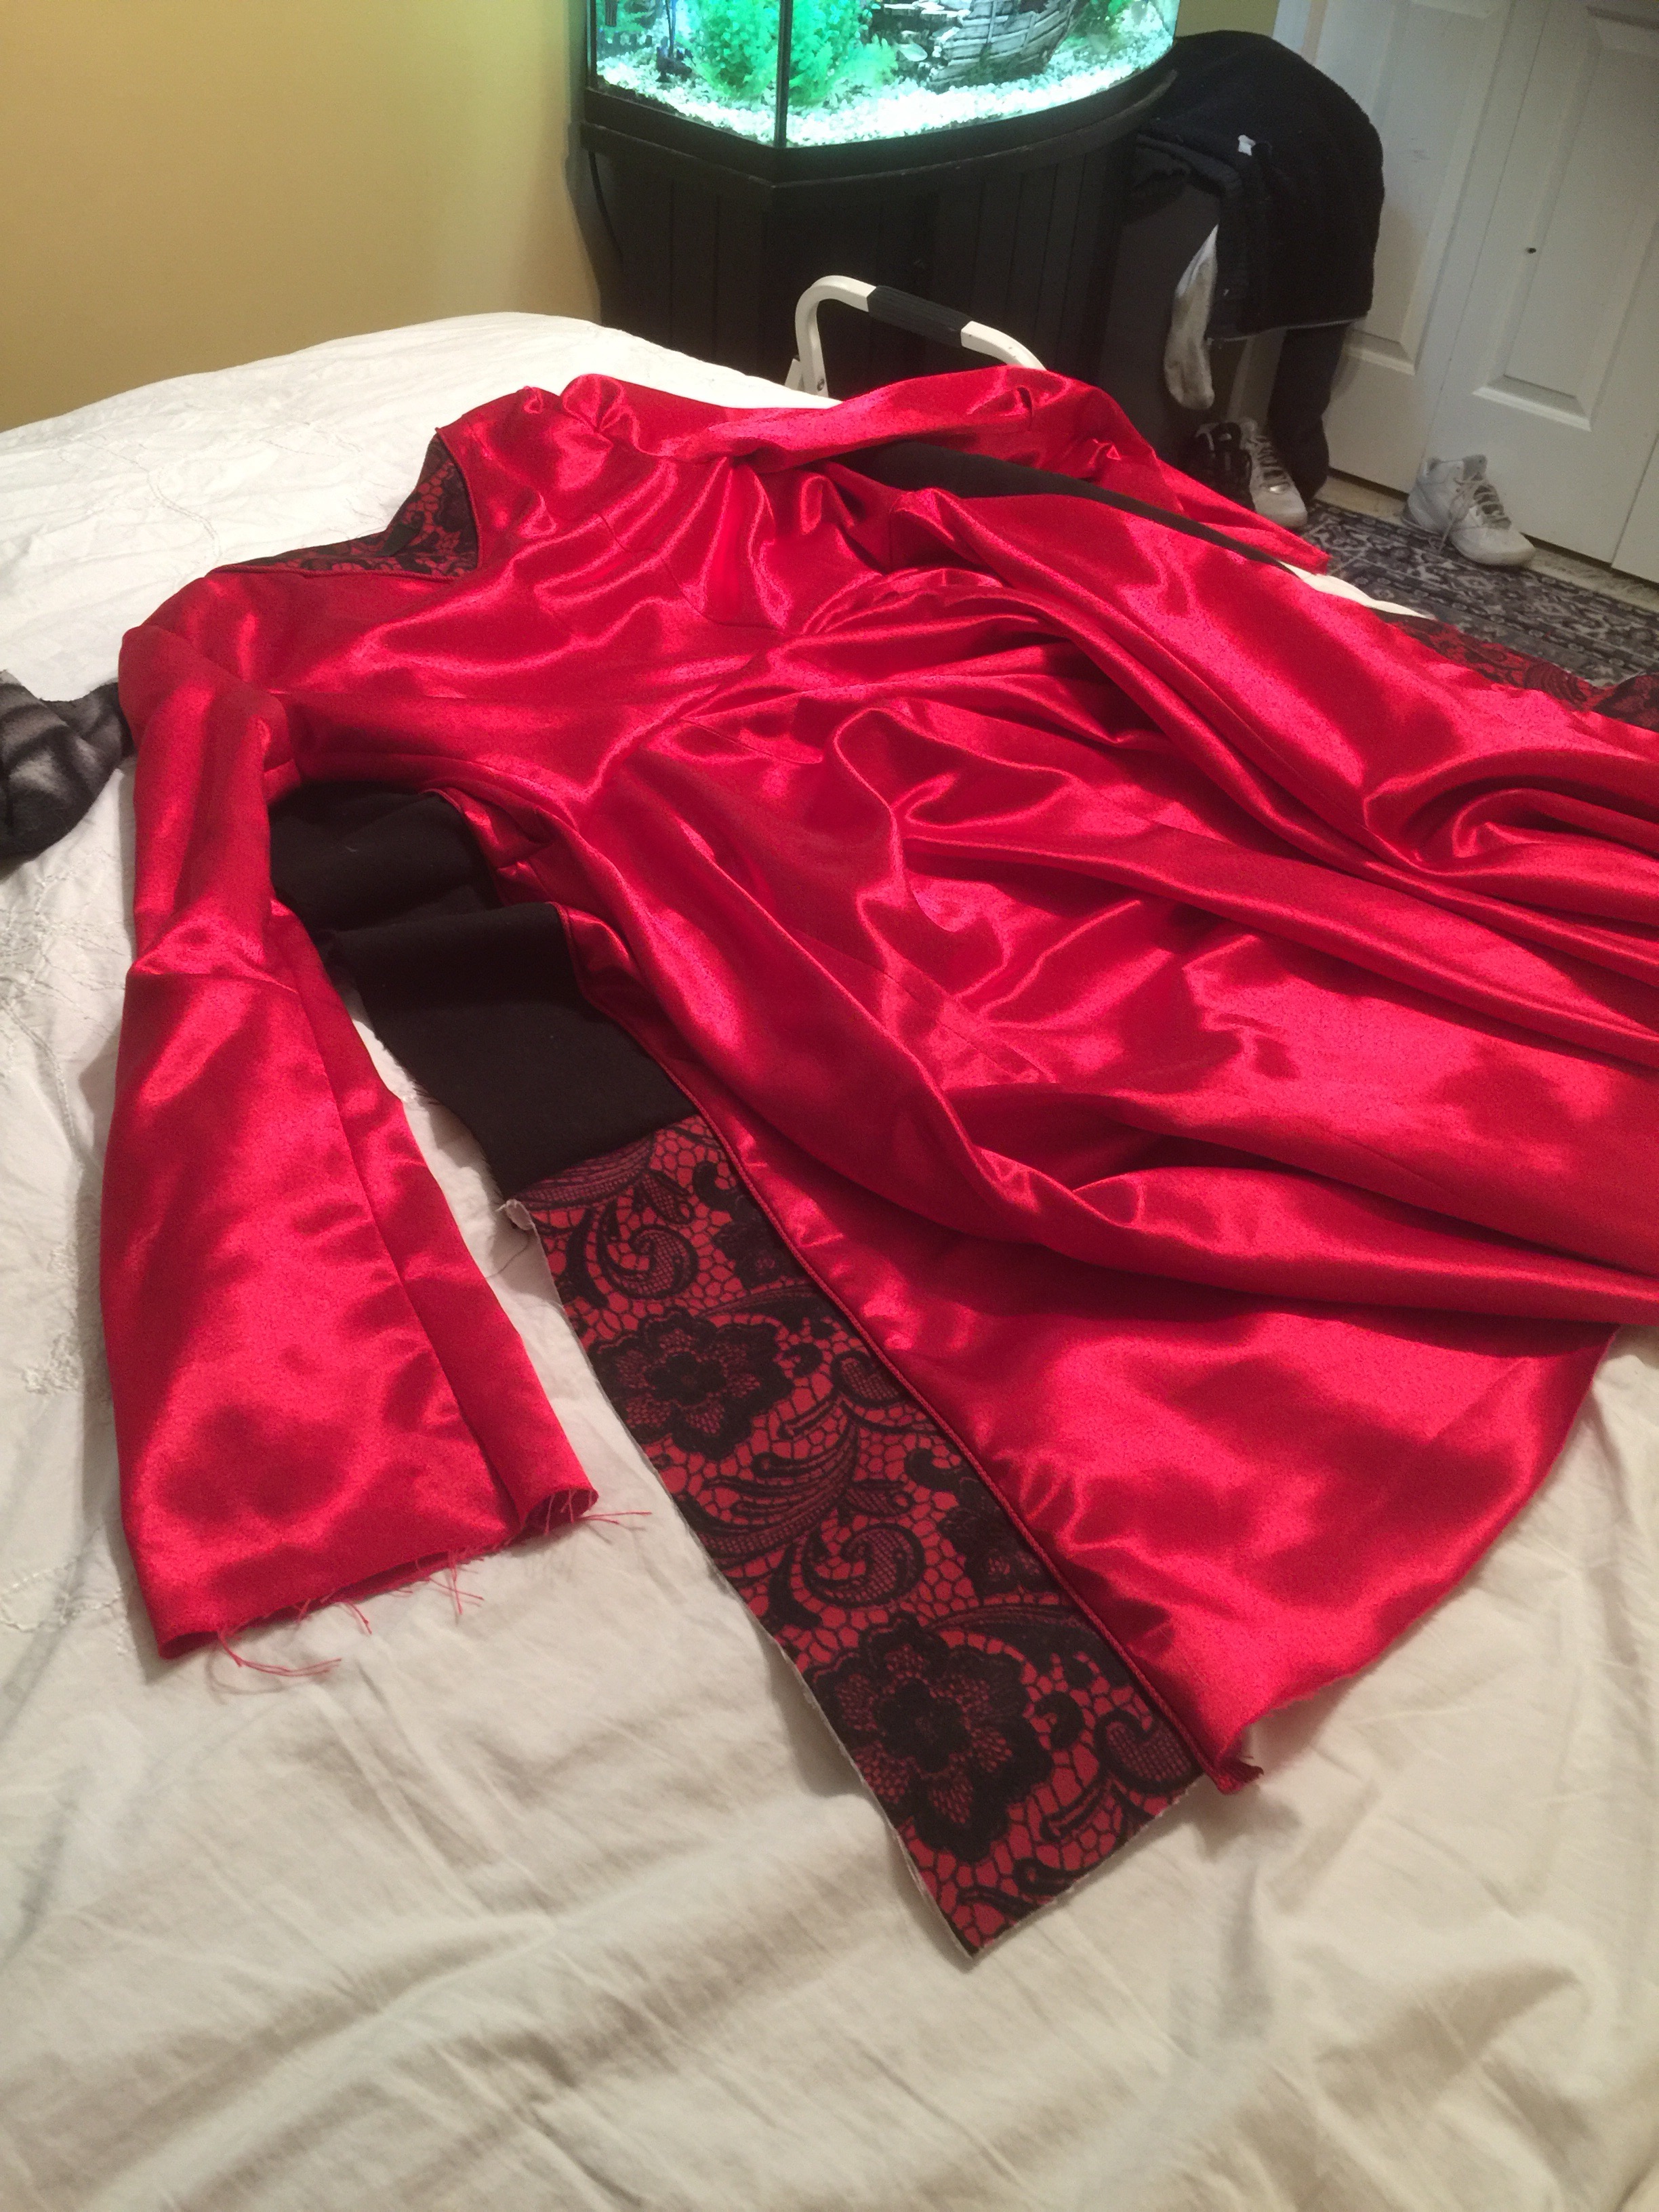
You can almost see it here… No, not really. Oh, the pattern has some separate lining pieces (yay!) but not all of them (aww) so the lining is supposed to have the extra seam partway down the skirt, too. I did not want that. It wasn’t too hard to overlap the edges of the two pieces to cut them as one. 

Anything else to say? This make was so stretched out I’ve forgotten half of it. The sleeves are quite narrow at the upper arm, wide at the cuff. I do like the elbow dart for shaping though. Lots of sleeve cap ease. I chopped off a bunch. 


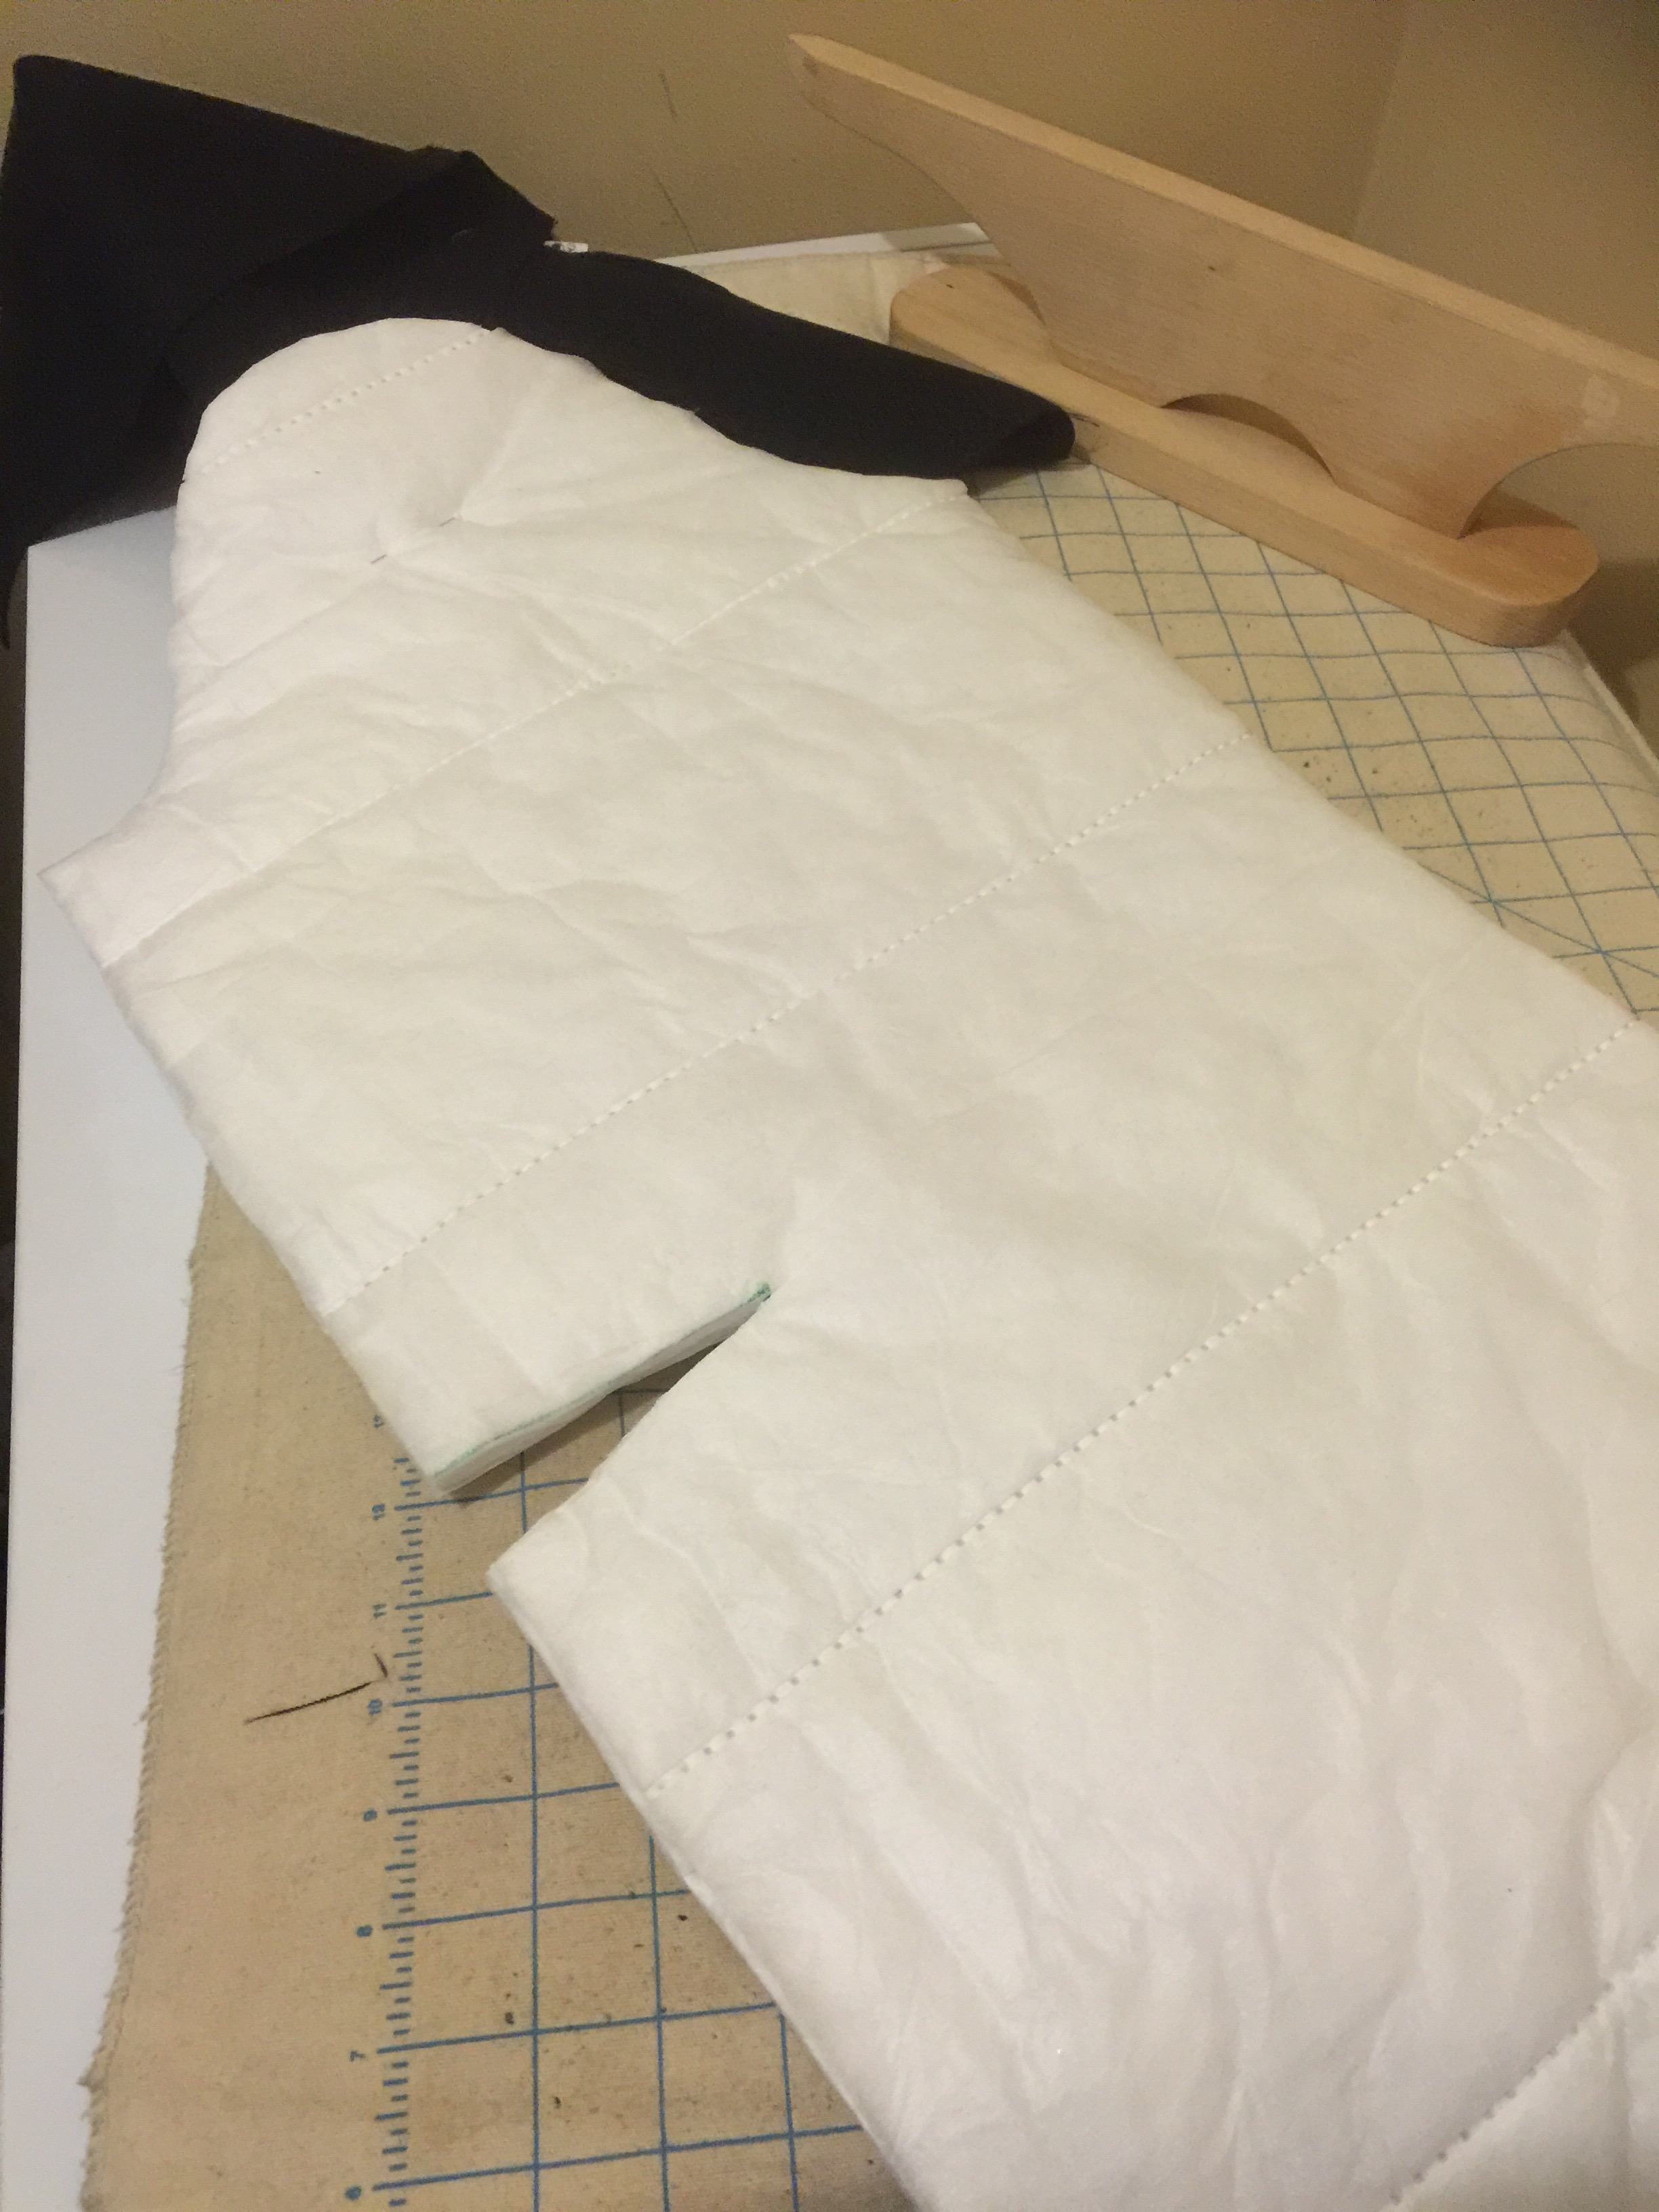
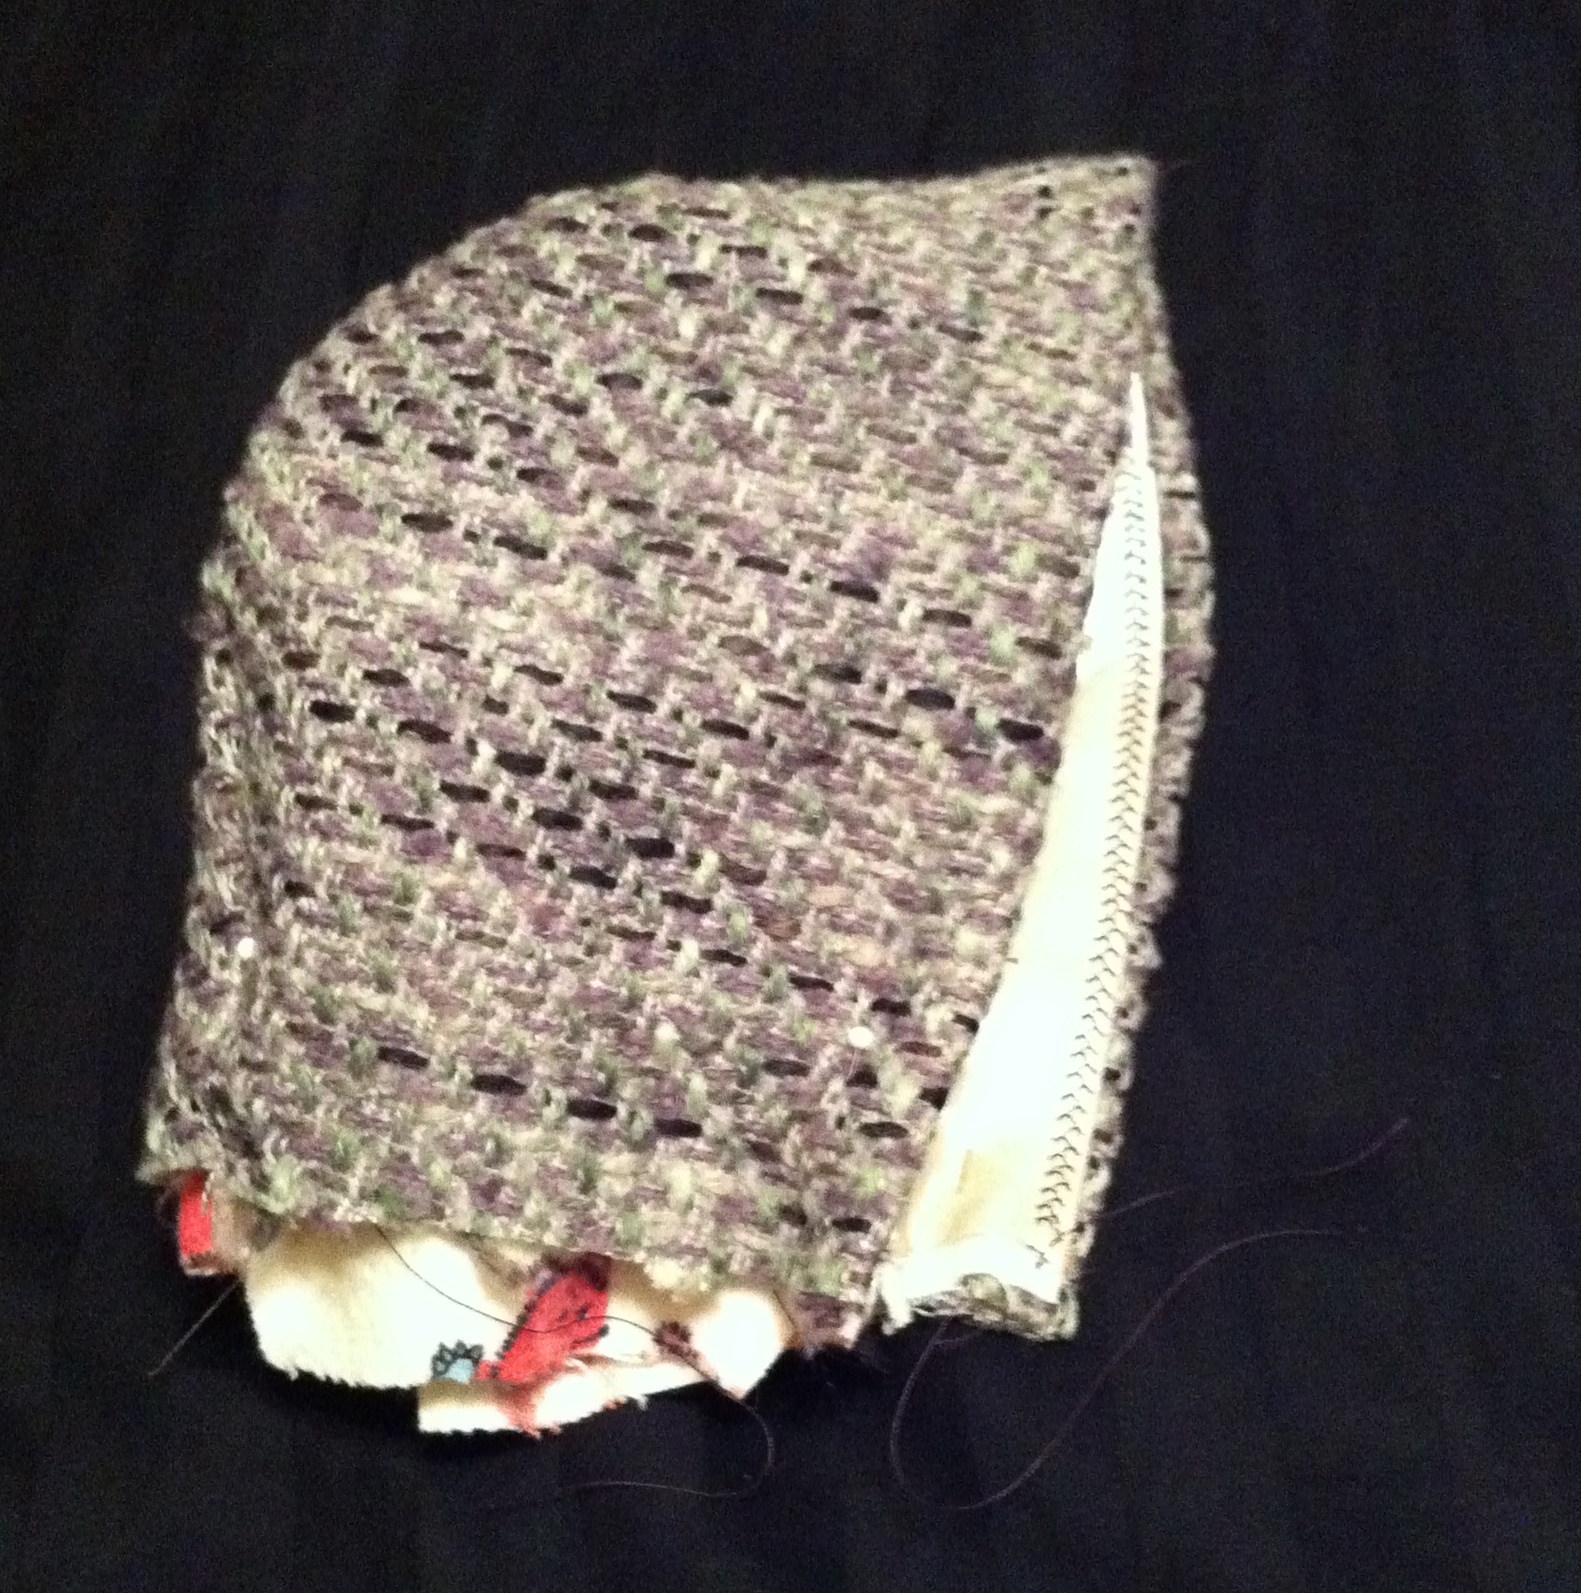
Oh, yeah, I interlined  with Thinsulate, body, upper skirt, and sleeves. Trimmed off the seam allowances and did butted seams on the body. 

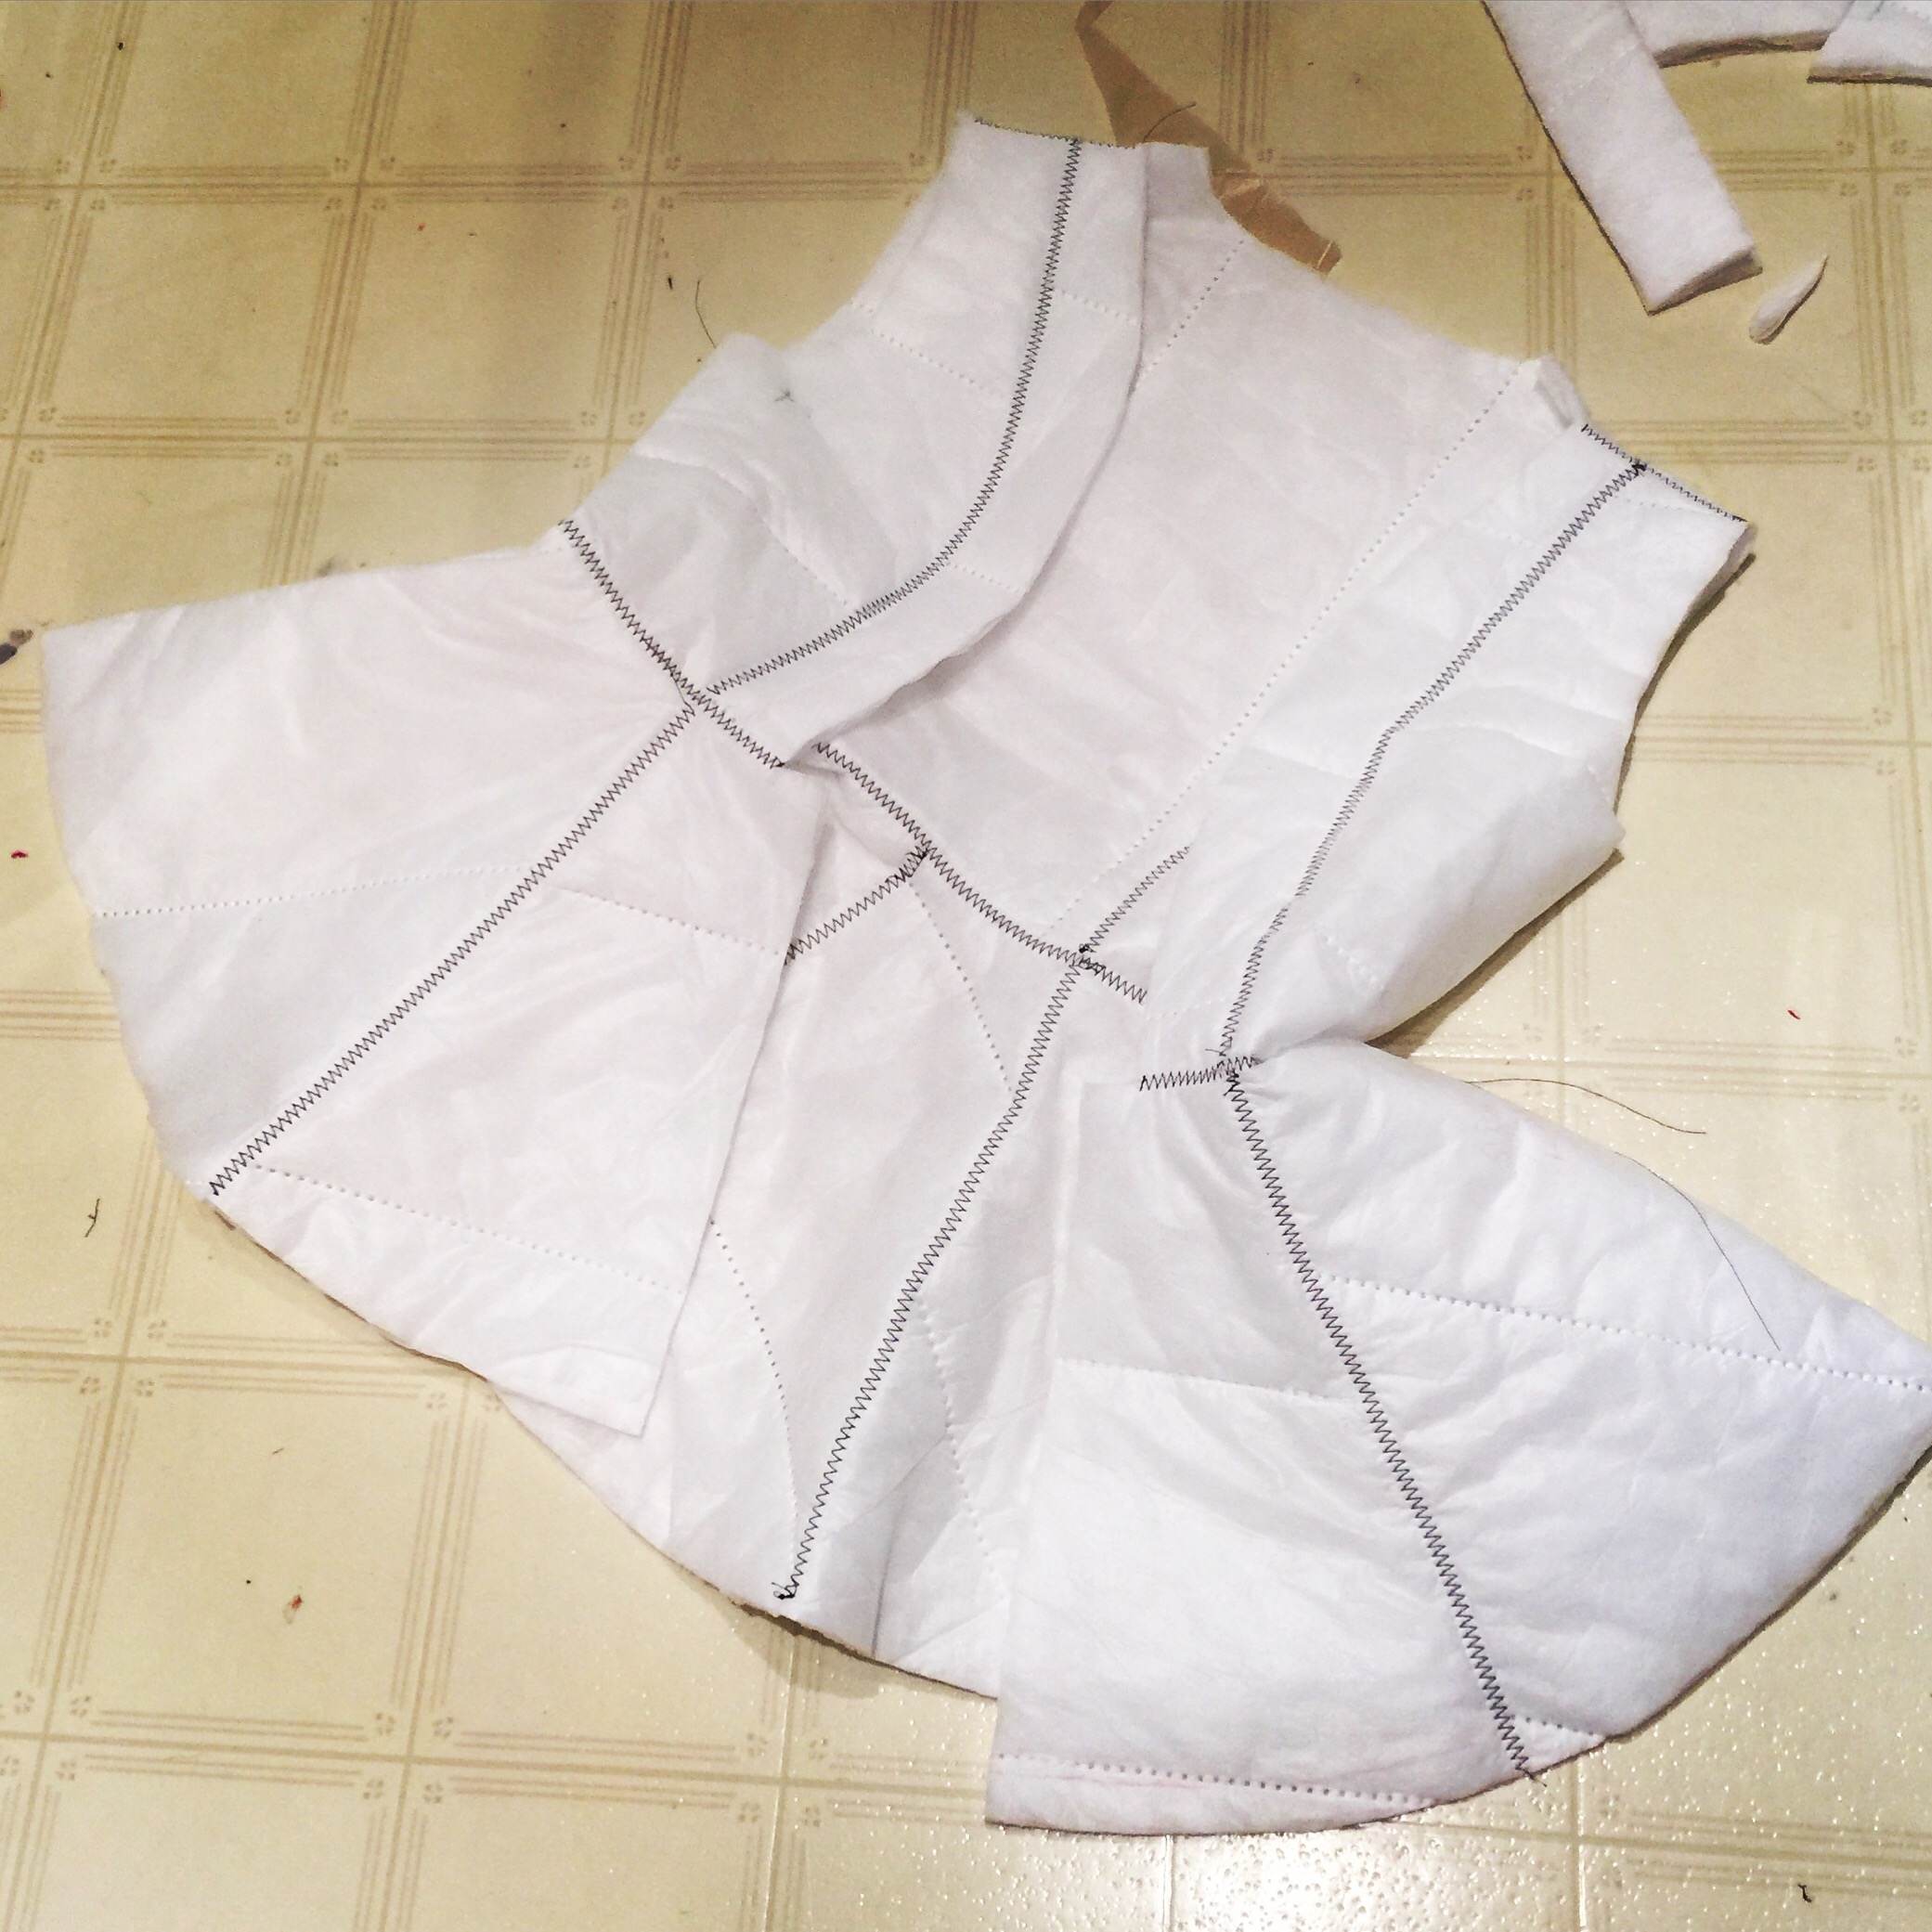
I must have miscalculated somewhere on what seam allowance I took off the front but otherwise that worked well for the bodice. I was a bit more stumped for the sleeves. (Incidentally, standard wisdoms for interlining seems to be “quilt it to the lining”. This probably works well, but I HATE QUILTED LININGS. They fill me with visions of really ugly early 80s parkas. Anyway, it’s really hard to sew a butted seam up a sleeve. Not impossible, but annoying enough that I spent several weeks avoiding it. In the end, I replaced the seam allowances I had cut off the edges of the Thinsulate with ugly flat bias tape zig-zagged on top so the bias tape stuck out past the edge of the Thinsulate, and underlined the coating fabric for the sleeves. This actually worked quite well, and I wish I’d gotten pictures but by this time I was in mad-last-minute-panic mode. Also you have to finish the edges of Thinsulate with a zig-zag at least, otherwise the outer layers shift and the inner fluff starts escaping. 

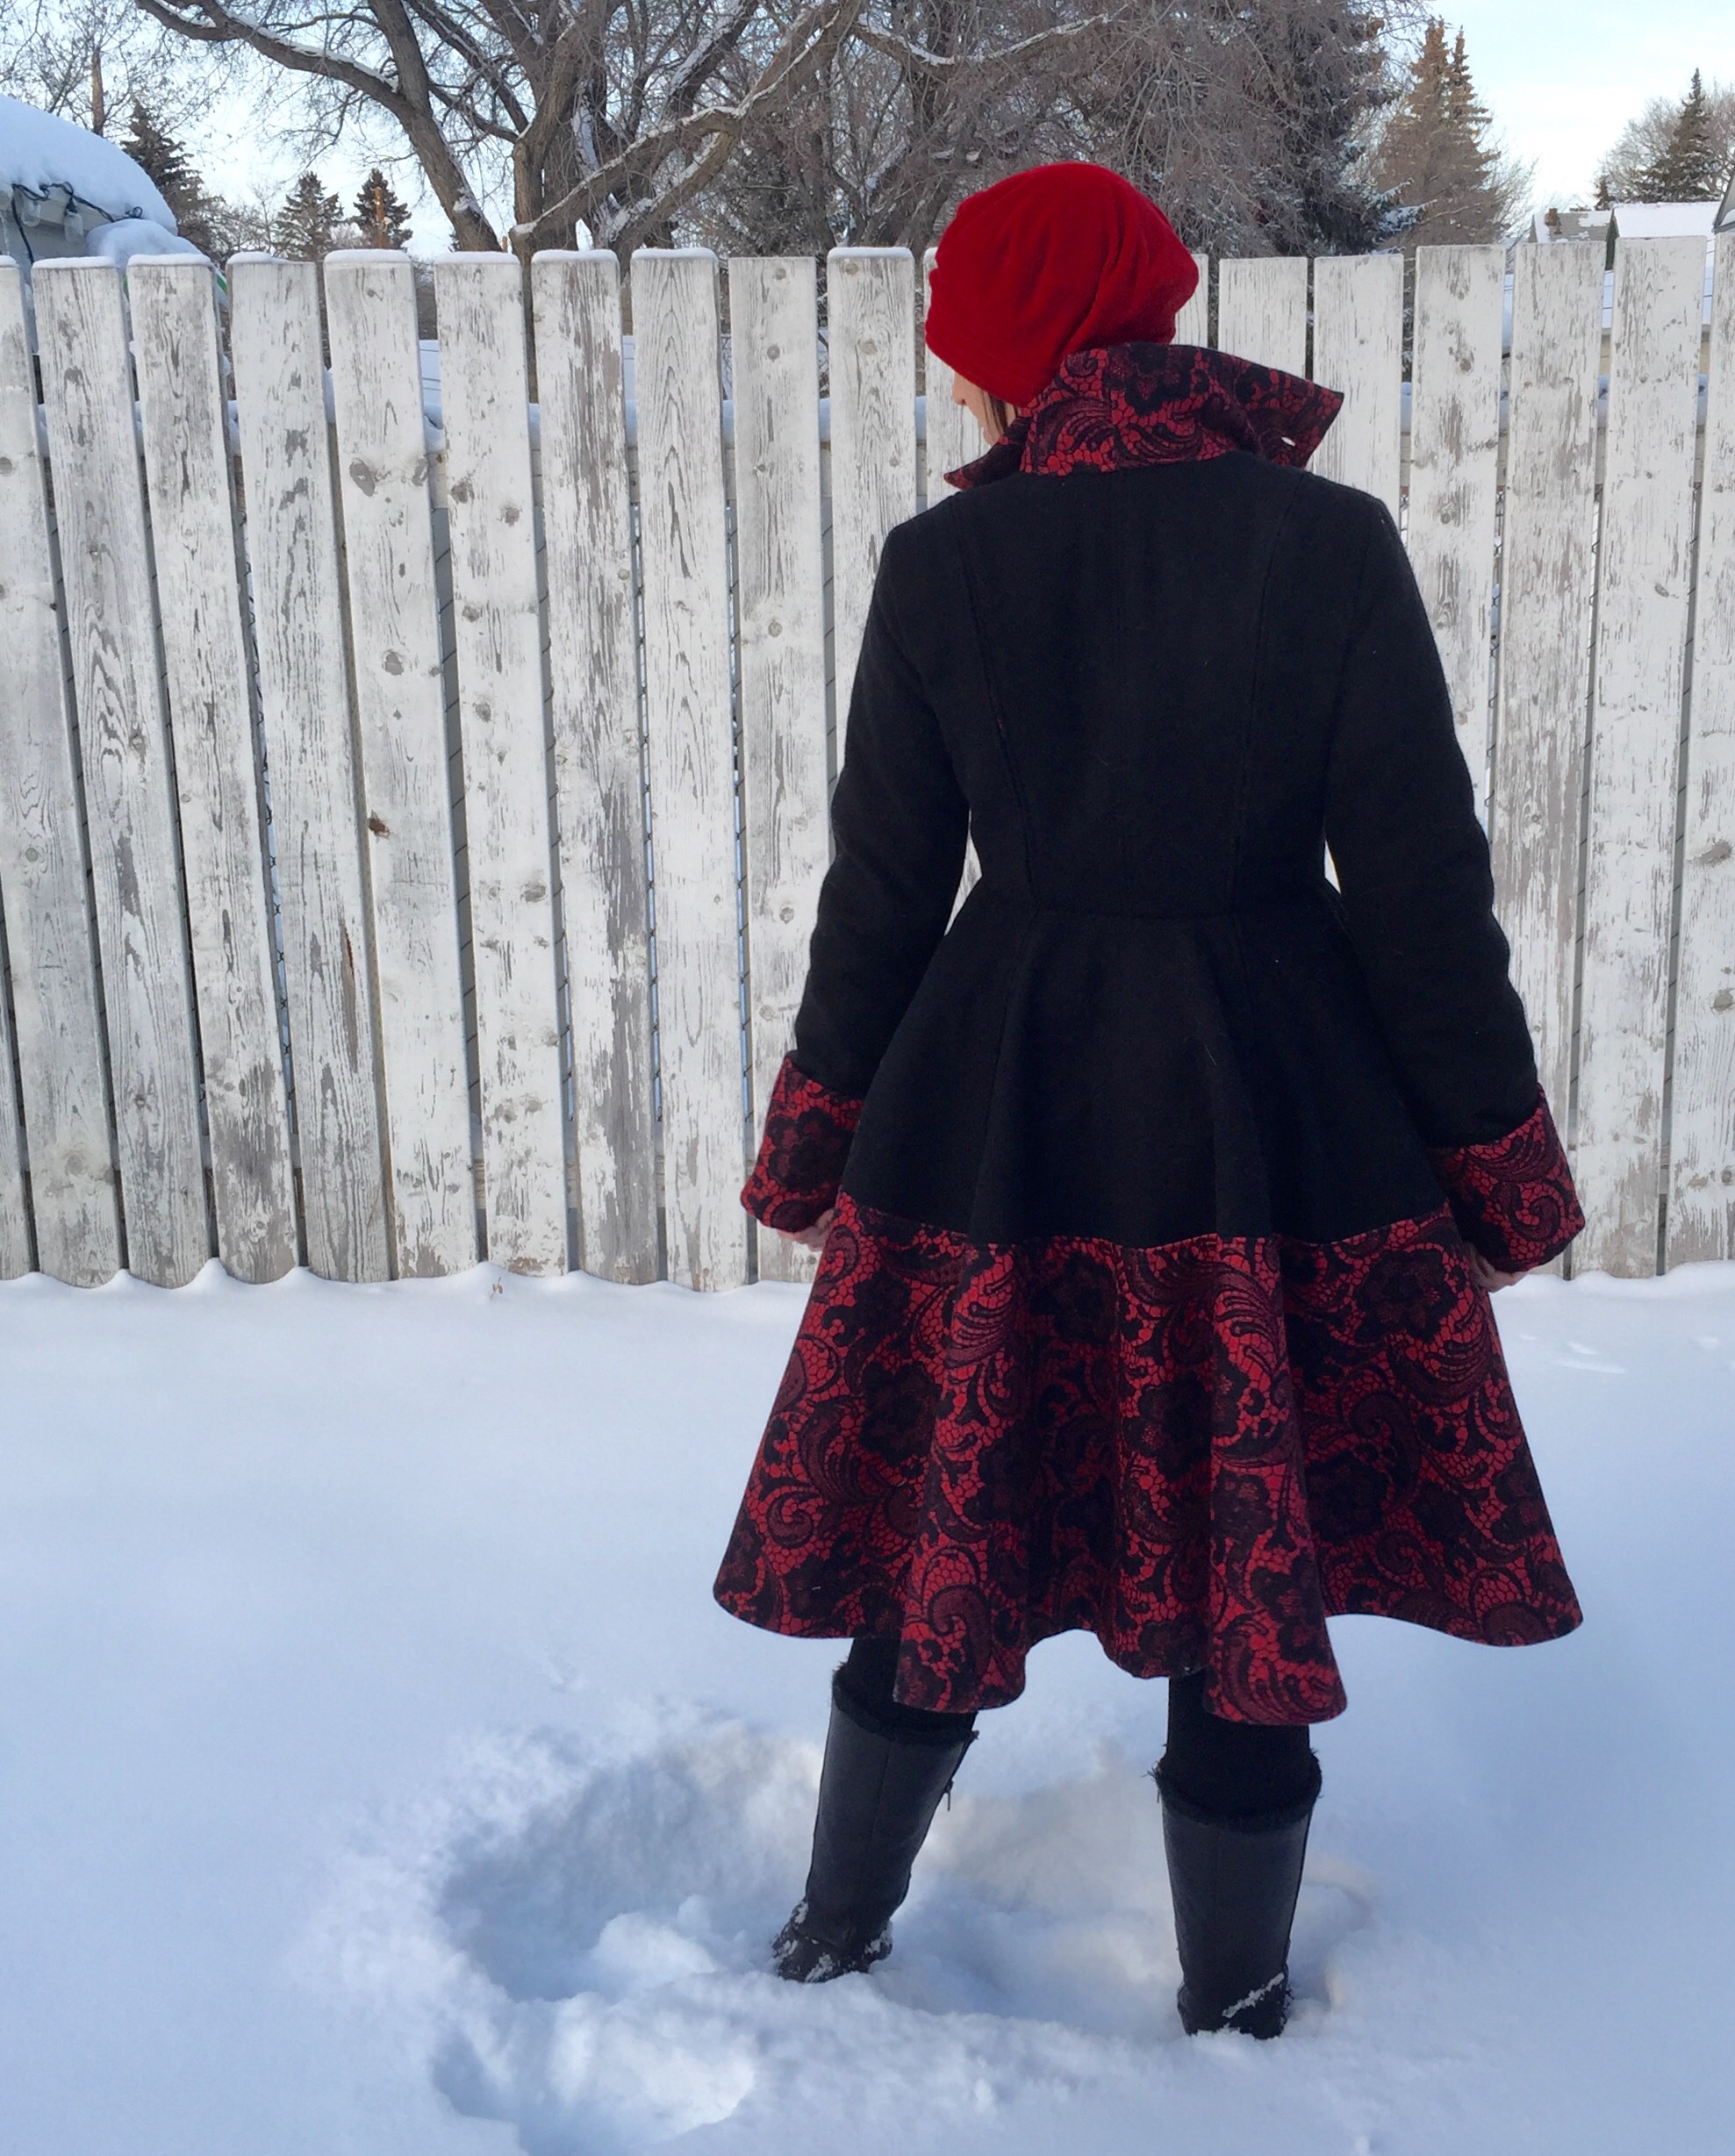
It’s hanging in the shop now, finally. I will probably like it better by the time I get it back. It’s certainly very striking. I had been kinda hoping this would be the mythical “warmer than the winter coat” that I’ve been dreaming of for the past six or seven years, but I don’t think it’ll be quite there, alas. But at least I’ll look fabulous… 😂

13 Comments

Filed under Sewing

Coatember

dsc08600

So there’s a bit of a gap in my coat collection, in that the Springy Coat is pretty lightweight, and my winter coat is fairly heavy, and I don’t have much in between. Technically my Lady Grey coat should be in the middle, but, um, much as I love the Lady Grey, that thing’s got short sleeves. -10 for practicality, Madam. Especially when made up in a hefty boiled wool.

So something in between would be pretty sweet, and it’s been a pretty long time since I made a coat that wasn’t for a tiny person.

m7442

McCall’s has some pretty cute coat patterns; I find them hard to resist, even though they aren’t terribly well drafted. (And by this I mean they use shortcuts, like having you use the same pattern pieces for the shell and the lining, not that the pieces don’t line up or anything like that.) It can take a fair bit of RTW Tailoring to get the pattern to a point I’m willing to go at it. McCall’s 7442 was better than some—at least it has a proper front facing piece and a front bodice lining piece to go with it—but I’d still recommend going over that sewalong or some other lining-drafting info before tackling it.

2016-09-05-11-07-08-1My first thought was a version of view C with the hood, but after trying out the little flounce at the waist I decided to skip it. It’s cute in theory but a little too much ruffle right at the waist for my liking.

14145381_1858178704410629_773238572_nThe fabric is a “wool blend” lightweight coating (or possibly a heavy flannel) that’s only 10% wool—eyeroll—but I sure do like the look. Plus the colour scheme will work really well (if boringly) with lots and lots of the other things that I have made. To make it a bit warmer, I underlined with some heavy flannel from stash, the same stuff that I used for the flannel petticoat an age or so ago. This has made it full-on coat-like, although definitely not Canadian Winter Coat Grade. Also, underlined coating is the sweetest stuff in the world to work with. My machine blind-hem is COMPLETELY invisible because not a single stitch penetrated the outer fabric… but that’s getting ahead of myself.

dsc08591Running with the inspiration of the lace-bedecked original, I also got as much of this black cotton cluny lace as I could fit in the project budget.

2016-09-07-16-21-05
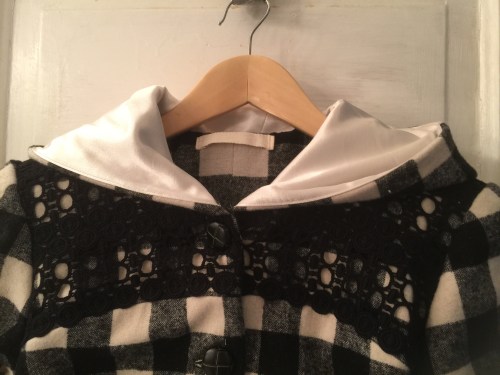
And I had just enough to go to town, covering not only the front and back yokes, but getting bands at the hem, waist, and sleeve hems as well. With only the tiniest sliver to spare!

dsc08592You might find this a bit unbelievable, but this is the only coat I have with a hood. It’s not quite big enough, from my point of view, to look good up, but it’s just right for wearing down. And I’m sure if I wear this far enough into the fall (assuming I can wear it, when the chips are down) I’ll test it out for warmth. At a certain point in the Canadian winter you give up on caring about what things look like.

I did, however, screw the pooch pretty big time on this one. I mean, it’ll pass for what it needs to do—it’s a work project, and it’ll hang and look decent on a mannequin for a month, but whether I’ll actually be able to wear it? Grum.

dsc08597Basically, I botched the plaid matching. Since it’s such a simple check, I guess I thought I could kinda wing it and, ah, no. Not a good idea. I should have spent much more time reviewing/researching. Or just thinking. Gah. All the different seam-lines (yoke, waist) didn’t help either.

Anyway, despite way more effort than it deserves, I totally failed at the most crucial of match-points—vertical lines right down the centre front. WTF, Tanit? HEADDESK.

dsc08586
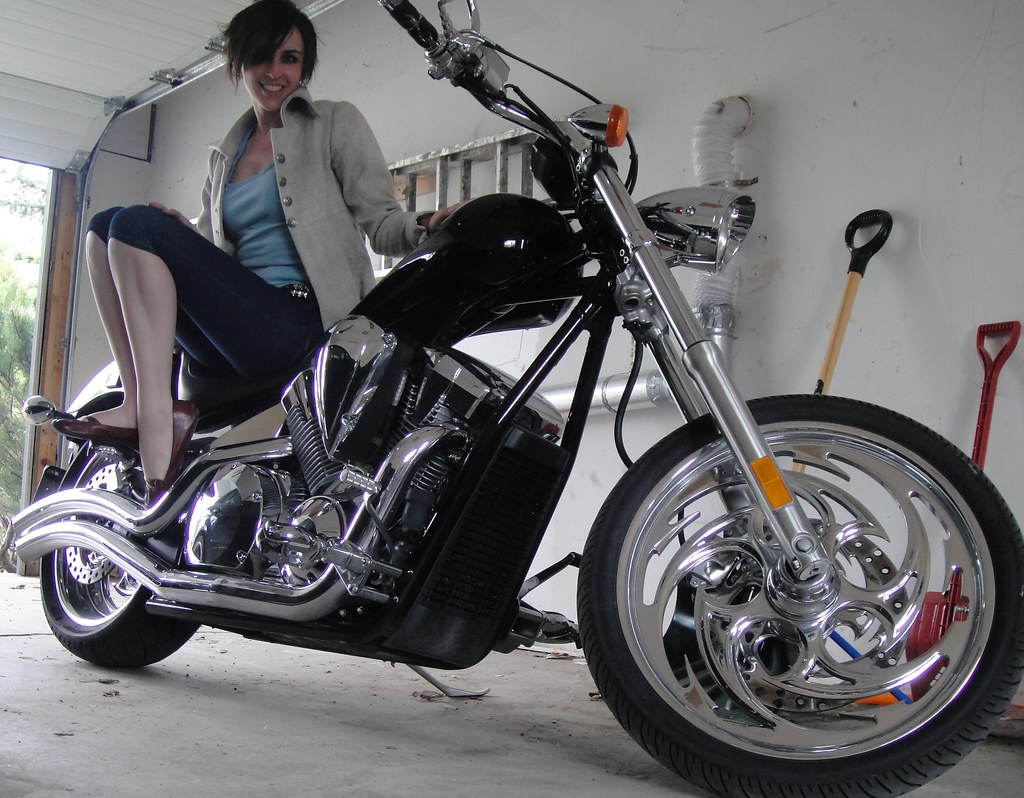
And I stretched and eased and fudged and tweaked and made it work, kinda, but, there was a price, which was that I had to trim off some of the centre front bodice. And that I lost what had been a vertical stripe match from left side to right side, in order to match bodice and skirt. Maybe not the right call in hindsight, especially since this meant I also lost inches, where you don’t really want to lose inches in a fitted coat that I was already making down a size. Which means the whole damn thing is tight, bordering on way too tight. Not what I wanted in a brand new coat. And you can see the awkward pulling across the front, especially above the bust, where there just isn’t as much fabric as there should be.

dsc08601Otherwise, I was pretty happy with my fit alterations. I started with a size 10 in the shoulders & bust, grading to a 12 at the waist, and squaring the shoulder down to the size 6 height. I did a petite through the armscye (but then forgot to take anything out of the sleeve cap, which led to a bit too much ease there, oops. My fabric was forgiving enough to accommodate it, but I wish I’d remembered in time to just trim it off. I’m glad I didn’t go with the straight 12 though as the shoulders are still a little boxy. I should have lowered the dart point a little bit, but the pulling above the bust bothers me a LOT more than the high dart.

2016-09-07-16-20-41I do like the two piece sleeve, although I did need to taper it in a couple of inches at the wrist—the bicep width is great, though. After comparing it with the sleeve for my Springy Coat, I added only 3cm of length, but then I lost about half of that trying to get the stripes to match up between my under and over-sleeve, and it’s still long enough. Which means that’s a very long sleeve to begin with, since it’s not unusual for me to add 3″ of length, not 3 cm. I wish I’d been able to keep the full 3cm, though—somehow with turn of cloth and everything it wound up about the same exact length as the Springy Coat sleeves, which are just a little shorter than I’d like. (Keeping in mind that I am obsessed with overly-long sleeves. Probably the length would be perfect for a normal person.)

dsc08594
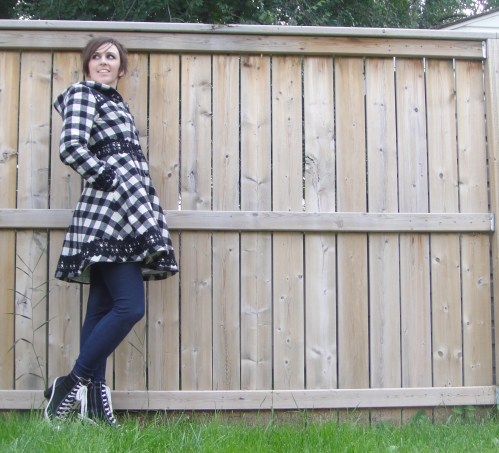
Oh, yeah. It comes with pockets! They are obscenely tiny. Make them bigger. BIGGER.

2016-09-07 16.20.23.jpg
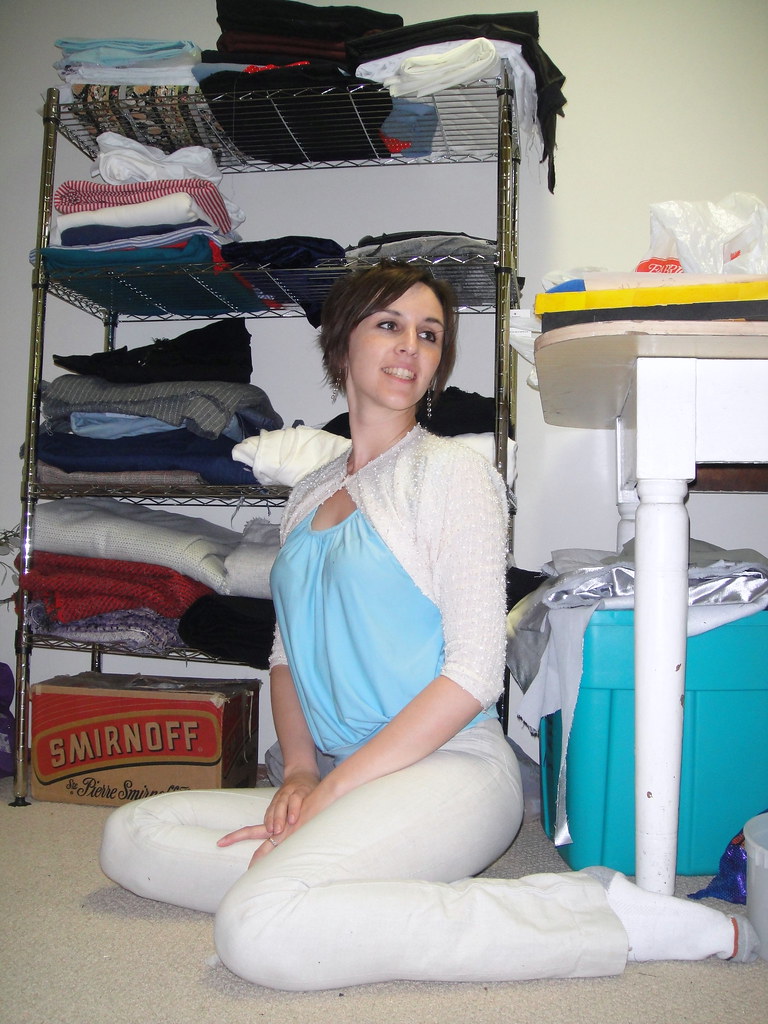
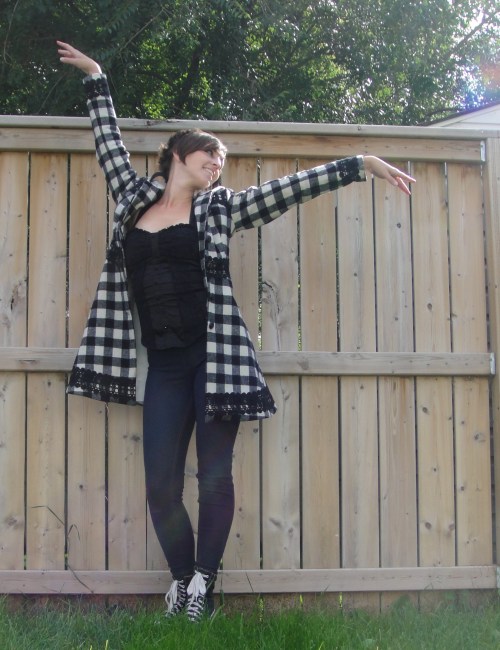
I do enjoy my lace, even though it adds to the business of my busy fabric. I used two rows to cover the yoke parts, and just had to piece in a tiny bit right along the shoulder-line.

dsc08603
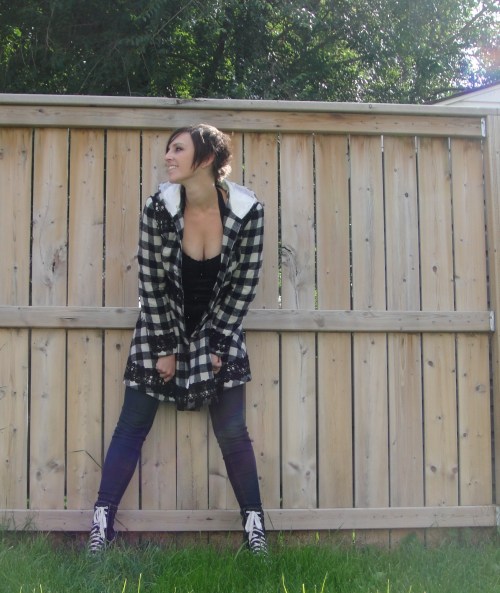
I think that’s it. I like the pictures. I love how it looks on the hanger. It just remains to be seen if tight is actually TOO TIGHT.

dsc08588The hood looks perfect when it’s down. Just the right amount of fabric to sit nicely.
Oh, I almost forgot the buttonholes! I did them on the Rocketeer using my vintage buttonholer. I was terrified because of the thickness of the fabric, and it OWNED. Not a hesitation, not a bunching, nothing. Even on the sections that were covered with lace. Perfect. I went around three times to get the coverage nice. 

dsc08604All in all, I think I will be happy once the plaid-related trauma fades…


14 Comments

Filed under Sewing

A Very Small Jacket

In the spirit of “How much more shit can I possibly cram in,” I made a baby jacket.

Let’s back up a bit. Last winter my bestie, Ada, recipient of the gift Ruby Slip, had a baby girl. In the spring, Ada and her husband came back to Saskabush to spend six months of their parental leave around family. YAY! And I spent most of the last six months thinking that really I ought to make something for this adorable baby who is lucky enough to have one of the most wonderful people in the entire world for a mother. Of course, in my typical procrastinaty way, I didn’t make anything. I even missed my window of opportunity to make this pattern last summer:

Simplicity 3243 – Opportunity Lost

I know, pretty unforgivable. I had fabric picked out and everything.

Alas, like all good things, this idyll must come to an end. Ada and family are headed back to the balmy west coast, and I probably won’t see baby Q (and her delicious pudgy rolls) until after she’s walking. Maybe talking. Stupid distance.

Style 2170

So I got it into my head, a week ago, to finally make up Style 2170, the un-numbered coat version. I traced it out, which would’ve been incredibly easy except for some reason the envelope designers didn’t give that view a number, and while the individual pieces were marked “Coat,” the pattern overview really wasn’t very clear about which pieces were which. I ransacked the stash a bit for coating (something I am well supplied with), Kasha lining (mmmm, Kasha), and finally settled on a flannel I could sacrifice for underlining. Although it has pink teddy bears. We’ll come back to that.

Coat

Coat

Did you notice this pattern, too, is for a six month old? Yeah, real bright, Tanit. Q is nine months. She’s not exactly a wispy, waifly nine-month-old, either (see above about the rolls.) So I have a sinking feeling that this coat will probably fit for about a minute and a half. Ah, well. It’s the thought that counts, right?

Don’t answer that.

Collar. Perfect button.

Collar. Perfect button.

I had hoped for two buttons for the closure (as per the drawing) but couldn’t find any pairs in stash that worked as well as this one perfect purple button. You can see I made no adjustments for turn of cloth when stitching the collar. I only had one afternoon to construct the whole thing, I wasn’t really thinking about fine tailoring.

Fold-over facings

Fold-over facings

The front and front yoke both have fold-over, cut on facings; this made for some nifty construction I don’t think I can explain without long diagrams, but was a pain in the butt when it came to adding the lining, since the original pattern wasn’t lined and when I went to sew in the sleeves, well, the front and back yoke were all sewn to each other. There was some seam-ripping and pouting. I wound up stitching the lining sleeve to the lining body by hand; technically it could’ve been done by machine, but the space was so small and fiddly. Baby clothes are pretty annoying that way, aren’t they? There was a fair bit of ease in the sleeve cap, as you can see; I didn’t really notice with the shell fabric, which eased gloriously.

Quilting for Q

Quilting for Q

I got it into my head, during the gap between cutting and actually sewing it up on Sunday, that I should quilt the back yoke. The thought process actually went: I want flannel interlining. Interlining is sometimes quilted to the linings. Think of those gorgeous quilted petticoats you like so much. I could totally do something like that! I should quilt a “Q” onto the back yoke! Then I tried to add a bunch of curly, floral bits. I’m not good at either quilting or embroidery, so I don’t think my results are terribly legible or lovely but, well, there is a Q there if you look closely. There are also some pink smudges, because when I washed the piece to get the little purple tracing-paper dots off, it appears the pink bears on the backing flannel bled. Aargh.

2013-10-27 19.07.00

Lining and facings

I used featherstitch topstitching to attach the facing to the front lining.

Hem and seam (un)finishing

The guts.

Here you can see those darn pink bears. This flannel had been pre-washed at lest twice, and it still bled. WTF? I cut the flannel 2 cm shorter than the lining, and then sewed the hems together (which took a lot of easing on a flared coat like this) and managed to sort-of get it to lie nicely once it was turned around. My coating fabric was really fray-prone, so I blockfused it to a knit interfacing , which made it lovely to work with, but I probably still should’ve serged the raw edges. I was assuming this was a poly coating, but maybe there’s some rayon or even wool in there; it sure pressed and eased beautifully. I love coating. I found a lavender lace hem tape in stash to cover my hem, though I picked a darker purple thread to sew it on, which doesn’t look terribly nice. It’s very tidy, though, at least.

that bit

that bit

I backed the purple button on the outside with this clear, boring button on the inside. I was looking for a cute purple one, but couldn’t find one that was small and flat enough.

Back view. Very boring.

Back view. Very boring.

I kind of wish I would’ve piped the lower yoke seam, as it’s a pretty feature and hardly shows. Or maybe I should’ve done the back yoke on the bias. Ah, well. What’s done is done.

Bonnet. Fail.

Bonnet. Fail.

As you may have noticed, the pattern included an adorable bonnet. I was pretty excited about this, until I got it to this point, and looked at it, and realized that it was highly unlikely to actually fit, or cover anything enough to keep it warm if it did. So it went to the bottom of the queue and didn’t get finished. It would’ve been lovely, though.

Bonnet insides.

Bonnet insides.

Don’t you love my featherstitch understitching?

I have to say, much as I don’t love making baby clothes (they have such funny squooshy bodies, regular clothes really don’t make much sense, and they grow too quickly), I sure do love making coats. I love working with the heavy fabrics, I love the way they ease and press and even the fiddly things like turn of cloth. This was a pleasure to make just for how the fabrics handled, and it was so much quicker than a full-sized coat would’ve been.

Edited to add:

It fits! It fits it fits it fits! I added an inch to the sleeves when I made it, and they are a little long, and the shoulders are still a little wide as well. Silly over-sized baby clothes. The sleeves aren’t particularly wide, especially for chubby baby arms, but she’ll be able to wear it for a bit, anyway (and she’ll get a lot more wear out of it in warm Vancouver than she would here, that’s for sure.)

Also, Ada has promised pictures of the jacket being worn in its natural habitat. 🙂

Also, I’m apparently going to a baby shower on Sunday. Which means I may have to make more baby clothes. /sigh.

42 Comments

Filed under Sewing

Frock Coat Defrocked

Coat---PROGRESS!

Just in case you’ve forgotten (I nearly have), this is the coat where I try to turn this pattern:

Lekala 6066

into this:

Christopher Walken in The Prophecy

I made two muslins, and extensive alterations—more for freedom of movement than fit per se.

And I would’ve sworn that the best things about both muslins was that the shoulders FIT.

Well, I tried the shell on Osiris and the shoulders are huge. I honestly couldn’t tell you anything else about the fit, I couldn’t see past the massive, sloppy shoulders.

Yes, the shoulder-pads were in place.

I’m not quite sure what’s going on. There is a lot of room in the back (as per his demand), but that’s not the issue. It’s like the shoulder point has expanded. Which it shouldn’t be able to, right? I’m hoping some re-adjustment of the pads/sleeve headers will help the issue. The armscye also seems low, where I swear the opposite was going on in the muslin. This may be a difference between firm sheet and soft (ish) wool (ish)?

Shoulder not-so-easing

The easing of the back to front shoulder also didn’t go super-duper well. Too much to ease, not enough wool content in the fabric, and I couldn’t find my tailor’s ham. (Also, way-overexposed photo to show detail)

I’m also wondering if I should be attempting to create a more tailored structure. I’ve been following Sherry’s RTW sewalong, which is lightly-structured but not really Tailored-with-a-capital-T. Neither was the inspiration garment for this project, of course, but I’m wondering if that’s some of the look that’s missing. Hard to say, hard to say. Maybe a little bit late at this point, too, unless I want to pull the whole thing apart and add a fully tailored front (it’s not like I have a shortage of hair canvas…)

Grum. It doesn’t help that I’m not allowed to take fit photos, and he’s not exactly keen on standing around while I attempt to note down every little wrinkle.

But he does like it. Or says he does.

On to construction and confusion.

Sleeve vent

Sherry has one lovely post on sewing a sleeve vent, which she helpfully links to from her sewalong. And I obediently followed her directions for adding a mitred corner to the sleeve pattern.

Mitred sleeve vent

For both the upper and under-sleeve.

For future reference, you only want the mitre on the upper sleeve (the top portion of the vent). The under sleeve needs a regular corner to underlap beneath the top side of the vent.

So, unless I wanted my vents open, I either had to re-cut the under-sleeve (which I doubt I have fabric for) or get creative.

Creativity. See the little seam?

I got creative. I pieced in a little snippet of left-over block-fused fabric. You can see just a little bit of the seam. It’s a bit bulky, but it’s going to be invisible once the buttons are stitched on anyway, right?

*headdesk*

Next up—figuring out how to line a vent. Ideally without resorting to massive hand-stitching, although I must admit soothing, mindless hand-stitching does seem a bit more attractive than brain-busting RTW-style sitching tricks, right now. Hmm. Maybe I’ll insert the whole damn lining by hand. If not, I’m thinking this book should cover it.

Lining resource

If I can get a good fit, anyway.

Also, I forgot pockets.

That’s probably unforgiveable, isn’t it?

29 Comments

Filed under Sewing

Sewing to Exhaustion

I have a confession. I was bad. I sewed yesterday—pretty much all day. This doesn’t happen very often—in fact, I think this is the first time in months that I’ve sewed to the point where I was tired of sewing. 

We had planned to spend the day at the river, but Syo wasn’t feeling well, so I wound up dropping Osiris and Tyo off and heading home with the saddest child to ever miss out on a day of fishing (Osiris caught his first fish last week, so it is officially Fishing Season chez Isis). The upshot was, I bundled Syo up on the couch with blankets, hot lemonade, and H2O (ugh) streaming on Netflix, and headed downstairs to sew. Anything to escape the Australian mermaids.

And sewed.

And sewed.

McCall's one-shoulder top

I finished off another version of the off-the-shoulder kids top (McCall’s 4821)for Syo—she had cut out the pieces (BY HERSELF) weeks ago, but I had black thread in the machine for stitching the Pink Suit, and then I was busy with slips. This version is from her pink leopard spandex, and fits much better than the ever-growing thin knit of the first version. Which almost makes up for the annoyingness of the pattern, and, y’know, the fact that it was cut out by a nine-year-old. The combination of leopard-print with the one-shoulder style does give it a distinct, mm, “Me Tarzan, you Syo” vibe… I used my “athletic stitch” to topstitch the elastic around the neck/armholes this time, just out of curiosity—it worked fine, although I’m not convinced it’s any better or more “professional” looking than the triple-stitch. The hem isn’t the prettiest—I didn’t bother using any steam-a-seam, just folded over and stitched away. Can you tell I really don’t give a flying f#&$ about this little shirt? On the other hand, I have every confidence that Syo will wear the snot out of it.

Coat---PROGRESS!

And then I worked on Osiris’s jacket. Yes, that long-neglected UFO that’s been hanging over my head since before Christmas. I finished the fusing and got the entire shell assembled. I even (ZOMG) stitched sleeve vents (now I just have to figure out how to line them). But I didn’t want to get ahead of myself before checking the fit, so I called a halt before cutting the lining.

Syo's Snuggly

So I moved on to Syo’s current pet project. She wants a new housecoat, reminiscent of Tyo’s. Except, not a kimono. But with the applique and stuff. Last time we were at Fabricland, she picked out a white, not-as-thick as-I’d-like, but inexpensive, fleece. After some discussion, we settled on the directions described in Sew What: Fleece (which I won in a giveaway from the gracious Clio) draft the pattern. And, well, I suspect she’ll be happier with the finished product than I am, but anyway.

In fact, I sewed so much that I’m going to milk it for the rest of the week and dribble out more detailed posts every couple of days.

One thing I did do this weekend was go through the jackets, boots, and other outer-wear—ousting the worst of the winter stuff (so if it blizzards, it’s my fault) and bringing in more of the summer stuff. Unfortunately, this also brings to the fore the more painful side of sewing for your children—what to do with the handmades they’ve outgrown. Now, I’ve said before that I have an excellent hand-me-down chain, and I do, in the form of two little nieces, but we really hit a lot of style issues going from Tyo to Syo. This jacket, my first “real clothes” make, is now too small for Tyo. In fact, it never really suited her, but for some reason it looks ADORABLE on Syo (I think it may suit her darker colouring and broad shoulders better). Syo, however, would rather wear a potato sack. Similarly, she is unthrilled with wearing the first pair of jeans I made Tyo, and the jean-jacket I made Tyo. Although I’m hopeful that practicality will win out in the last case. Which puts a big hitch in my hand-me-down chain, because my stylish sister-in-law gets a little annoyed when I send her stuff that she’s going to have to store for years and years before it’ll ever remotely fit.

But I sewed! Helped by the fact that Osiris and Tyo didn’t want to be picked up until 8:30 that night (after Tyo’s bedtime, I’ll add). And for once, I’m ready to do something else…

29 Comments

Filed under Sewing

On the Vogue Front

The next stage of fitting…

Sleevage. Fitting.

So, I slapped some sleeves onto my bodice-muslin of the Zoe coat, Vogue 7448, to see what they did to the floopyness around the front armscye. And also where the shoulders actually sit and things like that. Oh, and I added facings and the collar.

I think I should just suck it up and do the square shoulder adjustment.

I also think I’ve decided the front floopyness really boils down to my SBA being insufficiently agressive. If I stuff a fist in the side in front of my breast, it fills out the space quite nicely and the wrinkles disappear. (Incidentally, I took this photo wearing my padded bra, which does bring my bust measurement up to a proper size 12—34″. And it’s still floopy.

The only other thing (which doesn’t show in these photos) is how much the low armscye makes the arms bind when I put my hands on my hips. I’ve been trying to talk myself out of fixing it, but I just don’t think I can. Even the front floopyness doesn’t annoy me as much as that binding at the arms. I promise I’ll only raise it a centimetre or so. I’m sure I’ll still be able to get most of my sweaters underneath.

And the wearable muslin…

Vogue 7448 Sweater

Despite the fact that the fit is so-so and the internal finishing is abysmal, I really wanted to get something usable out of this. So, I grabbed some cream rib-knit that just happens to match the cream sweatshirt knit, cut a 3″ wide band (doubled), and added it to the bottom and made cuffs for the sleeves.

Buttons

Although I often really like cropped jackets, something about the position of the band has me not entirely convinced that it’s terribly flattering (maybe I’m just feeling muffin-top-conscious due to winter slothfulness and the depressing length of time since I’ve done a pretty, glamorous basement photo shoot. Oh, well. At least the jeans look good.)

I do quite like it hanging open, which is unusual for a double-breasted garment. The way the front hangs open reminds me faintly of those floppy-front cardigans.

Facing and under-collar

The buttons are cream, leather-covered buttons from one of my old-button thrift store hauls. The leather is pretty dinged up and dingy, but the colour was nice and I was willing to go with it for this particular garment. I decided to bind the inside of the facing and the undercollar with some nice patterned bias binding, which would be a lovely touch if the rest of the seam-finishing wasn’t so godawful. (er, nonexistent.) (Erm, buttonholes in rib knit. Bad idea, basically. Some kind of stabilizer would’ve been a VERY good idea. I thought of it just after I started the first one.)

I’m glad I made the full collar, though. This is the first time I’ve tackled one of those collars with inner corners, and it was a bit brain-breaky and nerve-wracking. I had to actually read the instructions. Definitely worth practicing.

So I guess this is one of those “time will tell” garments. I’ll probably wear it a bit, because I do need sweaters, badly. I may fall thoroughly in love with it… who knows.

20 Comments

Filed under Sewing

[cue Imperial March]

Hubby's Coat

Or other similarly foreboding music.

Last night I started, edging slowly, timidly, towards working on my hubby’s coat. This is the one I’ve been promising him, oh, at least since the spring. And he’s even whined about it, albeit intermittently.

In my defense, given the frustrations of my last project for him (WHICH HE DOESN”T WEAR!!!), I think a bit of heel-dragging on my part is understandable.

So, years and years ago, he bought a “trench coat*” from le chateau, the once-fabulous purveyor of all your goth gear needs.

Goth no longer being cool, apparently, they don’t sell that stuff anymore, but back in the day, man, that was the place to go.

The photo I just took has to be the single most unappealing I could have come up with—let me just say, it looks better on. And it was a staple of his leisure wardrobe for years. Sadly, aside from the stains which could probably be laundered out, at this point the fabric is full of snags, not to mention some melted holes from cigarette ash, and the whole thing is just not quite as smart-looking as it used to be. Which just isn’t acceptable.

Anyway, back in the spring I scored some great black coating at the thrift store, and my hubby pounced. He does this sometimes, gets a fabric stuck in his head. It HAD to be a replica of his coat. Regardless of the fact that this was a thick woolly coating, while the original was made of a thin, drapey suiting.

I wasn’t sure I would have enough (there were only 2m from the thrift-store find) so when Fabricland had a good sale, I picked up two more metres of  black “Kashmir Jacketing” (which, as far as I can tell, has absolutely no cashmere in it, but anyway). I was pretty sure this was the same fabric as the thrift-store find.

Why do I even try to photograph black fabric? Suiting on the left, kashmir jacketing in the middle, "melton" on the right

I was wrong. I think the thrift-store find may actually be melton, the stuff Fabricland sells for $33/m and is unforgivably bad about marking down, at least until after all the good colours are gone.

Concerned that my blacks didn’t match, I went back and found a nice cheap poly twill suiting, similar in weight to the original jacket. Cheering myself, I bought three metres. It would be perfect, a much better match to the original. I proudly showed it to my husband.

He was not amused. His heart was set on melton.

Argh. Anyway, I suspect I can make it work, although it’s possible I’ll end up cutting the facings and maybe side-body pieces out of the other fabric.

M-Sewing/Lekala pattern 6066

So, next requirement was, of course, a pattern. I considered trying to draft one (I’m masochistic that way, or at least like to pretend I am) but some noodling around the interwebs turned up this pattern. Which is actually a Lekala pattern, if you should for some reason want the custom sizing. But the M-Sewing site had multiple sizes for download.

Anyway, although you probably can’t see it due to my crappy photography, this pattern has all the right details, aside from length. I had even printed it out and taped it together months ago, back in July.

Pattern work

Last night, I went and began the rest of the pattern alterations. Sleeve—lengthened. Waist—narrowed. Vent moved from side-back seam to centre back seam. Now all I need to do is lengthen the crap out of the pieces, and I’ll be ready for the muslin.

And then I need to start re-reading Sherry’s RTW Coat Sewalong. Cuz I am not going all-out couture for this thing.

Having looked at the construction of the original, though, I have to say I’m not impressed. “Lightly tailored” does not even begin to describe it. I’ve made dresses with more structure than this thing. Ok, I haven’t, but someone out there has. Light, thin shoulder pads and a bit of interfacing on the front facing and collar. That’s IT.

There is one issue with the original that worries me a tad—the facing tends to roll out. Hubs has expressed a STRONG DESIRE that the new version not do this. I will definitely read over Sherry’s tips on drafting the front facing, but if any of you have any thoughts on what causes this problem I’d love to hear them. (Is it just natural? it kind of “rolls” out where a lapel would, except of course this jacket doesn’t have a rolled lapel. Hmm.)

I’m thinking maybe I should bust out a blazer pattern for myself while I’m at it… it’s not as if I don’t have at least five pieces of fabric that want to become blazers (and at least as many patterns in the running). But we’ll maybe leave that for a future post…

*My husband often has a bit of his own language; I blame it on the ADHD that makes sure he never pays too much attention to anything, least of all words. For years he would de-thaw food for supper. And as far as he’s concerned any long black coat is a trench coat. I have been arguing that this particular garment, completely lacking in the authentic trench-coat details (gun-flap, epaulettes, belt), is more of a frock-coat, but not with any kind of measurable success. He also considers the little coats I made my nieces trench-coats as well.

20 Comments

Filed under Sewing

Slow and steady…

Blinded by the lining

Progress has been made on Serena’s coat. In fact, if I hadn’t kinda-sorta said that I would have it done by the end of the week, I’d be extremely pleased with myself. As it is, I’m still half-ass panicked. The coat construction itself isn’t the issue, it’s the embellishment which eats up time, both physically in terms of stitching it on and mentally in terms of thinking about designs—how much? How intricate? How many different materials? At the moment I’m trying to constrain myself to gold-twist piping and lots of flat upholstery braid, but it’s hard. Give me a few months of this and my latent bellydancer would bling this coat out to the nines.

Which is why I should’ve done the basic work back in the spring and then spent the summer in leisurely construction/embelishment, but anyway. That ship has sailed.

Muslin #2 (with collar)

After the fitting I basically made up a whole ‘nother muslin. If I thought I could’ve hunted Serena down for a last fitting I would’ve, but she was out of town, so I tried it on my dummy, really liked the adjustment over the rear (I added 2cm to each side of the rear princess seam below the waist) , decided that the sleeves still needed more poof, and started cutting.

And fusing.

Happy fusing fun.

Lots and lots of fusing. I don’t think I’ll ever be able to thank Sherry enough for introducing me to the concept of fuse-tape. I lurve this stuff. Anywhere you might use stay-stitching.

Ready for ripping /sigh. At least the grommets aren't terrible.

Anyway, at this point I have the lining basically constructed, the shell lagging slightly because I had to run out to get grommets for the lacing and now I need to do some ripping (even with the heck fused out of it, stretch corduroy is still prone to creeping; I should’ve marked better).

Oh, and I made the collar.

The collar was rather scary. It needs to stand up, so lots of interfacing was required. Pepin has instructions for drafting a stand-up Elizabethan-type collar in Modern Pattern Design, but they’re a bit confusing (In particular, she advocates spreading 1/4″ per slash while only illustrating four slashes. This is not enough.) Still, it got me on the right track, and a series of paper tracings later I had a workable pattern. Fortunately for me, it was actually perfectly possible to pin the paper pattern in place on the dummy and get an idea of what I needed to tweak next.

Collar innards

Stitching wire into casing

I also wanted the edges of the collar to be wired, for stability and moldability—who knows if it’ll look best straight up, or with the corners rolled back, or whatever. So I hunted around and found some medium-weight wire in the old jewelry/beading box, a half-package of quarter-inch bias tape (one of those thrift store finds that you’re never quite sure how you’re going to use as it was rather grubby), and set to work stitching the wire into a casing around the trimmed-down edge of my interfacing piece (which consisted of the “muslin” drapery fabric collar plus some hair canvas). It’s not at all pretty, but it’s attached and now the collar’s constructed everything should be pretty much held in place anyway. I folded the ends of the wire back on themselves and encased them in little fusible-interfacing booties, so hopefully there’s no danger of that working through the fabric.

Collar exterior

Then I hand-stitched my wired interfacing piece to the collar outside, which was already piped and embellished. Once it was in place I topstitched along some of the embellishment again, just to hold it in place extra well. Overkill? Possibly. To finish it off I slip-stitched the lining fabric to the inside. For this jacket, I am using interfaced lining fabric in place of facings, as the lining is as much for show as the shell fabric, especially in areas like the collar and tails.

No other great insightful comments at the moment. Halfway through Saturday my Janome machine grew crankier and crankier and eventually stopped turning. The engine whirs, but nothing goes around. This sometimes happens when thread is jammed in the bobbin, but there is no thread, and even un-threading the machine completely does nothing. I can still force it to stitch with the hand-wheel, but it’s difficult and doesn’t feel like something I should be doing a whole lot of. I’m thinking a visit to the sewing doctor is in order, /sigh.

Most of what I’ll be doing this week can be done on the straight-stitcher, but of course now it’s not working I keep coming up with things I need a zig-zag for.

13 Comments

Filed under Sewing

Real sewing!

Coat for Niece # 2

… in the new sewing room.

Albeit not of a terribly exciting kind. Looking at my massive stash of coating fabric, I decided to do some reduction and tackle my younger niece’s long-neglected coat. For those with a short memory, this is basically a one-size-smaller version of McCall’s 3374, with blue leopard print fleece lining instead of pink (my sister-in-law keeps her daughters colour-coordinated. Well, sorta. When you have two kids so close together in

Pattern envelope

age, I imagine it helps with keeping track of things they have doubles of). This has to easily be my most used thrift-store pattern, this being version 3. It’s such a classic shape, once you get over the explosion of fun-fur on the pattern envelope. Of course, the envelope version is unlined, whereas mine wound up with both lining and, in these last two, interlining (I added a layer of black flannel to keep the light fleece from showing through my rather-loosely-woven boiled wool coating.

Blue leopard print fleece lining!

I did a couple of things minutely differently this time. Since I didn’t have the front facing traced out for the size 3 (the first two versions were size 4), I traced off my own facing and front lining piece from the front piece, as I learned to do from Sherry’s sewalong. I should’ve reviewed a couple other bits of the sewalong, too, like notching out the front where the facing goes and stuff, but, well, I was lazy. I also didn’t alter the original pattern to a lining pattern. I figure the extra ease isn’t really required when your lining is a knit. And I’m lazy. And it’s a coat for a three-year-old.

Fleece lining seamed to interlining to finish hem; shell hem with bias hem-facing.

I did have one flash of brilliance, where I decided to hem the lining by seaming it to the bottom of the interlining flannel and and reversing. If I’d been even more brilliant, I would’ve cut the flannel shorter so that the fuzzy lining folded up the other side of the hem more, but anyway. There’s enough extra drape in the fleece that it covers the bottom of the fold anyway.

Cute label, needs a ribbon hanging loop though.

I forgot to add the super-cute ribbon hanging-loop, although I did remember the Bookemon & Ebichu label. I probably should pick out the inner collar seam and add that—wouldn’t want my younger niece to get a jacket less cute than her sister’s.

Cuff (interior). Not finished (obvious).

I also added a piece of bias hem facing to the bottom as, ah, I may just accidentally have cut the bottom from and end where the under-side of the doubled fabric was a bit shorter than the visible part, if that makes any sense at all. Anyway. Next step is to finish the outer hem (which will be by hand), then the cuffs, and then I get to try to work the buttonholes! I will use my vintage buttonholer, of course, but I’m still not terribly accurate at placing the buttonholes with it. Ah, well, it can’t be worse than my manual buttonholes!

To continue with my Me-Made June catch up, we have:

June 10:

Transportation Friday

On a mode of transportation. The feminist in me is sad to report that I don’t drive it myself (hubby does). The chicken in me is happy it doesn’t have to control that much metal with nothing but my boots between me and the pavement. However, it was a very fun picture to take.

Springy Coat
Blue Lydia top
Jalie 2908 capris

June 11:

MMJ 11, the birth of a new sewing room!

Yes, you’ve seen this one on the blog before, but now it’s in context!

50s Shrug 2.0
Too-short tunic
Ellen pants

On June 12 I began my 70s week! So I think I’ll give that its own post…

19 Comments

Filed under Sewing

The Great Reveal

Ze Coat, She is finished!

Step right up, ladies and gent (there is at least one gent reading out there, I think?). You’ve borne with me through I don’t even want to count how many Springy Coat posts this month. And now, here we are, at the end of April (how did that happen?) and, at last—the Springy Little Coat is done!

At this point you’ve probably heard everything there is to hear about the construction of this coat. So all I’ll say is that I used seam-binding on the shell hem, stretching as I sewed, which worked fairly well for pulling it in (the joys of an A-line hem), then handstitched. For the lining I did a blind-hem (just for fun… I suck at machine blind-hems). I didn’t quite get my lining length vs. shell length right—the lining was a bit long—but I’m not going to complain at this point. (And better too long than too short, right?)

I also gave in and hand-stitched the lining at the cuffs. I know, not the point. But with my cuffs, it just seemed awkward, bulky, and likely to screw up to do it by machine.

Then I dug out all the coordinating (and some not-coordinating) clothes in my closet and played around in front of a mirror.

A lot. And since I’m not nearly as good as Patty at picking the one or two absolute best shots, I will hereby subject you to a crapload of them:

If I get my way, I will get better (outdoor!) shots this weekend, and subject you to those, too. I think by Sunday it should be warm enough to wear my coat out of doors. For now, it’s snowing again. (Obviously my strategy of invoking spring through sewing has failed. I should just cave and start making sweaters and snowsuits.)

Incidentally I’ve decided (along with most of the rest of those in the RTW sewalong, no doubt) to enter my Springy Little Coat in the PR Lined Jacket Contest, so if you’re a PR member go ahead and vote (ideally for me, but y’know. May the best jacket win and all that…)! Fortunately for me, Patty’s coat, which is almost a dead ringer for mine, can’t receive votes as she won the wardrobe contest in March.

For that matter, if you’re a Canadian, you have some voting to do, too—Monday, peeps! I happen to live in the Prime Minister’s riding, so I have the rare privilege of actually voting directly for (or, as the case may be, against) him—although since he’s pretty much guaranteed to win his seat, it does make it seem a bit pointless voting for anybody else. The joys of a parliamentary system.

61 Comments

Filed under Sewing