Tag Archives: McCall’s 3374

Real sewing!

Coat for Niece # 2

… in the new sewing room.

Albeit not of a terribly exciting kind. Looking at my massive stash of coating fabric, I decided to do some reduction and tackle my younger niece’s long-neglected coat. For those with a short memory, this is basically a one-size-smaller version of McCall’s 3374, with blue leopard print fleece lining instead of pink (my sister-in-law keeps her daughters colour-coordinated. Well, sorta. When you have two kids so close together in

Pattern envelope

age, I imagine it helps with keeping track of things they have doubles of). This has to easily be my most used thrift-store pattern, this being version 3. It’s such a classic shape, once you get over the explosion of fun-fur on the pattern envelope. Of course, the envelope version is unlined, whereas mine wound up with both lining and, in these last two, interlining (I added a layer of black flannel to keep the light fleece from showing through my rather-loosely-woven boiled wool coating.

Blue leopard print fleece lining!

I did a couple of things minutely differently this time. Since I didn’t have the front facing traced out for the size 3 (the first two versions were size 4), I traced off my own facing and front lining piece from the front piece, as I learned to do from Sherry’s sewalong. I should’ve reviewed a couple other bits of the sewalong, too, like notching out the front where the facing goes and stuff, but, well, I was lazy. I also didn’t alter the original pattern to a lining pattern. I figure the extra ease isn’t really required when your lining is a knit. And I’m lazy. And it’s a coat for a three-year-old.

Fleece lining seamed to interlining to finish hem; shell hem with bias hem-facing.

I did have one flash of brilliance, where I decided to hem the lining by seaming it to the bottom of the interlining flannel and and reversing. If I’d been even more brilliant, I would’ve cut the flannel shorter so that the fuzzy lining folded up the other side of the hem more, but anyway. There’s enough extra drape in the fleece that it covers the bottom of the fold anyway.

Cute label, needs a ribbon hanging loop though.

I forgot to add the super-cute ribbon hanging-loop, although I did remember the Bookemon & Ebichu label. I probably should pick out the inner collar seam and add that—wouldn’t want my younger niece to get a jacket less cute than her sister’s.

Cuff (interior). Not finished (obvious).

I also added a piece of bias hem facing to the bottom as, ah, I may just accidentally have cut the bottom from and end where the under-side of the doubled fabric was a bit shorter than the visible part, if that makes any sense at all. Anyway. Next step is to finish the outer hem (which will be by hand), then the cuffs, and then I get to try to work the buttonholes! I will use my vintage buttonholer, of course, but I’m still not terribly accurate at placing the buttonholes with it. Ah, well, it can’t be worse than my manual buttonholes!

To continue with my Me-Made June catch up, we have:

June 10:

Transportation Friday

On a mode of transportation. The feminist in me is sad to report that I don’t drive it myself (hubby does). The chicken in me is happy it doesn’t have to control that much metal with nothing but my boots between me and the pavement. However, it was a very fun picture to take.

Springy Coat
Blue Lydia top
Jalie 2908 capris

June 11:

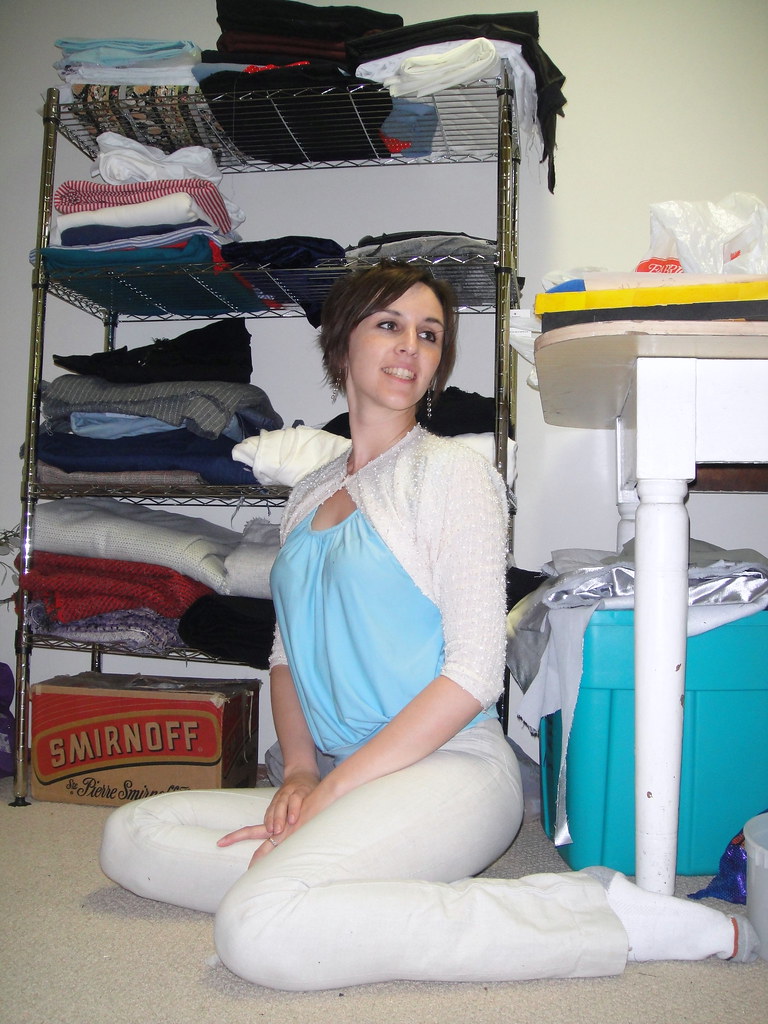
MMJ 11, the birth of a new sewing room!

Yes, you’ve seen this one on the blog before, but now it’s in context!

50s Shrug 2.0
Too-short tunic
Ellen pants

On June 12 I began my 70s week! So I think I’ll give that its own post…

Advertisement

19 Comments

Filed under Sewing

Scraping the bottom of the barrel

The Cute, it burns!

As I contemplate the fact that I have hardly made any progress on, well, anything, in the last several days, it occurred to me that I never did a final post about the coat I made for my niece in January (like, after I put on buttons and hemmed it). So here you go—if you’re not into looking at an excessive number of photos of my seven-year-old, feel free to stop reading now.

As a quick recap, I (for better or for worse) came up with the idea that I would make some fun “winter” coats for my nieces (aged 4 and not-quite-3). Probably it had something to do with this sparkly black boiled wool being on sale at my local Fabricland… at any rate, when we dashed home at New Years I dragged (both!) my SILs to the fabric store and got some lush leopard-print fleece for the lining, and headed home with the aim of having at least this first coat completed by Niece #1’s birthday at the end of January.

McCall's 3374

And I did. And if I were a mature and responsible adult, I would’ve had it in the post for said niece to receive in a timely fashion.

Instead, I dicked around, forgot about it, and now winter’s pretty much done (despite its best efforts) and the coat is still hanging in my front closet. Erm. Well, she’ll have it for next winter, for sure. And I’d really like to give the two coats at the same time. Right. That’s it.

Despite the explosion of fun-fur on the pattern envelope, this is actually a really basic, classic A-line coat pattern, with nice collar,  hood, and cuff options. It’s not lined, but when has that ever stopped me?

I made the size 4 for my oldest niece, which as you can see Syo is modelling quite handily—it’s a bit snug but not problematically so—so I’m not too concerned about the recipient outgrowing it before next winter. I will make the size 3 for my younger niece, who is even runtier than Syo was at that age (I wasn’t sure that was possible, but apparently it is), and hope that she can wear it sometime before kindergarten.

And now, without further adieu: photos.

15 Comments

Filed under Sewing

I was going to wait

until the little coat was done. But, as usual, I am impatient. And Syo was eager to model. Really, she twisted my arm.

So here it is, sans lining hem and buttons. With the puffy fleece lining it’s a bit snug on Syo, which is a good sign, although the sleeves, which I folded up a trifle more than strictly suggested by the pattern, are just right, so they will be quite long on Fyon.

Erm. Perhaps next time we’ll comb hair before the modelling sesh…

Also, did I mention I am dreading the buttonholes?

8 Comments

Filed under Sewing

Curveball

Coat, interlining, lining

I feel a little unpatriotic for picking a baseball over a hockey metaphor. Oh well. Progress on Fyon’s coat was continuing incrementally but steadily (holidays are definitely over) until last night I realized that the coating fabric really should’ve been underlined. It lets a bit too much light through to be lined with light fleece. WHOOPS! Fortunately I had purchased just over two meters of black cotton flannelette the other day for a (hopefully) wearable muslin of my sweetie’s shirt. But there was just over 2m left on the bolt, which I was worried would not be enough for a man’s shirt after flannelette’s notorious shrinkage. So I guess it can become girl coat underlining, and I’ll pick up some more. It’s not like it was expensive. Of course, the other problem here is that I have already constructed both shell and lining. So I guess the “underlining” will be more of an interlining. On the upside, flannelette is such a dream to cut and sew that I almost don’t mind the extra work.

One cute little collar, coming up.

The collar is also sewn and steamed, for whatever good that will do. 😉 I think I am starting to get the hang of the whole turn-of-cloth thing, for collars like this, anyway. Also getting a bit better at those tight corner curves… A little bit, at least.

I fought off the temptation to try and machine-blind-hem, mostly because I wasn’t confident I could get the crease out after, as I’m trying to avoid hard pressing on this spongy fabric. So it has a hand-stitched outer hem, anyway. I think I will check out Gigi’s post on finishing hem/facings to see if I can make head or tails out of it. Usually my lack of precision is hampering in these areas and I compensate with lots of hand stitching, er, couture detail.

Oh, and I remembered to put in a label and hanging loop! This ribbon is perfect for

Label and hanging loop

the coat—although I’m not convinced how sturdy it will be. Ah well. Odds of small fingers managing to use the loop even if it is there? Minimal, I’d say. Anyway, all that remains is hemming the lining, attaching the collar, and attaching lining/facings to coat. Not necessarily in that order.

I have a feeling my next “for me” project will be the fluffy petticoat. I seem to have fallen off the “practical clothing” bandwagon this year (so far. Maybe because my wearable wardrobe is no longer critically low, or maybe because, like everyone else, I’m just sick of winter sewing (although this

Fluffy petticoat supplies

doesn’t explain the continued coatitis). But the materials have been building for ages—the chiffon (background, left) since Aug. 2009, the idea since sometime in the summer of 2010, and the whole spool of gathered lace (top left) appearing at Value Village last weekend seems to have pushed things over the top. Now, making a tiered skirt is dead easy—this is ultimately just a shorter version of the tiered dance skirts I’ve made several times now, on various scales. But I really like Sugardale’s tutorial because of how she uses ribbon to finish the seams, so I’ll be going that route. Zena has another method that produces nicely-finished results, more for dance skirts (hers are like better-made, better-finished versions of mine). And I will have to consider how to use the vintage lace with the coral flowers. I would have used it on the lower edge but there’s only 4m, and 4m is not a full enough hem for a petticoat.

Just for the record, I have no skirts at all to wear with said petticoat. Yet. But then I’ve been thinking about a circle skirt since summer and been disinclined to make one because I only like how they look with petticoats under. Chicken and egg. But I’ve decided that the petticoat will be my egg, and hopefully once it’s done chickens will ensue. Yeah. If that makes any kind of sense at all.

But first… I have a little coat to finish.

5 Comments

Filed under Sewing

Attack the pink fluffy bunnies

Attack of the pink fluffy leopard print bunnies

Well, I have started work on the coat for my older niece. This is my first experience sewing with fleece and it’s, well, interesting. For one thing it’s filled my house with tiny pink blobs of fluff, which are getting EVERYWHERE. For another it seems to combine the annoying qualities of knits with the annoying qualities of velvet. Joy.

The pattern is McCalls 3374, a thrift-store find back at the start of my sewing adventure, just over a year ago now. As a bonus it came essentially un-cut, with the size 3 fully traced out and part of a size four. I traced the rest of the size four for Syo’s coat last winter, so this time I have no tracing to do! Whee!

This may be another exercise in “looking past the envelope” as the envelope cover

McCall's 3374

has a lot of fun-fur, fleece, and animal print. Despite the above rant about fleece, the fleece is strictly for the lining. My outer shell is black and sparkly “boiled wool camry blend” (a completely different fabric, however, than the stuff of the same name that the Russian Princess coat and my Czarina coat were made of. They were a knit, dense and felted. This stuff is a woven, tends to fray, and reminds me of boucle in its thick individual yarns.) It would’ve benefited from block fusing, but I am far too lazy to go there in coats for preschoolers. I did preshrink with wet towels in the dryer, which reduced the width by a good 10cm (4″) so I’m glad I did.

Coat shell

This first coat is for my four-year-old niece (let’s call her Fyon henceforth); she was also the recipient of the twirly Popover Sundress last summer. I decided against cutting out both coats at once as I was pretty sure that would inevitably result in me sewing size 4 sleeves onto a size three front or something. I will note here that the size four still fits Syo fine, so it will be plenty roomy on Fyon, although their size gap is not as extreme as you might expect from the three years between their ages, since Syo is a compact model, possibly even a Smart Car, while Fyon is more

Fuzzy pockets!

of an SUV type.

The best thing about this pattern is that the (very flat) sleeve caps have almost no ease, so they’re a cinch to put in flat. This makes for very quick construction (and I promise I’ll grab a photo of that stage on the next coat.)

I decided to cut the pockets out of the fleece, which will make them absolutely yummy to stick your hands in. This time, I knew enough to make the seam from coat to pockets narrower, so the fleece rolls nicely to the inside, unlike the last time I sewed this coat.

I debated about foldover cuffs, since I’m not overly thrilled with how this part of the pattern is drafted, but they do look so much more finished than just a plain sleeve ending. (Tabs do too, but I’m much too lazy to draft a tab for these coats.) I had considered interlining the coats, as well, but decided the fleece is bulky enough. It was the

Foldover cuffs. I love the texture of this fabric.

thickest, softest stuff we could find at Fabricland’s new-years sale (still expensive even at 50% off). I think there’s enough left over for an itty-bitty scarf, too. I had debated making the collar and cuff-fold out of it, but I really wanted to keep the outside of the coat “serious” (except for that hint of sparkle) (probably I wouldn’t’ve had enough fleece, either). Hopefully the girls won’t find the wool collar and facings too scratchy; it doesn’t feel scratchy to me, but it’s certainly not as wonderfully soft as the fleece.

Note to self: you forgot to cut out the back neck facing. Also, don’t forget to add one of the Bookemon & Ebichu labels and a hanging-loop before you sew on the lining/facings.

The pattern is inexplicably unlined, but I’ve just used the same body pieces for the fleece. I considered adding  a back-pleat, but I don’t think it’s necessary with the stretchy fleece. Next step: assemble the lining and facings (I will just topstitch the facings down on top of the fleece).

One Eyed Jack (left), Bandit (centre), Tigger (right)

In sadder news, we got up this morning and discovered One-Eyed Jack, the smallest and hardiest of our goldfish, was missing from the tank. I soon found him on the floor by the couch, where he had leapt to his doom. The smallest of our fish, he was still a good 6″ long, and had survived the Great Filter Malfunction of 2009, a 600-km migration in a glass jar in 2007, and a brutal cichlid attack that cost him his left eye (and gave him his name) probably sometime in 2006. Not to mention nearly four years of my rather indifferent fish care. I honestly thought he would be the last of our dwindling fish to survive, but I hadn’t counted on his adventurous nature. Usually he was a bottom-hugger, as his one-eyed state made it hard for him to find food until it had settled on the bottom. Tyo was stoic (her best friend’s dog died of an accident on the weekend, so compared to that the loss of a fish may be minor), Syo was stricken and still crying when I put her on the school bus, and I was a lot more freaked out than I should’ve been. Jack is now in a box in a freezer to await burial in the spring. He’s too special to just chuck in the garbage like the other goldfish we’ve lost.

10 Comments

Filed under Sewing

Coats for Little Girls (Part II)

My younger daughter wanted the older pattern, McCall’s 3374, view C in particular. I was a little worried about having enough fabric, so I opted for contrasting cuffs and collar out of another, dark-brown curtain from the same hamper. Good thing I did… as it was I didn’t have enough fabric to do two facings.

Using this pattern was a little trickier than the other, mostly because the pattern wasn’t lined and I wanted the finished garment to be.  I just used the same pattern pieces, although perhaps I should have graded the sleeve lining a little smaller; it came out a bit ripply around the fold-back cuff part. I could have used the facing-pattern to subtract the facing amount from the front pattern to make a lining front, but I didn’t bother; for the one facing I did have (ran out of fabric, remember) I just pressed the inner seam back and topstitched it to the lining. I did put interfacing on both sides; I wound up fusing it to the inside of the lining on the un-faced side, which was not my best idea… the stiff interfacing really shows on the thin lining. Maybe it’ll detach with wear… if not, at least it’s not visible when the coat’s on.

Other than that it went together not at all badly.

3 Comments

Filed under Uncategorized