Tag Archives: muslin

Simplicity 3965—The Toile

Peace out, dude.

I tend to use “muslin”, because that’s what the Reader’s Digest Complete Guide to Sewing uses and that was my first sewing text, but I really do prefer “toile”. It’s shorter, for one thing, and doesn’t sound like I’m macerating someone’s religion in the pursuit of better fitting clothes.

Anyway, I made up a quick toile for the bodice of Simplicity 3965. I have decided I need to get my butt moving on this project so I can have it done before the Cambie dress pattern comes out later this month, because when that happens it is totally going to be All Cambie All The Time. Well, probably not, but I will wish it was. And, since I had the excellent example of Tasia’s muslin, I was actually good and thread-traced all my seam allowances and darts and EVERYTHING!

Ok, so, I got a bit ahead of myself, there.

To start with, the pattern ElleC sent me is an old-school size 12, that is for a 32″ bust and 25″ waist. The first is slightly smaller than mine (OK, let’s face it, since this past Christmas it’s a full 2″ smaller, 3″ if I want to wear a bra, which I generally do with wovens.) Having compared the pattern pieces to my body, it actually seemed like the length was going to be all right, and a little bit of pattern measuring suggested that there might almost be enough ease for the bust. The waist, of course, was laughable. Hilarious, really. “Vintage” figure, I do not have. Snerk.

So for the muslin, I added 1 cm to the side-seams of each piece, for a total increase around the body of 4 cm (just under 2″).  And then I cut out and stitched up with, as mentioned above, traced seam-lines and everything.

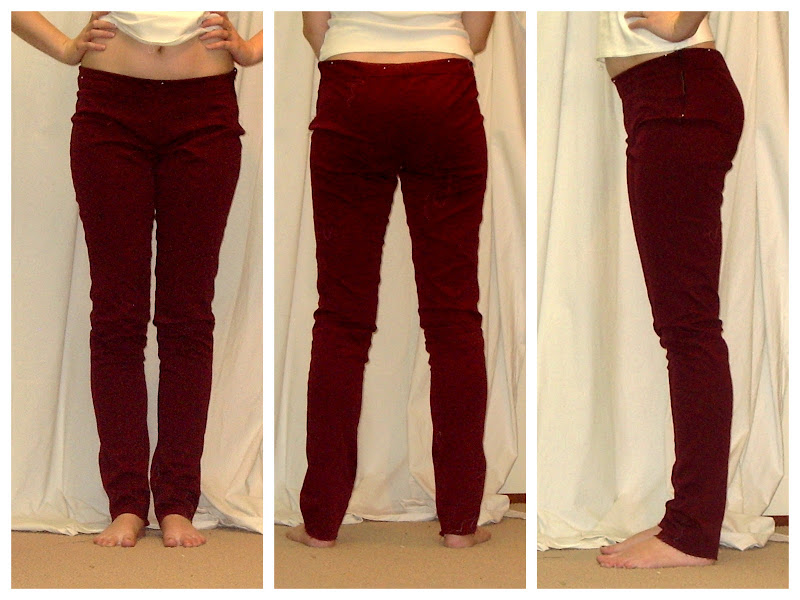
I took proper fitting photos but the combination of a weird camera angle, bad light, and the total lack of makeup and hair makes me unwilling to post the rest of them, sorry. Only the goofy one was entertaining enough to make up for the weird angle, and even then you’re not getting the face. So you’ll have to take me on my word that the fit seemed pretty good overall. The bust was just about perfect, darts pointed where they should, the shoulders etc. look good, but the waist obviously needs a bit more (more) room. At least if I want to, y’know, eat or breathe or anything like that.A small swayback adjustment (raising the rear waist seam in the middle by about 1 cm) will be in order, and a couple more cm ease at the waist, and I think I’ll call it good. Which means I’ve made almost none of my usual adjustments to this pattern. Interesting. (I’ll note that Tasia had to lengthen the waist on hers by a good inch.)

Of course, now I have to face the next stage—the waistline. As I’ve said before, I have a short waist and rectangular figure, and something about this combination tends to make gathered, dirndl-type skirts that begin right at the waist, well, a bad idea. Dropping the waist-seam a few inches gives me the look of a longer body and puts the added bulk of the gathers at my hips—which can always use a boost—rather than at my waist, which doesn’t need any added bulk ever, thanks.

However, for a fitted bodice like this, that also requires a lot more work. For the polkadot sundress, I kind of freehanded the front and fudged the back with a shirred panel. I would have to be a lot more precise for this project. Figuring out the hip curve. Fitting the bottom half of my swayback (without a waist seam). How to continue the shaping of the front darts.

Waistline Placement

Part of me is saying “go for it!”—if I figure this out, I’ll have a basic fitted (albeit sleeveless) bodice I can use to adapt the zillions of waist-seamed dresses that are flooding my fantasy sewing these days. Part of me is saying “Give the gathered-waist look another try. You never know, it might be ok this time. Maybe the problem’s mostly in your head. Everyone else likes those gathered skirts!”  On the other hand, looking at my little croquis there (which I traced right off the image at the beginning of the post) I know which one I prefer…


Advertisement

35 Comments

Filed under Sewing

Red Leaf Clover (Round two)

Clover---round two

Grum.

So. Still not the best photography, but at least it’s not the iPhone. I lightened the crap out of things to make the wrinkles etc. show better.

So, at this point I have lowered the rise in the front 5cm, tapering to 2.5 at the hip and zilch at the centre back. And this time (yay!) the zipper held out long enough to take some actual photos.

So at this point I’m seeing two major problems, aside from generalized looseness:

1) wrinkles at side-seam along hip. Several of you in the last post (thanks so much, everyone!) attributed this to excess hip curve, and you’re probably right. On the left side the zipper has forced this extra length into a single large fold at the bottom of the zipper, on the right side it’s more distributed.

2) bagginess at front crotch. I obviously need to research this. These aren’t strain wrinkles—it’s more like there’s just too much fabric here.

Minor problems include

3) dip at CB still there. If I lower the sides more, this may help, but really a bit of extra height in the back will be a must for next time.

4) wrinkles and looseness along legs. There’s some width that can be taken out here, I think.

Next up, I did what I should’ve done before I ever cut, and dug out my pattern for the Burdastyle Ellen Pants. This is the one that created the Businesswoman Pants, and while the fit isn’t totally perfect, it’s hella better than this pair, at least so far. The only reason I didn’t before, aside from laziness, was that the Ellen isn’t drafted for stretch fabric, so I wasn’t sure how precisely comparable they would be.

Crotch Curve Comparison:

Ellen vs. Clover

So this was the REALLY interesting part. I overlaid the two patterns. The solid paper is the Ellen pants (cut to a size 34 rather than my usual 36 as they run large). The tissue is my tracing of the Clover (size 2 grading to size 4 at the waist).

The biggest single difference is the rise in the front. It’s more than an inch higher at the centre front, and substantial. The rear rise is almost identical—a smidge lower at CB, a cm higher at the sideseam. There’s a slightly greater curve to the hip in the clover. The back piece is slightly wider in the Clover, but then the front piece is slightly narrower, so I think the overall width is very similar (and Ellen is non-stretch!). The spookiest thing is that the diference in rise doesn’t even out at the side seam—the rear side-seam is higher, when the crotch curves are lined up, than the side on the front, which means that there’s some odd shifting of how the halves are going to fit together. That’s boggling my brain, I tell you.

The crotch curves are almost identical, up to and including the much longer rear than front curve. This is the bit that really threw me for a loop, because I was expecting there to be a significant difference, not just a few mm at the back of the rear crotch curve. Now maybe having the front fly on the Ellen masks certain things, or maybe it’s just that they’re in non-stretch fabrics, but I never saw anything in any of my Ellens like the folds I have in the Clover.

There are a few other differences—the Clover legs are much narrwer, especially as you go down, than the straight-legged Ellens. But on the whole—scary close.

So I think I’m going to cry Uncle, seam rip the entire kaboodle, and recut following the Ellen pattern at the top. And then maybe consider taking in the side-seams until the stretch factor is properly accounted for.

And this, Ladies and Gentlemen, is why I’ve stuck with the same two pants patterns this whole time…

31 Comments

Filed under Sewing

Red-Leaf Clover

Colette Clover pants. You can see from the wrinkles that the waistband at the side isn't pulled as high as it can go.

Or, possibly the worst-photographed post ever.

Did I mention my camera charger didn’t come home with me after the holidays? So yeah, the last few posts have been iPhone photos. Painful, I know. I’m working to get the back-up camera functional again (battery issues, but at least it uses standard AA batteries), but as of this moment you get iPhone photos.

So, after making little jeans for everyone short in the family (or at least that’s what it feels like…), I was in the mood for some new pants myself. And frankly, I’m a little bored of Jalie 2908, although I do have fabric for another pair for myself planned.

So I pulled out this red stretch (?twill? Sometimes it looks like twill, other times not.)

After much hemming and hawing, I cut out the size 2, which is my actual hip size, grading to a size 4 (which is not quite my actual waist size) at the waist. The long view finished inseam is listed at 27″, designed to fall just above the ankle. Dear readers, 27″ is a longish capri length on me.  Since it’s winter and my desire to make a pair of pants that would look funny with socks is at absolute zero, I decided to lengthen them to a more normal, scrunch-around-the-ankle, skinny length. I added 6″ (15 cm.) I had some misgivings about the rise, which some people have reported as a bit high (and we all know I’m a low-rise kind of girl), but figured I would keep it as-is for now, as that’s something which can be tweaked after the pattern’s cut. The crotch-length was a little disconcerting, as the horizontal leg of the back L seemed really long, but the horizontal leg of the front L was really short, so I hoped it would even out. It’s different from most of the other crotch-curves I’ve seen, so I was kind of curious to try.

Clover crotch-curves

And then I took a deep, deep breath, and I cut into my precious* red twill.

It is my intention for these, eventually, to be a sort of wearable muslin. Uncharacteristically for me, I basted them together just to check the fit—I’m planning on completely re-stitching everything once I have them fitting how I like.

I didn’t get any full-length pictures. The legs are pretty much fine—skinny, long enough. I may take in the outseams above the knees about .5 cm on each side—enough to bring me down, basically, to a size 0; I think this fabric has a bit more stretch than the pattern may have been planned for (I wish it had a stretch guide, or at least listed %stretch rather than %Lycra.  % Lycra is not very useful at all in predicting how much a fabric stretches, in my experience.) Alternatively, I may just like my pants tighter than was originally meant. Which is probable, too.

Anyway. The rise in the back is good, although it does that dip-down thing at the middle of the back. I would not want it any lower, that’s for sure.

Front view. You can just barely see that my belly-button is immediately above the waistband.

The rise in the front is a full 5cm (almost 2″) higher than I’d like. The pin in the front shows where I’d like the bottom of the waistband to fall in order to get the rise right.

The size of the waistband seems good as long as I don’t interface all stretch out of the waistband. (Though I suppose this will be different once I change the rise, anyway.) There is not much gaping at the CB, which is a common problem for me, so that’s good.

Unfortunately, the crappy zipper I threw in self-destructed within about 30 seconds of me putting the pants on, so I’m frantically pinching the one hip together in the pictures.

The front crotch seems a bit odd, I think because the curve is so shallow, but I’m hesitant to mess with it at this point. Maybe later. If any of you know what these wrinkles mean (left side of the photo, the right side is being pulled off by the issues with the zipper) please let me know! 😉

Anyway, I think I’ll be able to make some quite nice pants out of these, once I have them tweaked a bit. But some tweaking is definitely required.

And unpicking. And, y’know, reading the actual instructions.

*in the sense that I have been looking for a fabric like this for ages, not in the sense that it was expensive—it was definitely not.

49 Comments

Filed under Sewing

The perils of tissue fitting

And other good ideas

Tissue-fitting

Baby steps continue on Vogue, 7448, henceforth to be known as the Zoe Coat. I am *this* close to convincing myself that I can splurge on some really nice wool and thinsulate to make an uber-winter version as my prezzie from Santa, although if I have to order anything online the time-frame is getting iffy. We’ll see.

So, I decided to try and tissue-fit my altered pattern pieces on my theoretically-me-shaped duct-tape double.

Now, I do not wish to completely malign duct-tape doubles. I suspect when done really well, and stuffed with a lot of attention to detail, and treated with appropriate respect thereafter, they can probably be pretty useful. Mine is a bit lacking. Another layer of duct-tape to stabilize would probably have not gone amiss. I should’ve been a little more careful in the stuffing, especially of the shoulder region. The fact that my kids think it’s the cat’s miaou and have had oodles more fun with it than I ever have doesn’t help, either. But it is still generally me-shaped.

So. I pinned my pattern pieces, noting centre front and centre back locations, and tried them on the double.  As you can see above (please ignore the awful background) the main issue seemed to be that the waist (which is supposed to be slightly raised—from past experience this is about 1/2″ above the natural waist) still appeared to be a couple of inches too low. There was also a lot of room in the bust (or rather, a lot more room in the bust than at the waist), so I added another tuck to shorten and did a modest Small Bust Adjustment. This is actually my first formal SBA with a dart, although I’ve smoothed down princess-seams in the bust area plenty. I tend to wear a bra with wovens, and my bras are all psychotically padded, so I’ve mostly been able to get away with the bust as drafted.

For good measure (considering all the height I’d taken out at this point), I shortened the bust dart by a centimetre or so.

Muslin---Stage 1

And moved on to muslin (stage 1). Apologies for the fuzzy photos, I am far too lazy to re-take them. This is what happens when you let your fingers or arm come between the camera and your photo-spot when setting up the self-timer. 😛

Several things became instantly obvious.

Firstly, I had taken out too much length. Obviously my duct-tape is not quite so double. (I suspect she’s compressed in length from being left standing from time to time.) I actually pretty much like where the bottom of the pieces is, but of course there needs to be a seam-allowance below that. /sigh. When I tried it on I thought the back was too short (remember I took 1 cm off the bottom of the back as part of my swayback adjustment), but actually as worn it hangs straight, so that’s a win.

There’s a lot of gaping in the back, at the neck and in the sway-back area.Fairly easy to fix by tweaking the back seam. I’m wondering if the neck-gaping is exacerbated by the need for a square-shoulder adjustment, though. I had hoped that since the pattern is designed for shoulder-pads, I wouldn’t need one, but it would probably have helped.

The front waist seems about right, and shoulder and side-seams fall in pretty good places. The point of the bust dart is high, but I think not problematically so. The big issue in the front is that folding in the front armscye. Those of you who are fit-gurus, please comment! My Singer Sewing Reference Library volume “The Perfect Fit” suggests two fixes for this, a minor one which is basically the same as a sloping-shoulder adjustment on the front bodice piece only(which is pretty much the opposite of what I need), and a major one where you take a dart out of the pattern at the armscye and then kind of smush it flat so there’s no dart there on your final piece. This seems annoyingly imprecise, but would probably work. Of course, these armscye issues are also affected by the sleeve, so I’ll be setting in sleeves before I make a final decision. I find it particularly interesting that the “fold” doesn’t point to the bust, but rather beside it

EDIT: Just a random bit of life I can’t resist putting in. Yesterday our area was in the grip of a fierce chinook windstorm. The wind was breathtaking, but even more amazing was the temperature—even with all that wind, it was WARM (comparatively) outside. Being good Canadians, we promptly kicked the kids out of the house to enjoy the weather.

This morning we turned on the Weather Network and learned that our area had received hurricane-force winds yesterday and that people had been urged to stay inside and away from windows.

Oopsie.

Well, at least they were away from windows…

24 Comments

Filed under Sewing

A little goes a long way…

A small lengthening adjustment

I took Steph (and several other peoples’) advice and lengthened the CF by rotating the bottom of the bust piece down 1/2″. (thanks for your thoughts, everyone!)

This seemingly-insignificant alteration had some major consequences. On the up-side, it achieved its intended goal of allowing the midriff piece to sit a little lower, bringing the seam-line down to the vicinity of my waist. On the downside, now the bust feels a little too full and wide (odd since if anything the piece is narrower than before). I assume this is because it’s under less vertical tension or something. Also the neck feels a bit gapy—always a risk in a V-neck like this, the correction for which is the exact opposite of the alteration I just made :P. I’m hoping that the weight of the skirt

Simplicity 5728, v. 2, with sleeves!

keeping the bodice in place will keep this from being a problem. In today’s photos I’m wearing the Bullet Proof Bra, which brings my bust measurement up in line with the pattern’s intended 34″; it succeeds in filling in most of the extra fullness, but it still feels a little bulky/loose under the arm.

(To bra or not to bra… that is the question. On a daily basis I tend to go without—a knit top offers enough support to get me through my daily routines, and indeed most exercise except for jogging. On the other hand, a bit of support is nice for when I’m wearing wovens, and if I must wear an annoying band around my ribs, I might as well get some, ah, enhancement, from it, which is where the Bullet Proof Bra comes in. Which will I be more likely to wear with this dress? Well, whichever ends up fitting under it better, I guess…)

Arm-lift---uh oh

Then, of course, I added the sleeves.

Can I just say that woven sleeves are a pain in the arse? These particular ones have a little pouf at the top, which is achieved by lengthening, rather than widening, the sleeve cap. So they look gorgeous with my arms down, but ride up mightily the moment I lift my arms. Now, I’m not expecting to be able to do jumping jacks, but it would be nice to able to put my hands on my hips without the entire bodice pulling up around my ears. And then the neckline goes totally wonky, too. Grr.

Side view, arm raised.

On the up side, I’m no longer wondering if the armscye is too high. With the sleeve on, it feels not nearly high enough.

Incidentally, I lengthened the sleeve pattern by a full two inches to bring it to this point, which is about where I’d like a finished sleeve to end. I’m not totally sure if I want the fold-back cuffs that came with the pattern or not (do they make sense without the collar?) so I’ll have to think on that. Maybe I don’t want long sleeves at all (but I’m having a hard time thinking about anything short sleeved right now, as I’ve said).

Back, with sleeves

But, the back looks pretty good with the sleeves—I wouldn’t want to take any ease out of it, I think.

Back with arms raised

It handles the arm-raising much better than the front.

I think I’m satisfied with the bodice for now—side seam ease is something I can

Side view, with sleeves

always tweak in my final fabric (whatever that may be), so the issue that remains is the sleeve. What do you think? Keep with restrictions? Attempt to alter the cap (I seem to recall the Sewista Fashionista taking a stab at something similar not that long ago…)? Swap in a different sleeve I like better? (I haven’t done a long-sleeve in a woven for me yet, so I don’t really have any candidates. I could do a short sleeve—I’d probably like a short cap sleeve better than a puff anyway, or there’s always the lure of a pleated sleeve cap. Again, though, I don’t have a preferred pattern for any of these.

This is my first elbow dart, by the way. it does make for a nice fit.

So what do you think? Short sleeve or long? This sleeve or other? I have a feeling I’m going to go with the long skirt option. Cuz, well, I love me a long skirt.

The pattern girls, to remind you

13 Comments

Filed under Sewing

I can’t believe…

I made three muslins for a kid’s coat.

However, I do believe we have achieved “fit.” Maybe not perfect fit, but enough for a growing child who will be handing it along to someone else (likely several someones if it holds up) in a few years anyway.

Both the side seams and the centre-back seam have been flared out from waist down to give more ease; I also added an extension on the CB for a vent; hopefully the Cupcake Goddess’s instructions on sewing a vent in a pencil skirt will be applicable to a vent in a coat. I added 2 cm ease (one to each sleeve piece) to the sleeves to give a bit more room there, as they still seemed really slim. I made a small narrow-shoulder adjustment (1 cm narrower). I will still add in a shoulder-pad, but they do look surprisingly better this way. Now I need to go and make the same adjustments to the lining pieces (sigh).

In other news, Syo is prancing around in Muslin #1 (the smaller size), which fits her remarkably well (although I still think the sleeves are far too narrow for a coat).

Tyo’s about to head off to “Outdoor School” (aka camping in November… what are these people thinking?) for three days. Who knows… maybe she’ll get back to a nearly-completed coat.

Or, y’know, not. The kids do have both Thursday and Friday off school for Remembrance day, so I may save it for then.

2 Comments

Filed under Sewing

A Coat for Tyo—Muslin #2

On Tuesday when I tried to print out the pattern in a larger size (140 instead of 134 height), my printer was out of ink.

Thursday night, despite me doing ABSOLUTELY NOTHING to fix this, it was willing to print.

Muslin #2 Front

So I pieced together the pattern (again) and compared it to the smaller version. The length of the sleeves on the larger pattern was just slightly longer than the length of the sleeves on the smaller after I had lengthened them to fit. Perfect. The width of the back piece was almost the same as the width of my alterations to the back piece. Good so far.

Muslin #2---Side

The shoulder was a whole cm longer. Ah, well.

So, here it is. Much better all around, except for those pesky shoulders.

It’s still catching the slightest bit on her bottom, so I think I will still do a small swayback adjustment. I’m thinking I’ll add a rear vent, too, just to make it a bit more practical for an active child. I’m also going to add 1 cm  to the undersleeve (and maybe flatten the sleeve-cap a tiny bit to compensate?) just to get a bit more ease there. The width they are now would be fine for a jacket, might be still a bit snug over sweaters, once all the layers are in place.

What do you think of those shoulders? If it were just for her alone, I would definitely alter them, but this coat will probably be handed down eventually to Syo, who is built much more like me, i.e. with broad shoulders and a narrow, compact bottom. And they are designed for a shoulder pad, too, although I wouldn’t want a large one. Anyone have a favourite narrow-shoulder adjustment tutorial out there?

Muslin #2---Rear view

On the fabric front, I washed the red fabric. It shrank. No big surprises there. I will wash the black, too. The downside of this fabric is a peculiar strong, plasticky odour (possibly the reason it was on sale). The store assured me several times that this will go away when the fabric is dry-cleaned. I hate dry-cleaning, so I just washed and dried it. I figured it couldn’t hurt a semi-felted fabric too much. Aside from the shrinking, it seems fine. The smell, though fainter, is still there. After several days of lying spread out in the basement, it seems hardly noticeable… I’ve now folded it up and we’ll see if the smell comes back. If I do need to dry-clean it to get rid of the smell, well, that’ll be another thing to wait on money for :P.

Syo's purse

In other news, Syo cut out and sewed a little purse for herself tonight. I did nothing but tie off a few knots (she even threaded the needle herself.) Meanwhile, Tyo is plotting making cloth dolls for her cousins. The basement is currently strewn with an assortment of doll-pattern-pieces. Also, I’d just like to point out that those purple striped socks Tyo is wearing, are mine. *grumblegrumblegrump* She’s starting to steal my shirts, too. The end is nigh, people, the end is nigh.

16 Comments

Filed under Sewing

Dear Tyo, I foresee…

… a lifetime of narrow-shoulder, wide-hip alterations. You’d better learn to sew.

Girls' Coat muslin I

I may have mentioned before that my sweet little Tyo has the build of all the women in her Dad’s family (and diametrically opposed to the women in mine, I’ll add): she is an incipient pear. Narrow shoulders and BOOTY. This has been apparent since she was, oh, two, but it’s only getting worse as the years go by. Let’s just say I could picture rap videos in her future. And a lot of quality time with the shotgun in her Dad’s.

So, I have to say, the muslin for the coat went together like a dream. The pattern is (surprisingly?) sophisticated, with separate lining pieces for everything. The overall shape looks good, all the seams (that I tested) match up beautifully; the sleeve-cap is drafted with a beautifully small amount of ease, just enough to curve it nicely without giving it any tendency at all to pucker (admittedly, the wonderful old flannel sheet I was using for the muslin was a dream to sew, too, so that didn’t hurt)

Side view

And, as you can see, it’s just a wee bit too small. Everywhere except in the shoulders, which are perfect. (The sleeves are long enough only because I lengthened those pattern pieces BEFORE cutting it out, as I could see they were going to be too short. Unfortunately paper-printout doesn’t lend itself to tissue fitting.)

Now, I can’t be 100% sure this is a problem with the original sizing, as it’s entirely possible my crude efforts at tiling let to some re-sizing of the printout and there’s no handy-dandy scale square to allow me to be sure (actually, according to the tiling program my printout is .01 feet smaller… which I didn’t think could throw it off by this amount, but anyway). But the fact remains that there is definitely not enough ease in the pattern AS I PRINTED IT OUT. Well, there would be if it were a dress. For a coat… not so much.

If it were just the skirt pieces that were the problem, I would just spread them. In fact, before I got the sleeves on, when

Rear view... split to let the side-seams hang straight. >_<

she first tried on the body and it became obvious that the skirt of the jacket didn’t have enough ease for her lovely bottom, I was all set to slash and spread the skirt of the back pieces, just enough to give her a couple of extra inches in the derriere region. But with the sleeves in place, it became evident that some extra ease was required there, as well.

So I’m torn, folks. What’s the best way to proceed? Re-print in a larger size? Slash-and-spread to widen sleeves, armscye, and the lower part of the coat, preserving the fit in the shoulder?

There’s only one part of the pattern that has confused me a little. Along the front princess seam there are two

Front pattern piece: princess seam with ?vent

expansions (places where the seam allowance goes from about 1 cm to 4 cm. The top one is for the placement of the pocket, but below that the seam allowance returns to normal for about an inch, and then widens again I’m not sure what’s meant to go there, as it doesn’t appear to be any different from the rest of the seam on the illustration (or the limited instructions available on m-sewing.)

It does resemble nothing so much as a vent or pleat, though I’ve never seen one in this precise location on a coat. What do you think? Ignore? Make as a vent or pleat? I should add that the lining doesn’t have an opening here and the seam between the CF facing and the lining does not coincide with this princess seam, either. So maybe that eliminates the vent option but still allows the pleat? I dunno. Anyway, if anyone has any suggestions or revelations, I’d love to hear them. Or I can just ignore it ;).

Probably I should go up a size, right? Bigger is always better with kids. (D’oh!)

7 Comments

Filed under Sewing

Lady Grey Muslin

So last night I managed to get the sleeves on and make some preliminary adjustments to the fit. Namely, I took in the centre back about 2″  and each back princess seam about another 1″. I might let the CB out a tiny bit—it looks awesome as is, but it’s probably a little more snug than an overgarment should be. Though I’m not aiming for this to be my awesome-warm-all-winter garment. Just a nice spring/fall coat. I also lowered the armscye by just taking another seam 1/4″ below the existing one, which eased that area  a lot. I may experiment with taking it down a bit more. There’s still a bit of extra width in the upper back, but if I take that in I lose range of motion.

I think I really do have to fix that lapel. 😛 What do you think of the back? There is still some wrinkling around the sleeves, but everyone seems to have that.

What about the length?  I haven’t turned anything under yet (hopefully get to that tonight). It really looks pretty ok just how it is… does this mean I should be adding hem-allowances? 😉 But that’s probably getting ahead of ourselves. Anyhoo, further thoughts/comments would be very, very, very welcome.

In Self-Stitched September news, I’ve been kinda slack documenting the last couple of days. I’ve been wearing the ex-capri Jalie jeans, tuesday with the red JJ blouse, yesterday with one of the Lydia tops. You can see portions of those outfits in today and yesterday’s muslin pics, but I didn’t get proper outfit photos. Today, for the finale, I’m attempting to jazz it up a bit with my Kasia skirt.

Self-Stitched September Day 30

Trying to fix my hair while posing (windy!)

Top: black JJ, red Simplicity 2603 cardi-wrap
Bottom: Kasia skirt from burdastyle.com, lacey tights from Joe (AKA Superstore) and my cute-librarian heels. I’m nots ure the busy tights work with the outfit, but oh well.

Also, while running up the steps of the deck I ripped the back slit of the Kasia up about three inches. Have to decide what to do about that (shoulda done a vent! 😉 )

Self-Stitched September Day 30

This would've been a cut pose except that it looks like I'm doing the dandruff check :P. Again trying to fix my hair in the wind at the wrong moment.

17 Comments

Filed under Sewing

Lady Grey Muslin… on your mark, get set…

So, I have dryer-steamed my “muslin” fabric. I attempted a tissue-fit of the pattern, with limited success, but I did decide to shorten the waist slightly and do a small swayback adjustment before I begin. Probably I should’ve done an SBA to start, too, but we’ll see. May I just say that swayback adjustments do scary thing to pattern pieces?

Anyway, yesterday I managed to cut out the pieces for the muslin and get the bodice, at least, sewn together.

I won’t post them up to the group until I get the sleeves and collar sewn on, but I couldn’t resist a quick preview for you guys (and myself).

The biggest issue I see is need for further swayback work. There’s also a slight gaping/sagging of the lapels at the front, but the princess-seam curve works surprisingly well (the whole time I was cutting it out, I was thinking “this is a really intense princess curve. It’s totally not going to fit me.” Once I get done butchering the swayback, I think I will need to lengthen the back hem by a couple of inches.

Now, my bust and hip measurements correspond to a Colette size 0. My waist, by contrast, is a size 6. So I was really worried about this coat wrapping around enough to sit properly. Also, since my shoulders are fairly broad (or at least, since I definitely do not have a C cup), I decided to cut the size 2. I thought this *might* give me a better fit than the 0 which is presumably designed for someone with a larger bust hung on a smaller frame. Additionally, when I shortened the waist, I did my best to remove/widen the smallest part of the waist, although it didn’t amount to more than a few milimetres at any given seam, so I’m not sure if it’s noticeably affecting the fit. It seems like there might be a little too much width across the back now, but I don’t really want to mess with that until after I’ve got the sleeves attached.

Anyway, please share any thoughts you have. Hopefully I’ll have the sleeves attached, hems pressed up, etc. by the end of the day to post to the flickr group 🙂

13 Comments

Filed under Sewing