Tag Archives: Clover pants

Flutter Fun, and an observation

Fluttery & Clover

Ever since Steph of 3 Hours Past the Edge of the World first mentioned her plan for a flutter-sleeve hack of her Blank Canvas Tee pattern, I was on board. Totally. For realz. I waited patiently for her to come out with the hack, and read through her tute carefully.

Diagram of my flutter-sleeve pattern changes.

And, of course, predictably, went my own way. I took a protractor, made a line 45° up from the edge of the shoulder (or, if it’s easier, at 135° from the line of the shoulder), and then measured a length from the edge of the neck that roughly corresponded with how long I thought the sleeve should be. Using the edge of the shoulder point as the centre of my circle, I made a partial arc of the circle down towards the rest of the sleeve (a compass would’ve been perfect for this but, being too lazy to head upstairs for the rest of the geometry kit, I just measured with my tape measure in several places.) Then I sort of free-handed, sort of used my French Curve, to approximate the rest of the sleeve. Oh, and I rounded the spot where I had drawn in my first angle. Steph’s method is probably a lot more precise.

Unfortunately, then I got cold feet. The sleeve looked too short, I thought. I lengthened it, re-drawing the curve, and cut out a trial version in my scrap jersey—the old knit bedsheet I bought at Hallowe’en for making Tyo a shirt. It doesn’t have the best drape, but it was available and cheap and not earmarked for any other projects at the moment.

Flutter sleeve: too long (original size), too short (cut line), just right (click to zoom in to see the "just right" line)

Predictably, the sleeve was too long. I stuck a pin in where I thought it “ought” to go, shortened, and cut again.

Now, I think they’re a bit short, at least at the very top of the shoulder. I actually think my original curve would’ve been pretty much perfect. So there you go. At least the angle seems pretty good.

Frikking finnicky flutter sleeves. At least they’re easy-ish to tweak going from longer to shorter.

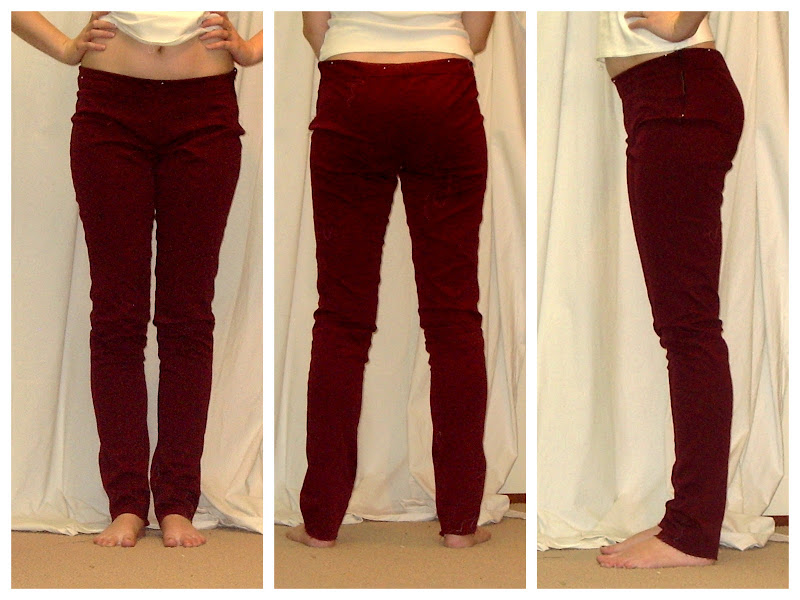
I paired my trial, not-really-opaque-enough-for-public version of the tee with my red clovers, cuffed to a high-ankle length, for the purposes of the photos. I think I’m liking this length better, and they are *much* more comfortable with belt-loops, although the belt doesn’t help with the front-sag, since the belt wants to sit exactly where the waistband wants to sit. Anyway, we’ll see. The weather is a long way from ready for this look, anyway.

An interesting observation

Steph recently came out with the updated and finalized version of her BCT pattern, considerably refined from the early draft I used around Christmastime to make my versions. Curious, I eagerly printed off a new version. And then compared it to my version of the pattern.

The results were very interesting indeed.

Pattern comparison. Click to see larger version.

For one thing, the pattern I had printed out (original size 35), whether through some quirk of the early drafting or scanning or my own ineptitude (always a possibility), was considerably smaller than the new size 35. Actually, it’s somewhat smaller than the new size 30 (for a 30″ bust). Which goes a long way towards explaining why my versions of the tee are so, well, fitted.

The shoulders on the old pattern were quite a bit wider (even in my shrunken print-out), as was the neck opening on the back, and the angle from shoulder to sleeve was more extreme. I suspect Steph was bang on in altering those for her new version :).

The original draft was quite short (Steph wears her trousers a lot higher than I do 😉 ) and I had added a lot of length to the bottom. The length of the new, longer draft is pretty much *exactly* the same as my lengthened version of the original. Win!

So, for the moment, I’m gong to keep on working with my old version (as I like how it fits), with maybe a few tweaks around the shoulder. But since I have thrown my versions out there of examples of what you may get from a Blank Canvas Tee, I thought I should also point out that I apparently printed mine considerably smaller than intended. If you want a tee that fits like mine—go down a size. 🙂

Advertisement

31 Comments

Filed under Sewing

Clover (anti)climax

Grum

It occurs to me that putting “climax” in a post title may not be the wisest decision ever… oh, well.

You remember my red clovers? No? Maybe that’s because they’ve been languishing in dreaded UFO limbo since, oh, January. I don’t do UFOs, peeps. I don’t always like what I make, but I almost always finish it.

Having cleared (or partially cleared) my sewing room of some backlog clutter on Monday, I was feeling inclined to tackle other energy-blocking projects (I even vacuumed the basement carpet, dammit. Of course, then I spread out and cut a bunch more fabric, but that’s beside the point.) So last night after dinner I picked up my Clovers from their sad little heap and set to work.

My main blockage was the zipper. I had settled on a lapped zipper for the final application (why, I don’t know, since I suck at lapped zips), but when stitching it up (after LOTS of hand basting, something I almost never do) I realized that my ends weren’t lining up with the top of the waistband on one side, and I chucked it in a corner put it away in disgust.

So, last night, I pulled the zipper out, examined the waistband and determined that one side was actually too wide, fixed that, and then set about hand-basting everything back in. Peeps, this zip is inserted almost entirely by hand. Probably not a good idea for a load-bearing area, but anyway. It looks mostly nice (a first for me with a lapped zip) except at the very bottom. Aside from the fact that the side of the hip is not a really good place for a lapped zipper—the over-lap seems to want to gape out a bit. The entire thing would’ve been considerably less brain-breaking if I’d made it more like a typical fly, with the waistband not included in the zipper, but that would’ve required a bit of extension of the waistband pattern, which I hadn’t done. So I made it work. The top of the zip has a wide pants-hook, but I couldn’t find a bar for it so I made a thread bar. I don’t really expect that to hold up, but it’s functional for now.

And then I hemmed, and now they’re done.

And, well, I’m… meh.

The problem is, I’m not sure if there’s an actual problem, or if I just don’t like side-zip, no-pocket, non-jeans-style pants. For one thing, I obviously need different underwear with them. 😛

Fit?

The side-seams are still a bit ripply. The waistband wants to sag down  in the front—it’s still a smidge higher than my “natural waistband groove”, despite me lowering it a good inch. I think this contributes to the wrinkling along the hip, not to mention the front-crotch wrinkles. I’d be tempted to take in the hips and thighs a bit more except it’s pretty much impossible to alter that side-zip. Well, without wanting to kill myself.

Hmm.

The calf is more snug than the thighs, which I think is also bothering me. Not a surprise—I have pretty muscular calves, and have run into this issue in storebought skinny pants. Although for some reason my feet and lower legs look tiny in these photos. Maybe it’s the wedges?

Probably I should add belt-loops and wear them with a belt and see if I like them better with the top held firmly in place. I interfaced the waistband with knit interfacing to retain a bit of the stretch, but if I want to wear them sans belt, I think that removing all stretch would’ve been a good idea. At the time I was paranoid about the whole thing being too small. Also it would mitigate the serious plumber’s crack that happens when I bend over.

Short or long?

Currently I’ve hemmed them full length (I added about 5″ to the pattern). I’m tempted to shorten them (though the picture doesn’t show the short look nearly as well as I hoped it would). I like the shorter look, but I feel like that would really limit their use in my wardrobe. I don’t usually go sock-free until the height of summer, and I don’t think the pedal-pusher look works with much but sandals, at least for me.

But am I going to wear them much anyway?

D’oh.

Why didn’t I just make this fabric into jeans? I really want red jeans…

54 Comments

Filed under Sewing

Red Leaf Clover (Round two)

Clover---round two

Grum.

So. Still not the best photography, but at least it’s not the iPhone. I lightened the crap out of things to make the wrinkles etc. show better.

So, at this point I have lowered the rise in the front 5cm, tapering to 2.5 at the hip and zilch at the centre back. And this time (yay!) the zipper held out long enough to take some actual photos.

So at this point I’m seeing two major problems, aside from generalized looseness:

1) wrinkles at side-seam along hip. Several of you in the last post (thanks so much, everyone!) attributed this to excess hip curve, and you’re probably right. On the left side the zipper has forced this extra length into a single large fold at the bottom of the zipper, on the right side it’s more distributed.

2) bagginess at front crotch. I obviously need to research this. These aren’t strain wrinkles—it’s more like there’s just too much fabric here.

Minor problems include

3) dip at CB still there. If I lower the sides more, this may help, but really a bit of extra height in the back will be a must for next time.

4) wrinkles and looseness along legs. There’s some width that can be taken out here, I think.

Next up, I did what I should’ve done before I ever cut, and dug out my pattern for the Burdastyle Ellen Pants. This is the one that created the Businesswoman Pants, and while the fit isn’t totally perfect, it’s hella better than this pair, at least so far. The only reason I didn’t before, aside from laziness, was that the Ellen isn’t drafted for stretch fabric, so I wasn’t sure how precisely comparable they would be.

Crotch Curve Comparison:

Ellen vs. Clover

So this was the REALLY interesting part. I overlaid the two patterns. The solid paper is the Ellen pants (cut to a size 34 rather than my usual 36 as they run large). The tissue is my tracing of the Clover (size 2 grading to size 4 at the waist).

The biggest single difference is the rise in the front. It’s more than an inch higher at the centre front, and substantial. The rear rise is almost identical—a smidge lower at CB, a cm higher at the sideseam. There’s a slightly greater curve to the hip in the clover. The back piece is slightly wider in the Clover, but then the front piece is slightly narrower, so I think the overall width is very similar (and Ellen is non-stretch!). The spookiest thing is that the diference in rise doesn’t even out at the side seam—the rear side-seam is higher, when the crotch curves are lined up, than the side on the front, which means that there’s some odd shifting of how the halves are going to fit together. That’s boggling my brain, I tell you.

The crotch curves are almost identical, up to and including the much longer rear than front curve. This is the bit that really threw me for a loop, because I was expecting there to be a significant difference, not just a few mm at the back of the rear crotch curve. Now maybe having the front fly on the Ellen masks certain things, or maybe it’s just that they’re in non-stretch fabrics, but I never saw anything in any of my Ellens like the folds I have in the Clover.

There are a few other differences—the Clover legs are much narrwer, especially as you go down, than the straight-legged Ellens. But on the whole—scary close.

So I think I’m going to cry Uncle, seam rip the entire kaboodle, and recut following the Ellen pattern at the top. And then maybe consider taking in the side-seams until the stretch factor is properly accounted for.

And this, Ladies and Gentlemen, is why I’ve stuck with the same two pants patterns this whole time…

31 Comments

Filed under Sewing

Red-Leaf Clover

Colette Clover pants. You can see from the wrinkles that the waistband at the side isn't pulled as high as it can go.

Or, possibly the worst-photographed post ever.

Did I mention my camera charger didn’t come home with me after the holidays? So yeah, the last few posts have been iPhone photos. Painful, I know. I’m working to get the back-up camera functional again (battery issues, but at least it uses standard AA batteries), but as of this moment you get iPhone photos.

So, after making little jeans for everyone short in the family (or at least that’s what it feels like…), I was in the mood for some new pants myself. And frankly, I’m a little bored of Jalie 2908, although I do have fabric for another pair for myself planned.

So I pulled out this red stretch (?twill? Sometimes it looks like twill, other times not.)

After much hemming and hawing, I cut out the size 2, which is my actual hip size, grading to a size 4 (which is not quite my actual waist size) at the waist. The long view finished inseam is listed at 27″, designed to fall just above the ankle. Dear readers, 27″ is a longish capri length on me.  Since it’s winter and my desire to make a pair of pants that would look funny with socks is at absolute zero, I decided to lengthen them to a more normal, scrunch-around-the-ankle, skinny length. I added 6″ (15 cm.) I had some misgivings about the rise, which some people have reported as a bit high (and we all know I’m a low-rise kind of girl), but figured I would keep it as-is for now, as that’s something which can be tweaked after the pattern’s cut. The crotch-length was a little disconcerting, as the horizontal leg of the back L seemed really long, but the horizontal leg of the front L was really short, so I hoped it would even out. It’s different from most of the other crotch-curves I’ve seen, so I was kind of curious to try.

Clover crotch-curves

And then I took a deep, deep breath, and I cut into my precious* red twill.

It is my intention for these, eventually, to be a sort of wearable muslin. Uncharacteristically for me, I basted them together just to check the fit—I’m planning on completely re-stitching everything once I have them fitting how I like.

I didn’t get any full-length pictures. The legs are pretty much fine—skinny, long enough. I may take in the outseams above the knees about .5 cm on each side—enough to bring me down, basically, to a size 0; I think this fabric has a bit more stretch than the pattern may have been planned for (I wish it had a stretch guide, or at least listed %stretch rather than %Lycra.  % Lycra is not very useful at all in predicting how much a fabric stretches, in my experience.) Alternatively, I may just like my pants tighter than was originally meant. Which is probable, too.

Anyway. The rise in the back is good, although it does that dip-down thing at the middle of the back. I would not want it any lower, that’s for sure.

Front view. You can just barely see that my belly-button is immediately above the waistband.

The rise in the front is a full 5cm (almost 2″) higher than I’d like. The pin in the front shows where I’d like the bottom of the waistband to fall in order to get the rise right.

The size of the waistband seems good as long as I don’t interface all stretch out of the waistband. (Though I suppose this will be different once I change the rise, anyway.) There is not much gaping at the CB, which is a common problem for me, so that’s good.

Unfortunately, the crappy zipper I threw in self-destructed within about 30 seconds of me putting the pants on, so I’m frantically pinching the one hip together in the pictures.

The front crotch seems a bit odd, I think because the curve is so shallow, but I’m hesitant to mess with it at this point. Maybe later. If any of you know what these wrinkles mean (left side of the photo, the right side is being pulled off by the issues with the zipper) please let me know! 😉

Anyway, I think I’ll be able to make some quite nice pants out of these, once I have them tweaked a bit. But some tweaking is definitely required.

And unpicking. And, y’know, reading the actual instructions.

*in the sense that I have been looking for a fabric like this for ages, not in the sense that it was expensive—it was definitely not.

49 Comments

Filed under Sewing