Tag Archives: lace

Quick Weekend Therapy Sewing

IMG_8834.JPG

It was probably inevitable that I would end up with a fabric stash problem. I’m a pack rat by nature, I like to have things around that just might come in handy someday. I don’t mind having some basics (and not-so-basics) kicking around for when the urge strikes. What I have more trouble coming to terms with is the scraps. I can’t seem to throw away anything bigger than a square foot, so a frustrating portion of the stash ends up being these pieces lingering from finished projects. They do come in handy—for contrast details, bias tape making, piping, pocket linings; and the kids will dive through them from time to time, especially when Tyo is in a monster-making mood, but in general the amount generated is more than the amount used, and they’re frustrating.

The best way I’ve found to deal with them (when I have the time) is to just keep making stuff from the fabric leftovers until it’s all gone. This often gets derailed by other priorities, of course, but one can try (and at least the machine is all threaded up in the right colour.)

IMG_0736.JPG

I had not quite a metre (very oddly shaped) of this stretch lace left from a far more exciting yet less practical project that has yet to be blogged, pending a proper photo-shoot. >_< Anyway, I having already cut some Rosy Ladyshorts (cute pattern, free, go make some) from it, I figured I would see if I could squeeze a simple long-sleeved tee out of it using my handy-dandy old knit sloper.

IMG_8835.JPG

Obviously, I could. Not much to say, just a few details—for a light neckline finish I serged a band of white jersey to the neck, folded to the inside, and topstitched down with a zig-zag; it’s soft, a little tidier than just adding clear elastic, but not too heavy, so I think it pretty much hit the mark for what I was going for.

IMG_8836.JPG

The sleeve hems I just serged and folded over and topstitched—nothing special.

I added a band for the hem, as I have for most of my recent knit-top makes, because it’s both easy and nice-looking, which is a rare combination. 😉

IMG_8837.JPG

I then needed a camisole of some kind to make the thing wearable. I made one from some cream cotton-lycra jersey; this is really a wardrobe staple I’ve been avoiding making for probably as long as I’ve been making clothes here.

IMG_8839.JPG

IMG_8841.JPG

I hacked my knit sloper into a wide-necked curve, (maybe a little wider than ideal, but it echoes the scooped neckline of the lace overlay well) and made a little tank-top.

IMG_8840.JPG

I didn’t have any fold-over elastic in the right colour, however, so I made bands using strips of jersey. If I had been willing/able to to make them as bindings, with the edges folded in, it would’ve worked really well, but with bands turning into knit tubes for the straps… well, there’s an ugly spot at the join. Some hand-stitching could probably pretty it up, but it’s not an ideal method.

IMG_8838.JPG

On the whole, though, it works, and both will be useful (if not terribly seasonal) wardrobe staples.

The only tragedy is that I burnt out the motor of my White, which is my go-to machine for knits (other than the serger) about halfway round the hem of the camisole. That was a lot of hand-wheeling to get it finished. >_< Next question: is it worth it to fix such a machine? A new motor can be had online for about thirty bucks (although Sew Classic won't ship them to Canada, apparently. Boo.) and my father-in-law has the know-how to attach one if I can get the right size and mounting-brackets. (This is still more money than I spent on the whole machine, by the way.) It's an internal motor, but still belt-driven and looks just like the external ones, to my untutored eye, anyway. /sigh. It was also my favourite machine to do buttonholes with the buttonholer attachment on. Double sigh.

IMG_8829.JPG

Of course, there’s still a little bit of the lace left. Time for another pair of ladyshorts?

23 Comments

Filed under Sewing

Gertie Slip

20140331-205230.jpg

Gertie’s Slip Pattern—Butterick 6031

So I wanted to make a slip. OK, frankly, I’ve needed a new one for a few months now. The beat-up old blue storebought one I have (which I’ve had longer than  I’ve had my husband, having purchased it in the golden age of vintage shopping, aka the 90s) broke a strap not long after Christmas, and I’ve just been pinning it in place for lack of a better option. Because if one wants to wear a dress, in the winter, in Canada, a slip goes a surprisingly long way towards making a ridiculously-not-warm-enough outfit just borderline wearable. Especially when it facilitates the wearing of thermal tights. And I really, really, really wanted to make Gertie’s new slip pattern, because, well, ERMAGERDCUTE. Confession: I really really wanted to make it just exactly like the cover, in black with cream lace. Although I knew I needed a light-coloured slip, badly, too.

Well, Fabricland had absolutely no plain, black, slippery, stretchy knit fabric. They did have the old-fashioned nylon knit (the stuff your grandma’s slips were made of. Ok, the stuff my dying blue slip is made of), but I didn’t think that would work for this particular pattern (I think I was right, by the way.) So instead I walked out with some ERMAGERDCUTE nylon swimsuit fabric, and half a metric ton of black stretch lace. And some ivory old-fashiong lingerie knit, but that’s another story.

20140331-205244.jpg

So, you may have noticed how Gertie’s selling kits for her slip? That’s SUCH A GOOD IDEA. Because figuring out everything you need from the bloody teeny text on the back of the envelope is not. easy. I read it fifteen times and still missed half of it. Like the 1/2″ lace for making the front half of the straps. It turned out all right because I found a really nice lingerie elastic I wanted to use for the whole straps, but still.  I did remember the strap-sliders kit. I messed up on the lace pretty badly, but we’ll get to that.

20140331-205259.jpg

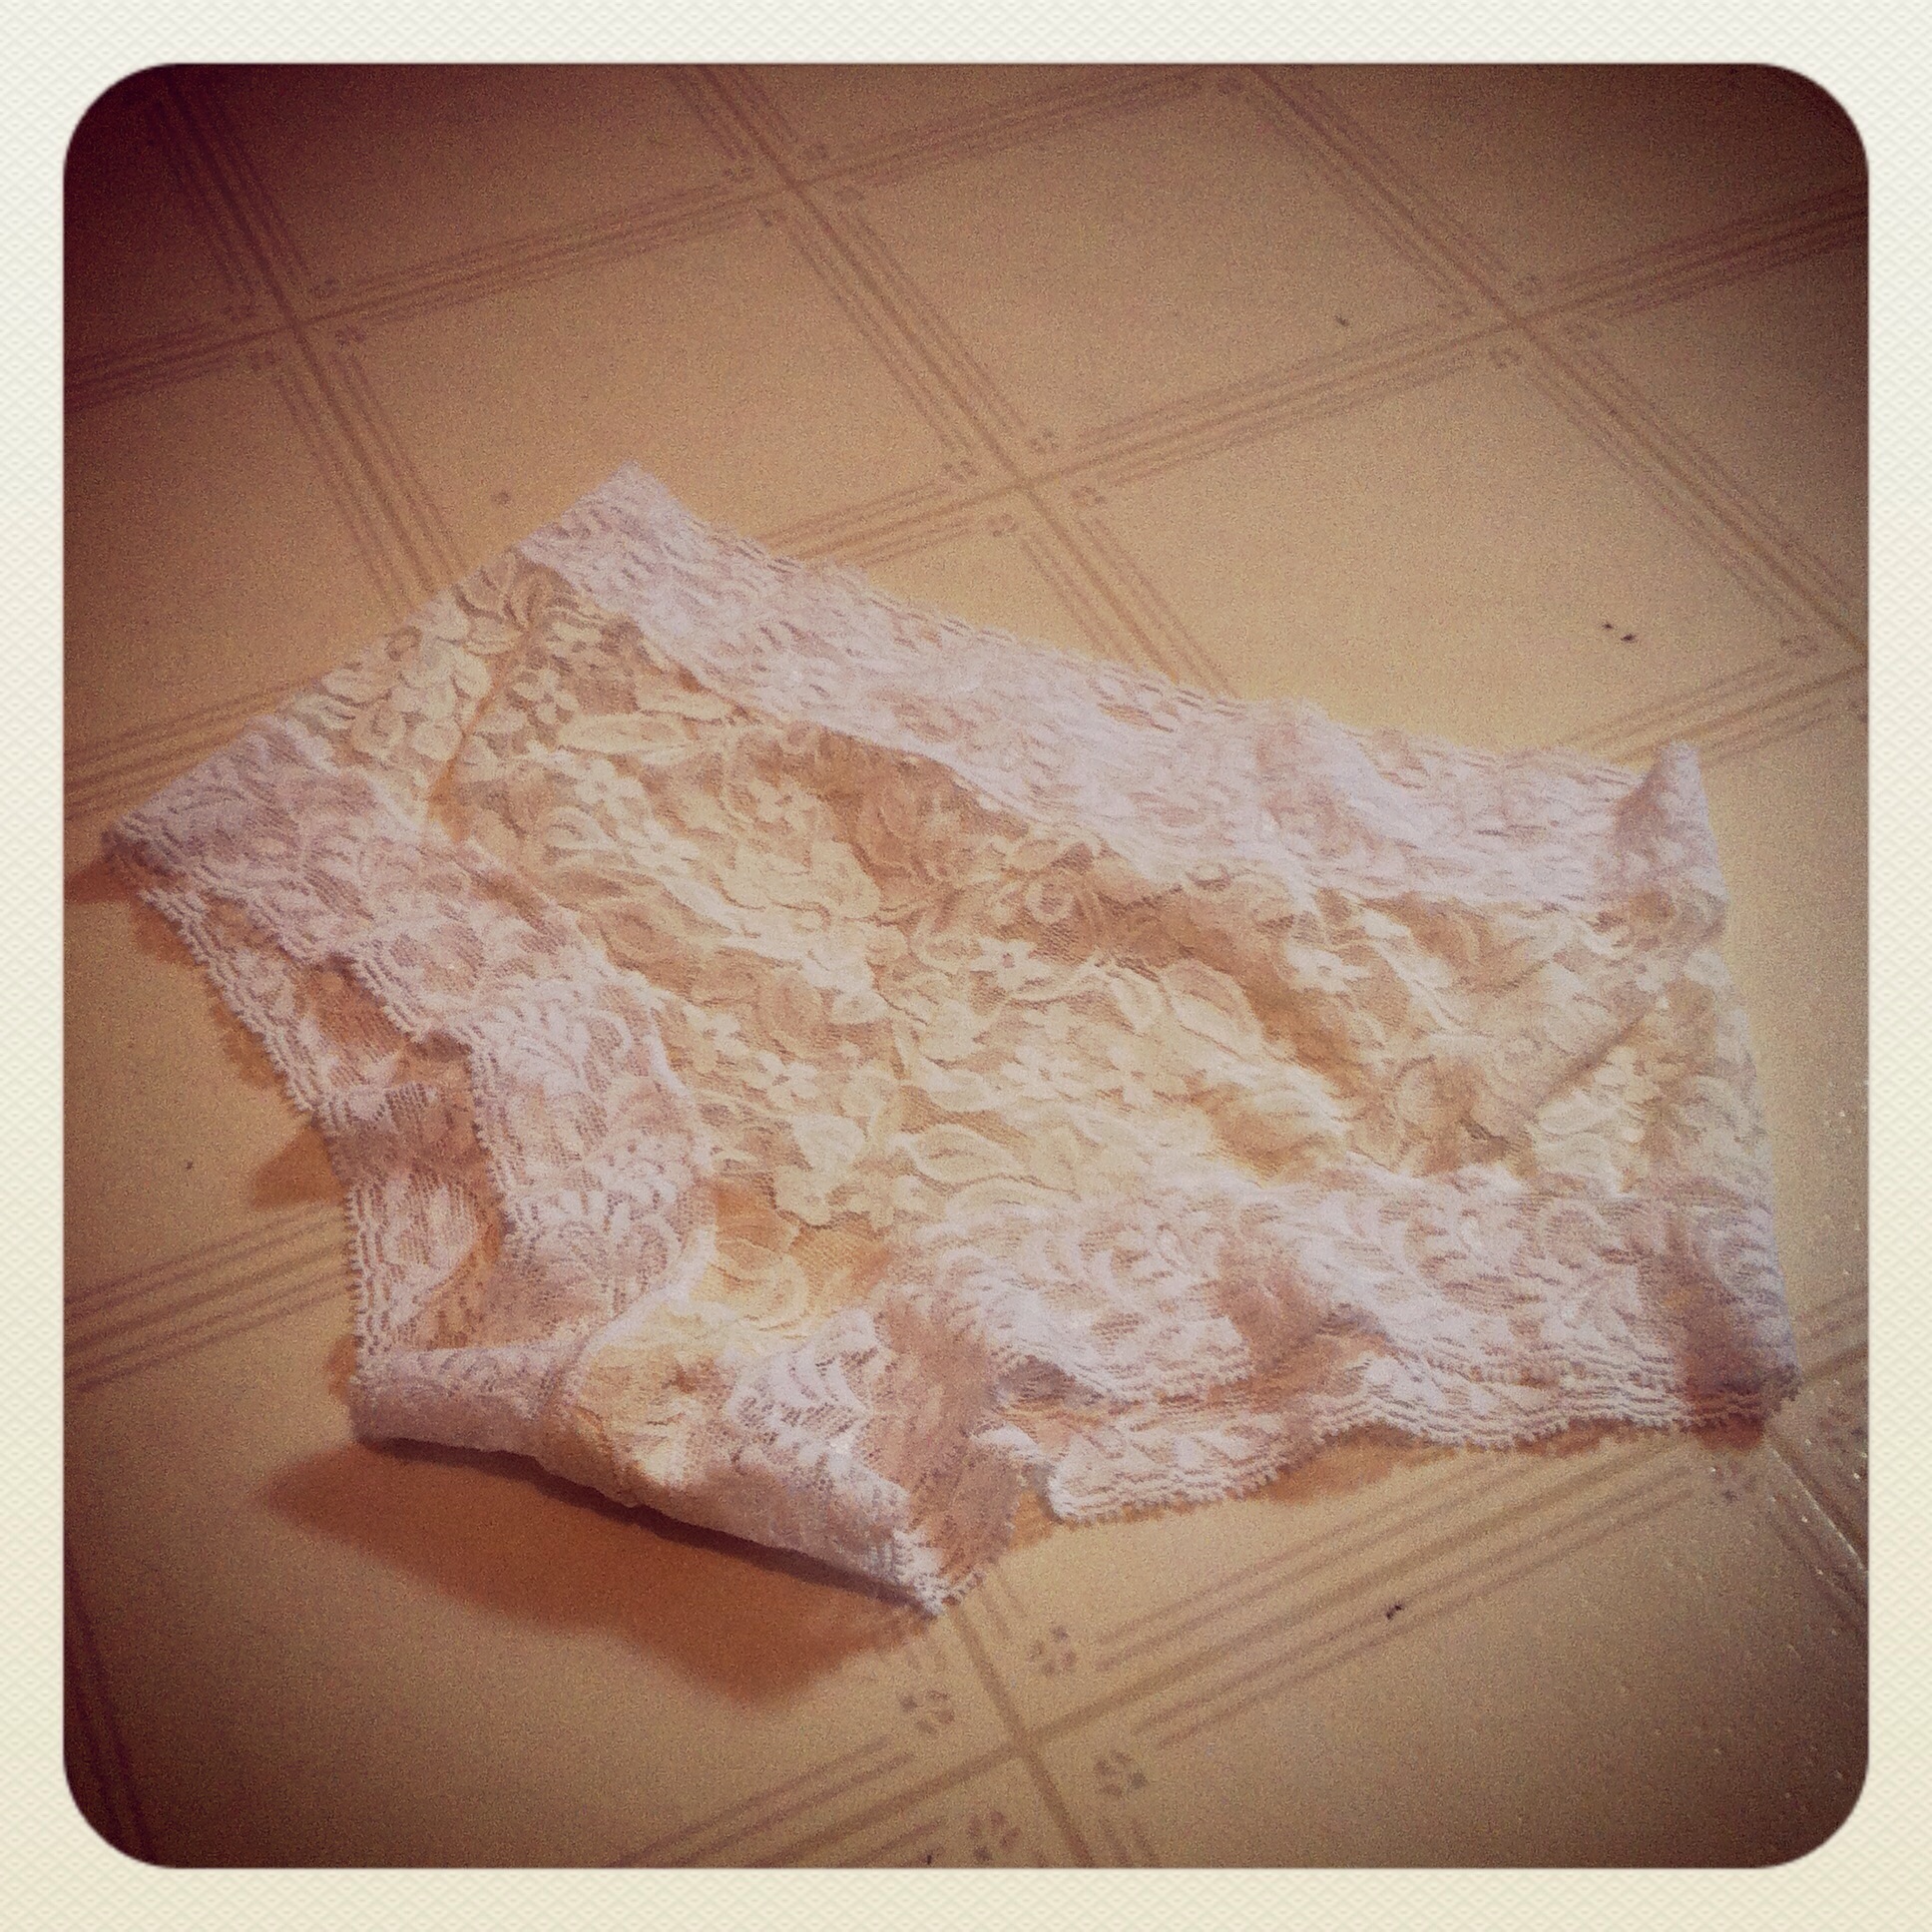
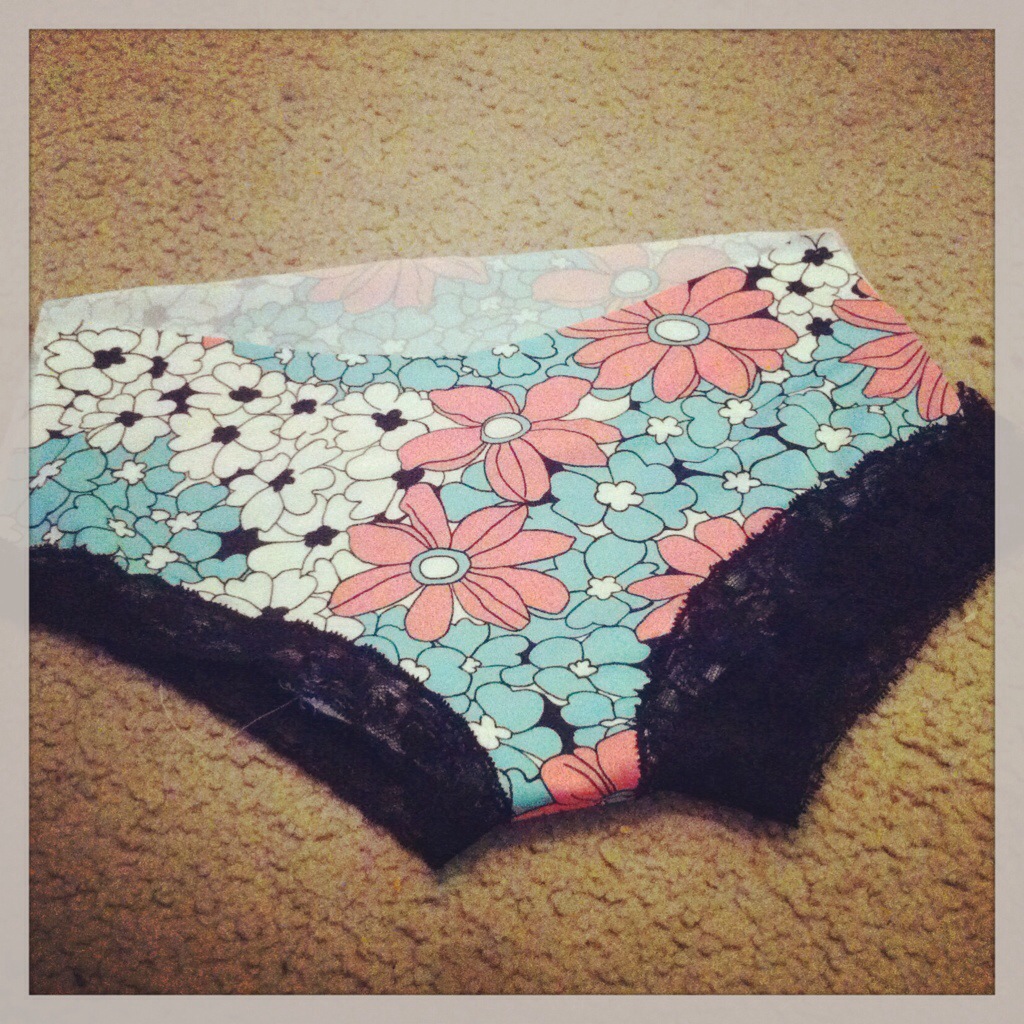
Once I cut everything out, I decided to start with the briefs, since that seemed a little simpler (and easier to recut if I really screwed it up.) Which, by the way, I did. I wasn’t paying too much attention when I grabbed my lace—I knew it called for a couple of different widths, and just grabbed one wider and one narrower that I liked.

Tanit-Isis Fail.

The wider lace was about 2″ wide. The pattern called for 1.5″. That 1/2″ is a big deal, as you can see above. On the left—great. On the right, um, not quite such a good look. Yes, I sat and picked that out. A frickin’ teeny little zigzag in swimsuit fabric. Did I want to kill myself? Only a little. On the plus side, once I had it all fixed, they fit like a dream; I did lower the front rise about an inch (a personal preference, I think), but the rear coverage was just right.

(PS, any of you who remember my last attempt at lace-trimmed undies, remember how wide I found the crotch after? You will not have that problem with this pattern. Teeniest little skinny crotch ever. Very comfy, although I wouldn’t recommend wearing pads with these. Also, the crotch-liner piece ends up pretty funny looking. Yeah, I also forgot to buy any cotton jersey for that. Fortunately I’m a fabric hoarder stasher and have enough white cotton knit bits kicking around for a small army of undies.)


20140331-205347.jpg

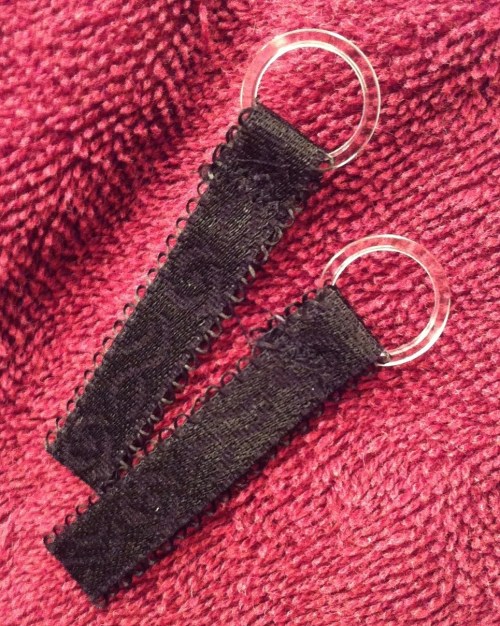
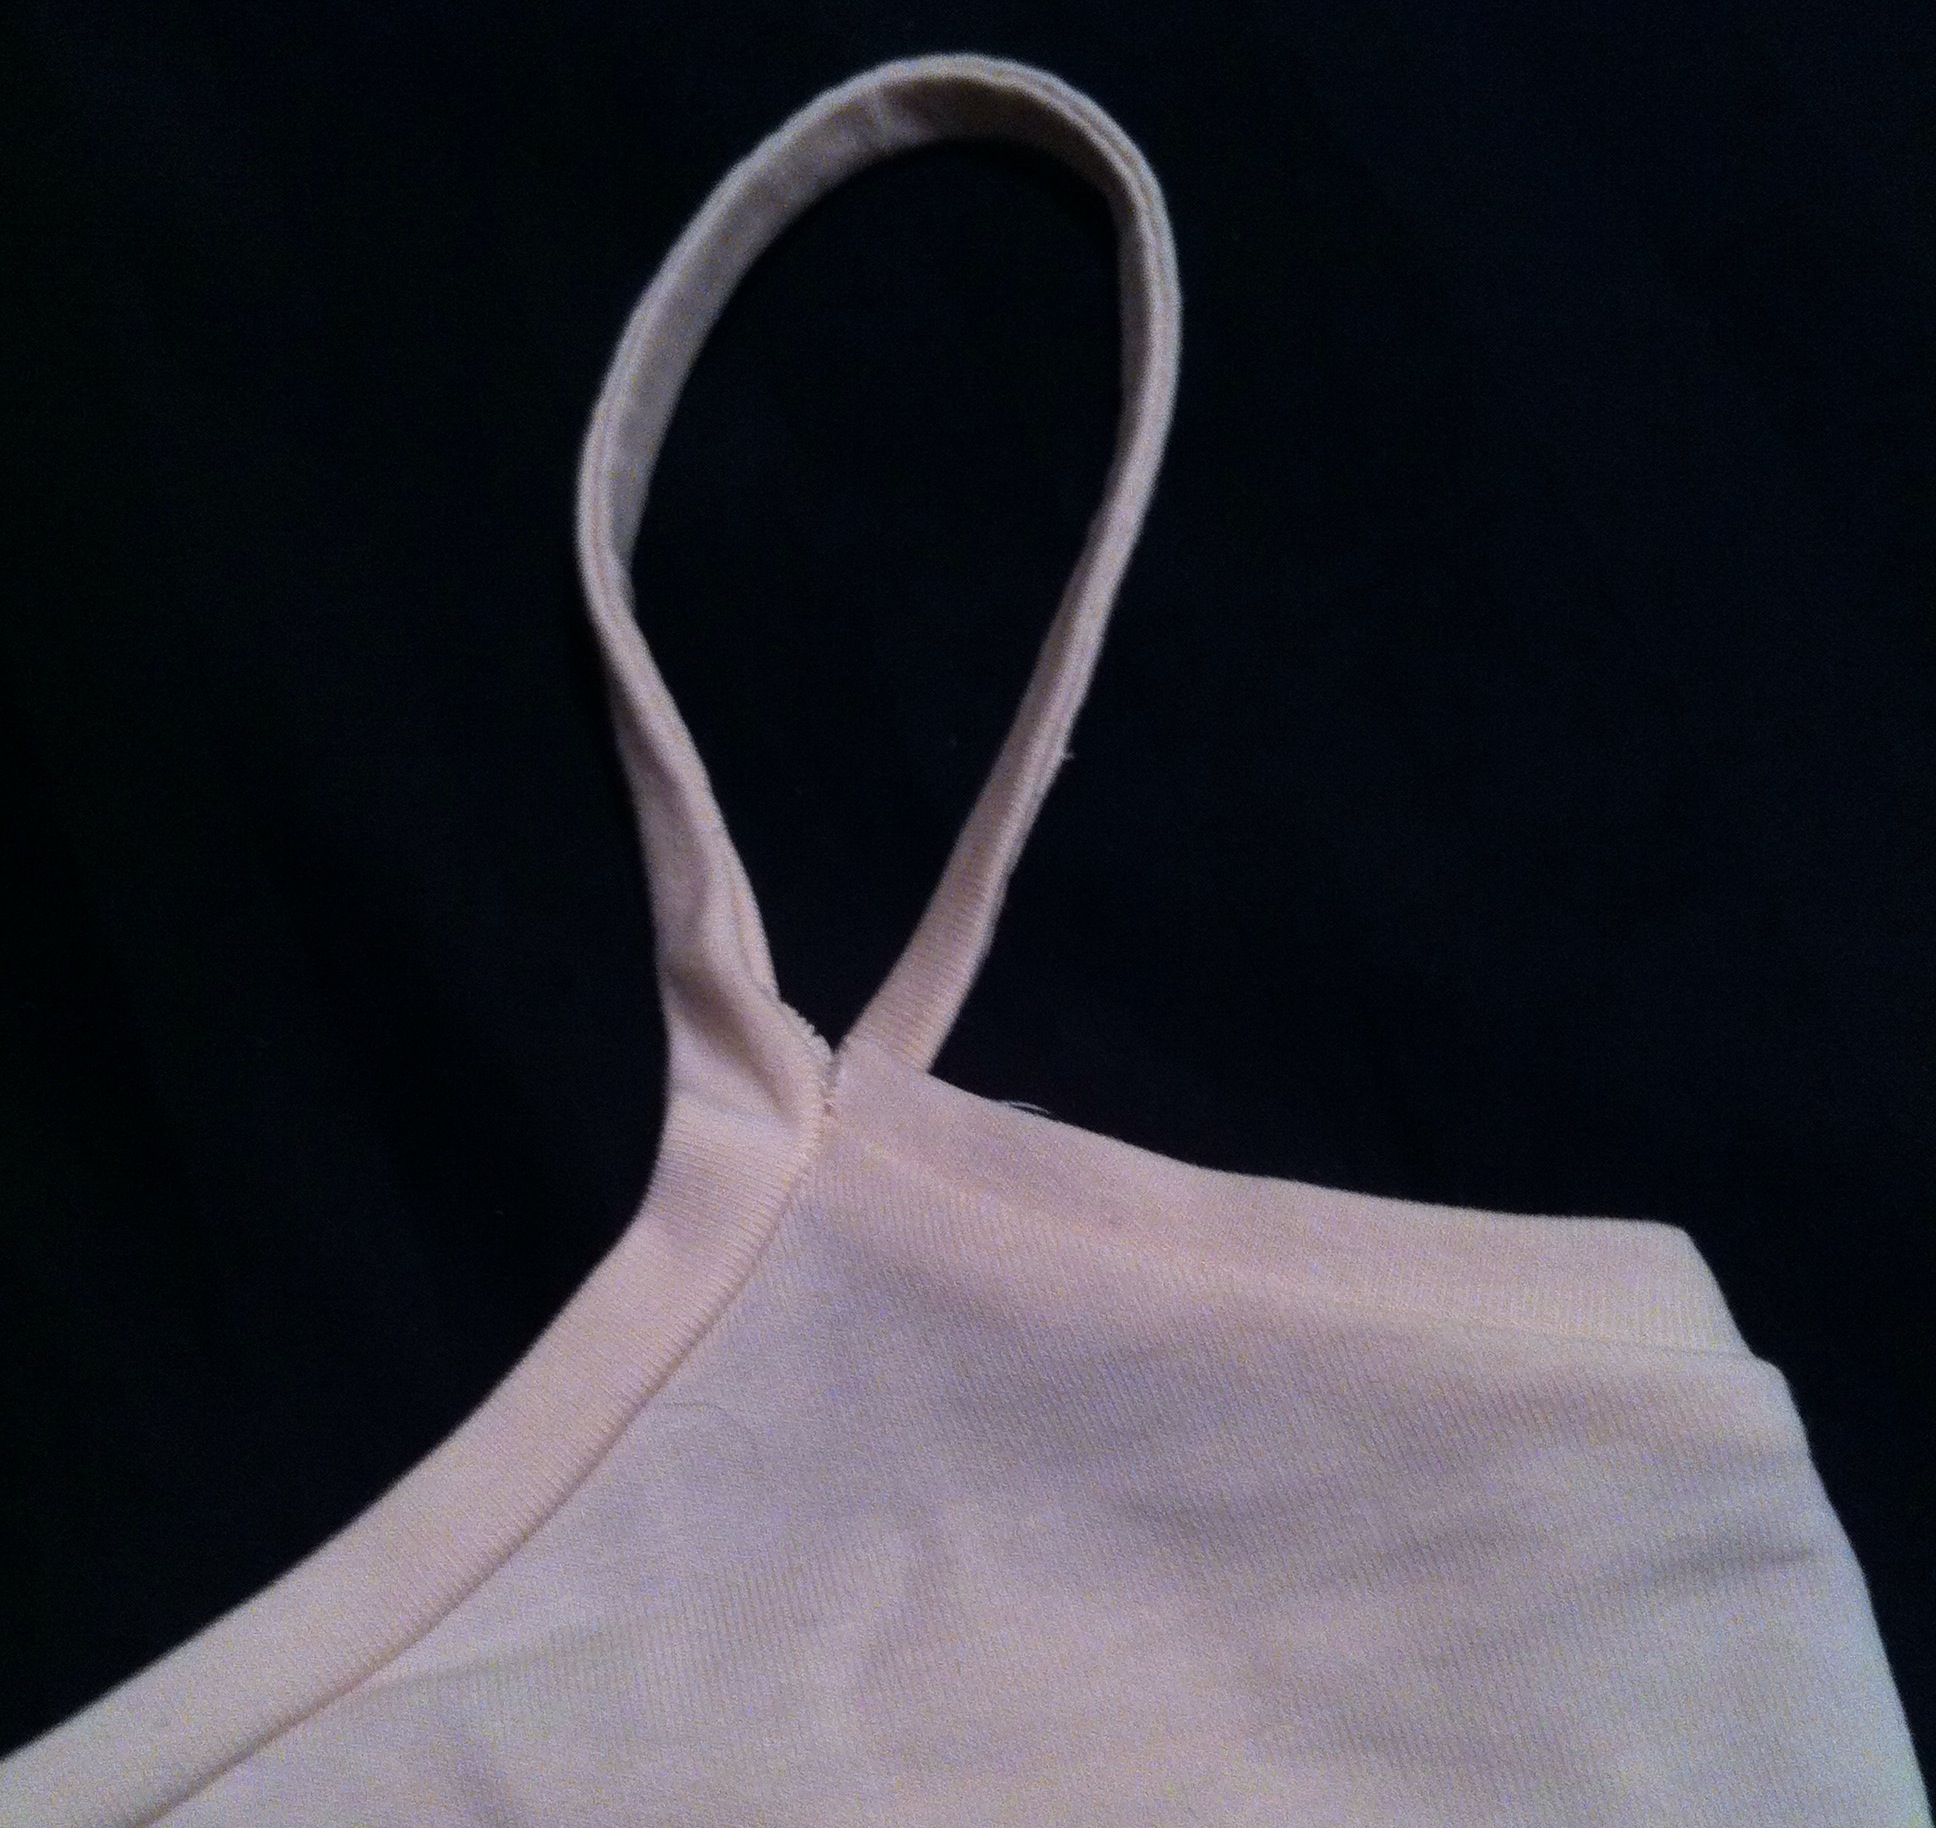
I like Gertie’s option for using lace for the front of the straps (though I wouldn’t use a stretch lace, and I’m not sure this is specified, and the rest of the lace in the pattern has to be stretch), but I have been lusting after this lingerie elastic since it came in to my local Fabricland last fall sometime. You can just about see, in the photo above, the cool shiny/not shiny designs on it. I like. And clear plastic sliders and rings, because that’s really all Fabricland has. Silver would’ve been perfect.

20140331-205333.jpg


Figuring out how to thread a slider for an adjustable strap always takes me a few tries and a lot of looking at an existing bra for reference. I started by sewing the rings on the back (opposite of how Gertie’s instructions have you do them, solely because I didn’t have the ornamental separate front portion of my strap.) But, I managed to get them on and the fancy side facing out. Also, starting at the back makes it much easier to get the strap length right when fitting on yourself. Although that’s not nearly as important for adjustable straps like these, anyway. I sewed my straps in two places, at the top of the lace and where the lace joins the main fabric.

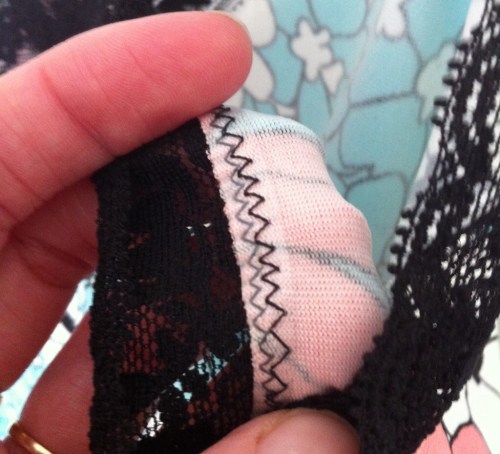
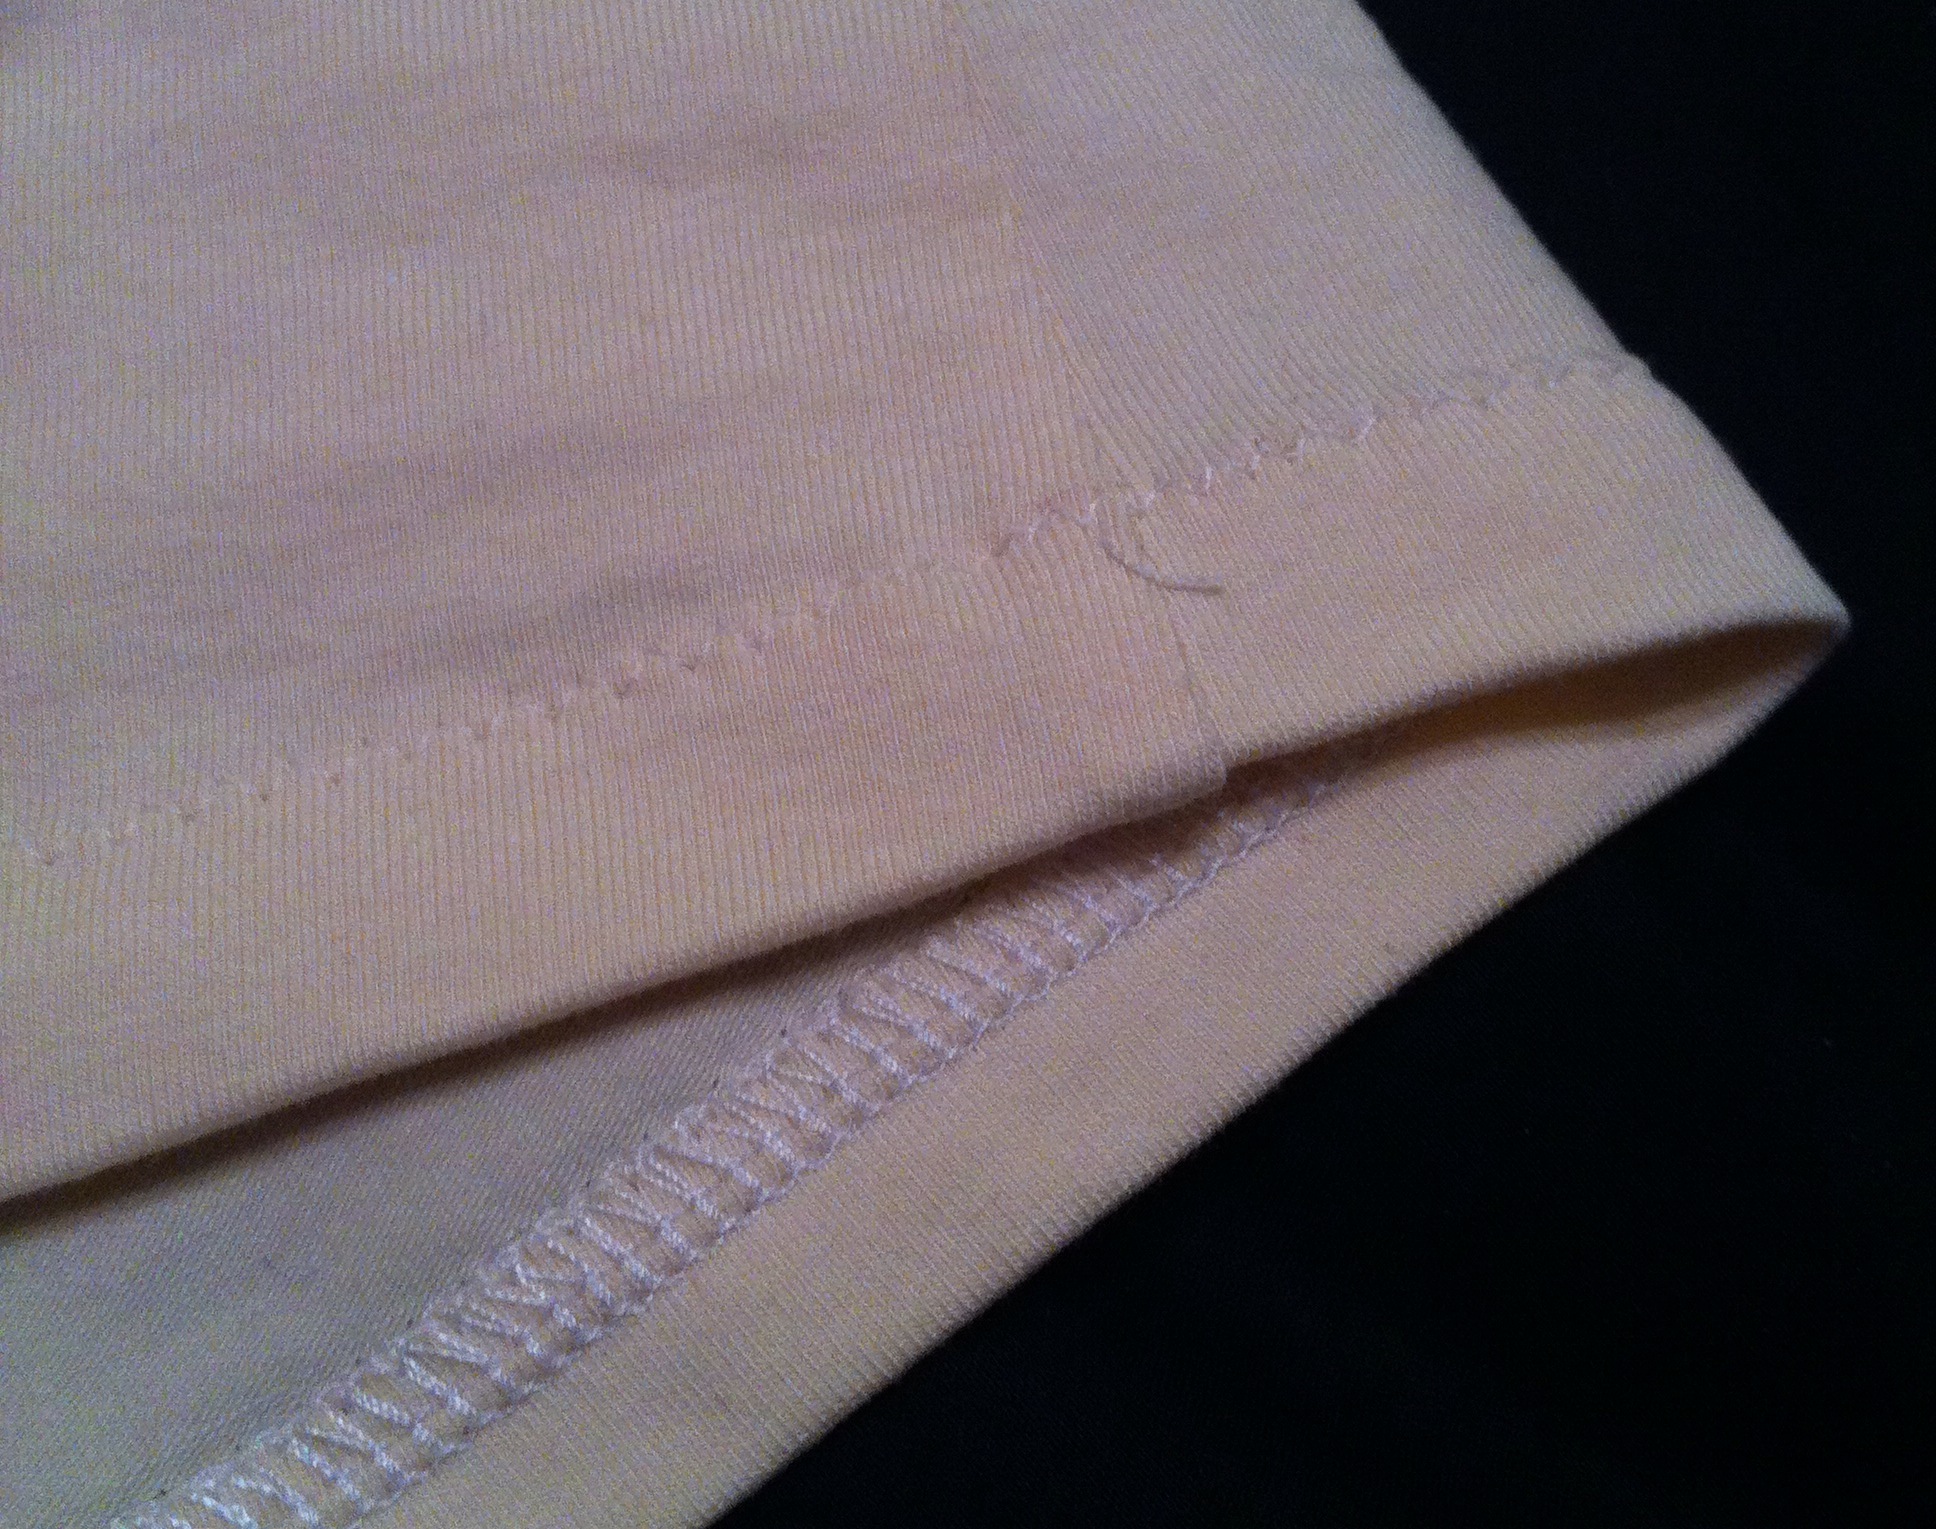
I did the vast majority of the construction (everything but the side-seams) on my regular sewing machine using a zig-zag. The only thing I don’t like is the black zig on the white fabric on the inside—kinda highlights every little inconsistency in stretching, stitch-speed, and trimming. I considered using a white bobbin thread, but that might have shown on the outside unless I fiddled with the tension, in which case the black would still have shown on the inside. So I am sucking up the black. I won’t give a flying anything once I’m wearing it.


20140331-205316.jpg

Fortunately, the way the pattern is designed lets you swap in pretty much whatever width of lace you like, because you apply the lace then trim away the fabric behind. I had to get more of my “narrow” lace (because that was working much better for most of the pattern), but I was still able to use the wider lace in a couple of places—under the bust and along the hem. I will note—there are a lot of different seam allowances in this pattern—none, 1/4″, 5/8,” and I think maybe a 3/8″ as well. I forgot to double-check and sewed my front cup pieces together with a 1/4″ seam allowance that should’ve been 5/8″. So my top front was too wide for my bottom front. Not figuring out what was going on until after, I just eased this in and went with it (which is easy with such a stretchy fabric), but it means my straps and darts fall just a little wider than they should. Not a big deal for me, but if you had narrow or sloping shoulders I bet it would not be great.
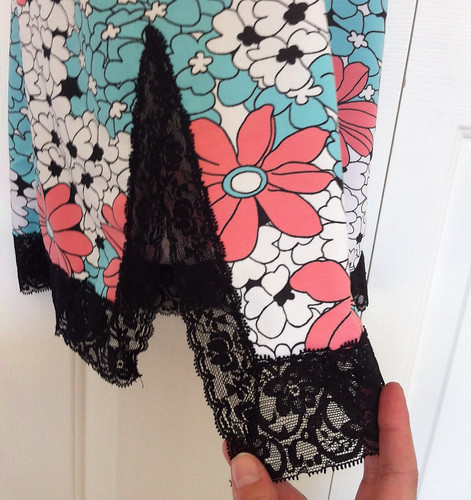
Lace finishing

I had a lot of fun piecing the lace for this. It’s very basic. Overlap the lace in the shape you want. Zig-zag it down. Trim off the bits you don’t want on either side. (Optional: follow the pattern of the lace so your zig-zag almost disappears).

I didn’t do much to tweak the pattern, other than my reckless use of inappropriate lace. I made a slight shortening adjustment to the length between underbust and waist. I didn’t even attempt a swayback alteration on the back (it would essentially have ended up being a wedge taken off the top of the back piece anyway). I did grade out to a size 14 for the back skirt, because I often find the side-seams trend to the back for me (this is another side-effect of swayback, more than the actual size of my butt), and this did help a lot with the problem. To the extent that it is a problem, anyway.

Slip: back view, with lace.

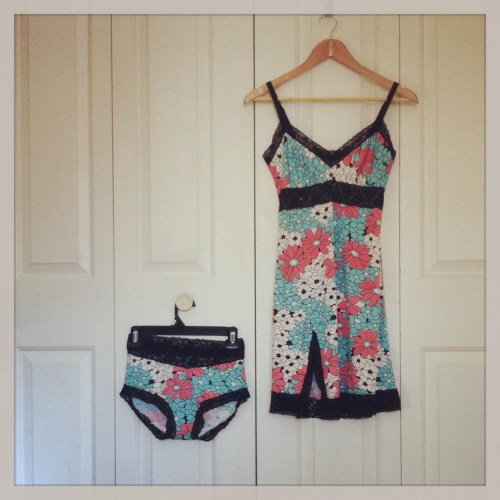
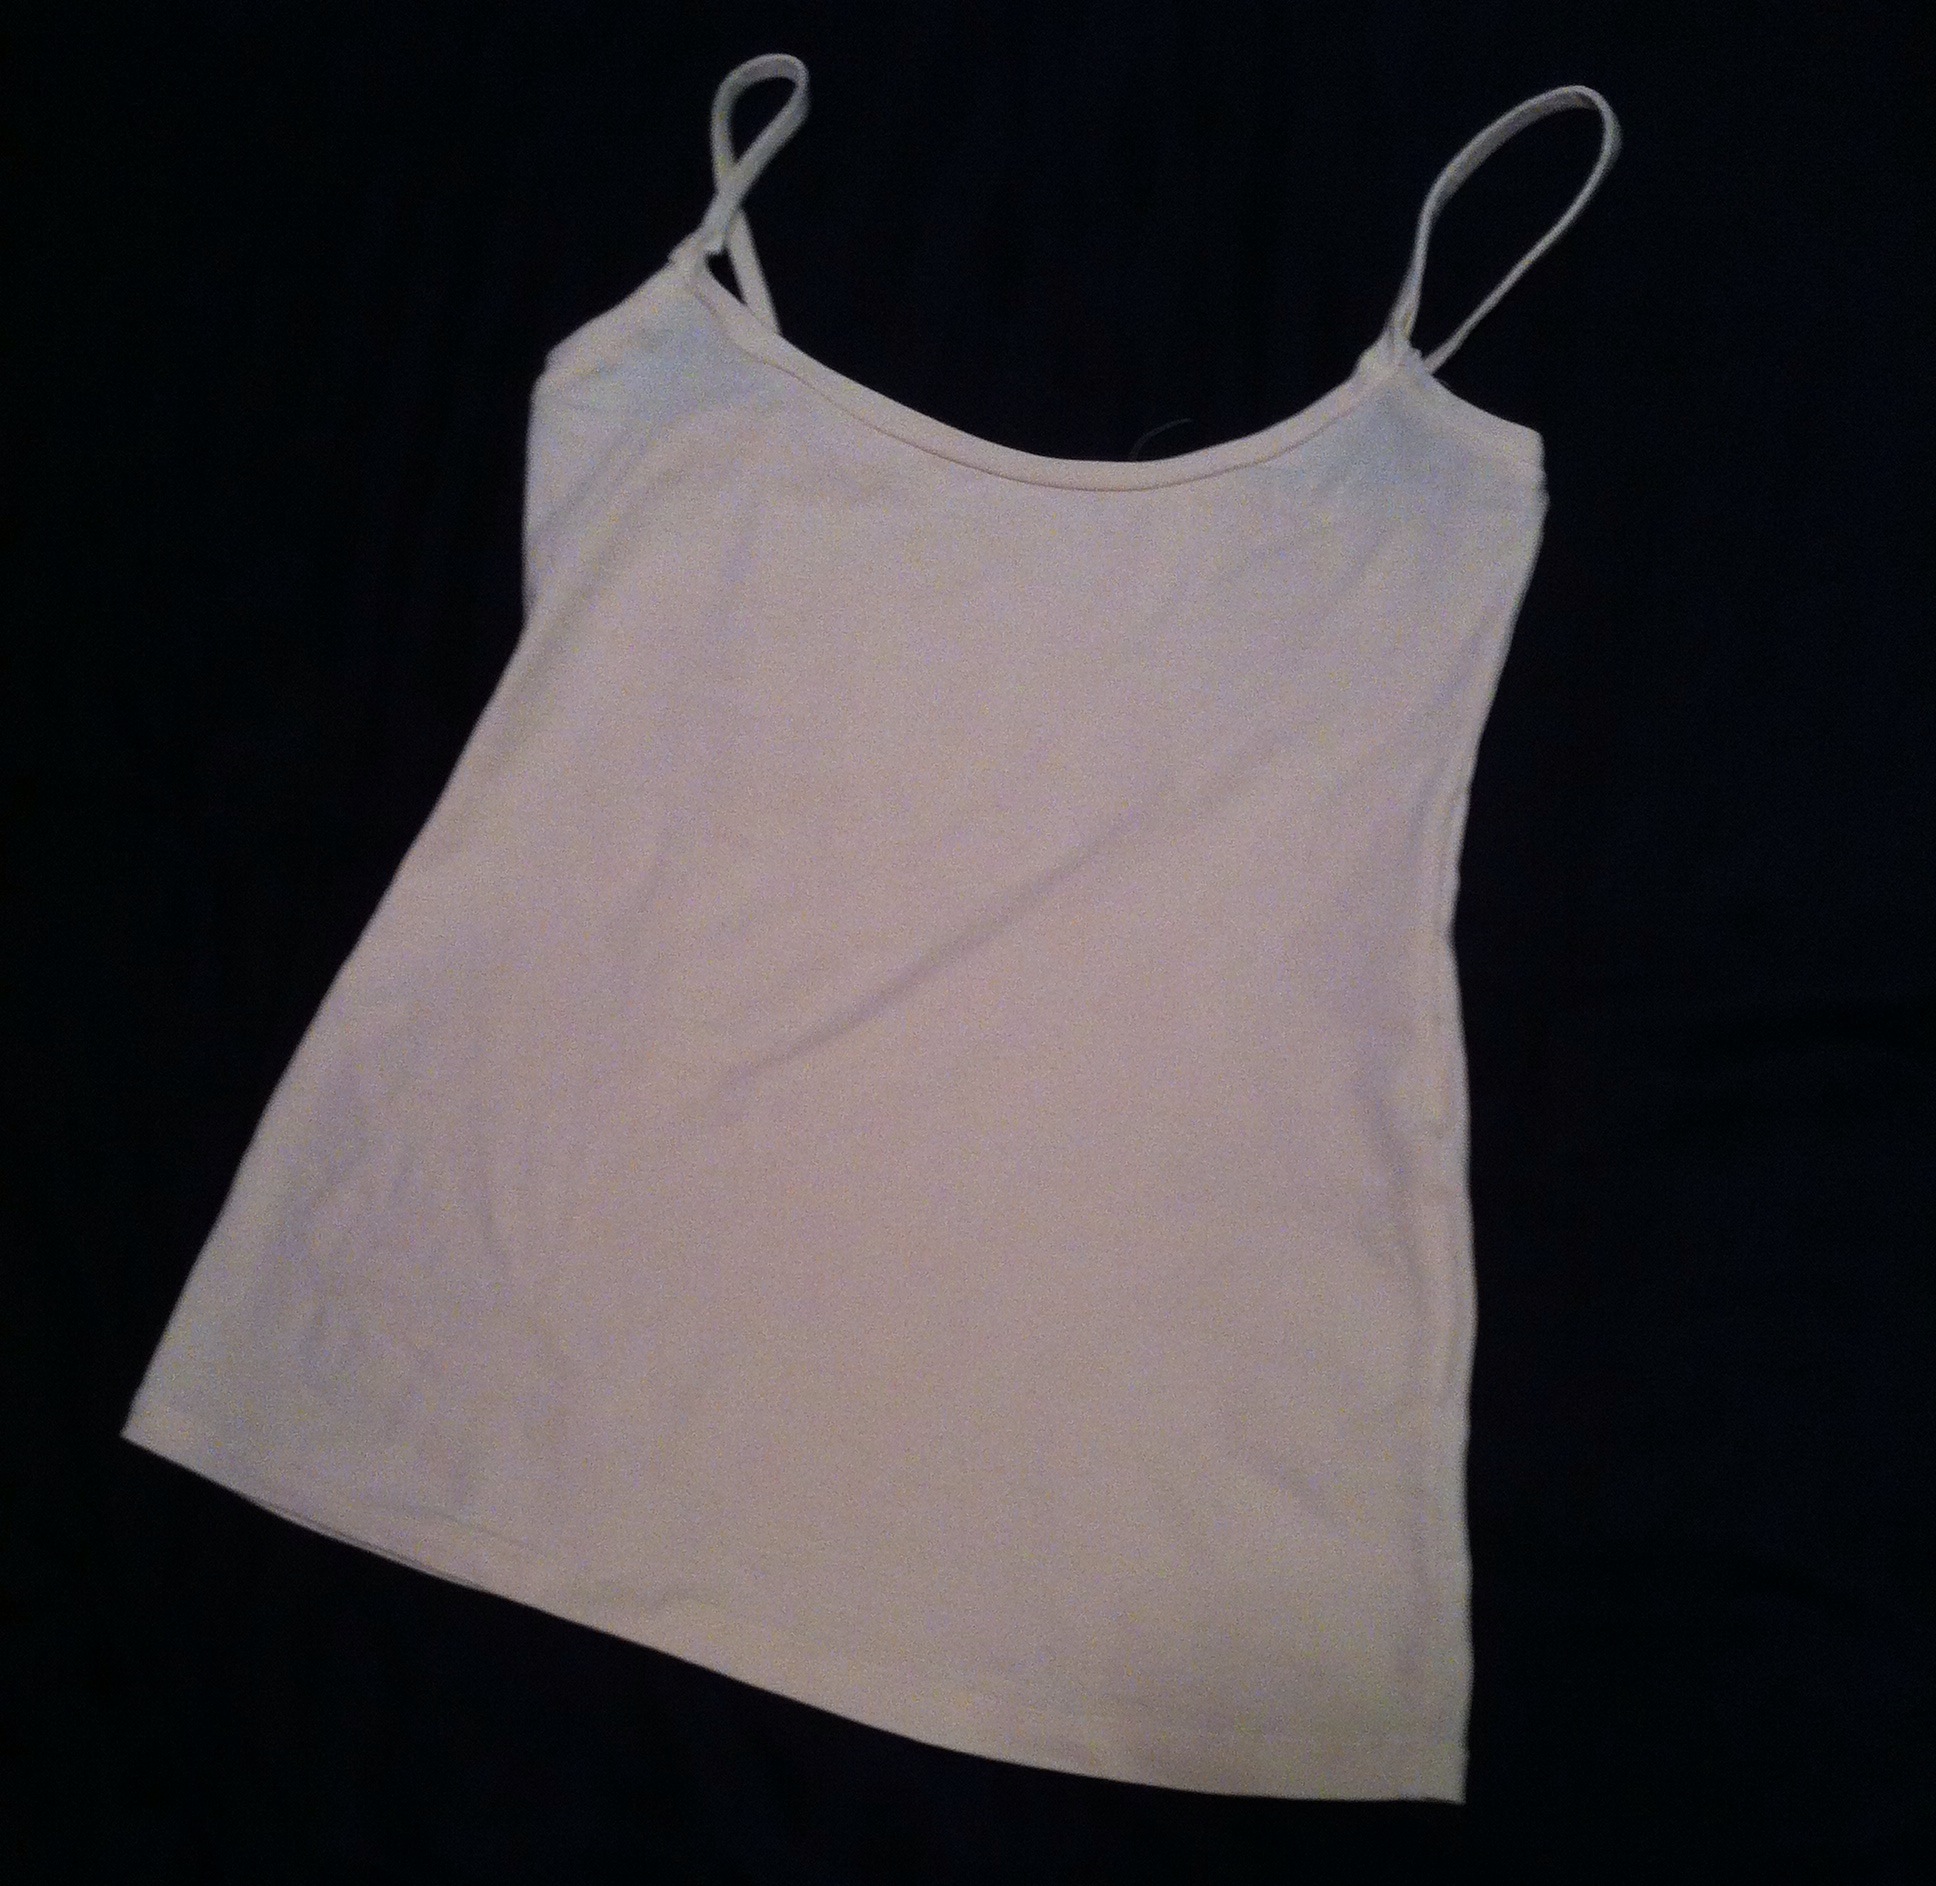
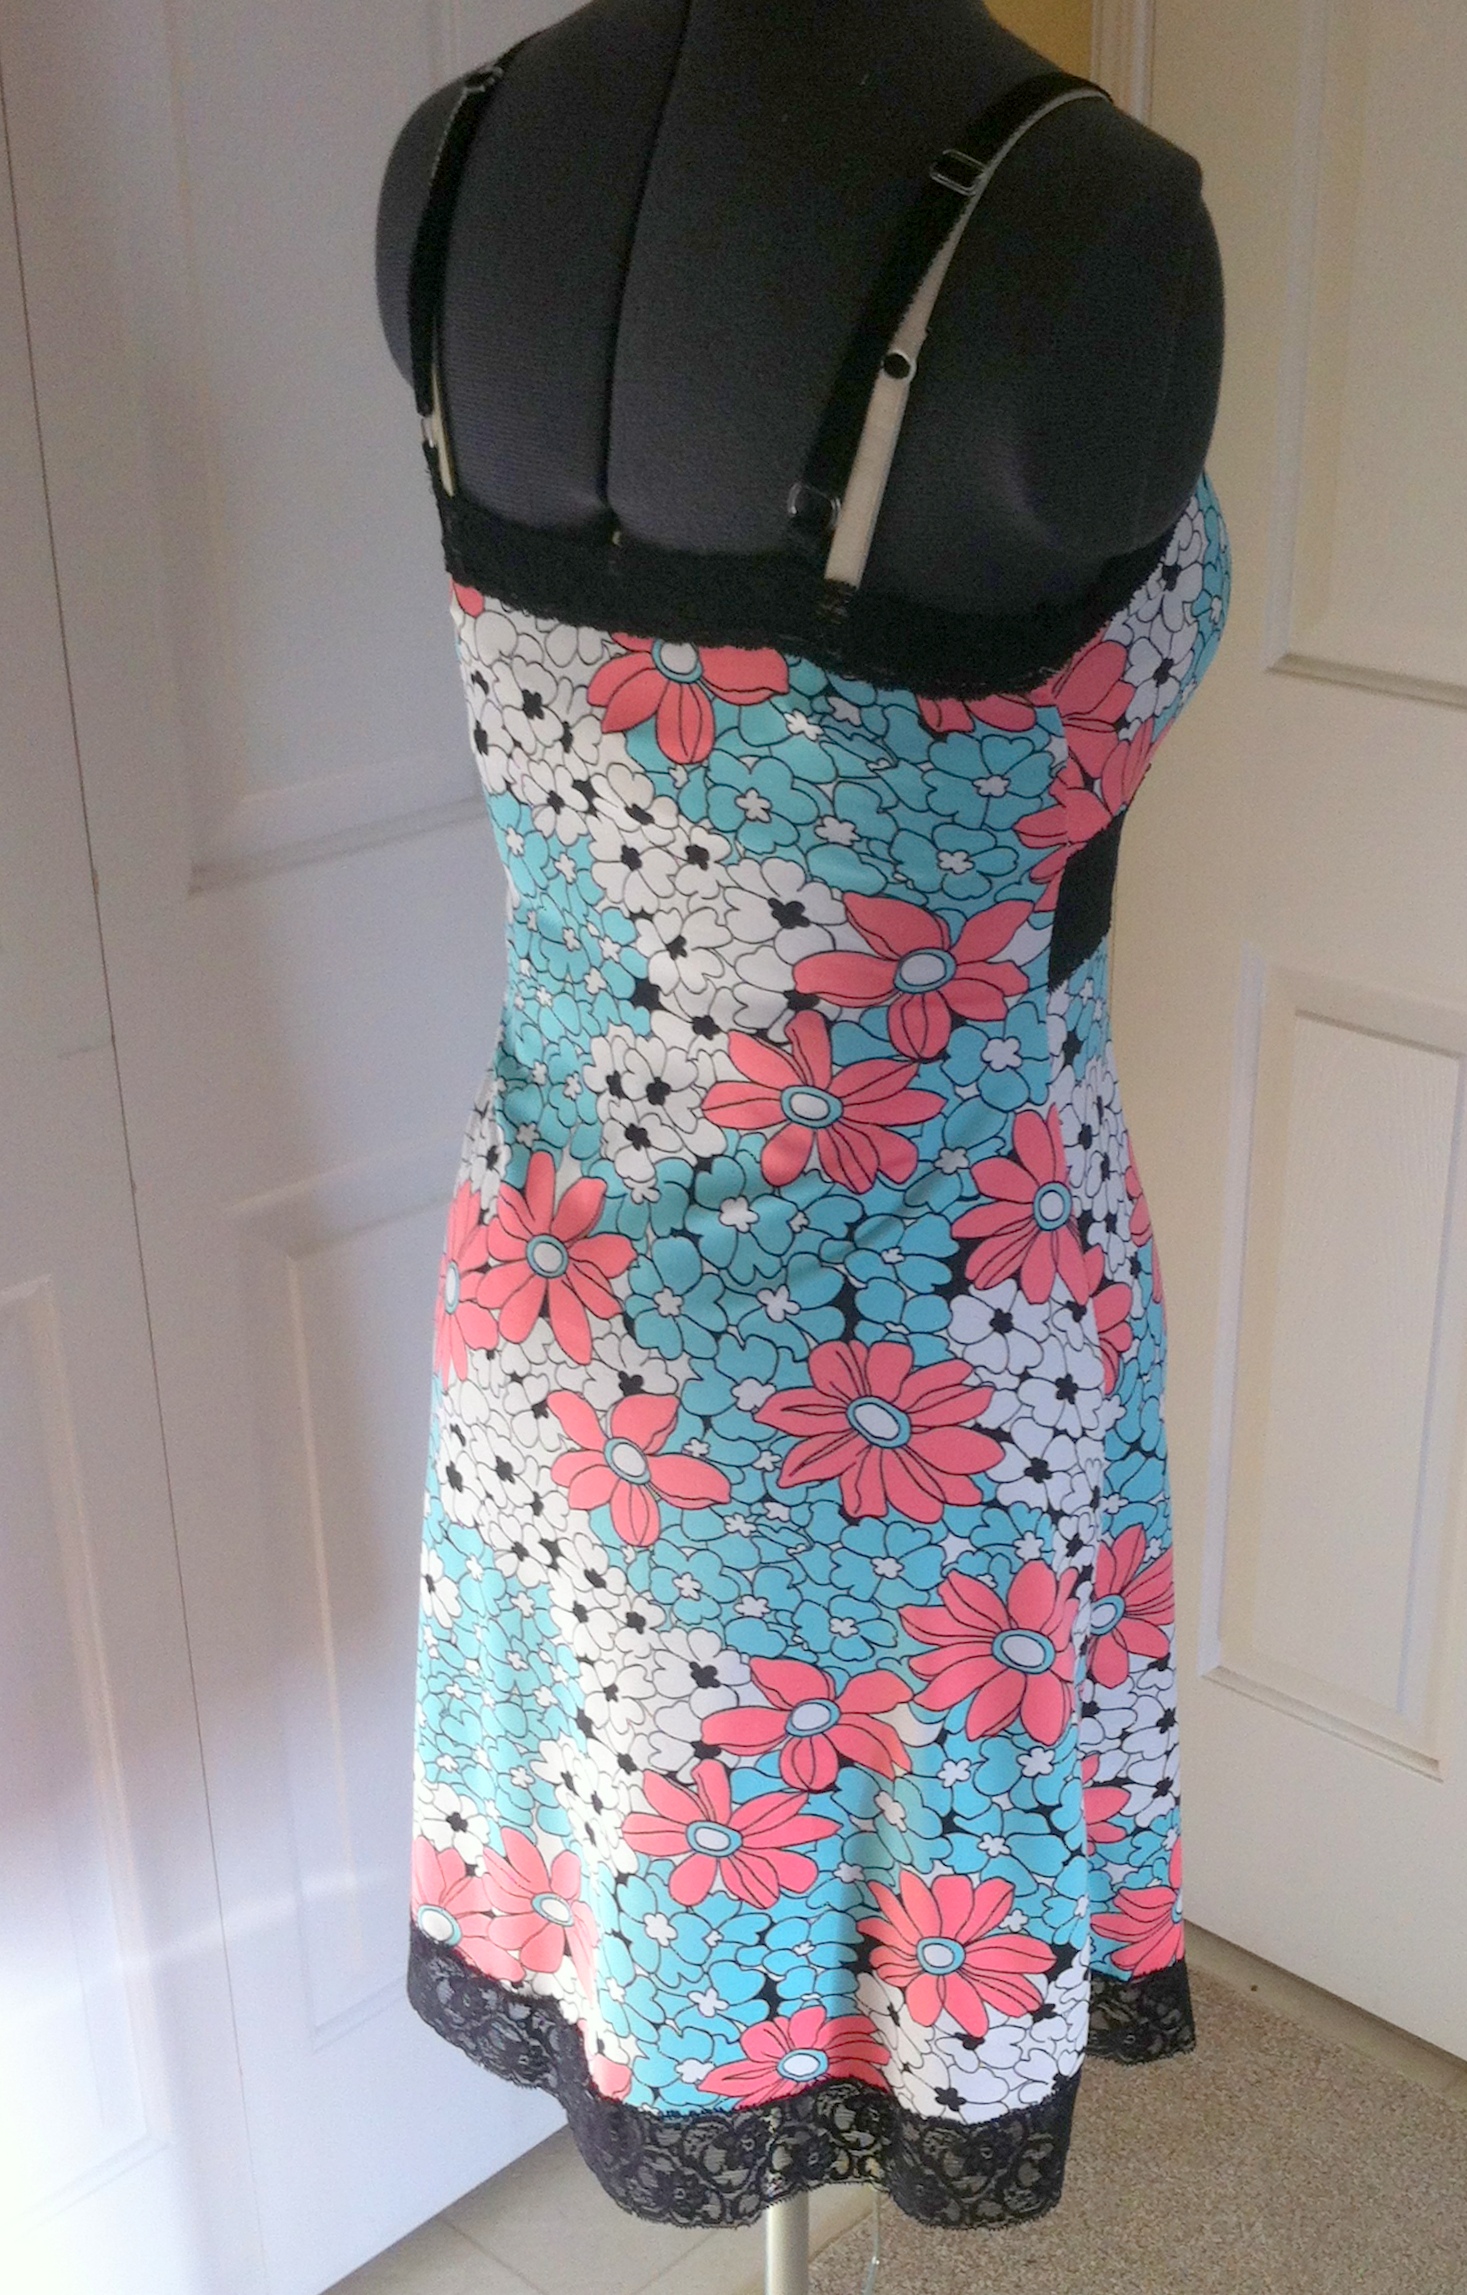
Slip: back view, with lace. If you wanted to continue the lace panel on the back, you could just mark where the front lace would match up with it, sew the lace on top, and trim away the slip fabric behind it.

I really did want to add lace across the upper back, however. As drafted the pattern is kinda coffin-clothes, with all the lace (except at the hem) on the front. I just  removed the seam-allowance from the top of the back piece, placed and zig-zagged down the lace, and removed the fabric from behind. Now, stretch-lace does not make the sturdiest of finishes, as we’ve discussed before, which I’m sure is why Gertie didn’t put it all across the back. For a modicum of extra elasticity, I added some clear elastic right at the join of the lace to the back piece. I also chose to live dangerously and skip the really-skinny elastic supporting the edge of the stretch lace in the front. Probably not a good idea for the longevity of my slip, but I can always add it in later, when I learn the error of my ways. So I tell myself.


20140331-205400.jpg


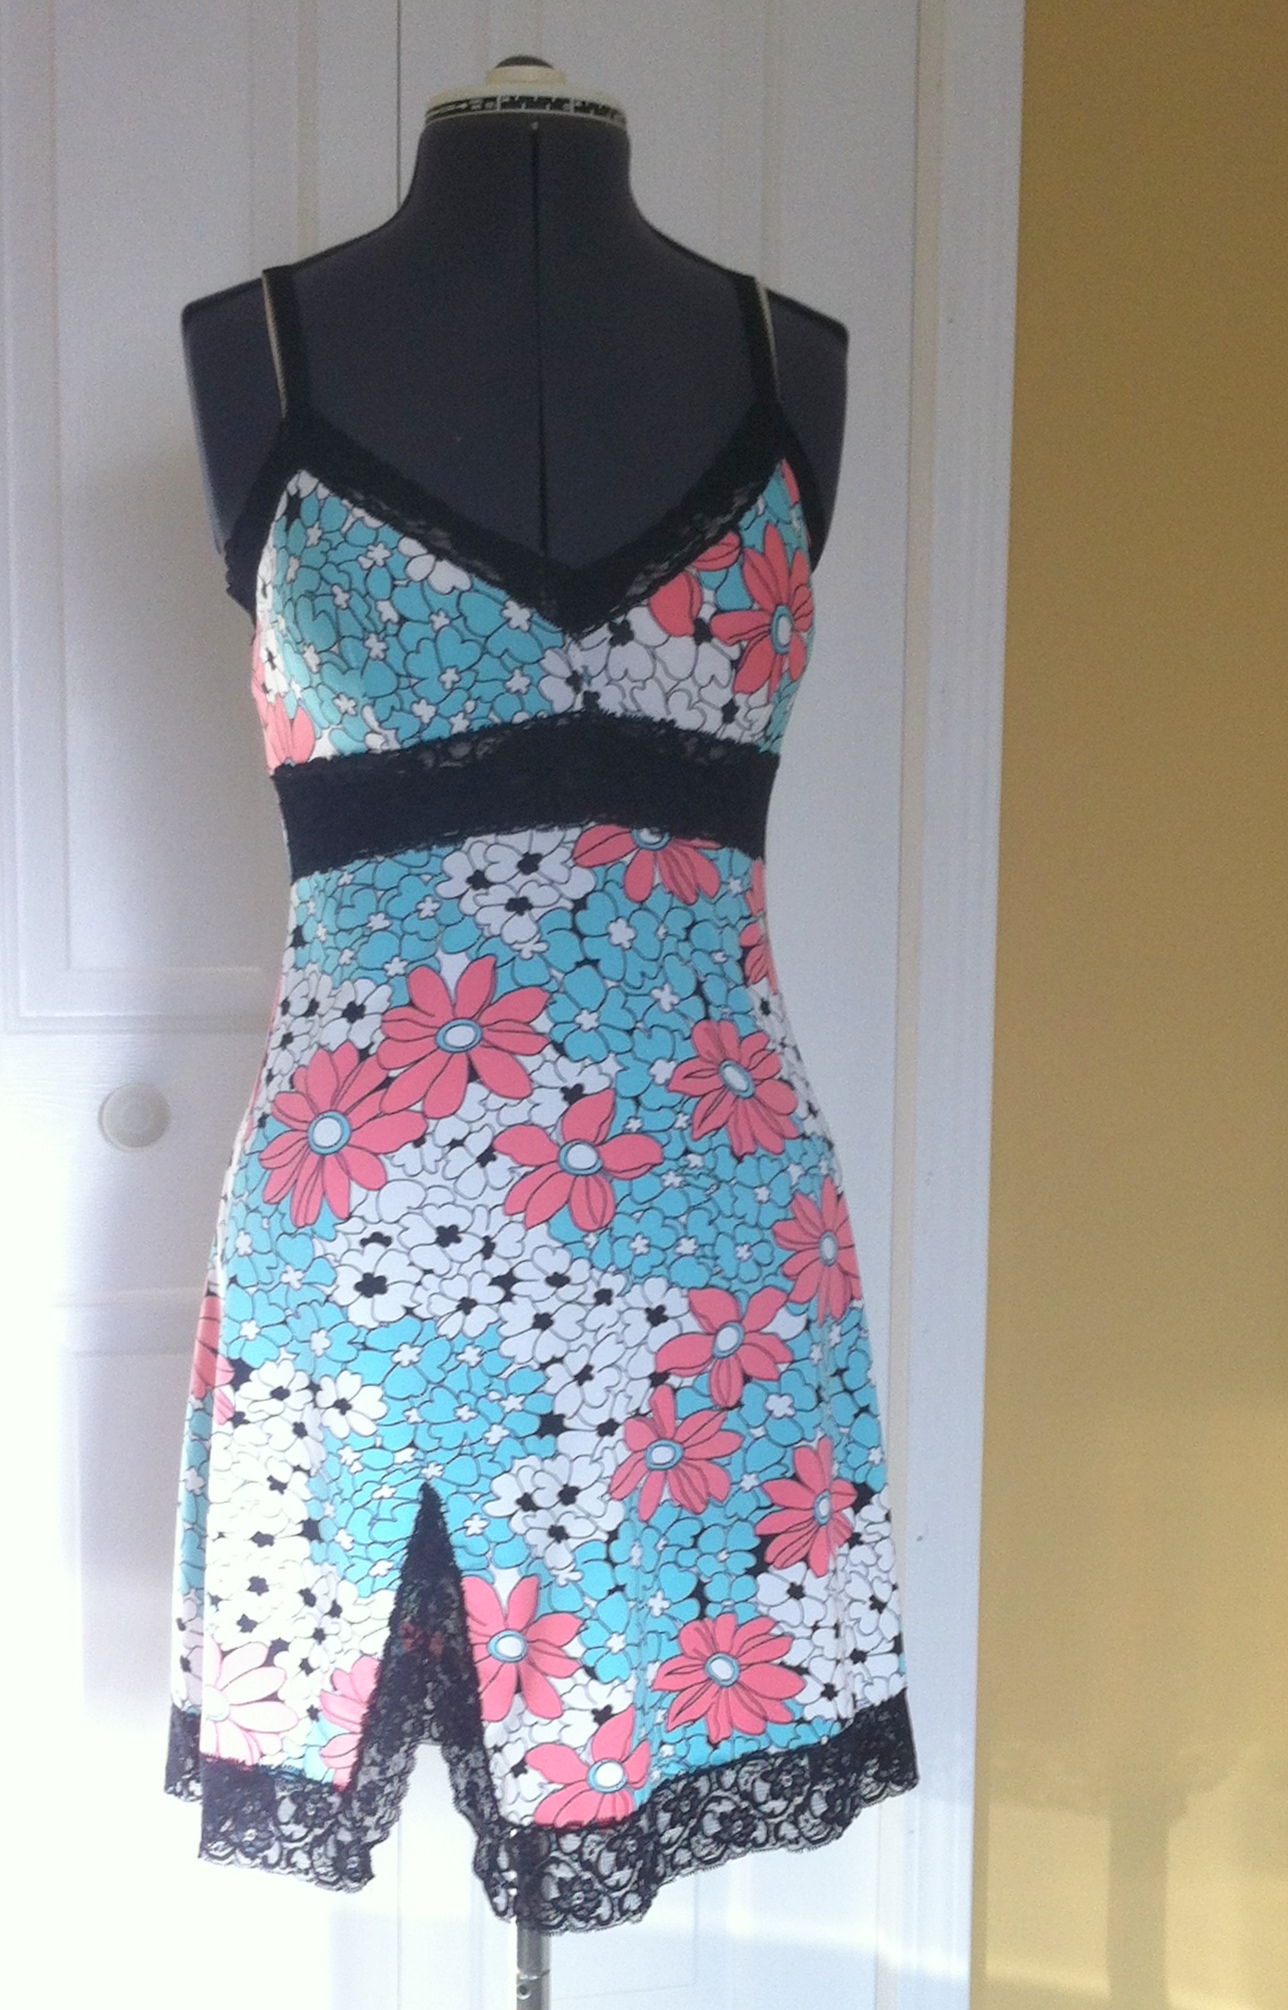
So, can I just say, I love this pattern just as much as I thought I would have? In particular, it’s drafted with the perfect amount of negative ease! (For my fabric, anyway.) As I said, I made my usual size 12, and I put it on, fully expecting to have to take in the side-seams (as one normally does with Big 4 knit patterns). NOPE! PERFECT! Snug through bust, easy skimming through the hips. YAAAAY!

It looks better on me

It looks better on me

And if I do say so myself, it looks considerably cuter on me than on my dress-form. The only problem is, it may be too cute to put clothes over top of. In which case I suppose I’ve made myself a new nightie, not a slip. I guess I might just have to make another…

23 Comments

Filed under Sewing

A ruby in blue

Creek Springtime

I didn’t get a lot of time to sew this past weekend. We spent much of the weekend at the creek, checking out the changes winter has wrought (not to mention the changes between Saturday and Sunday!). But I did, in snatches here and there, get started on my (long awaited) Ruby Slip.

Lace

After searching high or low, I was singularly disappointed in the lace available to me. (I thought this would probably be the case, but I hadn’t done a truly intensive lace-hunt before, so I was hoping that perhaps I had just overlooked some fabulous finds.)

Cute Slip Pose

Apparently, not so. For the record, I carried a bolt of silk charmeuse around Fabricland for some time, looking for lace worthy of it, but how can you possibly sew a silk & lace slip when the only lace available is scratchy, crappy polyester?*

So, in the end, I went with some 4″ wide stretch lace from this thrift store lace bundle, (this pattern is not recommended for stretch lace, nor for such narrow lace) and for the skirt, decided to sacrifice some of a beautifully-coloured (if not so beautiful-feeling) polyester crepe, snared at a thrift store back home last spring. It’s probably not any good for an actual slip, but, well, it looks nice and has the right drape.

Em. So, this is my first time sewing with lace (other than as a trim), and my first time sewing with crepe, and my first time sewing something cut on the bias.

I’ll start with the sewing bits. As I mentioned, my lace was a wee bit too narrow. Fortunately, Sherry on the sewalong linked to this post on piecing your lace if it’s just slightly too narrow. Which is what I did. It’s a bit trickier on stretch lace, which wants to, well, stretch out on you, but by backing everything with tissue-paper (my new favourite trick; just like what Steph does in this post) I got it to work quite well, especially on the White. Unfortunately, something went kfzzzt in the foot-pedal halfway through and I had to switch to my modern zig-zag machine, the Janome. Funny, the Janome has better stitches overall, but I really like how the White handles delicate (and stretchy) fabric with its adjustable presser-foot pressure and semi-drop-able feed dogs. As I understand it replacing foot pedals is dead easy, so I’m not panicking quite yet. For a thrift-store gamble that didn’t initially impress me, I’ve actually gotten quite attached to it, so I hope I can resurrect it without too much trouble.

ANYWAY, so I squeezed the bodice out, and while the join isn’t invisible, it’s subtle enough that I don’t even notice it any more (did you? it’s on the side-front bodice piece. 🙂 )

I had a hard time matching the notches on the skirt, although it’s hard to say if that has more to do with my sloppy cutting (I am better than I used to be, but that’s a relative improvement and I usually avoid slinky fabrics like the plague 😉 ) or with the weirdness of bias. The side-seams are a bit woobly, mostly where I narrowed the seams (at the top) and then tapered back to the original seam.

Fit photos.

I cut the size 8, which according to the sizing chart should’ve been a bit snug in the chest but spot-on in the hips; I figured my ill-advised stretch lace would probably make up for the difference. As it turns out, it’s snug/fine in the bust, and a bit too tight in the hips. If there is a next time, I will cut a 10. I made a small swayback adjustment (shaved of 1cm from the CB of the bodice, and 1 cm from the CB of the skirt, curving to nothing at the side-seams), but there’s still quite a bit of pooling/puddling above my bottom—which I think would be be fine if the skirt were wider. Look at that backwards-slanting side-seam.  And this is after I released the side-seams as much as I could…

Random Creek Shot, for interest.

The appropriate thing to do, of course, would be to unpick it all, and slice off and re-shape the top as I did for this dress last summer. (I’m not too fussy about the length.) I’m not sure if I have the oomph, though as the seams are already serged and topstitched. We’ll see where my mojo is at in a day or two, because I am really not liking the back view. I’m glad I took the modeled photos, though (even if they required photoshop de-niplifying) because it really brings home the back-tightness issue. And now I can see that the  front of the skirt is definitely hanging lower than the back, something that wasn’t obvious when it was hanging on my dressform. Yes, the dubious duct-tape double got some use, although again, her usefulness appears to have been limited. I think in this case because the direction she hangs naturally isn’t quite the direction I stand in. I think the width in the front is fine, it’s just the back which is too narrow.

Anyway, that was a lot more than I was expecting to write about something that’s not even finished yet (and really requires some re-working). At least the bodice (which I had sort of thought would be the worrisome bit) is pretty much perfect.

So, fix the damn skirt, Tanit, and then you can obsess over bows and other pretty finishing details…

And, just because she’s wearing jeans I made her, I’ll leave you with a picture of Tyo re-arranging rocks at the creek.

Rock work

*Disclaimer: there is, in fact, a very high-end bridal fabrics store in town, which I have not scoped out. I have no doubt they have all the lace and silks I could possibly want. However, they are a) located downtown, where I never go, and b) would no doubt break the bank, so would probably not be the best choice for a first trial of the pattern anyway.

40 Comments

Filed under Sewing

Lace?!?

Lace!

It’s probably Sherry’s fault, posting that Ruby Slip pattern and then hosting the sewalong with all those yummy tips on sewing with lace. Filling my nightime fantasies with dreams of guipure and silk habotai…

Yeah, let’s go with that.

It might also be that pickings at my local thrift store have been slim lately. (Except for sewing machines. There’s been lots of those. But I binged out over Christmas. It’s going to have to be something REALLY special before I bring home another one. I promise.) Maybe I’m desperate.

Whatever the reason, last time I stopped by, they had bags of lace. Bags and bags of it. I resisted. I only brought home two.

I have kind of a love-hate relationship with lace. Similar to how I feel about 70s fashions, actually. The best is heavenly, ringing bells for elegance, texture, luxury—all kinds of things I love.

But a lot of it, especially of what’s in my price range, is, quite frankly, meh. And some of it’s truly, abhorrently awful.

And I have to say, a fair bit of this haul is in the latter two categories.

Wide lace

There’s one piece that’s quite wide. (Maybe wide enough that I could do a practice Ruby with just some piecing? Or three. There’s like four metres of it.) Unfortunately, it’s nasty-70s/80s-polyester-awful, and doesn’t even have a nice pattern, either. The next widest stuff is stretch lace. Sherry recommends against that for the Ruby (even if it were wide enough), but maybe there’s cheeky panty possibilities? At any rate, it’s quite pretty. (I tried to take a closeup but it didn’t work out and I’m too lazy to re-take.)

There’s another, 3″ wide stretch lace that I could see using as a band at the hem of a T-shirt or something.

My Fave

Strictly for looks, this one’s my favourite. I love the delicacy and the little silvery threads. I have absolutely no idea what I’d do with it.

Bit of pink

This one with the bit of pink is also pretty neat. And there’s quite a lot. What for? What for?

Bits

And then, there’s the bits. Why did anyone even save these? (Oh yeah, they’re a scrap hoarder like me. :P)

And yet…

And yet…

Ok, I might have an idea. It’s twee. Possibly cavity-inducing.

Idea. Also poorly photographed. /sigh

Good thing I have a ready supply of little girls. Although I’m not even going to try this until I have at least one more good pair for me, dammit.

Maybe lace on the pockets, too?

48 Comments

Filed under Sewing

Something small

Lace panel from thrift store

In between unpicking the skirt from the halter sundress and procrastinating, I did actually (almost) finish one rather small piece. You may (or may not) recall a large piece (several metres) of starched white cotton I found at the thrift store back in June. It was the kind of lovely, plain, basic fabric you rarely find at the thrift store, so I would’ve picked it up just for that, but one end had also been worked with the most amazing panel of handmade lace I’ve ever seen.

Now, admittedly I don’t know much about lace-making. I have no idea what techniques are employed, except that it looks to have been done by hand, with gorgeous patience and precision. I assume this is some kind of heirloom stitching taken to an astounding extreme. It’s one of those pieces that makes you wonder about the person who had the fabric before you, though. What kind of piece was this worked for? Was it meant to be the yoke of a shirt? Part of a Christening gown or something? Why would someone put all that work into making the lace, and then never make the final garment? (The shape and positioning on the fabric suggests garment to me, but I suppose I don’t really know even that).

Anyway, obviously it needed to become something that would showcase the beautiful lace. After some hemming and hawing, I made my decision, and cut out a second version of my sundress bodice, with the lace in the centre front panel. I toyed with the idea of putting a coloured fabric behind, to show through at the lace, but the white cotton was too sheer to hide it, so I just lined with another layer of the same fabric.

The top. Unfortunately this was the only shot where the light didn't totally wash out the lace.

It still needs straps. I had some cut out and pressed and ready to go, but somewhere between bringing it upstairs to do the handstitching I mislaid them. It actually stays up remarkably well, with that large shirred back, but I’ll feel much happier with straps anyway. I used the facing piece to make the little “collar” top, which I really love, although since I forgot to add a seam-allowance to the CF, it wound up not reaching quite to the side-seams. I hand-stitched the bottom of the bodice front together for a nice finish that doesn’t show on the front. I maybe should’ve put some interfacing strips along the V-point in the front, as it’s a bit wavy and floppy, but it’s not awful.

It looks good with shorts, but wouldn’t it be perfect with a full, puffy skirt? 🙂

25 Comments

Filed under Sewing

Confection

Lacy dress!

I do truly, truly love how quick knits can be to sew up (especially when I’m floundering for a blog post 😉 ). I made up the pattern for this after supper last night and had the entire thing cut out and stitched up before bedtime. Yay!

Last week when I asked about ideas for my lace, there were lots and lots of very good thoughts, including another one of my 70s maxi-dresses (which would’ve been divine) or a top-and-skirt combo (and some links to some really neat skirts, too…) but the t-shirt dress, a la Carolyn, seemed to win out overall, and, most importantly, to me.

So I made one.

Pattern adjustments

Patty made an interesting point on her awesome skirt post that self-made patterns can be frustrating to read about since you can’t go out, pick up the pattern, and make it yourself. I get what she’s saying—but not enough to give up making up my own patterns, which is SO MUCH FUN (regardless whether I know what I’m doing or not.) So as a compromise, I figure I’ll mention a bit more about what exact changes to my basic pattern I made. (This is also good because then I’ll remember them for next time when I lose the pattern pieces)

As with the great cowl adventure, this all began with my trusty “knit top sloper”, the pattern formerly known as Lydia. The changes this time were minimal—I made a square neckline (just by squaring off the corner of my usual scoop-neck) and lengthened the bottom; I just followed the angle of the hip of the sloper on down and out, which created a slightly A-line skirt. For length, I picked 20″ below the waist (I have a waist line marked on the sloper for just such purposes, although I was too lazy to include it in the diagram, sorry) as a nice, above-the-knee-but-not-dangerously-short length. (I feel like I should add that I have nothing against micro-minis per se, it’s just that sad experience has taught me that if a skirt is short enough that I spend a considerable amount of time worrying about who I’m flashing while I’m wearing it, I will end up just not wearing it. Sad but true. My micro-mini skorts, on the other hand, get worn to death)

Lacy Dress---Side

For the sleeve, I eyeballed a “nice, just above-elbow” length, which turned out to be about 18cm below the armpit. I added quarter-inch seam allowances, and proceeded to (ulp!) cut my fabric.

I think it’s worth mentioning a couple of things about the fabric. You all met the lace, a gorgeous bargain-bin find, last week, of course. What I didn’t mention is that one of the reasons I hadn’t done anything with it yet (other than the weather) was that I didn’t have the right underlay. So last week, aside from juggling children, schoolwork, and ER visits (no lasting harm done), one of my goals was to acquire said fabric. It had to be smooth, stretchy, not to heavy, and set of my lace. Syo and I wandered high and low through Fabricland draping my lace over every solid-coloured knit. We started in the bargain centre, but of course what I settled on in the end was a much pricier cotton-lycra blend, setting me back roughly $10/m. Not humongously expensive (especially compared to the bamboo knits or some of the other nice athletic solids), but considering this is going underneath a $2.50/m fabric… yeah. Well. Anyway, I bit the bullet, and I have to say I love the fabric—its feel, stretch, recovery—more than enough to pay that much again. After much hemming and hawing, I picked a bright white, too, rather than an ivory or cream colour—I like how it brightens the overlying lace.

Lacy Dress---Front

So, I had both my fabrics. I cut the bodice front and back out of both, but the sleeves only out of the lace.

Now, stretch is always the wildcard when it comes to knits. Depending on the fabric, my knit sloper can produce garments that are either tent-like or alarmingly form-fitting. I wanted the lace dress to be form-skimming rather than sausage-skin-like, so I had checked its stretch, in a very rough and ready way, by marking a length of the fabric equivalent to the bodice front across the bust and then stretching this on me to see how snug it was. If it was too tight I was planning to add a bit of extra ease to the bodice, but it seemed all right—yay!

I did not perform said test with the underlay, choosing to hope that it would be, at least, no more droopy, and hopefully just a bit more snug.

For once, the sewing gods were not vengeful, and that seems to have been the case. In another interesting observation of knit/stretch, I meant to trim the underlay shorter (since you wouldn’t want it hanging out from beneath the scalloped edge) but totally forgot. Once assembled, however, the lace naturally stretched to an inch or more below the underlay bottom edge—perfect!

Lacy Dress---Back

Construction wise, I pondered a bit. I knew I wanted it attached at neckline, shoulders, and arms, but I figured I wanted the side-seams of the dress to move separately. This took a bit of mental gymnastics, and some fudging, as I basically followed my usual construction order (one shoulder, bind neckline, other shoulder, set sleeves flat, sew underarm and side-seams in one pass, except it was two passes this time.), but mostly has worked out.

Now, in fairness, all is not perfect. There are any number of oddly-pulled areas, around the hem, side-seams, and shoulders; my neckline didn’t come out perfectly symmetrical (boo!), the lace tends to droop in one spot, which I can relate directly to the ends of the fabric piece being more stretched out than the middle when I was cutting. For the most part I’m not going to sweat them until I wash the whole thing at least once. I was at a loss as to how to properly bind a square neckline in a knit (google mostly pulled up stuff featuring woven bias binding, not at all what I was looking for), and the V-neck methods I was hitting on all seemed to have a much wider band than I wanted. I did toy with trying to use the scalloped edge on the neckline, but the scallop seemed a little big and floppy. So in the end I just bound it with a strip of the lace and a bit of clear elastic. As I’ve been doing with my more floppy knits lately, it seemed easier to just turn the entire band to the inside and topstitch… In the end this worked all right, although the corners aren’t crisply square any more. Meh. I was hoping to skip out on hemming the lining fabric, but it’s one of those knits that rolls like crazy so I will probably have to :P.

On the whole, I’m not bothered, though, because I have a great lace T-shirt dress!

And, even better, I still have over a metre of my lace fabric left… what to do, people, what to do?

41 Comments

Filed under Sewing

The Lace Conundrum

The lace in question

A while back, I posted a teaser comment on Carolyn’s blog saying I had a question for her about lace. And then I got distracted. But finally, here it is, and I’d love to hear opinions from all of you—I singled Carolyn out merely because, as we all know, she’s the queen of using lace without it looking frilly or juvenile.

I have a bit of a love-hate relationship with lace. I am not (certain evidence to the contrary) the frilliest person in the world. And while I like the idea of lace (I am, after all, a sucker for texture and lace is pretty much texture distilled), I often am underwhelmed by the actual trims and fabrics available.

That being said, when I found this 4-way stretch (or is it 2-way stretch? Can someone with an industry background school me in the correct usage?) lace in the bargain bin at the Fabricland in my hometown at new years, I had to snaffle it up. (I think it was $1.50/m). The colours are perfect, it’s got the depth of texture I love—I love everything about it. I scooped up everything that was left on the bolt, just under 3m, although it’s only about 90cm (41″) wide. And now that spring is edging around the corner (it’s supposed to actually rain!), I’m itching to use it.

I just don’t know for what.

It’s got that great scalloped edge along both sides, which clamours to be worked into the hem of a skirt, but I don’t do dirndls particularly well. I’ve thought of a form-skimming t-shirt dress, sort of like this one Carolyn made her daughter. But is this really the best use of the lovely drape this has?

Help me out, people! What would you do with this?

UPDATE: WTF, it’s snowing again?!?

29 Comments

Filed under Sewing

Frivolity

Fluffy!

There’s room for a little silliness in life, right? (And considering what some of you out there are going through right now, there’s room for a LOT of silliness in my life.)

This petticoat is in clear and present violation of the mission I set myself when I began this blog, which was to create clothing that I would wear on a daily basis.  At the moment, it will join several other cream and lace pieces in the side of my closet that holds the “fun clothes”. Y’know, the old clubwear, goth gear, formal attire, stuff that gets an airing once or twice a year at most. (This doesn’t even count the actual dance costumes, which are all in the basement.) The best I can hope for is that its presence will spur me to create some circle-skirts or things of that nature to wear it with. Once, y’know, it stops being winter. Well, serious winter. Skirts can still be worn in mild winter, but it takes greater fortitude than I possess to wear them in real cold.

So, construction. Erm. I had, y’know, mentioned Sugardale’s tutorial. Which is a great tutorial. I used, well, the part where she uses ribbon to cover and finish her seams.

I started with the same basic measurements she used—22″ finished +2″ SAs=24″ skirt /3 tiers = 8″/tier.

Then I looked at my tulle, which I knew I wanted to be the bottom tier. I had enough for about four 8″ strips, each about 2.5m long, I thought. Which would give me enough for 10m on my bottom tier. It didn’t seem unreasonable as Sugardale suggested 8m for the bottom tier. (A basic tiered skirt for tribal bellydance is a 10-yard skirt, that is, like mine, it has 10 yards/m at the bottom. Yes, I know that a metre is longer than a yard, and the difference adds up to quite a bit once you have 10 of them. Hush, this conversion is the least of my problems. Of the two full-size ones I’ve made, one is about 22 metres at the bottom, the other is probably around 40-some… it is very, very, very, very full)

To start I edged the bottom of the tulle with ribbon and my “new” gathered lace. This took forever. The key to tiered skirts is to always start with the bottom tier—not only is it easier, but you will never have the stamina for that massive tier if you start at the top. Once I had the lace attached, I realized that my tier was more like 14″ than 8″.

So I decided to fold it over and have a double-length for the bottom. Extra fluffy!

Then, I broke out the ruffler foot.

I have mentioned this contraption briefly before, but I don’t know if I’ve ever gone into the full, detailed complexities of my relationship with this particular sewing machine foot.

To begin with, it is, quite simply, the most terrifying foot concoction imaginable. I suspect that those vintage buttonholer attachments are more frightening in their inner workings, but at least they tend to have it all neatly contained within that plastic casing.

Once you figure out how to attach the ruffler foot to your machine, it’s actually relatively simple. The up-and-down motion of the needle drives a sharp bit of metal back and forth, causing fabric threaded through a particular part of the foot to bunch up. How much it bunches per stitch is controlled by a little screw; another little lever adjusts whether the gathering takes place on every stitch, or only once per so many stitches. This means you can technically use the foot for making pleats as well, and control your gathering ratio quite precisely. Fabric tension and stitch length also play a role.

In practice it is… fiddly.

Now, I first wrestled the ruffler foot on my mother’s machine, which, I have

come to realize, is a prince among ruffler feet as well as a prince among machines. With a certain amount of experimentation I determined the settings I wanted, and, based on a foot-long sample, figured I had the ruffle ratio set to 2:1.

When I finished ruffling the first tier of my first tiered skirt, I realized the final ruffle ratio was more like 4:1. As a result several of the nine tiers in that first skirt (never let it be said that I’ve shied away from complex projects!) have no gathering at all. Still, I managed to pull the skirt off and was quite thrilled with it. Here’s a pic in action. And anything beats trying to hand-gather 40m+ of fabric

When I moved away from my hometown, my mother generously bought me my sewing machine as a going-away/Master’s degree present. The one attachment I requested was a ruffler foot to go with it.  As I discovered when I made my second tiered skirt, the differences between a vintage, quality attachment and a cheap modern generic version are subtle but substantial. The metal is just that little bit thinner, the edges sharper (which tends to cut fabric and threads when things get the least bit out of alignment. And something about the vibrations it generates (maybe because they aren’t anchored by the massive weight of my mom’s old machine?) makes things come loose. Like the needle. Or even the whole foot (at the part that screws on to the leg, not the little snap-on part). I’ve never been able to make my ruffler foot do anything other than gathers, and the control on the amount of gathering is rudimentary.

Apparently in tulle, it’s nonexistent. To ward off the machine’s tendency to eat the tulle, I gathered it to a length of ribbon. Once I figured out how to arrange this properly it wasn’t so bad, but for whatever reason the stitch-lengths were minute, and completely insensitive to my twiddling with the set stitch length. So instead of gathering at a nice 2:1-or-thereabouts ratio, it gathered my entire strip of doubled tulle into just over 2m. Not the 4-5m range I was looking for.

D’oh.

I had originally intended to have the top tier be about 2m, attached to an elastic casing of similar size. Obviously not going to work when I need at least one more tier in there.

A completely inadequate attempt to demonstrate this gathering method.

So I made a second doubled tier, in the hopes that it would fill out the second tier a bit above that crazy-full bottom tier, added more lace, and used the zig-zag-over-supplementary-thread method to gather it. This is the absolute best method available (to me) for gathering moderate to large amounts of fabric where you still need a fair bit of control over the ratio. (The ruffler foot is wonderful for doing the gathering for you—evenly—but limits your control. Or my control, anyway.) Note: I don’t have and have never used one of those “gathering feet” so I can’t compare. Maybe it would kick my method’s butt. Anyway, all you do is zig-zag OVERTOP of another thread (I like to use dental-floss), and then afterwards gather up your other thread/floss; the zig-zag acts as a kind of casing. Unfortunately, on this sheer fabric I decided to try using a clear monofilament-type thread for the supplementary thread, since the only dental floss we have right now is the psycho-expensive stuff the kids like and I’m not using that for sewing. While it works fine, it’s too slippery, so the gathers slide around and don’t stay put as well as I’d like. Only exacerbated by my fabric, which for the upper tiers was this godawful poly-chiffon stuff that I scavenged from my step-brother-in-law’s wedding decor summer before last. It’s the same fabric in the ruffly sheer JJ.

I really liked using my smocking-stitch on top of the ribbon when securing the seams. It gives it a nice, lacy texture, as well as finishing everything off nicely.

I’m realizing belatedly that I should’ve gotten more close-ups illustrating the way the tiers are doubled, which is a little nifty, if I do say so myself, but it’s late and this post is already hella-long and I’m too tired to bother right now. Sorry :(. Also, do you note the total lack of my vintage lace on the finished project?!? I didn’t have enough for the hem yet I didn’t want to attach it higher up where it would never, ever show. So now I don’t know what to do. Maybe save it for finishing a skirt lining that would go over the petticoat?

28 Comments

Filed under Sewing