Tag Archives: Lekala

Blue shirt

La Blue Shirt

Lekala 5672 strikes again.

No sooner had I destroyed half of this blue-striped fabric making a failed cowl-neck last spring, I knew it really had wanted to be this raglan top all along. I’ve lost track, at this point, of how many times I’ve made this pattern, nor is there really anything left to say—it’s my go-to for this style, though I still haven’t made it successfully with the kind of gathered bust in the original picture. Some of you may, more recently, recall that I made the exact same shirt in the red version of the fabric I bought at the same time, my Where’s Waldo shirt. Sometimes, you just meet the perfect marriage of fabric and pattern. This fabric wants to be close-fitted knit tees. Although I’m sorta hoping there’s enough of the red left to take a stab at Lisa’s Awesome Folded Mini-Skirt tutorial, sometime when I have enough brainpower to try anything creative (obviously that was not this weekend. In my defense, half of it was spent visiting my step-father-in-law in the hospital, as he just had a major back surgery).

Despite the absolute simplicity of this pattern, I still managed to stitch the sleeves in wrong-side out, and have to rip sleeve seams on one side due to accidentally stitching armscye to neck-portion of the sleeve not once, not twice, but three times. You can tell I like this fabric, because I generally don’t rip stretch stitches. I made this one, as with most of the knits I’ve been stitching lately, on my Janome rather than my serger. Although the serger’s much faster, I find the seams aren’t very strong, and tend to rip out and show the thread on the outside. Presumably this is a tension problem (although possibly a 3-thread-serger problem), but I think it’s one beyond my ability to fix, so for a garment like this that’s fairly fitted, it’s just better to suck it up and take the time to use the regular machine. The serger’s still great for seam-finishing, mind you.

I actually have a remarkable number of self-stitched long-sleeve knit tees at this point, but it seems like I can always use more. This sewing thing was worth it for the long sleeves alone.

There’s a wee bit of the blue-striped fabric left, if I’m good I’ll make something like this one for one of the girls. It’s a circular knit with a fairly wide width, which means I can get a long-sleeved shirt like this out of maybe half a metre of fabric. I love circle-cut knits—the cutting layouts are super-economical and it’s so much easier to get them folded on “grain”. Double win.

All of which is way more yakking than this shirt deserves. Warm. Comfy. TNT pattern. Done.

Advertisement

27 Comments

Filed under Sewing

The Where’s Waldo Shirt

Where's Waldo? Shirt

Since it appears I can’t escape my clothing’s cartoon references, I guess I’ll embrace it. I am thus proud to dub this the “Where’s Waldo” shirt.

This is one of those fabrics I eyed at Fabricland for quite a while. I thought I liked it, but wasn’t quite sure. Eventually it made its way to the clearance section, and I picked up two metres of each colour—blue and red stripes—for whatever ridiculously low price it was going for.

And I’m glad I did, although I’m also glad I didn’t pay more.

Where's Waldo in the back yard?

This is one of those terribly annoying knits that rolls like crazy. It also doesn’t have much stretch, so it’s fairly easy to cut and sew (aside from the dreaded rolling.

I used some of the blue to make an ill-fated attempt at a cowl-neck top last spring. The cowl was a disaster—this knit hasn’t got the drape—but I really liked the way the rest of the shirt fit, and the “feel”, if you will.  So it was only a matter of time before it became other long-sleeved knit tees.

Where's Waldo back

This shirt was also inspired by this Burdastyle pattern from ages back. There are some cute versions on Burdastyle, too. But why would I pay five bucks to download a pattern when I have Lekala 5672 for free?  Of course, it doesn’t have the seaming, I (again) skipped the gathering on the front, and the neckline, at least in this fabric, is not quite the signature Burda plunge. But it has stripes and the wide raglan neckline, right?

Fun in the Sun

The fit of knits varies massively depending on the knit itself. This same pattern can be dreadfully loose or scandalously tight depending on the fabric. This is a “tight fitting” fabric, so the armpits ride a little high. That’s all right—better than saggy, which is how my first take on this pattern turned out. I could probably narrow the arms a little bit towards the wrists, but we’ll see.

I decided to go easy on myself and use the self-rolling properties of the fabric as a design feature on the sleeves and hem. For the neckline, I stitched on some clear elastic and turned under twice, stitching with a stretch straight-stitch. I was tempted to let the neckline roll, too, but decided against it. Just barely. I did screw up and keep on turning under past where I should have, so there’s a portion that’s turned under three times and a bit of a kink at the end of it, but picking out the stretch stitch was doing more damage to the fabric than the thread so I am leaving it.

I couldn’t quite resist the obvious combination with the Sailor Shorts for the photos, sorry. I’m sad to say that these shorts haven’t gotten much (any) wear this summer. Partly because these days I only wear shorts for beach-bumming and creek-walking, but mostly because of the fit. The rise is a little high for my taste, and only made higher by the fact that I’ve been a little, ah, chubby most of the summer. It’s only about 5-10 lbs, but my physiology puts it  right around my middle, exactly where you don’t want it from a health perspective, and exactly where the shorts waistband falls. Urk.* Anyway, I’ll probably hang onto the shorts through next summer and see if I’m any more into them, but I have a feeling they’re not going to become faves. Too bad, because it really is a cute design.

It was really nice to whip something up quickly. This top took less than an hour, and at least ten minutes of that was finding the pattern. I REALLY need to organize my patterns better. I love it when I can throw together a knit top faster than it would take to shop for it. Plus a store-bought one wouldn’t have long, scrunchy sleeves.

*Incidentally, I try not to complain much about my body on the blog. It’s a pretty good body even if the tummy isn’t what she was a few years ago.  But I’m not one of those people whose weight fluctuates a lot, and aside from childbearing I’ve been mostly around my preferred weight all my adult life. The excursions from this ALWAYS coincide with periods where my usual minimally-healthy lifestyle tips over into chips-and-lazing-around. This summer definitely qualifies. Now that the school routine is back on, I will hopefully slip back to where I should be. Provided I can break this chocolate-bar habit.

21 Comments

Filed under Sewing

Tyo’s Too-Tight Top

Tyo's Too-Tight Shirt

So, just for the record, when you have a child who’s 140 cm tall, and the pattern is for a child 120 cm tall, even if the chest measurements match, it’s still going to take more than just lengthening the sleeves to get it to fit.

Just so you know.

Tyo being Tyo, the shoulders fit pretty much just right.

Now, before I get into the details too far, you will have noticed that the exuberant photo above is, above all, of craptacular quality. Guess what didn’t make it home from vacation? Yup, my camera charger. Blog, meet iPhone photos. IPhone photos, meet blog.* Here’s hoping my inlaws are better at mailing stuff than I and can be bothered to mail it back to me before we go back for Christmas…

Tyo's shirt. She is sad it doesn't fit the way it's supposed to. She'll probably wear it anyway.

For this reason I haven’t got much in the way of detail shots. I took them, they just didn’t turn out.

So, I’m feeling brutally mixed emotions about this project. Mostly because it didn’t fit. Mostly because the pattern wasn’t the right size in the first place (see first paragraph). Tyo’s also, to her father’s dismay, begun increasing in the chest measurement recently, so that may be playing a role here, too. On the other hand, it’s a pretty fun pattern (Lekala 7171), I think, a simple shirt with a striking detail on the back. Everything went together well, and having the MPB Men’s Shirt sewalong to reference pretty much makes up completely for the lack of instructions.

Collar

The execution is far from flawless, but it’s reasonable, I think. Topstitching on the Featherweight remains fun (although I’m using regular thread, not topstitching thread, so it wasn’t as fun as it could have been). I re-did the entire collar and stand, widening it by about 3cm and cutting out each side individually so that I could (almost) perfectly match all the stripes. Yay me.

Pockets

I used cardboard templates for shaping both the pockets and the sleeve plackets. Getting and keeping the bias-cut pockets square and even was quite a pain. Washable glue-stick was helpful. On the other hand, all the stripes make for super-easy positioning on the front, so it’s not all bad. Oh, and you can just about see the minute side-bust dart in the pic above, to the left of the pocket. This took in about 1 cm total of width. The original pattern had vertical, double-ended darts below the bust, too, but as they were about .5 cm at their widest point, I chose not to bother with them.

Placket (not an iPhone photo)

The plackets. This is only my second set of plackets, and thus far both have been made out of flannelly material, which is probably not the easiest stuff for it. I’m reasonably happy with how they turned out, however, despite a certain amount of user error. This is the little-house-on-the-placket style of placket, I think. I say I think because instead of the little house with an addition on the side shape of the other pieces I’ve seen, this one had a double peak to the roof (AA instead of A_ if that makes any sense… I’m too lazy to make a real diagram). I managed, by re-reading Peter’s post, to refresh my memory enough to put the plackets on the right side facing in the right direction (although it was a bit chancy). The user error came in in not allowing enough extra length at the top for the little house-roof-thingy. If I’d paid more attention and made my slash the length recommended by the pattern, it would’ve been fine. It’s still fine, except the opening is about an inch too long (note I didn’t lengthen the placket when I lengthened the sleeve—although looking at the technical drawing I suspect that they just didn’t change the length of the placket when they graded the pattern, so it’s a bit long for the shirt to begin with) so the opening goes clear to the elbow. Also it could really use a button halfway along, but I forgot when I was putting in the buttonholes.

Back view. Very glad I added that extra width at the bottom.

The back looks pretty spiffy, if I do say so myself. As you can see, the fit across the shoulders is pretty good in the back, even though it won’t quite close in the front.

The back on Syo

It felt really good to do some real sewing again finally. I spent most of the morning (whatever wasn’t spent ferrying my father-in-law around and mediating among four little girls. Who don’t actually seem to fight any more than two little girls do, but man those preschoolers can CRY) in the sewing room. With a lot of company from my four-year-old niece (of the polkadot sundress fame) telling me about how she’d love to have this and this and that sewn for her.

Weird flash-face. Note horizontally-matching stripes on the front.

Out of curiosity, I got Syo to try it on (she is roughly 120 cm tall). It’s none too spacious on her either, although it does close, at least. The shoulder-fit is remarkably similar to on Tyo, though. It’s pretty obvious which of my kids got my broad shoulders.

Side view on Syo

Syo likes to flex and show off her muscles. They are pretty impressive, frankly.

Syo

Gratuitous pics, I know. But I couldn’t resist the weird foreshortening in this one.

Sleeve rolled up

Both kids agree that the sleeves are better rolled up, anyway. They just possibly might have inherited this from their father.

Sorry if the post is a bit incoherent and disjointed. The shock of going from zero to four children (two of them now on antibiotics) in the house in under a week still has me a bit flattened. Though I’m glad to have mine back and to have the chance to spend some serious time with my nieces. I just wish I could’ve spent more of the week enjoying them, rather than trying to work in, around, and between interruptions.

Oh, and just for the sake of completeness, the pattern is Lekala 7171, and here’s the technical drawing again:

Technical drawing

*My camera is a Sony point-n-shoot, which is the only calibre of camera I’m qualified to manipulate. Interestingly, my friend’s Sony smart-phone takes awesome pictures. Obviously Apple has not completely cornered the market on awesome. Which does little to reduce my overall iPod addiction, but anyway.

21 Comments

Filed under Sewing

Who wears short shorts?

Shorts! ...ulp.

Um, I do. For a very long time a 1″ inseam was my standard. And while I’ve gotten considerably more shy about my midriff over the past decade, my legs have stood the test of time up much better. They remain one of my favourite physical features. (Not to toot my own horn)

Of course, the last few years I haven’t had much opportunity to wear shorts, period. The summers here are, well, chilly by my standards (blame elevation or proximity to the mountains or just a run of bad luck); it only broke 30C once last summer. Add that to spending my days in an air-conditioned lab and, well, shorts just kinda got left for weekends and visits home. (The two or possibly three people reading this from my home town can protest all you like that your summers have been beastly the last couple of years. They were still better than the summers here.)

Lekala 5465 Sailor Shorts, pattern here.

Anyway, my shorts history aside, this seemed like a good way to tackle the fit of the Lekala pants block without sacrificing a huge amount of fabric (obviously I was not thinking in terms of topstitching- and machine-rethreading-time). I may also have been feeling kid-project-ed-out. Or possibly crack smoking was involved*. Anyway. For whatever reason (reason really played no role in this decision), the other day I found myself printing out the pattern (only nine pages!) and laying out the pieces on the denim remnant left over from my bellbottoms.

One bonus to this particular set of pants is that the directions on the Lekala website have, in fact, been translated to English. Now, I think translating sewing directions has to be one of the hardest things in the world, as the technical terms are both a) highly specialized and b) unique to each language (translating scientific stuff, on the other hand, is much easier, since most of the important words come from Latin anyway. I don’t speak a word of German but can still often pull the major details I need out of a German research paper. Not so a German issue of Burda.) All that being said, I made it to about halfway through step 6 before my brain blew out. I had no idea what they were trying to get me to do.

What exactly are you telling me to do?

So I stood there with my pieces, laying one on top of the other, this way up, that way up, trying to figure out what to do.

There was a slit involved. I knew that much.

In the end I didn’t do it exactly right—the piece which they call the “Fly Panel Facing” (this would’ve been more helpful if the names of the pieces on the pattern hadn’t still been written in Cyrillic) is supposed to lap out and make a little overlap on the front, which I didn’t get. I’m still not sure how you would make the bottom of that neat, by the way, without adding a crapload of bulk, anyway). But I did manage to get the fly panel and the four “inner front parts” together. I am too lazy to actually put together a tutorial for how I did it—if you really feel the need to make this pattern, I can do one, but I’d really recommend you make the 5742 pants into shorts instead. Or use this tutorial for creating a sailor-button look with a continuous lap placket. Or even pay for the Hot Patterns pattern (which I haven’t used but have seen some very nice pairs made up). Or, y’know, email me and I’ll do my best.

WTF?

What it basically came down to, though, is that you end up with a slash down the middle of each front piece, with the “Fly Panel Facing” making a facing for the inner side of the pants and the “Inner front parts” sandwiching the edge of the slit, some frighteningly narrow seam allowances (I had to re-stitch several of mine), and nothing but a bit of fusible interfacing reinforcing the bottom of the slit. And I’m not convinced there’s anything at all you can do about this with this kind of pattern, unless you incorporate a front seam (as they did in the 5742 pants) or add a seam from the bottom of the slash over to the side, maybe with a pocket in it. Maybe I’ll try something like that next time.

So that’s my issue with the pattern itself. On to my own failings.

Crappy topstitching AND buttonholing!

Partly because I was really unhappy with the slit feature, and partly because I was trying to slug away at the piece and get it done before I had to reathread the machine for a kajllion kids’ projects, I sorta gave up trying hard. My topstitching around the inner part of the front fly panel isn’t symmetrical. I didn’t place my buttonholes properly, AT ALL (at least the topstitching I can fix if I come to my senses). My machine really doesn’t like zig-zagging with the top-stitching thread, so the buttonholes themselves are pretty dodgy as well (I tried buttonholer attachment, machine’s proper attachment, and manual—it just really doesn’t like to zig-zag with heavy thread). I added patch pockets to the rear, mostly on the principle that my butt needs as much decoration as it can get. Those are actually all right, although I forgot to do any topstitching designs before I sewed them on, so they look a little plain.

So those are my issues, purely self-inflicted. I should’ve taken more time, been more careful, not expected to bang out a pair of jean-shorts in a couple of hours. One thing the instructions do emphasize is topstitching carefully and evenly.

On me: front

And in the end, I don’t really like the shorts at all, for a reason that has nothing to do with the design features, the construction quality, or the instructions.

I don’t like the rise.

Now, the pattern illustration shows a moderately low rise. It’s hard to gauge things like this from illustrations (or even other peoples’ bodies, rise being a fairly individual thing). And I like low rise. The problem is, I like low rise.

These are more like mid-rise. They fall just below my navel. This is at least an inch or two above where I like my waistbands to fall, as it hits right in the middle of my jubbly bits. I’d rather have my waistband lower, where my hip gets bony. I realize that this isn’t most people’s preference, but it works for me, with my particular narrow-hipped, short-waisted body.

On me: side view

The bright spot of light in this is that the fit itself is more-or-less perfect. I didn’t even have to make any kind of gaposis adjustment to the back, which I had to in both the Ellen pants and the Jalie 2908 jeans (granted I think the Jalie pattern is drafted to the flattest common denominator, possibly because they figured this was an easier adjustment to make than the flat-butt adjustment). The only alteration I made upon trying them on was to take in the outseam of the leg a little bit below the hip, so they are not quite so loose around the thigh.  Which is more of a style issue, again, than a fit issue. The illustration shows quite loose, slouchy shorts, rather than my sturdy denim version (and the fabric they call for is “sheer flax”, by which I assume they mean a lightweight linen. They use the word “linen” for fabric.)

I also used a smaller number of buttons than called for, because it “looked right” and I thought it would be okay on the denim. So there’s a bit of gaping that shouldn’t be there. Lesson learned.

Oh, and in case you were wondering, the finished inseam wound up being about 2.5″.

Finished interior, with bonus threads. I'll snip those some time when I give a shit.

I don’t even know for sure that the rise will be an actual wearability problem, since I wouldn’t normally tuck a shirt into these anyway.

Oh, yeah… the pattern also calls for a zipper. I have no idea where this is supposed to go or why it would even be necessary.

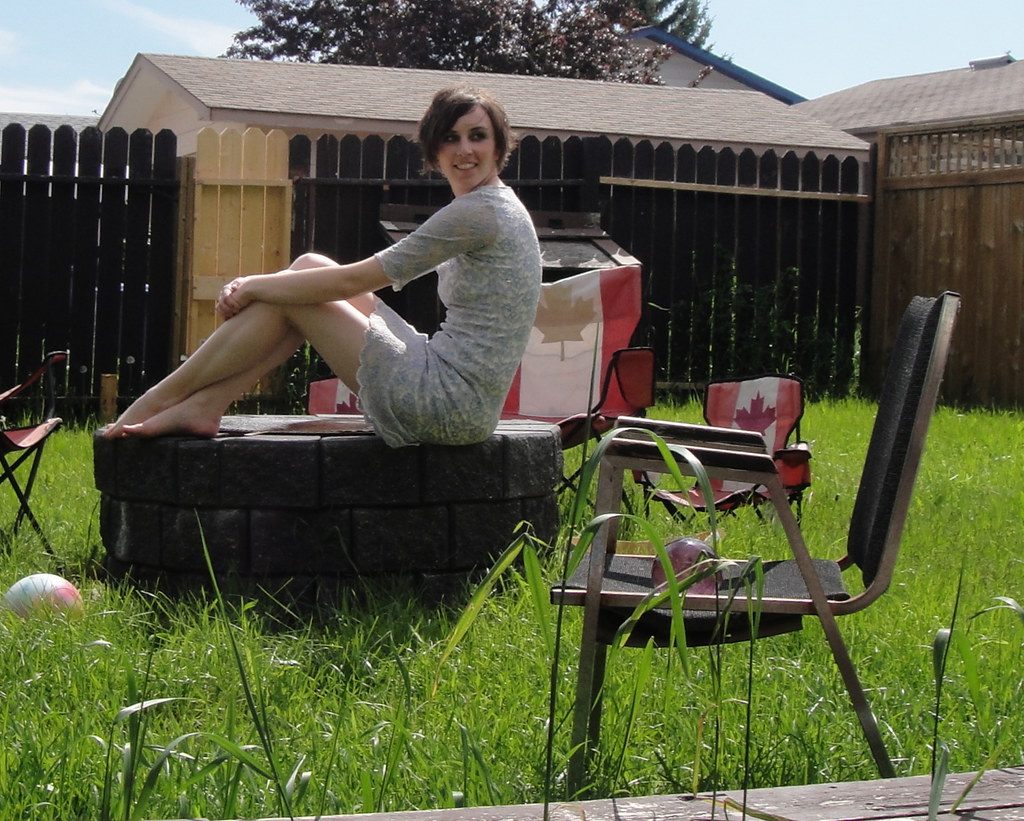
In Me-Made June news, here’s yesterday’s outfit.

Me-Made June 23

This photo was taken in the glorious sunshine about five seconds before the clouds rolled in and the winds picked up. I was expecting one of our June thunderstorms, but it never quite materialized. Maybe today (if not tomorrow in the midst of the kids’ birthday party).
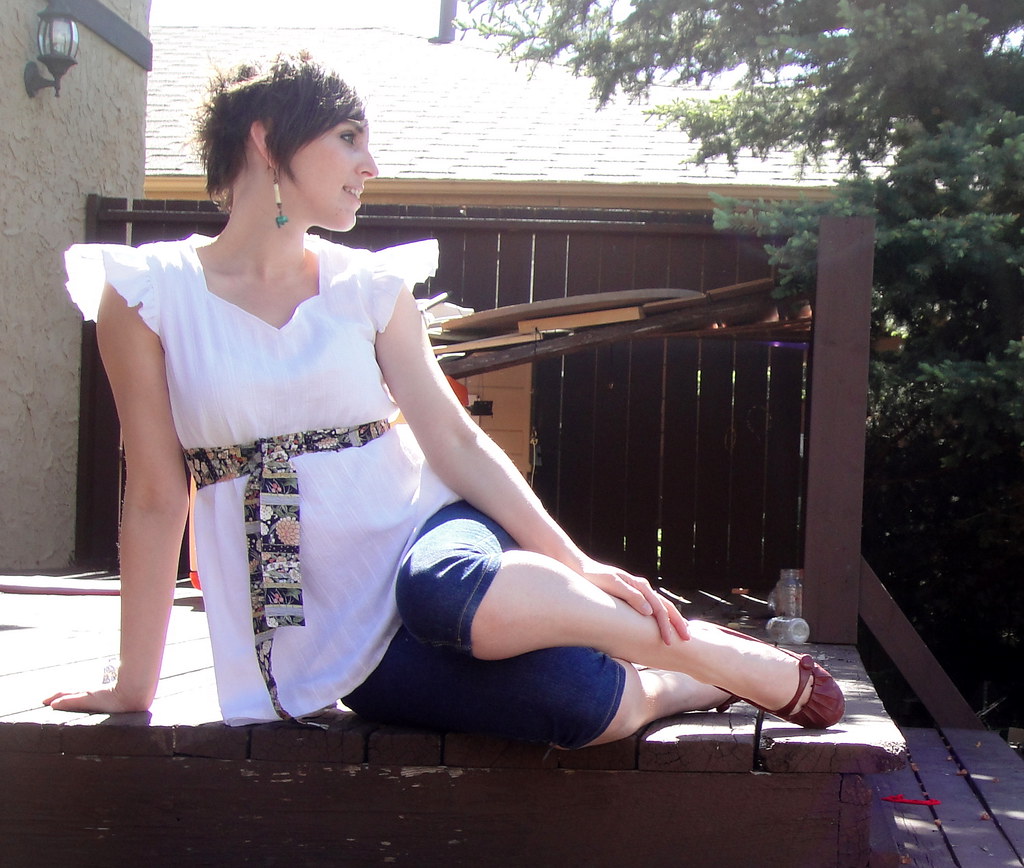
70s Tunic
Jalie 2908 CaprisHmm, tired of these yet? Obviously I need some other pairs… (and it just so happens I got some summery cream stretch twill at the Fabricland Canada Day sale yesterday…)

Oh, the earrings are a pair my mother and I put together back when we were making jewelry when I was in high-school. The bottom is a little malachine elephant a friend brought back from Zaire.
*Disclaimer: I do not now, nor have I at any point, smoked actual crack. Or been been in a room where crack was being smoked. Or seen crack, except on a movie. I didn’t even smoke pot in high school, which is practically a rite of passage.**

**largely because my friends all smoked pipes and I was too embarrassed to admit I didn’t know how to use a lighter. Yes, those cheap Bic lighters. It wasn’t until I had been married to a smoker for several years that I learned how to use one. Mostly by practicing when he wasn’t around.

29 Comments

Filed under Sewing

The littlest sweatshop, I mean, seamstress.

Dresses for nieces

The children have decided (however temporarily) that hanging out in the sewing room is their new favourite way to spend time with mom. This may just be because it’s easier to get me to pay attention to them when we’re making something together. We have all kinds of projects planned—dresses for my nieces, zippered pouches for their teachers—all of which need to be completed in the next week or so. I foresee evenings of toil and drudgeryI mean bonding and quality time.

Shh! It's a secret!

This would be work enough (especially since we have the massive birthday party from hell on Saturday: both kids’ parties at once, so roughly 20 kids aged 8-11 running around the house and yard for five hours while my husband is at work. Probably water-balloons and the lawn sprinkler will be involved at some point), but Tyo also wants to make Syo a dress for her birthday. That is a surprise. As in, it can only be worked on when Syo isn’t in the sewing room. See the first sentence as to why this is a problem. Out of the leftover fabric from my 70s tunic, which of course requires lining and nice seam finishes and stuff. I’m not 100% convinced she knows what she’s in for. For those of you to whom kid-related sewing is absolutely mind-numbing and irrelevant, I apologize. This may not be a good week for you.

Teacher-present fabrics

Also, the hunt for teacher-present-fabrics led to spending a dangerous amount of time in the quilting section, something I generally avoid like the plague. Apparently this is where they keep all the nice prints (I’m much more favourable about prints when I’m not trying to imagine myself wearing them, I guess). This is especially dangerous as I have twee-little-sundresses on the brain. For which quilting cottons could actually be appropriate.

So what did I do yesterday?

Lekala sailor shorts

I decided, on a whim, to take a stab at Lekala  5465, a set of sailor-buttoned shorts.

I haven’t tried making sailor shorts, so I can’t really compare various methods, but I really don’t like this one. It doesn’t help that I didn’t really do it right, but basically there’s a point of weakness at the bottom of the slash that I don’t think anything is really going to fix.

The shorts (in progress)

I tried to compensate with excessive bar-tacking.

Depending on how incompetent I feel when I finish these, I may go into the construction process and how I screwed up. Or I may just throw them in the wadder-bin. I did take a lot of in-progress photos, though.

In Me-Made June news,

June 22

Yesterday was easily the nicest day of the year yet. The high was 25C (that’s like almost 80 F!), which since we’re still inured to barely-double-digits felt like heaven (or hell, to hear Syo tell it… that child does not like being hot.) I took the opportunity to wear my lace T-shirt dress

12 Comments

Filed under Sewing

Using up the Blue

Blue raglan-sleeve top. See below for the reason I look so irate.

After the stegosaurus shirt, I had just under 90 cm (one yard) of fabric left. Possibly I should’ve made it into something for one of the kids, since it’s a bit of a distinctive colour, but for whatever reason, I was determined to get one more long-sleeved shirt for me out of it. Wiggle as I might, I couldn’t quite get the Pattern Formerly Known as Lydia onto the available amount of fabric. I didn’t want to cop out and go with short sleeves, as this is a warm, wintry knit.

Fortunately, Lekala patterns came to my rescue once again; the raglan top pattern that I made before just fit, helped out by the fact that the pattern pieces are full-width, not to be cut on the fold. This was annoying when it was eating up all my printer paper, but with careful jiggling I was able to get it all in place.

So, I have another raglan top. As this is a much more stable knit (though without any redeeming factors like cotton, as far as I can tell), it fits considerably more, ah, sleekly, than the white version. Thus far I haven’t bothered with the ruching on the front; I kinda like the round neck (though it is pretty similar to the stegosaurus neckline, isn’t it?). We’ll see how boring I find the top after wearing it today.

Aww... no back ruffle. Plenty of wrinkles, though, as usual...

Really nothing to say about the construction. I did the seams all on the serger, which is really easy for the raglan construction, and twin-needled the sleeve and bottom hems. The top edge is just folded under around a narrow clear elastic and twin-needled as well. I have a Schmetz twin needle right now and I can’t tell if it’s just in my head but it really seems to me like the Schmetz needles (especially the twins) break a lot less readily than the Klasse (the other brand I have ready access to…) Oh, and you may have noticed you’re getting a glimpse of something other than my usual, draped-sheet photo background. This is the brightest corner of my kitchen (at least at 8:00 in the morning), and you are being “treated” to it because my darling children trashed the basement yesterday and my sheet is now in a limp little pile on the carpet, buried under an avalanche of… not even toys. Just stuff. Urg. I love my children. I love my children. I love my children. I…

Versatile Blogger Award

oh, yes, and before I forget, the amazing Magda passed on this “Versatile Blogger” award to me, and then the equally mind-blowing Oona Baloona did as well. And I want to thank them both very much, but I think I’m running out of interesting things to reveal, so I’m going to bail on spreading the meme and just point y’all to my previous exposees: Stylish Blogger and Beautiful Blogger.

8 Comments

Filed under Sewing

SFOs (Semi-Finished Objects)

Zena of Blood, Sweatshop, & Tears once commented that “wearable is climax. Done is denouement.”

She is so right.

Lekala twist-top, v. 2

In that spirit, I give you my second take on the Lekala 5675, a.k.a. the twist top. The hems are serged but not completely finished, and it’s been like this most of the week. I am disinclined to fuss with trying to stabilize them for topstitching. Bleh. This red knit is wiggly, super-stretchy, and much more like the kind of fabric I imagine the shirt was designed for than my last attempt. It’s also an amazing example of the difference fabric choice can make for the exact same pattern (only difference is I added perhaps an inch more extra length to the red version, just in case, bringing the total increase to about 3-4″ in the sleeves and 4-5″ at the hem. The first version was roomy and sweater-like, with a surprisingly perfect fit in the shoulders. This version is second-skin tight and the shoulders look really narrow. Although about the same as they look in the pattern illustration, actually.. The twist still doesn’t pull naturally into the kind of tight twist the illustration suggested. This might be a drafting problem (maybe they should just have widened the upper front piece a bit so that a full twist was required), or it might just be that my doubling of the front (makes the finishing easier and never a bad idea in a thin knit) gives it a bit too much body. I think in my head the slit below the twist should be wider, but again it’s actually quite comparable to the illustration. Some day I shall use Sherry’s post to attempt to reduce a swayback in a knit. Someday.

Simplicity 5728

Simplicity 5728

In a similar vein, my (wearable muslin?) version of Simplicity 5728 is at a try-on-able phase in construction. Yay!

This is such a peculiar fabric. I would’ve sworn it

Simplicity 5728, side view

was a diagonally-ribbed knit, but it frays like a woven. It’s stretchy, very slightly in length, significantly in cross-grain, but fairly stable. It does have that cling-to-every-lump-and-bump quality of a knit.

In the stretchy (whatever the heck it is), I should probably have used the original bust-length, as the extra length doesn’t seem to be necessary. I had narrowed the bodice sides 1/4″ on the pattern, since it seemed a bit roomy under the arm,

Back (lightened to show lack of swayback wrinkles!)

tapering to nothing at the waist, and I took it in another 1/4″ here after trying it on (adding up to a substantial 2″ reduction in the total bodice width). I did a swayback alteration as per Sherry’s instructions (sooo easy when you have both waist and CB seams), taking off about 1/2″ (12mm) both above and below the waist seam. I gave the CB seam of the skirt a bit of an S-curve to it as my swayback seems to be rather below my waist in this area. And then I cut, inserted zipper, and hoped. And—well, look!

Can we say, happy customer?

Also, like what I did with the back neck? I did a brutal job of finishing the top of

Simplicity 5728, full back

the zipper, but otherwise it’s snazzy! Er, and yeah, the zipper’s pink. I thought it coordinated/contrasted nicely with the muted purple of the fabric, but probably it’s just too light. But the only other zipper I had of suitable length was white, and an invisible one, which I don’t actually know how to install. It’s vintage and metal, though, so it’s cute enough to deserve to be looked at.

Simplicity 5728, front closeup

You will recall that I received excellent advice from Kay and others on my sleeved muslin to raise the bottom of the armscye to improve my sleeve mobility. So I raised it a full 2cm, on the principle that it’s easy enough to lower it after the fact if I need to.

(It occurs to me that I probably annoy nearly everyone with my flitting back and forth between metric and imperial measurements. Can I call it a Canadian thing? I prefer to do my seam-allowances in metric because the metric markings are at the front of my sewing-machine face-place, making them easier to see than the imperial markings, which are at the back. On the other hand the width of the regular foot is definitely 1/4″, so I tend to do things like small alterations in this increment. It also depends on which ruler or measuring tape comes to hand first…)

I should also mention that I added 5″ (and we’re back to the imperial) to the hem of the skirt to get it to this luxuriously long length. That’s supposed to include 2 1/4″ of hem, which would bring it to a perfectly respectable heel-length, I think, although I’m not convinced a 2″ hem will be desirable in this fabric. I’m wearing a 3″ heel in the photos. I love these crazy-long 70s skirts.

Coming soon: the great sleeve adventure!

19 Comments

Filed under Sewing

More fun with Lekala Patterns

Or, The Unfortunate Effects of Poor Fabric Selection

Lekala knit top 5675

I got this fabric (bottom right in the photo) from the thrift store a month or two ago. It’s a light sweater-weight rib knit, very stretchy but not very drapey. I thought it would be ok for a cardigan-type top, a more fitted one rather than something drapey like the Simplicity one.

So why on earth did I think it would be good for taking a shot at this Lekala pattern? Can I plead temporary insanity?

I don’t know if I’ve mentioned before, but I’m a sucker for peekaboo clothing. Peekaboo backs in dresses, peekaboo shoulders; slit skirts… so yes, this top (scroll down) tickled my fancy right off the back: cute peekaboo detail, not too much skin showing since I’m attempting to be more demure in my old age, still warm for winter.

Twisty pattern piece

I printed it out, compared with my Lydia pattern, and again the only modifications I made were lengthening the bodice and the sleeves. The shoulders are more square than on the Lydia and the armscye and waist are much shorter (shorter even than my altered Lydia, where I shortened the armscye and raised the waist). Of course if you actually ordered the pattern it would be to your own length measurements, so probably most of this won’t be helpful. I added to the bodice only at the hem, and likewise to the sleeves.

It took me a couple of tries to figure out how I

Twist top... sweater version

wanted to finish the front; I double-layered it to simplify the finishing. If you look at the picture of the pattern piece, I sewed the two layers of the piece together along the red lines; I did the same with the middle portion of the lower bodice. Then I sewed the blue lines to the outer portions of the top of the lower bodice, so that all the seams are enclosed.  Despite my best efforts (and liberal use of clear elastic) it wound up quite stretched out, but that reflects on my fabric choice rather than the pattern, I think. I had to turn the bottom of the peekaboo-opening under and tack it on the inside, creating a bit of a “U”, because it was stretched out too badly. It looks okay, but not ideal.

I had to take in the shoulders a bit, again I think due to the spreading tendency of this fabric. I could probably take a bit more width in in front of the armscye, but again more due to the fabric than the pattern.

Oooh, the swayback!

After the trouble I had with the fabric spreading in the upper bodice and shoulders, I didn’t even want to contemplate doing a hem. So I did a rough ‘n ready lettuce hem on the serger on both bodice and sleeves (basically I just ran it through as usual but stretched while I did it). This means that the sleeves are extra-

Front view

gooey-long (which I love). Oddly, I didn’t have to take them in for width, which I’ve had to do before when using “growing” fabric.

I put the shoulders in flat, and they went in very nicely, which is always a plus.

I also took in the side seams after construction, curving in by a good 3/4″ at the waist. Again, due to the growing fabric.

On the plus side, after its initial sagging it doesn’t seem to be growing too much more, and it is quite warm. In the photos it doesn’t look half bad (if I do say so myself), though I feel like the fairly stiff fabric folds oddly as I move. I will definitely have to give this pattern a try in something a little more slinky in the future.

16 Comments

Filed under Sewing

Knit Tops: the Raglan Experiment

First of all, before I forget, thanks everyone who said they liked the new theme! I finally found one I can customize the way I like, and I get a header! yay!. Though I’m still getting used to the new colour scheme. I’ve been in such a “red and black” mode lately, the blue and cream feels odd.

Lekala raglan tee pattern illustration

So this past weekend, in between madly sewing jeans and bullying Tyo into posing for pictures in her coat, I spent some time sniffing around the Lekala website. In particular, I discovered their “knittings” section. There are some pretty groovy patterns there. Importantly, they have a link to a sample PDF of the patterns (conveniently tiled for home printing, albeit for an A4 size paper. I wonder if I could find A4 paper here if I looked?). EVEN more importantly, that PDF pattern is in a small adult size, for someone with an 84cm bust and 92 cm hips. Which happens to be about as close to my actual measurements as any non-custom pattern ever is (we’ll ignore the 64cm waist, AKA 25″ waist. Haven’t had one of those since I was 14.)

Anyhoo, I cheerfully went along downloading every pattern that caught my fancy, and decided in a fit of mad bravery to sew up my single remaining remnant of white cotton knit into this pattern (#5672, about halfway down the page). Don’t you love their foxy artist illustrations? I especially like that a lot of them are plus-sized (though not this one, obviously)

This is the line-drawing:

Lekala raglan top 5672 line drawing

Lekala raglan top 5672 line drawing

which shows what it is a little more plainly: a simple raglan-sleeved top with a gathered drawstring placket in the front.

I’ve been wanting to try a raglan-sleeved basic tee for awhile. Well, basically since this one appeared on Burdastyle. Obviously there’s some differences (no underbust seam here), but the basic shape’s the same, both have bust gathers, and this one is free!

I printed the pieces out and compared them to my much-laboured-over Lydia pattern. Almost a perfect match, aside from some subtle differences in the waist curve—the sizing was spot on, as was the sleeve length. The bodice of the Lekala top was quite short, as you can see in the pattern illustration, so I extended it by a good 10cm; as I no longer have the firmness of tummy the model does, I try to avoid that sliver of low-belly nowadays. I also added my usual extension to the arm as well.

Lekala raglan tee, V. 1, front

And I got sewing. Since the knit I had on hand was white and a bit sheer, I tried out Sherry’s double-layer, folded hem, enclosed seam technique. This worked really well, though I wasn’t quite clever enough to get the sleeve seam enclosed between the two bodice layers. Next time. Only downside—it’s awkward to take in after construction. Which is why Sherry made a muslin. I didn’t bother, despite remembering clearly that the white Lydia I made from this same fabric needed to be taken in, as the fabric has little to no recovery. So the bodice wound up a bit looser and bulkier than I might have liked… but still wearable. It also looses length significantly as it stretches in width; I should’ve added more length to the sleeves.

I had the most trouble with the neckline. I was quite worried about it stretching out of

Lekala raglan-sleeve tee, slightly better shot of the body

shape (see above about the recovery of this fabric). Initially I went to bind it with a a strip of self fabric cut on the lengthwise grain (as I’ve done with all my Lydias; the technique is the same as Sherry uses in her tank-top post, minus the serged edge and precision). However, I remembered (as I was sewing it on) that this fabric has no lengthwise stretch. The resulting binding looked great and didn’t sag, but when worn it pulled the neckline very high, making the whole shirt very tight through the armpits, but most importantly not providing that lovely almost-off-the-shoulder sweep of skin. So I cut it all off, went back, and sewed 1/4 clear elastic along the wrongside, and then just folded this under and topstitched. I started out the topstitching with a double needle, but one of the needles snapped within the first four inches of topstitching (first time using that needle, too… #$$%#%$@#@$), so I did two rows of single stretch straight stitching. Grrr. Well, it looks all right from a distance, anyway. In hindsight I could’ve been a little more aggressive snugging up the clear elastic; it flares out a bit more than necessary especially right at the sleeve seams.

The pattern called for a drawstring placket to make the gathers at the bust. I had no idea how to do this, the

Lekala raglan-sleeve T

instructions were less than edifying (I’ve never applied a surface placket like this before), and I didn’t have anything  I thought I’d want to make drawstrings out of anyway, so I used the same method I did on my blue tank top and sewed a stretched elastic on the inside. I could’ve made it a bit longer, but on the whole the detail worked.

I definitely want to repeat this in a nicer fabric (this isn’t an awful knit, it’s reasonably stable to cut and sew, but the lack of recovery, lack of vertical stretch, and boring colour irritate me). And maybe stick a big floppy collar like the Manequim Cowl on top.

I wish all the nice knits at Fabricland weren’t so frickin’ expensive. I know, I know, buy online… /sigh.

Here ends part 2 of my Lekala odyssey. I’m pretty sure there will be more in the future…

23 Comments

Filed under Sewing

A coat for Tyo?

So I may have mentioned already that I bought some (other) fabric last week. In fact, it was a bit of a binge-week, fabricwise (gotta love payday), but this is the EXPENSIVE fabric. Not the random metres snagged at the thrift-store, but real, honest-to-goodness expensive bought fabric.

Boiled "wool" camry

As a self-justification (can you tell how guilty I’m feeling about this?) I had a 50% off coupon for Fabricland (up to 5m of fabric) that expired at the end of October. My plan was to finally splurge on some wool melton ($16.50/m sounds much more palatable than $33/m, yes?). Red and a little bit of black. But there was this other fabric, a “boiled wool camry” (all “wools” at Fabricland, incuding the melton, are, in fact, wool blends, as far as I can tell). Its basic price was a little cheaper ($24/m), and it had a really interesting texture to the surface that the melton lacks. It had caught my eye before. It’s also a knit, which is interesting; it has a little give but isn’t what I would call stretchy.

And, this past week, it was on sale for $10/m.

That’s more than %50 off.

So I bought it instead. My precious 50%-off coupon will, it appears, expire, unused. 5m of red wool, 1 of black. The idea was to create something similar to my long-destroyed HBC blanket coat, with pieced-in or applique’d stripes, either for my long-neglected Lady Grey or even a rehash of my Winter Coat pattern (with the standard collar and lapel this time)

But…

But…

I’ve mentioned before that Tyo is in need of a new winter coat this year. And I’ve toyed with the idea of making one (provided I could throw it together quickly enough. But I didn’t think I had a good pattern handy, and am still worried  about whether my construciton techniques will be warm enough to get me through the winter.

Probably I should’ve spent that $60 on a coat for Tyo. Hence the guilt.

Girls' double-breasted coat

Then, yesterday, I stumbled again across this pattern. Cute, no? I originally downloaded it in September off the Lekala website when they were offering free downloads (in limited sizes); it came in a kid’s size 120, a bit small for Tyo.

But, many of the Lekala patterns are available, albeit in limited/fixed sizes, from M-sewing.com. So it occurred to me to check over there.

Now, I have to admit I’m pretty suspicious of these pattern companies. The few reviews of Lekala patterns have agreed that the instructions are useless and some of the measurements perhaps dodgy. More, I just don’t GET it. I don’t know where they come from, why a Russian site and an English-language one are offering the same patterns (albeit with a different sizing system), one for free and one charging. I guess basically, I don’t know where the money is, so I’m wary.

That being said, there are some pretty cute patterns on the sites, and I’m pretty sure I can throw a coat together without instructions at this point. I showed this one to Tyo and she said she loved it. Especially if it were in red. With, say, a black collar.

So I was able to download the coat off the m-sewing site in child’s size 134, which is Tyo’s

M-sewing pattern image

Burda/Ottobre size, and the measurements SEEM compatible (I should probably measure her again, however, to be sure). The other problem with the m-sewing (but not the Lekala) downloads is that the PDF isn’t tiled for printing at home. Apparently newer versions of Adobe Acrobat will tile it for you, but my archaic version won’t, and the built-in tiling software in my printer is limited to set sizes. I could print it at a copy-shop, but that would require spending actual money (as opposed to money on ink and paper, which doesn’t for some reason count), which I’m disinclined to do on a pattern I don’t trust. So I spent some time messing around with some equally archaic software, “poster printer“, and have what I HOPE is a reasonably-close printout.

Next step, of course, will be muslining. I figure whatever fabric I use for my muslin I’ll re-use for underlining, thus alleviating a) waste, and b) warmth worries. Unless of course it’s a total wadder, in which case, well, I get to use my red fabric for ME. Although with 5m of the red I really should have enough for a coat for Tyo AND one for me, even if I can’t use the Lady Grey pattern.

Of course one other big question remains: will I have time to get this done in November?

12 Comments

Filed under Sewing