

Truly Victorian 462 – 1880s tail bodice
Since the next Victorian Sewing Circle was coming up, last weekend I decided to muslin the bodice for Truly Victorian 462. In my memory, back in the fall I had calculated my size via their weird-ass method (basically you select your back size based on on the width across your back and your front size based on the difference between your back size and your full bust, and then twiddle the shoulders to fit. It’s meant to help you skip the FBA, I guess, not that I’m usually an FBA candidate…) and traced out the pieces. Well, it turned out on inspection that I had picked my size, traced out about half the pieces, and then completely not written down what size I was tracing. >_< Thanks, Past Tanit.
Comparison of my traced pieces with the original pattern and some cryptic notation I had left on the instructions eventually led me to conclude that I had been tracing size C for both front and back. Great! I finished tracing it out, made my most basic adjustment (removing 2cm total length, 1cm above the bust and 1 cm below) and cut my first muslin out of some old curtain last seen in a pair of Ellen pants, if anyone remembers what those are. Um, that was over five years ago. Wow. Blog is turning six pretty darn soon. Who knew?
ANYWAY.

Version # 1
Muslin version 1 revealed some problems. Um, TOO SMALL, much? I re-took my measurements. Apparently, with the combo of corset and bra, my bust is closer to 38″ than its actual 34.” And for the Victorian silhouette I do want the boob paddage. ALL THE BOOBS. However, everything else seemed really good—back size was great, shoulders maybe needed just a little tweak for squareness—I just needed a little more room in the front. Perfect candidate for an FBA, thought I. Never mind I’ve never done one before. How hard can it be?
Hmm.
Yeah, you can stop snickering now.
So I slashed and spread and ended up actually with quite an improvement, except that there was a bunch of extra fabric right along the CF line—like enough to take out an almost 1″ dart. So I did, and rotated that fullness into the two waist darts.
Version 3
This seemed like it did the trick. V. 3 fit basically like a second skin. Although looking at them now, I think the darts could maybe be spread out a little more evenly across the bodice front—they are both very close to the CF after all my futzing.
But. I wasn’t ready, after all that messing around, to jump right into my good fabric. So I went deep-stash-diving, looking for a suitable fabric that I had enough of that wasn’t otherwise earmarked.
Eventually I settled on this striped suiting. The fabric is some completely non-historical, soft and drapey thin suiting, mainly rayon by the feel. I have absolutely no memory of where it came from except that it must have been a gift. If it was from you, thank you! Anyway, it looked good and felt nice and there was plenty of it.
The deep stash also provided an underlining, in the form of this bublegum pink almost-light-canvas-type fabric (much less drapy) that I was quite happy to find a use for.
 Especially once I discovered the fabric tag. Yup, this fabric was received at Fabricland on 06/05/85. Over thirty years in stash, people.
I wasn’t overly concerned about authenticity at this point—just going for a fit test here. I didn’t bother with seam finishings (in hindsight I should’ve just serged my underlining to my fabric as the inside is fraying like crazy.) But despite that I was still going for as much “authenticity” in my construction methods as I could handle—so there’s boning, and the edges are faced with bias tape, and I generally tried to follow the method described in Plain Needlework and Amateur Dressmaking. To the best of my limited comprehension and/or patience, anyway.
 It felt like it took basically forever, though really I got it done in a week so that’s actually pretty fast.
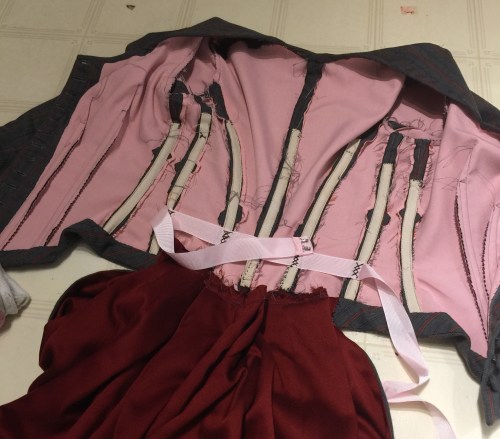
Guts
The guts aren’t pretty but they are complete—boning in channels, plus a waist stay. I think that’s a good idea with the long tails on this pattern. My materials range from vaguely plausible (cotton twill tape for the bone channels) to completely inappropriate (poly grosgrain ribbon for the waist stay. Rayon suiting)

Bodice interior from Plain Needlework and Amateur Sewing
And then there were the buttons. Plain Needlework suggested 1″ between buttons. In hindsight (funny how perfect it is) this was a bit much for the size of button I ended up with—I think 1 1/2″ between them would’ve been adequate.

Fabric-covered buttons!
Still determinedly stash-busting, I settled on some smallish coverable buttons that I had three packs of for some reason. I’ve never had much luck with covered buttons before. These went really well, in that I could easily pop them on to their bases once they were fabric-covered, but less well in that they tend to pop back off again quite readily.
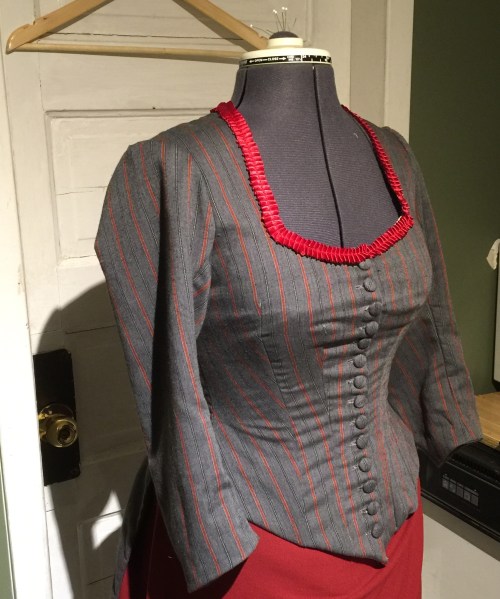
Lots of buttons. Also, a possible neckline trim.
They look nice, though. I did have all the stripes lined up, but as the tops kept popping off it was too annoying to try and get them back on straight. I made the buttonholes on the machine. I’ll drive myself nuts with the hand ones on the Good Copy.
(Oh, the pattern itself has a curve out at the CF bust area. This is a bit of an odd feature, but I gather is period. I had reduced it a wee bit with all my dart-moving, but I wound up making it completely straight for this version due to the stripes. Will I keep that for my “good copy”? If I don’t, my whole test fitting idea becomes kinda useless… if I do, my authenticity quotient goes down (not that I am expecting this to be overly high, mind you…)
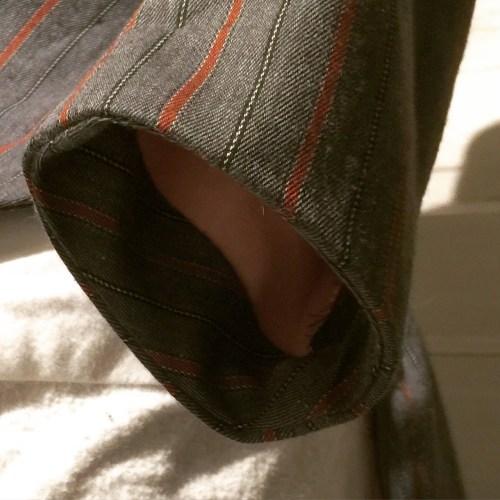
Sleeve with bias facing.
I muslined with long sleeves and (gasp) didn’t even add any length. I did take some width out of the sleeve, especially around the elbow curve, and tweaked the hell out of the sleeve-cap/armscye. It’s still not exactly perfect, but I have a pretty decent range of motion. The sleeve as drafted came just above my wristbone—which, actually, looking at my pinterest boards, seems to be accurate for the period, but would drive me absolutely batty. So I cut back to 3/4″ sleeves. Those I can handle. As per Amateur Dressmaking instructions, I faced both sleeves and bodice with bias tape made from the fashion fabric.
 Back in the fall I was playing with some satin ribbon and my ruffler and made this pleated trim. The slightly rusty red colour is perfect—I’m a bit torn about whether to use it or not. I actually like the simplicity of the plain bodice with the menswear-type fabric, but the lower neckline I chose is more of an evening style (which does not go with the menswear fabric at all, by the way, but it’s my party and I’ll show off my upper chest if I want to) and should probably be adorned. We’ll see how I feel once the skirt is gussied up a bit more.
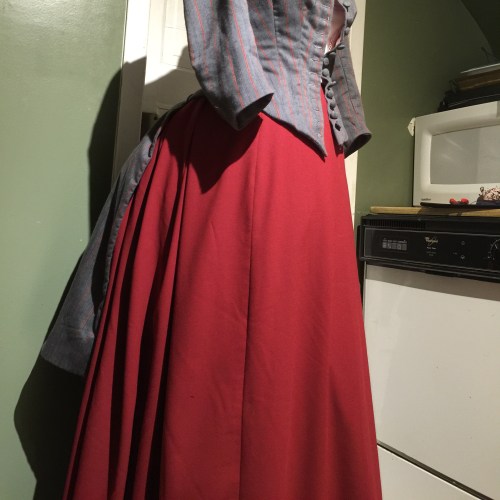 Which brings me to the skirt. Um, yeah. I didn’t have quite enough of the striped suiting for the skirt, or at least not for the skirt plus whatever overskirt draping I might eventually want to do. So I ended up breaking my stashbusting streak and picking up a few metres of this rusy red “wool crepe” (allgedly 65% wool… I am dubious). It was cheap, though, so it’s ok? Anyway, right down to the wire I managed to get it cut into gored panels, mounted on some black broadcloth underlining (salvaged from the same curtain as the cuffs for my blazer, so the walk through Deep Stash was not entirely finished). At 10:30 am Sunday morning, I had to admit, even as I finished pressing the hem facing, that it wasn’t going to be stitched in the hour I had left before I had to leave the house (and be showered and costumed), so I reluctantly but effectively broke out the safety pins. And I won’t even show you the joke of the waistband (more safety pins), but it covered my bottom half adequately, at least once I managed to half-ass a bustle for it.

Bustle, otherwise occupied.
(I made a perfectly good bustle already, but it’s adorning the mannequin that is holding my half-constructed blue skirt at the Marr Residence, so not actually accessible for wearing to said residence. I never said I had good planning skills. (Incidentally, yes, this does mean that I got further on my red skirt in approximately three hours of work than I have on the skirt I’ve been working on since October.)
 I did have a teeny little bum pad I made last spring, fairly softly stuffed—probably perfect for an 1890s “figure enhancer,” but not what I was looking for here. I decided to amp it up with a bigger cousin to get something a little more satisfactory; I stuffed it with fabric scraps (serger offcuts work well as they’re so teeny) from the sewing room garbage bag and had to largely hand-stitch it to the other as I couldn’t get the seam allowances anywhere near the sewing machine’s presser foot. This is a much heavier and less convenient option than the collapsible wired bustle I made before (especially for driving) but it was definitely functional, and didn’t collapse much, which I’m a bit worried the wired one will.
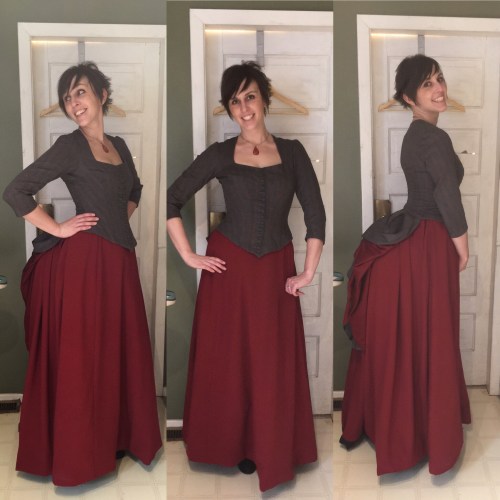
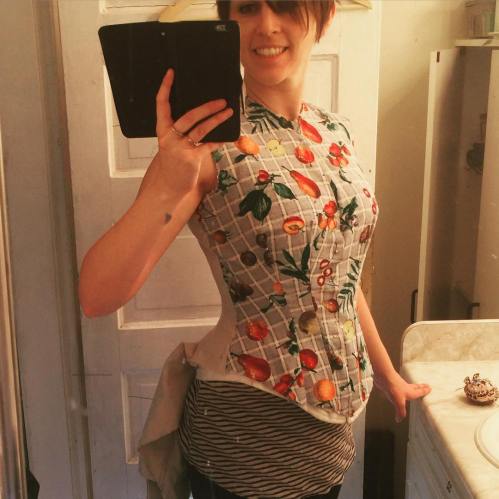
1880s outfit!
It made for a very plain ensemble, but at least the silhouette is there! Well, as close as I am likely to get to it, anyway. I meant to get some pics while at the Marr because DUH, but of course completely forgot. So rather than a beautifully restored period setting, you get narrow-cropped kitchen shots of my bathroom door. Which is probably close to period (well, early 1900s, anyway, and the only original door in our old wreck of a house), but not exactly gorgeously restored.

Back view.
I thought the plain tails of the waist (aka bodice) were a little, well, plain, so I tried pinning them up. I think the general principal is sound, but should probably be done by someone who can actually see what they’re doing, and not by me just randomly grabbing bits and pinning them blindly behind me while already dressed.
And just in case you aren’t thoroughly sick of this half-ass outfit yet have some mannequin shots of the half-finished skirt!

Skirt, front
Why did I let it sit wadded up on the ironing board for two days before I took these?
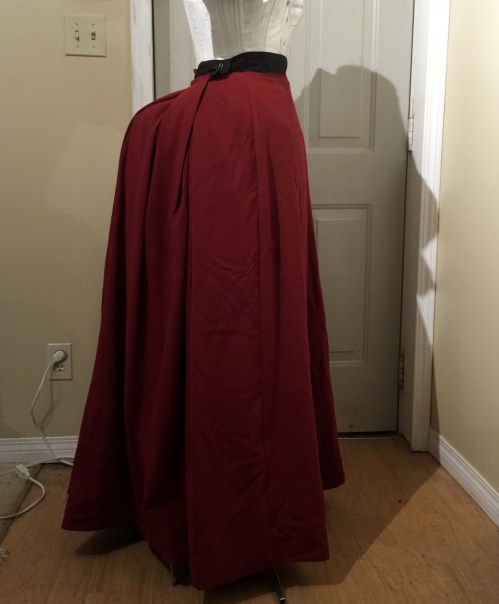
Side view. I think my other bustle definitely has a nicer shape (the fluffy petticoats would help, too.)
Pleats in the back. Also, the half-ass waistband. It’s just the black broadcloth (thin yet strong) basted quickly to the inside, and held closed with safety pins. I’ll do something better for next time.
I  Why yes, there’s a dress form beside my front door in half-Victorian costume.
 I’m kinda tempted to leave it there all month.


This is so gorgeous, I love it! I’m tempted to try making the bodice myself….not sure where I would go wearing it though!
Also, love the bump padding belt btw
I’m pretty tempted to try a daywear version myself! I love the tails. 🙂
There’s totally a dress form taking up a good portion of the sewing part of my bedroom — It’s dressed in mid nineteenth century undergarments (chemise, drawers, corset and hoop) because I thought if it was up and in my way I’d work on the rest of the outfit.
Did it work? It’s certainly easier… 😉
Beautiful! (and I love having my dress forms hanging around terrifying people as they walk into the room 🙂 )
It is kinda fun… 😉
Thank you!
LOL – I loved the part of the story about the unfinished skirt at the museum! Finish that sucker up sometime! You looked great in your final outfit – I’m so impressed with your historical sewing!
I will! It’s coming… I think I need to bring it home to work on…. 😉
Fabulous! Your outfit should be on display!
Thank you! It’s getting there. 😉
Wow, that’s incredible! It looks amazing.
Thank you!
It does not look half assed at all. I’m dead impressed :).
Thank you! It’s… less half-assed from the outside?
Awesome m’dear 🙂
I’m in awe.
Awww! Now I’m blushing.
What a challenge and you succeeded! Beautiful!
Pingback: Victorian Romp | Tanit-Isis Sews
Pingback: A Victorian Sundress | Tanit-Isis Sews