
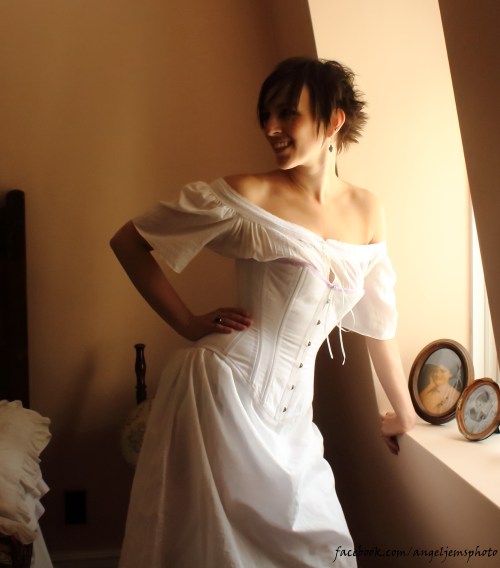
 My ersatz Victorian dress is finished, or at least as finished as it is likely to get, which is to say there is trim of some kind on all three main elements. (Waist, aka bodice, skirt, and overskirt.) I’m actually reasonably comfortable that it falls within the range of Victorian “normal” and isn’t too weirdly stripped-down, which is actually the biggest thing that often seems off about costumes (at least to me). Well, the skirt is probably a little too plain. And the whole thing is on the plain end. Just, hopefully not too plain. (And my neckline is completely inappropriate for a day dress as far as I can tell, while my suiting fabric would not be a good choice for evening wear… but this was my “fun” project and I don’t personally like high necks, so I picked the neckline I liked.

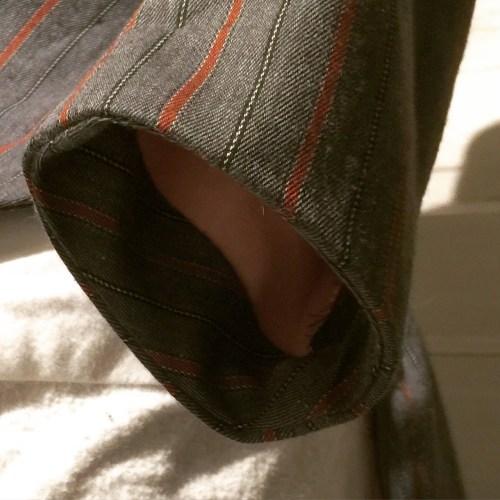
While getting dressed, I lost a button. A significant amount of the editing involved photoshopping the button that popped off when I was getting dressed.
The bodice has a pleated ribbon trim; the overskirt has the same ribbon, but unpleated. For the skirt I took all the remaining bias tape from my main fabric and folded the edges under to make a trim I could stitch down. This was the least successful trim as the bias is somewhat rippled (even though I stitched both edges in the same direction). I wasn’t convinced the placement was any good, either, but actually looking at the photos I don’t mind it. I don’t feel inclined to rip it all off, in any case. If I had more of the red fabric I would add a pleated trim around the bottom of the skirt, but I don’t, and at least at present I don’t feel like buying more.
 Anyway, this completion happily coincided with a couple of things. With my most recent Victorian Sewing Circle afternoon. Also, my sister-in-law, who has always dabbled in photography (and even worked as a portraitist a few times) has decided she wants to really get into the game. Photographer with a Real Camera who just wants some serious practice? Sign me up! So I got her to meet me at the Marr Residence that morning for a fun (almost*) period photo shoot.
We started with boudoir shots.
It’s been a really long time since I did a real photo shoot with, like, an actual photographer. It was really fun.
 We bounced around the house, playing with the light.
 Every room was different.

The Marr Residence has a great little double-lot park, and the day was warm enough that it wasn’t a huge sacrifice to run around in the snow—although the tail end of winter is not the most scenic time of year anywhere.
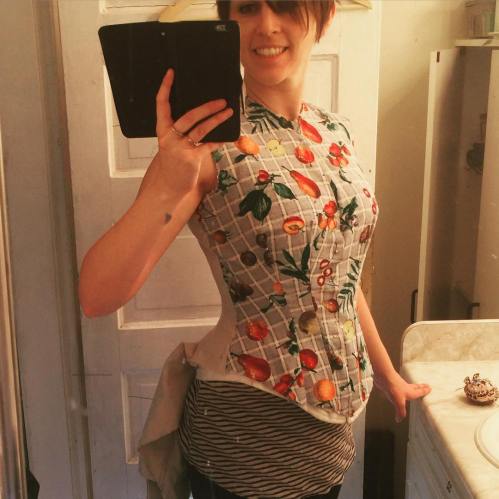
Angie was good enough to let me have at the electronic files. It’s also been a really long time since I took the time to seriously edit photos for anything. I am not on the Better Pictures Project. 😉 most of my blog photos are quick snaps with my iPhone, occasionally tripod shots on my point ‘n shoot, and the editing I do is only basic straightening, cropping, and a wee bit of contrast & exposure. Mostly via the built-in iPhone editor. It’s a hard reality that I have accepted—if I wait for good photos before I blog, there will be no blog.

But it was sure nice to actually take some time with these, both the photo shoot and the editing. And I even had RAW to play in! (I am not a good enough photo editor to tell you if RAW actually makes a difference in the final photo, but it sure is FUN!) though most of these were done from the jpeg as it’s just faster for me. RAW is like a rabbit hole from which there is no return.

I can’t help it. I love me some cheesy filtering sometimes.
I did most of the editing in GIMP (the GNU Image Manipulation Program) which is photoshop’s slightly awkward but most importantly free little brother. It can do pretty much whatever photoshop can, and doesn’t cost a dime (and it took about three seconds of googling for me to find and download the add-ons for processing RAW format and batch-editing. I do find it difficult to bounce back and forth between the two programs, as you have to remember two different ways to do everything, but if you don’t want to shell out for Photoshop it’s a pretty awesome alternative.
 I may have had a bit too much fun with the editing process, making sepia and low-colour versions. Oh, well. They’re my photos and I’ll cheese ’em up if I want too. I also lost the cover off one of my fabric-covered buttons while getting dressed, so that had to be photoshopped out of a bunch of pics. I will warn you, I also took the liberty of some SERIOUS Photoshopping once or twice—so if you catch yourself wondering “is her waist really that small?” The answer is probably “no, not even in a corset.” PICTURES LIE!!!!

PS, should you have the inclination, you can find my photographer at Angel Jems Photography—facebook page for now, hopefully a real website at some point. Also I’ve uploaded a few more photos on my Flickr page:

and:

What we didn’t get were any shots resembling an actual Victorian portrait, standing stiffly against a backdrop and not smiling. These pesky modern photographers and their action shots and candid snaps. Maybe next time.
 *you’ve seen my hair, right? Short of concocting a story about how I cut it off and sold it to buy a chain for my husband’s prize watch, which he sold to buy me a comb for my beautiful hair, we’re kinda stuck. I don’t have an appropriate wig, and I’m disinclined to go out and buy one at the moment. I also don’t have a period hat for the outdoor shots.

Ok, I’ll stop now.


 Especially once I discovered the fabric tag. Yup, this fabric was received at Fabricland on 06/05/85. Over thirty years in stash, people.
 It felt like it took basically forever, though really I got it done in a week so that’s actually pretty fast.
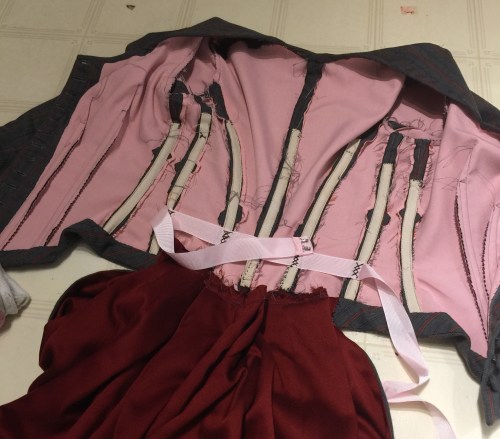


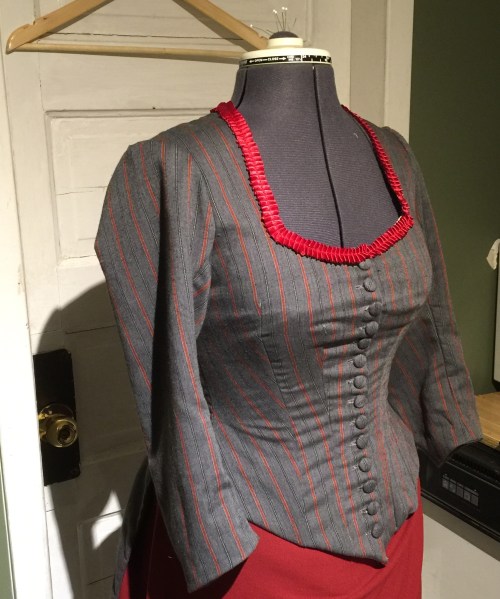
 Back in the fall I was playing with some satin ribbon and my ruffler and made this pleated trim. The slightly rusty red colour is perfect—I’m a bit torn about whether to use it or not. I actually like the simplicity of the plain bodice with the menswear-type fabric, but the lower neckline I chose is more of an evening style (which does not go with the menswear fabric at all, by the way, but it’s my party and I’ll show off my upper chest if I want to) and should probably be adorned. We’ll see how I feel once the skirt is gussied up a bit more.
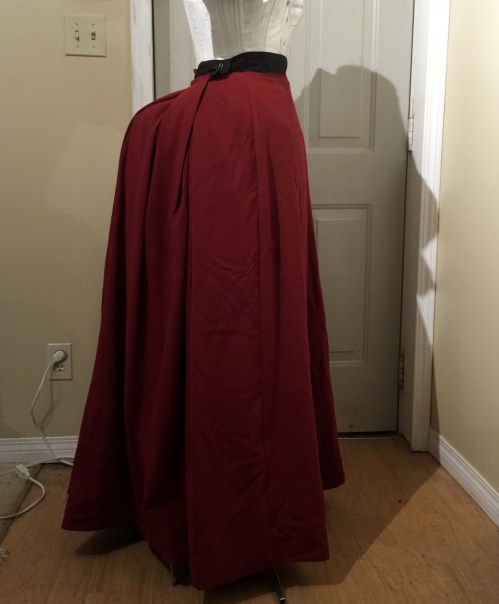
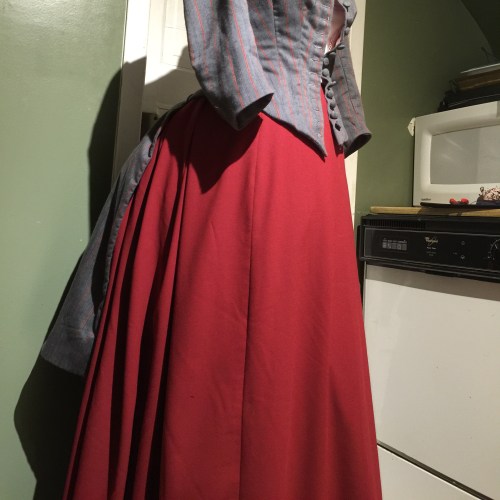 Which brings me to the skirt. Um, yeah. I didn’t have quite enough of the striped suiting for the skirt, or at least not for the skirt plus whatever overskirt draping I might eventually want to do. So I ended up breaking my stashbusting streak and picking up a few metres of this rusy red “wool crepe” (allgedly 65% wool… I am dubious). It was cheap, though, so it’s ok? Anyway, right down to the wire I managed to get it cut into gored panels, mounted on some black broadcloth underlining (salvaged from the same curtain as
 I did have a teeny little bum pad I made last spring, fairly softly stuffed—probably perfect for an 1890s “figure enhancer,” but not what I was looking for here. I decided to amp it up with a bigger cousin to get something a little more satisfactory; I stuffed it with fabric scraps (serger offcuts work well as they’re so teeny) from the sewing room garbage bag and had to largely hand-stitch it to the other as I couldn’t get the seam allowances anywhere near the sewing machine’s presser foot. This is a much heavier and less convenient option than the collapsible wired bustle I made before (especially for driving) but it was definitely functional, and didn’t collapse much, which I’m a bit worried the wired one will.
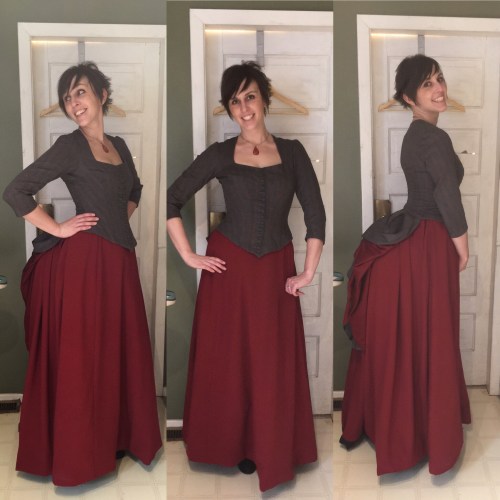


 Why yes, there’s a dress form beside my front door in half-Victorian costume.
 I’m kinda tempted to leave it there all month.


