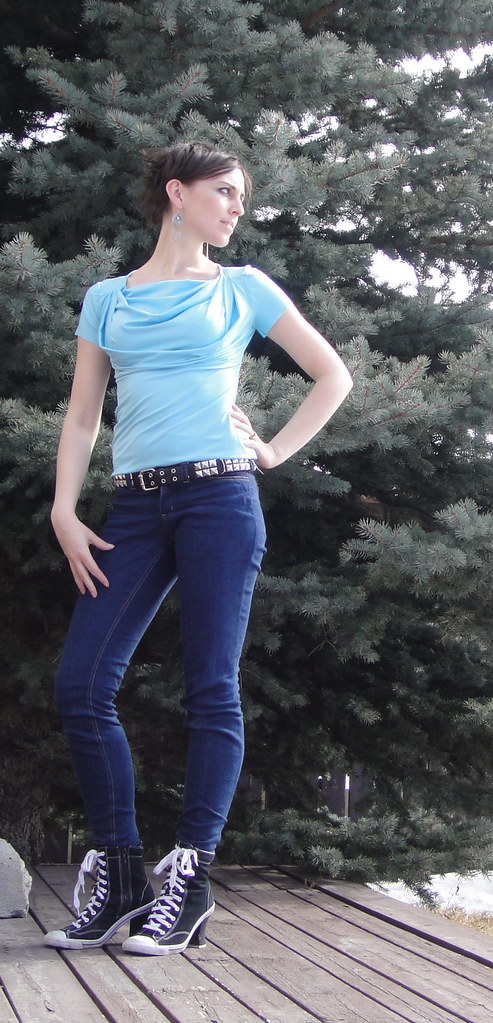
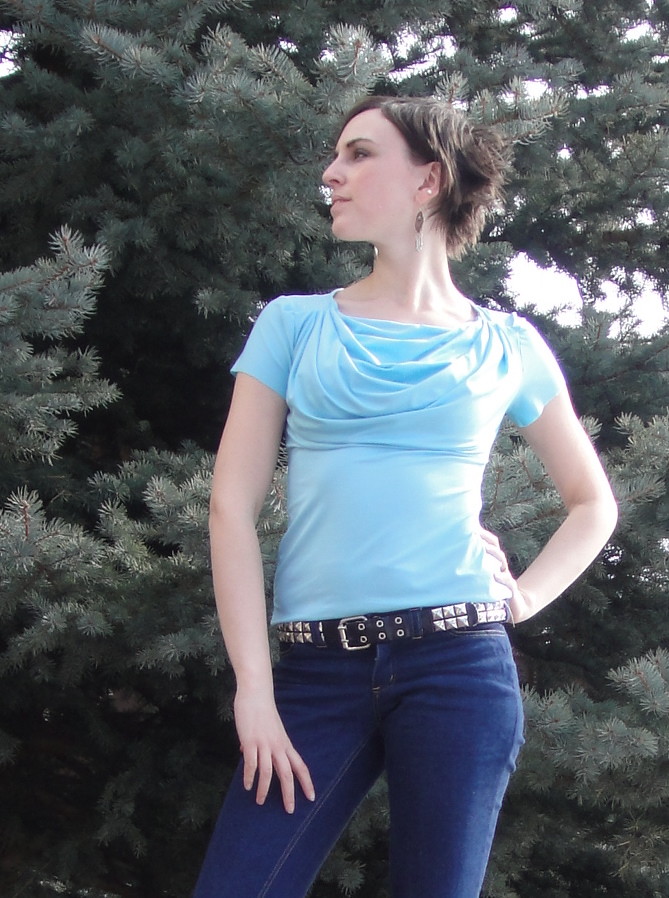
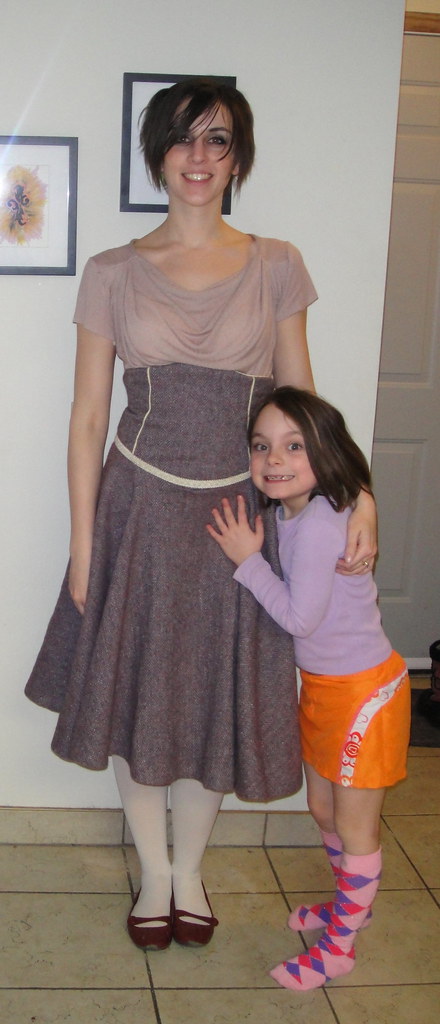
Tag Archives: finished projects

Scraping the bottom of the barrel

The Cute, it burns!

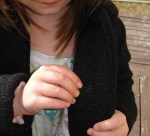
As I contemplate the fact that I have hardly made any progress on, well, anything, in the last several days, it occurred to me that I never did a final post about the coat I made for my niece in January (like, after I put on buttons and hemmed it). So here you go—if you’re not into looking at an excessive number of photos of my seven-year-old, feel free to stop reading now.

As a quick recap, I (for better or for worse) came up with the idea that I would make some fun “winter” coats for my nieces (aged 4 and not-quite-3). Probably it had something to do with this sparkly black boiled wool being on sale at my local Fabricland… at any rate, when we dashed home at New Years I dragged (both!) my SILs to the fabric store and got some lush leopard-print fleece for the lining, and headed home with the aim of having at least this first coat completed by Niece #1’s birthday at the end of January.

McCall's 3374

And I did. And if I were a mature and responsible adult, I would’ve had it in the post for said niece to receive in a timely fashion.

Instead, I dicked around, forgot about it, and now winter’s pretty much done (despite its best efforts) and the coat is still hanging in my front closet. Erm. Well, she’ll have it for next winter, for sure. And I’d really like to give the two coats at the same time. Right. That’s it.

Despite the explosion of fun-fur on the pattern envelope, this is actually a really basic, classic A-line coat pattern, with nice collar,  hood, and cuff options. It’s not lined, but when has that ever stopped me?

I made the size 4 for my oldest niece, which as you can see Syo is modelling quite handily—it’s a bit snug but not problematically so—so I’m not too concerned about the recipient outgrowing it before next winter. I will make the size 3 for my younger niece, who is even runtier than Syo was at that age (I wasn’t sure that was possible, but apparently it is), and hope that she can wear it sometime before kindergarten.

And now, without further adieu: photos.

15 Comments

Filed under Sewing

OMFG

Surveying the wreckage our children have made of the yard

I got pictures!

This shirt was finished at the end of February. And it’s taken me this long to wrangle him three steps out on the back deck to get something resembling decent pictures. Argh!

Anyhow. This was originally the muslin but (if you will recall), he was only willing to try it on for about three seconds and balked loudly at photos. But the fabric was nice—a flannelly old bedsheet—so I was able to convince him to let me finish it properly and photograph it. In theory. With promises of… well, I won’t go into that on a blog my mother reads.

So… the fit.

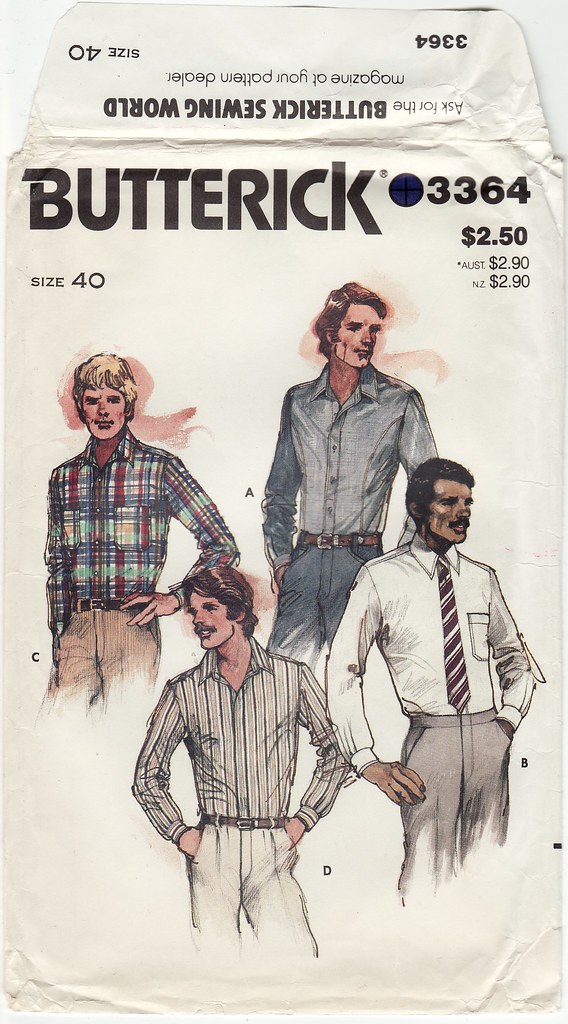
This is a “slim fitting” men’s shirt, with those interesting princess seams. I took the princess seams in each about 1/4″ around the waist (for a total 2″ reduction), since his actual waist is about 2″ less than the pattern’s waist measurement. This makes for a nice line that’s flattering without being overly tight.

Butterick 3364

I am actually squeeing a bit over how nicely the shoulders fit. No slope-shoulder adjustment required, apparently, which surprised me a bit since he’s plenty muscly in that area. Not going to complain, though.

I lengthened the sleeves by 2″. This was probably a bit much—I think 1″ would’ve been enough—but he, like me, is a bit ape-armed and thus prefers the overly-long sleeve to one that feels just not quite long enough.

Ma hunny!

I also omitted the pockets and collar roll, and just made the collar stand, as is his preference in shirts. The collar (stand) is in fact long enough to button up comfortably—I had to unpick the original and make a larger one—but between me buttoning up the shirt in the livingroom and getting him out to the deck he’d unbuttoned it.

A straight shot of the back to show the fit a bit better.

I wish I could say that this had become a go-to shirt, as I love the fit and how it looks on him. Unfortunately his main use of dress shirts is as comfy-lounging-around-the-house wear. The poet shirts I made him last summer are very well suited to this use, but a more fitted shirt like this is apparently a bit restrictive for such lounging.

I’m not sure when/if I’ll make another, not because I don’t love it, but if it’s going to be this much trouble to get a photo, AND he’s not going to wear the resulting shirt, well, my motivation is limited. I do have at least three fabrics in stash bought with a shirt for him in mind, though… I’ll have to think on it. One is a stretch linen, and I know he wears linen and the stretch might make it “comfy” enough to get some use.

Although when I tried to talk about the linen, he kept bringing up his lone, current, pretty-much-worn-to-death linen shirt, which has a camp collar and facing and back pleating pretty much identical to a short-sleeve Negroni.

So apparently I should’ve just made the Negroni.

I think I’ll go work on my springy coat now. Sewing for men seems to bring out my homicidal tendencies…

36 Comments

Filed under Sewing

Confection

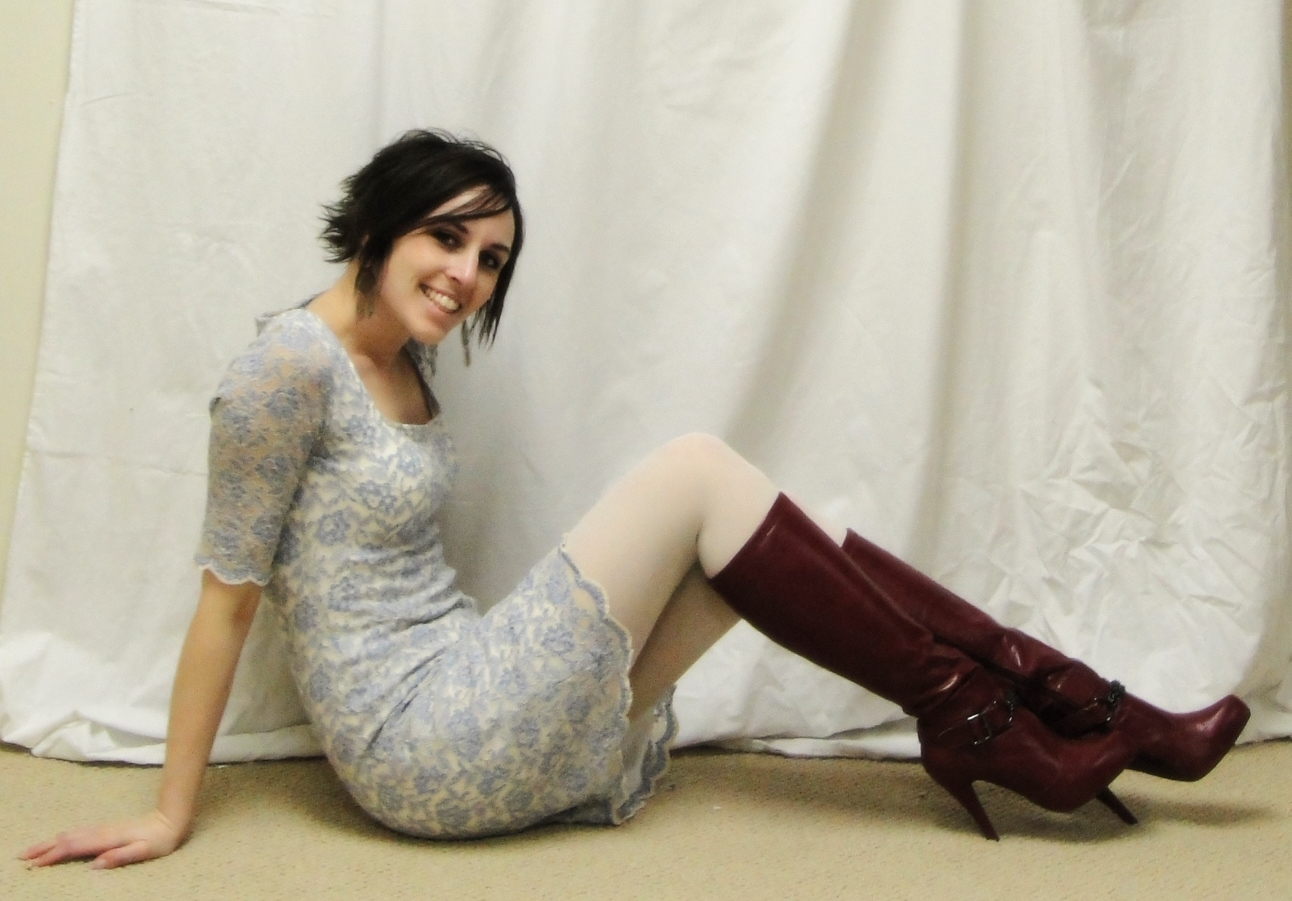
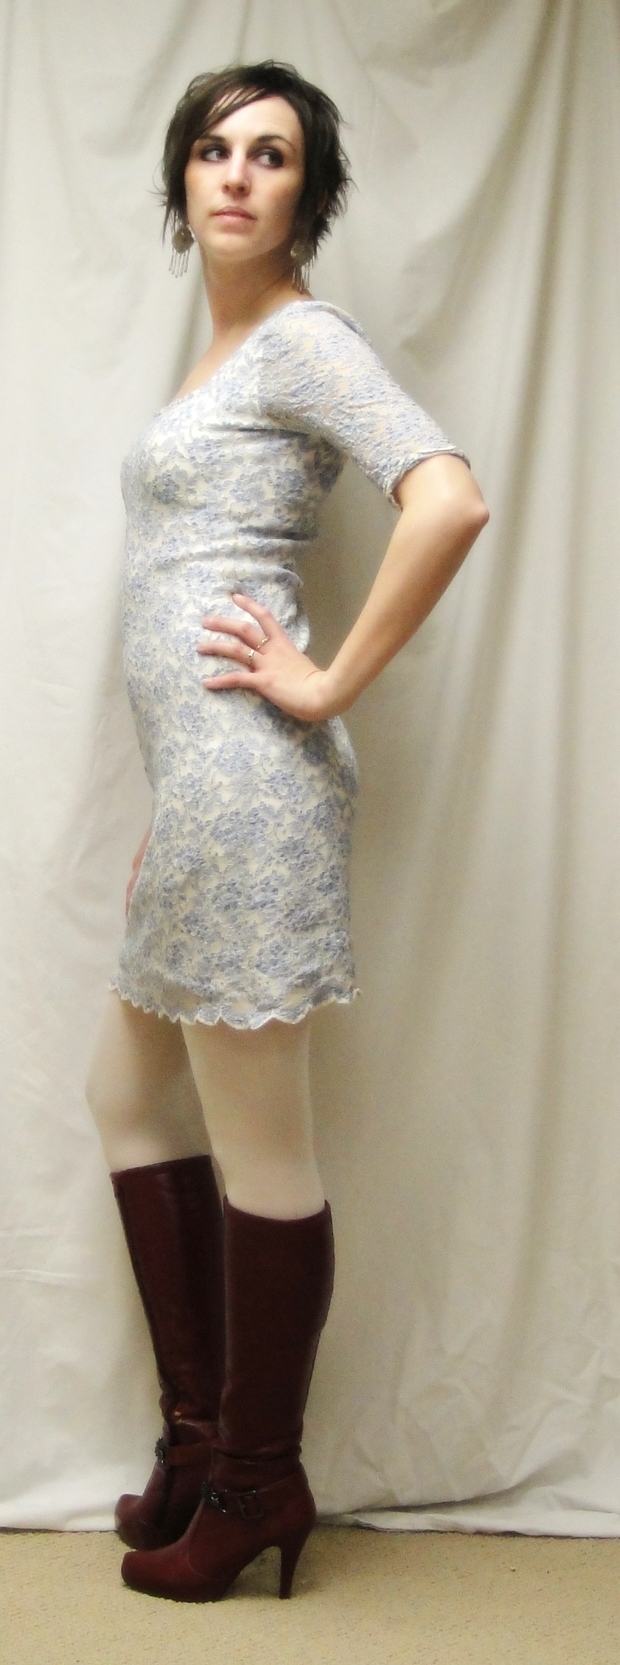
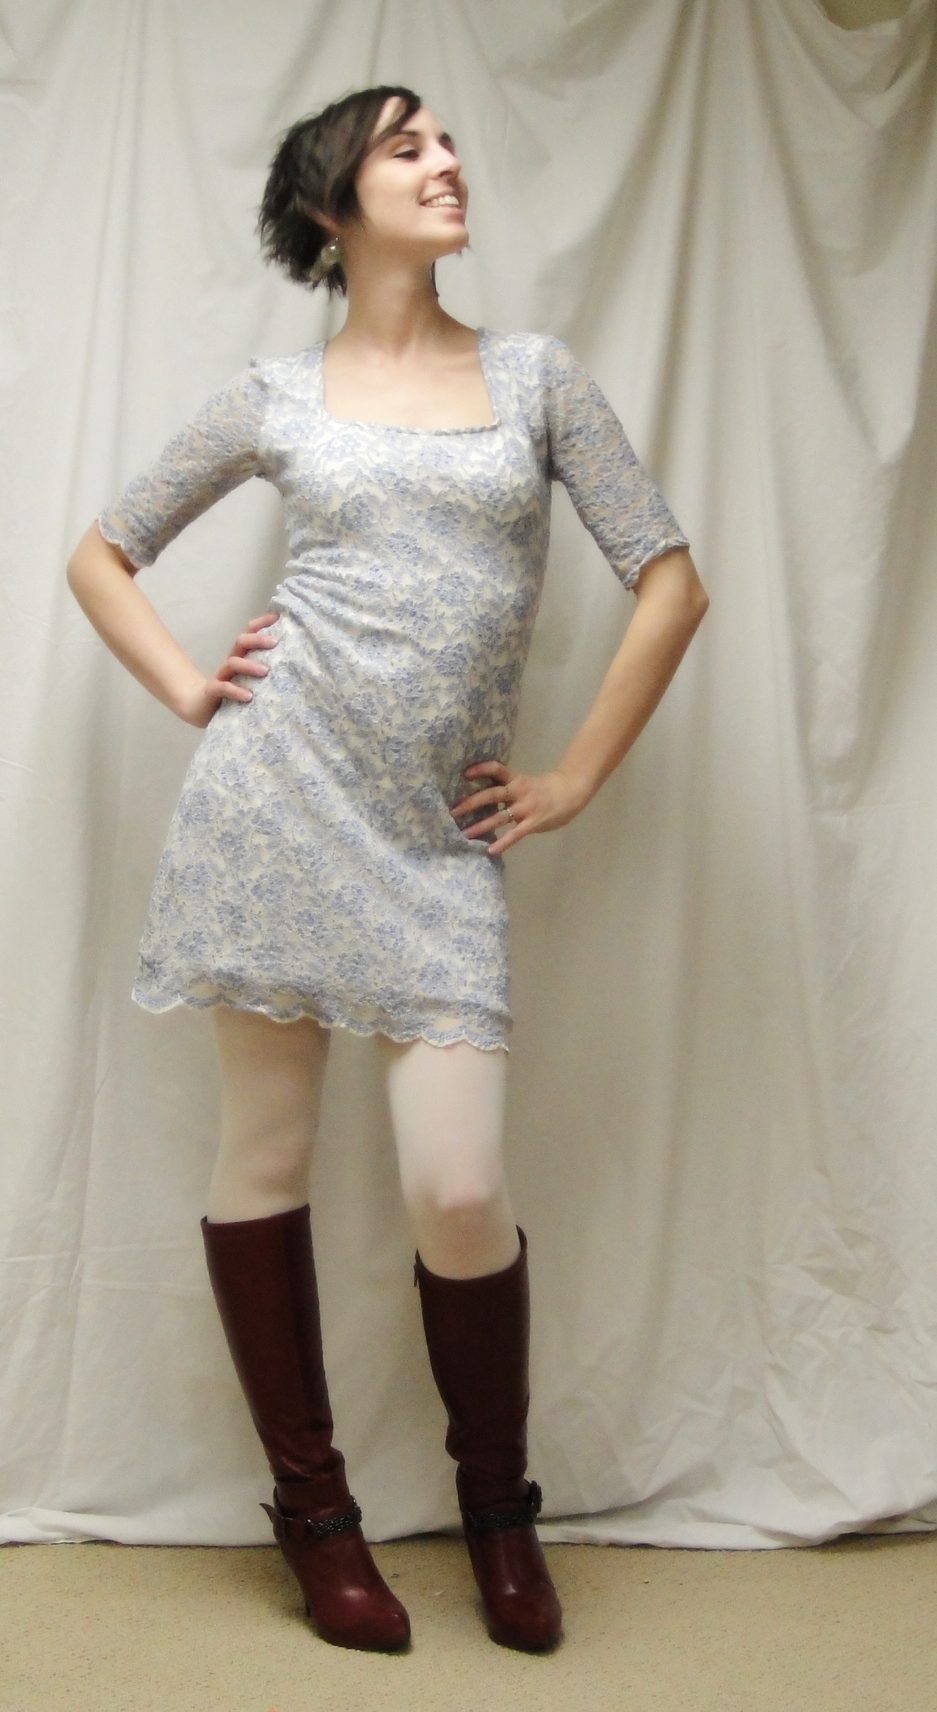
Lacy dress!

I do truly, truly love how quick knits can be to sew up (especially when I’m floundering for a blog post 😉 ). I made up the pattern for this after supper last night and had the entire thing cut out and stitched up before bedtime. Yay!

Last week when I asked about ideas for my lace, there were lots and lots of very good thoughts, including another one of my 70s maxi-dresses (which would’ve been divine) or a top-and-skirt combo (and some links to some really neat skirts, too…) but the t-shirt dress, a la Carolyn, seemed to win out overall, and, most importantly, to me.

So I made one.

Pattern adjustments

Patty made an interesting point on her awesome skirt post that self-made patterns can be frustrating to read about since you can’t go out, pick up the pattern, and make it yourself. I get what she’s saying—but not enough to give up making up my own patterns, which is SO MUCH FUN (regardless whether I know what I’m doing or not.) So as a compromise, I figure I’ll mention a bit more about what exact changes to my basic pattern I made. (This is also good because then I’ll remember them for next time when I lose the pattern pieces)

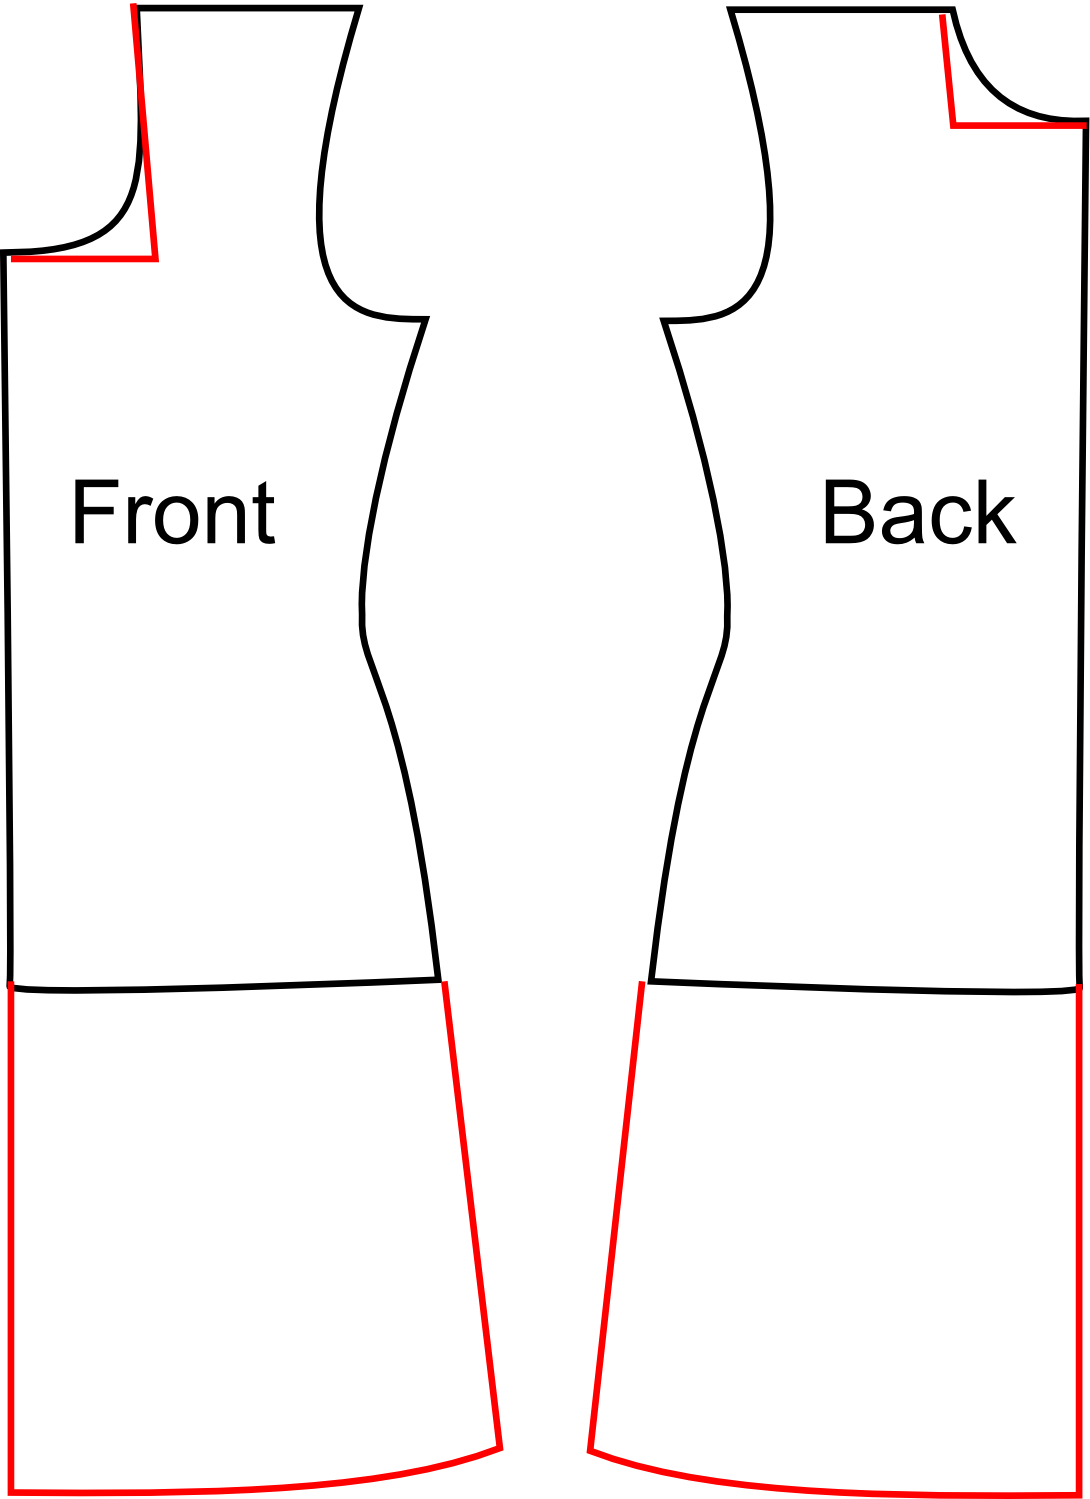
As with the great cowl adventure, this all began with my trusty “knit top sloper”, the pattern formerly known as Lydia. The changes this time were minimal—I made a square neckline (just by squaring off the corner of my usual scoop-neck) and lengthened the bottom; I just followed the angle of the hip of the sloper on down and out, which created a slightly A-line skirt. For length, I picked 20″ below the waist (I have a waist line marked on the sloper for just such purposes, although I was too lazy to include it in the diagram, sorry) as a nice, above-the-knee-but-not-dangerously-short length. (I feel like I should add that I have nothing against micro-minis per se, it’s just that sad experience has taught me that if a skirt is short enough that I spend a considerable amount of time worrying about who I’m flashing while I’m wearing it, I will end up just not wearing it. Sad but true. My micro-mini skorts, on the other hand, get worn to death)

Lacy Dress---Side

For the sleeve, I eyeballed a “nice, just above-elbow” length, which turned out to be about 18cm below the armpit. I added quarter-inch seam allowances, and proceeded to (ulp!) cut my fabric.

I think it’s worth mentioning a couple of things about the fabric. You all met the lace, a gorgeous bargain-bin find, last week, of course. What I didn’t mention is that one of the reasons I hadn’t done anything with it yet (other than the weather) was that I didn’t have the right underlay. So last week, aside from juggling children, schoolwork, and ER visits (no lasting harm done), one of my goals was to acquire said fabric. It had to be smooth, stretchy, not to heavy, and set of my lace. Syo and I wandered high and low through Fabricland draping my lace over every solid-coloured knit. We started in the bargain centre, but of course what I settled on in the end was a much pricier cotton-lycra blend, setting me back roughly $10/m. Not humongously expensive (especially compared to the bamboo knits or some of the other nice athletic solids), but considering this is going underneath a $2.50/m fabric… yeah. Well. Anyway, I bit the bullet, and I have to say I love the fabric—its feel, stretch, recovery—more than enough to pay that much again. After much hemming and hawing, I picked a bright white, too, rather than an ivory or cream colour—I like how it brightens the overlying lace.

Lacy Dress---Front

So, I had both my fabrics. I cut the bodice front and back out of both, but the sleeves only out of the lace.

Now, stretch is always the wildcard when it comes to knits. Depending on the fabric, my knit sloper can produce garments that are either tent-like or alarmingly form-fitting. I wanted the lace dress to be form-skimming rather than sausage-skin-like, so I had checked its stretch, in a very rough and ready way, by marking a length of the fabric equivalent to the bodice front across the bust and then stretching this on me to see how snug it was. If it was too tight I was planning to add a bit of extra ease to the bodice, but it seemed all right—yay!

I did not perform said test with the underlay, choosing to hope that it would be, at least, no more droopy, and hopefully just a bit more snug.

For once, the sewing gods were not vengeful, and that seems to have been the case. In another interesting observation of knit/stretch, I meant to trim the underlay shorter (since you wouldn’t want it hanging out from beneath the scalloped edge) but totally forgot. Once assembled, however, the lace naturally stretched to an inch or more below the underlay bottom edge—perfect!

Lacy Dress---Back

Construction wise, I pondered a bit. I knew I wanted it attached at neckline, shoulders, and arms, but I figured I wanted the side-seams of the dress to move separately. This took a bit of mental gymnastics, and some fudging, as I basically followed my usual construction order (one shoulder, bind neckline, other shoulder, set sleeves flat, sew underarm and side-seams in one pass, except it was two passes this time.), but mostly has worked out.

Now, in fairness, all is not perfect. There are any number of oddly-pulled areas, around the hem, side-seams, and shoulders; my neckline didn’t come out perfectly symmetrical (boo!), the lace tends to droop in one spot, which I can relate directly to the ends of the fabric piece being more stretched out than the middle when I was cutting. For the most part I’m not going to sweat them until I wash the whole thing at least once. I was at a loss as to how to properly bind a square neckline in a knit (google mostly pulled up stuff featuring woven bias binding, not at all what I was looking for), and the V-neck methods I was hitting on all seemed to have a much wider band than I wanted. I did toy with trying to use the scalloped edge on the neckline, but the scallop seemed a little big and floppy. So in the end I just bound it with a strip of the lace and a bit of clear elastic. As I’ve been doing with my more floppy knits lately, it seemed easier to just turn the entire band to the inside and topstitch… In the end this worked all right, although the corners aren’t crisply square any more. Meh. I was hoping to skip out on hemming the lining fabric, but it’s one of those knits that rolls like crazy so I will probably have to :P.

On the whole, I’m not bothered, though, because I have a great lace T-shirt dress!

And, even better, I still have over a metre of my lace fabric left… what to do, people, what to do?

41 Comments

Filed under Sewing

Apparently I am learning how to sew

Finally stitched!

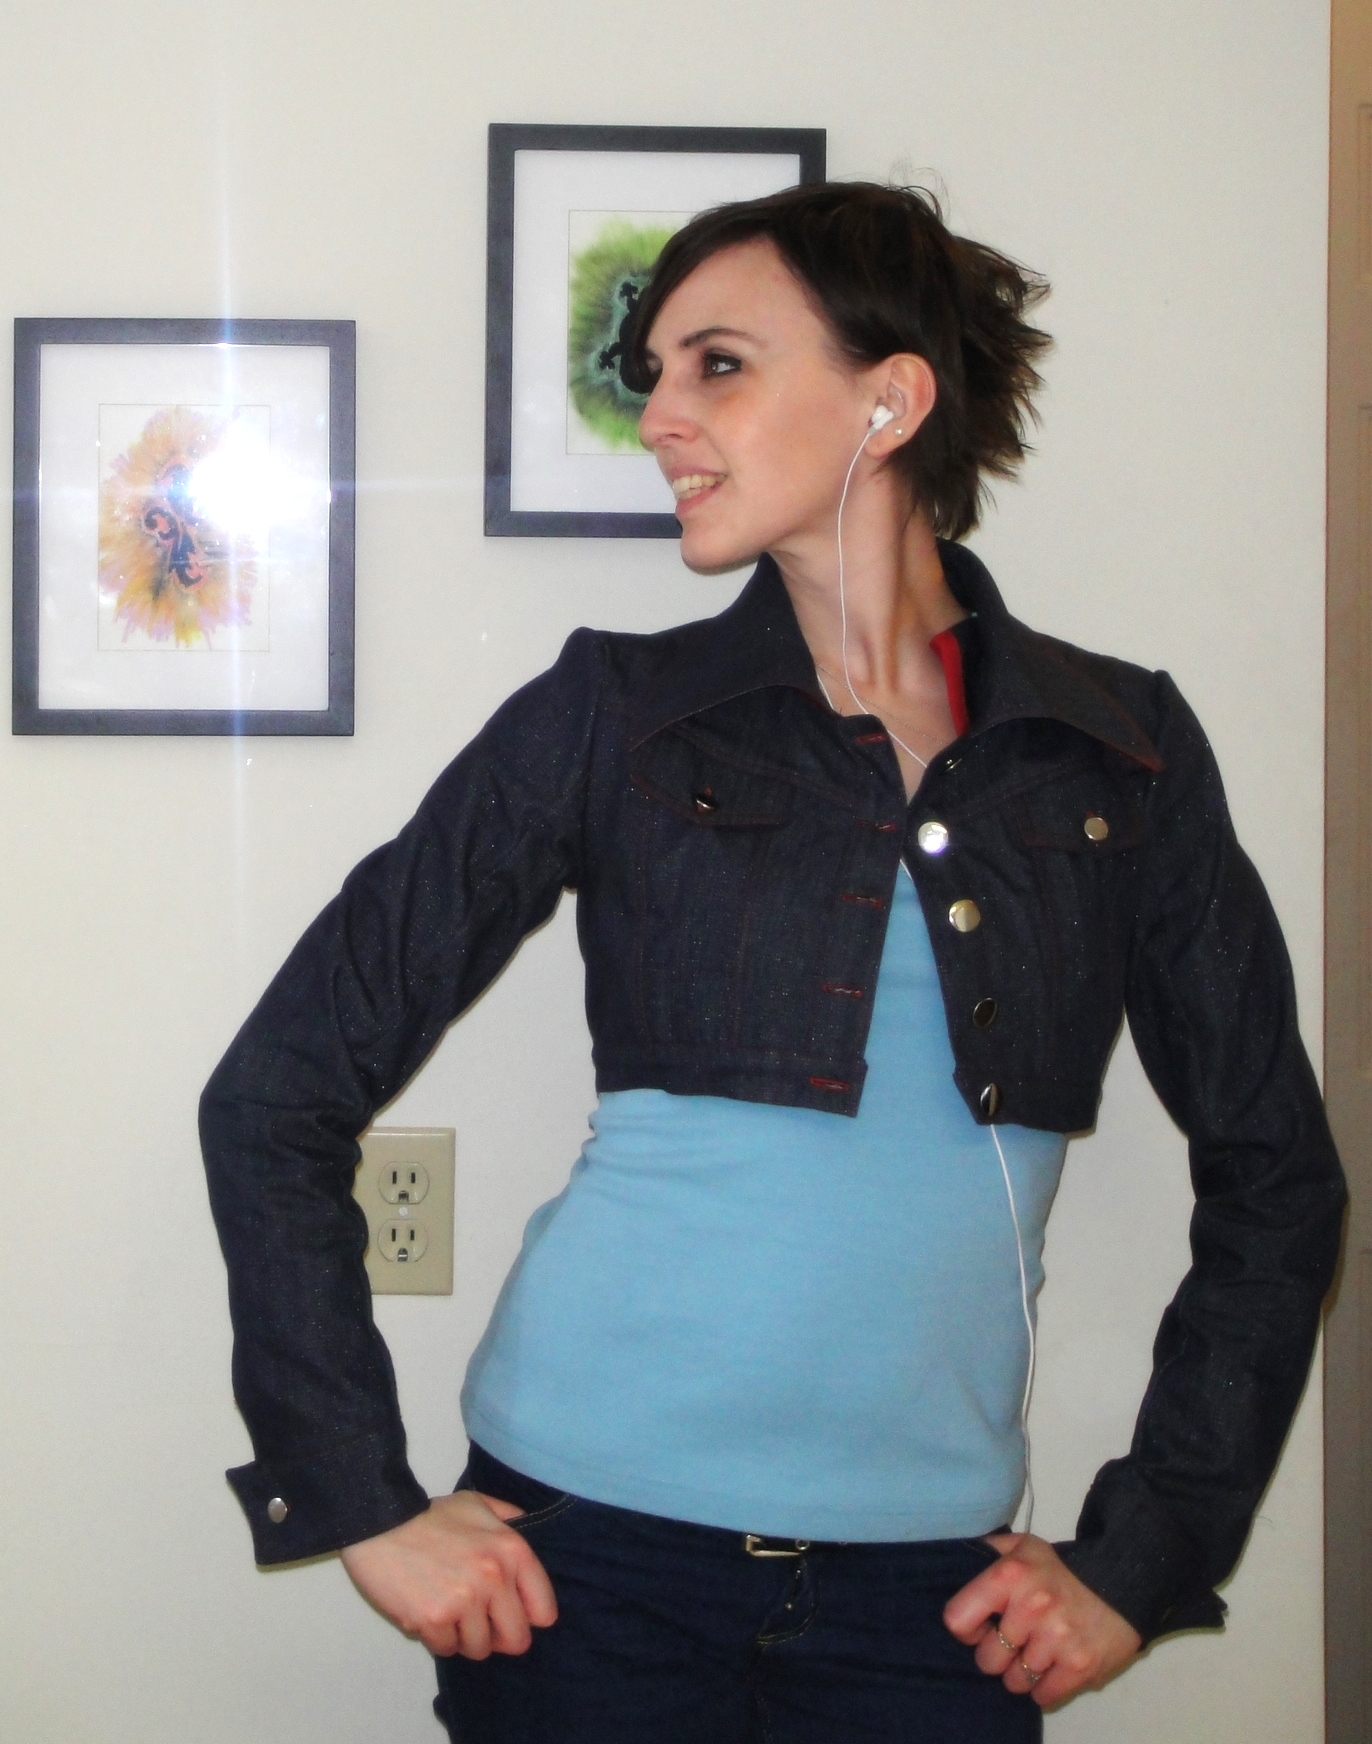
In particular, when it came time to stitch up the “waist” band on this cropped little jean jacket, I was able to topstitch along the entire length, from the outside, and successfully catch the underside along the whole length! Cue bugles, triumphal marches, and possibly even choirs of angels.

Of course, the nice, crisp hand of my denim and the straight edge didn’t hurt, but still, I feel like I was very careful feeling my way along, making sure the fabric was where it needed to be on the bottom and all that. I felt like I knew the little tricks the fabric was likely to pull, and what I had to watch out for—and how to watch out for it. Woohoo!

Back view

Which is not to say that this jacket is anything like flawless (I did mention the collar points before, didn’t I?), but on the whole it came together pretty well. The fabric was thin (for denim) and crisp enough that my machine did the buttonholes with scarcely a whimper.

If I decide to do another such jacket, I’ll increase the bust shaping in the front, as it’s a bit minimal—not that it doesn’t fit, mind you, but when your assets are, ah, modest, a bit more shaping that nature strictly requires can be a fine thing. Also the “waist” band is pretty loose—not problematically so, but it could have an inch or so less ease without even beginning to feel snug.

I’m a little regretful that I didn’t topstitch the front sleeve seam… I suppose I could still do it if I really wanted to, I’m just a little doubtful of my ability to do it neatly.

The buttons look as snazzy and shiny as I had hoped. I had two sizes available; I used the larger ones for the front and the smaller size for the pockets and cuffs.

Cuff (linked)

For the cuff buttons, I linked two buttons together with thread and blanket-stitched along the little length of thread between them to make a short bar. This was kinda a pain as the thread kept trying to miss the button, but while the end result was a bit messy, it doesn’t show, so I shan’t complain.

I went on about the construction at fair length here, so I won’t belabour it too much more. Incidentally, as you can see in the interior shots in the other post, there really are little pockets under those chest flaps, although they’re so tiny (and in such a location) that I probably won’t actually use them much. I’m still glad they’re there. Flaps without pockets would annoy me—but apparently flaps with vestigial pockets are fine.

Now, I just need the weather to shape up enough so I can wear it. Today is the first day in over a week that it hasn’t snowed, so that’s a good sign!


In Me-Made March News,

MMM day 29

I can’t believe that Me-Made March is almost done! I’ll try to spare you my requisite freak-out about time passing… it’s not that I’m that messed up about growing older, but when every month is one less of funding you have left, looking forward to the future is a bit hard. I’m sure everyone who’s ever done contract work knows the feeling.

Today I’m wearing my skinny jeans and this blue short-sleeved Lydia top (pre-dating many of the tweaks that made this pattern actually fit me), which incidentally is the exact same outfit I started off the month in. But I have my cropped jacket, so that’s different, at least (even if the denim of the jacket and the denim of the pants don’t match at all)

I have to admit, I find these cropped jackets surprisingly nice for wearing around the house. Someone commented that their tummy would get cold, but I really find that having the extra layer around my upper body is warm enough—and anything that gets me out of my bunnyhug* is a plus in my world. If I could just train myself to wear slippers, I’d be snug as a bug.

*Central Saskatchewanese for “hoodie.” And no, Saskatchewanese is not a word.

22 Comments

Filed under Sewing

A further invocation of spring

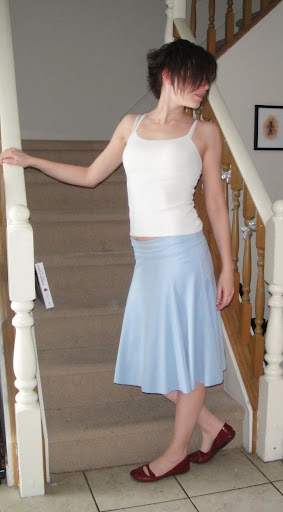
Mermaid skirt

Since the first one worked so well. Well, it did—the temperatures I’m complaining about right now are a full 20° C warmer than the ones I was complaining about at the beginning of the month. It’s still snowing, however.

This fabric was snatched up in the frenzy of stash-building earlier this month when I discovered Fabricland had actually put some decent knits in their clearance section. Mainly I like the colour, but it also has an interesting sueded surface and a moderate stretch. It seemed a little heavy and so was passed over during the Great Cowl Experiment (which Sigrid’s versions are making me ache to revisit, by the way…), but I thought it would be great for a springy little skirt.

My first thought was a half-circle like Hip Dropped Stitches’ gorgeous one, but I was concerned that the nap running in different directions might end up looking odd (I can’t tell if there is a direction, but if I pretend there isn’t, you know I’ll find out there is when I photograph the skirt.)

My next thought was a mermaid skirt. I’ve been wanting a little, flared, gored skirt since… well, aside from always liking them, Loutracey posted this one lots back in Self-Stitched September, and then Big in Japan copied this one, and then most recently Yoshimi unveiled this gorgeous (red!) version. Yum, yum YUM.

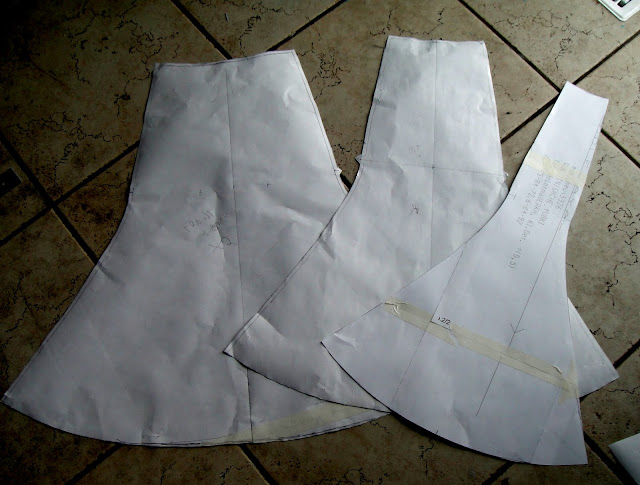
Evolution of a pattern: right, original piece; centre, doubled; left, tripled width.

What flummoxed me for the longest time was a pattern. Obviously a straight gored skirt would be easy to draft (bum-fitting aside), but I wanted something with a graceful curve hugging the hips and then flaring out below. This would take a bit more thought. And of course, going out and buying a pattern would be too easy. Lekala had a couple of versions I considered, but the one had too many panels (a 10-gore skirt, in fact) and looked too long (which is SO weird, because if you look at their artist’s rendering, the skirt comes to below the knee. The pattern piece is only 22″ long, people, and the waistband’s not that wide either. I mean, I know I have long legs, but not that long.), and the other one, while lovely, seemed to have a bit too much flare. I wanted the skirt to bell out, but not be a circle dropped to my hips.  (I can’t believe I just admitted that a skirt can be too full. That’s like saying pants can be… too long. Or that the Blondissima got your hair too blonde).

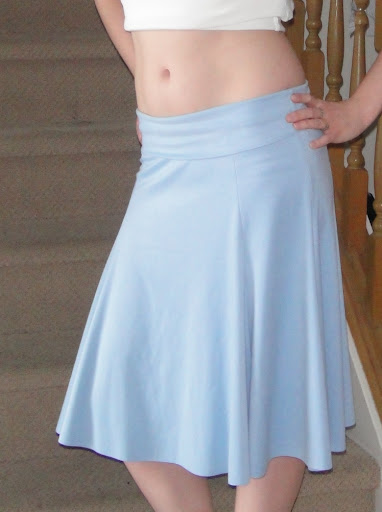
Skirt closeup, showing waistband

Anyway, when this fabric came along and the idea crystallized, I went back to the Lekala patterns, thinking I could probably make one work. I knew the length I wanted (just above knee), and that I wanted a six-gore skirt with wider CF and CB panels and narrower panels at the sides.

So I revisited the Lekala patterns, and eventually printed off Lekala 5826, mainly because it required less paper. Man was that a tiny pattern piece! Comparatively, anyway.

So, I had the pattern piece for a 10-gore skirt that was designed to fit me (or rather, someone with hips my size but a “normal” waist) at the natural waist. What I wanted was a 6 gore skirt that sat lower on my hips, with wider front and back panels. It was time to get creative.

Some quick measuring informed me that if the pattern piece as is were used to make a 12-gore, rather than a 10-gore, skirt, it would have pretty much exactly the “waist” measurement I was looking for. The length and flare still seemed good—it would be a very short skirt if worn at the true waist. Furthermore, a 12-gore arrangement is much easier to convert to the uneven panels I wanted—I could make the CF and CB panels the width of 3 original gores, and the side panels the width of 2 original gores. Perfect! I checked the amount of stretch on my fabric, to make sure I didn’t need to subtract ease, and got tracing. I used the highly scientific method of tracing the pattern piece, then sliding it over so the waist and hip notches lined up and tracing the other side. Aside from running off my paper and having to piece in a bit at the hem, it worked really well, although I can’t swear there isn’t a bit of flattening along the hem curve on the 3-times-wide panel.

So, I had my pattern. Time to lay it out.

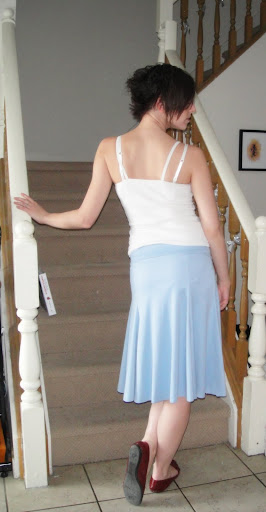
Back view

Blerg. Now I remember the second reason I had hesitated making one of these things—man are they wasteful of fabric! Especially since I couldn’t reverse any of the pieces due to nap-related fears. This little, itty bitty, not-even-knee-length skirt used up my full two metres of fabric, with barely enough left over for the wide, fold-over waistband I wanted. Of course there are plenty of (rather large) scraps… but seriously! I could probably have gotten two shirts out of that thing! As it is, maybe the scraps will be large enough to play with glovemaking… faux-suede sky-blue gloves would be lovely, don’t you think?

Anyway.

It was pretty quick to sew up, although I did inevitably serge the two wide panels together almost right off the bat. I don’t pick out serged seams, so I just cut that seam off. As it turned out (due to that magic of stretch fabric, even when it didn’t seem overly stretchy when tested) the skirt needed a fair bit of taking in anyway so it wasn’t a problem. I took a couple of cm off each seam, and then took the two side seams in another inch or so.

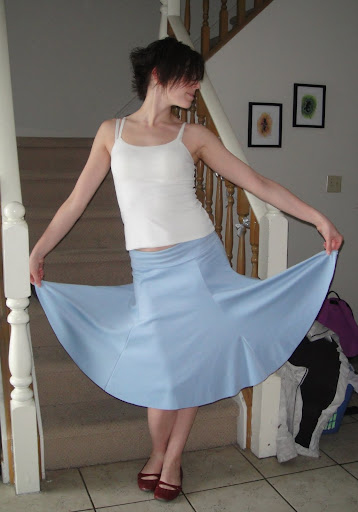
Skirt---spread out

The waistband is a wide rectangle folded over and applied exactly as the neckband in this tutorial.; I determined the length by wrapping the piece around my hips until it seemed like it was a good tightness. This wound up being a smidge smaller than the skirt opening after I’d taken it in, which seems about right. I didn’t have enough clear elastic to include it in the waist seam… we’ll see if I regret that in the future. Since the skirt’s absolutely the same front or back, whereas I am not, it has the potential to ride up in the back, but if I fold the waistband properly I can prevent that. If the problem persists I can always trim it at the front later; I didn’t do a hem, just trimmed the bottom edge smooth by running through my serger without thread.

It actually turned out quite a bit longer than I had thought it would—it’s hovering just below knee length where I was expecting it to be above. I guess that has to do with adding the waistband and where it sits on my hips, and the fact that there’s no need to take up a hem… anyway, I like it very much, although I’m going to have to figure out what it works with other than just tank-tops. It’s lean enough on the bottom that any puff on top—like the puffed sleeves on my JJs or a cowl neck on a shirt—makes me feel top-heavy, so we’ll see. I may have to make a shorter version in the future, though, out of a less drapy fabric to see more of the “mermaid” shape.

I do like the blue with my red shoes!

(But for now, since it is still snowing, I’m going to put my sweater back on!)

23 Comments

Filed under Sewing

Yet another knockoff…

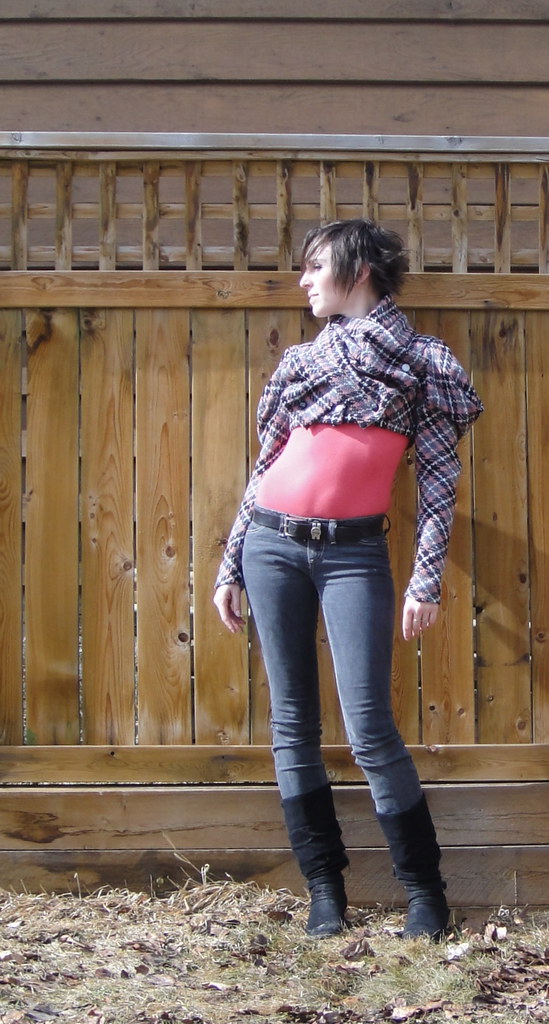
Jacket!

Someday I’ll make something original. Sooner or later the universe is bound to get tired of throwing other peoples’ really cool ideas at me, right?

Hmm.

So, I feel a teensy bit guilty about this knockoff, because it’s inspired by this EvaDress pattern, and I really feel like I ought to support her and buy the pattern. But, I’m also a starving student… and I wanted to try some kind of jacket with my new basic princess-seam pattern… and, well, here I am. I’ll buy it someday, I promise. In my own defense, the actual construction of my jacket is almost completely different—the original is a cut-on kimono sleeve, as far as I can tell, while mine is a standard princess-seam jacket, cropped to underbust length, with a set-in sleeve.

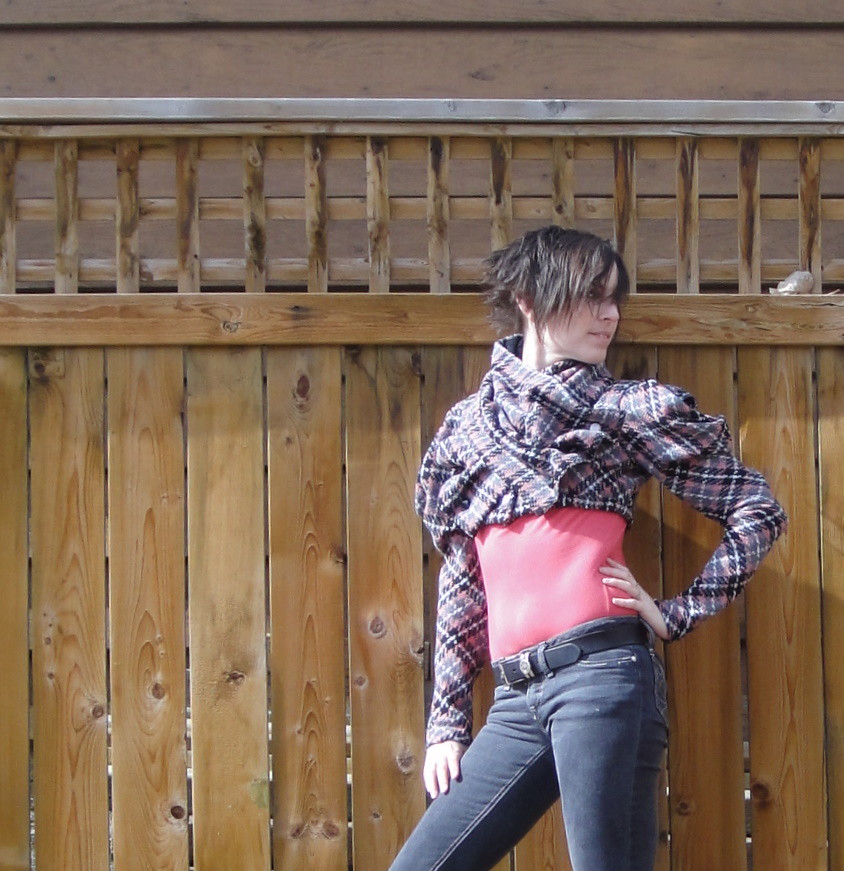
Drapey 30s jacket

Drapey 30s jacket

Debi’s made a great version of this jacket. (And here she shows more of the construction, which highlights the many differences between the “real” version and mine). If I’m not mistaken, it’s also the one pictured on this Threads article, which I’ve been lusting after since this time last year. Can we say, yum?

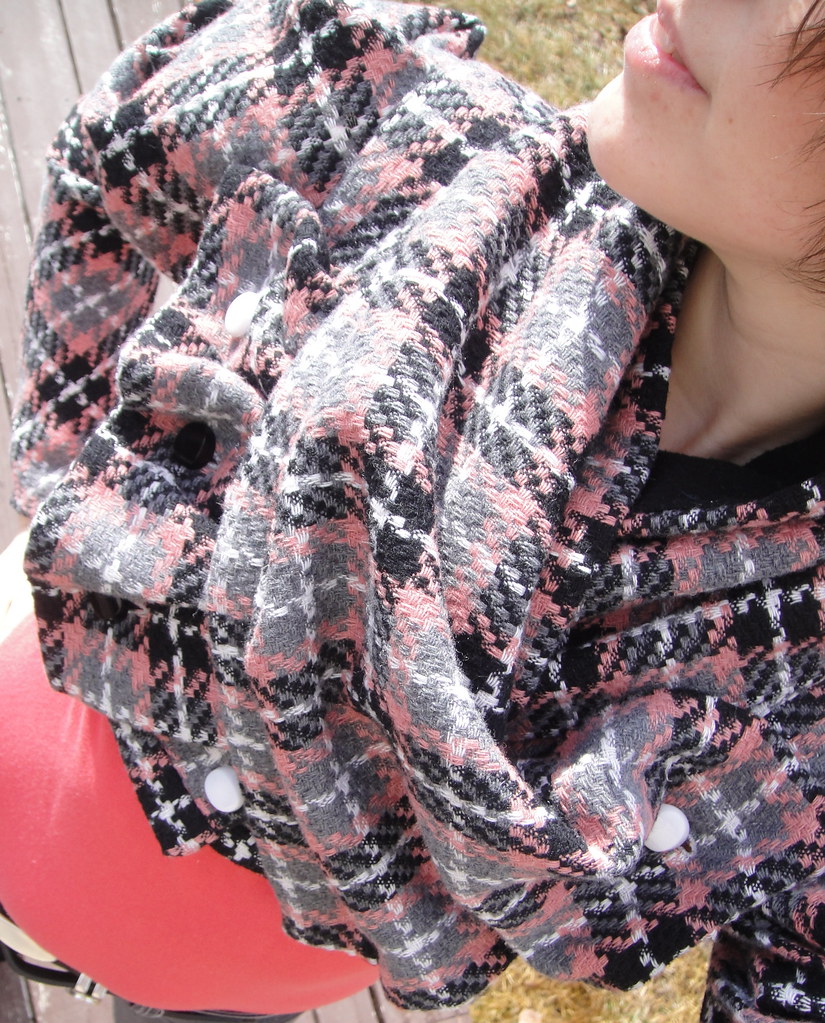
It’s really a very basic idea—a scrunched, buttoned-on scarf over a basic cropped jacket, with cowl sleeves. Lauriana featured a version of the sleeves here, and there’s a description in Modern Pattern Drafting of how to draft it—really simple, actually. I kept my cowl fairly small, partly because I like the close-fitted sleeve and partly because I didn’t have a lot of fabric.

Really, hardly any fabric, barely a metre. I had wanted to make a circle skirt out of this fabric (I’ve been cherishing it, waiting for the perfect project, since last summer some time) but didn’t have enough.

Without scarf

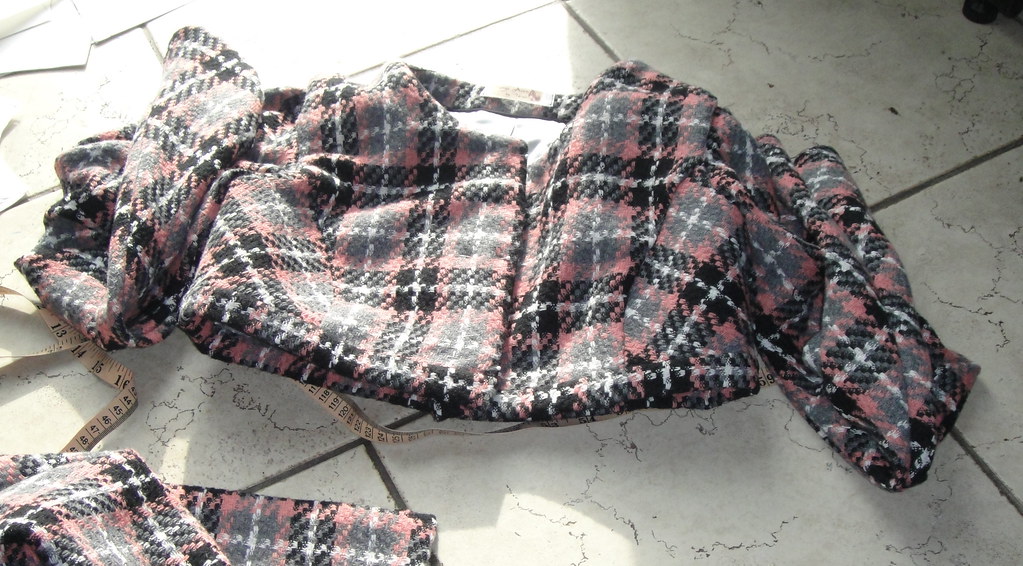
To avoid trying to match plaids (across princess seams, no less!), I cut the side pieces on the bias, then interfaced. The interfacing is probably a bit heavier than would have been ideal on this very light, soft, loosely-woven plaid, but hopefully it won’t be a problem in this location. I do wish I’d been a little more precise matching up the plaid across my CF, as it’s a hair off, but ah well. Not visible behind the scarf anyway.

The jacket has no collar (just the scarf), which was fortunate given the fabric shortage and the need to reserve a fair bit for the scarf. The underside of the scarf is made of flannel, as well.

The Built by Wendy book suggests using 1/2″ seam allowances on straighter seams and 1/4″ on highly curved ones (like the princess seams and the neckline and armscye). I followed the advice, and I like it, but I wonder if for this fabric I shouldn’t’ve used wider ones, as it’s pretty loosely-woven and ravelly. Time will tell, I suppose.

Back view, with pleat

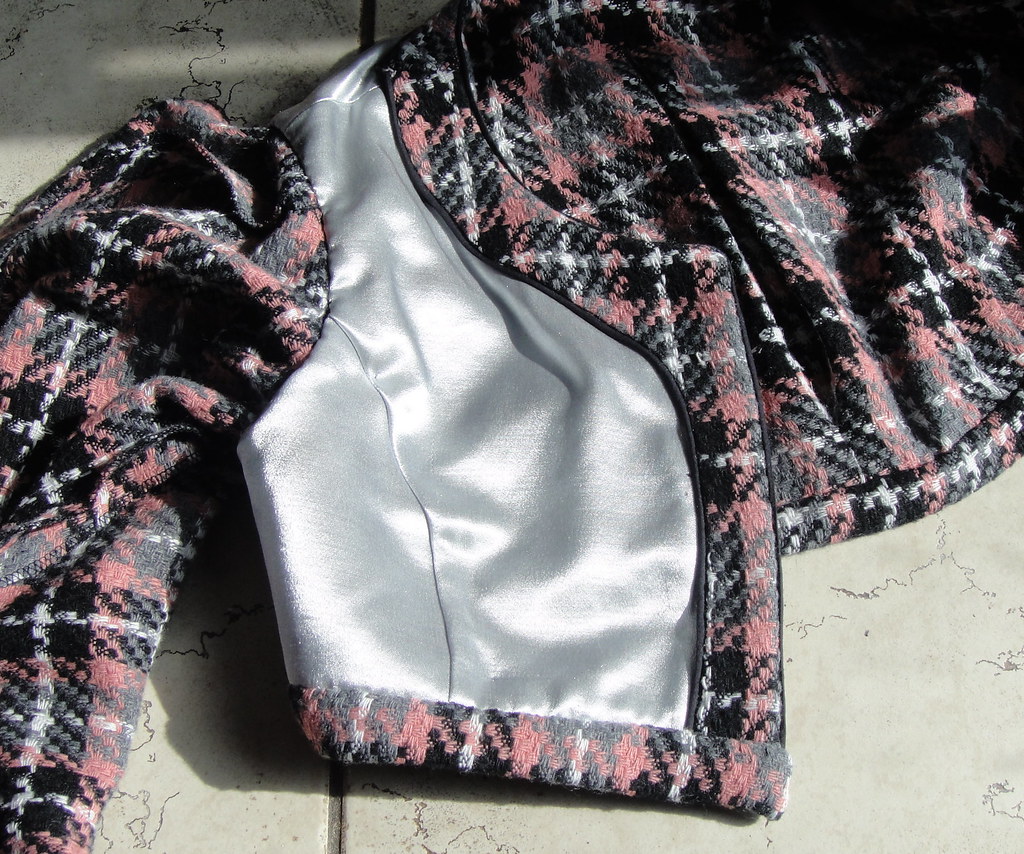
The bias sleeves are interesting. They tend to stretch and narrow, which works well with the style but could make getting a long-sleeved shirt on under them tricky. I also didn’t line the sleeves, as I was concerned with messing up the drape. The bodice is lined with some more bits of leftover silver Kasha from my Winter Coat. Someday I’ll run out of that… I’ve still got nearly a metre left, though!

I’m not 100% sure I handled the back pleat the best way possible. I made similar pleats in the lining and fashion fabric, meaning they’re both kind of occupying the same space. I wonder if it wouldn’t’ve been better to try to wrap the interior box pleat “around” the exterior one so they were folding the same way… anyway, it’s not too terrible, I think.

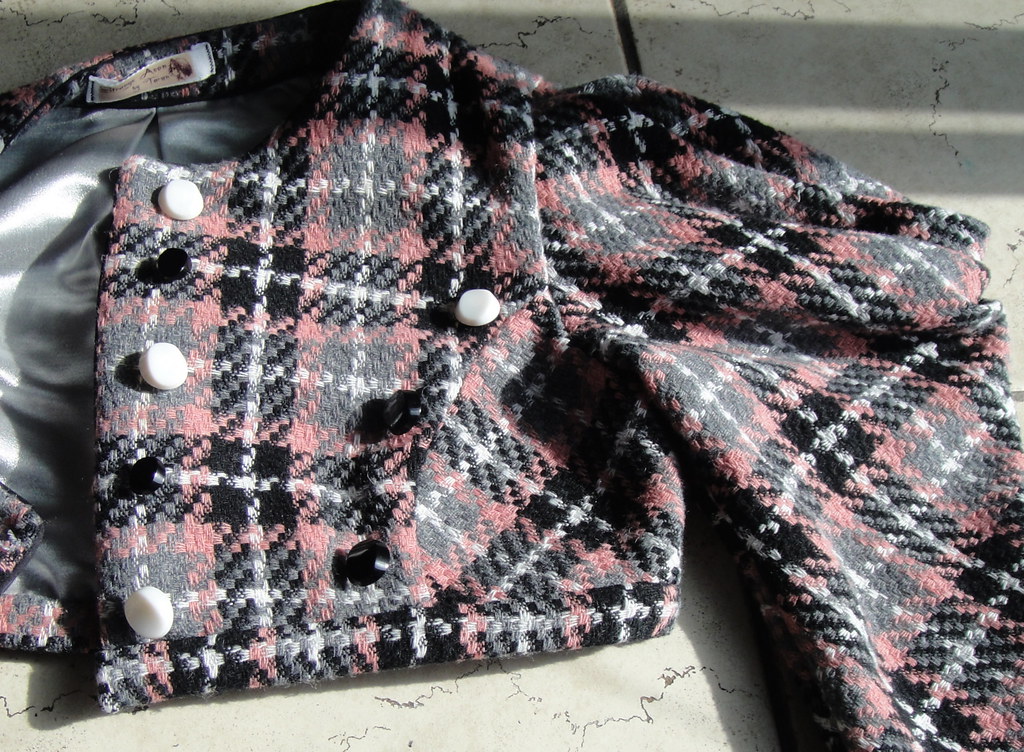
Scarf, lining, really bad buttonholes.

Nitty gritty details: the scarf is lined in black flannelette, as I didn’t have enough to make a wide enough scarf just out of the fashion fabric. As it is, I could’ve made it a bit narrower, and probably an inch or two longer… ah well. It’s pretty hard to get more than a general sense of this until the buttonholes are already in place, so such is life.

I piped both the inside of the facings and the neckline and front openings of the jacket. I like the piping around the facings, but perhaps a softer cord would be better next time… anyway, as is typical with coats and my sewing machine, the facings were too thick to work automatic buttonholes in, so the resulting buttonholes are as attrocious as you might expect. Ugh. The buttonholes on the scarf, on the other hand, worked out just fine… so look at those ones instead 😉

Piped facings

The facings were squeezed out of scraps (I didn’t actually think I’d have enough fabric for them) so are pretty narrow but worked out well enough. Note to self: remember to remove the back pleat when drafting the facings. And here I was trying to figure out how my neckline had stretched out so much…

Cowl sleeves: Bias sleeves are, well, interesting. They tend to grow (which is a good thing from my point of view) but also shrink width-wise. I will admit I took a couple of loose, surreptitious stitches inside the drape part to keep the folds in place. The cowl edge is finished with a fold-back facing, and the seams in the sleeves are finished with serging. I’m glad I didn’t try to line the sleeves, as it would’ve messed with the drape thoroughly, I think (at least with my lining and this particular fabric)

Button front

There are a LOT of buttons on this jacket. Well, eleven, in fact, and I have some extra little ones I might put on the sleeves, just for decoration. I had an assortment of black, white, and grey buttons of this same shape, in a couple of different sizes, from a thrift-store button baggie picked up a while back.  The arrangement I went with colour and size-wise is probably not optimal, but it was the best I could come up with given the limitations I had. They’re not overly visible when it’s worn, anyway. I’m actually really glad I was able to use them all together, and I like their shape—plain but distinctive—with this style.

Semi-glamour

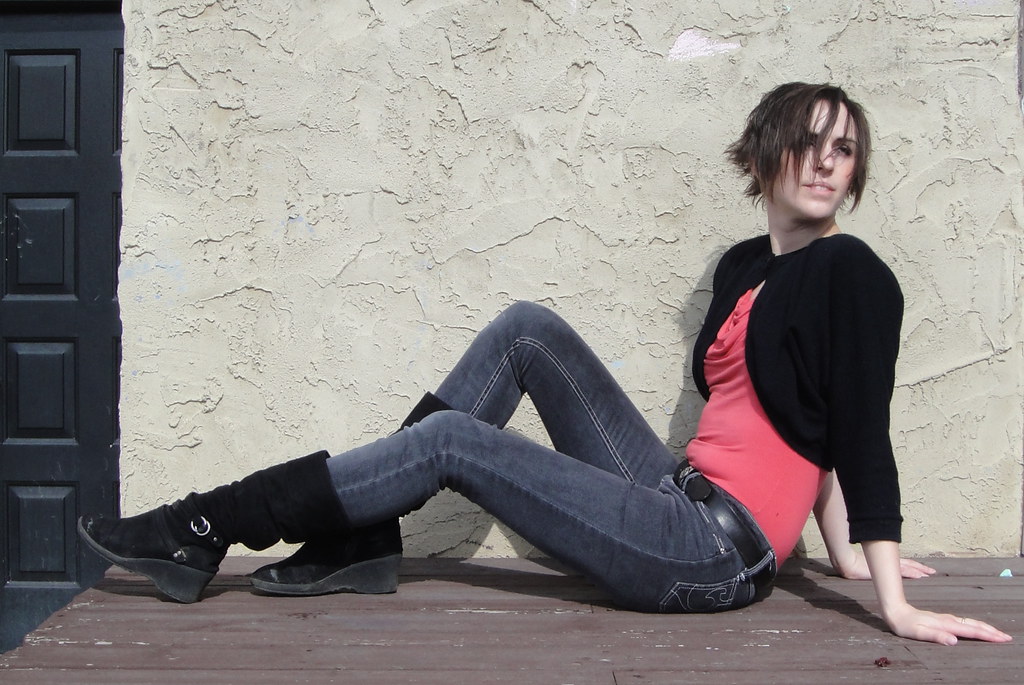
This jacket really deserves a much more glamorous photo shoot, but this is the best I was able to muster up today, as I’m still sick (have been all weekend). It looks killer with the 70s dress, actually. I had been hoping it would work with my circle skirts, but I’m not loving the combination—too much going on both top and bottom; instead of the hourglass look I was hoping for, it just looks busy. This jacket really seems to stand out with a slim, sleek bottom half—coincidentally just like the dress it was originally paired with.

I think I am officially satisfied with my fitting of the cropped bodice version of the “Built By Wendy Fitted Jacket”. Next up—sleeves and collar :). I’m thinking I might try a little cropped jean-jacket to test out a two-piece sleeve.

Warning: I have a deep and long-suppressed passion for boleros and severely cropped jackets. You may get sick of this look… soon.

I don’t know if I’ll ever actually do any of the particular projects in the Built by Wendy Coats & Jackets book (well, maybe one or two…), but I am loving having the basic pattern blocks to play with. So many possibilities! I may not be quite up to drafting my own patterns from scratch, but I love messing the heck out of  an existing one :).

Oh, and you can see the full Flickr set, with even more photos, here.

In Me-Made March news,

I did actually manage a picture today! (I promise I’ve been wearing my usual me-mades, but being sick just drains me of the energy to run around, get cute pictures, and then do the little followups like making links for the construction posts. Bleh.

At least the inch of snow that was covering the deck this morning is gone…

Me-Made March, day 20

Is the equinox today or tomorrow? Either way, the days will soon be longer than the nights! Hooray!

 

28 Comments

Filed under Sewing

A cute model…

…Makes up for many shortfalls.

Some people can just wear anything...

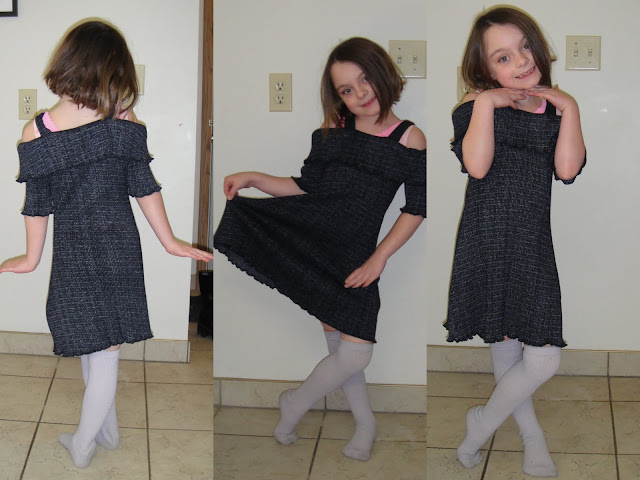
Should I feel guilt about convincing Syo that this totally crappy fabric was a good choice for the sweater-dress she wanted, based on the same pattern as this shirt? It’s (finally) almost all gone. Aside from my distaste for the fabric (and sewing it—it grows under the needle) the dress was really simple. The only tricky part was sewing an elastic into the neckline to keep it from becoming absolutely jumbo-esque. I had to pick out my first try because I hadn’t pulled the elastic taut enough. Argh. As with my sweater in this fabric, I ducked the aggravation of hemming by doing a half-ass lettuce hem, which is just a standard serged edge with the fabric pulled taut as it feeds through. Don’t look too closely at the strap placement or the straightness of the side-seams, but the sprout is happy, which is the main thing, right?

What I've been working on

My efforts towards drafting the Springy Coat pattern have led me astray. Or rather, I figured I should try a full jacket using my fitted pattern, so I’m in the process of working on this. I’d been hoping to have it finished today but that doesn’t seem likely at this point. I’m excited, though… 😉

3 Comments

Filed under Sewing

Cowl Finale

Cowlneck the fourth

Well, for the moment. Like Steph, I think I’m done with this project. I’ve made four knit cowly tops this week, all but one of which are wearable. (And I have hopes of salvaging the fourth, possibly by stitching down the folds or something…)

This one was supposed to be the ultimate. And, to be honest, I think it looks kick-ass in the pictures. That is pretty much what I was going for.

The devil, as always, is in the details.

The biggest one, I think, is the most inevitable—the large cowl which permits those lovely underbust folds doesn’t, in fact, stay in place particularly well; any time I raise my arms or lean over, it comes untucked, creating a front that just looks, well, poofy. I have a feeling the original top would’ve had the same problem unless (as I half-suspect) the “underbust” folds in the photo are created by tugging down on the cowl, rather than falling naturally that way—in which case in the shirt as worn they wouldn’t even be there at all…

Completely my fault, on the other hand, are the hole I

A bit of a closer look

accidentally snipped in the front neckline while trimming the binding, the cowl facing that doesn’t fall nicely to the inside (I sewed it down a hair or two wrong on the inside), and the fact that the sleeves are sewed on with the wrong side of the fabric facing out. Fortunately the last is virtually undetectable—anyone looking that close is going to be much more struck by my wonky stitching. /sigh. I was trying to take my time with this last version, but I think my subconscious was against me.

For those of you who’ve been thoroughly confused with what I’ve been doing (and who’ve stuck with me despite it 😉 ) I made up a quick little diagram of the steps I took. The tricky part, again, is the details—how long and wide of a drape, how much to curl back the front pattern piece.

Pattern alteration---click image to see full size

And I think that’s enough of messing with cowls for, well, at least a couple of weeks…

After all, Sherry’s tailoring sewalong begins in just a few weeks, and I need to have a pattern of some kind ready for that. I think I’m going to try to create my own based on the Built By Wendy jacket book (which Ali just did a great overview of). I’m thinking princess-seamed bodice, empire waist with A-line below, thigh-length, maybe an inverted box pleat or two in the skirt portion… still haven’t decided on a collar or single- or double-breasted… anyway, I’m sure I’ll have a post on that in a day or two, anyway. But I will still have to muslin etc., and decide if I can make the sleeves two piece etc.

So much to sew, so little time… 😉

23 Comments

Filed under Sewing

A qualified “meh”

Anthropologie knockoff v. 3

For this third iteration (see 1 and 2), I didn’t change much from the last; re-narrowed the neckline a wee bit, and lengthened the cowl portion so there would be more drape higher up.

This fabric is meh. The colour is drab,  it’s very, very thin, and worst of all it has very poor recovery; to get it to fit like anything other than a sack I took both sideseams in by over an inch. But it’s got great drape and cost about $1.50/m, which is about as good as it gets, at least around here.

For those of you who are insanely interested in the exact alterations, I think I’ve “curled back” the side seams/armscye too much. I needed to do it a bit more than in my first iteration to get the cowling to drape a little deeper, but not as much as I did. As usual, I overshot. I think there’s a sweet-spot somewhere between my pattern the first time and this iteration; mostly it looks good except that there’s some oddness in the folding of the pleats at the armpit; basically the first pleat is turning into a dart, which isn’t what I want. Solution? probably rotate the armscye back by the amount of that dart, and make up for the extra distance in cowl height.

Like my accessory?

Which sounds like gibberish typed out, but will hopefully remind me of what I’m trying to do… so I apologize to the rest of you for my opacity.

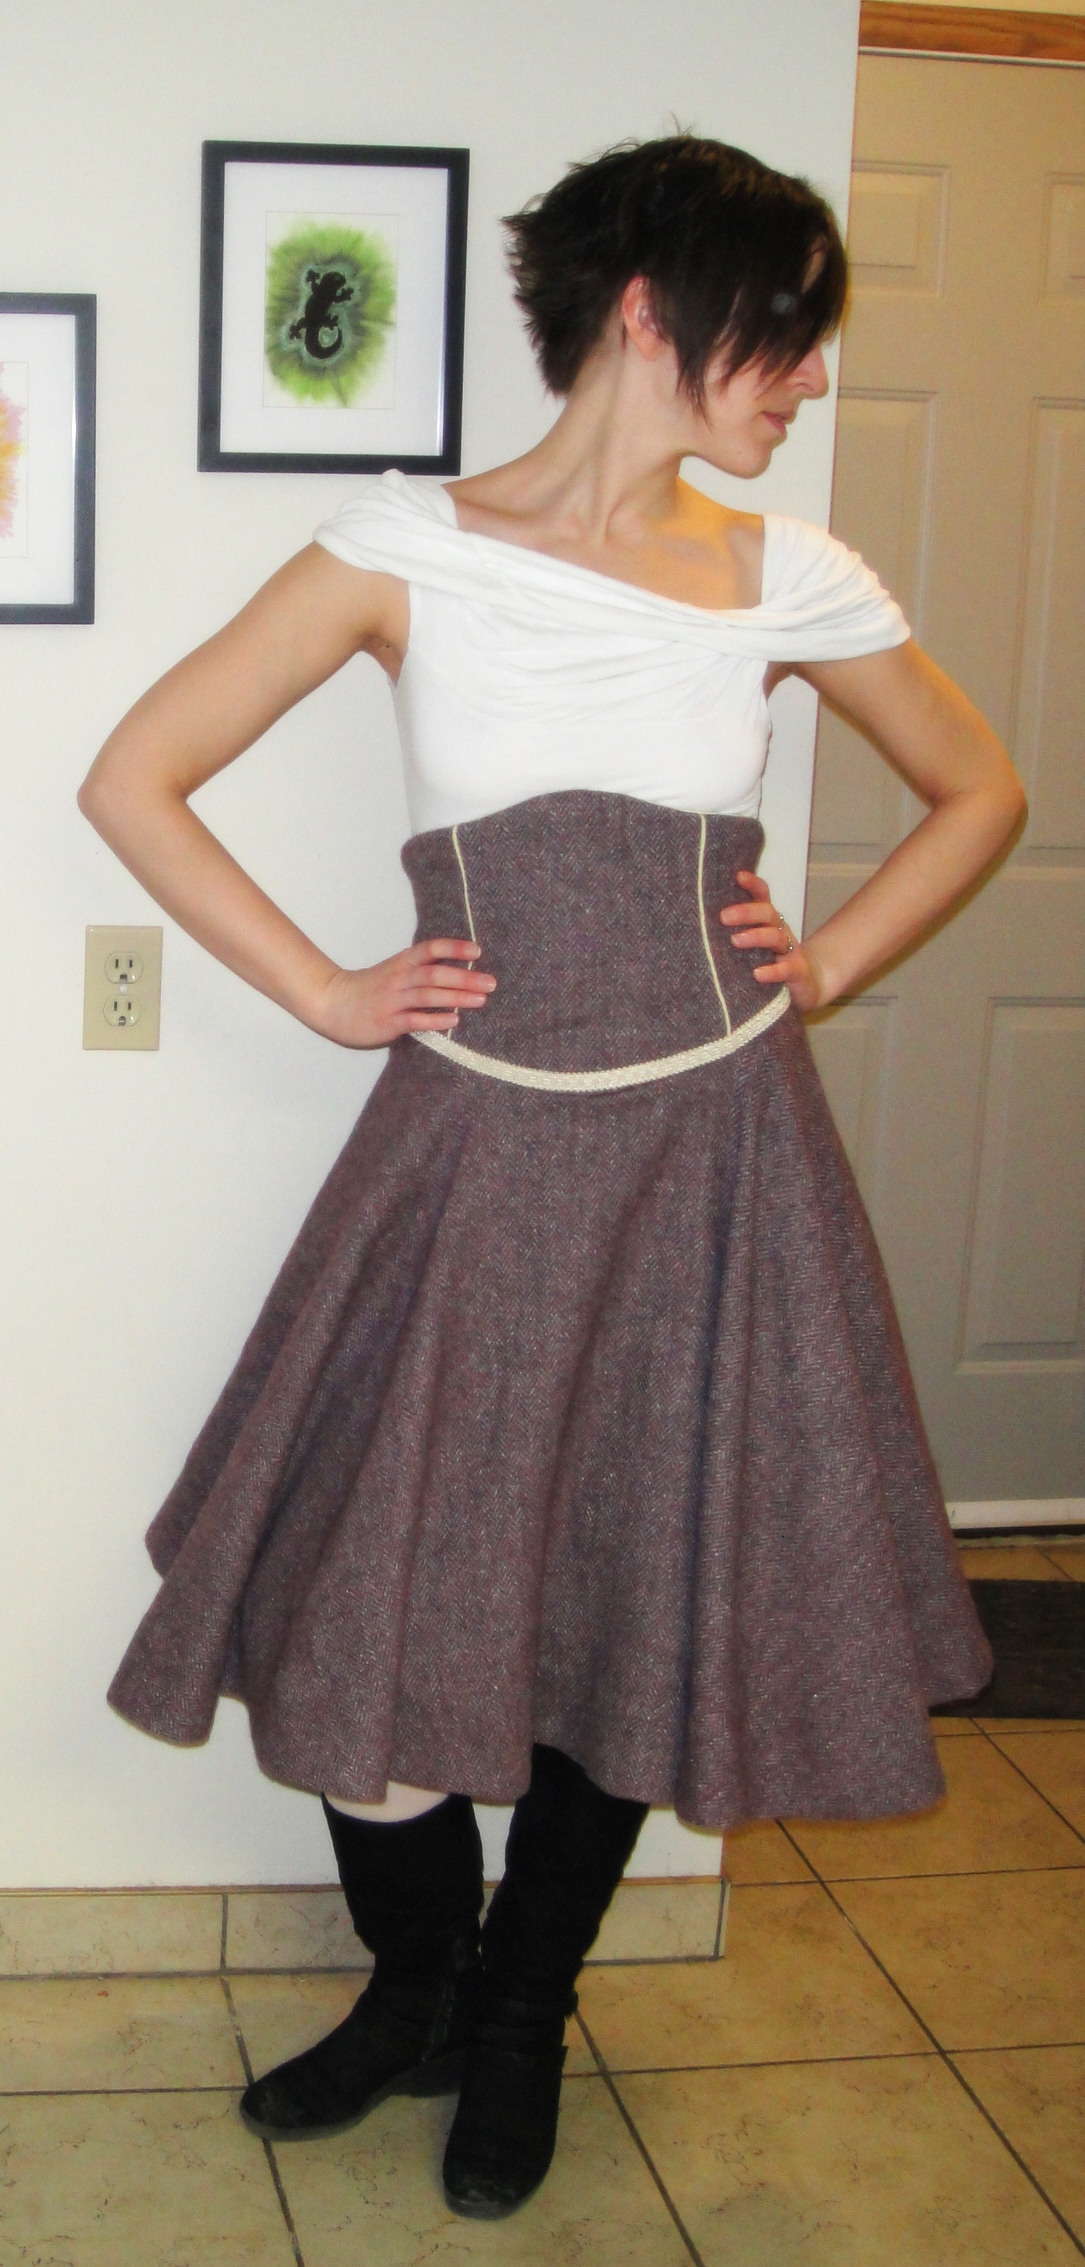
The other upside—this colour goes really well with my corset-waist circle skirt, which almost nothing else in my wardrobe does, and the corset-waist covers up the somewhat-more-meh lower portions of the top. Yay!
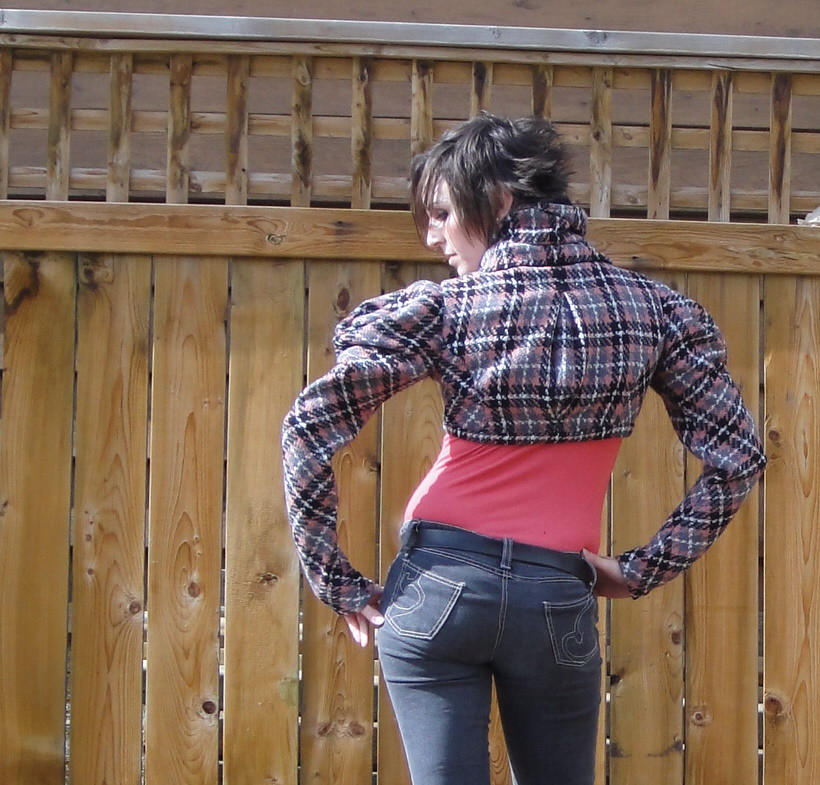
For honesty’s sake, I’ll include a shot of what I was wearing earlier in the day before I “finished” (for that unhemmed, threads hanging everwhere, value of finished)  the top. See? Not a good combo.

Previous outfit.

16 Comments

Filed under Sewing

Using up the Blue

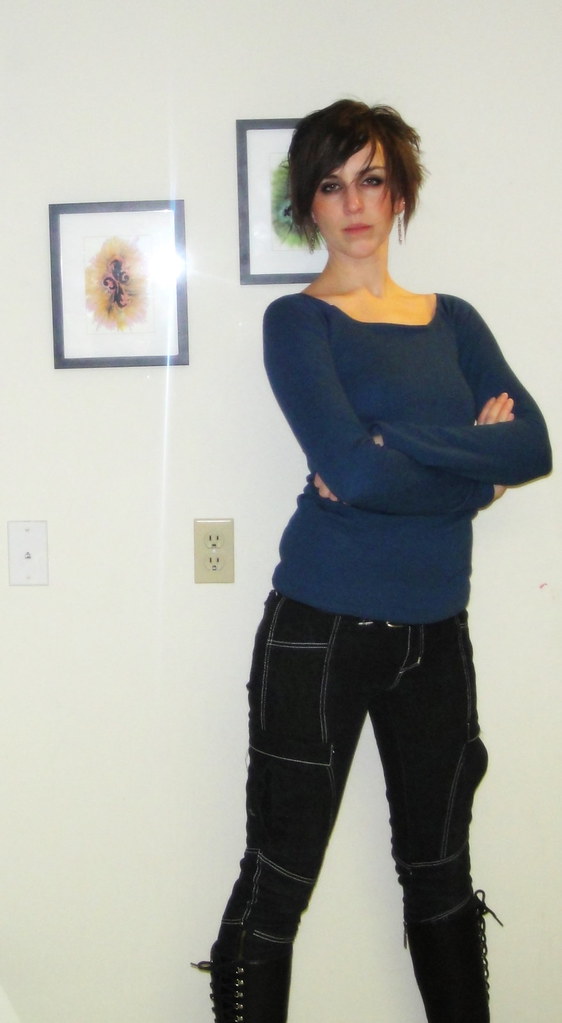
Blue raglan-sleeve top. See below for the reason I look so irate.

After the stegosaurus shirt, I had just under 90 cm (one yard) of fabric left. Possibly I should’ve made it into something for one of the kids, since it’s a bit of a distinctive colour, but for whatever reason, I was determined to get one more long-sleeved shirt for me out of it. Wiggle as I might, I couldn’t quite get the Pattern Formerly Known as Lydia onto the available amount of fabric. I didn’t want to cop out and go with short sleeves, as this is a warm, wintry knit.

Fortunately, Lekala patterns came to my rescue once again; the raglan top pattern that I made before just fit, helped out by the fact that the pattern pieces are full-width, not to be cut on the fold. This was annoying when it was eating up all my printer paper, but with careful jiggling I was able to get it all in place.

So, I have another raglan top. As this is a much more stable knit (though without any redeeming factors like cotton, as far as I can tell), it fits considerably more, ah, sleekly, than the white version. Thus far I haven’t bothered with the ruching on the front; I kinda like the round neck (though it is pretty similar to the stegosaurus neckline, isn’t it?). We’ll see how boring I find the top after wearing it today.

Aww... no back ruffle. Plenty of wrinkles, though, as usual...

Really nothing to say about the construction. I did the seams all on the serger, which is really easy for the raglan construction, and twin-needled the sleeve and bottom hems. The top edge is just folded under around a narrow clear elastic and twin-needled as well. I have a Schmetz twin needle right now and I can’t tell if it’s just in my head but it really seems to me like the Schmetz needles (especially the twins) break a lot less readily than the Klasse (the other brand I have ready access to…) Oh, and you may have noticed you’re getting a glimpse of something other than my usual, draped-sheet photo background. This is the brightest corner of my kitchen (at least at 8:00 in the morning), and you are being “treated” to it because my darling children trashed the basement yesterday and my sheet is now in a limp little pile on the carpet, buried under an avalanche of… not even toys. Just stuff. Urg. I love my children. I love my children. I love my children. I…

Versatile Blogger Award

oh, yes, and before I forget, the amazing Magda passed on this “Versatile Blogger” award to me, and then the equally mind-blowing Oona Baloona did as well. And I want to thank them both very much, but I think I’m running out of interesting things to reveal, so I’m going to bail on spreading the meme and just point y’all to my previous exposees: Stylish Blogger and Beautiful Blogger.

8 Comments

Filed under Sewing