Tag Archives: finished projects

The Stegosaurus Ruffle strikes again.

Blue long-sleeve top

Nothing like a me-made month to get me off the fluffies and back on track making practical clothing. Today’s version being rather more successful than yesterday’s.

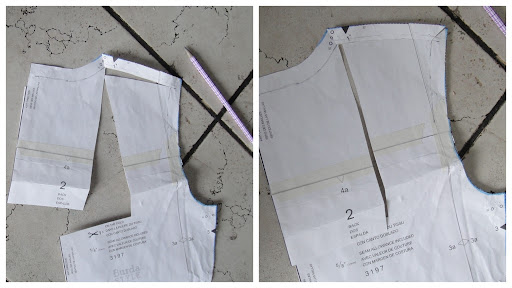
I made a couple more tweaks to my ever-evolving “Pattern formerly known as Lydia“. Since at this point I’ve altered the waist curve, the shoulder angle, the sleeve-cap, sleeve length, sleeve shape, and the neckline, I should probably give up on calling it a “Lydia“, and just call it my “Knit top TNT” or something equally generic. This time, I tweaked the sleeve-cap again, removing a bit more height, and attempted a seam-free swayback alteration, which creates much the same change in the angle of the back shoulders as Sherry’s method, except that… well, I dunno, I like the funky pivot-and-slide stuff. I then decided, on a whim (actually to optimize my pattern layout) to cut the back on a seam, so I took the opportunity there to add a teeny bit of shaping as well. If I decide to make the CB seam a regular feature, I can do a much more thorough swayback fix in the future.

No-seam swayback alteration. Yes, it affects only the shoulder.

Anyway.

My previous Lydias have been scoop-necked and plain. I didn’t want to just make another version in blue, so I decided to try a boatneck and a back ruffle, a nifty little feature I am blatantly stealing from Heather of Feathertysews. Thanks! I was a little hesitant about trying it in such a heavy fabric, but it actually worked out really well. Yay!

Flatlocked seam (open)

So, back to that CB seam. I didn’t really have enough room to add a seam-allowance, so I decided to try flatlocking the seam. This is a trick you can do with a serger, where you basically turn the needle thread tension way down. That way, after you serge the seam, you can basically pull it open so the ends of the fabric butt up right against each other. One side looks “serged,” the other side has these horizontal loops of thread—actually quite decorative; I have a RTW tee that features it (and I thought it was a super-cool feature when I bought it). It works best with a fairly beefy fabric, and I gather is used a lot in active wear, for butting fleeces and things like that. Here’s a better overview than mine… Since my knit is a fairly sturdy athletic/winter knit, I thought it would work, and after a certain amount of messing around (my serger’s tension settings are wonky at the best of times) I got it to work. I wasn’t too concerned with it being super-even, as my next step was to cover it with my little stegosaurus ruffle.

Ruffle closeup

I cut a piece of clear elastic just a little bit longer than my shirt back, and a strip of

my fabric about twice as long. I was originally planning to be quite scientific and match my ends, halves, quarters, etc., but it seemed like that would require too much stretching of the elastic, not to mention require more precision than I’m truly capable of. So I just held the elastic as taut as was comfortable, and slowly let it out as I stitched (a narrow zigzag) along the middle of the fabric strip, though both elastic and fabric. The result is that the strip isn’t gathered as evenly as it could be, but it doesn’t really show (and even if it does, I can’t see it 😉 ). Then, using the same narrow zig-zag, I stitched the ruffle overtop of my flat-locked seam.

Stegosaurus ruffle!

I used Sherry’s binding method here for the neck, which I attached in a C (that is , after sewing one shoulder but with the other one still open). It’s a wee bit gapy but I’m hoping that will go away in the wash. I didn’t include any clear elastic this time as the fabric is already fairly bulky… we’ll see if I regret that in the long run.

You can see that, although an improvement, my swayback alteration attempt was not enough to remove folding at the small of my back (the fact that the shirt is riding up on my belt isn’t helping, but I promise even when tugged down the problem persists). I’m happy to say the change in shoulder-angle doesn’t seem to create a problem, which I was worried about. If I try a CB seam again, I’ll do a real swayback tuck.

The further reduction of the sleeve cap seems to have hit a sweet spot (finally!); it went in (flat) essentially flawlessly, even on the serger.

I have to say, beefy, stable knits are such a dream to work with. I twin-needled the hems without needing to stabilize, with no problem at all.

Whew, I needed that after yesterday’s fiasco.

These posts will also double as my Me-Made March day 6 🙂

23 Comments

Filed under Sewing

I meant to do that…

Mini-cowl

Bleh.

I’ve been saving the rest of the fabric from this top, trying to find just the right project. I love this fabric so much. Eventually, I decided that it needed to be a drapy pattern—a cowl neck, maybe.

Last night, I decided that a reprise of this super-quick cowl neck top by Ichigogirl on Burdastyle would be perfect.

But. It’s still about -20C around here. I wanted to add sleeves.

I pulled out the pattern-pieces for Ichigogirl’s cowl-neck, and my “trusty” (aka much altered) Lydia pattern to compare. Armscyes were about the same size, as far as I could tell, but a radically different shape. I thought it seemed simpler to try to draft a cowl neck onto the Lydia than to try to fit sleeves to the odd-shaped armscyes of the sleeveless cowl pattern.

Of course, it was 8:00 at night and I was far too impatient to read up on cowl

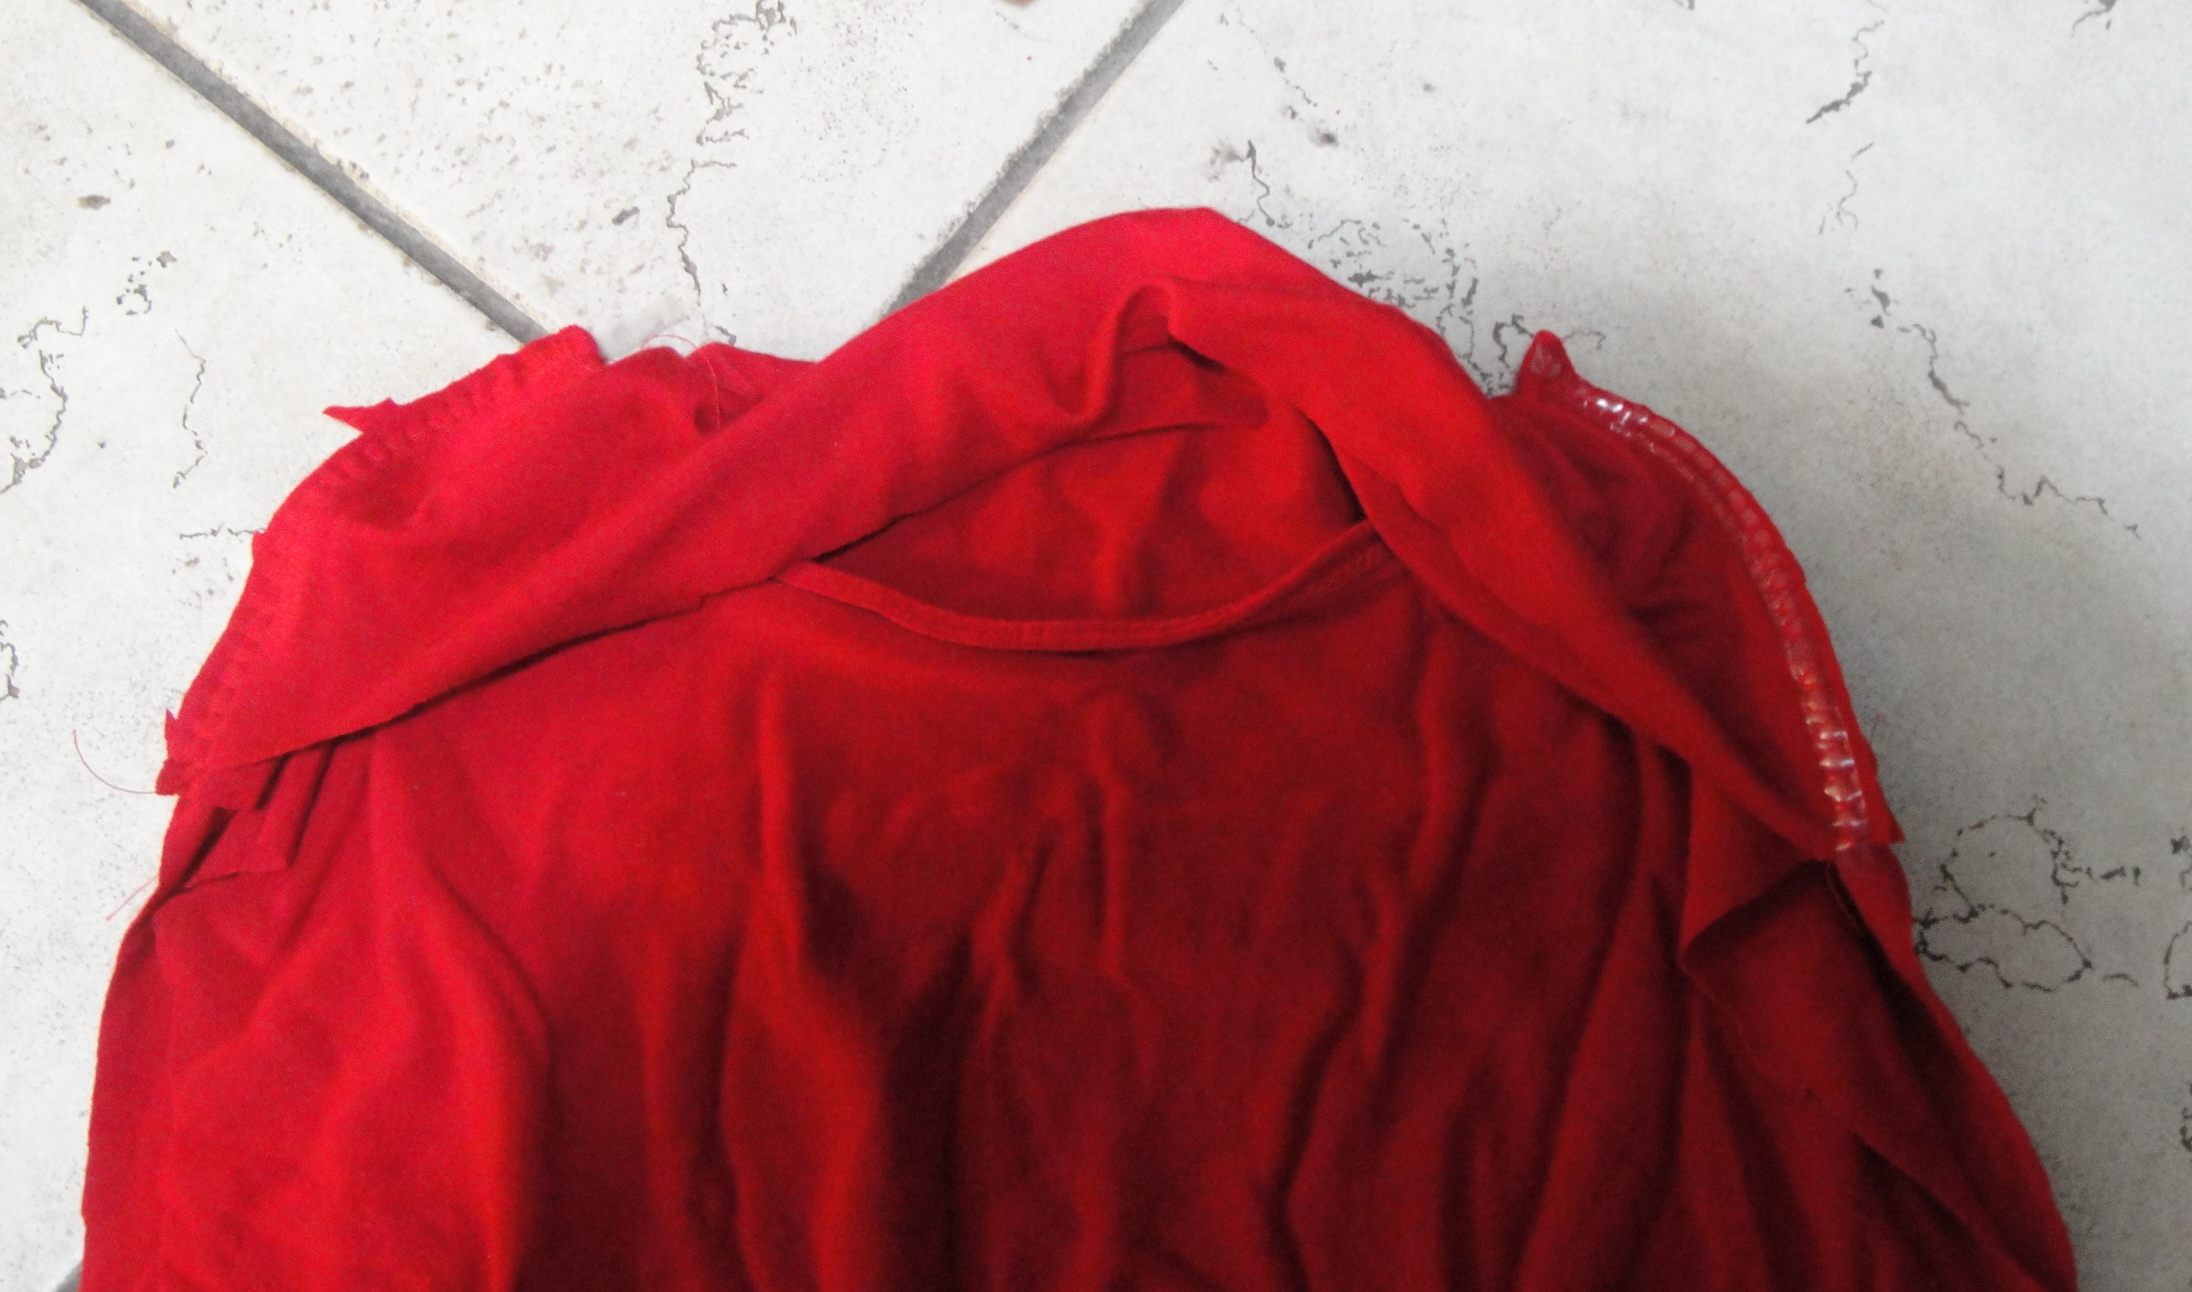
Inner folded facing of cowl neck sewn over rear of shoulders, to enclose the shoulder seam.

drafting… I had the pattern pieces right in front of me. It’s not like I’m a stranger to frankenpatterning.

Ehm. I had actually wanted a little bit shallower of a cowl than on the original pattern, which is a bit, ah, risque if you bend over.

But, not quite this shallow. Urgh.

Rear view. Meh.

I was very proud of myself for figuring out a neat way to attach the inner fold of the cowl-neck to the shoulder so it neatly encloses the shoulder seam. I’m not sure if the picture will make any sense at all, but you’re looking at the back of the shirt, inside-out. I folded the facing portion of the shoulder-seam around to the back, enclosing the entire shoulder-seam between shirt front and facing. This makes for a lovely finish on the inside.

I then proceeded to do an impatient bodge-job of setting in the shoulders (I think I

still need to remove a bit of ease from the Lydia sleeve-cap, and add a shoulder-point notch). Didn’t do such a good job on the back-neck binding, either.

Bleh. Can I just pretend I meant for it to be this way?

In Me-Made March news:

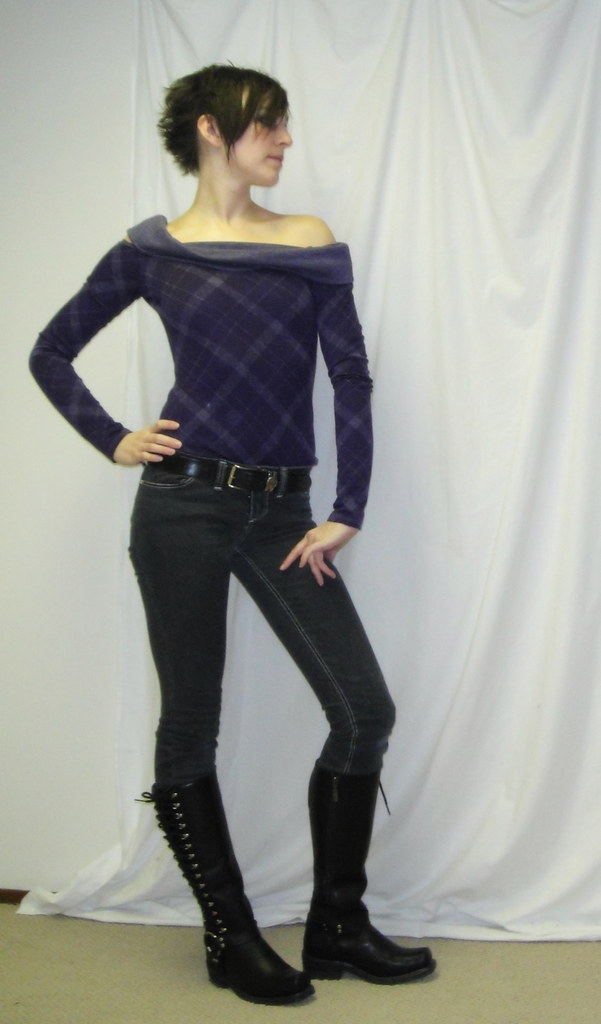
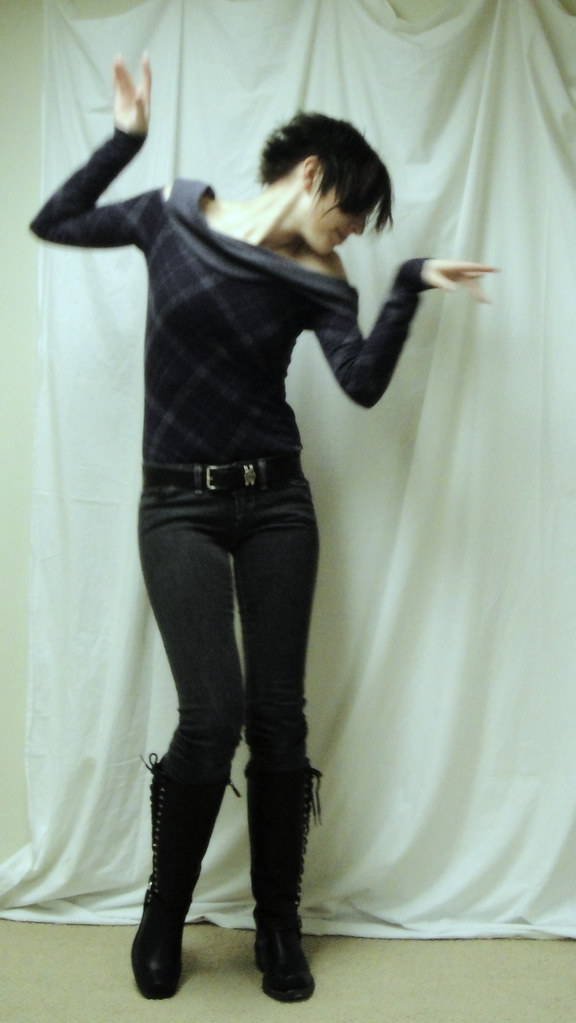
Here’s today’s outfit, which is my first one this week not to feature some (or entirely) items I didn’t have last September. It feels a little boring because of that, but on the other hand these are some of my absolute FAVE pieces so far, so… yeah!

Classic pose

Funky dancing pose

Frankenpatterned top
More self-stitched jeans

Also my new, awesome, but hyper-uncomfortable boots. They will be great once they’re broken in.

I was wondering how long it would take me to break out the goofy poses this time around…

10 Comments

Filed under Sewing

To Do, To Don’t, and What do I know?

The latest jeans

So after my great Skinny Cargoes affair, Claire of Sew Incidentally asked if I would consider putting together a do’s and don’ts post for jeans. Since I’m such a master at them, and all that.

Erm.

So, aside from the fact that she must be confusing me with some other blogger, I thought I’d give it a shot. Especially as I decided to crank out one last pair of denim to get me through Me-Made March.

Now, it didn’t take me long after deciding to “take my sewing to the next level” last spring, to decide that I wanted to tackle jeans. Yeah, I’d successfully managed to make my first blouse, what horrors could denim possibly hold?

This was spurred on by a number of factors. The biggest one was probably stumbling on the Jeans sewalong thread and summary thread on Pattern Review. I read literally every post of that 85-page thread. The idea of making my own jeans really appealed to me. First of all, I live in my jeans. Second of all, I’m picky about my jeans and how they fit. Third of all, I have pretty darn long legs. All of those factors combined means that I have spent a LOT of money over the years on jeans. Buffalo. Guess. Rarely under $100 for a pair. You get the idea. And always with that terror—will the fit I like go out of style? Will they be long enough? Even if they seem to fit when I try them on, will I wear them for a day and realize that they’re too short and too loose? Will I tear through the “artfully worn” knee within the first half-hour of putting them on (that pair was Guess, I returned them)? Speaking of which, when is that pre-tattered look going to go out of style? It was in style when I was in high-school (mid nineties). It was in style five years ago when the hubby and I went to NYC (and shopped at Gap. I know, we should be shot.) And it was EVERYWHERE last time I was tying to buy commercial jeans, which was one year ago. I haven’t really looked since, maybe it’s gone away?

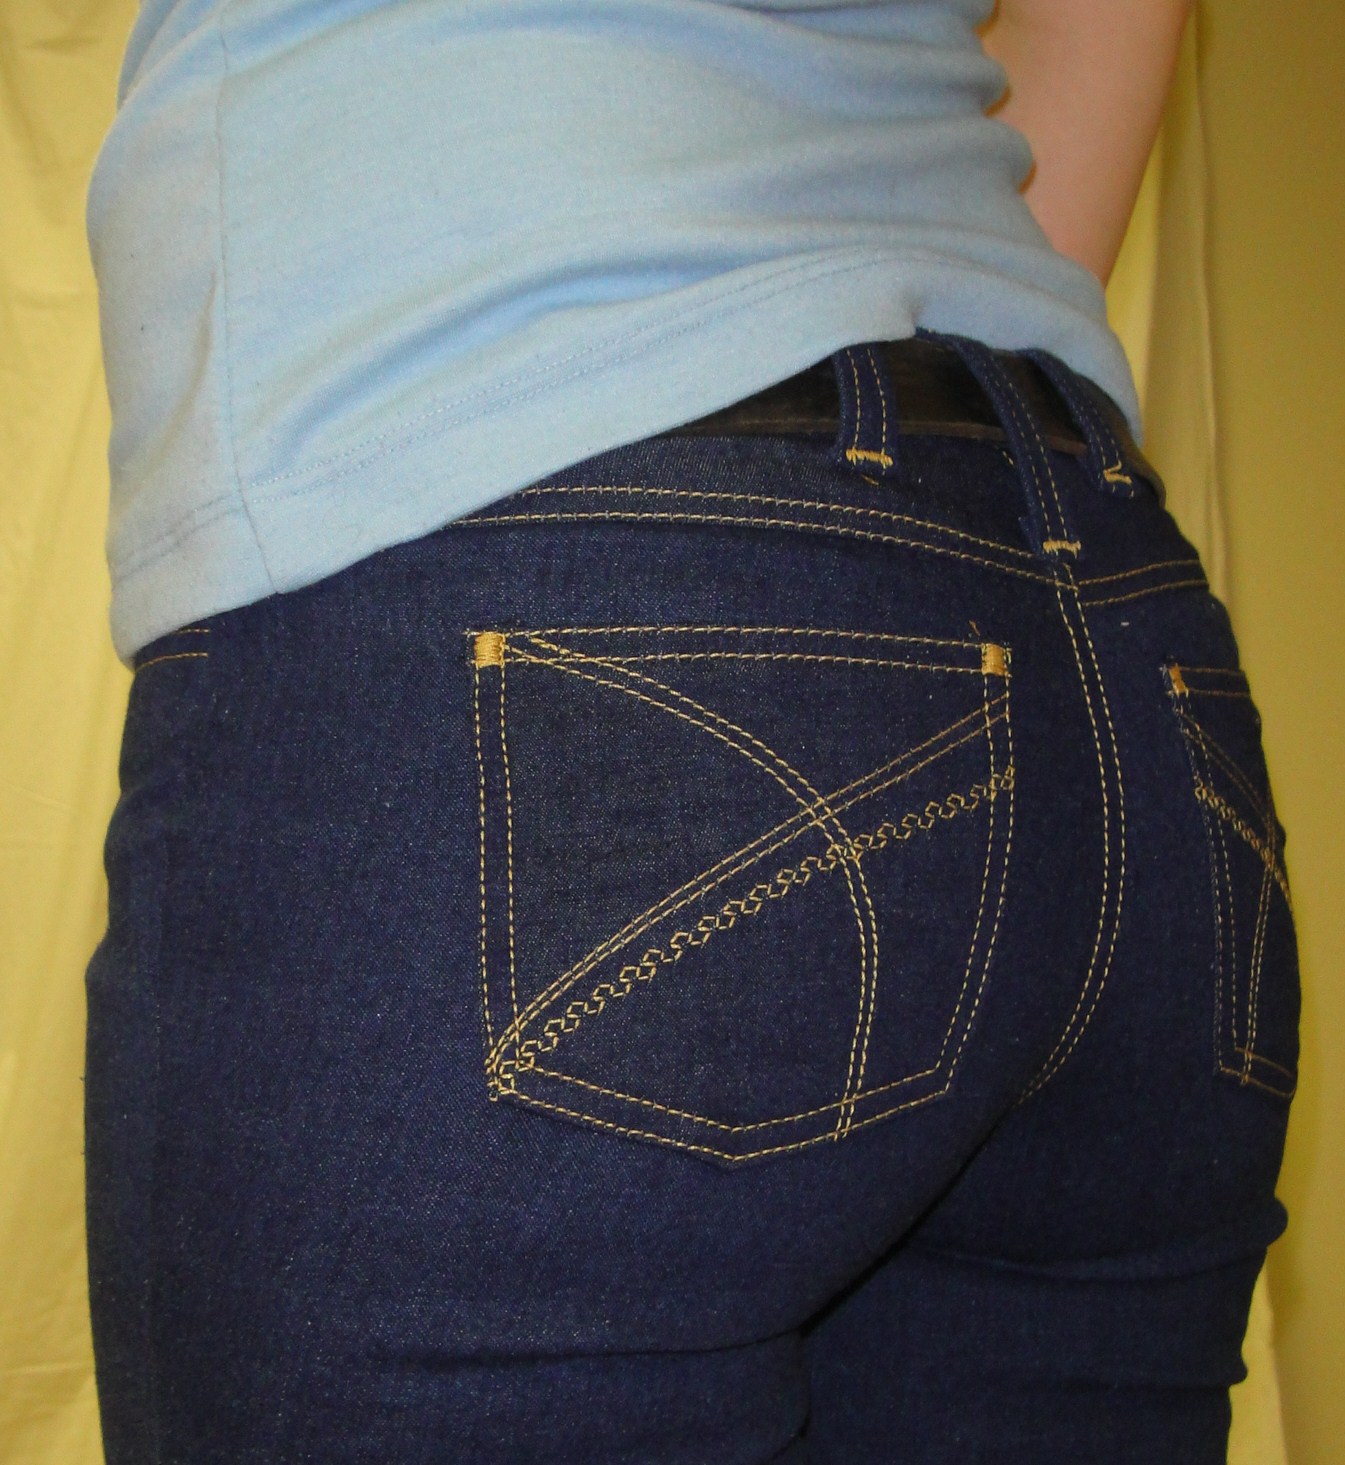
Despite the wonky stitching on the pockets (I suck at free-motion embroidery), these are probably still my favourite self-made jeans.

Now, I have a very clear list of things I’m looking for in my jeans. As far as I’m concerned, stretch-denim is the greatest invention of the 20th century (ok, after the birth-control pill). I like them low-rise, with a very fitted leg. I’m flexible on the degree of flare, although for preference I’ll go with what I tend to call a “stovepipe” leg, which is fitted in the thigh but absolutely straight below the knee; I’ve only ever once found this style in RTW.

If your list is different (as it doubtless is—few people are as fond of I am of the low rise, for perfectly good reason), some of my methods won’t apply, especially if you’re not looking for snug-fitted stretch-denim. (What, not everyone wants their jeans to look like they were sprayed on?!?) But I do hope you’ll be able to glean some nuggets from the dross, or at least be encouraged to tackle your own.

Incidentally, based on the PR thread, I used the Jalie 2908 pattern, with an assortment of modifications to make it suit my taste that are mostly detailed here. I like this pattern, but then I’ve only ever sewn two pants patterns, the Jalie one and the Burdastyle Ellen pant. Both were pretty painless, doubtless due to my minimal curvatures in this area. So I wouldn’t consider my endorsement to be the be-all-end-all in this area.

Anyway, without further ado,

DO:

  1. pay attention to the % stretch, not the % lycra; expect to resize slightly depending on the individual stretch of your fabric.
  2. buy enough fabric for two pairs of jeans—the first one can be a hopefully-wearable muslin, and you’ll know what to expect from the remaining fabric stretch-wise.
  3. wash and dry your fabric on hot at least once; then let it sit or hang (“relax”) for at least a day or two, as the heat can bunch up the lycra fibres, creating fabric that will stretch too much after wearing.
  4. My foot for topstitching. Not necessarily the best, just the best from my limited selection.

  5. do figure out which sewing-machine foot works best for topstitching. A lot of people prefer a straight-stitch foot as the sides are narrower and you can see right up to the needle. I don’t have one, but I find my rolled hem foot (of all things) works the best. An edgestitch or possibly even blind-hem foot are also good options.
  6. play around with your topstitching options. There’s jeans

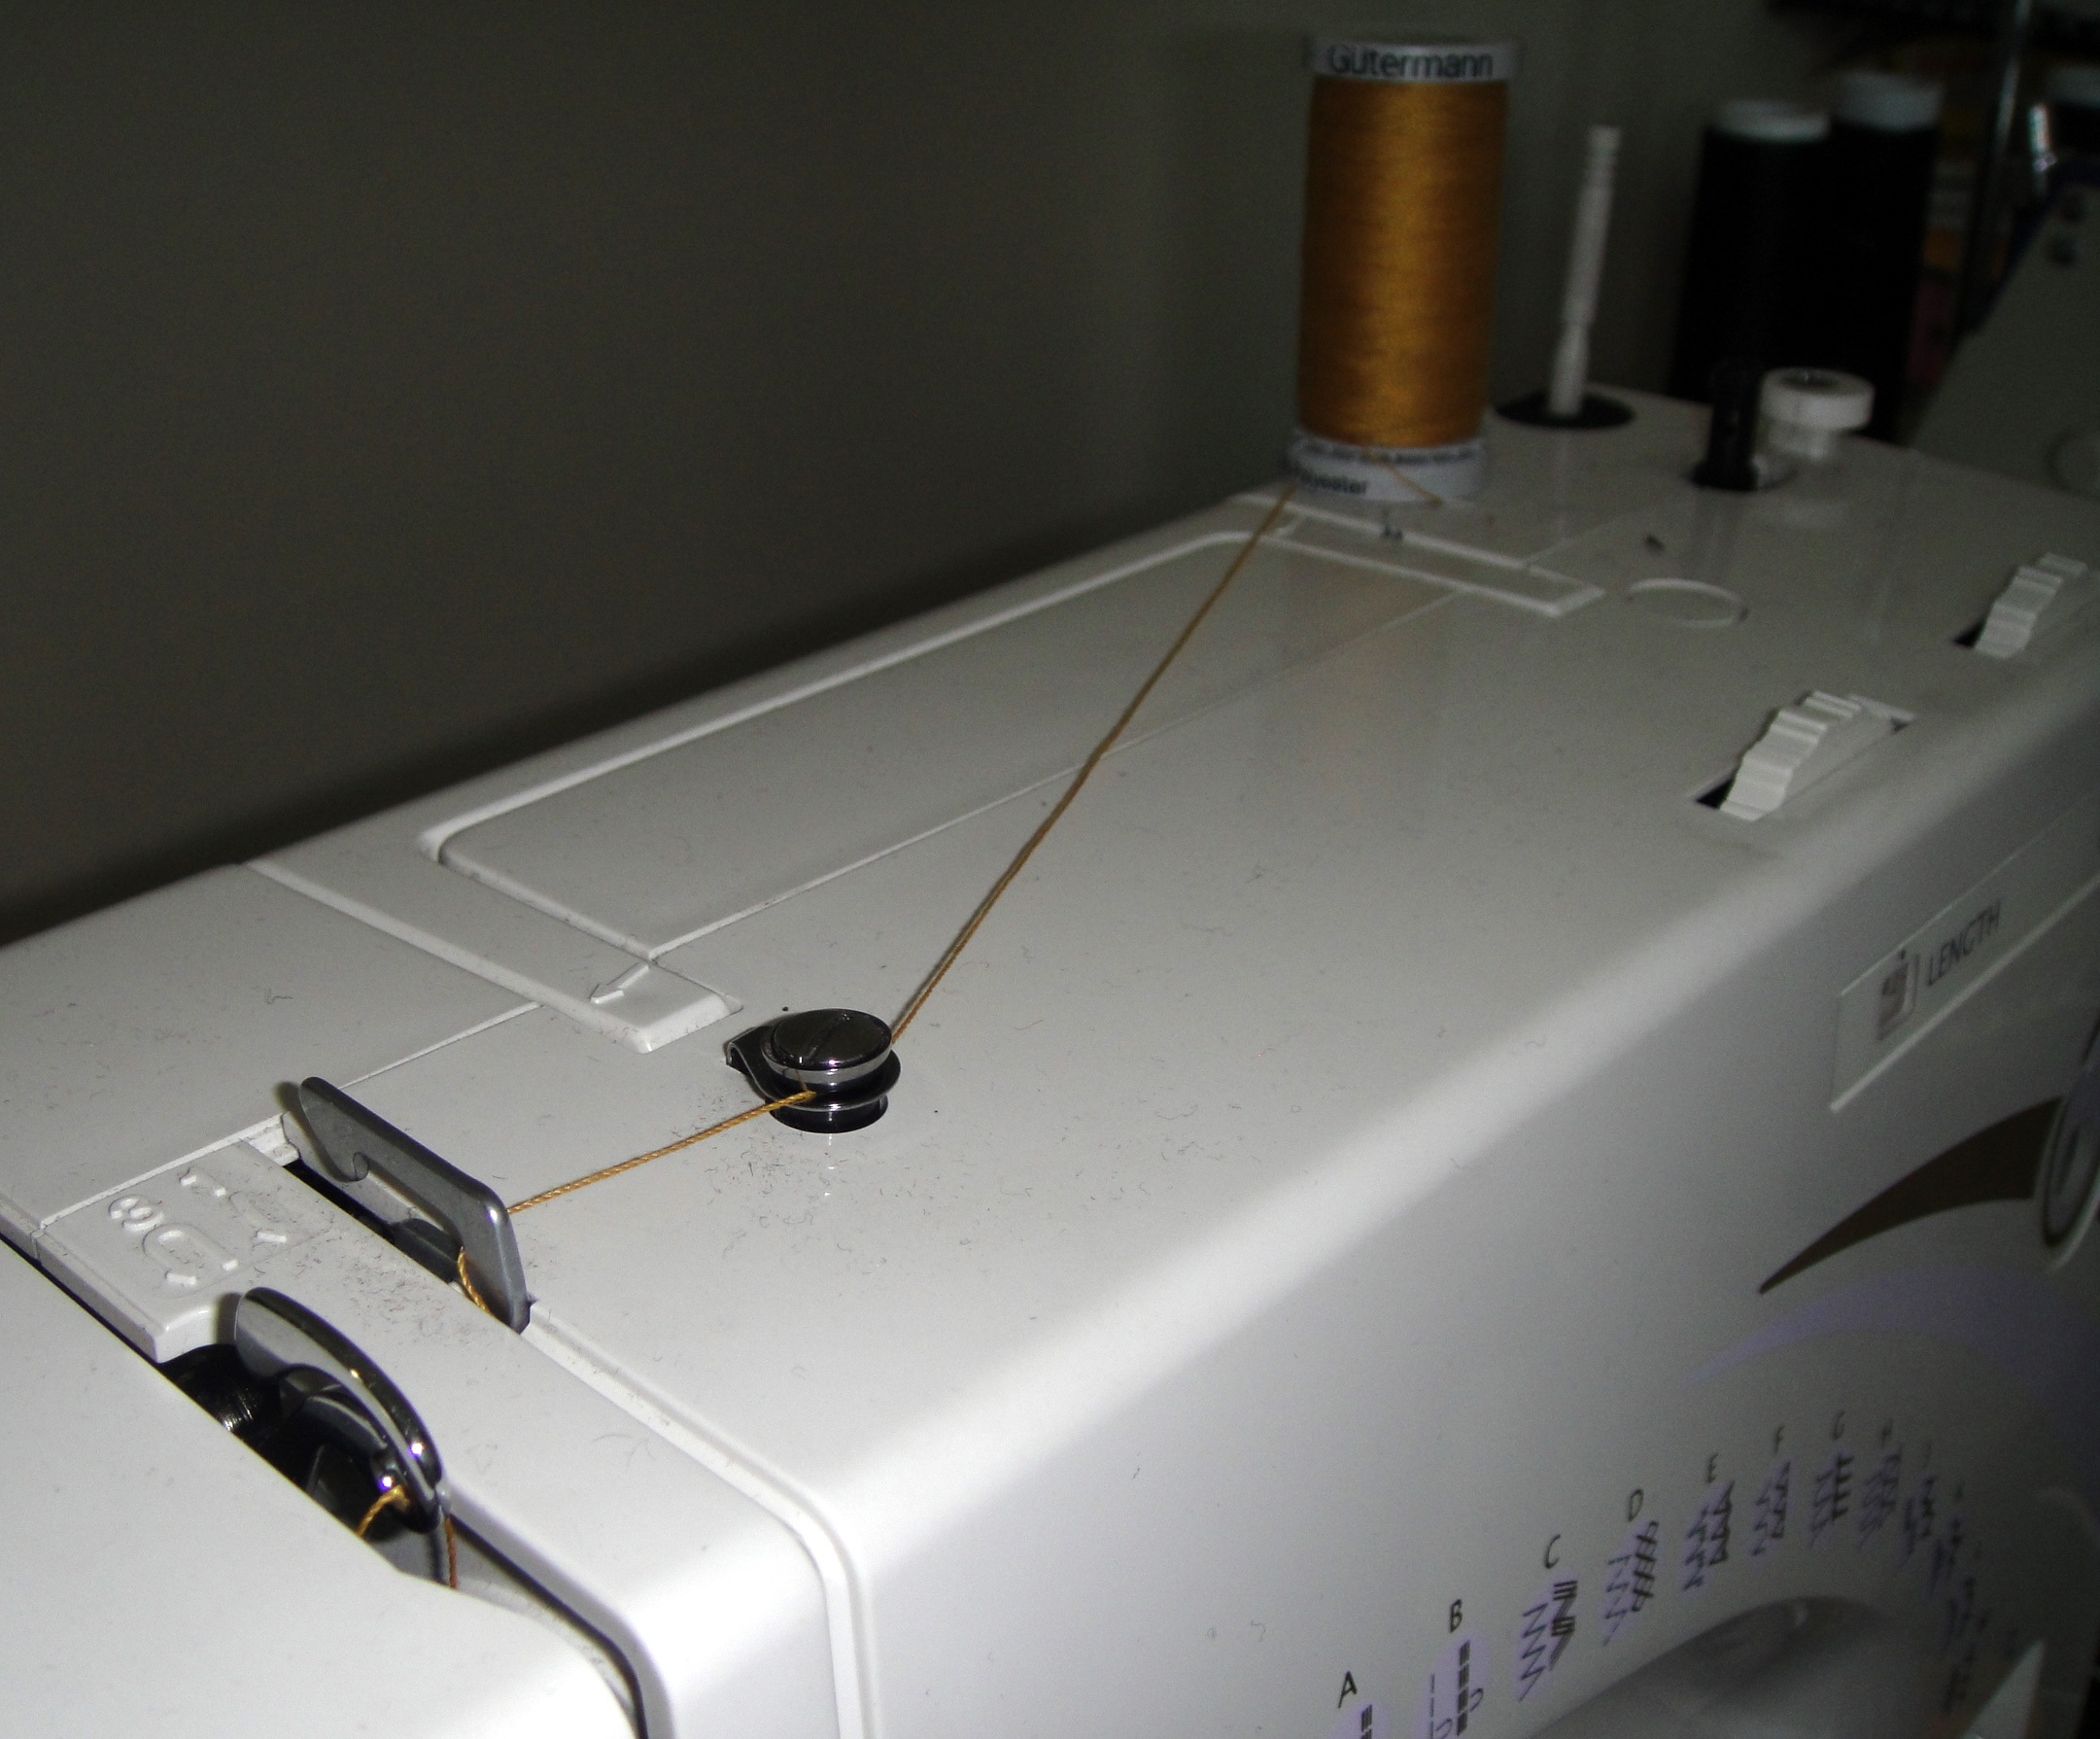
    I wrap my topstitching thread around the bobbin-winding doohicky to increase the tension (AKA cheat)

    thread, topstitching thread (really heavy), upholstry thread, or even regular thread in a stretch straight stitch (triple stitch) if your machine does it. You will probably need to raise your top tension if you’re topstitching with a heavy thread, and may even need to cheat.
  7. be prepared to baby your machine over the thick parts (at least if you, like me, have a wussy modern machine. Sometimes I need to just turn the hand-wheel for several stitches. Or hammer the crap out of the seams (preferably with a rubber mallet. I use a regular hammer or even my rock hammer and if I’m not careful the edges will cut the fabric)
  8. construct the front first, then the back. Have another pair of jeans around for reference. Attach the pockets after sewing the two sides of the back together, and centre them relative to the topstitching, rather than the true CB.
  9. If you’re doing anything other than the simplest of pocket-embroidery, you will want to stabilize the pockets, either with wash-away or tear-away stabilizer or even interfacing. I recommend the removable stabilizer, though; permanent interfacing interferes with the pocket’s ability to stretch and causes butt-flattening. (Ask me how I know 😉 ). Use a cardboard template to press your pockets’ seam-allowance under. Speaking of pockets, I use a size-K pocket on my size-Q pants. My derriere is compact, and I don’t like the bottom of the pockets to go below my actual bottom. YMMV.
  10. Look up your favourite fly-insertion method EVERY SINGLE TIME. My

    What passes for a successful fly around here.

    favourite is Debbie Cook’s; a lot of other people recommend Sandra Betzina’s video. (I have a hard time following video instructions, for some reason.) Also take a long, hard look at some RTW flies while you’re doing it. It will help. Oh, and interface the fly, too. (The fly isn’t actually hard. It’s just really easy to do the wrong way around, which is mildly annoying. The topstitching is a bit tricky, too, but you can manage.)

  11. once you have your jeans stitched up the side, before applying the waistband, do put them on and wear them around the house a bit (preferably for a few hours). This will give you an impression of how much the denim will relax with wear. You may also want to do a trial wash (serge the top edge first) at this stage, as washing and drying are another wild-card for stretch fit.

DON’T:

  1. be afraid. You can totally do this. Denim is heavy, but lovely to sew.
  2. use a pattern or fabric you don’t like. Remember that *perfect* pair of jeans you’ve been mourning since the day went to that great warehouse in the sky? Those are the ones you’re trying to re-create. You won’t, of course, but with any luck you’ll make it into the right ballpark.
  3. cut your waistband on the bias. I use a contour waistband on mine, stabilized with a light-weight interfacing. If I had to go with a straight waistband, I’d cut it on the lengthwise grain, to reduce stretch. My RTW jeans often have about 50% stretch in the fabric, but only about 10% stretch in the waistband (how do they do it?)
  4. sew over the bottom of the zipper when you’re topstitching your fly. Instant recipe for broken needles flying into eyes.
  5. add or remove length at the hem. Unless your jeans are drafted perfectly straight, there’s shaping between hip and knee, and knee and ankle; you need to measure your length to the knee and add (or remove) both above and below to keep the proportions right.
  6. add a wedge to the side back rather than the centre back because you weren’t paying attention. (yes, I did this once.)
  7. if you’re making skinnies, don’t narrow the leg so much you can’t get your foot through (unless you’re adding zippers!)
  8. freak out about wrinkles below your butt. These are not trousers that are supposed to fall straight down from the widest point. There will be wrinkles.
  9. try to finesse the slightly-too-tight waistband fit by putting your button too far over. You’ll just end up with a gapy fly.
  10. feel self-conscious about your wonky-topstitching, or those almost-invisible darts in the yoke. No one is looking. Seriously, they aren’t.

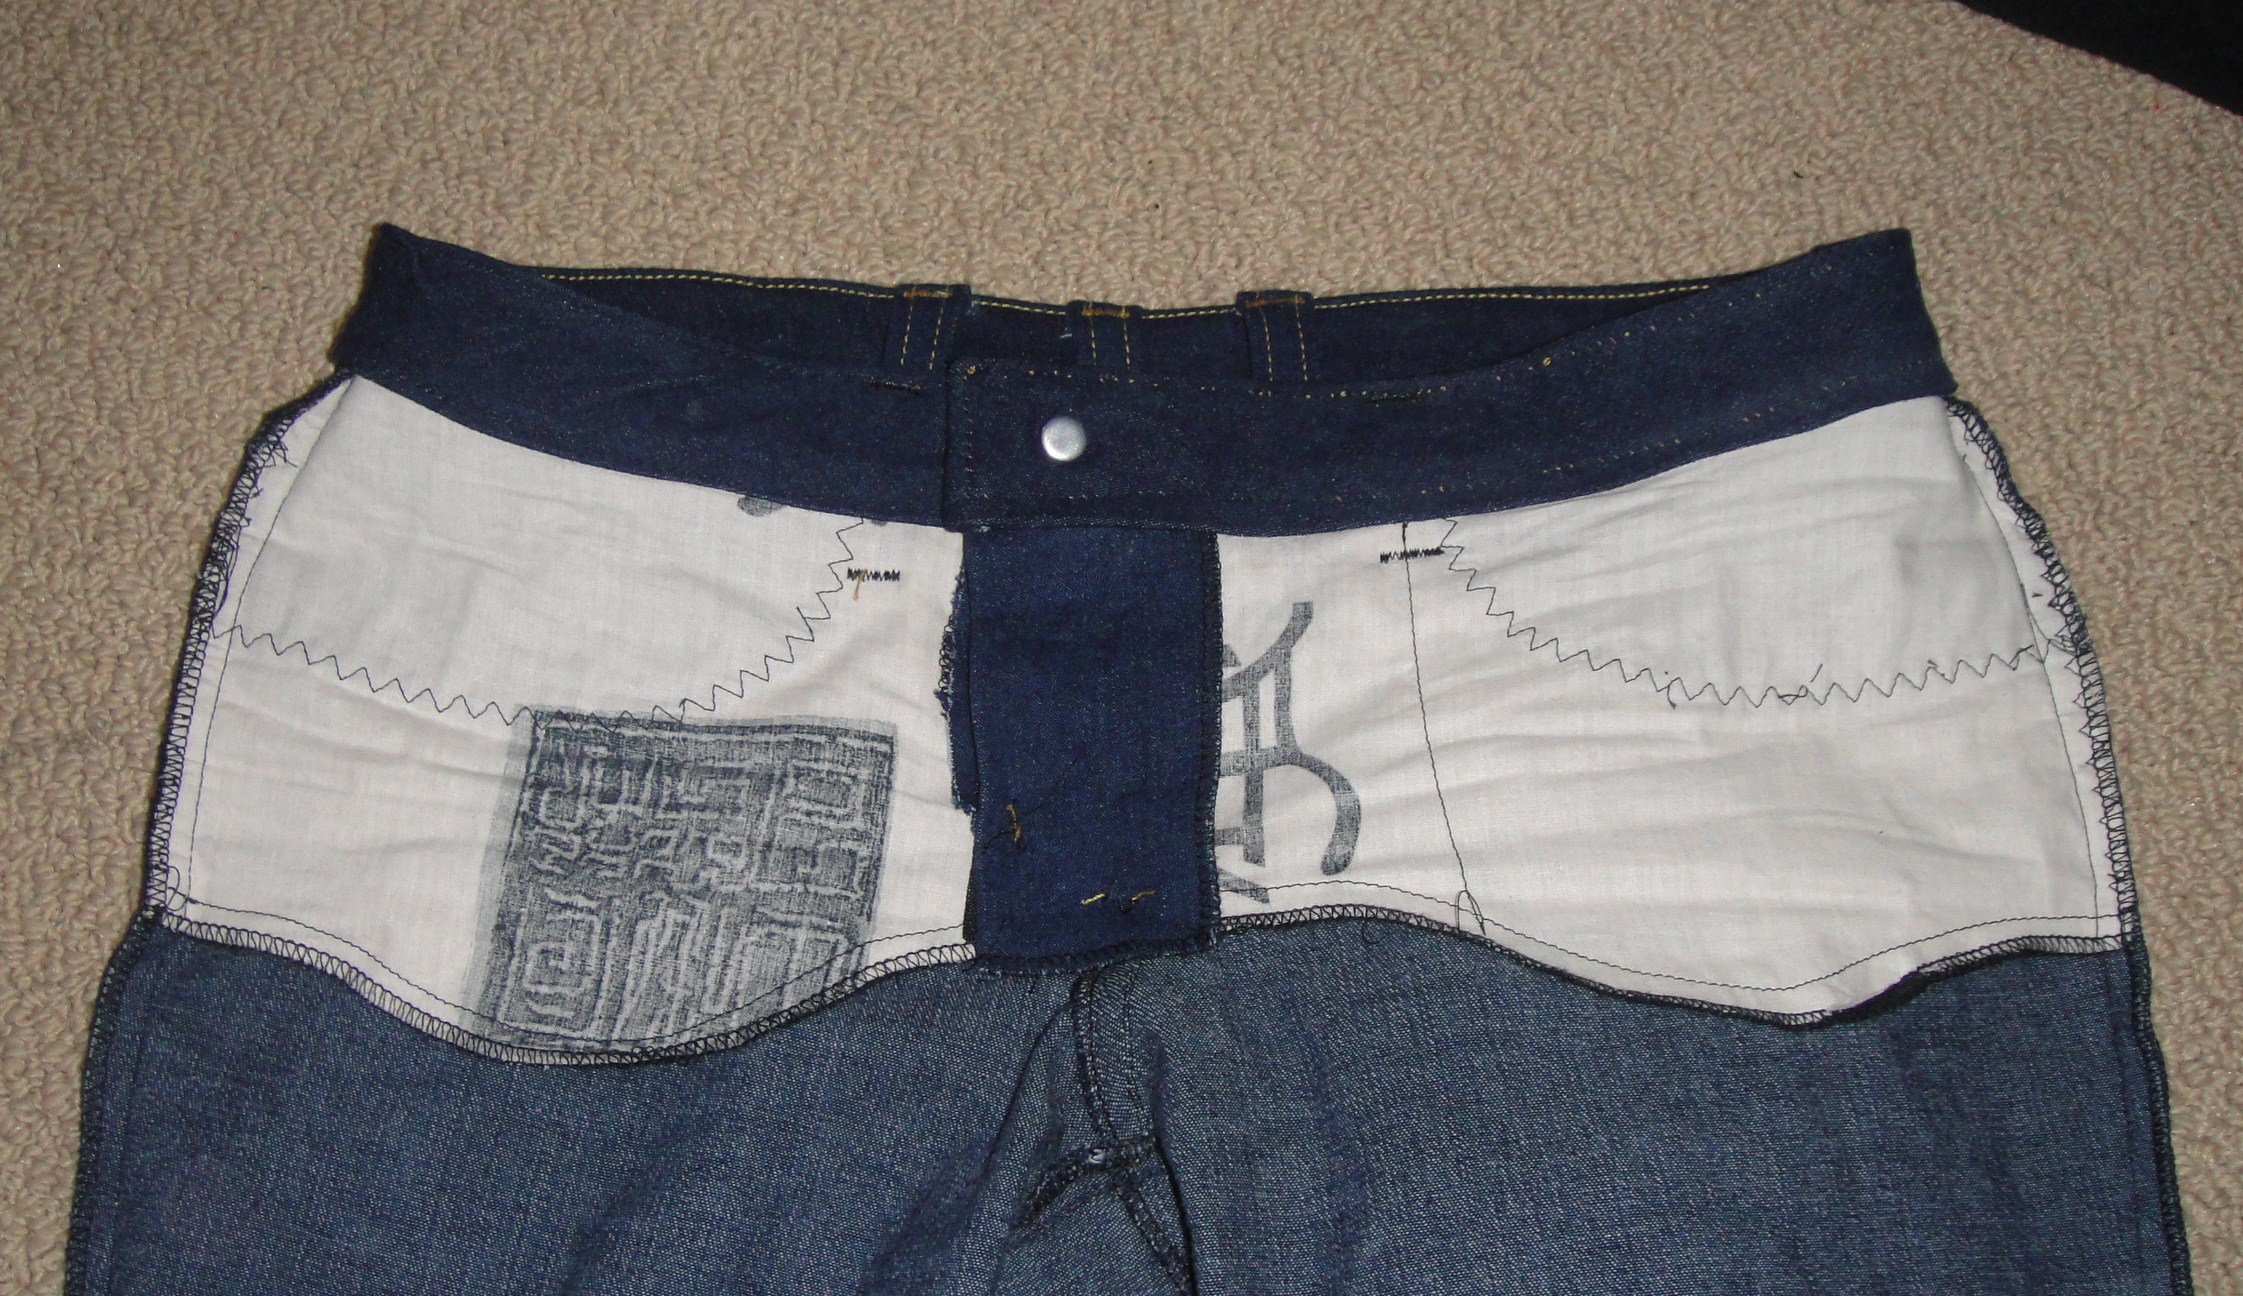
I extend my pocket-linings all the way to the front fly. This interfaces the fly while stabilizing (i.e. slimming) the front, and is super-easy to draft.

I have to admit I feel a bit bad about these lists. They’re tailored so specifically to my “jeans ideal”, which I know is not everyone’s cup of tea. I don’t have much to say about fitting—other than curving the back yoke and taking in the outseams a little bit, and of course the inevitable length adjustment, I haven’t done any (stretch-denim is fairly forgiving). Certainly no messing around with crotch-curves as the intrepid Patty does on a regular basis these days. While I’ve made a crapload of adjustments to the pattern, the majority have been for style or personal preference (pocket linings that reach all the way to the fly to interface it, contour waistband, smaller pockets, etc.)

Coming up with the top 10 was hard (as you can see since so many of them are actually two or three suggestions!). There’s lots of other little points that I could’ve thrown in there.  I didn’t even mention the buttonhole, which has been my waterloo. Mostly, I resort to doing them by hand—not too bad since there’s only one—but on this most recent pair I eased up on the waistband interfacing and was able to work it by machine. My machine can’t do a nice keyhole shape, sadly, but no one else is going to notice anyway.

New skinnies---rear

And I still haven’t really showed you photos of the new pair! So I’ll be quick: this is my first “truly skinny” pair of jeans (the other ones all have stovepipe legs). I made them to replace this pair of RTW jeans that are beginning to bite the dust, and are verboten this month anyway. As you can see (You might have to click through to the full-size photo), I included the same cute little top-stitched dart on the lower leg as in Syo’s pair.

As I doodled out my pocket detail, I

A subtly naughty pocket

realized I’d created an homage to Mary-Nanna’s white knicker jeans (and Steph’s tribute… and of course this alleged Japanese fashion trend which I’m happy to learn is indeed a hoax. I thought it was a bit fishy when I first saw the pictures a few years back, but you never can tell with the Japanese. 😉 ) Mine is a bit subtle, but those of you in the know… well, now you know! ;). If I ever find some white stretch denim, I promise I’ll do full out undies-pockets. The nice thing about making my own skinnies is I can keep the calf-width where I like it and just narrow below; so many skinnies are made for those toothpick-legged adolescents with no calves.

New skinnies, front view

Beyond that there’s not too much to say about them. I used much the same procedure to narrow the bottoms as I did with the skinny cargoes (except I only had two seams to work with, not four). I kept the full length this time, to get that “legwarmer” bunchy look around the ankle that I crave so badly (yes, I like my pants and my sleeves to look extra long. It’s such a rarity for me). Since there’s no zippers in this pair, I had better hope they don’t shrink at all in the wash or I may not get my feet through them next time ;).

So, this is officially my first pair of truly skinny (self-made) jeans… and I hear that apparently the bootleg cut is coming back. If it ever actually left. /sigh. I’m so non-trendy. Oh, wait. That’s a good thing.

I still think I like the stovepipe leg the best, though…

Oh, and this would be my first outfit for Me-Made March. Not terribly innovative, I know, but it’s far too cold out right now for the frillies and the pretties. Hopefully that will change over the course of the month…

34 Comments

Filed under Sewing

Meh.

A little "mad scientist"?

While attempting to unearth my kitchen yesterday, I uncovered one of my (mercifully few) UFOs. Right after I finished the first circle-skirt, I had a vision of mini-wardrobe bliss and promptly printed and sewed up the lining for a Franzi vest. Which has been kicking around my computer/sewing desk ever since.

In hindsight I’m not sure why I did it, as I have a hard time styling vests at the best of times and while I’ve nothing against the menswear look, it’s not really what I was going for in my mini-wardrobe-headspace.

Anyway, since I was looking for a quick weekend project, I figured I’d finish it off and at least get it out of the kitchen. So I hunted down the pattern-pieces (hooray, cleanup!) and cut out the shell. I even took the time to mess around with a piped pocket, which is like a double-welt pocket but narrower. It worked, though the ends aren’t

Piped pocket

especially pretty. I remembered to face the back of the inside with my fashion fabric, though, so there won’t be a big gap of pocket-lining showing through. I used the last of the red piping (left over from the Ceylon blouse) around the neckline, too. I opted not to fold down the little lapel bit, as I didn’t really like the bright silver lining with this fabric. Black would’ve been better.

And the result is… well, a little meh.

The fit’s not horrible but it’s not perfect. The larger sizes of this vest have a

Burdastyle Franzi vest

dart in addition to the princess seam, but my size doesn’t; the additional shaping would’ve been a good idea. It’s a bit gapy at the armhole above the bust. I could’ve shortened a wee bit above the waist, too—I can tell from the way it feels, although it doesn’t show too much, I think. Of course I don’t have a buckle for the back belt, so I’ll have to hunt one down. I did a small swayback adjustment, basically just taking in the bottom of the CB seam a wee bit, which worked well.

It really needs a high-necked shirt underneath it, which basically means one of

Back view

my JJ blouses, and since the ruffles don’t really do any favours for anything you wear over top, that limits it to one of the non-front-ruffle versions. And the red in the piping doesn’t match the red in my red JJ, so it really only looks even half-ass good with the white-with-black spots JJ.

So, I dunno. Not awful but not great. In theory a vest would be nice to spice up an otherwise generic outfit, but since this vest really only works with one top in my wardrobe, it’s not going to be that versatile. And I don’t really like it with the matching circle skirt. Still, I suspect it’ll crop up in Me-Made March, at least once or twice.

9 Comments

Filed under Sewing

An edgy little vest

Vest---closeups

One cool kid.

Tyo wanted to make her Patrones vest out of the same fabric as her lounge-pants. This was not ideal, but when has an inappropriate fabric choice stopped us? 😉 So I interfaced the skull print pieces with an iron-on knit interfacing, used scraps of sweatshirt-knit left over from the Kimono Lady Grey for the rest, and went to town. Tyo did much of the cutting out, but I did all the sewing. Mostly because I haven’t done many shawl-collars and was kinda winging it and didn’t want to confuse her and screw her up. It was also my first time making a lined vest since learning about the trick where you sew the neckline and the arm-hole edges before the side-seams so you can pull them right side out without hand-finishing. So I wanted to try it myself. I did manage to sew one of the side-seams with the front twisted around the first time… have I mentioned how much I hate picking out serger seams? And I managed to pick out half the front princess seam first, by mistake. *head-desk*

I did a particularly poor job on the little belt at the back, which I really should have interfaced, too, but fortunately it really doesn’t show (it does need a buckle still, but anyway). I wish I’d had enough of the skull stuff left over to do the front side panels in it, too, but it was touch-and-go as it was.

A stylin' girl

Her one request (besides the fabric) was the little pocket inside the front. Just the right size for her MP3 player.

Other than the little belt, I think it turned out really cute!

Also, nothing like a quick before-bedtime photo-shoot to bring out the silliness:

Stylin' Syo

But the Badass Badguy takes her down!

Even bad guys like to chill with their tiger.

Just for the record, I’m pretty sure that’s the only toy gun we have in the house. Toy swords… plenty. Guns… not so much. We are not really gun people.

12 Comments

Filed under Sewing

Skinny cargoes: a tale of obsession

We won’t go into the state of my house or how neglected my children are, all right? I promise I’ll stop. Ok, slow down. Real soon. Really, really, soon.

But in the meantime, while I was only planning to show you this:

A good start on the skinny cargoes

it turns out that I couldn’t tear myself away, and now I can show you this:

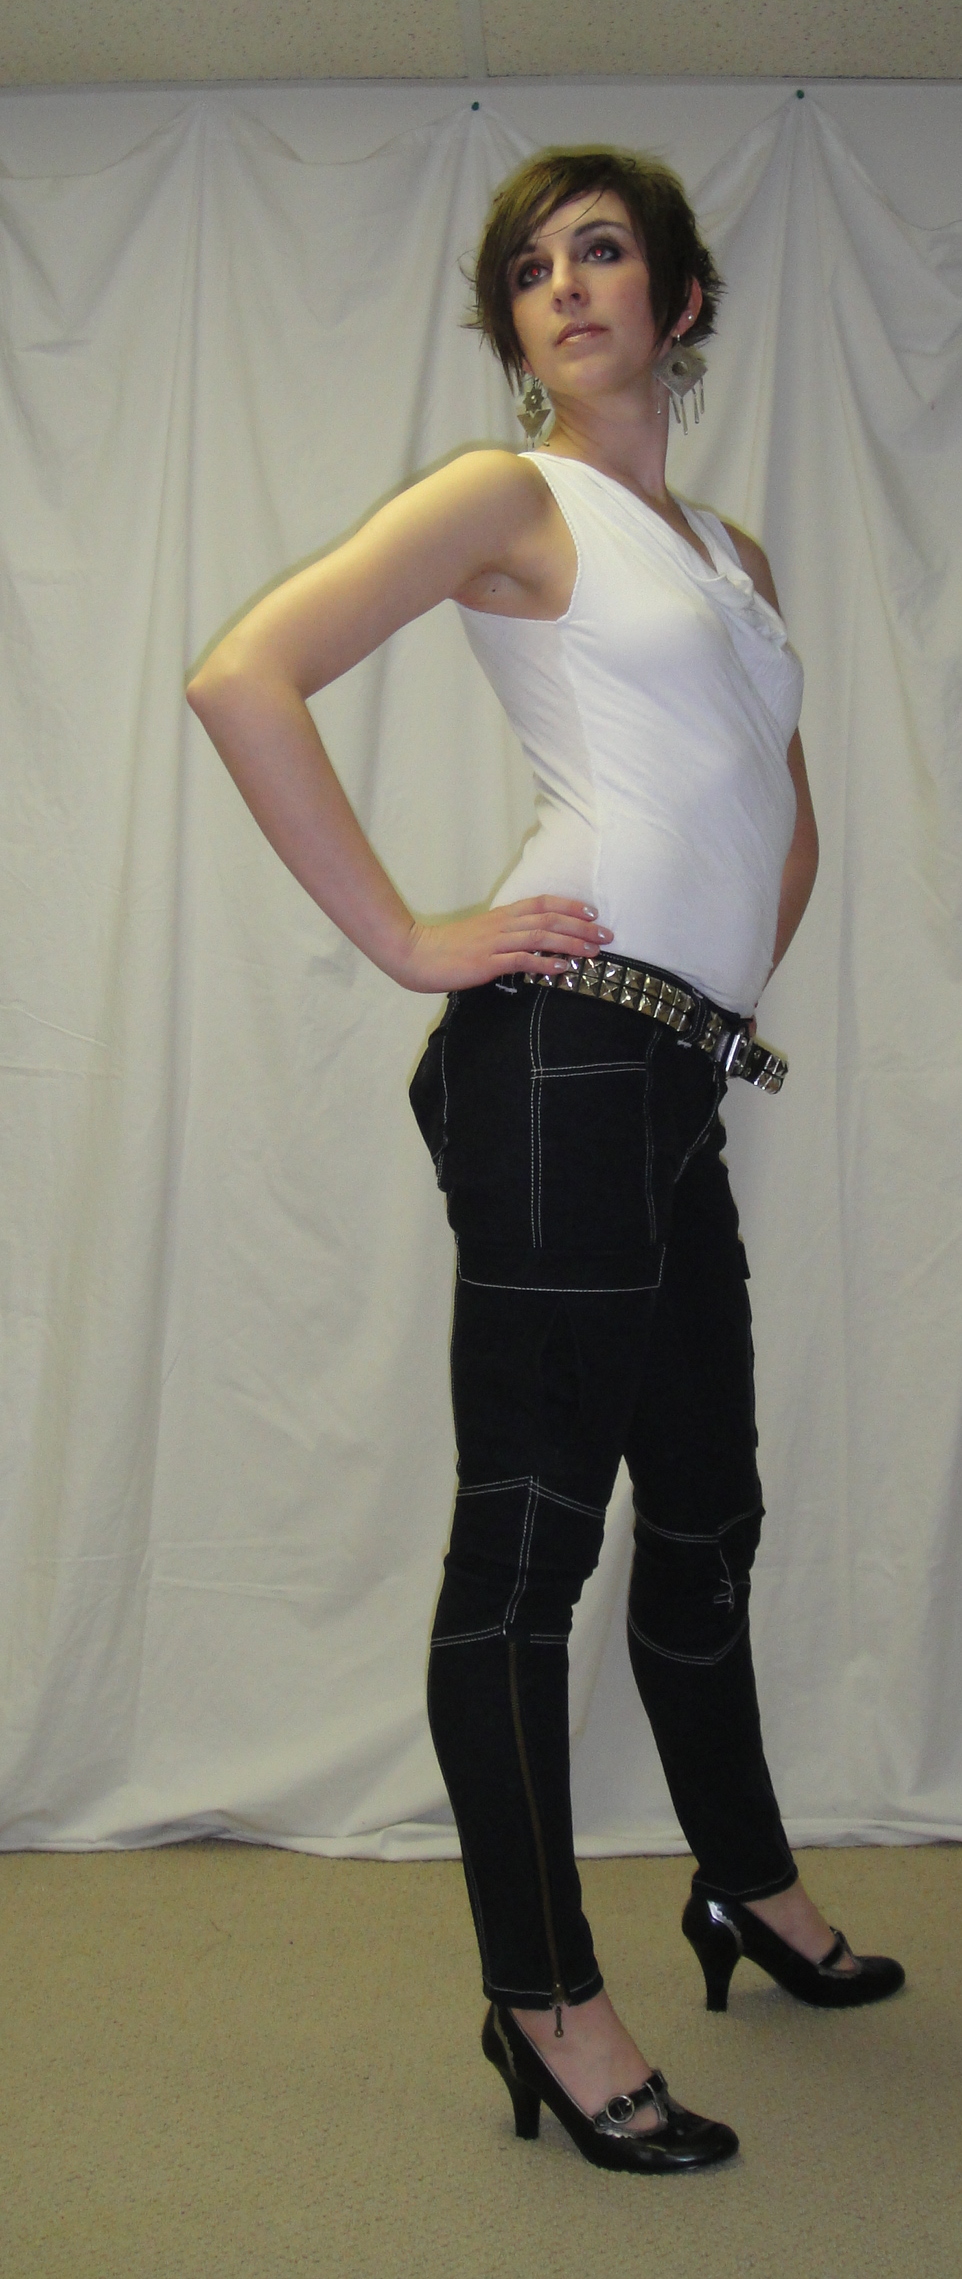
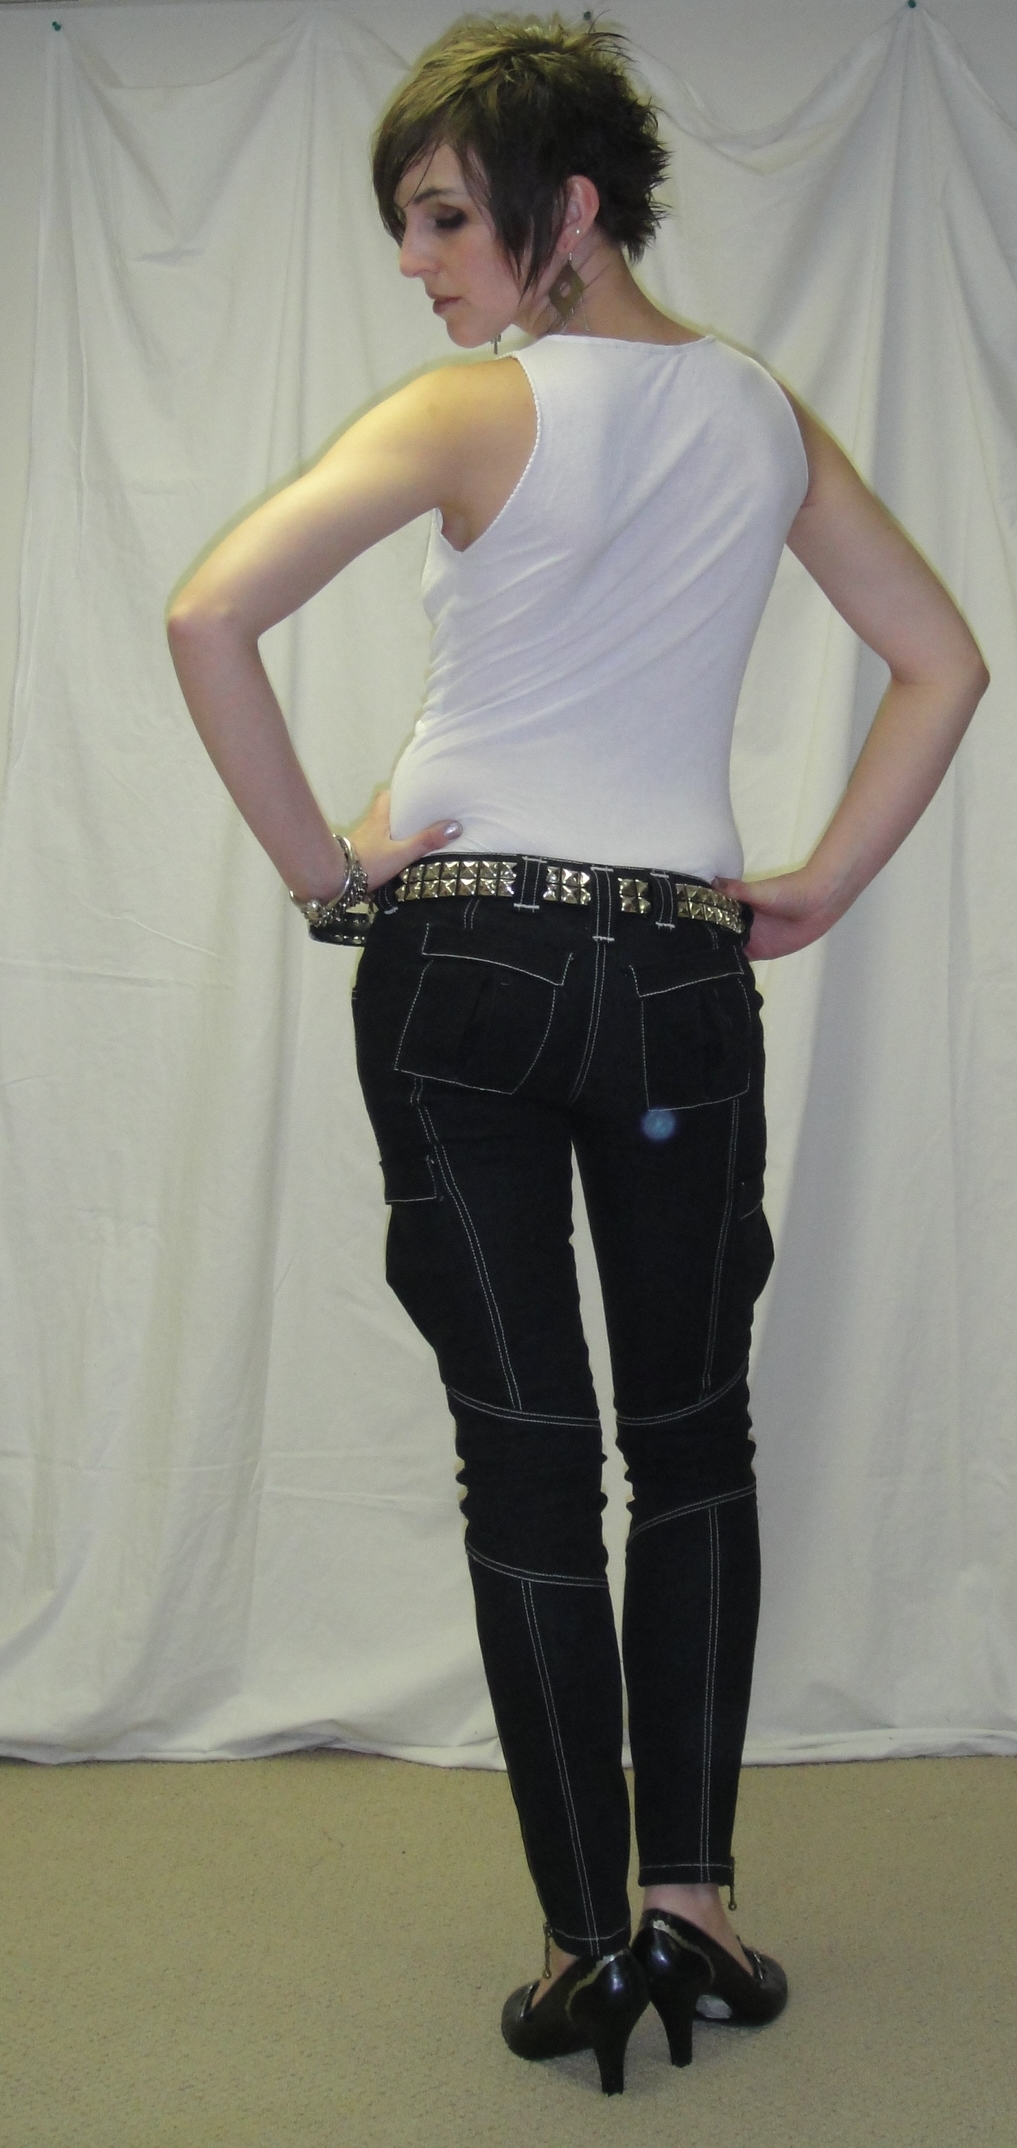
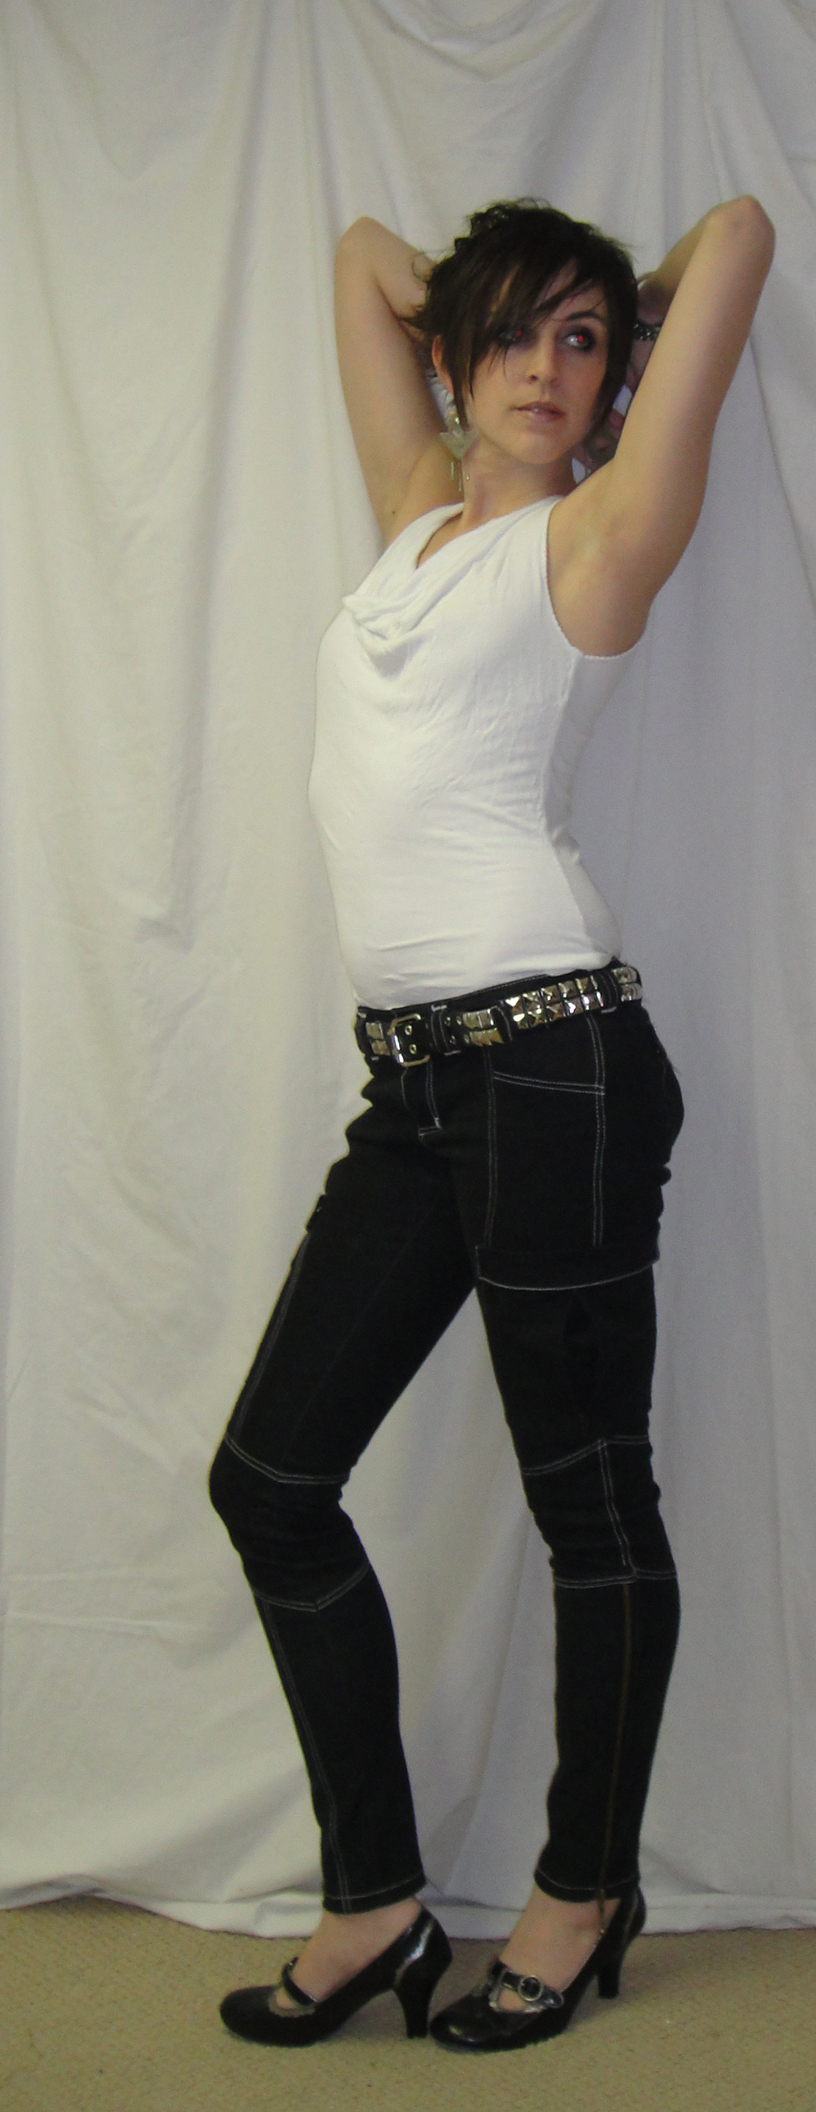
Skinny cargoes

Yup, they are finished. Pretty much. I’m still debating opening up the inseam again and adding topstitching all around the big cargo pockets. And there’s some issues with the topstitching around the top of the zippers having to do with me picking a crappy construction order and not noticing I grabbed separating, not regular, zippers.

Very, very skinny cargoes

Anyway, process, right?

As you may recall these pants were inspired by both Yoshimi and Amber’s recent takes on the skinny cargo. Amber, in particular, went into great detail on the construction of her knock-offs, and mine are essentially knock-offs of her knock offs.

I started, natch, with my particular version of the Jalie 2908 stretch jean pattern. Now, I feel a bit bad pimping this pattern (not that it’s a bad pattern, or doesn’t deserve pimping) because my version is distinctly altered. In particular, I went down a size, lowered the rise, darted the yoke, narrowed the leg to straight below the knee, and replaced the straight waistband with a contour one originally cribbed off the Ellen pants. Also added five inches or so of length, but that sorta goes without saying. So if you see my jeans and decide to order the pattern, well, you’ll have a bit of work ahead of you.

Anyway, I have previously produced at least four versions (for me) from this pattern, all of which are staples of my wardrobe (except for the capris, which I can’t wear right now due to weather, and the red-topstitched ones, which were out of commission after I pulled the pull of the zipper a month or so ago. I hate mending, but finally got to it earlier this week.)

Now, turning this jeans pattern into a skinny-cargo pattern required a bit of work. First

Skinny cargoes: rear view

off, as I traced out a version of my Jalie pattern, I had to figure out how to replace the yoke with a regular back with darts. I sorta winged this, and thanks to the mercy of stretch denim it seems to have worked. I also had to figure out how to reconstruct the front pocket area, but that was pretty straightforward. Then it was a matter of deciding where I wanted my seams to run (much referring to Amber’s post on the matter), hacking up this version of the pattern, labelling where I needed to add seam-allowances (not to mention up, down, inseam, and outseam), and re-tracing all my pieces with their proper seam allowances. Whew! I took the opportunity to incorporate my rear darts into the back seam, as well as adding a bit more butt-shaping, although I can’t really tell if that was successful as it is covered by the back pockets. I removed one cm off each side of each seam at the ankle, for a total of 8cm around the whole ankle, which made it pretty narrow, although I suspect I could still get my foot through without the zippers. The zippers make them VERY easy to put on and take off, though.

I can’t decide if having the pattern in so many itty bitty pieces saves fabric or not. Jeans are pretty economical at the best of times, so with the added fabric required for seam-allowances, maybe not.  Plus there’s those big pockets eating up fabric.

Because there were so many pieces and in particular the lower leg pieces are almost identical, I opted to cut and assemble the entire front and then the entire back. This is fine, except that I should’ve incorporated the side zipper in the lower leg into the original construction of the front instead of ripping out topstitching to fit it in later. But, we live and learn. Seeing as it’s only been a few days since I last installed a fly front zipper, I didn’t even need to look up the tutorial on it! It helps when you’re wearing jeans while sewing… I find I look down a lot to reference which side the stitching should be on ;). I opted to make the fly angular to echo the slanted hip pockets. Nothing to do with it being easier than a curve. Nothing at all.

Side-seam zipper

Once I had the front and backs assembled and topstitched, I had to do a bit of thinking. I couldn’t find a good reference on how to insert exposed zippers into a seam (though I didn’t look terribly hard). I decided for simplicity’s sake I wanted the zipper to fall in the front part of the pants, not straddling the seam evenly. Then I discovered that the cute little zippers with the nice little bauble at the end I picked up last weekend were, in fact, separating zippers.

I toyed with the idea of going back and getting different zippers, but I really like that bauble. I do wish these zippers came in silver (to go with my topstitching thread), but the selection at Fabricland is a bit limited. /sigh. Maybe I should’ve topstitched along the edges of the zippers, too? I think I was having topstitching fatigue by this point.

Because of the cargo pockets, I figured I needed to construct the outseam before the inseam. This is not as good for fitting as the reverse, but I was reasonably confident these would fit, due to the TNT pattern, so I went for it. The pockets were rather terrifying, I will say, especially getting them positioned and topstitched. Which is part of why I chickened out on most of the topstitching on the thigh pockets. We’ll see how much that irritates me in the days to come.

I almost always hit a point right before I’m able to try on a garment where I’m

You know black cargoes need biker boots and chain mail.

absolutely convinced it’s failed. It’ll be too big, too small, or just wonky looking. These were no exception—it was with immense relief that I wriggled into them the first time, discovered that the narrowed legs did indeed fit and that I could, in fact, zip up the zipper. Phew! This anxiety repeats again once I’ve attached the waistband. I tried a lighter waistband interfacing this time around, which was nice if only because it means I could make the buttonhole on the machine. On the upside, this iteration of the waistband is a nice width (some of my previous version were a little narrow) and doesn’t gape at the back. Yay!

Styling these is… interesting. My first effort, with the white cowl-neck top and the heels, is fine but a little, ah, mainstream? Doesn’t really feel like me. Nothing some biker boots and a little goth gear won’t fix. Ah, yes. Much better.

Stylin'

And I mustn’t forget to credit my delightful photographer:

Me and my photographer

In exciting men’s sewing news, my hubby has consented to having the shirt muslin finished for a comfy wear-around-the-house shirt, now that I’ve enlarged the collar. Which means I might actually get photos of it at some point… though probably not for a few weeks as he leaves tomorrow.

25 Comments

Filed under Sewing

The jeans of many sizes

Possibly subtitled “the best laid plans…”

Instructions: "Look cute."

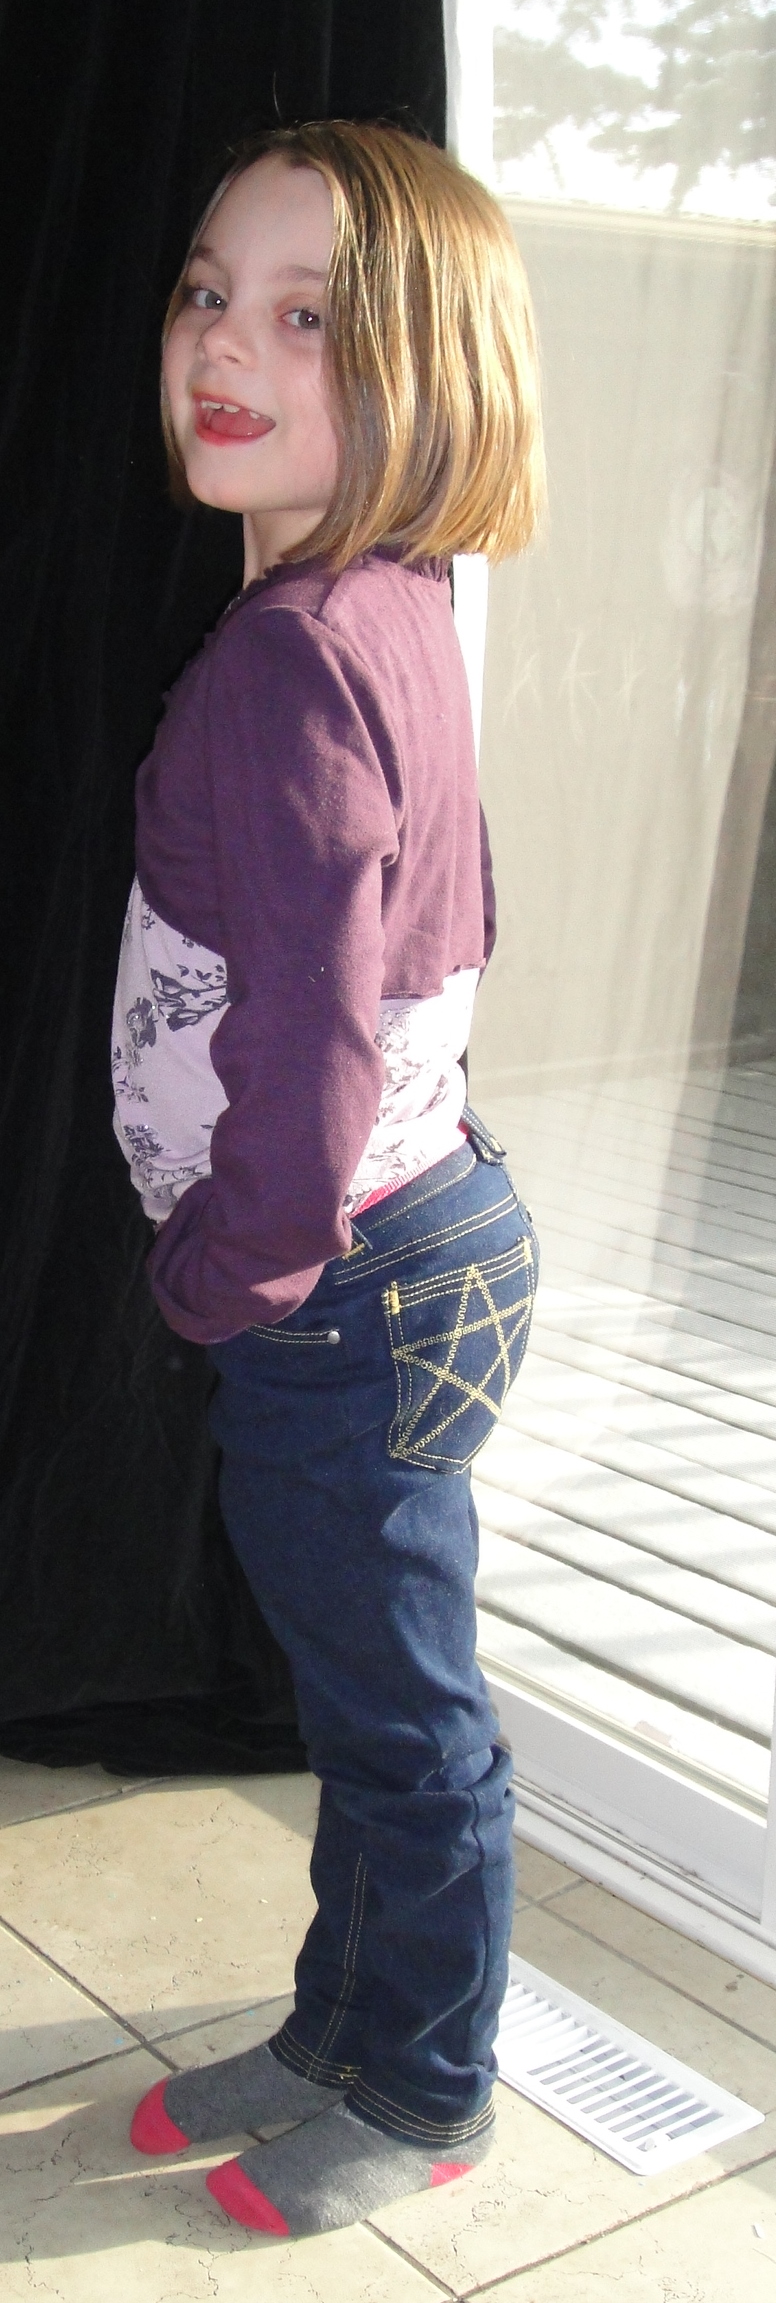
In a fit of obsession yesterday afternoon, Syo and I decided to tackle her jeans. The project was simple; all the materials were on hand: one traced version of Jalie 2908, size K (aka 7); one metre of dark blue stretch denim; gold jeans topstitching thread, and a little metal zipper.

The pattern is the same size I traced out for Tyo’s jeans last spring, which she had outgrown by August. Syo is now wearing these jeans, quite comfortably, so I was feeling pretty confident about the fit. They would probably be a bit long, but otherwise shouldn’t be problematic.

Syo required only one, simple alteration. Tyo’s jeans had been flares, the pattern’s basic shape. Syo’s must be skinny. Yes, my seven-year-old is much more on-trend than my ten-year-old. Which probably says everything you need to know about their respective personalities. So I measured what seemed like a reasonable distance out from the midline of each ankle, drew a line that angled out to the knee, and we folded the pattern in along that line. Just in case Syo wants a pair of flares in the future (not likely, but this is how I roll). Oh, yeah, I double-checked my reduced width with the circumference of her pointed foot, to make sure she could still get her feet through. All seemed good, so we set to cutting it out.

Syo really wants to be able to sew. And cut out fabric. Unfortunately, the fabric shears

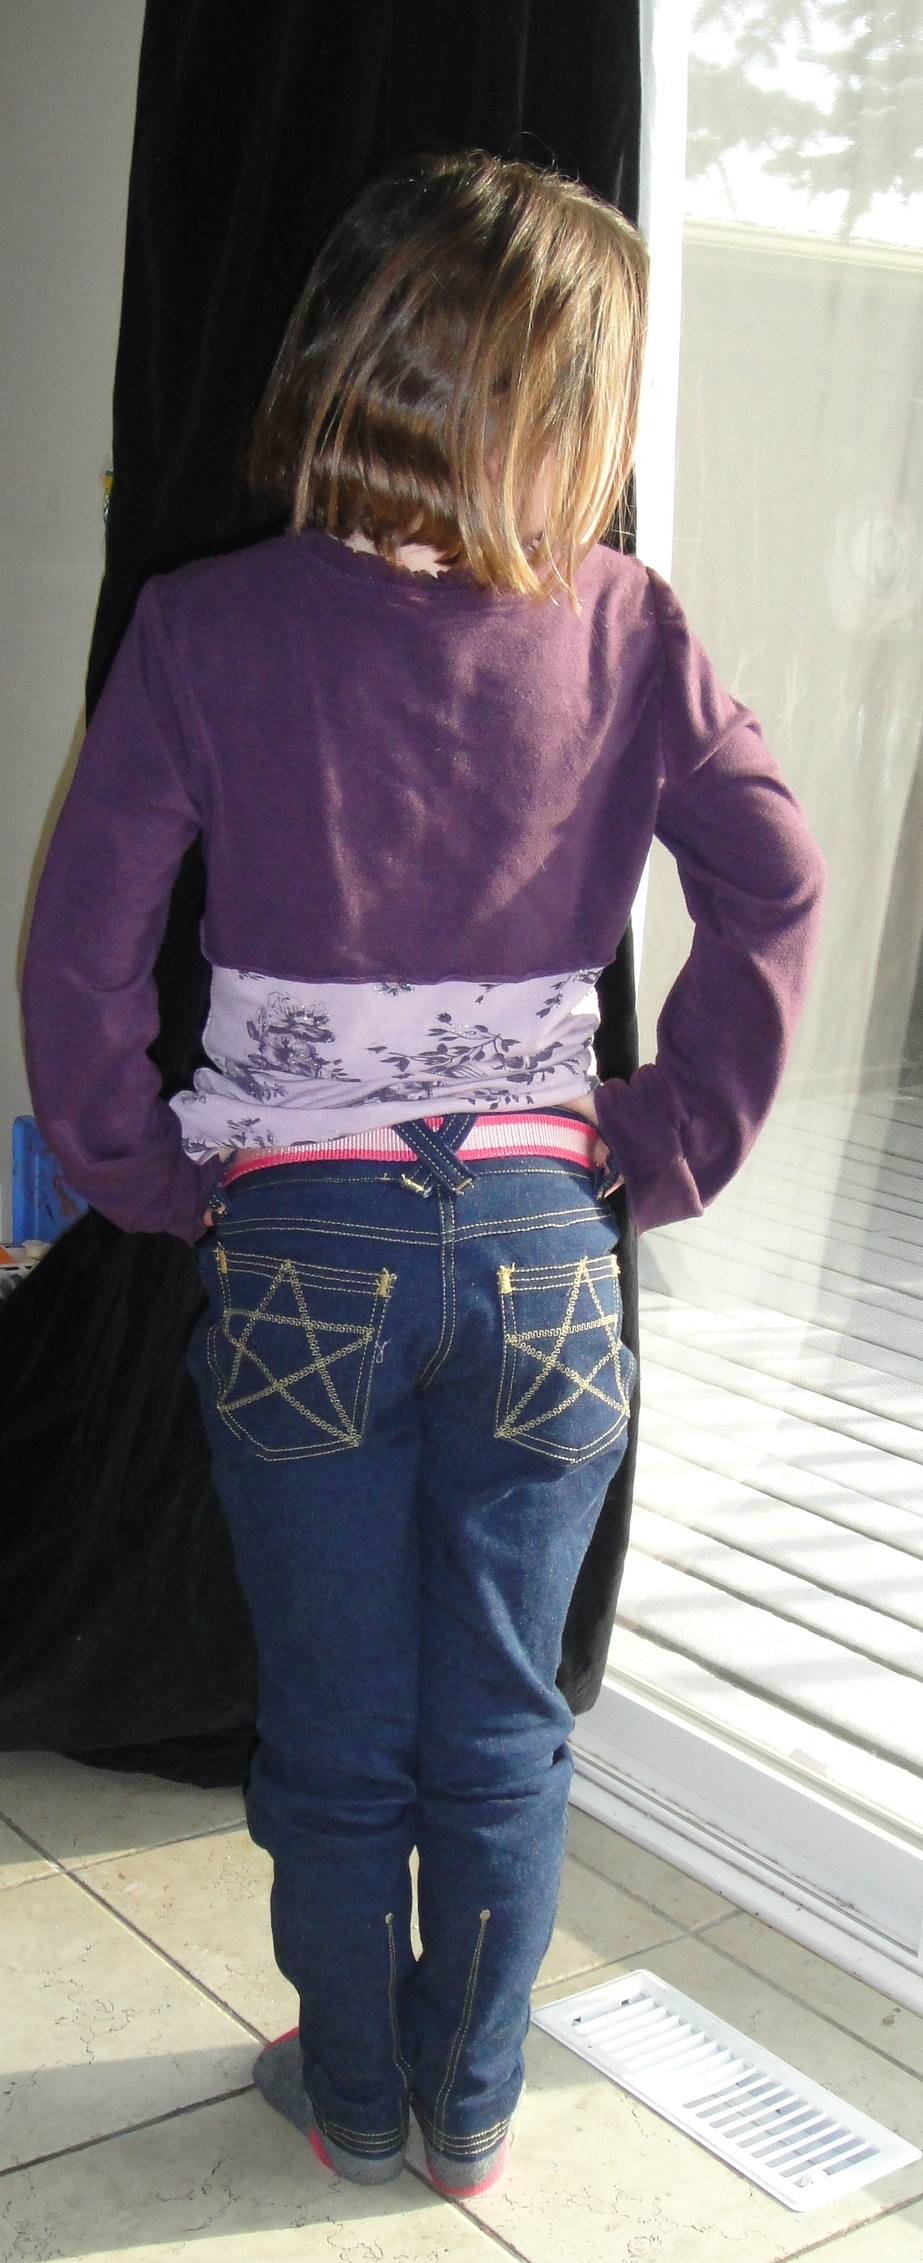
The back

are still too big for her little hands. This didn’t stop her from doing her best with the embroidery scissors on the pocket lining, and she actually did an excellent job, but man, it took forever.

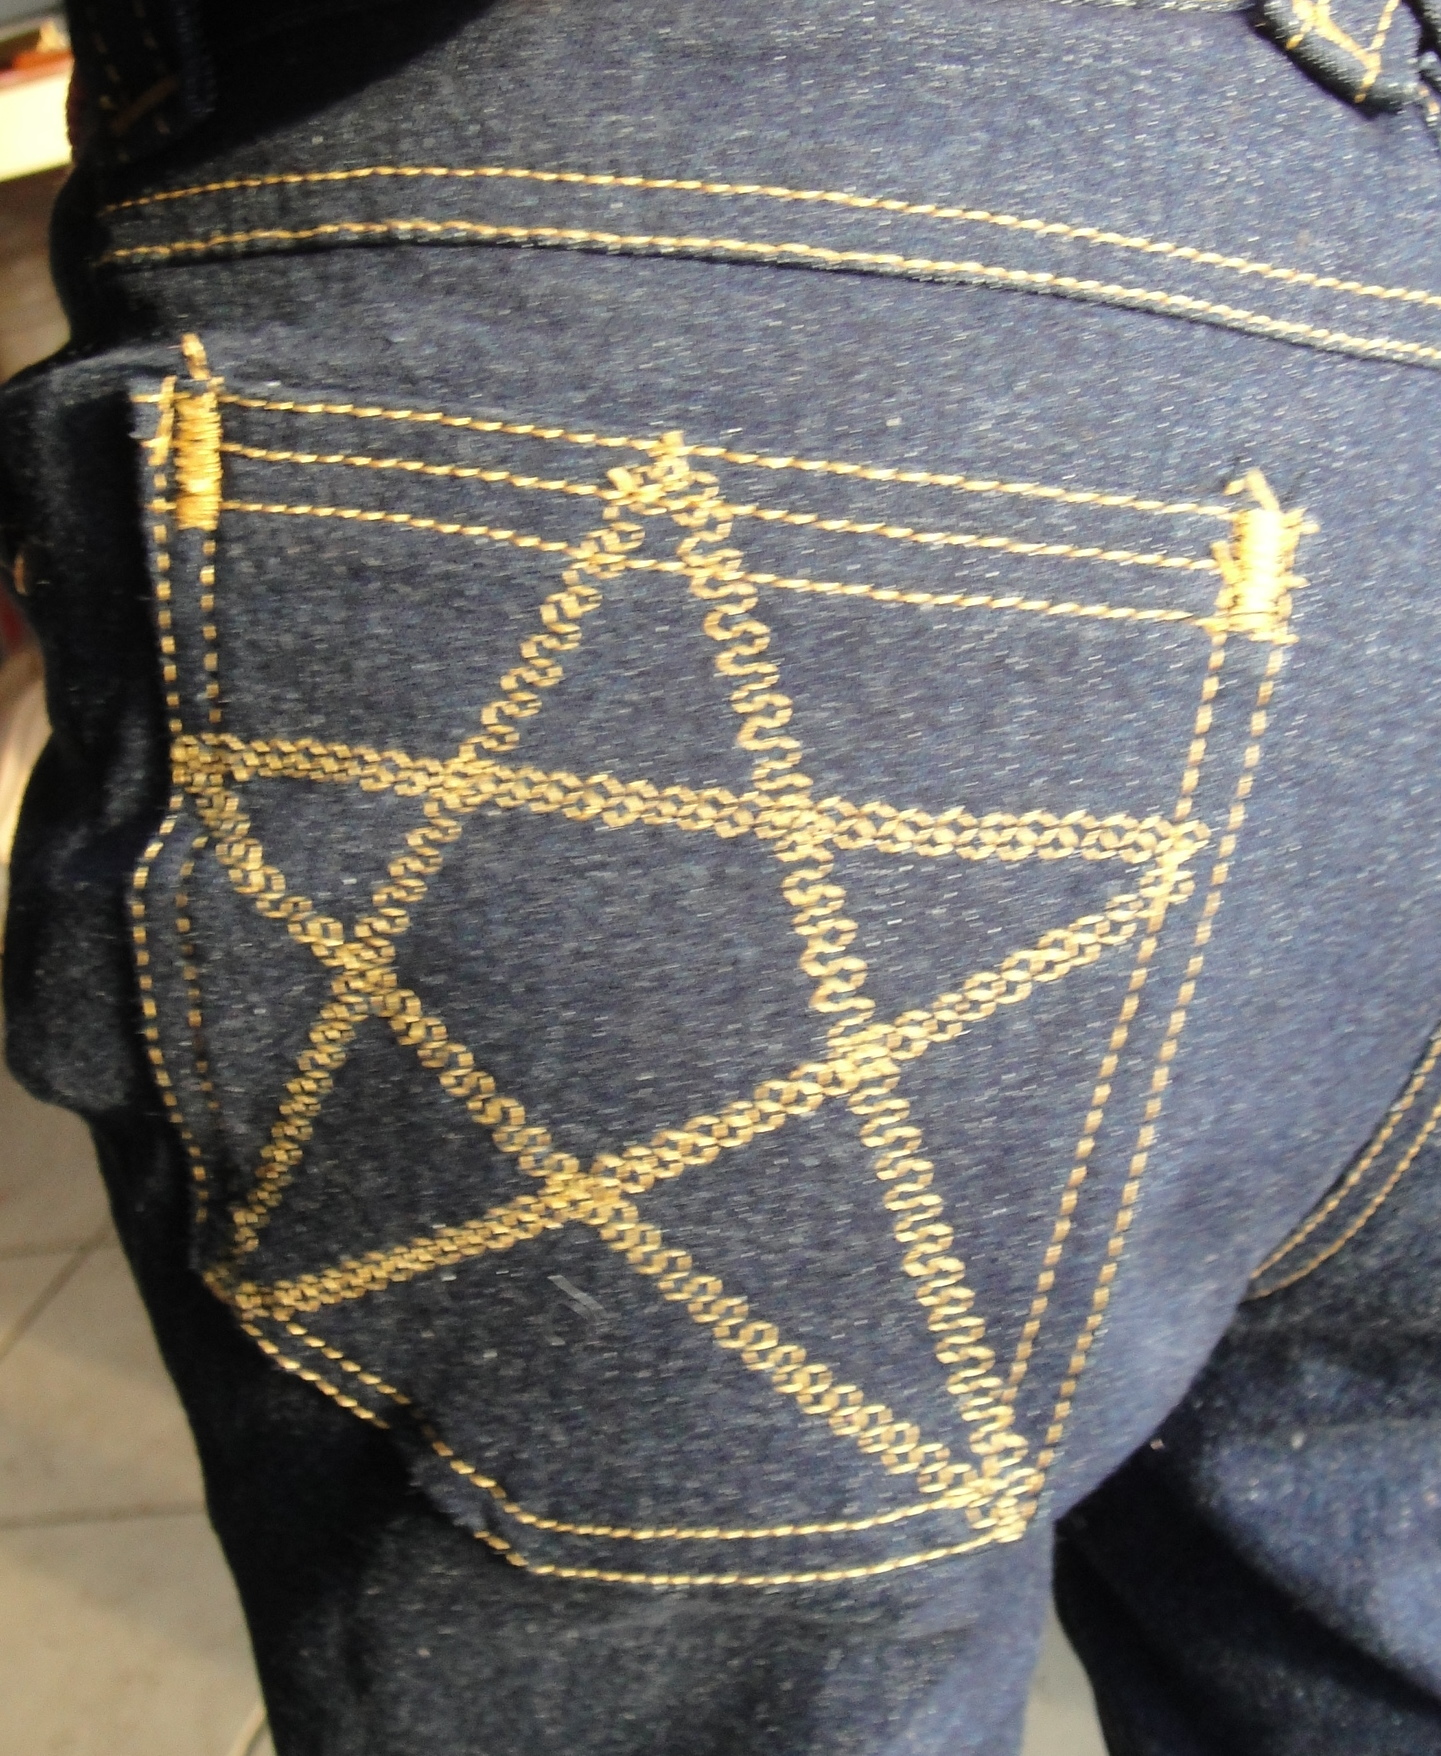
Pocket closeup, with fancy stitching.

After much discussion, we settled on stars for the back pockets. The first pair I made Tyo has stars on the back pockets (stars are nice and easy to embroider on stretchy denim when you don’t have an embroidery machine and are too lazy to stabilize your fabric).

This is the first pair of jeans I’ve made since I got my serger back in order, so it was my first chance to remember to serge seams after sewing, but before  topstitching. I mostly managed this. (Note: this pattern only has 1 cm seam-allowances, so you need to serge without cutting anything off or your second row of topstitching may not catch the seam-allowance.)

I like the Guterman jeans thread; it’s not as heavy as their topstitching thread, so

Side view

doesn’t require dirty tricks to get the upper tension high enough on my machine. Still, I can tell that my newish Janome doesn’t quite have the balls of the Grand Old Dame when it comes to stuff like this. The Dame would eat projects like this for breakfast—the Janome I have to baby along here and there. And this is with really thin denim.

I only hit one hitch in the construction, when I realized I’d cut the size Q back yoke (my size) rather than the size K. I think the size K yoke piece may have evaporated… oops. Another reason why I love tracing my patterns. However, I was pretty sure the outer width of the yoke was pretty close, so I just trimmed the wide, inner portion to fit. If there is any actual difference in the size, it’s well within my usual cutting-inexactitude; the side pieces went together just fine.

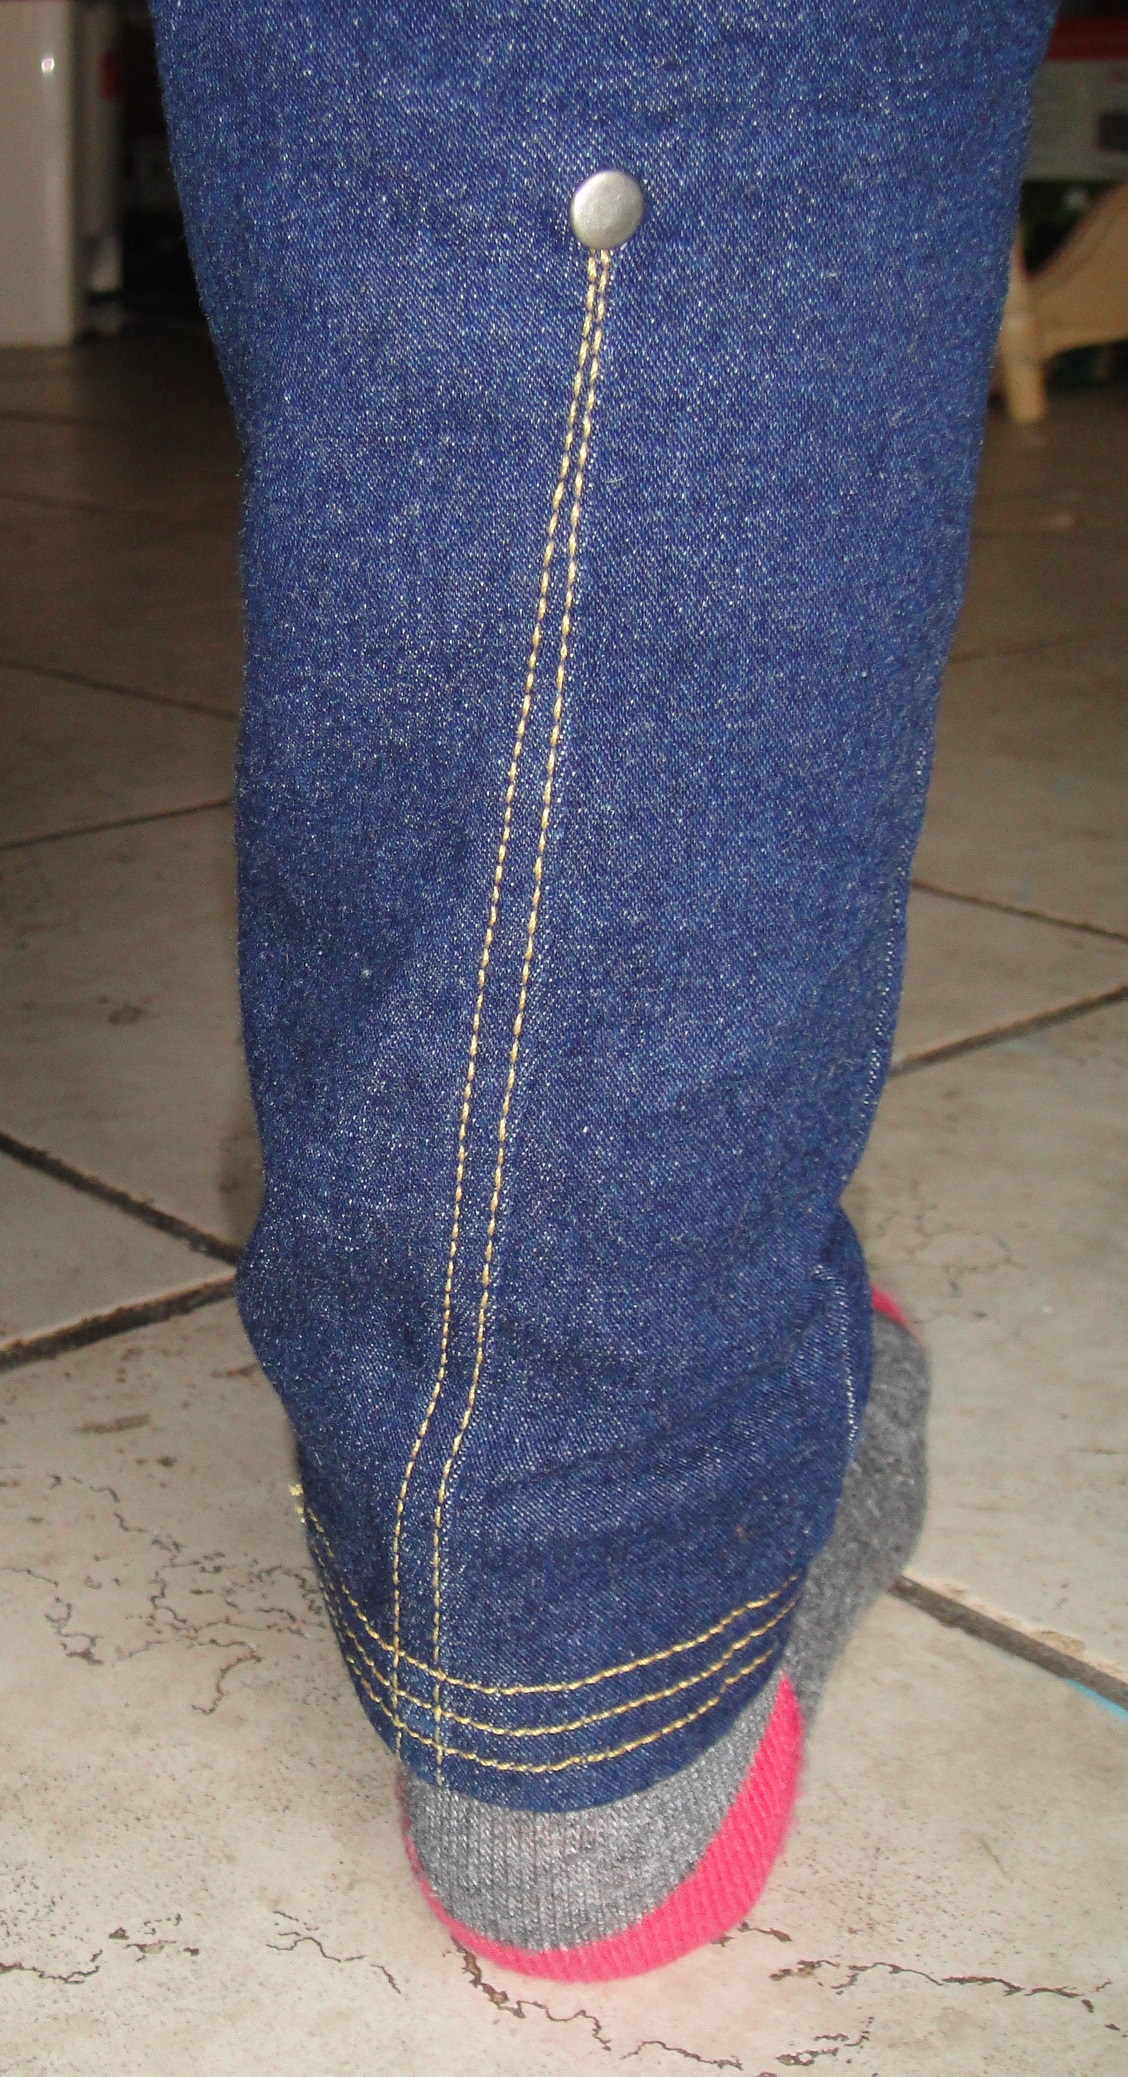
Calf detail

Oh, yes, and I added in a detail on the back lower legs ripped off from some RTW skinny jeans owned by one of Tyo’s trendier friends: basically a long, thin topstitched dart with a stud at the top of it, forming a very small amount of shaping below the calf. I keep meaning to do this on jeans for myself, but forgetting as it has to be done quite early in the process. It wasn’t as hard as I thought it might be, though, though I suspect my studs are not perfectly aligned.

With the aid of Debbie Cook’s tutorial, I once again achieved near-perfect fly insertion. I actually had double-sided wonder-tape to use to stick the zipper down this time, and it was very nice indeed, although using pins instead really isn’t that terrible either. I did manage to put it in backwards (so girl-version, as opposed to boy/jeans version), but in my defense this is because I was matching the topstitching direction of the crotch to the one I’d already done on the rear of the pants, and I find it pretty much impossible to think that far ahead. The moral of this story is that I should probably construct the jeans front and fly before the back.

My straight-stitch topstitching is getting so good!

Fly... almost perfect.

My around-pocket and around-fly stitching… not so much. Perhaps I am sloppy because they’re for the kid… I’d like to think I wouldn’t wear such shoddy work.

I can’t promise anything, though. I’m pretty lazy about un-picking.

I sewed up the outer sideseams, and Syo came to try them on…

and they were HUGE.

Now, I don’t want to repeat my mistake with Tyo and make pants she’ll outgrow in three months. But these are supposed to be skinny jeans, not tapered-but-baggy jeans. I took in the side-seams by a cm on each side (so 2cm off each leg).

Better, but not perfect. Take another cm off. Hrrm. Well, maybe that’ll do. Keep in mind this is the same pattern as the other pair she’s wearing that are actually getting a wee bit tight. The only thing I can think of is that the first pair shrunk, which isn’t impossible, but I have a pair of my own out of the exact same “denim” that I’m still wearing just fine, and I promise you I definitely haven’t shrunk.

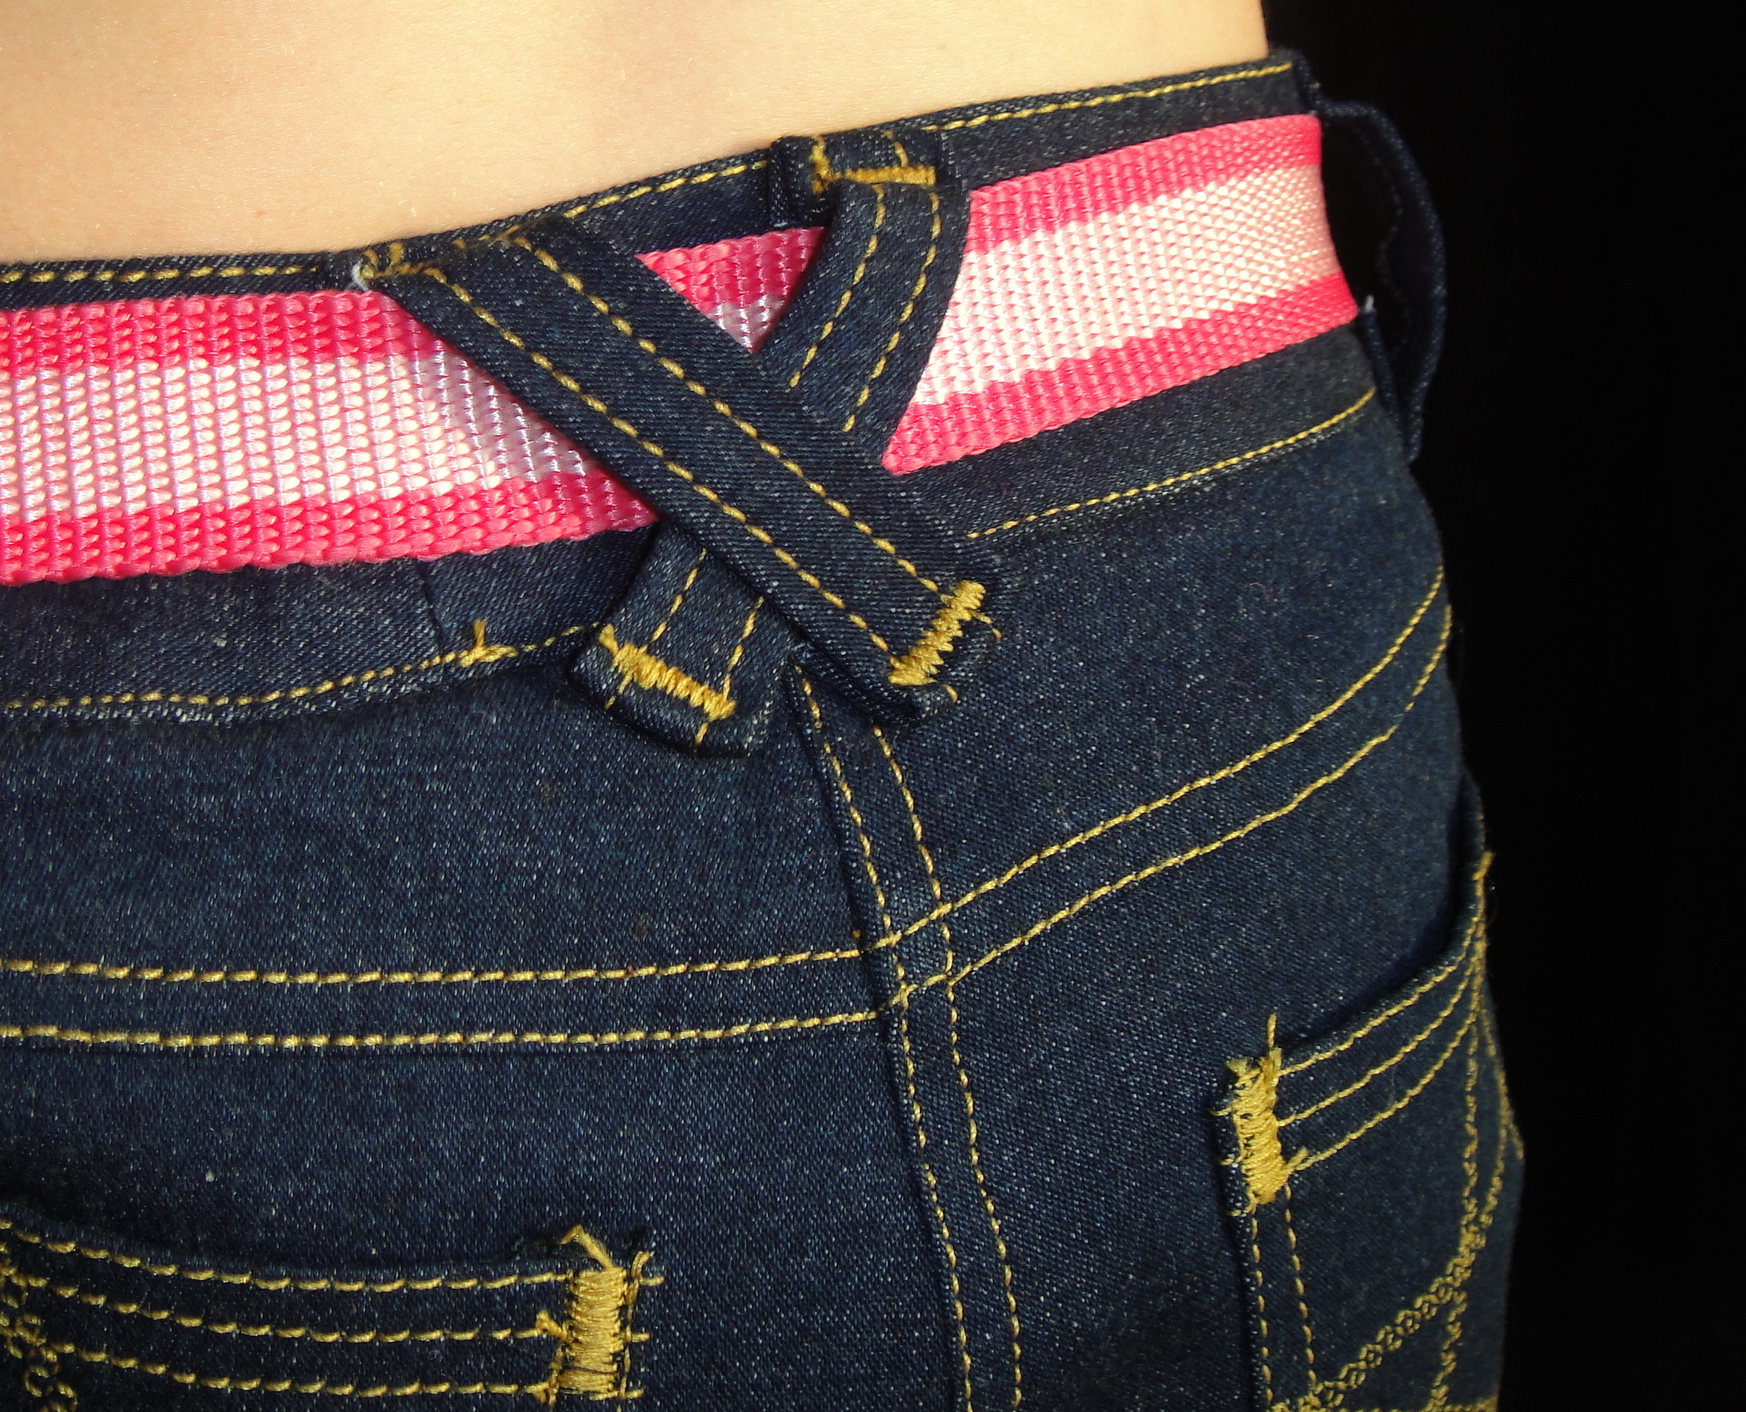
CB belt loops. Can you spot the booboo?

Putting waistbands on kids jeans is so much more relaxing than putting the waistband on a pair for me. For one thing, I use the pattern’s straight waistband piece, instead of my own contour band (coopted from the Ellen pants, if you must know). I also didn’t bother with interfacing. The only thing to remember was to put in buttons and buttonholes for the attaching of the buttonhole elastic. I did have one problem with the sizing, as my waistband wound up being too short to centre the CB seam on the back and cover the fly-extension. Maybe I’m doing something wrong with the fly extension, although what I end up with seems to be the same as what I see on my storebought jeans, so I don’t know what. Rather than fuss around, I gave in and put the CB seam of the waistband about an inch off of the true CB seam. It’s a problem, but it’s mostly covered by the belt-loops anyway.

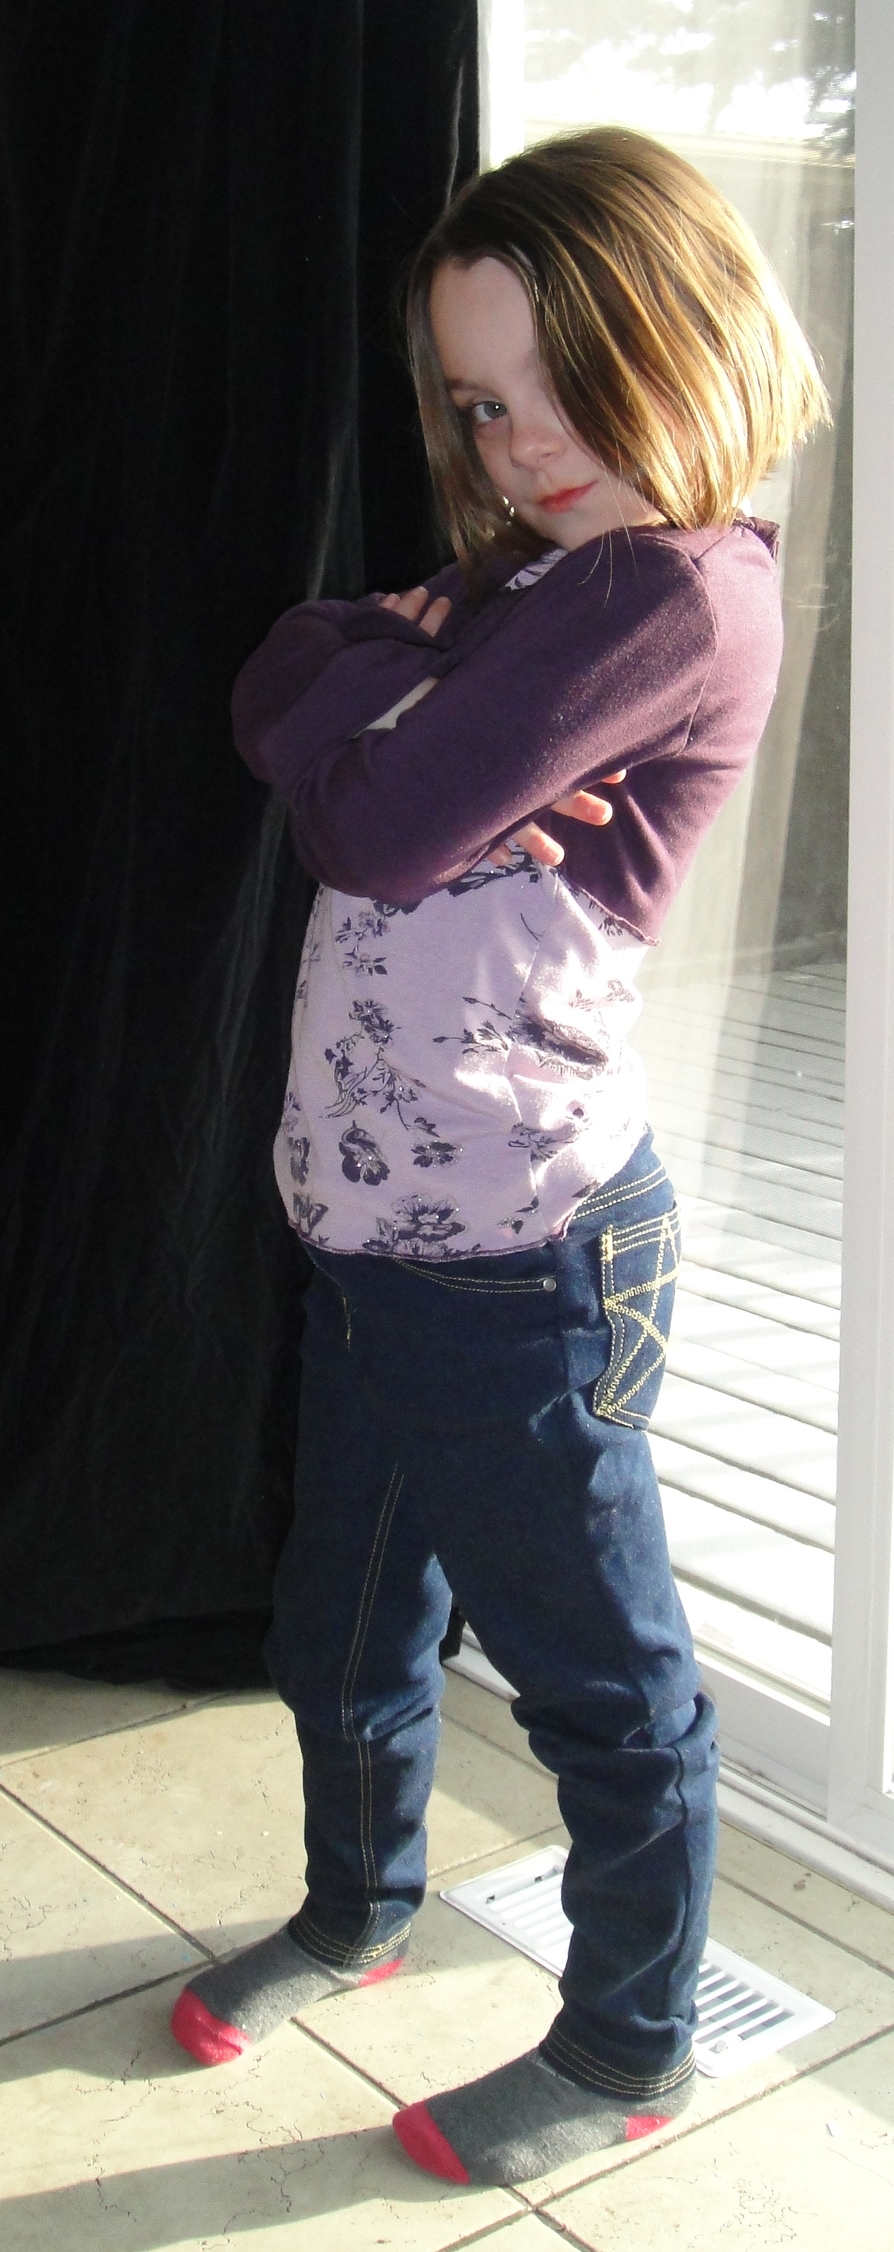
Her coolest pose.

Finally, all that was left was to hem them to an appropriate length. This is always dicey with children, and skinny jeans are even worse than flares in this department. In the end I opted for a length that would be floor-brushing in socks if they weren’t being pulled up by the front of her feet, and just folded the excess 2″ of fabric under, topstitching three times to make sure it’s well in place (this mimics the three rows of topstitching on the top of the pockets, so it’s a design feature, right?). In theory this means that when she hits her next growth spurt and grows three inches by summer, I can let out the excess length. In practice, we know this’ll never happen, but hey, allow me my fantasies, all right?

Also, Syo was very helpful in the hammering of rivets, and only hit my thumb once. And Steph, the awl from your sharp and pointy giveaway kit is divine. How on earth did I live without it?

So that’s one more project down on the “madly off” list. Which leaves, mainly, shirts for my hubby and those skinny cargoes! If I can get the neck alteration figured out for the hubby’s shirt before he abandons me, I can putter away at that until he gets back. And I think I’ll take a stab at the drafting for the cargoes this weekend, if I can find paper I like for it. I’d rather use craft paper than tissue paper for stuff like this.

14 Comments

Filed under Sewing

Oops…

Circle skirt, take two

I did it again.

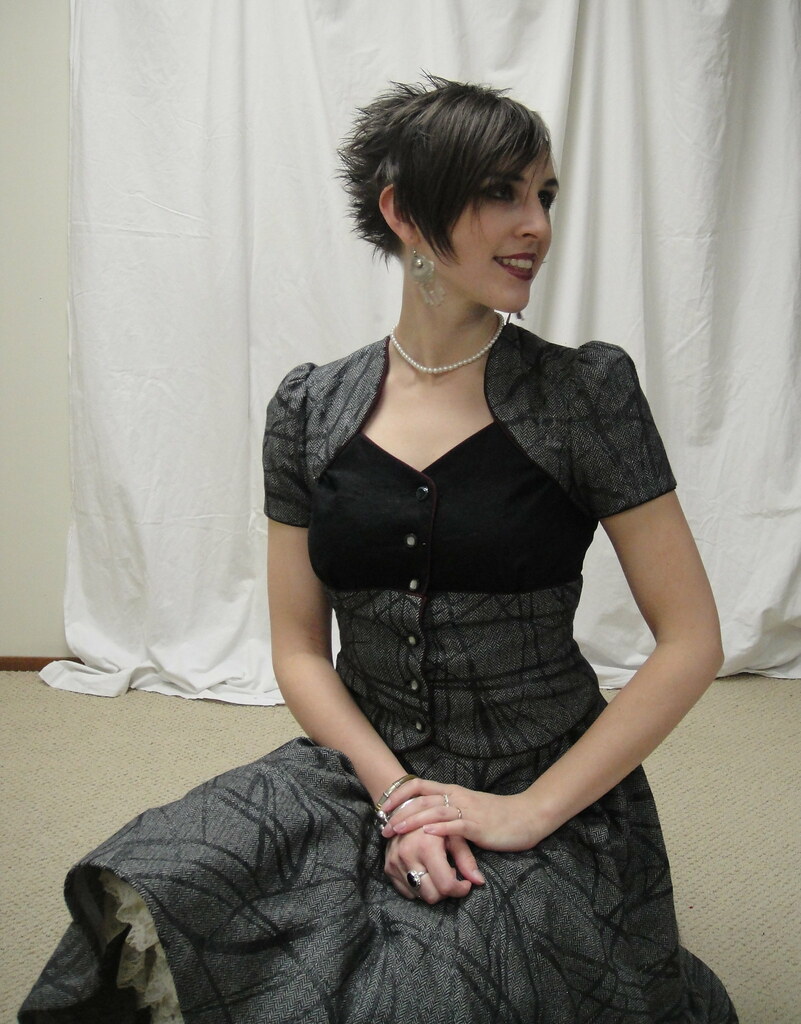
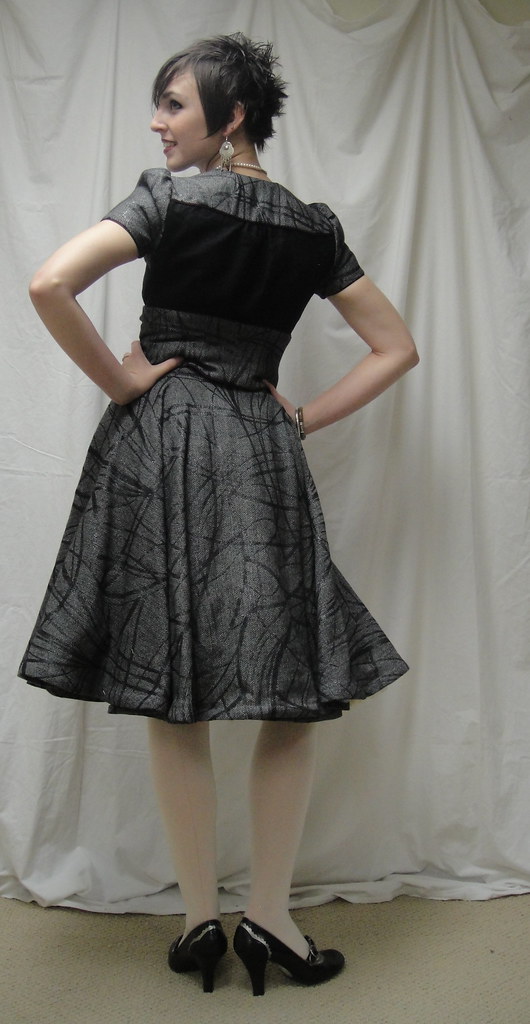
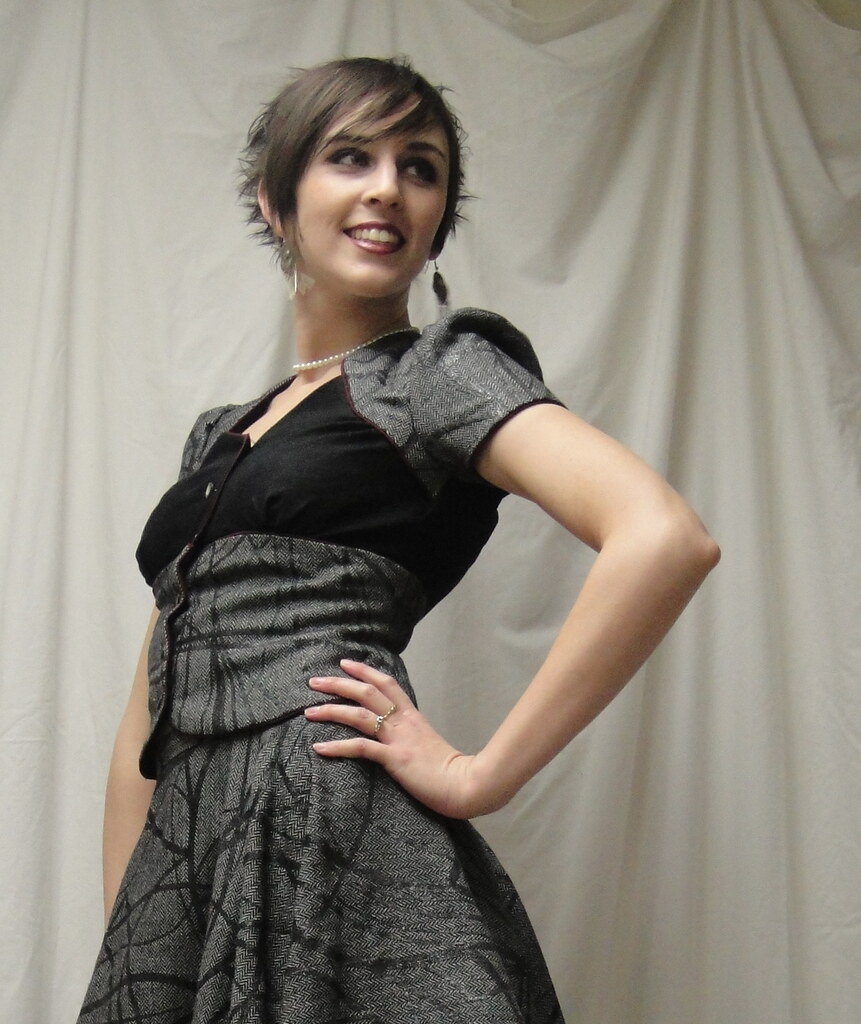
Yup, despite deadlines and a myriad of other things I should be working on, I finished the corset-waist circle skirt. (Sorry, Liza-Jane… I promise I’ll get to those skinny cargoes soon!)

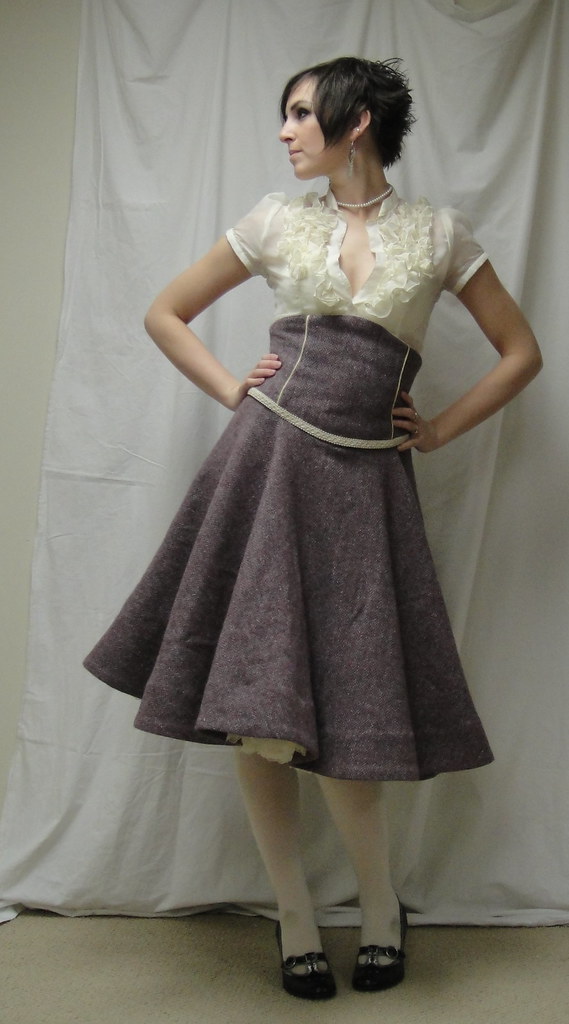
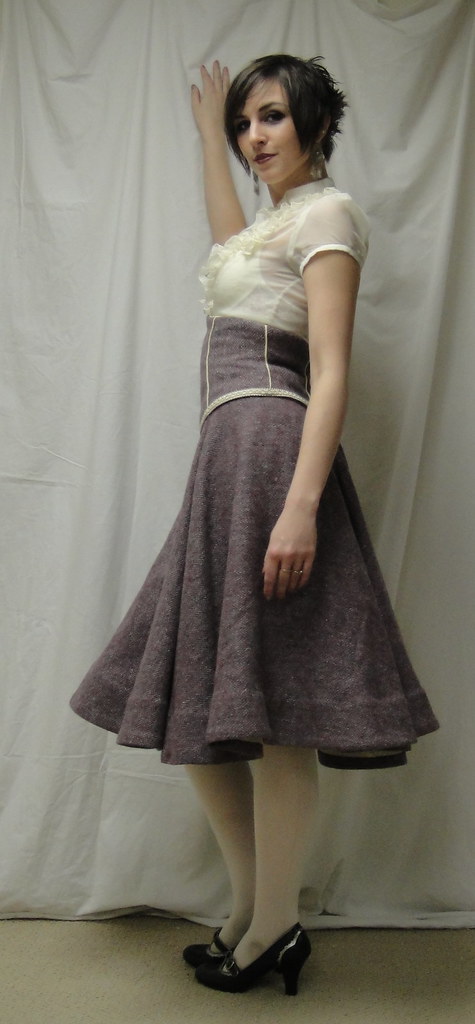
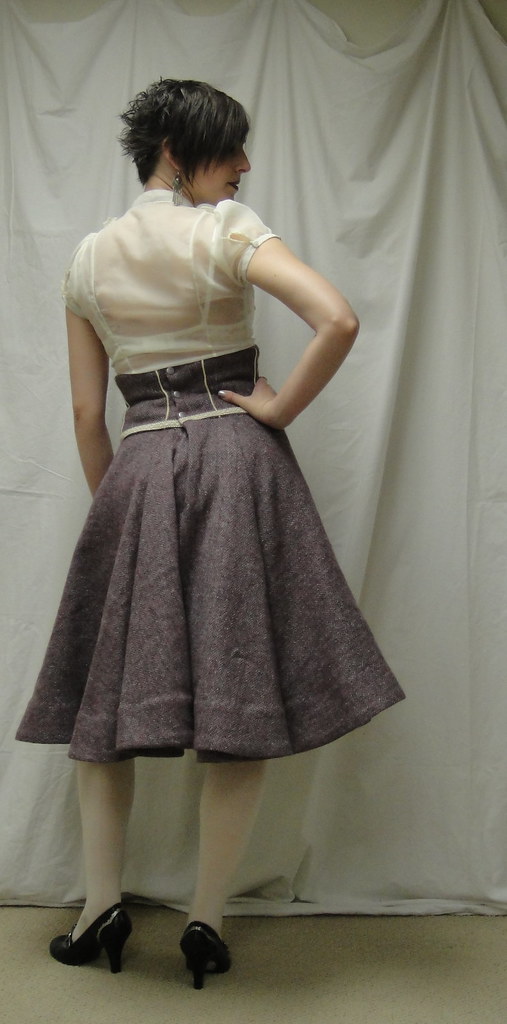
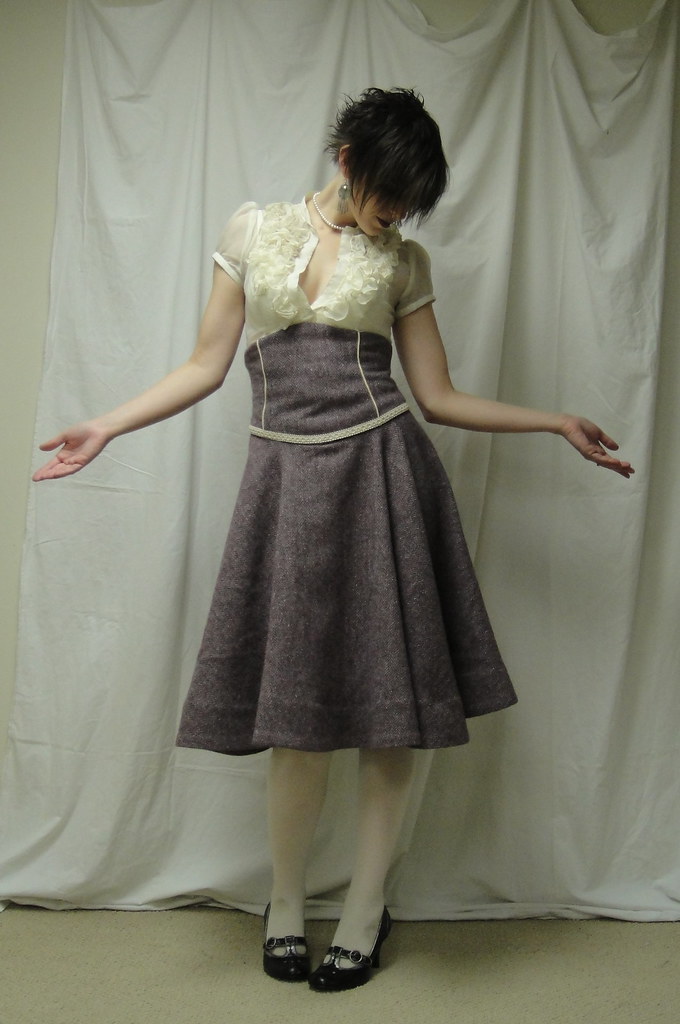
I used the Ceylon midriff pieces as my basis for the “corset” portion, with, obviously, a fair bit of alteration: I put the centre-front on a fold, added a sinuous side-front seam, and completely forgot to allow for overlap in the back, which is now the opening portion. Fortunately, the amount of ease you need in a blouse is considerably more than what works for corset-style waist panels, so there was plenty of room for overlap. I made my lining piece first, out of a sturdy cotton ex-curtain also used here, adjusted the fit on that, and went from there. I added notches to all the tops of pieces, which made it much easier to keep track of how they should go together.

Side view

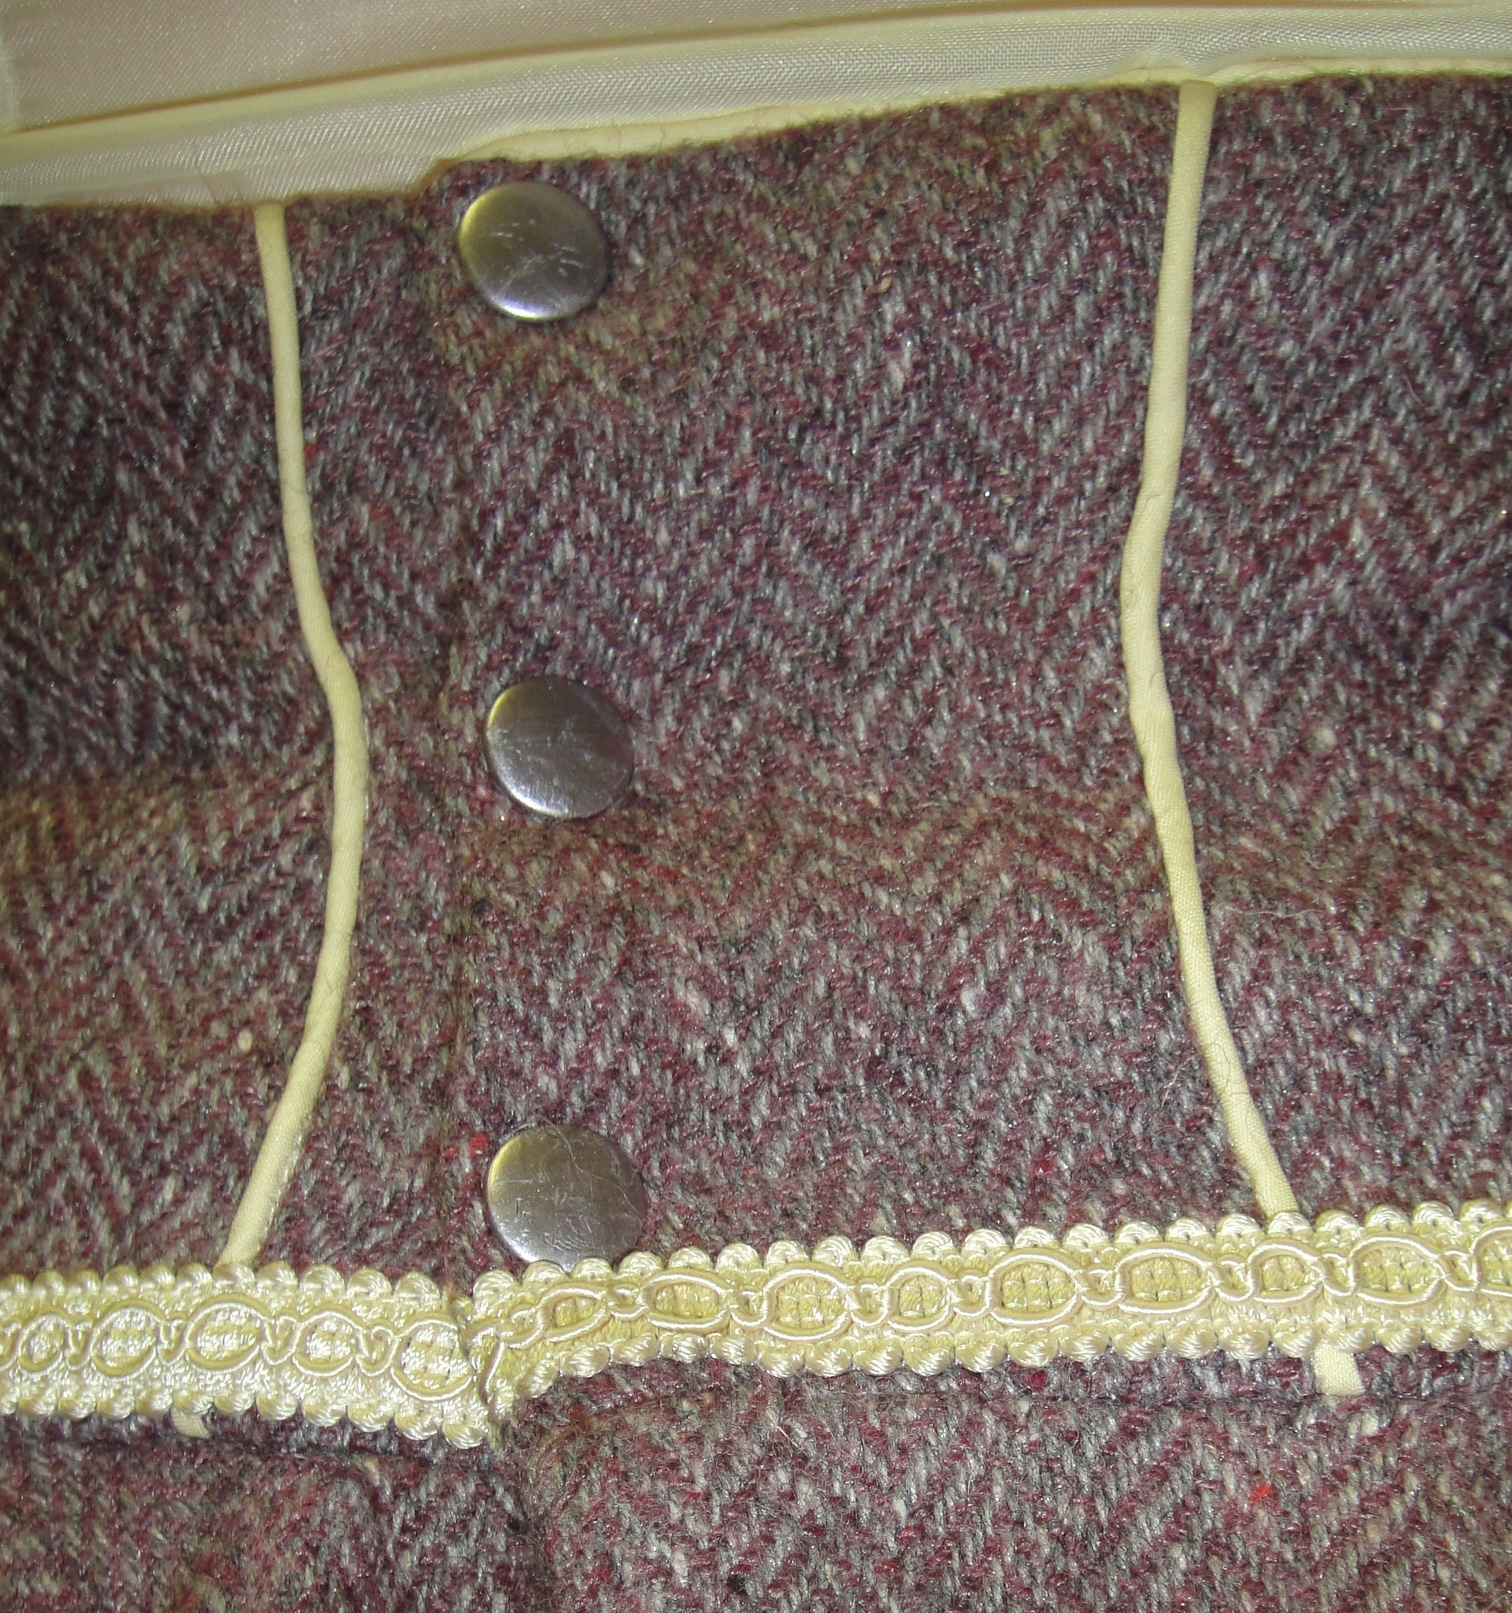
I piped the seams on the corset portion, using a narrow off-white piping from one of my thrift store scores. Unfortunately, I only had the one packet of this and, although I measured my seams first, apparently I screwed that up royally because I didn’t have enough left for the bottom seam. So I waffled a bit and ended up adding this home-dec trim from my stash. In the past I’ve always stitched this trim on by hand, but I was lazy and machined it this time. I can’t say that I notice a difference, even from up pretty close, except perhaps that my positioning isn’t quite as exact as it might have been.

I mentioned before, I elected to use snaps as the closure here. Time will tell as to the wisdom (or folly) of this decision. Way back when I was sewing the original circle skirt, I had posted a question on PatternReview about how to insert the zipper. I got great answers, but also the suggestion of a snap-placket as a vintage-style alternative. So I determined I would give it a try on my next circle skirt.

Now, I will say, the snap-placket would have worked better in a thinner fabric. This wool is quite heavy, more of a coat weight than a suit weight, and getting even the most heavy-duty snaps through multiple layers of it was a pain in the ass. And a double-fold bias strip of the wool (so that’s like five layers!) is really, really bulky. That being said, I really like the idea, and will try it again in a more summery fabric. On the up-side, because I was using snaps, when I discovered on first try-on that there was way too much ease in the “corset” portion to hold it in place properly, it was easy to run another row of snaps up further in, instead of having to pick out and adjust piped seams or, worse, a zipper.
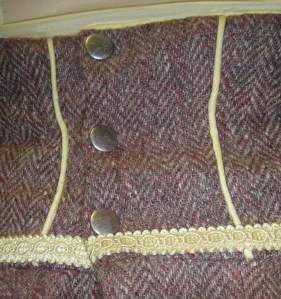
Snap placket (top portion). I painted the snaps with matching nail polish.

I don’t know that the snaps are ideal for the “corset” style either, though, as due to the small amount of ease they’re under a lot of strain. For now they seem to be holding—they are heavy duty, after all—but I’m not convinced they’ll make it in the long run. We’ll see. Converting it to a laced closure or something at some point would be a pain in the butt, but not impossible, I guess. (Note to self… hang on to some of those scraps in case you need a modesty panel for behind the lacing…)

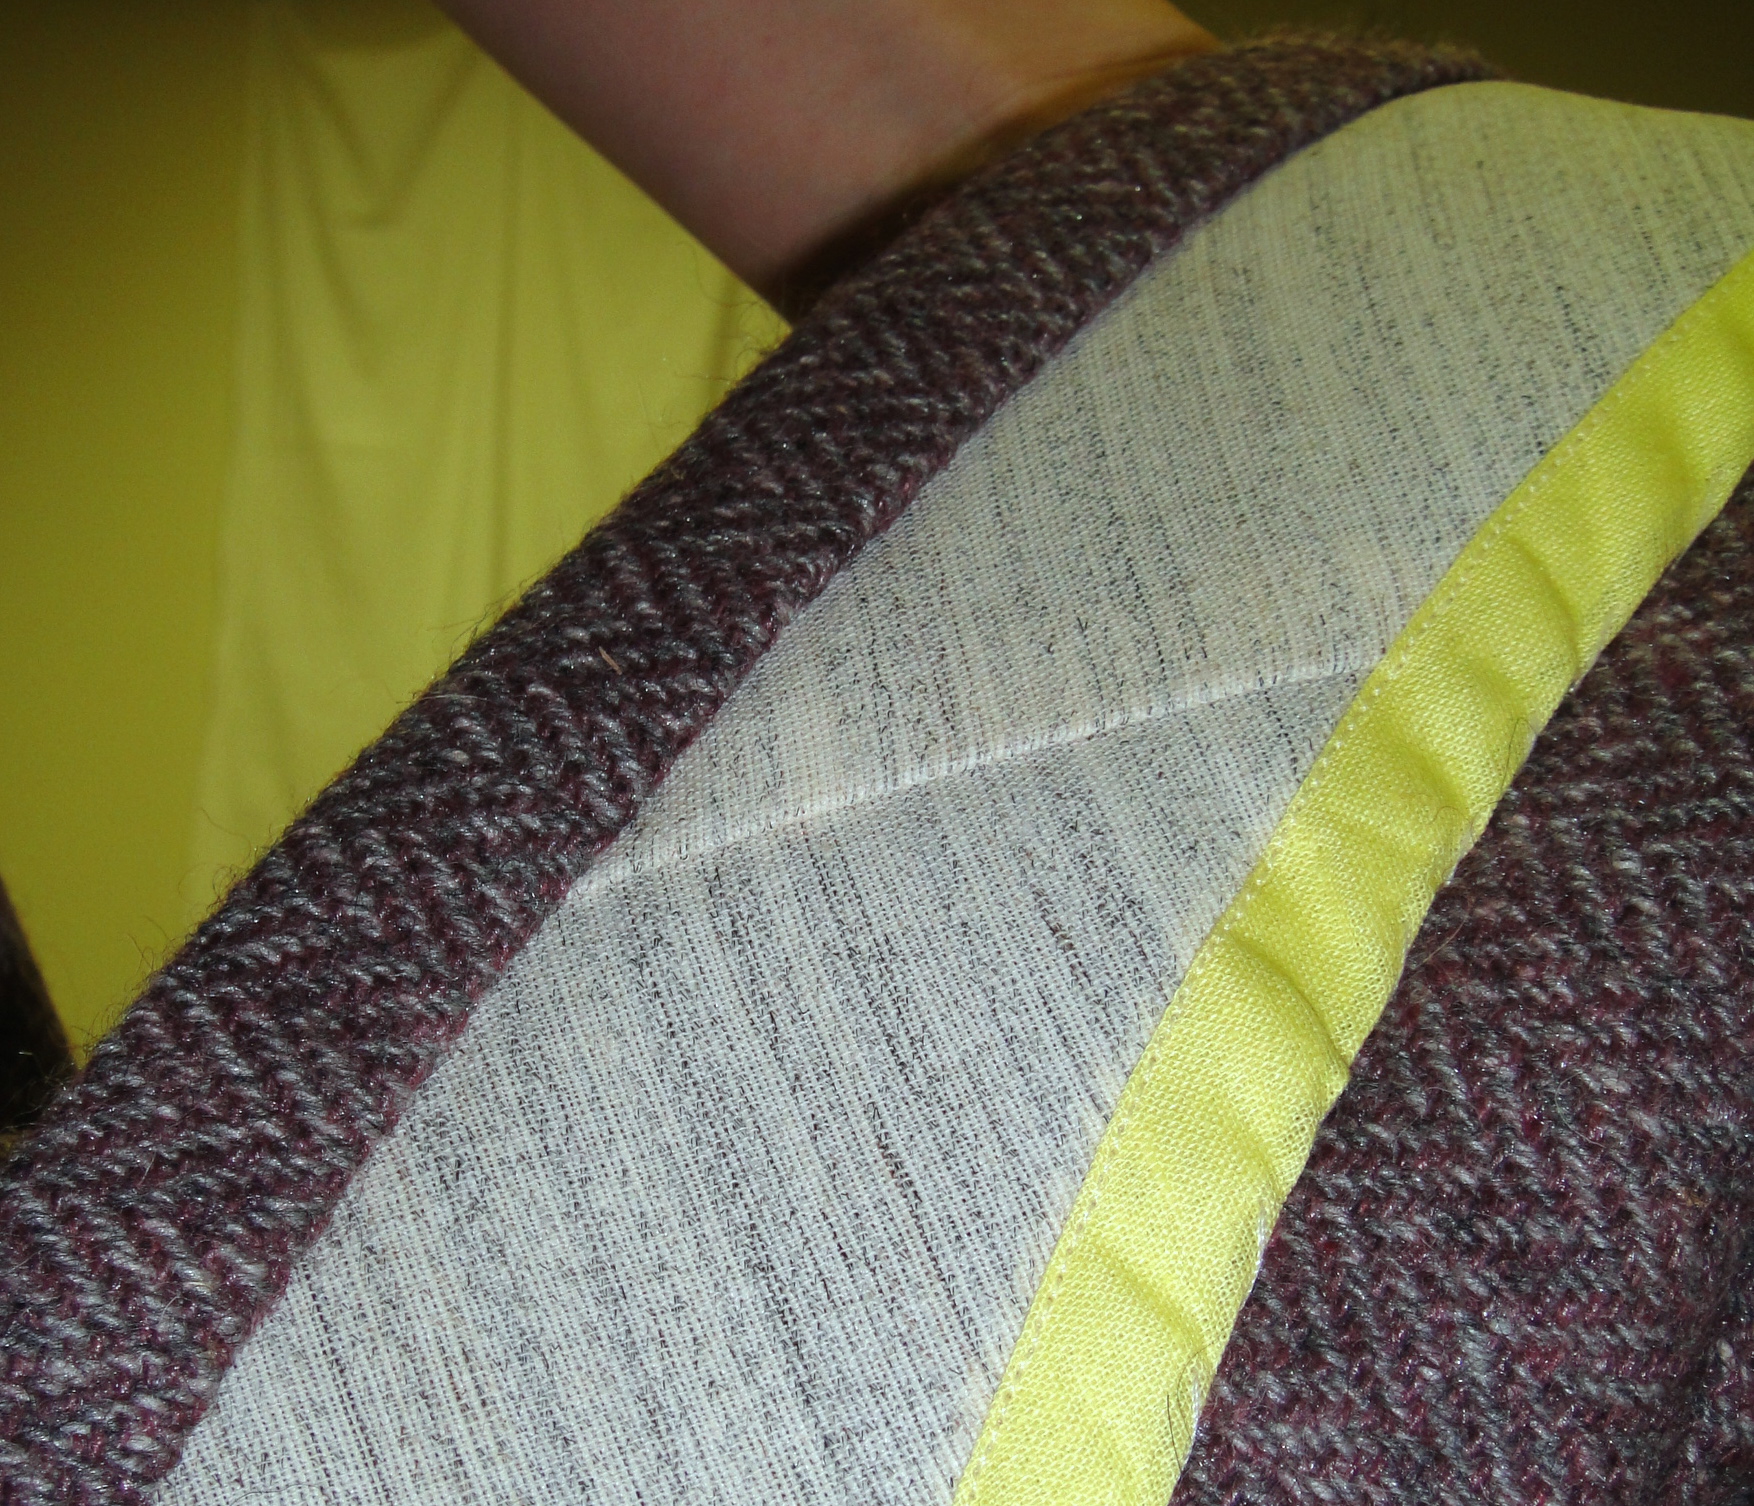
As I mentioned before, I opted to pass on boning mostly as I’m too lazy/disorganized to procure any (or cable ties, either, as Ms. Slapdash so smartly pointed out). I used hair-canvas interfacing, hand-basted in place, with the “hairs” running vertically in at least some of the pieces (read: the ones where I remembered). This makes the waist nice and firm, but I can see that I might keep a smoother line longer with boning. Again, not impossible to add later if I feel the need…

So now we come to the hem. I was quite happy with my experiment with horsehair
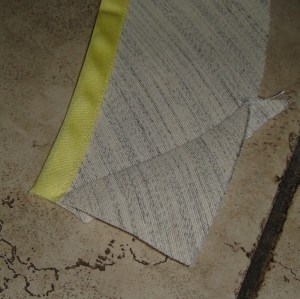
Hem interfacing... bound and circled

braid last time, but as I mentioned before it’s a bit tricky to source locally and I’m (again) too impatient/disorganized to order online. Not saying I never will, but not for this project. So, since I still have plenty of hair-canvas kicking around, I decided to give bias interfacing a try. I measured and cut three-inch bias strips of the hair canvas. I will say, cutting bias strips out of hair canvas is much less annoying than out of regular fabric—it’s nice and stable and hardly skids around under your pencil at all. I then sewed the pieces together into a long strip (and managed to only sew two pieces on wrong-way round 😉 ) and ironed to “circle” it—just pulled it into a curve while ironing. The stuff goes incredibly soft under the seam-iron, but firms up again perfectly when it cools, which is mostly nice but can be a little tricky. I then stitched some ready-made bias-tape along the inside edge of the “circle”, stretching the bias as I went. I picked this yellow because it was the only colour I had enough of other than red. I love red, but it wouldn’t really go with this project. Cream would’ve been perfect, but I didn’t have any. (if I had, I would’ve turned it into piping for that last corset seam, anyway). And where else am I going to use six yards of yellow bias tape, anyway? (this is another of those thrift-store “scores”)

Finished hem

So now I had my interfacing ready, I basically followed the rest of Gertie’s tutorial for applying horsehair braid. The only trick was to make sure to remember to start with the seams in my bias interfacing facing up, so that when flipped to the inside they’d be hidden. Ironing the hem down once it was flipped was in some ways easier than with the horsehair braid—the hair canvas won’t melt under the iron—but in other ways harder, as the hair canvas gets really soft when ironed and I had to be careful that the seam allowances weren’t getting folded and crunched. Still, with a bit of care and pinning, I got it all folded over and steamed so that the upper and lower seams were about the right circumference.

I opted to hand-stitch the hem this time, rather than topstitching, which worked

Full skirt!

reasonably well and only took two TV shows. I’m sorely tempted to run a band or three of the same trim from the waist around the edge, but that might be a bit over the top and would take a lot more of the trim than I have kicking around. We’ll see, I suppose. 😉

So this project fits with my “spring palette,” which isn’t a formal part of the Colette Spring Palette Challenge, but is in line with a palette that I’ve been playing around with intermittently for a while now. As is demonstrated by the colour scheme of this entire website ;). The main colours are cream or ivory and a muted, dusty blue (sometimes veering towards a pale aqua), but this light, dusty purple fits right in as well. It’s not far off Sunni’s palette of choice, either, although I don’t know that I’ll be incorporating her caterpillar green ;).

Back view

I absolutely love the skirt with this blouse, though I’m thinking I’m a little old for the sheer-blouse-over-bra look. Still, fun for a photo shoot, anyway. I’ve been keeping my eyes open at the thrift store for a perfect pair of ivory shoes to go with this palette, but nothing’s really thrown itself at me yet. Light-colour shoes get banged up and turn drab so quicky, I may need to hunt around new-shoe stores… though I hate to buy new a pair of shoes just for taking photos in… /sigh.

The back closure wound up a bit bunchy, partly because of the incredible thickness of the snap placket in the skirt part, and partly because of the overlap where I readjusted the size (which i why the snaps are closer to the left-hand line of piping, not centred between the two). As I don’t have to look at it, I’m not bothered by it ;).

As to whether heavy wool belongs in a “spring” palette… well, as far as I’m concerned skirts of any kind are spring wear. Heck, anything that isn’t quilted down is spring wear. So there. 😉

Oh, yes, and since some people like to see what they look like without the fluffy petticoat underneath:


Sans petticoat

Here you go. In this particular (heavy) fabric, with the interfaced hem, it’s actually not a striking difference. I have noticed one thing about wearing the petticoat, however—it makes a skirt much warmer, as its fluffiness fills in that air-space between legs and skirt remarkably effectively. Still not as warm as pants, but much better than a skirt without petticoat.

Next up: probably Syo’s skinny jeans. Poor kid seems to have the virus Tyo had last week, although her symptoms are totally different. Those of you with children, do you ever find that? Even when we had swine flu last year, Tyo and their dad had one distinct set of symptoms, while Syo and I had another. Yet I’m sure it was the same virus—their entire school was decimated for about two weeks. Although it would be nice if I could get the alterations figured out on my sweetie’s shirt this weekend, before he goes away… I could then present him with a completed shirt or two when he gets back. (Yes, I’m going to be single-parenting for a full two weeks! Wish me well… I’ve never had to do this before. Usually it’s me bopping off and leaving him with the kids…). Also I should really make another pair of jeans (or those cargoes 😉 ) before March kicks in…

23 Comments

Filed under Sewing

Skully Pants and Sleevy Plackets

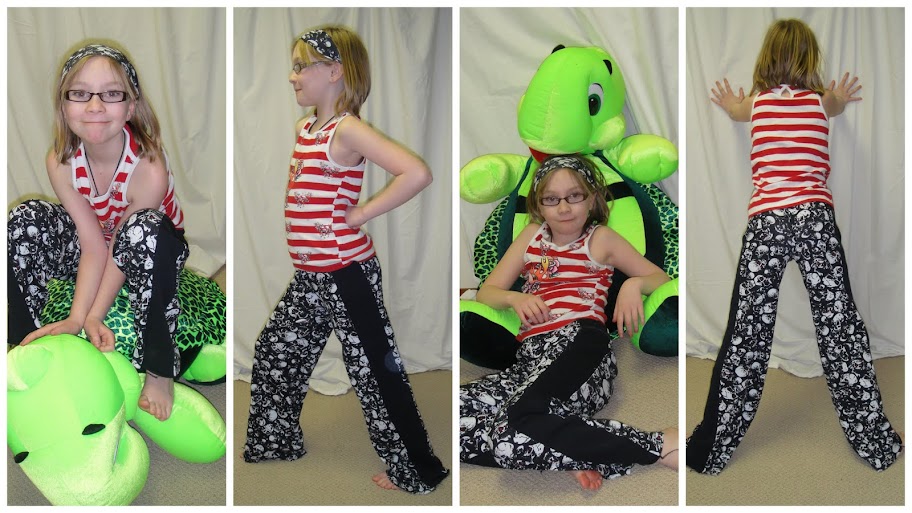
Tyo’s pants may now be unveiled! They still need hemming, but taking photos before hemming is practically a tradition around here…
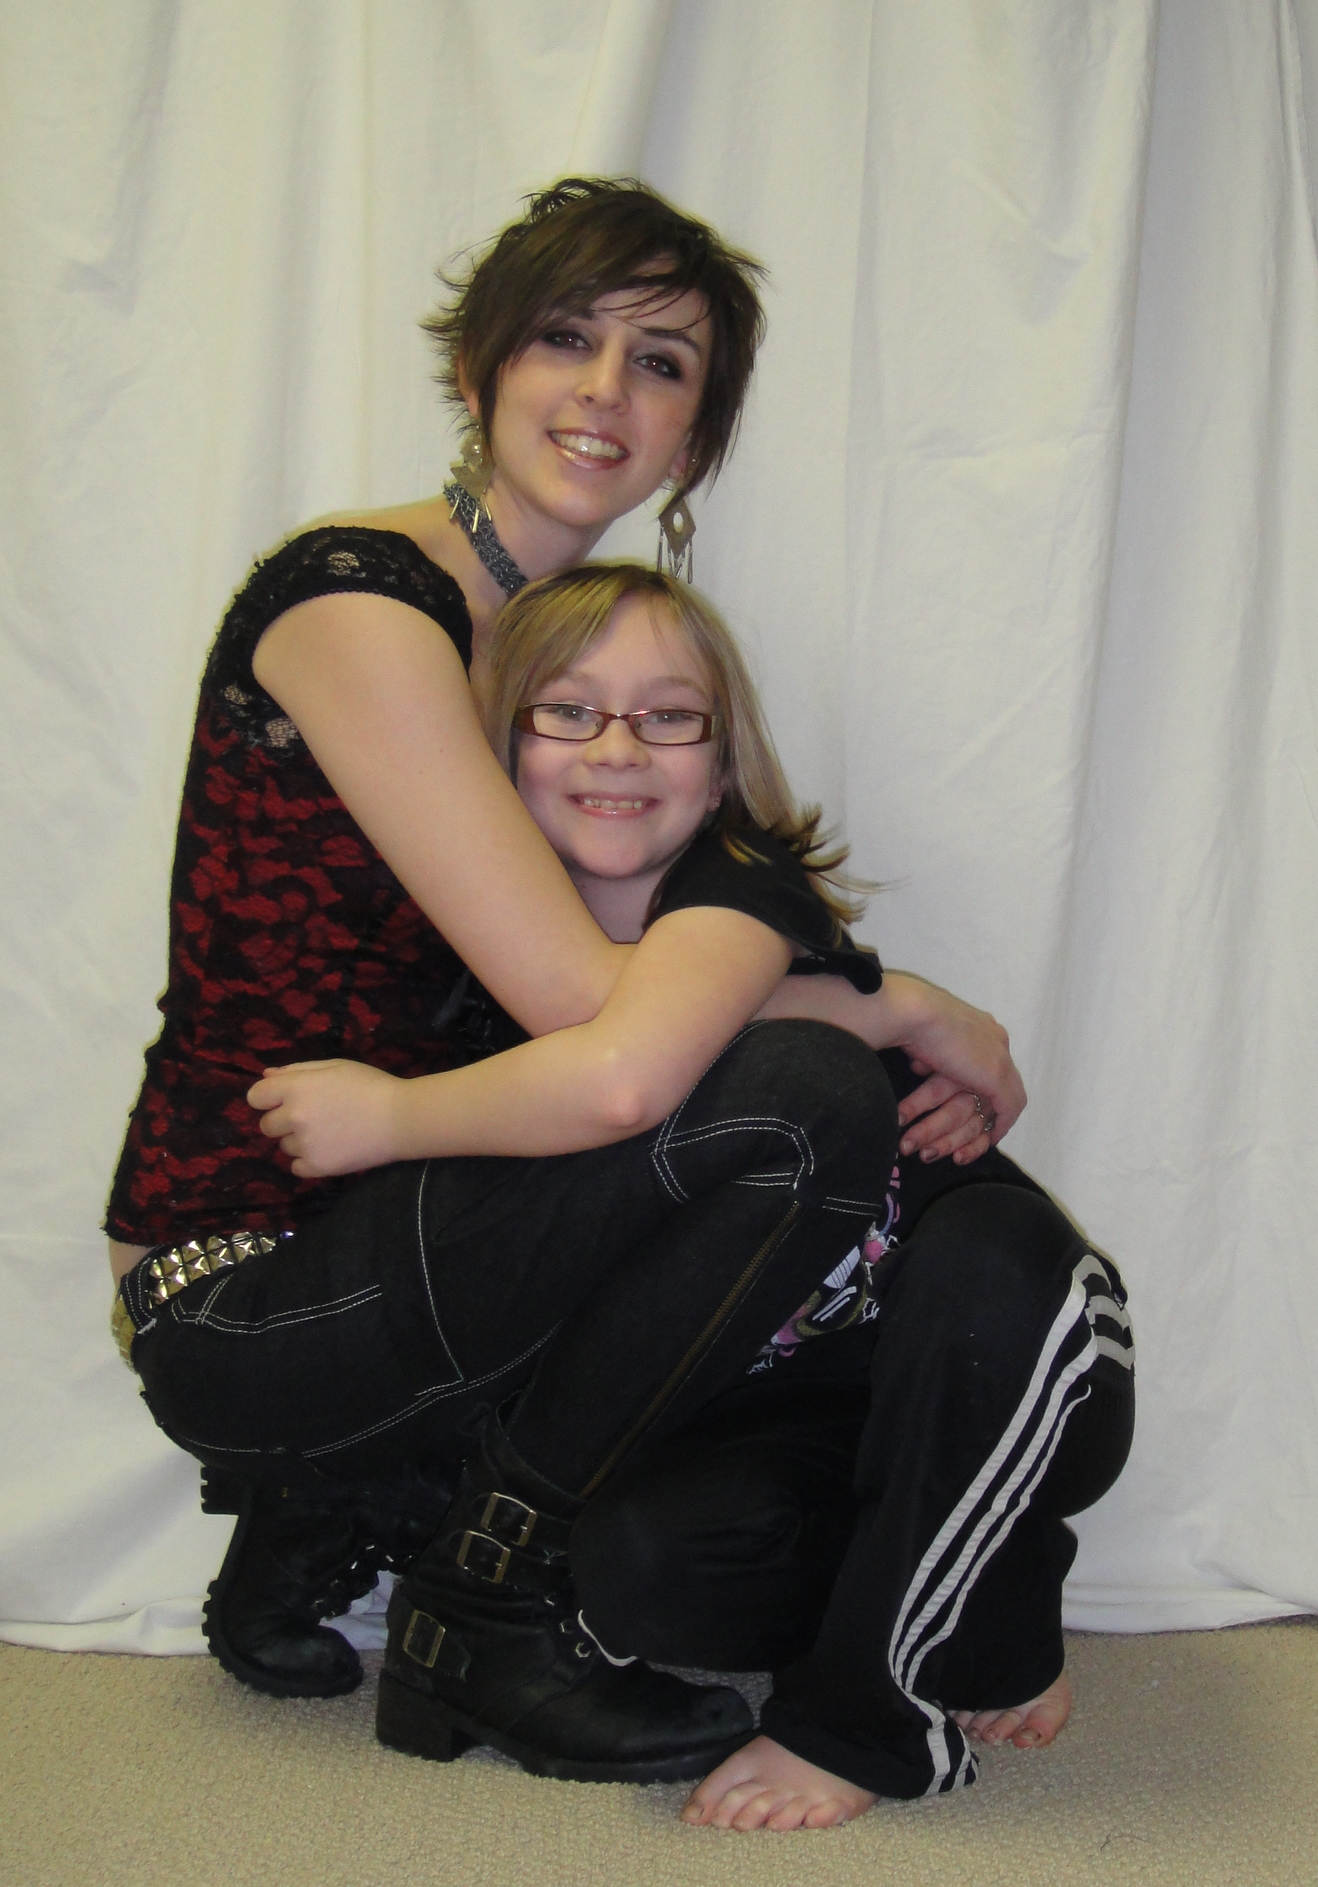
Tyo's Skuly Pants. Poses by Tyo. Guest appearance by Slimer the Turtle.

And, y’know, they turned out ok. Especially considering my various screw ups (the original drafting, and then pinning the two edges of the fronts together instead of front-to-back and not noticing until Tyo had it all sewn up…)

Tyo did all the sewing, on the serger, except for the elastic casing, which I sewed in a stretch stitch on the regular machine. She was really unsure and irregular to begin with but by the last few seams she was getting much more consistent and steady. She threaded the elastic into the casing, too.

May I just say I detest this skull-printed fabric? It’s a thin, stretchy cotton rib-knit with no recovery, and the printed pattern is not as stretchy as the fabric, so it’s already looking worn and crappy anywhere that gets a bit of stretch.

In MPB Sewalong News

Shirt plackets: the ugly truth

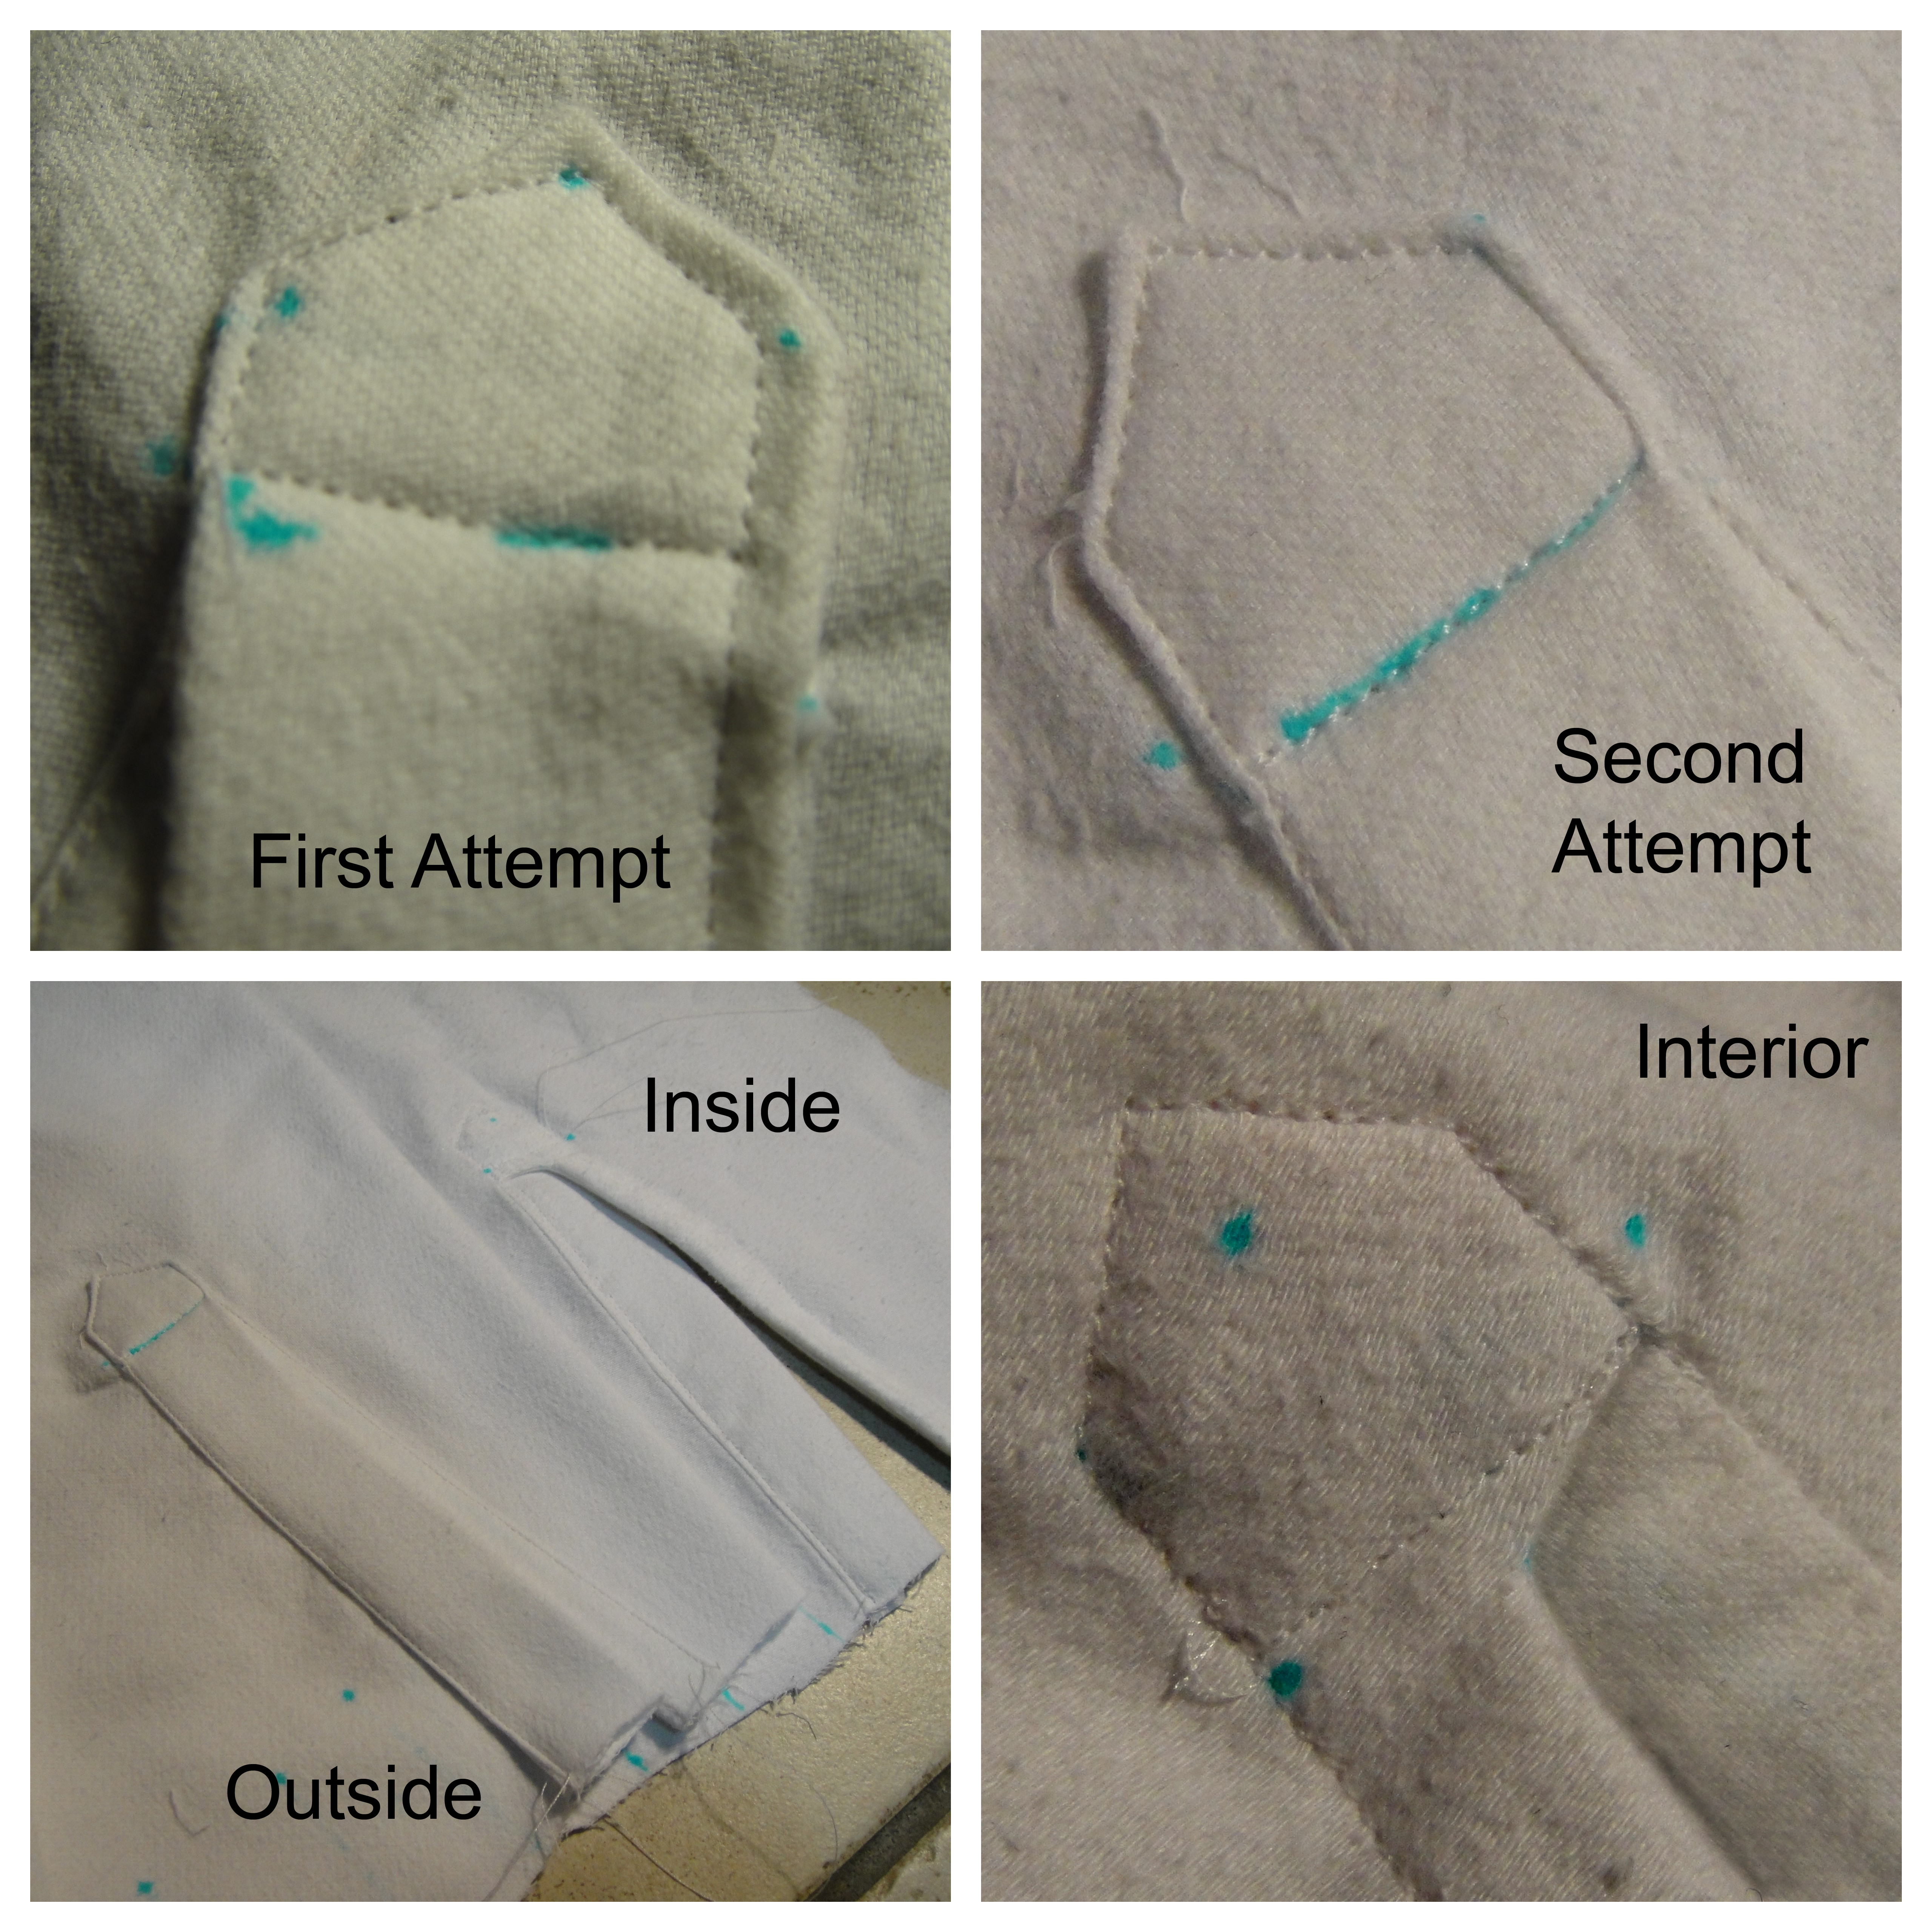
I sewed my plackets! Urg. This is the kind of precision sewing I normally resort to hand-sewing to deal with, but obviously that’s not quite appropriate here. I tried using my blind-stitch foot for the topstitching the first time, as it has a keel that theoretically should help guide the stitching. I say theoretically because it’s mounted on a screw and doesn’t stay in place. Ever. Second attempt, I reverted to using my rolled hem foot, of all things. Something about the way the toes of the foot are positioned (not the roll part) works really nicely for guiding the fabric for perfect edgestitching.

Er.

This is me we’re talking about. Perfection and precision are not my strong suits.

I used washable glue-stick to try to hold the triangles in place, which worked better than pins, and might’ve worked better still if I had the patience to let it dry for a few minutes before sewing. I wonder if making a template to press the triangle top around would be worth it…

I made the row of stitches crossing the placket run just above the funny folded part on the inside (bottom right picture), but a quick inspection of my hubby’s RTW shirts shows that they run the stitch about 1/4″ below this. Will keep this in mind for the next version.

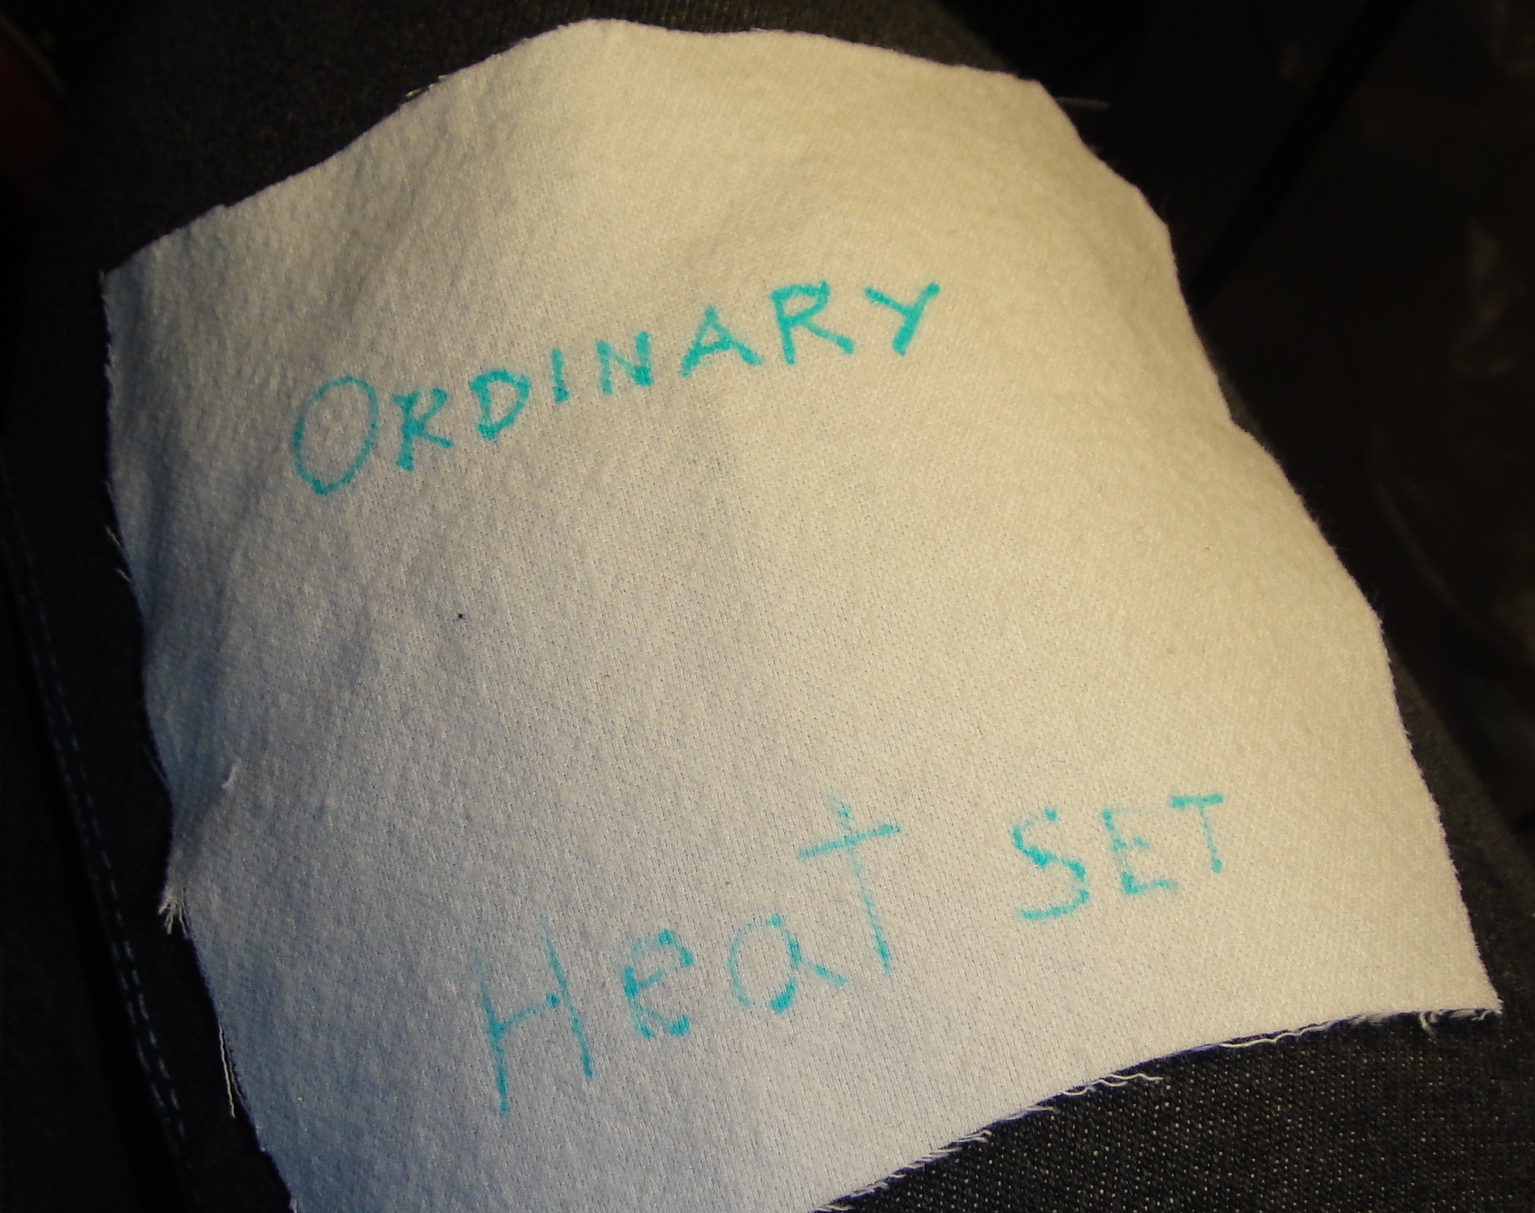
Testing my fabric marker

Also, I decided to test out my blue disappears-in-water marker. I’ve heard horror-stories about these before (especially if you press the ink), so I’ve been pretty skeptical about it and haven’t actually used it until now. Well, the fact that it’s a fine-tip and doesn’t really mark most of my fabrics well didn’t help.

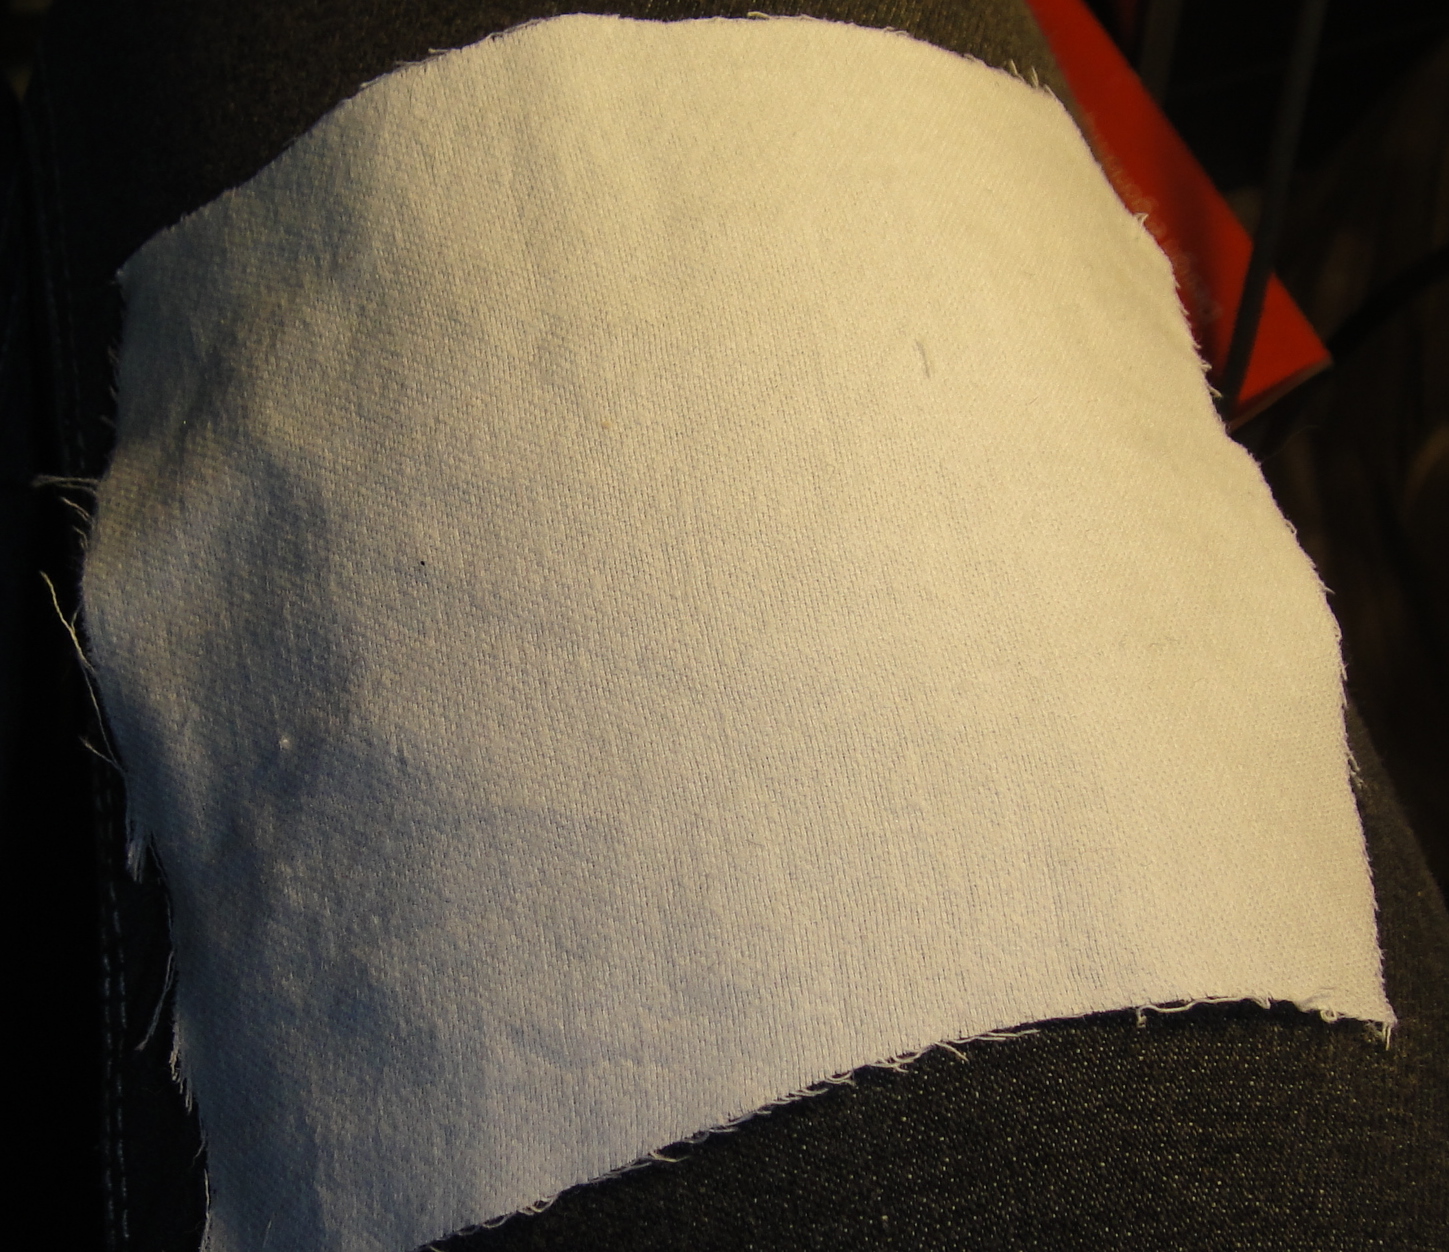
Anyway, here you can see on the top, the plain marker, and the bottom which I wrote and then ironed over (with heavy steam on maximum heat, my typical MO as long as the fabric will take it.) Interestingly, even the steam seemed to start to lighten the markings, which could be annoying.

Took the piece to the sink, add water, and—voila!

Just add water!

Anyway, that’s enough for tonight. Tomorrow I will get the yoke sewn up and maybe even rope my hubby into a fitting if I’m extremely-extra-lucky. And Syo is agitating for a project she can help with, so if I’m extra ambitious maybe we’ll start on some skinny jeans for her, as she’s been begging for a pair of those since last summer.

Speaking of Syo, we must keep the post balanced, so I will leave you with:

Syo---yes, she knows exactly how cute she is.

15 Comments

Filed under Sewing

The Ceylon Blouse

The Ceylon Blouse

So, before committing to the entire Ceylon dress, I figured I would try and squeeze just the bodice out of various scraps I have lying around. The nice thing about this bodice is it’s in so many little pieces, almost any little scraps will do. I wound up using (some of) the rest of the swirly-print herringbone wool and a bit of black linen I picked up at the thrift store ages ago that was really too small for almost anything. Well, obviously not since I managed to line the entire blouse with it.

Now, I have a bit of a propensity for colour-blocking, and when you combine that with

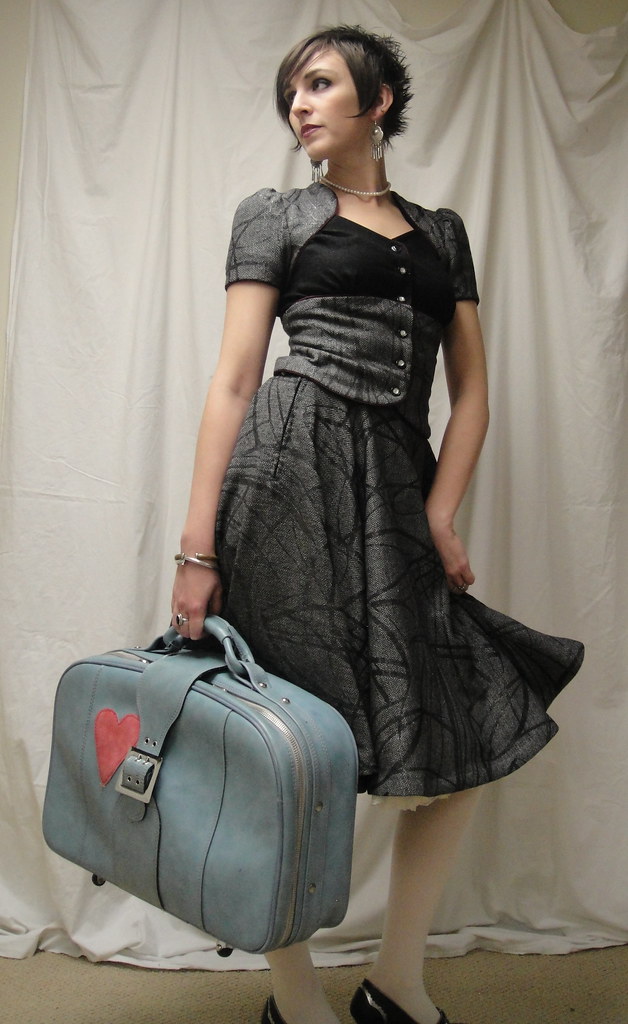
Ceylon with suitcase. Why? Cuz.

the almost bolero-looking cut of of the Ceylon yoke, well, it was bound to happen. I opted to do the sleeves, yokes, and midriff pieces out of the wool, with the “blousy” pieces in between just out of the black linen. Since I didn’t particularly want the wool against my skin, I decided to line those segments with more of the linen. And, since something about Ceylon almost demands it, I opted to pipe, as well. It adds a nice touch of colour to an otherwise grey-and-black garment.

On the upside, this gave me lots of new techniques to try. Making my own piping (I used dark-red bias binding and some dense wool yarn, both from stash*), and using piping period  (I followed this lovely tutorial). I got to try the “burrito technique” of attaching a double-layered back yoke so the shoulder and bottom yoke seams are all nicely enclosed. Worked like a charm :). I also tried a technique for clean-finishing facings I just read about from Beth of Sunny Gal Studios. which was nifty and makes a super-nice finish; then this morning I get up and discover a recent post by Pam Erny for a very similar finish, but with less bulk at the seam (although hers leaves some of the interfacing showing on the visible side of the facing—which could be undesirable depending on how attractive your interfacing is.) Oh, yes, and a massive, massive amount of seam-grading.

My construction order was a bit haphazard and very different from that given in the pattern, but between the piping and the lining (everything but the mid-back and bust pieces) it’s possibly the most nicely-finished garment I’ve made yet. The piping was actually fun, and a wee bit more forgiving of minor variations in my stitching than I had feared it might be. I did end up hand-stitching the lining of the sleeves to the bodice and the upper seam of the midriff-pieces lining, making for absolutely  ever seam in the piece being enclosed.

I took a crapload of construction pics, but really I think the posts I linked to above cover most of the techniques, so I will just give you a gallery of them to browse through at your leisure. Feel free to ask questions, tell me I’m on crack, etc.

Ceylon Blouse

Buttons are funny things. As construction proceeded to the point where I could start to try on the shirt, I became convinced that it was way too small, that I had completely misled myself into selecting the size 0, abetted by the give of my flannel muslin fabric. The linen, by contrast, had no give at all, and I was sure the resulting blouse was going to be, if not outright ridiculous, at least far too constricting for comfort.

It wasn’t until I had the buttons attached and could try it on normally that I felt at all relieved. It is very snug, and more restrictive than I’d like for everyday, but for an “occasion” dress it’s fine. The sleeves are about as narrow as my arms could comfortably take, but don’t make my hands go numb or anything, and the shoulder width looks good. I’m very glad I tweaked the shape of the front yoke right beside the neck, and lowered the neckline 1/2″.

Ceylon blouse, back

I did manage to remove the wrinkling at the back midriff by flaring out the upper portion of the midriff a bit more (at both CB and side seams). Curving the bottom of the main back piece so it is shorter in the middle worked perfectly to reduce the excess blouseiness (doubtless I took off a bit too much, again, for my different fabric). As to those diagonal wrinkles, well, we’ll see. I think I begin to understand the fix Sherry was suggesting for them, but I’ll have to give it a go on another project.

The bust doesn’t sit particularly nicely, partly because there isn’t enough ease and partly because of the fairly crisp fabric. I would venture to say it fits about as well as in most of the other versions I’ve seen of it, though, which I suppose is good enough. There’s still some gaping on the left side top, which I suspect is the result of my left breast being smaller. It’s not such a big difference that I usually notice, but this style seems to emphasize it. Fortunately I was mostly able to compensate for it by clever positioning of my buttons—the topmost is considerably to the left of the rest of the row but you can’t see that when it’s closed.

And one more time...

So all in all, it was a great learning experience—lots of new techniques and construction to think through. Next version I make I will have to do some serious considering about sizing and my fabric and where I want to wear it—if it’s a crisp, firm fabric and I want to wear the dress every day, I should go up to the size 2 (possibly with SBA, probably with shortening in the upper torso). If it’s a soft fabric with some give, or a stretch woven, I could probably make the 0 again.

I do feel like I should apologize to Sarai, Colette’s designer, though. Everyone raves about her instructions, and they are lovely—I just haven’t ever followed them yet.

More photos in the Flickr Gallery

Whew! That was a lot of sewing for one weekend! And I still have to finish tracing off my pattern for the men’s shirt sewalong…

* Yes, despite the fact that my knitting education was highly truncated and I have never so much as learned to cast on, I have a yarn stash. I have even, as I think I once confessed to Sigrid though I can’t find the comment now, been known to buy souvenir yarn while travelling. In my defense, it’s not a large yarn stash, and some of it has proven useful in dance costuming over the years… but, er, yeah.

47 Comments

Filed under Sewing