Tag Archives: skirts

Skirtles

DSC08402

The Teacher Skirt

After the craziness of Christmas I was determined to get my January Fabricland project in. This is kinda the last chance, as we have to use fabrics from the current season, and the spring stuff is already starting to come in. And I really wanted to do something with this gorgeous, heavy brushed cotton that came in too late for Tyo’s shirt. Ok, it’s still not actually heavy, but it feels more like garment fabric and less like something intended for PJ pants. I was seriously considering a Deer & Doe Bruyère, but while I loved the mental image, I wasn’t sure if I would actually wear a plaid shirt myself (I’m not really a button-up kind of gal). I’m noticing that I often make something (especially shop projects) less because I want that item to wear than because I think it would be a great idea for a particular fabric. Fun process, but not really a practical way of wardrobe building. I mean, my wardrobe is pretty built at this stage, but you know what I mean.
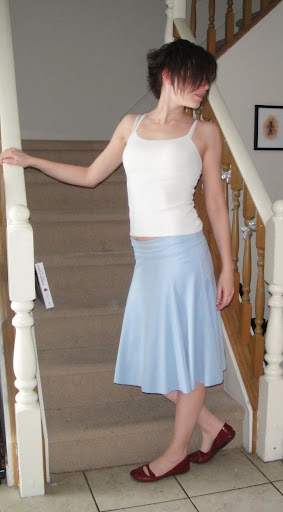
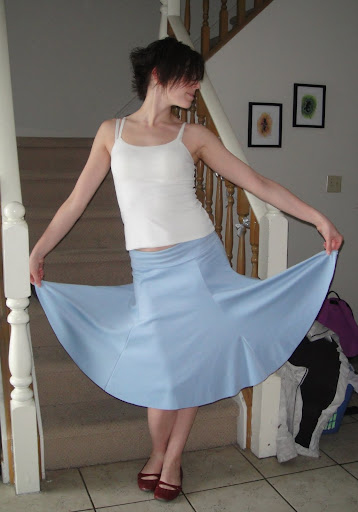
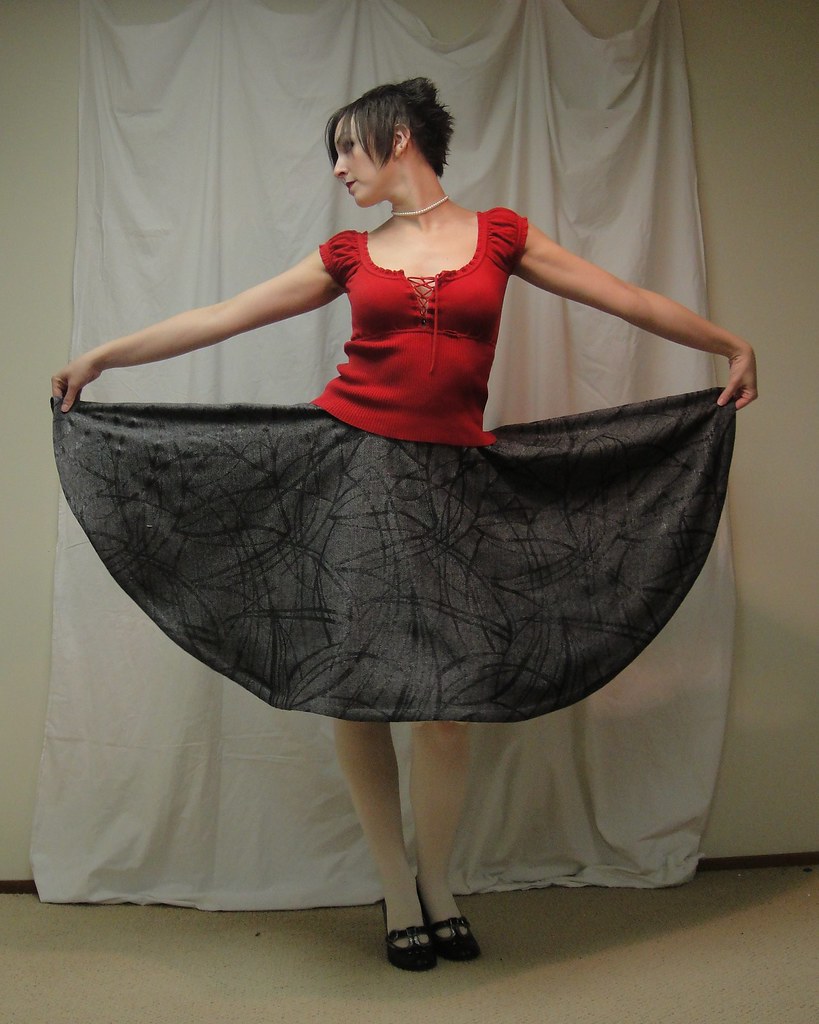
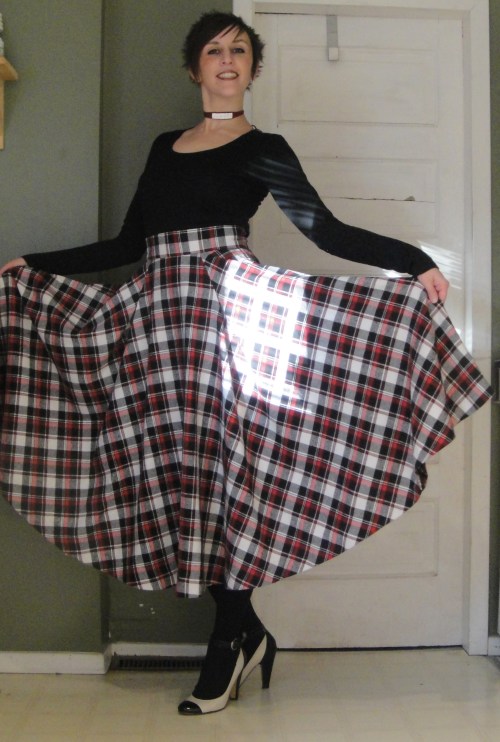
DSC08396

Swishy!

Then it hit, rather like a lightning bolt. I love it when that happens. Vogue 8882, which I’ve been ogling since I first noticed it. A long, plaid version. Boo yeah.

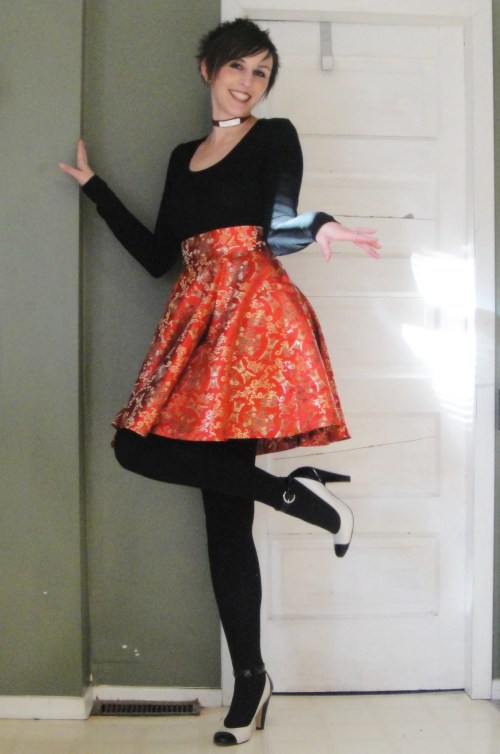
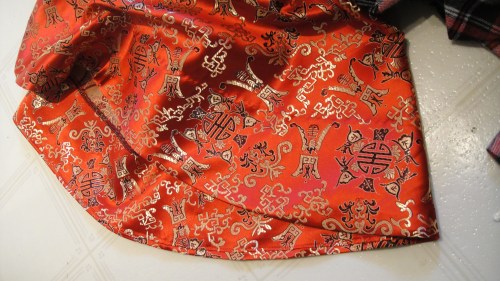
Best part? The plaid was not overly expensive and so ate  up only about half of my project budget. Which sent me on the prowl for part 2 of the project—how about a fun short fancy version, more in keeping with the luxe look on the fashion envelope. Bring on the Chinese brocade!

DSC08404

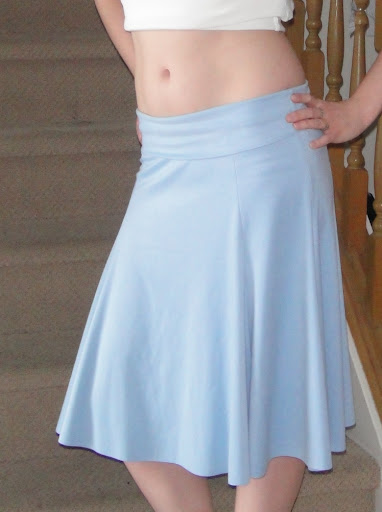
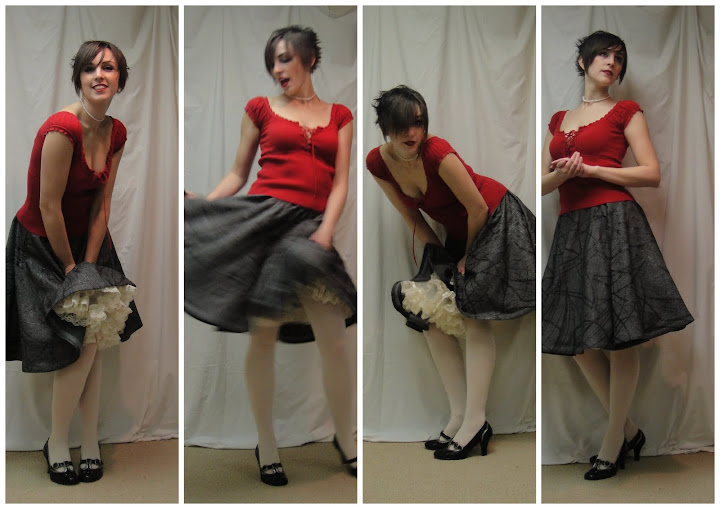
Blurry, but so cute!

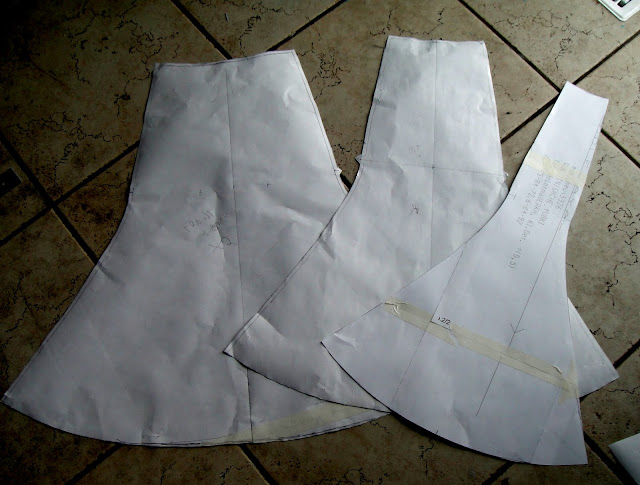
Ok, so let’s back up a bit. This is a circle skirt pattern. There are no pattern pieces that you couldn’t draw out with your grade four geometry kit. The only added detail is the pleats, which are arguably the selling point, but they are every bit as fun as you would think. I don’t know if I would actually have paid the full Vogue $$$ for this pattern, pretty as I think it is, because it is so extremely basic. But getting it with the project—perfect, and it is a cinch not having to calculate anything. It comes down to which you have more of, I guess—time or money.  The rectangular waistband is really wide, which could be a problem if you are quite curvy in the waist, but it works ok for my rather columnar build.

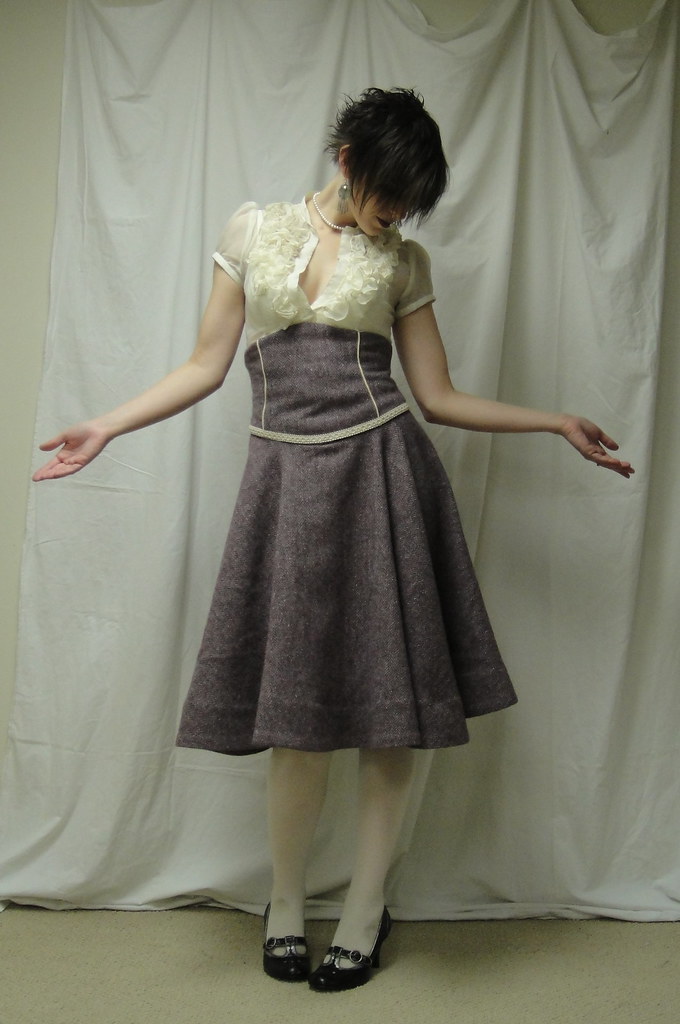
I made the size 12 based on the waist measurement, which is fine. I was a bit dismayed, though, when I got the pattern tissue open and realized that the longest version was still only 27 1/2″ long! I mean, I know I’m not short and I have a lot of leg, but the drawing of this version made me think of something between calf and ankle—27 1/2″ is upper calf on me, barely longer than “just below the knee.”

DSC08398

LOTS of skirt. 😀 Also, stupid spot of sunlight throwing everything off.

So I added 4″ to the plaid version (10 cm for those who use sane measuring systems). I was a little worried this would end up too long, but I have to say I am extremely happy with the finished length. Exactly what I was going for.

My daughter says it looks like a teacher skirt. I said that that had better be a good thing.

DSC08422

I worked disturbingly hard to get those lines to match up across the lapped zipper.

The construction was very basic for this one. I painstakingly matched the plaids horizontally along the side-seams, but completely forgot to think about vertical matching. My CB seam matching is not bad, though, and the walking foot really does help with not having the stripes crawl around on you between pins. The hardest part (actually for both skirts) was getting the overlapping parts of the waistband to be the exact same width. I actually unpicked the brocade three times, which is perilous indeed with brocade. And very unlike me. 😛

DSC08421

Hem by machine.

I hemmed by serging the lower edge with my differential feed turned all the way up. This produced enough gathering to give a nice 2″ hem at the bottom. I’ve been making friends (very slowly) with the blind-hemming function on my new machine, but this time it definitely did the trick. I use the blind-hem stitch with my stitch-in-the-ditch foot.

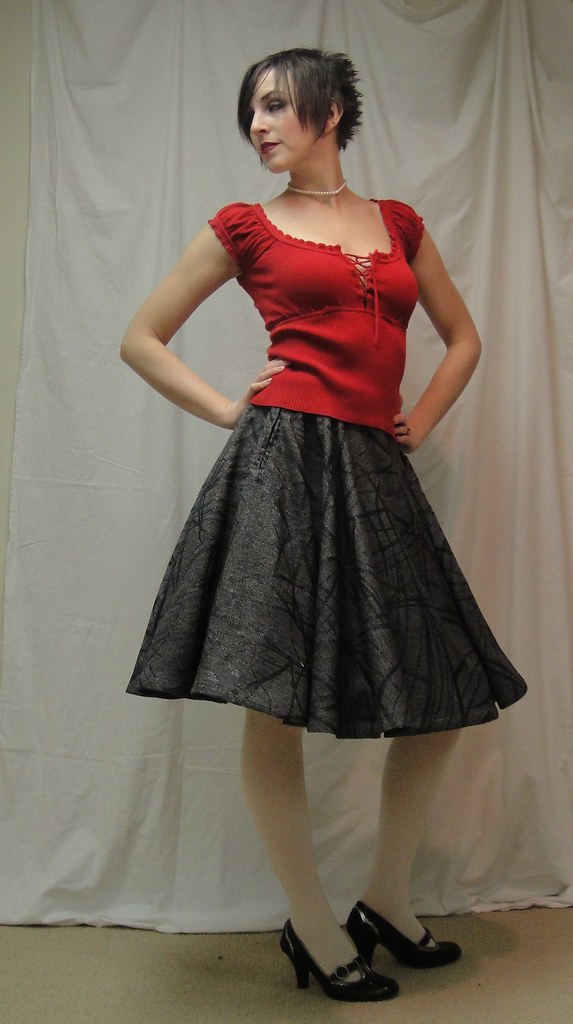
Also I added pockets, since this was supposed to be the “practical” version. You can see them in the second image. They turned out a little small, but still better than nothing (I can fit my hands in fine but not my monstrous phone.)

DSC08406

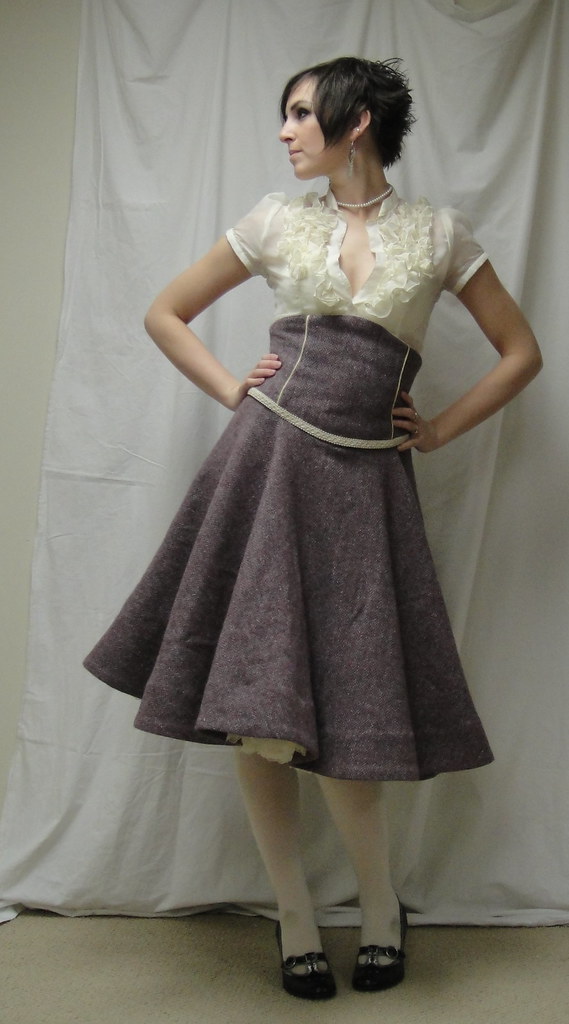
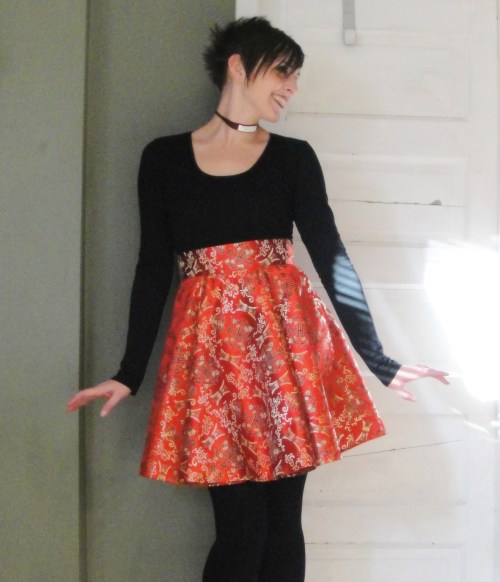
THE CUTE, IT BURNS!!!!

Version two is much less practical, both in length and fabric. I have no idea where I will wear it. (OK, I’ll wear it to work, since being ridiculously overdressed is kinda my baseline at both my jobs. But not until it warms up a tiny bit. No colder than -10C) I wish I went to plays or the symphony or things like that, so I could wear it there, but that would require being Cultured.

DSC08405

Front

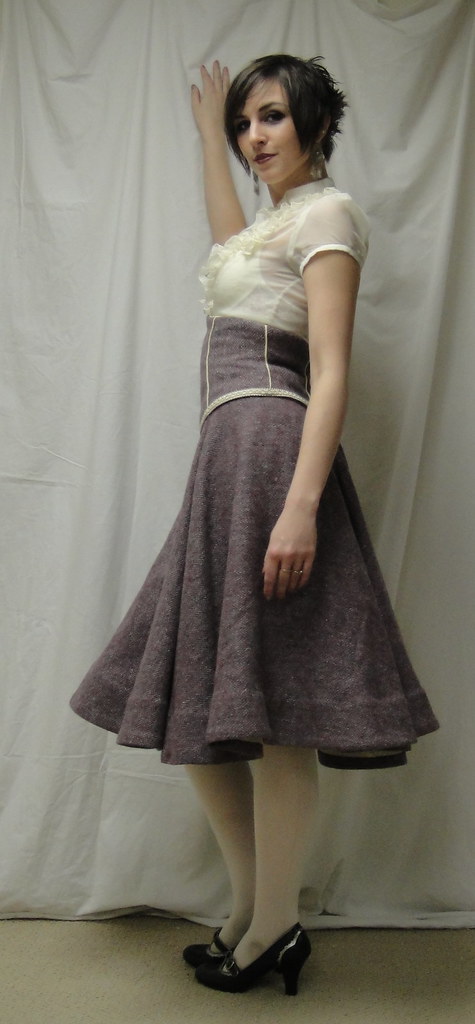
The shortest two versions of this pattern include pattern pieces for a faced hem. Now, I love a faced hem on a circle skirt but I hate the part where it basically takes as much fabric for the hem facings as for the skirt itself. YIKES. So I’ve always used bias facings in the past, carefully ironed into shape. But I didn’t think that the poly-whatever brocade would bias all that well, plus I figured if I’m not willing to do hem facings when someone else is paying for the fabric, when will I ever?

DSC08424

Faced hem

So I sucked it up and did it and I love it to bits. You really can’t correct for bias drag with this kind of a finish, but I doubt it’ll be a problem on this short skirt in this crisp fabric. And if it is, well, it won’t be the first wonky circle skirt I’ve worn happily. I love the weight it gives to the skirt (and I didn’t even interface the facing, as the pattern suggested.)
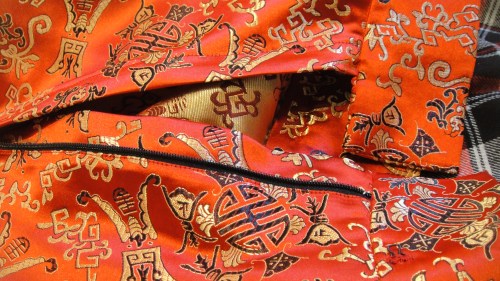
DSC08426

Zipper

I’m kinda absurdly proud of my lapped zipper on this one, too.
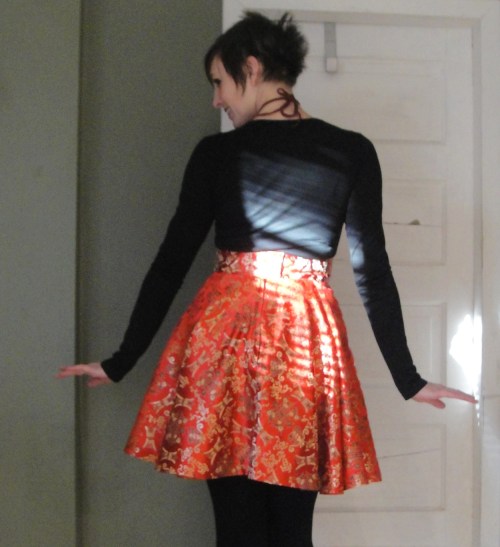
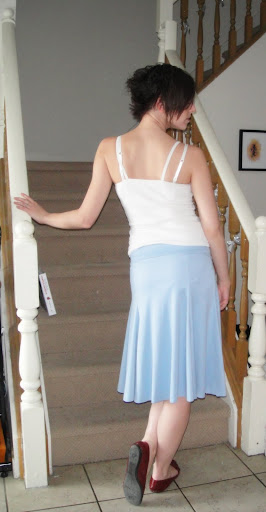
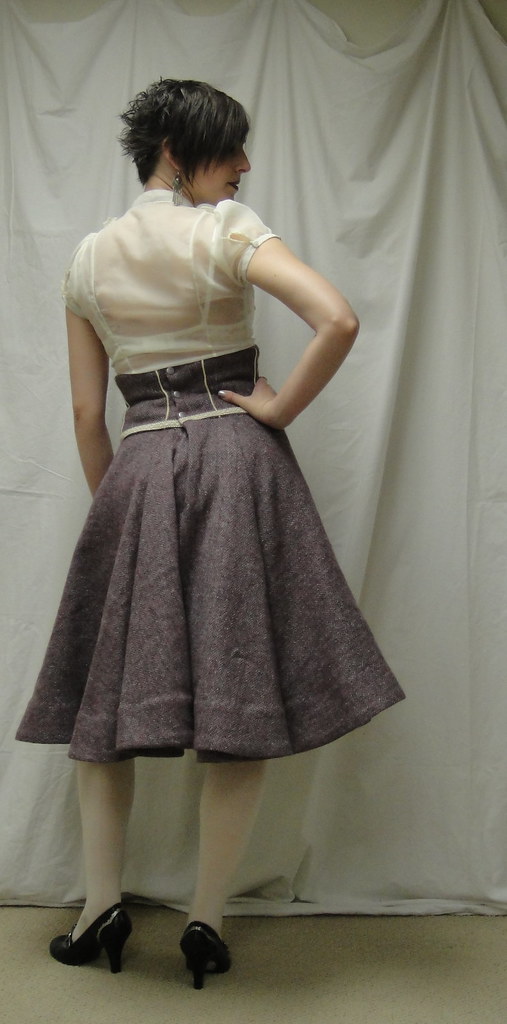
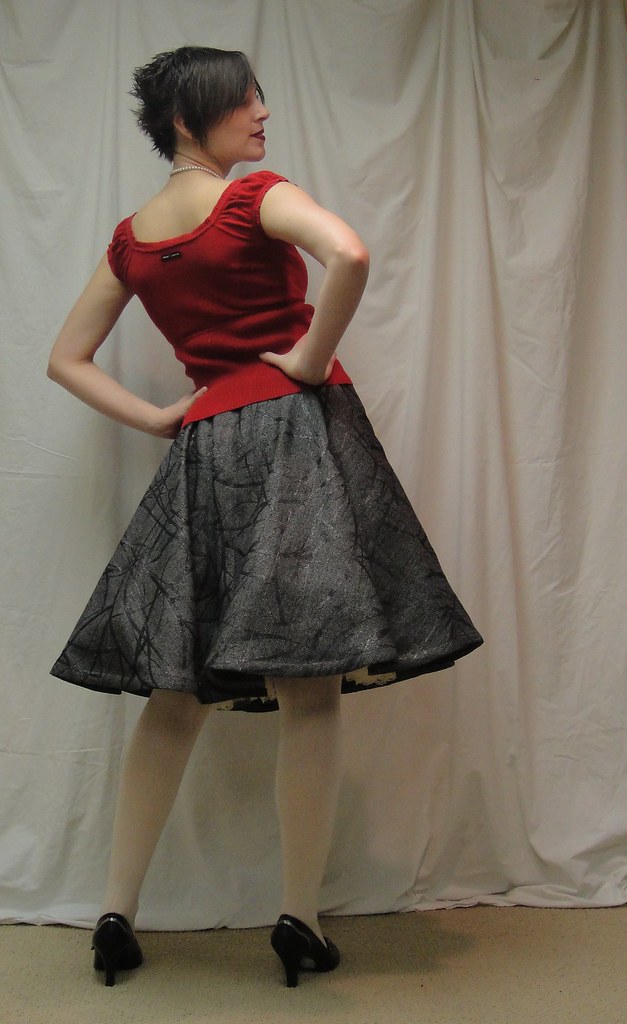
DSC08403

Back view

Here’s a back view, since I think sewing blogs should include things like that. And apparently I didn’t get one of the plaid skirt. 😛

DSC08407Of course, it’s a project, so now I have to go and hang it and I won’t get to wear either of them for a month. /cry. The best projects are the hardest to hang…

Advertisement

28 Comments

Filed under Sewing

A further invocation of spring

Mermaid skirt

Since the first one worked so well. Well, it did—the temperatures I’m complaining about right now are a full 20° C warmer than the ones I was complaining about at the beginning of the month. It’s still snowing, however.

This fabric was snatched up in the frenzy of stash-building earlier this month when I discovered Fabricland had actually put some decent knits in their clearance section. Mainly I like the colour, but it also has an interesting sueded surface and a moderate stretch. It seemed a little heavy and so was passed over during the Great Cowl Experiment (which Sigrid’s versions are making me ache to revisit, by the way…), but I thought it would be great for a springy little skirt.

My first thought was a half-circle like Hip Dropped Stitches’ gorgeous one, but I was concerned that the nap running in different directions might end up looking odd (I can’t tell if there is a direction, but if I pretend there isn’t, you know I’ll find out there is when I photograph the skirt.)

My next thought was a mermaid skirt. I’ve been wanting a little, flared, gored skirt since… well, aside from always liking them, Loutracey posted this one lots back in Self-Stitched September, and then Big in Japan copied this one, and then most recently Yoshimi unveiled this gorgeous (red!) version. Yum, yum YUM.

Evolution of a pattern: right, original piece; centre, doubled; left, tripled width.

What flummoxed me for the longest time was a pattern. Obviously a straight gored skirt would be easy to draft (bum-fitting aside), but I wanted something with a graceful curve hugging the hips and then flaring out below. This would take a bit more thought. And of course, going out and buying a pattern would be too easy. Lekala had a couple of versions I considered, but the one had too many panels (a 10-gore skirt, in fact) and looked too long (which is SO weird, because if you look at their artist’s rendering, the skirt comes to below the knee. The pattern piece is only 22″ long, people, and the waistband’s not that wide either. I mean, I know I have long legs, but not that long.), and the other one, while lovely, seemed to have a bit too much flare. I wanted the skirt to bell out, but not be a circle dropped to my hips.  (I can’t believe I just admitted that a skirt can be too full. That’s like saying pants can be… too long. Or that the Blondissima got your hair too blonde).

Skirt closeup, showing waistband

Anyway, when this fabric came along and the idea crystallized, I went back to the Lekala patterns, thinking I could probably make one work. I knew the length I wanted (just above knee), and that I wanted a six-gore skirt with wider CF and CB panels and narrower panels at the sides.

So I revisited the Lekala patterns, and eventually printed off Lekala 5826, mainly because it required less paper. Man was that a tiny pattern piece! Comparatively, anyway.

So, I had the pattern piece for a 10-gore skirt that was designed to fit me (or rather, someone with hips my size but a “normal” waist) at the natural waist. What I wanted was a 6 gore skirt that sat lower on my hips, with wider front and back panels. It was time to get creative.

Some quick measuring informed me that if the pattern piece as is were used to make a 12-gore, rather than a 10-gore, skirt, it would have pretty much exactly the “waist” measurement I was looking for. The length and flare still seemed good—it would be a very short skirt if worn at the true waist. Furthermore, a 12-gore arrangement is much easier to convert to the uneven panels I wanted—I could make the CF and CB panels the width of 3 original gores, and the side panels the width of 2 original gores. Perfect! I checked the amount of stretch on my fabric, to make sure I didn’t need to subtract ease, and got tracing. I used the highly scientific method of tracing the pattern piece, then sliding it over so the waist and hip notches lined up and tracing the other side. Aside from running off my paper and having to piece in a bit at the hem, it worked really well, although I can’t swear there isn’t a bit of flattening along the hem curve on the 3-times-wide panel.

So, I had my pattern. Time to lay it out.

Back view

Blerg. Now I remember the second reason I had hesitated making one of these things—man are they wasteful of fabric! Especially since I couldn’t reverse any of the pieces due to nap-related fears. This little, itty bitty, not-even-knee-length skirt used up my full two metres of fabric, with barely enough left over for the wide, fold-over waistband I wanted. Of course there are plenty of (rather large) scraps… but seriously! I could probably have gotten two shirts out of that thing! As it is, maybe the scraps will be large enough to play with glovemaking… faux-suede sky-blue gloves would be lovely, don’t you think?

Anyway.

It was pretty quick to sew up, although I did inevitably serge the two wide panels together almost right off the bat. I don’t pick out serged seams, so I just cut that seam off. As it turned out (due to that magic of stretch fabric, even when it didn’t seem overly stretchy when tested) the skirt needed a fair bit of taking in anyway so it wasn’t a problem. I took a couple of cm off each seam, and then took the two side seams in another inch or so.

Skirt---spread out

The waistband is a wide rectangle folded over and applied exactly as the neckband in this tutorial.; I determined the length by wrapping the piece around my hips until it seemed like it was a good tightness. This wound up being a smidge smaller than the skirt opening after I’d taken it in, which seems about right. I didn’t have enough clear elastic to include it in the waist seam… we’ll see if I regret that in the future. Since the skirt’s absolutely the same front or back, whereas I am not, it has the potential to ride up in the back, but if I fold the waistband properly I can prevent that. If the problem persists I can always trim it at the front later; I didn’t do a hem, just trimmed the bottom edge smooth by running through my serger without thread.

It actually turned out quite a bit longer than I had thought it would—it’s hovering just below knee length where I was expecting it to be above. I guess that has to do with adding the waistband and where it sits on my hips, and the fact that there’s no need to take up a hem… anyway, I like it very much, although I’m going to have to figure out what it works with other than just tank-tops. It’s lean enough on the bottom that any puff on top—like the puffed sleeves on my JJs or a cowl neck on a shirt—makes me feel top-heavy, so we’ll see. I may have to make a shorter version in the future, though, out of a less drapy fabric to see more of the “mermaid” shape.

I do like the blue with my red shoes!

(But for now, since it is still snowing, I’m going to put my sweater back on!)

23 Comments

Filed under Sewing

Oops…

Circle skirt, take two

I did it again.

Yup, despite deadlines and a myriad of other things I should be working on, I finished the corset-waist circle skirt. (Sorry, Liza-Jane… I promise I’ll get to those skinny cargoes soon!)

I used the Ceylon midriff pieces as my basis for the “corset” portion, with, obviously, a fair bit of alteration: I put the centre-front on a fold, added a sinuous side-front seam, and completely forgot to allow for overlap in the back, which is now the opening portion. Fortunately, the amount of ease you need in a blouse is considerably more than what works for corset-style waist panels, so there was plenty of room for overlap. I made my lining piece first, out of a sturdy cotton ex-curtain also used here, adjusted the fit on that, and went from there. I added notches to all the tops of pieces, which made it much easier to keep track of how they should go together.

Side view

I piped the seams on the corset portion, using a narrow off-white piping from one of my thrift store scores. Unfortunately, I only had the one packet of this and, although I measured my seams first, apparently I screwed that up royally because I didn’t have enough left for the bottom seam. So I waffled a bit and ended up adding this home-dec trim from my stash. In the past I’ve always stitched this trim on by hand, but I was lazy and machined it this time. I can’t say that I notice a difference, even from up pretty close, except perhaps that my positioning isn’t quite as exact as it might have been.

I mentioned before, I elected to use snaps as the closure here. Time will tell as to the wisdom (or folly) of this decision. Way back when I was sewing the original circle skirt, I had posted a question on PatternReview about how to insert the zipper. I got great answers, but also the suggestion of a snap-placket as a vintage-style alternative. So I determined I would give it a try on my next circle skirt.

Now, I will say, the snap-placket would have worked better in a thinner fabric. This wool is quite heavy, more of a coat weight than a suit weight, and getting even the most heavy-duty snaps through multiple layers of it was a pain in the ass. And a double-fold bias strip of the wool (so that’s like five layers!) is really, really bulky. That being said, I really like the idea, and will try it again in a more summery fabric. On the up-side, because I was using snaps, when I discovered on first try-on that there was way too much ease in the “corset” portion to hold it in place properly, it was easy to run another row of snaps up further in, instead of having to pick out and adjust piped seams or, worse, a zipper.

Snap placket (top portion). I painted the snaps with matching nail polish.

I don’t know that the snaps are ideal for the “corset” style either, though, as due to the small amount of ease they’re under a lot of strain. For now they seem to be holding—they are heavy duty, after all—but I’m not convinced they’ll make it in the long run. We’ll see. Converting it to a laced closure or something at some point would be a pain in the butt, but not impossible, I guess. (Note to self… hang on to some of those scraps in case you need a modesty panel for behind the lacing…)

As I mentioned before, I opted to pass on boning mostly as I’m too lazy/disorganized to procure any (or cable ties, either, as Ms. Slapdash so smartly pointed out). I used hair-canvas interfacing, hand-basted in place, with the “hairs” running vertically in at least some of the pieces (read: the ones where I remembered). This makes the waist nice and firm, but I can see that I might keep a smoother line longer with boning. Again, not impossible to add later if I feel the need…

So now we come to the hem. I was quite happy with my experiment with horsehair

Hem interfacing... bound and circled

braid last time, but as I mentioned before it’s a bit tricky to source locally and I’m (again) too impatient/disorganized to order online. Not saying I never will, but not for this project. So, since I still have plenty of hair-canvas kicking around, I decided to give bias interfacing a try. I measured and cut three-inch bias strips of the hair canvas. I will say, cutting bias strips out of hair canvas is much less annoying than out of regular fabric—it’s nice and stable and hardly skids around under your pencil at all. I then sewed the pieces together into a long strip (and managed to only sew two pieces on wrong-way round 😉 ) and ironed to “circle” it—just pulled it into a curve while ironing. The stuff goes incredibly soft under the seam-iron, but firms up again perfectly when it cools, which is mostly nice but can be a little tricky. I then stitched some ready-made bias-tape along the inside edge of the “circle”, stretching the bias as I went. I picked this yellow because it was the only colour I had enough of other than red. I love red, but it wouldn’t really go with this project. Cream would’ve been perfect, but I didn’t have any. (if I had, I would’ve turned it into piping for that last corset seam, anyway). And where else am I going to use six yards of yellow bias tape, anyway? (this is another of those thrift-store “scores”)

Finished hem

So now I had my interfacing ready, I basically followed the rest of Gertie’s tutorial for applying horsehair braid. The only trick was to make sure to remember to start with the seams in my bias interfacing facing up, so that when flipped to the inside they’d be hidden. Ironing the hem down once it was flipped was in some ways easier than with the horsehair braid—the hair canvas won’t melt under the iron—but in other ways harder, as the hair canvas gets really soft when ironed and I had to be careful that the seam allowances weren’t getting folded and crunched. Still, with a bit of care and pinning, I got it all folded over and steamed so that the upper and lower seams were about the right circumference.

I opted to hand-stitch the hem this time, rather than topstitching, which worked

Full skirt!

reasonably well and only took two TV shows. I’m sorely tempted to run a band or three of the same trim from the waist around the edge, but that might be a bit over the top and would take a lot more of the trim than I have kicking around. We’ll see, I suppose. 😉

So this project fits with my “spring palette,” which isn’t a formal part of the Colette Spring Palette Challenge, but is in line with a palette that I’ve been playing around with intermittently for a while now. As is demonstrated by the colour scheme of this entire website ;). The main colours are cream or ivory and a muted, dusty blue (sometimes veering towards a pale aqua), but this light, dusty purple fits right in as well. It’s not far off Sunni’s palette of choice, either, although I don’t know that I’ll be incorporating her caterpillar green ;).

Back view

I absolutely love the skirt with this blouse, though I’m thinking I’m a little old for the sheer-blouse-over-bra look. Still, fun for a photo shoot, anyway. I’ve been keeping my eyes open at the thrift store for a perfect pair of ivory shoes to go with this palette, but nothing’s really thrown itself at me yet. Light-colour shoes get banged up and turn drab so quicky, I may need to hunt around new-shoe stores… though I hate to buy new a pair of shoes just for taking photos in… /sigh.

The back closure wound up a bit bunchy, partly because of the incredible thickness of the snap placket in the skirt part, and partly because of the overlap where I readjusted the size (which i why the snaps are closer to the left-hand line of piping, not centred between the two). As I don’t have to look at it, I’m not bothered by it ;).

As to whether heavy wool belongs in a “spring” palette… well, as far as I’m concerned skirts of any kind are spring wear. Heck, anything that isn’t quilted down is spring wear. So there. 😉

Oh, yes, and since some people like to see what they look like without the fluffy petticoat underneath:


Sans petticoat

Here you go. In this particular (heavy) fabric, with the interfaced hem, it’s actually not a striking difference. I have noticed one thing about wearing the petticoat, however—it makes a skirt much warmer, as its fluffiness fills in that air-space between legs and skirt remarkably effectively. Still not as warm as pants, but much better than a skirt without petticoat.

Next up: probably Syo’s skinny jeans. Poor kid seems to have the virus Tyo had last week, although her symptoms are totally different. Those of you with children, do you ever find that? Even when we had swine flu last year, Tyo and their dad had one distinct set of symptoms, while Syo and I had another. Yet I’m sure it was the same virus—their entire school was decimated for about two weeks. Although it would be nice if I could get the alterations figured out on my sweetie’s shirt this weekend, before he goes away… I could then present him with a completed shirt or two when he gets back. (Yes, I’m going to be single-parenting for a full two weeks! Wish me well… I’ve never had to do this before. Usually it’s me bopping off and leaving him with the kids…). Also I should really make another pair of jeans (or those cargoes 😉 ) before March kicks in…

23 Comments

Filed under Sewing

Swirly girly

Oops, I made it instead

Erm, yeah, so that’s a circle skirt.

You may, ah, notice that it’s not that yummy purple fabric I showed earlier in the week. I chickened out. This doesn’t logically add up—2 meters of that purple stuff cost me $4 at the thrift store, whereas this stuff I originally bought for my Lady Grey muslin was at least $5/m. I still like the purple stuff more. Also I can’t get more of the purple, whereas every single Fabricland I’ve visited in the last six months (in two provinces) has bolts of this grey stuff in their clearance section. Apparently it did not sell well. At any rate, it seemed like a good vehicle on which to practice my circle-skirting techniques. It’s actually a really nice herringbone wool, suit weight, with this weird, sparkly black swishy pattern printed over top in what feels like latex paint.

Actually, it seems perfect for a circle skirt. Sedate but with a bit of fun—just like the skirt.

As per expectations, the waistband at the waist

Tucked in shirt: meh

looks terrible. You will not see how bad it is because I’m only going to show you  the “Pamela Anderson” pose: shoulders straight on, pelvis twisted to the side. Really I should call it the Egyptian pose, as I think they had it figured out a few thousand years earlier, but anyway. It emphasizes bust, minimizes the waist, and shows off your butt. Check out the magazine rack next time you’re at the grocery store, I’m pretty sure you can find an example or three.

Note the interesting hang of the folds

However, it does look pretty cute with a hip-length top over it, so I can style it that way. And I’m thinking a Franzi vest might complete the ensemble. Actually, I can envision a bit of a capsule wardrobe happening (that’ll be a first!) involving this fabric and the grey pinstripe I made my Businesswoman Pants out of. It might require me to buy more of this weird fabric if I want to both make the vest and finish the Lady Grey muslin. We’ll have to think on that.

As to the skirt itself—easy peasy. My fabric was 60″ wide (just shy after I steam-shrunk it), just enough to cut the entire thing in one piece. I used Casey’s 50s circle skirt tutorial, which provides you with a lovely pattern for the different waist sizes that runs quite true, though I’ll note that my size, 28″, is the second-largest. Oh, those 50s wasp-waists. The waist pattern is slightly squared off, which changes the hang of the circle skirt slightly: it hangs more straight at front and back (and sides, I suppose), with somewhat more folding at the front and back hips. This looks nice, and might even help minimize the bias-stretch since if you cut an even circle those bias areas will be a smidge shorter.

Using a single piece for the skirt is lovely and simple, but

Don'tcha love the full circle?

does complicate inserting the zipper. The tutorial is not particularly helpful in this case—it simply says “follow the instructions that come with your zipper.”

The outside of my hand-picked zipper. Not perfect but reasonable.

Which would’ve been fine if I’d, y’know, remembered I was using a vintage zipper—probably not quite as old as the skirt, but still—that actually *came* with packaging and instructions. Duh. Once I opened it up and looked through them (and posted piteously on Pattern Review—thanks for the helpful responses!), it became clear that I should do a facing around a narrow slit, and then attach the zipper as usual. Well, as usual as zippers ever get for me, anyway. I also LOVE the suggestion of doing a snap-placket, similar to the continuous-lap placket in a blouse sleeve. I’ll try that on the next one. I machine-stitched the ziper to the facing but hand-picked to the outside. It seems to have worked reasonably well. I still need to stitch a hook and bar onto the waistband, but we needn’t dwell on such trivialities here. 😉

Oh, and I should probably show you a back view:

Back view

When I went to measure to hem it today, I trimmed down the length of the front but not the back. It doesn’t seem to have stretched much on the bias at all, although the sides were for some reason distinctly shorter than the front and back. I trimmed down the front half of the circle to match the side length, but left the back, as even I have enough booty to make it appear shorter at the back. Probably it doesn’t look as perfectly even as it could (still a bit short at the back, actually) but, y’know, whatever.

The horsehair braid was fun, despite the fact that I couldn’t find any as yummy and wide as Gertie’s (as it was it took me two different Fabriclands to find the 1″ width). I followed her tutorial quite closely anyway, and managed not to singe off my fingers or melt the nylon braid, so life is good—but I I would still have preferred wider braid. Ah, well. Time to start hunting for an online source, I guess.

Horsehair braid---sadly I could only find up to 1" thick

Oh, and I recently splurged on a point-presser/clapper, urged on by MPB’s list of “tools you won’t want to be without” (relatively few of which I actually own). And, y’know, it’s awesome. I used the clapper-part like crazy in the making of this skirt and I am truly impressed by how much it improves the edge of the press. Who knew? (Okay, I know the rest of you knew already… these things I tend to have to figure out for myself.)

So now I am working on a vest to go with this, assuming that will work out and not just look funny, and I may nibble on that mini-wardrobe-capsule (that’ll be a first!) as well, assuming I can find the stamina to tackle another Lady Grey. I tried the skirt with my grey blazer, though, and it looks like crap—it needs something with a flared peplum, or at least a much shorter one. You can see all the photos here.

For the next circle skirt (the purple), I want to do a yoke of some kind, maybe princess seamed, so I don’t have that awful waistband right at my waist. But that requires a bit more fitting and I haven’t quite gotten that far yet…

26 Comments

Filed under Sewing