Category Archives: Sewing

To SBA or not to SBA

All y’all* are a bunch of enablers, you know.

So against my better judgment (and to my hubby’s dismay) I spent the latter part of yesterday evening whipping up a very quick muslin of the Colette Ceylon pattern rather than snuggling on the couch with him watching the last of Mrs. Doubtfire.

Altered bodice pattern pieces

The nice thing about the Ceylon  bodice is that the pieces are all itty-bitty, so you can squeeze them out of pretty small scraps. I really didn’t think I’d get anything else out of the last few bits of that blue flannel duvet, but I got it all, quite handily. Well, not the sleeves, yet.

Oh, dear. I’m going to have to show you fitting pictures again. Darn it.

Yes, I know this one really provides no fitting information at all. Be patient.

Now, I started slow, with just the midriff-band pieces. I initially traced them in a size 2, grading up to a size 4 at the waist. (According to the Colette size charts, my waist is a size 6 while the rest of my measurements suggest a size 0. However, even with the astounding amount of waist-innish-ness on these pieces, going from a 0 to a 6 would’ve given me a convex, rather than concave waistline. 2 to 4 seemed like a reasonable compromise). I also added a CB seam and did a pre-emptive swayback alteration. The resulting piece turned out just right in the lower back, a little loose above the waist, and a bit big across the front. So I gleefully graded the front down by 1/4″, and the back similarly above the waist. I guess that means my front waist piece grades from size 0 at the top and bottom to size 2 at the waist, while the back goes 0-4-2 top-waist-bottom. Plus whatever distortion the swayback throws in there.

It’s well-known that Colette drafts for a generous C cup, while I am more in the “small

Ceylon muslin 1, front view

end of B but loudly refusing to consider myself an A” territory. Obviously an SBA was going to be in order. Previous experience suggests that some shortening in the upper bodice would be appropriate, as well.

So I started with a horizontal tuck around the bust and mid-back pieces of the bodice, taking out about 2cm of height. This may have been a bit much in the front, but anyway. I played around with a second, angled vertical tuck in the front bust piece, pinned the pieces on my duct-tape double and decided to give it a whirl.

Ceylon, muslin 1, side view

On aesthetic rather than fitting grounds, I also messed with the curve of the front yoke (which seems to stick out a little high on the smaller sizes at least). I cut the upper pieces a size 0 before alteration, by the way.

As you can see, the SBA was a bit, ah, enthusiastic. It still fits, but there’s a certain blousiness to the back that seems to be missing from the front, and I’m pretty sure when buttoned it would end up gapey. Assuming ambition does not desert me, I’ll try a version tonight with the vertical tuck removed, and see where that leaves me.

I like the new shape of the front yoke pieces. I still think the neckline (those gaping, angled pieces of the bodice) needs to come down 1/2″ or so. Some of the gapeyness doubtless comes from carelessly stretching on the bias, but I will have to watch for that in the final construction. Having adequate bust space should help with it, too, I would think.

I’m torn on the horizontal tuck. The front length seems good to perhaps a wee bit

Ceylon muslin 1, back view, slack.

short, the back length still looks a little long. And there are still a few wrinkles in the back midriff piece that I’m not sure what to do about. I’m reluctant to increase the swayback alteration, as it’s already at Sherry’s recommended maximum before you should start looking for other fitting causes (like, oh, a short upper body). Would shortening the upper back pull the midriff pieces higher and let them fit my waist a bit better?

There is a lot of blousiness at the back, some of which is necessary, but it seems a bit excessive. Again, I’m wondering if there isn’t too much length in this section; the width seems good, as it goes comfortably taut when I move my arms forward.

So that’s where I am. I think tonight I’ll re-cut my front bust pieces and mess with the length of the back piece. But now, I must get back to work on the wondrous intricacies of phylogenetic analysis…

*Lest I besmirch the reputation of my fellow Canucks, I would like to point out that I learnt that lovely bit of English in Texas a couple of years ago. We don’t really talk like that up here, eh.

16 Comments

Filed under Sewing

Dresses I shouldn’t be sewing

A dress I shouldn't've been sewing

Ok, this post has been in the “drafts” folder long enough that the original title was “Dresses I’m Not Sewing”. But since I seem to have fallen off (or on?) that wagon, and I can feel the itch for another one or two coming on, I’ll retitle it.

I’ve been trying to focus my sewing this time around very tightly on things I will wear in my everyday life, as I spent the first, er, twenty years or so of my sewing career making things that were mildly to wildly impractical, at least from an everyday standpoint. And I was doing really well, too, right up until about Christmas, give or take a Lady Grey coat.

Since Christmas, I’ve made the 70s dress, a fluffy petticoat, and now a skirt to wear with the petticoat. I’m feeling a little less guilty about the petticoat since I made the skirt, and a little less guilty about the skirt since I did wear it all last weekend. And I have worn the 70s dress out of the house once, to a friend’s birthday. It’s possible that when the weather is warm (I can’t say “warms up” as we were the warmest place in Canada yesterday for a bit and it’s been lovely for almost a week, but winter is bound to return before it goes for good) I can work on incorporating some fun skirts and dresses into my wardrobe a bit more. I’ve certainly had my bouts of creative over-dressing before, but I’ve been rather lazy the last several years.

Anyway, this post is not a to-do list. It might even be a to-don’t list. But it is a quick examination of some of the dresses, in my stash or on the internet, that are tickling my fancy right now, and tempting me from the Straight and Narrow Road of Practicality.

Maybe I’m just impatient for Spring.

Ceylon

Collette’s Ceylon

Yum, yum, yum. Colette’s pattern draft is probably about as far from “suited to my figure” as you can get, but I’m willing to dare it for the Ceylon. I love the waist panel; I love the little pseudo-bolero yoke (wouldn’t it look smashing colour-blocked?). I even love the buttons all down the front, though I don’t imagine I’ll love actually sewing them, or their buttonholes. The only thing I think I might want to change would be the skirt—wouldn’t it just be yummy with a circle skirt on there?

I especially love this version. Though it may be one of those cases where the way it looks on her figure and the way it would look on mine won’t add up.

When I start thinking about making this dress, I become paralyzed. Start with size 0 or 2? How should I do the swayback alteration? What about the SBA?

Now that I have a duct-tape quasi-double, I’m feeling a little more bold about tackling this, but… we’ll see. My guess is that I will need to do an SBA, shorten the bodice and/or the waist piece, grade out at the waist, and do a swayback alteration, possibly involving the addition of a back seam.

Style 3416

Maternity ?!?!

Ah, those 70s dress. Style 3416 crept into my stash last summer, mainly for the sleeveless dress version in pink on the cover. Imagine my surprise when I got it home, opened the baggie (it came in a baggie of three patterns for $1 at the thrift store) and discovered it was technically a maternity pattern. I’m betting it would be easy to de-maternify, though, or failing that just get pregnant again.

That was a joke. Don’t even go there. I may be at an age where most of my cohort are finally giving in to the biological clock, but while there are advantages to having your kids later, and advantages to having your kids earlier, I’m fairly convinced that there are no advantages to having both.

McCall’s Easy Stitch ‘n Save 8500

McCall's 8500

I know, I know, but look at the lines. Basic, scoop neck, princess seam. This is another one of those cases of “looking past the envelope.”

Or so I’m telling myself, anyway.

I had a dress like this in high-school made out of green crushed stretch velvet, with laces in the back (oh, the mid-90s…). I did love that dress. The only problem with it was the sleeves were too short.

I’m pretty sure with the right fabric, and maybe a detail or two, this dress could be the bomb. With buttons all down the front, I bet I’d love it almost as much as Ceylon…

When I get around to it.

Cheongsam

Cheongsam pattern

And then the Sew Convert has to go and post about cheongsams, re-igniting a love of this dress-style I’ve probably nursed since first seeing the Indiana Jones and the Temple of Doom as a tot. Don’t laugh, I blame my 14-year-plus love affair with bellydance squarely on Princess Leia’s slave-girl outfit in Return of the Jedi. Well, and how awesome bellydance is, but that’s a whole nother story (and would require a whole nother blog, I suspect).

I had one of these I found at a vintage clothing store as a teenager. I loved it, but it always needed to be altered to fit properly, and since I kept fluctuating size what with growing up and then having babies, I eventually passed it on.  This pattern is on the “Modern Sewing” site, which is a few of the same patterns as the Lekala people, but free, not custom sized, and not conveniently tiled for printing. I’m not sure I love the cut-on sleeves of this particular one, but I don’t hate them either and I’ve had good luck with their drafting in the past, and there’s back darts and a CB seam for shaping, unlike, say, the Folkwear pattern.

Contrary to type, I think I want a blue one. It’s possible I’m being led astray by Adey’s gorgeous wedding cheongsam

Since I just paid an unpleasant volume of bills today, which has me gasping slightly and vowing to sew only stash fabrics for the foreseeable future (yes, you may start placing bets on how long that lasts…), I think this one is going to have to wait a bit. Also, have I mentioned I’m terrified of double-ended darts?

Upshot

Red fabric

Ok, if nothing else a post like this helps me prioritize, and fitting terror aside, I think Ceylon’s definitely ahead of the pack. I have a copious amount of a rather sturdy red fabric (right of picture, and rather more dark-red than the muted purplish colour in the photo, sigh. Actually, the muted purple it’s showing on my screen is rather close to the actual colour of the 70s dress, which photographs as black) that’s been aging in the stash since last summer, and would be a lovely Ceylon. I originally bought it for mediaeval-costuming purposes, but it’s the only piece I have in stash right now that’s large enough for a full dress, and a regular dress would be at least a tiny bit more wearable than a mediaeval costume…

Hmm…. I have to finish tracing out the pattern for the hubby’s shirt… maybe I could pull out some of the Ceylon pieces at the same time…

Bad, bad seamstress….

25 Comments

Filed under Sewing

A (probably) vintage shrug

Two cute shrugs

Above left is a very cute little cream sweater shrug I nabbed from the dress-up box at my Grandma’s house ages ago. I can’t actually confirm its age, except that it’s been kicking around the farmhouse for as long as I can remember. It might have belonged to my mother or her sister (in which case it would be late 60s or very early 70s) or not. A Google search of “50s shrug” turns up examples of identical style, so even if the actual garment isn’t that old, the style certainly is.

In particular I think it’s adorable with my 70s dress. I don’t like it as much with my circle skirt, though on someone with a longer waist I think the look would be great.

Drapey sleeve

Sadly, however, the fabric is starting to disintegrate—little moth-holes everywhere—so it’s no longer really wearable. However, it was such a cute little sweater, and so simple a pattern, that I thought I would give making a pattern a try. So I spent some time this past weekend measuring the original and plotting out lines in Inkscape, and came up with a pattern! Hooray! Which sewed up into a passable copy of the original! (That would be the black version, by the way.)

So, in a first for this blog, I’d like to share with you my 50s Shrug Pattern! (Also tiled for A4—warning, not tested, and the first, overview page is for sure not A4 sized).

The back---would look better on someone with a longer waist.

Now, this first go came out a bit larger than the original, although the sleeve-cuffs are still quite nicely narrow; in particular, the arms are longer. I’d say it would be good for someone with a bust in the 34-36″ range (as opposed to my 33″). I may down-size a wee bit for my next one, in which case I’ll post that pattern, too. For those in the larger range, I’m sorry, my pattern-grading skills are nonexistent. I don’t think it would be too hard, though…

In the original, the bands are made of ribbing, but for mine I just used cross-grain strips of the same fabric and it worked fine.

So, without further adieu, here’s my instructions, such as they are. Please bear with me—I’ve never done this before! 🙂

Recommended Fabric: 1 m (or yard) of sweater-knit, 60″ (150 cm) wide (slightly narrower might work, but not much). Pattern includes 6mm (1/4″) seam allowances; I used the serger for all construction, but any stretch-stitch would do.

Instructions:

Pattern piece on folded fabric

  1. Print and tape together pattern; there are nine pattern pages, numbered as in the overview page. Test square for sizing is placed on numbered page 1, and should be 10 cm (4″) square. Trimming should not be necessary, although there may be a small blank space around the outer edge of the page due to printer limitations. (Again, I don’t have any A4 paper so I couldn’t test this version. Sorry!)
  2. Fold fabric lengthwise; place pattern piece so Centre Back is on fold. Cut out pattern piece.
  3. From remaining fabric, make two cross-grain bands, one 8 cm (3″) wide by the full fabric width, one 6cm (2 1/4″) wide by 44 cm (17″) long. Fold bands in half, wrong sides together, and press.
  4. Cut two 24 cm lengths from the wider strip; align raw edges with right side of sleeve ends and stitch. The process is the same as described here for T-shirt collars, except not in the round and without topstitching afterwards. The same process is used for applying all bands on the shrug.
  5. Stitch curved under-arm seams.

    Cuff band attached, ready to sew curved underarm seams

  6. Mark centre of bottom back and centre of remaining wide cross-grain band (roughly 120 cm or 47″)
  7. Distribute wide cross-grain band around the shrug’s hem, from neck opening to neck opening, matching halfway points. The cross-grain band should be slightly stretched, especially  around the curved areas in front. Stitch as for wrist-bands.
  8. Fold ends of narrow cross-band strip right-sides together; stitch ends and turn wrong-sides together so that ends are neatly enclosed.
  9. Align raw edges of narrow band with neck opening, again aligning centre back with halfway point on band and stretching/easing to fit. Stitch.
  10. Work buttonhole in front-right corner of neckline; attach button on front-left.
  11. If desired, press band seams towards garment interior.
  12. Wear, looking adorably cute!

How’s that? Clear as mud? Writing sewing instructions is HARD! (Way harder than sewing the actual thing was. I feel like that’s all clear as mud)

31 Comments

Filed under Sewing

Swirly girly

Oops, I made it instead

Erm, yeah, so that’s a circle skirt.

You may, ah, notice that it’s not that yummy purple fabric I showed earlier in the week. I chickened out. This doesn’t logically add up—2 meters of that purple stuff cost me $4 at the thrift store, whereas this stuff I originally bought for my Lady Grey muslin was at least $5/m. I still like the purple stuff more. Also I can’t get more of the purple, whereas every single Fabricland I’ve visited in the last six months (in two provinces) has bolts of this grey stuff in their clearance section. Apparently it did not sell well. At any rate, it seemed like a good vehicle on which to practice my circle-skirting techniques. It’s actually a really nice herringbone wool, suit weight, with this weird, sparkly black swishy pattern printed over top in what feels like latex paint.

Actually, it seems perfect for a circle skirt. Sedate but with a bit of fun—just like the skirt.

As per expectations, the waistband at the waist

Tucked in shirt: meh

looks terrible. You will not see how bad it is because I’m only going to show you  the “Pamela Anderson” pose: shoulders straight on, pelvis twisted to the side. Really I should call it the Egyptian pose, as I think they had it figured out a few thousand years earlier, but anyway. It emphasizes bust, minimizes the waist, and shows off your butt. Check out the magazine rack next time you’re at the grocery store, I’m pretty sure you can find an example or three.

Note the interesting hang of the folds

However, it does look pretty cute with a hip-length top over it, so I can style it that way. And I’m thinking a Franzi vest might complete the ensemble. Actually, I can envision a bit of a capsule wardrobe happening (that’ll be a first!) involving this fabric and the grey pinstripe I made my Businesswoman Pants out of. It might require me to buy more of this weird fabric if I want to both make the vest and finish the Lady Grey muslin. We’ll have to think on that.

As to the skirt itself—easy peasy. My fabric was 60″ wide (just shy after I steam-shrunk it), just enough to cut the entire thing in one piece. I used Casey’s 50s circle skirt tutorial, which provides you with a lovely pattern for the different waist sizes that runs quite true, though I’ll note that my size, 28″, is the second-largest. Oh, those 50s wasp-waists. The waist pattern is slightly squared off, which changes the hang of the circle skirt slightly: it hangs more straight at front and back (and sides, I suppose), with somewhat more folding at the front and back hips. This looks nice, and might even help minimize the bias-stretch since if you cut an even circle those bias areas will be a smidge shorter.

Using a single piece for the skirt is lovely and simple, but

Don'tcha love the full circle?

does complicate inserting the zipper. The tutorial is not particularly helpful in this case—it simply says “follow the instructions that come with your zipper.”

The outside of my hand-picked zipper. Not perfect but reasonable.

Which would’ve been fine if I’d, y’know, remembered I was using a vintage zipper—probably not quite as old as the skirt, but still—that actually *came* with packaging and instructions. Duh. Once I opened it up and looked through them (and posted piteously on Pattern Review—thanks for the helpful responses!), it became clear that I should do a facing around a narrow slit, and then attach the zipper as usual. Well, as usual as zippers ever get for me, anyway. I also LOVE the suggestion of doing a snap-placket, similar to the continuous-lap placket in a blouse sleeve. I’ll try that on the next one. I machine-stitched the ziper to the facing but hand-picked to the outside. It seems to have worked reasonably well. I still need to stitch a hook and bar onto the waistband, but we needn’t dwell on such trivialities here. 😉

Oh, and I should probably show you a back view:

Back view

When I went to measure to hem it today, I trimmed down the length of the front but not the back. It doesn’t seem to have stretched much on the bias at all, although the sides were for some reason distinctly shorter than the front and back. I trimmed down the front half of the circle to match the side length, but left the back, as even I have enough booty to make it appear shorter at the back. Probably it doesn’t look as perfectly even as it could (still a bit short at the back, actually) but, y’know, whatever.

The horsehair braid was fun, despite the fact that I couldn’t find any as yummy and wide as Gertie’s (as it was it took me two different Fabriclands to find the 1″ width). I followed her tutorial quite closely anyway, and managed not to singe off my fingers or melt the nylon braid, so life is good—but I I would still have preferred wider braid. Ah, well. Time to start hunting for an online source, I guess.

Horsehair braid---sadly I could only find up to 1" thick

Oh, and I recently splurged on a point-presser/clapper, urged on by MPB’s list of “tools you won’t want to be without” (relatively few of which I actually own). And, y’know, it’s awesome. I used the clapper-part like crazy in the making of this skirt and I am truly impressed by how much it improves the edge of the press. Who knew? (Okay, I know the rest of you knew already… these things I tend to have to figure out for myself.)

So now I am working on a vest to go with this, assuming that will work out and not just look funny, and I may nibble on that mini-wardrobe-capsule (that’ll be a first!) as well, assuming I can find the stamina to tackle another Lady Grey. I tried the skirt with my grey blazer, though, and it looks like crap—it needs something with a flared peplum, or at least a much shorter one. You can see all the photos here.

For the next circle skirt (the purple), I want to do a yoke of some kind, maybe princess seamed, so I don’t have that awful waistband right at my waist. But that requires a bit more fitting and I haven’t quite gotten that far yet…

26 Comments

Filed under Sewing

An interview

My mom and I, Fall 2009 (in Cambridge, UK, of all places...)

This is an interview with my mother, inspired by numerous discussions we’ ve had about ‘sewing—then and now’. All the in-person sewing instruction I’ve had came from her, and it made me curious about where and how she acquired it. My mother grew up in rural Saskatchewan in the 1950s and 60s, and learned to sew in part in the home and in part through 4-H and high-school (Grade 9 Home-Economics, after that she took Typing.) She never was a professional seamstress, but she knows her stuff, and I think her experiences are probably typical of the home sewists of her generation, at least in our area. I know I love talking with her about it, and comparing how things have changed—or not.

I’ve inserted a few of my own observations in italics where relevant :).

Were you exposed to sewing in the home growing up?

Yes, my mother sewed. She sewed clothes for my sister and I. I remember plaid skirts,when we were about 4/5/6, which I think she sewed, Hallowe’ en costumes (a leopard for me and a white rabbit for my sister, age 5/6), ‘ Davey Crockett’ jackets out of a light tan, light-weight twill, complete with ‘ fringes’ cut from light-brown vinyl (about age 7/8), ‘ sailor’ dresses of mid-blue cotton, with white sailor-collars with embroidered red anchor accents, white cuffs on the short sleeves (age 8/9) (I think those dresses are still in the tickle trunk at my Grandma’s. We wore them when we were kids, too, for dress-up), rag-dolls, complete with clothing (when we were very young, pretty much babies). She must have done most of it on a treadle machine.

How did you and your peers view sewing? What about the older generation?

I think we viewed sewing as a way of acquiring items that were considered ‘ not essential’ . We purchased everyday clothing, usually from a mail-order catalogue (Eaton’ sor Simpson’ s-Sears), or on a late-August-before-school-started, one-day shopping excursion to the nearest city, an hour’ s drive away. We purchased winter outerwear,although I think my mother sewed me a wool coat with a rabbit-fur collar and matching leggings, when I was about 2. (I have seen the photos of me wearing it. I think she had made it). If we wanted a ‘ special’ dress to wear to some event, or if we wanted to alter anarticle of clothing, we sewed.
I think that my mother’ s generation embraced ‘ ready-to-wear’ clothing, although theycontinued to sew those items considered non-essential. They also did a lot of mendingand patching to keep every-day clothes wearable.

How, and from whom, did you learn to sew?

My sister and I must have learned to sew from our mother, who would have taught us the basics, (eg. seams, seam allowances). We received a hand-cranked, child’ s sewingmachine one Christmas (age 8/9), and used it to make doll’ s clothes. I don’ t know if wehad patterns, or drew them up ourselves. I remember my mother saying that her mother, years before, had drafted her own patterns. I started 4-H at age 10, and that first year, took the ‘Let’ s Entertain’ project, where we sewed and embroidered a cotton ‘ tea-apron’ ,
fringed the edges of a small ‘ tea-cloth’ , learned to set a table, and made ‘ tea-sandwiches and dainties’ . This would have been my formal introduction to sewing.

On what kind of machines?

I remember learning to sew on a treadle machine. To be most effective, you place one foot ahead of the other on the treadle-plate, and alternate foot pressure back and forth(a bit like riding a bike), rather than rocking both feet back and forth. It makes it easier to keep a steady pace. The little child’ s machine sewed with a chain-stitch, so one had to remember to pull the tail end of the thread through the loop, or it would un-ravel (I remember playing with this machine, too. I don’t think my grandma gets rid of anything!). My mother got a ‘ White’ portable about 1963. It was a straight-stitch model, which she used for everything, including mending denim work clothes, and stitching up my brothers’ hockey skates (by guiding the needle, carefully into the original holes). That is the machine I did my sewing on until I left home (and my mother still uses it!). I recall that it had a button-hole attachment that clamped the fabric, and moved it from side-to-side, tocreate an overcast stitch for the button-hole.

Where did you get your fabric, patterns, other supplies? Do you think it’s easier tofind good sewing supplies now than it was?

Our fabric, patterns and notions we usually purchased at a large department store in the nearest city (forty miles away). Some basic notions, like threads (black, white, brown, blue), buttons, maybe even elastic, was available in the general store in the nearest village (seven miles away), or perhaps in the nearest larger town (twenty miles away). One could also order fabric, etc, from the mail-order catalogues, but one could not really tell what one was ordering, other than the type of cloth (eg. cotton, print or plain, pillow ticking, woven wool – coat weight, dark red, green or black.)
With specialized stores dedicated to fabrics, patterns and supplies, it is so much easier to find what you want, in the colours and styles you want. And with the improvements in roads and vehicles, people are much more mobile, and even those living outside large cities have easier access.

What kind of finishing/techniques did you use? How do you think they have changed, if they have?

Because we sewed mostly with woven fabrics, often the only finish on a plain seam would be a pinked edge. We used French-seams on sheers, and flat-felled seams on heavy-weight fabrics where extra strength was needed (eg. work clothes). With a straight-stitch machine, there weren’ t a lot of options. We didn’ t sew with knit fabrics, perhaps because they weren’ t as available to home-sewers, or perhaps because we couldn’ t, with the machine we had. Once I bought my zig-zag machine (the Grand Old Dame), I could finish seams with a zig-zagged, overcast edge.

Did you learn about fitting?

In 4-H dressmaking, and in Grade 9 Home-Economics, we learned the basics of fitting, and of altering a pattern, based on one’ s measurements. We never got into making muslins (although, maybe we would have if we had been making something really expensive), because it was viewed as a waste of fabric and thread, as well as time. I always had a hard time with fitting, especially pants, as I always had a very short torso, with very little definition at the waist. Some of our methods for altering/fitting were rough-and-ready. For bust-line darts that didn’ t hit the right spot, we simply took up the shoulder seams (and then tried to alter the sleeve so we could set it in). For pants, we tried to fit the waist, and then tried them on inside-out, and pinned the crotch and inseams, or side seams until the fit was close enough.

Did you, at any point, feel like part of a sewing community, or was it a very solitary pursuit?

When I was growing up and learning to sew, it was more like taking classes, so there was a sense of competition, and of having to take things apart and redo them until they were right. After inserting, and re-inserting my first zipper (about 9 times) in an A-line skirt (no waist-band, faced top edge at hip-bone height), for 4-H, the fabric, a soft-pink twill, looked so dirty and bedraggled, that I don’ t think I ever wore the skirt much. When I was sewing for my own children, and my house, I had some friends who sewed, but it wasn’t exactly a sense of community. We could trade some suggestions, and did, but it was pretty minimal.

What inspired you to sew in the first place?

I don’ t think I was really inspired until I started sewing things for my own children and my home. When I first learned to sew, it was ‘a good thing to know’ , much like typing, or cooking. It was a way of acquiring items that would have been very expensive to buy, for a lesser cost. Even later, that was always there; I wouldn’ t buy brand-name blue-jeans for my toddlers, but I could sew them ‘Levi’s’ by mimicking the pocket stitching, andsewing on labels salvaged from worn-out adult jeans. And making a child’s parka and snow pants lined with ‘ Thinsulate’ was experimenting with new technology (although Inever really knew if the stuff was warm enough, since I never sewed anything from it for myself.) (I always thought it wasn`t warm enough, but then I don’t recall ever thinking my winter stuff was warm enough. It was Saskatchewan after all.)


How has your interest in sewing changed over the years? (off, on, what kinds of items, etc.)

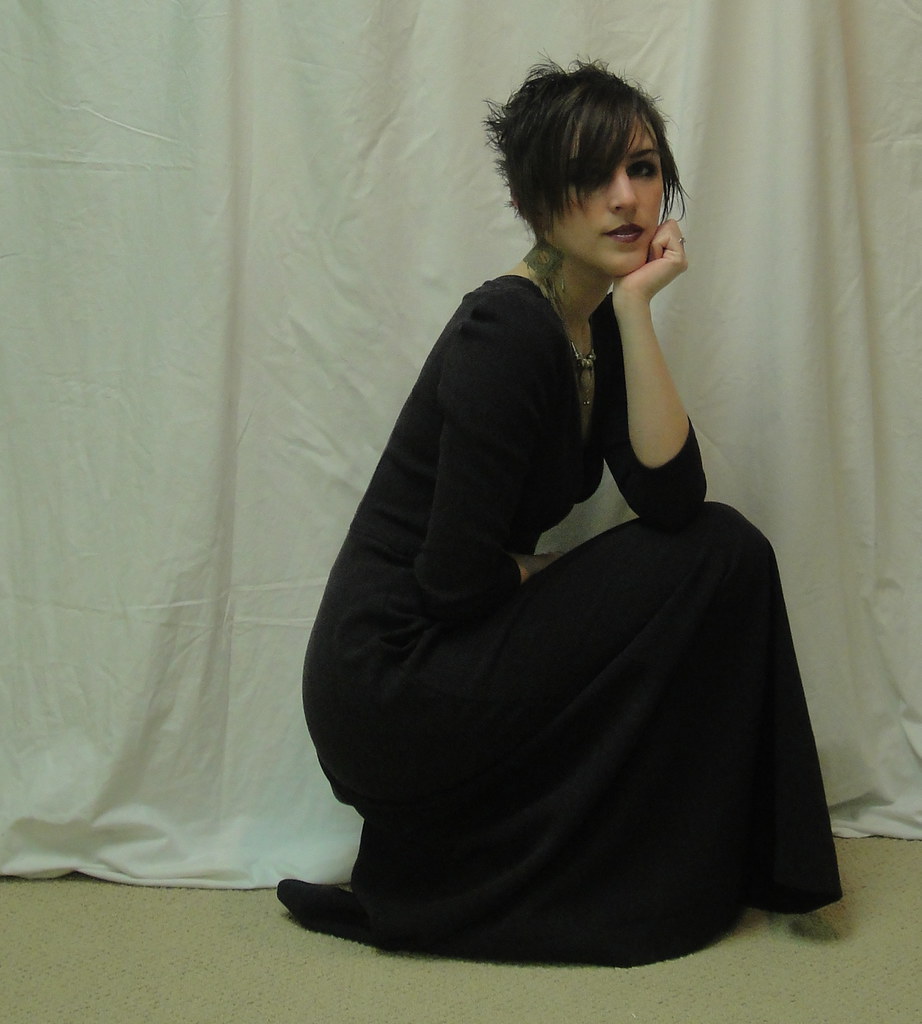
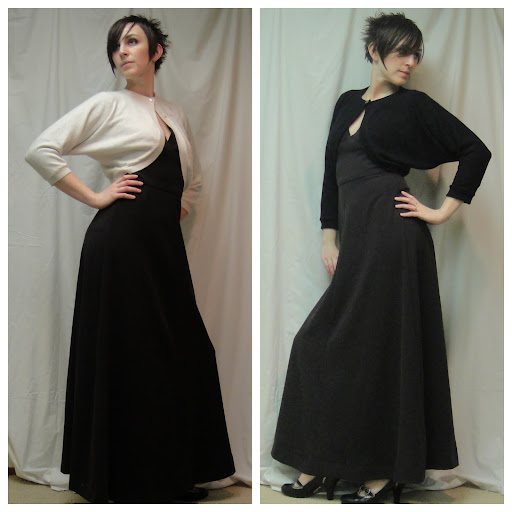
The grad dress she made. Yup, that's me wearing it. What a classic! 🙂


The things I remember sewing, at home, were the 4-H projects: the tea-apron and fringed tea-cloth, pink A-line skirt (and perhaps some kind of top?), and the graduation-dress I made in Grade 12,and which I got to wear to the Provincial Dress Review, in Regina, that summer. (They tried to teach us how to walk down a cat-walk. I would have rather goneto camp, like my sister!). Also, the cotton shift dress in Grade 9 Home-Ec. which I never got to wear, since we cut them out in the fall, sewed intermittently all winter, and by spring I had outgrown mine.

After I left home, and bought my own machine, I did sew for myself, including a long, billowy ‘garden-party’ dress, out of a yellow, dotted-Swiss fabric (I wonder where it went?), a tunic top (of unbleached cotton) which I decorated with multiple bands of machine embroidery around the neck (I think my kids have this one in their dress-up stuff), hem and short sleeves (thanks to the Grand Old Dame)-–-a reflection of my ‘wanna-be Hippie’ years, drapes for apartment windows, a long-sleeved, button-front tunic and matching gored skirt, in a rust-peach print double-knit, for my wedding ensemble. Throw pillows, place-mats with matching, mitered, hemmed napkins, sheer sash-curtains, baby and kid items, including shaped flannel diapers, blue-jeans and aforementioned parka and snow pants, sundresses, Hallowe’ en costumes (thankfully, you were never into figure-skating!) I also sewed an Edwardian Walking Skirt, from a Folkwear pattern, as an interpretive costume for a historic house-museum I became involved with, as well as those ‘ Prairie-Girl’ (Folkwear) dresses and pinafores for you. The last thing I ever sewed for you was a ‘little-house’ inspired skirt and blouse combo, in a blue-and-white flowered print, which I

Me in the `Prairie Girl`dress, age 3 or so.

cut out, but which you outgrew before I could get it sewn.
I interspersed sewing with crocheting, knitting (remember the fisherman-knit sweater that I started for you, your brother wore it, and your girls) and other crafts. I have a small collection of antique apparel, including a man’s shirt, girl’s night-dress,women’s blouses, Edwardian white summer dresses in small child and small woman sizes, shoes and boots. It is amazing to look at the detailed work that was created from very fine fabrics, with pin-tucks, lace insertions and embroidery, by hand and treadle-sewing machine. I also have a collection of antique/vintage photographs (other people’ s ancestors, as well as mine) showing clothing from about 1890 to about 1929, and several reproduction catalogues which illustrate clothing (and household goods).

Why did you ‘give it up’?

I think the main reason was that I got too busy with other things, including gardening, heritage research and interpretation, local community concerns/activities. Also, I had no dedicated place to set up a ‘sewing corner’ where I could leave everything out. The computer took over the dining room, and one really can’ t sew on the kitchen table when people want to be fed. Also, I never mastered the art of fitting, and was frustrated with not being able to produce wearable clothes that fit. I am inspired by your sewing activities, almost enough to try again. Or maybe I will teach myself how to cane chairs, or to use the ruffler-foot to make an Edwardian petticoat. (I say go for it, mom!)

Thank you, Mom, for taking the time to answer these questions and for letting me post them. I hope they’ve been interesting for the rest of you. I know some of you have probably been sewing for as long—or longer—than my mom, and have seen all the changes for better and for worse. I’d love to hear your take as well!

20 Comments

Filed under Sewing

I want horsehair braid.

In real life, this is another muted purple. Apparently my lighting completely fails to capture this colour.

I think this is the fabric that will become my first skirt for the petticoat. It’s a thrift-store find, yummy purple herringbone wool (I seem to be on a purple kick here.) But now, ah, now I am torn. So many decisions. Do I want to cut the skirt in a single piece? Do I want to try and have front and back seams on the bias, matching the herringbone? How will I mark the hem before I hem it? How do I want to hem it? Narrow hem, hem facings… horsehair braid. Sigh. I want horsehair braid. I haven’t seen it at Fabricland but it’s certainly possible I missed it.  I *really* love the look and hang of the skirts I’ve seen (pictured) using this. Second best, I guess, would be a hem facing, but it always seems like that would just take up an obscene amount of additional fabric. And then there’s a lining. I really don’t have anything on hand that would work. Do I need a lining for a skirt I’m going to put a petticoat underneath? Maybe I don’t.  Will I ever want to wear the skirt without the petticoat? Doubtful. I much prefer how they look with some pouf. Grum, grum.

On the Men’s Shirt Sewalong front,

Left, woven-stripe cotton; right, black flannel.

I have two fabrics picked out and pre-washed, though I suspect the flannel, at least, should be washed a couple more times to make sure all that pesky shrinking is taken care of (I hear flannel’s a progressive shrinker.) Both of these fabrics are black*, and by some miracle I managed to capture the texture, if not the colour, of both. The woven-stripe stuff on the left would appear much smoother if it were ironed, but to be honest, my inclination to iron my hubby’s shirts is about on par with my inclination to run a marathon. I keep thinking that it would be a worthy goal, but there are far too many more immediate and rewarding things to spend my time on. Fortunately his work supplies his uniforms, so any clothing I make will just be worn to and from work and around the house, so a slouchy, casual shirt is fine (Yes, I will press while sewing, I promise. Just maybe not ever again, after). I will make my first try from the black flannel, as it was significantly cheaper.

Butterick 3364

I’m thinking I will go with view A for the first shirt after all, as I think the seaming would spice up an otherwise terribly plain shirt. Also I noticed some hand-topstitching on a male co-worker’s shirt (anyone else in this sewalong, are you ogling menswear around you as badly as I am?) today that looked really nice. If it turns out well I might consider something like that—again, it could be a subtle way to jazz up the flannel without trying to appear formal.

I guess I should really get on, y’know, tracing the darned pattern before I get too far ahead of myself, eh?

And on that note, what I thought was going to be a super-quick fabrics post turned into half a book, so I’ll end it here.

*here’s the problem. My hubby, the light of my life, a funny, insane, delightfully stylish man, wears only three colours. Black, white, and denim**. Occasionally a small amount of red or purple, as an accent, is tolerable. Although he really doesn’t like red. He doesn’t even wear grey.

**for him, this is a colour.

10 Comments

Filed under Sewing

Frivolity

Fluffy!

There’s room for a little silliness in life, right? (And considering what some of you out there are going through right now, there’s room for a LOT of silliness in my life.)

This petticoat is in clear and present violation of the mission I set myself when I began this blog, which was to create clothing that I would wear on a daily basis.  At the moment, it will join several other cream and lace pieces in the side of my closet that holds the “fun clothes”. Y’know, the old clubwear, goth gear, formal attire, stuff that gets an airing once or twice a year at most. (This doesn’t even count the actual dance costumes, which are all in the basement.) The best I can hope for is that its presence will spur me to create some circle-skirts or things of that nature to wear it with. Once, y’know, it stops being winter. Well, serious winter. Skirts can still be worn in mild winter, but it takes greater fortitude than I possess to wear them in real cold.

So, construction. Erm. I had, y’know, mentioned Sugardale’s tutorial. Which is a great tutorial. I used, well, the part where she uses ribbon to cover and finish her seams.

I started with the same basic measurements she used—22″ finished +2″ SAs=24″ skirt /3 tiers = 8″/tier.

Then I looked at my tulle, which I knew I wanted to be the bottom tier. I had enough for about four 8″ strips, each about 2.5m long, I thought. Which would give me enough for 10m on my bottom tier. It didn’t seem unreasonable as Sugardale suggested 8m for the bottom tier. (A basic tiered skirt for tribal bellydance is a 10-yard skirt, that is, like mine, it has 10 yards/m at the bottom. Yes, I know that a metre is longer than a yard, and the difference adds up to quite a bit once you have 10 of them. Hush, this conversion is the least of my problems. Of the two full-size ones I’ve made, one is about 22 metres at the bottom, the other is probably around 40-some… it is very, very, very, very full)

To start I edged the bottom of the tulle with ribbon and my “new” gathered lace. This took forever. The key to tiered skirts is to always start with the bottom tier—not only is it easier, but you will never have the stamina for that massive tier if you start at the top. Once I had the lace attached, I realized that my tier was more like 14″ than 8″.

So I decided to fold it over and have a double-length for the bottom. Extra fluffy!

Then, I broke out the ruffler foot.

I have mentioned this contraption briefly before, but I don’t know if I’ve ever gone into the full, detailed complexities of my relationship with this particular sewing machine foot.

To begin with, it is, quite simply, the most terrifying foot concoction imaginable. I suspect that those vintage buttonholer attachments are more frightening in their inner workings, but at least they tend to have it all neatly contained within that plastic casing.

Once you figure out how to attach the ruffler foot to your machine, it’s actually relatively simple. The up-and-down motion of the needle drives a sharp bit of metal back and forth, causing fabric threaded through a particular part of the foot to bunch up. How much it bunches per stitch is controlled by a little screw; another little lever adjusts whether the gathering takes place on every stitch, or only once per so many stitches. This means you can technically use the foot for making pleats as well, and control your gathering ratio quite precisely. Fabric tension and stitch length also play a role.

In practice it is… fiddly.

Now, I first wrestled the ruffler foot on my mother’s machine, which, I have

come to realize, is a prince among ruffler feet as well as a prince among machines. With a certain amount of experimentation I determined the settings I wanted, and, based on a foot-long sample, figured I had the ruffle ratio set to 2:1.

When I finished ruffling the first tier of my first tiered skirt, I realized the final ruffle ratio was more like 4:1. As a result several of the nine tiers in that first skirt (never let it be said that I’ve shied away from complex projects!) have no gathering at all. Still, I managed to pull the skirt off and was quite thrilled with it. Here’s a pic in action. And anything beats trying to hand-gather 40m+ of fabric

When I moved away from my hometown, my mother generously bought me my sewing machine as a going-away/Master’s degree present. The one attachment I requested was a ruffler foot to go with it.  As I discovered when I made my second tiered skirt, the differences between a vintage, quality attachment and a cheap modern generic version are subtle but substantial. The metal is just that little bit thinner, the edges sharper (which tends to cut fabric and threads when things get the least bit out of alignment. And something about the vibrations it generates (maybe because they aren’t anchored by the massive weight of my mom’s old machine?) makes things come loose. Like the needle. Or even the whole foot (at the part that screws on to the leg, not the little snap-on part). I’ve never been able to make my ruffler foot do anything other than gathers, and the control on the amount of gathering is rudimentary.

Apparently in tulle, it’s nonexistent. To ward off the machine’s tendency to eat the tulle, I gathered it to a length of ribbon. Once I figured out how to arrange this properly it wasn’t so bad, but for whatever reason the stitch-lengths were minute, and completely insensitive to my twiddling with the set stitch length. So instead of gathering at a nice 2:1-or-thereabouts ratio, it gathered my entire strip of doubled tulle into just over 2m. Not the 4-5m range I was looking for.

D’oh.

I had originally intended to have the top tier be about 2m, attached to an elastic casing of similar size. Obviously not going to work when I need at least one more tier in there.

A completely inadequate attempt to demonstrate this gathering method.

So I made a second doubled tier, in the hopes that it would fill out the second tier a bit above that crazy-full bottom tier, added more lace, and used the zig-zag-over-supplementary-thread method to gather it. This is the absolute best method available (to me) for gathering moderate to large amounts of fabric where you still need a fair bit of control over the ratio. (The ruffler foot is wonderful for doing the gathering for you—evenly—but limits your control. Or my control, anyway.) Note: I don’t have and have never used one of those “gathering feet” so I can’t compare. Maybe it would kick my method’s butt. Anyway, all you do is zig-zag OVERTOP of another thread (I like to use dental-floss), and then afterwards gather up your other thread/floss; the zig-zag acts as a kind of casing. Unfortunately, on this sheer fabric I decided to try using a clear monofilament-type thread for the supplementary thread, since the only dental floss we have right now is the psycho-expensive stuff the kids like and I’m not using that for sewing. While it works fine, it’s too slippery, so the gathers slide around and don’t stay put as well as I’d like. Only exacerbated by my fabric, which for the upper tiers was this godawful poly-chiffon stuff that I scavenged from my step-brother-in-law’s wedding decor summer before last. It’s the same fabric in the ruffly sheer JJ.

I really liked using my smocking-stitch on top of the ribbon when securing the seams. It gives it a nice, lacy texture, as well as finishing everything off nicely.

I’m realizing belatedly that I should’ve gotten more close-ups illustrating the way the tiers are doubled, which is a little nifty, if I do say so myself, but it’s late and this post is already hella-long and I’m too tired to bother right now. Sorry :(. Also, do you note the total lack of my vintage lace on the finished project?!? I didn’t have enough for the hem yet I didn’t want to attach it higher up where it would never, ever show. So now I don’t know what to do. Maybe save it for finishing a skirt lining that would go over the petticoat?

28 Comments

Filed under Sewing

I was going to wait

until the little coat was done. But, as usual, I am impatient. And Syo was eager to model. Really, she twisted my arm.

So here it is, sans lining hem and buttons. With the puffy fleece lining it’s a bit snug on Syo, which is a good sign, although the sleeves, which I folded up a trifle more than strictly suggested by the pattern, are just right, so they will be quite long on Fyon.

Erm. Perhaps next time we’ll comb hair before the modelling sesh…

Also, did I mention I am dreading the buttonholes?

8 Comments

Filed under Sewing

Curveball

Coat, interlining, lining

I feel a little unpatriotic for picking a baseball over a hockey metaphor. Oh well. Progress on Fyon’s coat was continuing incrementally but steadily (holidays are definitely over) until last night I realized that the coating fabric really should’ve been underlined. It lets a bit too much light through to be lined with light fleece. WHOOPS! Fortunately I had purchased just over two meters of black cotton flannelette the other day for a (hopefully) wearable muslin of my sweetie’s shirt. But there was just over 2m left on the bolt, which I was worried would not be enough for a man’s shirt after flannelette’s notorious shrinkage. So I guess it can become girl coat underlining, and I’ll pick up some more. It’s not like it was expensive. Of course, the other problem here is that I have already constructed both shell and lining. So I guess the “underlining” will be more of an interlining. On the upside, flannelette is such a dream to cut and sew that I almost don’t mind the extra work.

One cute little collar, coming up.

The collar is also sewn and steamed, for whatever good that will do. 😉 I think I am starting to get the hang of the whole turn-of-cloth thing, for collars like this, anyway. Also getting a bit better at those tight corner curves… A little bit, at least.

I fought off the temptation to try and machine-blind-hem, mostly because I wasn’t confident I could get the crease out after, as I’m trying to avoid hard pressing on this spongy fabric. So it has a hand-stitched outer hem, anyway. I think I will check out Gigi’s post on finishing hem/facings to see if I can make head or tails out of it. Usually my lack of precision is hampering in these areas and I compensate with lots of hand stitching, er, couture detail.

Oh, and I remembered to put in a label and hanging loop! This ribbon is perfect for

Label and hanging loop

the coat—although I’m not convinced how sturdy it will be. Ah well. Odds of small fingers managing to use the loop even if it is there? Minimal, I’d say. Anyway, all that remains is hemming the lining, attaching the collar, and attaching lining/facings to coat. Not necessarily in that order.

I have a feeling my next “for me” project will be the fluffy petticoat. I seem to have fallen off the “practical clothing” bandwagon this year (so far. Maybe because my wearable wardrobe is no longer critically low, or maybe because, like everyone else, I’m just sick of winter sewing (although this

Fluffy petticoat supplies

doesn’t explain the continued coatitis). But the materials have been building for ages—the chiffon (background, left) since Aug. 2009, the idea since sometime in the summer of 2010, and the whole spool of gathered lace (top left) appearing at Value Village last weekend seems to have pushed things over the top. Now, making a tiered skirt is dead easy—this is ultimately just a shorter version of the tiered dance skirts I’ve made several times now, on various scales. But I really like Sugardale’s tutorial because of how she uses ribbon to finish the seams, so I’ll be going that route. Zena has another method that produces nicely-finished results, more for dance skirts (hers are like better-made, better-finished versions of mine). And I will have to consider how to use the vintage lace with the coral flowers. I would have used it on the lower edge but there’s only 4m, and 4m is not a full enough hem for a petticoat.

Just for the record, I have no skirts at all to wear with said petticoat. Yet. But then I’ve been thinking about a circle skirt since summer and been disinclined to make one because I only like how they look with petticoats under. Chicken and egg. But I’ve decided that the petticoat will be my egg, and hopefully once it’s done chickens will ensue. Yeah. If that makes any kind of sense at all.

But first… I have a little coat to finish.

5 Comments

Filed under Sewing

Attack the pink fluffy bunnies

Attack of the pink fluffy leopard print bunnies

Well, I have started work on the coat for my older niece. This is my first experience sewing with fleece and it’s, well, interesting. For one thing it’s filled my house with tiny pink blobs of fluff, which are getting EVERYWHERE. For another it seems to combine the annoying qualities of knits with the annoying qualities of velvet. Joy.

The pattern is McCalls 3374, a thrift-store find back at the start of my sewing adventure, just over a year ago now. As a bonus it came essentially un-cut, with the size 3 fully traced out and part of a size four. I traced the rest of the size four for Syo’s coat last winter, so this time I have no tracing to do! Whee!

This may be another exercise in “looking past the envelope” as the envelope cover

McCall's 3374

has a lot of fun-fur, fleece, and animal print. Despite the above rant about fleece, the fleece is strictly for the lining. My outer shell is black and sparkly “boiled wool camry blend” (a completely different fabric, however, than the stuff of the same name that the Russian Princess coat and my Czarina coat were made of. They were a knit, dense and felted. This stuff is a woven, tends to fray, and reminds me of boucle in its thick individual yarns.) It would’ve benefited from block fusing, but I am far too lazy to go there in coats for preschoolers. I did preshrink with wet towels in the dryer, which reduced the width by a good 10cm (4″) so I’m glad I did.

Coat shell

This first coat is for my four-year-old niece (let’s call her Fyon henceforth); she was also the recipient of the twirly Popover Sundress last summer. I decided against cutting out both coats at once as I was pretty sure that would inevitably result in me sewing size 4 sleeves onto a size three front or something. I will note here that the size four still fits Syo fine, so it will be plenty roomy on Fyon, although their size gap is not as extreme as you might expect from the three years between their ages, since Syo is a compact model, possibly even a Smart Car, while Fyon is more

Fuzzy pockets!

of an SUV type.

The best thing about this pattern is that the (very flat) sleeve caps have almost no ease, so they’re a cinch to put in flat. This makes for very quick construction (and I promise I’ll grab a photo of that stage on the next coat.)

I decided to cut the pockets out of the fleece, which will make them absolutely yummy to stick your hands in. This time, I knew enough to make the seam from coat to pockets narrower, so the fleece rolls nicely to the inside, unlike the last time I sewed this coat.

I debated about foldover cuffs, since I’m not overly thrilled with how this part of the pattern is drafted, but they do look so much more finished than just a plain sleeve ending. (Tabs do too, but I’m much too lazy to draft a tab for these coats.) I had considered interlining the coats, as well, but decided the fleece is bulky enough. It was the

Foldover cuffs. I love the texture of this fabric.

thickest, softest stuff we could find at Fabricland’s new-years sale (still expensive even at 50% off). I think there’s enough left over for an itty-bitty scarf, too. I had debated making the collar and cuff-fold out of it, but I really wanted to keep the outside of the coat “serious” (except for that hint of sparkle) (probably I wouldn’t’ve had enough fleece, either). Hopefully the girls won’t find the wool collar and facings too scratchy; it doesn’t feel scratchy to me, but it’s certainly not as wonderfully soft as the fleece.

Note to self: you forgot to cut out the back neck facing. Also, don’t forget to add one of the Bookemon & Ebichu labels and a hanging-loop before you sew on the lining/facings.

The pattern is inexplicably unlined, but I’ve just used the same body pieces for the fleece. I considered adding  a back-pleat, but I don’t think it’s necessary with the stretchy fleece. Next step: assemble the lining and facings (I will just topstitch the facings down on top of the fleece).

One Eyed Jack (left), Bandit (centre), Tigger (right)

In sadder news, we got up this morning and discovered One-Eyed Jack, the smallest and hardiest of our goldfish, was missing from the tank. I soon found him on the floor by the couch, where he had leapt to his doom. The smallest of our fish, he was still a good 6″ long, and had survived the Great Filter Malfunction of 2009, a 600-km migration in a glass jar in 2007, and a brutal cichlid attack that cost him his left eye (and gave him his name) probably sometime in 2006. Not to mention nearly four years of my rather indifferent fish care. I honestly thought he would be the last of our dwindling fish to survive, but I hadn’t counted on his adventurous nature. Usually he was a bottom-hugger, as his one-eyed state made it hard for him to find food until it had settled on the bottom. Tyo was stoic (her best friend’s dog died of an accident on the weekend, so compared to that the loss of a fish may be minor), Syo was stricken and still crying when I put her on the school bus, and I was a lot more freaked out than I should’ve been. Jack is now in a box in a freezer to await burial in the spring. He’s too special to just chuck in the garbage like the other goldfish we’ve lost.

10 Comments

Filed under Sewing