Thanks to COVID-19 it was a very strange, sad year to graduate high school. Syo (now seventeen, not seven) missed out on a lot this year—school musical, dance classes, Pom and cheer, and while our schoolboard never did shut down in person class this year, there has been a system of alternating days to keep the in-class numbers low, so there’s many friends she hasn’t even seen at class all year.

The one thing we were determined to make as normal as possible—a proper, handmade grad dress.
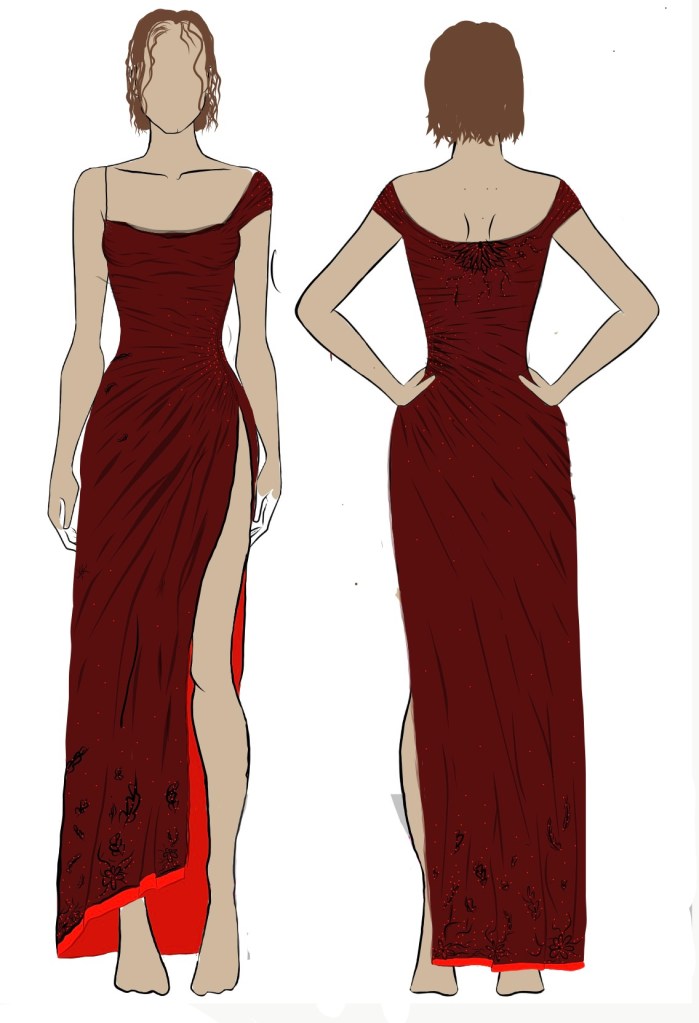
We started off strong. Syo did a concept drawing last fall and we purchased fabric back before Hallowe’en. Over Christmas we began making mock-ups, first perfecting a strapless knit “block” that fit to her liking, and then testing several iterations of the cowl-like neckline she wanted.
And then in March, staring down the barrel of the “last mock up,” it was confirmed that there would be no big grad ceremony as our region entered its third wave of the pandemic. And we both lost steam. Even though I had told both her and myself that she deserved the dress with or without the ceremony or the party.
But finally, in early June, I put on my big girl panties and asked if she really wanted to finish it. And she did.
Commence panic.

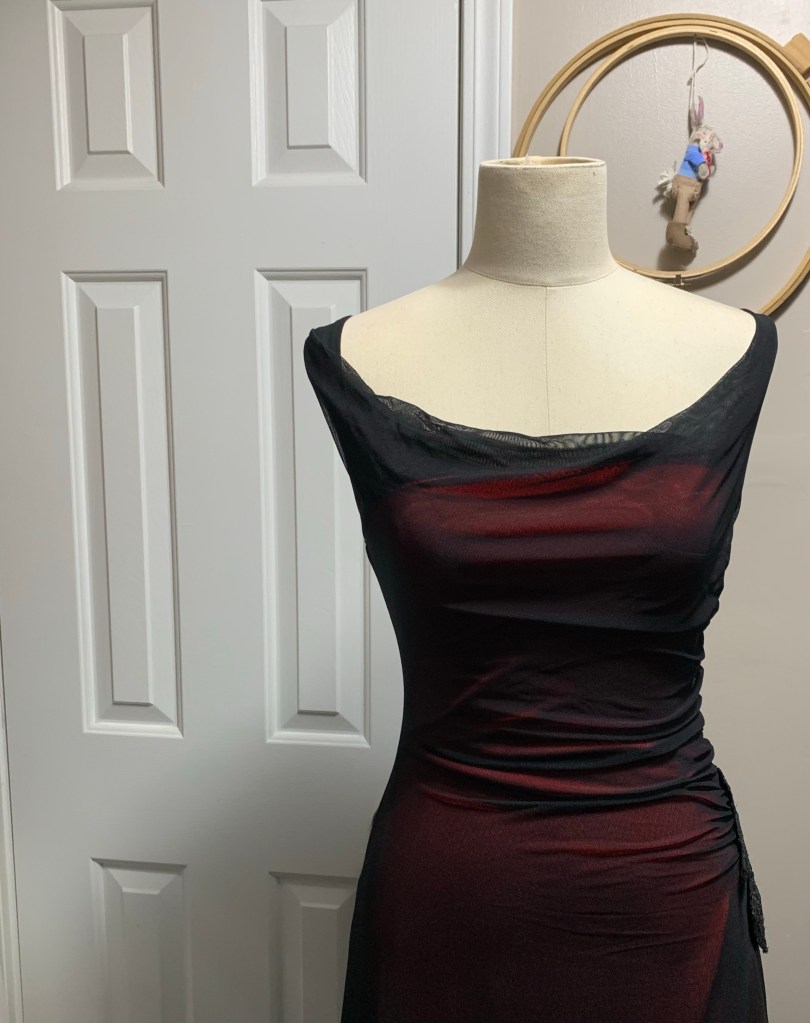
We had to draft the final pattern. Half-circle full length skirt, in one piece with an asymmetrical bodice with ruching on one side only. The skirt wound up being too wide for the fabric. We were able to narrow it slightly for the red under layer, but the problem was much bigger for the black mesh overlay, which was a slightly narrower fabric with an even bigger pattern piece in the front. (In the back we added a CB seam to compensate)

This is where I made my biggest mistake. I should’ve just let the pattern hang off the edge of the fabric and cut the full length. Instead, thinking it would be covered by the lace, I made the decision to skip the bottom most portion of the front skirt. This did not work out—thé degree of coverage of the lace’s mesh was much less than the stretch mesh, so we had to add a big piece of stretch mesh to the bottom. Syo is less bothered by it than I am, fortunately. And actually, when it’s on and the skirt is draping in its folds it’s not at all noticeable.
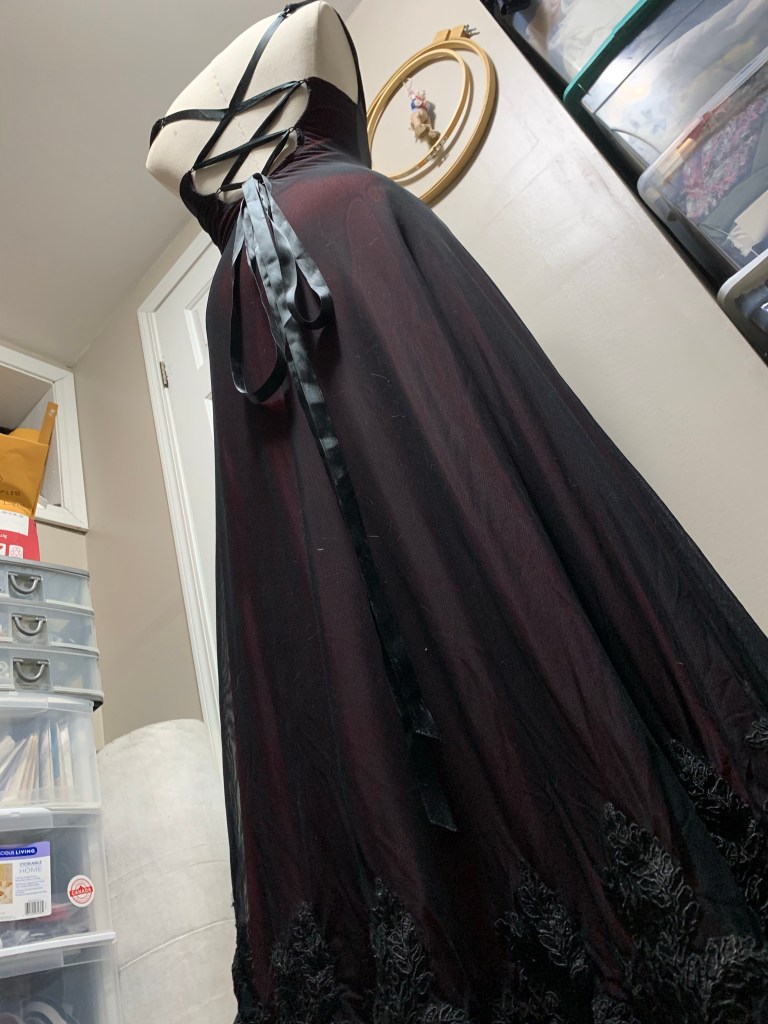
There were a few other hiccoughs in construction. She really wanted to be able to move the straps either up onto her shoulders or draping down off of them, which is fine but wasn’t working out with the back portion of the strap, so at the last moment we had to cut that off. And her desire for a cut-out back with lacing (absent in that original sketch, you may note) made EVERYTHING more complicated.

The back-lacing ribbon extending to attach to the straps (with a black lingerie ring to look fancy although they’re not really visible) was a last minute remedy, and I think it works well even though it wasn’t part of the original vision.

And yes, it’s one of the most striking features of the finished gown and I didn’t get ANY actual pictures of it on her on the Day?!?

It took a fair bit of fussing to get the side gathers right, and the weight of the lace on the hem pulled them down in a way not really intended.
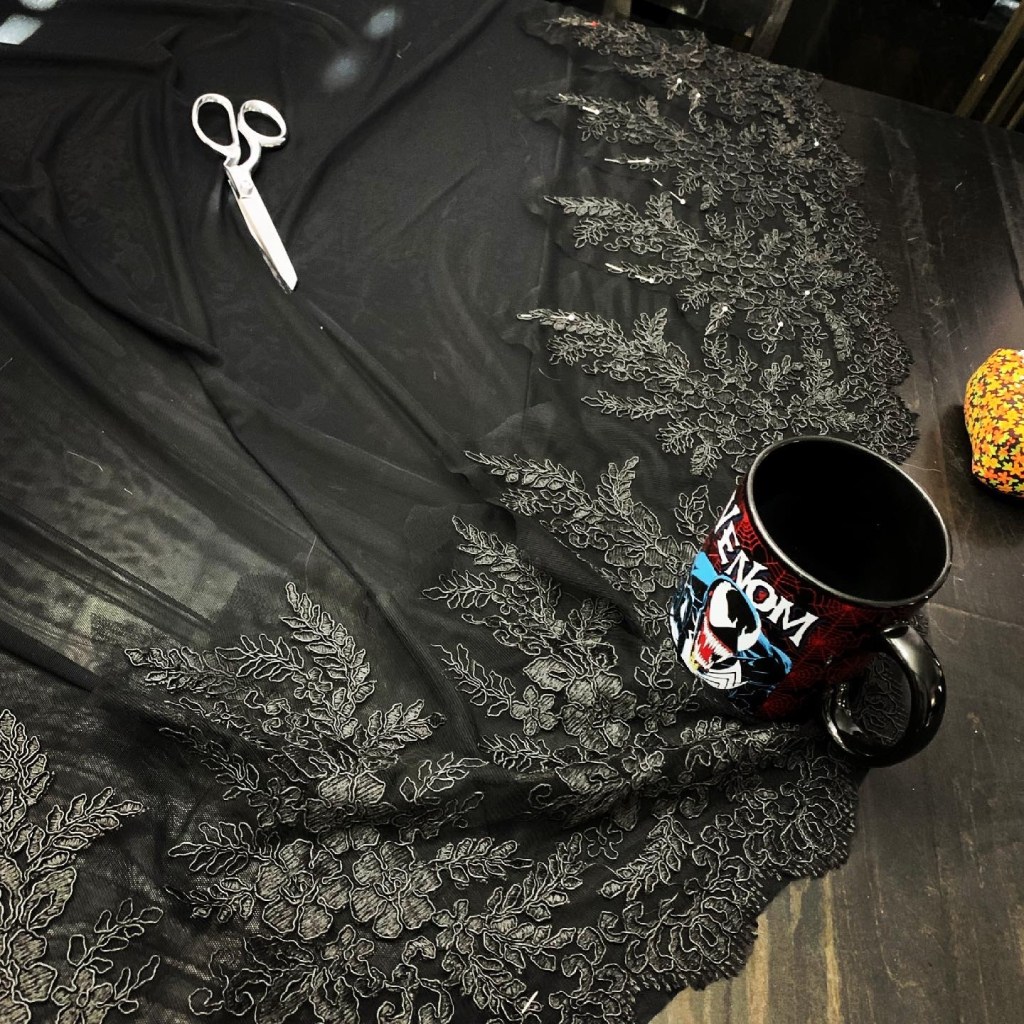
The biggest and hardest part, though, was appliqueing the lace on to the bottom of the skirt. It was a full-width lace fabric, and I had originally expected to use rather more of it than just the wide scalloped borders, but it became obvious that it was going to be much simpler to fit just the border to the curve (there was still a lot of snipping and overlapping) and then appliqué isolated lace medallions trailing up the skirt after. Although that last bit did not happen due to time constraints.

I’ve done lace-play a couple of times before, and it’s incredibly fun to mix, match, and reshape motifs into the shape you need. But the scale of this, and the tight time constraint, was new. Not to mention the fact that I would be appliqueing non-stretch lace into a stretch mesh.

Placement was the first issue—the weight of the lace pulled down on the stretch mesh so that I had to raise everything at least an inch from where it “should” have been. Getting everything as flat as possible was the second issue, and there are still areas that ended up stretched and puckered despite my best efforts. In hindsight, backing the whole thing with a layer of wash-away stabilizer might have been helpful, but I didn’t think of that until I was well into the weeds. Or or having the time to hand-baste everything, but see above about time crunch.

As it is, I did my preliminary placement on the dress form and then refined and smoothed things out as I went along. We’ll just pretend it adds texture and depth to the lace.

We had to ditch the idea of further lace medallions scattered up the skirt due to time, but I did add fusible interfacing to a lace motif to make an appliqué for the top of the skirt slit.

When one is playing with lace, you have to go for it, so we also added little lace motifs to her shoes and, of course, a mask. (This involved some last minute hand-stitching the morning of.)

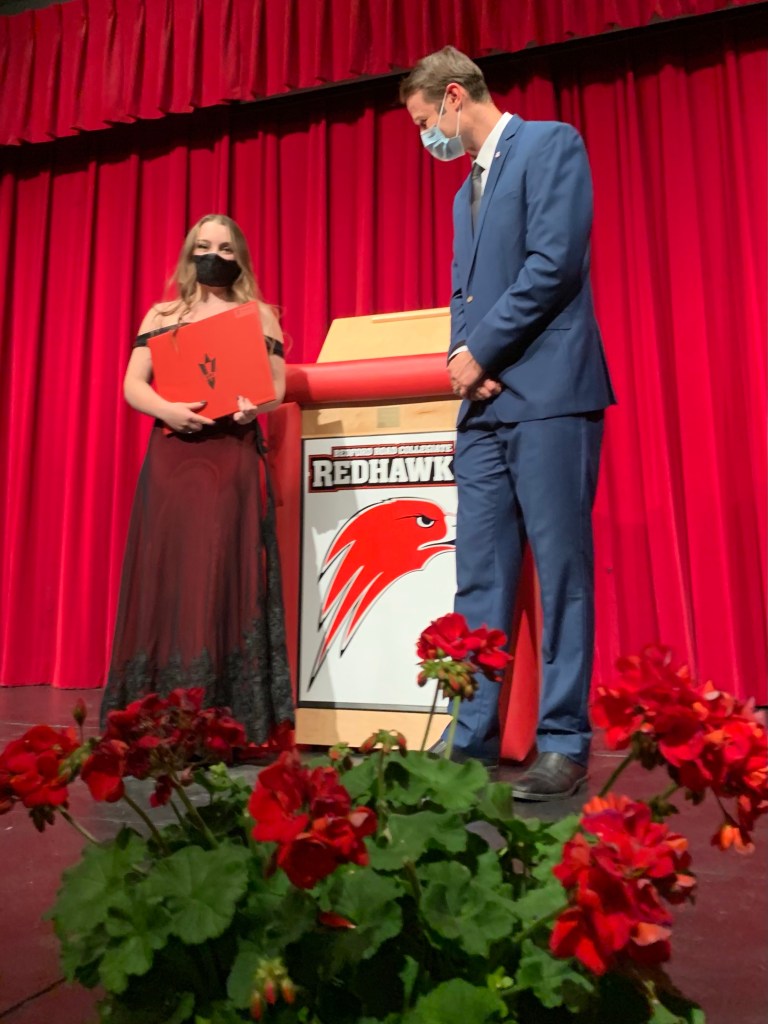
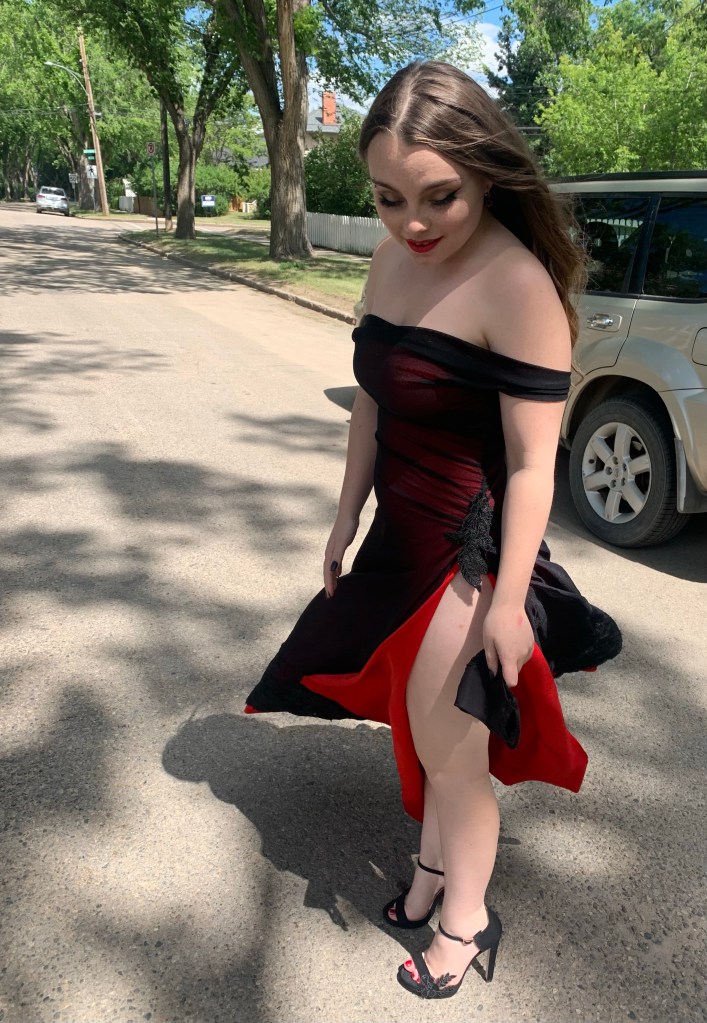
The graduation ceremony was modified into a kind of conveyer-belt style where each grad and family group was moved in in turn, and each got to walk across the stage and receive their diploma from the principal, one by one. It was more than I expected, frankly, and what it lacked in gravitas was made up for in photo-ops, although Syo may not feel the same.

The biggest problem in the end was that the weight of the skirt pulled down on what is, essentially, a strapless knit dress. I’m not sure how we could anchor it better, however, as it’s hard to add a waist stay to a knit (power mesh panels?) without creating bulges.
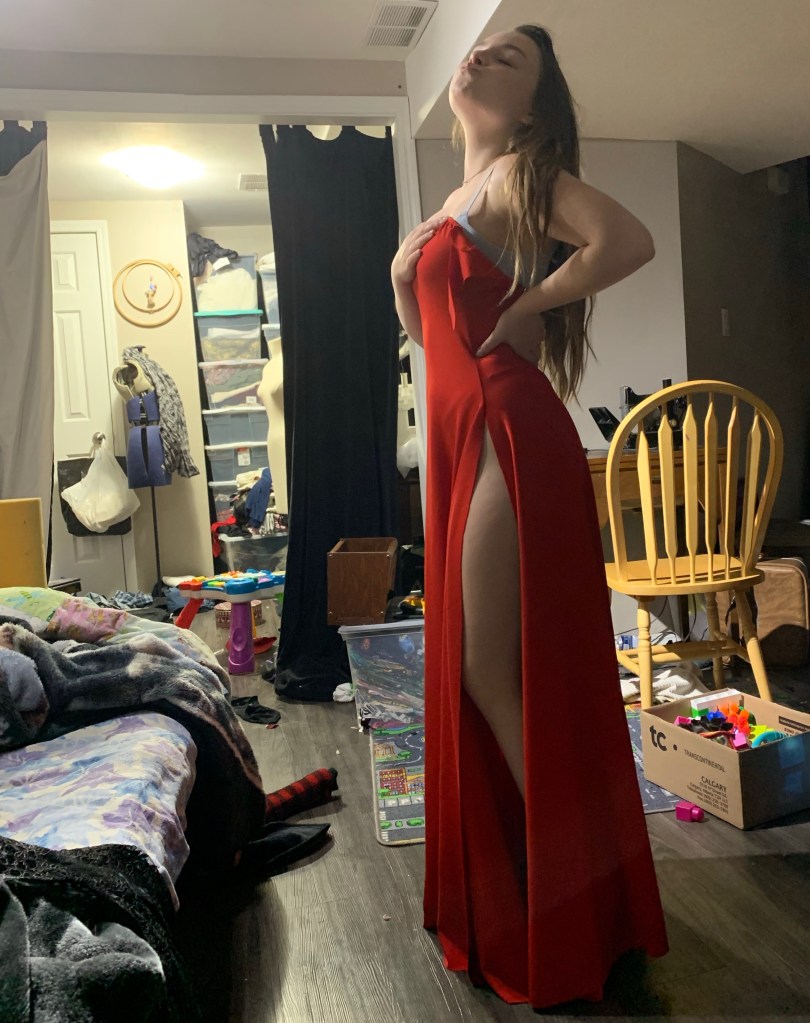
Anyway, she got many gorgeous photos although I didn’t manage to take any of the back! and I didn’t manage to capture the details of the dress all that well. But the best one remains this snap of her looking at Tris, taken just as we left for the ceremony.

 In my head, I’m calling this the Into The Woods Dress.
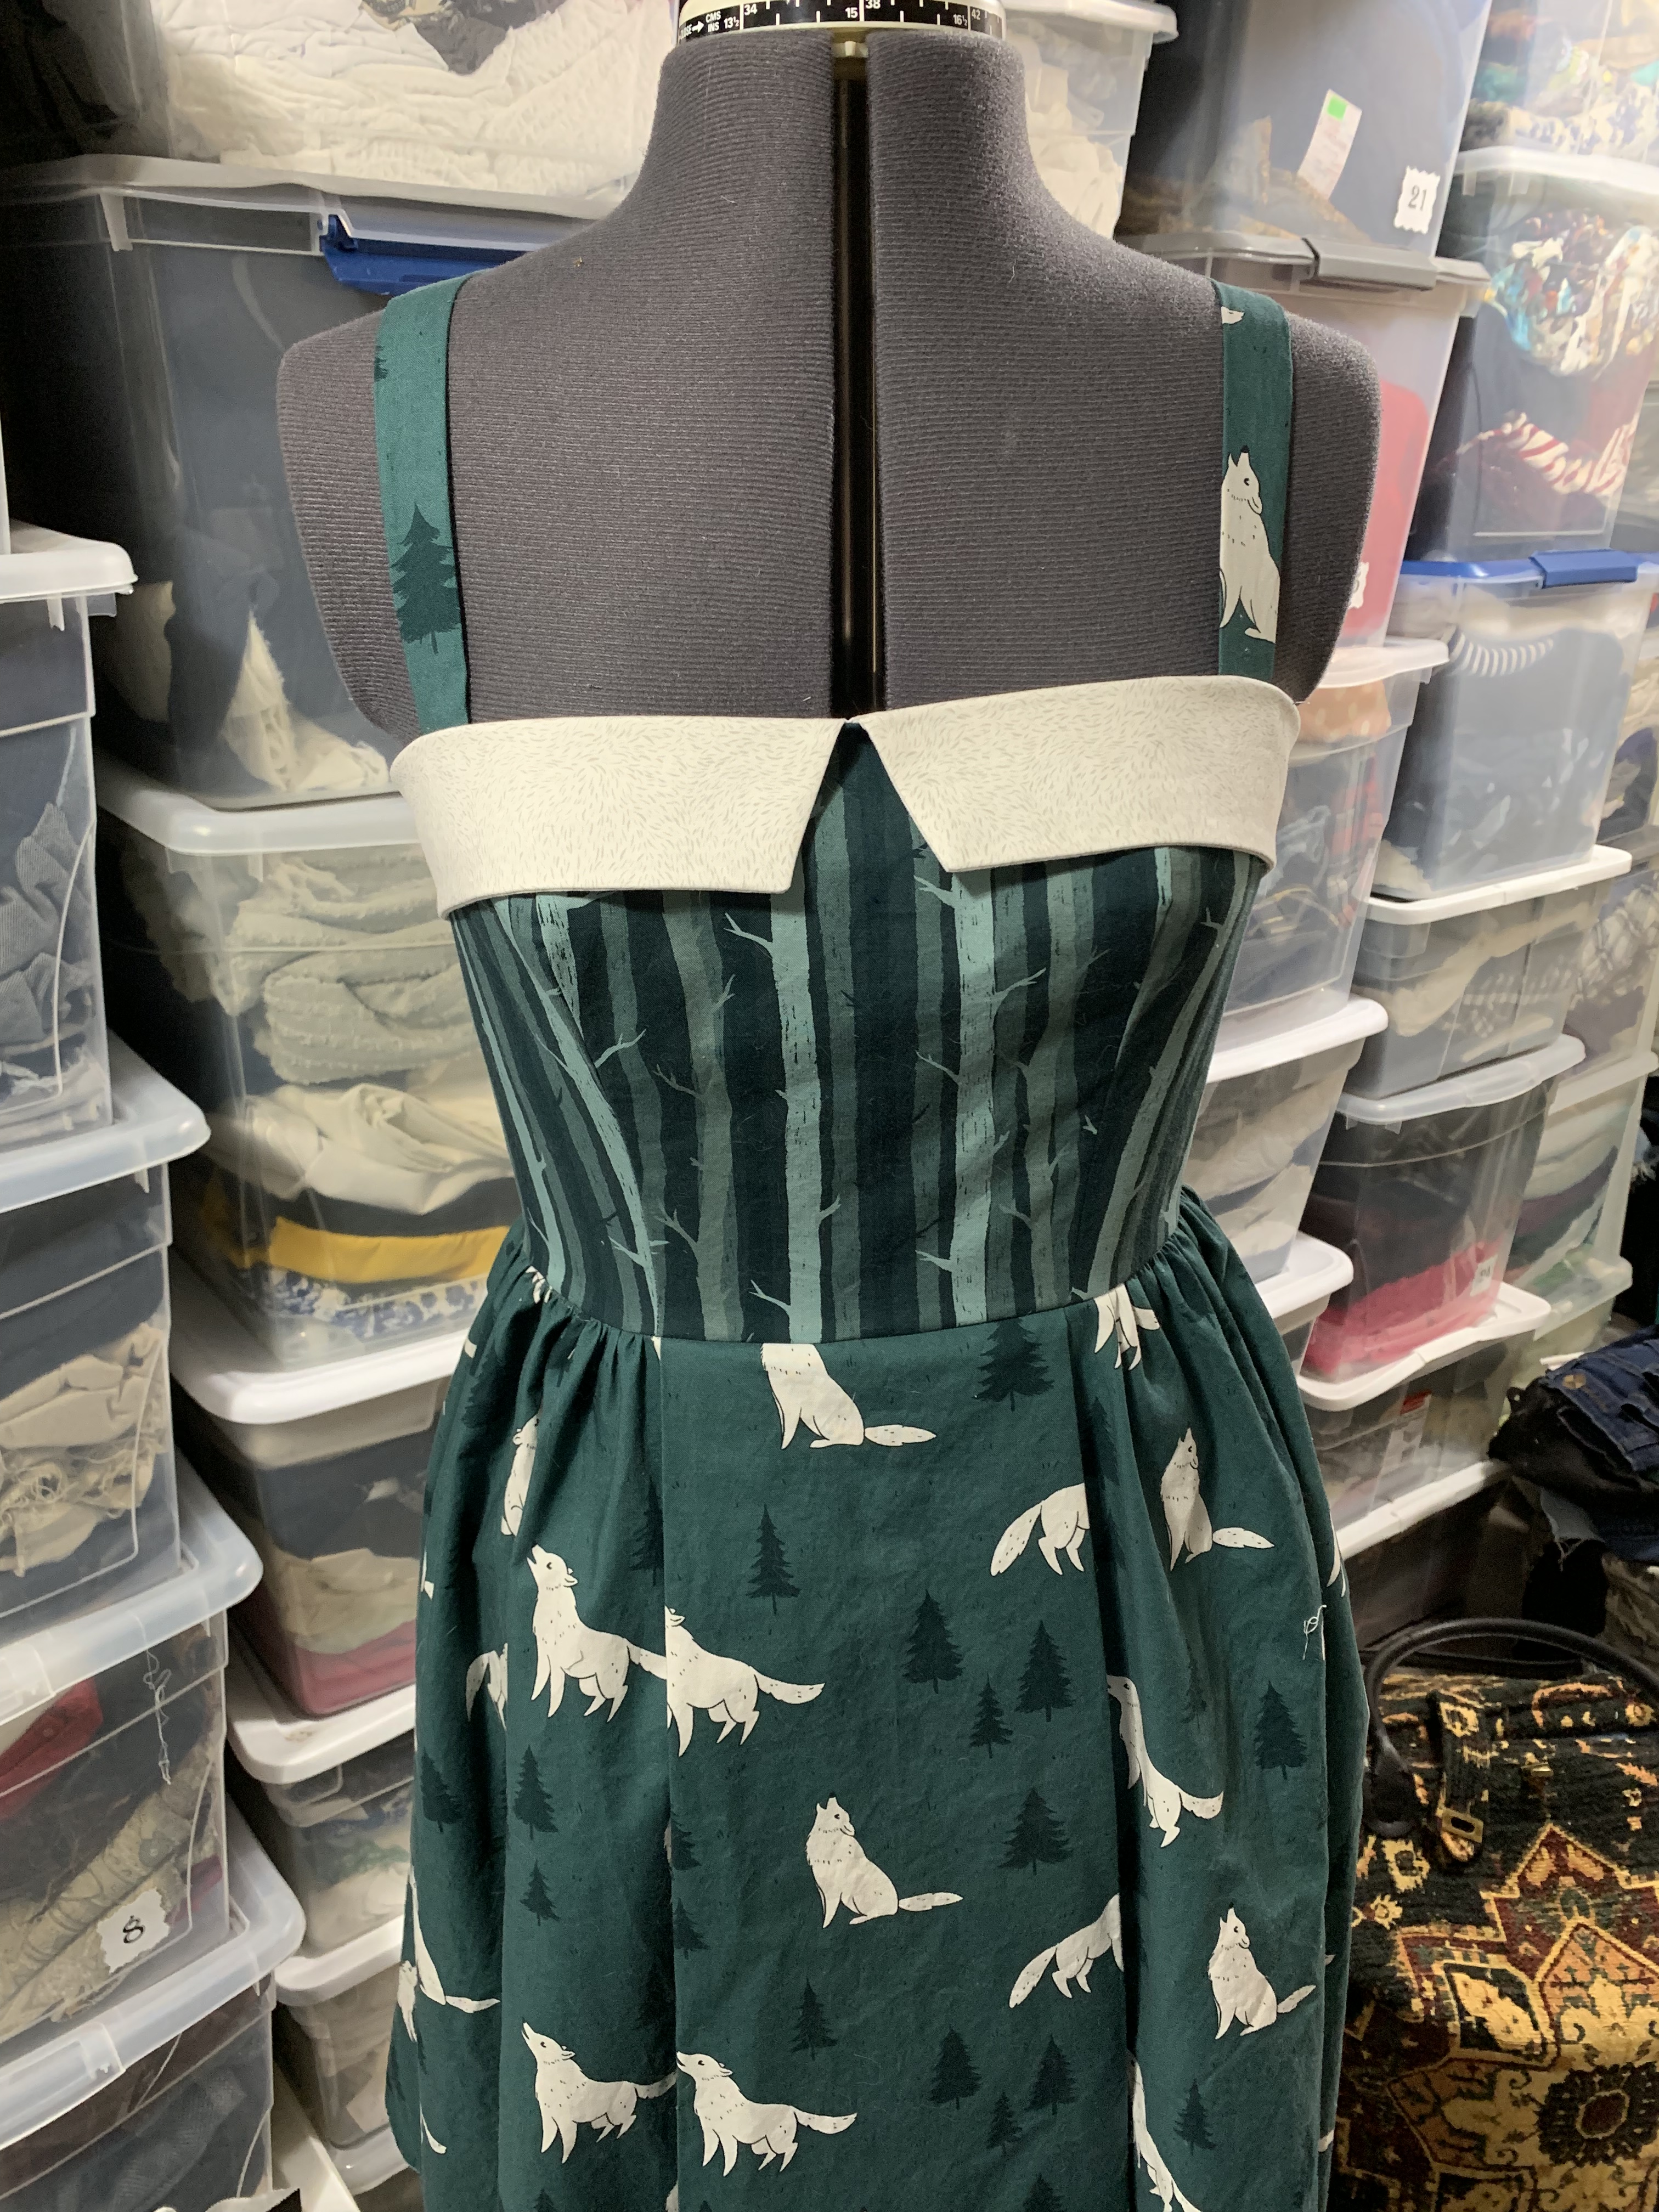
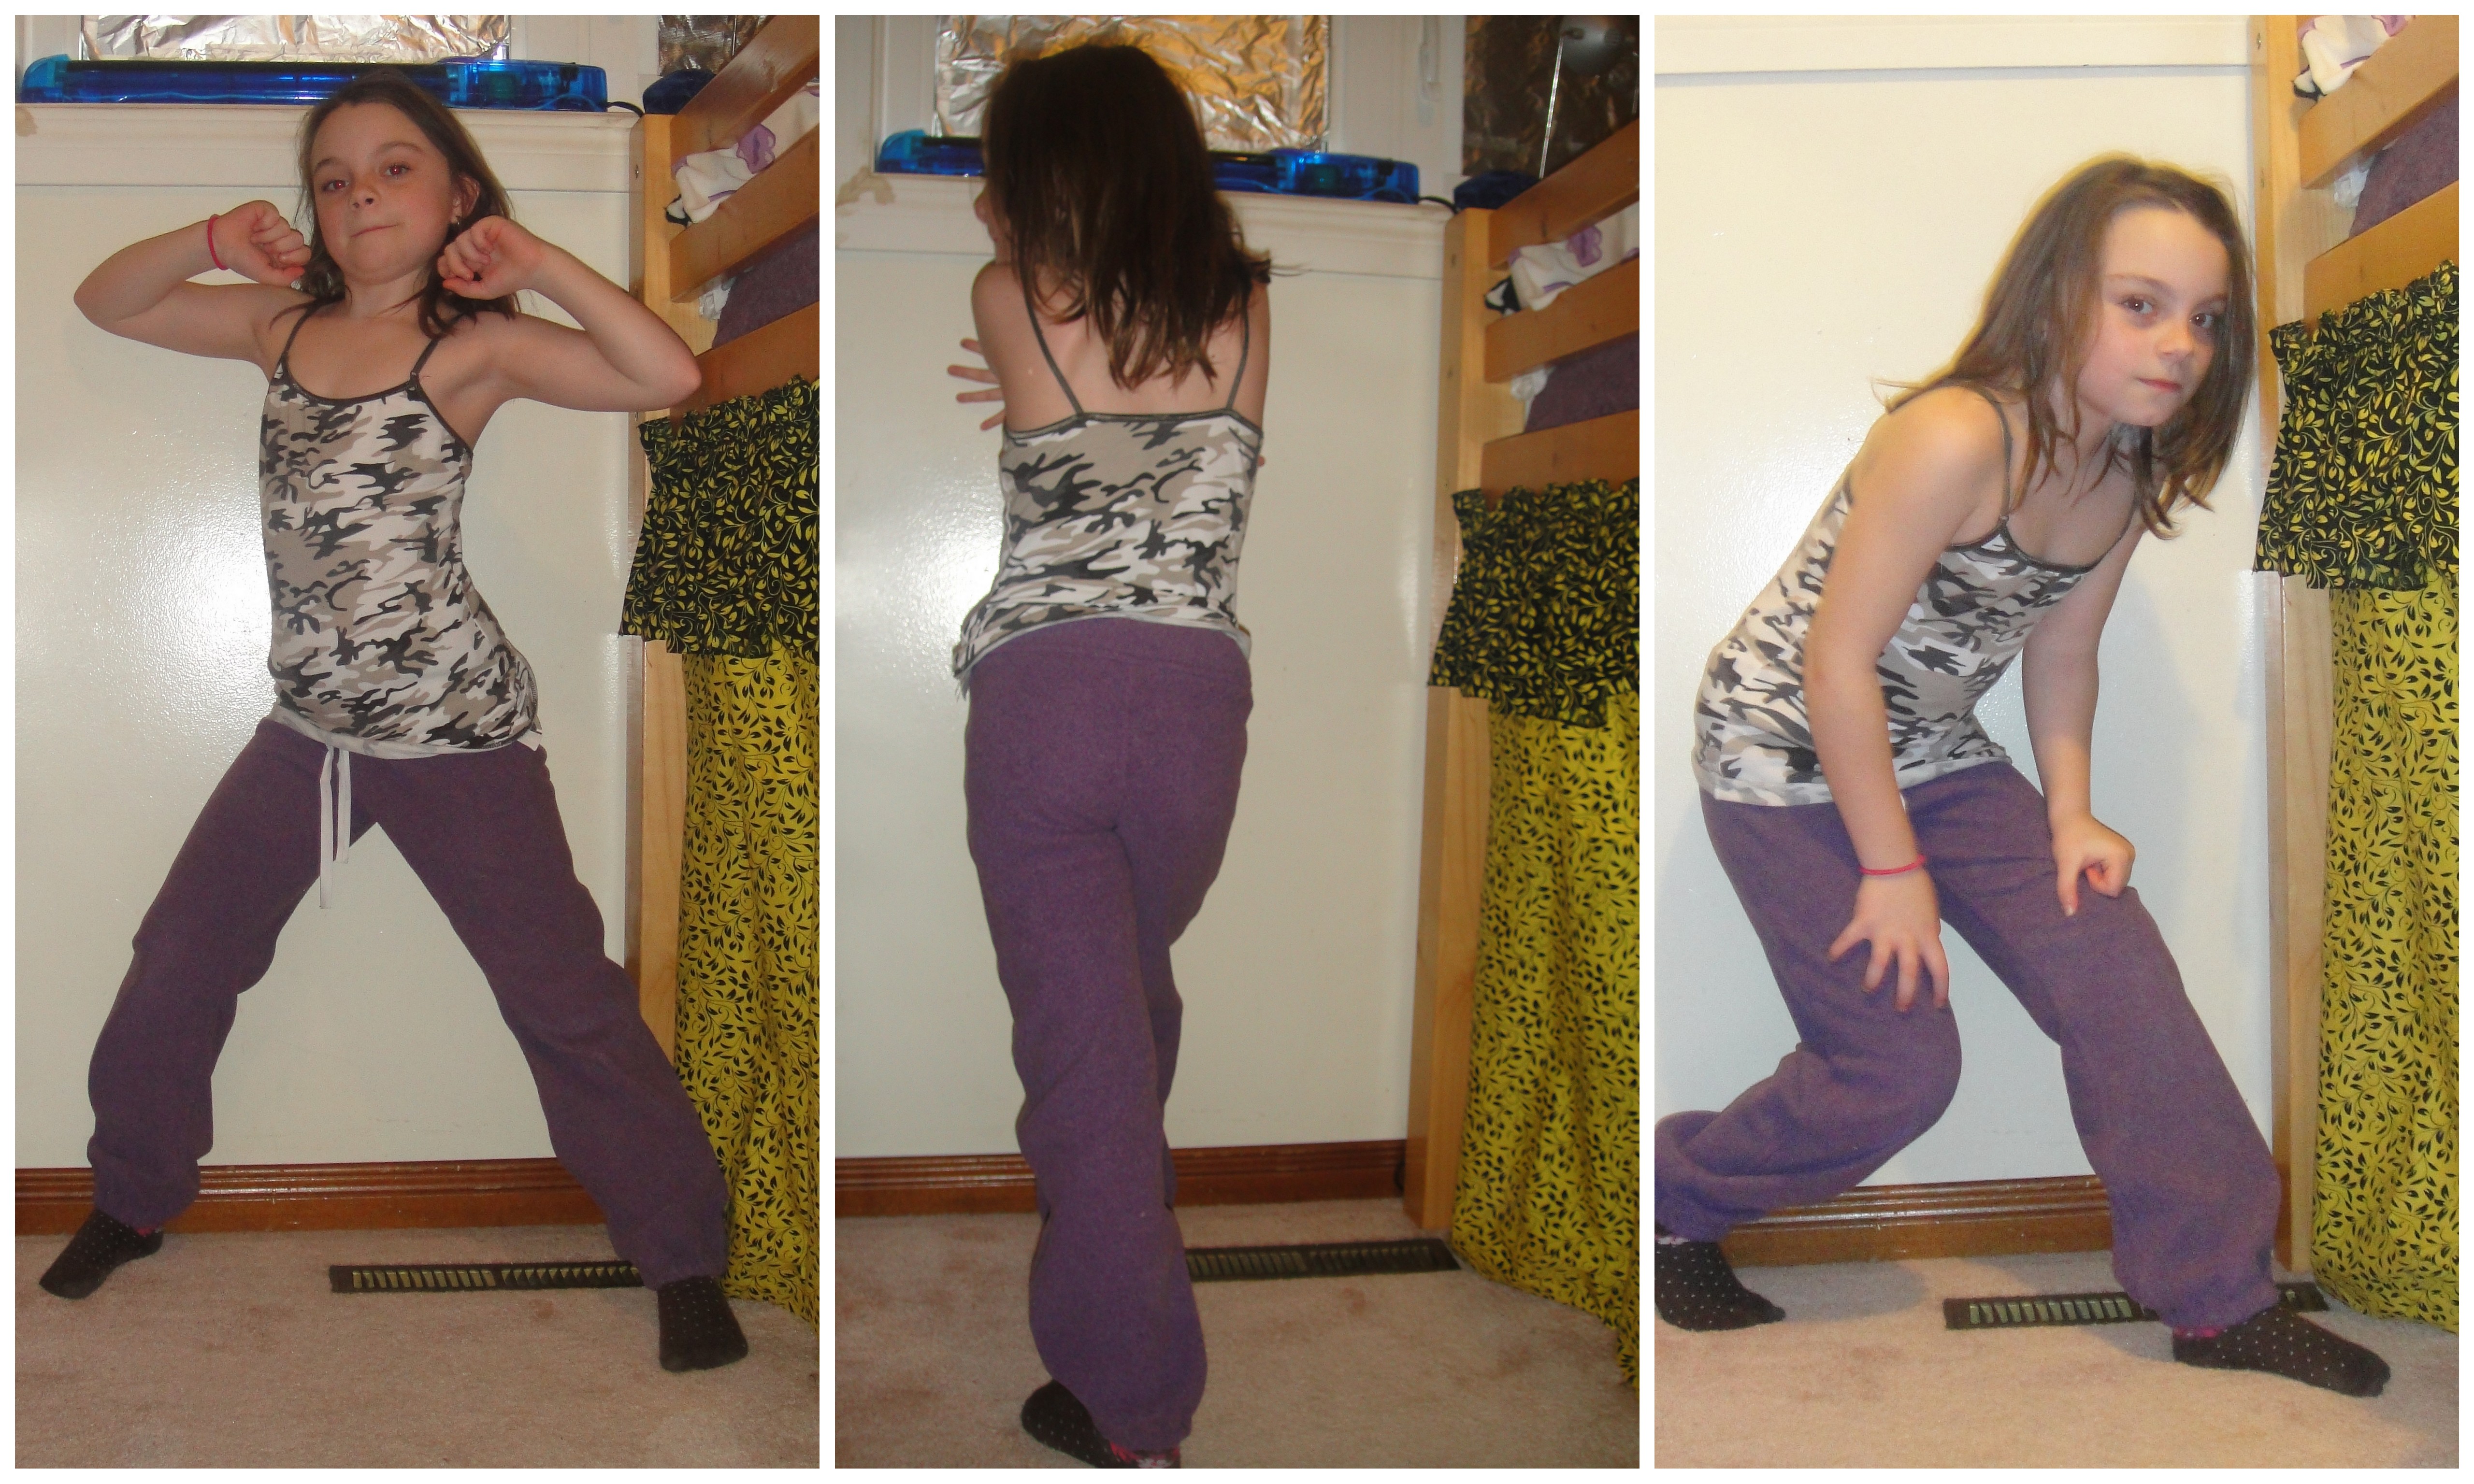
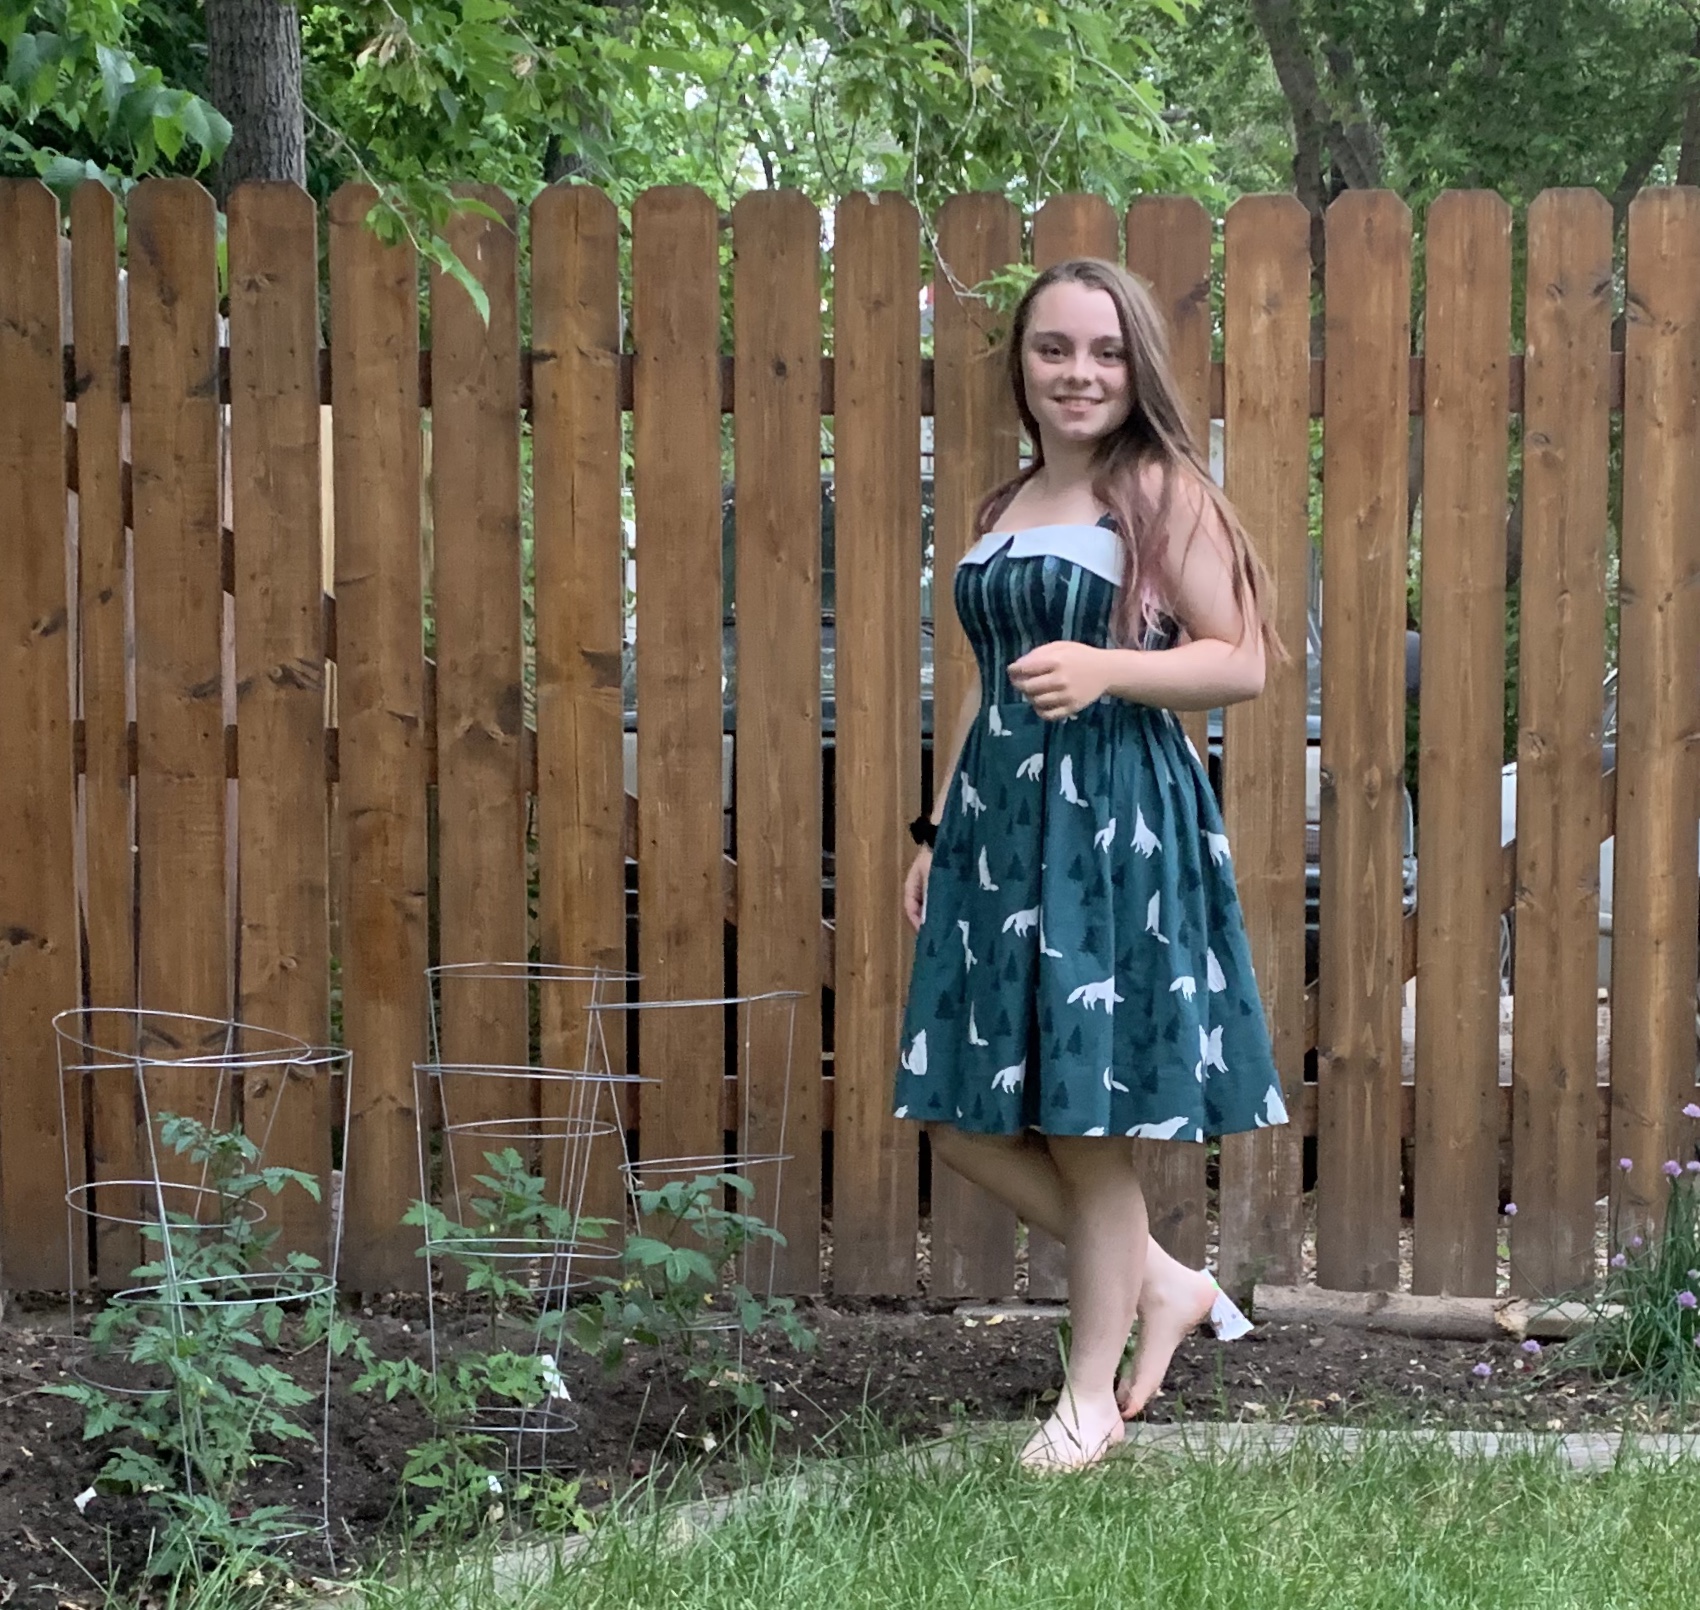
 The straps are really wide set on Syo’s frame (which surprised me as I tend to think of her as similar to me in build except shorter); I wound up moving the back straps quite a bit closer to the center, and would’ve moved the front if they weren’t already sewn down and understitched and graded and everything.
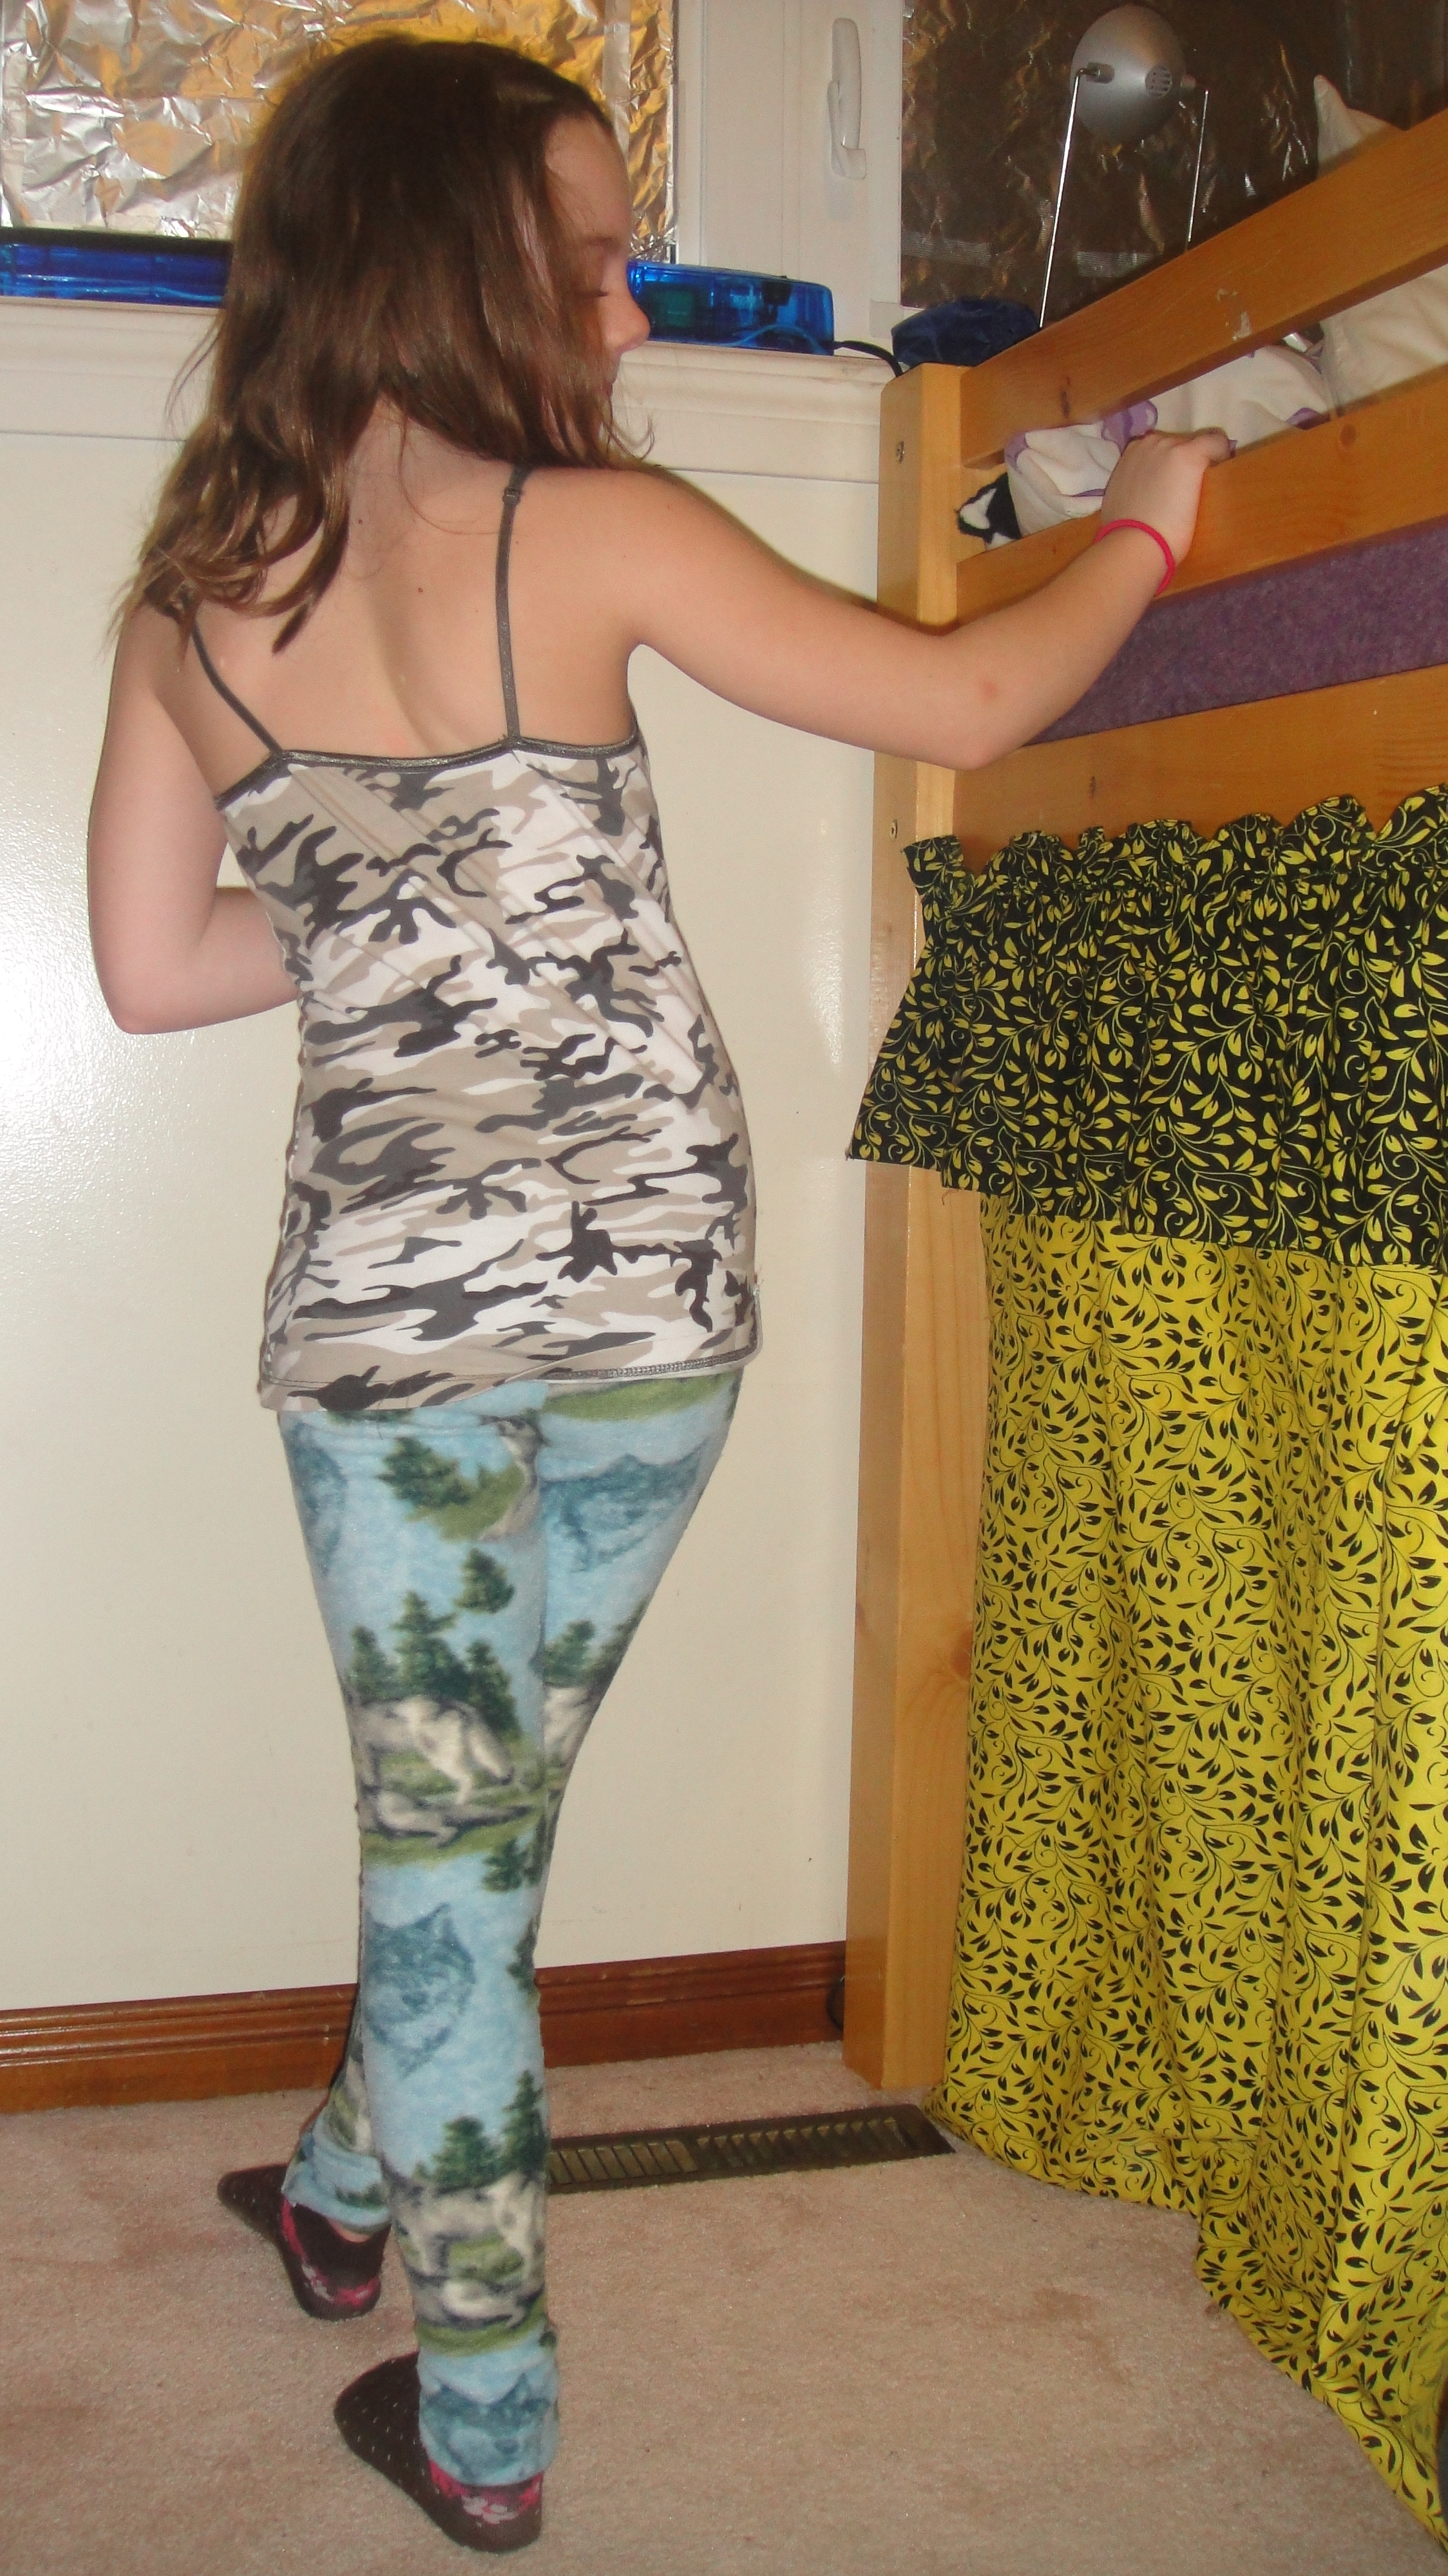
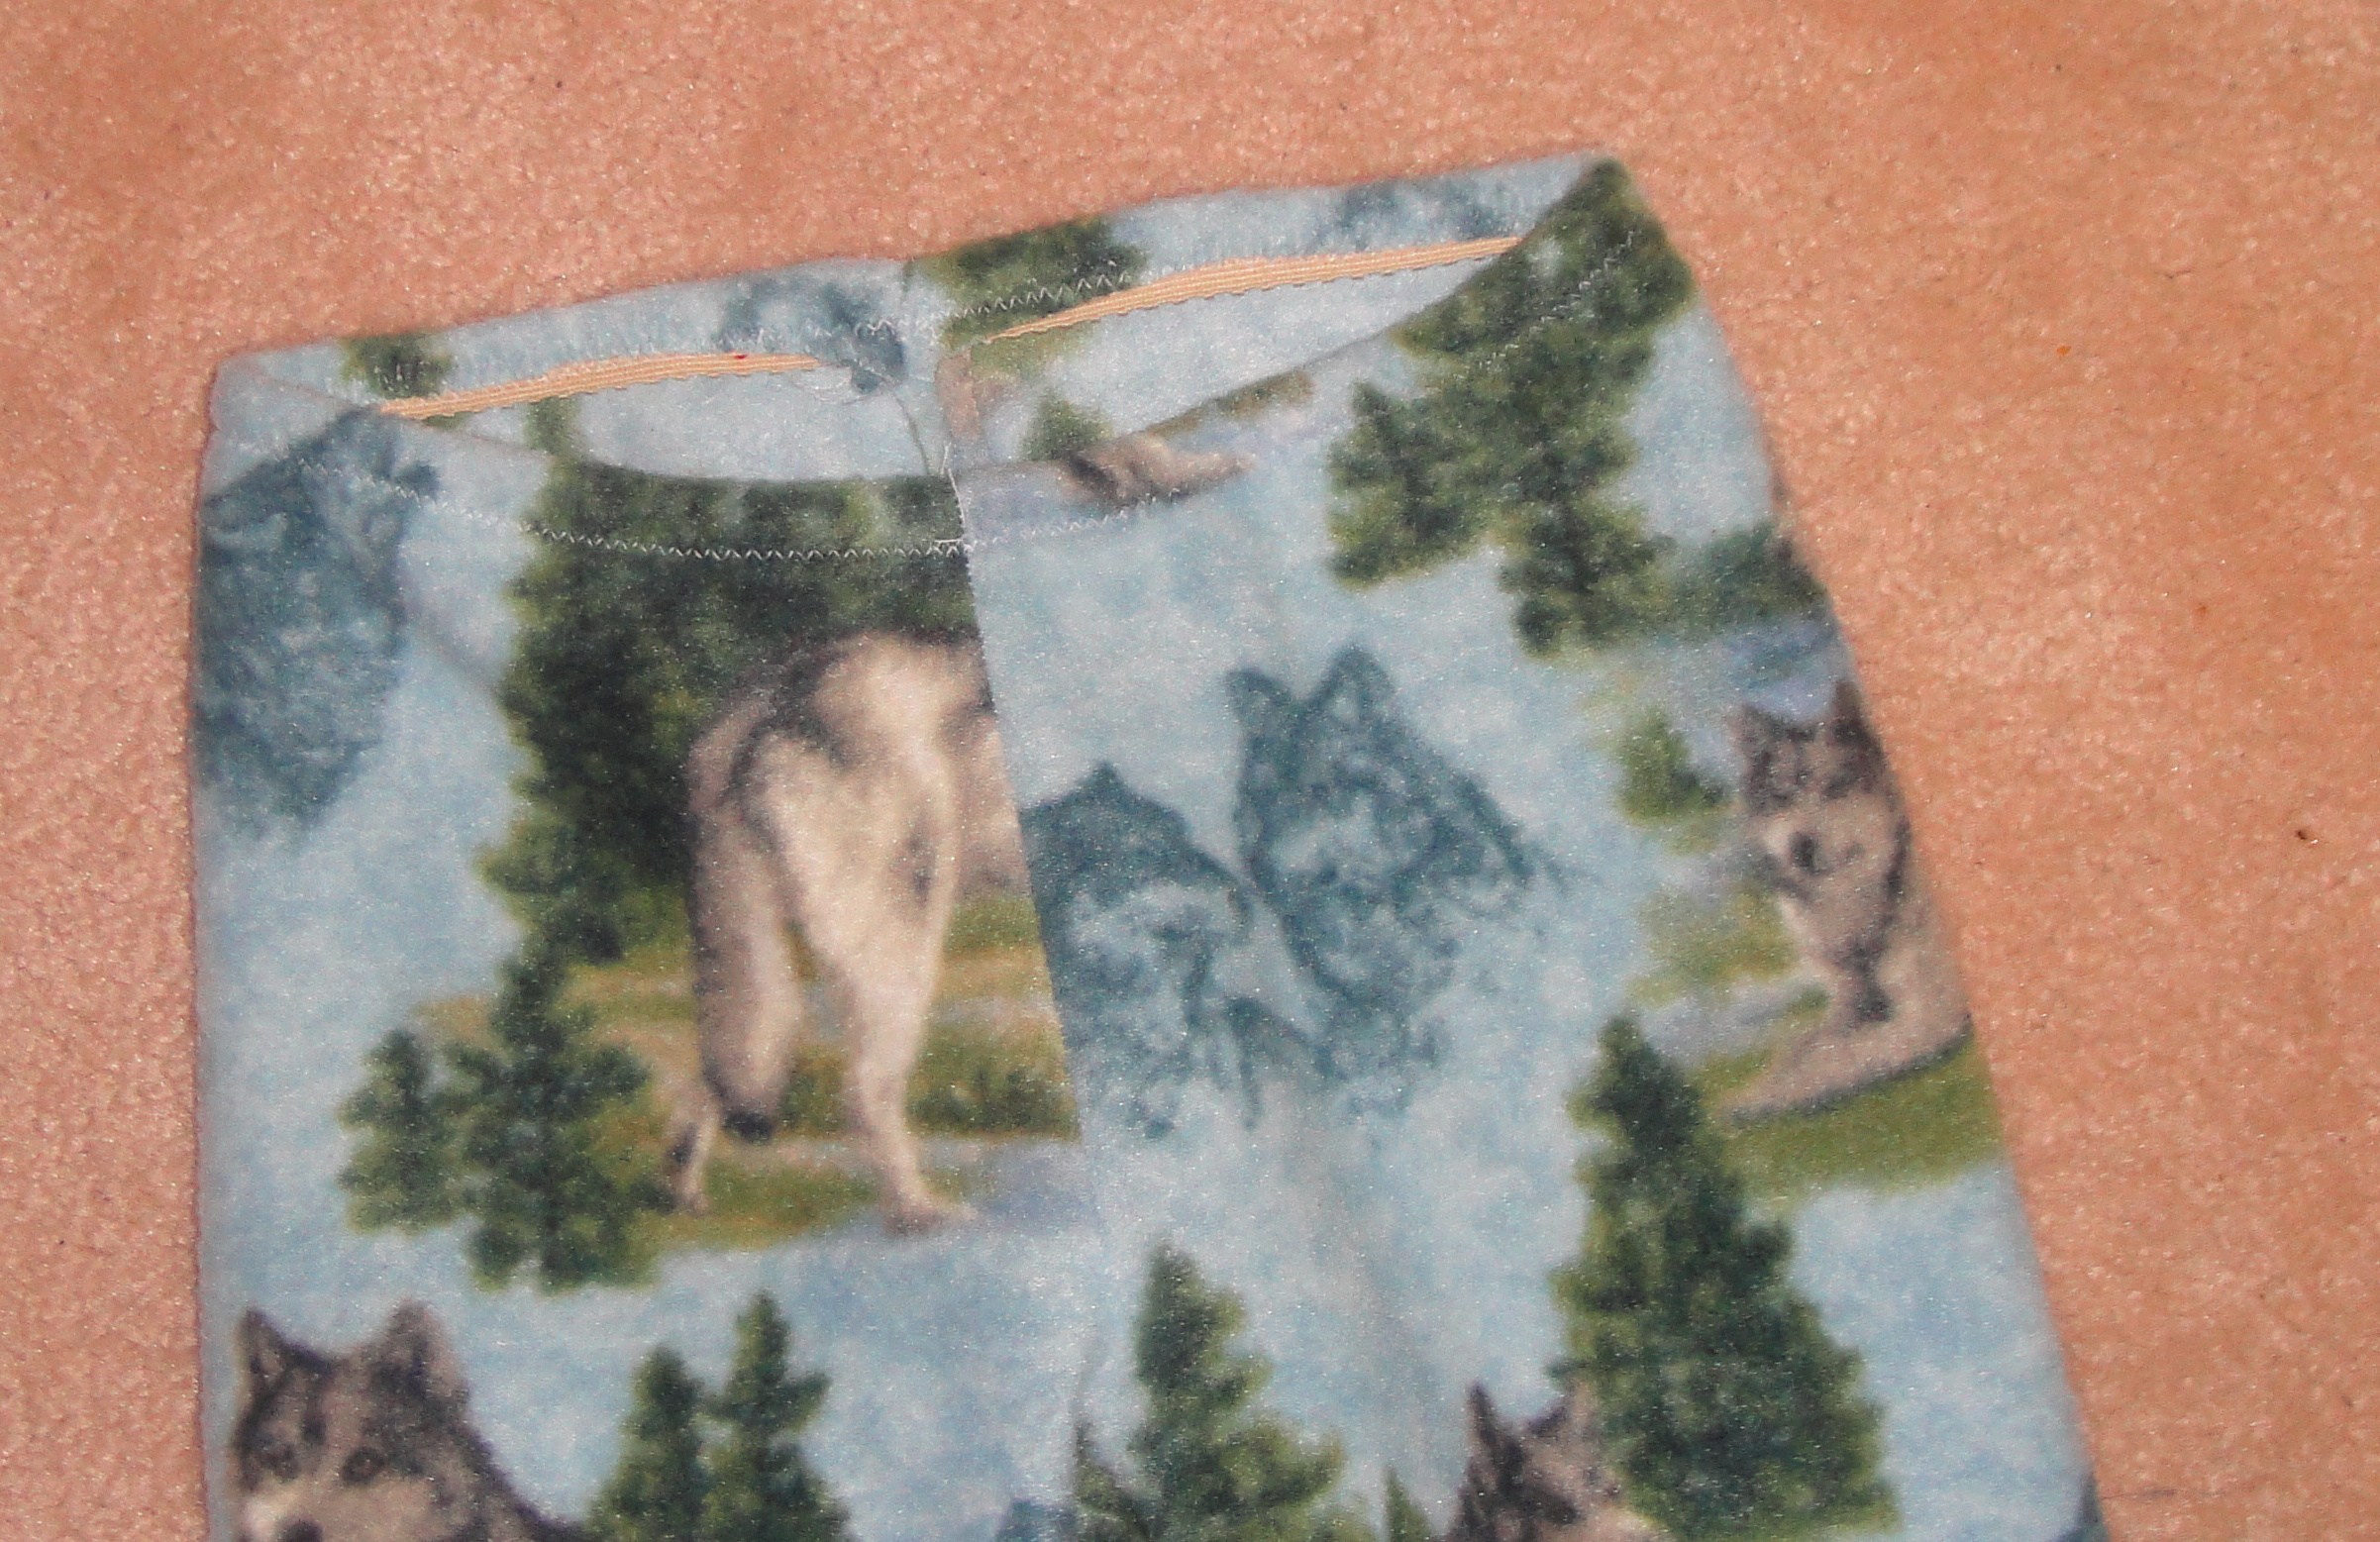
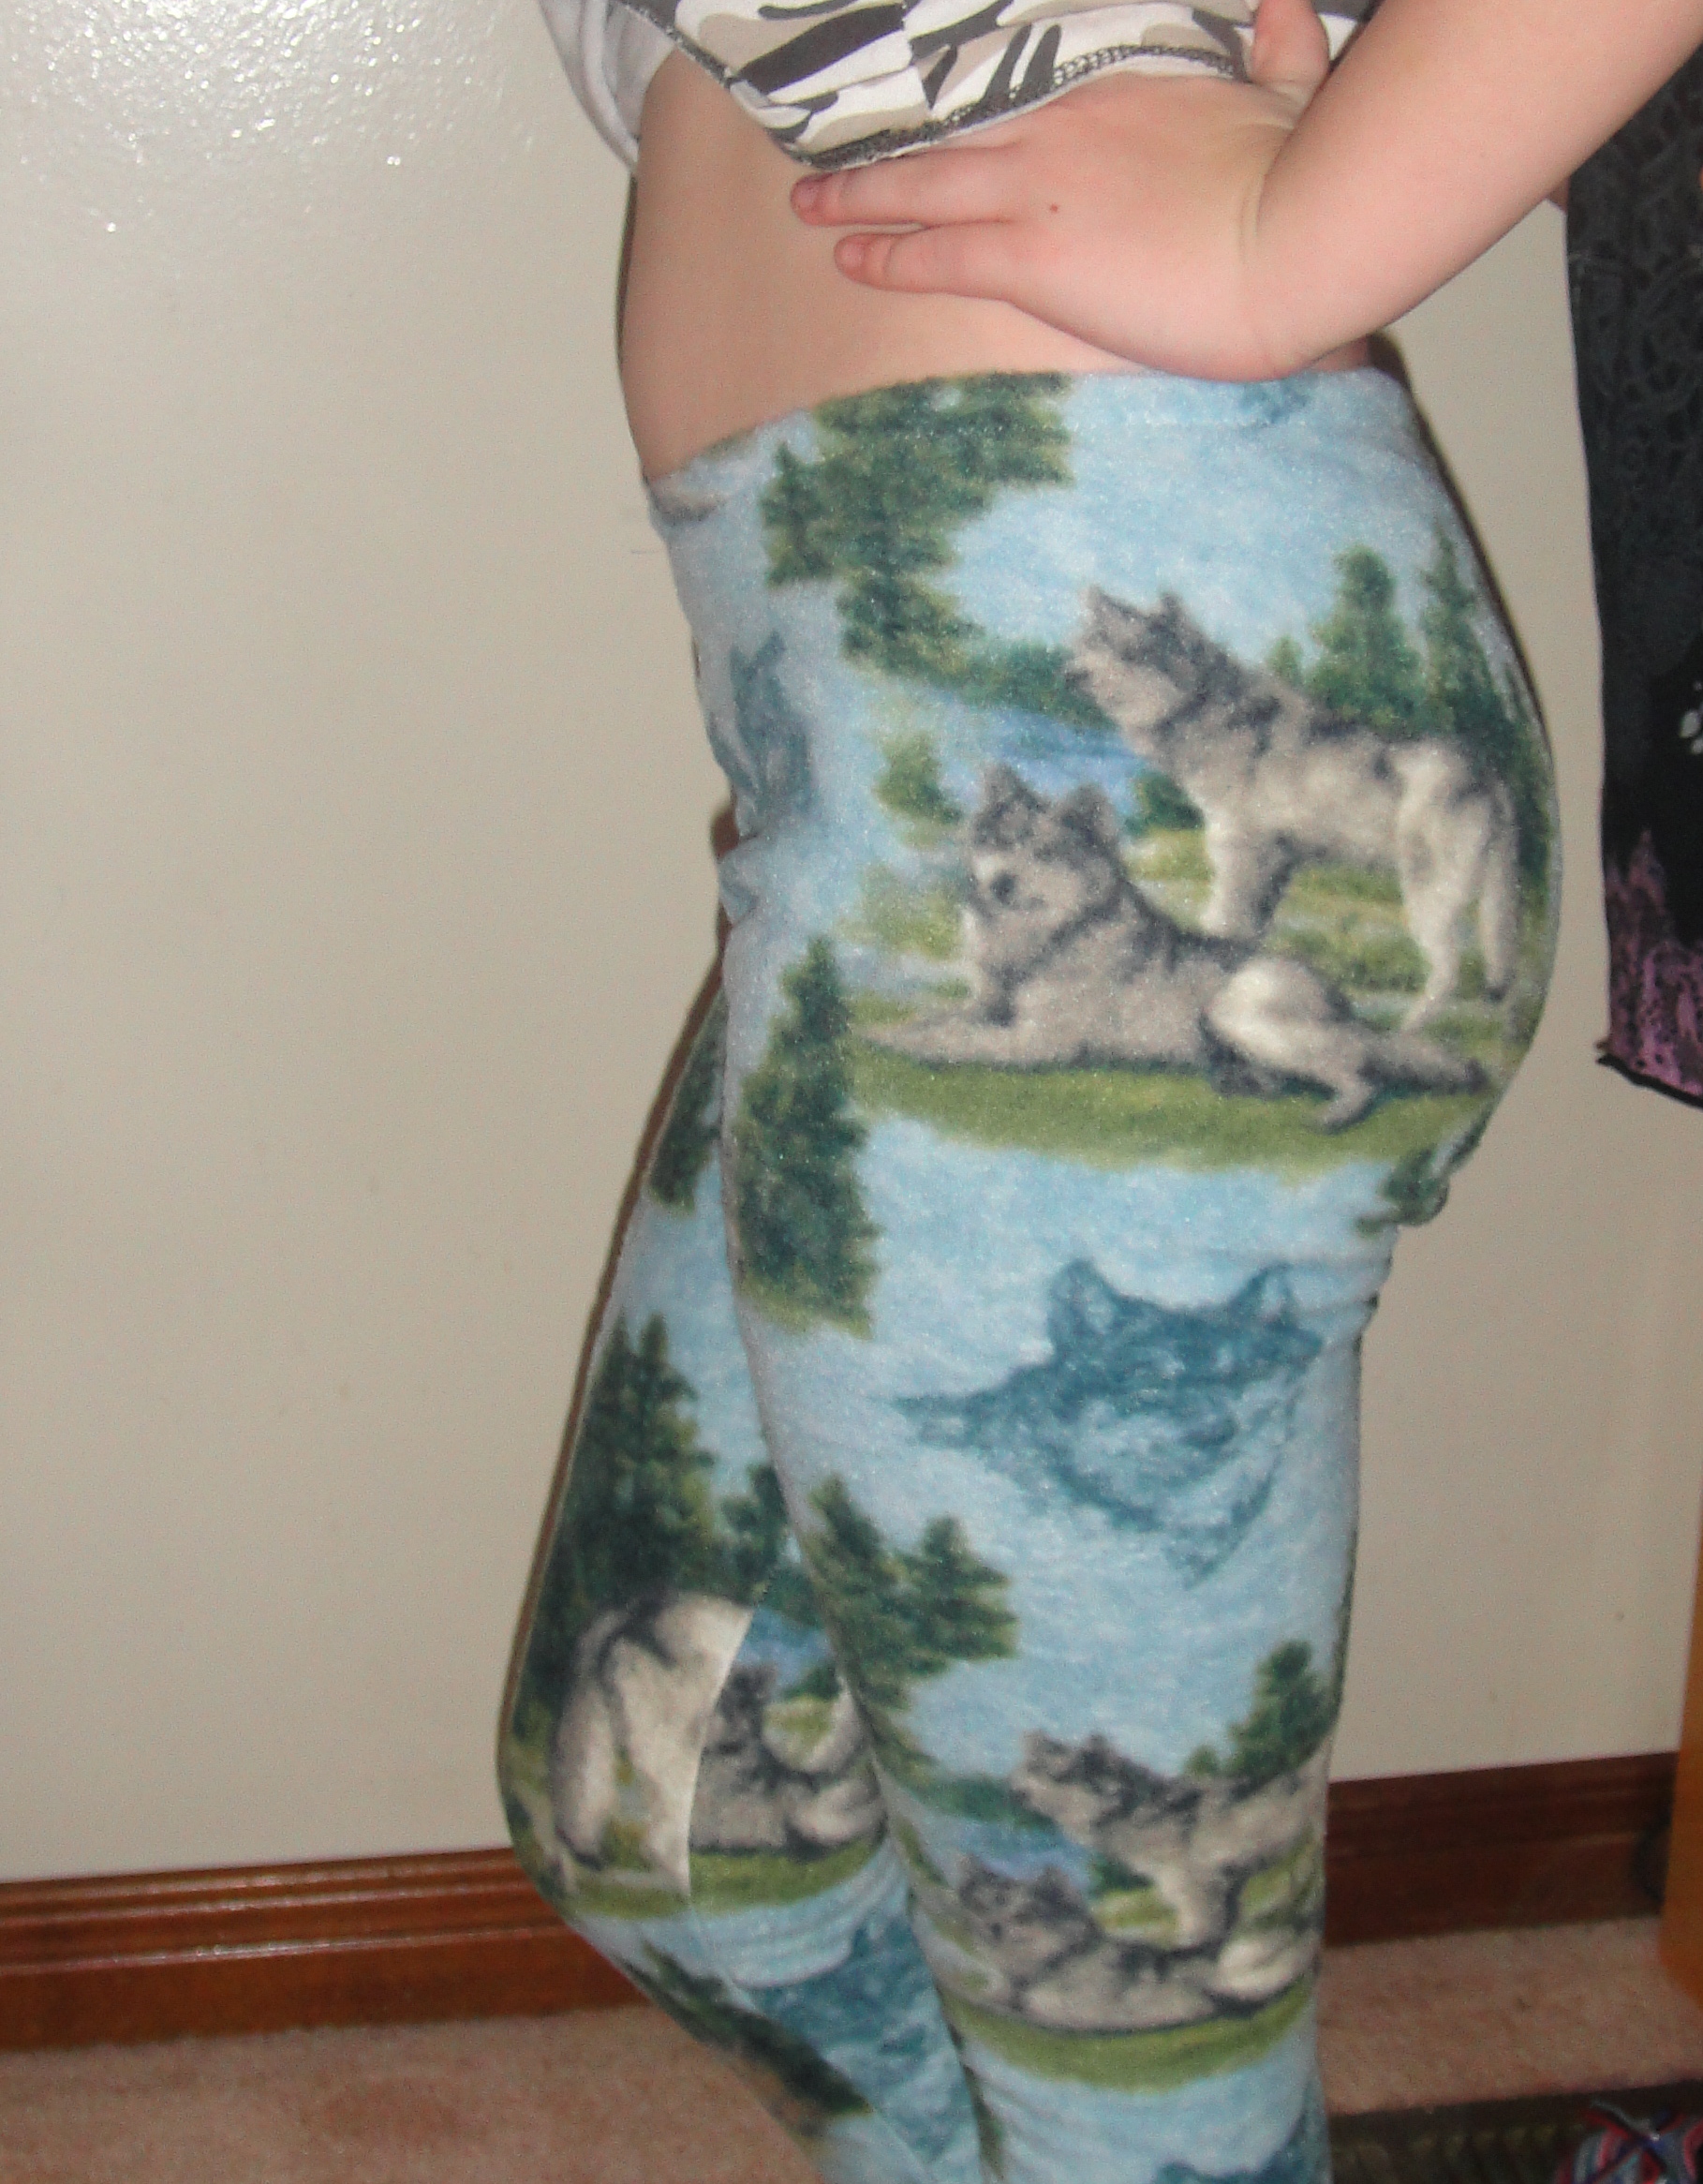
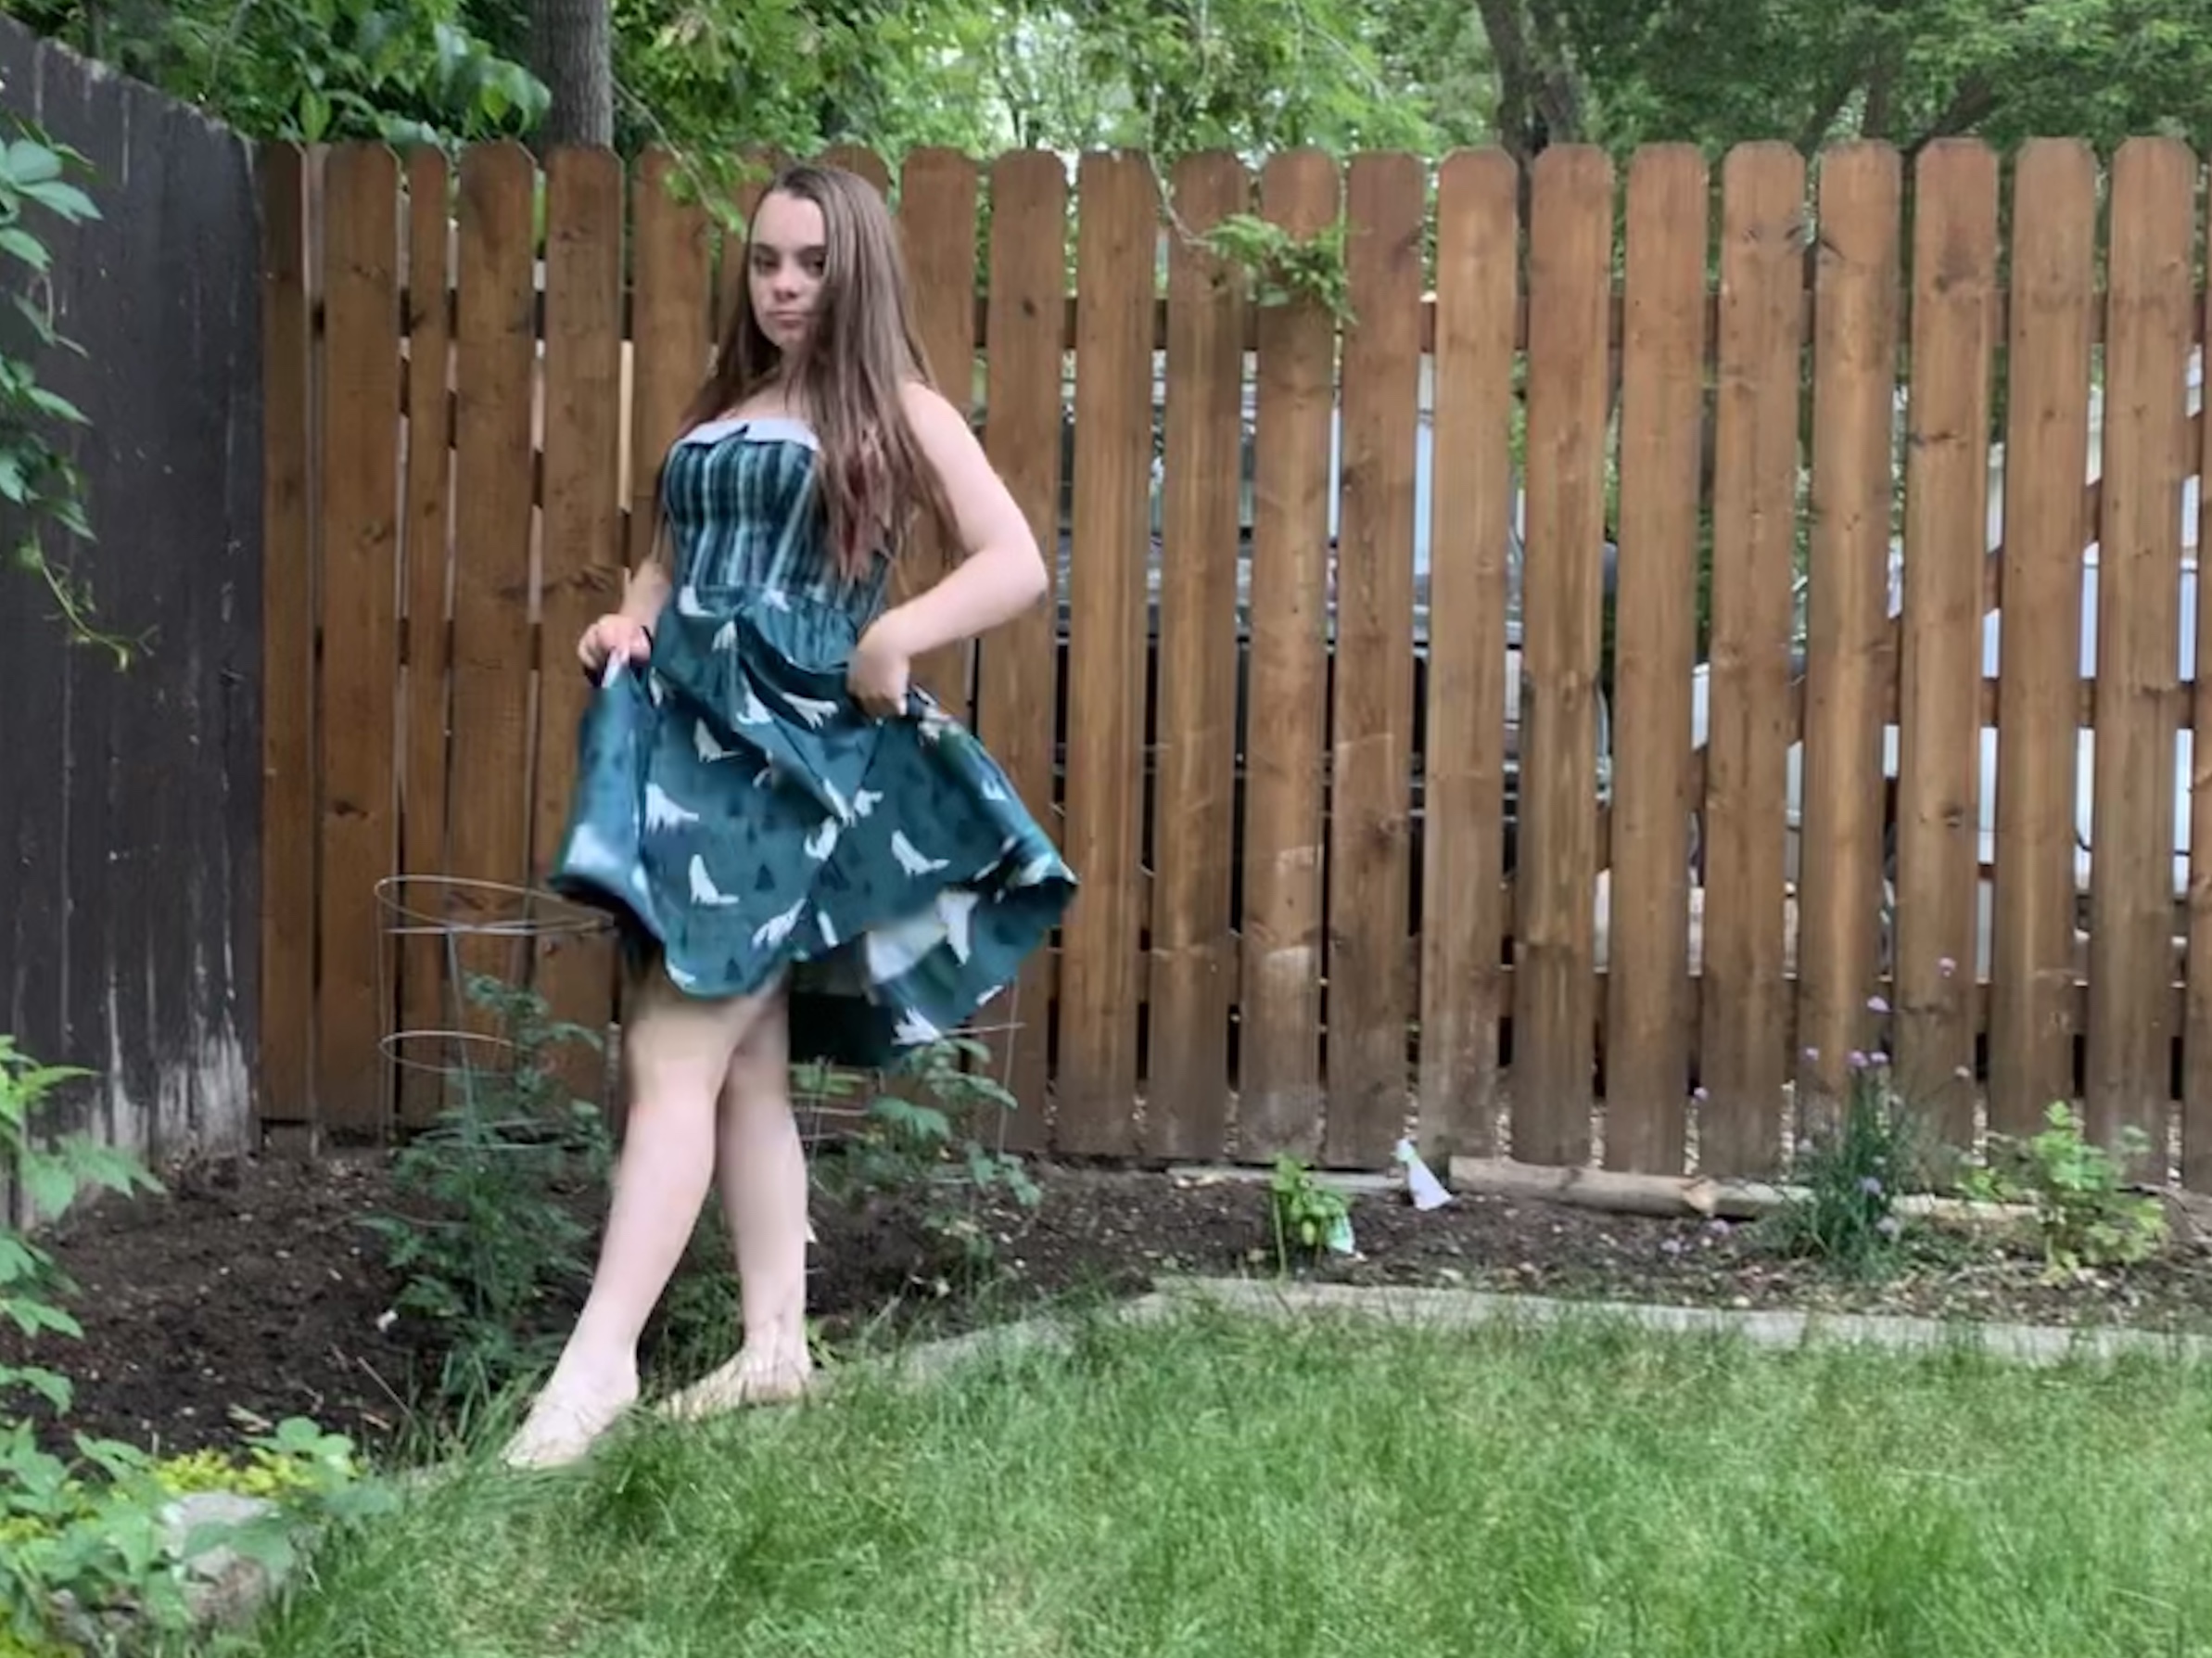 The pattern called for somewhere over 4m of fabric in the narrower width. With a bit of measuring I estimated that about three meters were needed for the skirt alone. However, it turned out the bolt of the wolves and trees print was divided right down the middle into two sections of about 2.6m each. So I took one of them home and resolved to Make It Work. I was fairly sure if I really ran short I could shorten the skirt an inch or two without causing a problem. Which in hindsight I could’ve, but I managed to squeak out all the pieces with only a little fudging, though there was no attempt to refine print placement. It is a pretty fun skirt, though, with subtle shaping and a front panel framed by pleats that’s just begging to be made in a contrast fabric.
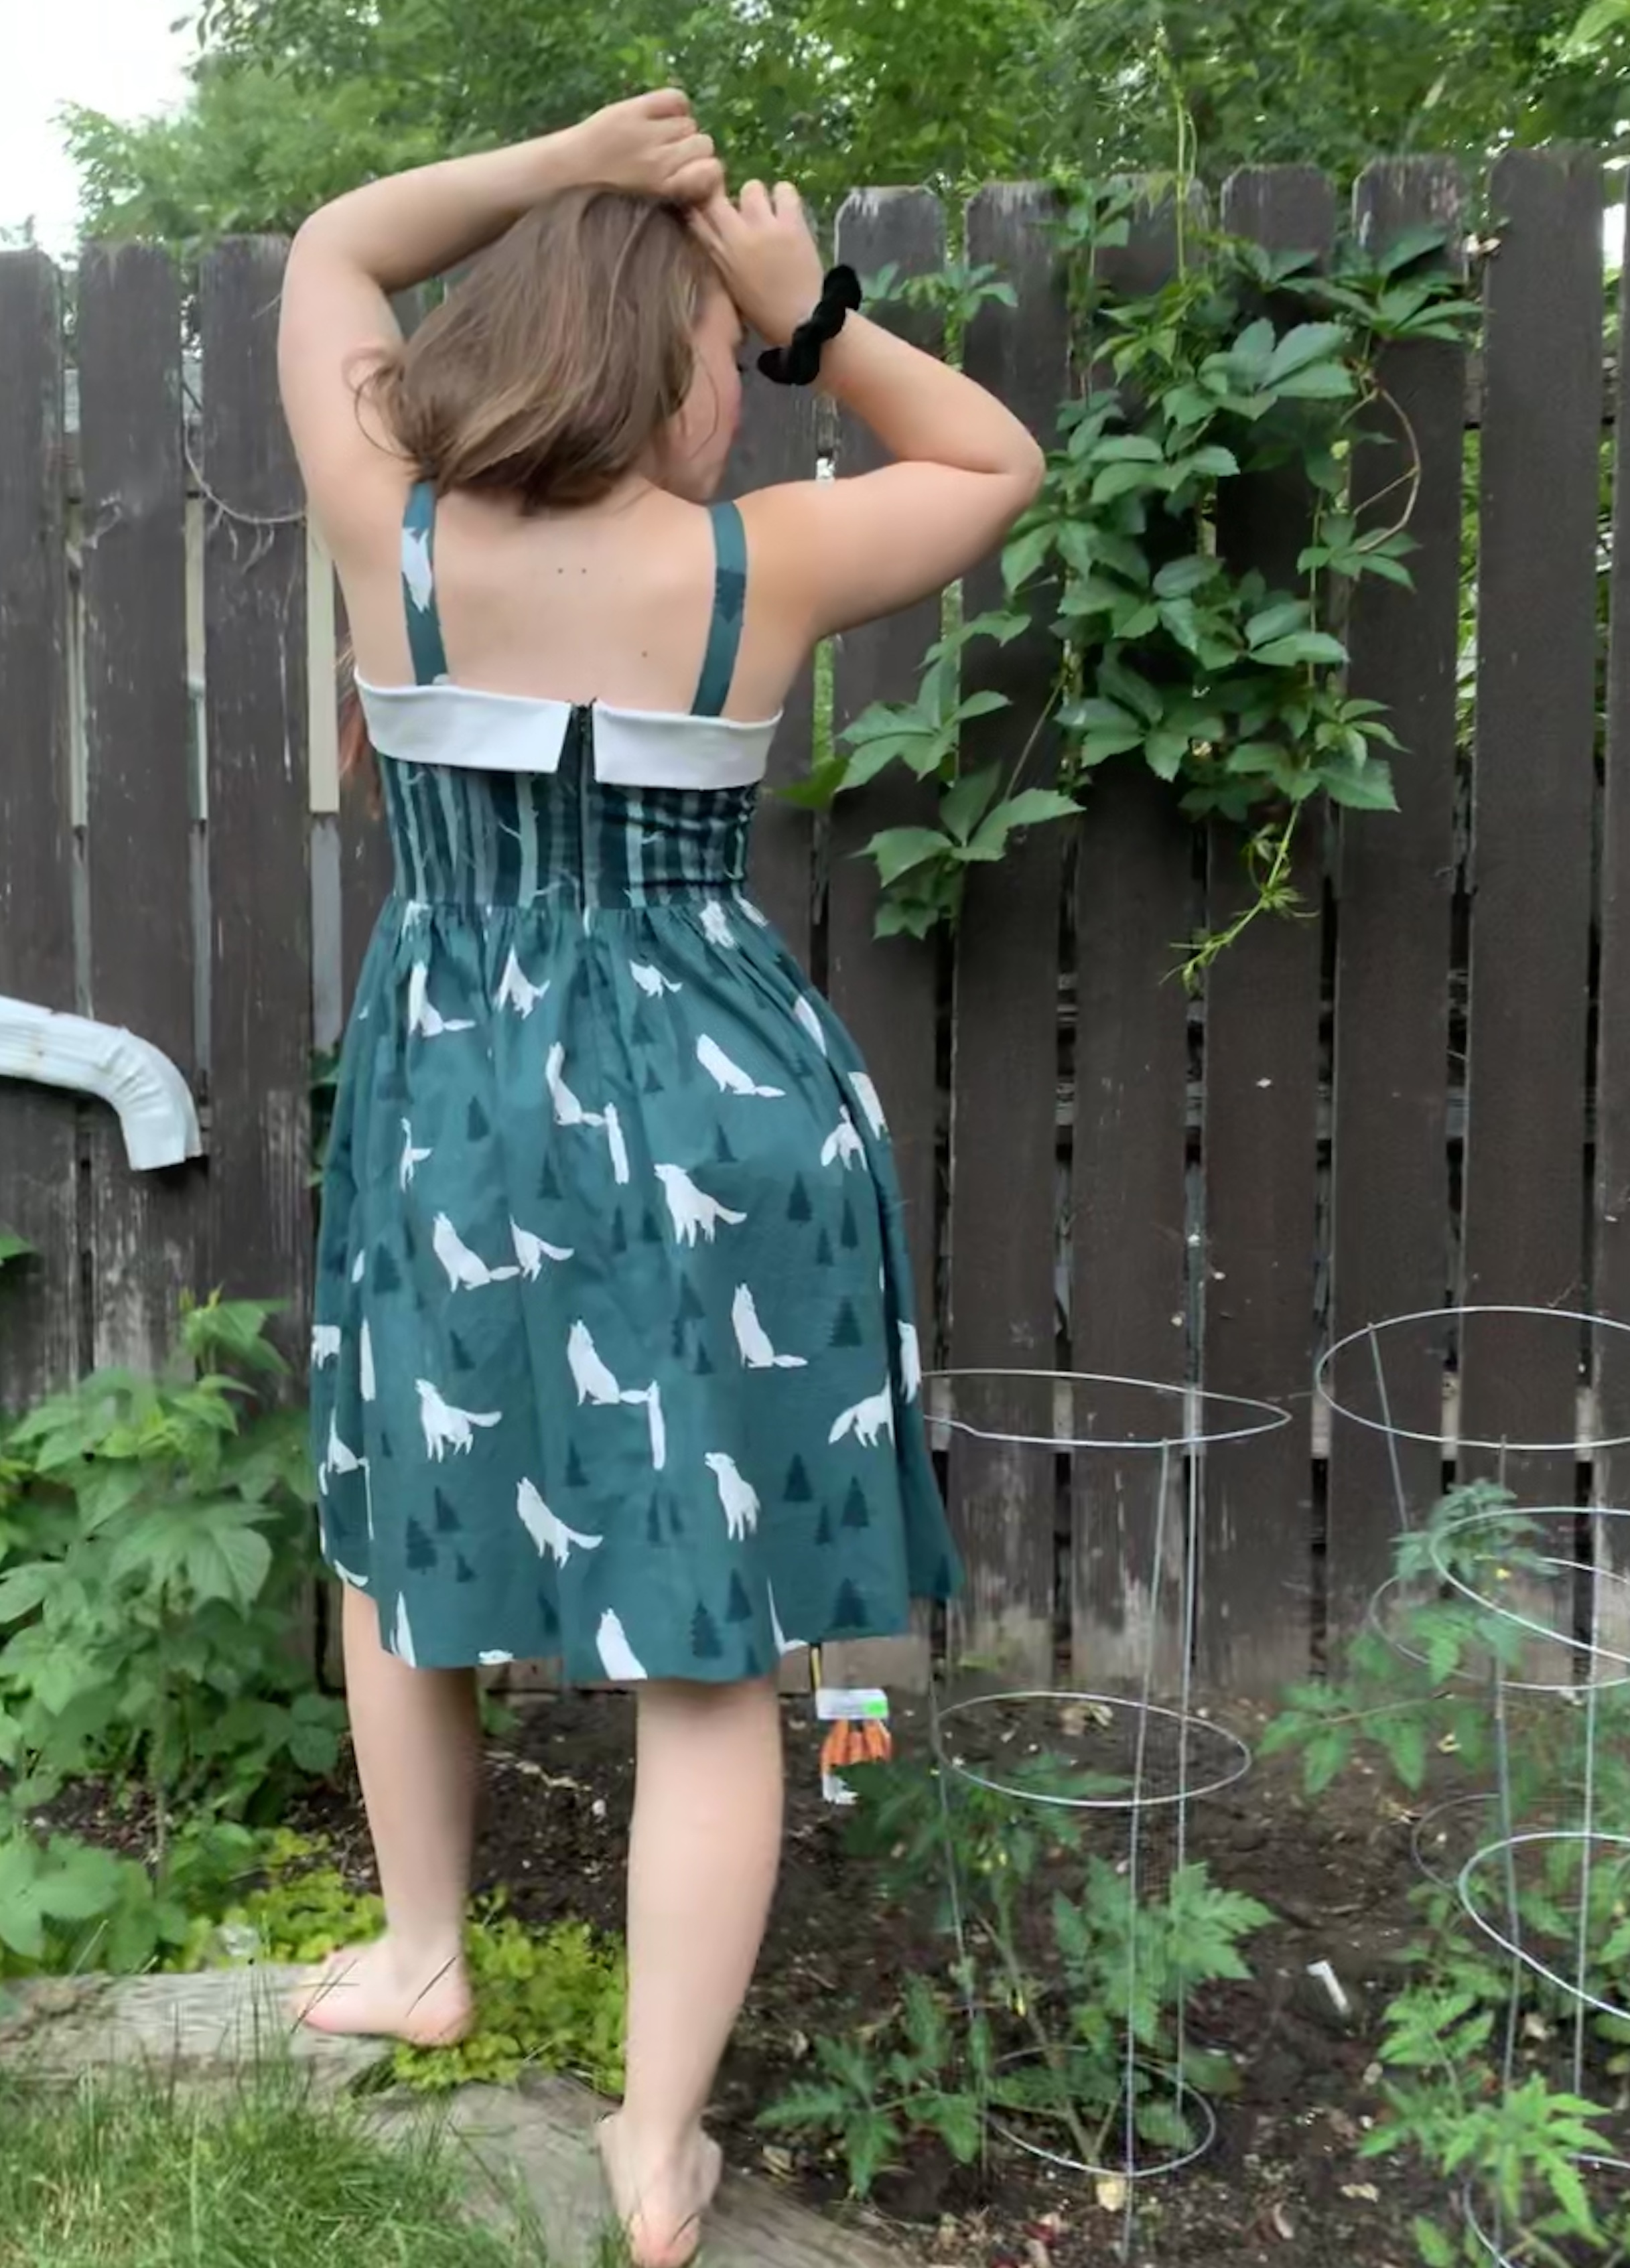 Most of the angst came from the zipper for this project. Last summer I acquired (among other things) a “proper” invisible zipper foot. I’ve always installed them with a regular foot, and I feel most comfortable with that. But I thought I’d try using the proper foot, so I have more experience if any of my students bring one. Heh. My first pass was too far from the zipper teeth; a stripe of black zipper showed. So I adjusted my needle position, but I over-corrected and it was too close. It did up all right on its own, but when I tried to put it on the dress form, the zipper gave and then one half of the slide came right off.
 When I finally came back to it, I was able to get the zipper back into its track, only to promptly have it burst off again when I tried to put the dress on Syo. So I grumblingly unpicked the near-tooth row of stitching, and it seems to be working now, even if I’m not terribly trusting of it. And there’s that stripe of black in the back. I’m going to live with it. (Though I confess, I haven’t closed up the bodice lining yet, in case I do have to completely replace the zipper. Yeah, not laziness at all…)


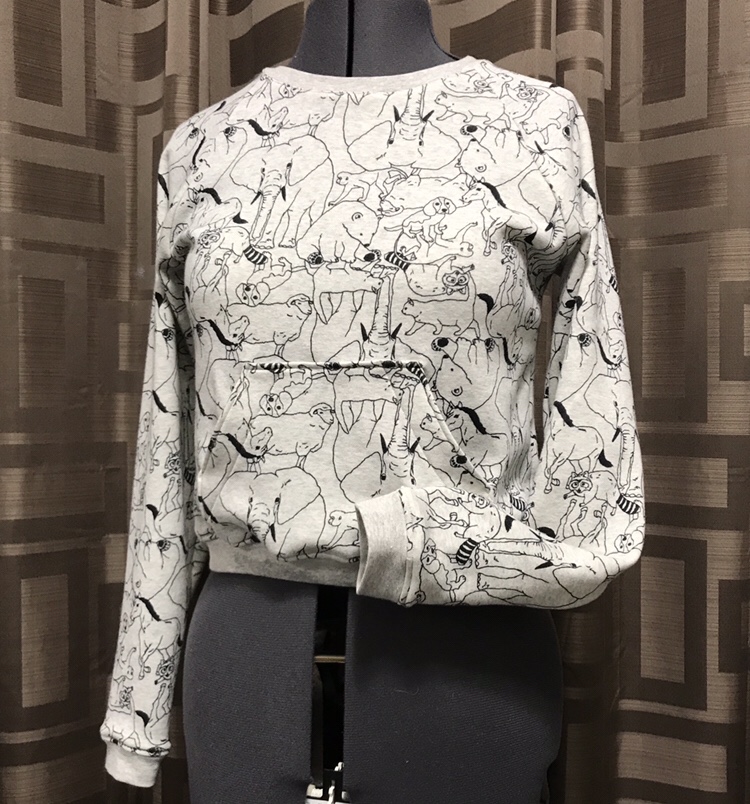 Anyway, so looking around for something else, I spied this fabric, which I bought my girls for Christmas presents last year. (This is what happens, teenagers, when you make the mistake of showing interest in your mom’s hobbies.)
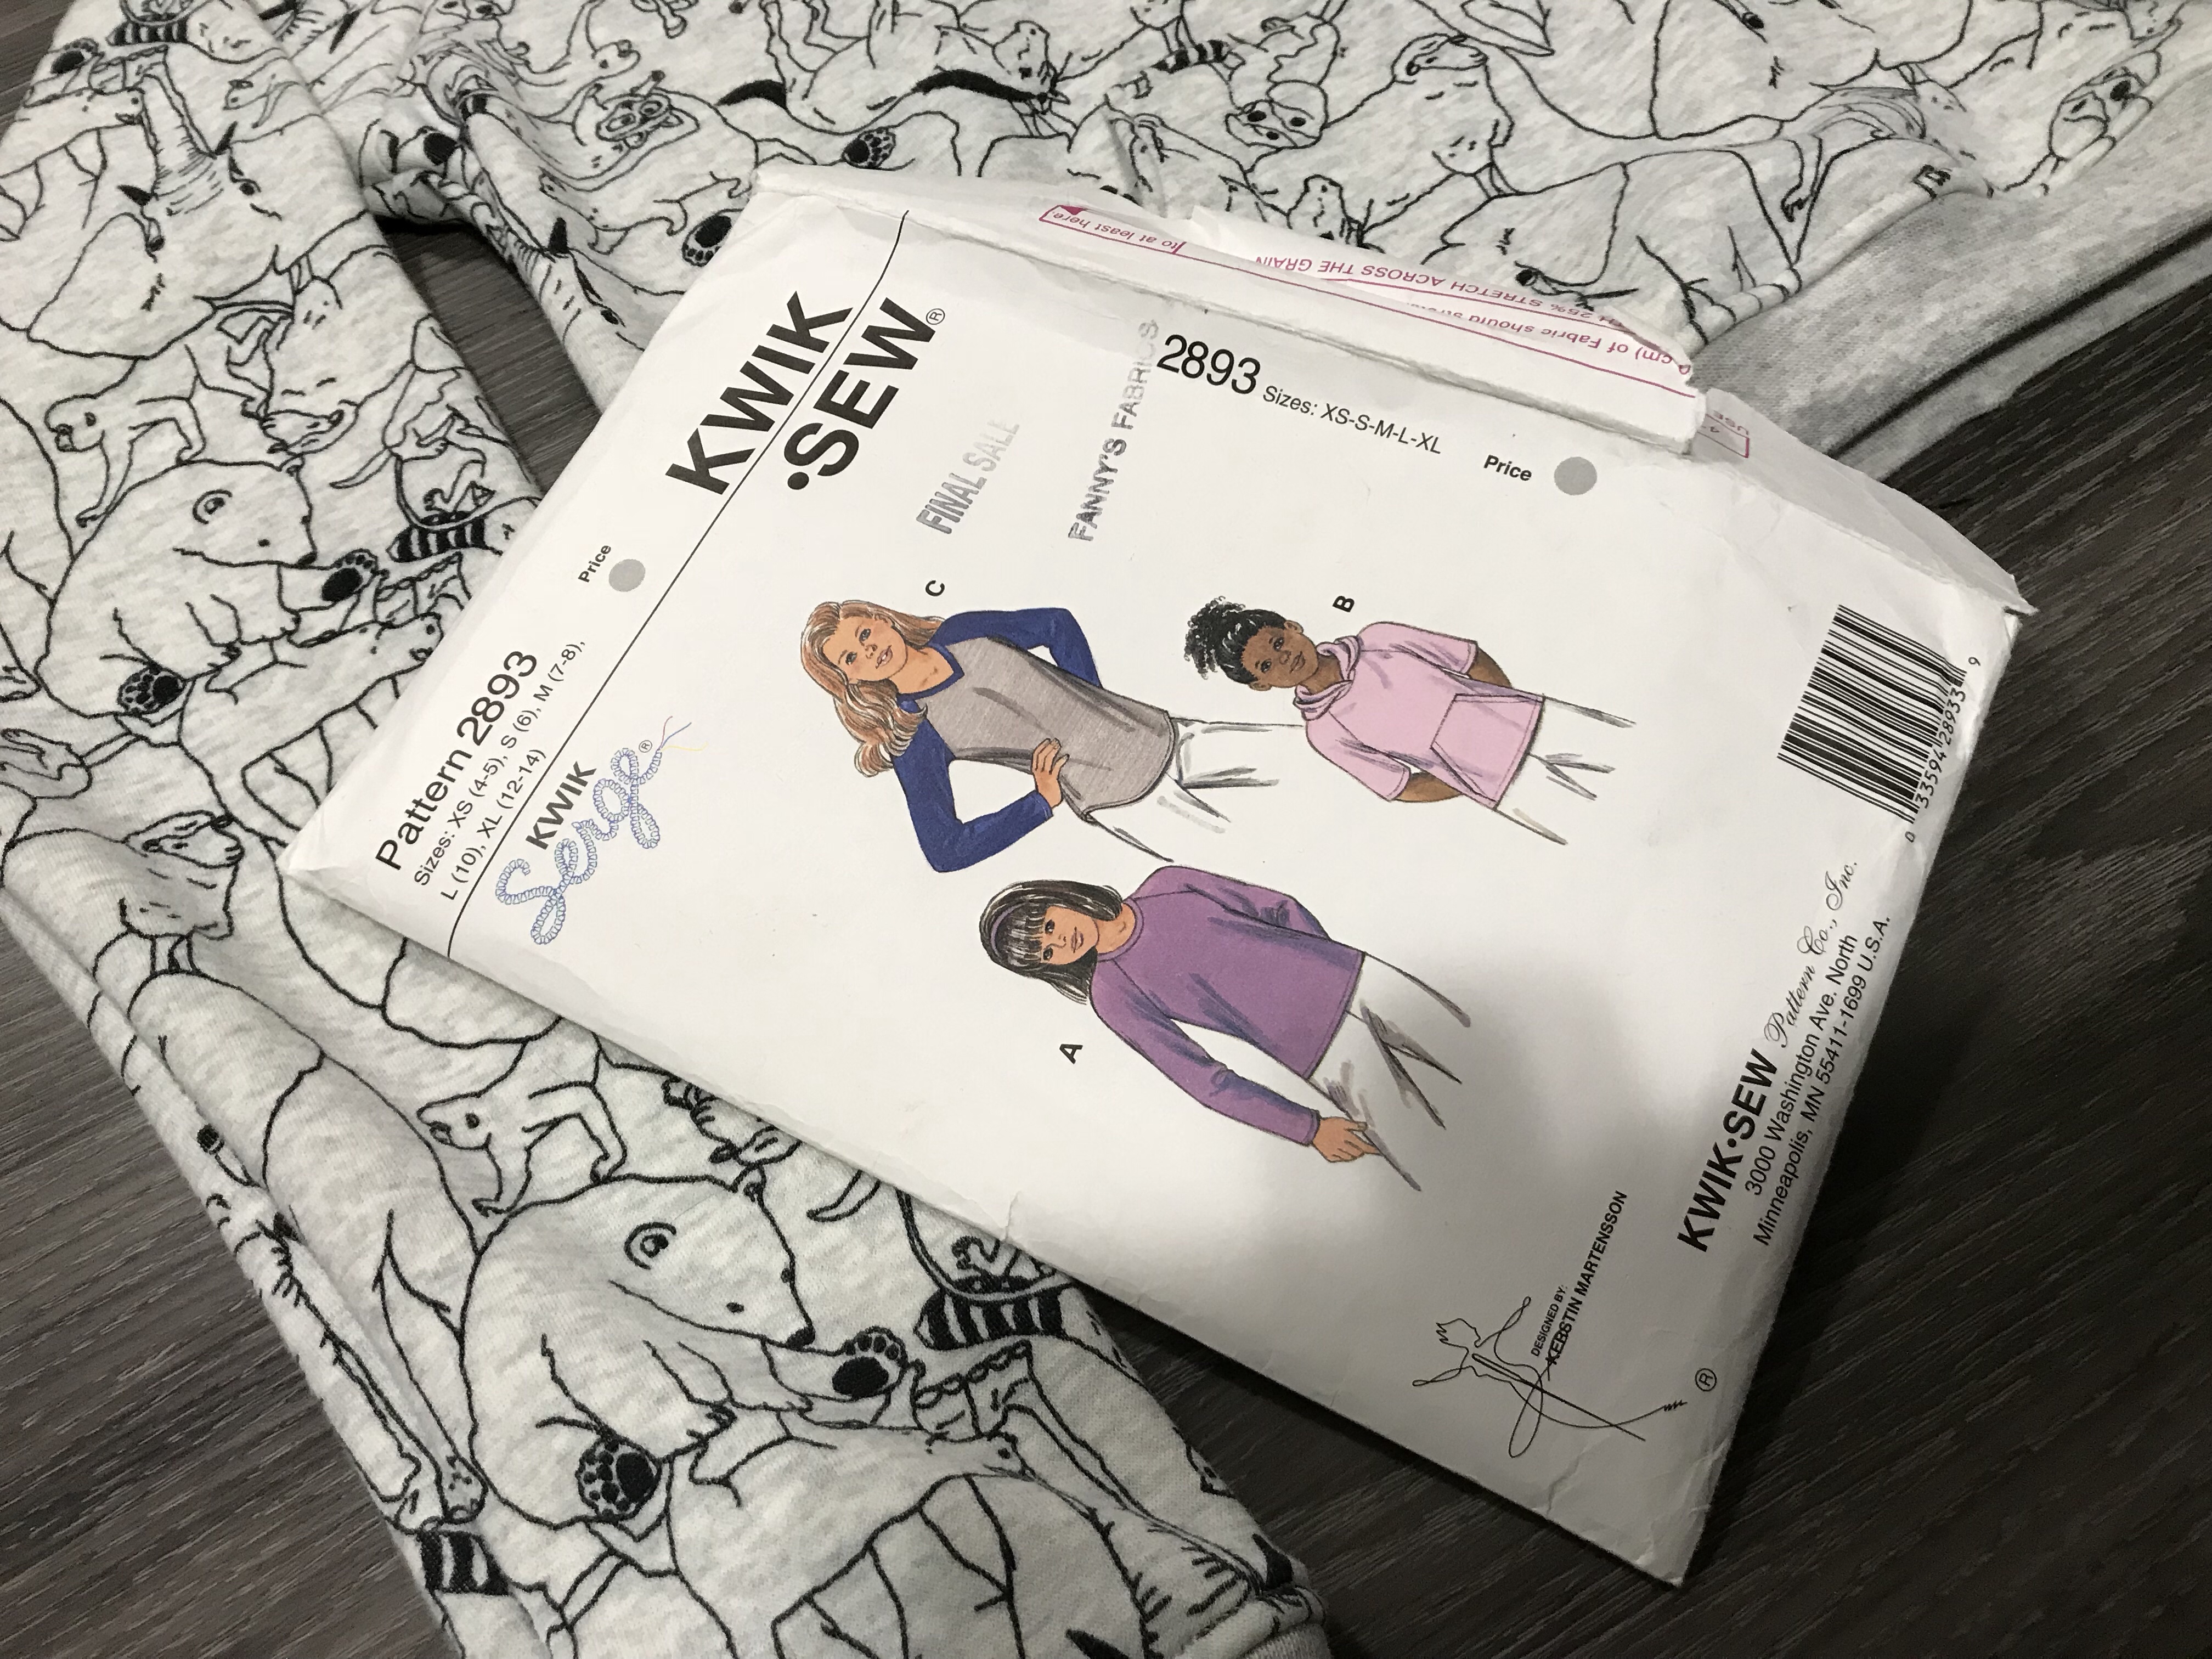 After a bit of digging I decided Kwik Sew 2893 seemed like a good place to start. While it’s styled like a baseball tee, it’s roomier than
 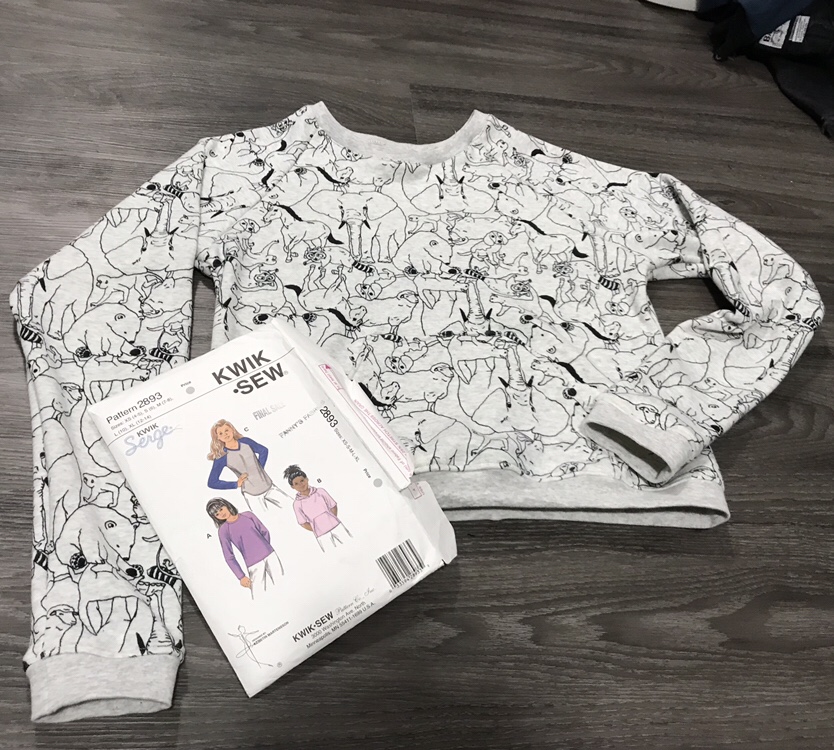 It’s a kids pattern but the XL is a size 12-14, which is about the same chest measurement as Tyo, and I figured if it didn’t fit Syo it would fit Tyo, and if Tyo didn’t like it it would work for Fyon, who is a very skinny eleven now. This is the convenient part of having multiple girls in the family, even if they don’t stairstep quite as neatly as they used to.
 I wanted a slightly cropped length, partly just to use less fabric in this tester version, so I made it the length of the Extra Small size. This is still significantly longer than the sweater at the top of the post, and as it turned out, while it makes a short sweater, it’s not what I would call cropped.
 At the last moment I decided to include the pocket, also in a size XS, because it’s nice for teenagers to have somewhere to stuff their phones. This was pretty simple, although more stabilization might’ve been nice. I did knit interfacing strips along the opening parts.
 None of the grey ribbings I have in stash were a perfect match, but this one was the best. I could also try black at some point, that might be fun.
 Anyway. While I was sewing it up I was convinced I was making a sweater for Fyon, but Syo tried it on and it fits her. It also fits Tyo but the length is awkward—longer than cropped but not as long as she’d like a normal length sweater. On the other hand she didn’t take it off and went on to sleep in it, so I guess it’s not that bad.
 And it’s one tiny piece less taking up space in my stash.