Tag Archives: finished projects

Weekend Sewing

What to do on a Sunday evening to save your weekend from complete non-productivity

I was really hoping to get the blue tunic finished this past weekend. However, after thoroughly botching the zipper insertion*, I decided to take a break from annoying polyester crepe and take a stab at using up the remainder of the Pink Suit fabric, which has been lurking around the basement for the last few months.

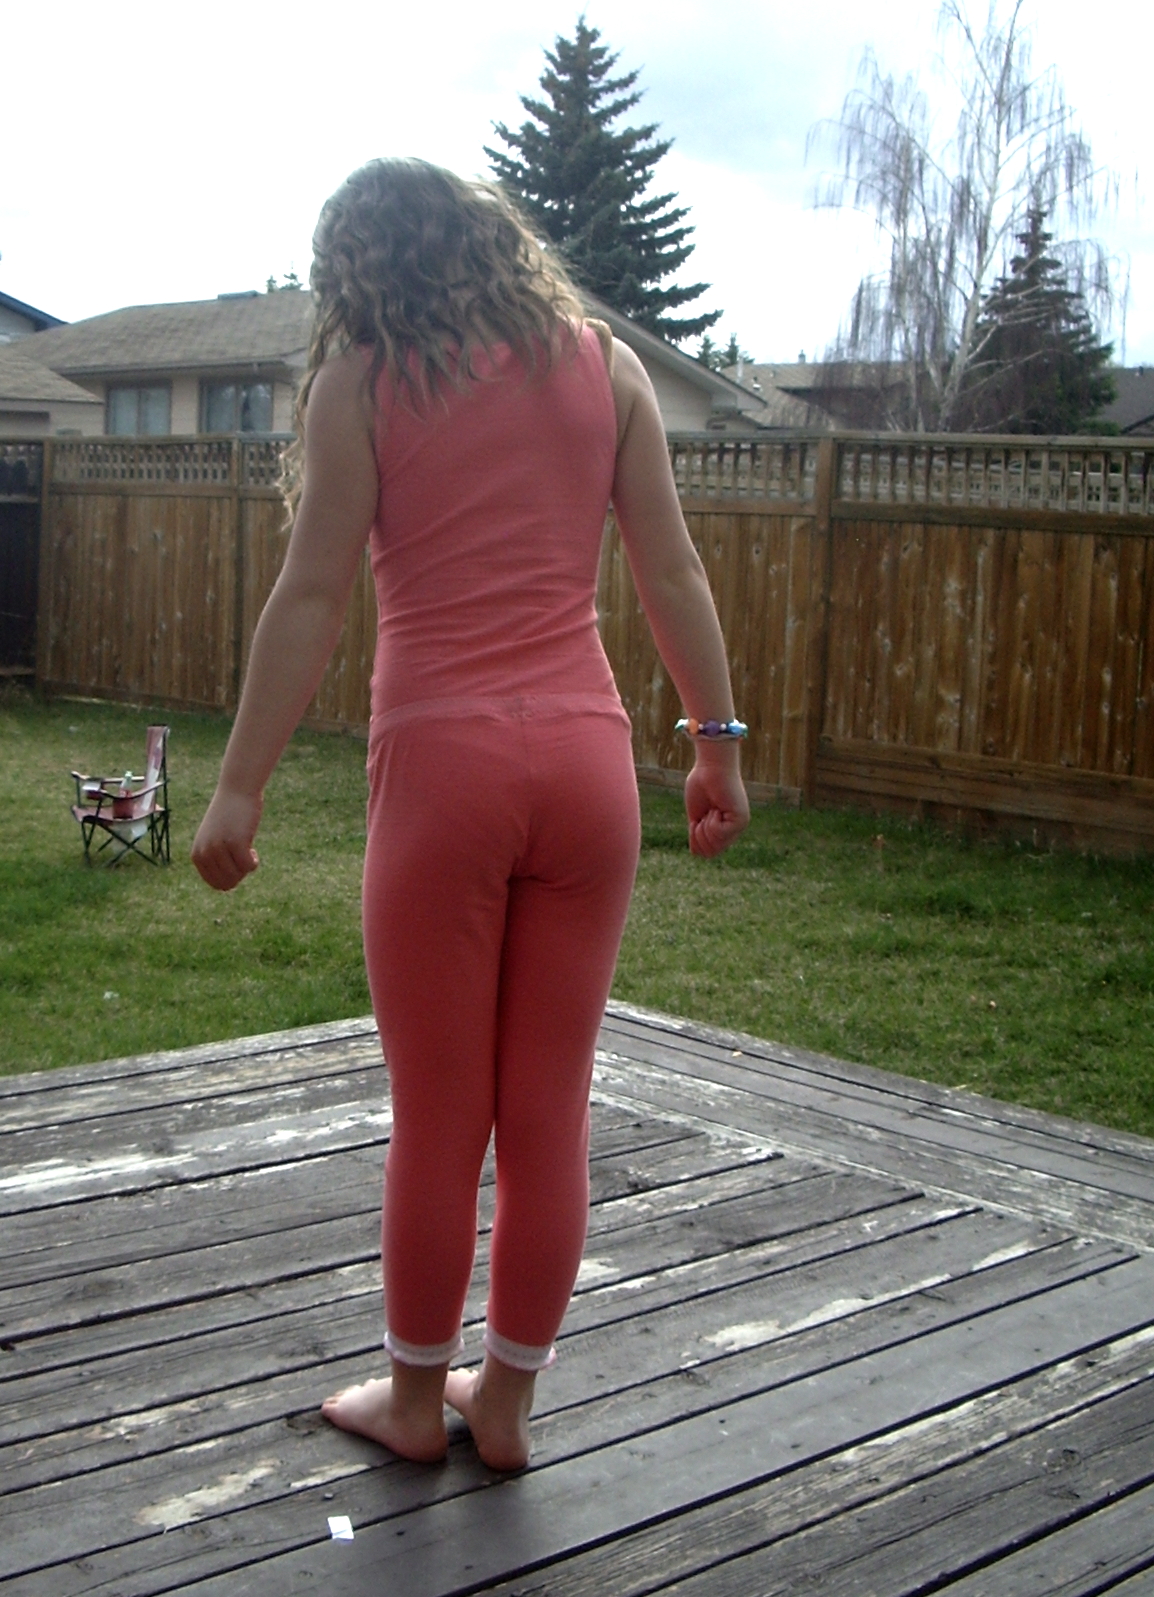
ETA: Emergency Clarification: this project was for Syo, the eight-almost-nine-year-old. This is her in the next photo; I did not miraculously grow my hair ten inches, nor did I shrink two and a half feet. You may now return to your regularly scheduled blog-reading.

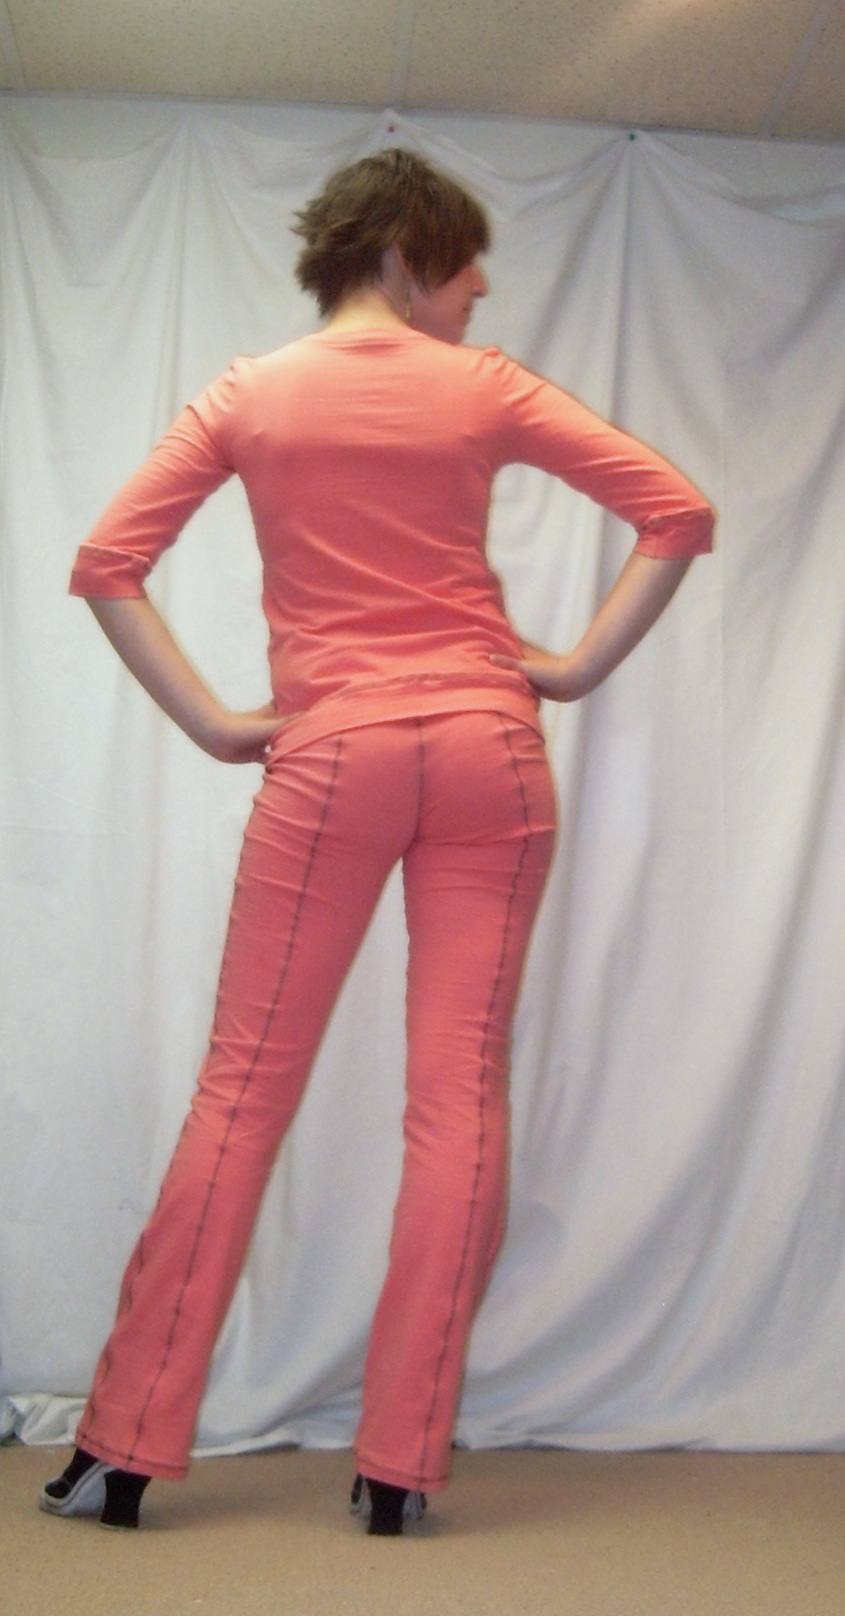
Back view

Diving through stash, I also located the bag of lace that came from my Grandma’s stash, presumably dating back to the days when she used to make us underwear for Christmas. I picked this bit of stretch lace, enough to do the cuffs of a pair of leggings and a single line across the front of the matching leotard. I thought it would be a nice break from All Pink All The Time.

A super-simple leotard

Frankly, I was a little surprised when Syo got up this morning and eagerly put the leggings on. I was not sure that pinkpinkpink was going to be a popular colour. And the fabric has a bit more stretch in it than the last pair of leggings I made her, so they’re a bit loose, even after I took in the inseam a bit.

Lace top-stitched down with a zig-zag

I was pretty stoked when I came upstairs from finishing the set last night and realized my husband was just finishing the episode of Breakout Kings he’d started when I went down to sew. Had I really cut & stitched all this in under an hour?

… turns out it was the extra-long season finale.

Edges: clear elastic stitched on with triple zig-zag and then topstitched under with the "athletic" stitch.

But still, two hours (minus commercials, because he records and skips through those) for the set. Not too shabby.

Front

The pattern is, again, Kwik Sew 1670, in a size 8, which is just a little big for Syo (who will be turning nine in two months). It includes both the leotard and slightly cropped leggings. This time I disregarded the lengths Kwik Sew suggests for the elastic on the leotard and sewed it in straight rather than in the round, putting a wee bit of tension into it but not enough to ripple the fabric. And I quite like how it turned out. It does involve a bit more thought in terms of construction order—sew crotch; elasticate leg openings; sew side-seams; elasticate arm openings; sew one shoulder; elasticate neck opening; sew second shoulder; turn all elasticated edges under and topstitch in the round. I *really* like that this got me both the ease of putting in elastic flat and the nice finish of topstitching in the round. As you can see I topstitched with my “athletic” stitch, rather than the triple zig-zag. It’s a bit of a different look; not sure if I like it any better, though.

Testing

Now I really need to make something for Tyo before she notices that Syo’s gotten two (three) things in a row…

Or, y’know, finish the blue tunic.

*Funny story. I wasn’t actually going to *do* a zipper insertion, except then there was a nice dress-length zipper in the proper shade of blue in the package from ElleC, so I thought it was karma and figured I’d throw it in. Bad idea. Bad, bad Karma. Either that or ElleC is sending me cursed zippers, which I might not put past her, but I think the culprit in this case is the *really annoying fabric*.

21 Comments

Filed under Sewing

A Silkier Slip

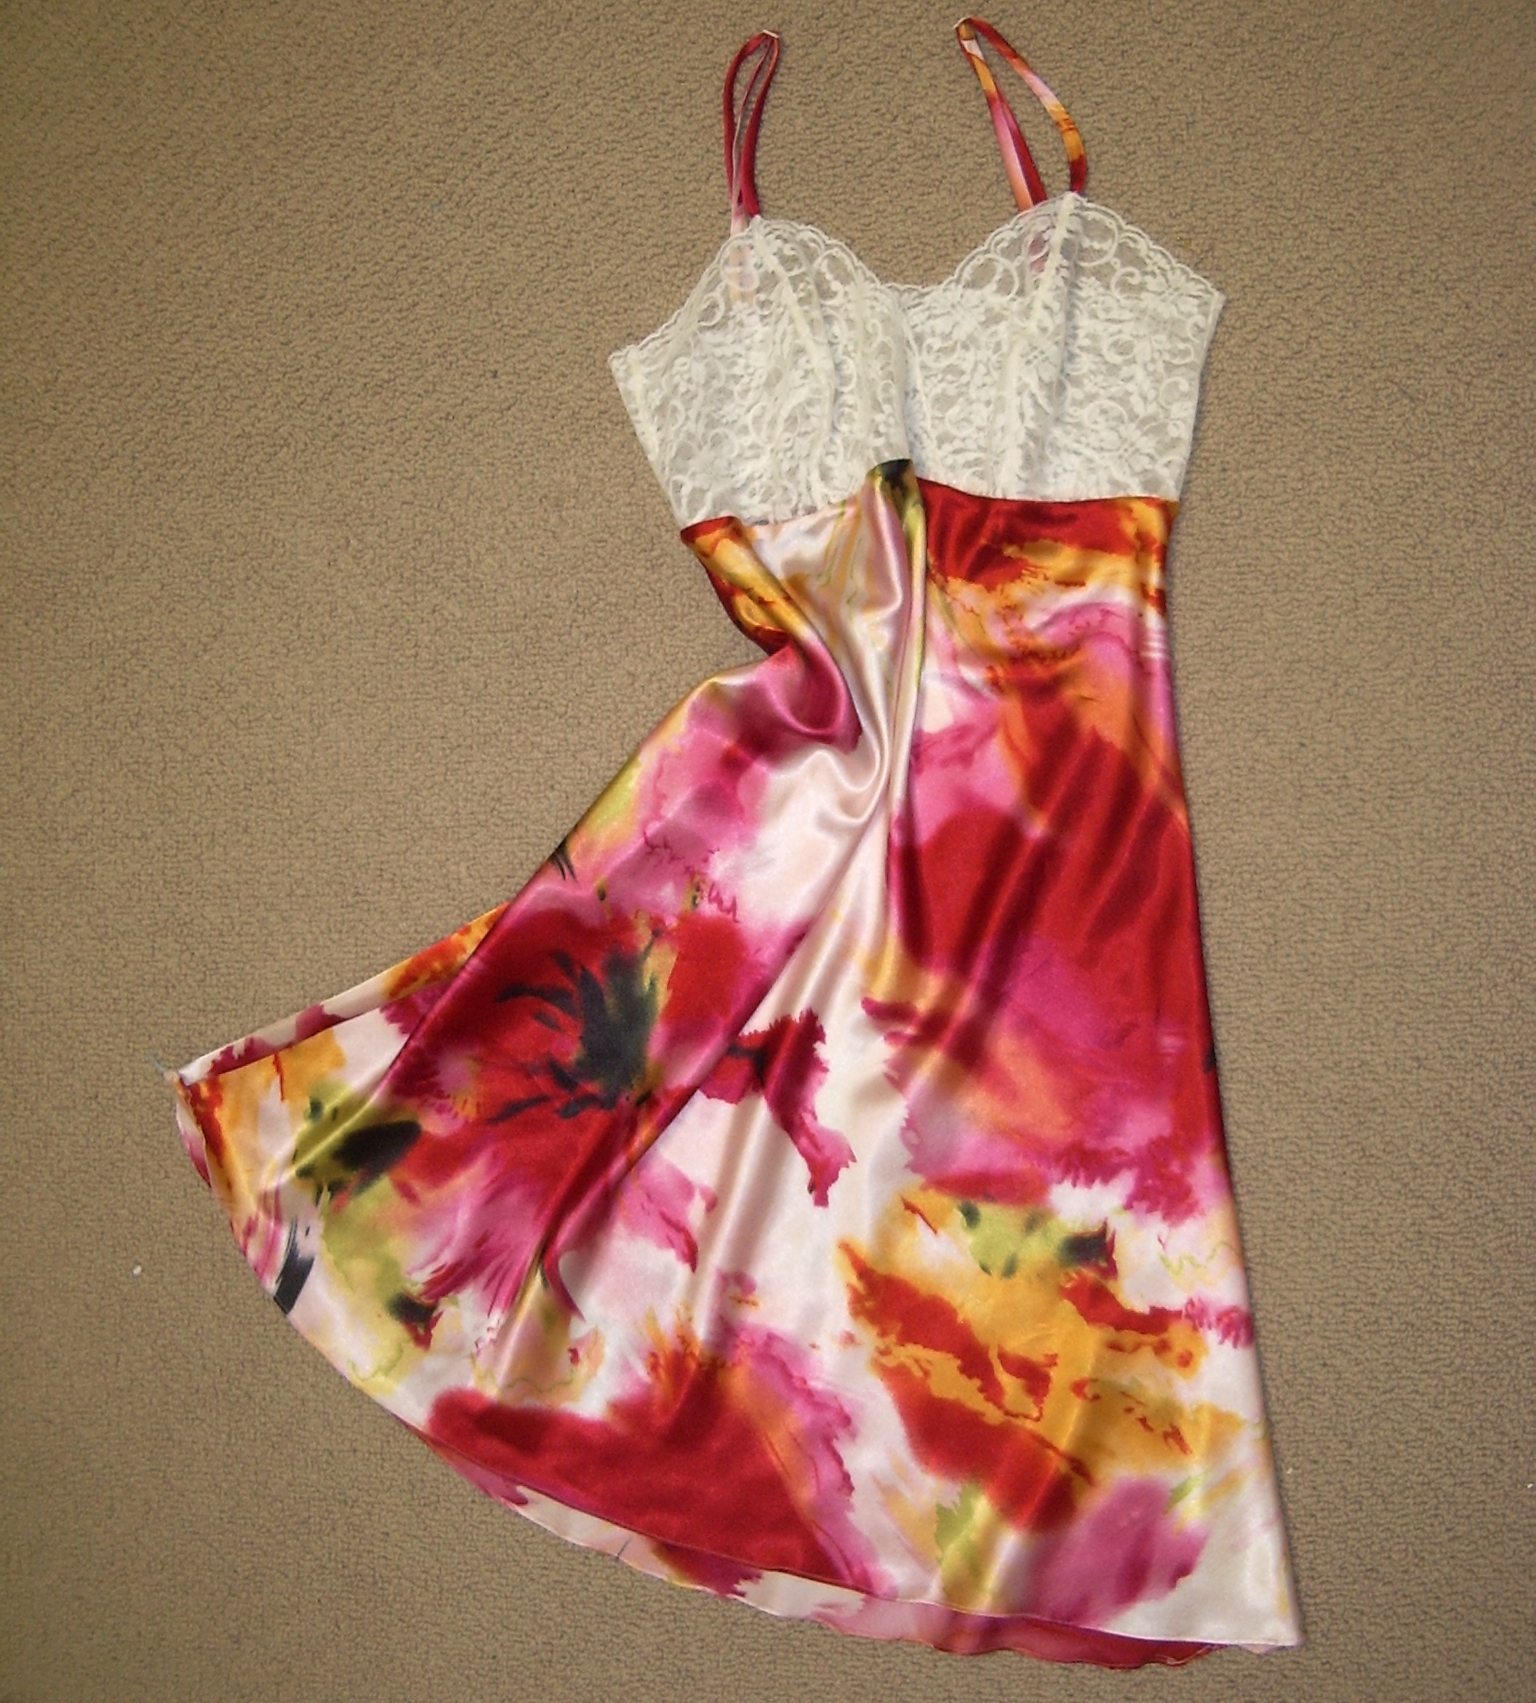
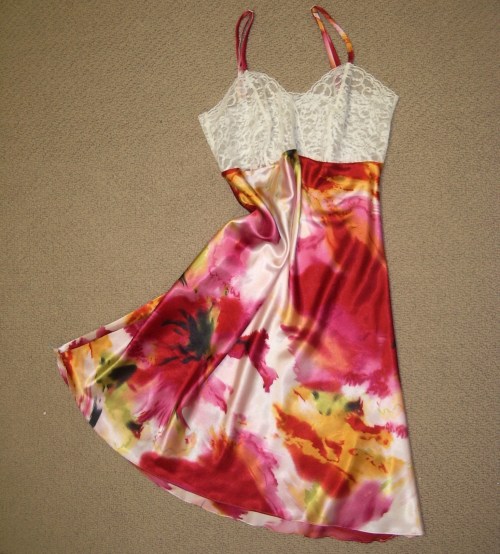
A gift slip

You may recognize this as the slip I teased about a little while back. Now that the gift is sent, I can talk a bit more about it. Ada, who has been one of my best friends since High School, is getting married.

Unfortunately for me, she decided to do it in Mexico, and between family and THESIS obligations and the eternal (lack of) money, I couldn’t go. This is the woman who came to prenatal classes with me, who was there when my kids were born. And I can’t be there for the most amazing day in her life since, oh—at least since she got her Master’s degree. POOPY!!!!

On the mannequin. Even padded out, the fit on my duct-tape-double is mediocre, but hopefully the real-life fit will be better.

But I could (attempt to) make something for her that would be, if not as awesome as she  is, at least really, really neat. And as soon as Sherry came out with the Ruby Slip pattern last Christmas, I knew what I wanted it to be.

Unfortunately, I also knew exactly what I wanted it to look like. Teal fabric with orange lace, her signature colours—a pairing as unique and awesome as she is.

The problem with having the exact image in your head is, nothing you look at in the store ever quite matches up. I even found silk charmeuse in the perfect slightly-burnt-orange shade, but couldn’t find a lace that was a worthy match. I bought four metres (!) of teal stretch lace (with sequins!) but while it has a certain coolness, it’s also tacky as hell, and I couldn’t bring myself to use it. This time. No promises for the future.

So, in the end, I settled. Despite being 100% polyester, this fabric feels just as nice as the above-mentioned silk (seriously, with my eyes closed I couldn’t tell the difference), and was a fraction of the price. Not that I was going for cheap here, for once. And while the print isn’t quite what I envisioned, it is very her. I think. Oona should be proud—I have such a hard time wrapping my head around prints. The lace is the same thrift-store stuff as my blue slip—as I said, I haven’t found anything nicer.

In theory, having just made the blue version, I should avoid making all the mistakes I made the first time around, right?

Hmm.

Detail

Sometimes that works. Other times, I just seem to end up paying less attention (because I totally know what I’m doing, right?)

So some things are better in this one (my bias side-seams, for example). Others… were not quite so smooth (some of my seam-matching on the bodice, eg.)

The fabric was slithery and slinky, as is to be expected. However, it mostly went together well. I think the most alarming thing about sewing on the bias is how the lovely 1cm seam allowance (my favourite seam-allowance width) can shrink to half or billow wider, all depending on how much tension you have on the fabric. Sherry suggests sewing the bias with a slight tension on the fabric, which is what I tried to do, but it’s still a bit alarming and fiddly. I didn’t have much trouble with riplling seams, though, except a bit around the bottom of the bodice that probably have more to do with the stretch lace and the clear elastic I added in there (probably not necessary) than the bias.

Now, those of you who just like to look at pretty pictures can probably go on with your lives. Those of you who actually enjoy obscene amounts of construction detail, read on. 😉

The shoulder straps

An adjustable strap

Not having the recipient available for fitting, I wanted to do adjustable shoulder-straps. Naively, I headed off to Fabricland to pick up little rings and sliders. I knew they had some bra supplies—underwires and formed cups and bra-hooks—so I assumed they would have little sliders, too.

You guessed it. Nary a little slider. There were two styles of complete, ready-made straps, with sliders on, one of which cost $12.95, one which cost $2.50. Of course, I didn’t want pre-made straps—I wanted gorgeous slinky silky matching straps—so, I went with the cheaper ones. Which means I basically spend two-fifty on the crappiest, cheapest plastic rings and sliders ever. I’m sorry, Ada. My bad. I promise I’ll replace them when they fuck up. I should probably have just bought a junk bra from the thrift store and scavenged off it.

Back loop

Other than that, making the straps wasn’t too hard, especially since I could compare them with the crappy pre-made straps for how the loops needed to loop together. I wanted the straps to fit the sliders (at least more or less) so I didn’t make the straps as narrow as I could have. I will say, turning spaghetti straps in this kind of slinky fabric is insanely easy. I would’ve used the bobby-pin method, but I couldn’t find my bobby pin, so I used a small safety pin instead, and it worked just fine, although it’s not quite as slick as the bobby-pin method. Stitching the little loops wasn’t too hard, although I initially tried to attach them entirely by machine, which basically flattened my slender bias straps into fat wads of ugly thread. Fortunately the straps were super-extra-long so I was able to just cut off the booboo and re-stitch by hand. Not exactly the flawless finish I was hoping to give Ada, but pretty enough.

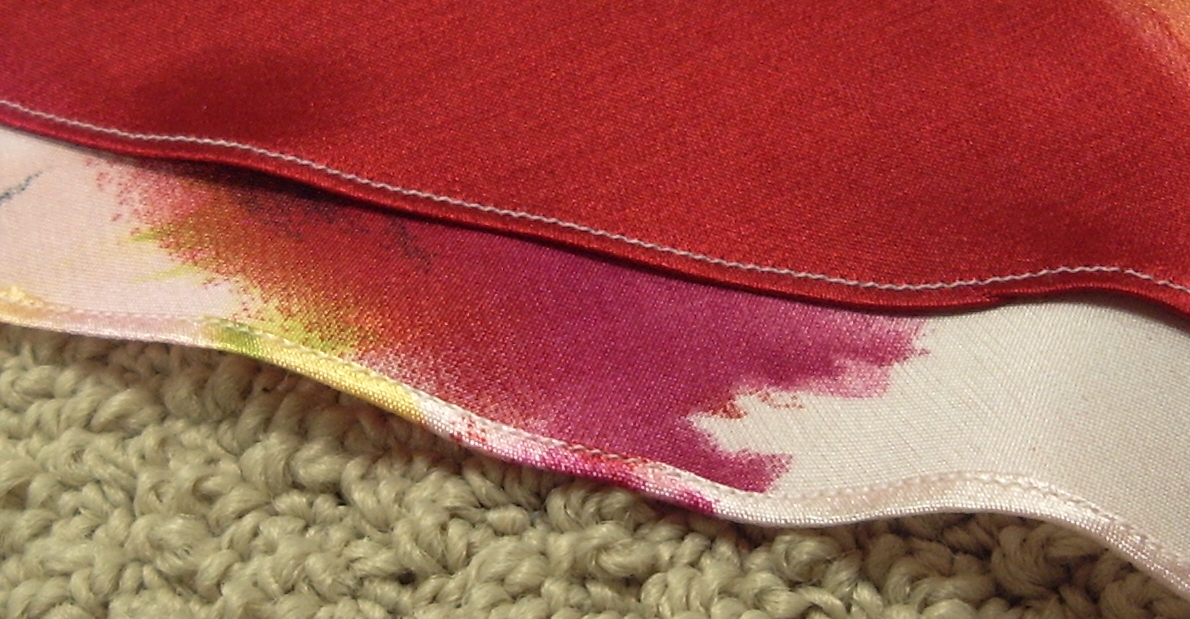
The Hem

The Good

And then, when I had everything together, had hung the whole kaboodle, adjusted the length to be a bit more even (hopefully), I got a little crazy.

I decided I would try and do the hem with my rolled-hem foot.
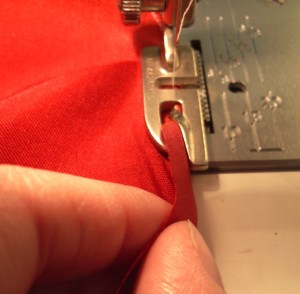
Rolling the hem

Judging by the comments on my teaser, I am not the only one who has a love/hate (or hate/hate) relationship with this damned, deceptively simple little attachment. It’s not coincidence that Sherry, for the sewalong, advised sewing the hem in two passes. Not that that method doesn’t require skill, either ;). I’m not quite sure what possessed me to try the foot this time, either, except bloody-mindedness. And I was going to go into a bit of detail here on my history with this insidious foot and the things I do to (attempt to) master it, but it was getting really, really long so I think I’ll throw it up as a separate post. Gotta milk my sewing woes for all they’re worth. 🙂

The bad: messy seam area.

In short, I finished the slip, wrapped it up, and sent it off with a friend who was flying down for the ceremony.

So now my main fear is that it’s not going to fit. Ada gave me her measurements (high bust and full bust), and as she’s a rather well endowed lady, I did an FBA following Sherry’s method which I *hope* will be adequate. Part of it is that Ada’s lost weight since I last saw her (and probably more since she gave me the measurements after Christmas) so the Ada in my head is not the same size as the real-world Ada.

I seriously don’t know how people sew wedding-dresses. The hardest part of this make was that perfectionism (which I usually confine to areas of my life outside of sewing)  reared its nasty head. How can I send my BFF a wedding present with a wonky hem? With less-than-perfect stitching? That might not fit? That has cheap crappy strap sliders? Aaaaaaaaaah!!!

Breathe, Tanit. Breathe.

So that was my weekend. How was yours?

37 Comments

Filed under Sewing

A Fluttery Finale

Flutter Sleeve Top

The second, “definitive” version of the Flutter Sleeve Hack has been completed.

It is made, as my husband noted, of the same stretch lace as my Tee-shirt dress last year.

Actually, my dearly beloved man didn’t realize this was a different garment.

*eyeroll* *headdesk* *facepalm*

Anyway, I’m quite happy with the flutter length and angle etc. I will say that this is not the easiest way to get a flutter sleeve—turning a regular set-in sleeve of a length you like into a flutter is dead easy to get right the first time. On the other hand, this one you don’t need to actually sew on, which is the major win of the BCT pattern all around.

I also quite like how it looks with this knit skirt, which is one of those pieces that, while I love it, doesn’t go with much of anything (except a plain white tank-top). It’s not so much the colour or even style that’s the problem, as the hip-hugging shape; any kind of boxy or detailed top tends to overwhelm it. I feel like I’ve kinda got some vague 20s-vibe going (or maybe that’s just the evening gloves and the shoes).

For the purposes of the photos I was daring and wore the top over my lilac-coloured bra. I think it’s pretty fetching and fairly subtle, but in real life I’ll be wearing the afore-mentioned white tank top underneath. Just saying. I think I prefer the lace with a white underlay anyway—it brightens it up and takes it a little farther from my skin tone.

I did a very simple neckline finish, just zig-zagged some narrow clear elastic to the neckline, folded it under, and topstitched. It turns out I could’ve pulled it a little tighter, but it’s hard to judge on this fabric—the amount of stretch and recovery in the lace is really, um, confusing, somehow.

All in all, this is about as simple and easy as a knit top gets. No hem finishing. No sleeve finishing. Just four seams and the neck-opening.

And that’s all there is to say about that. 🙂

30 Comments

Filed under Sewing

The Closet Monster Lives!

Monster & Maker

Tyo had a good friend’s birthday party to go to this weekend. (These pictures were squeezed in between her having a shower and leaving for the party, hence the wet hair.)

Said good friend has a mother who sews (quilts) and has given away home-stitched party favours at previous birthday parties. She also really liked looking at Tyo’s Closet Monster book, and even gave Tyo an old PJ shirt* she didn’t like to turn into a monster.

So naturally, Tyo wanted to give this friend a closet monster for her birthday.

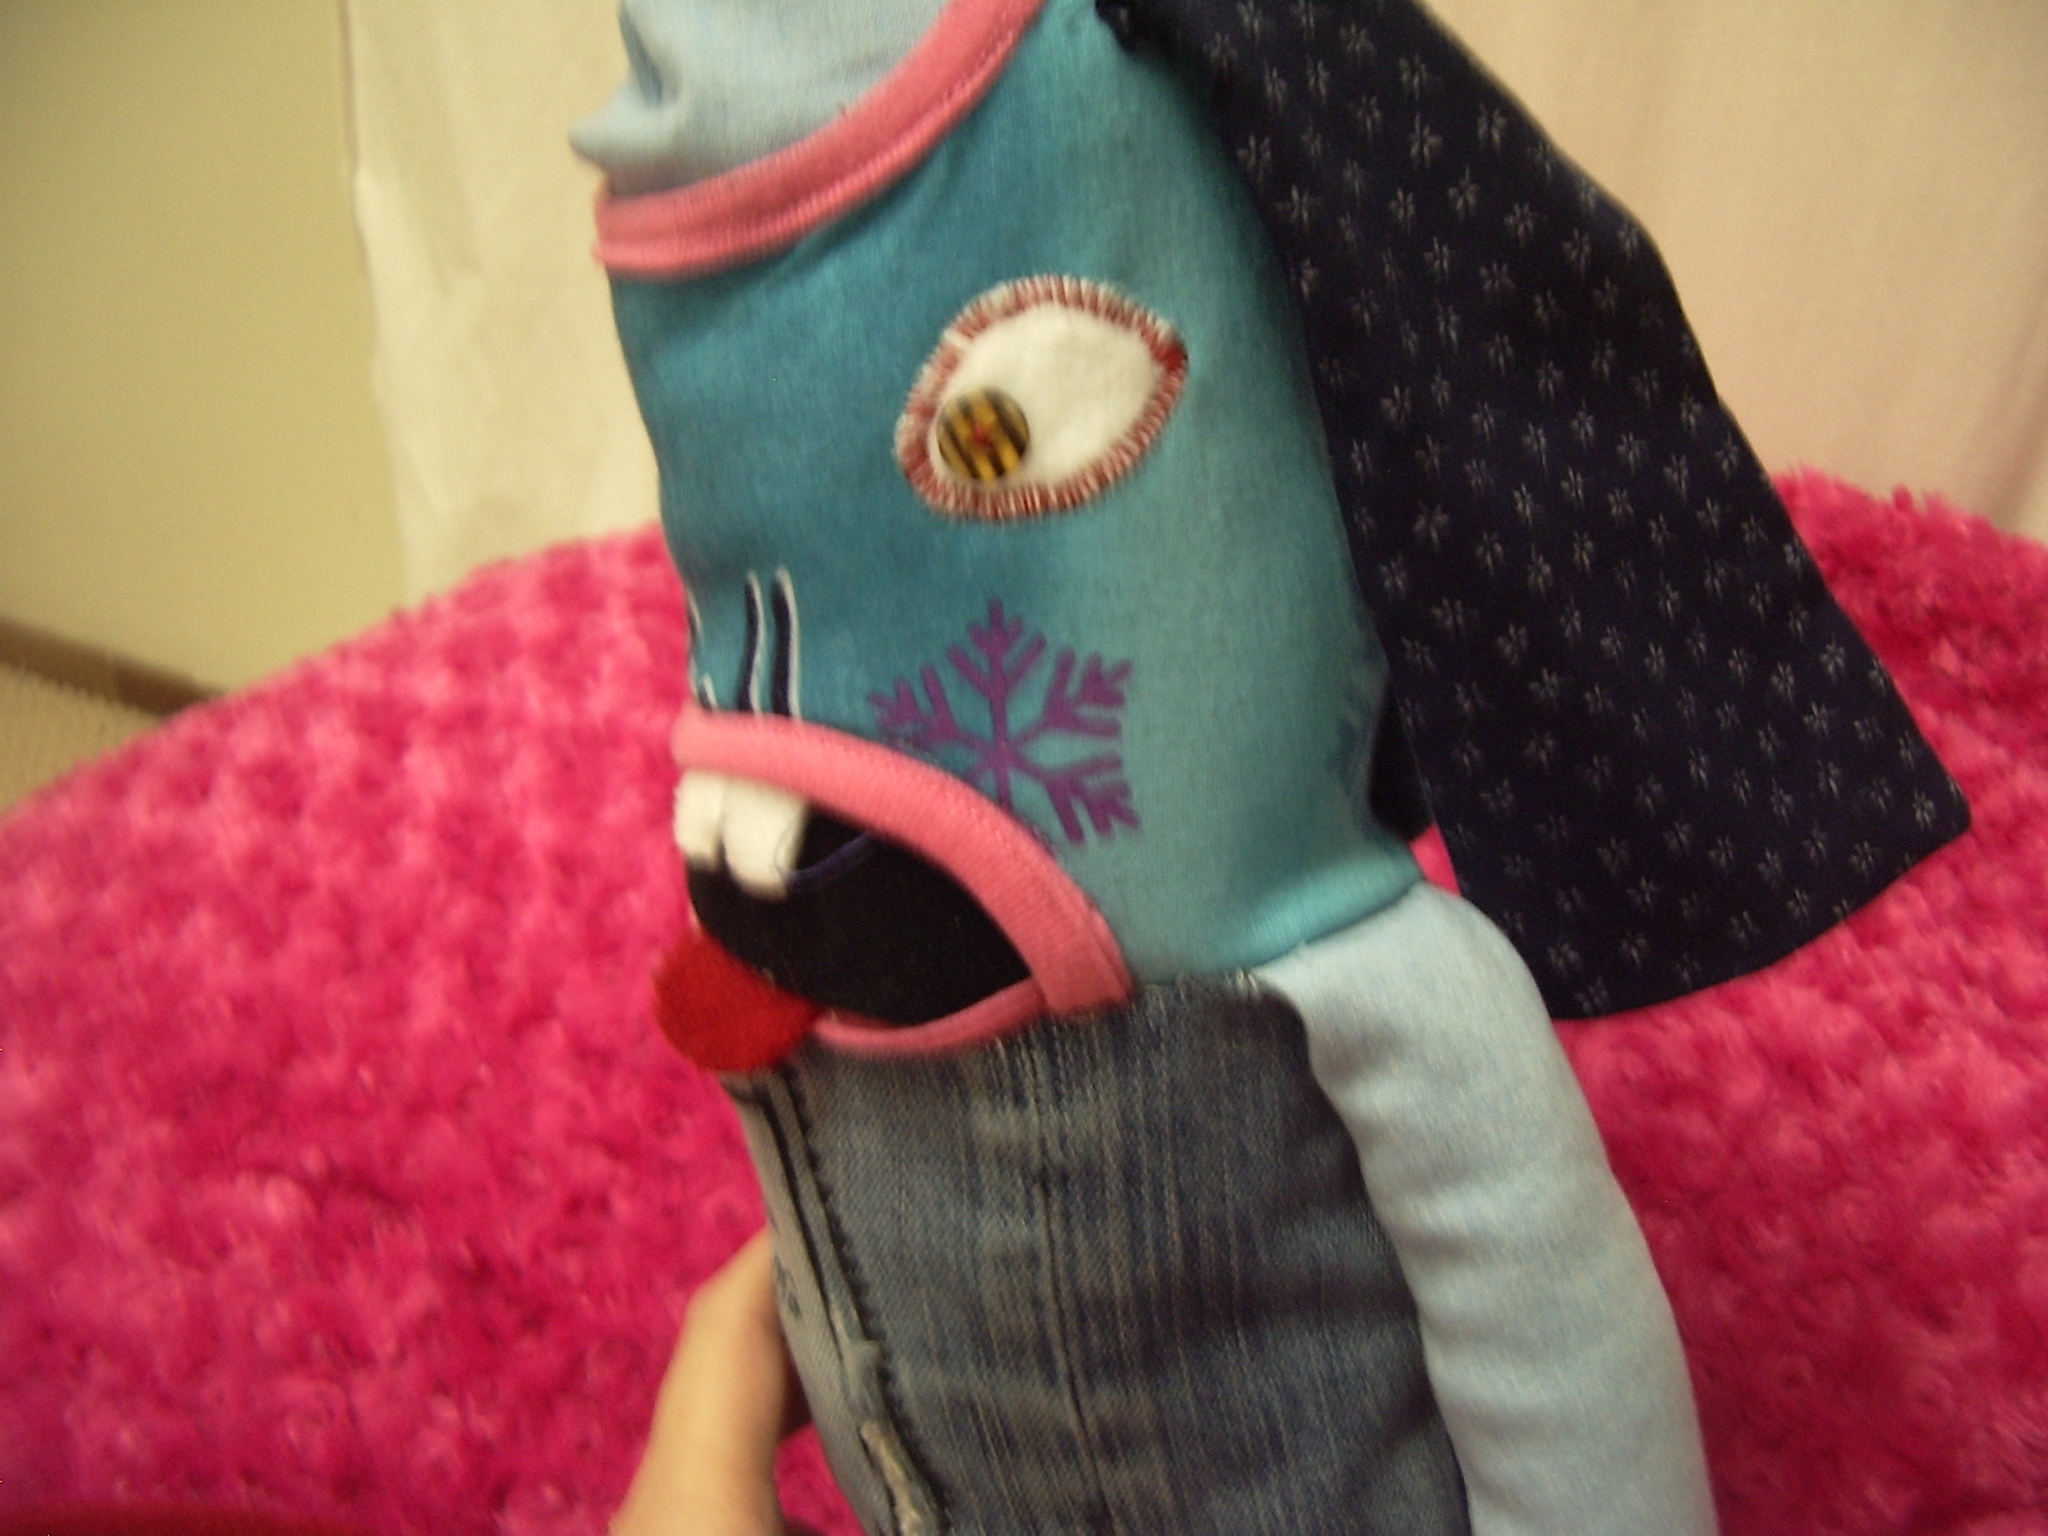
The Inspiration Monster

I won’t go into too much boring detail. The inspiration monster was Gilmor Oothby, who also appears on the book’s cover. We did not follow the directions particularly, because Tyo doesn’t read directions very well and I couldn’t be bothered. We looked at the picture of the pattern pieces, but that was about it, especially since we wound up using mostly fabric scraps from the massive Scrap Stash of Doom , and not much in the way of the actual shirt, which had a cute penguin on the front that Tyo wants to applique to something else. And was a really soft, thin knit not really suited to monsterizing. The trickiest part was getting the bottoms of the feet and the bottom of the body approximately the right size—but fortunately, approximately was plenty good enough.

Monster Face

Anyway, Tyo managed a fair proportion of the construction, and I did the trickier bits, and while it was definitely a joint project I feel pretty satisfied that she held up her end of things. There was a modest amount of un-picking where we went too far off the rails (like forgetting to insert the arms), which was accomplished with only minor grumbling.

I am told his name is "Freddy."

The body is made out of one leg of what was once my favourite pair of jeans. When Buffalo Jeans discontinued their City X style, it was probably the first step on the road to making my own jeans, because man, nothing has quite matched them since. /sniff.

Back View

Every other piece of fabric on the body (aside from the head/mouth that was from the gifted PJ shirt) is a scrap left over from some other project on the blog. I’m tempted to list them, but it would be long and probably boring. How about you guys guess? Y’know, with all that free blog-reading time you have.

Pointy fingers.

The monster appears to have been well-received. I have a feeling we will be making more of these in the coming months…

There was a certain amount of goofiness.

*Turns out it was actually a nearly-brand-new shirt she got for Christmas. Oops.

23 Comments

Filed under Sewing

Clover (anti)climax

Grum

It occurs to me that putting “climax” in a post title may not be the wisest decision ever… oh, well.

You remember my red clovers? No? Maybe that’s because they’ve been languishing in dreaded UFO limbo since, oh, January. I don’t do UFOs, peeps. I don’t always like what I make, but I almost always finish it.

Having cleared (or partially cleared) my sewing room of some backlog clutter on Monday, I was feeling inclined to tackle other energy-blocking projects (I even vacuumed the basement carpet, dammit. Of course, then I spread out and cut a bunch more fabric, but that’s beside the point.) So last night after dinner I picked up my Clovers from their sad little heap and set to work.

My main blockage was the zipper. I had settled on a lapped zipper for the final application (why, I don’t know, since I suck at lapped zips), but when stitching it up (after LOTS of hand basting, something I almost never do) I realized that my ends weren’t lining up with the top of the waistband on one side, and I chucked it in a corner put it away in disgust.

So, last night, I pulled the zipper out, examined the waistband and determined that one side was actually too wide, fixed that, and then set about hand-basting everything back in. Peeps, this zip is inserted almost entirely by hand. Probably not a good idea for a load-bearing area, but anyway. It looks mostly nice (a first for me with a lapped zip) except at the very bottom. Aside from the fact that the side of the hip is not a really good place for a lapped zipper—the over-lap seems to want to gape out a bit. The entire thing would’ve been considerably less brain-breaking if I’d made it more like a typical fly, with the waistband not included in the zipper, but that would’ve required a bit of extension of the waistband pattern, which I hadn’t done. So I made it work. The top of the zip has a wide pants-hook, but I couldn’t find a bar for it so I made a thread bar. I don’t really expect that to hold up, but it’s functional for now.

And then I hemmed, and now they’re done.

And, well, I’m… meh.

The problem is, I’m not sure if there’s an actual problem, or if I just don’t like side-zip, no-pocket, non-jeans-style pants. For one thing, I obviously need different underwear with them. 😛

Fit?

The side-seams are still a bit ripply. The waistband wants to sag down  in the front—it’s still a smidge higher than my “natural waistband groove”, despite me lowering it a good inch. I think this contributes to the wrinkling along the hip, not to mention the front-crotch wrinkles. I’d be tempted to take in the hips and thighs a bit more except it’s pretty much impossible to alter that side-zip. Well, without wanting to kill myself.

Hmm.

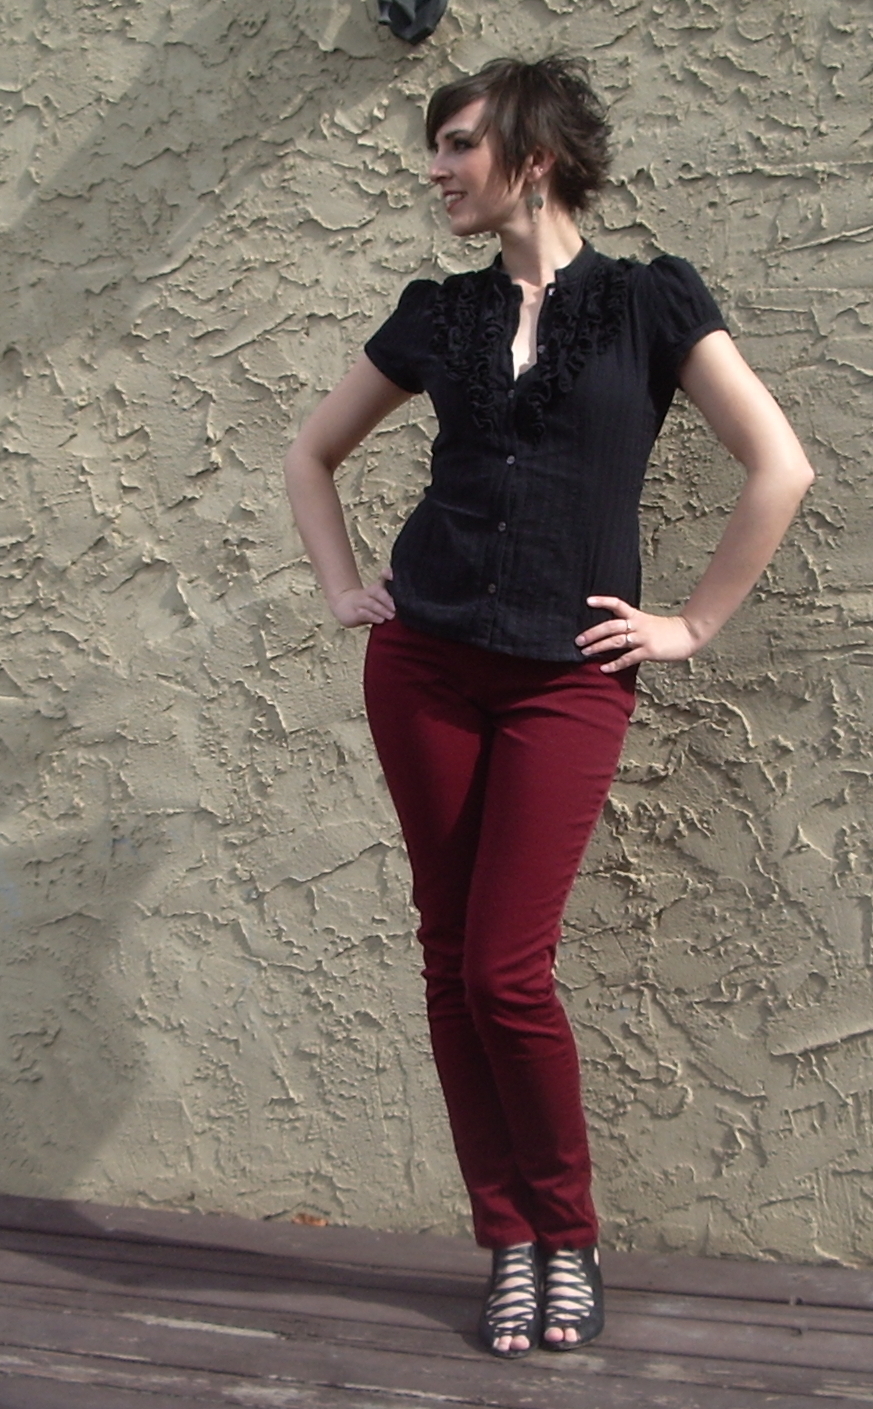
The calf is more snug than the thighs, which I think is also bothering me. Not a surprise—I have pretty muscular calves, and have run into this issue in storebought skinny pants. Although for some reason my feet and lower legs look tiny in these photos. Maybe it’s the wedges?

Probably I should add belt-loops and wear them with a belt and see if I like them better with the top held firmly in place. I interfaced the waistband with knit interfacing to retain a bit of the stretch, but if I want to wear them sans belt, I think that removing all stretch would’ve been a good idea. At the time I was paranoid about the whole thing being too small. Also it would mitigate the serious plumber’s crack that happens when I bend over.

Short or long?
Currently I’ve hemmed them full length (I added about 5″ to the pattern). I’m tempted to shorten them (though the picture doesn’t show the short look nearly as well as I hoped it would). I like the shorter look, but I feel like that would really limit their use in my wardrobe. I don’t usually go sock-free until the height of summer, and I don’t think the pedal-pusher look works with much but sandals, at least for me.

But am I going to wear them much anyway?

D’oh.

Why didn’t I just make this fabric into jeans? I really want red jeans…

54 Comments

Filed under Sewing

The Pink Suit

Pink Suit. Also, bad hair. >_<

(as my children so endearingly dubbed it) … is finished.

Right off the bat, I am going to apologize to Lisa. I did not end up incorporating her awesome hood pattern on the Renfrew. Mostly because I couldn’t find one of the  pattern pieces I painstakingly drafted from her instructions when the time was right, and I was too impatient to wait for it to show up. But then, the pink fabric is possibly a bit too thin, anyway. I will definitely try another time, after the pattern piece shows up.

So, shall we start with the bottom?

Jalie 3022

I added 4″ to the leg length in this pattern, as the size R (my hip size) only has a 30.5″ inseam. 34.5″ is a bit excessive, even for me, but frankly I wanted to be safe rather than sorry, and given that 4-way stretch pants sometimes lose length as they stretch, I wanted plenty. As it turned out (at least in this very stretchy fabric), I only needed about two extra inches, but I think I’m going to keep the length in the pattern just in case. I added the length in two sections, 2″ at the lengthen-shorten line on the thigh and 2″ just below the knee. I also did a small full-butt wedge (this  adjustment), based on my kids’ experience. Although as it turns out I probably could’ve skipped that, not so much because I didn’t need a bit of extra height in the back as because the overall rise was considerably too high for me—coming to just below my belly-button. That looks right on my kids; it doesn’t look right on me. Fortunately in a style like this, it’s easy to fix. I lopped off the seam at the bottom of the waistband (I don’t un-pick knits if I can avoid it), and cut a band off the top of the pants-portion, about 1cm from the back increasing to 3 cm at the front. Then re-attached the waistband. PERFECT!

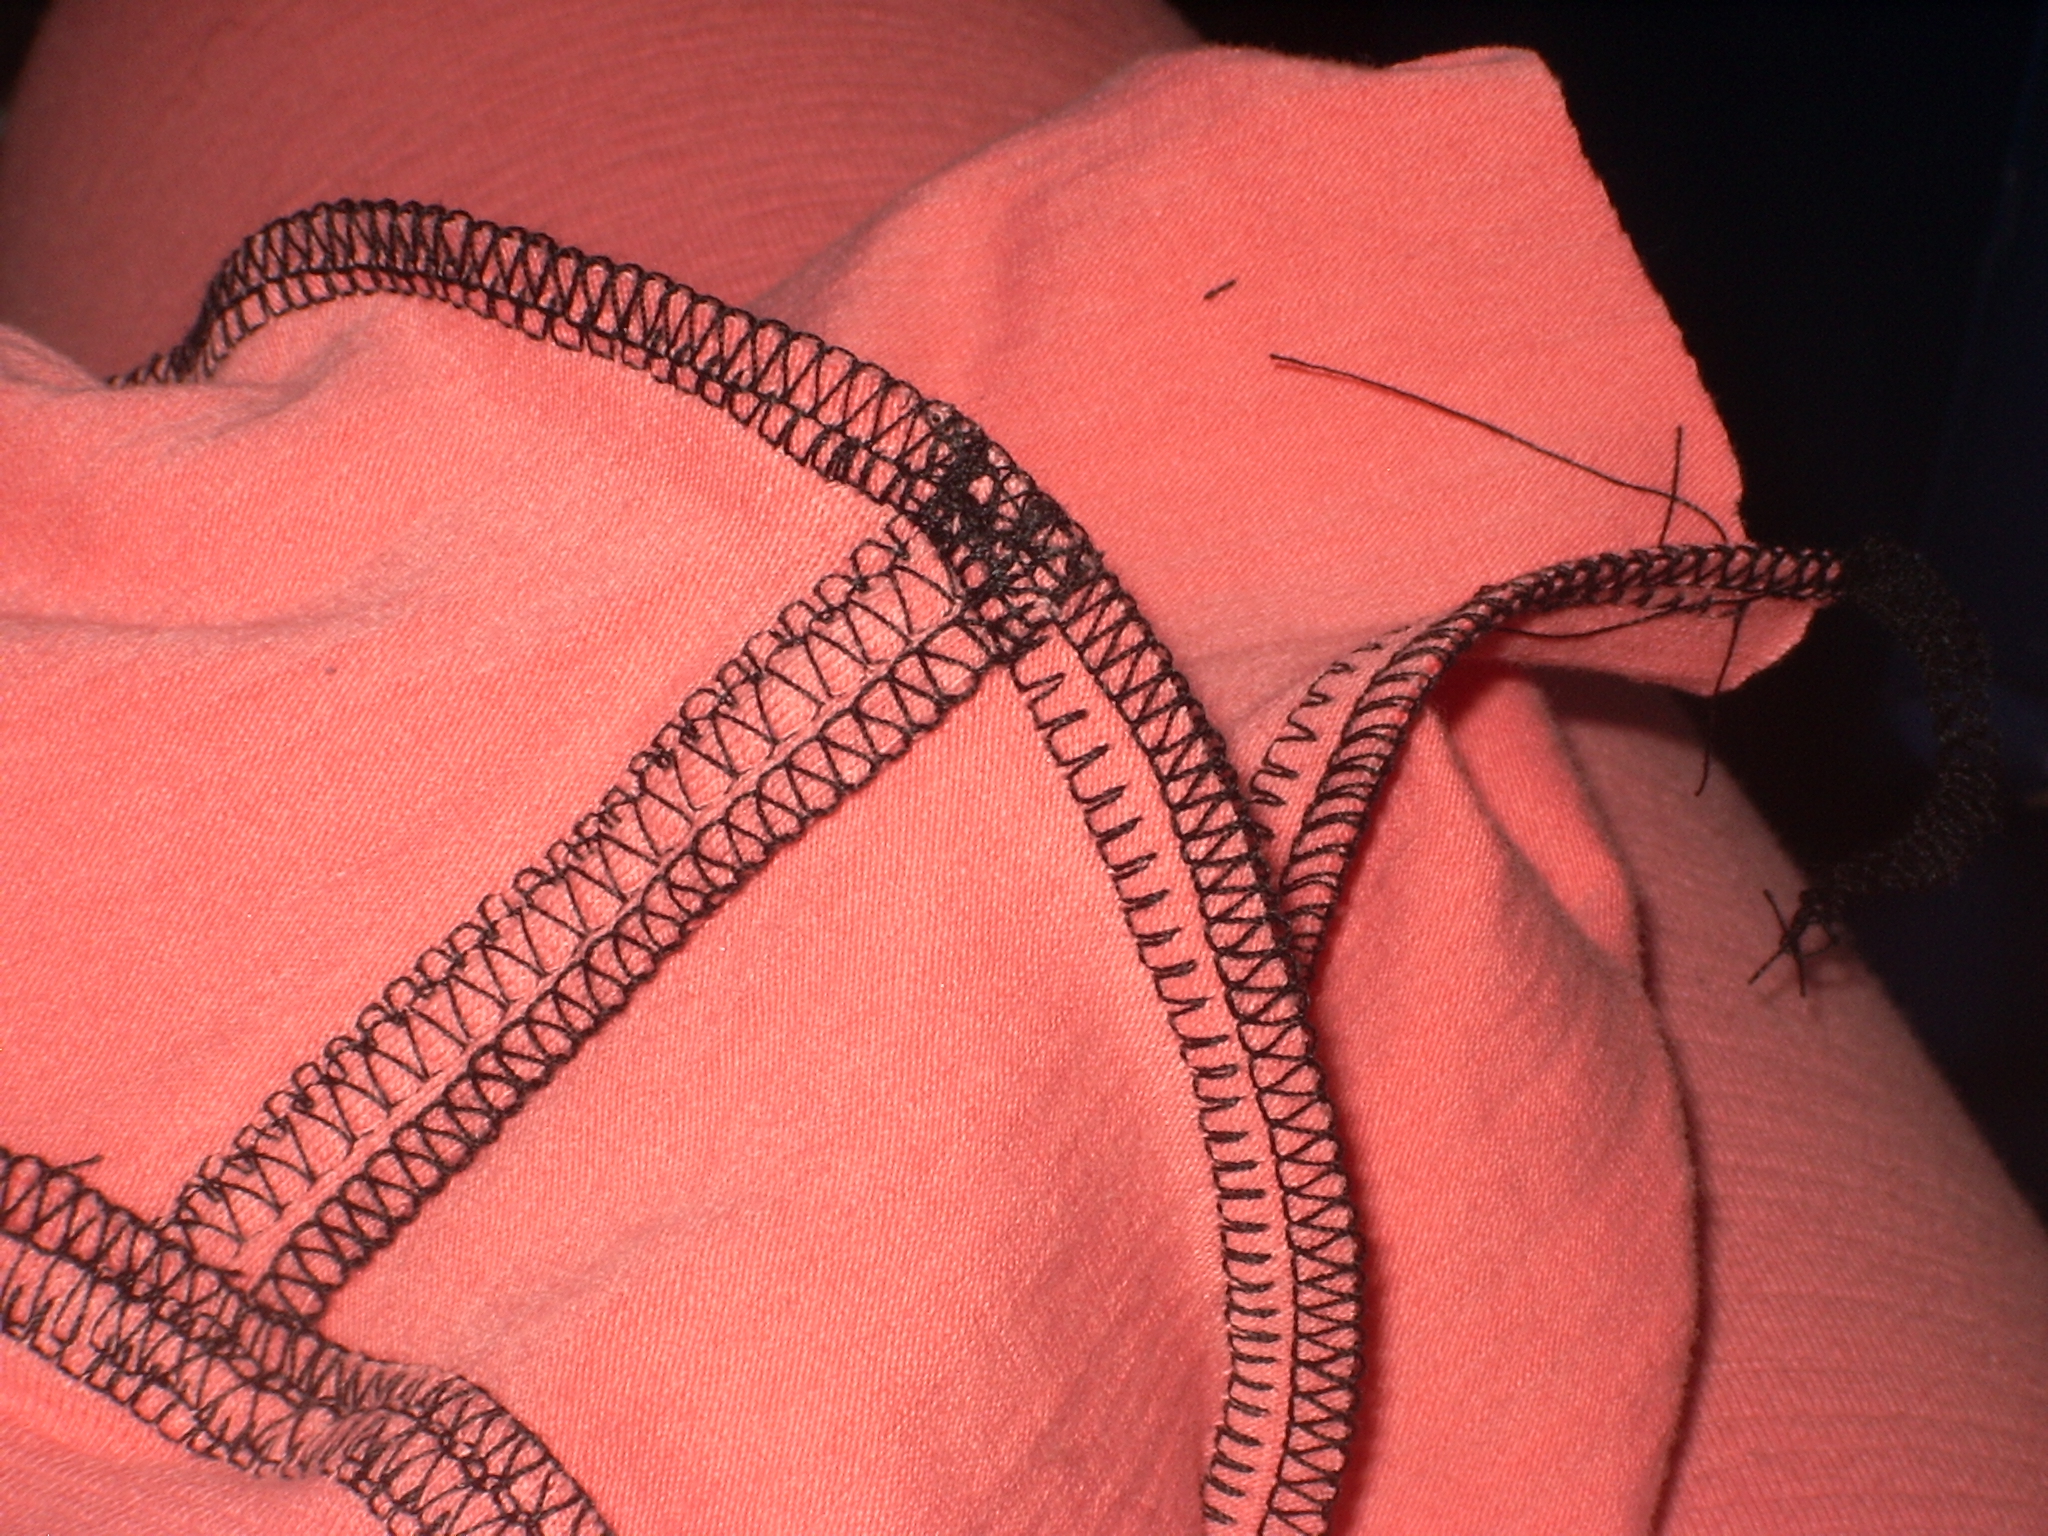
Seam---interior

For seam finishing I went a bit…overboard. I had decided on black topstitching, in the hopes of cutting down the severe sweetness of all that pink. For my seams themselves, I opted to use a simple overedge stitch on my White, which is both stretchy and makes a much straighter seam on the right side than the overedge stitch on the Janome. And then finish the edge on the serger. And then topstitch with what I think of as the Janome’s “Athletic stitch.”

That’s a lot of stitching.

Topstitching

One of my main reasons for using the White for the seam stitch (besides saving me switching my settings constantly) is that it has adjustable pressure on the presser foot, and lightening the presser-foot pressure makes the knit wave up much less than the Janome’s fixed, heavy foot. Which meant that my seams looked really nice right up until I decided to topstitch with the same Janome. At which point they waved up like crazy. Ironing has helped somewhat, and I’m hoping that the laundry will take care of the rest, but if not, I will be warned for the future. Which is too bad, because I really like the look of this topstitching for “athletic” gear.

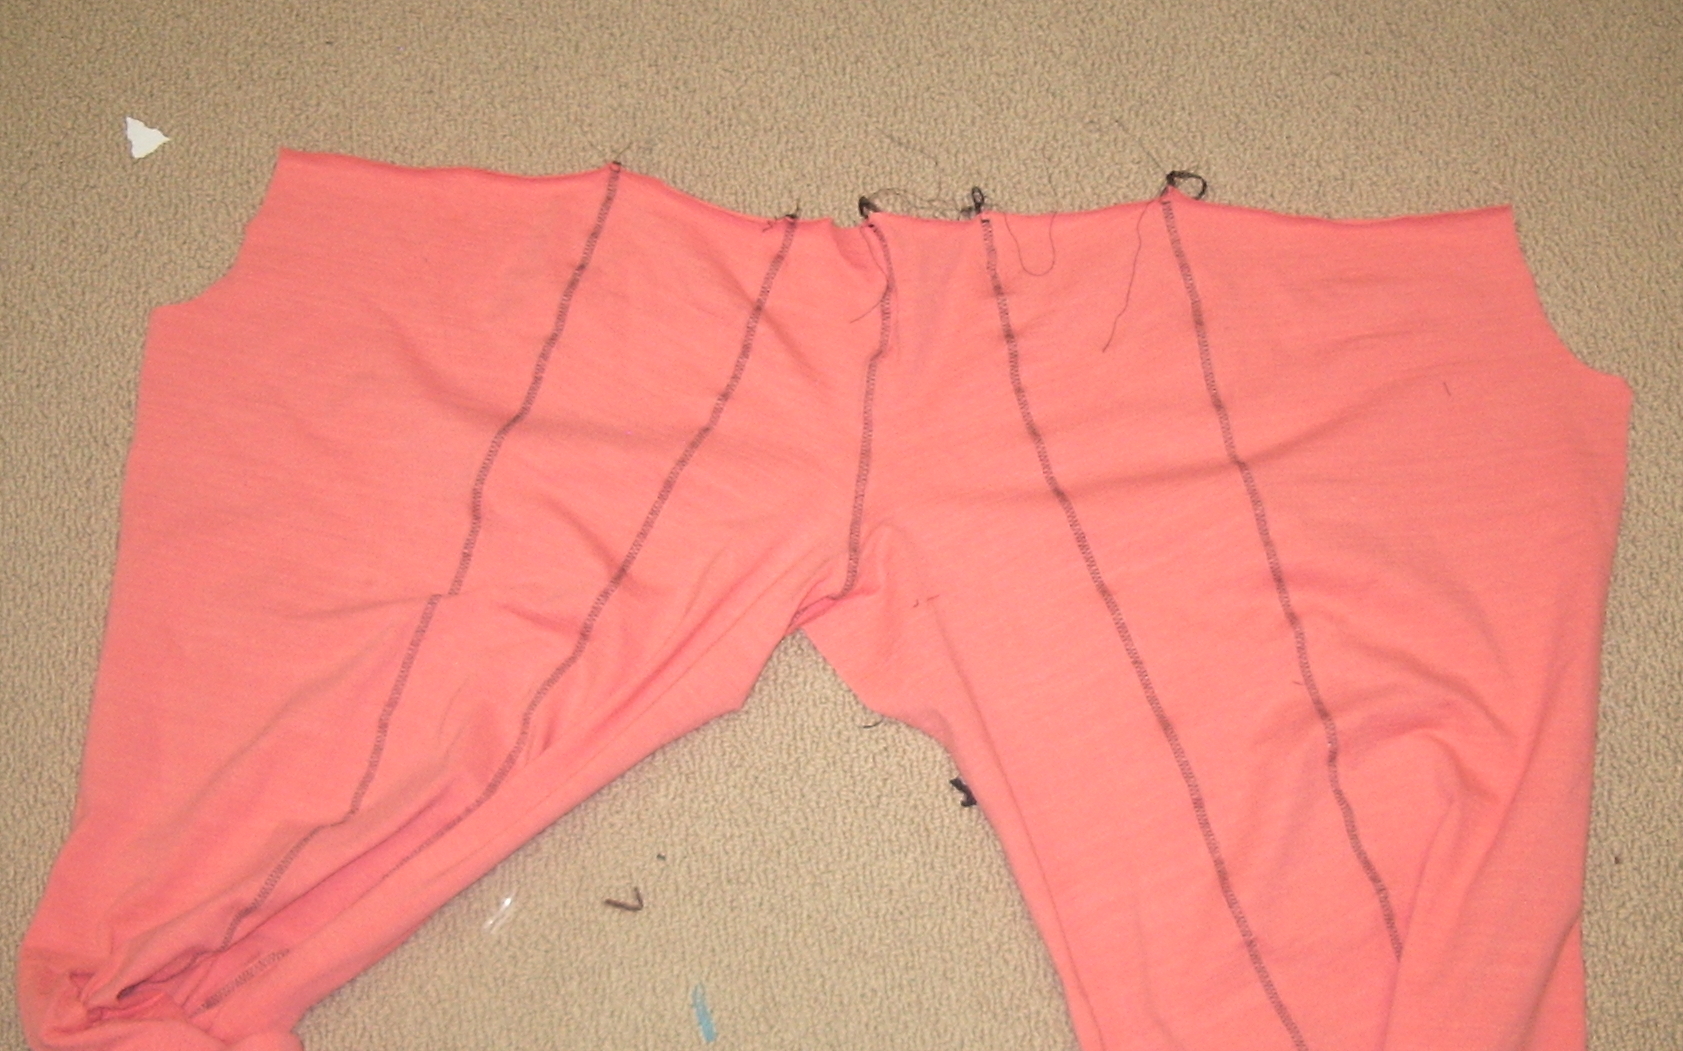
Jalie 3022 construction---one wide, flat piece.

I was initially a touch puzzled by the instructions, which have you construct the back as usual, then stitch each side of the front to the sides of the back, before finishing the front crotch and then the inseam. Then I realized it was *much* easier to topstitch the outseam before the “tube” was closed by stitching the front crotch. Smart Jalie! And for once I actually followed the instructions, so I got to enjoy the benefits of their braininess. Yay!

I used strips of Steam-a-Seam Lite (2) in the hems of the pants, as has become my modus operandi for knits, and they turned out, well, no wavier than the other topstitched seams. The nice thing about this particular topstitching (as opposed to say, twin-needling) is that it is the same top and bottom, so I could topstitch looking at the inside and make sure I was covering the edges of the hem-fold. Although, since the edge was already fused in place with the Steam-a-Seam, I suppose there wasn’t much I could actually do if the hem was wonky. Still, I felt better. 😉

Pink suit! Seams slightly ripply

On to the top?

Sewaholic’s Renfrew Top.

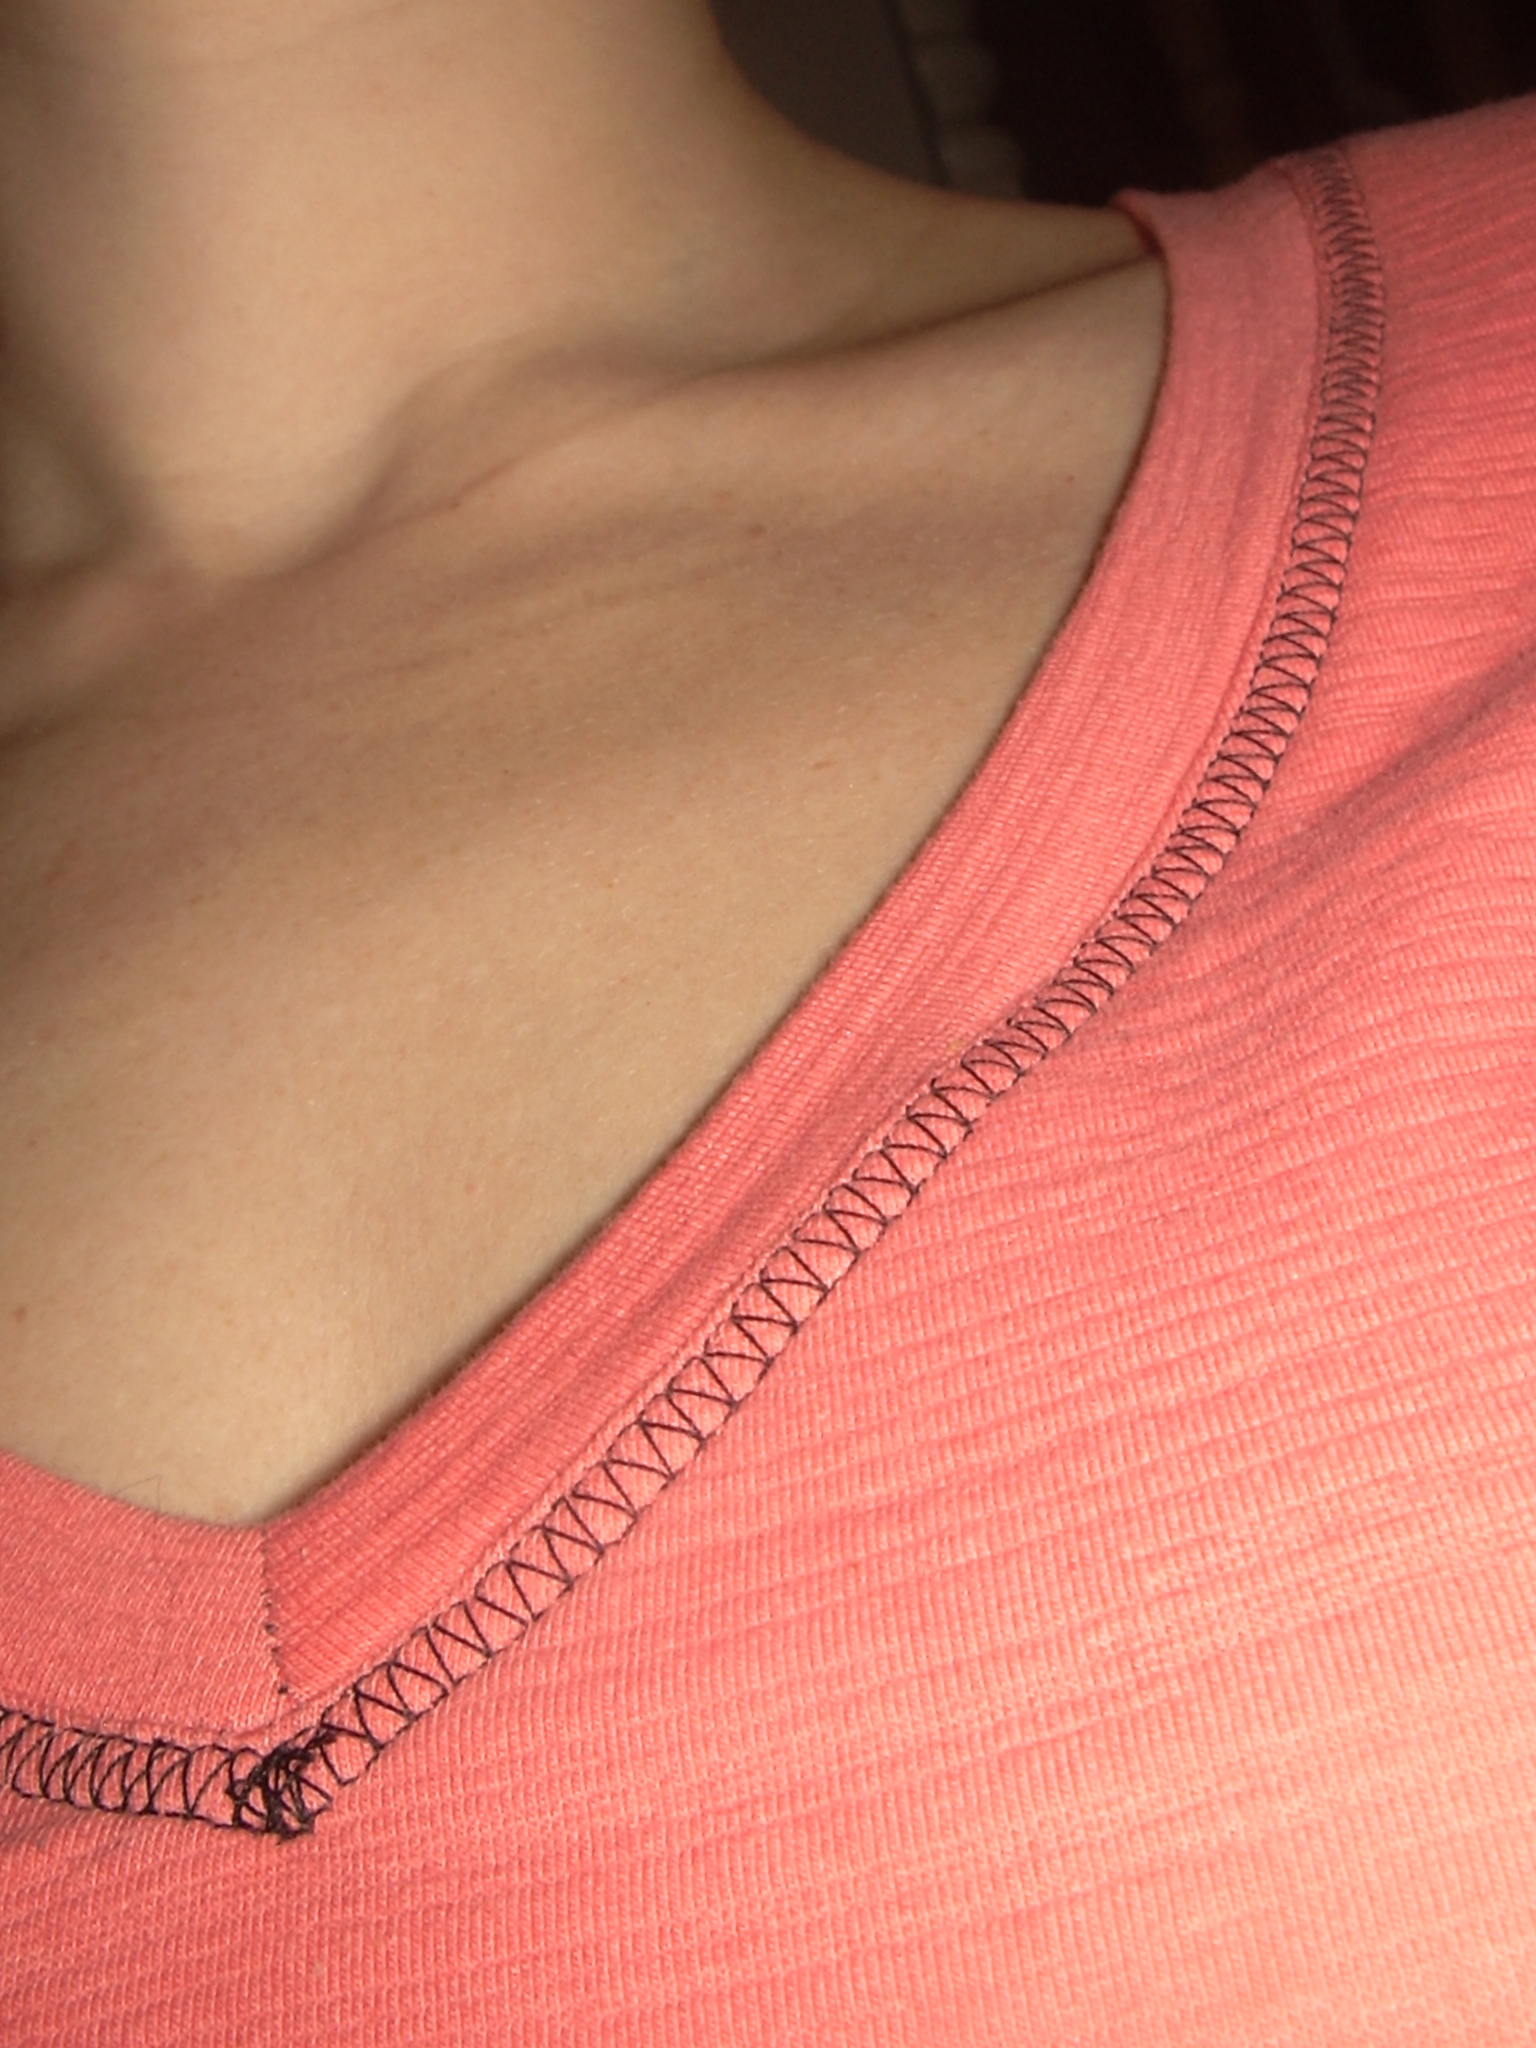
I used mostly the same construction methods on the shirt, although not nearly so much topstitching (just around the bands.) Once again I followed Tasia’s instructions surprisingly closely (for me), and was glad of it, because I initially sewed the “V” on the neck-band the wrong way—it was making an “A”, not a “V”.  So double-check that bit, because it’s not really obvious from the pattern piece. It turned out pretty well, though, as you saw above.

As so many others have said before me, there’s not really much not to love about this top. Easy fit, cute styling. I do prefer a smaller seam-allowance, especially when setting in the sleeves; the Jalie knits all have 1/4″ seam allowances, which can feel a bit scant—I think 1cm is definitely my fave in almost any situation. The shoulders feel a bit tight (which is odd, considering they’re rather wider than on my knit sloper) but I think this actually has to do with the curve of the armscye on the body, which is much more extreme in this pattern—which also makes the sleeves angle down more, as opposed to the sleeves on my sloper, where they angle more out. Despite the sleeve-caps being virtually identical. Verry Eeenteresting, my friends. (You can see the effect of the downward angle in the photo below, where they bunch up a bit above my shoulders because my arms are out.) This is also one of those differences that I wouldn’t notice in a fabric with a bit more give or a bit less recovery. I will say, if you’re fitting a knit, this is the fabric to do it in—it actually stays the size and shape that you cut it out.

Other than that, it is what it is and what it is is luverly.

Oh, yeah, back view

Altogether, it is a lot of pink. Possibly more than I’m comfortable with. I was hoping the black topstitching would take the edge of the sweetness, but there’s not quite enough of it. I don’t think it will actually stop me wearing these (although maybe not so much together), but if it does become a problem I could always take a whack at producing a lovely sludgy dyed colour as Carolyn is so good at.

The only complaint I have about the pants (aside from the ripply seams) is that the fabric is *borderline* too thin for bottoms. In a dark colour, I might not have noticed it, but, well, we’ll just say I shall have to be careful which underwear I wear with these.

So another view. Note the un-ripply inseam and the ripply topstitching.

I had some photos showing where the waistband ended up after my alteration, but I’m just not quite happy enough with the current  jowly condition of my midsection to throw them up (at least in combination with the other things I don’t like about these photos, like my bad after-work hair and the crappy photo quality of my backup camera).   So you’ll just have to imagine it going from right below my navel to sitting comfortably beneath the belly-flub.*

On your mark...

I wish I could say this sporty suit will inspire me to  take after Winnie, but I fear that a) I hate long-distance running, and b) nothing’s going to change before the end of the summer at the earliest.

But at least I will be comfy while I slob around the house!

Also, now Tyo wants shorts from the leftover fabric. My desire to move on to other projects is at war with my desire to get rid of the remaining half-metre or so of this fabric. Hmm.

*As usual when I whinge about my body, I feel the need to insert a disclaimer: overall, it’s a pretty good body. I am (and have been for the past several years) mistreating it horribly, as health, fitness, and everything else except family and sewing, in fact, are pushed aside in the face of THESIS. And while I haven’t gained a significant amount of weight, I’ve definitely lost muscle tone, and what I do gain goes right to my middle. It’s not horrific—it’s just not what I want to see when I look in the mirror, and not what I would be seeing if I was doing anything other than sit in front of a computer nine hours a day. And I can’t even blame it on having children… 😉

48 Comments

Filed under Sewing

Whew!

Action shots

This post was almost titled “Disaster, Part II.” But at least temporarily, disaster appears to have been avoided.

Finished (?)

I finished Tyo’s Jalie 2795 bunnyhug late Saturday, and handed it to her to try on. I was a little apprehensive since an early test fitting had suggested it was going to be snug; the sleeves had been a little short, so I had added an extension to the cuffs, as you can see.

Well, Tyo couldn’t even get her hands through the cuffs without major pinching and pulling. That being said, once she did get it on, she didn’t even want to take it off to go to bed, always a good sign. So when I got up this morning I sliced off the old cuffs, grabbed the pattern piece, and dug through the mass of scraps under my cutting table in search of something I could make a new pair of cuffs from (since the rest of the fabric I used for this has now been reduced to scraps none of which are much bigger than 4″ square. I eventually (to my great relief!) turned up the remnant of the fabric from when I made this sweater last winter. It’s not as fresh and dark a black as the other sweatshirt knit, but there was enough of it and I was beyond caring (and I suspect things will even out after a wash or three)

Cuffs!

So I improvised some wider, extra-long cuffs, slapped them on, and the child was happy to go. Further examination indicated that the problem with the cuffs may have been more me than the pattern—I think I reversed the direction of maximum stretch in my attempts to cut thriftily, as the fleece grainline isn’t obvious, the only way to tell is by stretching the fabric experimentally.

Slim fit

The size, which I was really worried about, is definitely not generous. This will be great when I make one for myself, but isn’t exactly what you’re usually looking for for kids. I have a feeling the time she’ll be wearing this one will be measured in months as opposed to years or even seasons.

j

Interfaced zipper

In an attempt to avoid wavy-zipper issues, I used a small strip of interfacing on either size of the zipper insertion. This seems to have (mostly) done its job, except I should probably have put it on the other side—the way I folded the zipper in to finish everything the edges of the strip show on the inside, which isn’t ideal.

Back view

I wasn’t too keen with how the hood, which inserts on top of the collar, looked when I first stitched it up, but I actually like it quite a bit when worn. The size is ok, not big but not too small to be functional, and the unusual seaming looks really nice when it’s down.

I used two main seam finishes in this piece, serging and topstitching on the black sweatshirt material and stitching the seams inside-out and covering the seam allowance with twill tape on the fleece. Both are pretty fun and make for a nice finish, but are a bit time-consuming (you have to go over each seam three times). A few seams, like the underarm/sideseams, I just stitched and then serged for finish.

Pocket and side panels

The one interesting bit of construction was the pocket openings. They’re set into the side seams, and you basically make a single welt and insert it into the cut-out in the side-piece. It gapes a bit towards the centre, but I don’t actually mind the look, and it meant that I was less likely to catch the welt in the seam. Yay! It also helps that my pocket lining and my side-panel material matched—I wouldn’t want to use a different material for the pocket lining (not that you normally would on a sweatshirt).

Most importantly, though, it was perfect for a day at the playground.

Play!

29 Comments

Filed under Sewing

And a pair for Tyo.

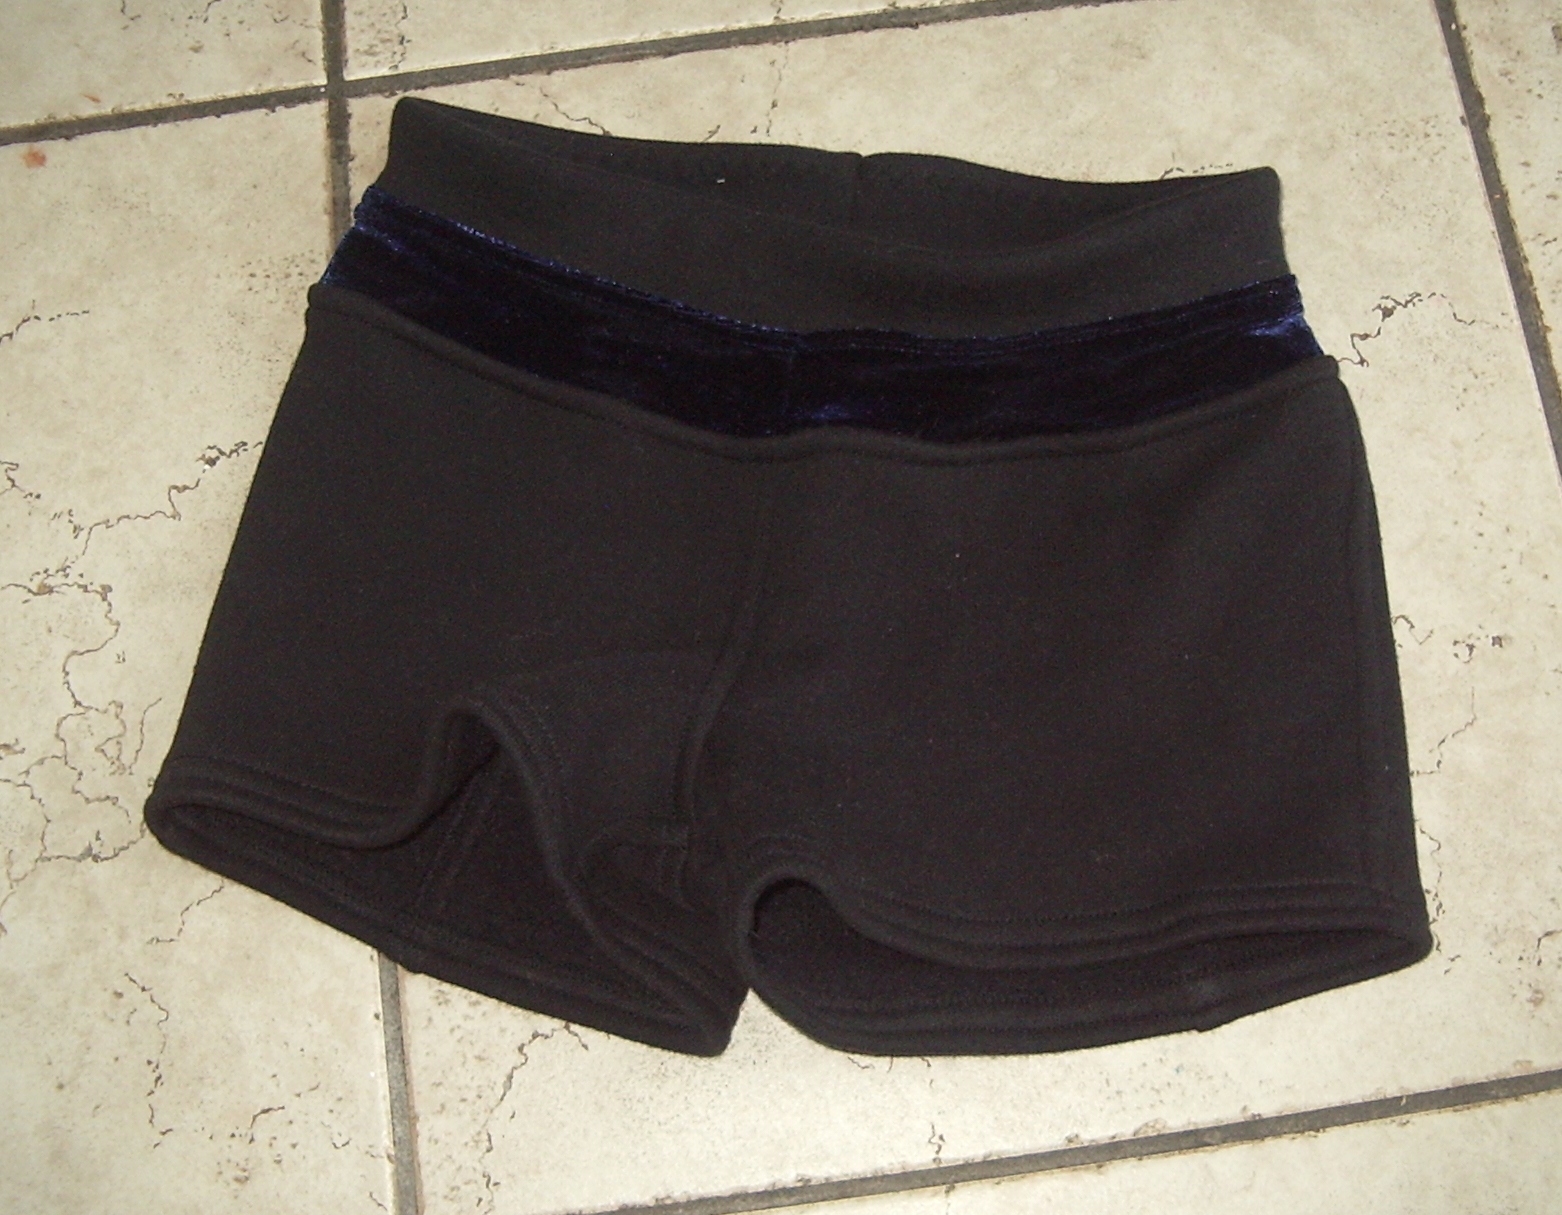
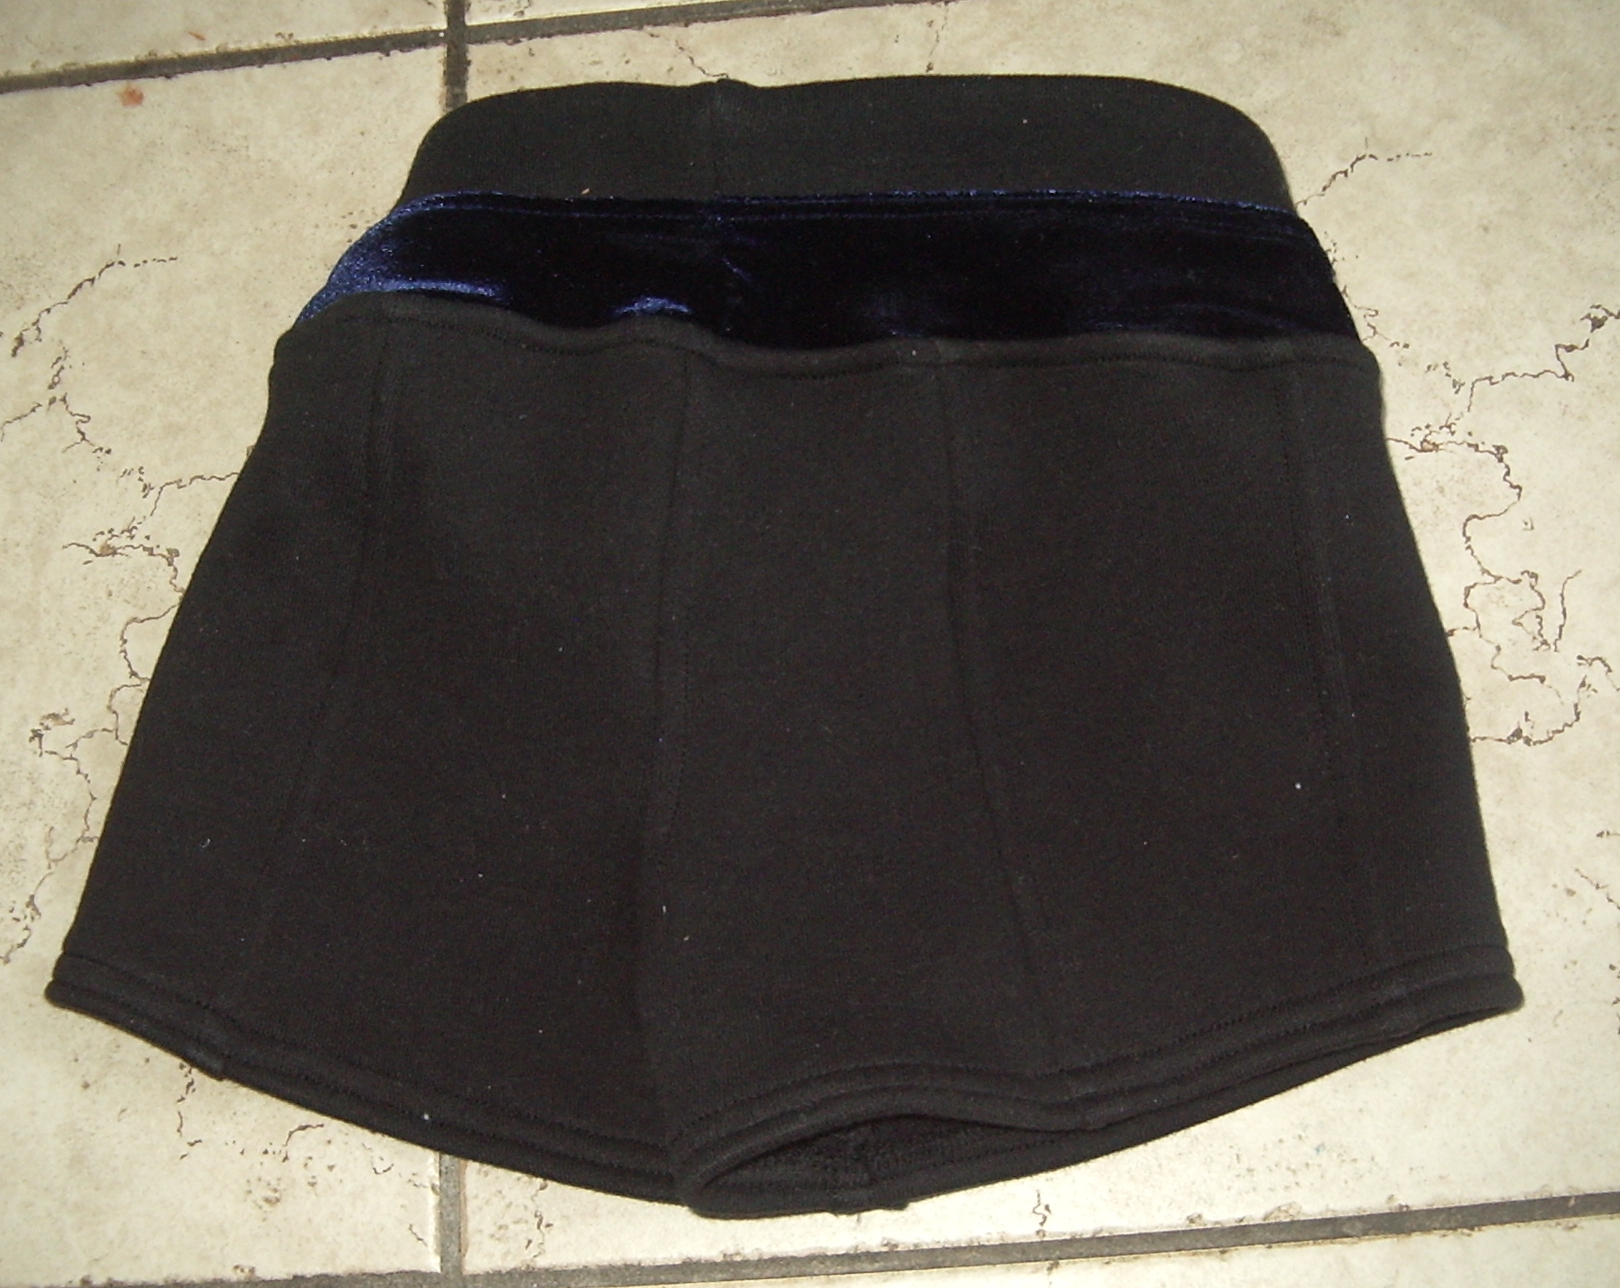
Tyo's shorts (front)

Having finished cutting the last bits for Tyo’s bunnyhug last night, I had about half a men’s XL sweatshirt left sitting on the basement floor, so I decided to cut the shorties (Jalie 3022)  for Tyo out of it. It may be borderline in terms of stretch, but then so was the red striped fabric I used for Syo’s pair. I tend to round up the Jalie patterns for the kids, because I’d rather make their clothes a little loose and have them grow into them. (This does not always thrill my children.) On the other hand, I really need to re-measure them; Tyo grew something like two inches since Christmas.

The photos pretty much all suck—black, y’know–but I think you get the idea. Though I think the shorts are much cuter in real life.

Tyo 'Tude

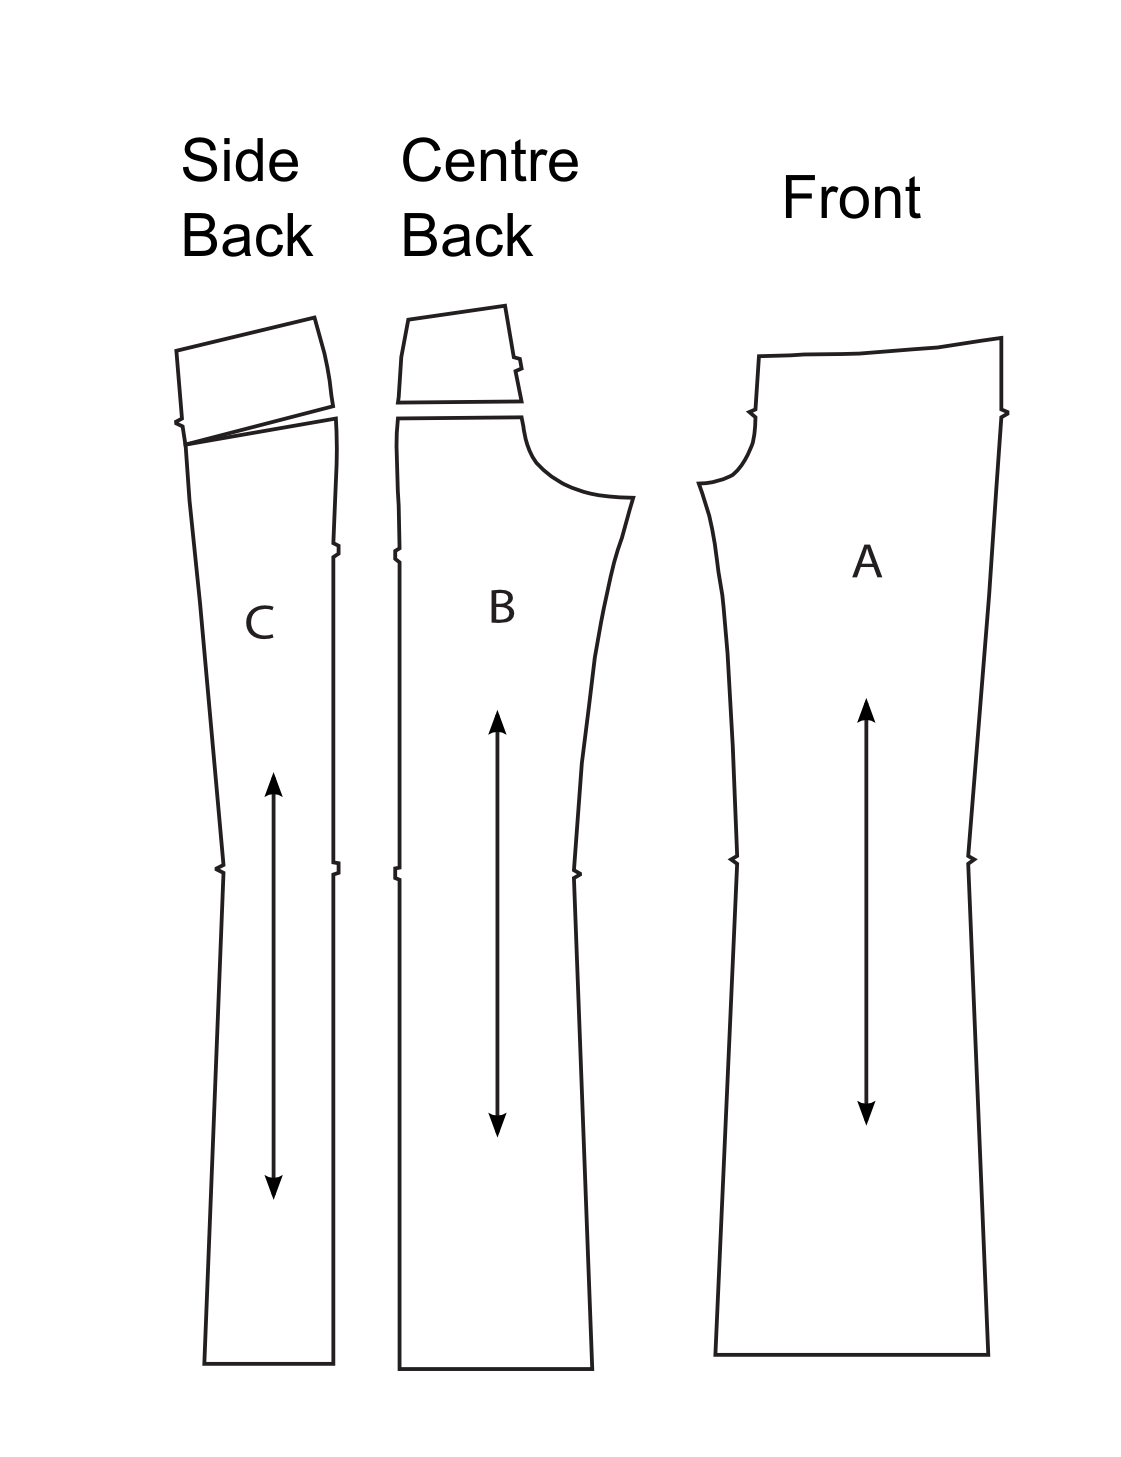
Knowing that Tyo’s derriere requires rather more room than Syo’s, I wanted to add more height to the rear crotch curve. Normally to do this I just add a wedge at the CB seam, about halfway up the curve, tapering to nothing at the side-seam. For this particular pattern, though, this is complicated by the vertical seam along the back of the leg. This incorporates a little bit of shaping at the top, and the potential for a lot more if you needed it. For this first try, I didn’t add any shaping on this seam, and they seem fine, but it’s certainly an option if you need it. Anyway, I basically added 1.5 cm in height all along the centre-back pattern piece (piece B), and made a wedge on the side-back pattern piece (piece C).

My changes

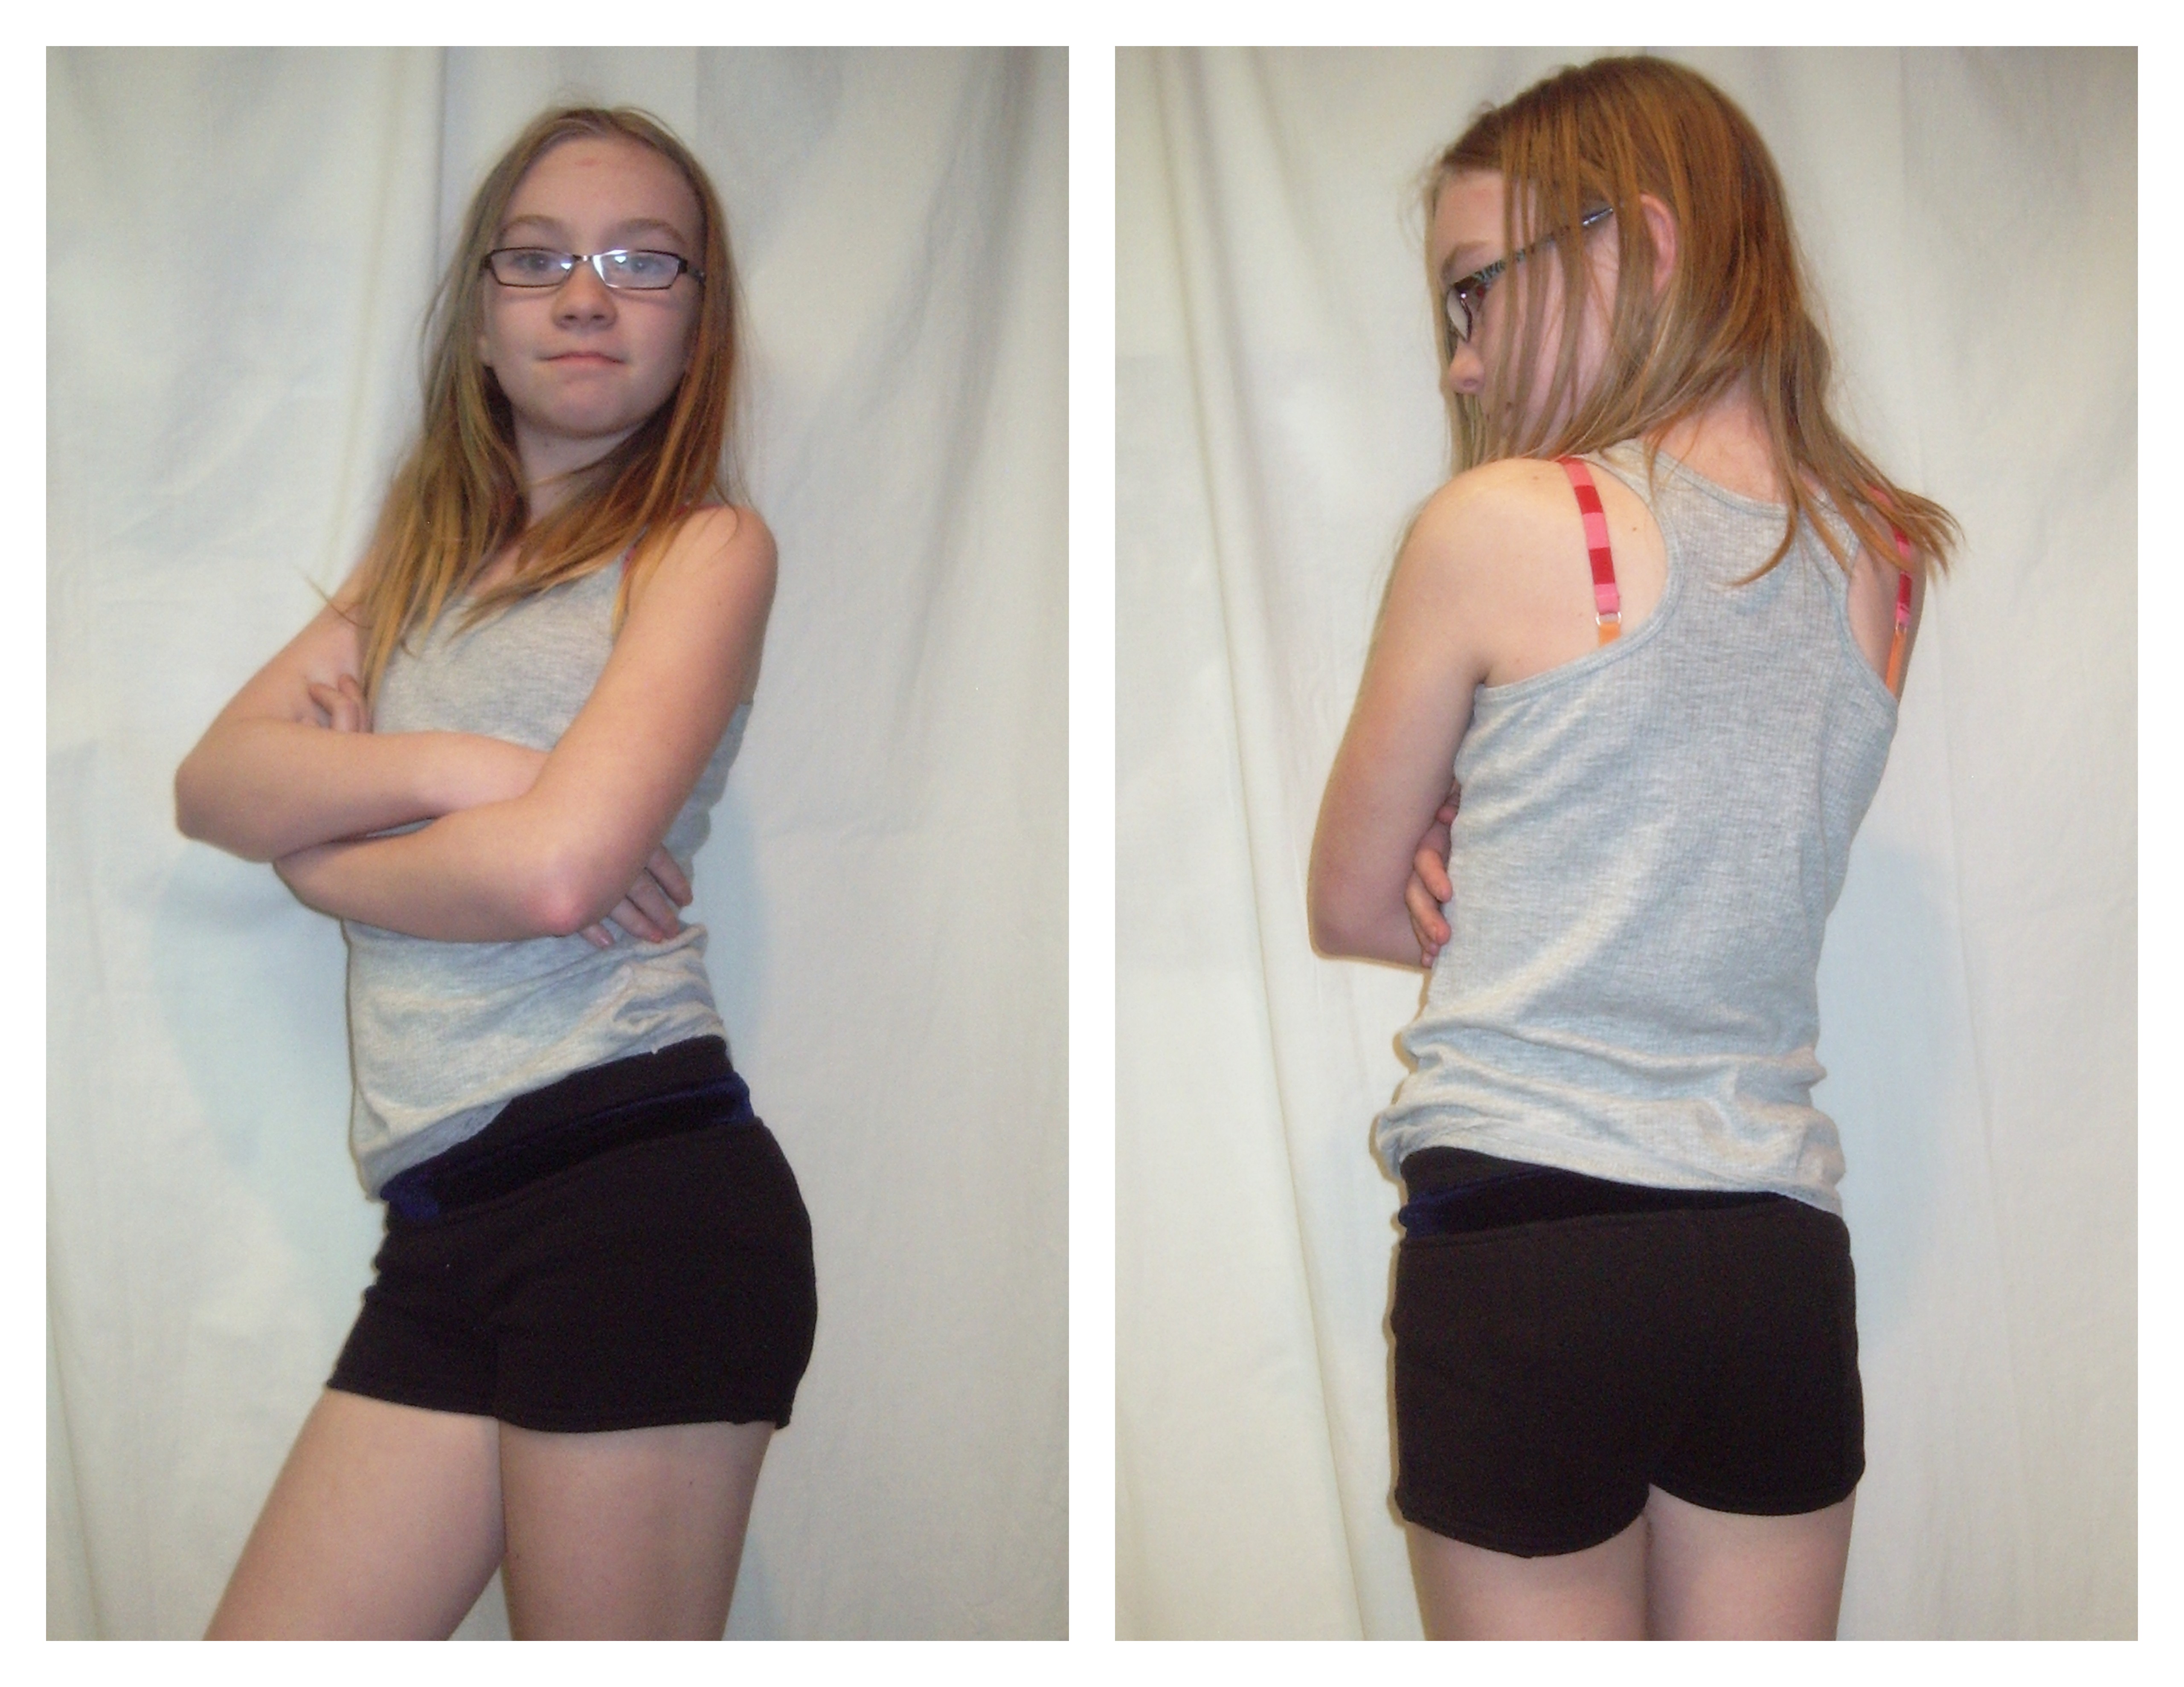
I am very, very, very glad I did this little alteration, as Tyo’s shorts cover very nicely—high enough at the back and covering her entire butt. Yay! Hence the modeled shots here. 1.5 cm may have been a bit excessive, but I’d rather be safe than sorry in this case.

Side view---great rear coverage

For construction I followed the Jalie instructions much more closely this time, especially for the waistband, which is the full height with the decorative “contrast” band—in this case it’s made of blue stretch velvet, from a tiny remnant I had to piece at the CF (in hindsight, it would’ve made much more sense to put the seams at the sides, but I wasn’t thinking far enough ahead.)

Tyo's shorts, rear view

I stitched all my seams in three passes, straight triple stitch for the seam itself and then using the serger to finish it, and then topstitching. It makes a much nicer finish inside than the overedge stitch on my machine, and with the topstitching the seam-allowances are flattened down nicely on the inside, which looks much more professional, if not 100% RTW.

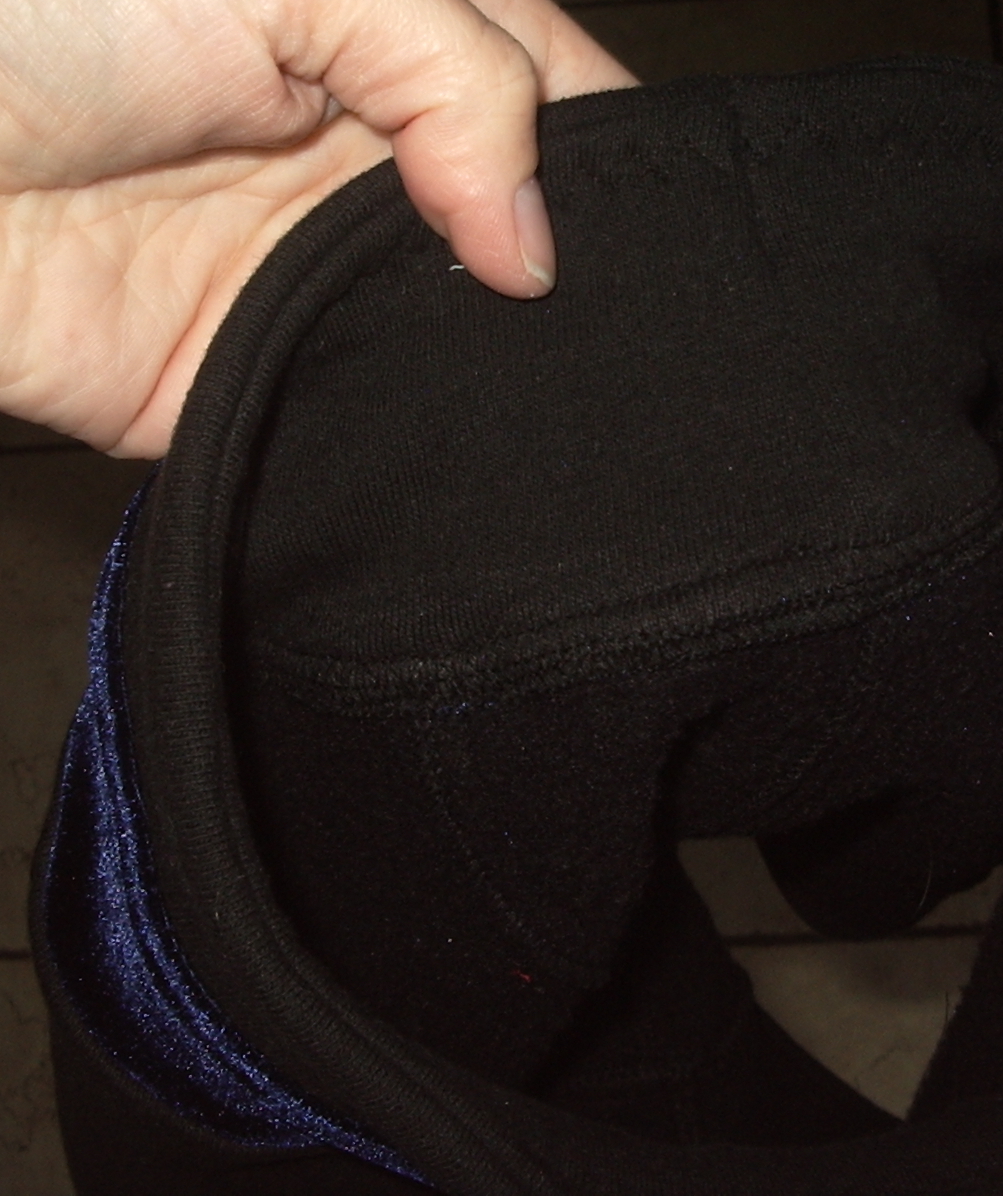
Inside waistband.

When I posted about Syo’s Leotard and using the three-step zig-zag to attach it, I got a lot of comments from people who found this stitch stretched out the elastic too much, keeping it from recovering fully. I didn’t find that at all on the leotard, but I was using clear plastic swimsuit elastic in that case, and I wonder if the commenters were referring to standard elastic instead—because when I triple-stitched the (regular) elastic to the inside of the waistband (basically understitching) with a three-step zig-zag, it definitely ended up longer than when it started. It’s fine on, but you can see the top of the waistband is a little ripply when it’s not being worn. So, commenters—have you had this problem with clear plastic elastic? Or is it just (as here) with standard elastic? I don’t know if I’d use clear plastic elastic in a waistband like this anyway, but it’s definitely something I’ll keep in mind when making my stitch-choices in the future.

Rear view---coverage!

Incidentally, I sewed the entire project with my 1/4″ edgestitching foot. This worked great, because the keel on the foot is right at the edge of the seam-allowance. I mean, it’s not hard to line up a 1/4″ seam allowance with the edge of the regular zig-zag foot, but this was practically brainless. It wouldn’t have worked if I’d been trying to use my over-edge stitch, though, because the edgestitching foot is a straight-stitch-only foot.

So, in conclusion, pretty definitely a win.

21 Comments

Filed under Sewing

Shorts for the shortie

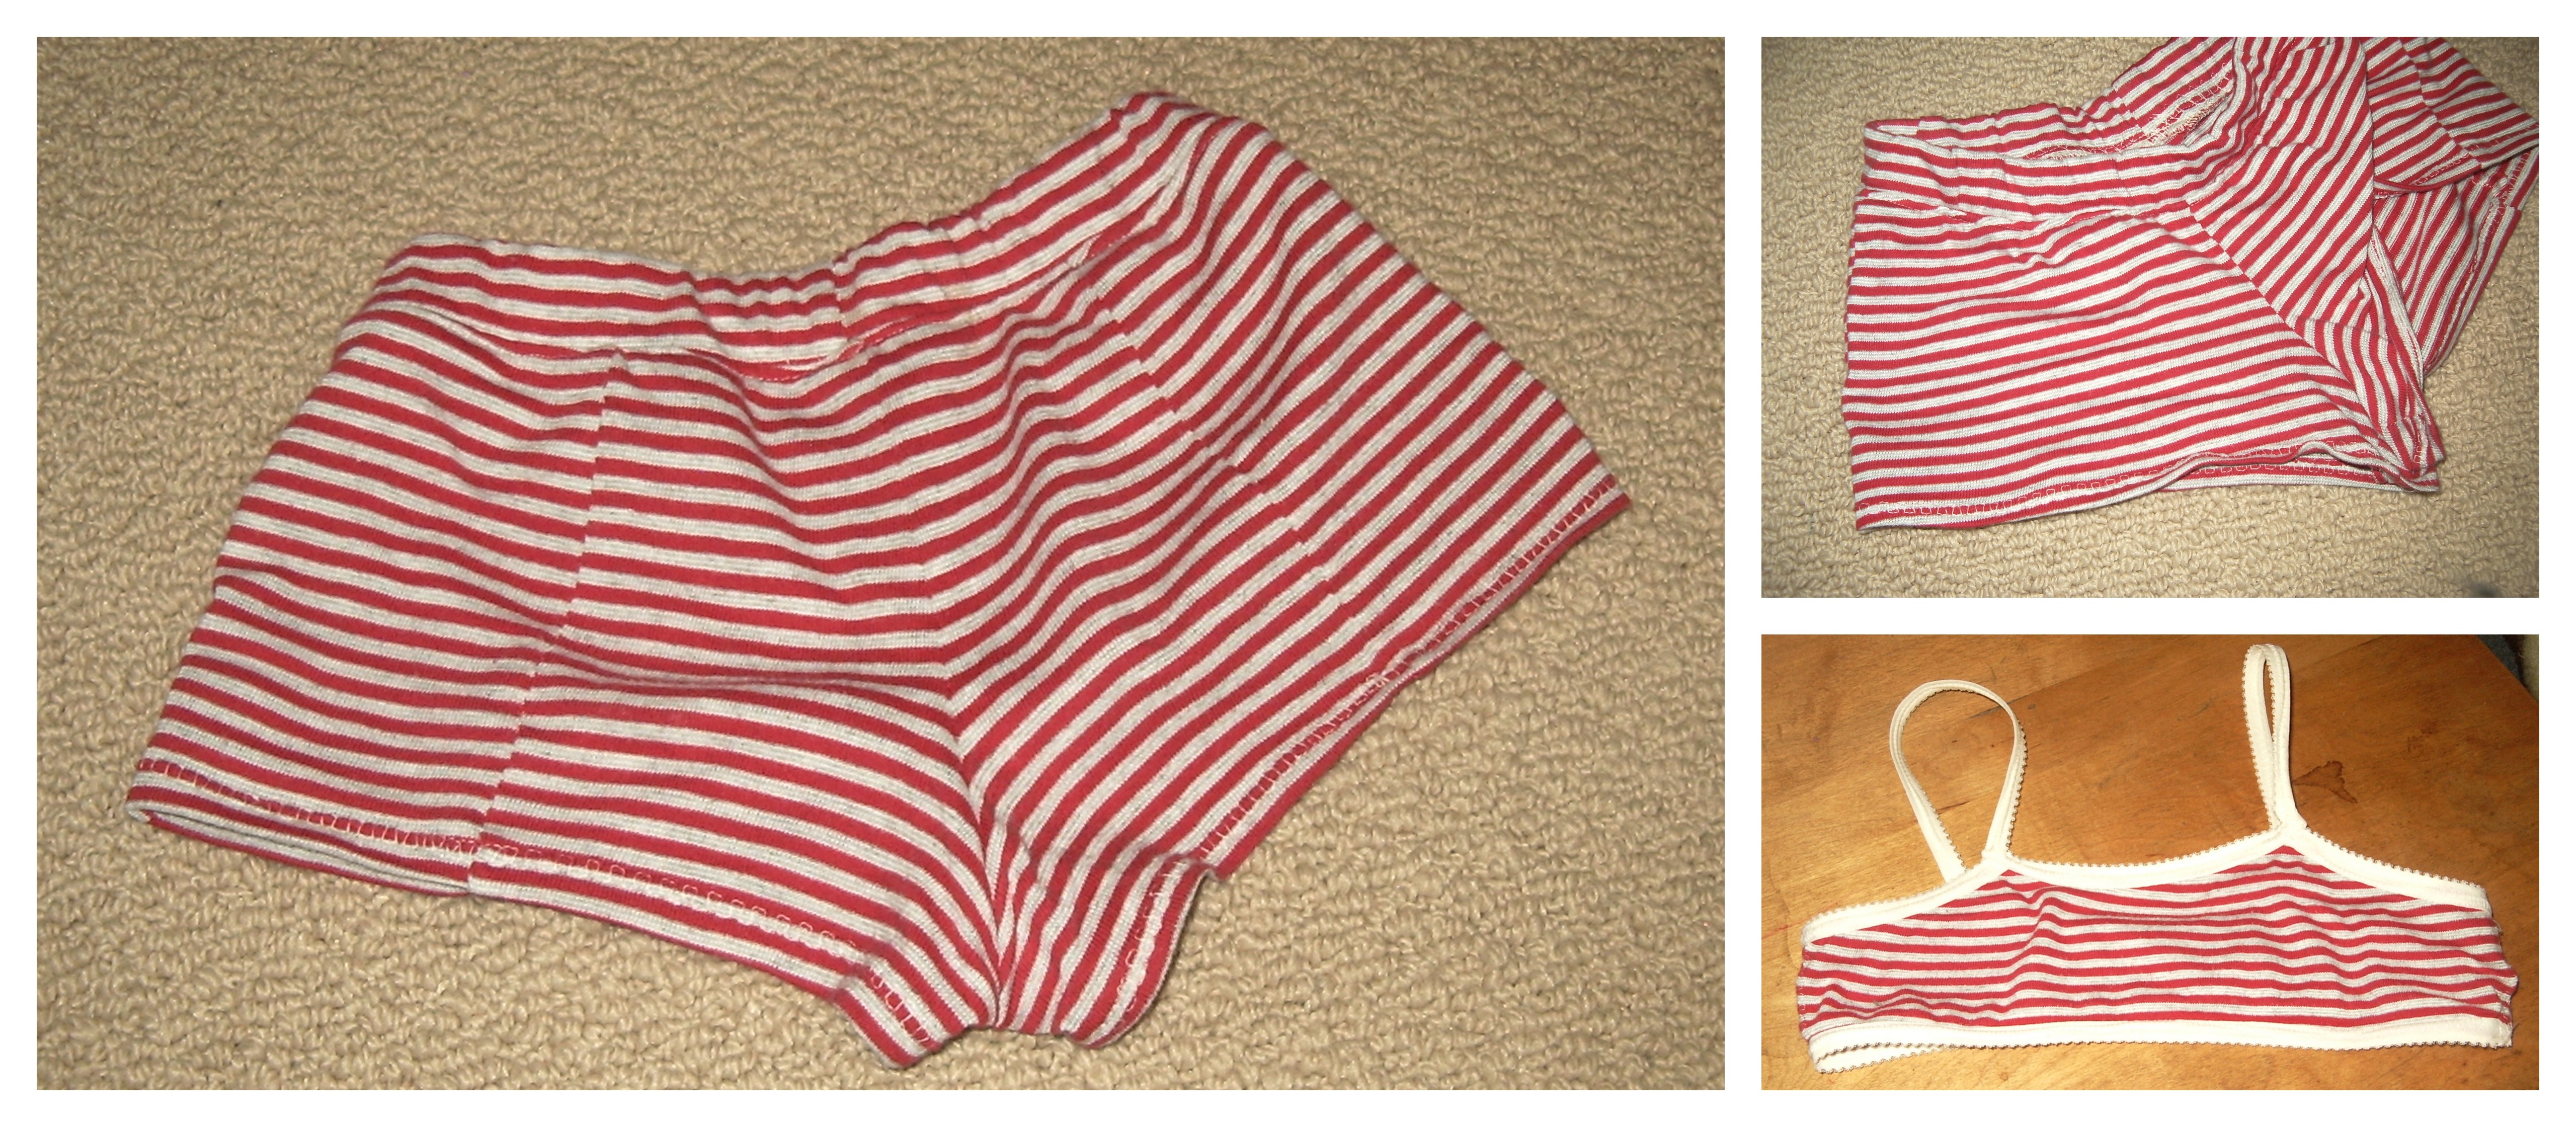
Almost-undies

One of the things I traced off last week was Jalie 3022, a cute yoga-pants pattern.

In the shorts length.

In sizes for my kids.

This allows me to use up yet more teeny knit scraps, test out the pattern, and, in all probability, contribute to my children’s chronic habit of dressing extremely inappropriately for the weather.

So, over the last week, I managed, in approximately five-second intervals, to get a pair of the shorts together for Syo. I traced of the size J pattern, in shorts length, making no adjustments on this initial pair. This is the equivalent of the size 6, for my nearly-nine-year-old, but it matched her measurements and the fit is pretty much spot on.

I should, however, have remembered that Jalie drafts for the flat-of-butt. Syo’s derriere is not quite as J-Lo-esque as her older sister’s, but it’s still decently protruberant. The rise in the front is good, even a little high, but the rise in the back is a bit meager. And, while the shorts version is pretty short, I don’t actually think the bottom of her butt is supposed to be hanging out. And there’s a wee bit of wedgie action going on.

None of which prevented her from bouncing up and down upon seeing them, squealing “Mommy made me booty shorts!”. She has also slept in them every night since, and worn them to school under her (very) skinny jeans because she forgot to take them off, so they must be fairly comfortable. It’s also why they look a bit stretched out and beat up in the photo…

As to the pattern itself…

The main feature that makes this pattern a little different is the additional vertical seam down the back. This allows for a bit more shaping in the butt region, not to mention lets me use even smaller scraps of fabric to make up the shorts. It does increase the construction time a wee bit.

I took some major liberties with the waistband, partly due to fabric limitations and partly due to not having a nice contrast-fabric to make the oramental panel on the outside. I just cut the single, inside piece, and folded it over around some wide elastic. This worked, but it didn’t produce a particularly nice waistband—partly because the waistband elastic I had on hand was a bit heavy for the purposes, and partly because my fabric is not overly stretchy, so rather than easing neatly to the waistband it’s pretty harshly gathered. it looks fine on, though. I have since actually read the instructions, and they make much more sense and give a much nicer finish, calling for a narrow, 1 cm elastic to be attached inside the top of the waistband. So don’t judge the pattern by the crap-tacle I made of the waistband.

I used a faux-athletic-looking stitch for hemming the legs. I will note this is the first time I’ve successfully hemmed this particular, rolly fabric without adding elastic or a band. I stitched the hem from the wrong side so I could flatten out the rolling manually as I went, and it worked really well, but obviously wouldn’t’ve been possible if I’d wanted to use a twin needle topstitch, for example.

All in all these are a quick, not terribly nicely-finished test piece. But Syo seems completely happy with them. I’m not sure how many booty shorts my kids need (they actually cover less of her butt than some of her underwear), but it’s a great way of using up spare fabric, especially little teeny bits. And yes, she wears them with the matching bralette from the photo.

I have a pair ready for Tyo, too, but I’ll do a separate post on them once I get her to try them on…

19 Comments

Filed under Sewing

Experimental design

A finished project for me!

OMG SHE MADE SOMETHING FOR HERSELF!

… okay, now that we’ve got that out of our systems…

I MADE SOMETHING FOR MYSELF!

Erm.

Vintage Patterns

So you may recall that I somewhat wantonly purchased a couple of 50s patterns from New Vintage Lady just before Christmas—a cute dress and a blouse that could’ve been Sencha’s grandmother. Both really adorable, and both a size or two too small.

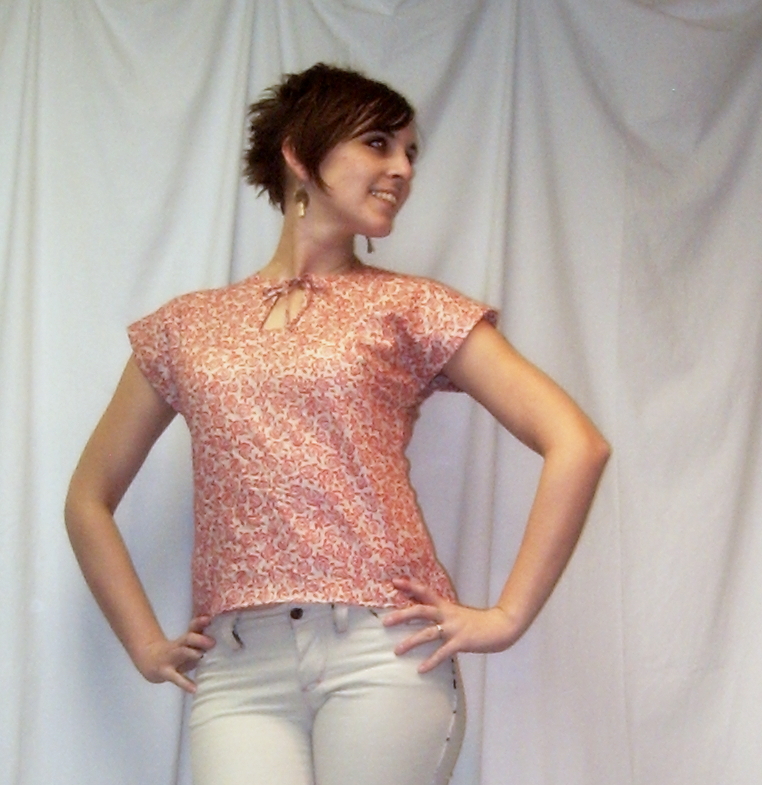
Well, I was feeling experimental on the weekend (and in the mood for something quick that would use up scrap fabric), and somehow in the digging through of fabric and patterns I settled on this combo: Using the McCall’s 6288 (from 1945, the year my father was born) in combination with the scanty fabric remains from my Birthday Dress.

Despite the size 12 (30″ bust) of my copy of the pattern (I’m more a 14-16 in the old sizing), pattern-measurement suggested there would be enough ease in the bust and even in the waist, especially if I omitted the little tucks from the waist. So, feeling bold, I traced off the pattern and set to.

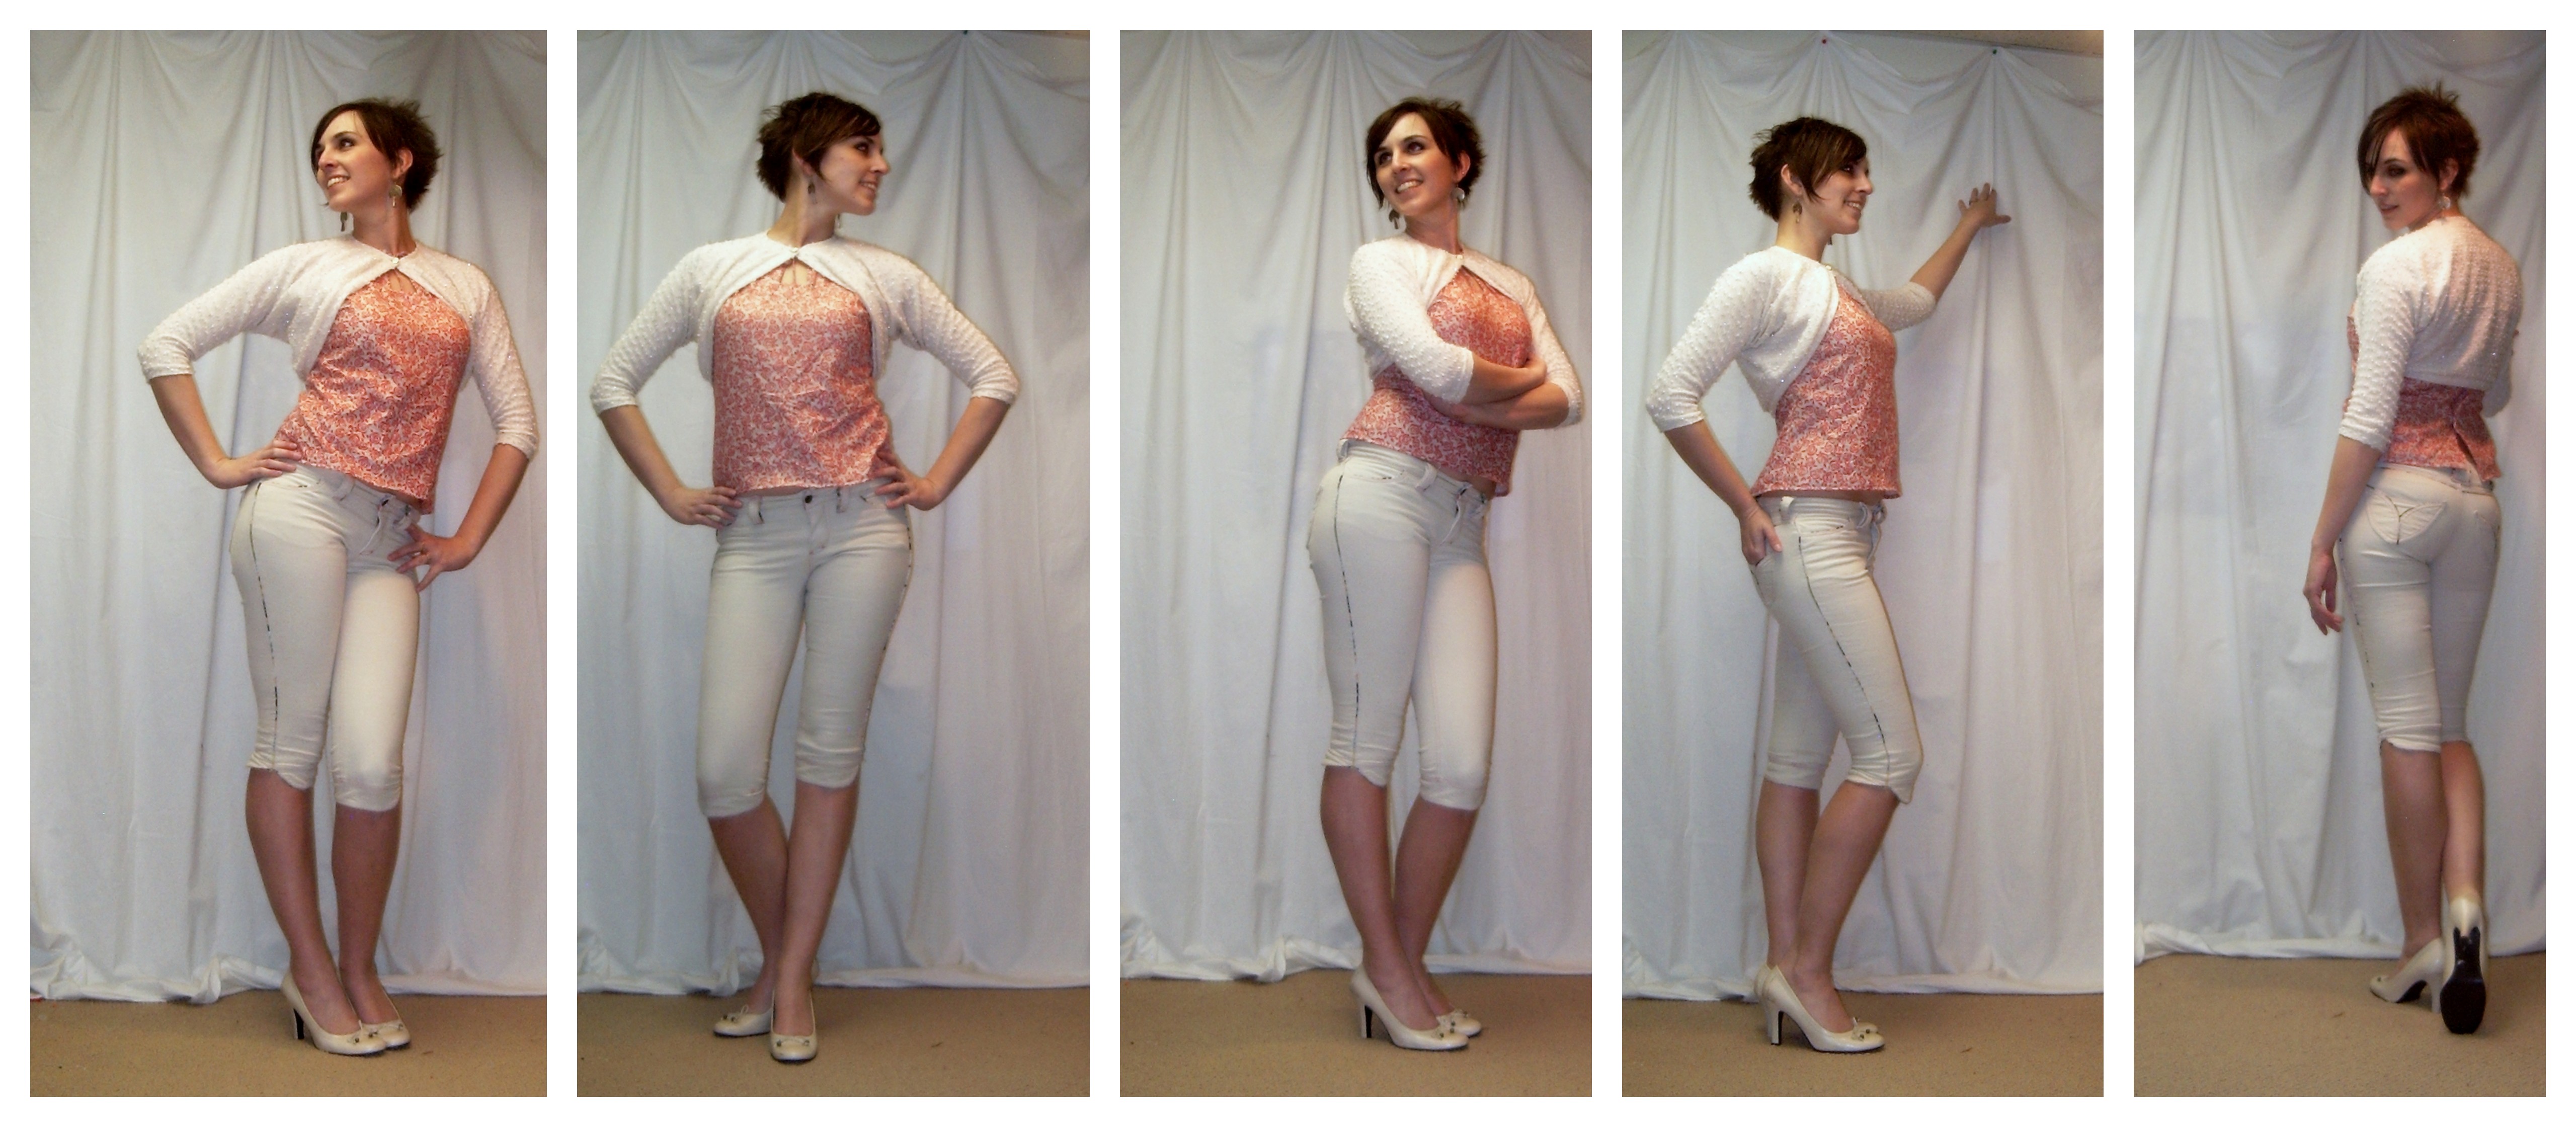
The best styling (click to see full size)

Careful pattern placement, and a certain amount of fudging, allowed me to fit both sides of the shirt on the .5m or so of actual full-width fabric I had left. I will confess, I did something I have not done, I think, EVER—I fudged the grain-line on the back piece so it would fit. I’m hoping that the fact that it’s a small blouse means the off-grain thing won’t be too noticeable—I certainly don’t notice it, but I’m sure the sewing gods are glaring down in disapproval. In hindsight, I could’ve pieced the fold-over portion of the rear button placket in from the huge LONG, THIN piece of the leftover fabric, but anyway. What’s done is done.

I opted not to be stingy with the interfacing, using it on the neck facings and the rear button placket. Not least because I think it’s a really nice way to finish facings. This is the trick that went ’round the blogosphere a while back, where you stitch interfacing and facings right sides together (right side of the interfacing being the non-fusible side) along the outside edge of the facing, and then flip and fuse them. The seam encloses and finishes the facing edge nicely. This is white Armo-weft, by the way, which is far and away my favourite interfacing—lightweight, fuses well, doesn’t shrink or bubble. I mean, there’s probably better out there, but it’s the best I’ve found from what I have available locally. You do need to use a press-cloth, even though I try to pretend you don’t.

Interfacing

Anyway, at this point I had to break for the night, and took the instructions upstairs to read over before bedtime. Erm. Me being me, they promptly evaporated, and I was left to wing the rest of the construction. A bit of a bummer since half the interest of making up a *really vintage* pattern like this is checking out the instructions. They have since resurfaced, actually just as I sat down to write this post, on the computer desk where they were hiding under my daughter’s laptop. Grr.

So, without benefit of instructions, I set to the next morning, starting with stitching the shoulders (french seam) and then the neck facings into place. I even remembered to stitch the ties in place! Of course, no sooner did I have  everything nicely understitched, but I flipped it around and discovered a) my neck-facing was showing on the outside of my back button placket rather than being sandwiched between the two folded layers (leaving an unsightly raw and flapping edge) and b) the neck was WAY too tight.

Which, I guess, was a good thing, because it motivated me to fix problem (a) before re-stitching.

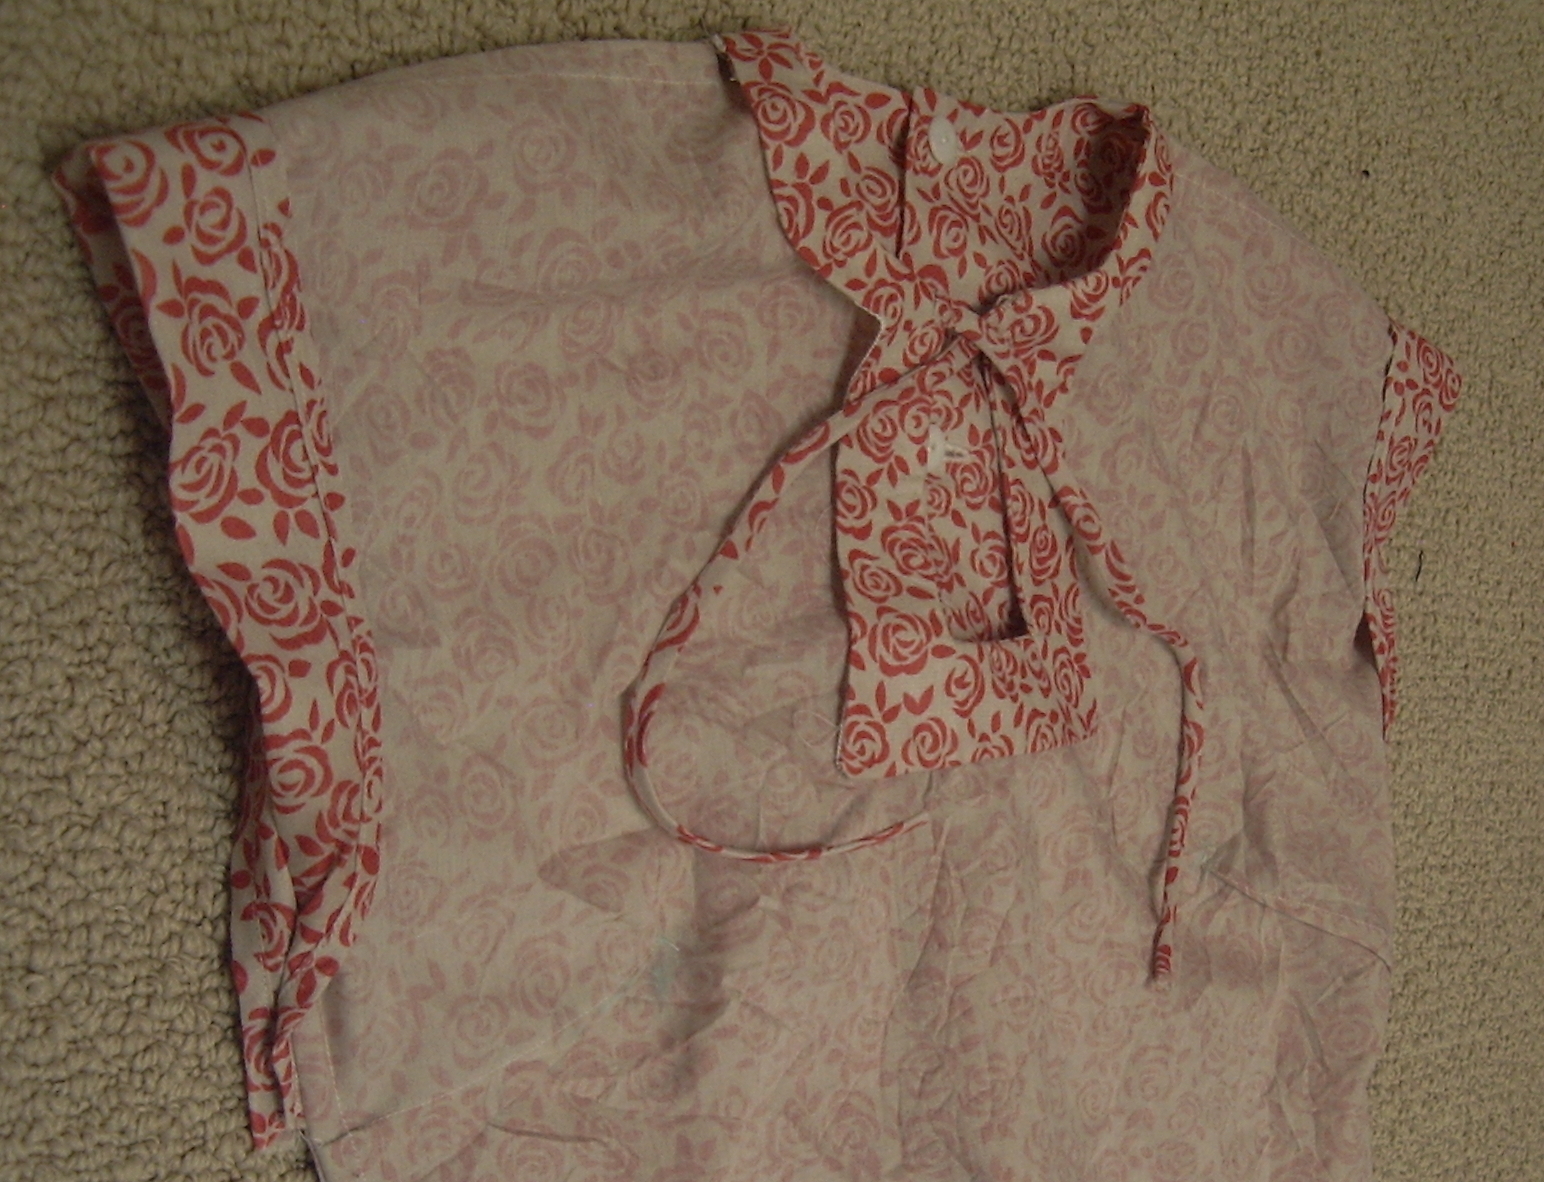
Interior

I lowered the neckline by a good 1.5 cm all around, which has brought it to the point of being just-barely-wearable, although it also means that there’s not much left of my facing.

I then decided I would do french seams on the side-seams, which was also not my brightest moment ever, since they don’t play at all well with the way the sleeve is supposed to be finished. It doesn’t really show when wearing, since the fudge is all tucked in the armpit, but it’s definitely not smooth and sleek. You can see it clearly on the interior photo.

Buttonliness

I made the buttonholes using my Greist buttonholer on the White, since I wanted to try the buttonholer on a machine with drop-able feed dogs. I must admit I feel a bit daft using a buttonholer on a zig-zag machine, but anyway. The White is really growing on me as a machine—I wasn’t initially thrilled, but it’s a sturdy workhorse. It took a few samples to get the tension and stitch-width right, but once I had that figured out it made my buttonholes quickly and fairly neatly. It’s the first time I’ve used the buttonholer on such a light-weight material, and it made for a rather different experience. They’re not all perfect, especially the fifth one which I added after and of course messed up, but they’re in and functional. Incidentally, the pattern calls for four buttonholes; the location of the fifth, now that I have the instructions in front of me, calls for a snap, presumably because that would be more comfortable than a button under a waistband.

The pattern also calls for small shoulder-pads. I don’t really mind skipping those. I think I look about as square-shouldered as the envelope girls without them, thanks.

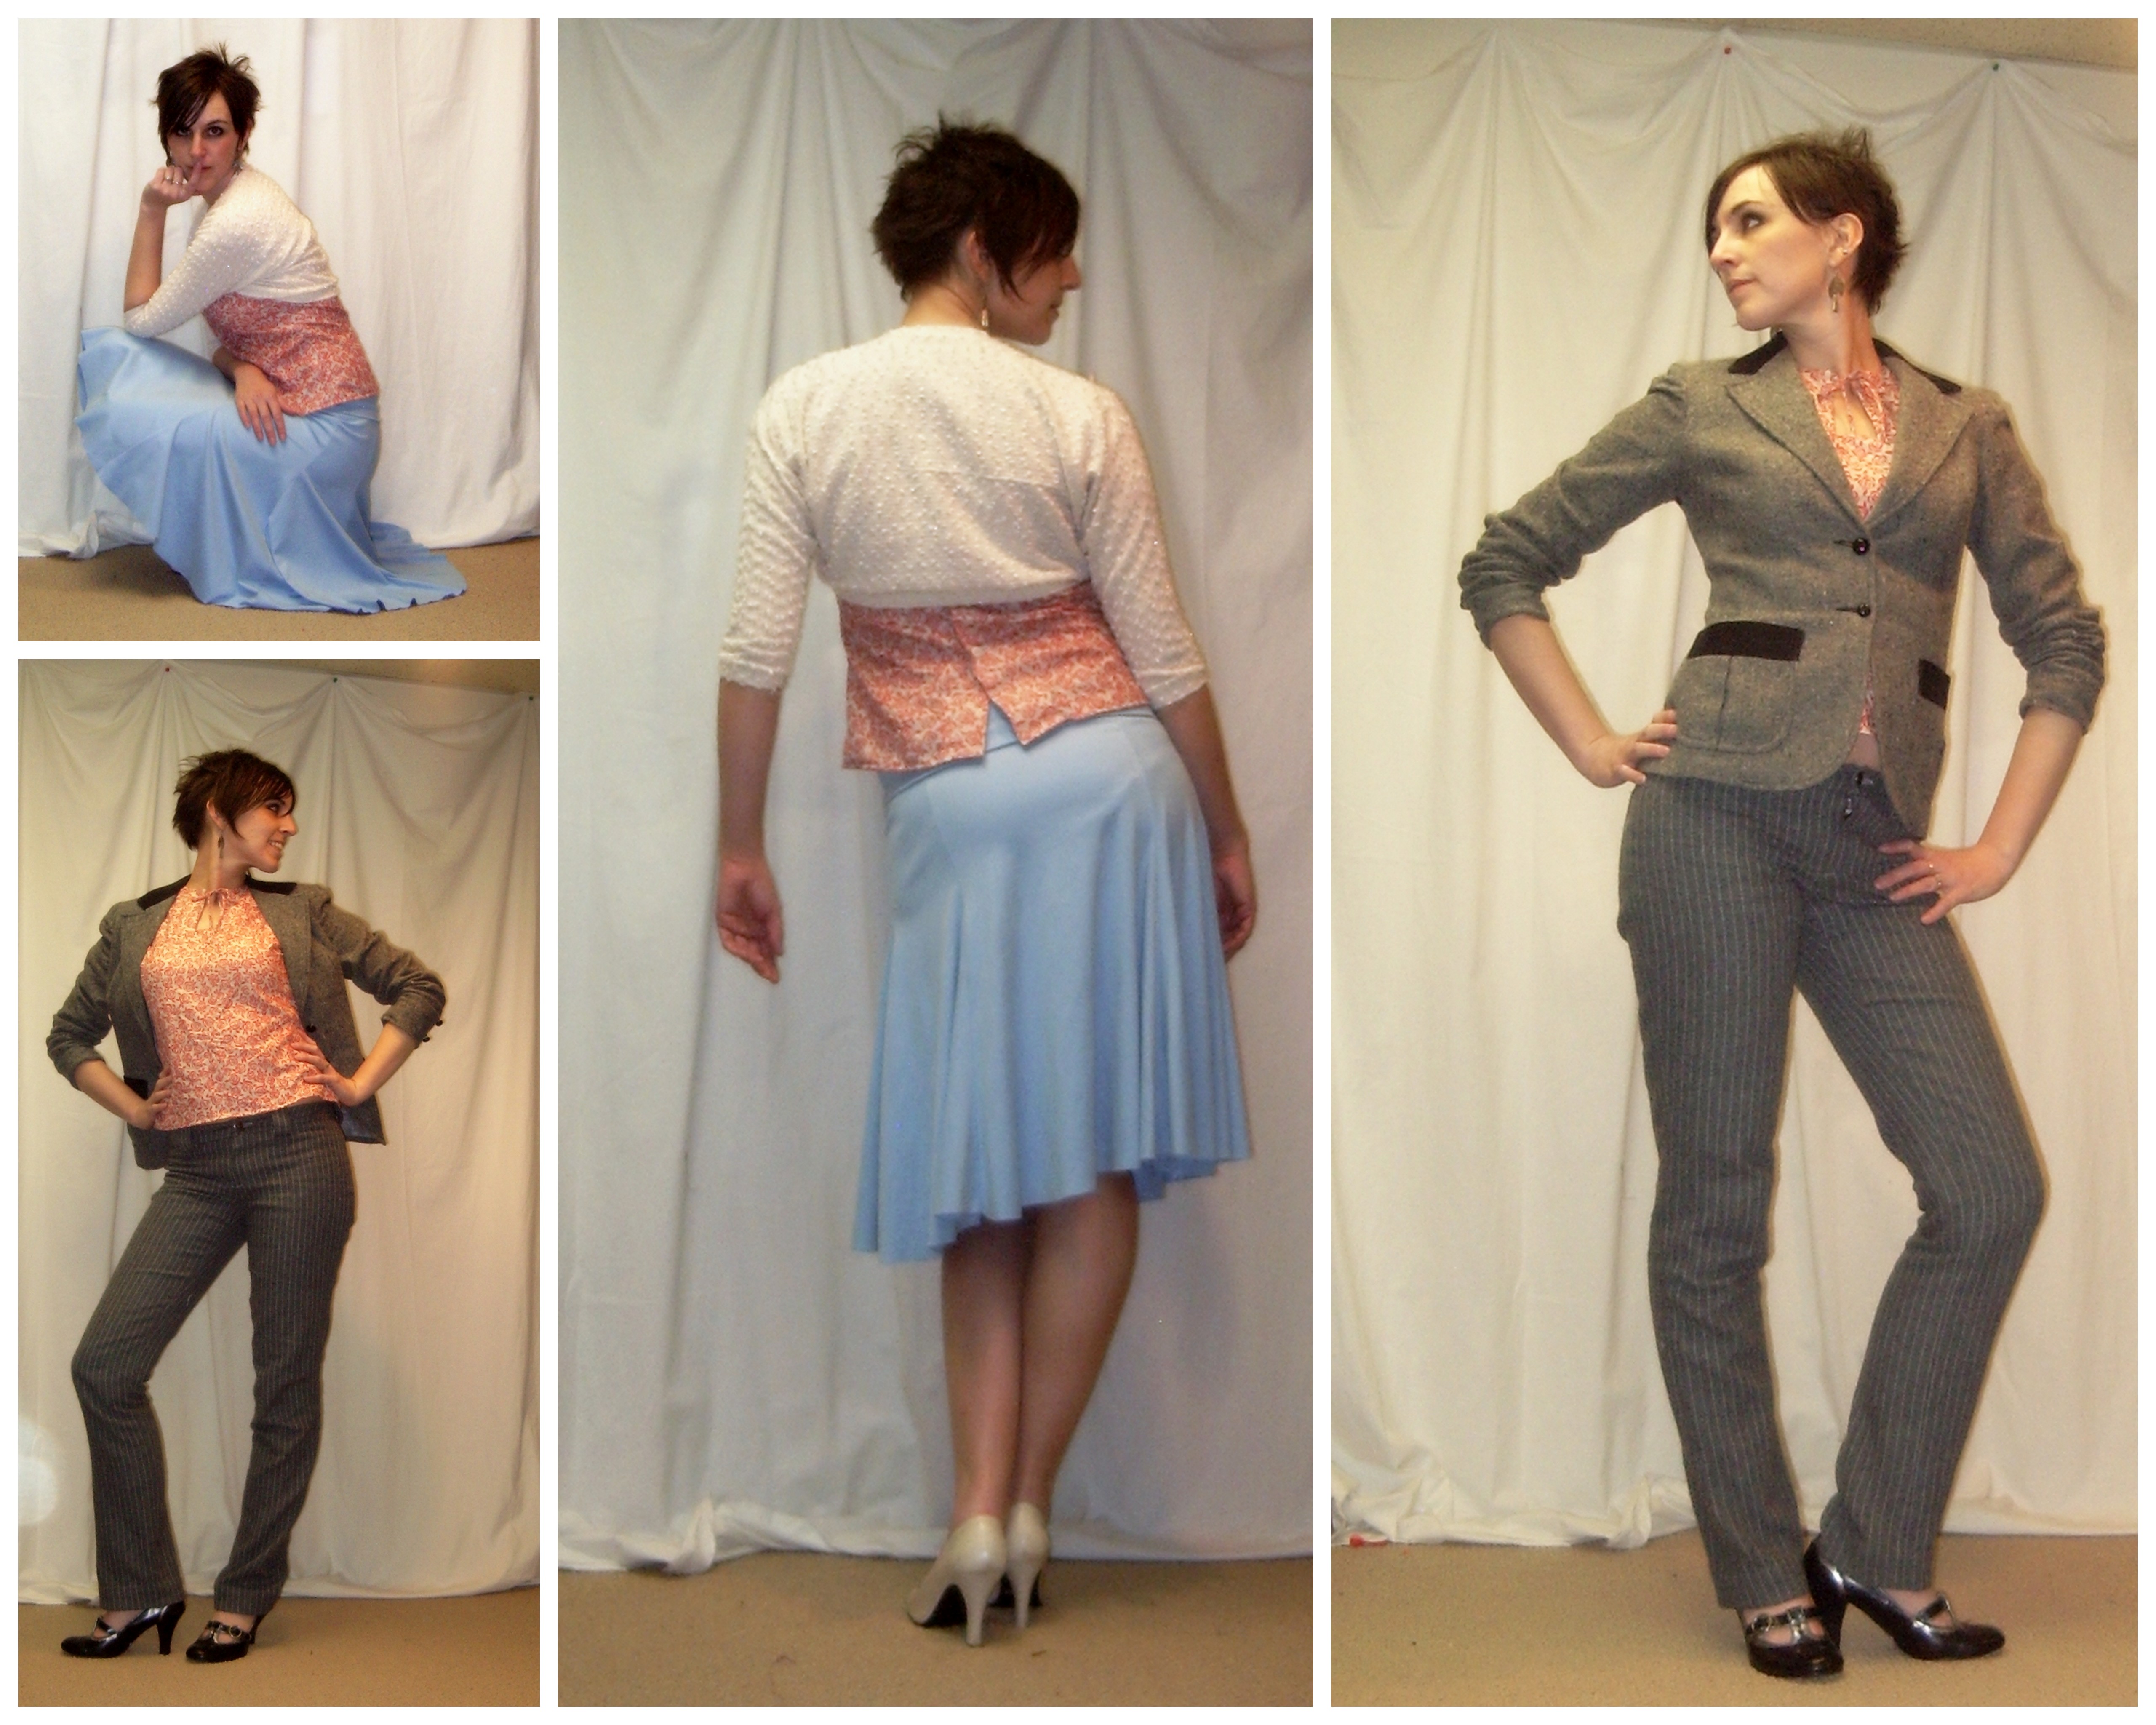
More styling

So, verdict?

Well, it fits remarkably well. The bust is a wee bit tight (especially over a padded bra) but not as bad as I had feared—a pinch test suggests there’s just under 2″ of ease, which is pretty minimal for the bust. The waist fits well, although it would be more interesting with the tucks. The darts are a smidgeon high (like maybe 1 cm) but really not bad at all.

I really wasn’t sold when I first tried it on, but after throwing it together with over half my wardrobe in a shotgun approach to styling, I think it’s growing on me. I really like it with the shrug, I think because I like the brighter colour contrast near my face. The mix of colours in the blouse kinda blends into my skin tone from a distance. I also think it might be great in a more drapy fabric—crepe or rayon or (ulp) silk. For most of my wardrobe needs it’s also a bit short. You’ll notice one way you don’t see it styled here—tucked in. I tried, honestly—with my circle skirts and my Kasia skirt. It almost worked with the Kasia, but the colours are wrong. And, well. Blouses. I have Blouse Issues.

So, all in all, it was a fun experiment. Will I wear it? I’m not convinced—but I’m not quite as skeptical as I was a few days ago, so there may be hope. Especially with my cream capris and the vintage shrug.

42 Comments

Filed under Sewing