Tag Archives: finished projects

A dress for the boredom

A dress for roasting marshmallows

My kids have been done school for just over a week, although they’ve only really been home for the last two days, since we went Home for Canada Day (July 1, just for reference). Nonetheless, last night Tyo was moping around as only a near-teenager can. “Dad and Syo are out fishing, Grandpa’s watching TV, and you’re sewing! There’s nothing to do!”

This is actually wonderful.

“So, does this mean you don’t want to be homeschooled after all?”

Since the main thing coming out of her mouth for the last three months  of school has been requests to be homeschooled.

“NO! I don’t get to see any of my friends!”

Somewhere, choirs of angels broke into hallelujah chorus.

Anyway, it appeared that the only thing that could possibly alleviate boredom at eight o’clock on a Friday night was sewing with me, or rather, me sewing while she sang me her most recent song.

Front view

The fabric she selected was one of the slinky knits that I can’t seem to resist. I love buying them. I love wearing them. I just don’t. love. sewing. them. This particular knit threw itself at me on the Fabricland Canada Day sale (which took place several days early) when even the clearance racks were fifty percent off. I have a hard time resisting $1.50/m fabric. Fortunately, I bought three metres, so even with this dress for her, there’s still plenty left over.

ANYWAY.

Obligatory racerback shot

For the pattern, we just used the ubiquitous racerback tank pattern, Y1201 from Young Image Magazine (which was a dress pattern, originally). I added what I thought would be enough length to take it to her knees, and a bit of width over the hips because, well, Tyo, and more-or-less happily went to work.

Now, the four previous times I’ve made this pattern, I’ve used a rib-knit. What I hadn’t really grasped on was how much rib knits grow. I mean, my brain knows it, but I didn’t really understand it. This was an easy-fitting tank when stitched in a rib-knit—close fitted but not exactly skintight.

In this slinky knit it’s, ah, pretty tight. Note to self. Also, next time add more to the butt. Tyo is not one of those children who can wear a skirt whose back and front are cut the same.

Because I don’t trust these slinky knits as far as I can stretch them (which is pretty far, actually), I used clear elastic inside the binding on the neck and arm-holes. I didn’t stretch it quite enough on the neck, which is a bit wavy, and then stretched it a little too much on the arm openings, so they’re a bit snugged up. It seems pretty much ok when worn, however. I should really look into elastic and/or binding attachments for my machine…

Back view

I had measured Tyo from shoulder to knee to get the length, thinking I might have to trim some off as the fabric sagged under its own weight. But I forgot/neglected that four-way stretches will lose length as they are stretched sideways, so it’s actually an inch or two above her knees. Not horrendously mini, but a bit shorter than planned. It rides up a bit in back, but I’m not sure if that’s because it needs extra length, or more width so it doesn’t get caught up on her posterior. Probably both.

We left the bottom unhemmed, as I’m congenitally unable to get a nice hem in these thin knits so it would flow nicely.

I was a little worried about how sheer the white base fabric might be, but it doesn’t seem to be horribly bad.

Stretch!

OK, actually I’m really jealous. I love this fabric, and really want my own garment out of it. I’m thinking flowy maxi-dress.

29 Comments

Filed under Sewing

Simplicity Blues, or, ElleC’s Revenge

Hmm.

Remember this pattern, Simplicity 6710? No? I don’t blame you. I probably wouldn’t either, except that it’s been kicking around the corners of my sewing room, leering at me, for three months. Well, in the wake of the Fishing Vest, I’ve been in a light-weight, puttery sort of mood, so I’ve been trying (in my half-ass way) to tidy and clear some things out in the sewing room. I finally stitched up the Young Image racerback tank in Syo’s size, which I cut out (at Syo’s request, I will emphasize) weeks ago. I’d blog about it but it looks basically identical to Tyo’s. Tyo is not pleased about that, by the way.

So, why did this project slip into UFO-dom? Well, it was a combination of factors. The single biggest is that, when I decided to make it up, I wanted a mini-dress length. I figured adding a couple of inches to the tunic length on the pattern should be good. When I got to the point pictured above and could actually tried it on, I realized we were still well within tunic territory, and at lest three or four  inches shy of mini-dress length (and that’s without considering hem allowance.) All of a sudden my excitement for the project went down the toilet.

Expecting, much?

Aside from that, this is that poly crepe and holy &*($ does it piss me off. It’s got gorgeous drape and I love the colour, but damn—it shifts, it wriggles, it slips, it frays, and it DOES NOT PRESS. Urg. Obviously there was a good reason it was at the thrift store. Also, while the drape is beautiful, it has a bit too much body for the gathers on the front (the photos are after I pressed the crap out of the gathers to flatten them). Anyone looking for a gorgeous 70s maternity dress, I think I have just the pattern for you. Which is probably at least partly the pattern’s fault—I’m thinking this is a case of excessive gathering.

And then there was the zipper. Part of a gift from ElleC this spring (I also got the pattern from her, way back when. Do I sense a pattern? ElleC, are you out to get me? Wait, don’t answer that.), it was the perfect colour, so I figured it was kismet. Or some other mythical force. Anyway, I already knew I could wriggle into the dress top sans zipper, so obviously I was just looking to make my life difficult. It was a disaster. It’s been a while since I tried to insert a centred zipper, and the crepe wriggled and slid and bubbled and bulged and, well, by the time I got it all unpicked I was thoroughly pissed off and chucked the whole thing in a corner.

The good?

But now that I’ve whinged thoroughly about the bad, let’s move on.

I made my usual changes for fit:

  • petite bodice (1.5 cm) (this required petiting the sleeves as well, which I did by just taking a fold out of the middle, on grain.)
  • square shoulder (1 cm)
  • swayback (2 cm straight across the CB piece, angling from 2 cm to nothing in the side-back piece)

That vintage look (courtesy of Picasa filters)

I even remembered to add the length I took off the back in the swayback adjustment, back on to the hem of the back pieces. Now if only I’d added a few extra inches of length all around. (And even more in the back…)

Apparently my square-shoulder adjustment was, for once, unneccessary. *headdesk* There’s some distinct drag-lines from the shoulder that go away if I pull upon the outer edge of the shoulder. I blame this at least partly on where the pattern (which has really narrow shoulders, as you can see) sits—right at the base of the neck, over my trapezius, which is the one part of my shoulder that does slope.

Back view. Definitely not dress length.

I wasn’t convinced about the sleeves, but figured I’d give them a try, and it turns out I quite like the long, swingy flutter-shape, and how they’re inserted forward of the side-seam, which I think is rather slimming. There is possibly a bit of the linebacker look happening.

Linebacker look?

I opted to line, carefully modifying the front panel so as not to add bulk, but the  broadcloth I used (because it was the right colour and handy) was not a good choice, either. A remarkable number of bad choices for one garment, don’t you think?

Not feeling like messing with the rolled hemmer, I used Sherry’s handkerchief-hem method, which worked astoundingly well aside from the fact that my hem edge was distinctly uneven and very ravelly after three months on the floor. If I had trimmed it first so it was nice and even, it would’ve been awesome. As it is, like so much of this project, there’s room for improvement.

So, in the end? Not sure how I like it. There’s a lot of little  things that annoy me, which may or may not fade after some time in the Magic Closet. But a lot of the issues were self-inflicted. With the right fabric (a scrumptious lightweight silk or rayon or even cotton gauze, maybe) and a bit less fullness in the front, this could still be an awesome dress.

31 Comments

Filed under Sewing

Inordinately Pleased With Myself

Smug.

Yeah, that about sums it up.

Which I suppose is why I take on these ridiculous, intricate projects. Especially at times when I’ve been claiming I need all my sewing to be brainless and easy because my brains are occupied elsewhere.

The Fishing Vest is finished. (For those of you paying attention, the missing front lining piece showed up on the cutting table, underneath about three layers of other crap that I swear I went through twice before)

Back & Front

So, as fishing vests go, this one is fairly simple, meaning there’s only eleven pockets instead of umpteen bajillion. And I forgot to pick up D-rings, so there’s no little D-ring doodads, and there’s only one snap tab because apparently I only had one heavy-duty snap left (well, I had 3/4 of the second one, but that last 1/4 is kind of critical. Osiris had asked that the back pocket be deep enough to hold a water-bottle, and I think it probably isn’t. I interfaced the upper back yoke for a bit of extra strength, and possibly I should’ve interfaced the front of the vest as well, but oh, well.

Bias tape “maker” (actually folder)

I waffled back and forth about how I was going to finish the vest, but in the end went for a bound finish, which is common (yes, I’ve spent a depressing amount of time in the last several weeks looking at pictures of fishing vests online) but not universal. I tried to convince myself this was a perfect opportunity to use pre-made bias binding, but couldn’t quite make myself go there. What is it about pre-made bias binding? I have a shitload of the stuff, and every time I go to use it I talk myself out of it. So I made my first denim bias-binding. Fortunately, it’s a pretty darn light-weight twill. I used my jumbo bias-tape maker, possibly for the first time, and it went better than expected, especially considering I totally eyeballed the width of the tape when I was cutting it out. The application went relatively well, as well, despite not always remembering which side I should start on. And after stitching on four cargo pockets (albeit teeny ones) I feel much more comfortable with them than I did last time. The exposed zippers are still a little rough, especially the ones on the pockets.

Details (view at own risk as there’s at least five screw-ups visible in these photos alone…)

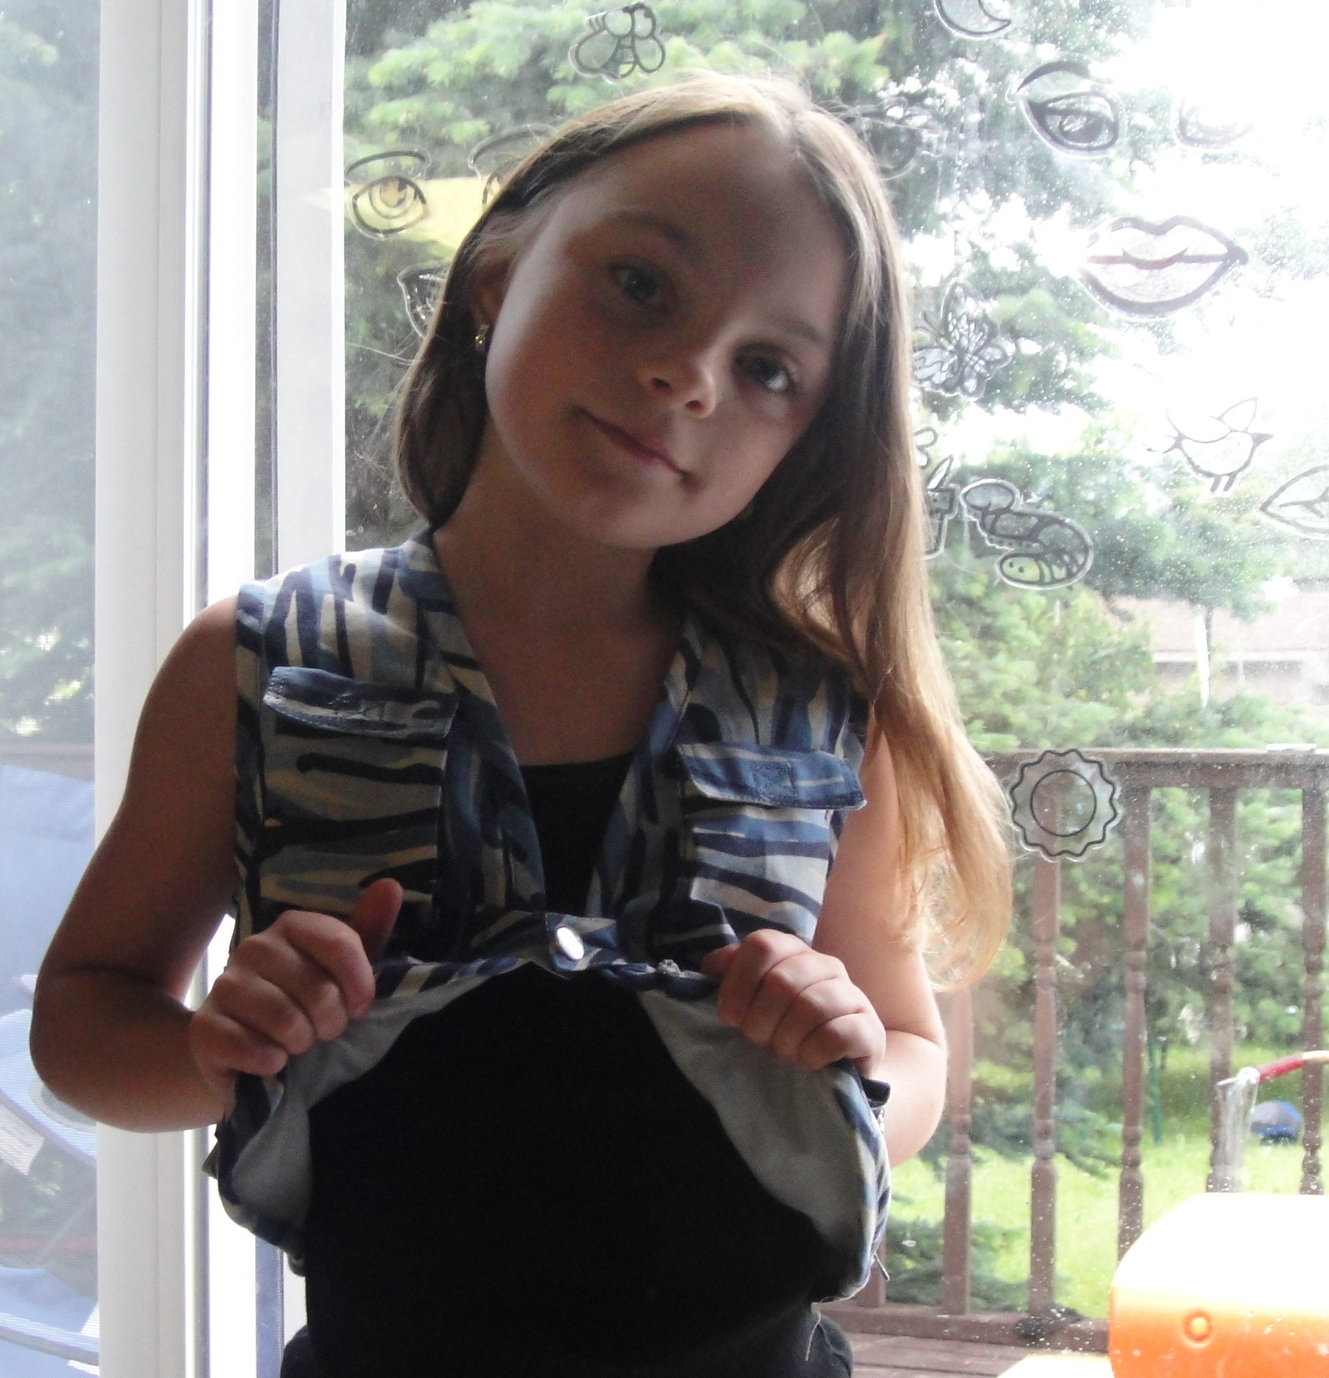
Actually, the whole project went better than expected. There were a few inevitable snafus, like forgetting to sew the velcro tabs on the upper pair of pockets before attaching them (actually the hand-sewn finish looks much better, if only because I use black thread to match the velcro that time) and forgetting to make the two zippered cargo pockets on the front mirror images of each other, and there are minor imperfections at every single point along the way, but I’m not going to dwell on them too much because, y’know what, it’s DONE! And, what’s most important, it’ll work. And it’s pretty cute from even a foot away

Oh, and the playing with the grain of the stripey almost-camo-print on the pockets was intentional. I’m kinda proud of that.

Comparing fit

It fits Tyo snugly and Syo more loosely (I did mention their shoulders are almost identical…), so I think the next one should be a little larger. It won’t be hard to grade the vest up a bit (and maybe do a teeny FBA  with the dart incorporated in that horizontal seam above the zipper), and I think I’ll just use the same pockets.

But not yet—I’m going to wait until they have a chance to road-test this one.

29 Comments

Filed under Sewing

Needing no introduction…

You know what this is.

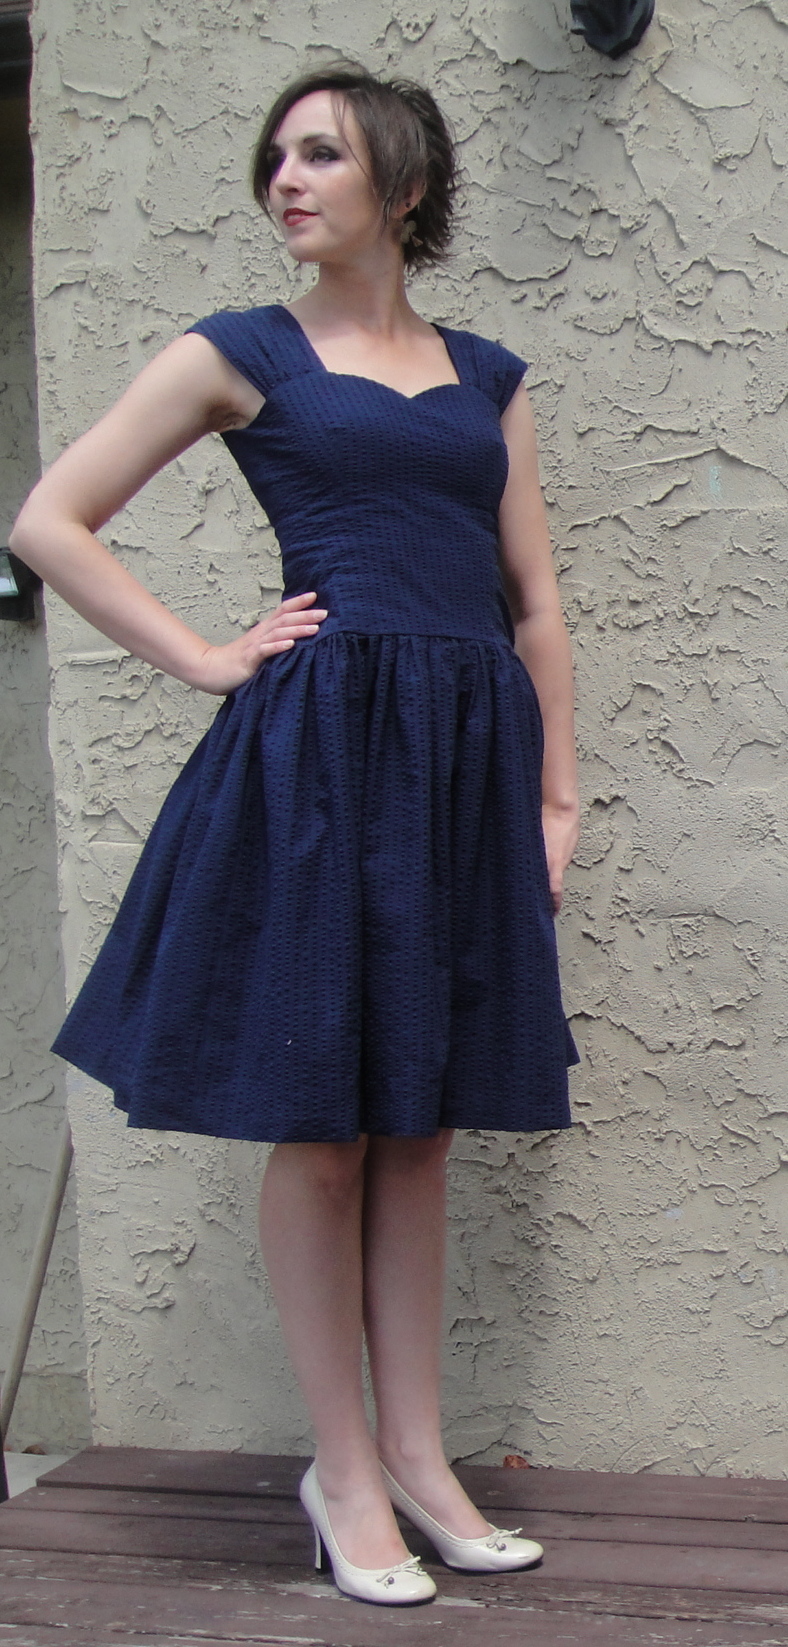
It should come as a surprise to no one that I’ve made a Sewaholic Cambie. I fell hard for this dress from the moment it landed in my inbox (and it made me very jealous of the pattern testers who got to see it first…) In fact, the only reason it took so long to make up was figuring out whether I wanted to do the full-skirted or A-line version first, and whether I wanted to make it a part of Project Drop Waist or not.

Unsurprisingly, the answer was full and yes.

So, some deets:

The fabric is a navy seersucker from the thrift store, whose purchase I agonized over way back when. (You guys are such enablers, I headed back and got it). I actually had to give in and go buy some poly-cotton broadcloth for the lining, however, which wound up costing rather more than the fashion fabric. /sigh.

Click to enlarge

I used the bodice pieces from Simplicity 3965 to extend the Cambie bodice to hip length, which worked fairly well and even seemed to correct the rear-trending side-seam issue. I also wound up removing a fair bit of length through the bodice above the waist, plus my usual square-shoulder adjustment. I did a muslin but didn’t bother photographing it—sorry. I started with the size 6 (the same size I made for my Lonsdale last summer), though technically my measurements are a bit closer to the size 8; the finished measurements Tasia so thoughtfully includes on the envelope cover seemed to suggest that it would work, however. Initially the muslin seemed perfect through the bust but a bit snug through the waist and hips, so I added a wee bit—however, when I tried on the finished bodice, I wound up taking off what I had added to the hips. I think when you add the weight of the gathered skirt at the hips, the downward pull on the bodice smoothes out a lot of the wrinkles from close-fitting, and also spreads out the shape so it looks kind of boxy if it’s not snug. Or at least, that’s how I have felt about both this dress and the Star Wars dress. Either that or my fashion fabrics have more give than my muslin fabrics, except that in this case both involved broadcloth, and I don’t think bedsheet has a lot more give, either…

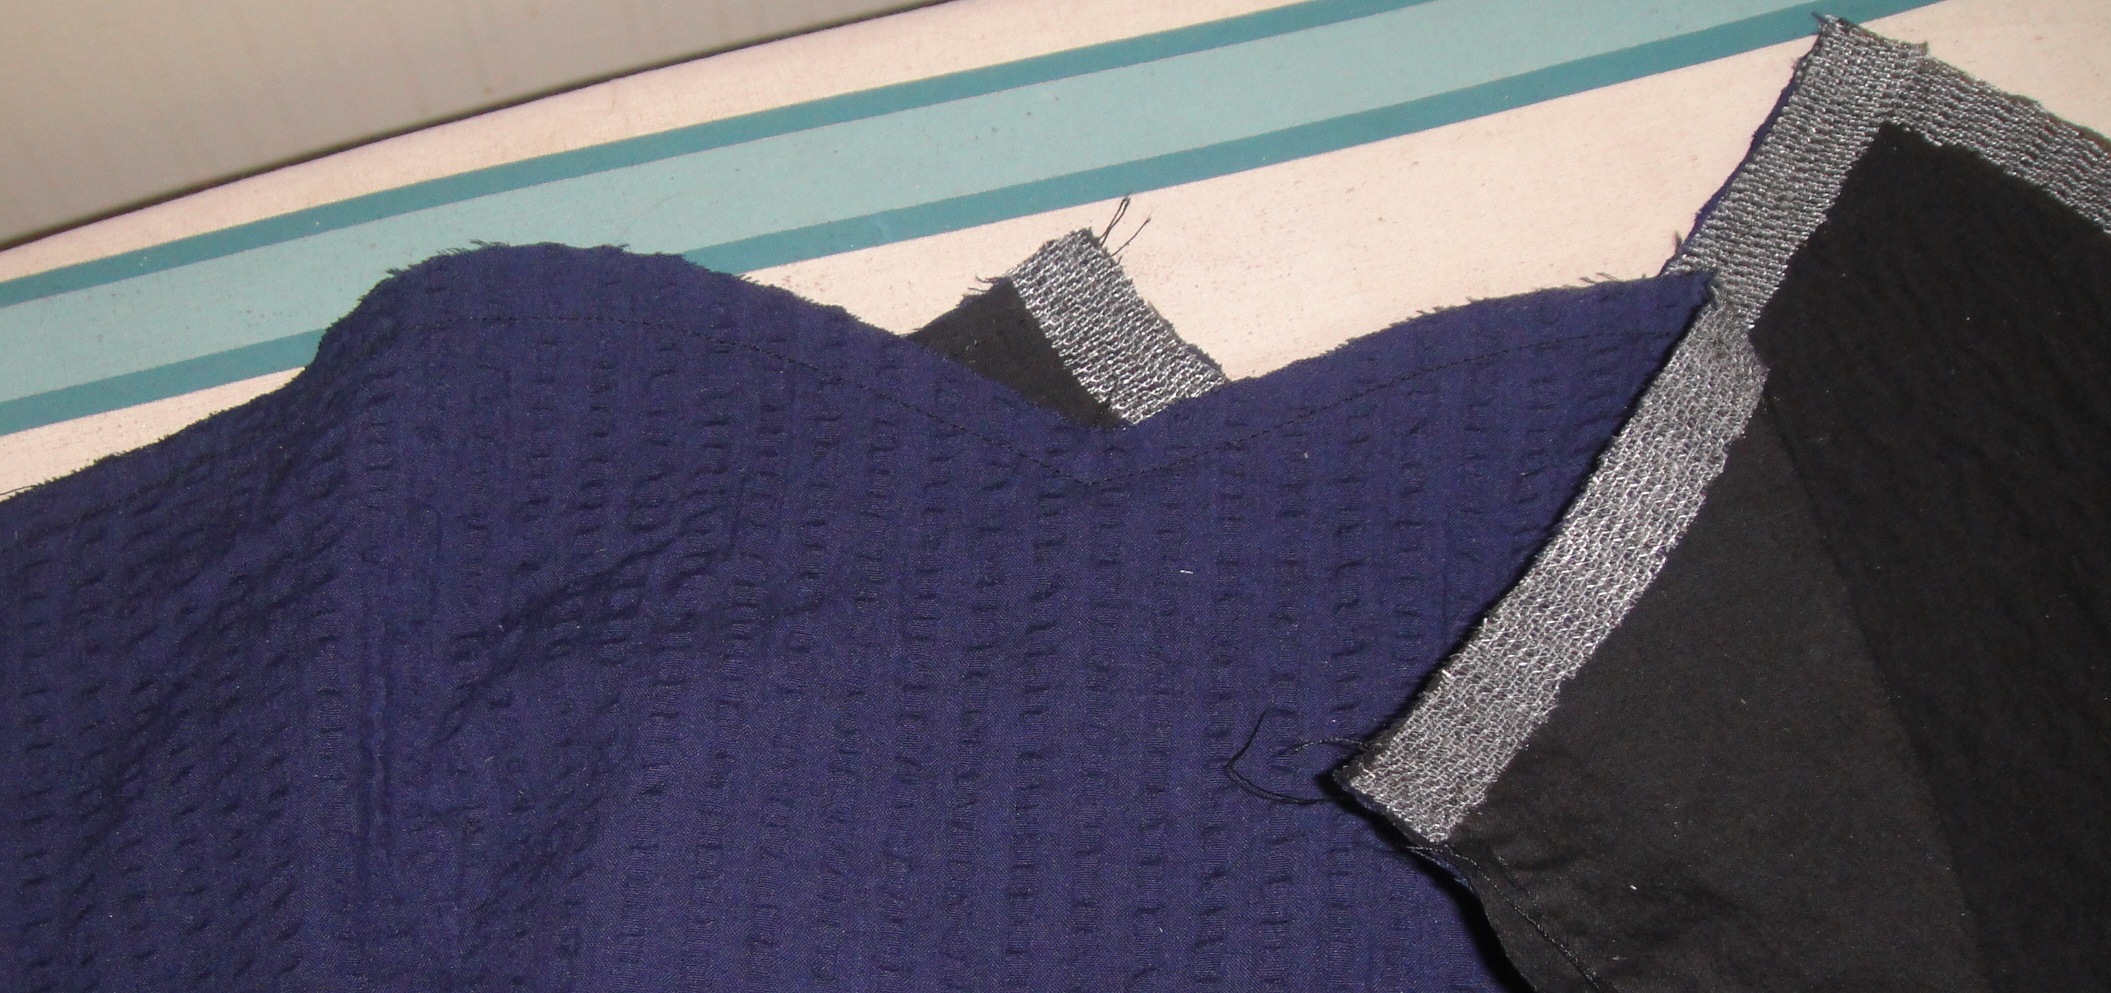
Underlining & fusetape

The pattern pieces for this pattern are really curvy—curvy sweetheart neckline, curvy shoulder on the back piece, curvy armscye. All the curves prompted me to do a lot of reinforcing with narrow strips of interfacing. Maybe it was overkill, but it feels nice and sturdy. Once again I underlined the bodice (with some remnants of black cotton voile I had kicking around). Unlike the Star Wars Dress, I did a separate skirt lining.

I used the original length from Tasia’s skirt pattern, but then the waist is dropped, but then the bodice was also shortened—so I think I’m in the realm of maybe an inch longer nape-to-hem than the original pattern, but maybe not. I think I’m a bit taller than Tasia, too. I like the knee length it turned out, anyway. Because I’m too lazy to trace rectangular pattern pieces, I just ripped strips across my fabric the right length. An interesting feature of this pattern is that there’s roughly twice as much skirt in the back as the front. I decided to just use the full width of my fabric (45″ or 115 cm, roughly) for the skirt panels, so there’s one panel gathered across the front and one for each side of the back.

My only issue, at the end of the day, is that with all the bodice shortening, the dropped waist wound up being not quite dropped enough—at least at the centre front. I haven’t attempted to add shaping to the dropped waist in this area (though that is a gorgeous look), kind of as a “keep it simple, stupid” measure—but I think the next time I do this I will, because I really wish I could drop the front waist seam just a little more. It doesn’t quite sag to the sides, but it comes very close. And no, there’s not enough seam allowance left to let it out.

Also my bust darts are still kinda pointy. I stitched them as drafted, basically. I really should spend some more time figuring out how to make a perfect, non-pointy dart.  D’you think if I keep saying that often enough, I’ll actually do something about it?

I did not forget the pockets (hooray!) but I did forget to take a picture using them. Anyway, pockets are, of course, awesome. Also, do follow Tasia’s directions for attaching the front strap/sleeves. I tried to go my own way and it was a disaster. Hooray for seam-rippers.

Hems!

And, as you saw yesterday, I finished the hems with navy hem lace (it matches much better in the non-flash photos, by the way). Just because I could. No fancy horsehair braid or anything this time—the seersucker has plenty of body. And I don’t have enough horsehair braid left from the Star Wars dress.

deflated skirt

Most of the pictures were taken wearing my super fluffy square-dancing petticoat, which definitely notches things up to full fifties-crazy-skirtness. In the theme of honesty in blogging, the above picture is without a petticoat—just the skirt and lining to hold it up. For most everyday wear I’ll probably wear my fluffy petticoat, which, while not as spectacular as the crazy one, is a lot less obnoxious and doesn’t hit both walls at the same time when I go down the basement stairs.

I think my fluffy dress itch *may* have been scratched. It’s just possible—just barely possible—that I can move on to less ridiculous projects now.

Well, maybe. I make no promises.

58 Comments

Filed under Sewing

An Odyssey in Denim

Inspiration

Inspiration

Back in the late nineties, I was a high-school student exuberantly indulging in exploring my own style, limited only by my budget and what I could find at the thrift store. I had settled, somewhat reluctantly, on Levi’s button-fly 501s for jeans—they were a decently close fit, didn’t have the hugest saddlebags at the hips, and were comfy. They had one major drawback, however—the waist was quite high and, me being as rectangular back then as I am now, rather snug.

Yes, this was the beginning of my quest for the low-rise jeans. At the time, at least in my backwater corner of North America, stretch-denim was unknown, and waistbands still hovered just below the navel. 80s-tight was out, but I was so done with oversize-grunge, and the 70s revival was only just beginning.

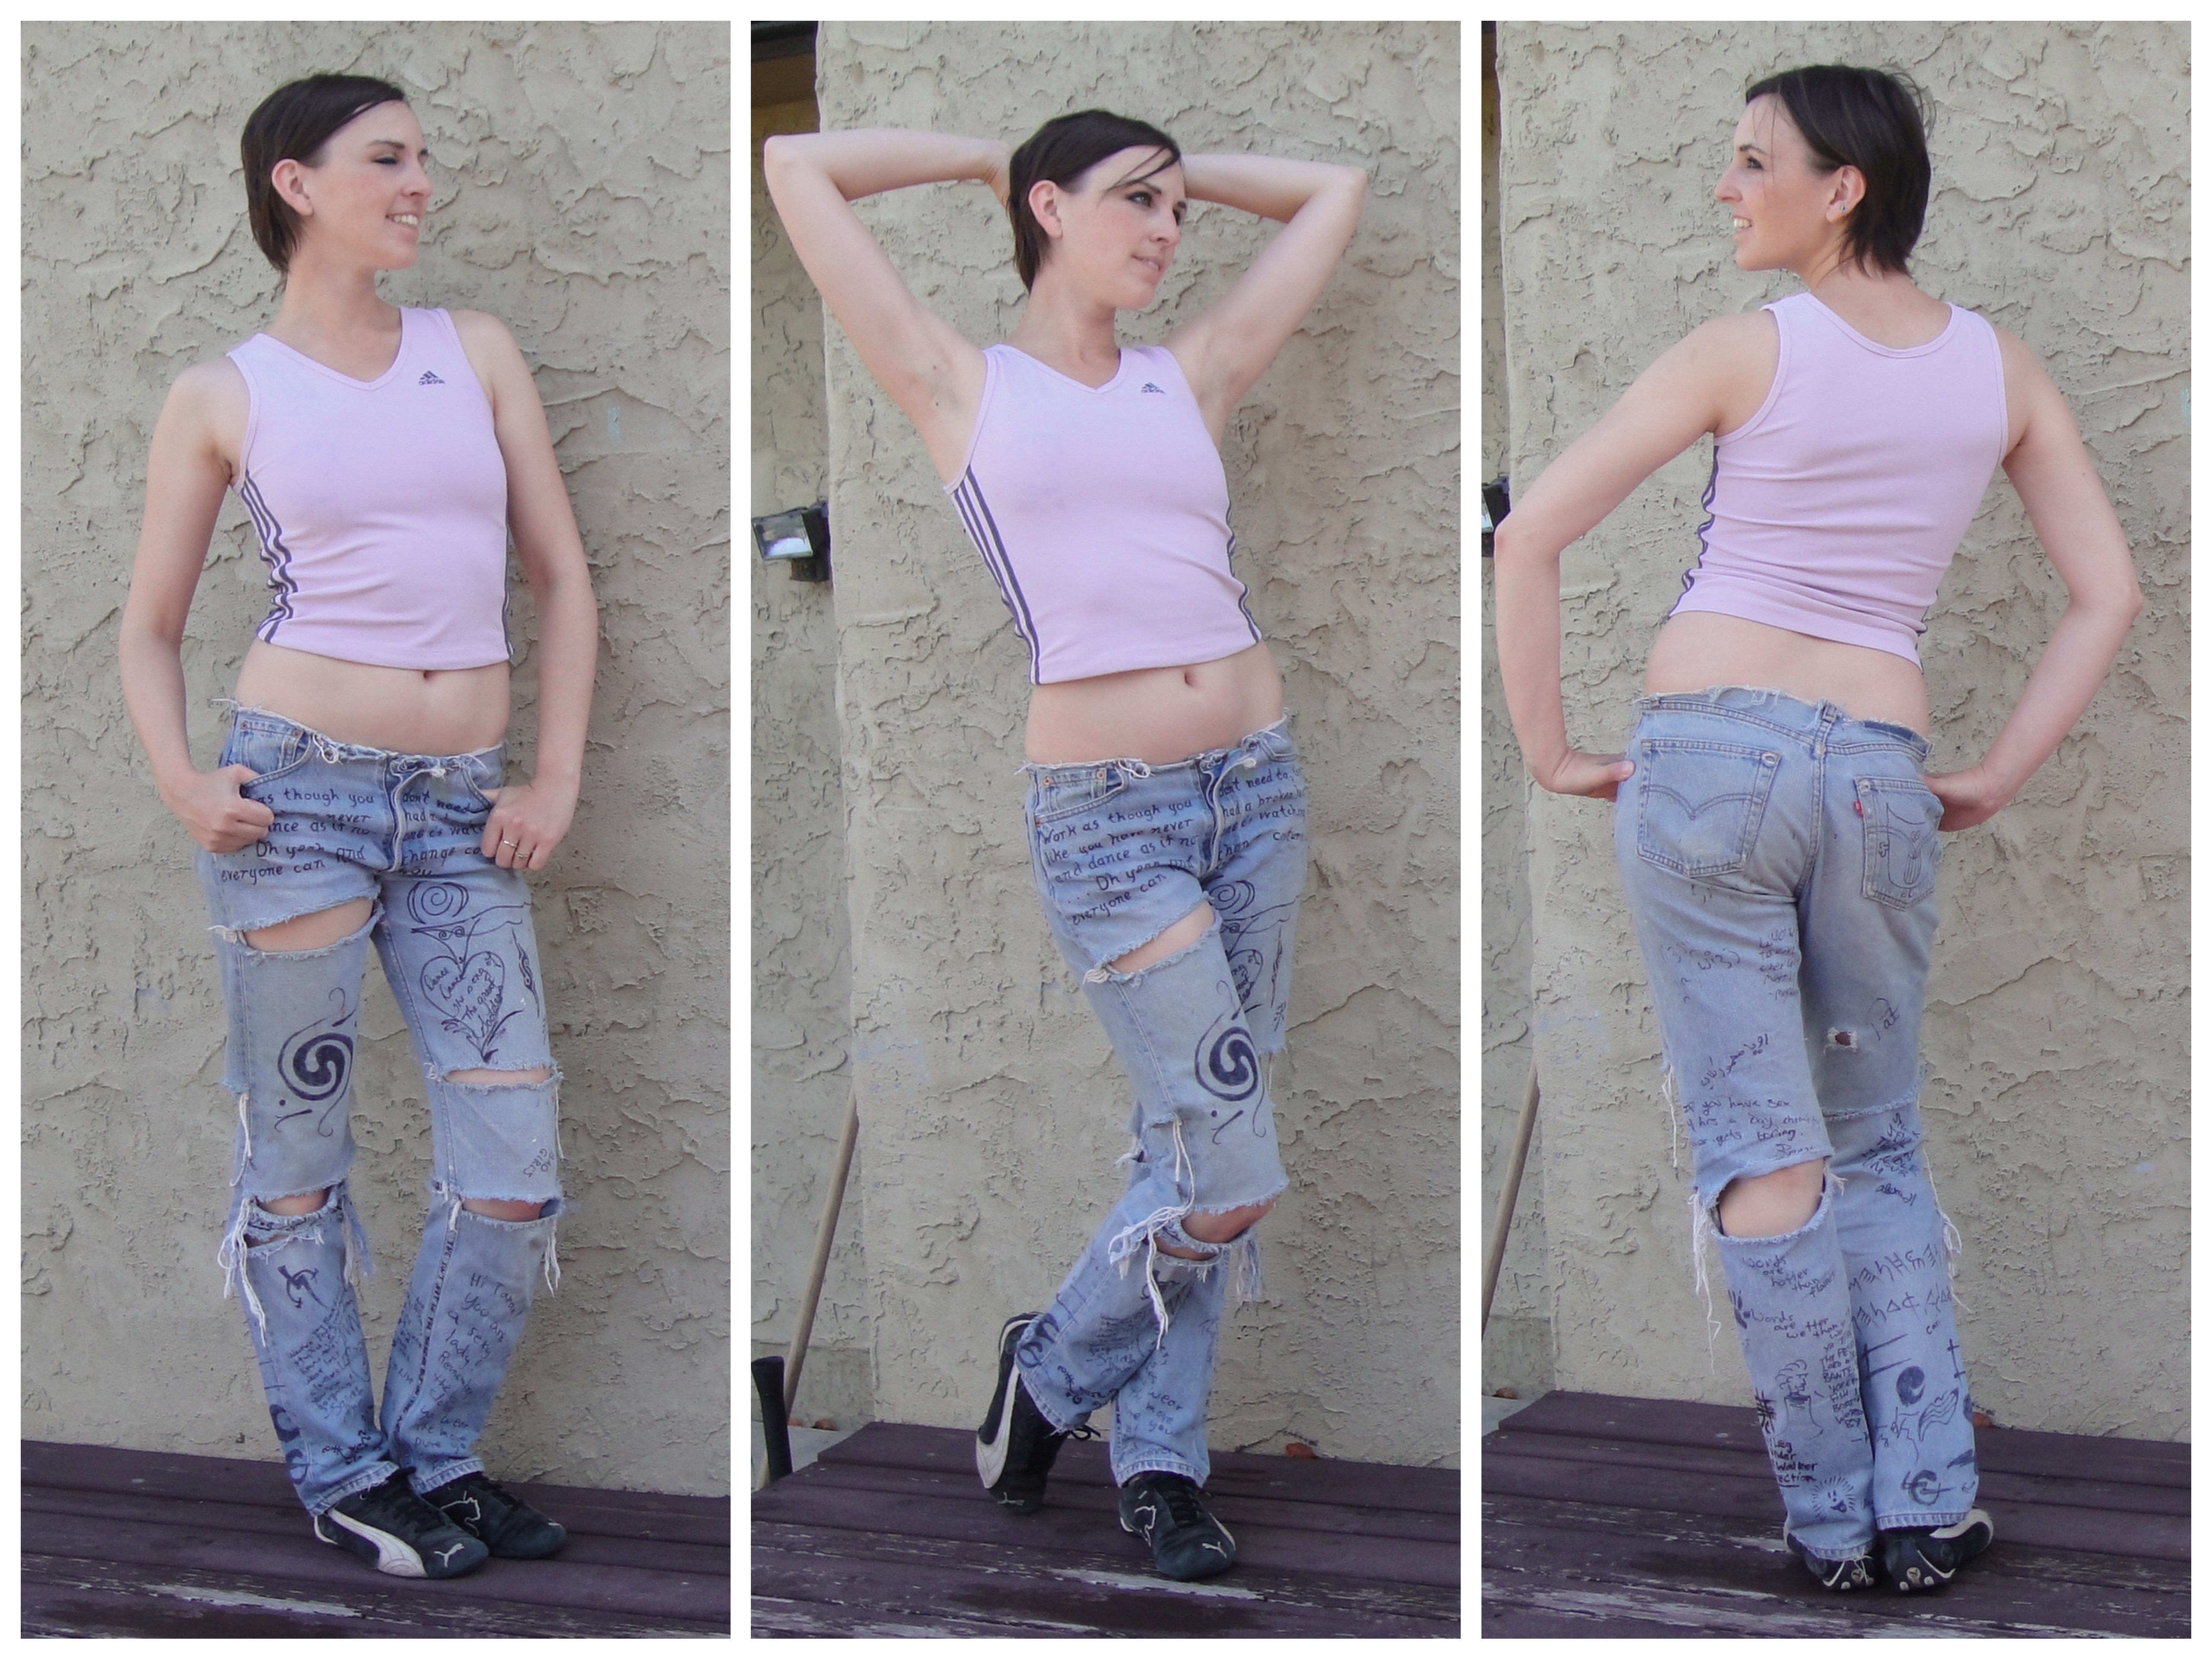
One day in gr. 12, probably during Creative Writing class, I had a brainwave. If I removed the waistband from my Levi’s, they would be lower-rise, the waist would no longer be uncomfortably tight, AND it would be a cool inversion of the omnipresent cutoff denim shorts everyone wore. And because of the button-fly, they would still stay closed.

I have rarely been so pleased with myself for any fashion innovation. I wore my reverse-cutoffs proudly. With crop-tops, of course, to maximize the amount of tummy-tan. (I tried to find a lingering crop-top to pose in, for posterity’s sake. Apparently the last of them have been purged from my wardrobe, although it occurs to me that I do still have one cropped boho gypsy blouse in the basement that I bought when I was 14…)

Mariah’s cut-off jeans

A few weeks later, I first saw this Mariah Carey video* (also a nifty article about the waistbandless-jeans phenomenon, which I have to say, in my area, was a phenomenon consisting of me and only me). I don’t think I can properly convey how crushed/angry/amused I was, to have been scooped on my fashion innovation. This did not, however, stop me from wearing my very first low-rises proudly. Two or three different pairs got the treatment.

Anyway, fast forward a year or two, and one of my pairs of hacked-up Levi’s was on its last legs. I had moved on to other jeans styles at that point—notably vintage Wranglers—but I wanted to give my “innovation” one last hurrah. So I hit upon the idea of having a plethora of friends sign, draw, and write all over them. Sometimes while I was wearing them, mostly not.

Anyway, having created this unique piece of apparel, I realized I couldn’t really wear the (rather tattered) jeans anymore. I hadn’t heard of the idea of setting Sharpie marker with an iron, and after the first or second wash the text was showing significant signs of fading. So I retired them, and proceeded to cart them around with me in the “sentimental” box over every move (and there were a lot of them) of the next dozen years.

Sometime this past winter, Tyo found them.

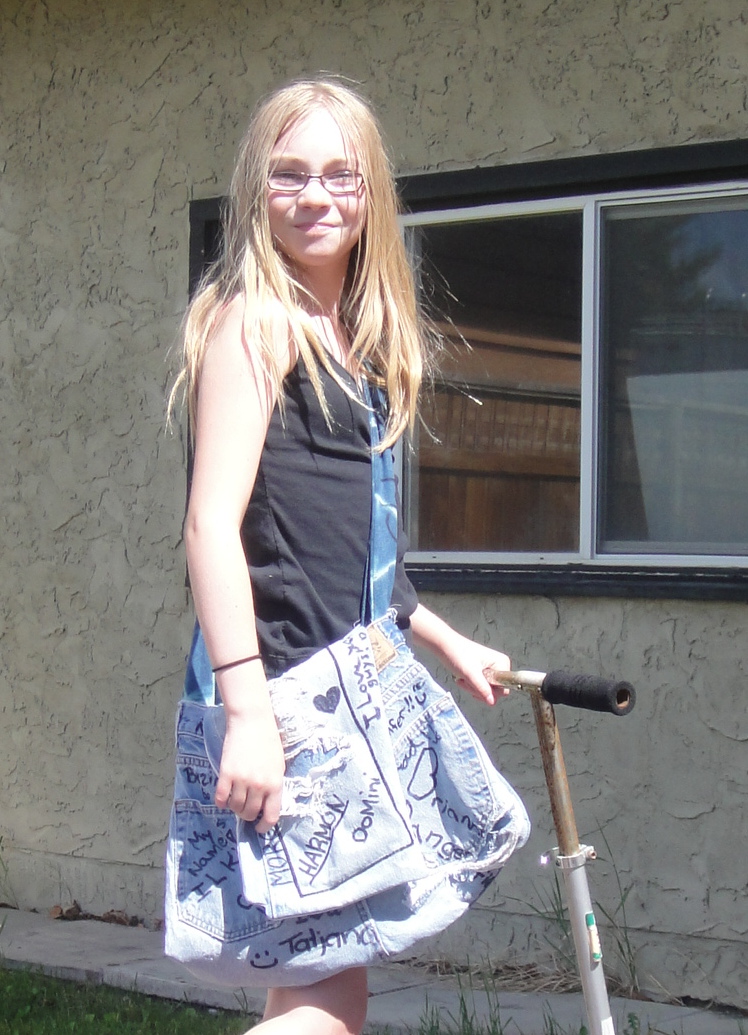
Fortunately for me, she’s not quite big enough to steal my jeans yet. But she did like the idea. As she and her classmates are graduating to middle school this year, and we’re moving away, so naturally she’s been feeling sentimental all around and wanting a way to commemorate her class. Not long after finding my jeans, she hit upon her solution—a messenger-bag, made out of old jeans, that she could take to school and have everyone sign.

Stitching the bag.

Now, ever since I saw these jeans of Yoshimi’s (back when I was brand-spanking-new to the world of blogging) I’ve been hoarding old jeans in the hopes of someday making my own pair. Well, that hasn’t happened yet, but the old pairs finally got put to use for this project, so I feel less guilty about the hoarding. Three pairs of my husband’s old pants (two jeans and one pair of khakis, if anyone cares) went into the making of these, plus the strap which was made from the cutoff legs of a pair of Tyo’s jeans which recently became shorts.

The bag

We made the main part of the bag from the butts—lots of extra pockets this way. The flap was from a leg area, the patch having been in use on the jeans. Tyo did the majority of the stitching, although I did a bit of additional patching as necessary, and the final stitching around the top of the bag, which was through the lining plus jeans waistband and belt-loops—pretty heavy-duty with some major changes in thickness. The featherweight handled it like a champ, although I still prefer to hand-wheel the really thick parts. I did a bit of re-stitching around the crotch to get them to lie flatter (the same thing you’d do if converting a pair of jeans into a skirt), and Tyo stitched across the bottom corners to give it a bit more of a 3D shape. And an interesting cutout in the corner of the flap. Just because.

Bag, open.

And Tyo took it away to school with a big, fat sharpie. Apparently her replacement teacher (who has been the source of much angst the last few months) was not impressed. Ah, well.

Happy Tyo

Tyo, at least, is happy.

Now I just have to manage to iron all that sharpie.

*This is one of those Lessons On the Fallibility of Memory. I would swear that I cut my waistbands off in Gr. 12, and saw the video shortly thereafter. I graduated high school in June 1998; the video apparently came out in 1999. Am I transposing my brainwave earlier? Or was the gap between my waistbandless jeans and Mariah’s longer than I remember? Who knows…

24 Comments

Filed under Sewing

Not my best work

20120609-005049.jpg

Deets

Every time, in the last little while, a friend or colleague has a baby, I think that I should make said baby a homemade gift. I’ve even bought several baby patterns with such things in mind. But so far, every time my own slackitude has won out, and I haven’t gotten around to it.

Well, this piece has, perhaps, made it clear to me why not doing so wasn’t such a bad idea.

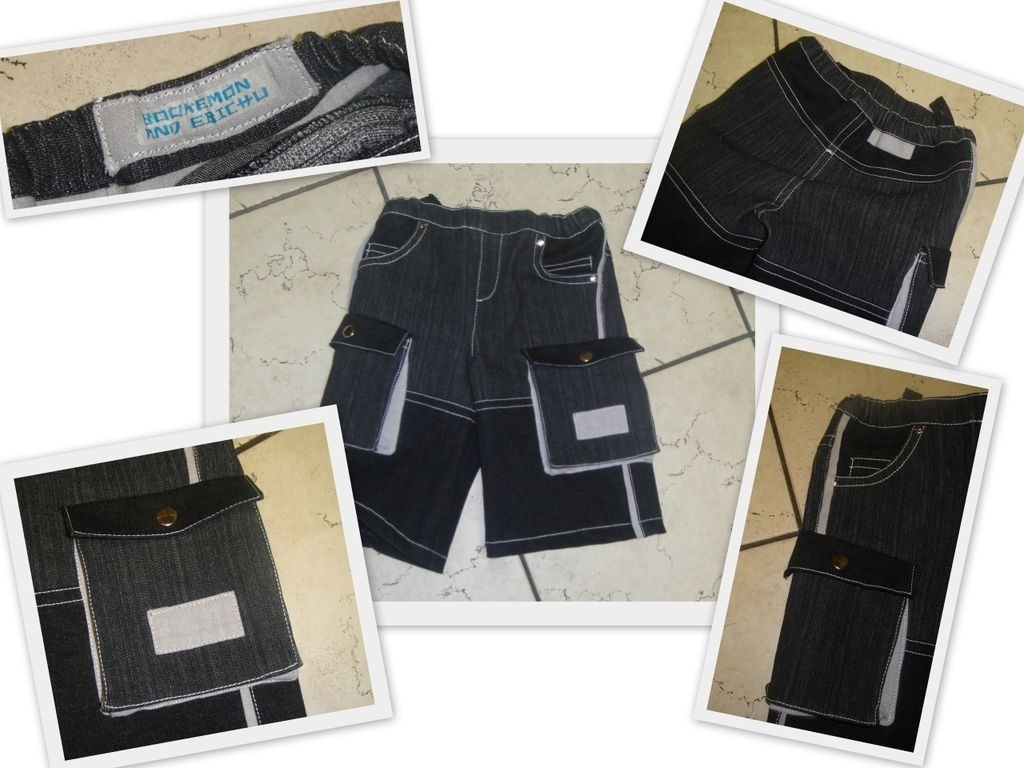
This is a present for a little boy born last winter who’s technically my husband’s cousin (or is there such a thing as half cousin?). So this is really a lot of firsts for me—first baby sewing, first little boy sewing. Except, peeps, it’s jeans. I’ve made umpteen however many at this point. Oh yeah, first deep cargo pockets. Joy of 21 Wale did a nice cargo-pocket tutorial a while back that I totally would’ve re-read and applied if I’d had a bit more time, organization, or motivation.

Anyway, details.

This is another pattern from the excellent kids’ issue of Patrones magazine Her Selfishness bestowed upon me lo these many moons ago. Previous makes include this vest and these capris for Tyo. Anyway, there aren’t a whole lot of baby patterns in the magazine, but I did like the idea of the little cargo jeans at the back. I did decide to forego the gathered ankle, and as a result opted to square off the rest of the leg, which was drafted to taper. It has some cute details like the cargo-pockets, and a mid-leg horizontal seam that would let me use up some teeny scraps of denim that have been languishing in the not-quite-scrap pile for… well, since I made my first pair of jeans, frankly.

The pattern came in three sizes, 3 months, 9 months, and 18 months. Since the baby is currently about five months and (last I checked) a rather large specimen, I opted for the 9 months.

20120609-005919.jpg

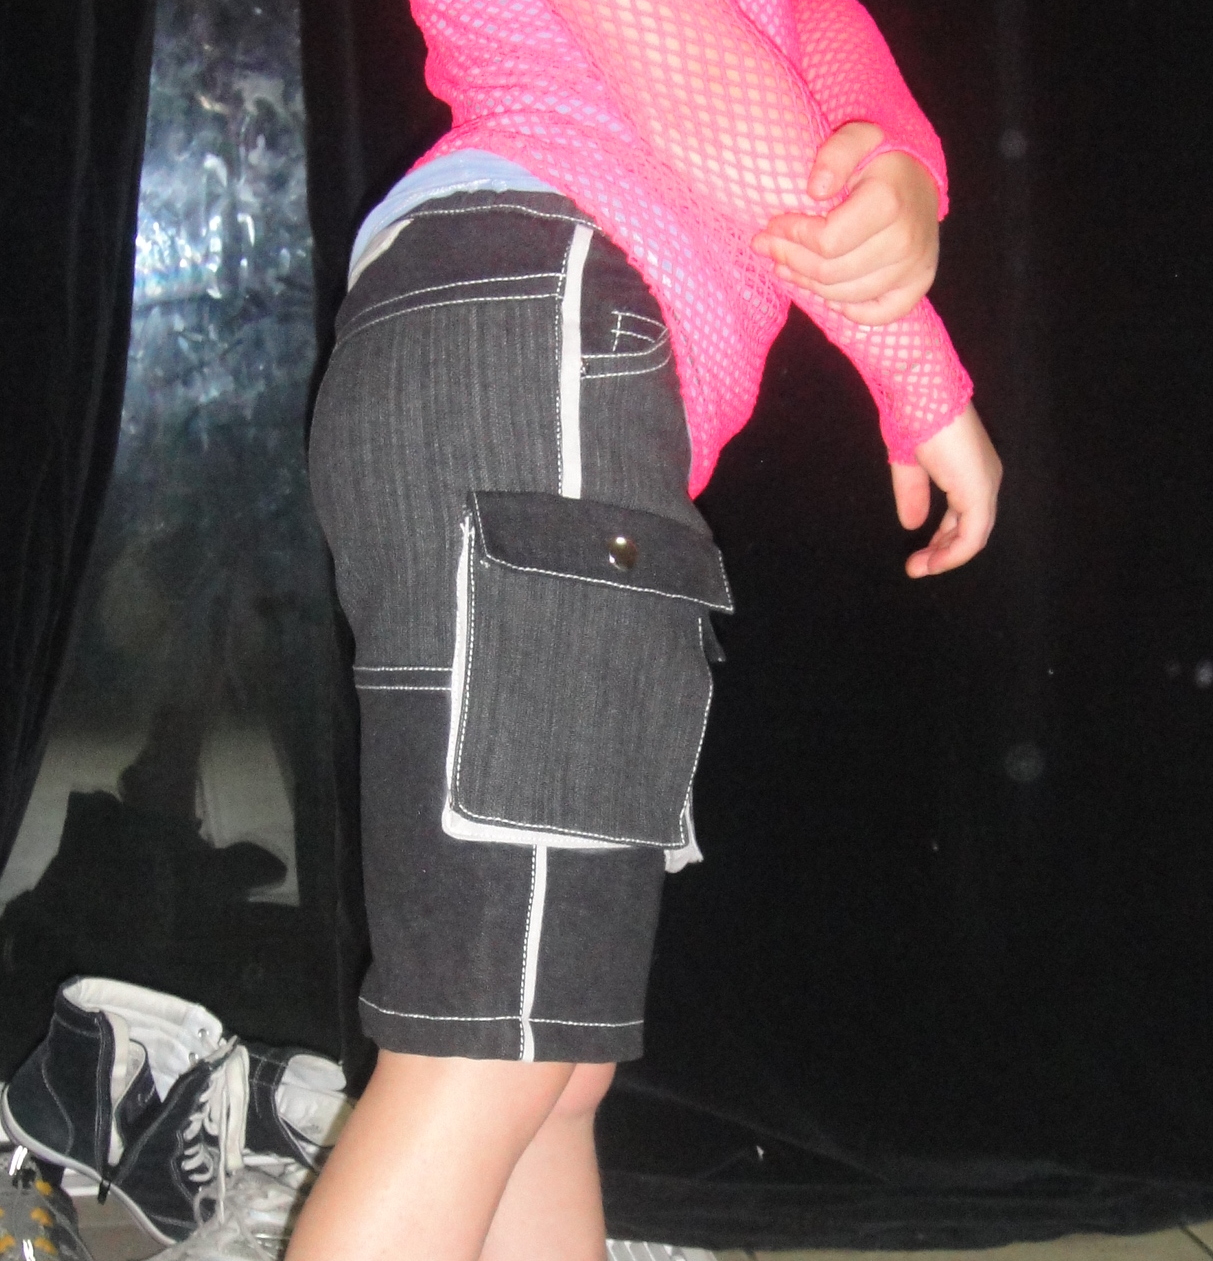
Syo, modeling.

Um, yes, this photo is Syo modeling said jeans. That would be my almost-nine-year-old, wearing the jeans for a nine MONTH old. I mean, there’s ease (and diapers ease) and then there’s ease. The top of the pattern is basically rectangular, relying entirely on the gathered waistband for shape. Considering that they actually fit OK in crotch depth, I’m suspecting there would be plenty of ease even for cloth diapers. (And you’ll have to forgive the crappy late-night flash photos. The fact that it was dark when I finished them should tell you everything you need to know, considering we’re only a few weeks from the longest day of the year.

Er, yeah, they’re a bit roomy. Maybe he’ll get to wear them next summer…

They would’ve been quite fun if I wasn’t on such a tight timeline to get them finished for this weekend. I used two different kinds of denim, plus some grey

Side view

stretch linen for the detailing, and remembered to add some nice touches like flat piping along the side-seams and random patches and flaps here and there. I even managed to attach the snaps on the  cargo pockets without totally mangling them. (I find snaps stressful.) I did a LOT of reinforcing with soft interfacing, in the hopes of avoiding blowing my topstitching, Some of this was useful, some was overkill, and some just caused its own set of problems. A lightweight knit interfacing would’ve been better, but the only nice knit interfacing I have around here is soft but fairly bulky, which I also didn’t want. In hind-sight, I should’ve done the waistband (which is designed as one piece) with a separate facing in the linen. It’s so nice and soft, whereas the denim I used on the waistband is fairly harsh. Though it does soften fairly nicely with wear.

I added studs, but because I didn’t want any metal against sensitive baby (or, as it will be by the time they fit, toddler) skin, I inserted them just in the outer layer of the pocket, before sewing the pockets together. Strictly decorative. I also used a my usual adjustable-buttonhole-elastic in the waistband, rather than doing a stitched-down elastic waistband as the pattern suggested.

All in all, they were fun, I just wish I’d been less rushed—I would’ve been able to enjoy the process more, not to mention taking more time to screw up less (and fix what I screwed up more.) If jeans are all about the precise details, well, these have plenty of detail, not so much precision.

Ah well. They’re done, and gifted, and the mom and I had a nice chat about how she loves the idea of sewing, and the amazingness of Pow-Wow costumes, and geez if I had a nickel for every time someone says to me “I’d love to learn to sew BUT”…

Ah. well. Done. And I can get back to sewing for MEEEEEE.

As soon as I have the energy to do more than stare at a screen, anyway.

29 Comments

Filed under Sewing

Follow-up

More Star Wars

You guys rock my world . Your comments on the Star Wars dress have left me in mushy (geeky) heaven all week, even as I’ve had almost no time or read, write, or comment myself this week. Which unfortunately is probably going to be pretty representative of the next few months of my life. Aiee. I’m exhausted just thinking about it. (Incidentally, I wore the dress to work on Monday. Not. One. Single. Comment. Which says something about my workplace…)

After finishing a big exciting project like the Star Wars dress, there’s always a bit of a “what next” feeling. Obviously it’s not possible to top it, at least immediately. So I backed off, and made Tyo another Young Image tank-top.

Except I decided to experiment with some fold-over elastic instead of a self-fabric binding, and, um, the results were not pretty. I gave it to her for a pyjama shirt.

She wore it to school the next day.

Tyo’s new racerback tank (aka boybeater)

Which is an awesome ego-boost, even as I cringe inwardly that people might actually see it. They know I sew at her school. Someone might notice. Anyway, to redeem myself in my own eyes, at least, I immediately made another, with “proper” binding. The photo is the “proper” one. I couldn’t find the crappy one to photograph—which might mean she’s wearing it again. The fabric is a black rib-knit I found at the thrift store; it’s soft and drapes well but has zero recovery, which works okay for a shirt like this—I won’t say well, but okay. Also when I was putting on the bindings (with clear elastic this time) I didn’t always stretch them quite enough, so when I finished one side of the back armscye was stretched out *way* more than the other. And with clear elastic in the binding, there’s no chance of it shrinking down in the wash. So I trimmed that side to match the other, sacrificing grain-straightness in the process. So probably it will twist weirdly when worn. At least the bottom is still on grain.

That’s a funny thing I’ve noticed, sewing for my kids. They have definite standards for what they will and won’t wear (sewing for Syo, in particular, is very hit-or-miss) but when I do get a hit, they a) won’t take it off until I peel it off with a spatula, and b) don’t give a rat’s ass about the stitching, finish, quality, or even attractiveness. Syo’s favourite homemade pieces are some self-drafted bits I couldn’t even bring myself to blog about, including one she made herself that looks like something a caveman would make, if cavemen had access to lycra and sergers. (And, thinking of the amazing Neolithic art out there, I’m probably being offensive to cavemen.)

Syo’s faves: caveman sewing

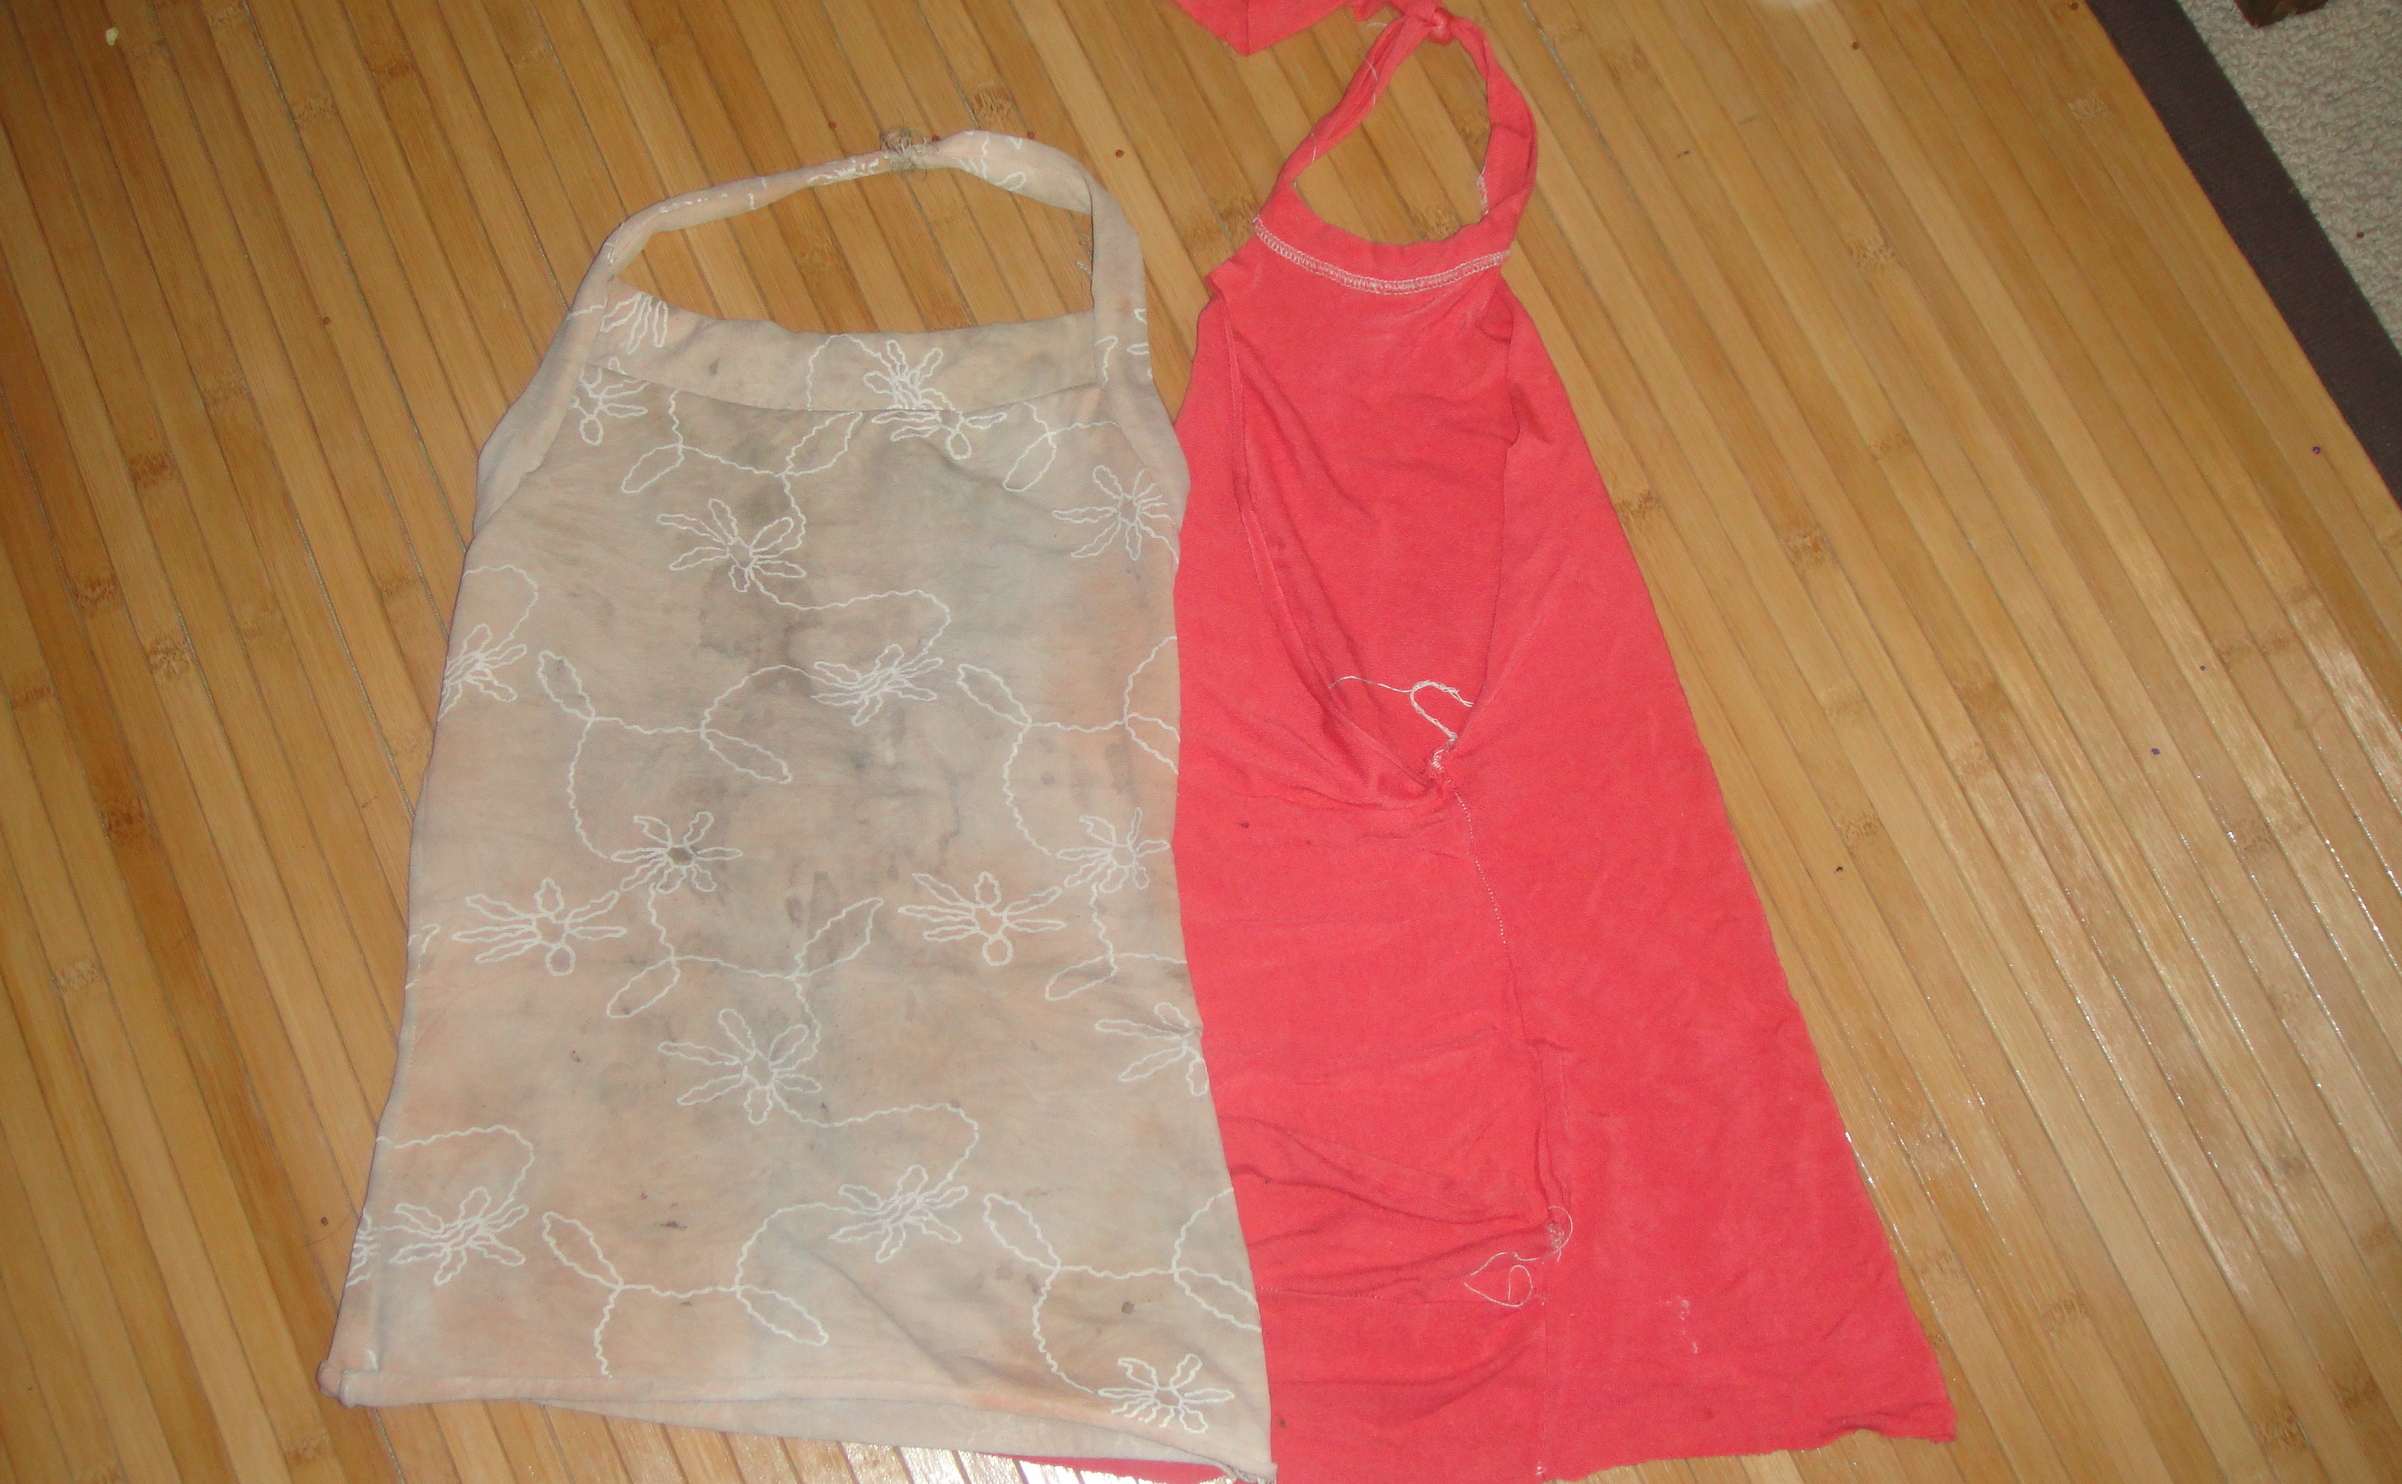
And they’re both grubby, having been retrieved from the laundry for this photo. Like I said, peeled off with a spatula. Although the print of the one on the left has these weird grey smudges in it that always looks grubby. The one on the right she made pretty much all by herself. There are some bits pieced in over the butt on the one side. Symmetry is optional.

Thrift store “scores”

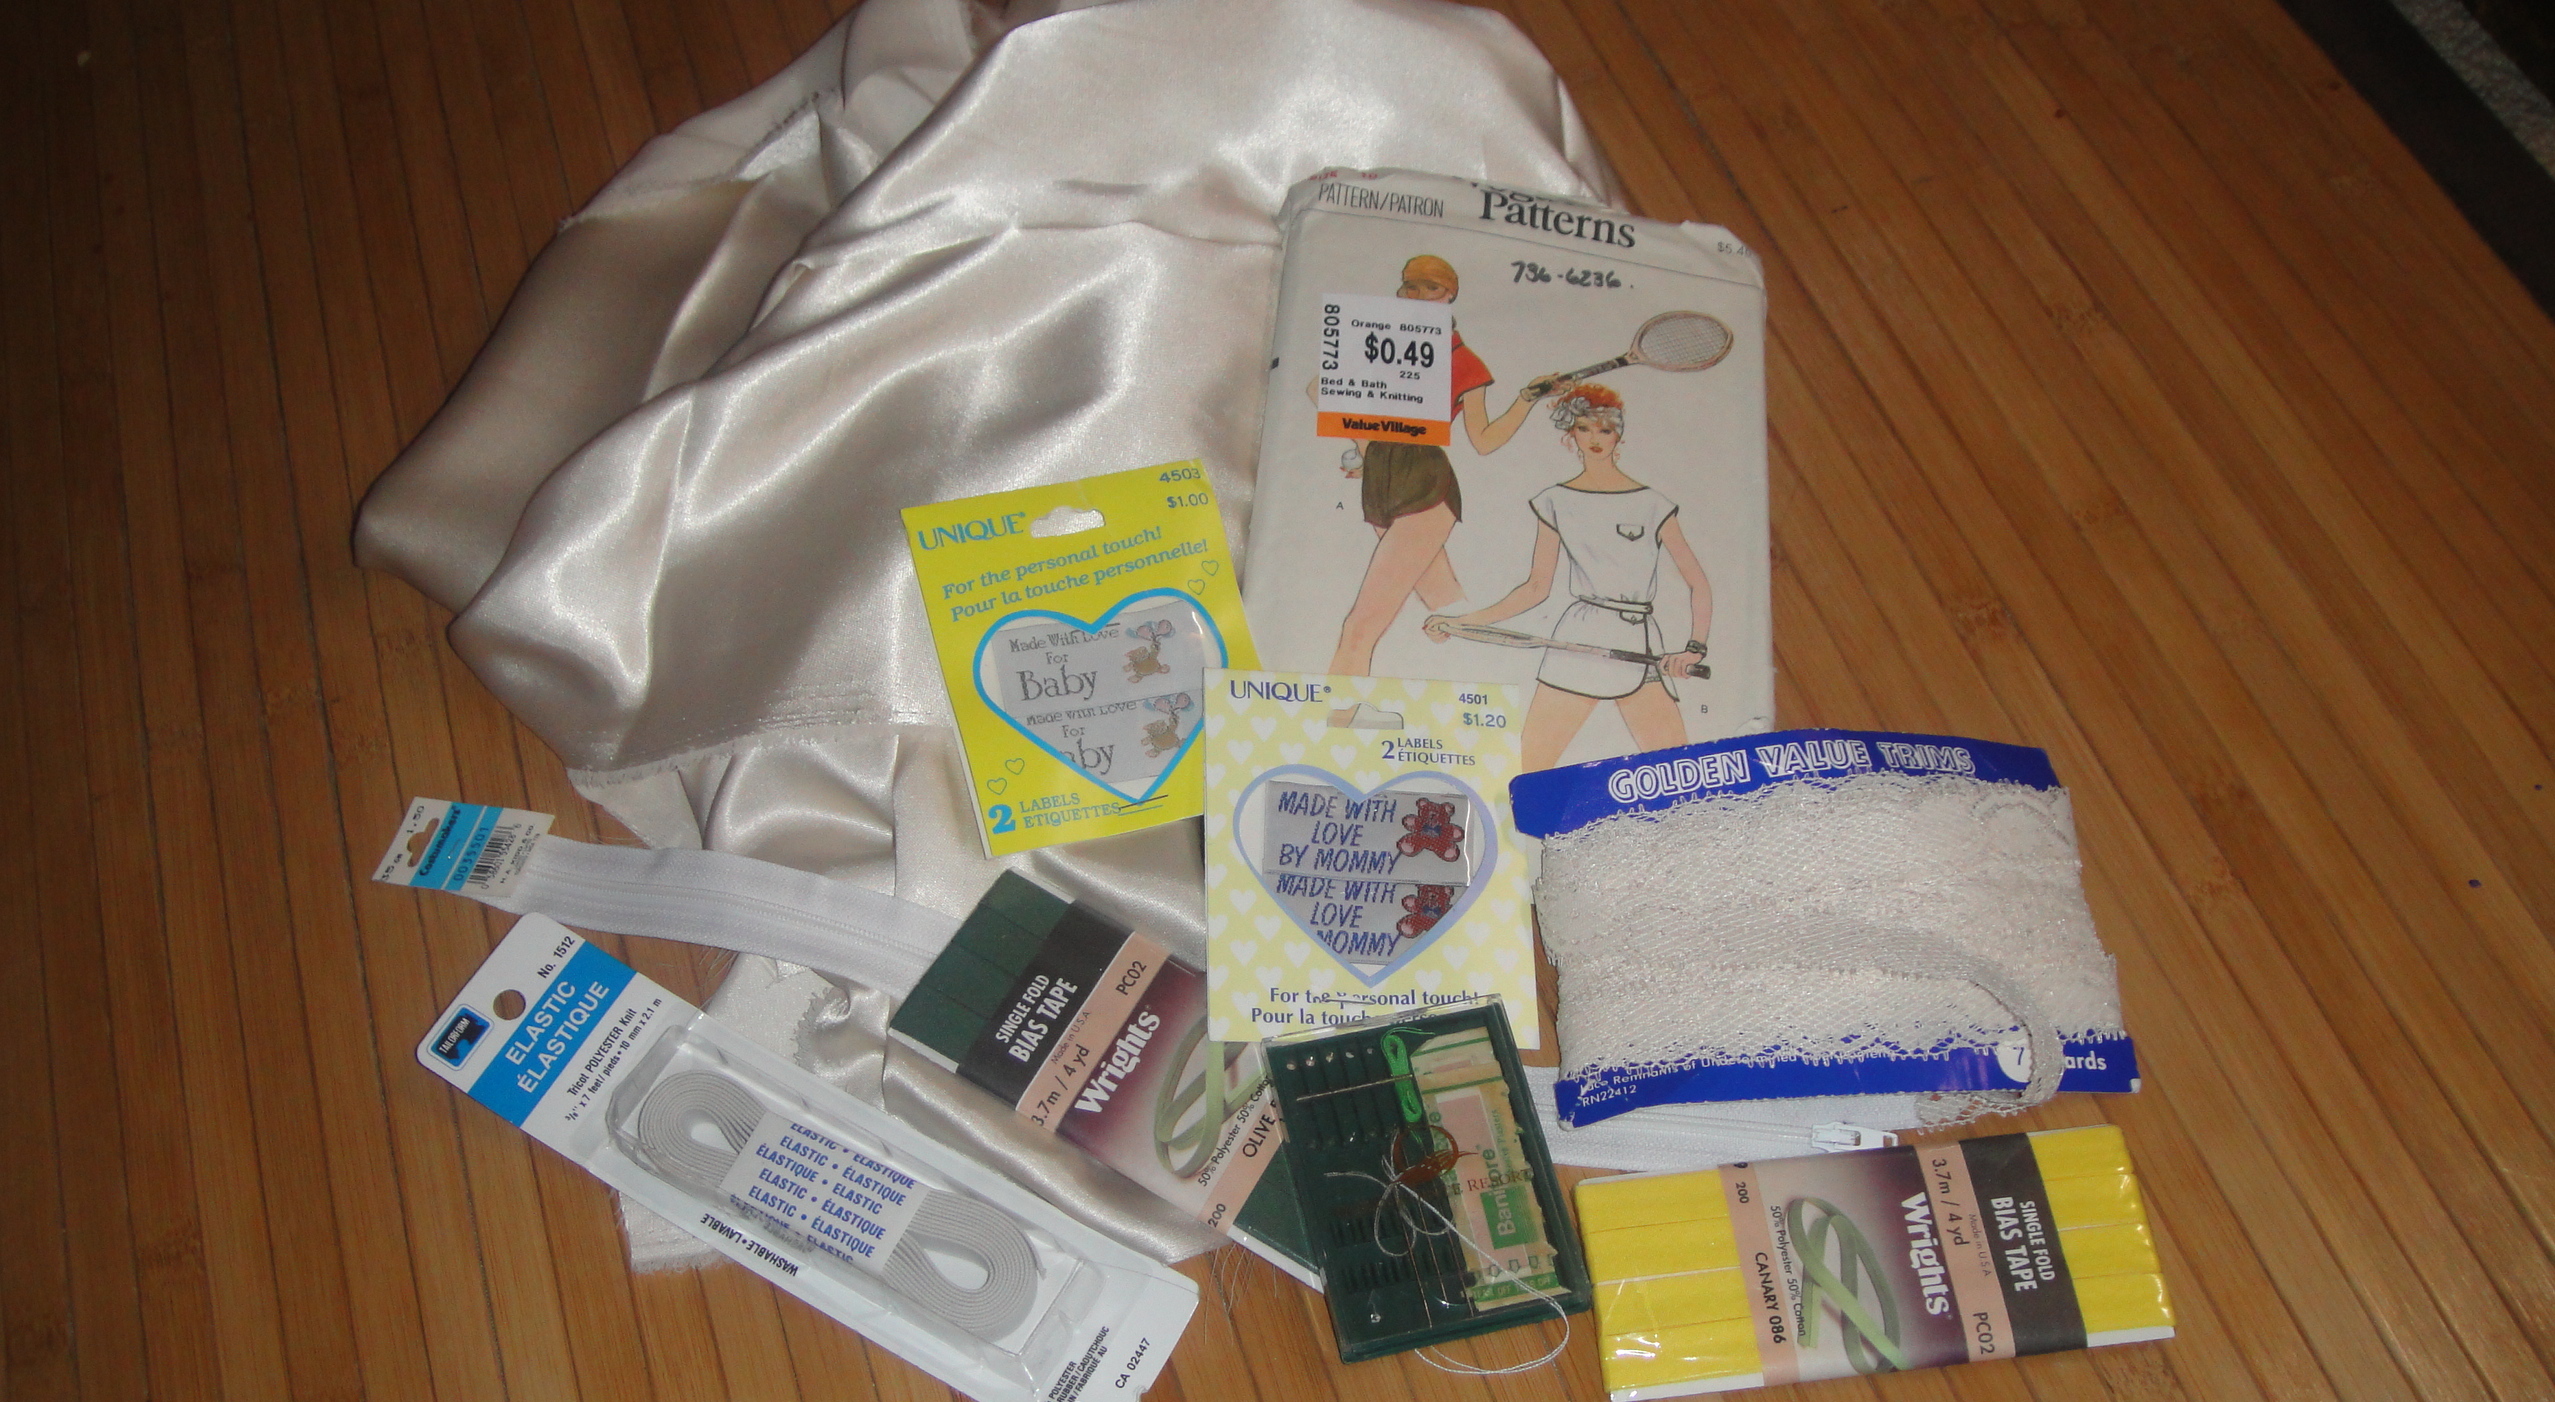
Anyway, just to round out this post (since there’s not much to show when it comes to simple tank tops I’ve made before) here’s the week’s thrift store gleanings. Some off-white silky stuff that will be good for a lining*, some random odds and ends from a baggie, and one early-80s athletic pattern of questionable redeeming value. What do you think about those generic woven labels? I love the custom labels people make (even though I forget to use mine most of the time, and mine at least don’t hold up to the wash at all well), but these generic ones strike me as a little, hmm, tacky. “Made for baby with love” and “Made with love by Mommy.” I might have to put them in stuff for my husband. That would be kind of awesome, actually.

It’s our anniversary today, by the way. 13 years.  I believe the plan is to “celebrate” with steak and Return of the Jedi. I was hoping for a motorcycle ride, too, but Osiris slept funny last night and now his neck is killing him, which doesn’t work so well with things like shoulder-checking while leaning forward holding on to handlebars. Maybe a walk instead. The weather is too fab to spend the entire day inside working. 🙂

*There was also off-white poly satin and off-white poly chiffon, which I resisted. Methinks someone was planning to make their wedding dress, then bailed.

28 Comments

Filed under Sewing

Episode IV

Long, long ago, in a galaxy far, far away…
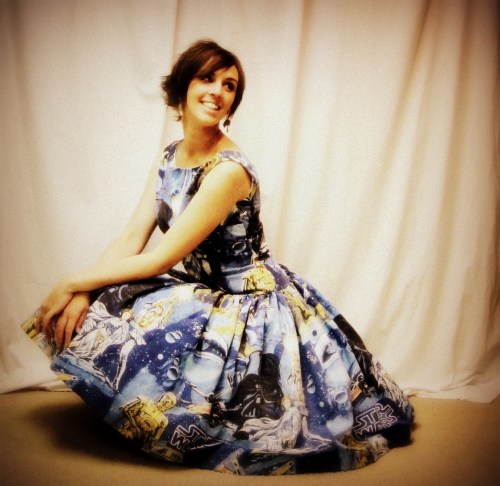
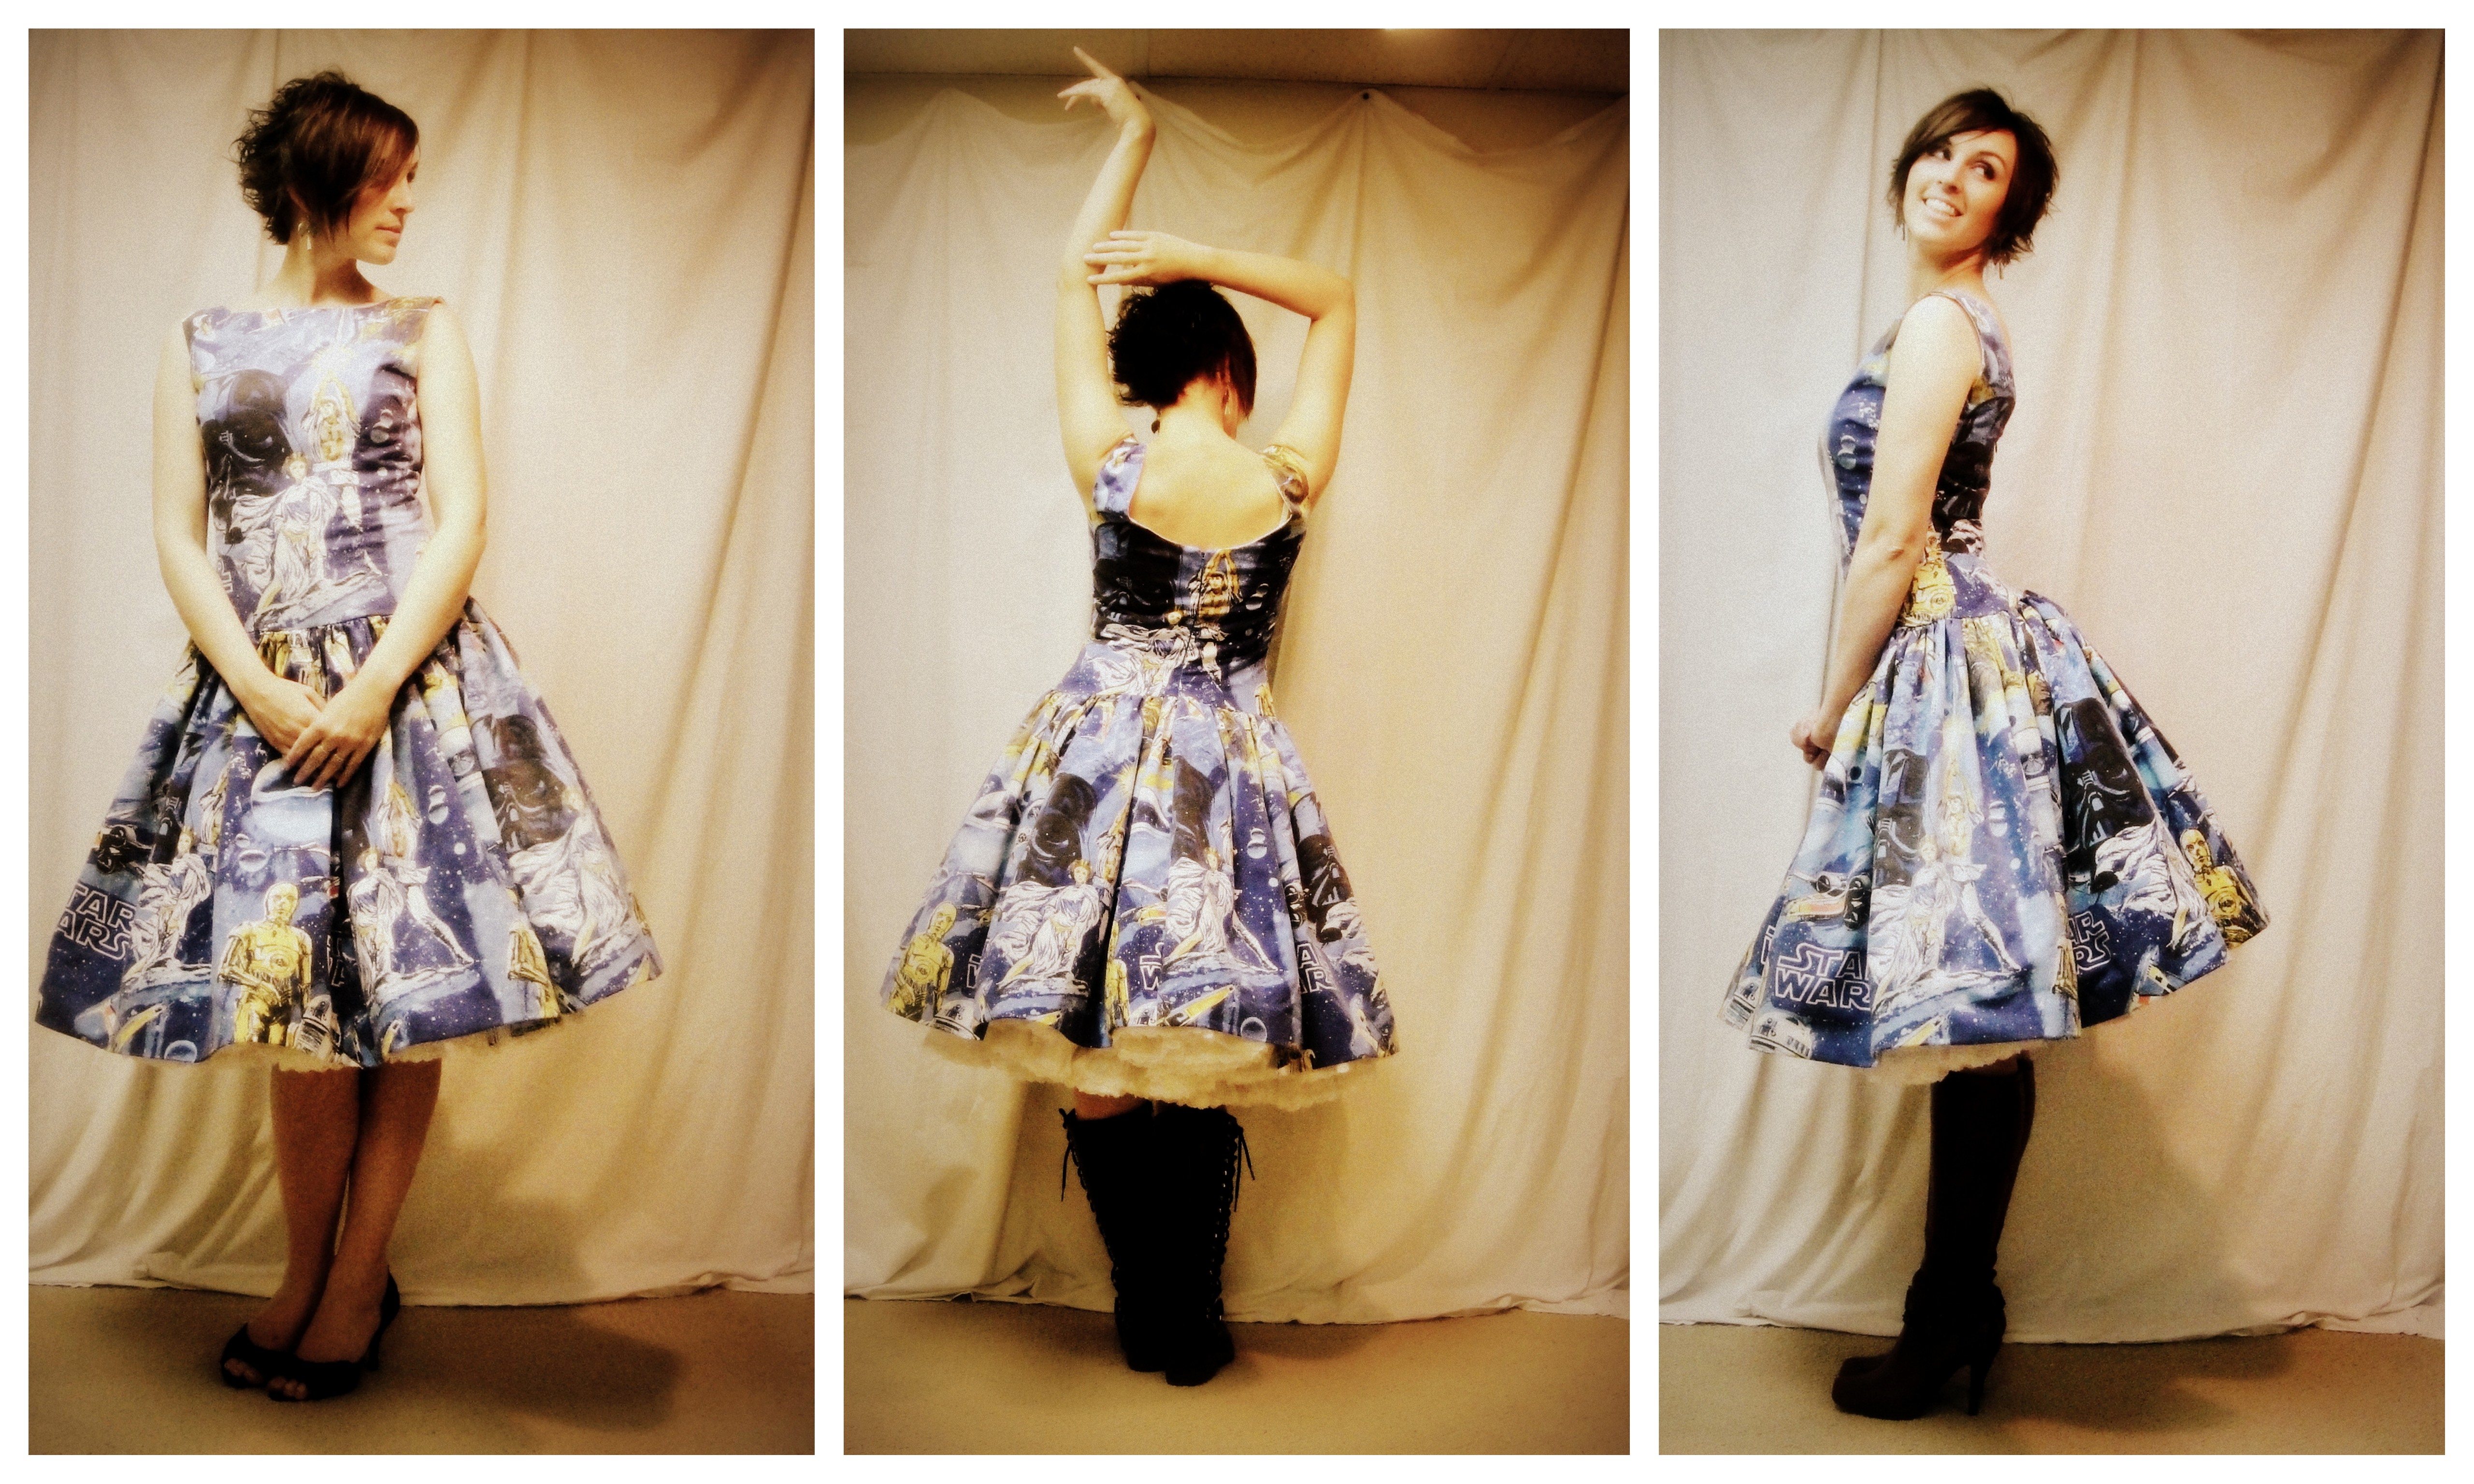
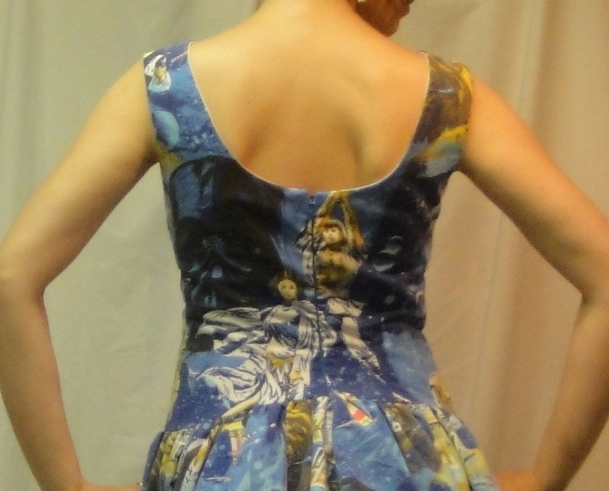
The dress formerly known as Simplicity 3965, alias the Star Wars Dress.

She is finished (well, mostly. Still need to slipstitch the bottom of the bodice lining) And I am triumphant, mostly. (I also had WAY too much fun with the Lomo-ish filer in Picasa while editing these photos. Sorry.)

Demure.

I am definitely going to chalk this one up as a victory for Project Drop Waist. Bodice has been lengthened, and it fits, I think, pretty darn well. Minor dart issues aside. I will confess, after completion I took the bodice in a smidge at the side-seams. It was pleasantly skimming, but I fear I prefer “hugging.” Eve if it’s not objectively better. /sigh.
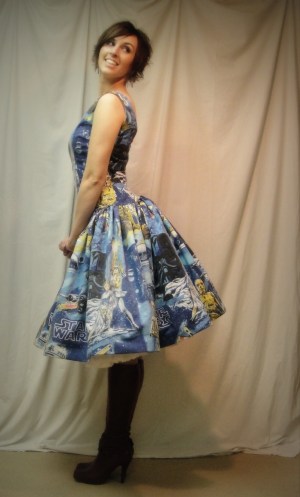
Cute!

Boring Construction Bit:

The only problem with sewing with bedsheets is that your fabric is, well, bedsheet. Which doesn’t always have the greatest drape. So I wanted to underline. Digging through stash spat out a couple of pieces of cotton-poly broadcloth that seemed like they would work well while adding a bit more body to my fabric. I wanted to underline the whole thing, and then line the bodice. Once I cut the underlining, I used those pieces to cut out the shell (aka sheet) pieces. The cream broadcloth was just sheer enough to make positioning the motifs (aka Luke & Leia) a breeze, and I’m very glad I didn’t try to cut them out on the fold. I used this tutorial for the pattern-matching on the back; it’s not perfect, (and I may have thrown the back slightly off grain—but not the underlining!) but I’m satisfied. I didn’t attempt pattern matching anywhere else—I would’ve lost too much width on the skirt. And it wasn’t possible to match the side-seams and the back seam.

Pattern matching across the zipper (on a curved seam). Not perfect, but I’m not going to complain.

I used the trick of stitching down the fold of the dart first, to keep the shell and underlining from shifting when sewing the darts, and it worked like a charm. Sadly, I wasn’t able to completely avoid dart-tip poofiness. I’m not quite as panicked about darts as I used to be, but I am still a long way from mastering their subtleties (I’m just happy they usually turn out more-or-less symmetrical these days). I think the fact that the original pattern was designed for a pointier, early-60s bra didn’t help the situation. Anyway, not make-or-break. I did all my marking on the underlining, with my new chalk pencil (in bright fuschia. I am currently convinced that those marks will never come out…), which worked well except for when I tried sharpening it and broke of a big chunk of “lead”. I don’t think it’ll replace my love of my wash-away marker, but it is nice for larger areas, and comes in loads of colours. I also used a tracing-wheel and some of my vintage tracing paper, which I’ve never really gotten comfortable with in the past. But it was really handy for tracing the dart shaping more precisely than I tend to.

That’s a lot of skirt… (The pile of blue fabric above it is the entire remnants of the sheet)

Once I had cut the bodice pieces, I trimmed the rest of the sheet (it had been a fitted sheet, so there were some odd notches from the corners) into a rectangle (rrrrip!) losing a couple of inches to a small tear that I’m ever so glad I noticed, and determined (YAY!) that I would have enough fabric to make the skirt two sheet-widths wide. I got the sheet-widths stitched together, and the underlining as well, and then had a panic that the skirt was going to be insanely full. I mean, I was going for pouffy gathers, but there’s pouffy and then there’s pouffy, you know. I pulled out the original skirt pattern pieces, and was pleasantly surprised to discover that while my skirt was a bit shorter than the original pattern pieces (remembering that my “waist” is a couple of inches lower, too), the total width I had was actually only a few inches wider than the pattern suggested. Not enough to be bothered about in a skirt like this. Win!

Keeping the underlining and lining of the skirt together, smooth, and not wonky over that whole 3m+ length was distinctly nerve-wracking. To continue my couture efforts, I decided to use the 2″ horsehaid braid I found at Fabricland a few weeks back, for the low, low price of $4/m (fortunately 50% off). I considered slipping the horsehair between the underlining and the fashion fabric, but in the end went with stitching it to the fabric and then wrapping  the hem around it. I was going to just link to Gertie’s horsehair hem posts, but checking them over, none is exactly what I did. Though they’re all lovely methods. Obviously I should’ve taken some photos—oopsie. I then did some quick and dirty retro-fitting to stitch part of the rear seam (but not all of it because I didn’t want it stitched for my zipper insertion) so that I could overlap the horsehair braid at the seam. And then I realized I needed to figure out a way to finish the back edge, again only partially. I opted for binding. More retro-fitting. Not my most well-thought-through process (there was quite a bit of that in this project). But it’s all together, now. I hand-stitched the hem in place, catching it to the underlining (mostly), while watching Chronicle with Osiris last night. That was pretty fun.

Zig-zag casing gathering method.

I used the zig-zag-over-supplementary-thread method to gather the top of the skirt. (I originally learned this method with dental floss, but it occurred to me that the dental floss I buy is the super-fancy-expensive slippery stuff, so probably another sturdy thread is more economical; I used some button thread I have). This is my favourite gathering method, far and away, for medium to large amounts of gathering where I need a precise ratio of gathering. I used this clear foot, which I think is meant for inserting invisible zippers, because the grooves were pretty good for holding the thread underneath, and the clearness made it easy to keep track of where the thread was. It’s still not quite as good for this purpose as a cording foot, but I don’t seem to have one of those at this point. Really any zig-zag foot will work, but the cording foot holds the supplementary thread in a little tunnel, not just a groove, so it physically can’t slip out from under the zig-zag.

Another dig through of my vintage zippers turned up a blue invisible zip in the suggested (14″) length (plastic teeth this time). I was a bit surprised how short of a zipper was called for, but then I remembered that the back of this dress is way low. And 14″ is plenty, although the invisible zip doesn’t really like going past the gathered part at the waist. As per usual, I used this method for insertion.

Back view

The one thing I was concerned about, dropping the waist, was how it would affect the proportions of the skirt. Rather than having a short bodice and a long skirt, I now have a long bodice and a shorter skirt. The skirt comes a bit below my usual knee-length, but I was worried that making it any shorter would just look weirdly odd—like a tutu, perhaps. I considered doing some funky golden ratio calculations but in the end got lazy and decided to run with my current length and see. I can’t really lengthen it, after all, and I can always take it up if I need to. Now that I look at the photos, I think it’s all right—I don’t think I would want it any shorter, though. (And yes, I’m wearing the crazy square-dancing crinoline. It’s not really possible to wear this one without the lace showing, since the inner layer hangs lower than the outer layer. So it’s a design feature. 😉

I was considering adding a waist-stay, but then got confused. where do you put a waist-stay in, in a dropped-waist bodice? At the waist seam (down on my hips) or the actual waist? There’s a couple of inches of ease at the hips, so I’m worried a stay there that was snug enough to take the weight of the ruffles would cause a gathered look at the bottom of the bodice. On the other hand, it might make a weird fold at the waist. Hmm.

In hind-sight, piping the edges of the bodice and even the waist with something dark would’ve been a nice touch. I thought about trim going in and didn’t want to because the print was so busy, but I think a solid navy or black piping would’ve anchored the edges. I also didn’t understitch anything, though I should probably do some hand-understitching to keep the white lining from rolling out.

A little more utter photo ridiculousness.

Still, pretty happy. Now where am I going to wear it?

65 Comments

Filed under Sewing

Sweet Finale

Y1111

OK, I promise this is the last on this little dress. Once again, pattern Y1111 from Young Image Magazine, from their first issue, Summer 2011.

Snug. (and that’s the zipper side! 🙂 )

I made the size 128, as per Syo’s chest measurement, however I did lose a small amount of width due to taking slightly larger seam-allowances on the skirt gores. I don’t imagine it was more than one or two centimetres around the whole dress, though, so the dress is very close fitting to begin with. We can just barely get it zipped up around Syo.

Unfortunately, my old camera didn’t want to focus on anything more than a foot away.

Which, of course, she thinks is absolutely perfect.

Side view

I also lengthened the skirt by about 4 cm. It now comes to just below her knees. If I had been actually trying to fit it to her, a small swayback adjustment would’ve been in order. Or, y’know, a bit more ease for that bottom.

Front

Hmm

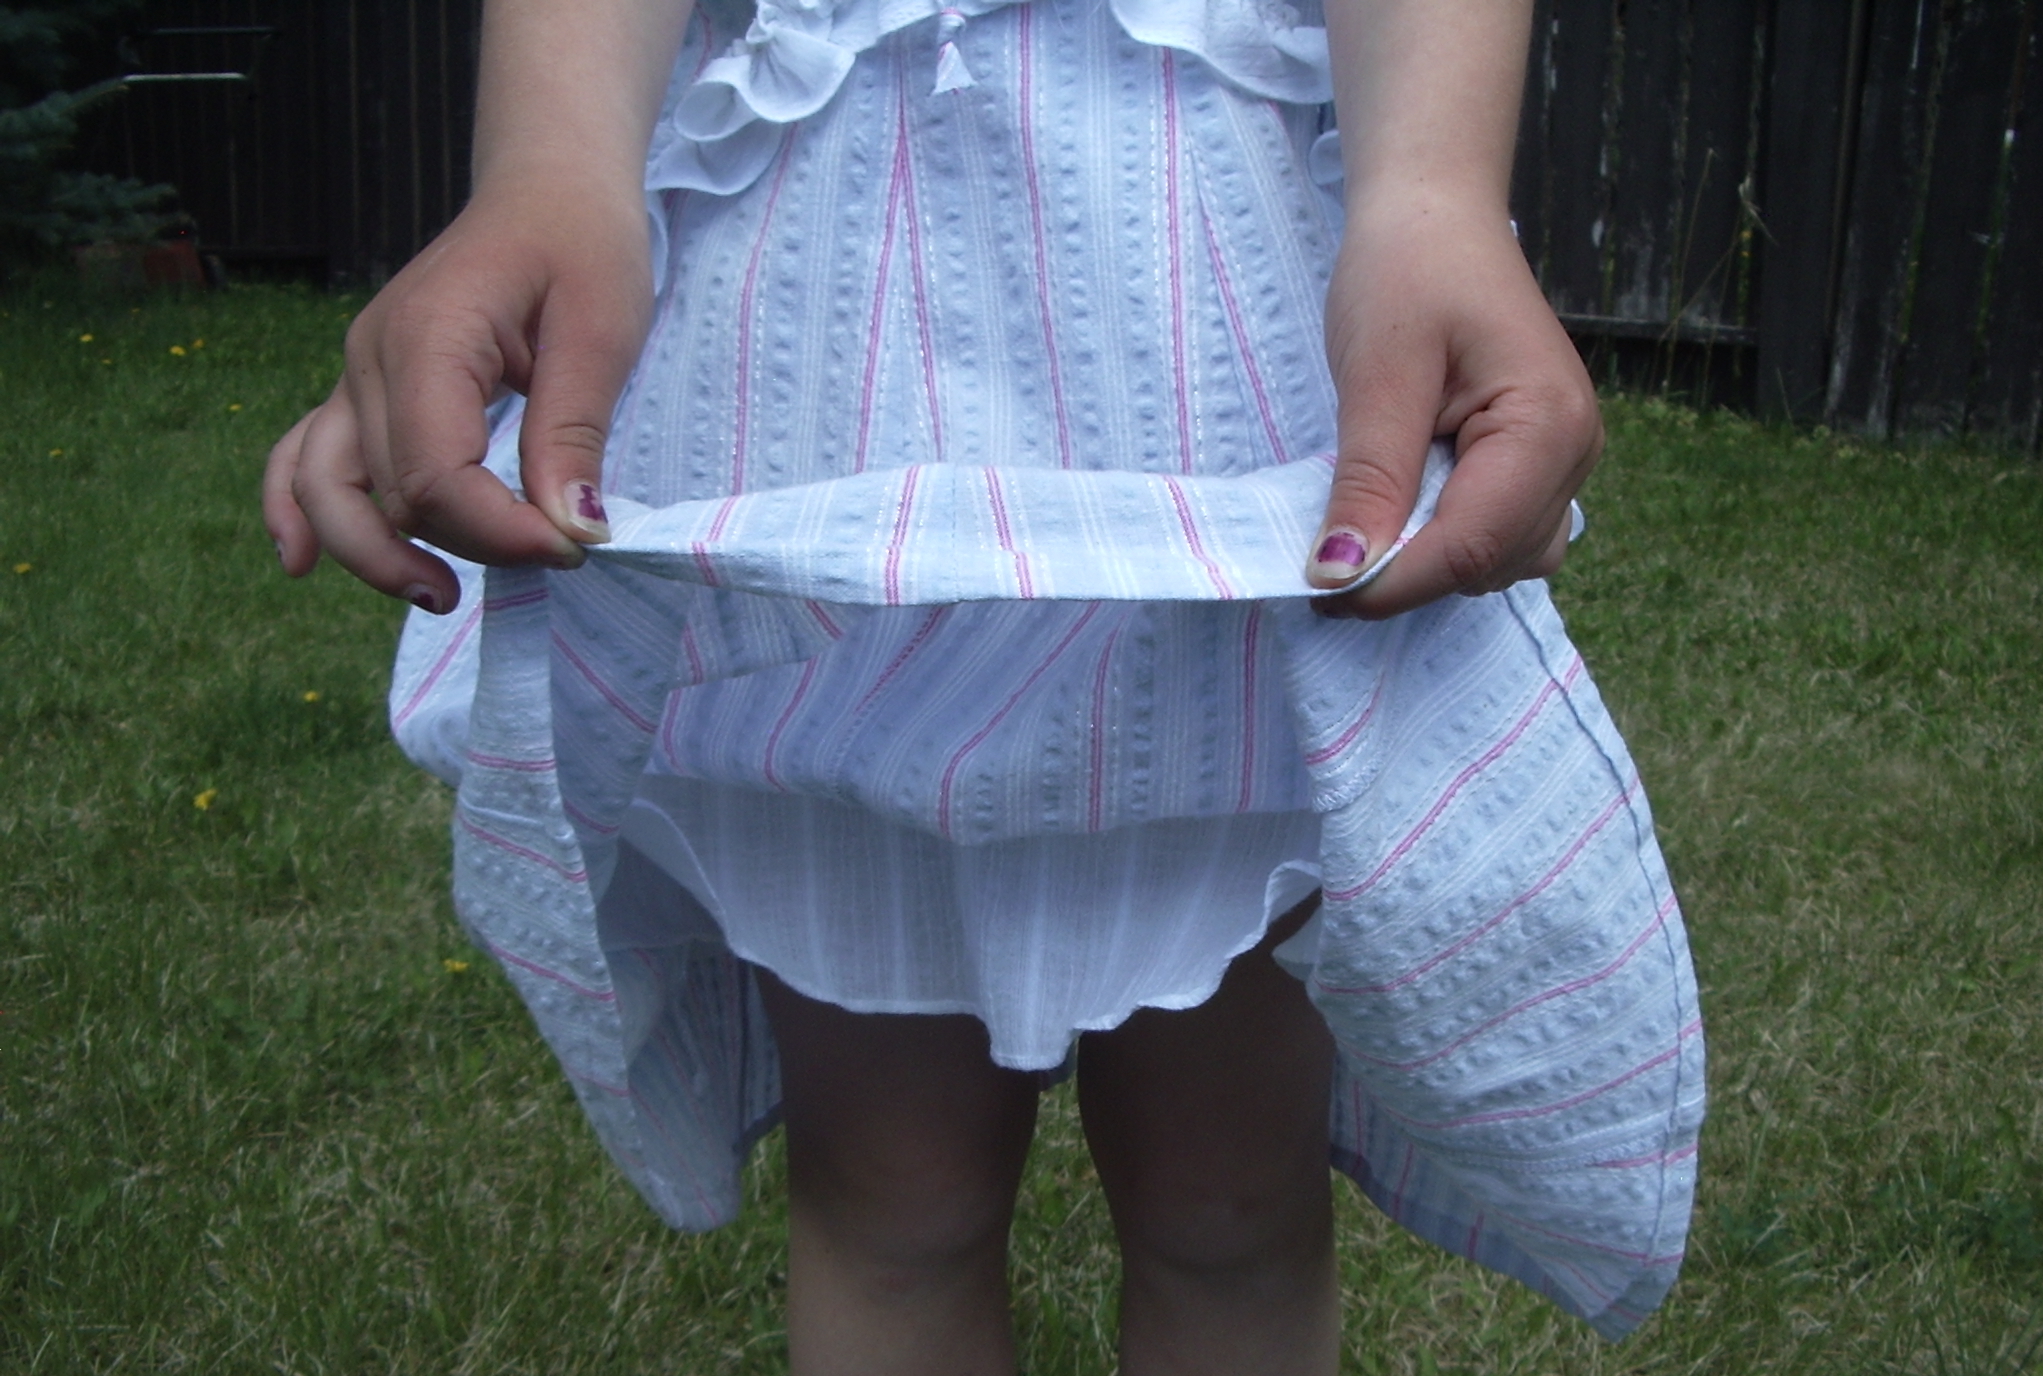
The hem.

Ok, I am now officially completely out of things to say about this dress. Definitely time for a dress for me.

12 Comments

Filed under Sewing

Twee Whee Wheedle Wheet

Twee.

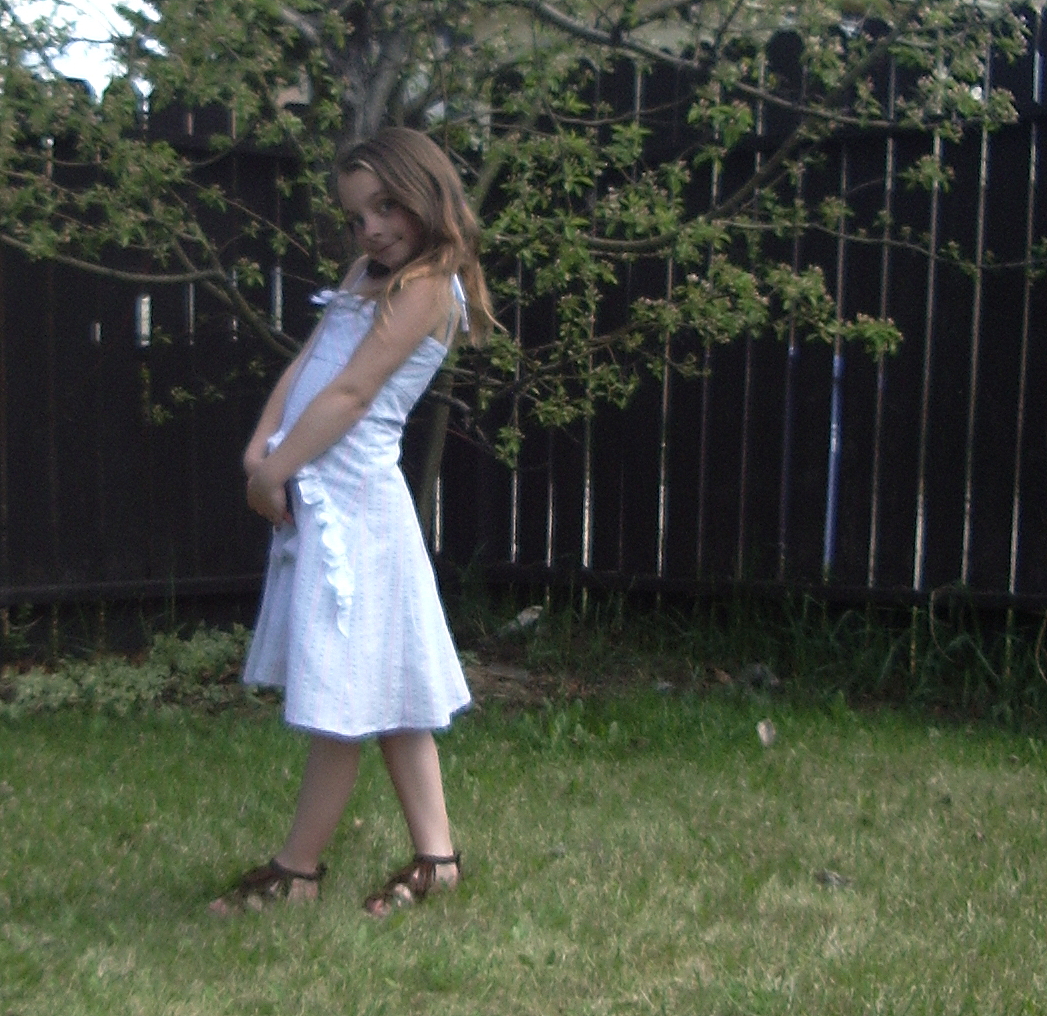
This is a sweet little dress.

A very, very sweet little dress. Too saccharine to have any business anywhere near either of my children, frankly (although Syo will probably bat her eyelashes at you to confuse the issue.)

Once again, this is Young Image Magazine pattern Y1111, from their inaugural issue. My first installation of wittering on the dress is here.

Looking at the photos and the line drawing, one has the impression of a rather complicated dress, but there are actually only four pattern pieces: front bodice, back bodice, skirt panel (gore, if you prefer), and front overlay. And a few instructions for making the ruffle and ties for the shoulders and the drawstring, not that I actually paid attention to them. I will confess, once I had figured out basic things like how many of the skirt pieces needed to be cut out (five pairs, by the way) and where to put the zipper, I didn’t look back at the instructions. I did improvise a fifth piece, for the skirt lining, but in hindsight I could’ve just used the front overlay piece and fudged a normal hem curve. I realized this right after I finished laboriously tracing the skirt panel five times to get a five-gore width. (Then I realized I only needed a two-and-a-half-gore-width if I cut it on the fold. *headdesk*)

As with Burda, you do need to add seam allowances to the patterns. I know some brave seamstresses who just eyeball these, or use little gizmos like the seam-measurers; I am not so brave, and add them on the tissue.

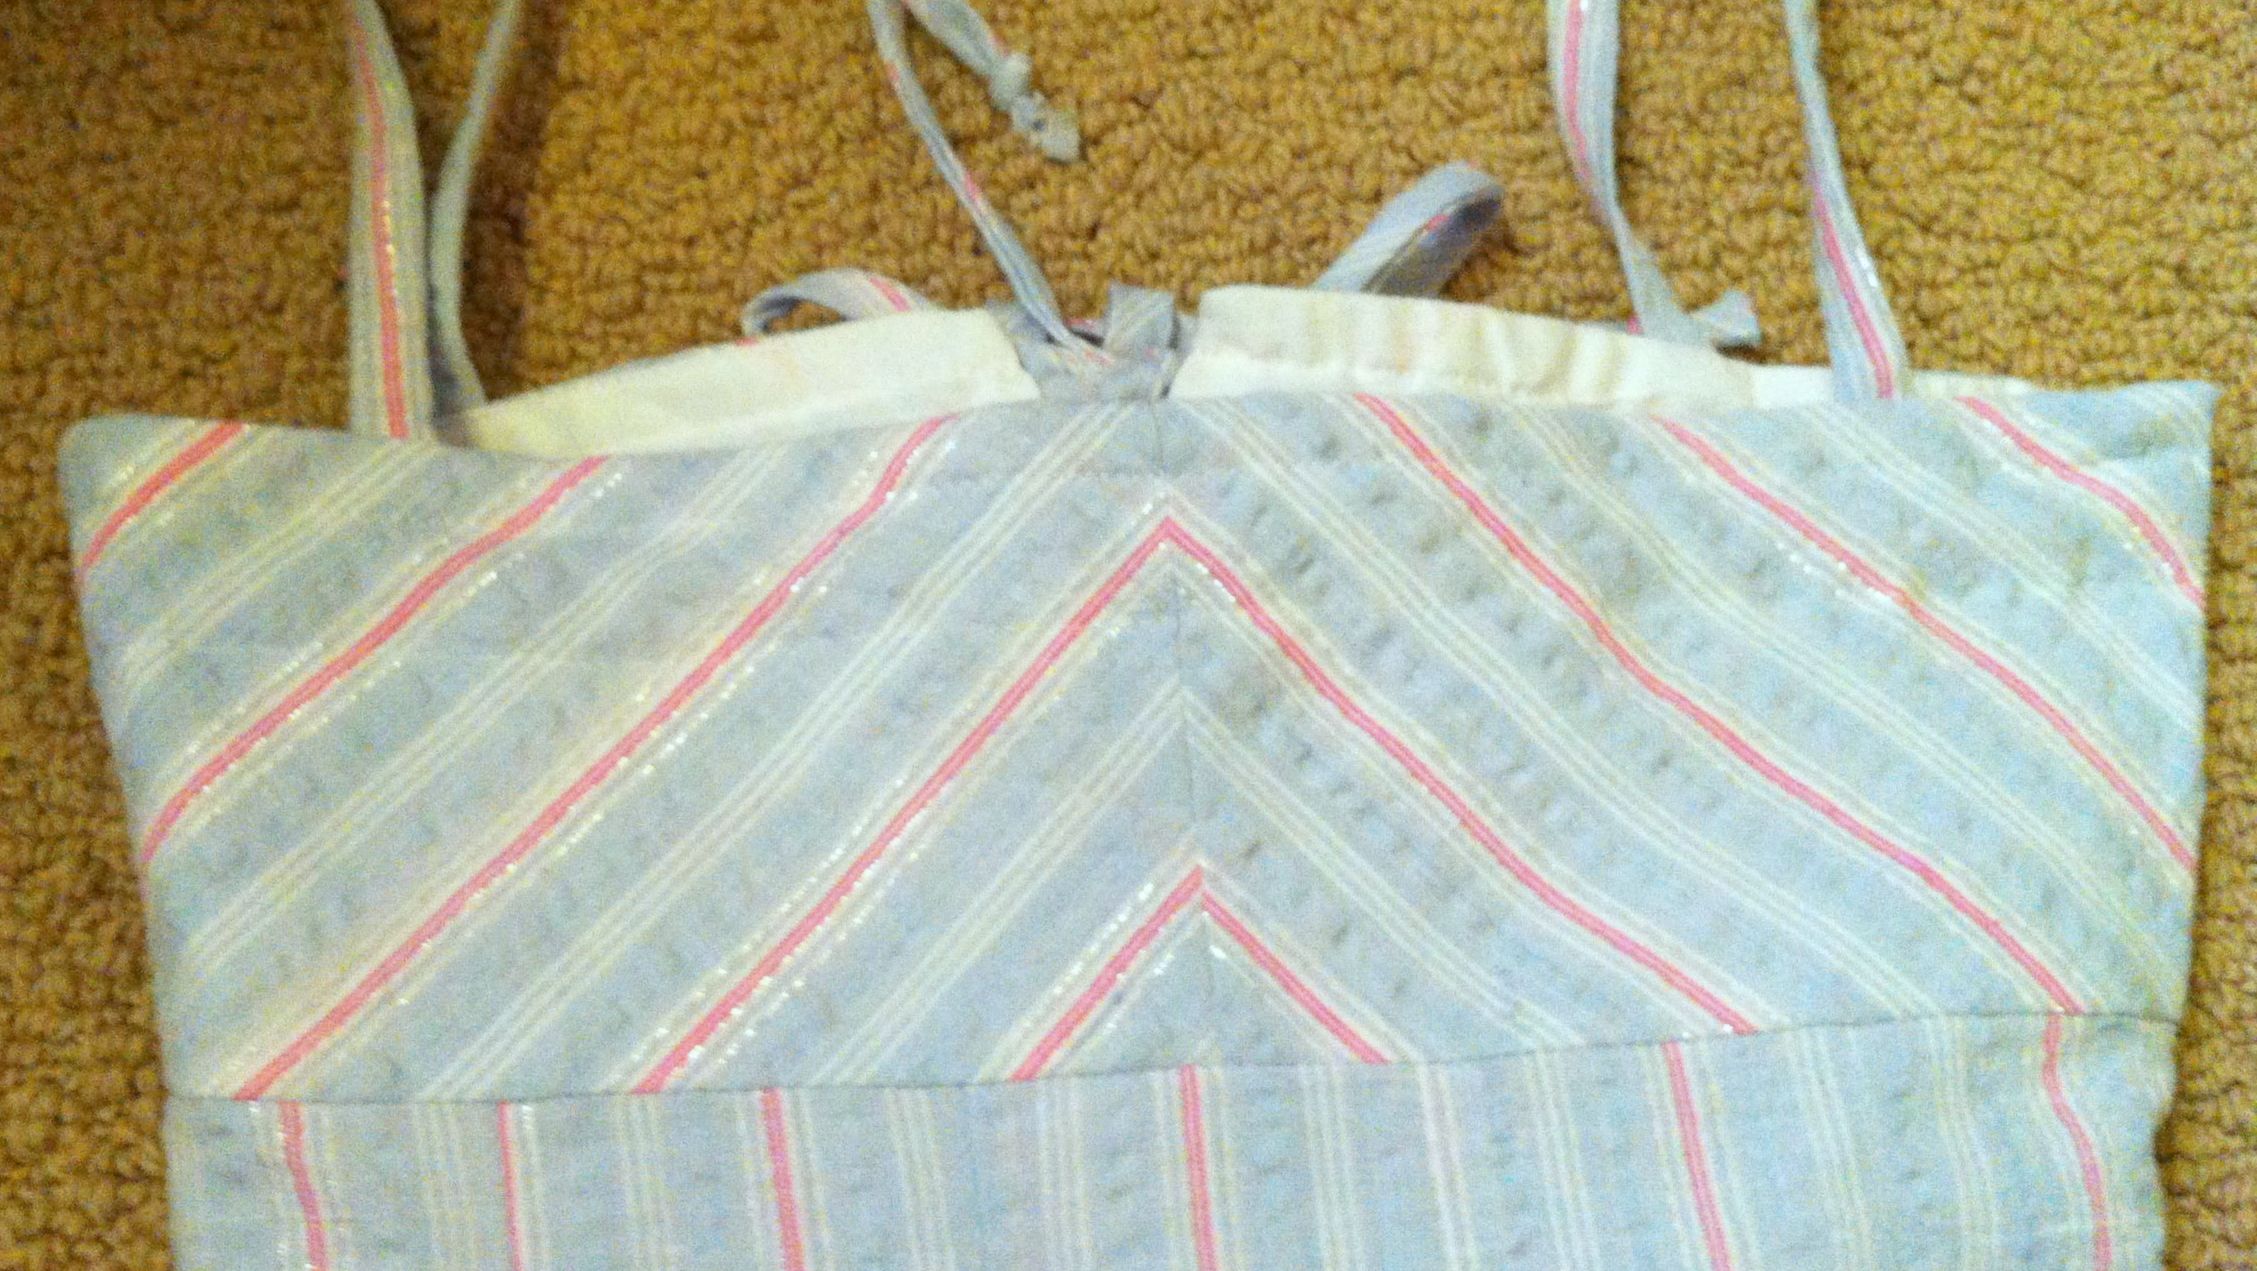
Bodice chevrons (back view)

Being the brilliant thing that I am, I decided I was going to try and do chevron stripes on the bodice. Not being completely idiotic, I decided I would underline the bias bodice pieces with some  leftover cotton (lawn? batiste?) cut on grain. This was a good idea since by the time I had the chevroned seams (mostly) matched and stitched the bias pieces, they weren’t exactly the same size and shape they started out as. Seersucker’s kinda shifty at the best of times, and my relationship with precision is, well, hit and miss.
I realized after stitching up the skirt panels, that I’d had my needle set in the left-most position, so each of those many seam allowances (it’s essentially a 10-gore skirt) was just a smidge wider than it should’ve been. Oops. So I did have to shave a smidgeon off the bodice. I cut the size 128, as I was told my husband’s little cousin is a “skinny 8” and that was the size which corresponded with Syo’s bust measurement. Of course, Syo is on the shrimpy side for her age, too, but mostly that’s in height—she’s fairly sturdy and has my broad shoulders. Here’s hoping it fits. If not—I’m sure there’s a niece somewhere it’ll fit. I also added about 4 cm to the length, just at the hem of the skirt.

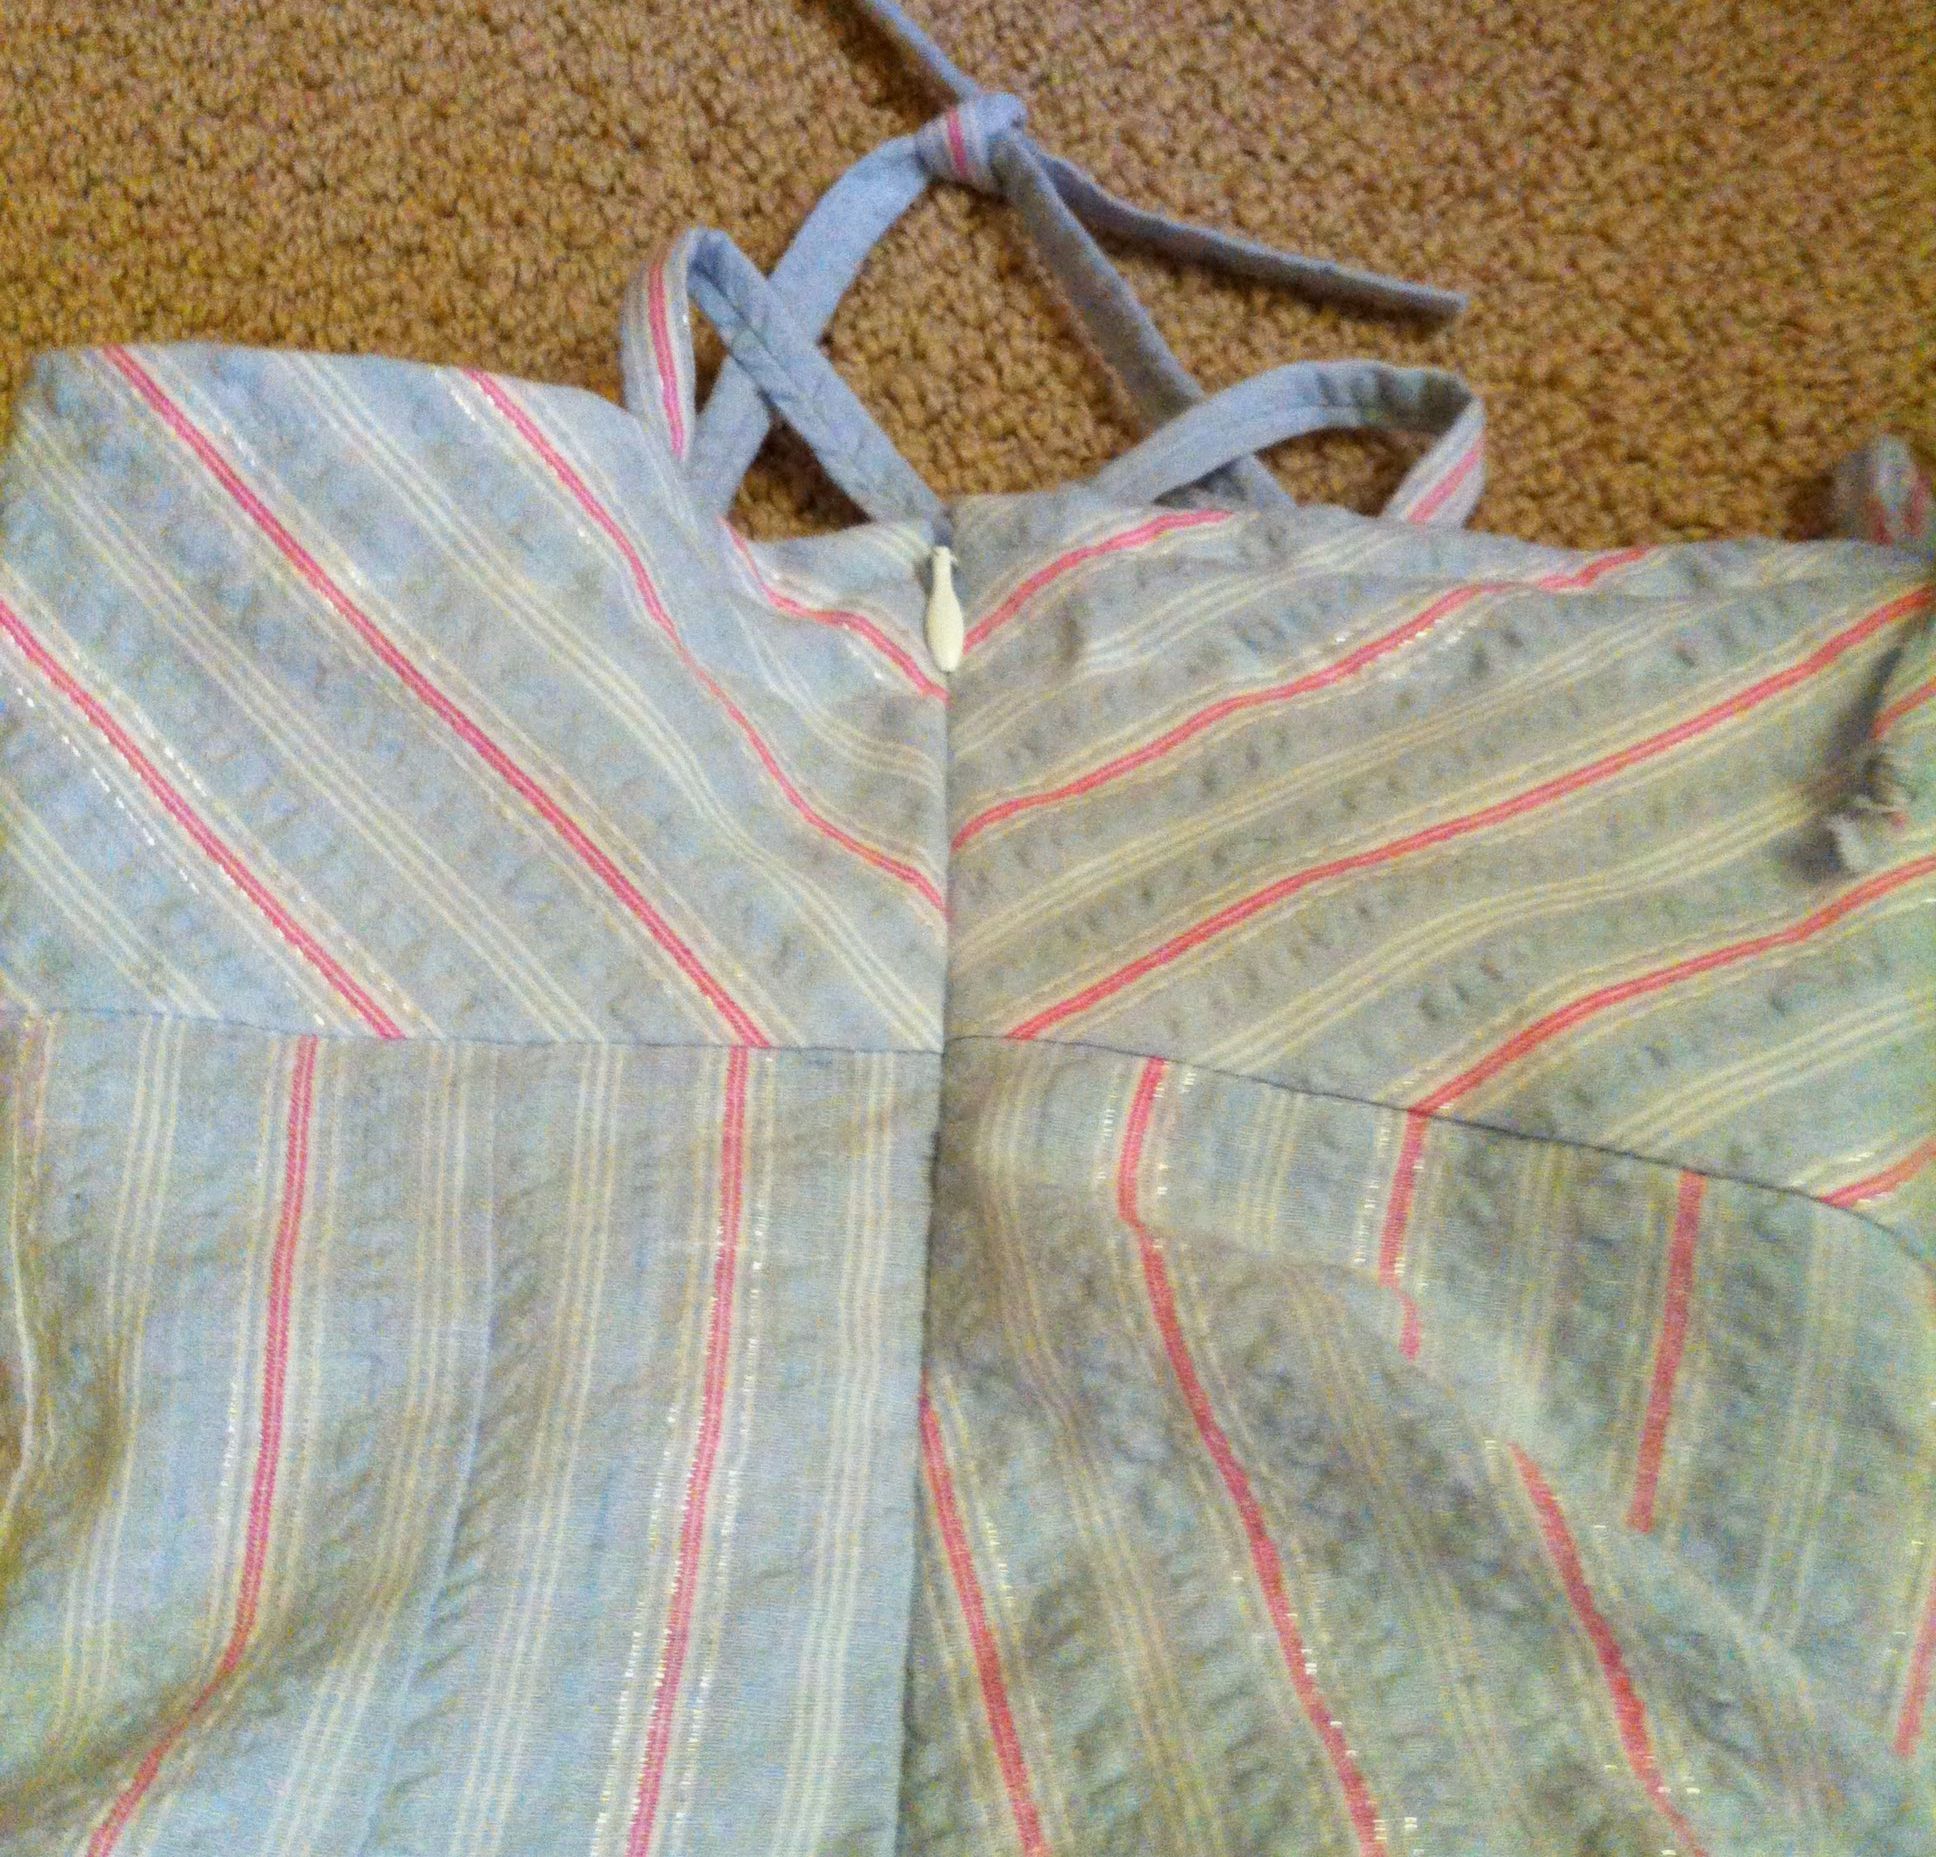
Can you spot the zipper? (PS the bodice seam is actually matched. I gave up on the chevrons, however. Also the difference in angle/grain between the skirt overlay and the gores at the side seem preclude stripe-matching on the skirt)

The pattern calls for a side-zip, so I pulled out one of my vintage invisible zippers, since I am officially “off” regular zippers after attempting one in the blue tunic. This was my first time installing a metal invisible zipper, and it was interesting. I remembered to stabilize the fabric with a little strip of fusible interfacing before stitching the zipper in, and I’m very glad I did because I think it would’ve driven me nuts. As it is, there’s a bit of poof around it, but not too bad. Anyway. I use Sherry’s method and install it with a regular zipper foot. In some ways this was easier with a metal zip—it’s easier to see the teeth, and they feel a bit sturdier so I was less paranoid about wrecking it. On the other hand, I was terrified I was going to needle down on one of the teeth and have sharp flying metal flying at my eye. It took me a couple of passes to  get the feel for how far back to rotate the teeth, and I did nearly sew my fingers a couple of times, but in the end it worked really well, and I even managed to figure out the trick of sewing the lining on by machine this time.

There’s the zipper! 🙂

The combination of a drawstring and a side zip is, um, not intuitive. Basically, I ended up with the drawstring in two parts, both stitched to the zipper tape (if I’d been a little more together they would’ve been attached before I put in the zipper, but anyway)—a short one which goes from the side to the CF opening, and a long one which goes from the side, around the back, to the other CF. Hopefully this’ll work out—it’s mostly decorative anyway.

Front notch with drawstring.

The pattern (OK, the photos from the magazine, again, didn’t look at the instructions) has you leave a gap in the stitching at the CF notch for the drawstrings to emerge.  This is easy, but there’s no real good way to finish the edges, and I’m kind of convinced that after a few wearings there’s going to be threads poking out like crazy, barring some hand-stitching. I considered putting a tiny little buttonhole in the front on either side of the notch, but when the chips came down I took the easy route. An eyelet would be cool, too, if you made a punk-y version of the dress. Which would be really fun, actually. Wouldn’t it be awesome made out of old metal-band T-shirts, with exposed construction and some scraps of black lace and studs?

… ANYWAY.

I did the topstitching around the drawstring casing last. It was a little nerve-wracking making sure that I didn’t stitch down the drawstring itself, but it wasn’t as bad as I feared. I did hold the fabric very taut, since I was stitching three layers at that point, the top one of which was on the bias, and I was terrified the fabric was going to move and ripple. It did a bit, but not too much, at least on the outside (the inside, as you can see in the zipper shot above, isn’t lovely, but it’s done so I’m not going to sweat it.

I was going to wait until I could try and shove Syo into the dress to get some modeled shots before posting, but a) mysteriously she didn’t want to get up extra-early for a photo-shoot in the snow (yes, snow) before breakfast and b) I’m not 100% convinced it’s actually going to fit her. Although given that she likes everything skin-tight these days, that might be right up her alley.

Coming soon: more bodice fun!

29 Comments

Filed under Sewing