Tag Archives: finished projects

Minimum Blogable Unit

Leggings. Also motorcycle.

I made Syo leggings.

Possibly there is no less glamourous or discussion-worthy thing I could sew; hopefully the photos (Syo’s idea) make up for that. The pattern is Kwik Sew 1670, which I’ve made up several times now, and I didn’t even up the size. (I did actually take a 2cm vertical tuck in the pattern, as the last pair was too wide.) I did not use my serger at all, as it doesn’t make as strong of a seam. And it’s threaded with cream and I’m lazy. I used a black cotton-Lycra bought at the last major Fabricland sale I went to, and while it curls rather annoyingly, it’s otherwise a nice sturdy, stable knit. Syo is currently in rebellion against real pants, so I think these will be a really useful wardrobe addition, especially as the weather continues its inevitable slide towards the Canadian winter. (Though the last few days have been gorgeous, so no whining from me yet.)

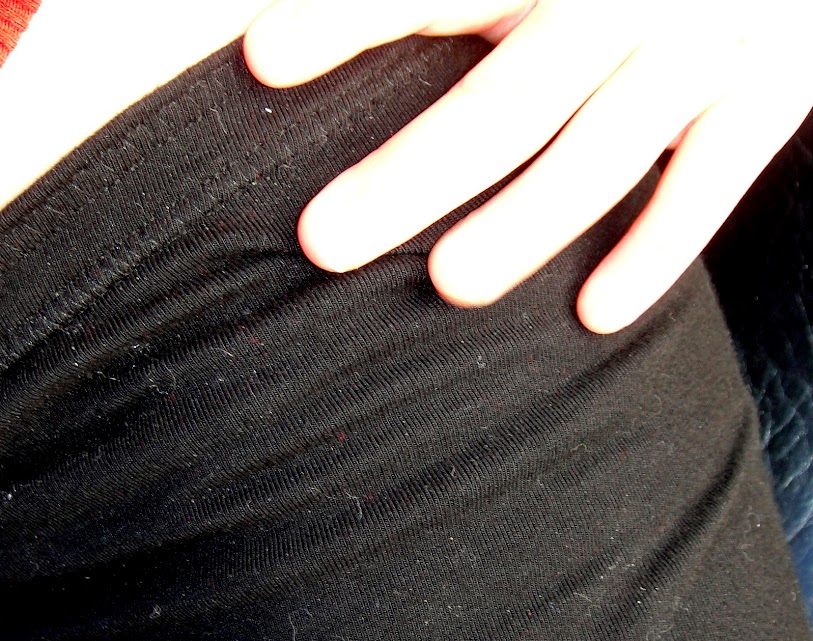
A slightly more stretched out (and grubby) view.

They are still a little loose in the thigh, especially after wearing them all day, but pretty decent. The length is supposed to be 3/4.

Closeup

I used Steam-a-Seam Lite in the hems and stitched in the elastic at the waist with two rows of topstitching. Not quite RTW, but it’s nicely finished inside and functional.

At the same time I cut these out, I cut out a pair of Kwik Sew 2100 with the bikini-rise, in a size 4. I am, according to the measurement chart, a size 5 or 6 but the reviews are universal in the pattern running large by at least two sizes, and 4 is the smallest in the envelope. I also narrowed the middle of the crotch gusset by 1cm off each side, as it is apparently quite large. Then I turned around and lost the crotch gusset pieces, so I have not been able to stitch them. >_< if they don’t show up soon, I will cut new ones. So I can’t really report anything else. Sarai made herself a pair of these recently—it’s almost like celebrity sewing.

Or, y’know, not.

Ok, one more thing.

Motorcycle.

14 Comments

Filed under Sewing

Back in the Saddle (?)

I sewed!

Sewing!

It took a lot, both in terms of re-organizing (the box with my main sewing machine conveniently wound up at the very bottom of the middle of the massive pile of stuff we have in storage right now) and personal patience. This having the sewing room in someone else’s house bites bigtime. Not least because every time I go over to try and tackle things, I feel like I’m being rude for heading down to work rather than upstairs to visit. Going to have to work on that.

There was the predictable myriad of small, unanticipated hiccoughs, from not having my good pins or my seam-ripper, to discovering that my mother-in-law, who is currently allowing me to occupy a corner of her basement with my sewing stuff, doesn’t have an ironing board. I had assumed everyone with a “real household” would have one. I mean, she has a rice steamer, people. She said, “I don’t iron.” I said, “I don’t bake. But I still have cookie sheets.” That may not have been my most diplomatic moment as a daughter-in-law. >_< So I also need to dig my ironing board and iron out of storage.

Former T-shirt

Anyway, I did eventually settle on the quickest of projects, a T-shirt refashion. Why didn’t I get a damn before picture? /headdesk. This black tee has been kicking around the bottom of my wardrobe for roughly a decade at this point, one of those shapeless “unisex” T-shirts that I can never actually bring myself to wear, courtesy of my student club days. The pattern is an old one, dating from one of my first knit projects, but is presumably roughly comparable to Zoe’s vest pattern. I used the same fold-over elastic that gave me such fits with Tyo’s tank top back in the spring, and I’m happy to say that with a good deal more care and attention to the stitches (and practice samples!), helped along by this more stable fabric, I was able to attach it more or less adequately. Because this particular fold-over elastic doesn’t fold on its own, I stitched it on in two passes, using a three-step zig-zag and being careful not to let my stitches reach the midline groove, where they basically shred the fabric of the elastic.

The T-shirt knit is not as stretchy as the last fabric I used this pattern for, so the top is quite snug, giving a bit of a flattening uniboob thing. But it’s comfy, and infinitely more wearable than it was before. And nice and long.

Strappy fun.

I decided to bring both straps to the centre back, partly because it looks cool, largely because it meant that I could just stitch them in place without worrying about where the straps should be positioned. They are a little long, but I didn’t have time to re-adjust before I had to round up children (my own and nieces) for home-made pizza at Uncle’s house. The pain of having family around, I tell you.

Oh, and for the really geeky among you, the logo says “Miocene Park” and the skeleton is that of an entelodont.

Is this the beginning of big things? I really don’t know. I have hopes (I have coats on the brain, frankly), but we’ll see. Also, I got eight (possibly nine) patterns at the local Mennonite thrift today. They’re usually 50¢ there, but the guy only charged me $2 for the bunch. Yay. I think I need to sew more, if only so I’ll buy fewer patterns…

29 Comments

Filed under Sewing

Prezzies (2)

Simplicity 1149

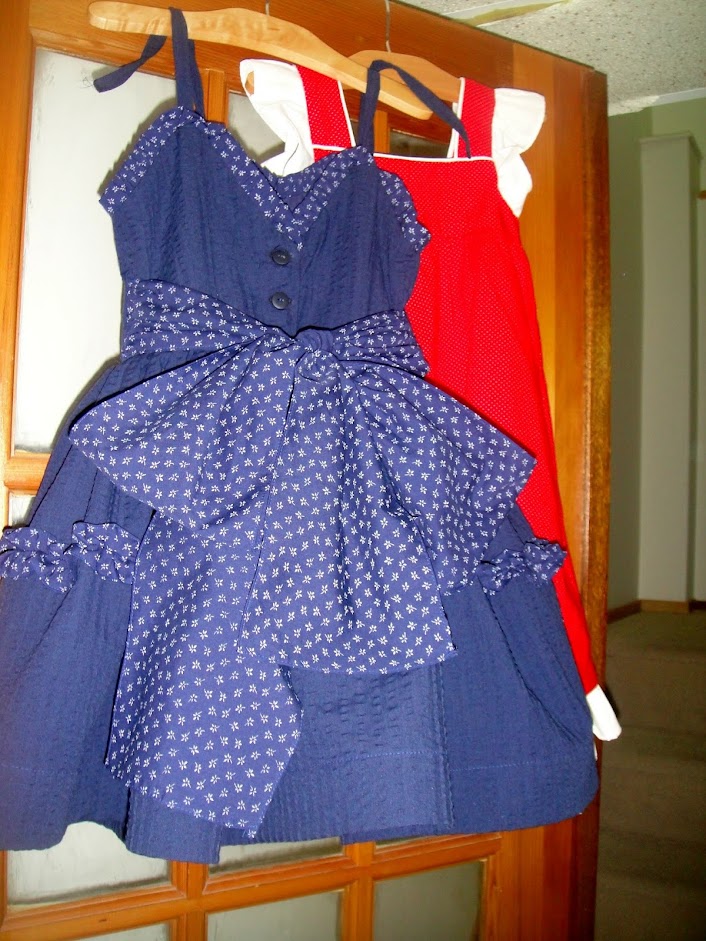
More fun, although considerably more time-intensive than Style 2304, was Simplicity 1149. This is probably in the running for cutest little pattern ever. I was a little concerned about the width vs. length ratio, and obviously that kind of horizontal skirt poof isn’t going to happen without intense crinolining of a type I’m not keen to subject my nieces to, but I’m hopeful the sheer cuteness will make up for it.

Damn, this is cute.

Dress & Bolero

My older niece, Fyon (who is five), loves having dresses that match mine (well, loves it more than my kids do, anyway), so I thought I would use up the rest of my navy seersucker from the Cambie on a dress for her. I looked through my patterns for something close in style to the Cambie, but the closest I could find was actually the dress I made her last year, and I didn’t want to re-use a pattern where there are so many other crazy fun ones to try. So, Simplicity 1149. And I thought this navy cotton (cotton poly?) with the little white flowers would be the perfect complementary fabric. It originally came from my Grandmother’s stash, and Tyo had sorta earmarked it to make boxers out of, but hopefully she’s forgiven me for putting it to a more immediate use. I used it for the sash, the lining of the little jacket, and, most importantly, the ruffle ornament.

Ruffles!

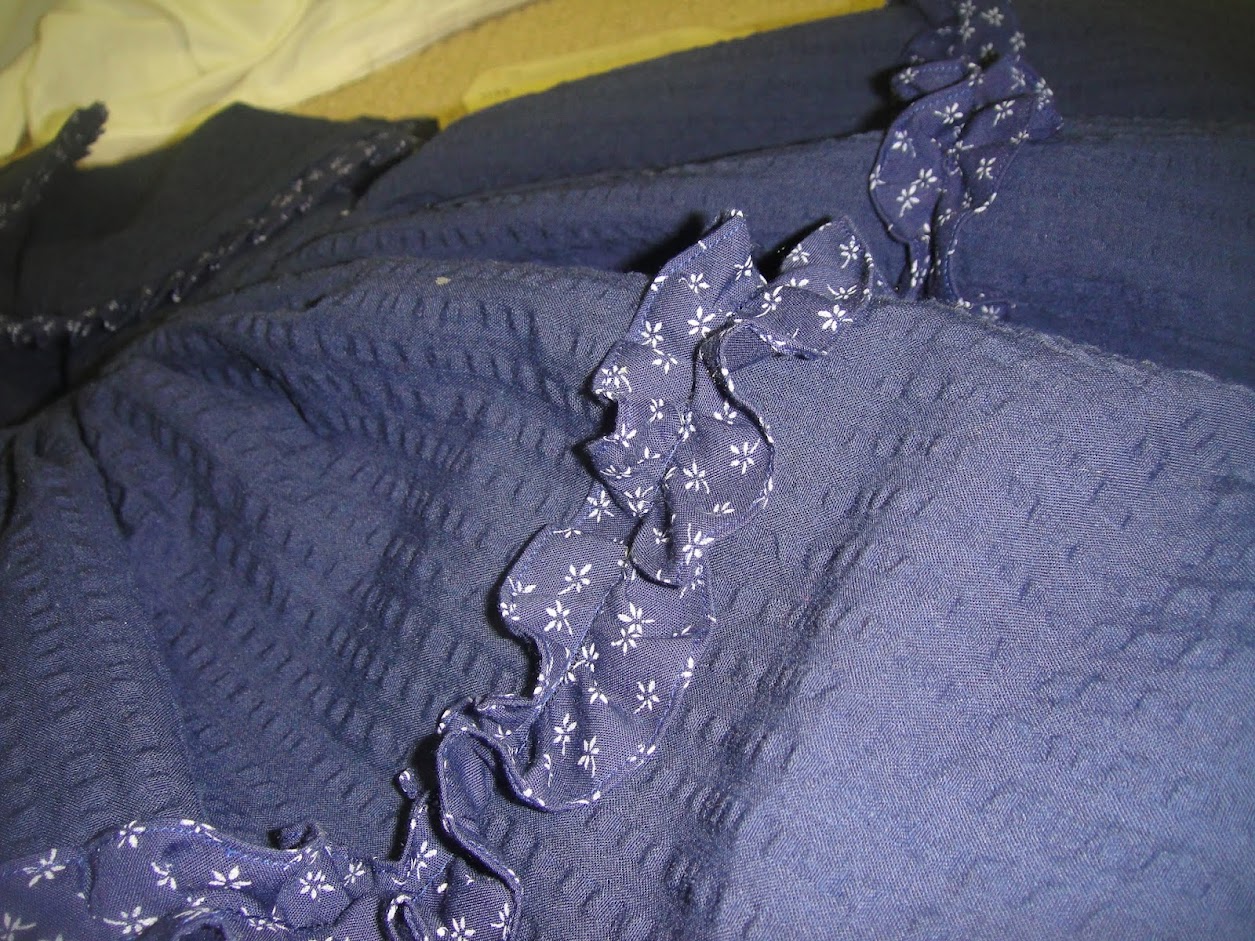
There are two kinds of “ruffle” on this dress, both of which were pleated using the ruffler that came with my Pfaff, attached to my singer Featherweight. I have three ruffler feet now, but one only works with the army machine (which is put away and not really reliable) and the other works with the quick-snap foot on my modern machine, and has driven my absolutely fucking nuts in the past.*  I set it to pleat (gathering every five stitches, rather than with every stitch) although really there are plenty of places where it screwed that up. It looks fine, though—half the battle with ruffles is not to sweat the small stuff, in my opinion.

Anyway, for the skirt ruffle, I ripped on-grain strips, stitched them all together, and finished the edges with the rolled hemmer. For the edging, I pressed the strips in half lengthwise and basted down the open edge—I find if you don’t baste it closed, the ruffler tries to ruffle just the top layer and Bad Things Happen.

A very blurry attempt at a closeup. 😦 Showing edge-pleats and back buttons and bow.

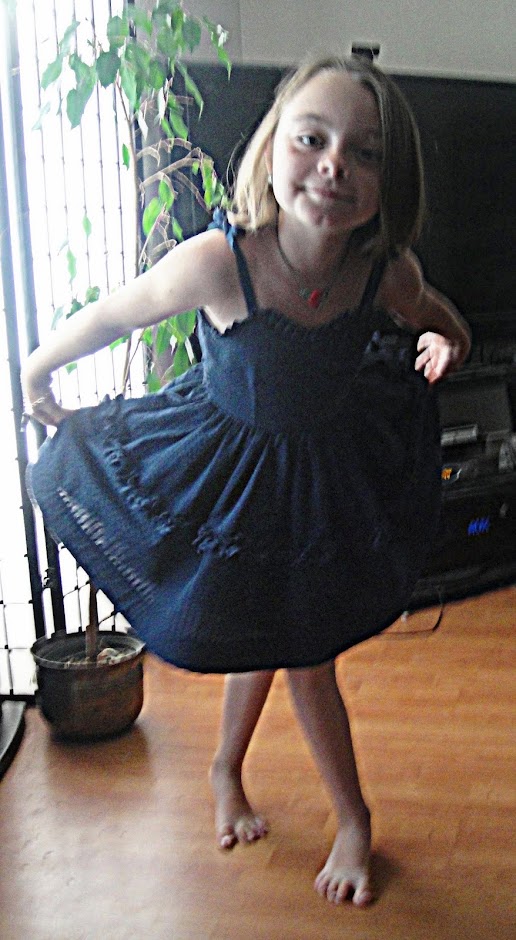
Syo was eerily enthused when she came home after a quick mom-free vacation and discovered this little thing lying around the house. The first thing she had to do was try it on. (I’ll remind you that Syo just turned nine, while the pattern alleges itself to be a “size 5”.) It’s absolutely not the sort of thing she would be willing to wear in public—but some latent toddler in her just couldn’t resist trying it on to twirl around the house. It’s SNUG—she has to exhale a bit to get the waist button closed (These fifties pattern that assume that children have waists. Pfft.) But it’s still on her.

You cannot resist the Cute. You will be assimilated.

The skirt is obviously very short on my nine-year-old. Fortunately Fyon is a little narrower than Syo, and significantly shorter, so I’m thinking the fit should be great.

I finished the skirt hem with the last of my 2″ horsehair braid (actually, I was about 2″ short, and had to patch in a little section of hem with bits of 1″ horsehair braid. It is Not Pretty, but it’s all covered by fabric now and doesn’t seem to show. And combined with the double-tiered lining I added (made of stiff cotton-poly blend broadcloth) it really had a surprising amount of loft.

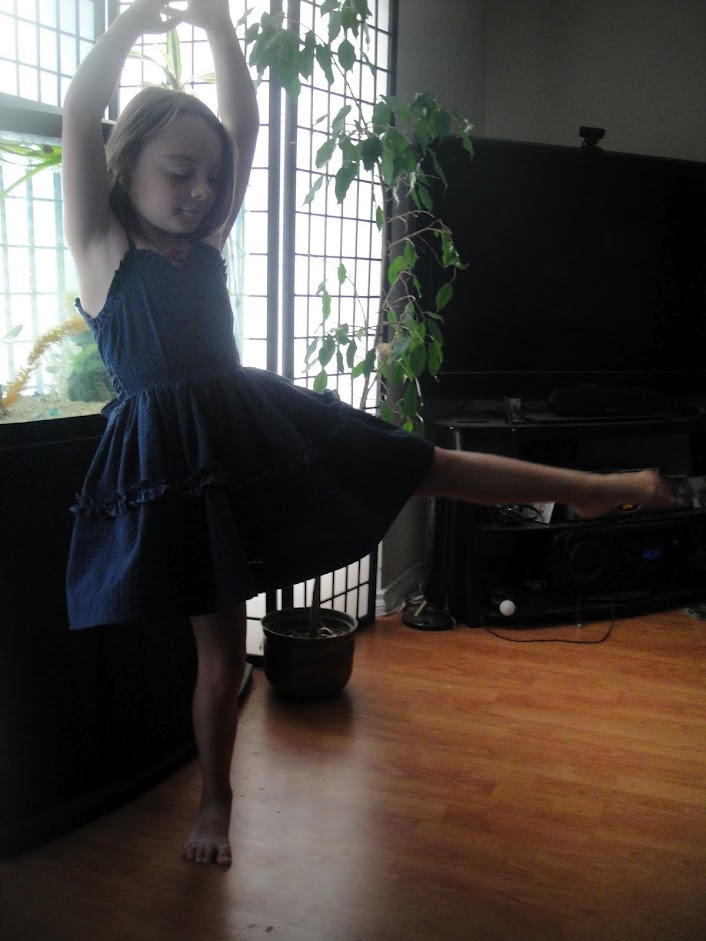
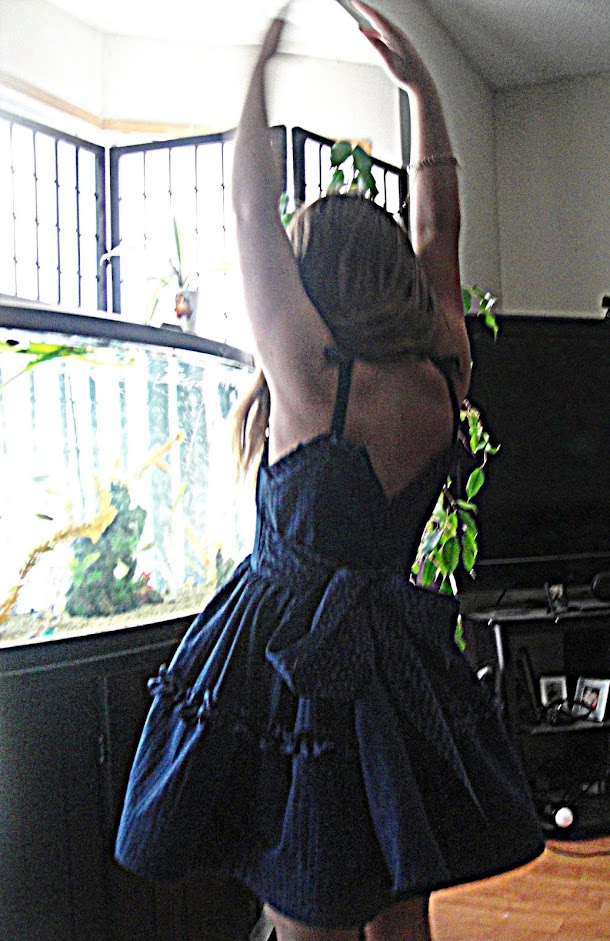
Bringing out the Inner Ballerina

We are so cute

Back view

Yes Yes We are.

Oh, wait. What. You’re still reading? Sorry, I kind of succumbed to The Cute there for a minute. Insidious stuff, that. Sorry for the grainy photos—this was the best light we could find in the five minutes we had before I went off to work that morning, and the camera did not like it.

Back, with buttons

Here, have a quick closeup of the back buttons (buttonholes made using my Greist buttonholer, ). I guess I shoulda taken a photo without the sash tied, too. /sigh.

but sooooo cute…

*possibly because there’s just too much vibration and movement on the light-weight, modern plastic machine, but anyway, I don’t trust it and didn’t feel like taking the time to experiment, when I have a perfectly good Pfaff ruffler foot anyway.

26 Comments

Filed under Sewing

Prezzies (1)

Tiny sundresses

I confess: I finished up my Last Sundress, and what did I do?

Turned around and made two more.

At least these ones aren’t for me—they’re for my little nieces. And they give me a chance to use some of the really insanely cute vintage kids’ patterns I’ve picked up, that my kids are just not going to go for.

Style 2304

Let’s start with Style 2304, which is intended for my younger niece. Is that not the epitome of 70s-kid-cute?

So I was a little worried about starting with a regular size 4 pattern; this is the Waif we’re talking about, who is four but probably still newborn in width. I decided, upon cutting it out, that it was way too wide, and shaved a couple of inches off by adding a pleat at CF and taking a bit off at the back. Because the yoke was now narrower, I narrowed the straps by a similar amount. So the look is a bit different—longer relative to its width, and more delicate—than I think I was really going for. And I didn’t want to shorten the length because I know my stylish sister-in-law doesn’t really like how short a lot of the vintage kids patterns are, but combined with the narrowed-ness and the ruffles, I kinda feel like it looks a bit more little-house-on-the-prairie than I had intended. Not quite my favourite look. I suppose I can always shorten it later if desired.

Buttons

I went with buttons in the back. I had three not-exactly-matching red buttons fished out from the random button stash, but when I went to stitch them on the plastic between the the holes of one was, ah, missing. Meaning the thread fell straight through. Not exactly a useful button to hold on to, button stasher. So now I’m a button short; I’ll have to go through and see what else I can come up with.

I must admit, I kind of broke my brain adding the piping and the little ruffle sleevelets on this one. In the end I resorted to finishing the inside of the armscye by hand.

I like that the amount of gathering under the yoke is really minimal (even with me lopping a couple of inches off the yoke and leaving the skirt piece the same.).

And I think that is about as much as I have to say about that dress. Under the fine old academic principle of the Minimum Publishable Unit, I’ll tell you about the even-cuter Simplicity 1149… next time!

18 Comments

Filed under Sewing

Funnygrrl’s Dress (the Making Of)


Pattern & Fabric

Whew! That Promaballoona really took it out of me. I need a weekend after my weekend.

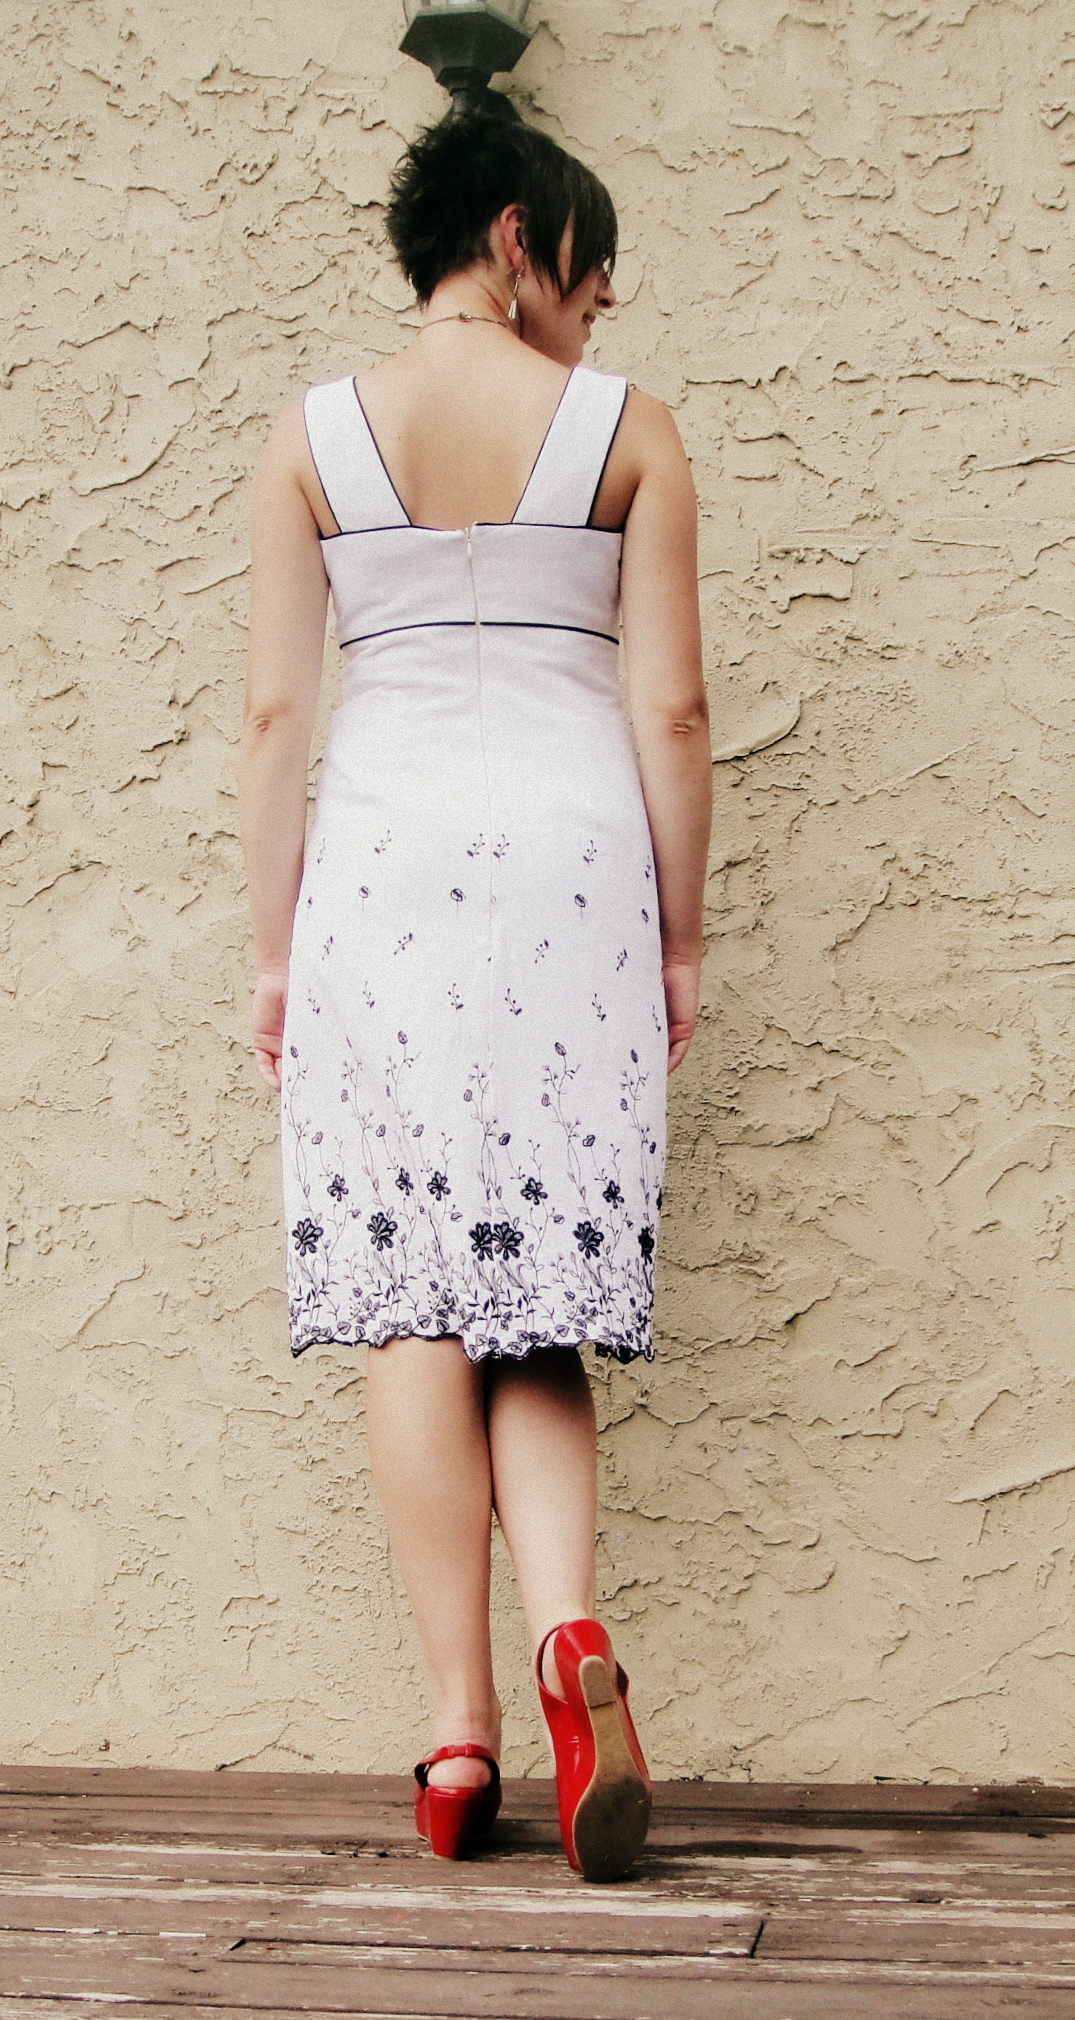
Ok, so, finally, here is the actual post about the making of  Simplicity 5549, view B, otherwise known as the Funnygrrl Dress.

This dress was perfect for several reasons—cute, shaped empire waist, relatively straight hem, and, most importantly for this project, it would fit on the 1.5 m of fabric I had at my disposal. WIN.

I made the size 12, with all my usual alterations—petite (both at the shoulder and 3 cm  removed above the waist in the skirt), square shoulder, and swayback. Lots and lots of swayback. I probably could’ve gotten away without the square shoulder—I’m beginning to think I shouldn’t bother with that one for strappy, narrow-shouldered patterns. Other than that, the alterations worked great!

I cut out the bodice in my “lining fabric” (aka white bedsheet from the thrift store) and basted it up quickly to check the fit, making a few minor tweaks. The most significant was to lower the neckline. I dropped it 2 cm, and widened a little bit as well—3 or 4 cm would’ve been fine. It was very, ah, demure. I should probably have paid a little more attention to the length of the “shorter” skirt on the model, as well. It reaches easily to the bottom of her knee, which is a good two or three inches longer than I like. I don’t usually pay attention to skirt lengths since I always figure I’ll just hem it at the end, but of course that’s not how it works with a border embroidery motif. D’oh.

Piping

Obviously, the dress needed black piping on the bodice to go with the black embroidery on the skirt. Pipe, pipe pipety pipe.  I am pleased to report that not only has the last of the black piping Claire sent me last winter been used up, but it was used up with only inches to spare (as you can see in the photo). I tried to be very careful not to stretch the piping while sewing, this time, lest I end up with puckery fabric. This worked well, but since I ended up with a fair bit of gapiness at the underarm, I’m thinking some pulling might’ve been in order, at least there.

Gapsies

I confess, I did not even look at the instructions for this dress. I promise when I have a little more time for sewing, I will start reading instructions again. In this case, I figured a construction order just like the Sewaholic Cambie would work just fine (only backwards)—and it did. Did I mention I really like the back of this dress? The straps widen and angle in towards the middle and it’s REALLY CUTE. Not to mention bra-strap covering, for those of you for whom that is a major issue. Also, unlike the Spiderman Dress, I think I nailed the swayback adjustment this time. WOOT! Having the extra darts for shaping certainly helps, too.

Look at that back fit!

Halfway through construction I realized I had no idea if I had any kind of suitable zipper or not. Some diving through the stash produced another vintage, metal-toothed invisible zipper in an off white colour. Not perfect, but close enough for an invisible zipper, especially if the alternative was delaying construction until I can visit a fabric store. I am trying really hard to avoid fabric stores right now. I’ve started packing up my stash for our pending move, and it’s, ah, traumatic.

Full length

I did zero matching of the embroidered motifs. I considered it for about half a second, but frankly, I was lucky to get the dress out of the amount of fabric I had period. There was only about 3″ of wiggle room along the width of the hem, not enough to match anything

Wiggle!

I gotta say, it’s easy to quibble about little things like the gaping under the arm and the length of the skirt, but really—I am so stoked over how this turned out. The back is AWESOME. The fit over the hips is close but good. It’s cute, not too over the top, and easy to wear. I love the back, not something I usually get to say. So yeah! I’m going to call it a win. 🙂

Nothing procrastinates like procrastination…

Thanks, Funnygrrl! 

31 Comments

Filed under Sewing

Spreading the bug.

Teehee

I have a lovely friend here in town who is creative, crafty, and has one of those unique figures  that makes buying clothes off the rack an experience that ranges from frustrating to soul-destroyingly brutal. She is well-rounded,  busty, and very, very petite. Needless to say, it was glaringly obvious to me that she needed to start sewing.

Of course, persuading her (a busy puppy-mom with nowhere near enough hours in the day already) of this took a bit more work. In fact, it wasn’t until a month or so ago that I finally managed to get her to pick a thing to make, and we began the adventure of fitting her.

Booyeah

As I mentioned before, the pattern she picked was New Look 6789. This had lots of things going for it, from our perspective. Aside from being intensely cute to start with, it has princess seams, no waist seam (a feature she’s about as fond of as I am, with even better reason), and broad, bra-friendly straps.

The main downside is that the pattern only goes up to a size 16, and we really should’ve been starting with an 18, even before the FBA.

I started with measurements. Full bust, high bust, and back waist. To give you a small sense of what we were dealing with—standard Misses sizes are drafted with a back length of 16″ or so. Mine is around 15″, resulting in my standard, moderate petite alteration to the bodice.

My friend’s is 13″. If she’s standing tall.

What followed was not an elegant sequence of well-practiced fitting. Rather, it involved a lot of measurement, followed by pattern alteration, followed by trying on, followed by further tweaking, and that’s without going into all the stitching and unpicking and swearing. My friend did, far and away, the bulk of the work herself, while I directed. This worked pretty well for me, and hopefully for her.

Having determined based on measurements, roughly what we needed to add to the pattern, both all around and for FBA purposes, I put my slave labour friend to work tracing out her pattern. We added width. And I did a Y-type Full Bust Adjustment a la Debbie Cook, except with less precision.

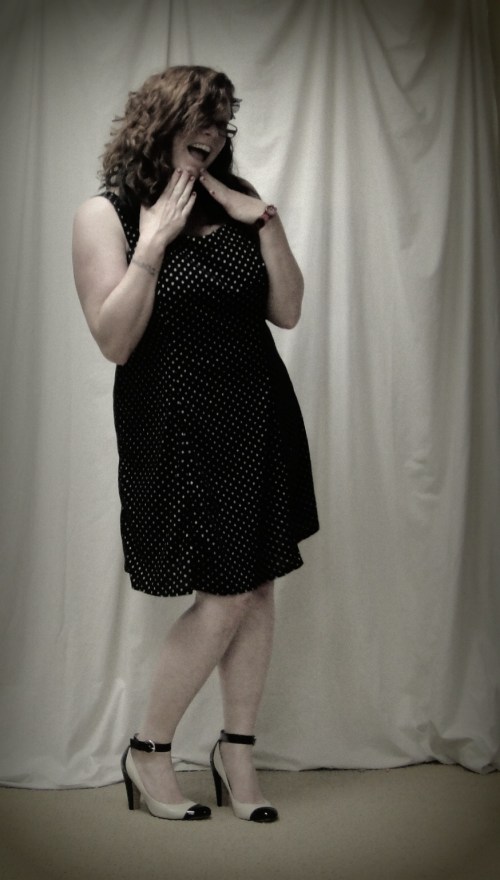
Now, my dear friend, having picked an excellent pattern, had decided on a very cute, black with white polkadots knit for the fabric. Yes, you are absolutely right, this is a pattern for a woven. Ahem. Never one to be dissuaded, I figured that making it in a knit should make it possible to omit the zipper, so away we went. To start off, after she’d block fused a portion of fabric, we cut out the top yokes and straps, and did some quick test-fitting with these. All seemed well, so I set her to cutting out the rest of it. Which was not block-fused. Which was not fun in this fabric. Nor was it the kind of stuff that liked to be sewn. But she soldiered on, hampered mainly by the fact that our days off during a week don’t coincide, and she lives on the far side of the city (which is the better part of an hour’s drive even when traffic isn’t ridiculous). Obviously, it’s not perfect—some spots the angles are a little off, and in particular there’s some issues with the vertical seams where I should’ve had her use a stretchier stitch, and hemming the lining nearly drove her over the edge—but the fit, the fit.
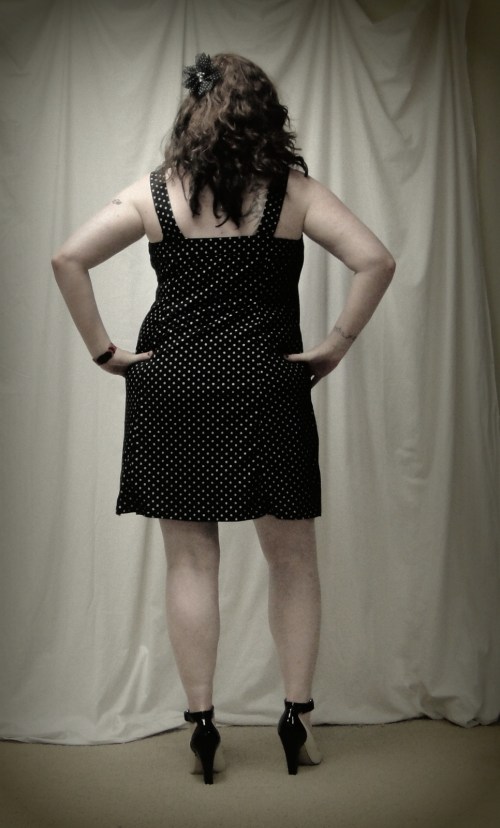
Rear fit

I don’t think I can explain to you how triumphant I feel over this dress. It’s not perfect, by any means, but it’s leaps and bounds above anything off the rack.

It fits her bust.

It fits her back.

We could probably have shortened the waist even more (I wasn’t sure how much should come out below the armpit, as opposed to above it, which was easy to adjust with the straps.), but it’s much better than storebought.

With a little bit of princess-seam tweaking, we seem to have achieved skimming fit. Woot, woot!
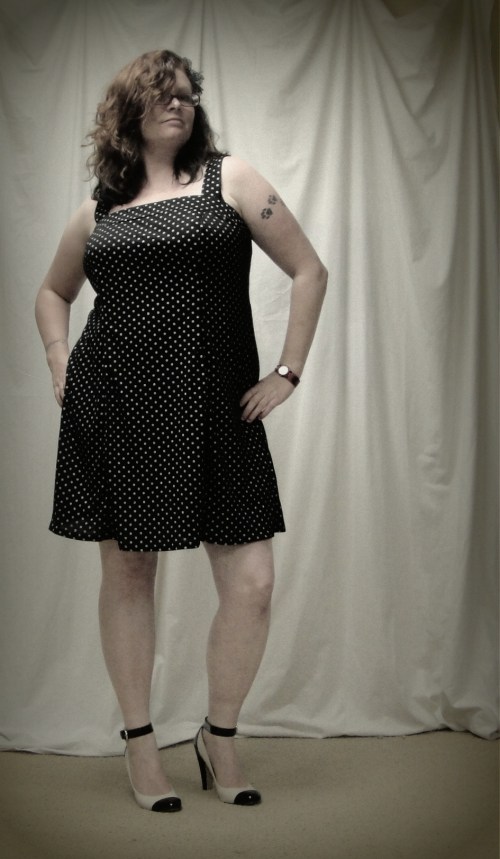
Rawr!

So, bear with me while I wax philosophical here a moment. I’m a big fan of body acceptance. A fan of finding what’s beautiful about yourself, whatever your size or shape may be, and running with that.

And watching my friend go through the fitting process has been illuminating on so many levels—the physical challenge of fitting a body so different from mine, sure, but also the body-negativity she struggles with, having a body that not only isn’t the model ideal, but doesn’t even seem to be in the same universe, as dictated by the clothes on the rack. Like most of us, she knows what works for her and what doesn’t, but—like most non-stitchers—she doesn’t quite know the difference between what doesn’t work because it’s not flattering for her shape, and what doesn’t work because she’s never tried on a version that actually fit. (I have a similar problem with tailored shirts, frankly). And she’s still trying to digest that it’s not a problem with her—it’s a problem with the clothes, and the system that only caters to shapes within a certain standard deviation of average.

I hope she does absorb it. I hope she learns to tell the difference between a bad fit and a bad body. And I hope (maybe a little selfishly), that she’ll keep on sewing, even if it doesn’t become a major obsession hobby, and will have at least a few things that make the body that she has look as beautiful as it actually is.

And I think that she looks like a bombshell in this dress. 😀

53 Comments

Filed under Sewing

Next Size Up II

Jeans. She has them.

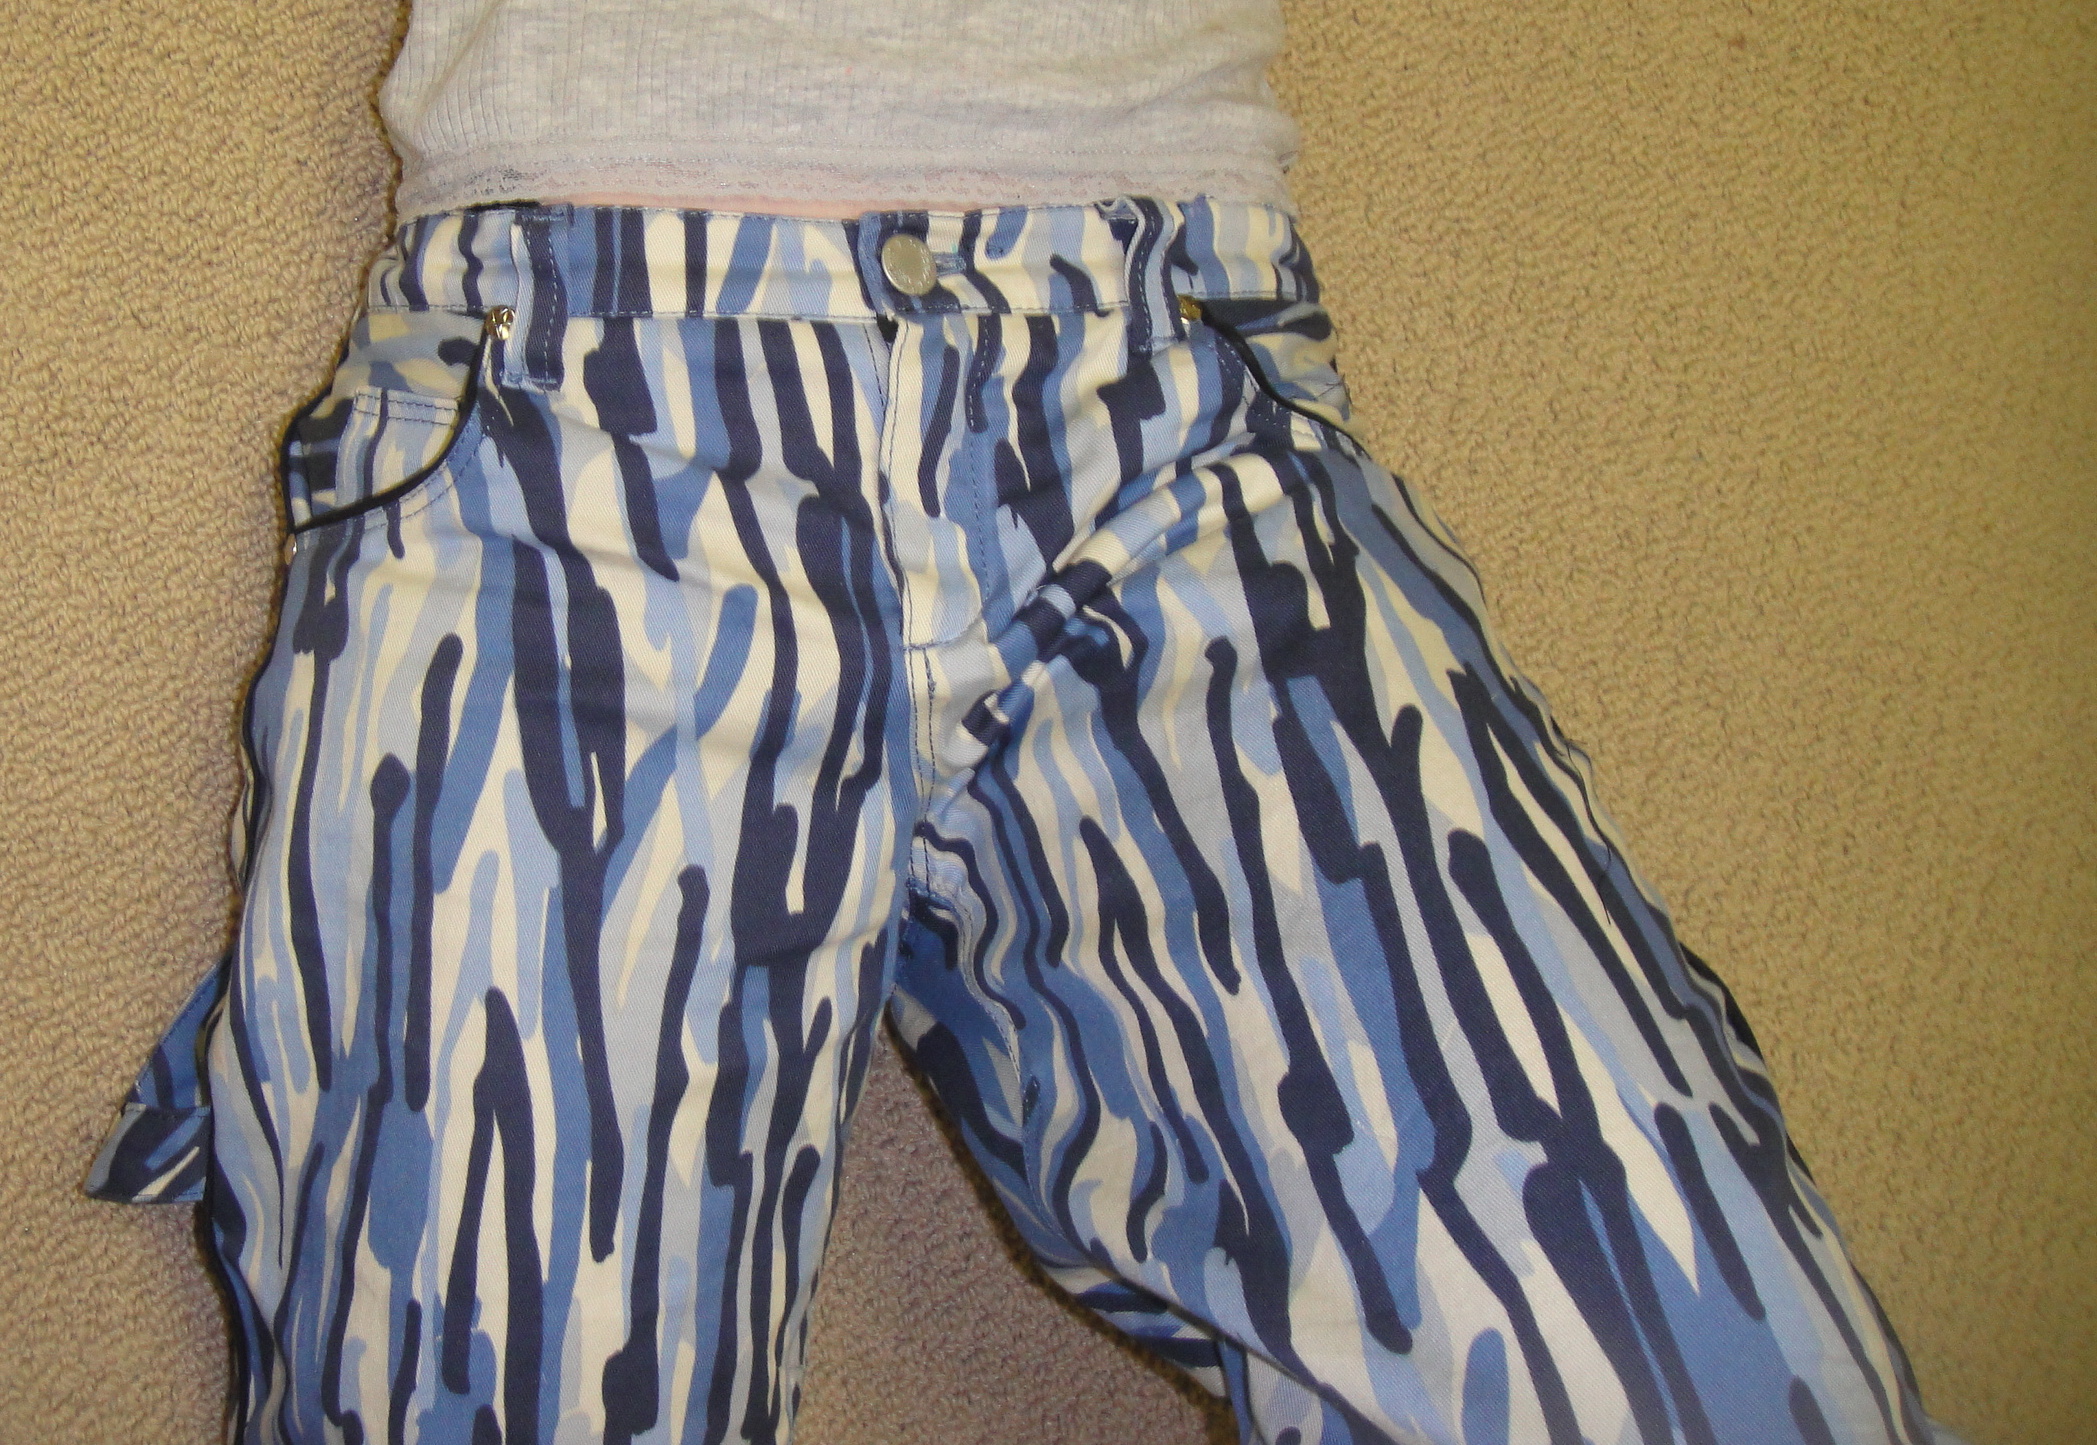
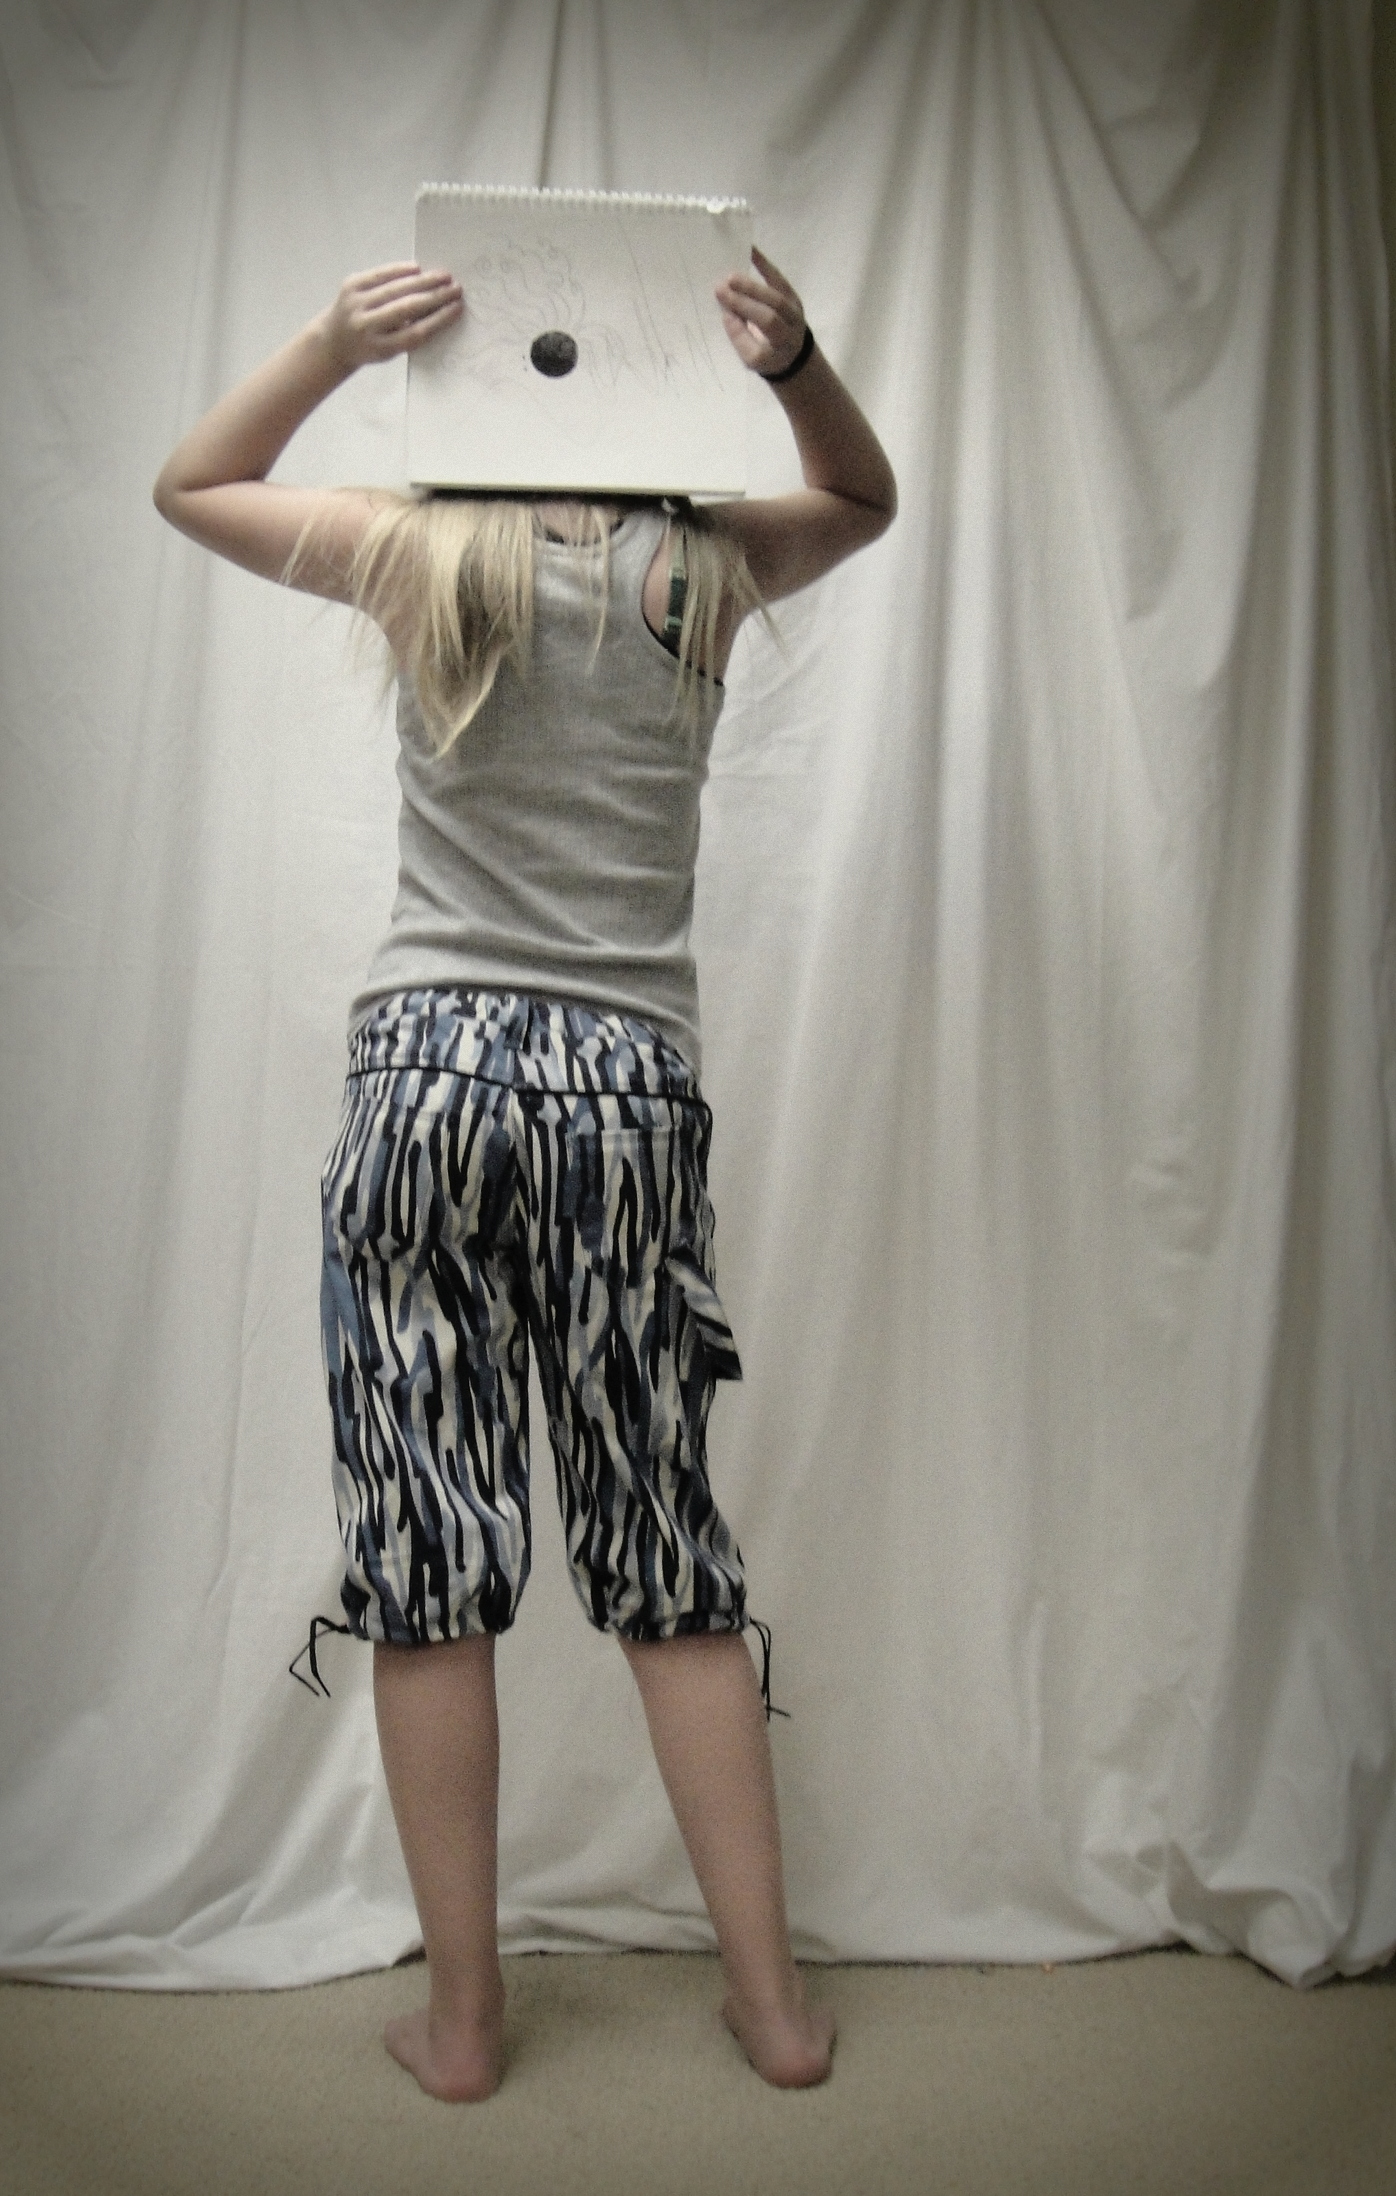
Tyo’s replacement capris are finished. Or is that Bermudas? My shorts terminology is lacking. Can I blame being Canadian? The Patrones magazine calls them “pirata,” which I think is totally awesome.

They are pretty standard jeans-styled capris, with a few additional details.

Rear view

Funky, asymmetrical pockets are part of the original pattern (I left off the flaps this time. Not even for lack of fabric—I made them, but didn’t put them on. I don’t really like their shape.) I should’ve piped the pocket edges, although getting the piping crisp around all those corners would not have been fun. As it is, you can barely see the pockets are there. Hmm. I do like the piped yoke—I should’ve piped the waistband, too.

I had better not dwell on the missed piping opportunities. That way lies madness. I added one of those weird, pointless straps between back pocket and side-seam, at Tyo’s request.

I’m too cool.

And then managed to photograph her only from the other side.

Luv

Damn she is cool.

I love who I am.

Oh, wait, I’m supposed to be discussing construction, not just posting pictures of my cool kid.

Inside front—pockets, fly construction, buttonhole elastic, bound-edge waistband.

My fly interiors are not generally things of great beauty, and this one isn’t, either, although it’s one of my better ones. I won’t get into how many needles I broke as soon as I started trying to do zig-zags—bar tacks, buttonholes, attaching the belt loops. There was much howling and unpcking. I HATE unpicking bar-tacks. It got better when I ran out of topstitching thread and just used regular blue thread. I may do that for all bar tacks/dense zig-zags in the future. The buttonhole elastics emerge from gaps in the seams where I had to piece the waistband.

Drawstrings

I added buttonholes on the outside before stitching the hems, to run the drawstrings (aka shoelaces) through. Back when I made the first pair of camo capris, I bought a metre or so of narrow black twill-tape for the drawstrings. I couldn’t find it when I finished that project, so wound up using shoe-laces instead. It’s kicked around on and off since then, (notably being used in this project) but again today I couldn’t find it. I did, however, find more shoelaces. (And I can never, ever find shoelaces when my shoes need them…)

Front closeup

Can you see that I screwed up the cutting played with the grain on the front pockets? No? Maybe just as well.

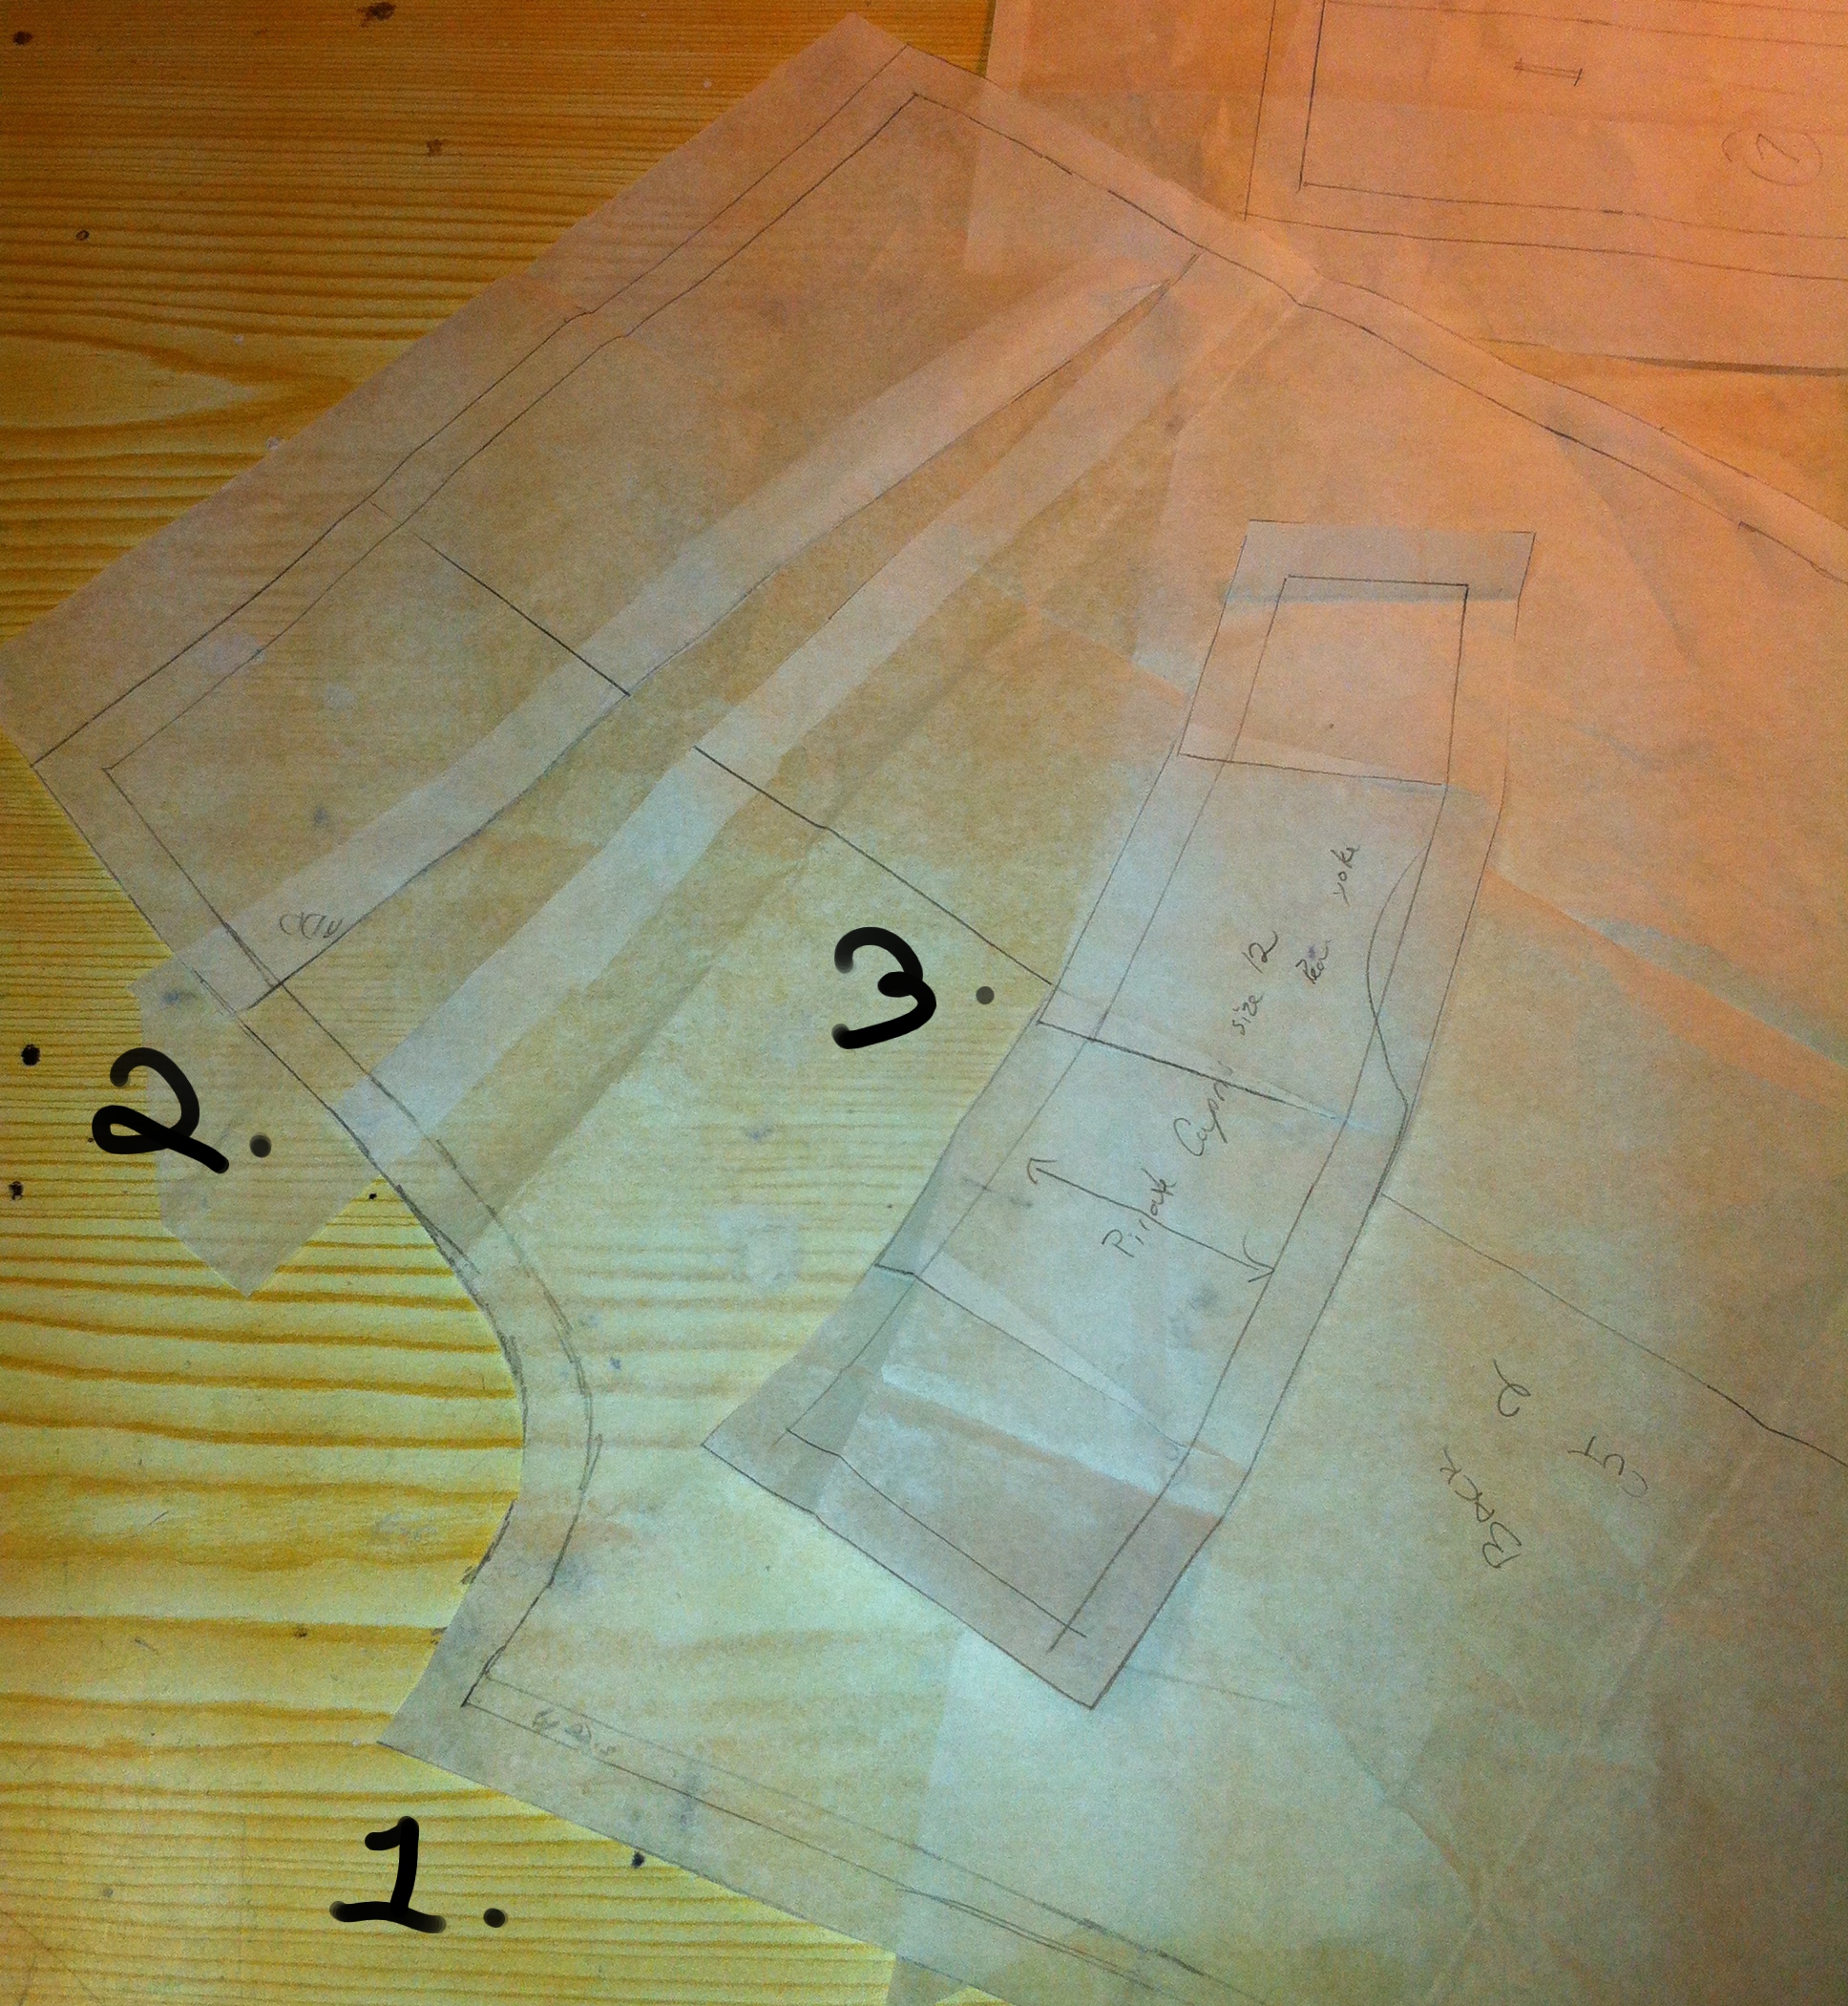
Pattern alterations.

Remember my pattern alterations?

Back view

Ok, here’s how they wound up looking. (If you can see through the print, which you probably can’t.) Rear rise is good—not any too high, could probably have gone a little higher, but coverage is maintained even when she squats down. Yay! Yoke curve-in is good but could’ve been more extreme—there’s still plenty of extra ease at the waistband that isn’t there at the hips. There is still some slight wedgification happening—not enough to be uncomfortable (yet) but I can tell that the crotch curve is not perfect for her. Presumably scooping is in order? I’m really not sufficiently enamoured of this pattern to bother, but Tyo may be, in which case I’ll keep it in mind if we end up at Pair #3.

Whew!

Ok, I’m done. And apologies to Claire for not doing a full-camo photo shoot with the vest. We snapped these pictures in about five minutes just before bedtime.

26 Comments

Filed under Sewing

That slinky summer dress

Fun dress

Claire suggested, most sagely, that I make something quick and knittish as a palate cleanser after my recent detail-heavy exertions.  Of course, she was hinting I make up Zoe’s new “vest” pattern, which is indeed quite cute and tempting, but I decided to jump on the maxidress bandwagon. Ok, it doesn’t exactly take much to get me on the maxidress bandwagon. (see here, here… oh, and here.)

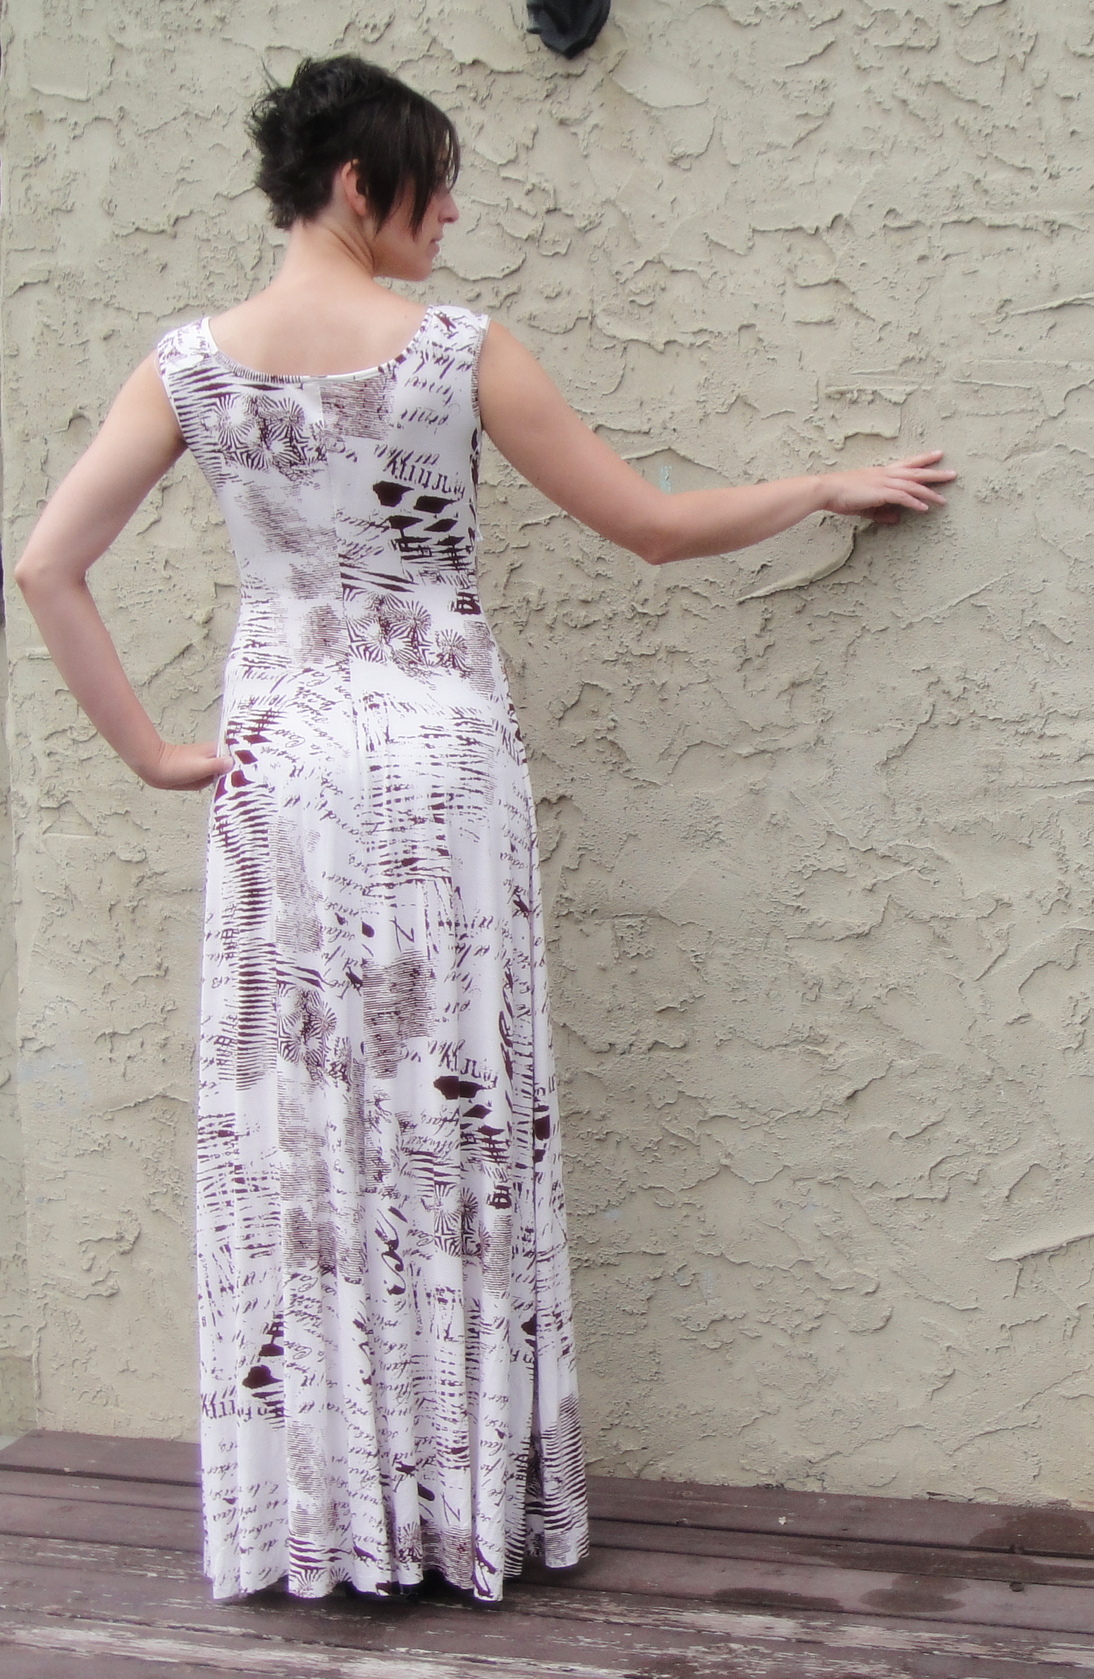
Yes, jealousy over Tyo’s Boredom Dress got the better of me, and I busted out Simplicity 7434, all the way from 1976.

Simplicity 7434

This pattern is part of the Ratzlaff Collection, a number of patterns I nabbed from the Mennonite thrift in my hometown, all of which bear the name “Darlene Ratzlaff” (except one which belonged to “Mrs. Art Ratzlaff.”) Most of them are from the late sixties and earliest seventies, and are a size 10 or 12. So I’m not sure why, in 1976 (or 1977), Mrs. Ratzlaff thought she should buy a size 8 pattern. Did she dramatically lose weight? Is it possible to lose weight when your culinary cultural heritage includes rollkuchen**? Did she have a daughter finally reach the women’s sizes*? Obviously we shall never know (unless I start telephoning all the Ratzlaffs in my hometown until I find the right one. Which would be amusing.)

ANYWAY.

This is designed for a size 8 bias woven. I am obviously not a size 8, but I thought it just might work in a knit. A quick comparison with my altered Renfrew pattern suggested that, in fact, the sizing was almost identical. KA-CHING.

Front view

From the envelope drawing (and even the technical drawings on the back) I’d assumed it was a simple tank-style pattern underneath the funny cape thingy. Not quite—it has separate shoulder pieces, meant to be cut on grain. I opted to cut them double and add a knit interfacing, so the shoulders are quite sturdy. Knit being knit, I cut the dress pieces on grain as well. The only alteration I made was to fold out a small (1 cm) swayback wedge from the back. In the facings-loving world of 70s patterns, this pattern calls for a bound edge on the neck and armscyes! Perfect, since that was what I was going to do anyway.

Y’all may recall that my comparable pattern, Renfrew, is recommended for a stable knit.

Stable knit, this fabric is not.

Back view

When I first tried it on, it was, in a word, tentlike. The only thing that wasn’t sagging and bagging was the (heavily reinforced) shoulders, which were sitting rather too far to the sides. Fortunately, there’s a CF seam. I took in the front and side-seams about 1″ each above the waist, tapering to nothing below, and on the back I angled in in my swayback region to take out 2-3″ of width, tapering to nothing below the waist. There’s still a little bit of room back there that I could tweak further, I think due to the weight of the skirt, but the side-seams are already tending to ride backwards and I don’t really want to take any more out of the front, so I think I’ll leave it, at lest for the moment. Fabric weight produced the gain in length I had expected, but didn’t see, in Tyo’s dress, so that it currently sweeps the floor unless I wear heels. I may have to trim it for practicality, but I’m liking the extravagant length for now.

Front

The neckline seemed a tad bare when I first tried it on, so I added the raw-edge bow (click through to the full size photo if you can’t see it… it’s there, I swear). I was sort of hoping the fabric would whirl itself into tight curls when stretched and stay that way, but alas, no dice. If I decide I really want a skinny stringy bow, I’ll make and turn some tubes, but I think I’m ok with the raw edge. The hem is raw, too. It has a fabulous flow and drape and, as observed with the bow, no significant tendency to curl.

Of course, all of this has been completed just in time for the end of our glorious week of summer weather (I might’ve had better pictures if I’d been willing to stand outside for more than thirty seconds…). Will summer and +30C tmeperatures return? No telling, this close to the mountains, but I fervently hope so. A few solid weeks of heat like that and I might actually be able to face the inexorable return of winter.

Bonus

Bonus: Osiris likes it. Very, very much. >:D

*Tyo is feeling very fashionably frustrated right now. Nothing in the children’s racks appeals to her, but the women’s sizes are still mostly too big. The exception is the very smallest of the size 0/1 jeans, of which she now has several pairs, although unfortunately they don’t have the handy buttonhole elastics for cinching in the inevitable above-butt gapage that is her genetic heritage. Probably I should look into that alteration. *wince* I have a few junior teen patterns, but they’re mostly from the 70s and while I think they’re adorable, they’re not quite the current zeitgeist…

**my stylish sister in law is married to a Mennonite, and has been learning to make rollkuchen. Nomnomnom…

54 Comments

Filed under Sewing

Second verse, same as the first!

A little bit louder and a little bit worse!

I’m about 95% sure I’ve used that as a post title before.

Yet it works, so very, very well.

Tyo’s fishing vest is finished. I was able to avoid some of my mistakes from the first time around, and instead make a whole new crop. I’d say overall, I did not improve significantly. Although I think all the practice with cargo pockets has helped some in that department. And some of the mistakes were the ones I have to make in order to learn why X shortcut was a bad idea. Yes, I tend to have to learn things the hard way. Especially with sewing.

Whaddaya lookin’ at?

The details are all the same as this post, the only difference being I had snaps and D-rings this time, so there are two snaps and a D-ring at the nape of the neck, which is apparently a handy place to hang your little fishing net from. To fit Syo I graded the basic vest pieces up, increasing width by about 4 cm around and length by about 1 cm. I interfaced all the vest body, instead of just the back yoke, this time, which will hopefully add to the vest’s sturdiness (it’s a very lightweight denim), but necessitated some extra pocket linings that I forgot to incorporate properly and had to engineer into place rather late in the construction process. Oops.

Back view

Here’s the only shot you can see the D-ring at the back of the neck.

My girl.

Here’s some random poses.

This one was supposed to show the pockets better.

I’m really far too bored by this whole project to go into the annoying details. If you have something specific you’re dying to know, feel free to ask in the comments and I promise I’ll answer.

And now, on to bigger, better things! (and a fly fishing rod case. Ulp.)

11 Comments

Filed under Sewing

Spider Dress, Spider Dress…

Spider Dress

Does whatever a spider… um.

Dude, Homer got further than me. Urg.

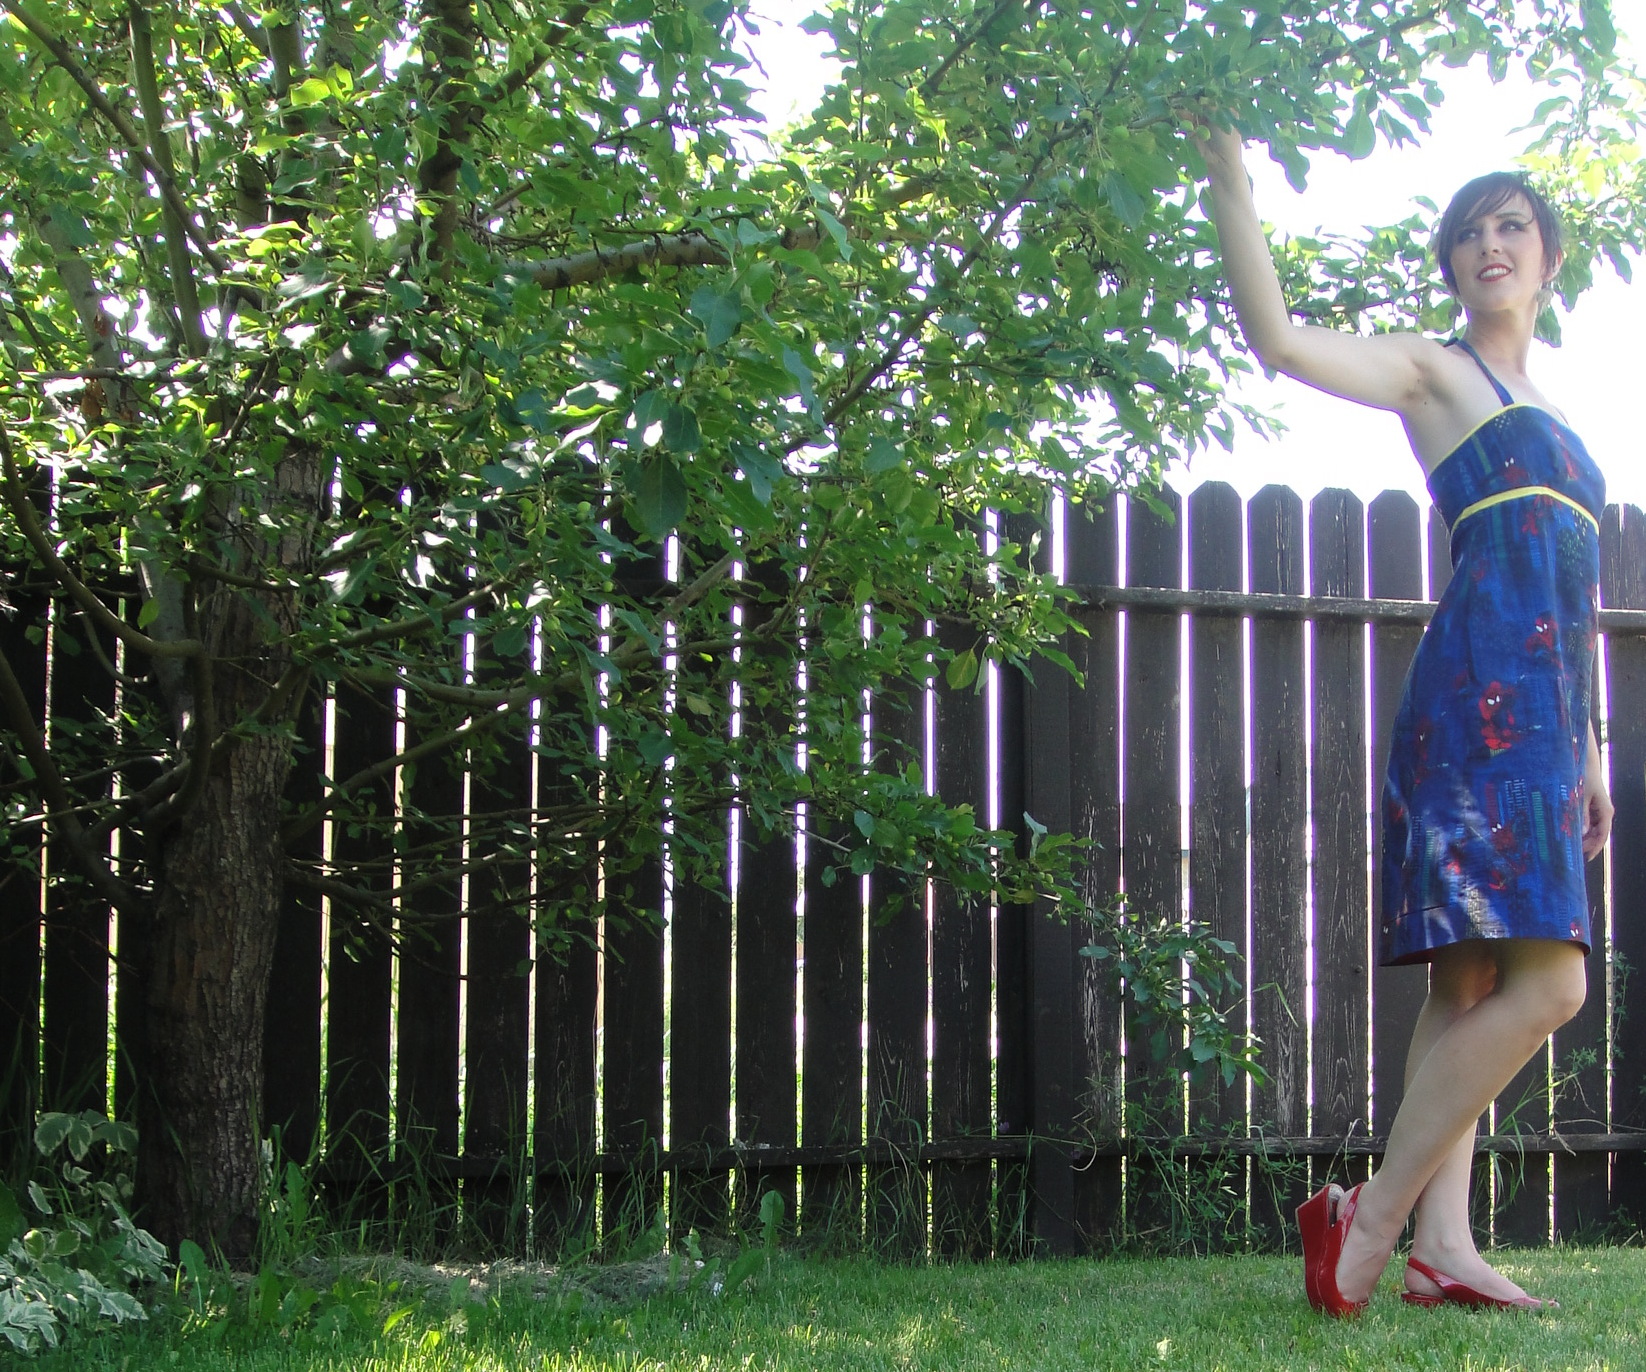
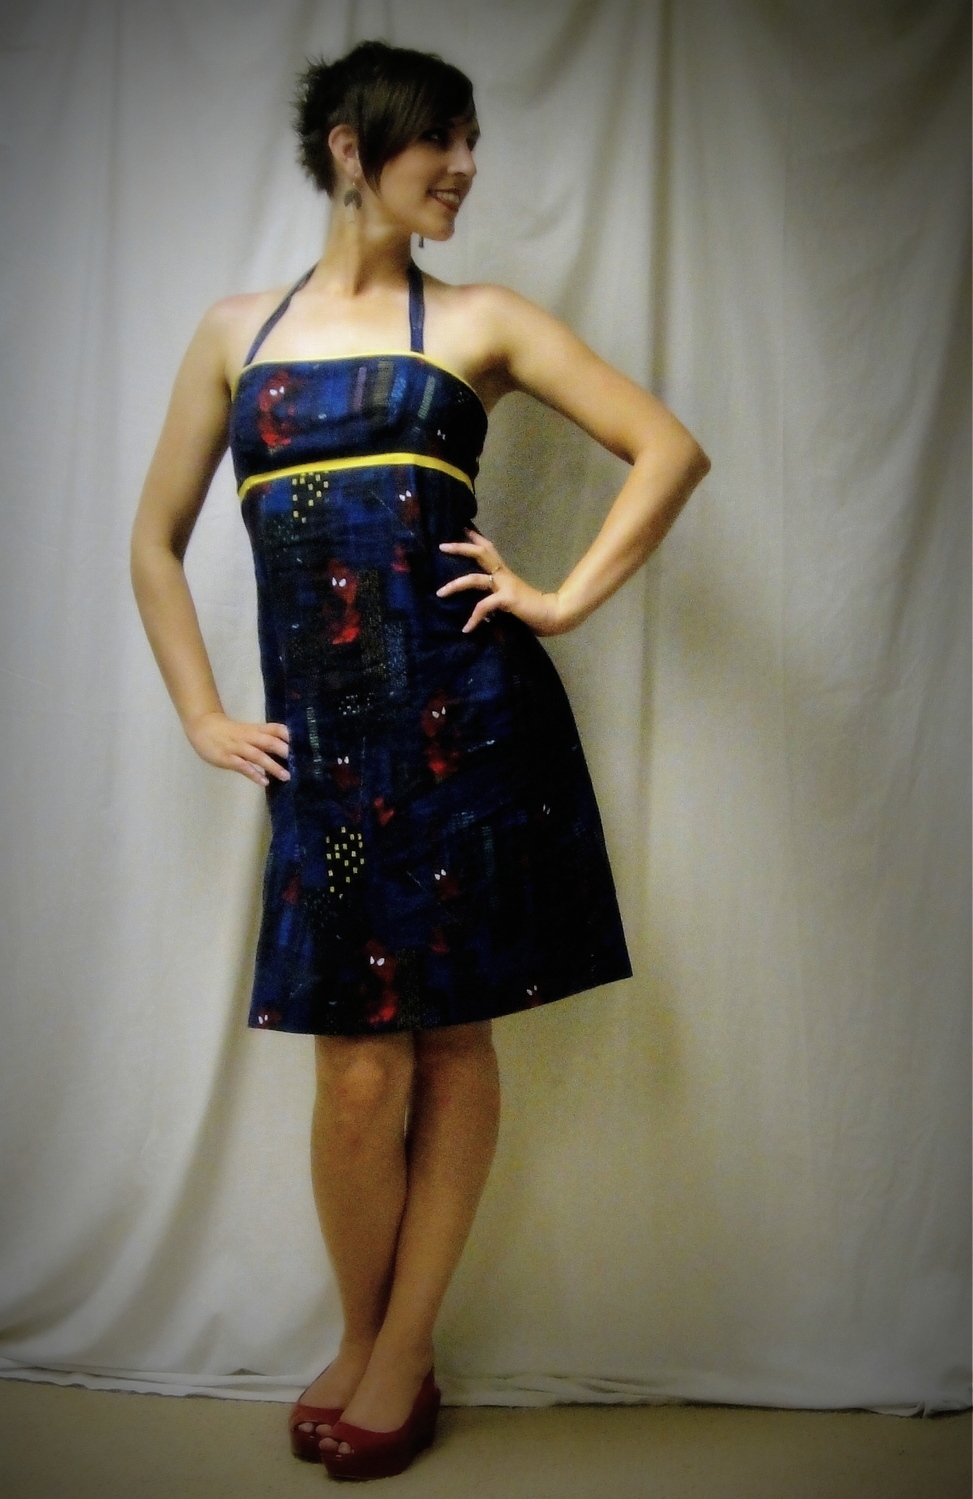
Questionable theme-song rip-offs aside, I proudly present my (almost timely) Spiderman Dress, made of two metres of thrift store Spiderman fabric. Those of you who know what’s what may recall that Cindy of Cation Designs and I had a totally impromptu sewalong/throwdown for our spiderman dresses. She claims it’s a match of n00b against l33t. I’ll let you decide which is which… I’m pretty sure I just got pwned. (incidentally, my children use “pwned” in conversation. I didn’t even know you could pronounce that word. It’s pronounced “poned,” apparently.) You are warned now, she took totally cool perched-on-top-of-building-photos. I did not.

New Look 6459

The pattern, as I mentioned before, is New Look 6459. This is actually a fairly recent pattern (2005) and I even remembered to check the reviews on Pattern Review before cutting! Yay me! (I used to do this all the time, but as my obsession with the thrift store pattern set has grown, I got out of the habit. They just don’t have thorough coverage of 1970s patterns on that site for some reason ;).) Anyway, this was my first try at a New Look pattern. The reviews all agreed that the dress ran large. I was a bit puzzled by this, since it does have the allegedly helpful “finished garment size” measurements printed on the pattern itself, and they suggested a very reasonable 1″ of ease at the bust. However, I was suspicious enough to take my measuring-tape to it (it’s a pretty simple pattern, anyway), and sure enough, the amount of ease at the bust in the pattern was much more like 2-3″.

Not totally pointy darts. Please ignore the wrinkled state. It’s way too hot to iron right now. Which is a Very Good Thing.

So I traced the pattern with a size 10 at the top (I am a size 12 by bust measurement), but past experience has made me wary of A-line skirts in the bottom half department, so I graduated out to the 12 below the waist. Which waist I shortened by about 3 cm. This is all in the skirt, by the way. The bodice piece I traced exactly as a size 10; the only change I made was a bit of careful dart-reshaping in the hopes of avoiding the niplicious look. I also did my usual swayback alteration. In short, I did all my standard alterations except the square shoulder, which obviously doesn’t apply. The waist-height ended up pretty much perfect, so win. The height of the bodice itself is none too generous, however—if you have any kind of a larger bust you would need to add some serious length there to get decent coverage. I wouldn’t have minded an extra half-inch at the top myself, although it’s perfectly wearable as is.

Line Drawings

I had intended to make View C, but forgot to mark the stitch-line for the notch on the pattern piece and ended up making something resembling view B but with halter ties. Oopsie.

I decided the dark print needed something bright to make it pop, and, very uncharacteristically for me, it had to be yellow (to draw on the tiny flecks of yellow windows in the buildings on the print). I tried to talk myself into red, which is much more my style, but nope. It had to be yellow. Fortunately my excessive stash of thrift-store bias binding turned up some bright yellow, so I used that to make a flat piping for the upper edge (much easier since I clean forgot about that notch) and a ribbon-type look on the top of the skirt.

Back view. I don’t think I would want it any narrower in the skirt.

I find there’s a real tension in sewing between finishing something nicely and being able to fit as you sew. I certainly ran into that a *lot* with this dress. Because of the piping and ribbon, it was impossible to alter the side-seams and take it in there. I wound up taking the excess (yes, even going down a size, I still took out about an inch) at the back zipper (tapering to nothing below the waist), which I think contributes to some of the odd folding around the back, not to mention the way the side-seams run towards the back. Oh, well.

Front view

I had opted to add inseam pockets, but they were a bit bulky for the fairly slim skirt, and just didn’t look right, so off they came. I suppose I can put them in something else if I really feel the need…

Hem facing.

I liked the length un-hemmed (remembering I lost an inch when I shortened the waist), so I decided to use up some more stash—this time a red bias hem facing I bought way back when I was finishing my Lady Grey jacket and waffling over the best way to finish that hem. I do like hem facings, although probably this particular fabric didn’t need any more body at the hem. I really like the flash of red there, though.

Fun with Filters

All in all I’m pretty tickled. I could wish it was a little more figure hugging or didn’t have this or that odd hang-up, but for what it is, it’s pretty sweet, especially since summer has arrived in southern Alberta (possibly for the first time in the five years I’ve lived here) and we’ve had several days of +25C (that’s over 80F) temperatures, with more to come. It passed 30C today, and I couldn’t be happier. Ok, if someone called up and offered me a million-dollar contract to be their personal stylist and technical illustrator, I might be happier…

And it’s superhero-y.

Win.

Well, unless I have to go up against Cationess.

43 Comments

Filed under Sewing