Tag Archives: finished projects

A Syo-lytic leotard

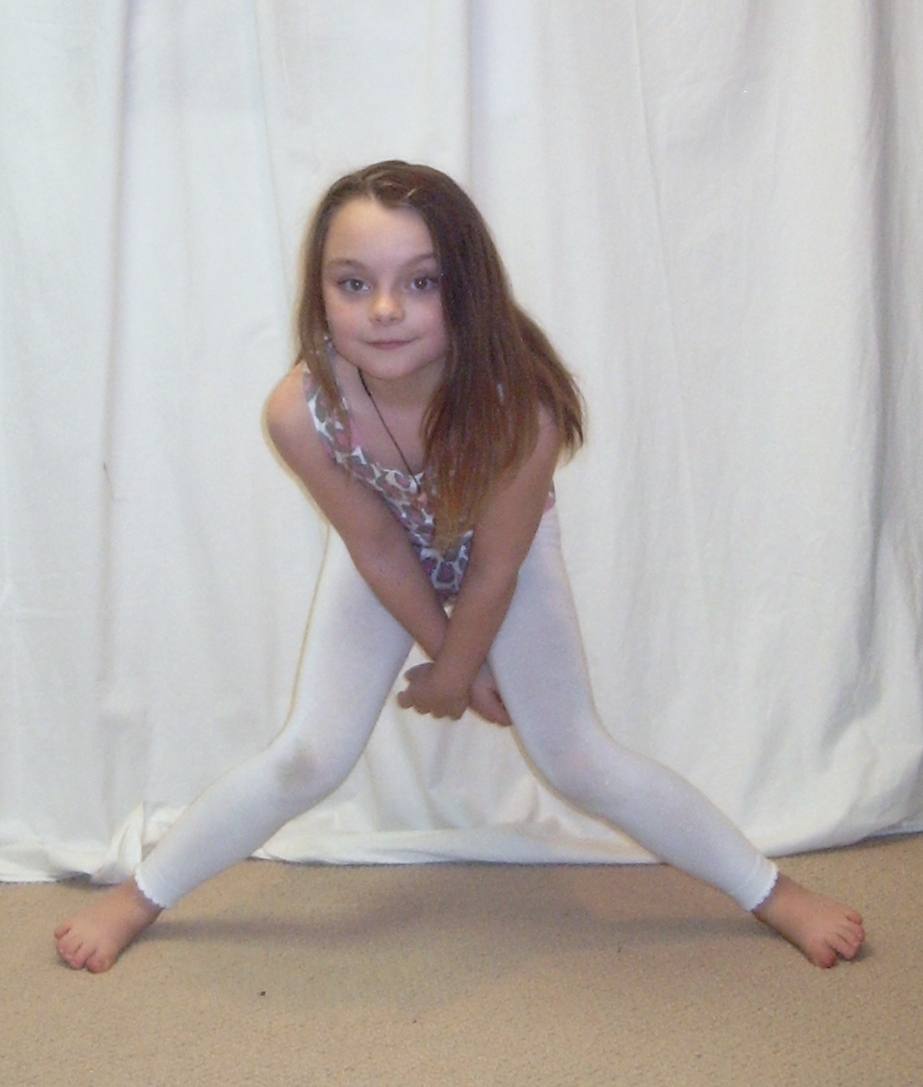
I asked for a dance pose.

So I’ve been trying to start sewing down stash. I’ve been positively stingy with the new fabric purchases the last little while (which seems to mostly be resulting in pattern-binging, but that’s another issue). I’ve been avoiding Fabricland like an (insert clever, really annoying thing to avoid here).

However, the other day Syo had a doctor’s appointment across town at a location I wasn’t familiar with, and so I had built in an excessive amount of traffic/getting lost time, and so we arrived in the area with rather more than an hour to kill before her appointment. And I may not know that area well, but I do know where the fabric store is, so in we tromped.

And Syo found the swimsuit fabrics.

And they were having a big 50% off nearly everything sale.

And I’m officially the biggest pushover ever to disgrace mommydom.

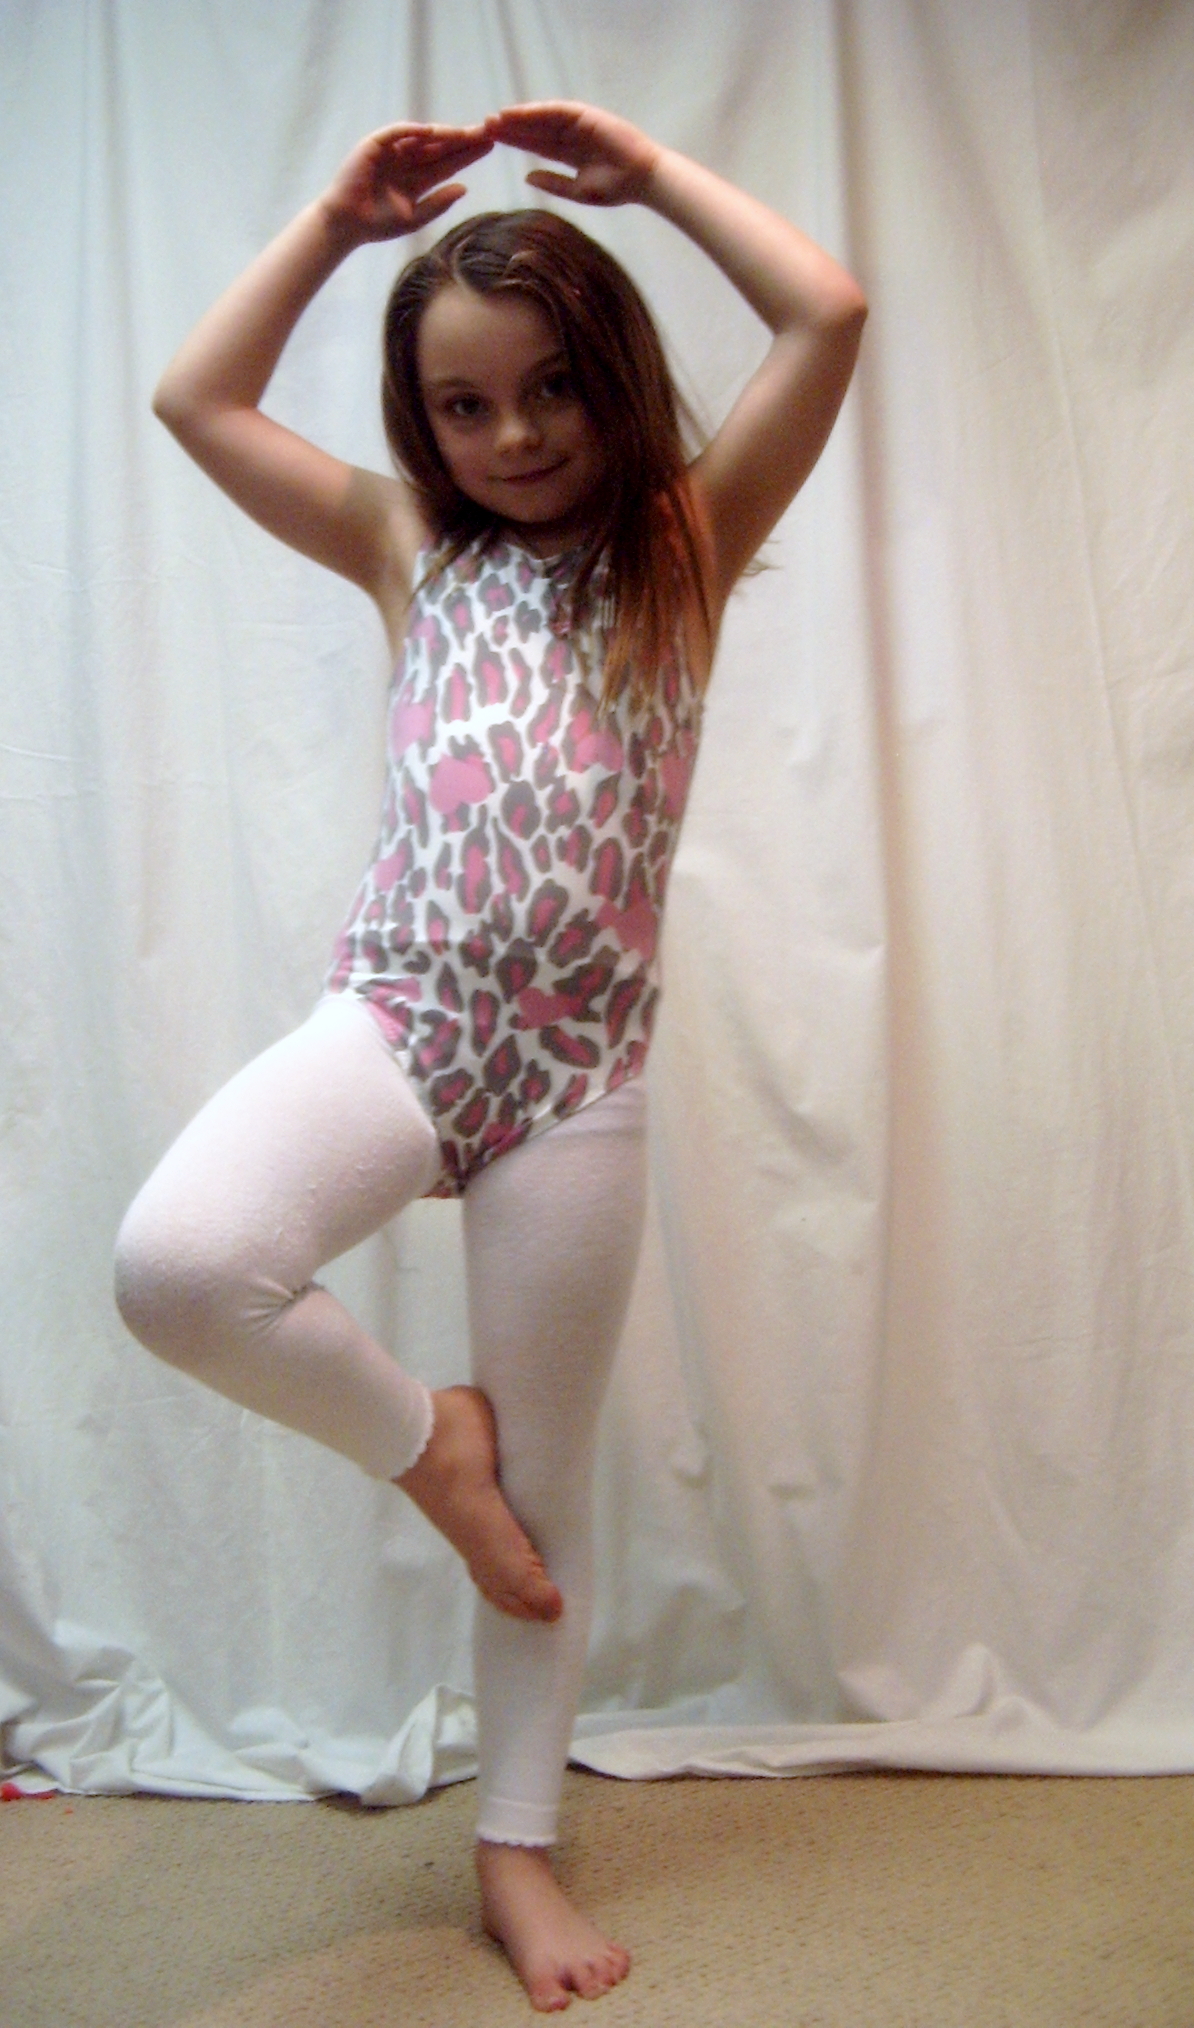
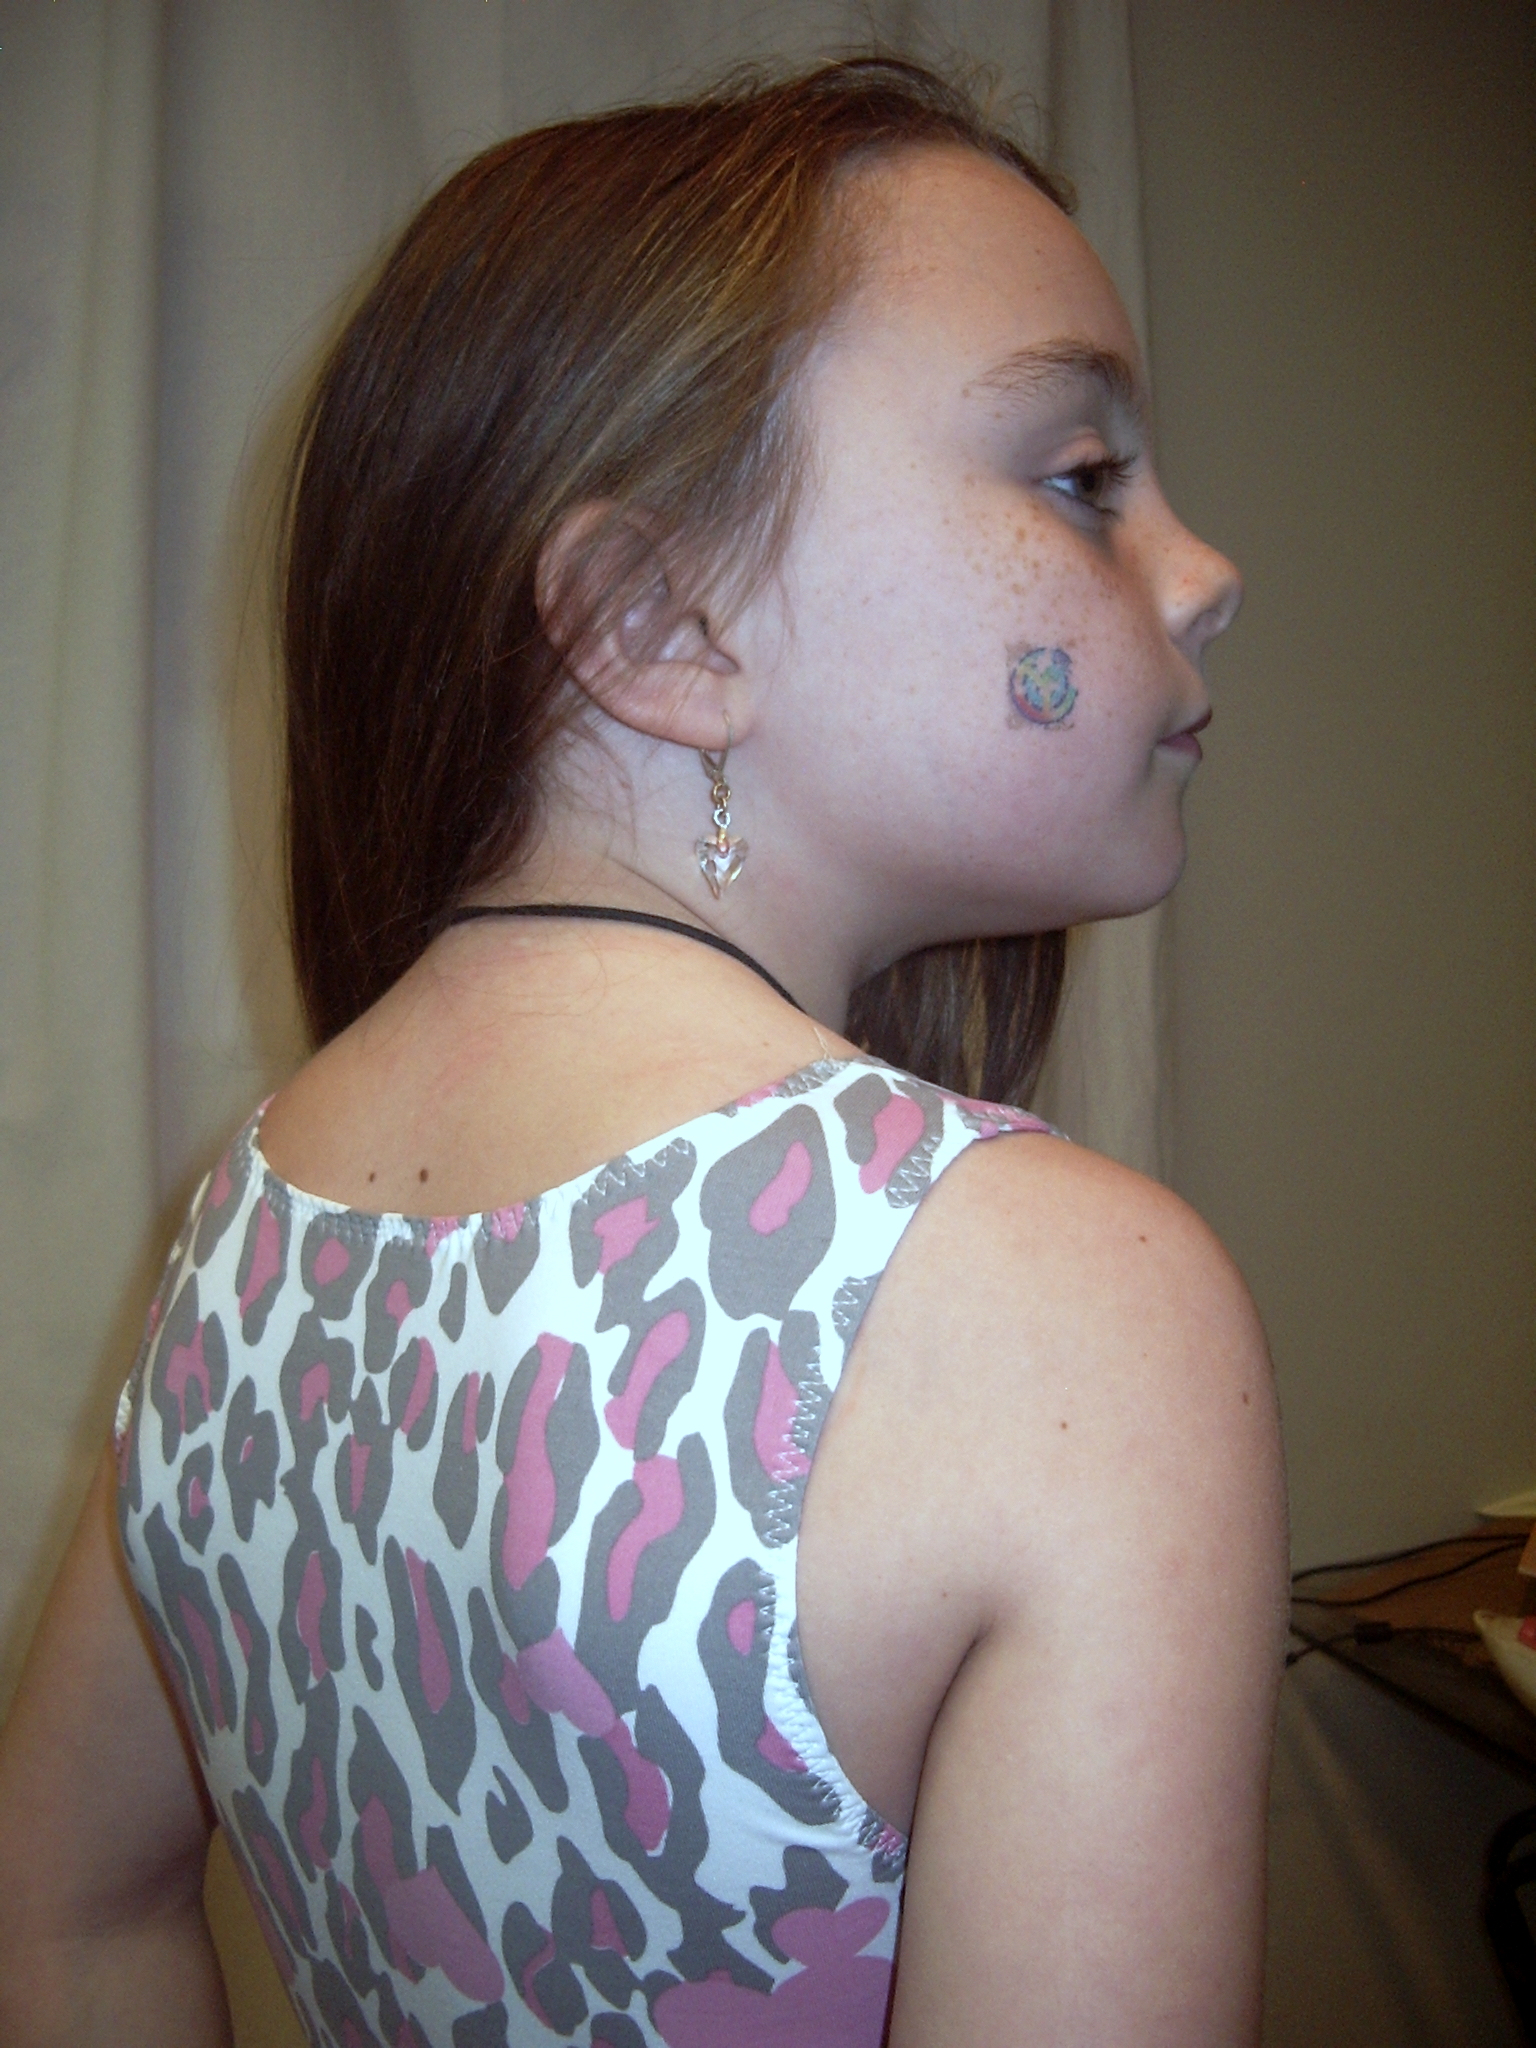
So Syo scored a metre of pink, grey, and white leopard- and heart-print spandex. For a new leotard for her dance class.

Now, she is in sore need of a new leotard—the ones she has are mostly two or three sizes too small. But there is a dress code for the class (however poorly enforced) and I’m pretty sure pink leopard print isn’t on it.

However,

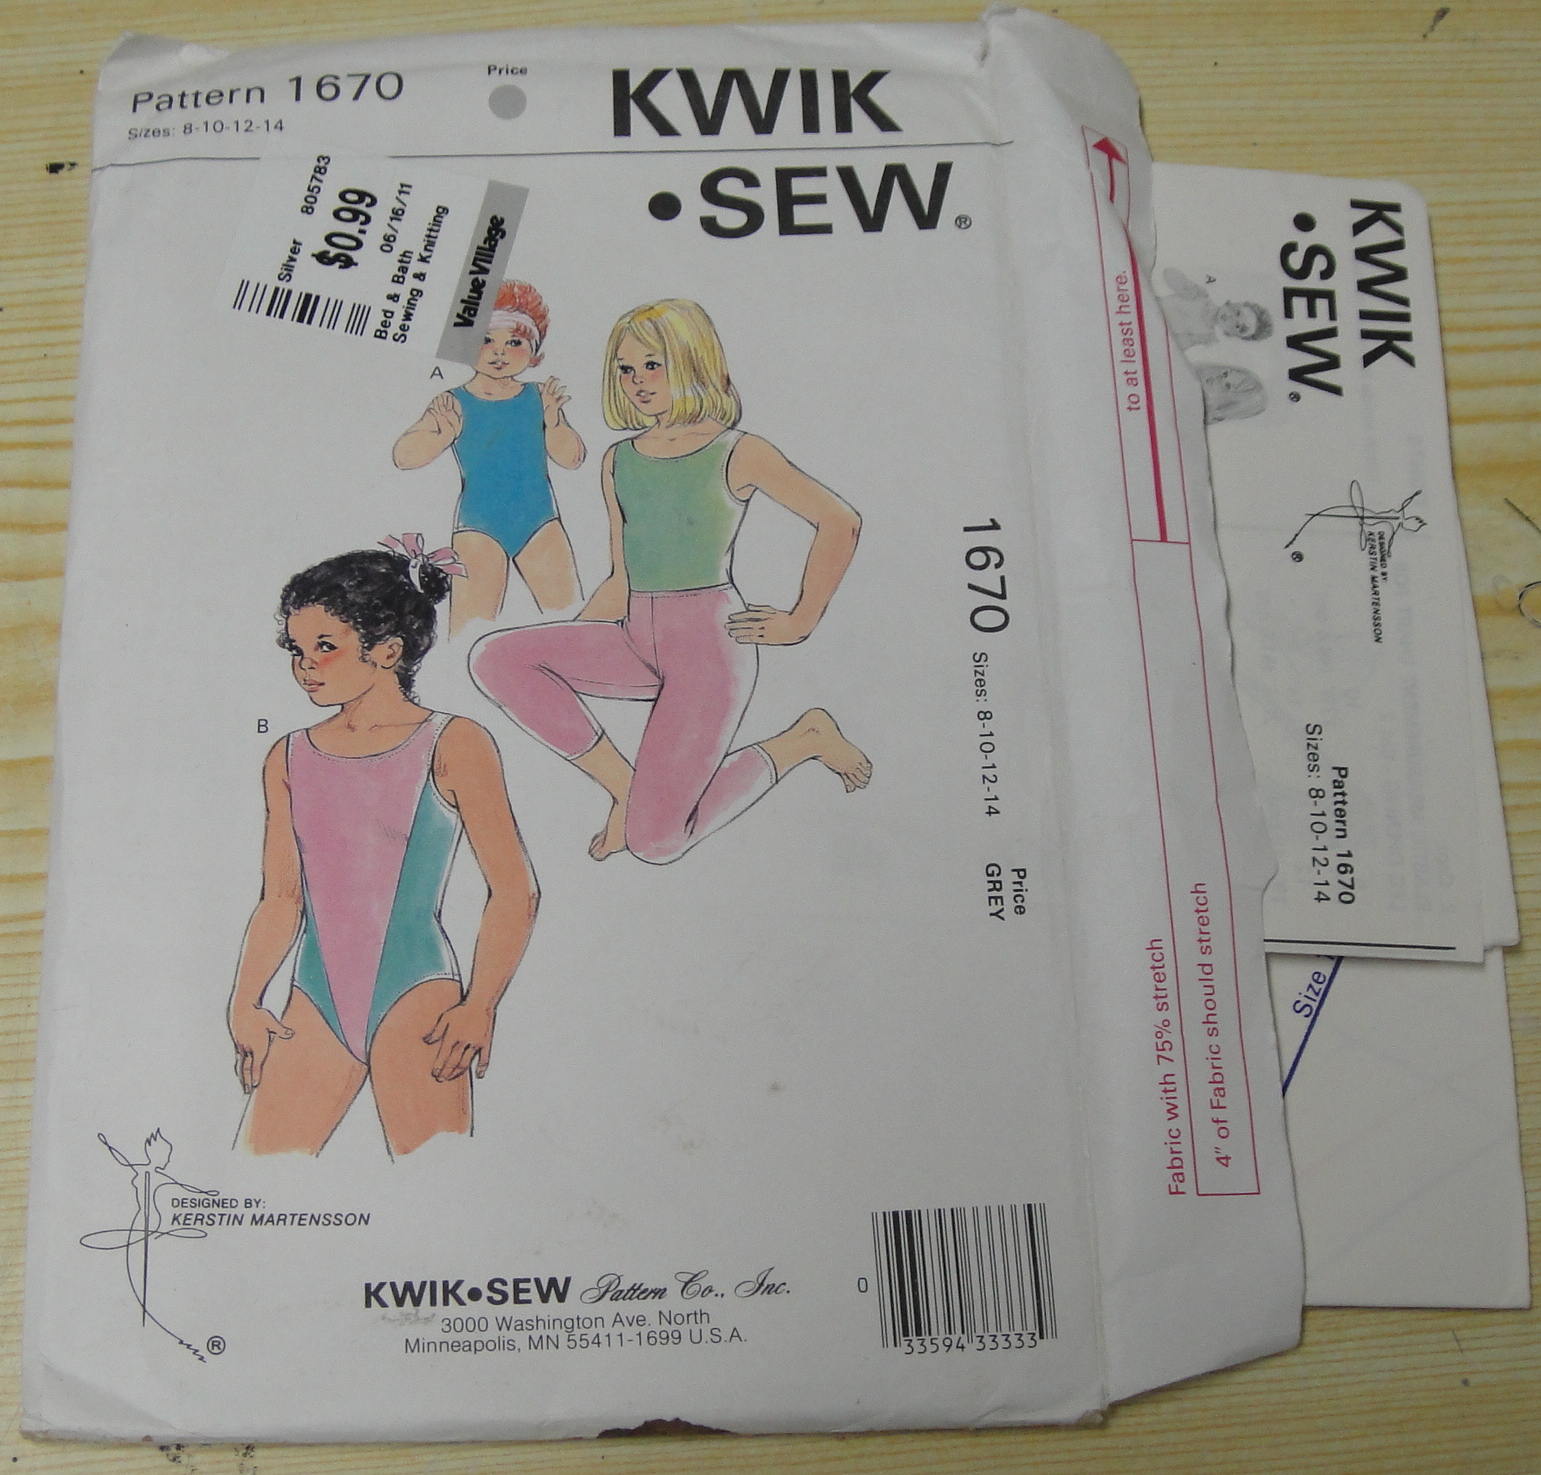
Kwik Sew 1670

Bring on Kwik Sew 1670, again. This pattern has previously been used (abused) to create the pattern for Tyo’s close-fitting shirt, and the leggings have been made before, but this is the first time I’ve made the leotard up as such. It’s the first time, frankly, that I’ve sewn with full-on spandex in all its slippery, stretchy glory.

That's more like it.

First off, I will say, a sleeveless leotard is an insanely easy project. Two pattern pieces, no facings, not even any binding. I started tracing the size 8 (a bit large on Syo but the smallest in my packet) at 8:00 and had the whole thing done before 10:00.

Hmm, swayback appears to run in the family

I followed the Kwik Sew instructions remarkably closely, although I don’t know if I’ll do the same next time. They have you measure out elastic lengths, stitch them into circles, and then stretch the circles to fit the various openings (leg, arms, neck). While the elastic lengths were good, I think I do just as well applying in the flat and eyeballing my stretch ratio. I’ll give it a try next time and let you know…

Triple-stitch zig-zag finish

Anyway, I stitched the entire thing on my Janome, as she has the best stretch-stitches—I’ve come to the conclusion (backed by a wee bit of actual research) that my 3-thread serger really isn’t intended for making seams, just finishing them. I’m not supremely in love with the overlock stitch on the Janome—the seams look a little wavy when you open them up—but it is very stretchy. For applying and then topstitching the elastic, I used the 3-step zig-zag. It’s a bit of a home-finished look, but not a bad once, I think.

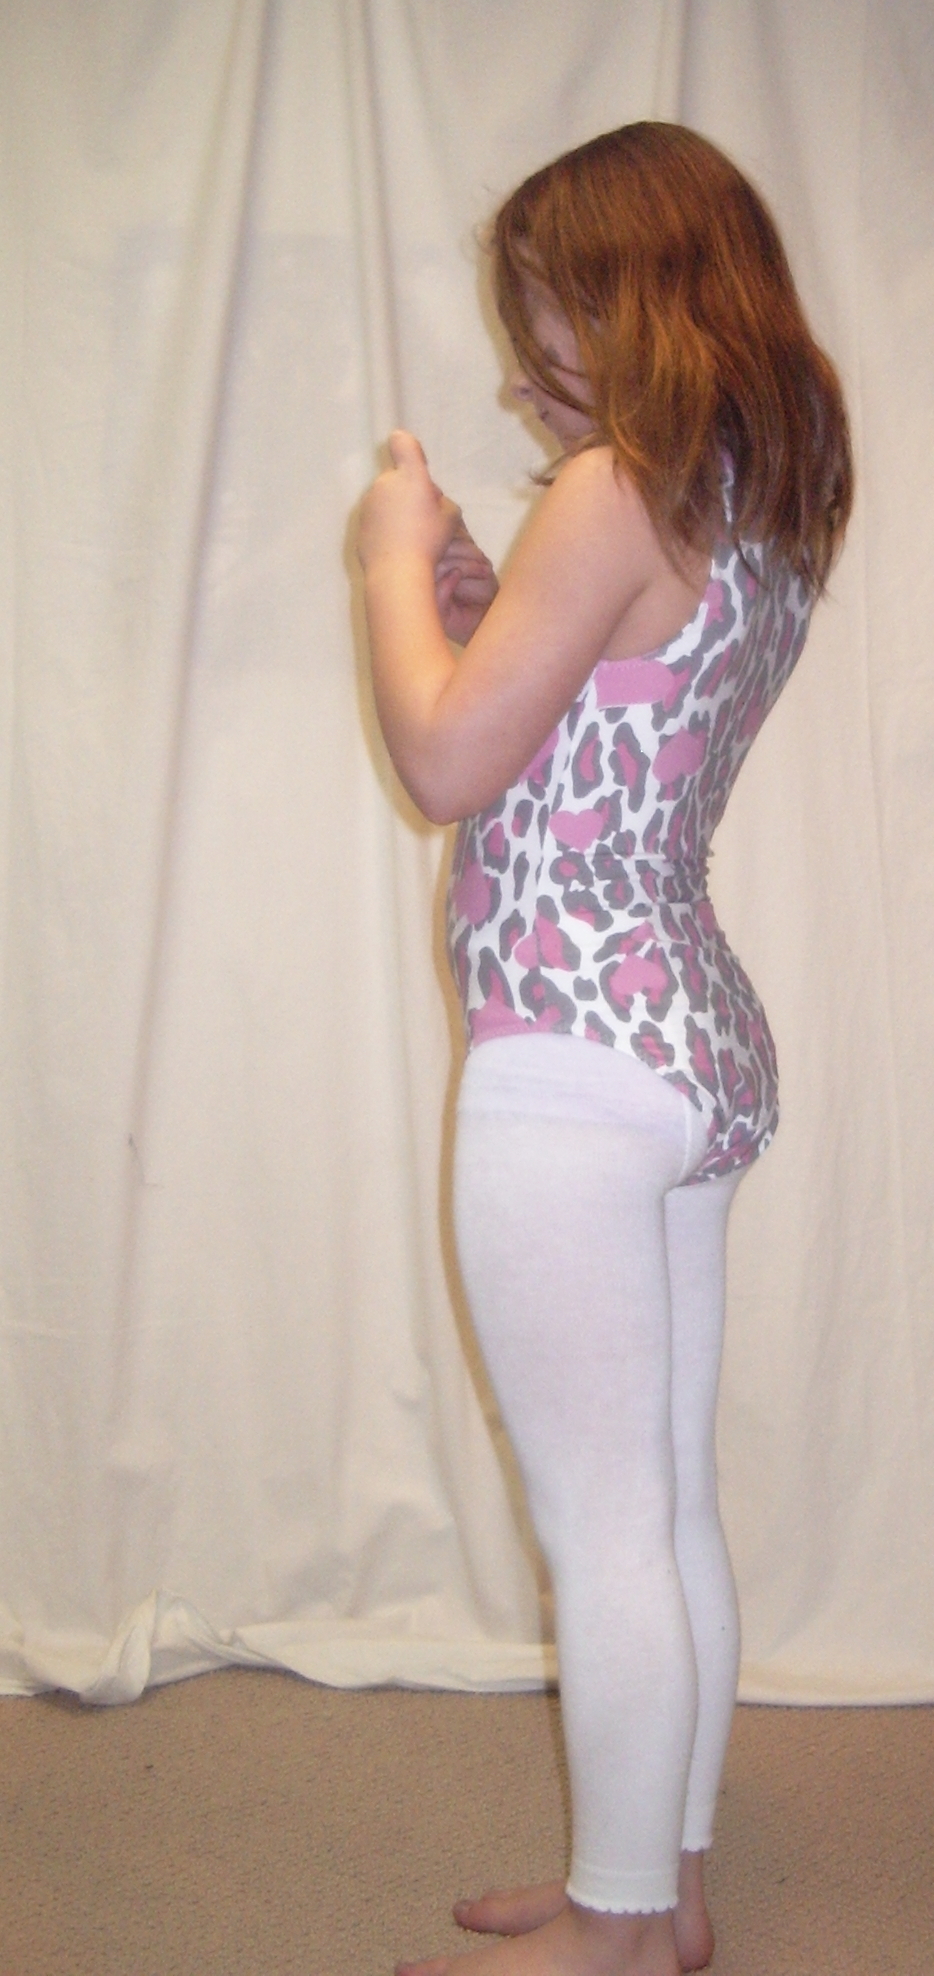
Side view

Some of this may have been motivated by the fact that Syo got her costume for the year-end show the other day. Ah, 1992 called, it wants its clothing back. Black, neon, fishnet, paint-splatter print—an amazing blast from the past. All of which I paid $80 for. And it’s not exactly badly made, and I don’t begrudge the stitcher getting paid a living wage for her time, and she does have a coverstitch, which I don’t… but, frankly, I could’ve done just as well*. And maybe I needed to prove that to myself.

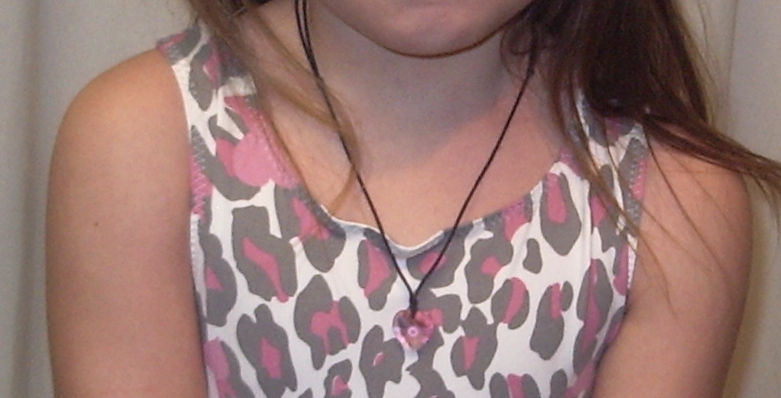
Gappy neckline

Syo is obscenely happy with her new leotard (not to mention how quickly it was made up). It is a smidge large on her, or at least the neck gapes a touch where I didn’t get the elastic pulled quite evenly, but I imagine that will lessen as she grows. As leotards go, it’s pretty modest, high-necked back and front—I’ll be really tempted to scoop out the back a bunch next time. The butt-coverage is decent, but I suspect it will become less so as her body takes up the excess length. The crotch between the legs seems a bit wide to me, but doesn’t appear to bother her. There’s no crotch-lining included, but I might try adding one next time.

The big question, of course, is what to do with the rest of the fabric, since I used approximately 30 cm off one side of the 150-cm wide, 1m length…

*I don’t think I have any ambitions to pursue a career stitching up dance costumes for local troupes, anyway. Well, at least not the kind of semi-mass-production this kind of costuming requires. Now, making someone a fabulous bellydance or flamenco costume… that could be fun.

25 Comments

Filed under Sewing

My Image Again

Young Image

A couple of weeks back, My Image magazine (the new European pattern magazine) sent me an email offer I couldn’t refuse—get the two summer issues FREE paying only shipping. Sold!

I picked up a couple of issues last spring. Now, I have to confess, I have a bit of an issue with pattern magazines. On the one hand, I LOVE them. I trace most of my patterns anyway, so that’s not an issue, and there’s something so exciting about having all those looks to flip through. However, (as with a lot of my pattern purchases, actually) I haven’t made up a whole lot from what I’ve already bought. I bought one issue of Burda, once, and made one pattern from it, which was basically a fail. From the previous two My Image magazines I bought last spring, I made one dress from the Young Image, for my niece (and modified it highly). My most-used pattern magazine is actually an old kids’ issue of Patrones that the Selfish Seamstress (reluctantly) gave me, back when I was blessed to bathe in the reflected light of her glory. I’ve made two patterns from it, and there are a couple more that are on the KIDS WANT list.

No, instead I tend to make variation after variation of TNTs.

One of the awesome things about My Image is that you can actually look at the entire magazine (except the patterns) on their website. The only issue I have there is that they tend to make things up in fabulous and crazy prints, which look great but can make it a touch hard to see what’s actually going on. Although the shots are more clothing-focused than a lot of Burda photos. You can also order the patterns in custom sizes, although the price of a single custom size is more than the entire magazine. Still, I’m tempted to give it a try, since one of the things that puts me off making up new patterns is the annoyance of fitting myself.

Anyway, the magazines arrived in really pretty good time shipping from Europe (about two weeks, which is faster than anything I ordered before Christmas arrived from the States). And, in an attempt to get myself out of my current stall, I resolved to make something. However, the dress I most would like to make from the women’s issue requires a stable knit of the sort I don’t have in stash (a doubleknit would be perfect). And I’m REALLY trying to work from stash right now. To the extent that I’m actually *doing* anything, of course, as opposed to just thinking about it.

A very simple pattern.

More importantly, being too lazy to worry about fitting myself, I selected arguably the most brain-dead easy pattern in the Young Image, Y1201, a racer-back tank tunic/dress with flounces on the bottom, cute ornamental tie-on things at the shoulders, and an odd little collar snugging in the racerback.

A very, very bad photo of the line drawing. Sorry, my scanner is being a pain today.

My children being not so much the flouncy types, I left these off. Being lazy, I left off the tie-thingies, too. I did motivate myself to make the little cuff. Go me!

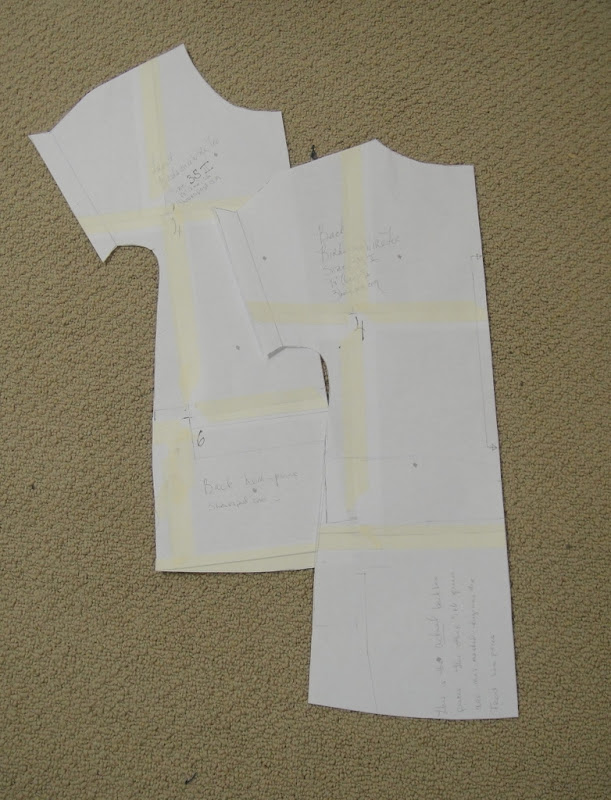
On first  impressions, I traced off the 116. The chest measurement is the same as Syo’s (or at least, the one I recorded for Syo last summer—she’s probably grown a bit but she also likes her clothes more fitted than tunicky). The “dress length” isn’t very long (it’s supposed to have a flounce at the bottom) while the shirt length ended right at the waist. I thought about cutting mid way between the two lengths, but ended up just going with the longer length, which worked out in the end. My Image pattern sheets are a dream to trace—there’s only 16 patterns, four to each sheet, and each pattern is in its own colour. Easy. The hardest part was remembering to add seam allowance to the sides, shoulders, and hem, but not to the neckline and armscye where I would be binding the edge.

Wait—that’s not Syo!

For fabric, I dug through the stash (which despite being rather too big never has exactly what you’re looking for) and picked a cream rib-knit, originally purchased because it was on clearance and a good colour and cotton and I must’ve forgotten how much I don’t like rib-knits for general wear.

The instructions have you cut the binding for the neck and arm-holes on the bias, which I think is fairly silly for a knit, so I just cut mine on the cross-grain. However, this design has enough ease you could probably do it in a woven, in which case the bias binding would make sense.

I have to say, although I am overall quite charmed with the My Image product, the English-language translation remains pretty, um, amusing. What was actually worse than the odd word choices is that the language isn’t entirely consistent. The bindings are referred to in various places as “yokes” and “edging”. One or the other would be figure-out-able, but the inconsistency makes it tricky. Or as tricky as an insanely simple project like this can be. I can’t tell you anything more about the instructions because I abandoned them at that point.

My terrible binding. And my goofy daughter, who will probably never forgive me for posting this shot.

I used my dumbed-down version of Sherry’s excellent binding technique, which is to say that I do it like her except I make my bands extra-wide to start with, don’t overlock the edge, and just trim down the extra close to the stitching on the inside. You have to stretch rib-knit binding an awful lot to get it to end up smooth. I figured that out eventually.

Back “cuff”

They give you dimensions, rather than pattern-pieces, for the rectangular pieces like the little back cuff,   which I approve of thoroughly. That being said, I’m not entirely sure how the cuff was supposed to be put together. I settled for seaming the long edges, turning inside out, and then stitching the ends together and turning that to the inside of the loop before threading it into place and finishing the side-seams. My first attempt seemed a little too wide, so I narrowed it some mmore, and I’m now pretty happy with it although I think it could be a little shorter, too. I didn’t add any seam allowances to this piece, but then I did use 1cm seams, so if seam allowances were included, they may have been 1.5 cm. I dunno.

Full back

Anyway, once I was finished stitching it all up, I realized that the use of a rib-knit and the omission of all the frilly bits had moved it firmly into “wifebeater”*, or rather boybeater, territory. And the loose, tunic style of the original was not at all appropriate for a boybeater. I could tell from looking, however, that the size and length would be just about perfect for Tyo’s tastes.

Woo!

I was a little concerned that the armscye would be too high, but Tyo assures me it’s perfectly comfortable. And she hasn’t taken it off since I gave it to her, so it seems to be a hit.

As for the puppy hat, I have no idea.

*It occurs to me that this is probably one of those regional word usage things. A wifebeater is a close-fitting, usually rib-knit men’s undershirt, evoking the stereotypical image of the white-trash male sitting his trailer drinking a beer while watching the game and yelling at his wife. By extension, when a girl wears one, it is called a boybeater. Manbeater might be more appropriate, arguably.

27 Comments

Filed under Sewing

Where’s Waldo (Jr)

Tyo Looks Cute (in my tights and shoes...)

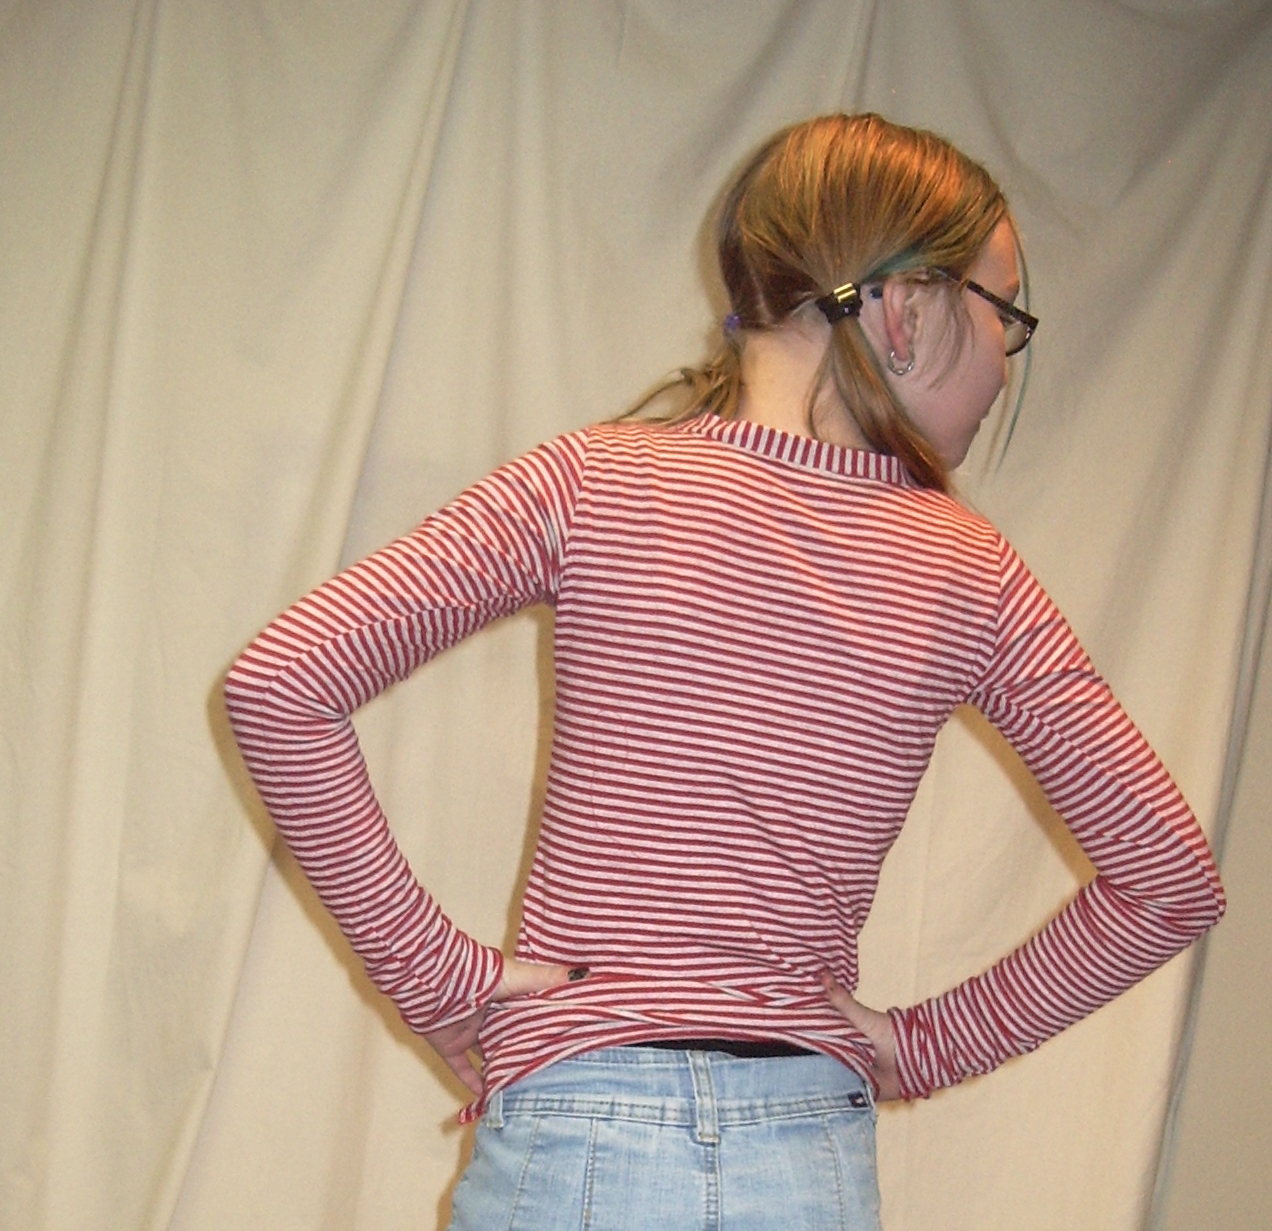
As I procrastinated my way through last weekend (as is my wont), I asked Tyo if she’d like a shirt from the remaining bits of my red and grey striped fabric. As I already have two shirts out of it, I thought a third might be overkill. Tyo was amenable, so I cut out another version of her fitted knit top.

I actually sewed this version with a straight stitch, then finished the edges on the serger. I may come to regret that, but it’s an awfully stable knit.

V-neck

I did an unusually good job of measuring the neckline for the neck-band (on my usual scooped necks I just sort of cut an approximate neckband and stretch as I go, but you have to put V-necks on in the round, as far as I can tell, so a little precision goes a long way. I also did one small but obvious thing, I made a tiny snip in the point of the V (before I started attaching the neckband) so that the seam-allowance can fold back. And, miraculously, I ended up with my first-ever, completely-non-puckered V-neck finish! Who knew? (Yes, I know, everyone who ever bothered to read up on inserting V-neck bands knew. We’ve gone over the stubborn-have-to-make-mistakes-for-myself part, haven’t we?)

Back View

Frankly, I was ridiculously proud of myself when I finished this top.

And then Tyo tried it on.

Well, remember I mentioned this knit has very little stretch? I mean, it makes it quite nice to sew up (evil rolling tendencies aside), and I like a firm knit. But this pattern which fit Tyo perfectly in the loose, giving jersey of the white version… is really, really snug. Even the shoulders are too narrow, although the part that’s bugging her is the sleeves. So we’ve been wrangling all week over whether she can cut the sleeves short, or whether she should just hand it down to Syo. I’m leaning towards the latter, preferring not to have my new creation hacked into, especially when there would’ve been a lot more usable fabric left if I’d decided to cut short sleeves from the beginning. Probably enough enough for a shirt for Tyo. Grroar. Of course, now that the pictures are taken, she’s still wearing it and not complaining… we’ll see.

Not sure how much sewing I’ll get up to over the weekend, but here’s hoping.

Front view

14 Comments

Filed under Sewing

Birds on a Wire

Birds on a Wire Tee

So I’ve been promising (well, promising Steph) pictures of this version for ages. I’m not feeling very photogenic lately (never even mind the camera issues)… and my tripod is missing in action, and I’ve been sick, and… well, motivation hasn’t outweighed laziness, is I guess the basic way to put it.

This is, if you don’t instantly recognize it, a dead knockoff of Steph’s original version of her Blank Canvas Tee pattern, including using her very own Bird on a Wire fabric. Which, I feel I should disclose, she sent me as a gift for agreeing to help test the pattern (and advising on electronic drafting, although I turned out to be absolutely useless for that in the end :P). Since I drew her up a little technical drawing for the shirt, I almost feel like I earned it, although maybe I won’t admit how little time that sketch took…

Anyway, thank you, Steph, for both fabric and pattern! 🙂

This is the same pattern I made up before, except I scooped out the neck a couple of inches more—Steph and I share a love of scoop-necks. The length, you’ll recall, is extended, too… I don’t have a long body, but I wear my pants low, so I need my shirts long to cover them. I gather Steph has since tweaked the pattern to make the shoulders a little smaller, something I may follow suit in. The first version I made fit perfectly in the shoulders, but this version, in a knit with a bit more give, is a little large, and I have broad shoulders to begin with.

It’s a good thing I don’t have any navy blue knits in stash, though, or I’d be in the midst of whipping up yet another version, based on Steph’s first official pattern hack—a cute sweetheart-neckline, empire-waist, sailor-buttoned version.

This is my first time sewing with a Spoonflower knit (this is their organic cotton, if memory serves). It’s a nice weight and feels lovely. It does give quite a bit in stitching—I should’ve stabilized the shoulder seams—and the black print has grayed quite a bit even after only a couple of trips through the wash. That being said, you get your own freakin’ custom print. So, er, it’s probably still worth it. But maybe avoid throwing it in the dryer. Be a better person than I am.

19 Comments

Filed under Sewing

Quantum Bralettes

Mini bra (and pattern)

Quantum: noun, the smallest possible amount which retains the properties of the substance in question.

Tyo has reached that age.

Despite the fact that she still has very little worth mentioning to put in them (thankfully!), she’s decided she wants to wear bras. She has one fully-formed, underwired, lightly padded AA monstrosity, and a few more sports-bra-like things, only one of which is satisfactory.

So several times over the last few months, she’s let me know that more, of the mommy-made variety, would be extremely welcome.

Back view

And, considering that they use teeny little scraps, I could hardly refuse. Although I should finalize the measurements for the straps so that I don’t have to call her down to fit them every time.

The pattern is a single piece with a seam at centre back, although I can cut the back portion separately if the pieces are extra small (as they were for this pair.) I made it up, loosely based (mostly for size) on a RTW one that she likes. The edges are finished with fold-over elastic, zig-zagged down in this case although other stretchy stitches also work well. The elastic is a little more stiff than I might like, but she seems to find them comfy.

And now Syo (who I’ll remind you is eight) wants some.

*headdesk*

56 Comments

Filed under Sewing

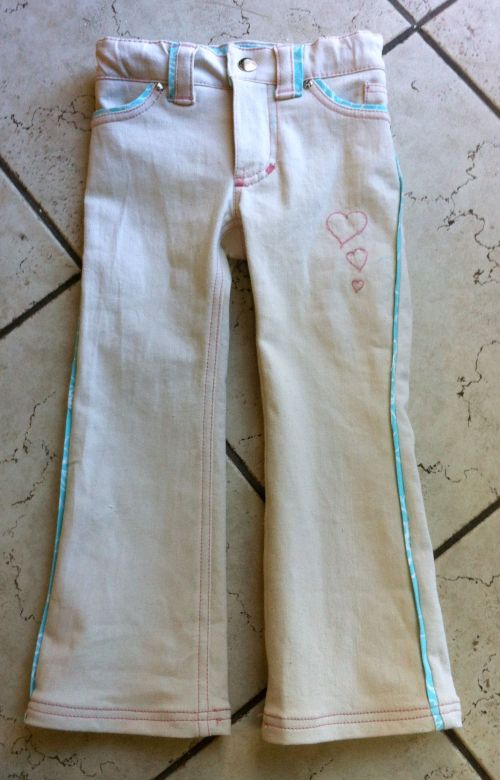
The littlest jeans… EVER.

teensy tiny jeans

I didn’t sew for my kids when they were little. I think I made one sundress-type-thingy for Tyo when she was two, and as sundress-thingies go, it was not impressive. So sewing in these extremely small sizes is a bit new to me.

But, a few weeks before Christmas, my Stylish Sister-in-Law happened to mention that she has a terrible time finding pants for her youngest daughter, who is one of those waifish children with the waist-size of a one-year-old and the leg-length of, well, at least a two year old. (Seriously, child is 3.5 years right now and hasn’t broken 30 lbs. Maybe not even 25. I’m pretty sure Tyo was that weight at a year.)
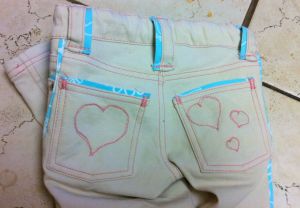
Pocketses

Now, unfortunately, this conversation didn’t take place enough before Christmas that I could actually put together a pair of very little (but relatively long) jeans as a present for the Waif. But now that I’m home and seeking fresh avenues for procrastination, it seemed like the perfect project.

Also, I got to try an experiment—how many sewing machines can you use on one pair of jeans?

The answer, at the moment, is three, plus the serger. If that weren’t the absolute maximum number of machines I can have set up at any one time, it might well have been more.I did the main construction on my Featherweight, and the topstitching and embroidery on the “new” Pfaff 360. The upside of using the Pfaff for the topstitching (and it has an excellent straight stitch, even with no straight-stitch plate) is that I can switch it to zig-zags for the bar-tacks without having to re-thread anything. The downside of this is that the tension settings for a straight stitch with topstitching thread (very high) vs. a zig-zag stitch with topstitchings thread (much lower) are very different, and I kept forgetting to switch back. So I had to re-stitch several areas, and wasted a lot of precious topstitching thread in the process. At least it’s easy to pick out when there’s huge loops on the back because the tension was too low. I used the White for a regular-thread zig-zag to attach the front yoke to the front pocket lining, since that was easier than re-threading the Pfaff (or I told myself it was…). If I’d gone with applique embelishment, I would probably have used the White for that, too. (Incidentally, while I still love my modern, basic Janome, it’s so very, very nice to have machines that can handle the tension required for topstitching through denim.)

Now, kids jeans are fun. Not so much because they’re little (although that doesn’t hurt), but because you can use the most whimsical, off-the-wall details. And jeans, let’s face it, are all about the details. The basic construction is both monotonous and intermittently fiddly—adding the details is where the fun comes in.
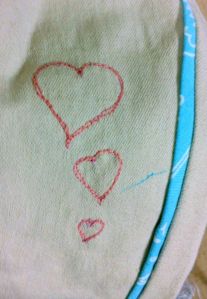
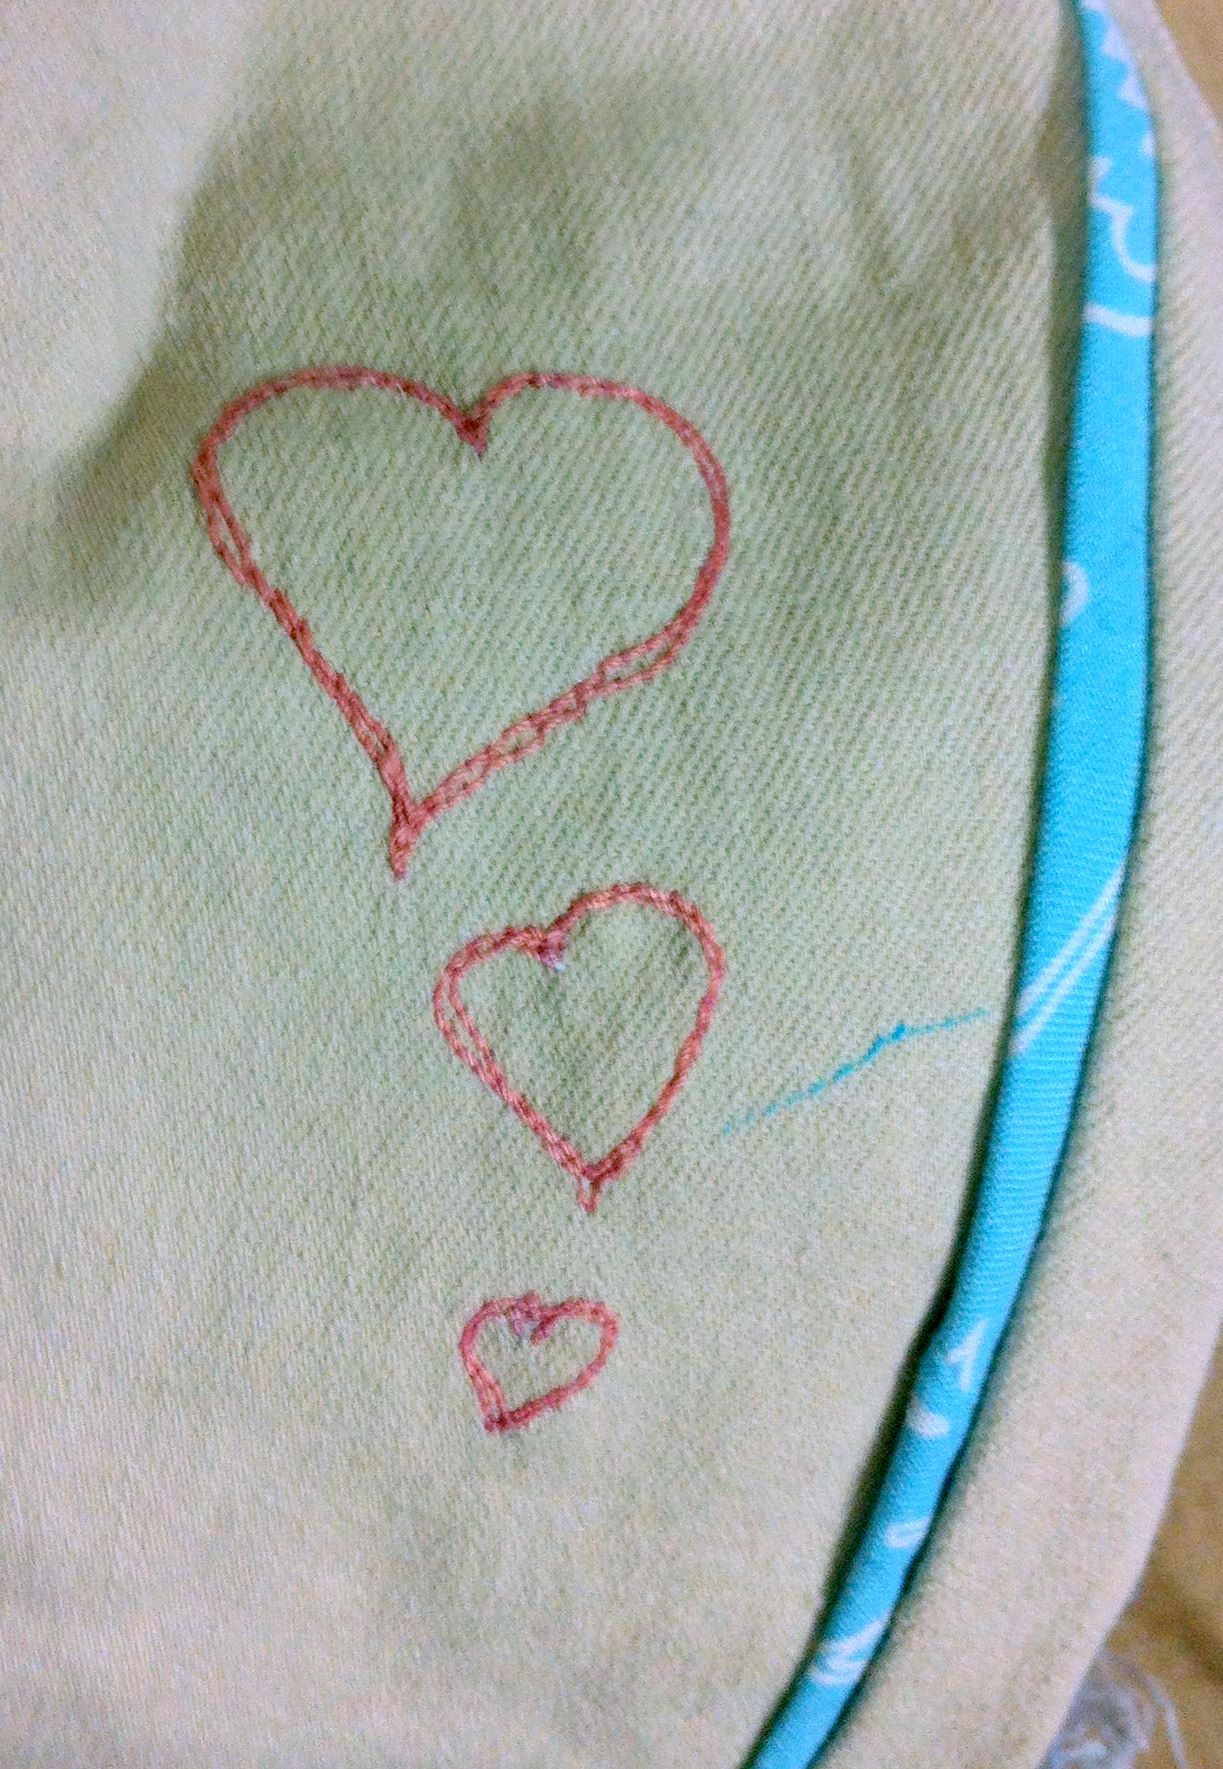
Embroidered hearts

After some experimentation, I settled on free-motion embroidery and flat “piping” for this particular pair.  I opted to use the remnant of fabric from my Cream Spice Capris of last summer, since neither of my children seem particularly intrigued by it and I won’t be the one who has to keep them clean.*

The pattern, as always, is Jalie 2908. I cannot explain to you how awesome it is that the Jalie patterns come in umpteen sizes. For the Waif, I traced off the size 2 (F, the smallest size), but used the size 3 (G) length. I then re-checked my measurements and realized that the hip measurement I had for her (49 cm) is well below the hip-size of the 2 (56 cm), even allowing for any growth she might have done in the four months or so since I measured her. (However, as I discovered sewing my first pair of jeans for Tyo, you do want to go a bit big for the kids sizes in this pattern, if only so they don’t outgrow them in five minutes. Although again, I’m curious if this is the same in the really little patterns or if they’re drafted with more ease. The picture of the girl on the pattern envelope certainly looks like her jeans have a lot more ease than the adult version.) So I took 1 cm lengthwise tucks out of the back and front pattern pieces (avoiding the pockets to make my life easier), which should reduce the width by 4 cm total, a reasonable amount.  I forgot to narrow the back pockets by the same amount, which did come bite me in the ass later, but we’ll get to that.

To change things up,

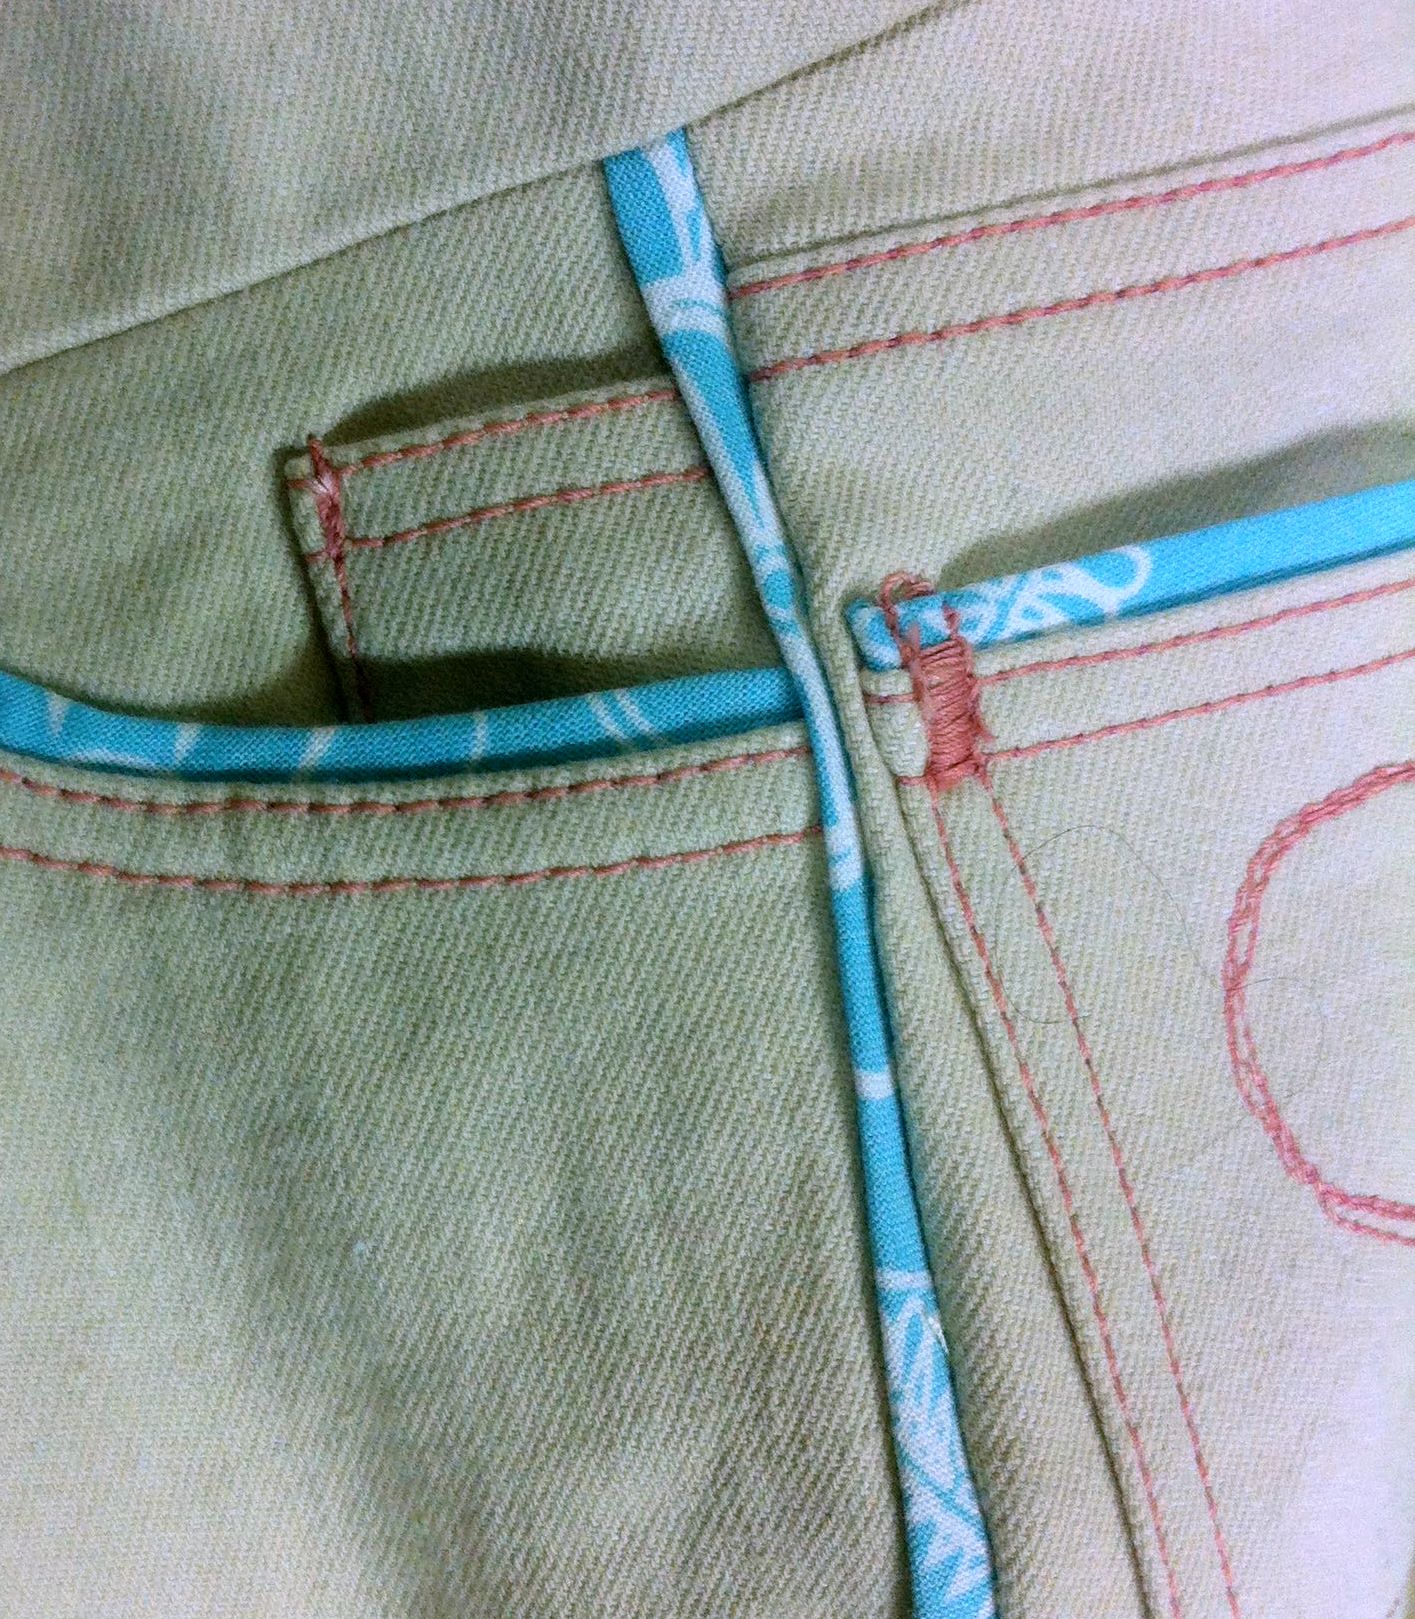
After some experimentation and a lot of trial stitching, I hit on my strategy for embellishment. For the piping, I made some bias roughly 3 cm wide and folded it in half. I tested adding a cord, but decided I liked a flat, soft insert better—a little more flexible for the small niece, although it is a bit trickier to get even and it comes out a little wide. I played around with applique, but wasn’t satisfied with the look with my particular thread and fabric colours. Maybe when I make a pair for Waif’s older sister, Fyon. Instead, I went with some freehand embroidery hearts. I outlined each heart once or twice, for a sketchy, crayon-drawing sort of look. Also, that’s about all I’m capable of for freehand embroidery. Not my forte (although I’m sure hooping the fabric and doing the embroidery first would probably improve things at least somewhat. As it was, I ironed wash-away stabilizer onto the back of the denim, used the same little foot and settings as my mending extravaganza, and went to town.

Now here’s the thing. I could have gone with a more precise design (perhaps not hearts) and created more-computer-quality-looking embroidery. Personally, I rather like the freehand/wobbly look (and there are plenty of jeans out there that have machined versions of this look). But it’s one of those things that could, in the right eyes, just make these cute little jeans look tacky and home-made. Not so much because they’re on jeans, but because they’re on homemade jeans. I’m choosing to reject this opinion; hopefully Stylish will, too.
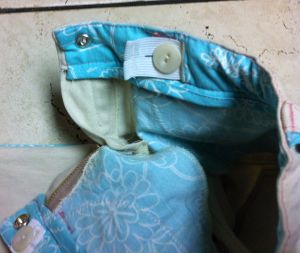
Waistband inside with buttonhole elastic.

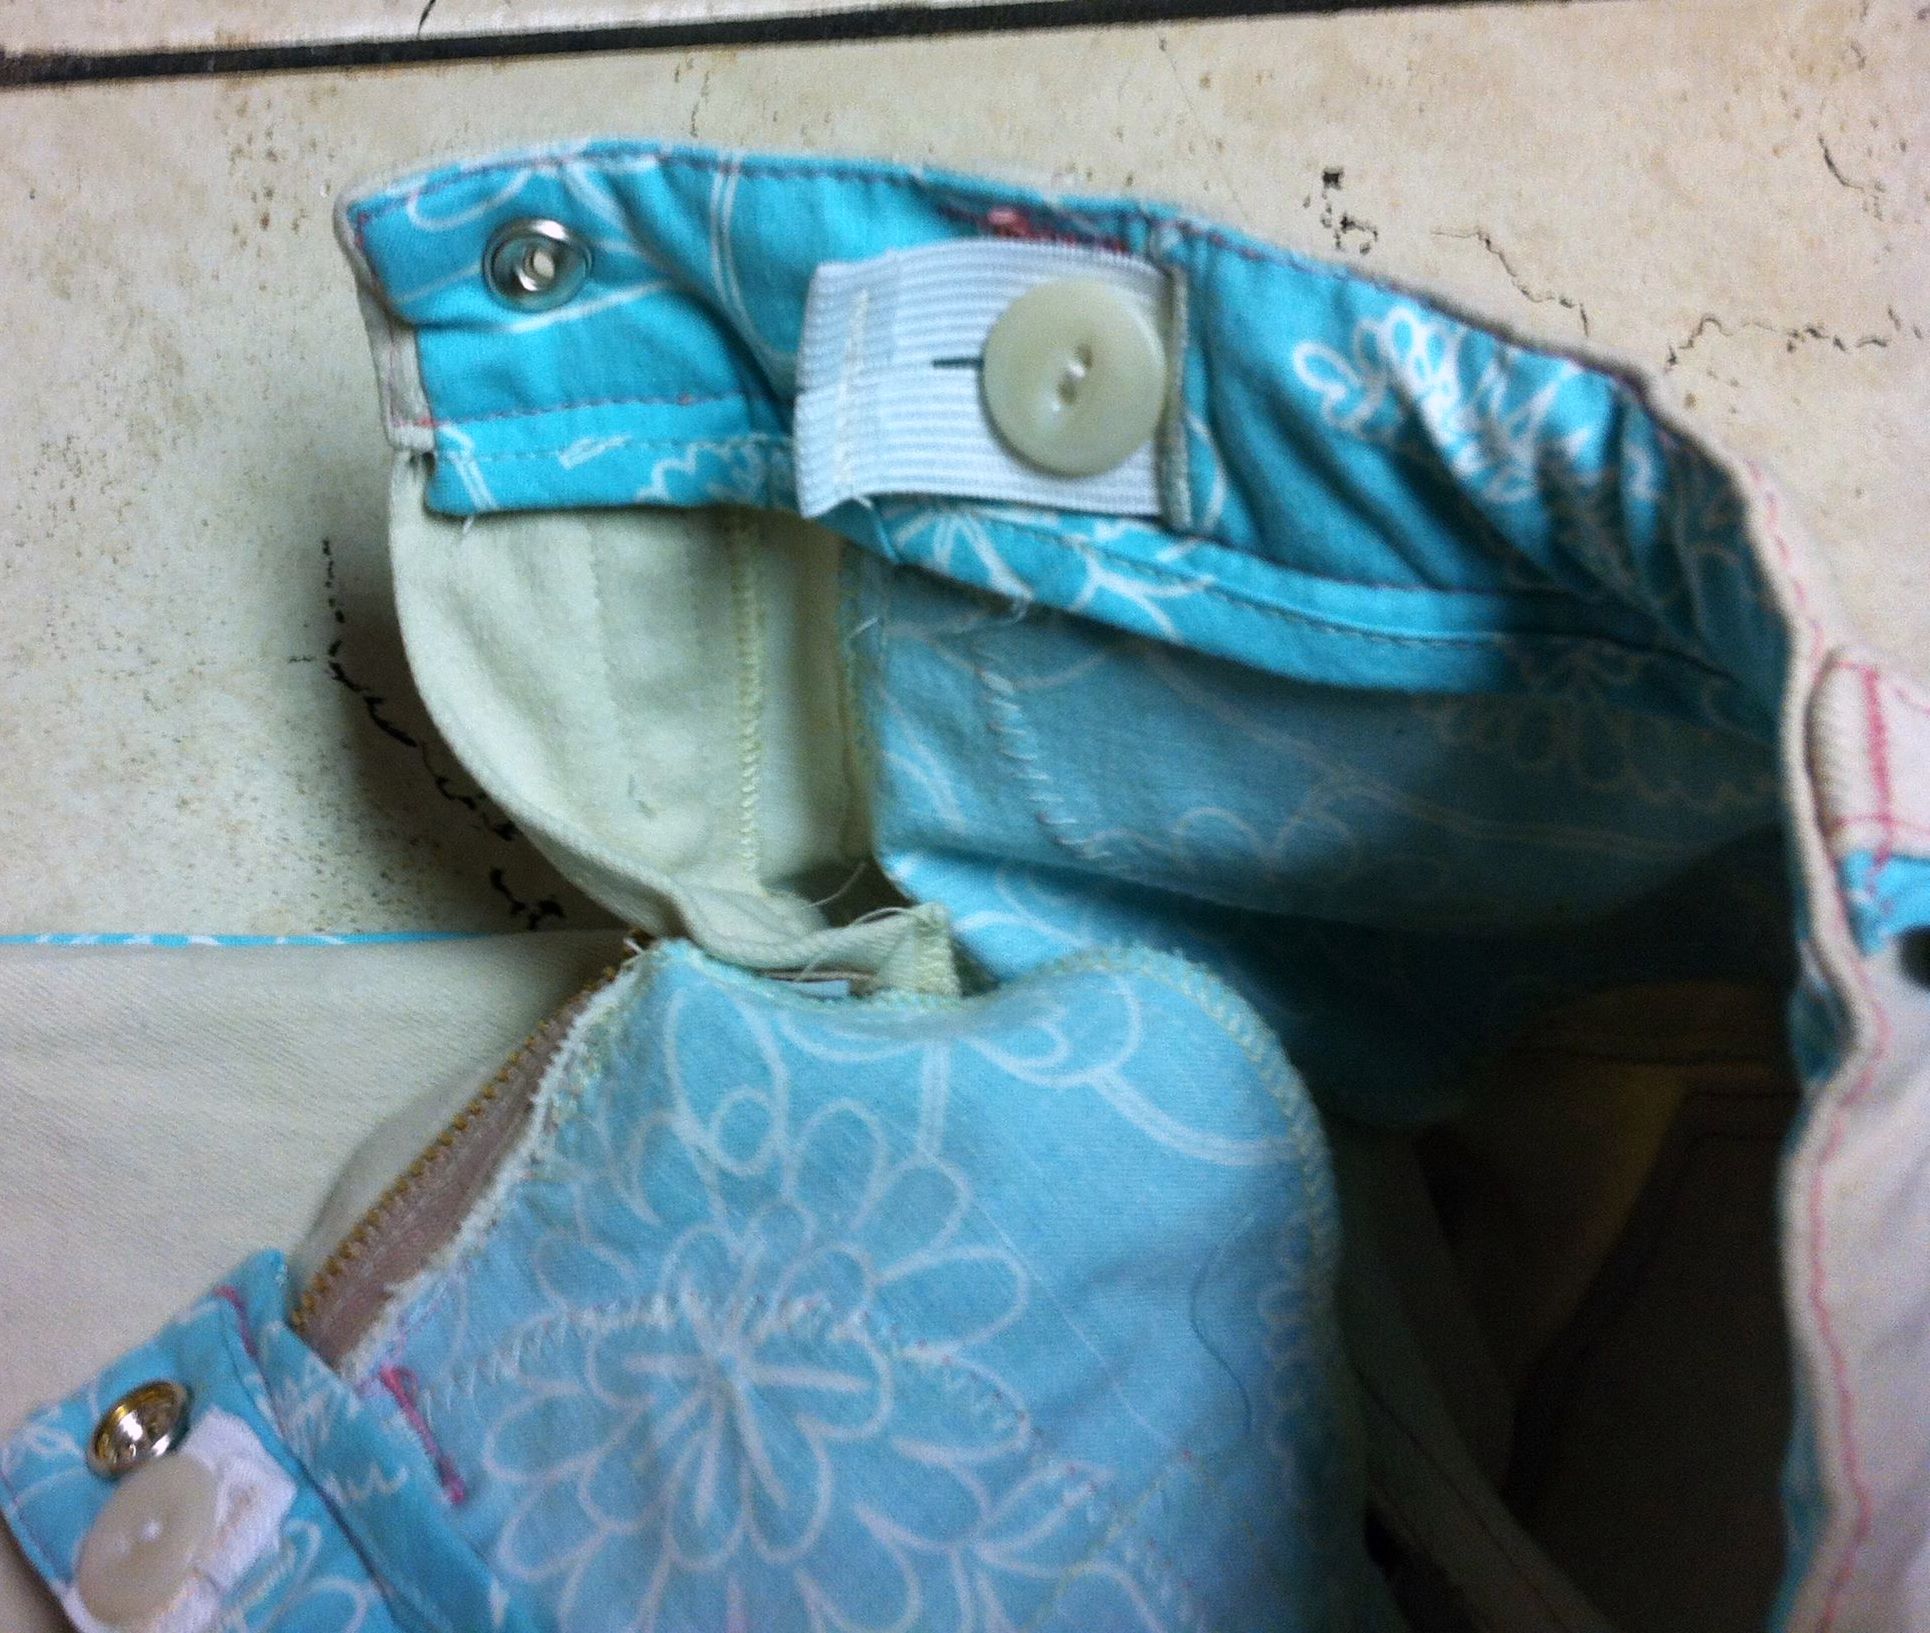
I made some other alterations that are kinda standard at this point for making 2908 kids’ jeans. I curved in the yoke a bit more (easy since I was already putting a tuck in it), although not as much as I often do as Waif’s bottom is considerably less curvaceous than, say, Tyo’s. (She seems  to take after her father in the that department, as Stylish, her mother, is the embodiment of what I think Tyo’s going to look like when she grows up. At least from the neck down.). I cut the waistband in long, narrow pieces rather than short, wide pieces with a back seam, and used my pocketing/piping fabric for the inner facing. This reduces bulk, but mostly I just like the flash of colour it adds to the inside. I bound the bottom of the band with more bias tape, as that’s every so much easier than trying to fold it under and have things come out nicely. And, I added buttonholes to insert adjustable buttonhole elastic, easily the best invention for kids’ pants in the last 20 years. (Tyo is going to have such a hard time finding pants that fit once she outgrows the ones that come with buttonhole elastic)

Excessively tiny change pocket. The blue smudges on the fly are my wash-away marker, and will wash out.

I remembered this time to add a change-pocket, although given the teensy-weensy size of the jeans it’s strictly decorative. I opted for piping only along the top of the rear pockets, and did a much better job of finishing the edges of it this time—you need to fold the ends over at a 45° angle so that once everything’s in place and stitched down there’s a smooth edge and no joogly bits sticking up. As per usual, I positioned my pockets after stitching the CB seam, so they’d be centred around the topstitching rather than around the rear seam itself.

However.

Pocket colliding with side-seam. Oopsie.

Remember how I said I didn’t shrink the pockets when I narrowed the red of the pants?

This, combined with the general tininess of the jeans, means once the outseam was all stitched up, the 1-cm (or less) offset on the one side was enough to put the left pocket right against the side-seam, while there’s about 1 cm of space between pocket and side-seam on the right.

Oops.

Erm.

I am not going to try to fix this, even if I could. But note to self—when smallening a pattern, smallen** the pockets, too. Even when you’re lazy.

Final details. I decided to try a heavy-duty snap for the front closure, as several of the children of my acquaintance seem to prefer these (let’s face it, the traditional jeans fly with button for small and even medium-sized kids is not really a good idea). I always find snap-insertion a bit haphazard, and I’m a little worried it will pop open, but I suppose time will tell.

As I did on the Cream Spice Capris, I added piping to the edge of the belt-loops, just to look pretty.

And as that’s probably way more than ANYONE wants to read about a pair of jeans for a preschooler, I’ll sign off.

*Lest you accuse me of cruelty to my sister-in-law, I’ll point out that I am making it for my younger niece, so she won’t have to try to keep it unstained through two whole children. Also, she dresses them in white pants all the time, so really she’s asking for it. But then she’s a lot more together on the whole “homemaking” thing than I am…

**I can make up words if I want to.

50 Comments

Filed under Sewing

The Procrastination Tee

Steph

I’m supposed to be sewing my husband’s christmas coat this weekend. It’s amazing what you can do when you’re procrastinating…

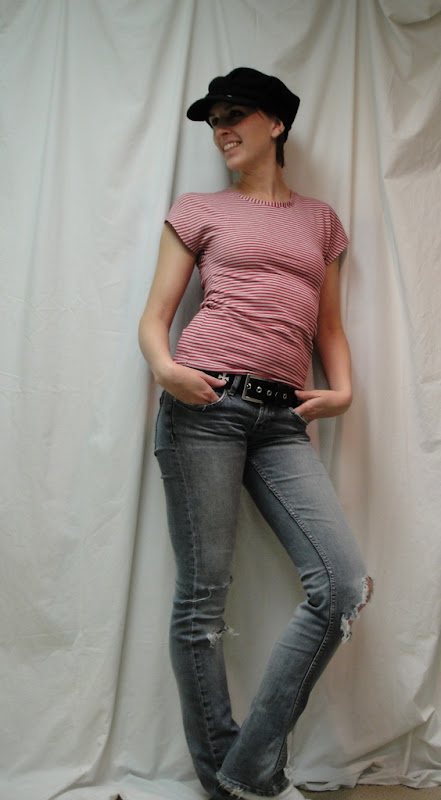
This is not, obviously, the Bird on a Wire fabric. Seeing as Spoonflower knits are like $27/m, I figured a wearable muslin was in order. This stripey stuff (formerly seen in the Where’s Waldo shirt) was like $3/m. That works.

Pattern: lengthened

I made only one change to Steph’s pattern (which I have to admit, after the Zoe coat fitting and the hack ‘n slash I’ve been doing on the Lekala pattern for my husband, was a BIG relief): I added a crapload of length to the bottom. Steph drafted for 3″ below the waist… 3″ below my waist is still an inch or two above my pants. Those of you who don’t wear your pants indecently low won’t have this issue. 😉 I also smoothed the curve of the back piece in the hip region—I have no idea if it’s better this way, I just liked the look.

So, fit? The shoulders fit. Perfectly. Like a dream. OMG. For the record, I did not once supply Steph with my shoulder measurement.

Back view

In fact, the fit of the whole thing is pretty fabulous. As promised, it’s snug through the bust with a teensy bit of ease in the midriff, just enough to not feel like a stuffed sausage, without feeling odd about the difference between the bust-ease and the waist-ease. Now, just for the record, I made the 35|| size, that’s 35″ bust, rectangular shape. Steph recommends it for those with 8″ or less difference between bust and waist.

Cool Cat

Also for the record, I myself have a 33″ bust and  a 5″ difference with my waist on a good day. /sigh. This is not a very stretchy fabric, but if you’re an actual 35″-bust you probably want to make sure you use a fabric with at least a modest amount of give. There’s a fairly significant amount of negative ease at the bust, which is actually the narrowest point on the pattern. Bonus for me, it meant I didn’t need to adjust the waist shaping for my short waist!

I think the only thing I’ll change next time is lowering the neck-scoop a little more. Like an inch or two. It’s a bit high for my taste, and maybe a bit higher than in the version Steph drafted for herself. My neck-binding is standing up a bit, but I think that has everything to do with the fabric not stretching enough to make a nice, flat binding.
All inall? Good job, Steph! And thank you :).

(Oh, and sorry for the hat, I had an afternoon shower and no way was I doing my hair again…)

Should you for some reason require more random photos of me goofing around in a stripey T-shirt, they can be found here. I tried to embed the slideshow, but WordPress does not seem to want to play nice with Picasa.

ETA: The pattern is, of course, the Bird on a Wire Tee by Steph of 3 Hours Past the Edge of the World. I’ve linked it before but obviously I should include it in the main post here!

30 Comments

Filed under Sewing

The Lotus Lady

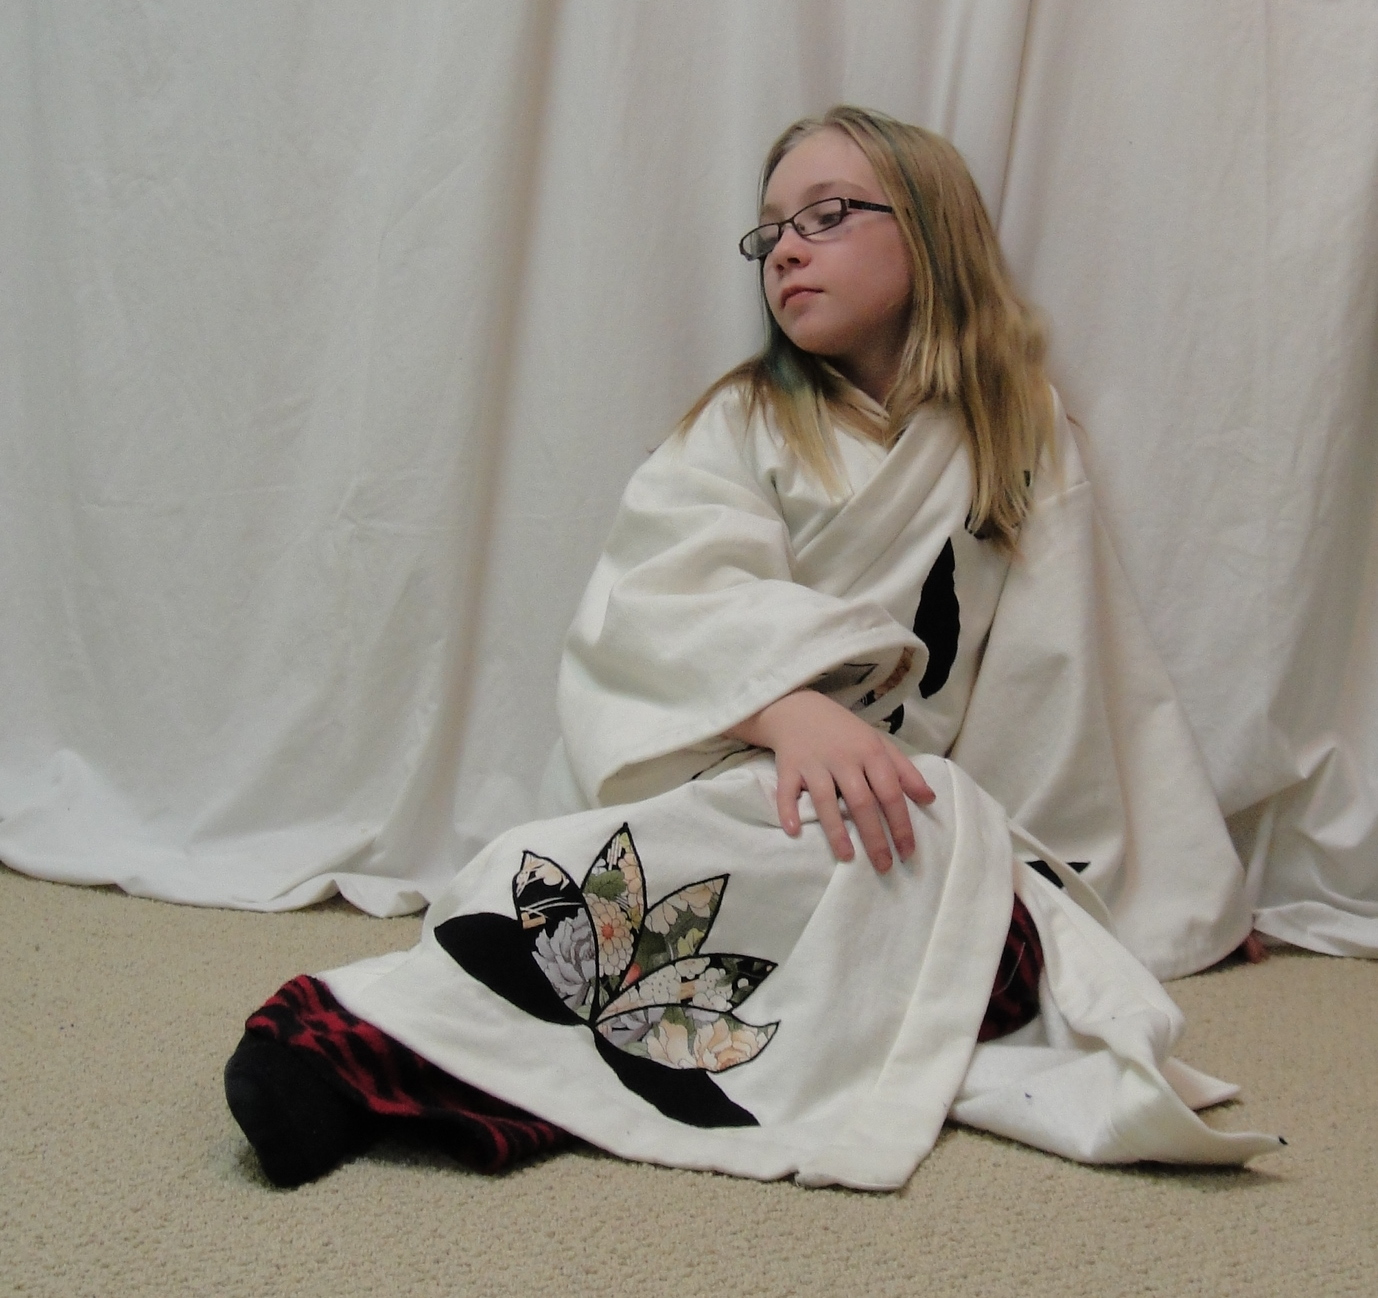
So serene... so contemplative...

Perhaps “Lotus Lass” would be more apt, but it just doesn’t have the rhythm, y’know?

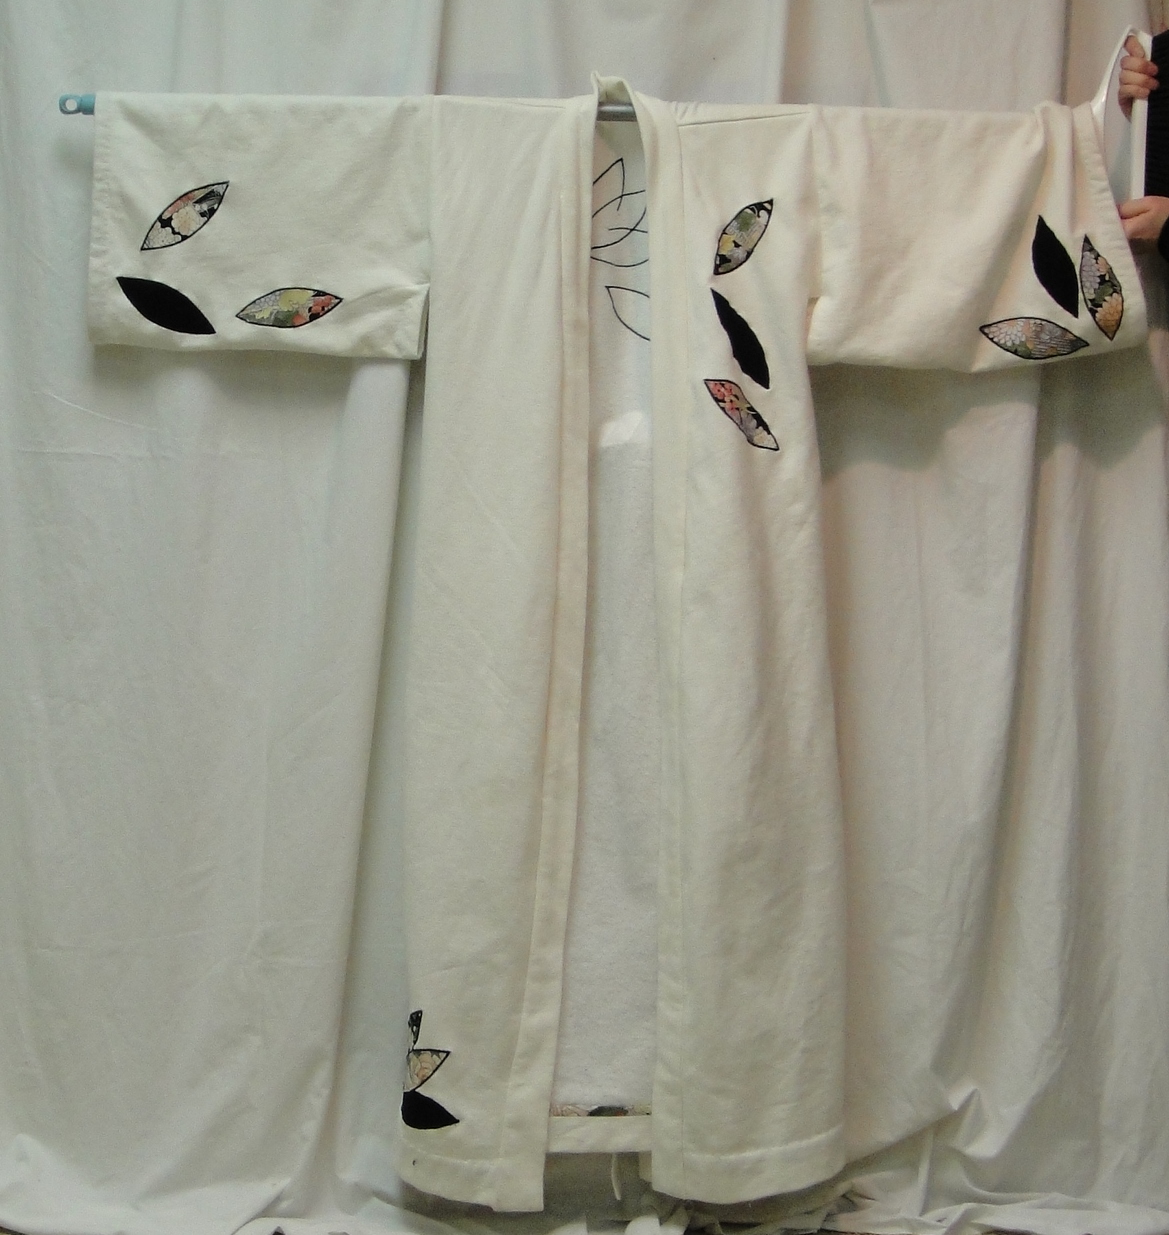
Kimono front. Pay no attention to the broom handle sticking out of the sleeve...

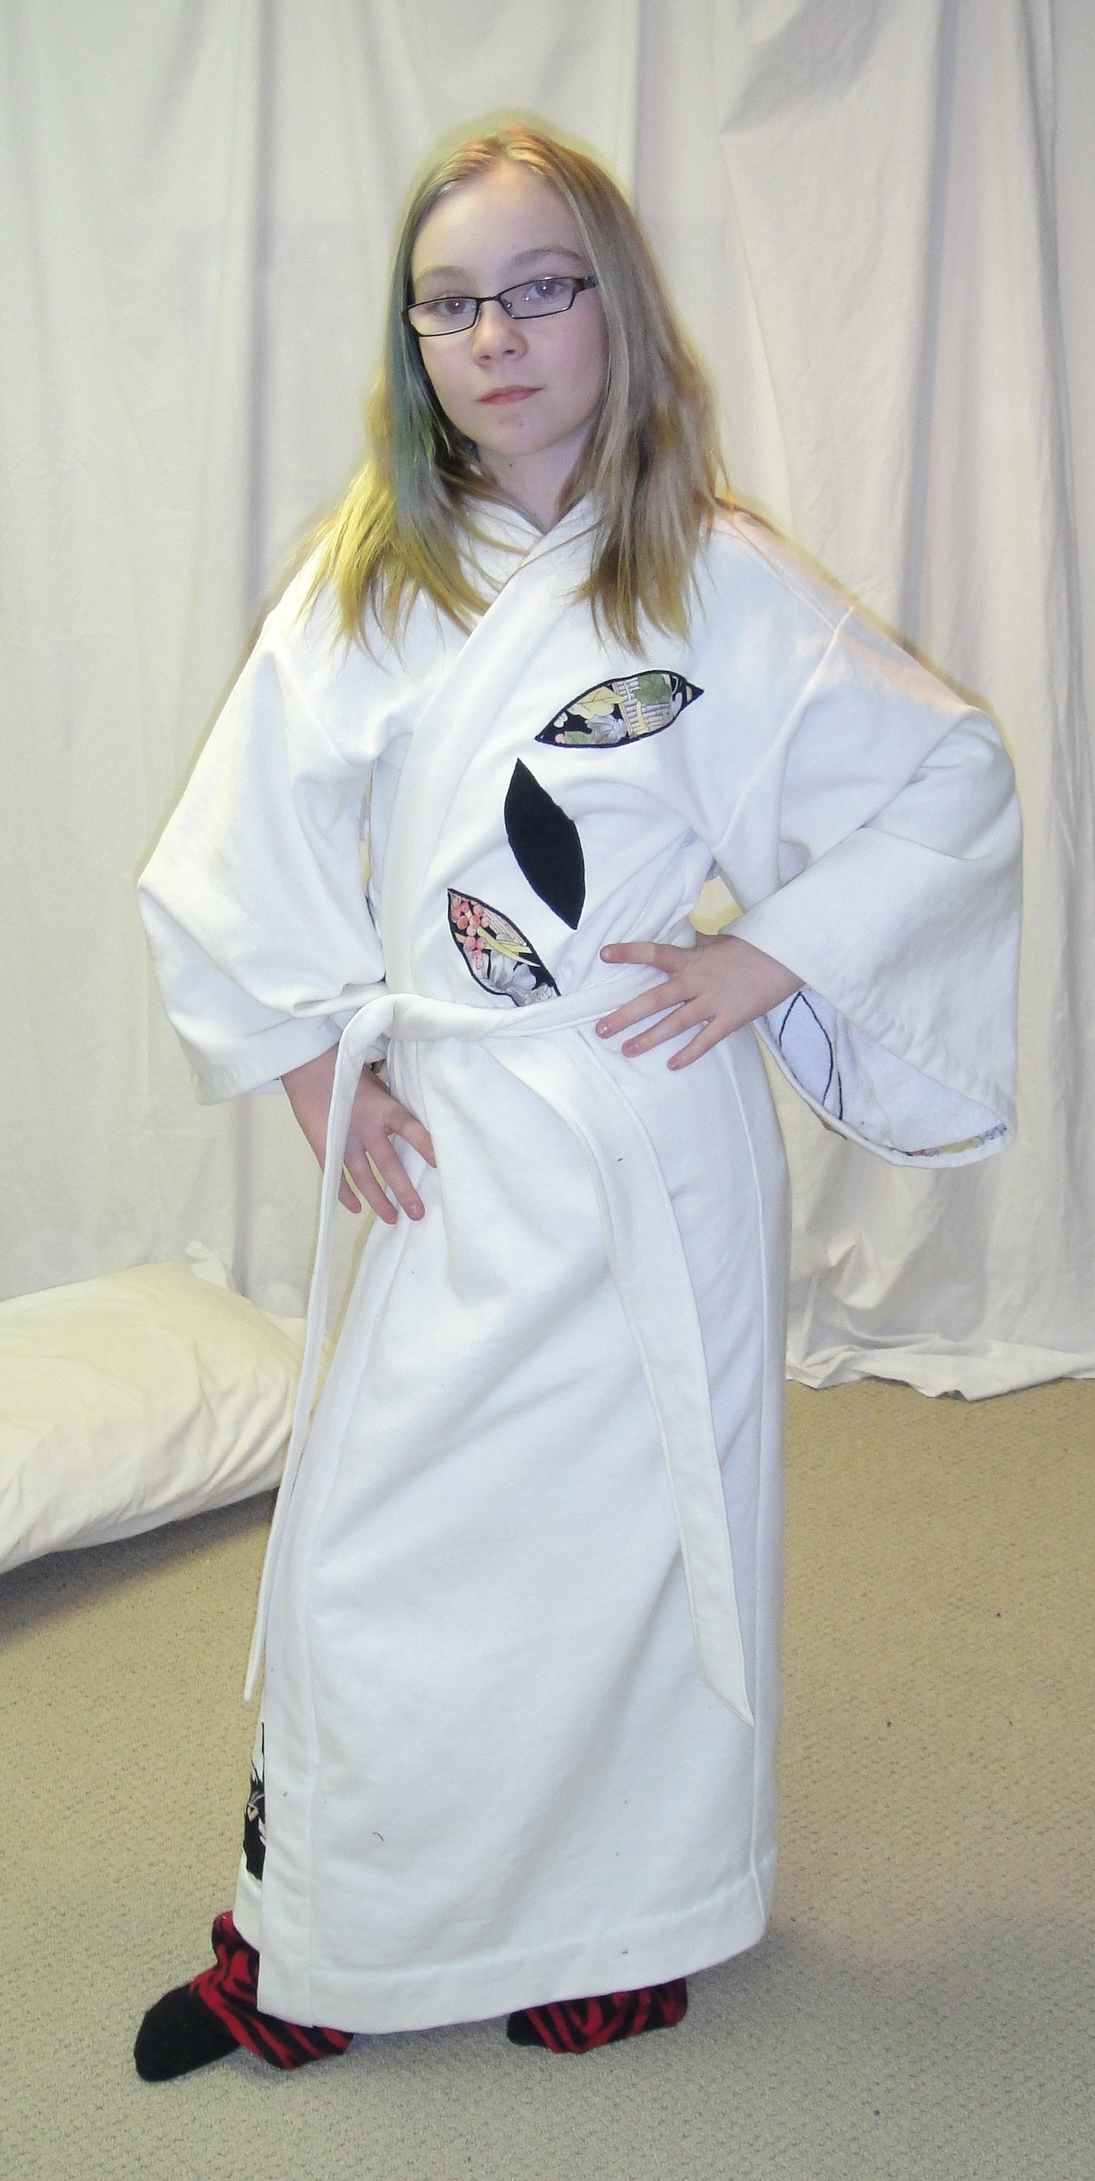
Tyo’s robe is finished and has been worn pretty much every day, so I’d say it’s a success. Although now she wants those loop-over-the-arms tie things that keep the kimono sleeves from dragging in everything, because, well, they drag in everything. Fortunately we’ve watched enough Miyazaki that she knows all about them.

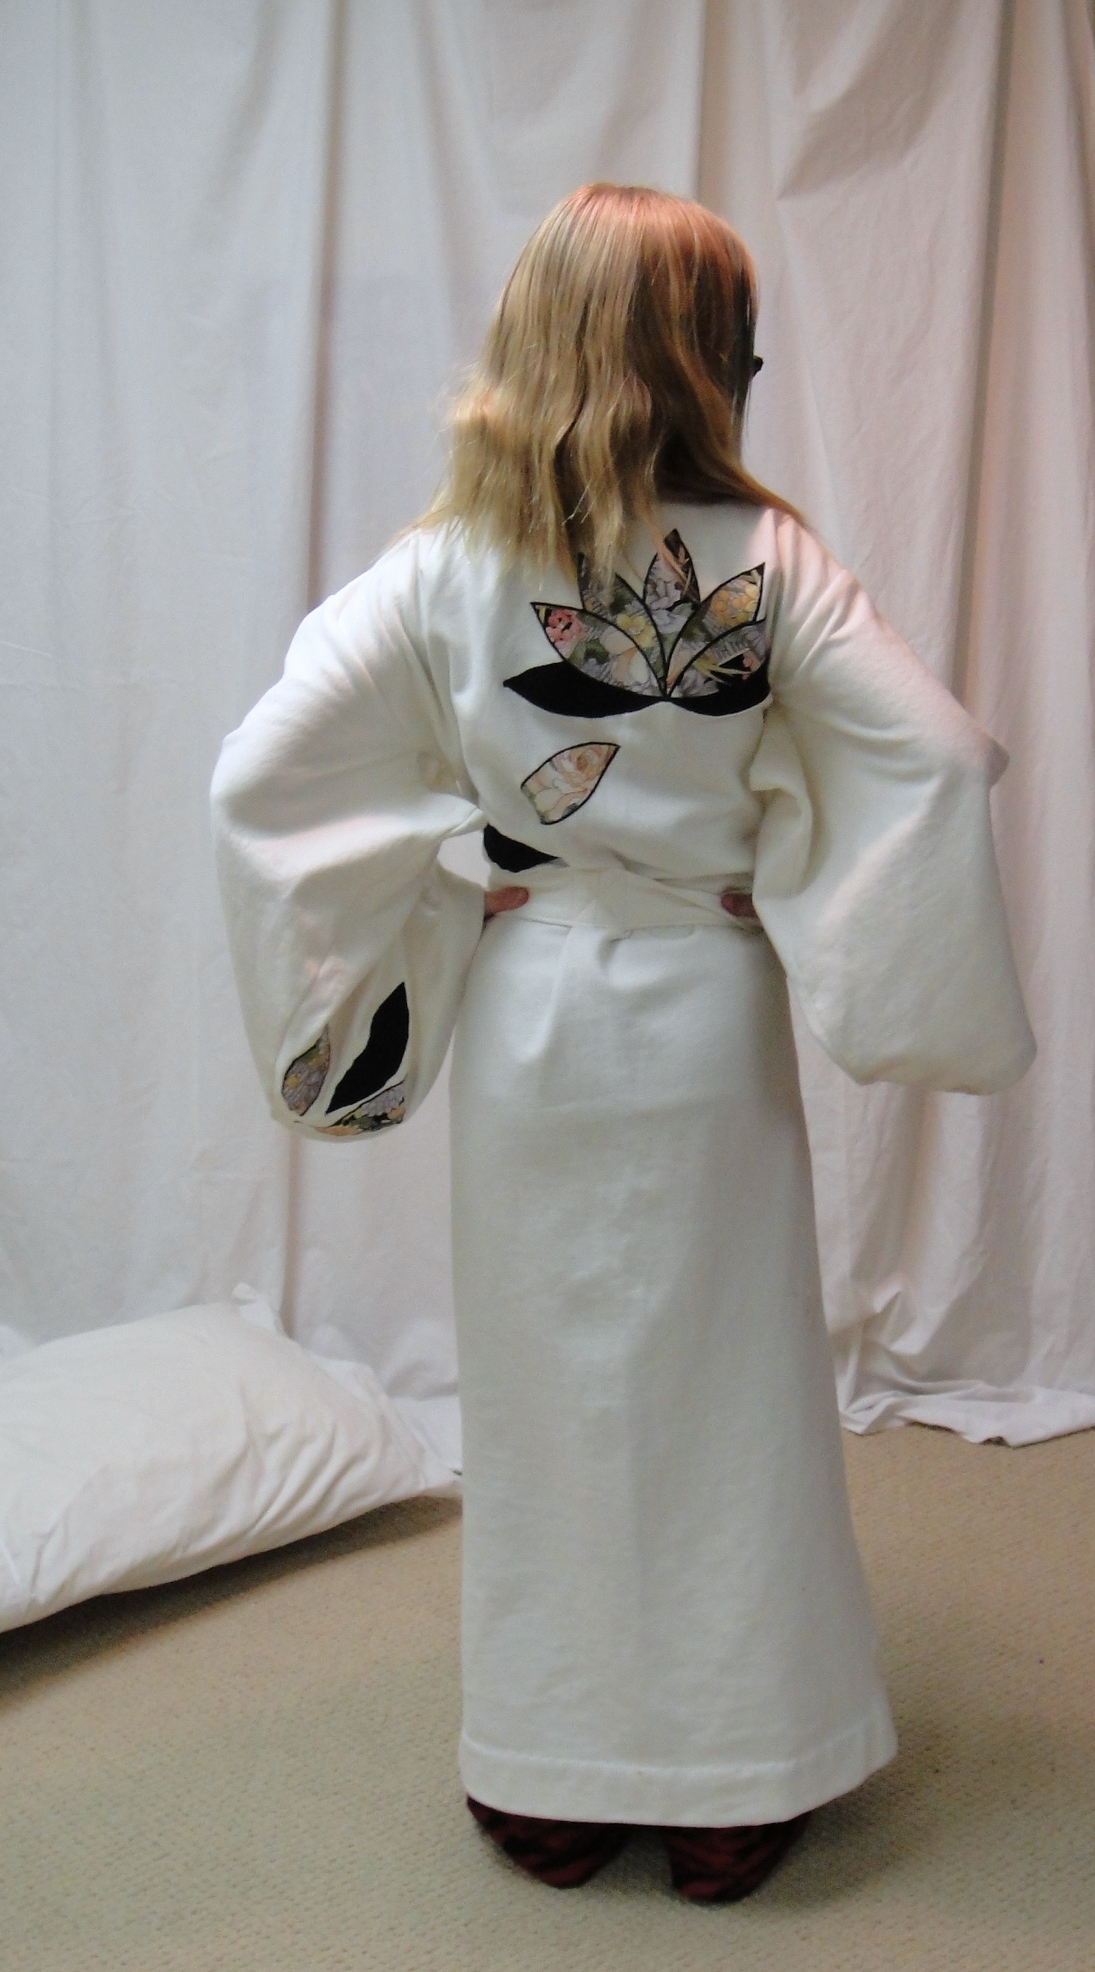
Kimono back.

It’s really long, which is what she wanted, but quite narrow. Not so much it doesn’t close, but it certainly doesn’t stay closed while walking. This is the downside of rectangular construction, I guess. Godets at the sideseam might’ve been effective (if not particularly kimono-accurate).

Hem lotus

I quite enjoyed laying out all the applique, which I did after cutting the fabric but before assembling anything. There are two full lotuses, one on the upper back, one at the hem on the front right side. The sleeves and the front left are decorated with individual petals.

Back view---worn

The belt is a simple sash. I opted to stitch it down with an X on the centre back, so she can’t lose it. (I could’ve added belt loops, but in my experience that’s never enough to keep a kid’s belt with their housecoat.) Most of the time it’s trailing along behind her elegantly, but at least it’s there if she decides she needs it.

Front, worn.

The other morning she came down for breakfast wearing her cream bunnyhug* under the robe, which threw me for a loop as I couldn’t figure out how she’d gotten a hood onto the robe.

All in all?

1) new technique learnt (applique)

2) new construction methods

3) used up stash fabric

4) garment is getting lots of use and love.

WIN.

Your robe fu is strong, but mine is stronger!*

*yes, I know Kung Fu is not Japanese. Hush.

34 Comments

Filed under Sewing

On the Vogue Front

The next stage of fitting…

Sleevage. Fitting.

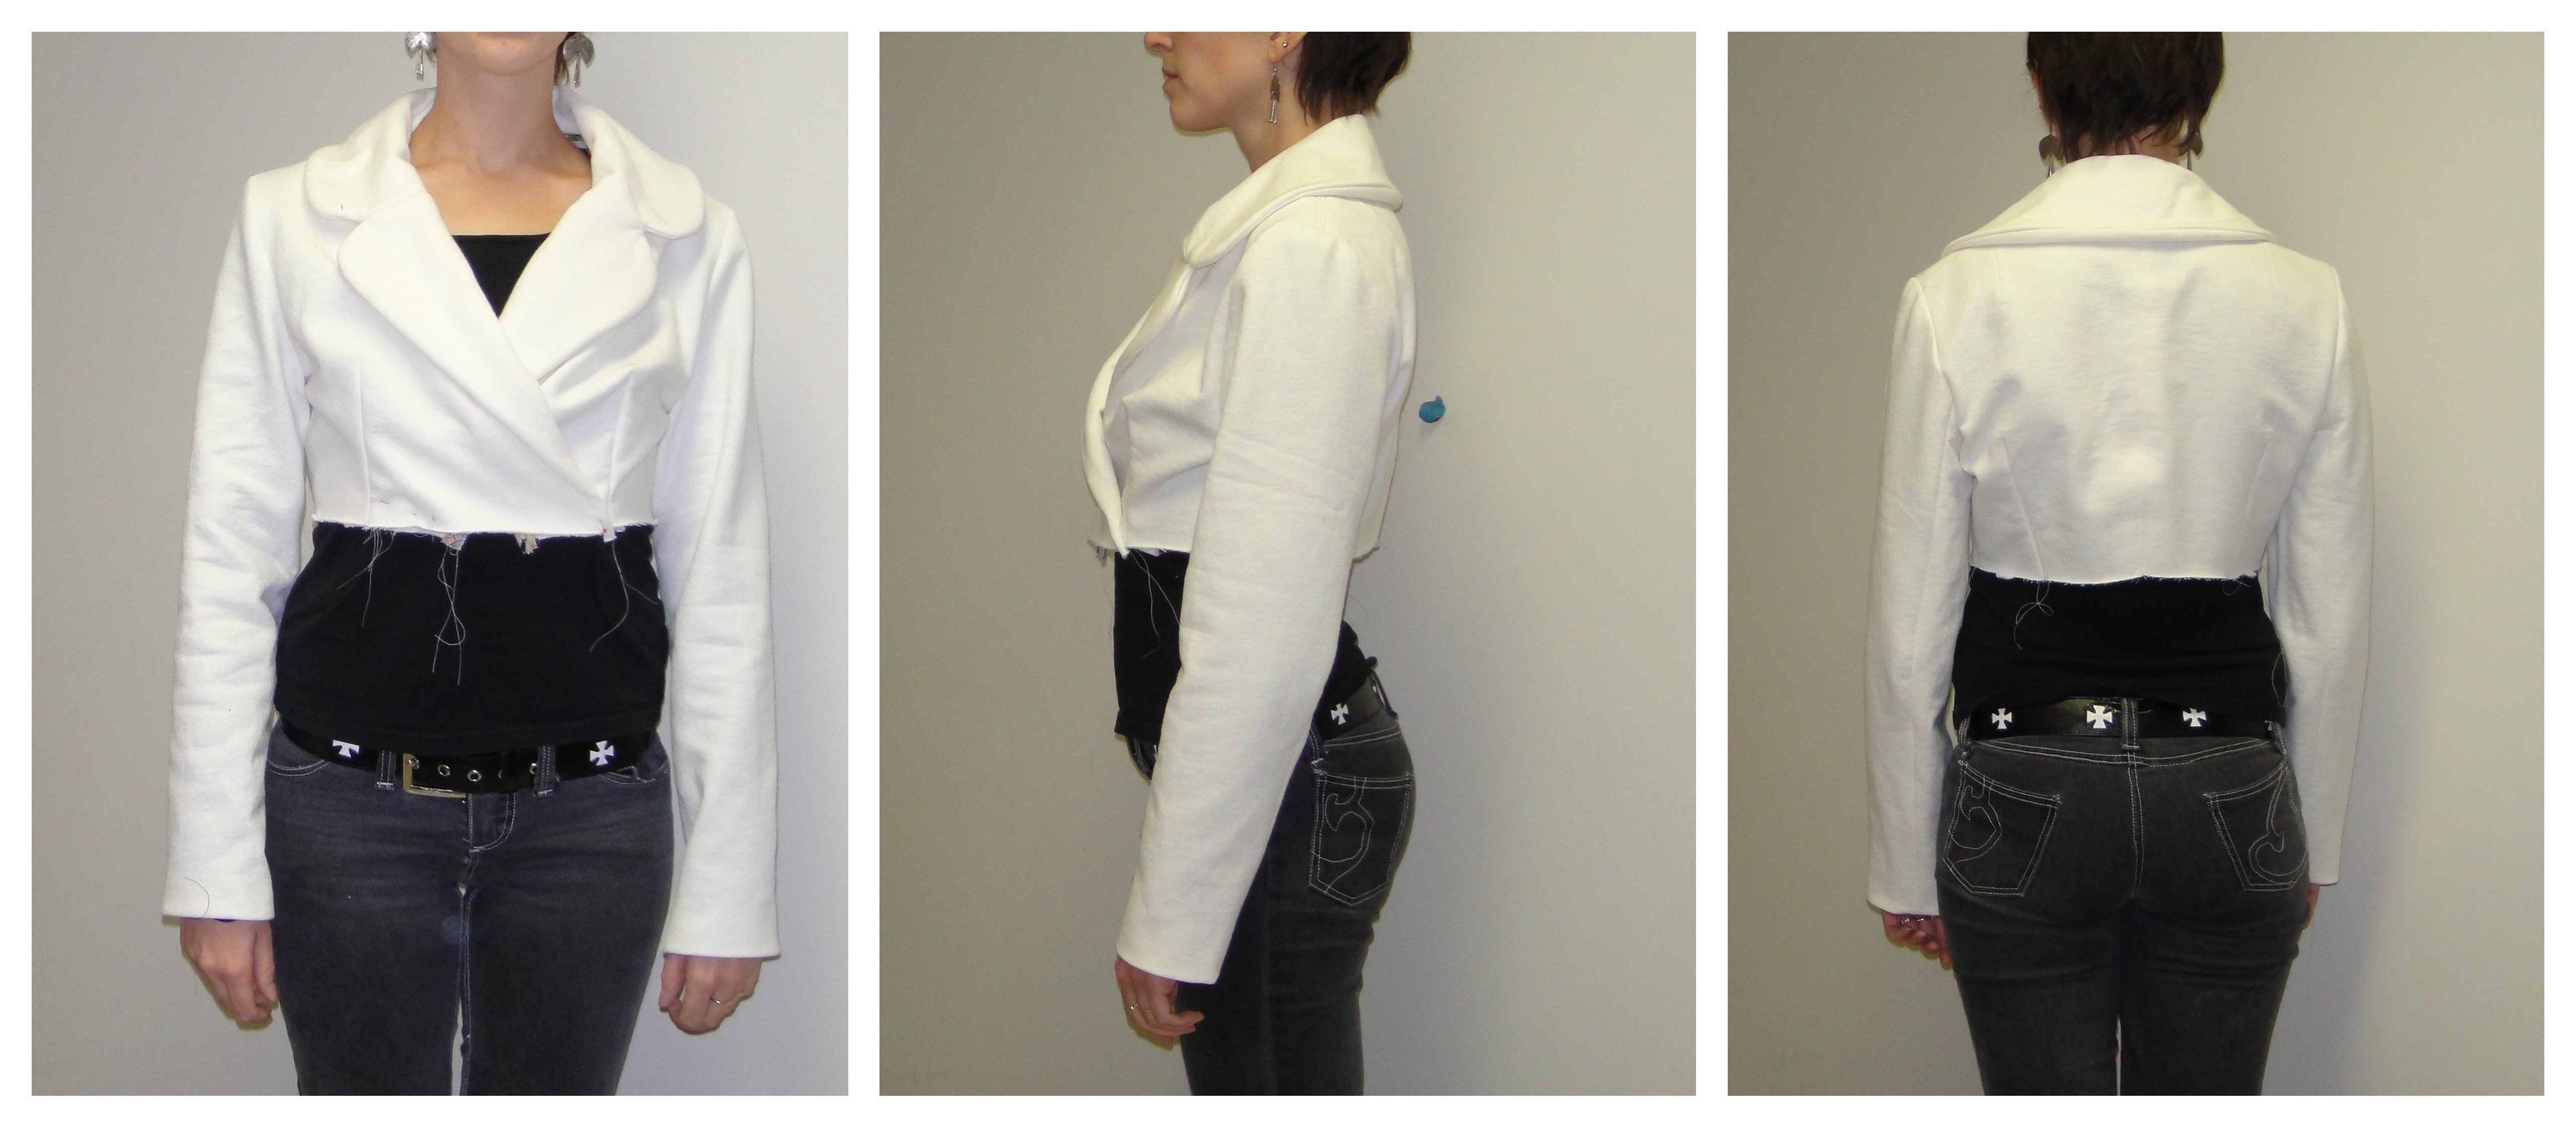
So, I slapped some sleeves onto my bodice-muslin of the Zoe coat, Vogue 7448, to see what they did to the floopyness around the front armscye. And also where the shoulders actually sit and things like that. Oh, and I added facings and the collar.

I think I should just suck it up and do the square shoulder adjustment.

I also think I’ve decided the front floopyness really boils down to my SBA being insufficiently agressive. If I stuff a fist in the side in front of my breast, it fills out the space quite nicely and the wrinkles disappear. (Incidentally, I took this photo wearing my padded bra, which does bring my bust measurement up to a proper size 12—34″. And it’s still floopy.

The only other thing (which doesn’t show in these photos) is how much the low armscye makes the arms bind when I put my hands on my hips. I’ve been trying to talk myself out of fixing it, but I just don’t think I can. Even the front floopyness doesn’t annoy me as much as that binding at the arms. I promise I’ll only raise it a centimetre or so. I’m sure I’ll still be able to get most of my sweaters underneath.

And the wearable muslin…

Vogue 7448 Sweater

Despite the fact that the fit is so-so and the internal finishing is abysmal, I really wanted to get something usable out of this. So, I grabbed some cream rib-knit that just happens to match the cream sweatshirt knit, cut a 3″ wide band (doubled), and added it to the bottom and made cuffs for the sleeves.

Buttons

Although I often really like cropped jackets, something about the position of the band has me not entirely convinced that it’s terribly flattering (maybe I’m just feeling muffin-top-conscious due to winter slothfulness and the depressing length of time since I’ve done a pretty, glamorous basement photo shoot. Oh, well. At least the jeans look good.)

I do quite like it hanging open, which is unusual for a double-breasted garment. The way the front hangs open reminds me faintly of those floppy-front cardigans.

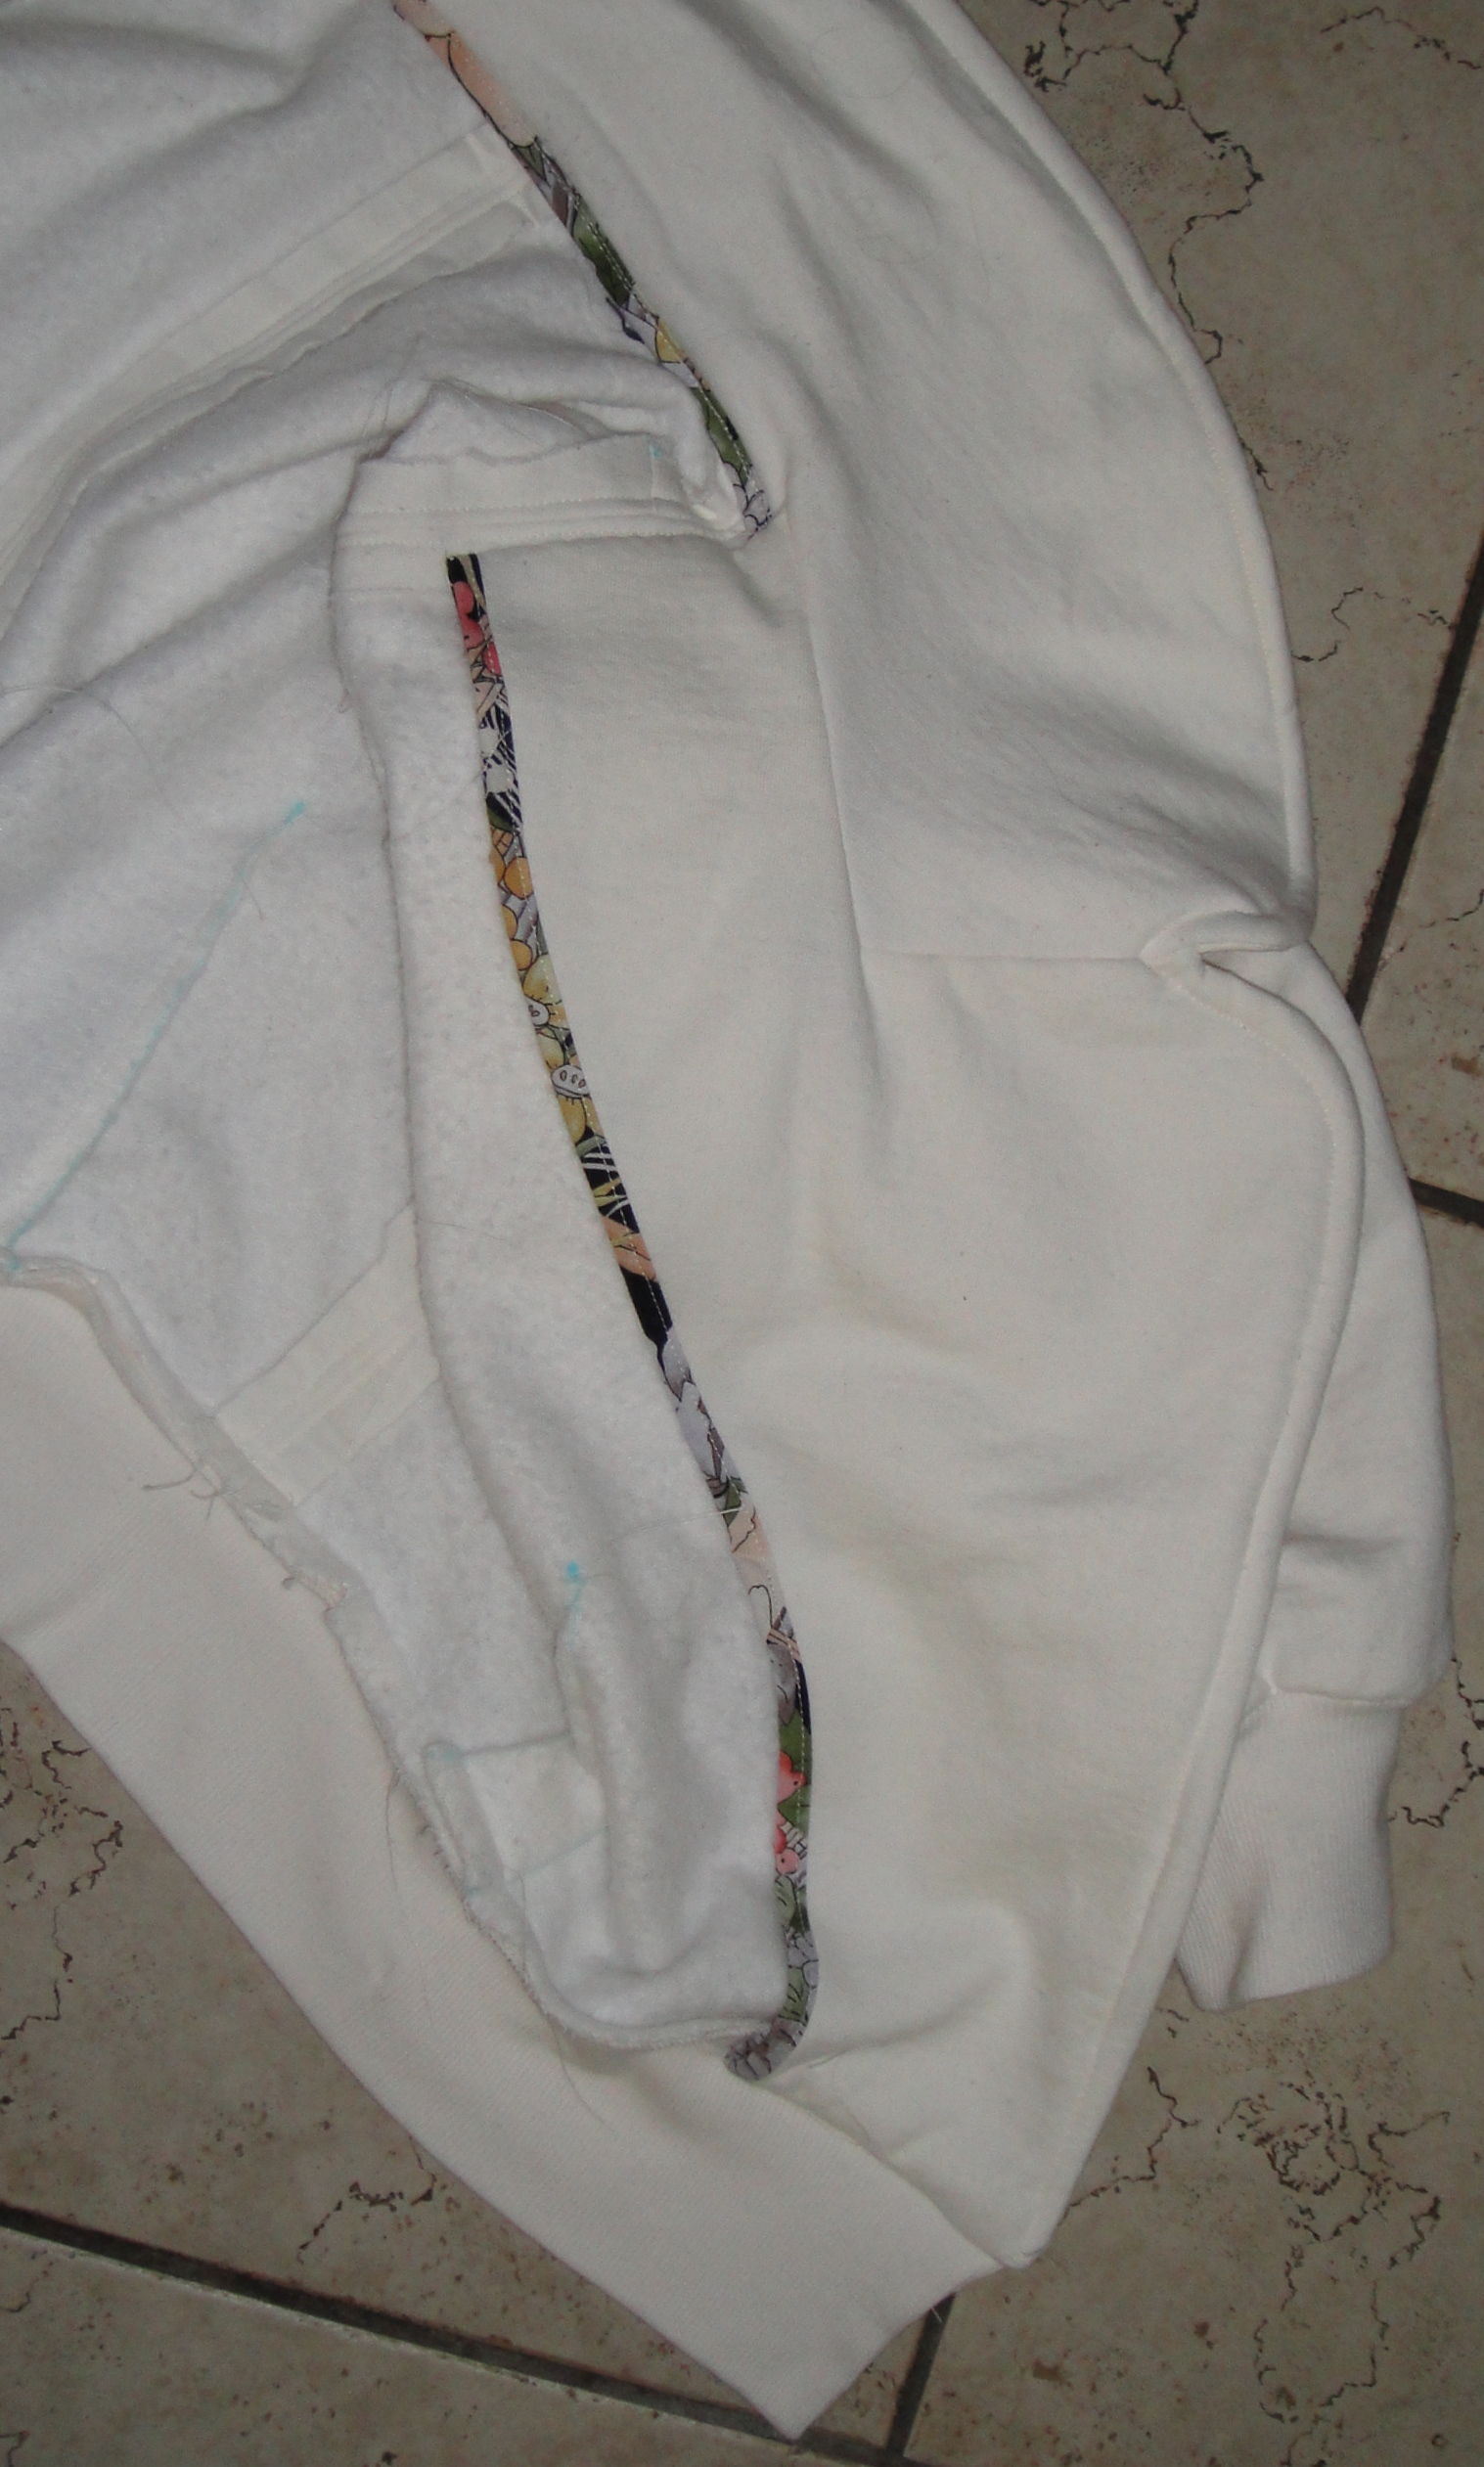
Facing and under-collar

The buttons are cream, leather-covered buttons from one of my old-button thrift store hauls. The leather is pretty dinged up and dingy, but the colour was nice and I was willing to go with it for this particular garment. I decided to bind the inside of the facing and the undercollar with some nice patterned bias binding, which would be a lovely touch if the rest of the seam-finishing wasn’t so godawful. (er, nonexistent.) (Erm, buttonholes in rib knit. Bad idea, basically. Some kind of stabilizer would’ve been a VERY good idea. I thought of it just after I started the first one.)

I’m glad I made the full collar, though. This is the first time I’ve tackled one of those collars with inner corners, and it was a bit brain-breaky and nerve-wracking. I had to actually read the instructions. Definitely worth practicing.

So I guess this is one of those “time will tell” garments. I’ll probably wear it a bit, because I do need sweaters, badly. I may fall thoroughly in love with it… who knows.

20 Comments

Filed under Sewing

Do Over

Mom, you can't expect me to pose with my sister!

Although I love the idea of the Sew Weekly challenges—how fun, to be sewing something on the same theme as people all around the world!—I hardly ever actually do them, partly because I already have too much on my own list of projects, and partly because it usually takes me a lot longer than a week to go from theme/inspiration to an actual project idea, never mind a finished project. But every once in a (long) while the weekly theme coincides with something I’m already working on, and that was the case this week: Do Over.

Now, since I do over a LOT of patterns, this is not such a bit coincidence. But I’m still going to count it, because the project I finished this week, Tyo’s new jeans, is a do over on SO many levels.

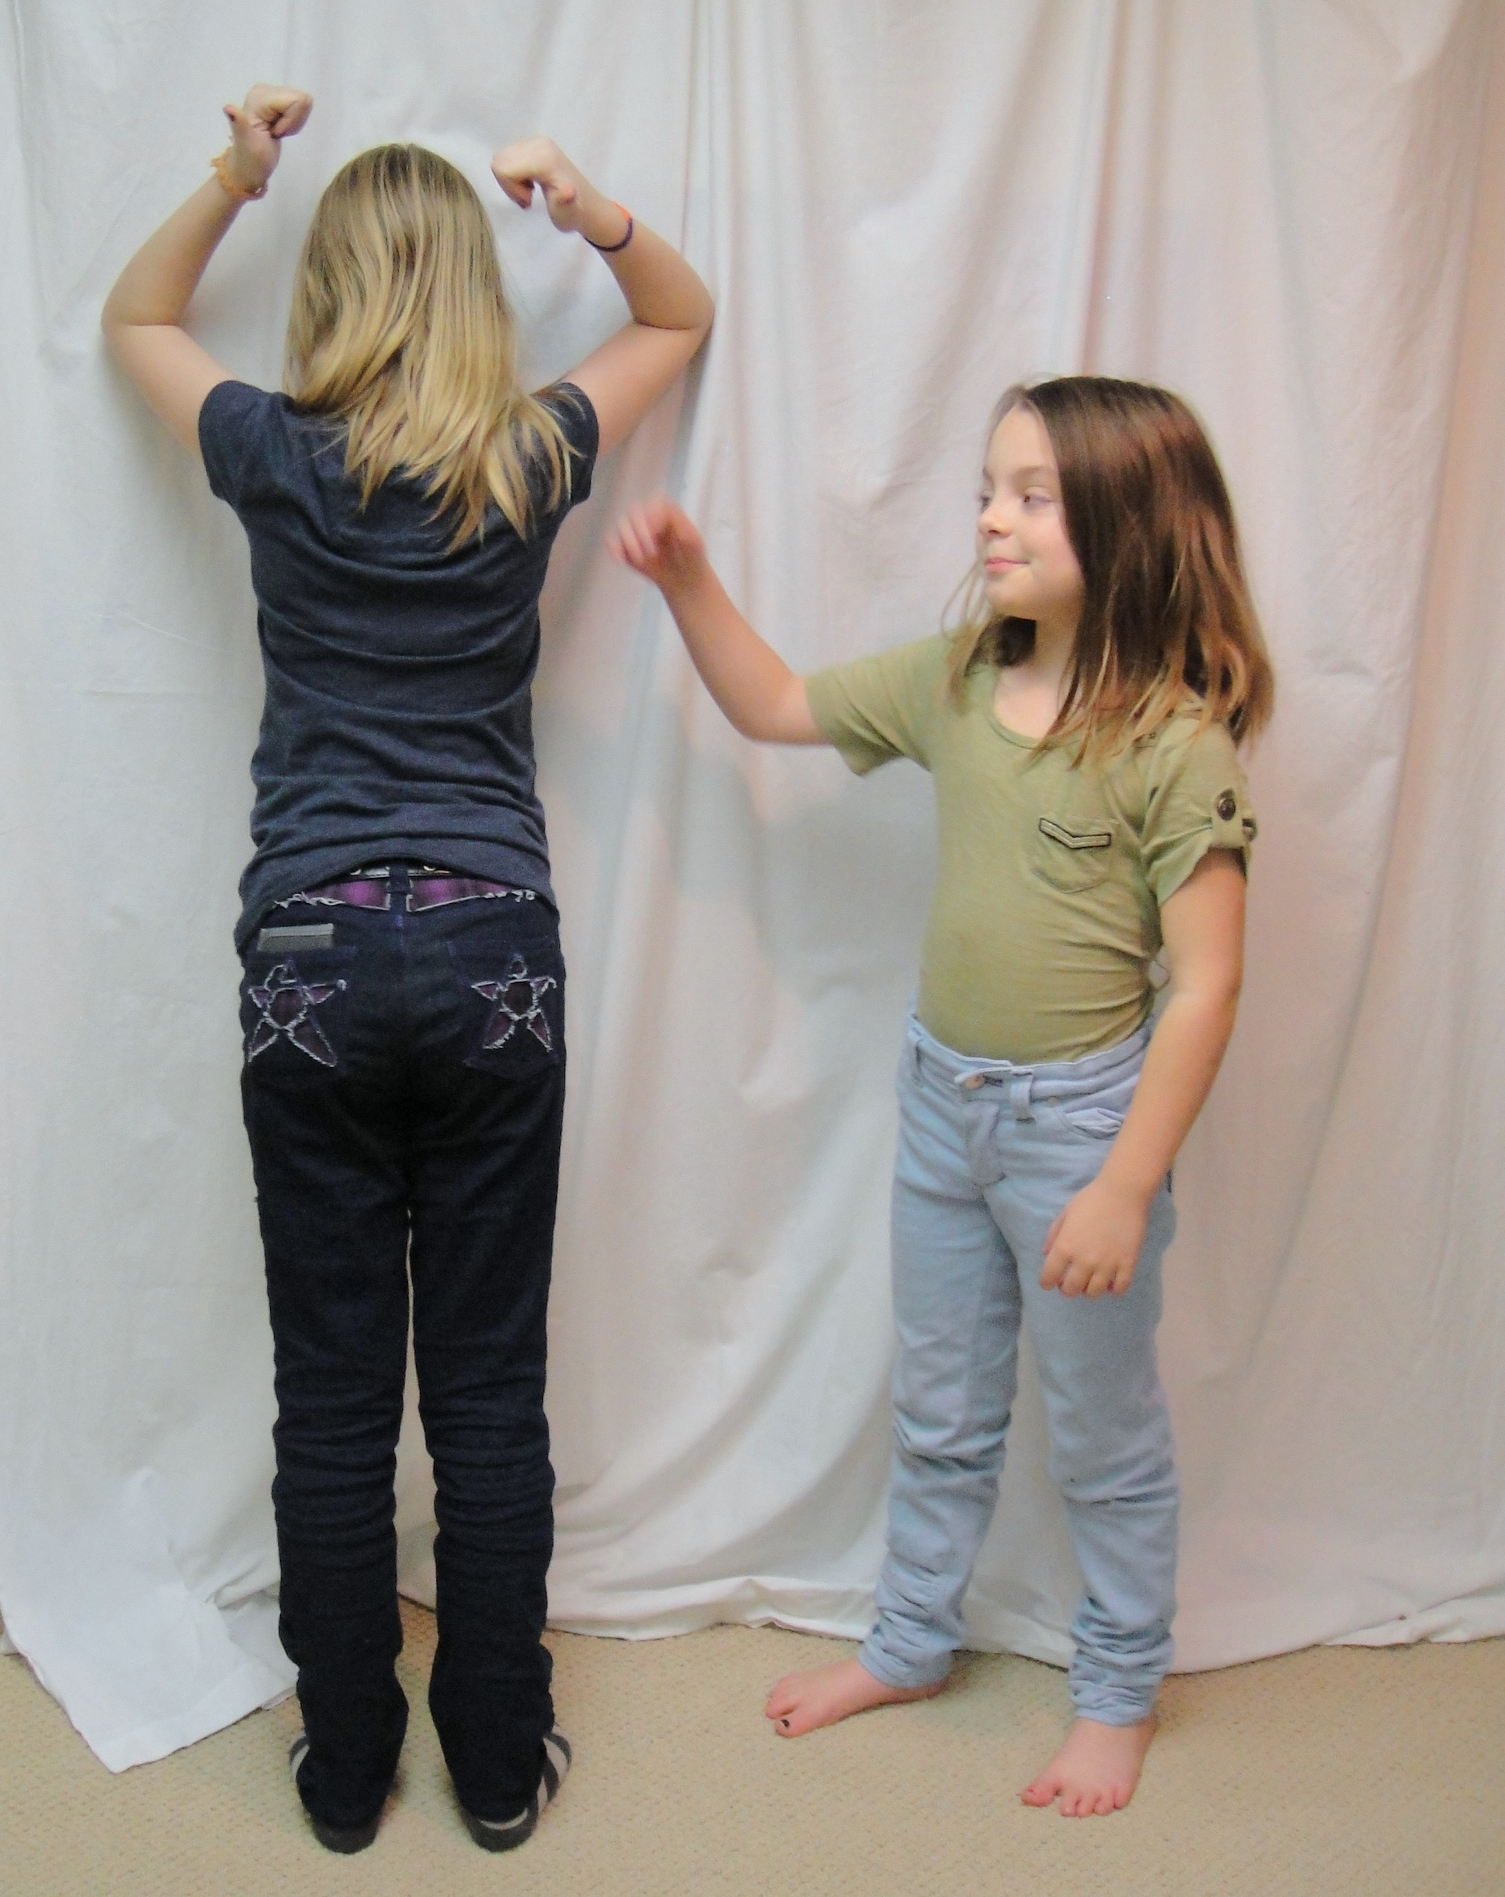
Tyo's Ruched Jeans

1) Jalie 2908. Part of the do over is to revisit a pattern you’ve used before. This is easily my most-revisited pattern of all time, not least because it comes in sizes for both me and my kids.

2) I am re-visiting the skinny, ruched-leg detail I used on Syo’s most recent jeans

3) I am ALSO revisiting the cutout/underlay detailing from Tyo’s first, too-quickly-outgrown, pair of Jalie jeans.

… which basically means that there was nothing new or innovative about this project at all, which I think was probably NOT the idea of the theme, but oh, well. I’m still claiming it.

Some final thoughts: I added height to the rear crotch for Tyo’s booty. At the moment it’s a bit baggy there, so this wasn’t really necessary. On the other hand, she still has a fair bit of room to grow into these, so I’ll get back to you on that in another six months or so. Remember how I had pieced the waistband? I wound up only needing a small portion of extra and it works fine, but I’m a little puzzled that I needed any at all, since if anything my yoke tucks should have made the waistband too long for the jeans. Tyo’s jeans aren’t as strongly ruched at the ankle, mostly because I was trying to squeeze them out of a small amount of denim, so I could only extend the leg a small amount.

All right, I GUESS I can pose with my sister...

25 Comments

Filed under Sewing