
 A very eager student asked about a class using this pattern. Curious, I was happy enough to oblige.
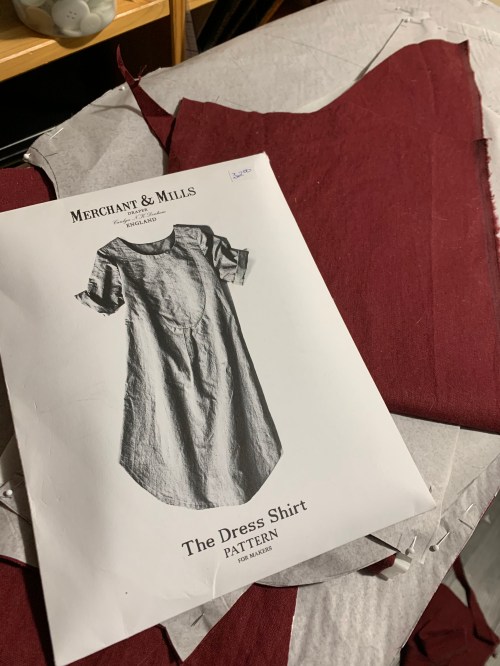
 The Dress Shirt is a simple, pared-down take on a shirtdress, and I actually really enjoyed the sewing process, particularly the front bib and how the neckline was finished. Things went a bit awry at the sleeves—my first inclination was to set them in flat, shirt-style, but there’s way too much ease in the sleeve cap for this method—lots of gathers that are difficult to control. So I did the second sleeve in the round, but still didn’t do a great job on the easing. Next time I would pare down the sleeve cap a wee bit.
 On the other hand, the pockets I added worked out fine.
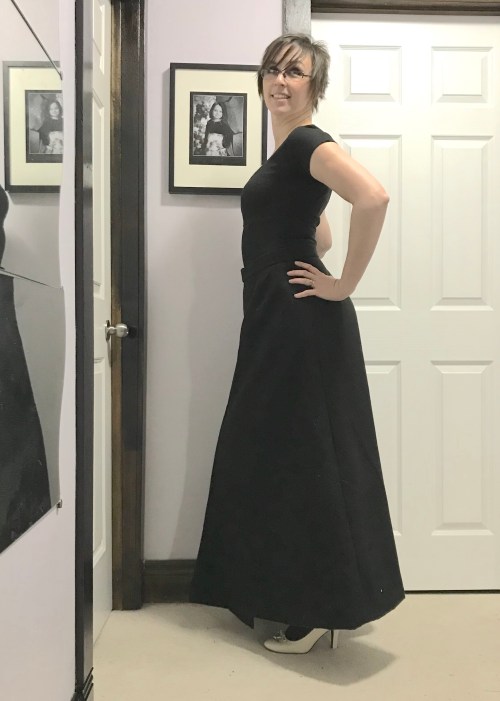
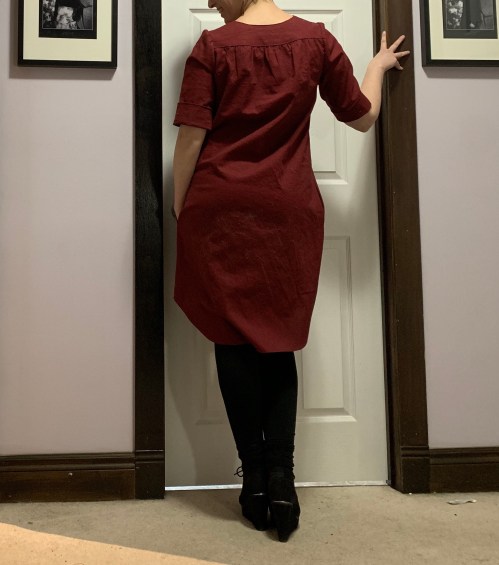 The back view is surprisingly attractive in this picture, at least (these are terrible photos but I had about three minutes to take them in, so it is what it is.)
However, my biggest issue, far and away, is the fit in the shoulders. I did the same size (10) as for the Trapeze Dress last fall, which is technically a size down from my current measurements but a) there’s plenty of ease and b) I don’t think my shoulders have actually changed very much. Plus looking at the model, the pattern seemed to have slightly dropped shoulders, not really what I wanted. But, as it turns out, the shoulder fit has the same restricted movement and tightness across the back as I had in the Trapeze—plus a WAY low armscye.
I did only two of my usual adjustments–when sewing up these class samples I try to stay fairly close to the pattern. I squared the shoulders slightly, and I raised the underarm about 1cm. I did the same on the Trapeze Dress, and I don’t think the underarm height there was a problem. But obviously a bit of a broad-back adjustment is probably in order.
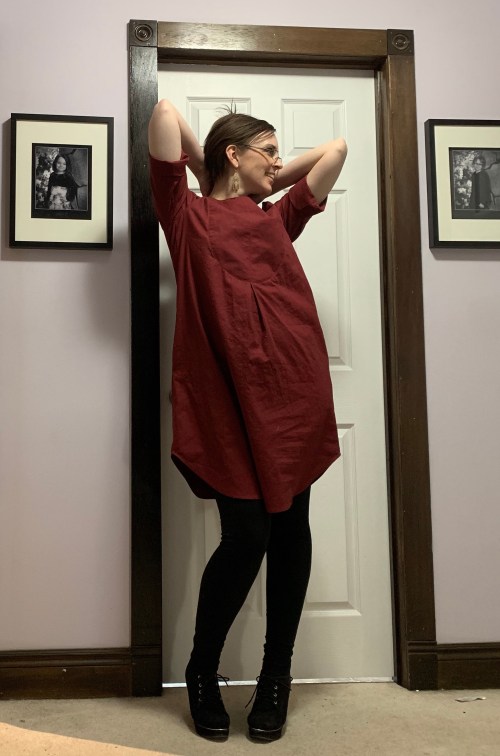
Dress lifts up at least 2-3” when I raise my arms. However, I do like the shorter hen length.
But on this dress, the armscye appears to be dropped by over an inch. I could easily lift it up an inch to an inch and a half before I’m happy with where it falls. For that matter, if I can get the sleeves sewn in a way that’s comfy for me, I’ll probably take 2-3″ off the hem, too. But that’s more personal preference.
There’s not much more to say as it’s a simple make. I really did enjoy the physical sewing of it. I don’t know if it’s the most flattering thing I’ve ever made (better photos might change my mind there), but it was a fun process!
 It’s a bit sweet. And a bit snug right through the bust—I really need to come to terms with my new measurements. But I knew from scouring Instagram that I preferred the “fitted” versions of this dress, so I was at least somewhat intentional in sizing down.
 I went with a mandarin version of the collar. Partly I like them better, partly I’m hoping if I lead some students in that direction it will save some class time. This is only scheduled as a 6 hour class and I’m a little scared. Once it’s don’t being a class sample, I might even cut the neck down to a bound scoop. I’ve seen some hacks like that that I really like. I’m just not really a shirt-collar person, I guess.
 The front patch pockets are teeny weeny. I was a good sample maker and resisted the urge to skip them, but I did add some side-seam pockets, suspended from the gathered skirt seam at the top. This holds them in place a little more nicely than just side pockets.
 The construction went pretty smoothly, without any major and unfixable snafus. Unlike my
  What I completely failed to take was progress and detail shots, except for the one lone pic of the pockets underway. It’s too bad, because I like how the side pockets went together, and I actually managed some very nice inset corners, if I do say so myself. And the hem turned out really nice, too, if I do say so myself. I guess you’ll have to take my word for it…
 I have a complicated relationship with distressed denim. Like most teens in the 90s, one of my main goals in life was to shred my jeans—or at least bust through the knees. However, the romance of the tattered denim faded pretty abruptly when I had to start buying my own jeans—I wanted those to last as long as possible! So I avoided the pre-tattered distressed looks as much as I could. I’ll put my own holes in them, thanks.
 Fast forward to about a month ago, just after making the
  For construction, I used the same method as my
 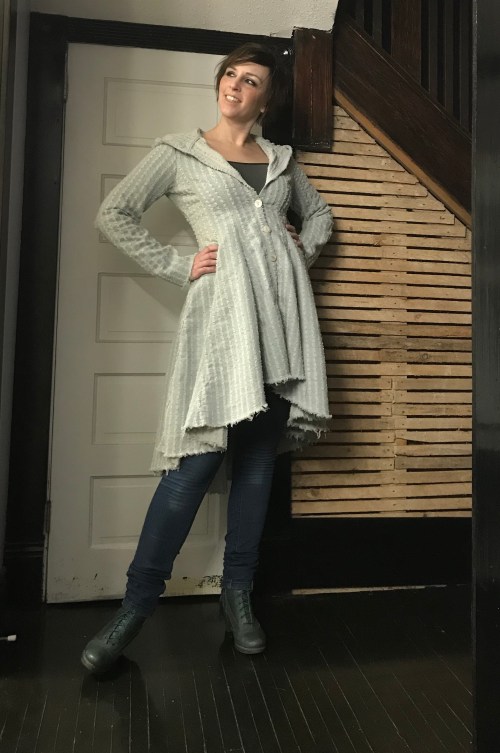 However, Hong Kong binding plus double topstitching does not make for a quick project. I also didn’t go full bore, and had to occasionally interrupt… anyway. It developed slowly.
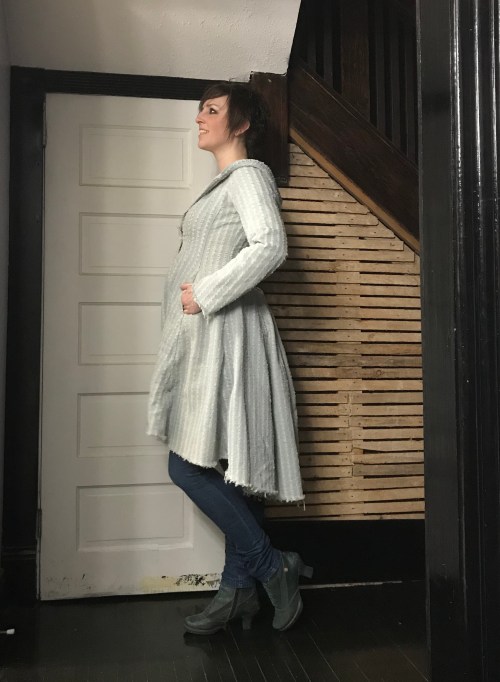 But, it’s finally finished. Or, maybe finished isn’t quite the right word. In temporary equilibrium? Because this piece calls out for distressing. I’m almost tempted to go at it theatre-style, get some patina going. Failing that, the shredded fabric is more-or-less guaranteed to begin failing sooner rather than later.
 I’m already planning visible mending, layering, patching. I don’t really think this jacket is done.
 I think maybe it’s ready to start becoming. Obsolescence is a part of the plan.
 If you read any of my posts from January, you probably noticed me whining about this jacket in the background. Well, it’s done! And you can read the full whinge over on
  In March I’m teaching a class on the
  I’m generally a big proponent of tracing when it comes to expensive indie patterns, but I find the SOI patterns really hard to trace. The Betty didn’t have different line styles for the different sizes, which made it hard to pick out the right size, and this one had different line styles, but some of them were really faint, with tiny and spaced out dots, including the size 12 I was tracing for the lower half. Also there’s more notches than you can shake a stick at, and I always miss notches when I trace. So I cut. Based on the Betty, I cut a size 10 for the shoulders and bust and a size 12 for the waist and hip. I didn’t do a petite alteration, but I did add a small swayback adjustment, by shortening the back piece at the waistline and taking a wedge out of the side piece, since the pattern has princess seams but no side seams.
 I tend to like a lot of ease in the hips, so I kinda wish I had gone up another size there. As is, I let out the side back princess seams as much as possible–you can’t adjust the front princess seams because there are pockets in this area (yay pockets), but the back is where I really need the room anyway.
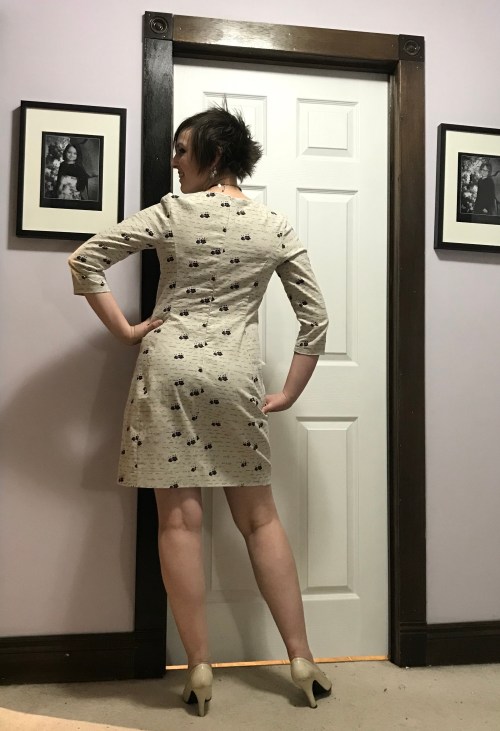
 But something is off with the back armscye. The sleeve cap is tall and narrow, which alarmed me a bit, and it definitely works well if I keep my arms down but doesn’t allow a lot of motion. And moving my arms to the front the littlest bit pulls mightily across the back. Fortunately this cotton has quite a bit of give, but it feels like I need a bit of a forward-shoulder adjustment—it’s tight across the back if I try to move my arms forward, but roomy across the chest. Weird because that’s not something I’ve ever needed. Possibly I could let out the seam at the back armscye a wee bit…
 I did raise the underarm a tiny bit, which I almost always do, and that helps with the mobility a bit, but I’m just not totally sold on that armscye. And I’ll definitely be checking back measurements when we do the class.
 All in all, though, it’s pretty cute.
 There. There it is. Do you see? How in the HELL did I not check, when I went to cut it out, which way the print was facing? Of all the STUPID… anyway, I can’t go on or this blog will descend into a string of profanity I’ll probably regret releasing onto the internet.
 On a happier note, the invisible zipper and the facing attachment fully by machine went smooth as butter. After all these years I still think of
 After the protracted trauma of the suit jacket (post still to come), I needed something fast and satisfying. And fortunately (?) I had another deadline just around the corner—a baby shower for one of my old Fabricland colleagues.
 And when I figured out the scrap of fabric left over from my
  A hunt through the thread stash didn’t turn up any topstitching thread a good colour, but apparently I do have a 500-m spool of dusty pink regular thread. Don’t ask me why. (It’s not even one of the many spools of dodgy ancient inherited thread!) So I fiddled with my Elna and managed to slightly lengthen the triple-stitch setting, and voila! This is when the Elna’s ridiculous speed really comes in handy—even doing triple-stitch, it moves along at a great clip and doesn’t make me want to stab something. The only downside is the limited needle position control, which makes fine-tuning your topstitching distances tricky. I did all the topstitching with a 1/4″ foot, which was not bad but my edgestitching is a little more wobbly than I’d like. All in all, though, everything went well, except that every once in a while the Elna bobbin seems to start catching on something and then everything snarls up and you have to rethread the whole damn thing.
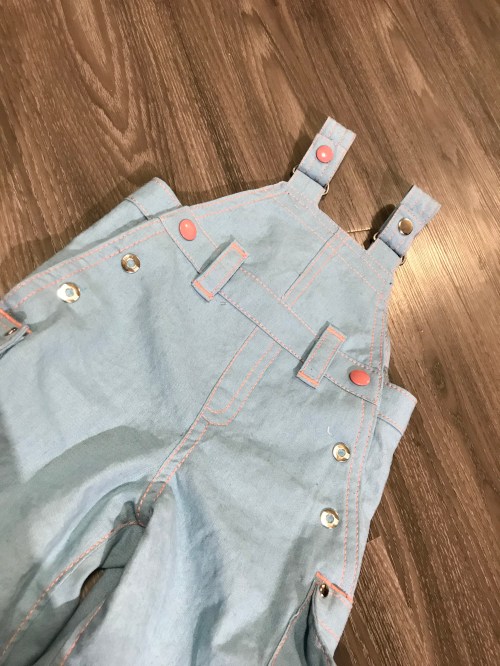 I haven’t made a lot of overalls. Actually, this might be the first time I’ve ever made overalls. Anyway, I found myself a lot more reliant on the sketchy Burda instructions than I like to be. There’s some weird stuff around the hip closures. In particular, some of the pattern pieces didn’t have their names marked on them, just numbers, and the instructions didn’t always reference the number. And there are quite a few little rectangles and almost-rectangles that were tricky to differentiate. And I would’ve liked some indication of when to finish seams, from time to time. But on the whole it all went together fairly well.
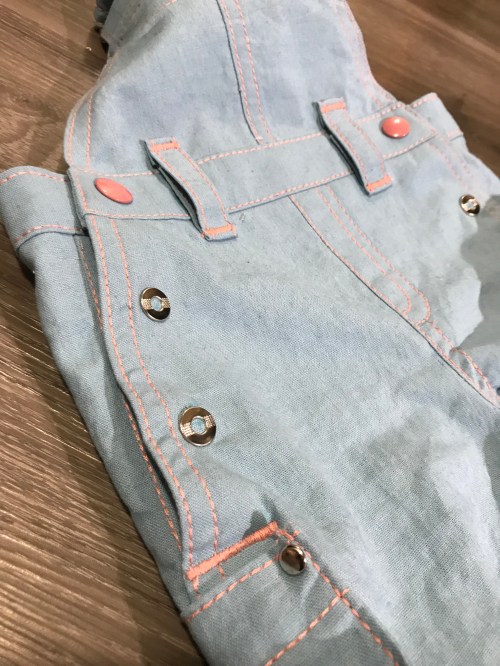 Things got a bit more off-road when it came to the hardware. My hardware stash is not nearly as vast as my fabric stash, and it’s actually getting a bit depleted at this point. I wanted heavy-duty snaps for the waistband and lighter ones for the rest of the closure. The pattern called for some cute little alligator-type clips for the straps, which I did not have, nor was I willing to venture out into our current blizzard to see what I could obtain locally. So I opted for D-rings and more snaps. Sturdy, but maybe a bit bulky, especially since I wanted the straps to be adjustable so I included extra back-snaps.
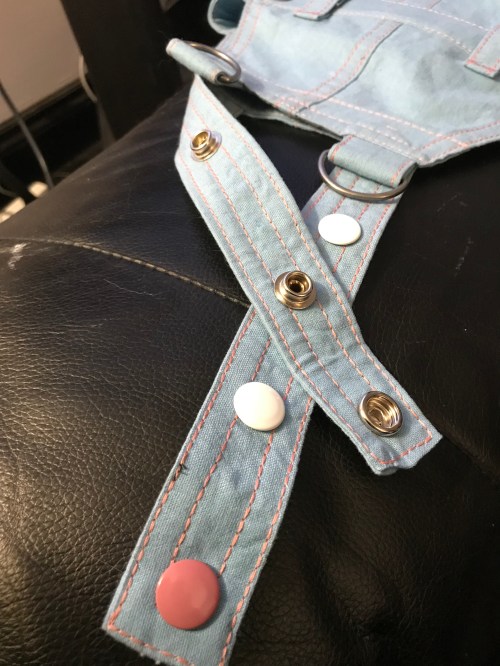 My stash of heavy-duty snaps came mostly from a thrift store acquisition of vintage snaps that have some cool colours—including three with a dusty pink finish that was perfect with my topstitching! Except that I only had three. And this vintage set was missing the back most pieces, which means I have to use extra snap fronts on the backs, too. Probably nice against baby skin, but it means I’m going to have a lot of extra snap middles when I’m done. I used lighter-weight snaps for the rest of the side closures, and added rivets at the pocket corners. That was probably the most annoying part, as there was something like 12 layers of fabric at the pocket corners. My silver rivet posts actually weren’t long enough, and I had to swap them out for longer black ones on the inside. Not visible, happily, unlike the mishmash of snap colours. I’m mostly just happy I managed to use those pink snaps, though.
 There are a couple of other little details I meant to add but didn’t. I had some pink grosgrain to make a little tab sticking out of a pocket, and a teeny D-ring hanging from below one of the useless belt-loops would’ve been adorable… but I didn’t remember, and the cute factor is pretty high, anyway. So we’ll call it good, and hopefully baby Tessa (or at least, her mother) will find them as adorable as I do. I’m really excited about this baby shower, as I’m pretty sure most every gift will be hand-made. It should be great!
 Back around Christmas, Jalie patterns released a free, boxy sweater pattern, the
 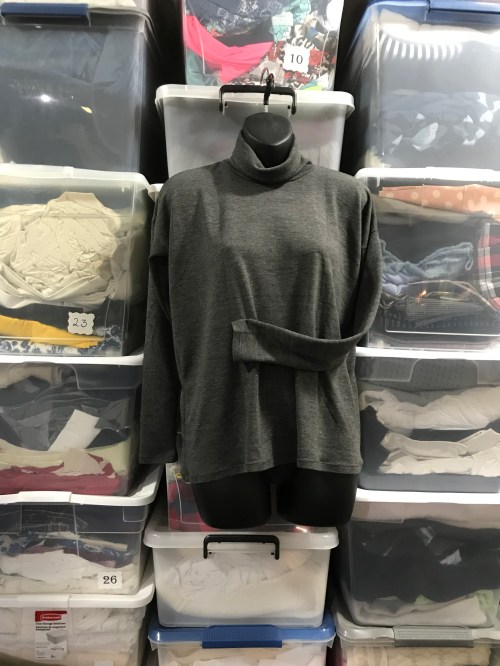 I thought that a soft, grey, drapey version of Yoko might be perfect for an almost-young-lady, a little sophisticated and a lot comfy. Assuming, anyway, that she didn’t hate turtlenecks.
 It was super simple to sew, once I figured out that half the sleeve wasn’t missing (the sleeve “cap” isn’t—it’s completely flat!)
 And it was just as drapey and suave as I had hoped, but maybe a bit plain. So I sacrificed one of my precious hoarded lace appliqués, picked up during the last, desperate discount days at Fabricland, and stitched them on the back as angel-wings. That little act of hand-sewing approximately tripled the time it took to make the sweater, but I think it was well worth it. Fyon loves the sweater (or at least that’s what she said), and I think it’s adorable on her, except I didn’t manage to get a picture. But, y’know. You can trust me.
 I’m in the throes of a Big Project (TM) that is eating my brain and possibly driving me crazy. Did I mention making a suit jacket for my uncle? Yes? I wish I hadn’t. Anyway, I’m not quite ready to dive into that pile of angst yet, but suffice it to say, I needed a break from it.
 Wait, I hadn’t mentioned my pouf! After

 I cut out and sewed up a quick pair of
 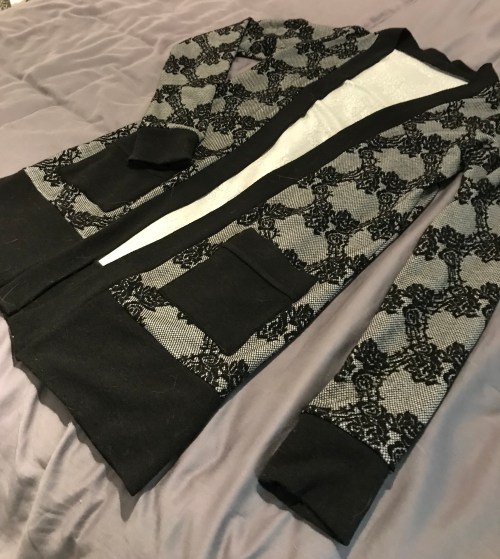 And then, after some pleasant digging through my freshly re-ordered bins, I whipped up a second
  This particular piece had large yellow hand-writing at one end (fortunately on the wrong side) and a linear flaw in the jacquard all down one side, not to mention being cut wildly off grain. The fabric itself is nothing special, either, highly synthetic and pretty much guaranteed to snag almost instantly. But, very pretty.
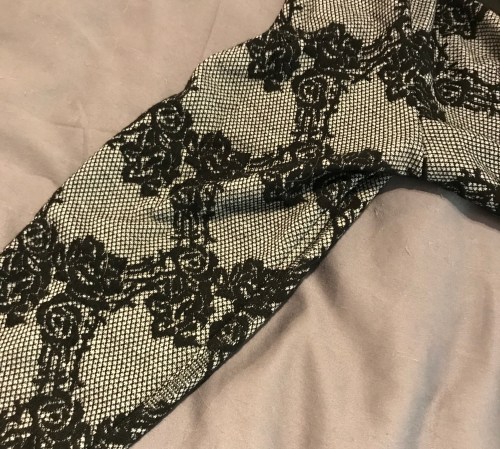

 I’m sad (but not surprised) to report that, while very pretty and comfy, it’s definitely not as warm as my wool version. But it was simple and reliable and quick, which is everything the ongoing project is not, and sometimes a dose of simple is exactly what you need.
 Happy Sunday!
 A few years ago in my town, something began showing up among the stylish and hipster in the city:
  Finally, in the last days of 2019, whilst procrastinating from another project, I decided to trial the concept. A look through my pattern database turned up three good candidates—I don’t have a lot of wrap skirt patterns since it’s not a style I favour usually. Of course it wouldn’t be hard to hack an ordinary skirt pattern, but less work is less work.
 In the end I went with Simplicity 7497, for its narrow skirt, low fabric requirements and larger size (and the parts where one of the other patterns is MIA, very upsetting, and the other had been cut off at the knee length view).
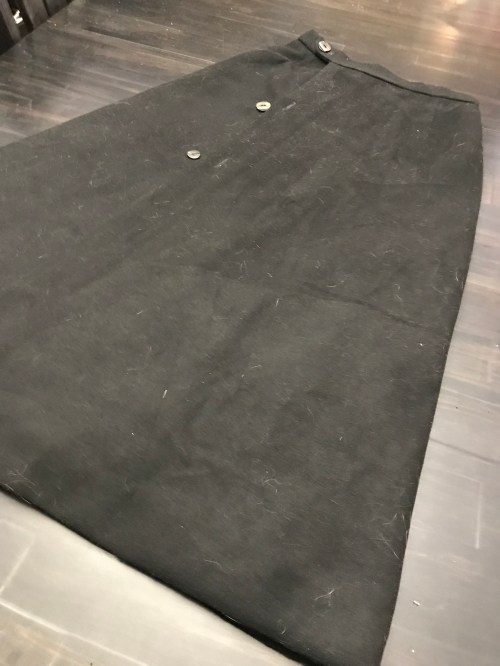
 the fabric is a polyester coating that I really don’t care for, but it’s essentially the same stuff as my Red Lace coat is made of, and I didn’t want to waste any of my precious wool on a project that might be a total waste of time.
 I was originally planning to interline with flannel, but the only flannel I had enough of that I was prepared to sacrifice was one my daughter came in and dibsed for PJs while I was midway through ironing it. In the end I went with fabric from a rather ugly rayon bedsheet, which was almost as slithery as my evilly beautiful polyester lining (a remnant from a

 Now if it will just stop melting long enough for me to test out its final form. Thanks, climate change.
 I’m not the biggest fan of fashion trends, in general, but when the trend of the moment happens to overlap with your innate preferences… well, you just gotta run with it, right? Which is how I feel about velvet right now.
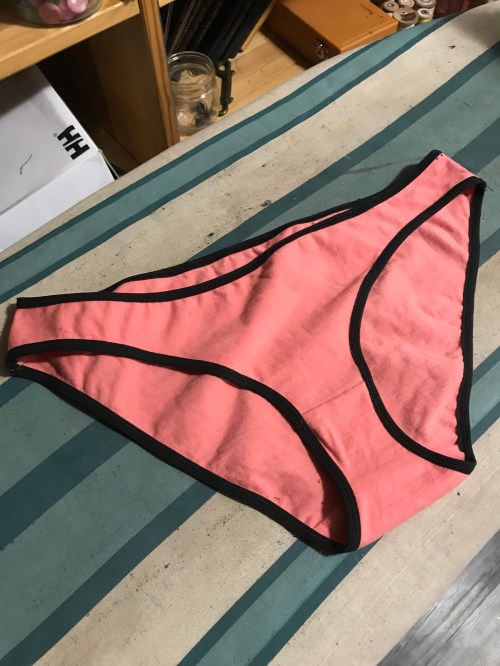
 I used Butterick 6031 again. I’m trying to do a count in my head and I think I’ve made the slip or cami a total of six times. Well, seven now. I’ve made the briefs a couple of times, too, but I’m not as wild about them.
 For this version, I went very pared down. I didn’t want to mix flimsy stretch lace with the heftier velvet. So I went with FOE for the top edge and straps, and I lengthened the skirt three inches. I’ll probably shave an inch or so off of that, though, it’s a little long now.
 I used my usual 5/8″ FOE (which finishes at about 1/4″) and I think I maybe should’ve gone with the 1″ that finishes at about 1/2″ for a heftier look, but it didn’t even occur to me. I use the 5/8″ for just about everything, and I’m making a pretty good dent in that giant 100-yard spool I got a few years ago.
 The whole thing took about half an hour, including cutting out. It helps that the pattern was in my quick-access drawer and that I used the same black thread that was already on the machines.
 Now obviously a velvet slip is not very effective as a slip per se, but it’s a pretty awesome nightie. Especially when it has matching velvet stockings. Presumably a robe would complete the set but I’m not much of a robe person… we’ll see. For now—back to the Christmas presents!


