Desperate little bits

Little Bits

Sewing has been happening, in lots of desperate little bits.

This weekend we are going to my husband’s grandfather’s funeral. My husband wasn’t particularly close with his grandfather, and the passing was not entirely unexpected, but it does mean we’re going to be seeing a couple of little cousins we don’t often see, including the intended recipient of the Sweet Little Dress. Unfortunately, upon consideration, I remembered that said little cousin, while a slender member of her age-group, still gives Syo hand-me-downs… so I nerved myself to make another sweet dress, in the size up (size 140, for reference). As per usual, making something the second time tends to allow me to skip things and otherwise screw up—there have been a few improvements, but a lot of growling and even unnecessary hand-stitching.

And since we’re giving her a hand-made present, her little baby cousin, who was born last winter, should probably get something hand-made as well. Assuming I can pull that off tonight (I do like some of the baby-boy pants in this Patrones issue). /sigh. And because I should have been doing that, I’ve been working in frantic little spurts on the thing for me, which photographed as featureless black, so you’ll have to guess what it is. 😉

Oh, and Tyo has been desperate to work on a project for school, which we’ll have photos of tonight, maybe.

I don’t really like working on multiple projects at once. I feel like I don’t really get in the zone with any of them. Tonight, I really have to prioritize and get the presents DONE. But right now I’d probably better get my butt in gear so I can put in a reasonable day’s work and still have a bit of time to sew tonight.

>_<

13 Comments

Filed under Sewing

Sewing Kit—an iPhone App review

The Pattern Problem

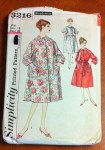
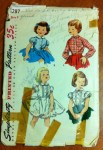
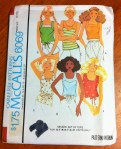
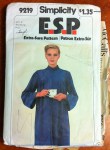
So, from time to time over the last few months as I’ve gone from pattern thrifter to pattern hoarder, people have asked how I organize or keep track of all the patterns (and how many, ulp, there are.) The answer to the first question, frankly, is “Not well,” especially when it comes to organizing the physical patterns (which currently involves a plastic multi-drawer thingy and a lot of shoeboxes). On the electronic side, I’ve tried a couple of different methods, but the main one is an iPhone app called Sewing Kit. I don’t have every single pattern I own in there (especially the electronic ones) but I do have a fair number (erm, 211 last count), and since I got it last summer I’ve been pretty good with putting in my new purchases. I like that it’s on my phone (so handy when I’m out and about) and that I can take the photos and add them straight in, rather than having to transfer them to the computer and set things up. I’m trying to keep a simple folder of all the envelope photos on my laptop, too, but the info on the iPhone is a bit more comprehensive.

I don’t know that this app is available for anything other than iPhone, so this post may have a bit of a limited target audience… sorry. But anyway, folks, meet Sewing Kit

This is, far and away, the most expensive app I’ve ever bought for my iPhone. It costs $9.99 or so last summer (Although it appears the price has gone down. Which sucks for me, but it’s much easier to recommend it for five bucks than for ten) And it gets so close to being awesome that it’s quite painful, really.

I picked Sewing Kit, as opposed to some of the other stash-tracking apps, because it was the only one that seemed geared towards garment sewing as opposed to quilting. In particular, you can track patterns, stash, people (‘s measurements), and projects all in one app.

Patterns:

Patterns

This is the part of the app I use most, as I just can’t get too excited about tracking my fabric stash, even if I ought to. For recent Big 4 patterns, there’s a scan-barcode feature that lets you just point the camera of your phone at the bar-code on the pattern envelope—it will download the name, number, even photos from the company website. I don’t buy a lot of brand-new patterns, so I don’t get too much use out of this feature, but it’s pretty handy when it works. If it doesn’t work for a particular pattern, you can enter company (from a customizable list), number, size, category, yardage, difficulty, etc. manually, as well as add photos. The adding photo function is glitchy—often it will crash the program and fail to save the photo. The workaround is to take the photos first, and then after touching “Add photo” choose “select existing”, which works fine and means you have a real copy of the photo to upload to your computer or whatever if you (like me) try to keep track of patterns there as well. It’s a little clunkier of a process, though.

Pattern details

I have a couple of issues: one, it would be nice to be able to include a pattern in more than one category (eg. a wardrobe pattern that has shirt, pants, and jacket). The second is that there’s not a whole lot of browsing functionality—it’s easy to look up a particular pattern, but the thumbnails are kinda small (as necessary on a little phone) and it would be nice to have a full-screen photo-view without going all the way into the edit-photo feature. It’s also not really easy to call up the individual categories for viewing (say, to see all your jacket patterns)—you can do a search for that category, but it’s not like you can just pick it from a list, and again, a photo-browsing function would be nice.

Pattern images (these ones were downloaded automatically because it is a new pattern.)

Every once in a while I’ve run into a glitch where it simply stops displaying the patterns in the pattern list. It still says there’s however many patterns there, but they don’t show up, which is pretty heart-stopping. Doing a search of any kind seems to clear up this glitch, but still, weird.

Stash:

Stash

As expected, you can upload photos (same issue with crashing), length, width, fibre and care information about your various fabrics. I should probably use this feature a lot more than I do, especially to keep track of yardage.

People:

People

Although it doesn’t get the most use, this is a really handy feature of the app, and was probably the one that tipped me over into buying it. It lets you record a person’s name, photo, and measurements (selecting from a list of basic measurements, with the ability to add custom measurements as well) for future reference. I find this really handy as I’m always losing the little bits of paper I write measurements down on. It even has non-sewing use, as I used it the other day when picking up undies for the kids to choose the right size.

Projects

Projects

Projects pull together all the other categories—you can pick which pattern you’re using, which fabric, and who it’s for, as well as add information about notions and anything else you might need. I hardly ever use this category, at least partly because I’d rather blog this sort of stuff, but it would be perfect for pulling together your shopping list (notions, lining, etc.) and planning things, if you were that sort of organized person (which, as we’ve long ago established, I am not.) There are a couple of things that really niggle me about how this is set up, though—the lists it calls up of your patterns and fabric don’t show the images, so you’d better remember the pattern number or the name you gave the fabric. Also, there’s no way, once you’ve selected a pattern, to jump from viewing the project directly to viewing the pattern—you’d have to switch over to the pattern category and look the pattern up (say, to check on the yardage it requires). Again, not a big deal, but not slick.

Overall? I’d give it about a 7 out of 10. If there were anything out there with similar functionality (and please let me know if there is, there wasn’t when I looked last but times do change rapidly in the world of apps) I’d probably score it lower, but it does do what it does in a way that’s handy, portable, and I’m likely to have with me if I decide to pop into the fabric store on a whim. You can export/back up the information, although I haven’t actually tested transferring it to another device (like my iPad). There is an HD version for the iPad but I haven’t bothered to spring for it, either—the reviewers were a bit crabby about the lack of ability to sync between the apps on different devices.

It’s just not a very slick app. To enter information, you often have to go in through several  screens to get to actually enter the number. Even though it’s something you’re always going to entering a number for (like a measurement), the default keyboard is the alphabet, not the numeric keyboard. There’s no “overview” function for viewing details, just the edit view—basically, the functionality for retrieving and overviewing information isn’t as great as the functionality for entering information (and even the entering function isn’t the greatest). There’ve been a few improvements in the year or so that I’ve had the app, but not a whole lot.

Is slick too much to ask? I dunno. I don’t regret my purchase, and I do use it plenty, but it could be so much more…

59 Comments

Filed under Sewing

My pre-stitched fabric

Pre-stitched fabric

Some people expressed a desire to see the dress I bought (aka pre-stitched fabric) while back home for May Long, actually on a body. It’s “vintage” in that it’s a fairly timeless style and came from a vintage clothing store—as I said before, if it’s older than a couple of decades I’d be extremely surprised.

These are not the best photos, mostly because it was a work-from-home day and my hair was pretty abysmal. I need a haircut in the worst way right now, and while I can still coax it into a fun style, it’s not long-lasting and takes a lot of work. This day, I did not put in all that work.

Cute?

This dress has the exact feature that set me off on Project Drop-Waist, the full skirt beginning at waist. It’s still a little touch and go, but I think the fact that this one is pleated rather than gathered and not overly full, helps a lot.

Back view

I even tried to take pictures outside, but wound up all squinty, so I’ll just give you this rear shot highlighting my lop-sided self-tied bow and complete failure to make appropriate use of my iron. Also, I could totally do a better invisible zipper. 🙂

There’s some horizontal wrinkling on the bodice, partly because it’s tight, and partly because it’s (zomg*) too long. By shortening the straps I can get the waist to end at my waist, but it still comes quite (almost uncomfortably) high under my armpits, and there’s still a little bit too much length. None of which I would’ve noticed before I was sewing.

In any case, I feel pretty cute and not too poufy, so I’ll call it a win.

Also, anyone who complains about quilting-cotton as a garment fabric (and I am one of those people 😉 ) should take note of the complete lack of drape of this fabric. It’s not quilting cotton, but the way it hangs (and wrinkles!) is eerily similar…

drawing tablet

In other news, Whee! Do you see that? That’s my Wacom drawing tablet, which I got as a birthday present from Osiris yonks ago. Most importantly, though, is that’s the stylus for it, which has been missing in action for most of the past two years. It had resurfaced briefly last fall, only to vanish again within weeks. Most recently it was retrieved from the depths of the couch (how the heck did it even get into the living room? I *never* take the tablet in the living room). I am thinking this time I will chain it to the tablet…

*Sarcasm font.

8 Comments

Filed under Sewing

Follow-up

More Star Wars

You guys rock my world . Your comments on the Star Wars dress have left me in mushy (geeky) heaven all week, even as I’ve had almost no time or read, write, or comment myself this week. Which unfortunately is probably going to be pretty representative of the next few months of my life. Aiee. I’m exhausted just thinking about it. (Incidentally, I wore the dress to work on Monday. Not. One. Single. Comment. Which says something about my workplace…)

After finishing a big exciting project like the Star Wars dress, there’s always a bit of a “what next” feeling. Obviously it’s not possible to top it, at least immediately. So I backed off, and made Tyo another Young Image tank-top.

Except I decided to experiment with some fold-over elastic instead of a self-fabric binding, and, um, the results were not pretty. I gave it to her for a pyjama shirt.

She wore it to school the next day.

Tyo’s new racerback tank (aka boybeater)

Which is an awesome ego-boost, even as I cringe inwardly that people might actually see it. They know I sew at her school. Someone might notice. Anyway, to redeem myself in my own eyes, at least, I immediately made another, with “proper” binding. The photo is the “proper” one. I couldn’t find the crappy one to photograph—which might mean she’s wearing it again. The fabric is a black rib-knit I found at the thrift store; it’s soft and drapes well but has zero recovery, which works okay for a shirt like this—I won’t say well, but okay. Also when I was putting on the bindings (with clear elastic this time) I didn’t always stretch them quite enough, so when I finished one side of the back armscye was stretched out *way* more than the other. And with clear elastic in the binding, there’s no chance of it shrinking down in the wash. So I trimmed that side to match the other, sacrificing grain-straightness in the process. So probably it will twist weirdly when worn. At least the bottom is still on grain.

That’s a funny thing I’ve noticed, sewing for my kids. They have definite standards for what they will and won’t wear (sewing for Syo, in particular, is very hit-or-miss) but when I do get a hit, they a) won’t take it off until I peel it off with a spatula, and b) don’t give a rat’s ass about the stitching, finish, quality, or even attractiveness. Syo’s favourite homemade pieces are some self-drafted bits I couldn’t even bring myself to blog about, including one she made herself that looks like something a caveman would make, if cavemen had access to lycra and sergers. (And, thinking of the amazing Neolithic art out there, I’m probably being offensive to cavemen.)

Syo’s faves: caveman sewing

And they’re both grubby, having been retrieved from the laundry for this photo. Like I said, peeled off with a spatula. Although the print of the one on the left has these weird grey smudges in it that always looks grubby. The one on the right she made pretty much all by herself. There are some bits pieced in over the butt on the one side. Symmetry is optional.

Thrift store “scores”

Anyway, just to round out this post (since there’s not much to show when it comes to simple tank tops I’ve made before) here’s the week’s thrift store gleanings. Some off-white silky stuff that will be good for a lining*, some random odds and ends from a baggie, and one early-80s athletic pattern of questionable redeeming value. What do you think about those generic woven labels? I love the custom labels people make (even though I forget to use mine most of the time, and mine at least don’t hold up to the wash at all well), but these generic ones strike me as a little, hmm, tacky. “Made for baby with love” and “Made with love by Mommy.” I might have to put them in stuff for my husband. That would be kind of awesome, actually.

It’s our anniversary today, by the way. 13 years.  I believe the plan is to “celebrate” with steak and Return of the Jedi. I was hoping for a motorcycle ride, too, but Osiris slept funny last night and now his neck is killing him, which doesn’t work so well with things like shoulder-checking while leaning forward holding on to handlebars. Maybe a walk instead. The weather is too fab to spend the entire day inside working. 🙂

*There was also off-white poly satin and off-white poly chiffon, which I resisted. Methinks someone was planning to make their wedding dress, then bailed.

28 Comments

Filed under Sewing

Episode IV

Long, long ago, in a galaxy far, far away…

The dress formerly known as Simplicity 3965, alias the Star Wars Dress.

She is finished (well, mostly. Still need to slipstitch the bottom of the bodice lining) And I am triumphant, mostly. (I also had WAY too much fun with the Lomo-ish filer in Picasa while editing these photos. Sorry.)

Demure.

I am definitely going to chalk this one up as a victory for Project Drop Waist. Bodice has been lengthened, and it fits, I think, pretty darn well. Minor dart issues aside. I will confess, after completion I took the bodice in a smidge at the side-seams. It was pleasantly skimming, but I fear I prefer “hugging.” Eve if it’s not objectively better. /sigh.

Cute!

Boring Construction Bit:

The only problem with sewing with bedsheets is that your fabric is, well, bedsheet. Which doesn’t always have the greatest drape. So I wanted to underline. Digging through stash spat out a couple of pieces of cotton-poly broadcloth that seemed like they would work well while adding a bit more body to my fabric. I wanted to underline the whole thing, and then line the bodice. Once I cut the underlining, I used those pieces to cut out the shell (aka sheet) pieces. The cream broadcloth was just sheer enough to make positioning the motifs (aka Luke & Leia) a breeze, and I’m very glad I didn’t try to cut them out on the fold. I used this tutorial for the pattern-matching on the back; it’s not perfect, (and I may have thrown the back slightly off grain—but not the underlining!) but I’m satisfied. I didn’t attempt pattern matching anywhere else—I would’ve lost too much width on the skirt. And it wasn’t possible to match the side-seams and the back seam.

Pattern matching across the zipper (on a curved seam). Not perfect, but I’m not going to complain.

I used the trick of stitching down the fold of the dart first, to keep the shell and underlining from shifting when sewing the darts, and it worked like a charm. Sadly, I wasn’t able to completely avoid dart-tip poofiness. I’m not quite as panicked about darts as I used to be, but I am still a long way from mastering their subtleties (I’m just happy they usually turn out more-or-less symmetrical these days). I think the fact that the original pattern was designed for a pointier, early-60s bra didn’t help the situation. Anyway, not make-or-break. I did all my marking on the underlining, with my new chalk pencil (in bright fuschia. I am currently convinced that those marks will never come out…), which worked well except for when I tried sharpening it and broke of a big chunk of “lead”. I don’t think it’ll replace my love of my wash-away marker, but it is nice for larger areas, and comes in loads of colours. I also used a tracing-wheel and some of my vintage tracing paper, which I’ve never really gotten comfortable with in the past. But it was really handy for tracing the dart shaping more precisely than I tend to.

That’s a lot of skirt… (The pile of blue fabric above it is the entire remnants of the sheet)

Once I had cut the bodice pieces, I trimmed the rest of the sheet (it had been a fitted sheet, so there were some odd notches from the corners) into a rectangle (rrrrip!) losing a couple of inches to a small tear that I’m ever so glad I noticed, and determined (YAY!) that I would have enough fabric to make the skirt two sheet-widths wide. I got the sheet-widths stitched together, and the underlining as well, and then had a panic that the skirt was going to be insanely full. I mean, I was going for pouffy gathers, but there’s pouffy and then there’s pouffy, you know. I pulled out the original skirt pattern pieces, and was pleasantly surprised to discover that while my skirt was a bit shorter than the original pattern pieces (remembering that my “waist” is a couple of inches lower, too), the total width I had was actually only a few inches wider than the pattern suggested. Not enough to be bothered about in a skirt like this. Win!

Keeping the underlining and lining of the skirt together, smooth, and not wonky over that whole 3m+ length was distinctly nerve-wracking. To continue my couture efforts, I decided to use the 2″ horsehaid braid I found at Fabricland a few weeks back, for the low, low price of $4/m (fortunately 50% off). I considered slipping the horsehair between the underlining and the fashion fabric, but in the end went with stitching it to the fabric and then wrapping  the hem around it. I was going to just link to Gertie’s horsehair hem posts, but checking them over, none is exactly what I did. Though they’re all lovely methods. Obviously I should’ve taken some photos—oopsie. I then did some quick and dirty retro-fitting to stitch part of the rear seam (but not all of it because I didn’t want it stitched for my zipper insertion) so that I could overlap the horsehair braid at the seam. And then I realized I needed to figure out a way to finish the back edge, again only partially. I opted for binding. More retro-fitting. Not my most well-thought-through process (there was quite a bit of that in this project). But it’s all together, now. I hand-stitched the hem in place, catching it to the underlining (mostly), while watching Chronicle with Osiris last night. That was pretty fun.

Zig-zag casing gathering method.

I used the zig-zag-over-supplementary-thread method to gather the top of the skirt. (I originally learned this method with dental floss, but it occurred to me that the dental floss I buy is the super-fancy-expensive slippery stuff, so probably another sturdy thread is more economical; I used some button thread I have). This is my favourite gathering method, far and away, for medium to large amounts of gathering where I need a precise ratio of gathering. I used this clear foot, which I think is meant for inserting invisible zippers, because the grooves were pretty good for holding the thread underneath, and the clearness made it easy to keep track of where the thread was. It’s still not quite as good for this purpose as a cording foot, but I don’t seem to have one of those at this point. Really any zig-zag foot will work, but the cording foot holds the supplementary thread in a little tunnel, not just a groove, so it physically can’t slip out from under the zig-zag.

Another dig through of my vintage zippers turned up a blue invisible zip in the suggested (14″) length (plastic teeth this time). I was a bit surprised how short of a zipper was called for, but then I remembered that the back of this dress is way low. And 14″ is plenty, although the invisible zip doesn’t really like going past the gathered part at the waist. As per usual, I used this method for insertion.

Back view

The one thing I was concerned about, dropping the waist, was how it would affect the proportions of the skirt. Rather than having a short bodice and a long skirt, I now have a long bodice and a shorter skirt. The skirt comes a bit below my usual knee-length, but I was worried that making it any shorter would just look weirdly odd—like a tutu, perhaps. I considered doing some funky golden ratio calculations but in the end got lazy and decided to run with my current length and see. I can’t really lengthen it, after all, and I can always take it up if I need to. Now that I look at the photos, I think it’s all right—I don’t think I would want it any shorter, though. (And yes, I’m wearing the crazy square-dancing crinoline. It’s not really possible to wear this one without the lace showing, since the inner layer hangs lower than the outer layer. So it’s a design feature. 😉

I was considering adding a waist-stay, but then got confused. where do you put a waist-stay in, in a dropped-waist bodice? At the waist seam (down on my hips) or the actual waist? There’s a couple of inches of ease at the hips, so I’m worried a stay there that was snug enough to take the weight of the ruffles would cause a gathered look at the bottom of the bodice. On the other hand, it might make a weird fold at the waist. Hmm.

In hind-sight, piping the edges of the bodice and even the waist with something dark would’ve been a nice touch. I thought about trim going in and didn’t want to because the print was so busy, but I think a solid navy or black piping would’ve anchored the edges. I also didn’t understitch anything, though I should probably do some hand-understitching to keep the white lining from rolling out.

A little more utter photo ridiculousness.

Still, pretty happy. Now where am I going to wear it?

65 Comments

Filed under Sewing

What’s wrong with this picture?

20120525-210354.jpg

>_<

23 Comments

May 25, 2012 · 9:04 pm

What I’m doing tonight

20120524-221833.jpg

… Now if only I didn’t have to do all that inconvenient sleeping.

41 Comments

May 24, 2012 · 10:21 pm

Enabled

The Mass

While Home this past weekend, my crafty sister-in-law took me down to the Value Village thrift store there, which is much bigger than the one by my house. And apparently has fewer vintage pattern aficionados haunting it, because there is a huge pattern section, and it was well-stocked with vintage. Of course, the patterns are more expensive, 99¢ rather than 49¢ for the individual patterns. And they do indulge in the obnoxious practice of bagging some of them (usually the best of the vintage, although there’s a fair bit of vintage in the individual patterns, as well).

Despite these disadvantages, I had very little restraint. Something about being home and not having the option of coming back next week.

For those who are actually interested in the nitty gritty, please flip through the gallery. For those who are merely shaking your heads in dismay at my wholesale descent into pattern-hoarding, well, my husband shares your pain. At least I didn’t buy fabric.

Now if only I can snatch a few minutes to actually sew one of these days…

30 Comments

Filed under Sewing

I bought fabric.

Adorable fabric.

Unfortunately (or fortunately, depending on your perspective), it’s already been fashioned into a dress. An adorable little full-skirted sundress, in fact. Are you surprised?

Pre-stitched Sundress

We are back in our hometown for the weekend, and my hometown Sewing Friend suggested that we check out a new vintage clothing shop in her neighbourhood. So we abandoned our spouses with the children and dashed off for a few minutes of precious child-free time at Tikkityboo Vintage, a teensy tiny, exquisitely elegant little store in a sadly-dilapidated stretch of minor commercial real-estate. It’s one of those areas that looks just like that really cool, chic part of town with all the nifty boutiques, about ten years before everyone realized how nifty and chic it really is. Except in this case, it’s been like this for as long as I can remember. Which is a pity, because the other street of chic, stylish boutiques in town has long since lost most of its eclectic charm under a swarm of high-end clothing shops and hair-salons.

Amidst the racks of gorgeous (and not so gorgeous) vintage dressses, I found a lovely flocked-print circle skirt, unfortunately with a waistband that *might* have fit Tyo, and this cute little dress, which fits me just about perfectly. I’m not convinced it’s *especially* vintage—the label is Made In China and identical to something that you’d find in a modern garment, and nothing about the construction suggests any great age. But it’s cute, the fabric is adorable, and the price was low.

In need of repair.

There’s a tiny bit of discoloration on the sash that hopefully a bit of a soak with some Oxy-Clean will do away with, and it needs a touch of repair at the bottom of the bodice. And while the weather is actually fairly good for May Long*, it’s not quite strappy-sundress weather, so I won’t be wearing it right away.

But I still think it’s really, really cute, and I get to have that warm supporting-local-small-business glow, which I rarely get in my usual haunts, as I live in a fairly modern suburb that is the natural habitat of big box stores and chain everything. Unfortunately I’m not likely to have any sewing to report for several more days, unless Sewing Friend and I manage to dodge our husbands again and duck off to the fabric store…


*The long weekend in May in Canada is officially Victoria Day, when we celebrate the Queen’s birthday, but most people call it May Long. It’s the official (usually miserable) start of camping season, and is generally celebrated with bush parties and snowstorms.

16 Comments

Filed under Sewing

Sweet Finale

Y1111

OK, I promise this is the last on this little dress. Once again, pattern Y1111 from Young Image Magazine, from their first issue, Summer 2011.

Snug. (and that’s the zipper side! 🙂 )

I made the size 128, as per Syo’s chest measurement, however I did lose a small amount of width due to taking slightly larger seam-allowances on the skirt gores. I don’t imagine it was more than one or two centimetres around the whole dress, though, so the dress is very close fitting to begin with. We can just barely get it zipped up around Syo.

Unfortunately, my old camera didn’t want to focus on anything more than a foot away.

Which, of course, she thinks is absolutely perfect.

Side view

I also lengthened the skirt by about 4 cm. It now comes to just below her knees. If I had been actually trying to fit it to her, a small swayback adjustment would’ve been in order. Or, y’know, a bit more ease for that bottom.

Front

Hmm

The hem.

Ok, I am now officially completely out of things to say about this dress. Definitely time for a dress for me.

12 Comments

Filed under Sewing