Never let it be said that I was afraid of a challenge. Well, a sewing one. I shy away from non-sewing ones in my daily life all the time. But that’s for my shrink to work out. In the meantime, what the fuck was I thinking?
Oh, yeah.
 I’ve been playing with the idea of a quilted skirt since even before Gertie first made one last year. I’ve been intrigued by the idea of free motion quilting ever since I discovered it was a thing that exists. (Especially once I got a machine with feed dogs you could drop.) And while I’m intrigued by the thriftiness of patchwork, I am less attracted to the mysterious desire to chop perfectly good bits of fabric up into ittybitty pieces, however charming and artistic the result may be. But free motion quilting—drawing with thread—seemed right up my alley.
Especially when I started researching historical costuming and ran across the fabulous quilted silk “petticoats” of the 1700s.

Now, odds of me wearing a fabulous silk petticoat like the one above (from the Met)are fairly low, but odds of wearing a fifties-style quilted skirt? Well, that seemed at least probable.
(Incidentally, throw the term “boutis” in the search in Pinterest. OMG.)
 And if I can do it as a shop project without having to fork out for the weird stuff I don’t have lying around (like batting)? Even better.
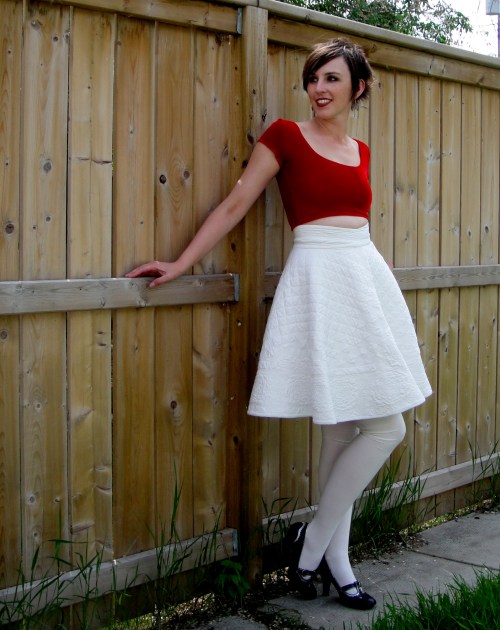
My fabric of choice was the “cotton satin” Fabricland got in again this spring. (I thought cotton satin was sateen, but anyway.) it’s delicious. It’s the same fabric I used for my polkadot dress last summer. I don’t know if it really is different from, say, a quilting cotton for this application, but I love it so whatever. 🙂
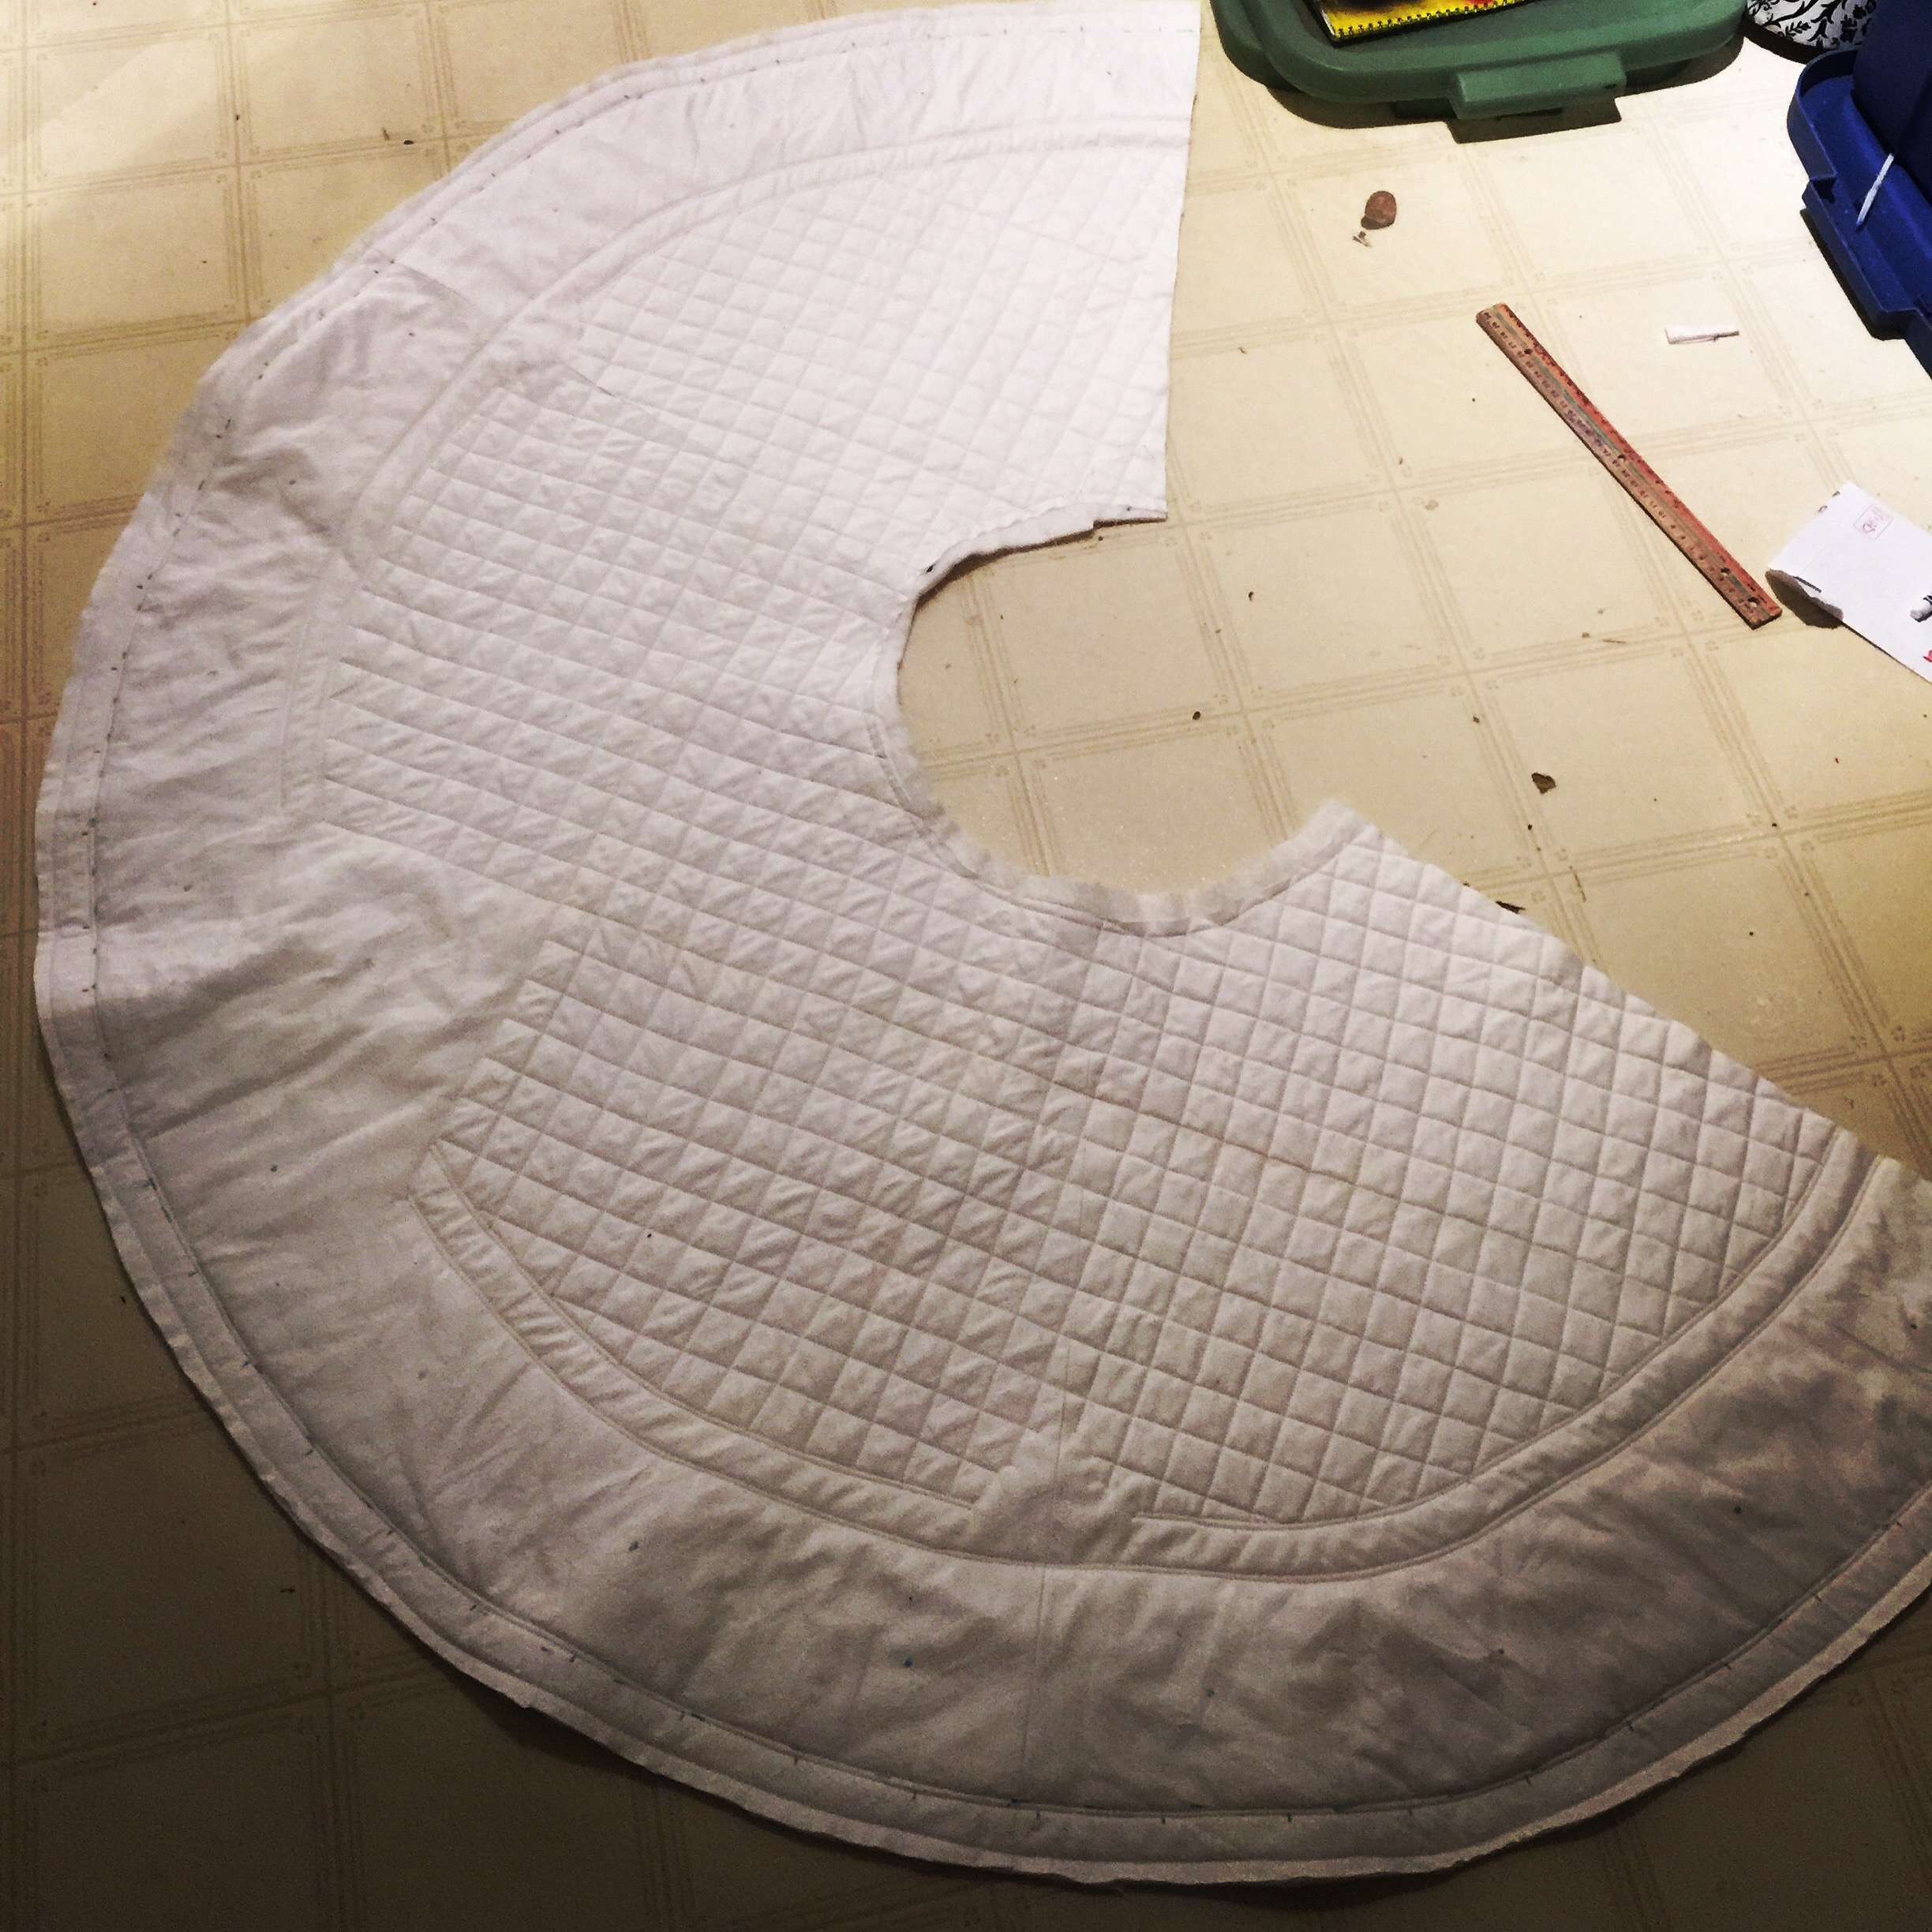
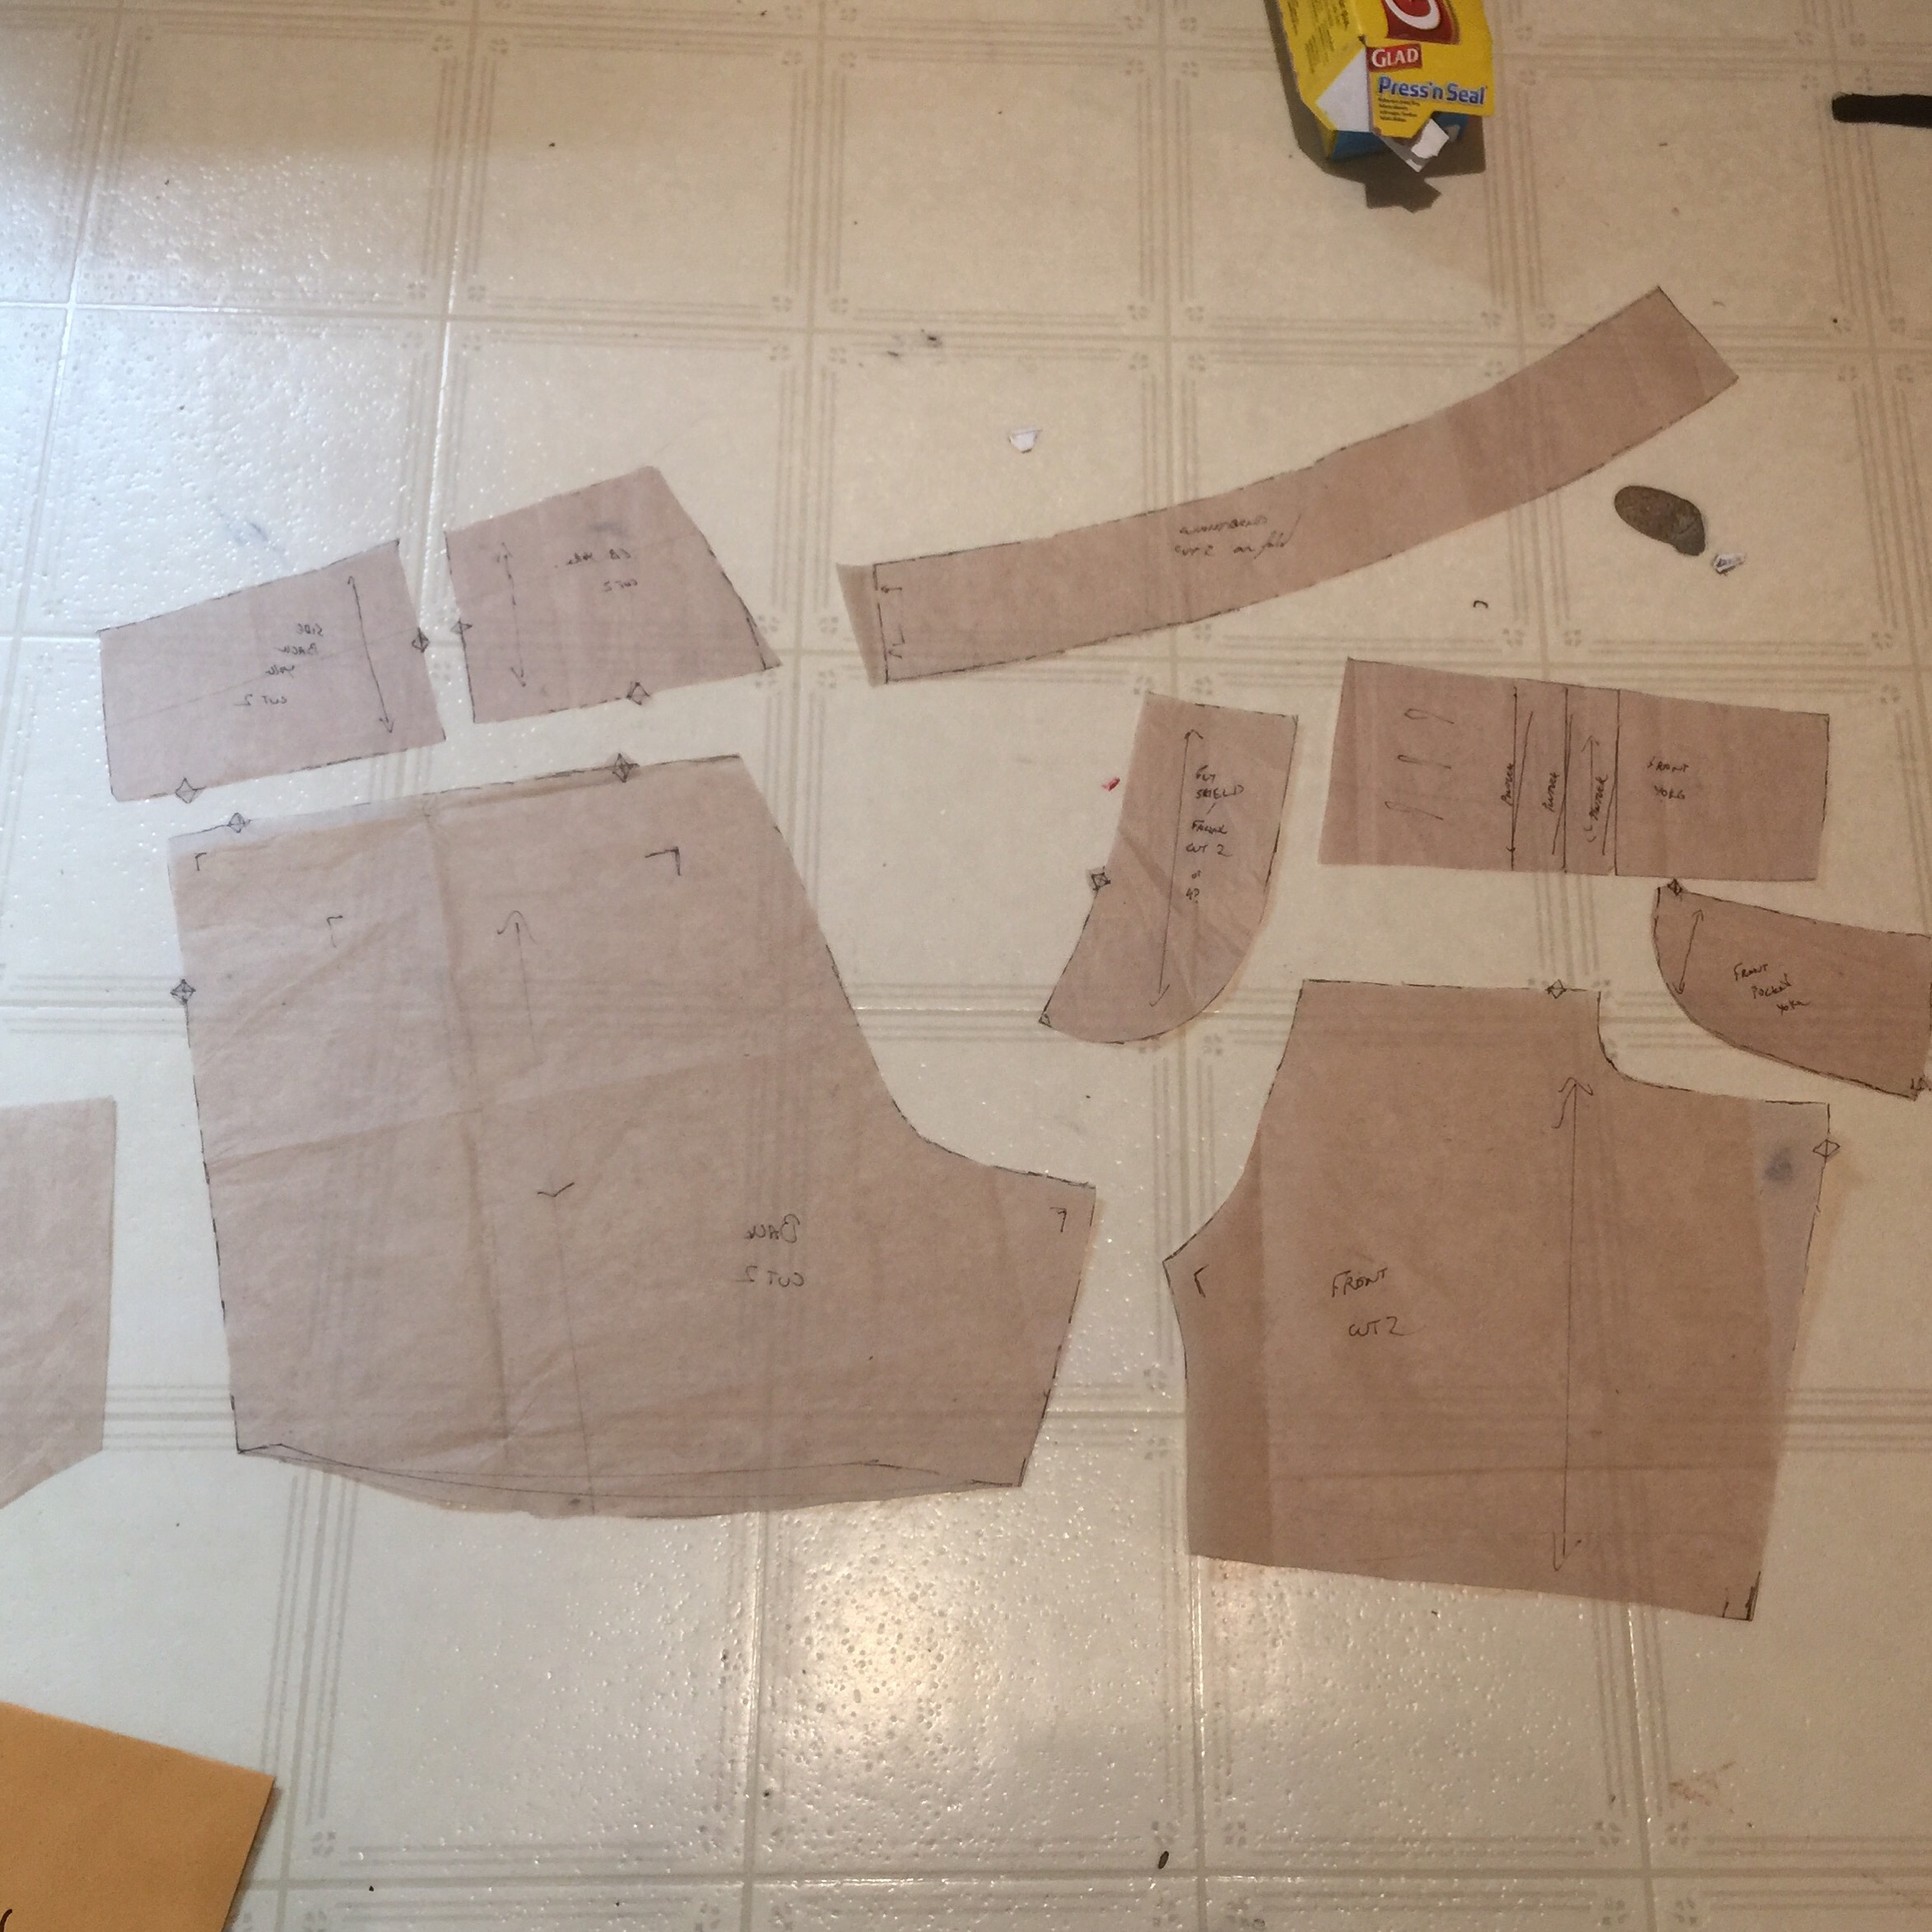
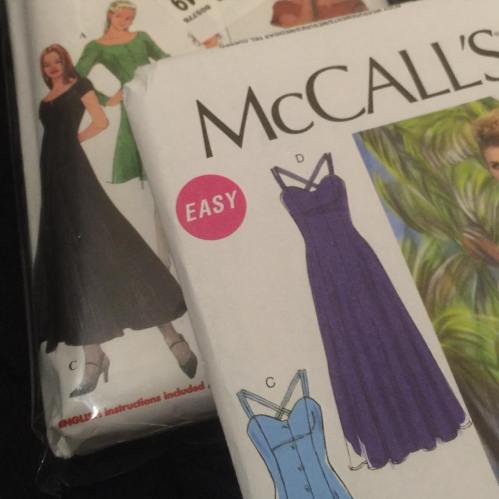
 For the pattern, I went with McCall’s 7197. I wanted a flared skirt without darts, but not a full circle as I thought that might be too much.
 It’s still a good chunk of a circle, about 2/3?
The batting is a bamboo needlepunch because it feels so soft and yummy to touch as well as being quite thin. I was hoping it might make a softer final fabric than a cotton batting, although then I went and double-layered it since the quilting on my samples looked much better double-layered, and then I quilted the whole border so densely it could probably stand up all by itself. So I suspect my final product is not readily distinguishable from the final result of any of the cotton battings.
 Initially I had grand hopes of making my skirt reversible, one side black, one side white, and contrast quilting on the white side.
 My first tests of actual quilting quickly convinced me that contrast quilting is just not a good idea at my current skill level (I have improved a bit since the above sample, my ego wants me to mention, but nowhere near enough.)
 And balancing tension while free motion quilting is tricky enough (again, at my skill level) that using different colour threads top and bottom is also a bad idea.
 As for the finer points of free motioning, I confess my research was not extensive. I spent some time on Pinterest gathering links, read a web tute on the basics, which didn’t tell me much I didn’t already know. It may have helped that while I’ve done little quilting and no free motion quilting before, I’ve appliquéd and I darn jeans like nobody’s business, which is much like free motion except for all the pretty and artistic parts.
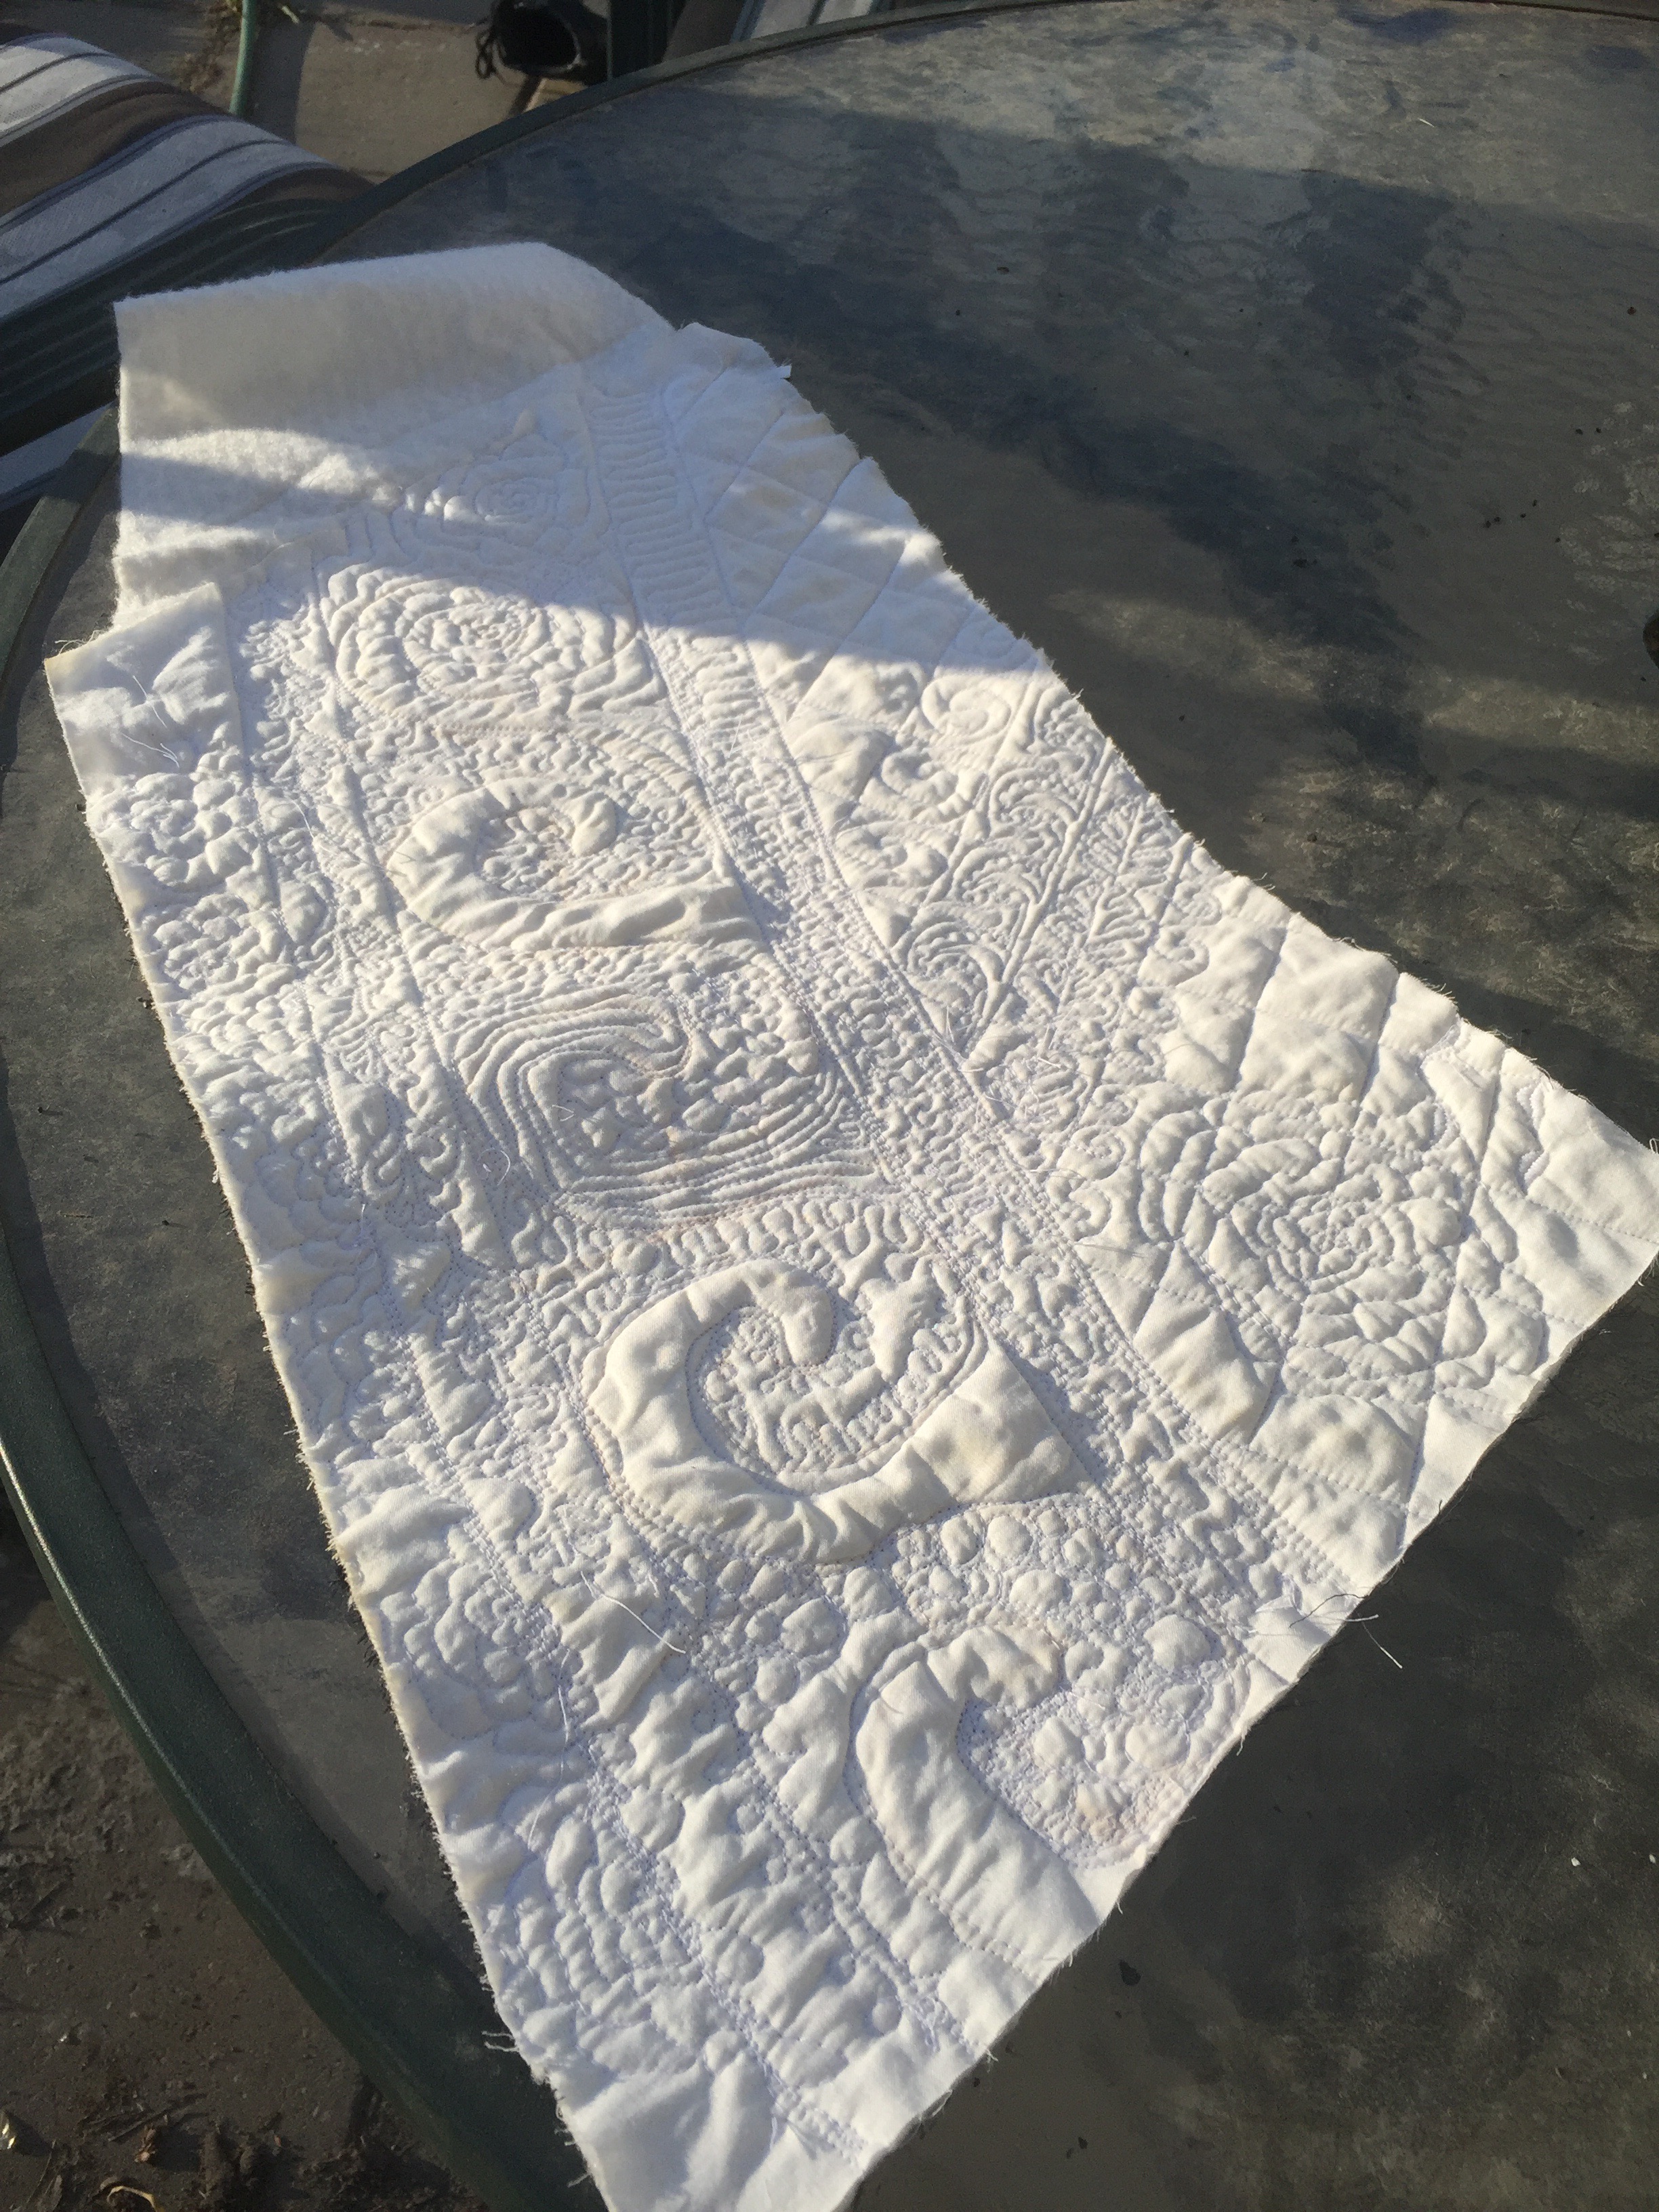
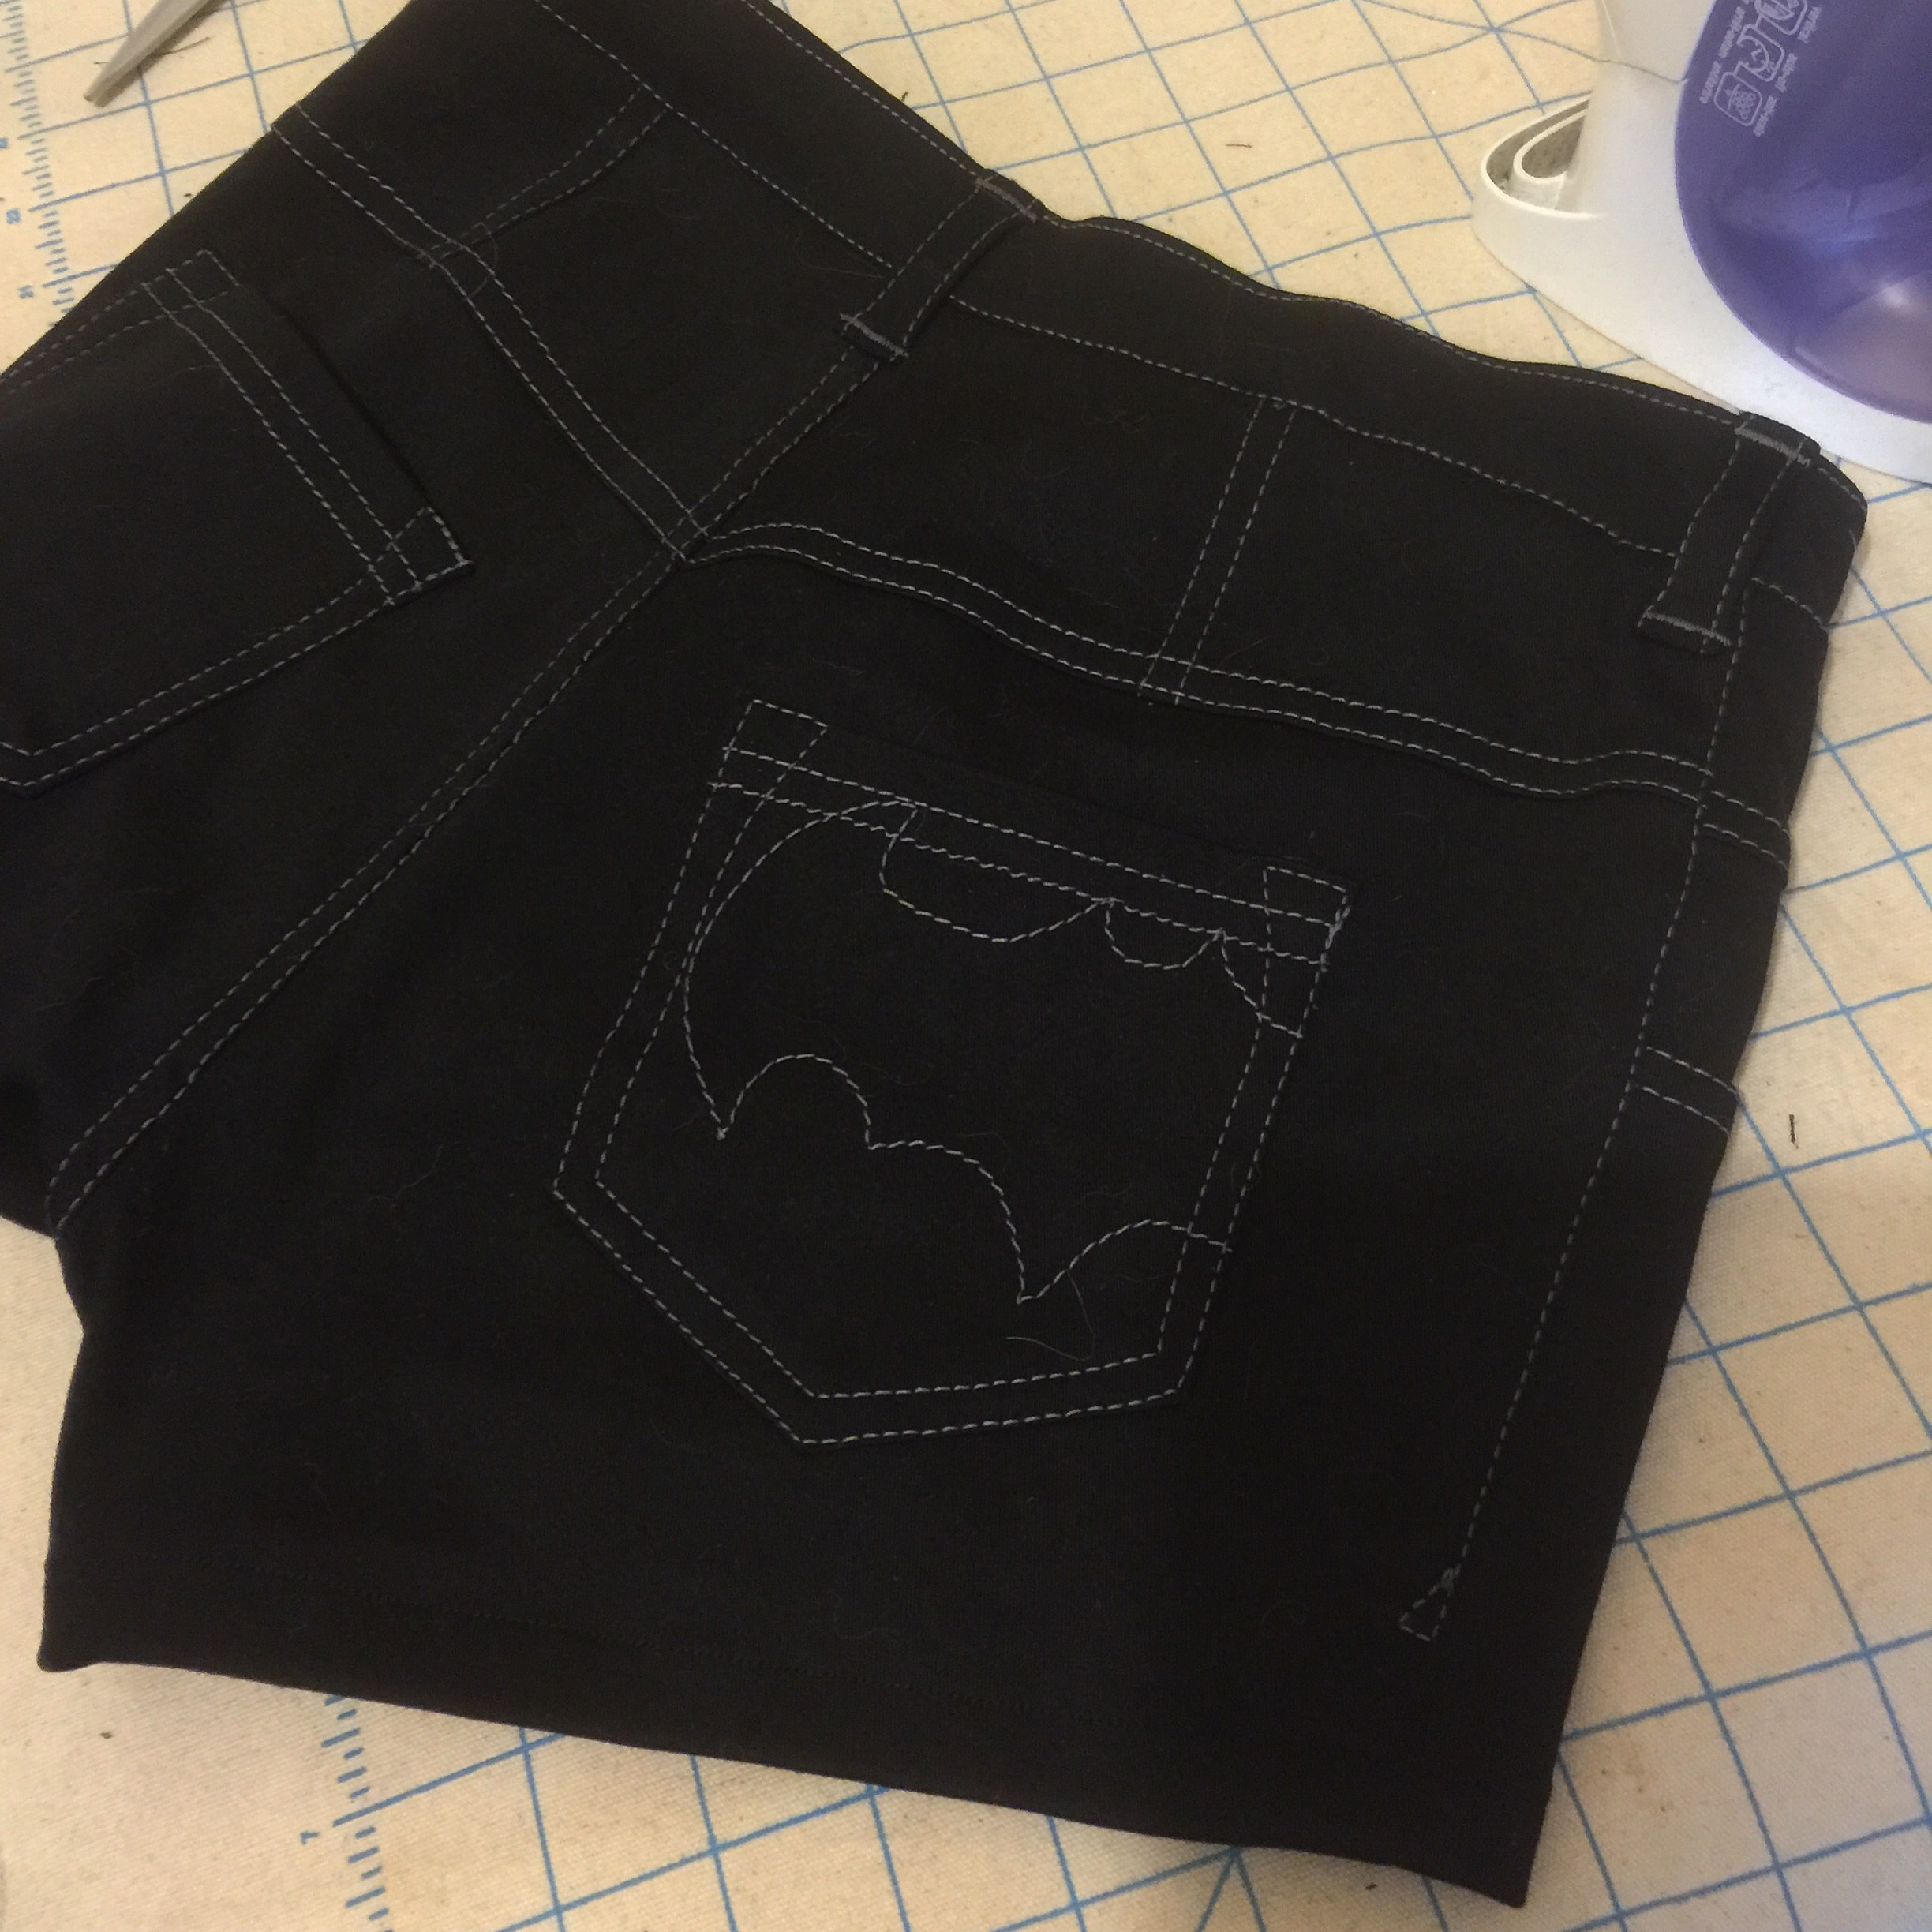
The most helpful info was a collection of tutorials from a site called The Inbox Jaunt on various motifs. Most of which are way beyond me, but they were fun to play with and give me an idea of the range of possibilities, and the few I could master I used to death in the skirt. Mainly those big peony-looking flowers, also the leaves and the checkerboard squares.
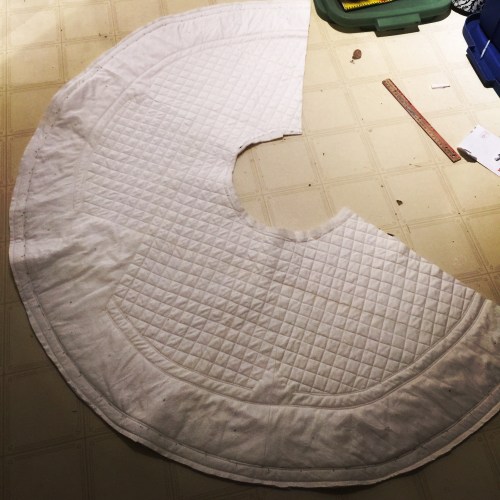 I started with a “frame” of conventional quilting, using my walking foot. Last time I quilted anything, I didn’t have such a foot, and boy what a difference it makes. The layers just stayed together. Nothing crept or pulled—even my pin basting was minimal and almost unnecessary. And the quilting bar made it much faster to quilt all those little squares.
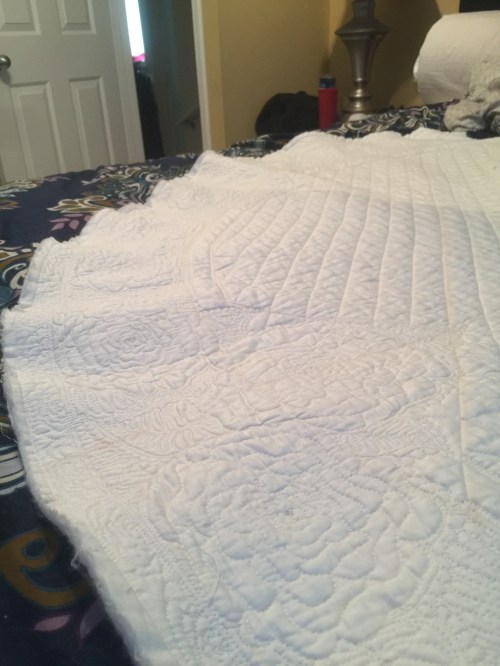 Initially I had envisioned a sinuous or spiraled motif for the border, but my skillz were inadequate to the challenge. I settled instead for lots of playing with those big flowers; the organic shape seemed to be the most tolerant of my inability to keep my free motion curves smooth and my hands’ occasional tendency to twitch sideways.
 I made liberal use of the wash-away marker, and less liberal use of the pale peach chalk pencil. I prefer the wash away marker, FYI. I still can’t get all the damn peach out. I only used it because my wash away marker died and I couldn’t get a new one for a few days.
 I wish I could say my quilting has improved exponentially, but I think all the spirals and feathers I yearn for are still beyond me. I did get a lot smoother over the course of my practicing, though, and I only sometimes jerk randomly any more. So there’s that.
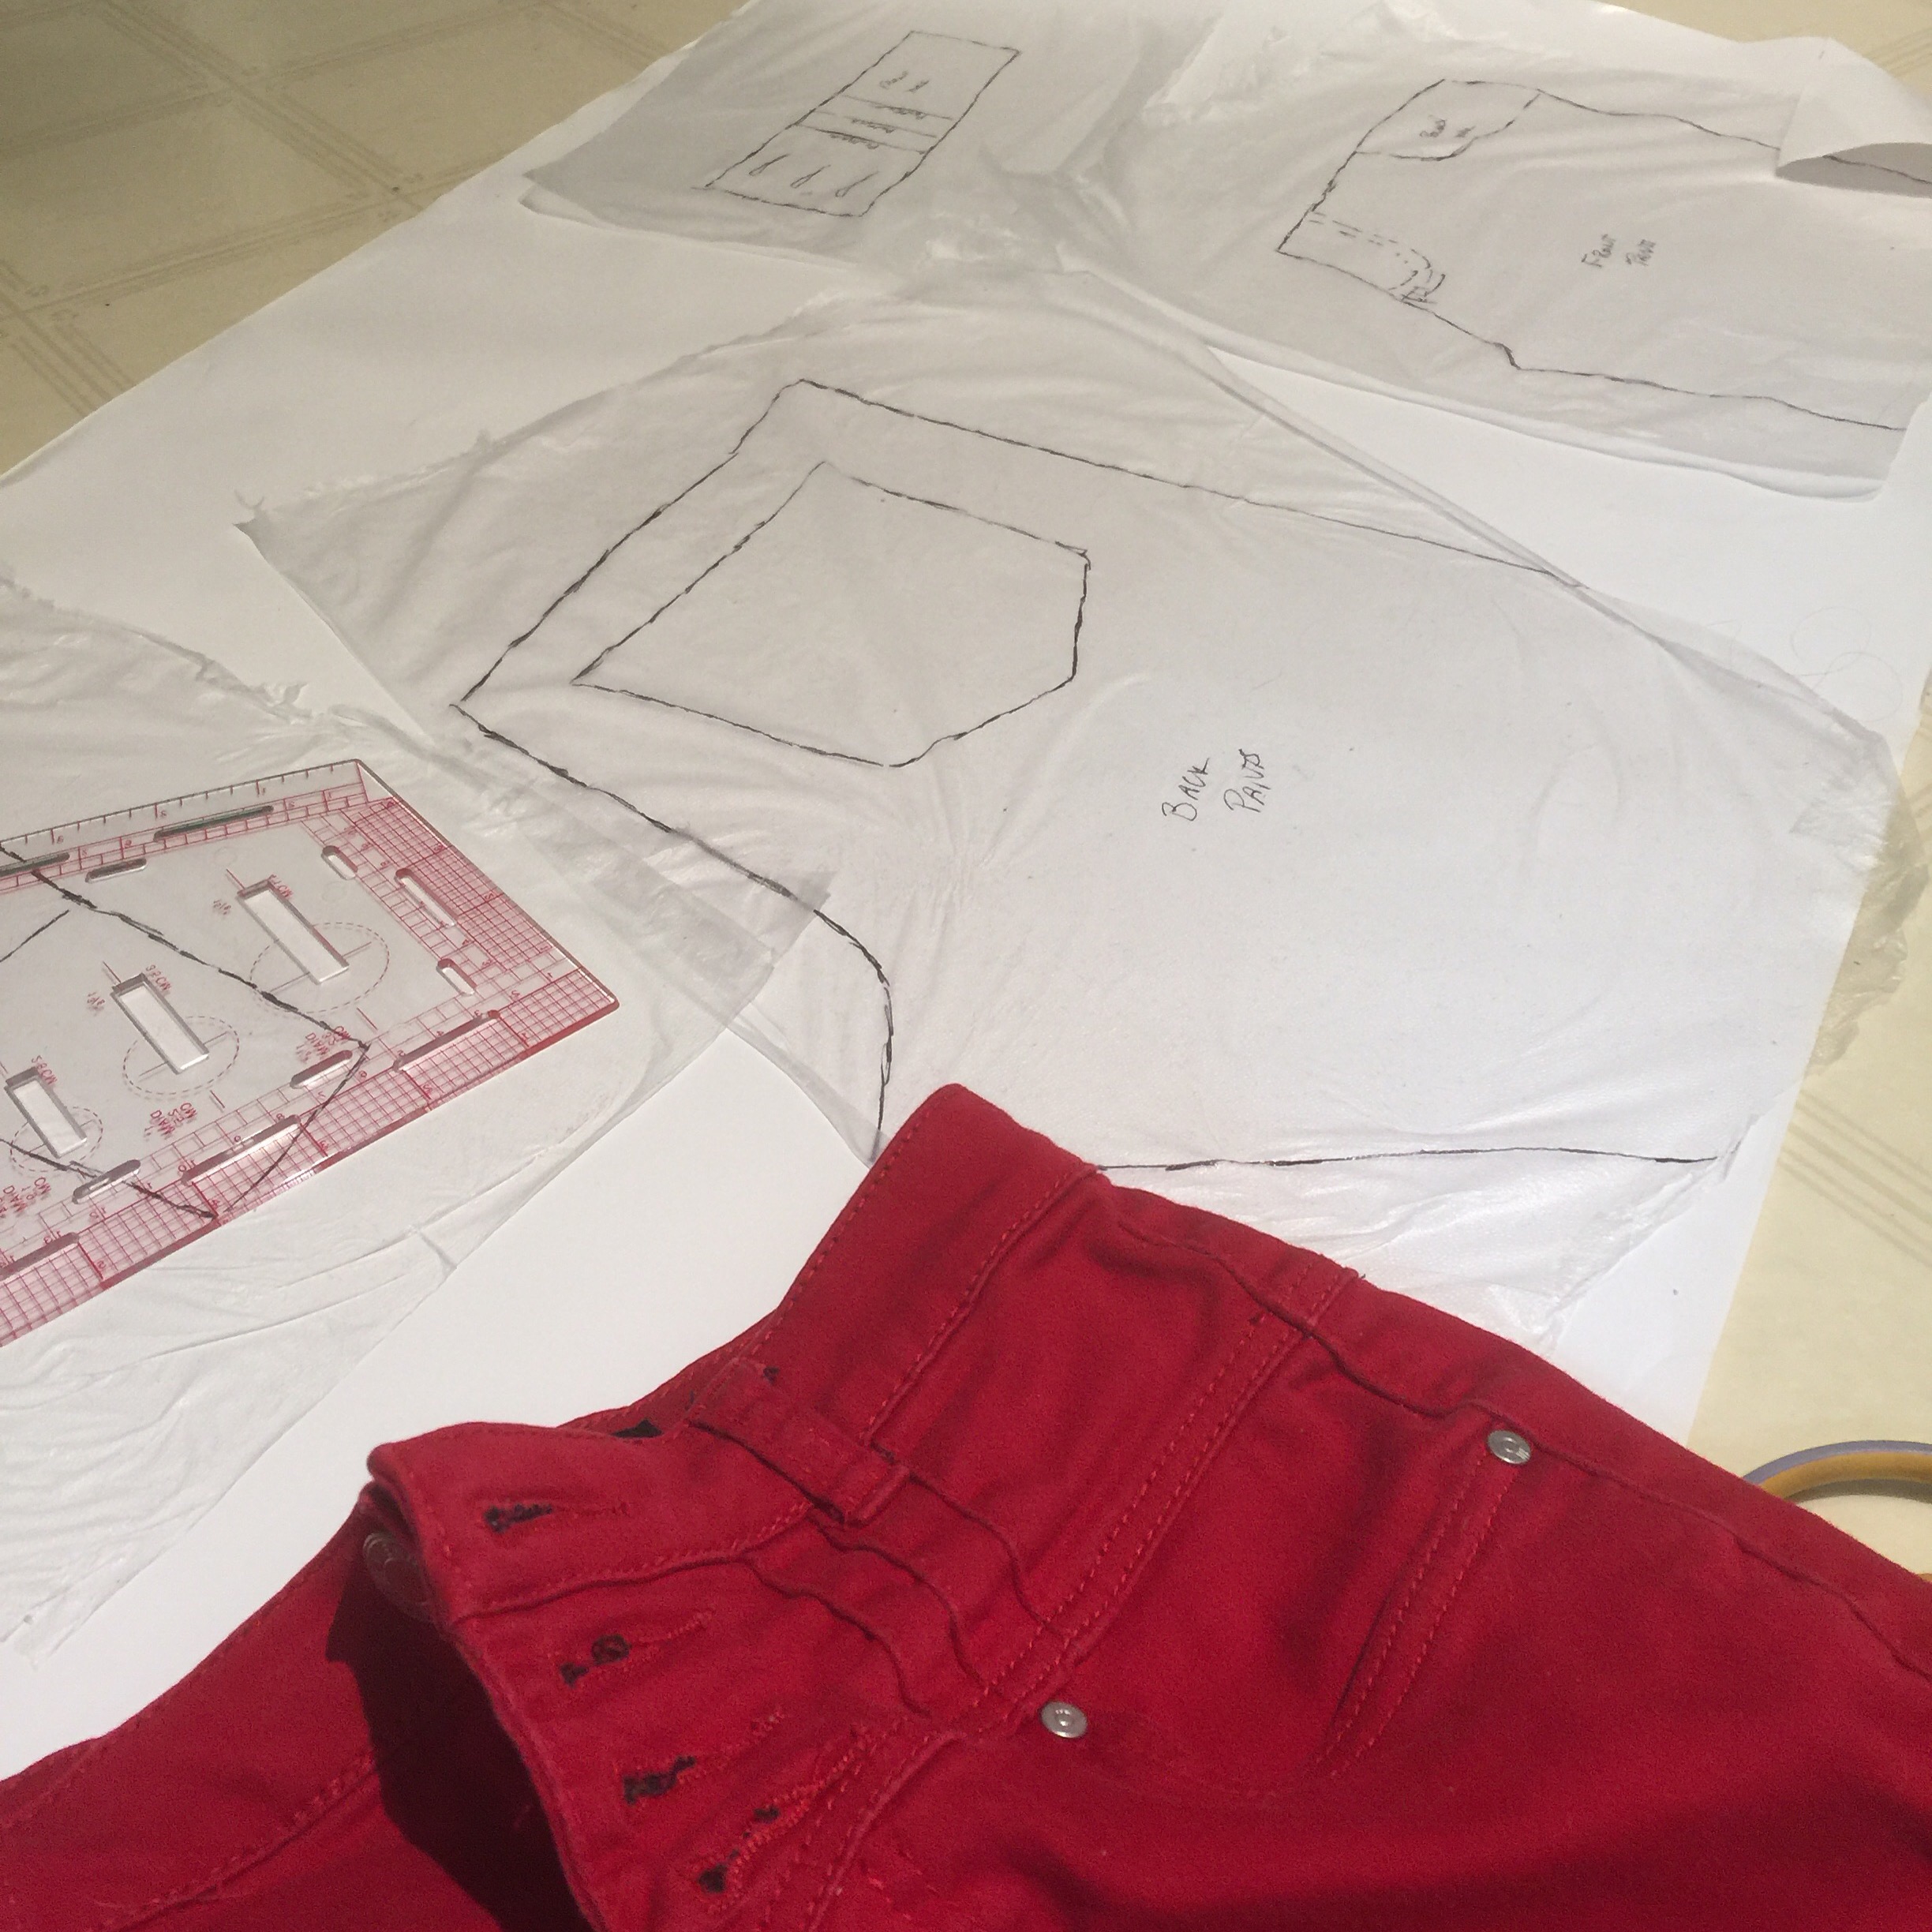
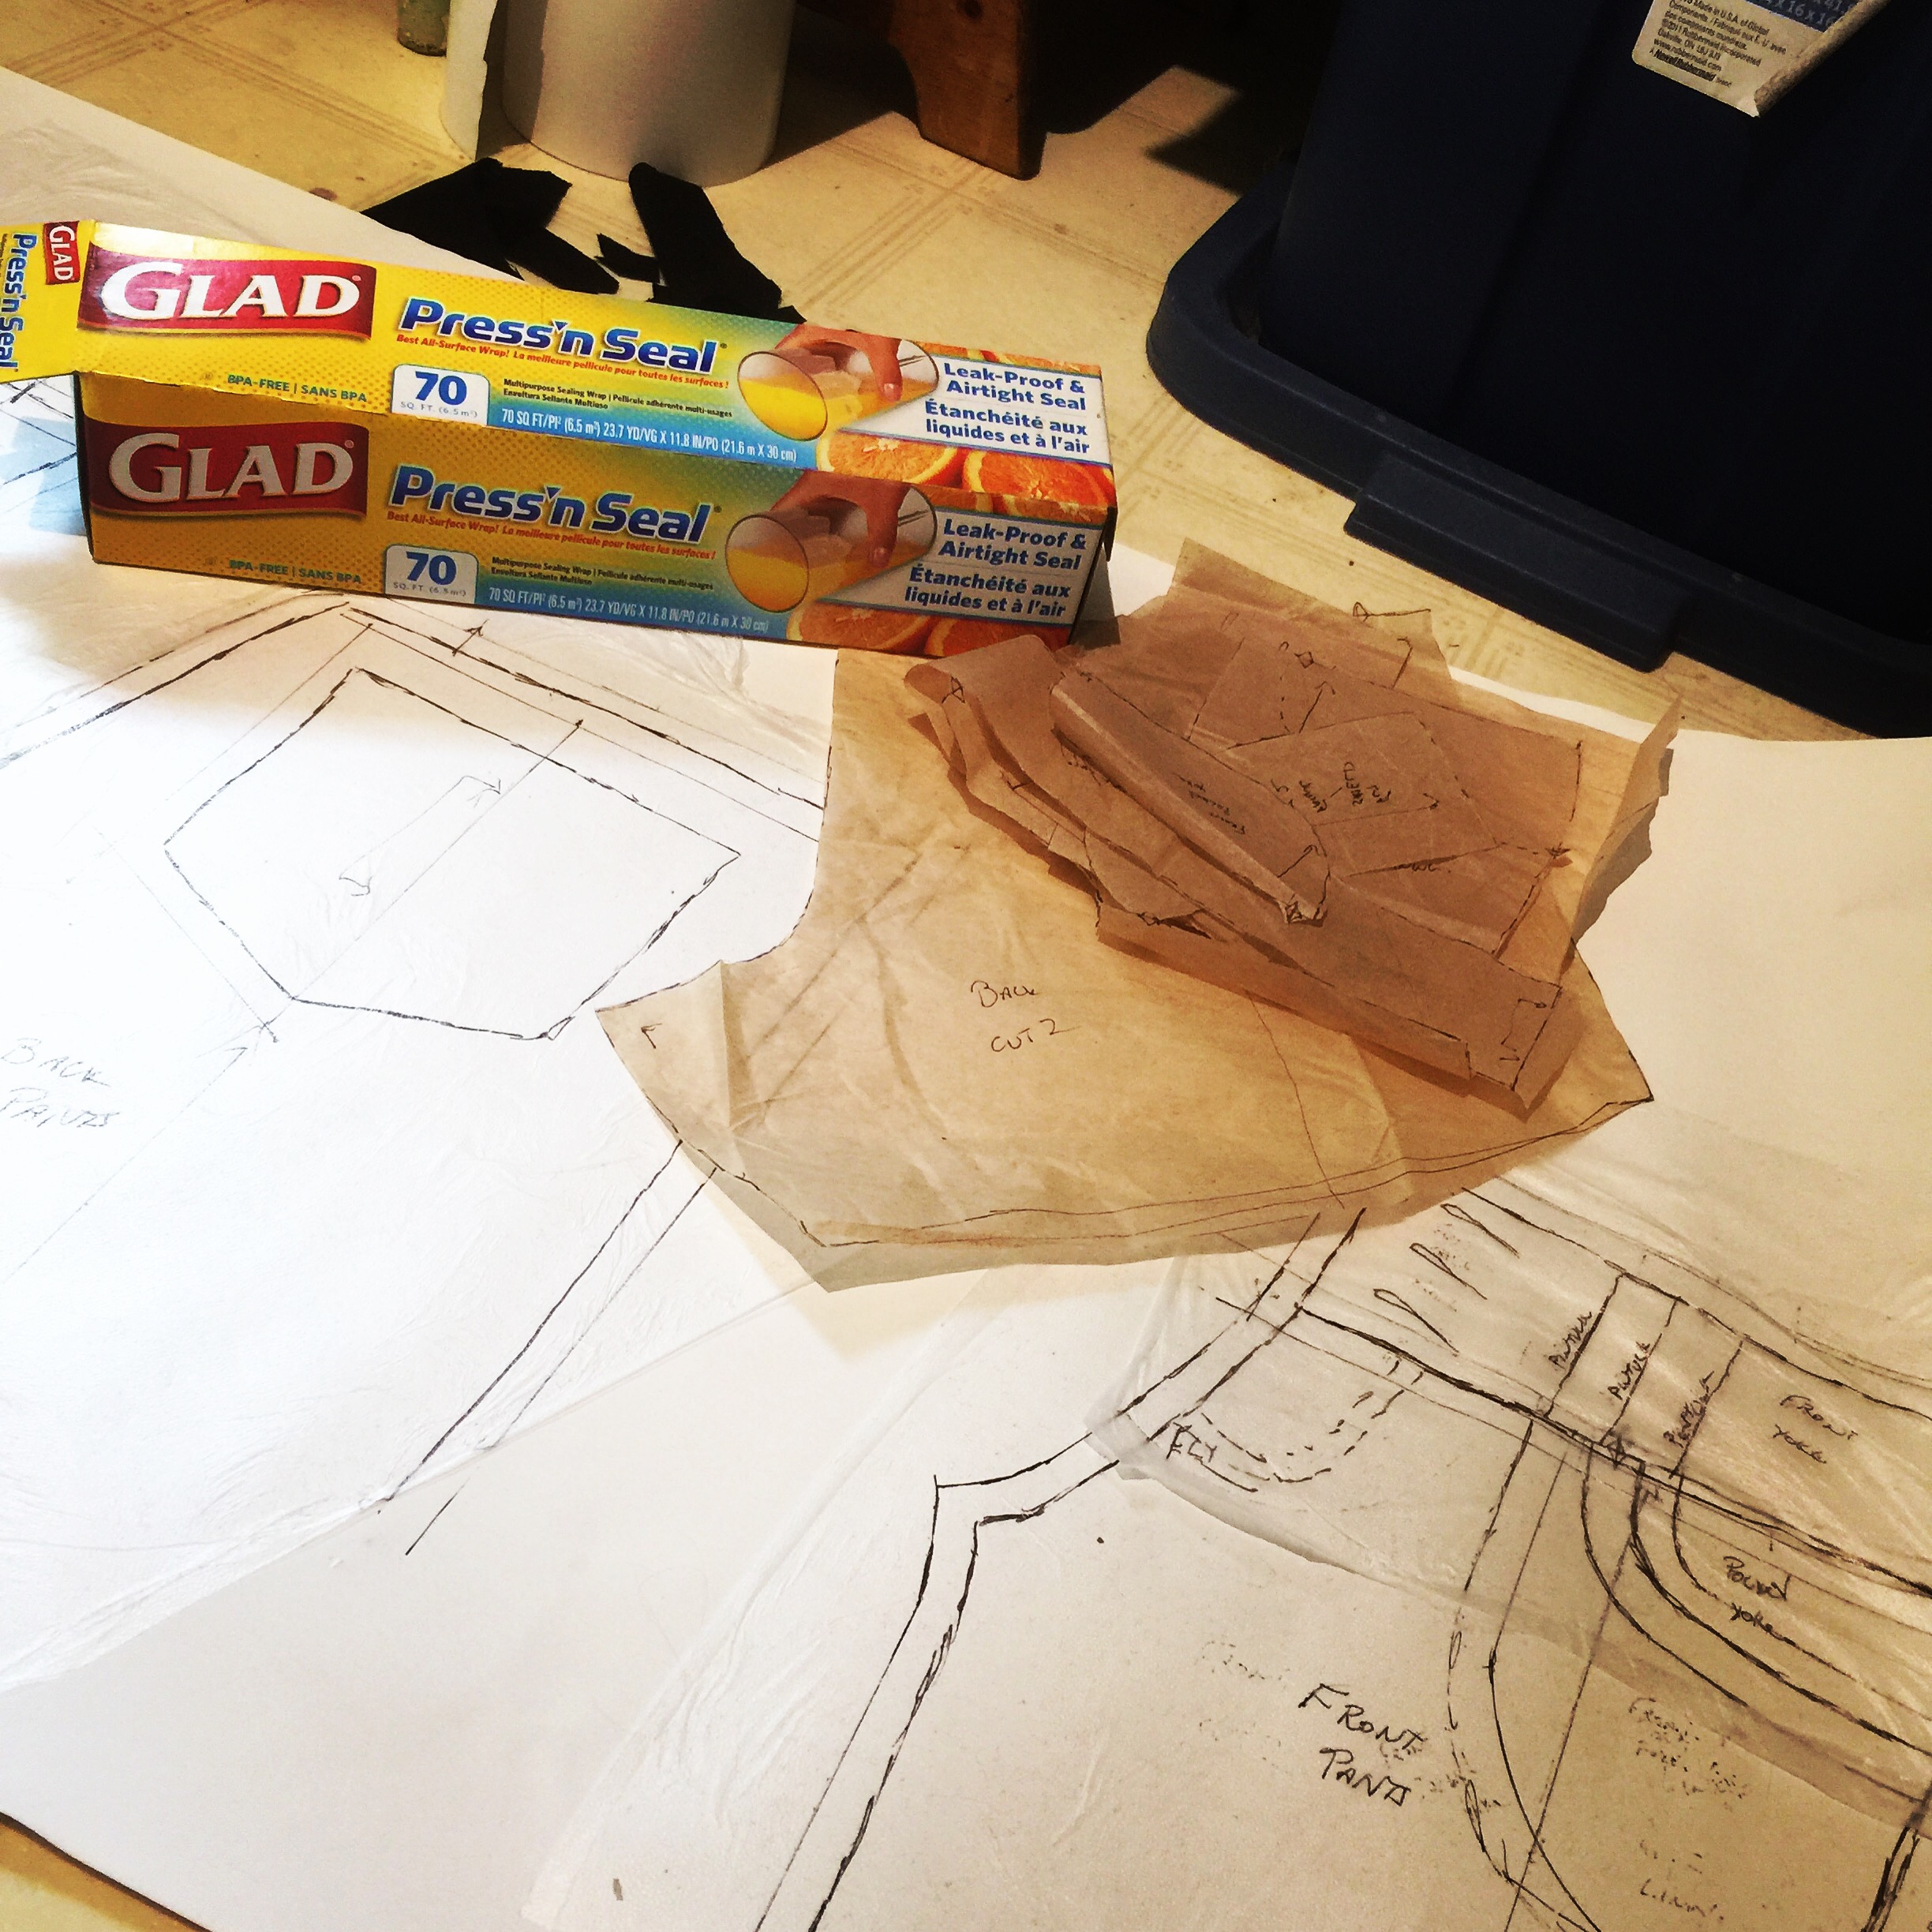
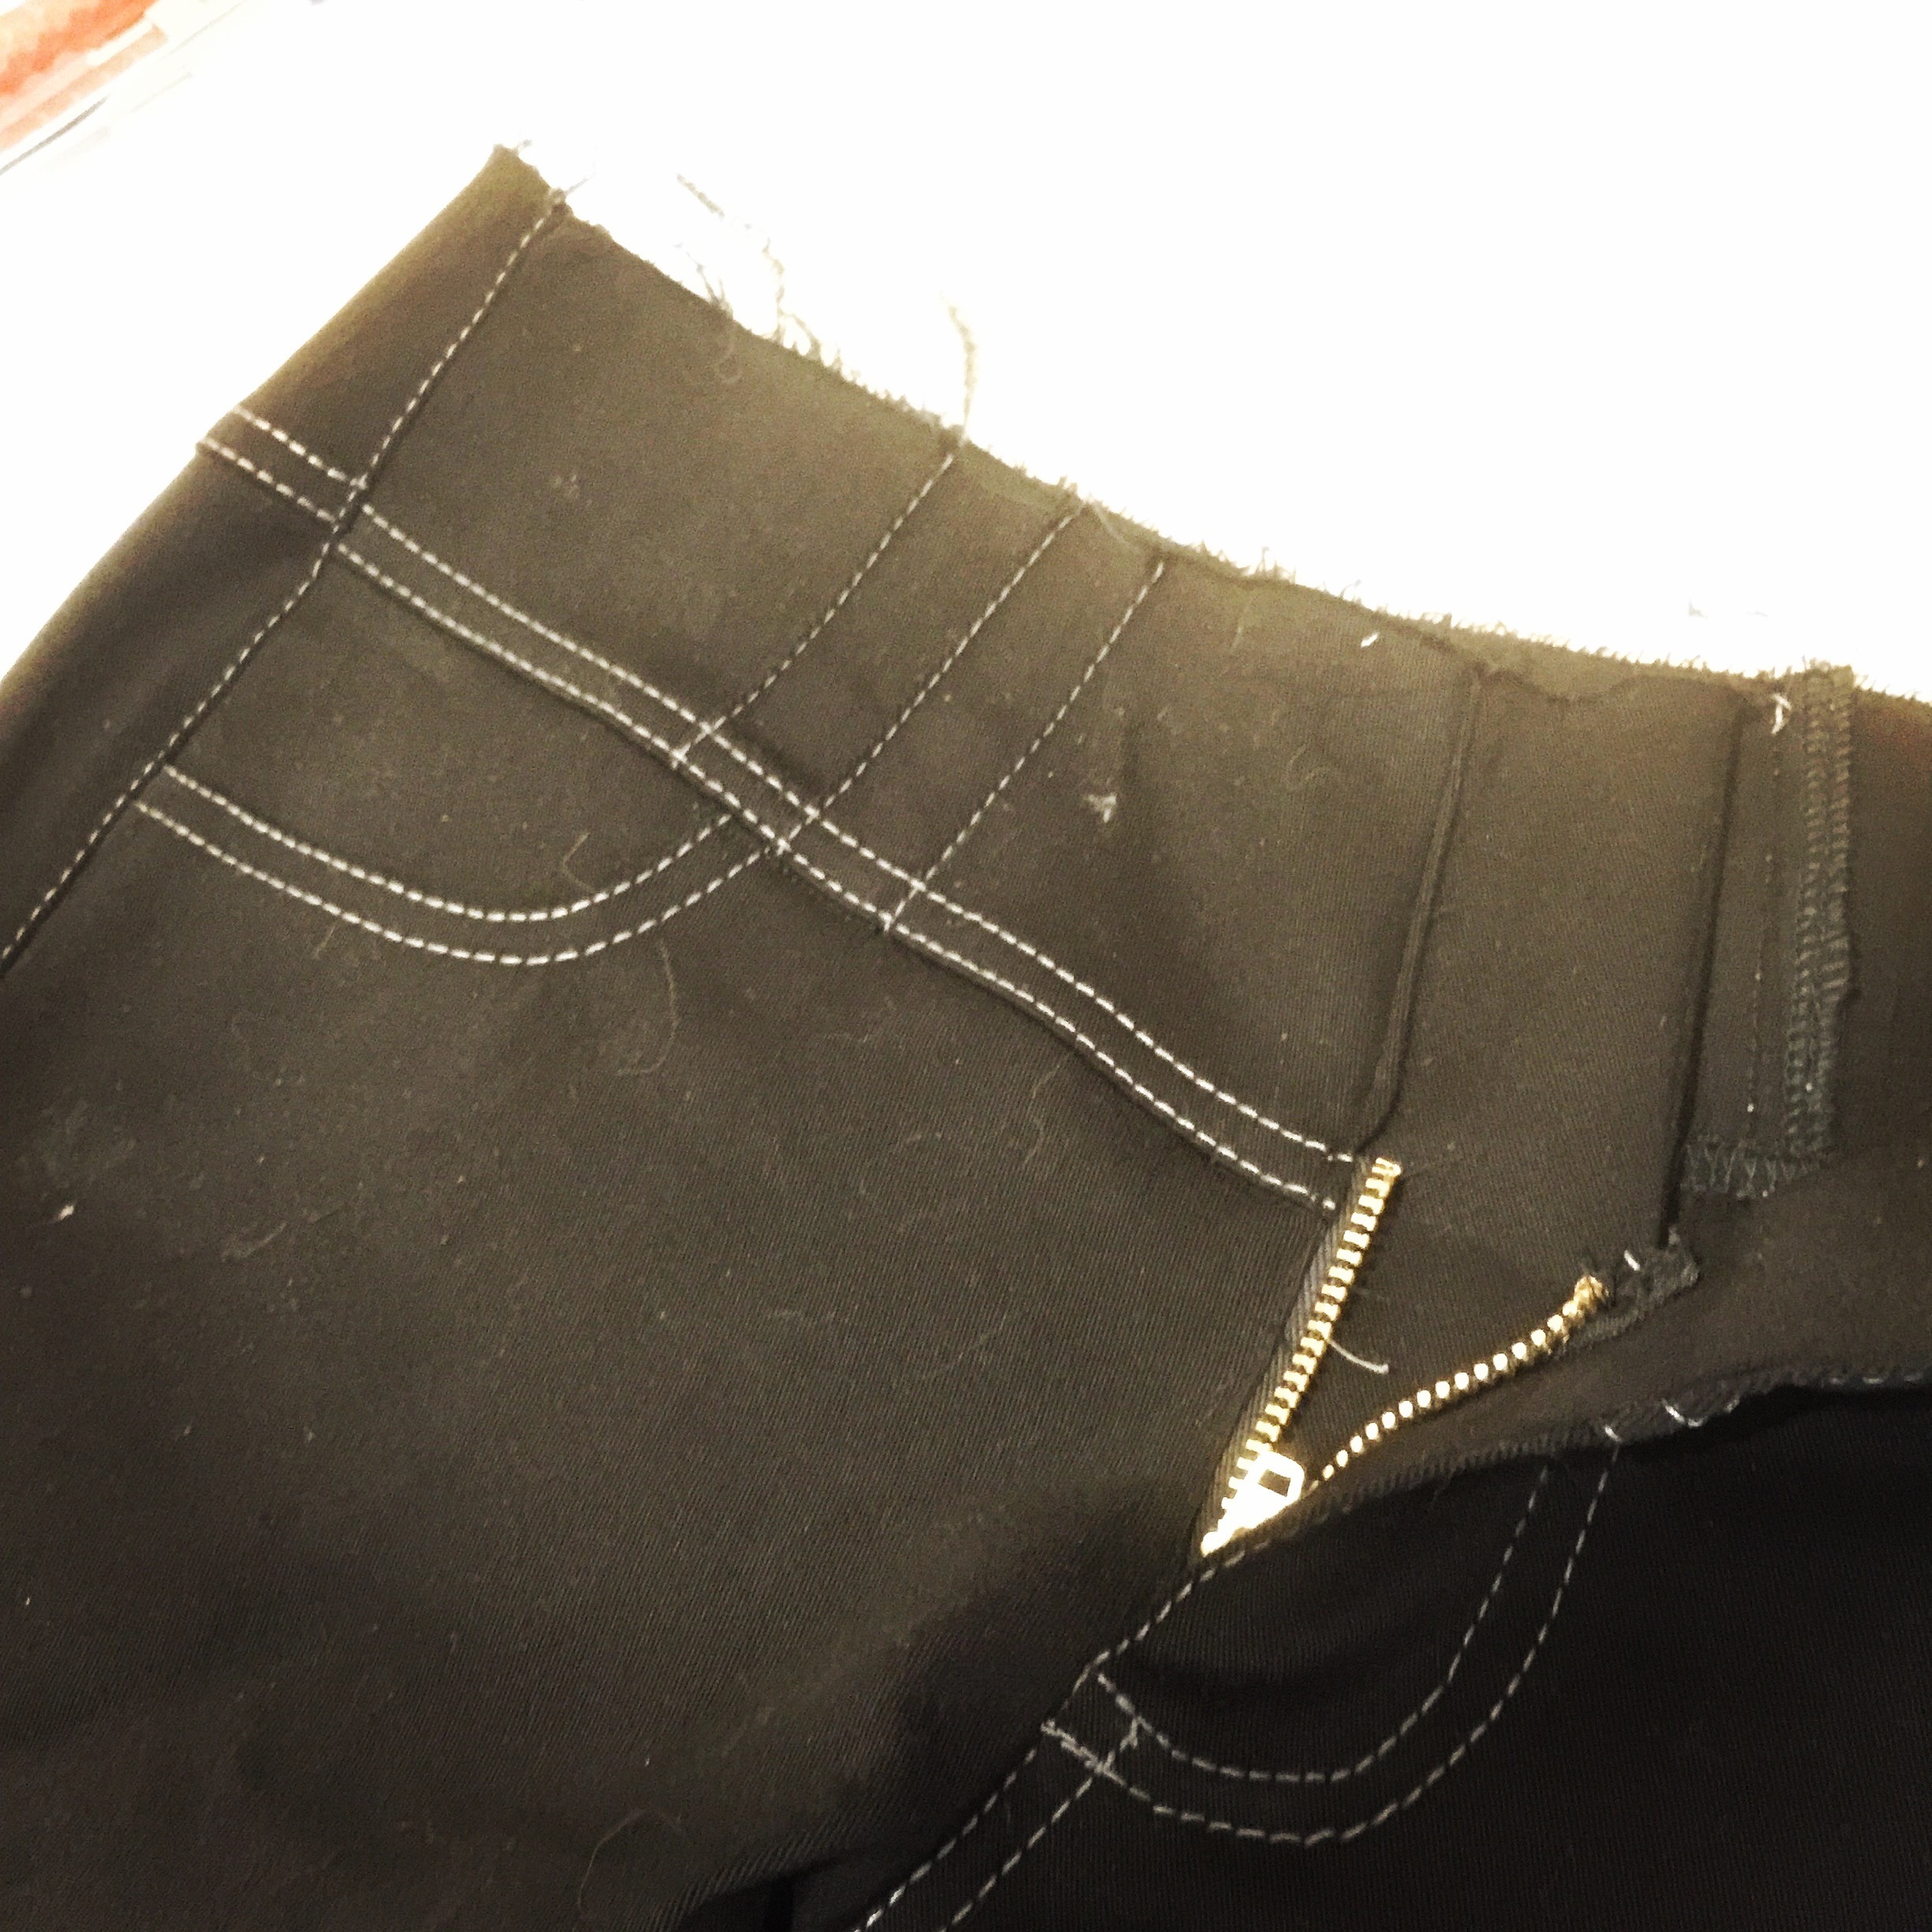
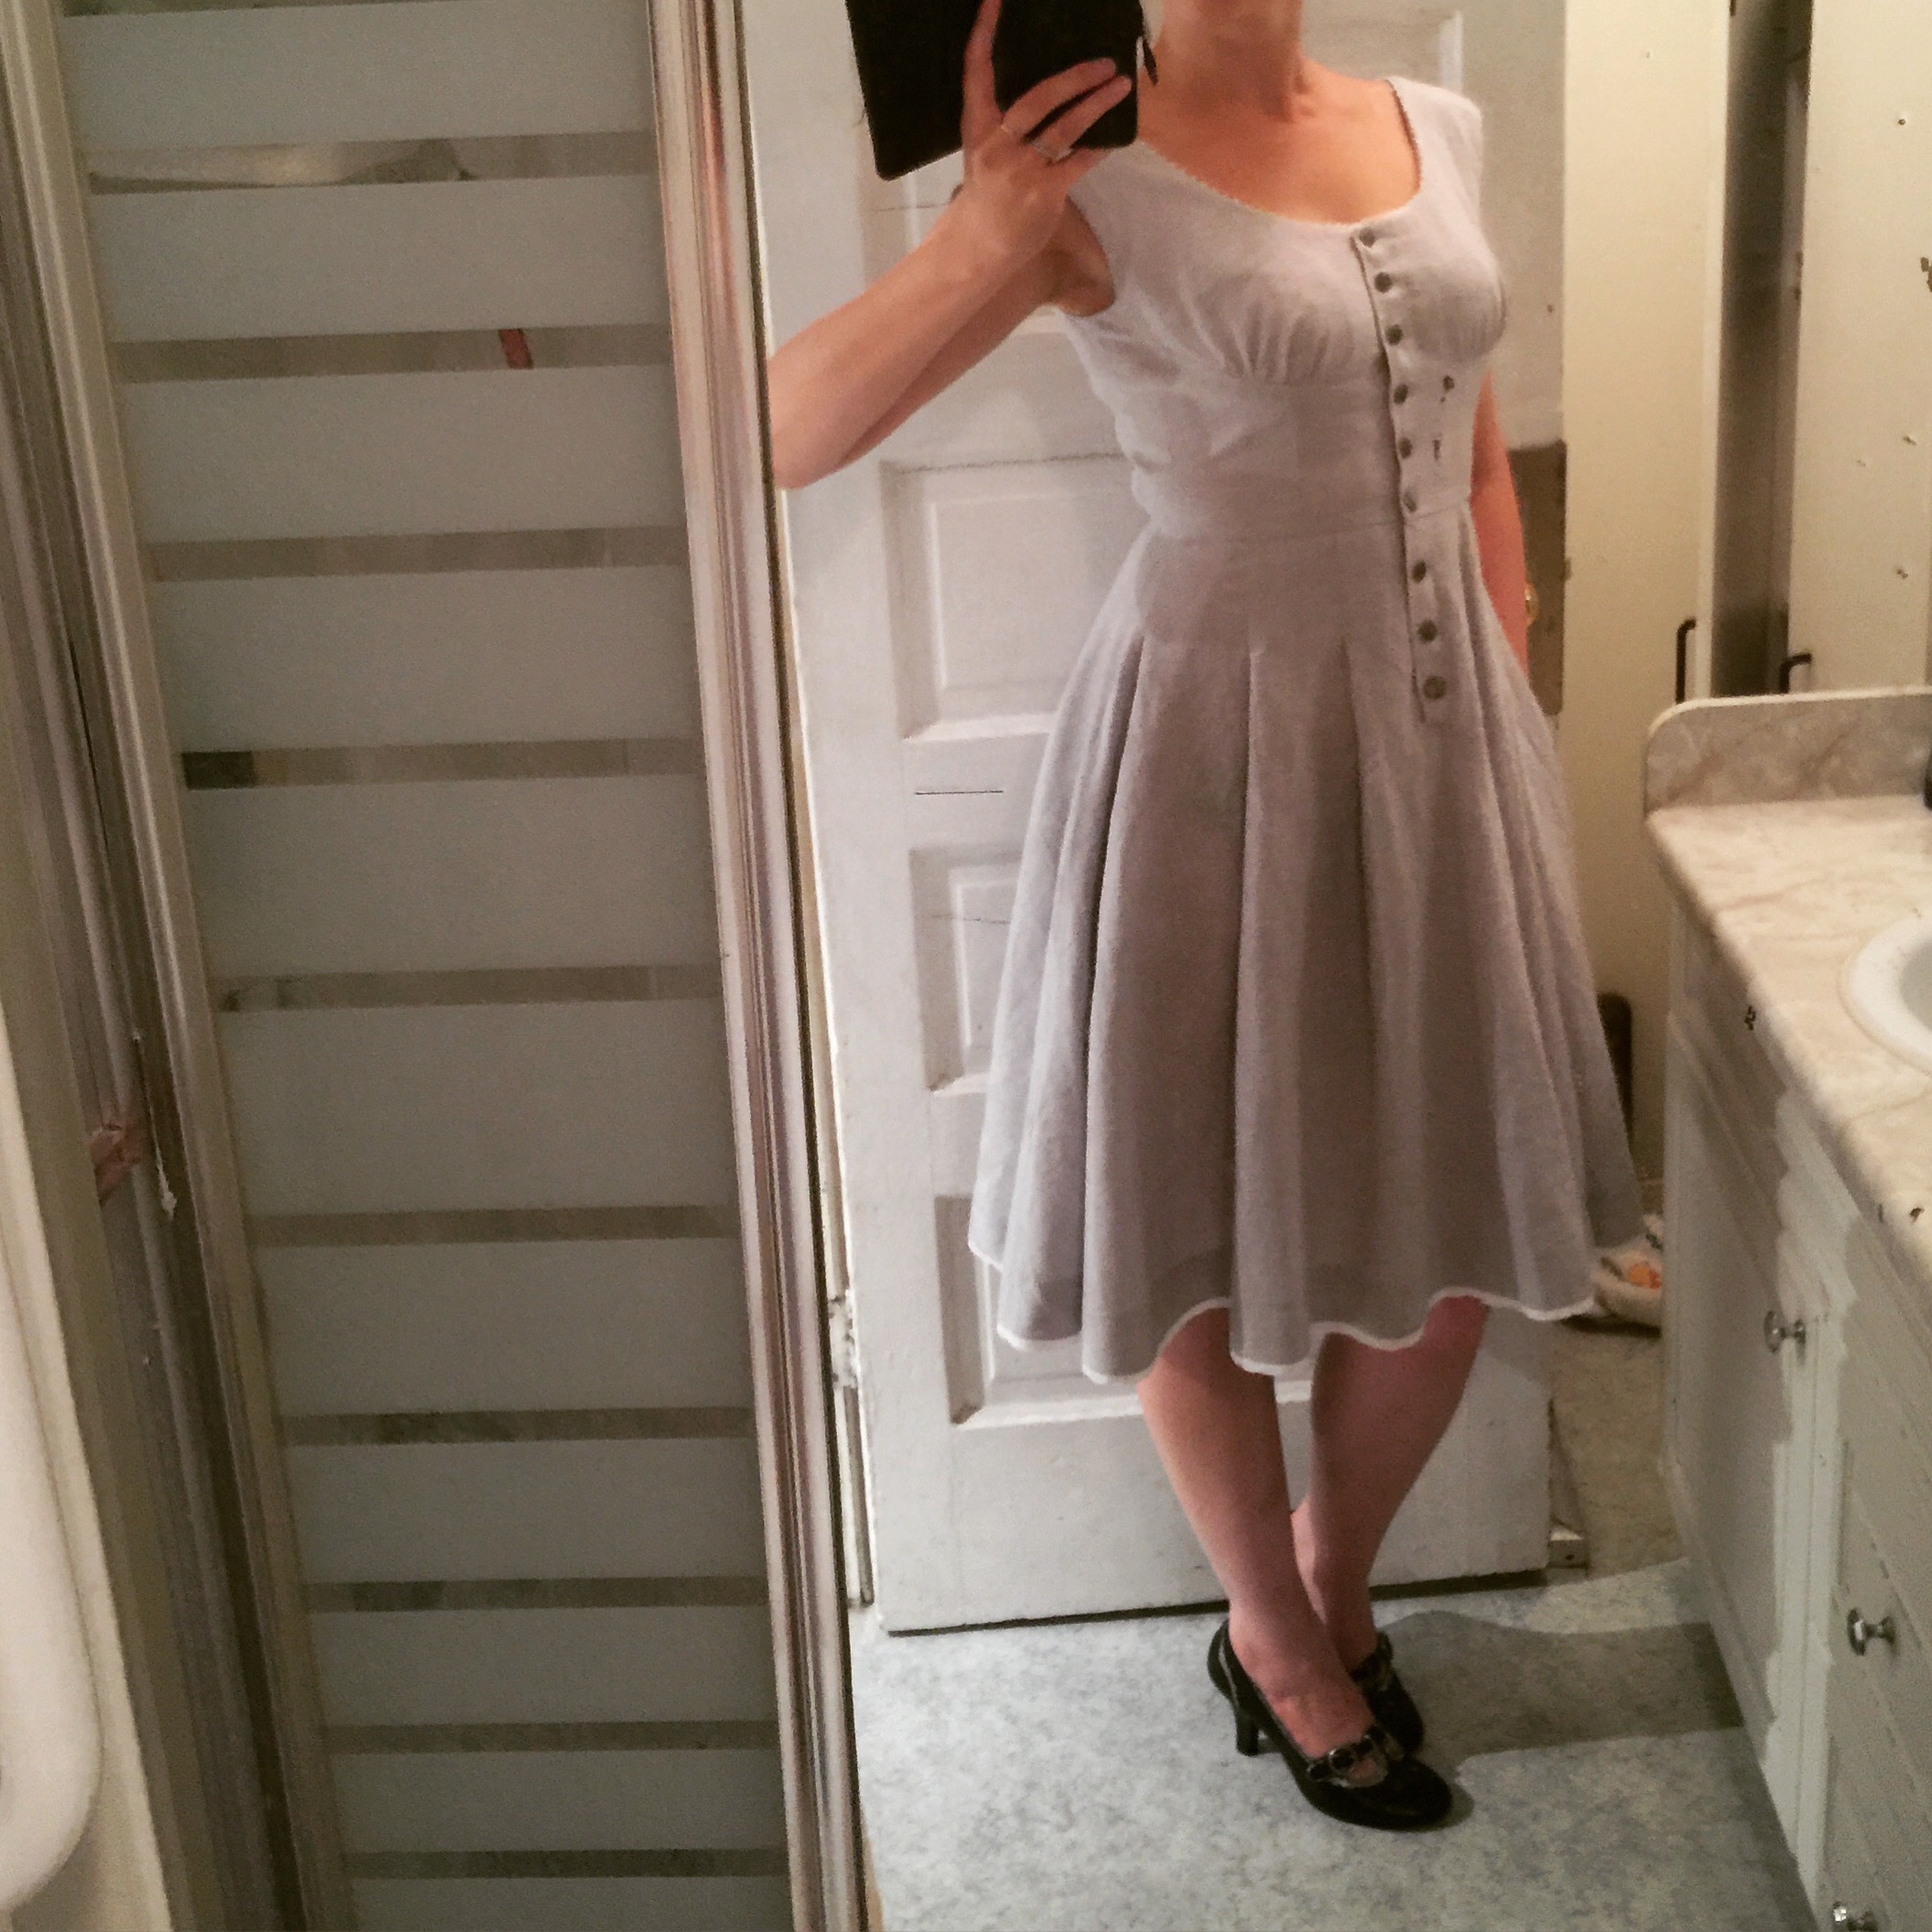
I cut a size 10 based on the final measurements given on the pattern. It’s small on my waist, but I really wanted it to be snug to hold up the weight of the quilted skirt. If you look at the pattern it’s a contoured waistband, so technically the top of the waist band would be the natural waist, which is what the pics show. But the pattern piece has the waist line marked at halfway down the waist band. And personally, I wanted it to sit so the bottom of the waistband was at the natural waist. So we’ll see how that turns out.
 Other than the flower motif, I filled in the border with leaves and scallops and squiggles. Above the border, I wanted a checkerboard pattern sort of randomly fading out into the upper skirt, and I threw the occasional little flower in there too.
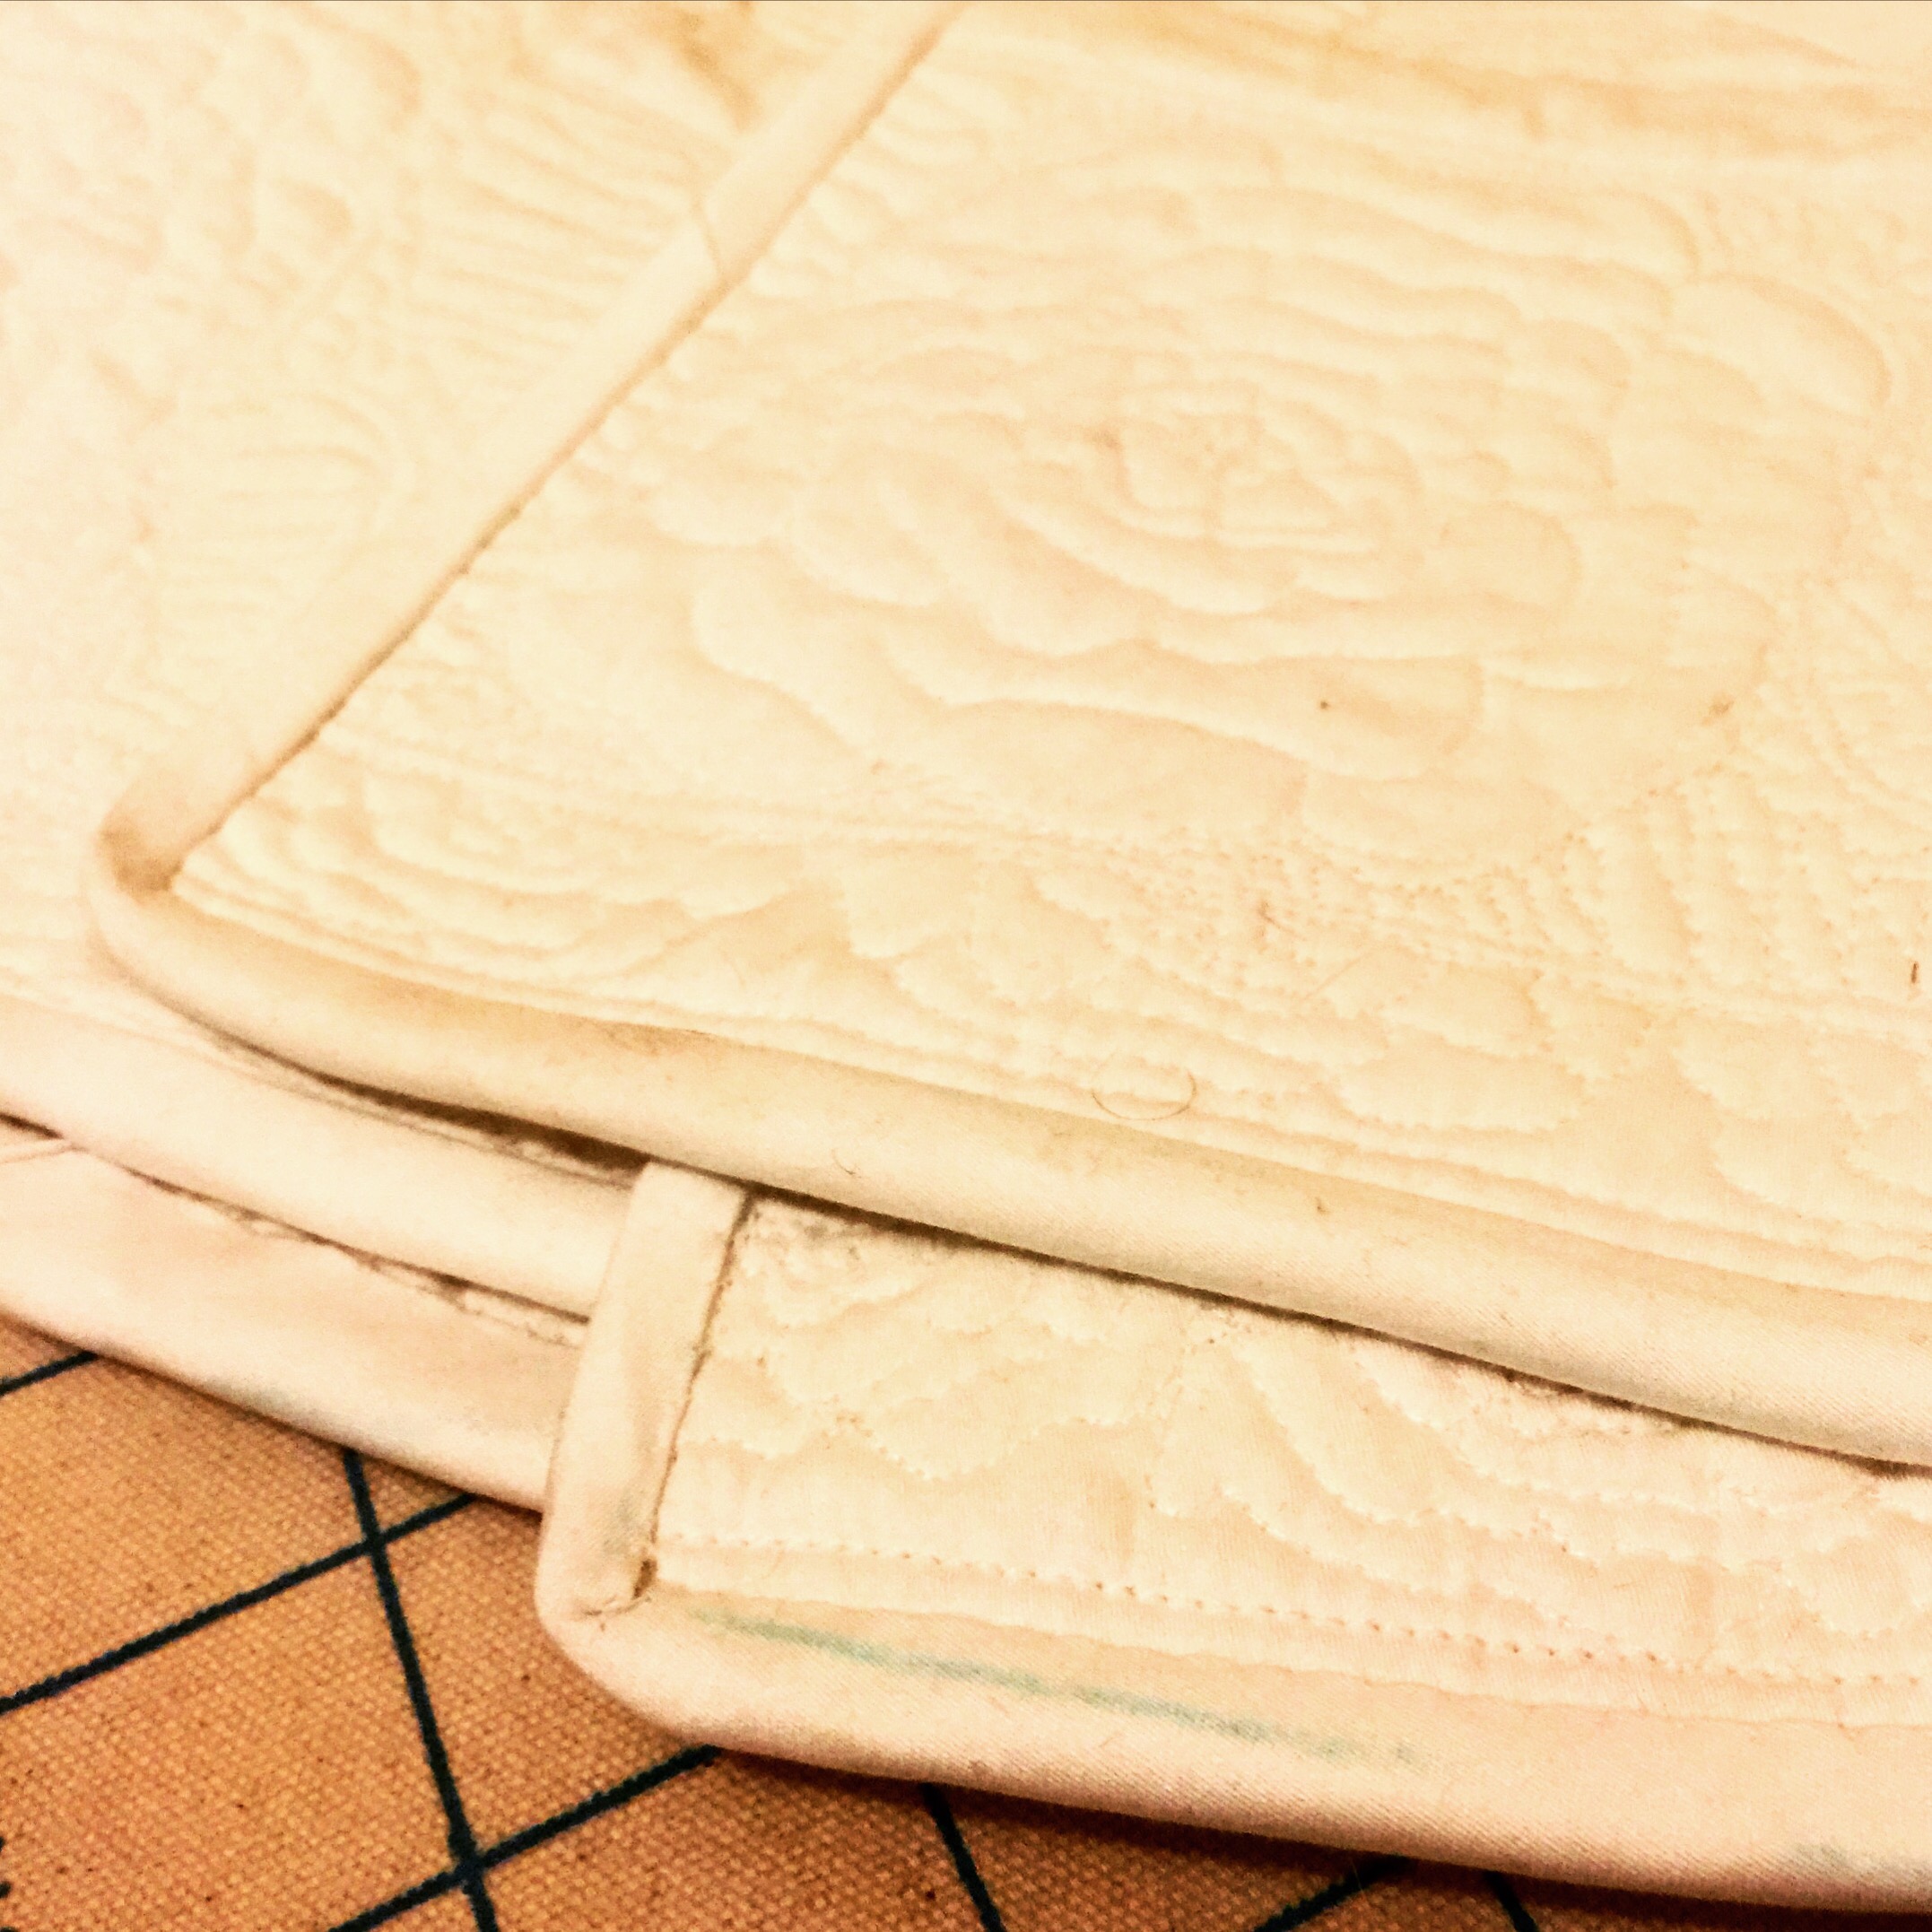
 I bound the edges of the skirt just like a quilt, though the waistband I finished more normally, for less bulk. Instead of a zip I went with buttons at the back, and so far the back seam isn’t stitched at all, just tacked with a nonfunctioning button partway down. If this isn’t enough I will hand-stitch it shut invisibly.
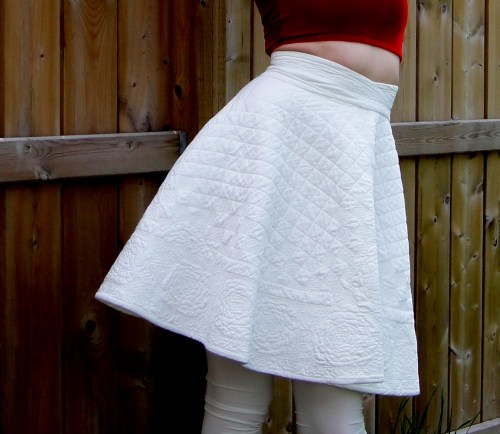
 Guys, I won’t lie. This was a shitload of fun and I am so fucking proud of myself right now I can’t even. It was a lot of very intense work, but I love the level of detail I got, the intensity of the texture. I love crazy intricate detailing (hence the intermittent Victorian obsession) but very rarely reach that level in my own work, so to achieve it feels amazing. I want to just sit there and pet it and gaze at the glorious texture. Which is not to say it’s perfect, far from it, but where I got from where I started? That feels truly epic.

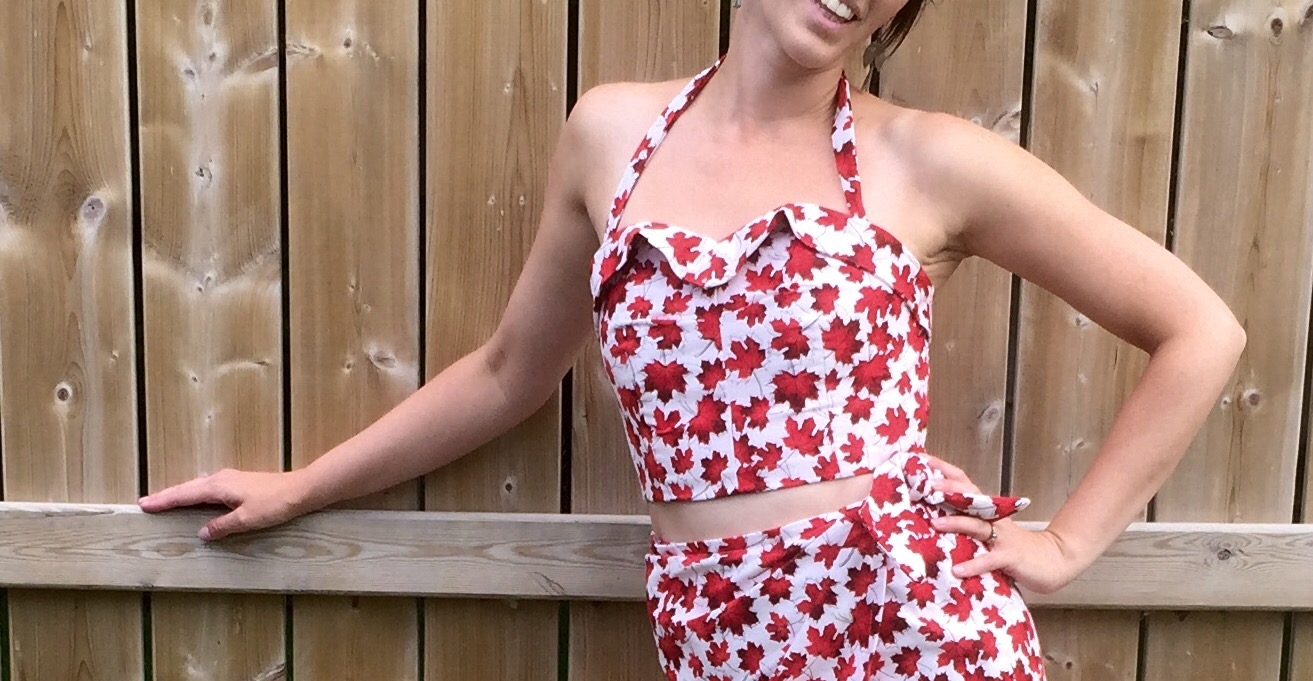
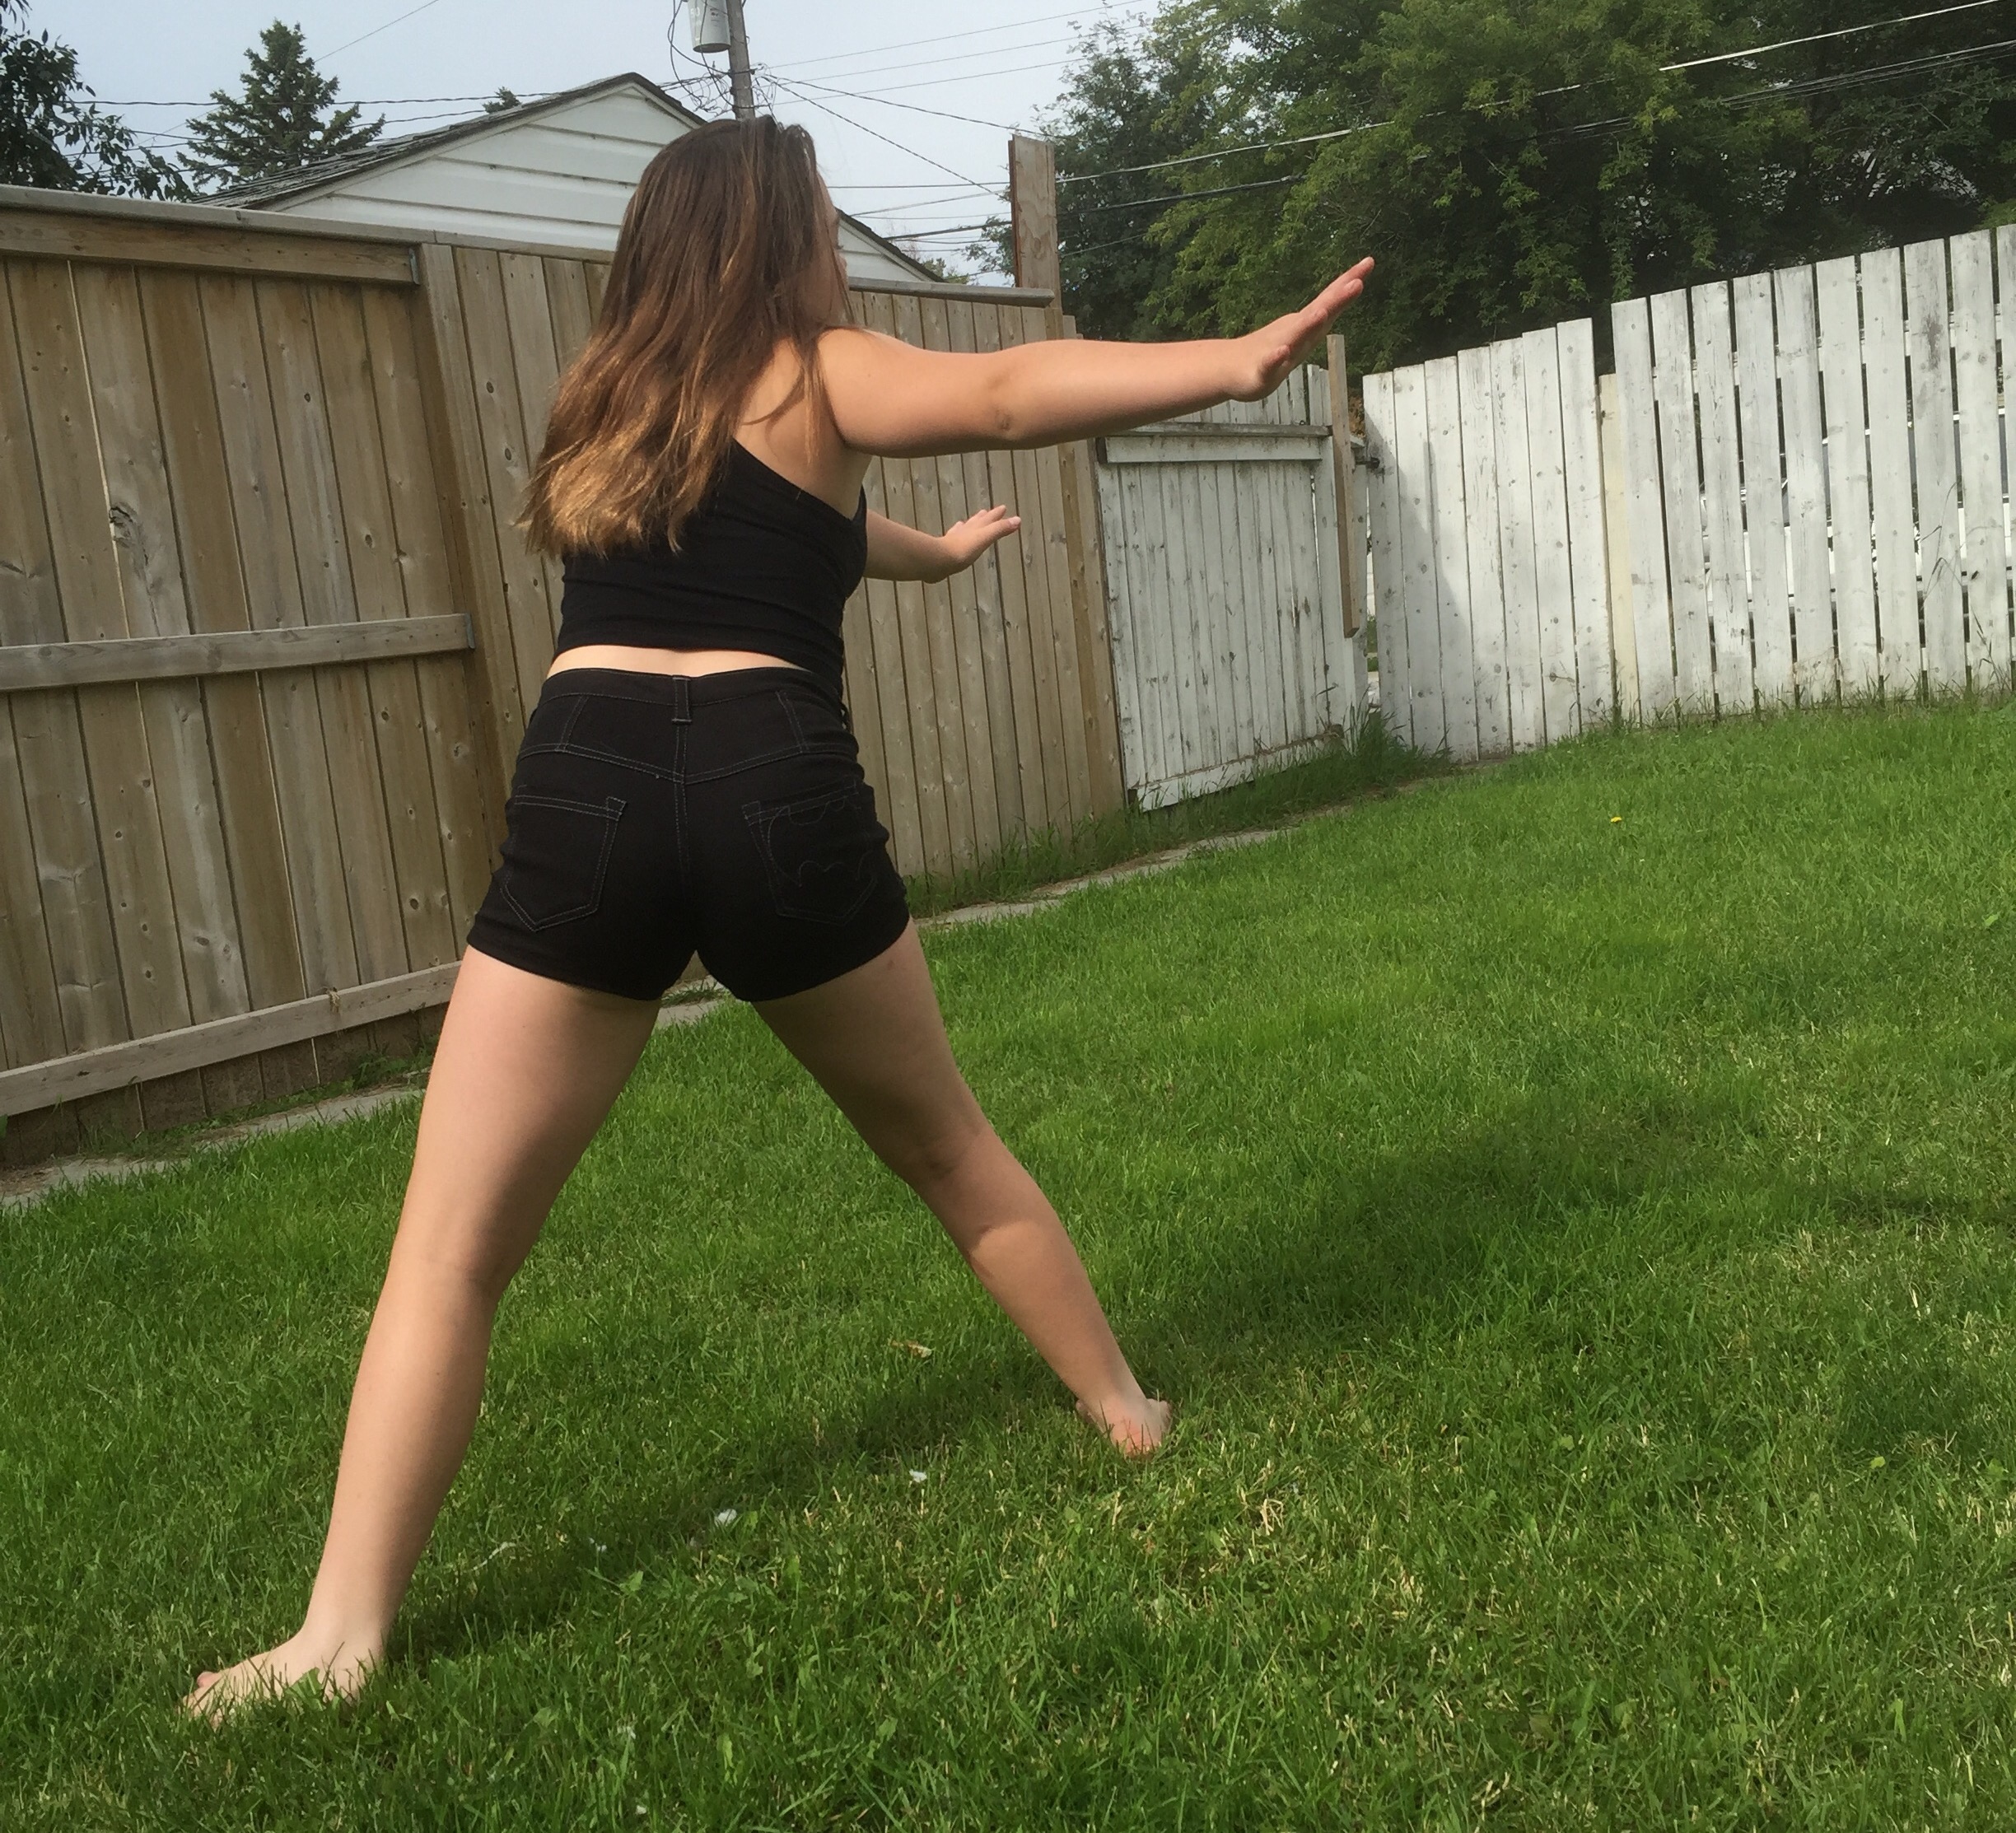
 I’ll forgive you if you don’t remember Gabriola the first; I couldn’t even remember if I’d blogged about it. Two years, eh? Anyway. I like this version better.
 A few months ago I made a new corset. But it wasn’t in my usual colour scheme, so I needed some kind of bottom.
 A few days ago, I went stash diving for fabric. As I said, it’s not one of my usual colours. Pickings were slim. But at last I settled on this piece of rather drab tie-dye with a subtle embroidered border. It’s from a range of border-embroidered fabrics that were already marked down when I first started at Fabricland, and I picked up the last bits of an embarrassing number of the pieces. What can I say?
 Fortunately, I had about 4m of this particular one—what with trying to at least roughly match the scalloped border, I needed every bit of fabric.
 It was so nice to have the pattern all traced and ready to go. I made a couple of little mods this time around strictly for style purposes. I added a placket at the back and buttons, instead of a zipper.
 The buttons are all mother of pearl, from the Antique Button Stash—they roughly match, except for the big one at the top.
 And I left a slit between the left and centre panels on the front.
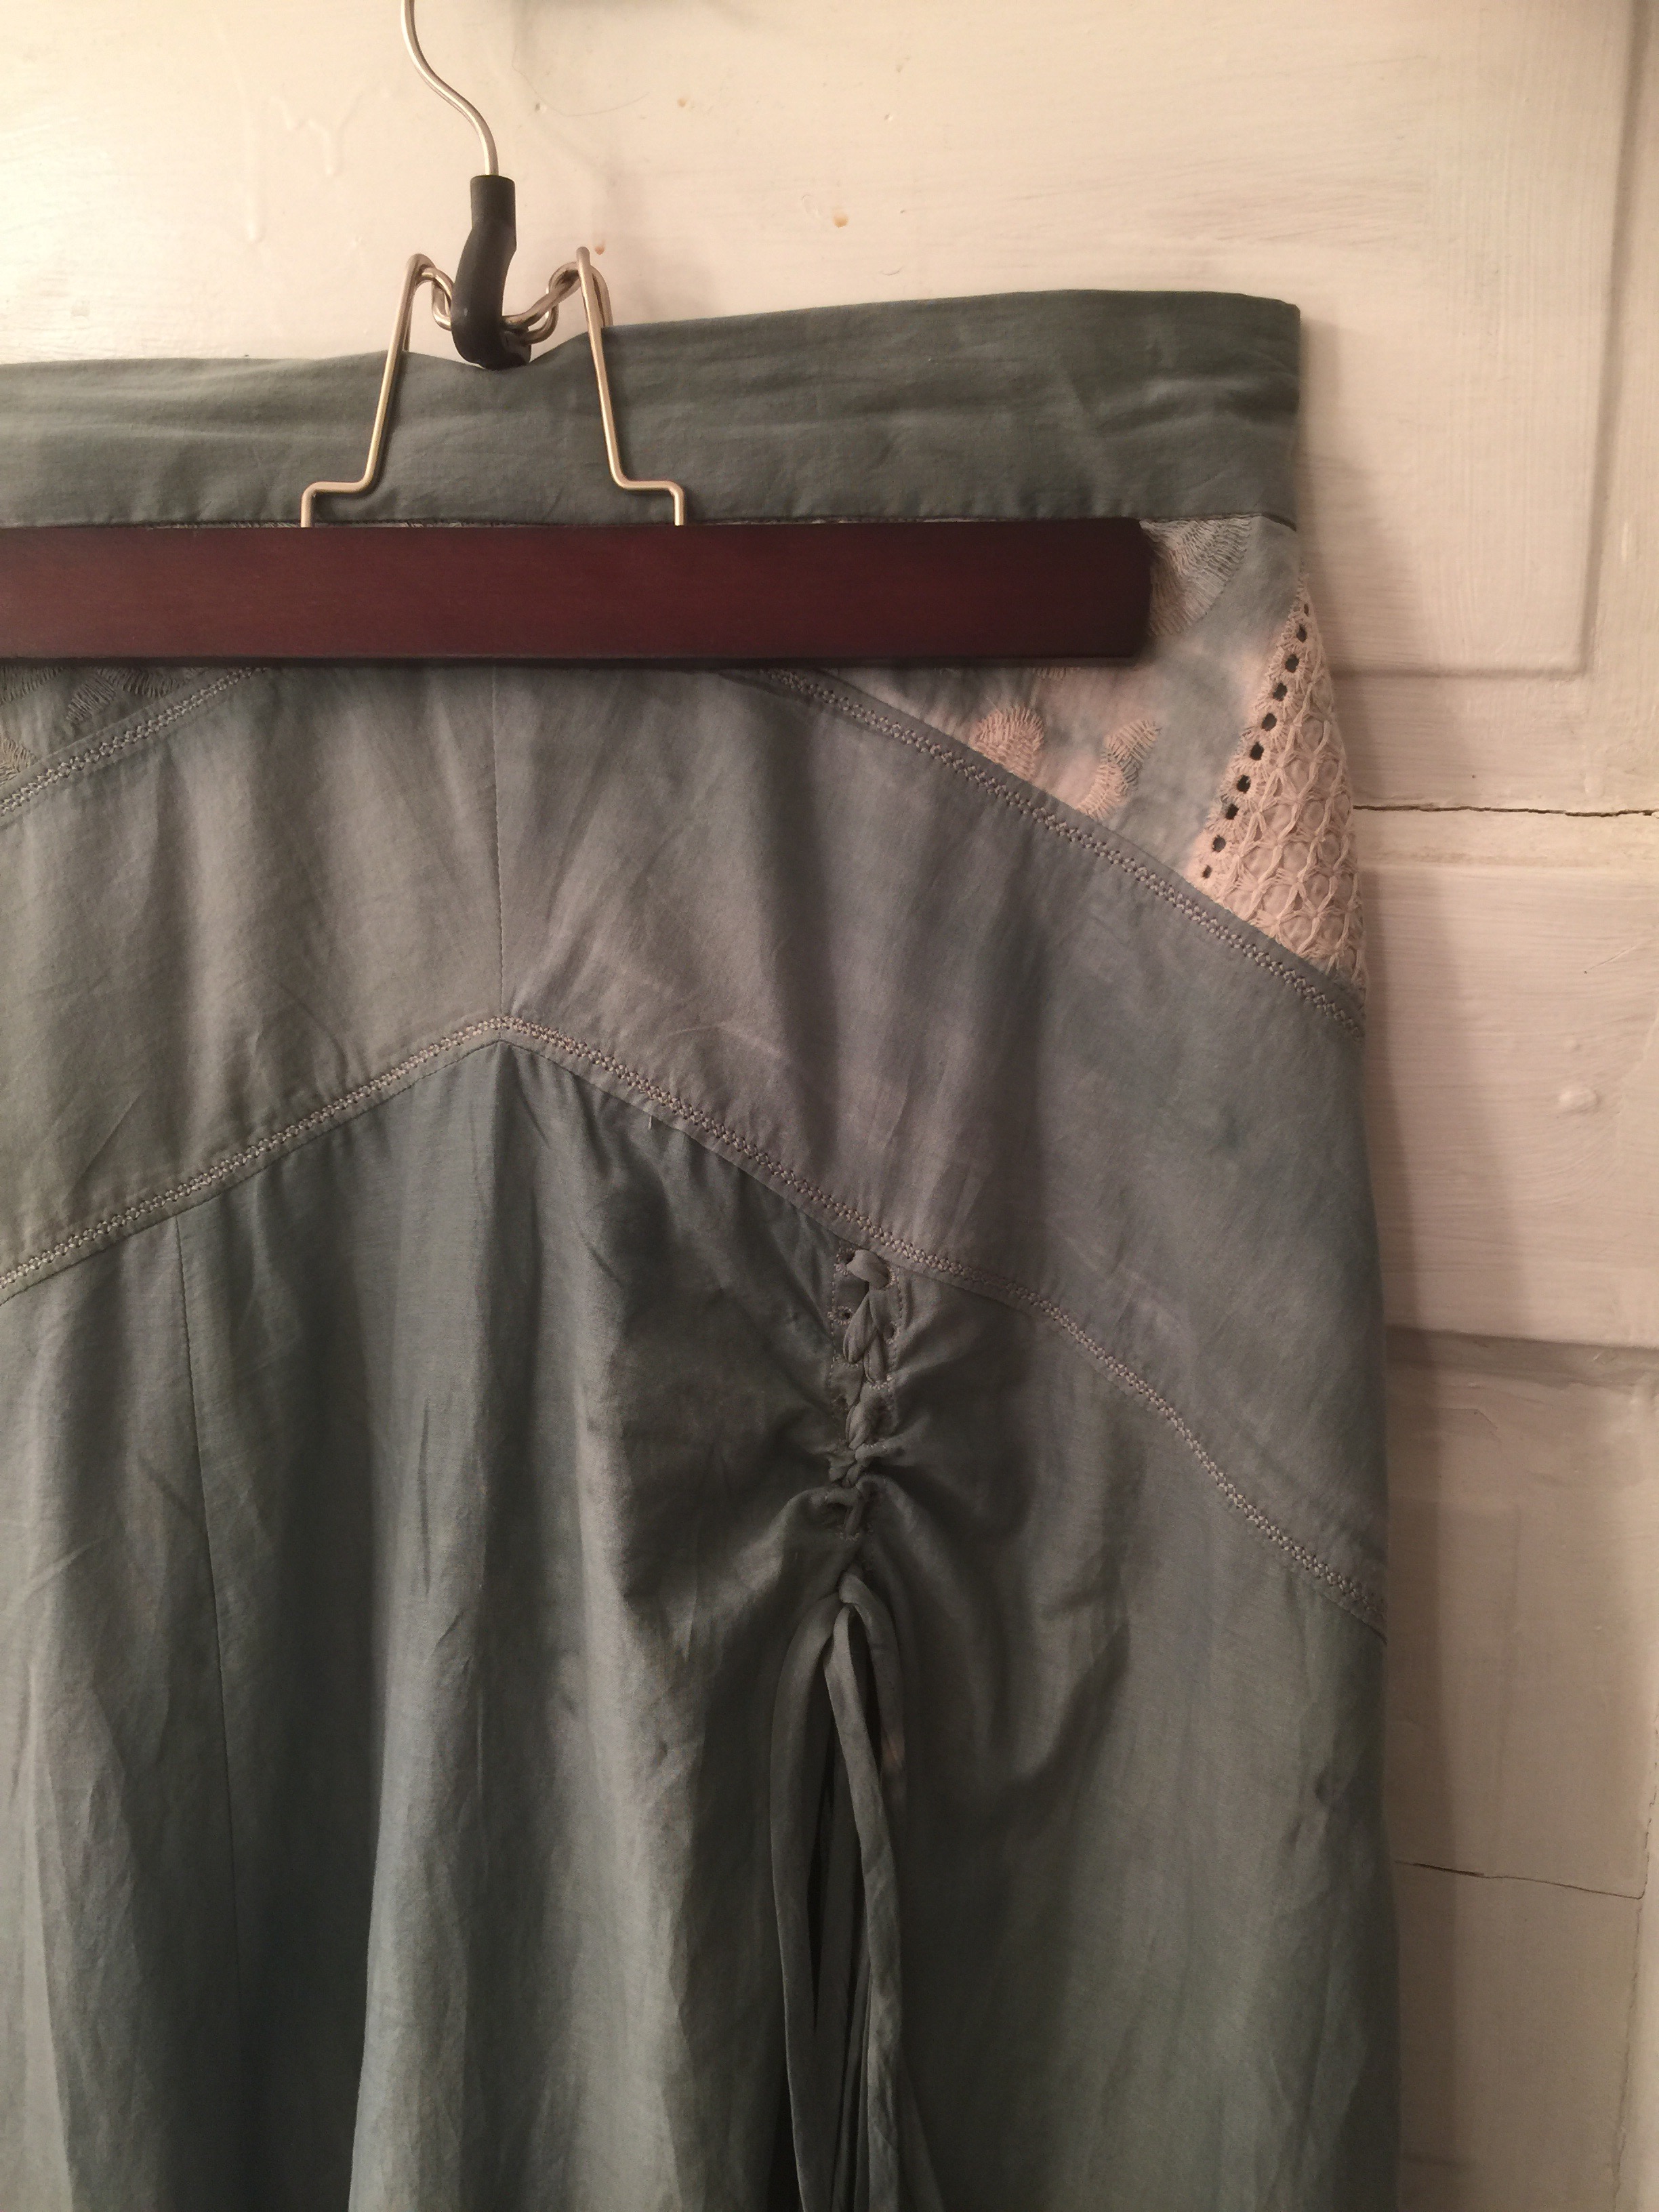 It ends really high if you do it that way, by the way. I did plan for this by adding little eyelets and a lacing cord to close it up a bit, which had the added benefit of gathering it up a little—a benefit because that seam must’ve stretched when I was doing the hemming (despite stay-stitching) because it’s the only part of the skirt that was too long. And you can’t adjust a border embroidery at the bottom.
 I cut the embroidered overlays on the hips from the tiny scraps left over, so although I tried to get them mirroring left and right, the front and back are a bit different. On the other hand I managed to get all those points on the lower yokes to line up, which is good because had topstitched those panels with a cross stitch and that shit isn’t coming out.
 Using the embroidered hem meant losing the curve along the bottom of the skirt pieces, which was a risk, but I think looks fine in this case, even if the finished hem is a bit angular and jagged.
 All in all pretty happy! Not sure if it’ll be truly wearable or just another costume piece, but I sure do like it—considerably more than I thought I would, since the fabric was frankly kinda boring and ugly.
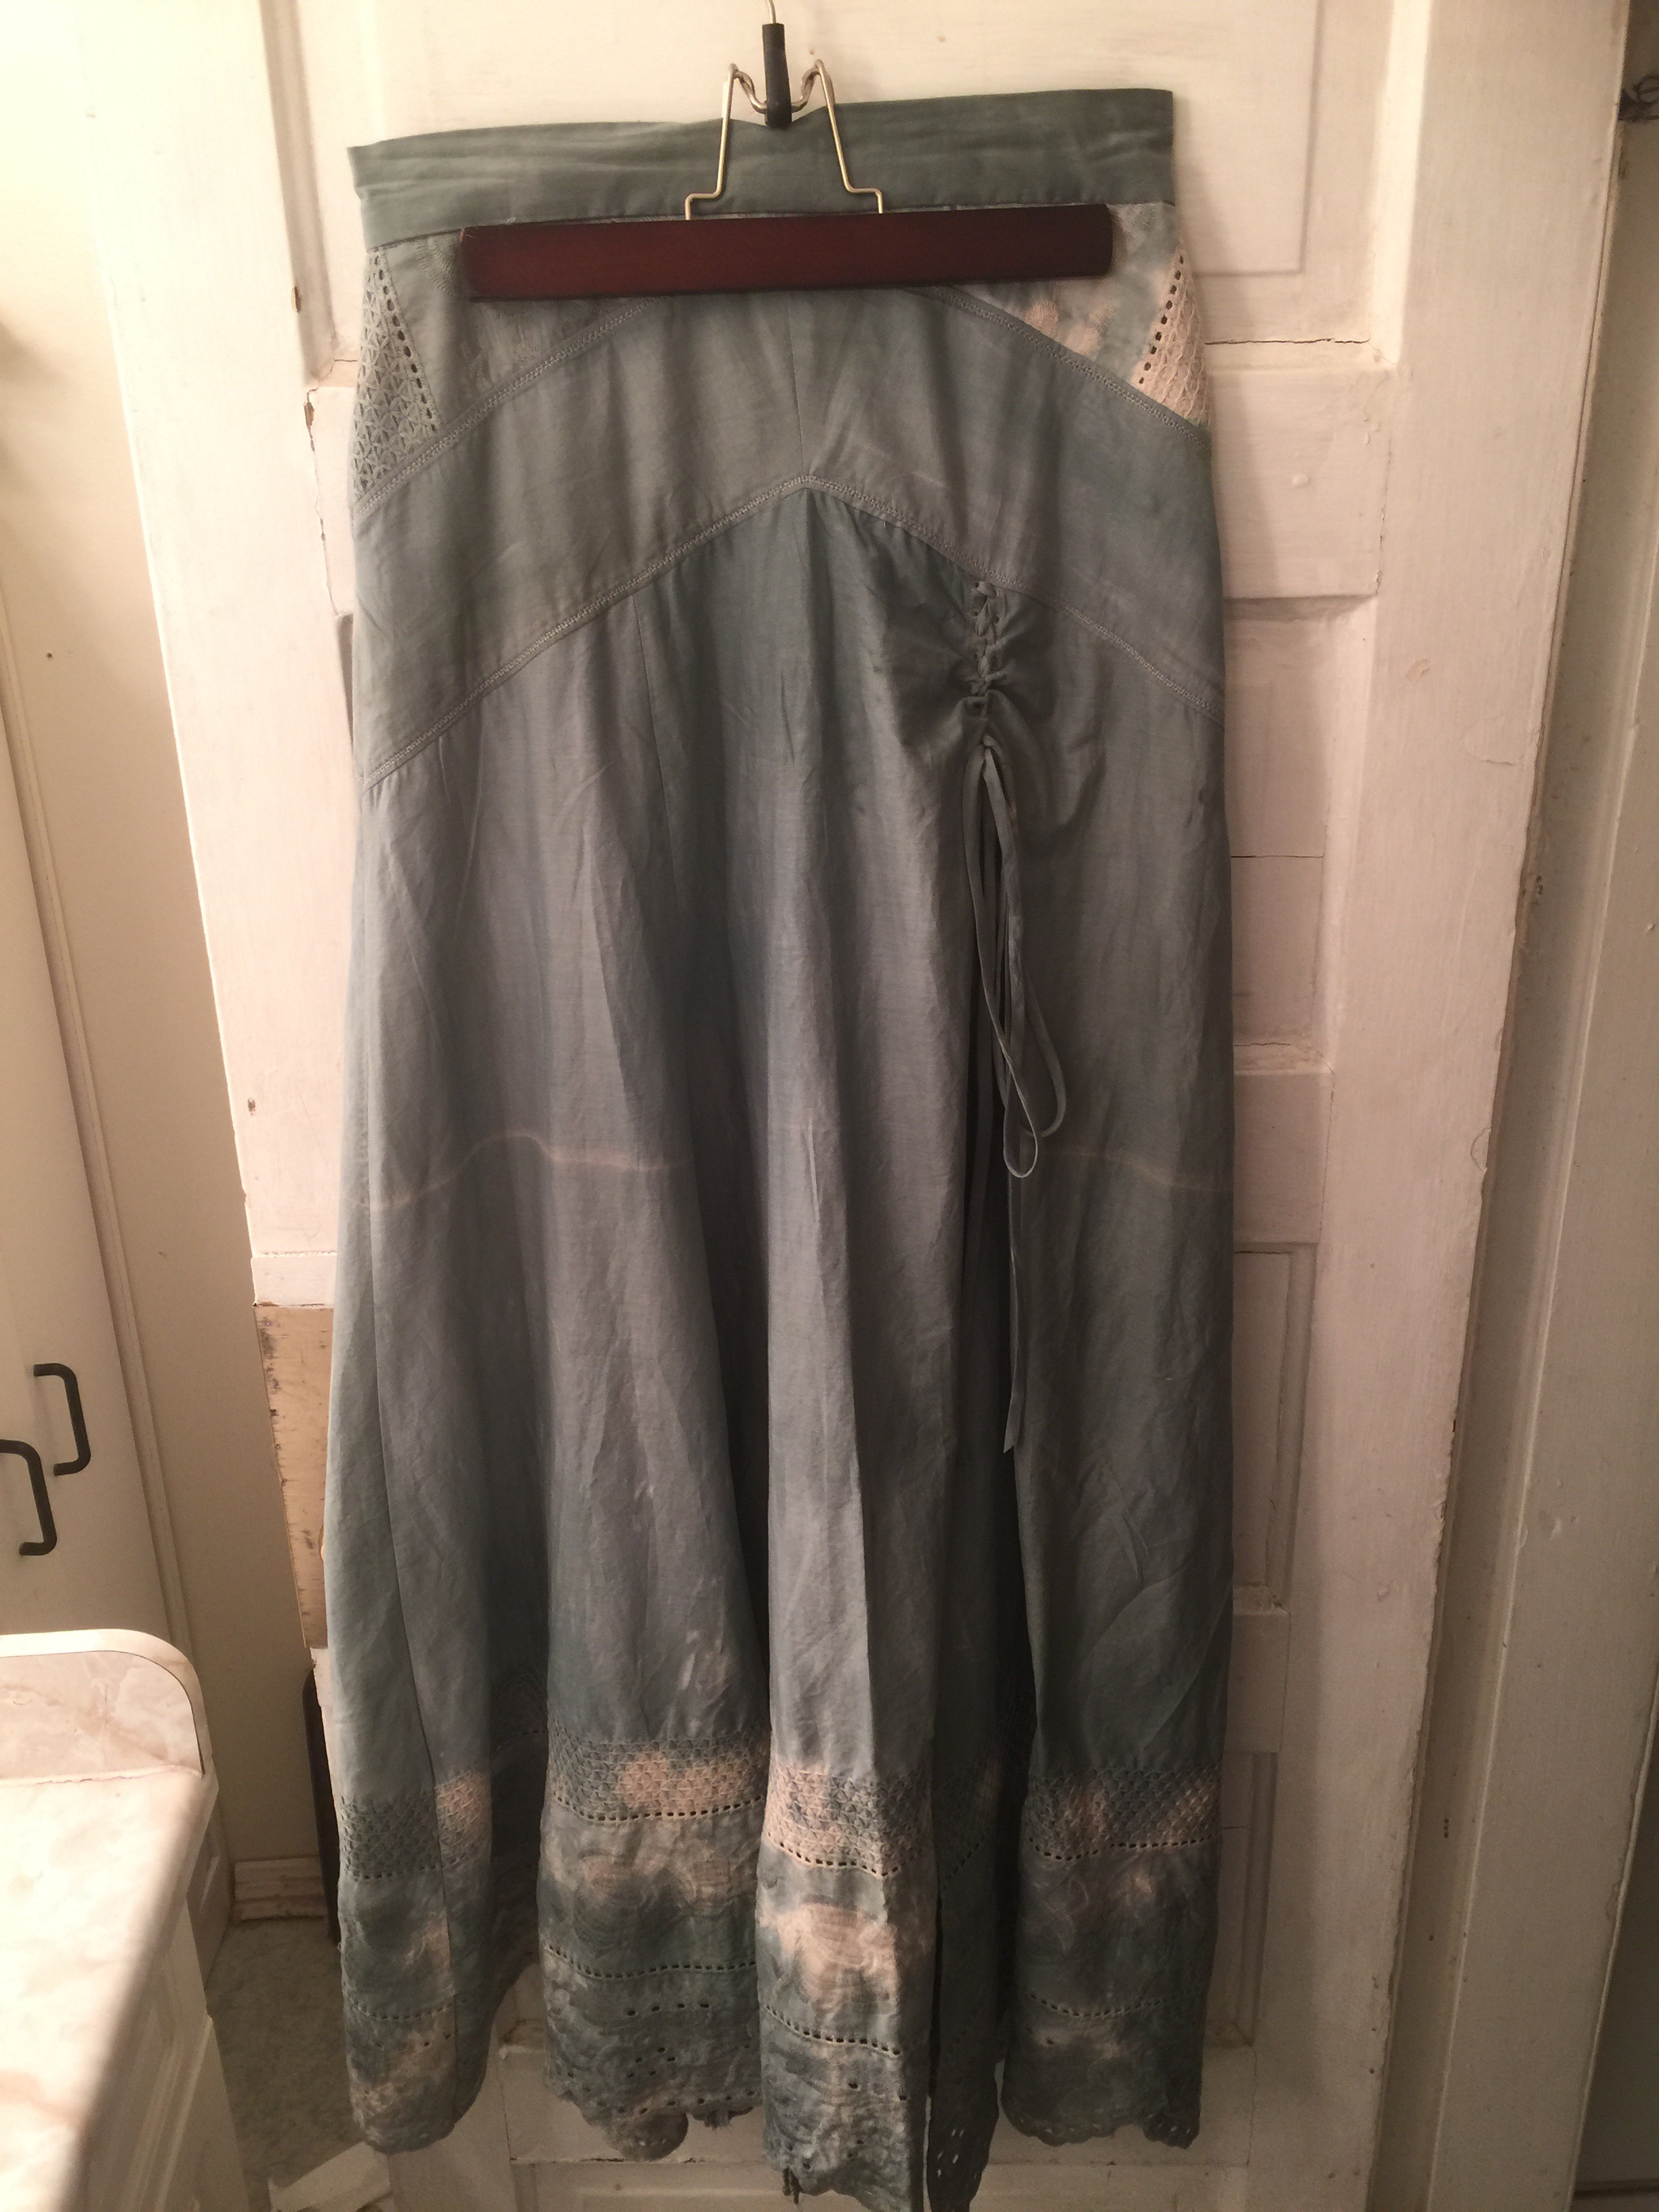 The colour is not quite spot on for the corset (although it varies since it’s a tie-dye) but I think it’s close enough. If not, I think a bit of a tea bath will fix that, but I’m not going to rush things. I managed to cut a tiny bodice from the scraps, as you can see in the “nice” photos, so I should be able to wear it with that on a slightly more every-day basis than with the corset. I’ll talk about the bodice next, though!
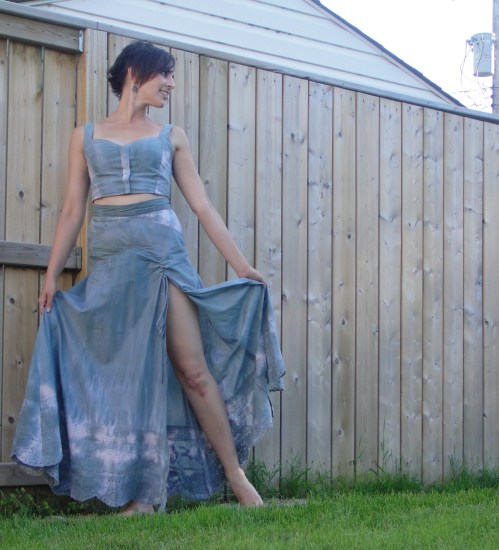

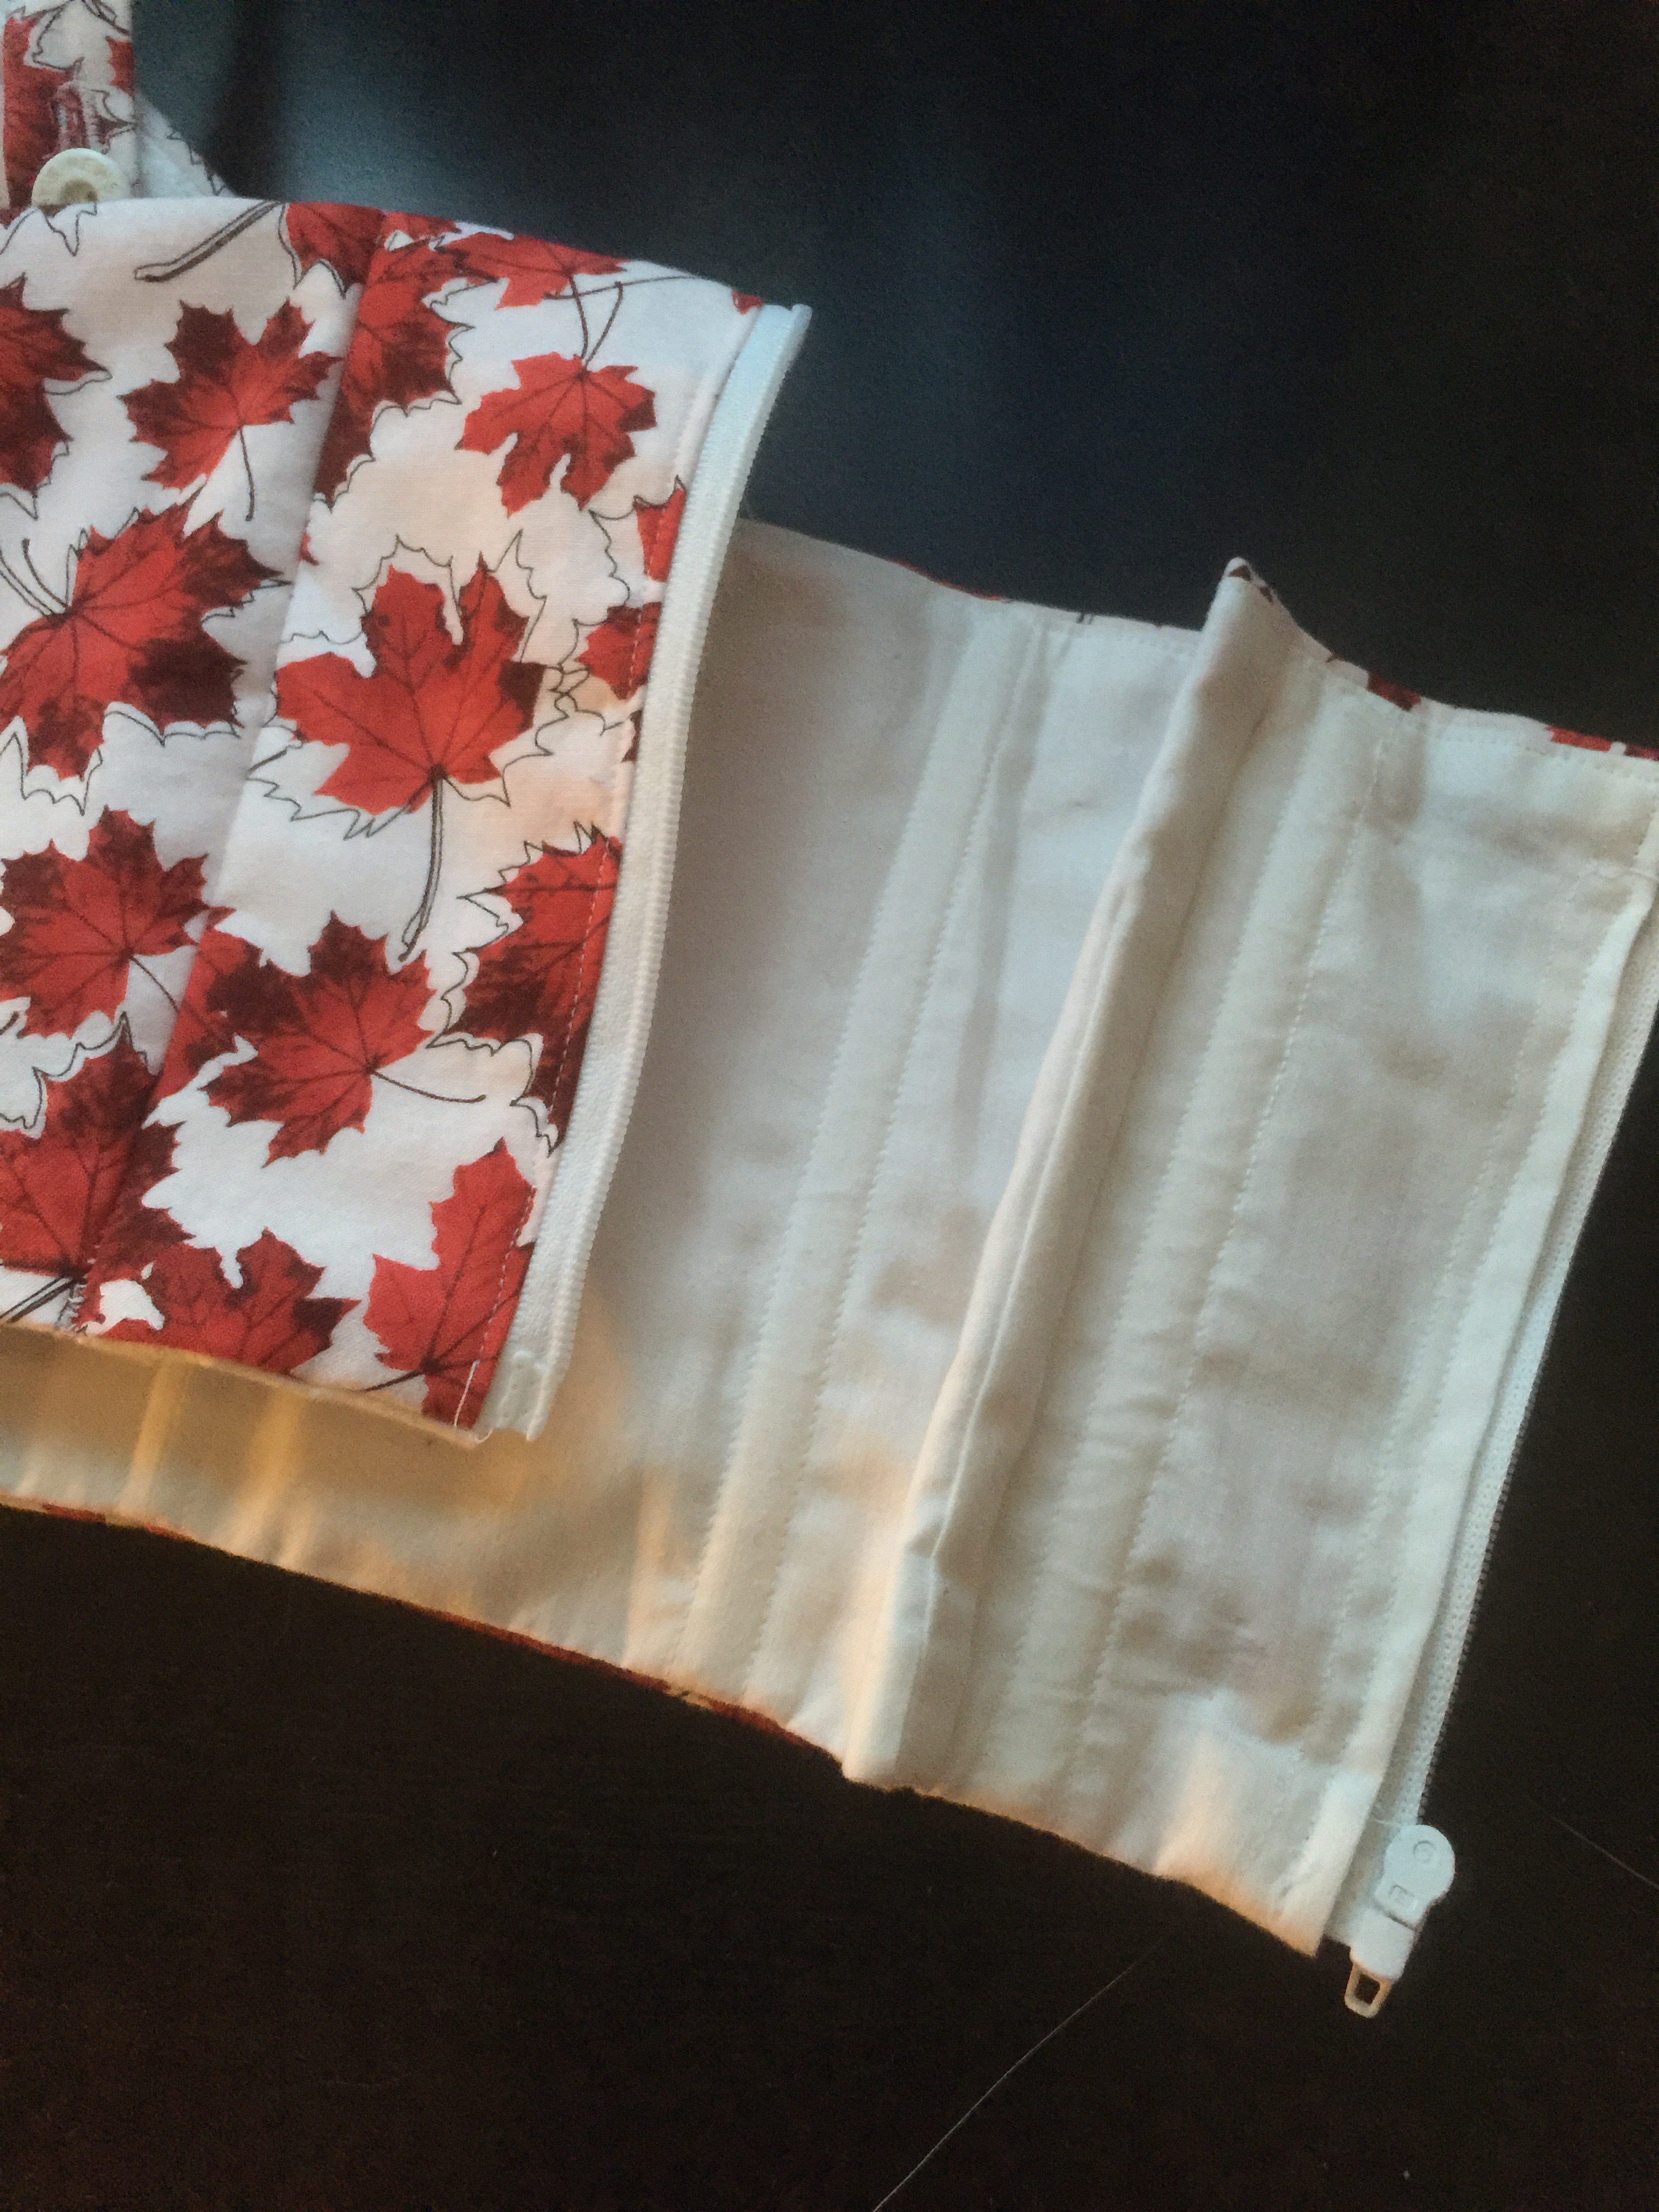
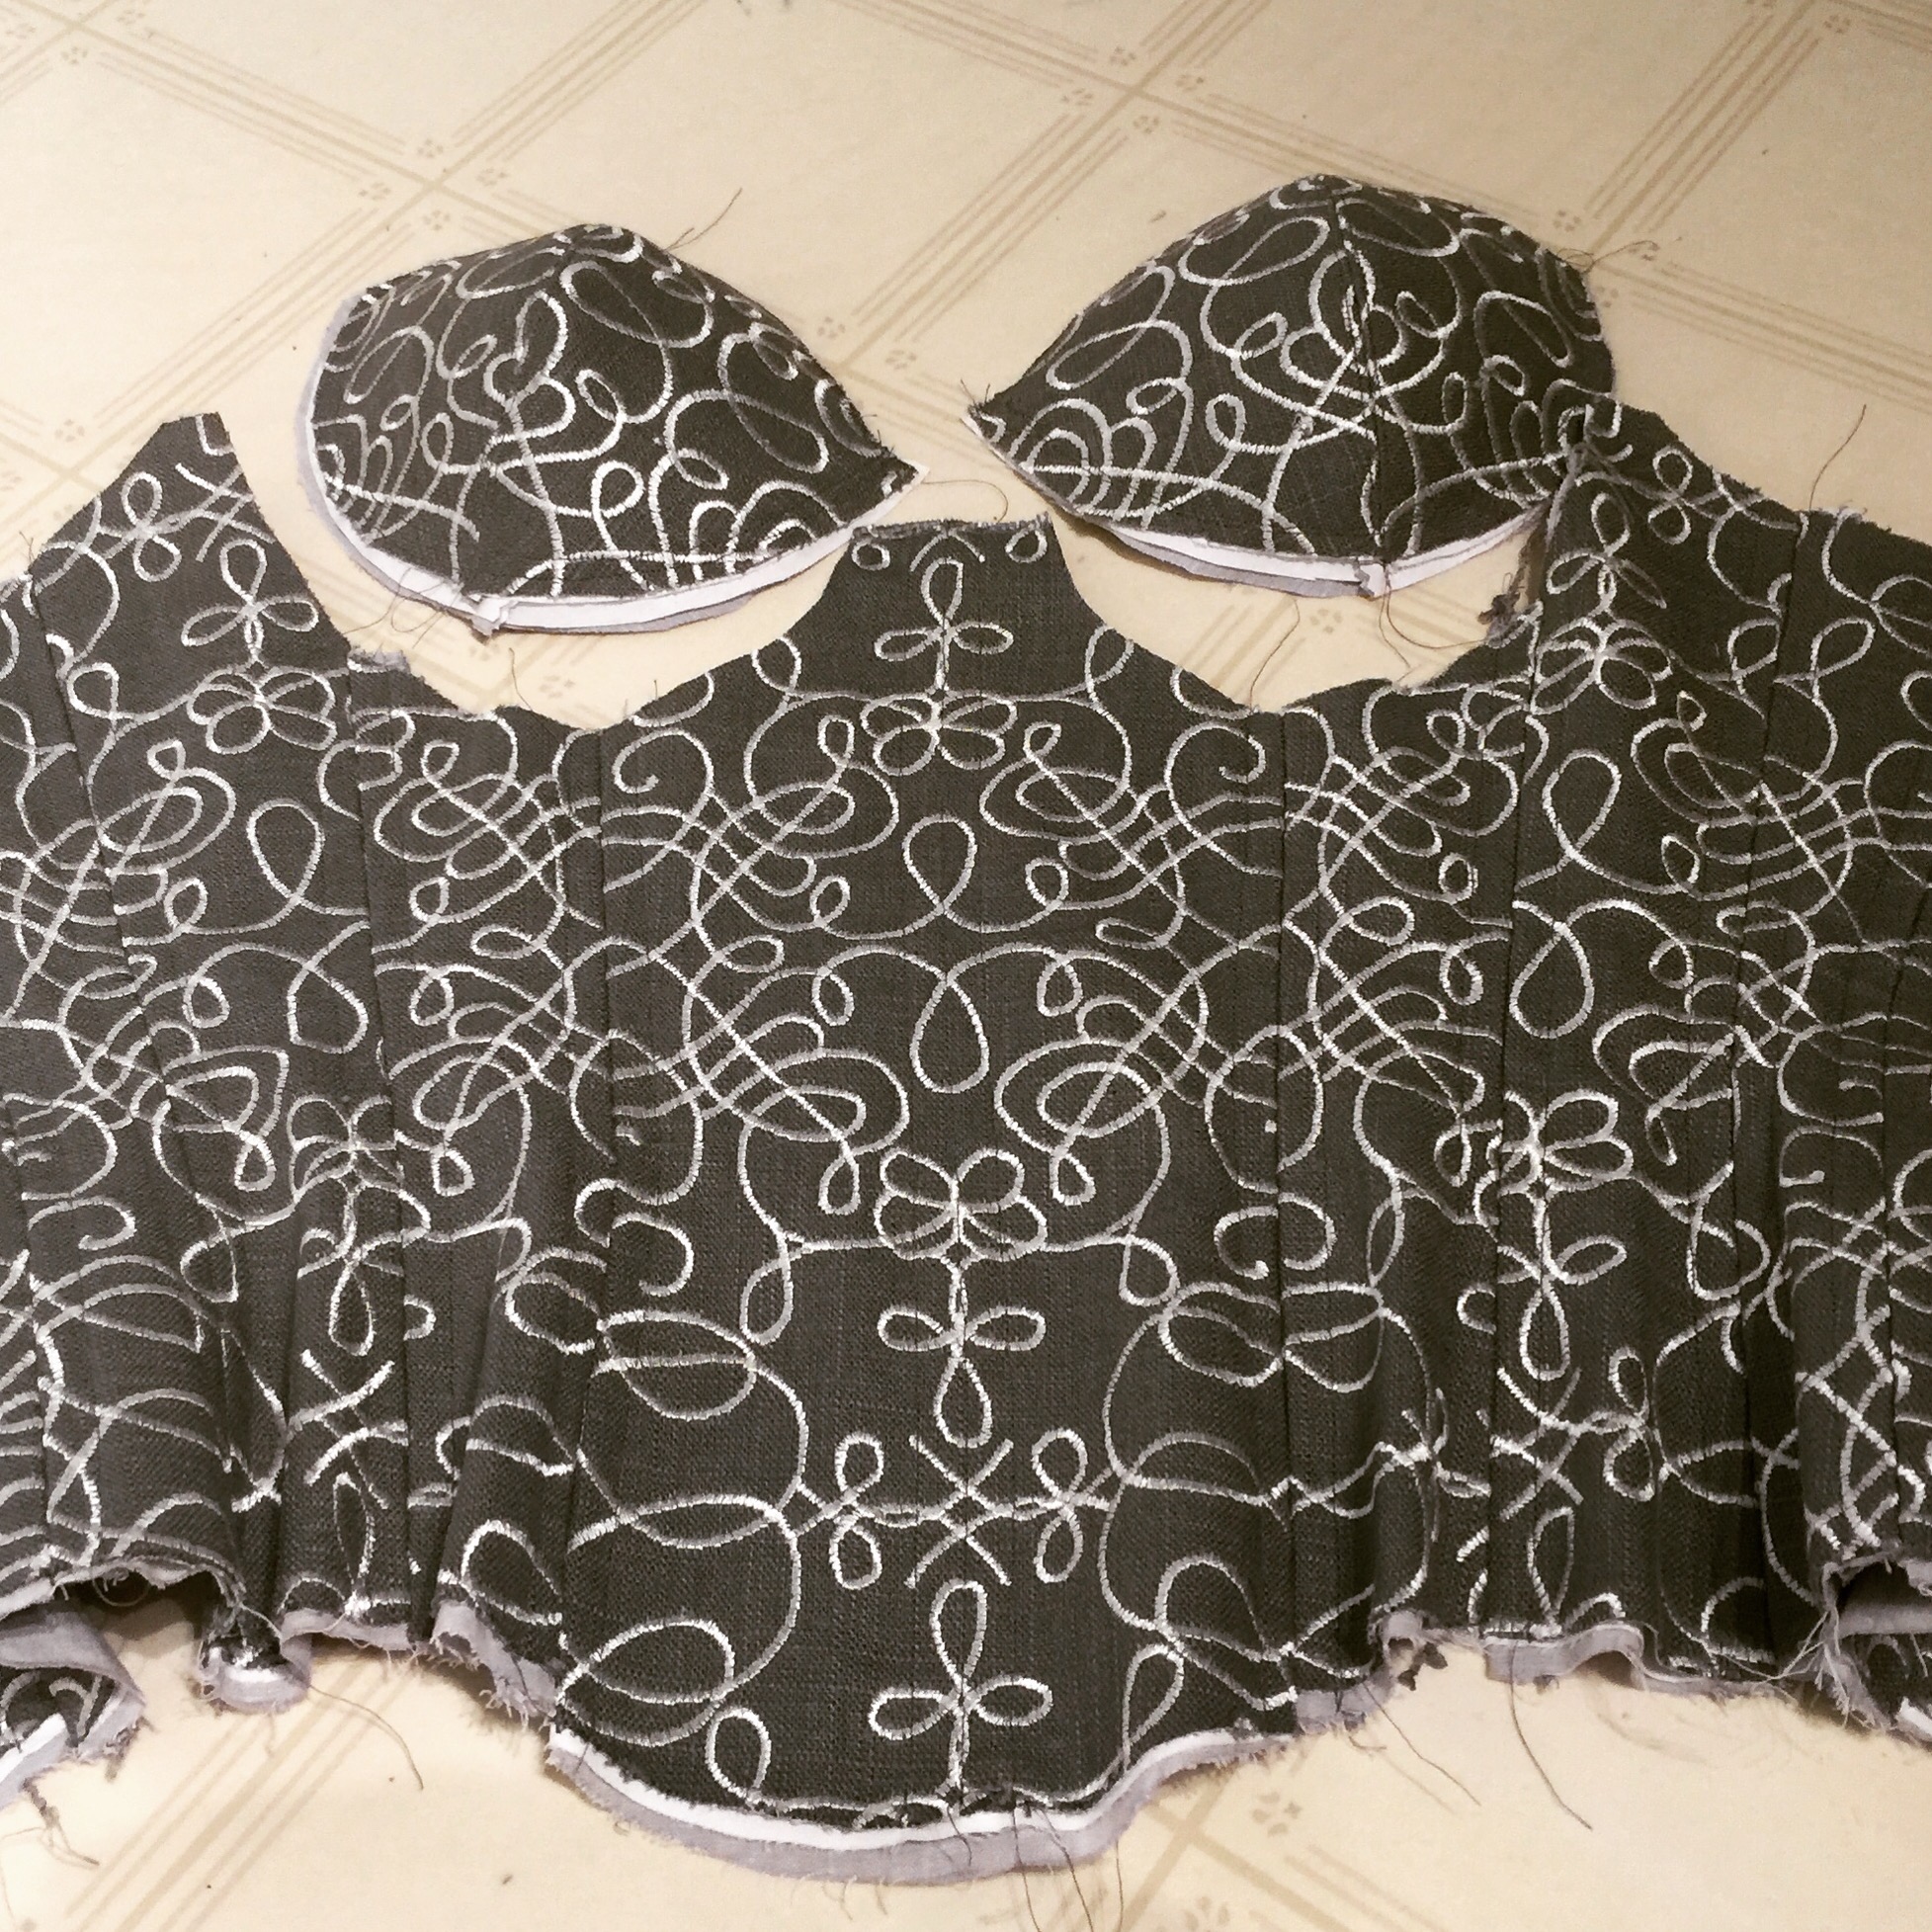
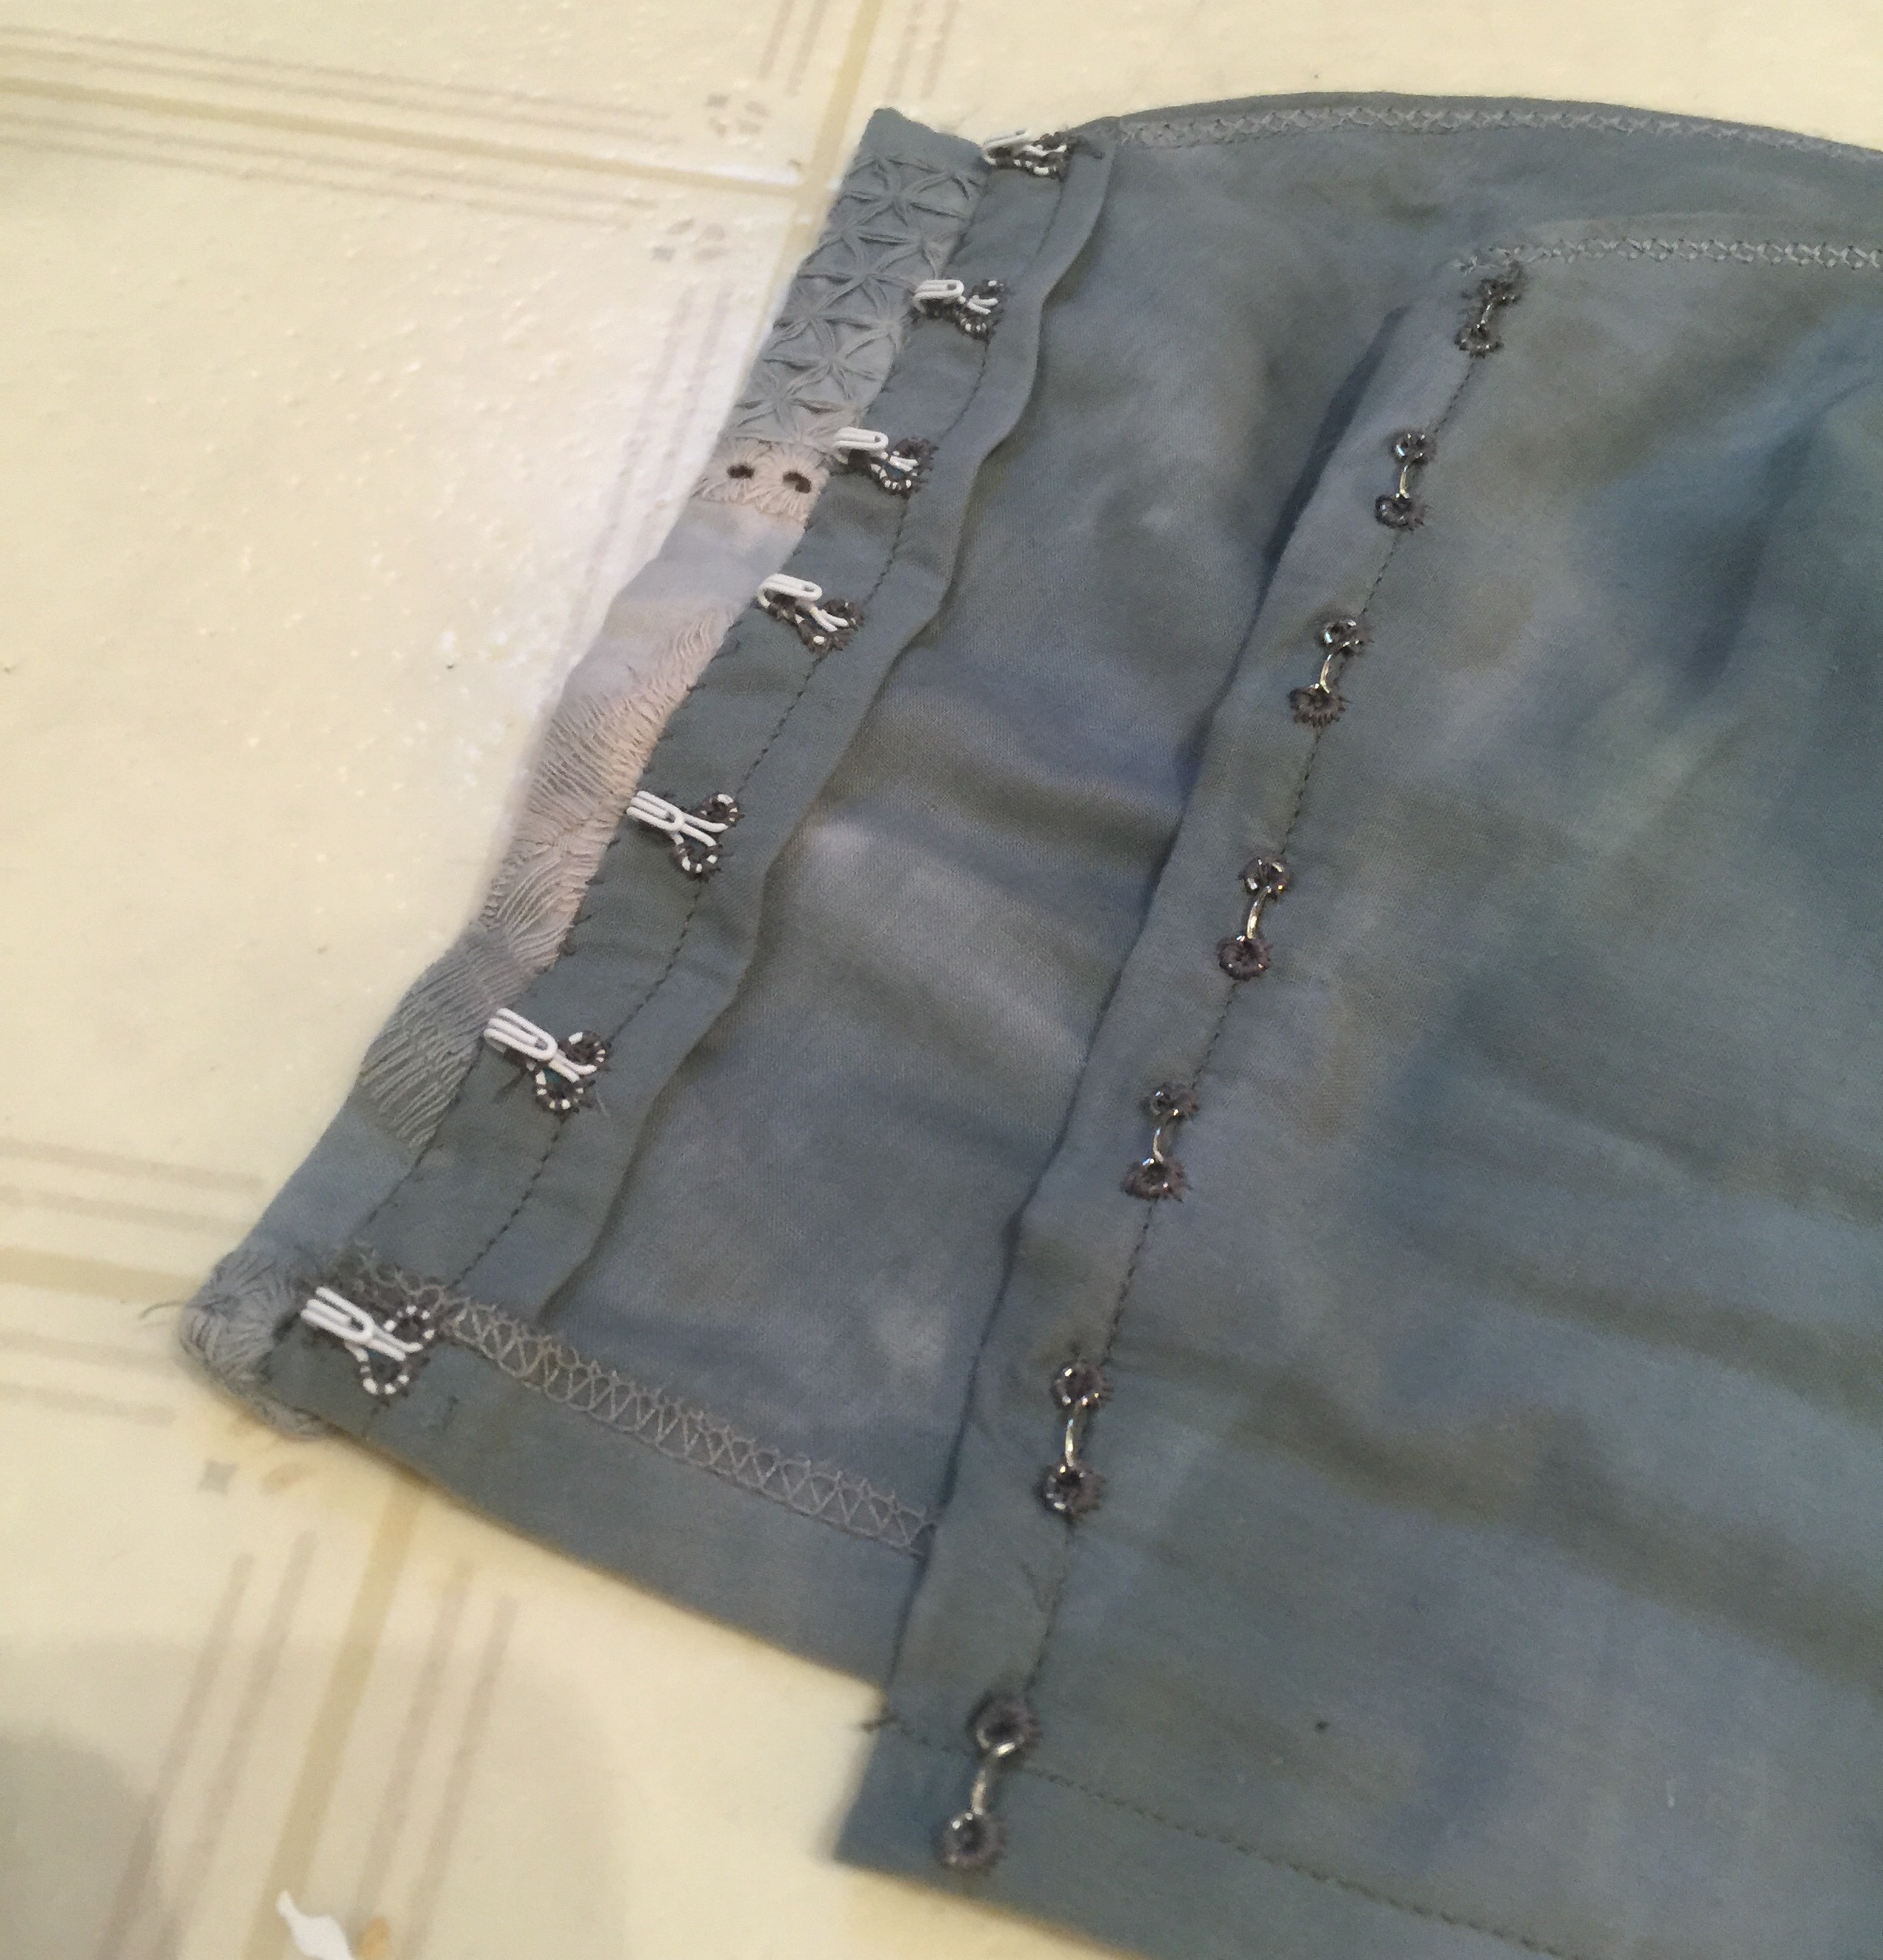
 The materials I chose were affected quite a bit by this being a shop project. Aside from the busk, I used ticking instead of coutil, and tried substituting Bosal in-R-form (a bag making product) for the poly laminate foam the pattern calls for for the cups. What I didn’t make do on was the boning—I used my usual 1/4″ spiral steel, double boned at each seam. I kinda construct all my corsets the same way—one trick pony, I guess. I know it’s not he strongest way, but it makes them easier to adjust and alter, as you go or after the fact. And I haven’t had a seam split on me yet.
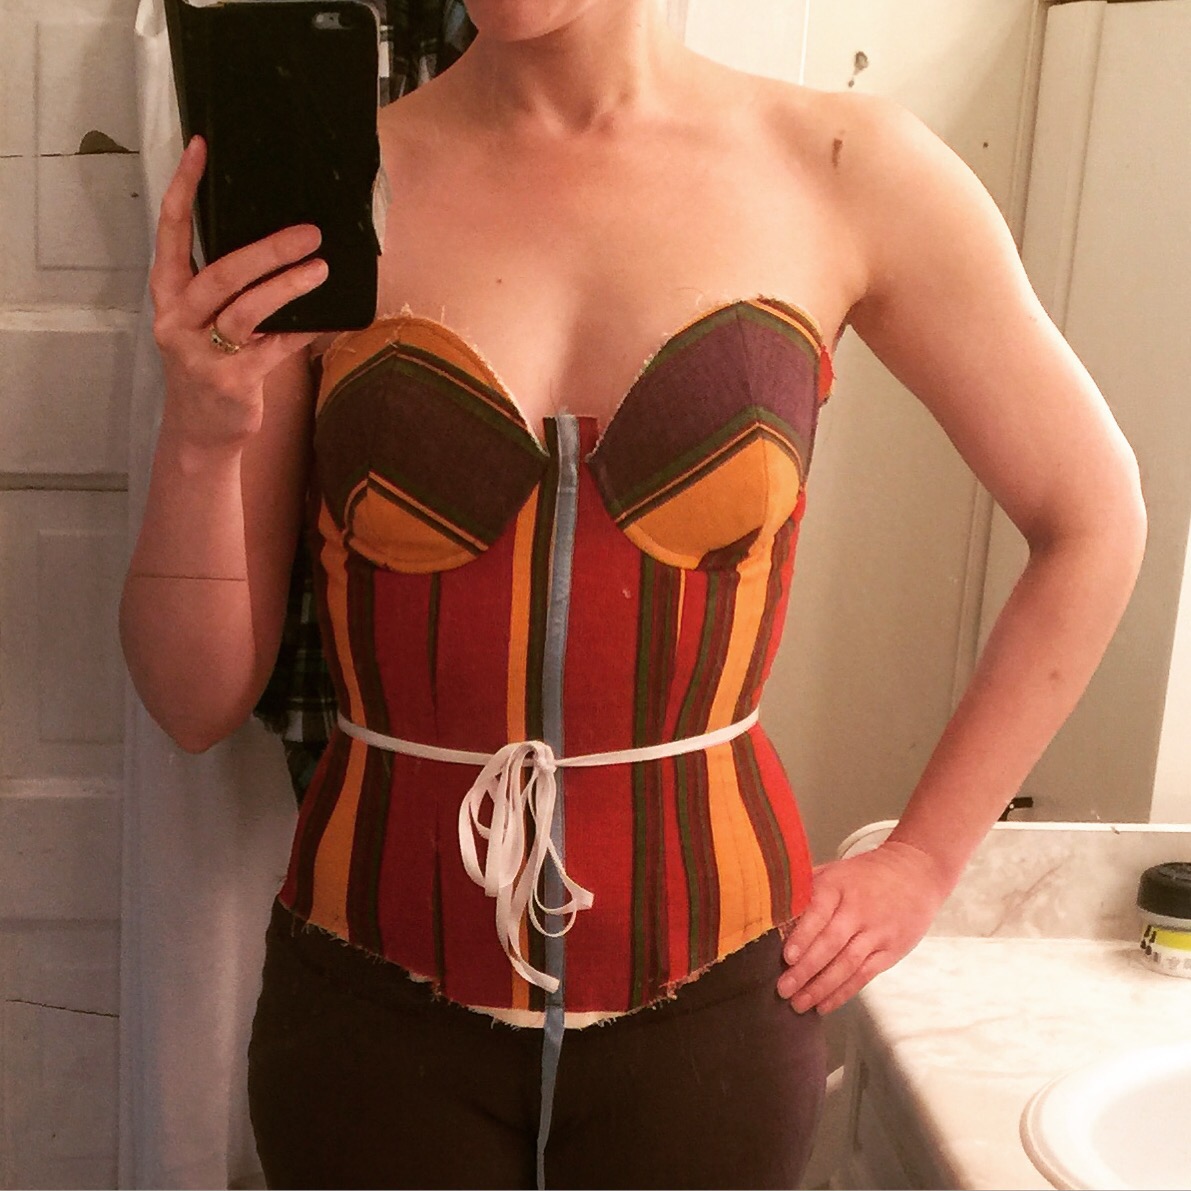

 The bust cups affect the fit a lot, too, incidentally, so don’t take your fitting too far without them, if you’re going to use them. I don’t think I’ve really nailed the bust fit. Even downsizing to a 10 in those pieces the cups were a bit large, though with the foam lining it doesn’t show so much in the photos. I made some minor tweaks to the shape to round the bottom a little more smoothly and bring in the top 1/8″, and I played around with making some little chicken fillet push-up pads.
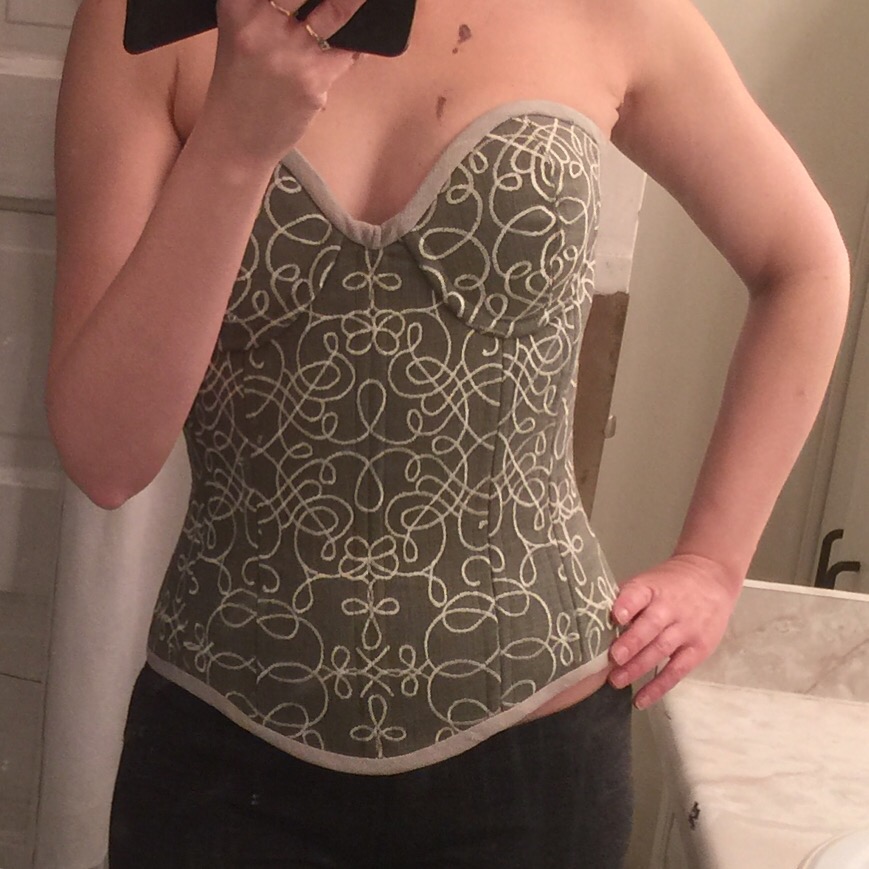


 All in all it’s very pretty, and feels very sleek and smooth, so that’s nice. It makes me think of an elven princess. Probably some delicate silver jewelry would be in order.

 Hey, a girl can dream. I can also wear it swanning around the house (as I did the day I wrote this). I’m getting to like this crop-top-with-high-waist thing. (It only took me what, three years, to wrap my head around it? Bear with me, I’m well past the prime age for adopting new styles.)
 I had hoped to cut the centre front panels from the last “large” scrap of the embroidery, but alas it was too small—I had to settle for just making that the lower portion of the side fronts.
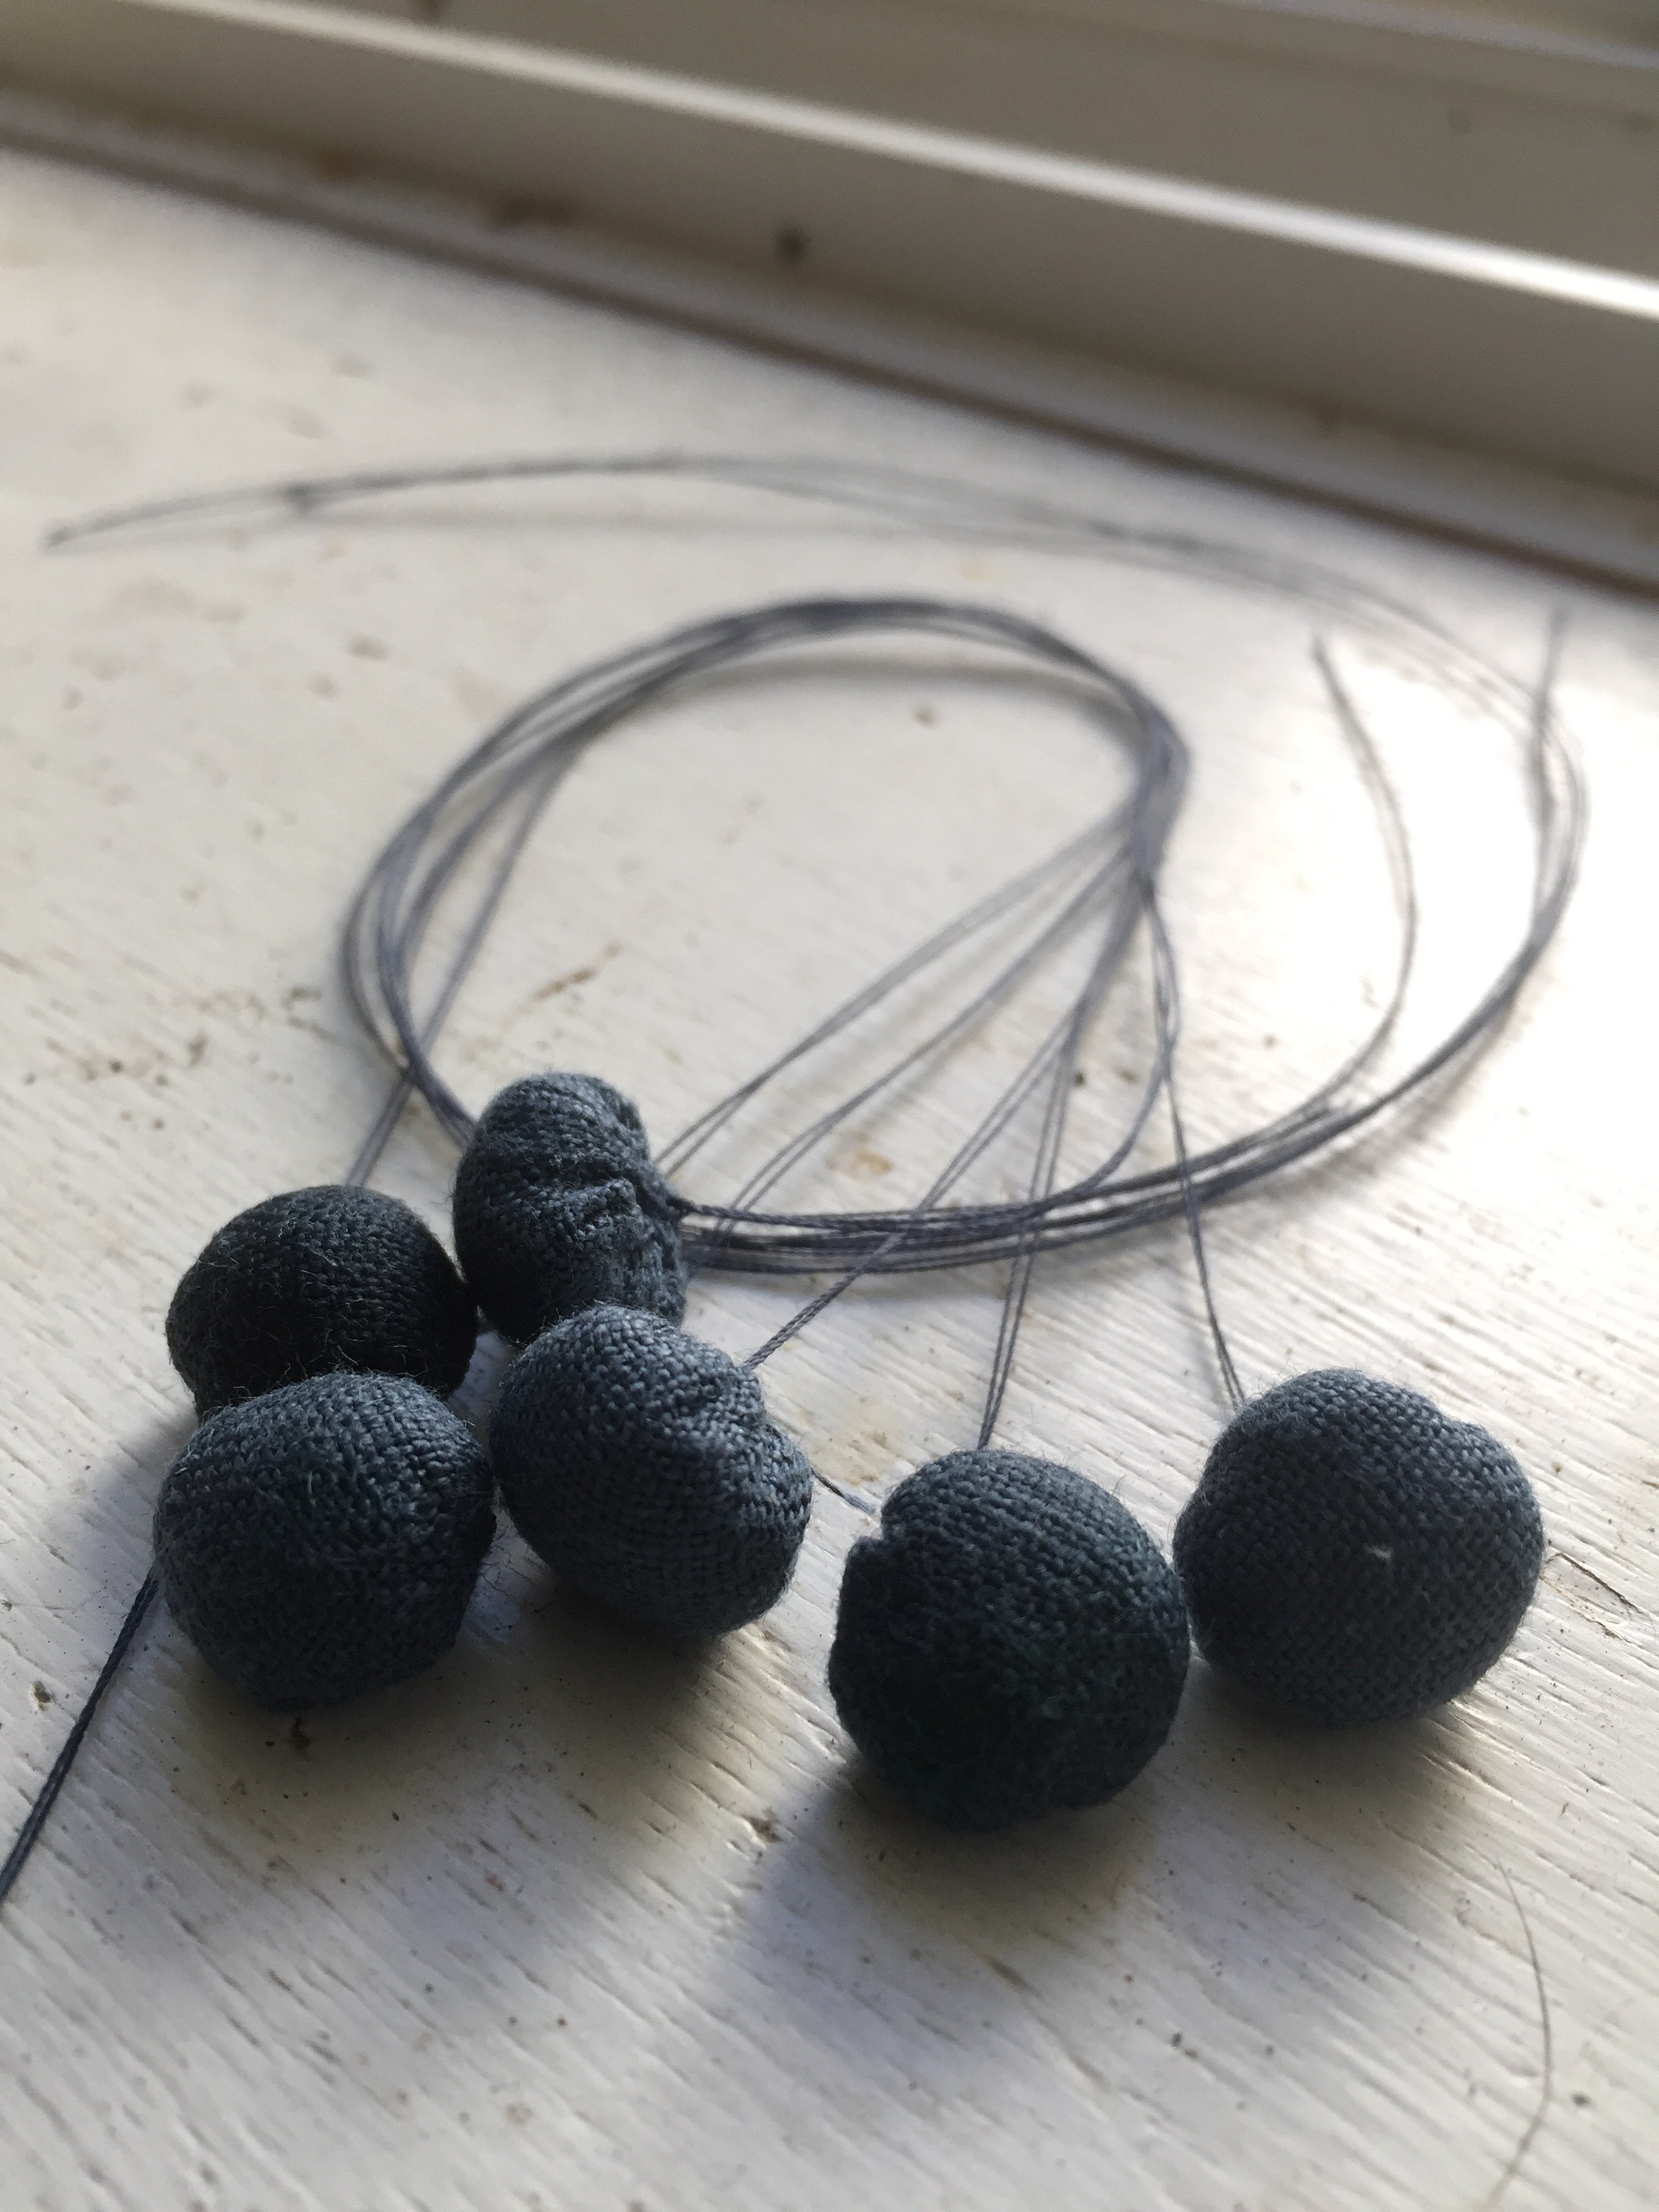
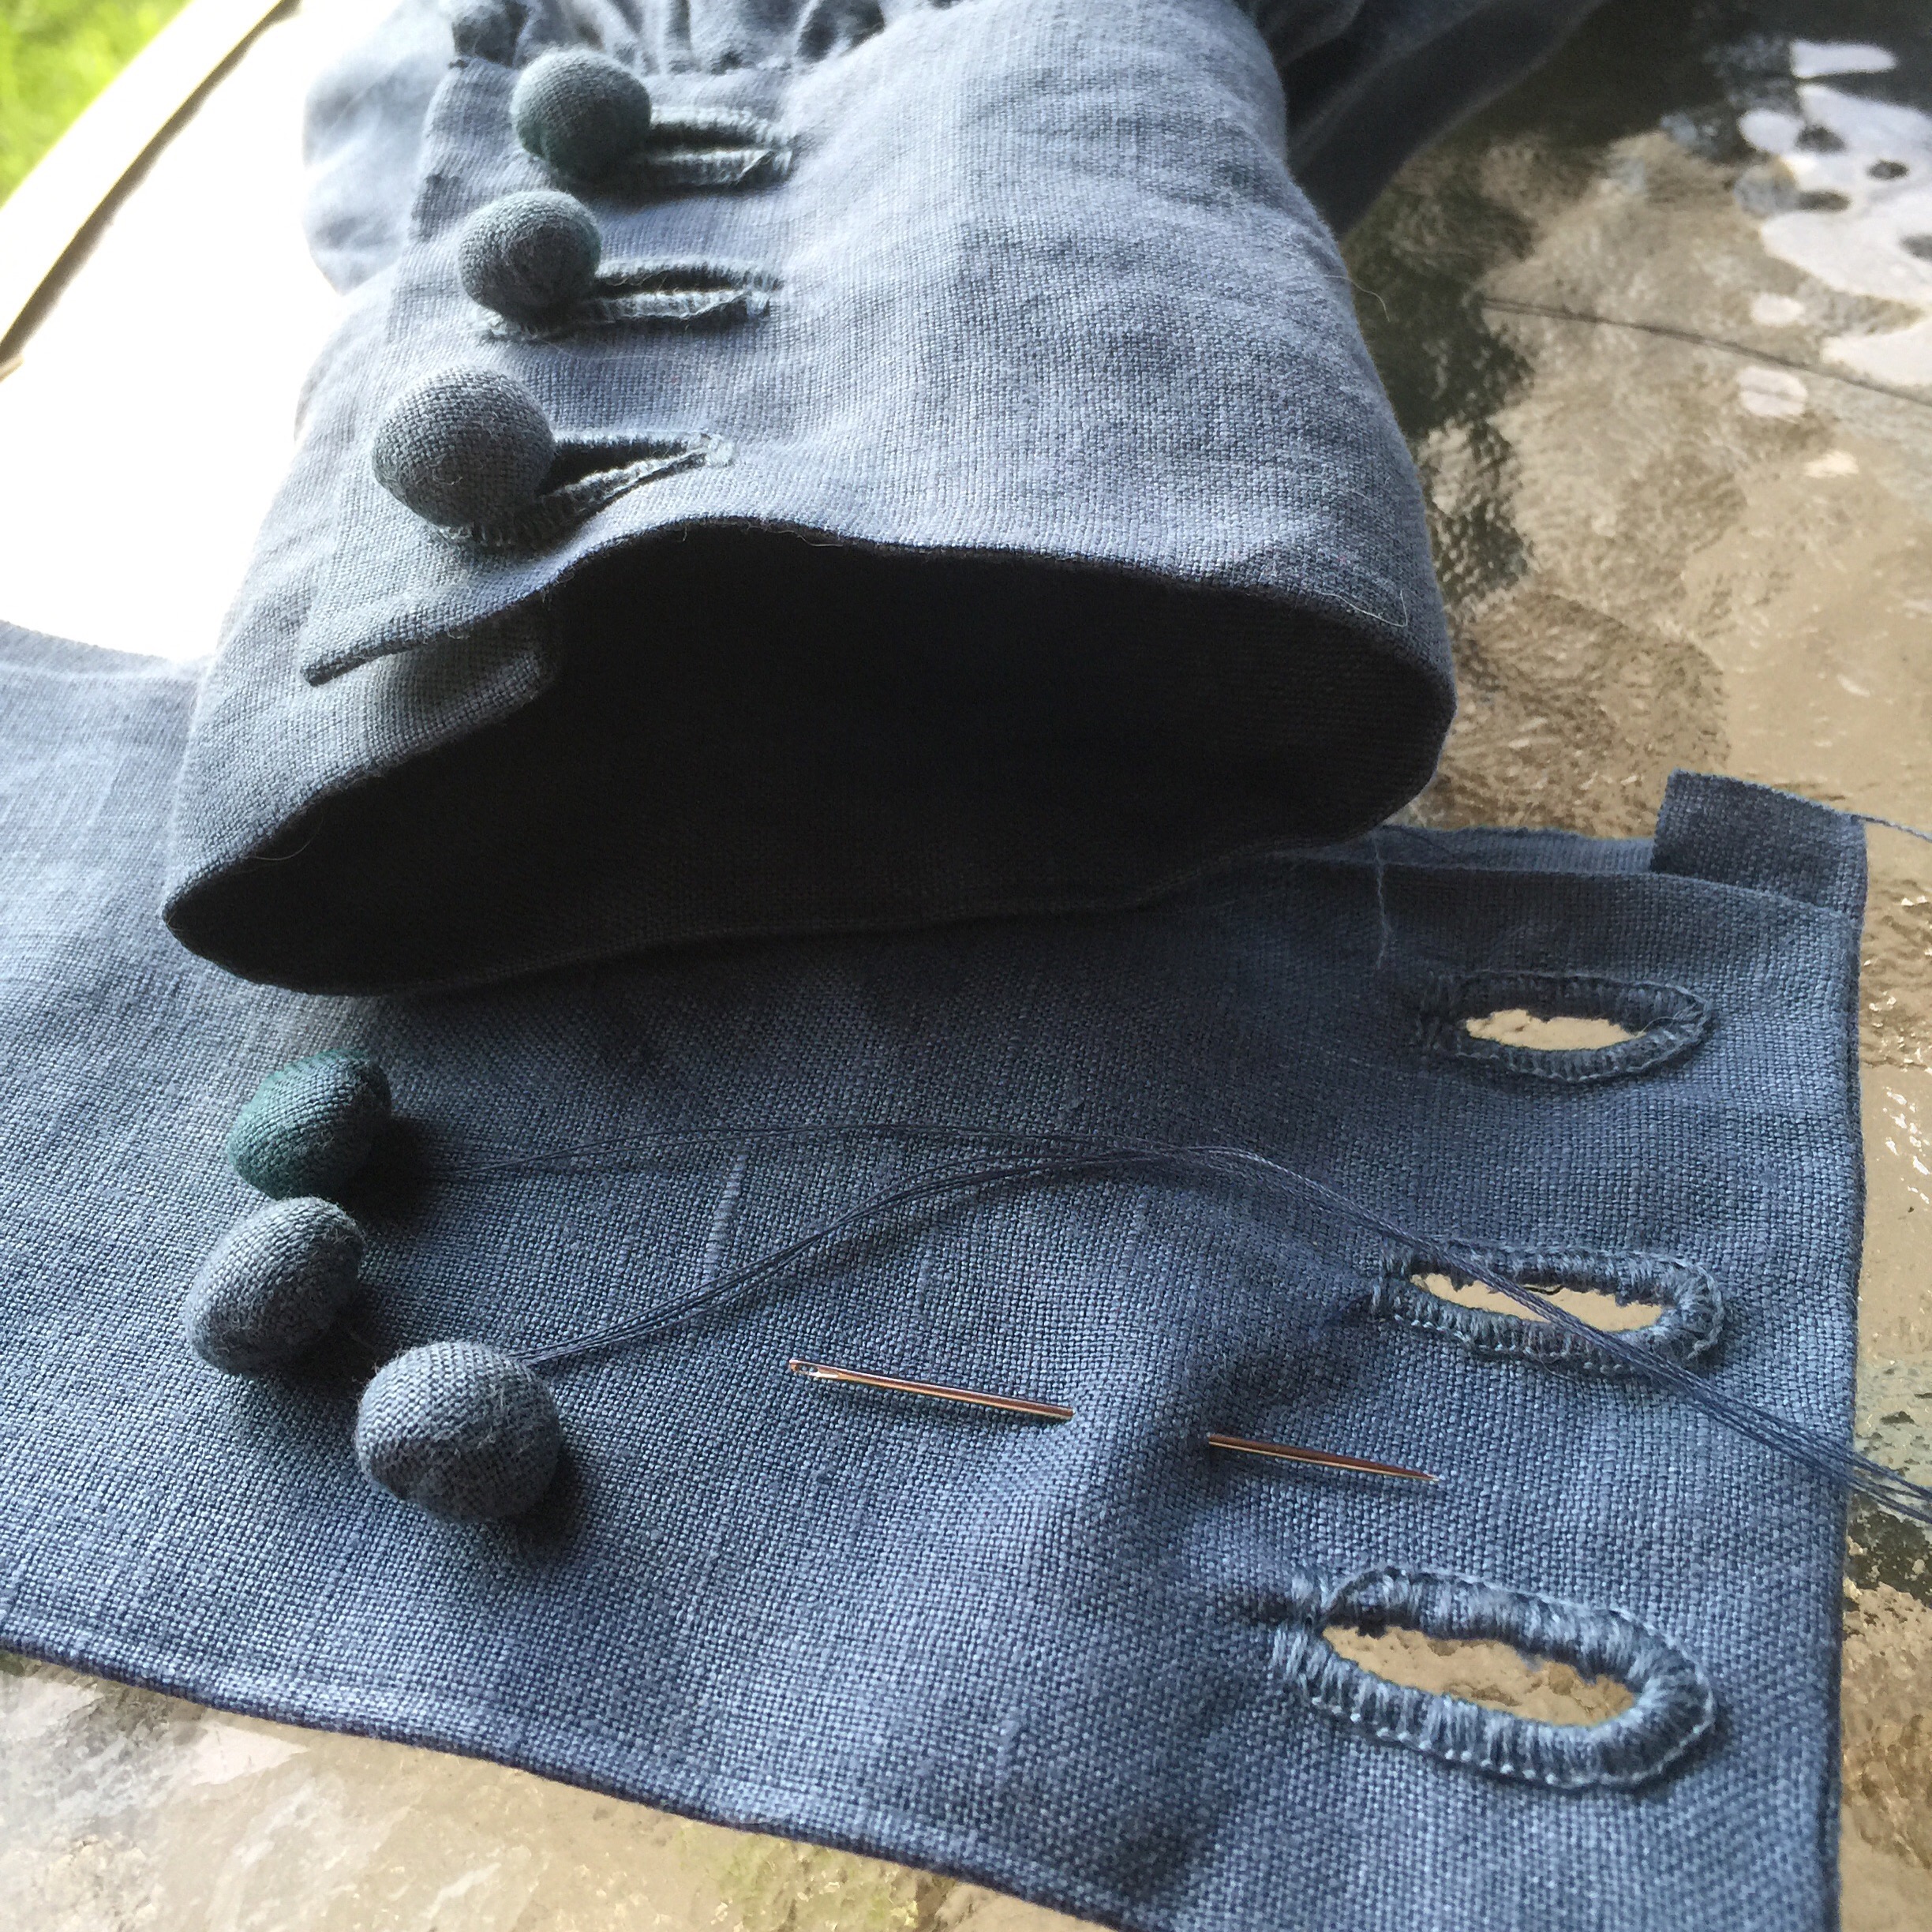
 This left the front rather boring, so I ended up hand-stitching a little embroidered bit in place over the closure.
 I had a lot of fun with the construction; everything is clean-finished inside and out except the bottom hem. I wish I could describe all the inside-folding-burrito shapes I got this thing into, but words fail me.
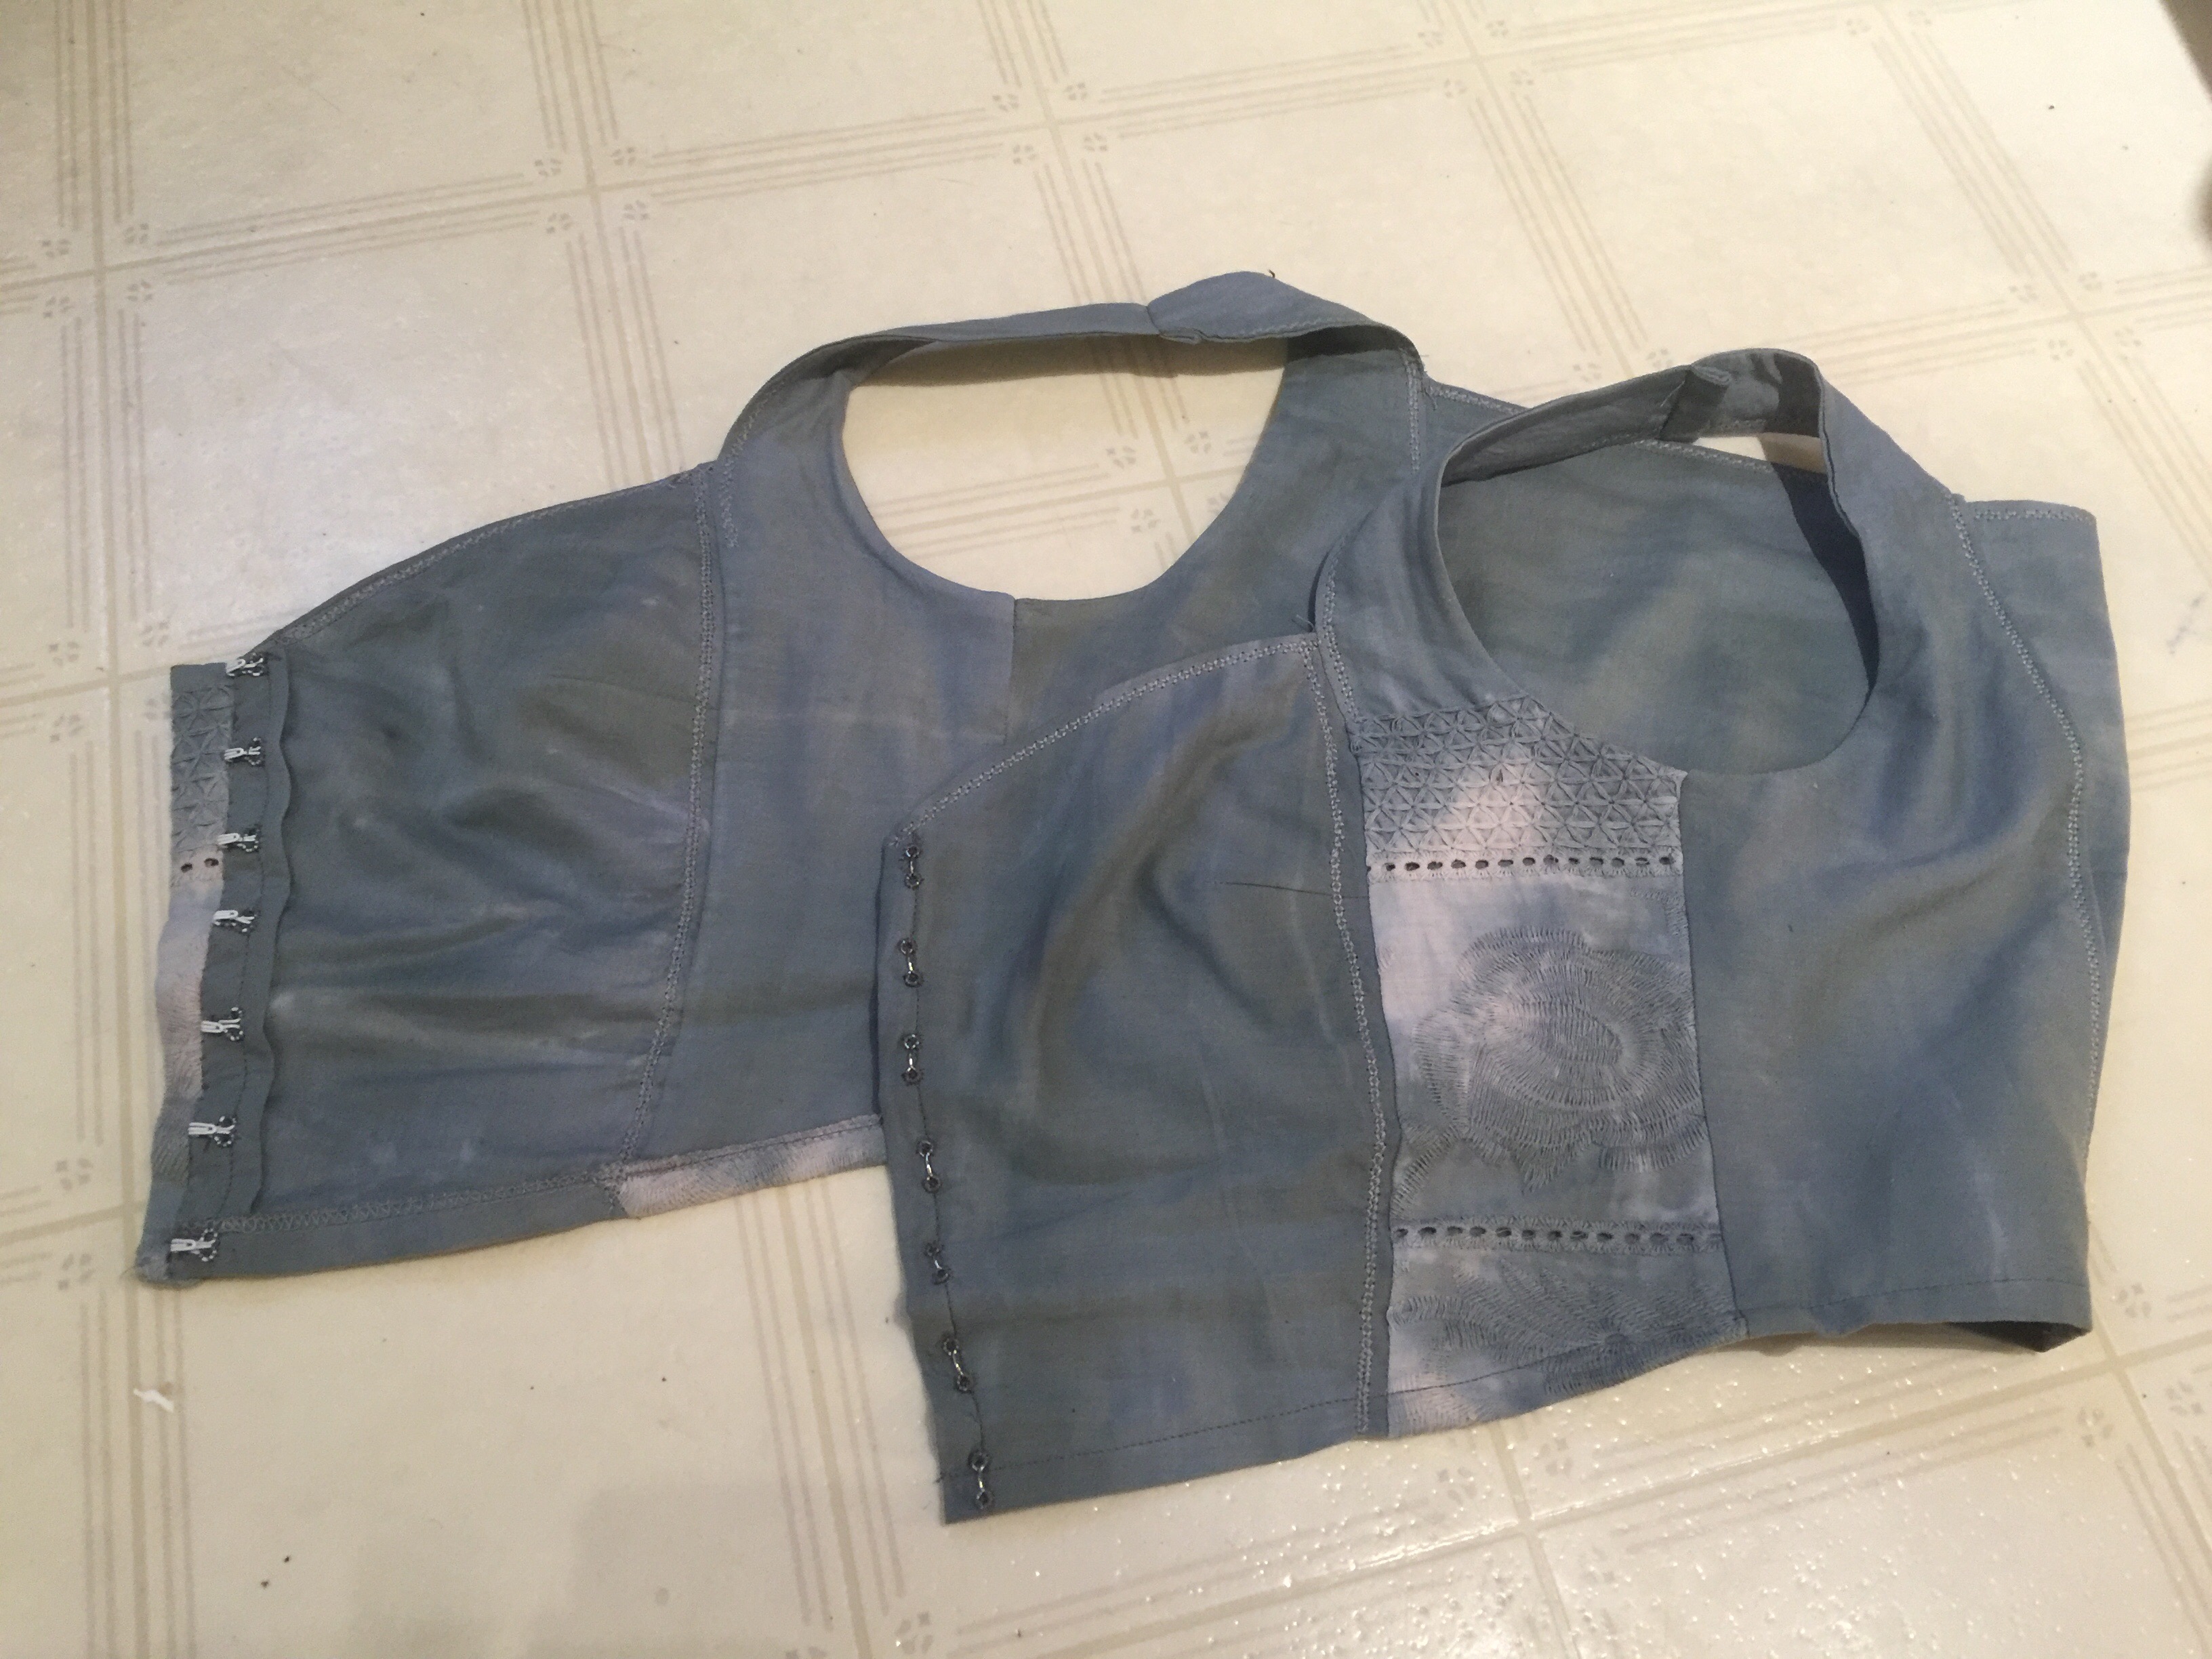
 I initially skipped my usual petite alterations (not sure why), but then I wound up taking in the shoulders and cutting off a good 1/2″ from the bottom (more like 1″ at the back), so I probably wound up in much the same place. Ah, well.

 The whole outfit feels wild and wood-witchy and mysterious to me, which I am enjoying immensely. (And if you don’t think so, well, feel free to keep it to yourself. I’m having fun here 😉 ) Now if only I could be taking photos in an ancient oak grove, maybe with a few standing stones kicking around for ambiance…


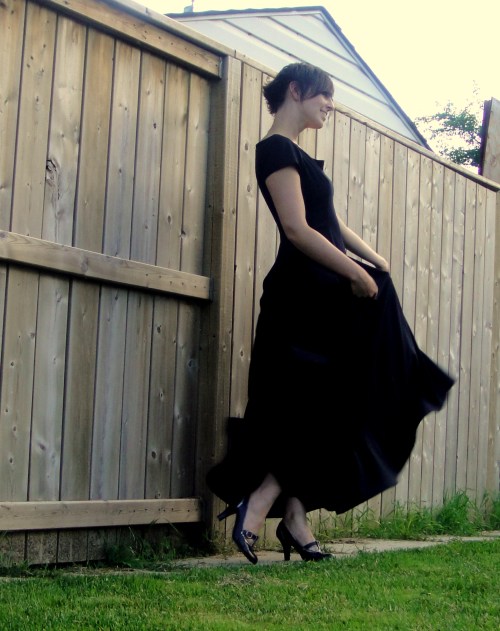
 And, well, it ain’t Simplicity 7514. I did more fit-fiddling on this damn thing than I have in quite a while. At least that’s easy with all the different seams on this pattern.
 I’m not sure how entirely I can blame the pattern, however. I cut a size 12 knowing it would probably be large, but that was the largest size in my pattern envelope and I was too
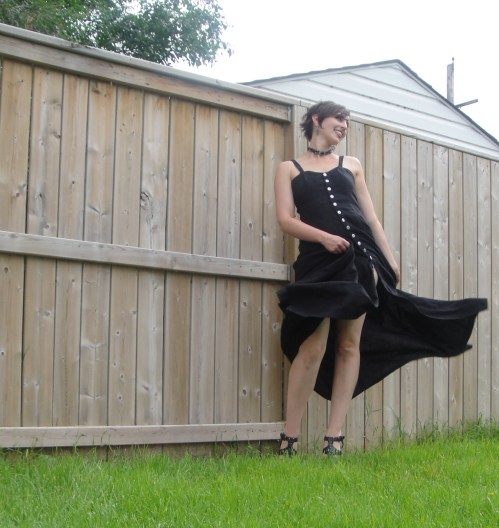 AND the pattern was meant to be lined, so doesn’t have facings or any other nice way to finish the top, and again I was too

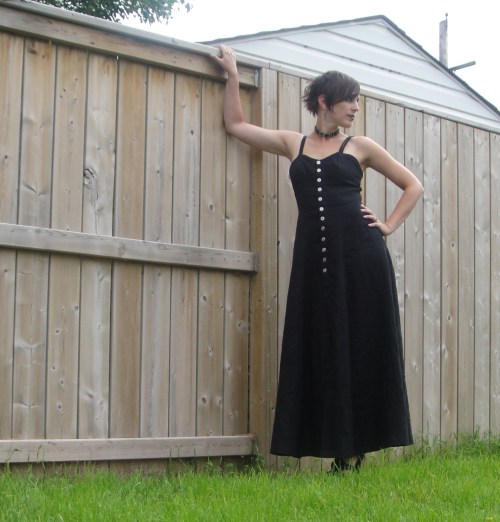
 So a few years ago I got this nice, substantial, shiny black linen with the plan of making a shirt for my husband—but it’s a bit heavy for his taste in linen shirts, so it has languished. And it surfaced during some recent stash diving, and I realized that there’s way more than the two-ish metres I had thought I’d bought—more like four or five. Yowza! And I was suddenly seized by the need for a swishy long black linen sundress. I dug up some options and posted them on Instagram, and the chorus was in favour of McCall’s 7640. And it did seem like it would be a really great linen sundress.
 But I still REALLY liked the idea of a long black version of Simplicity 7514. So I dug around stash some more, and stumbled upon this piece of black bargain centre fabric ($4.00/m tag still attached) that I didn’t have earmarked for anything. (I didn’t recall right off the bat but as construction, especially ironing, went on, I remembered the reason I picked it up. 100% wool, in what I suspect they would call a tropical weight.
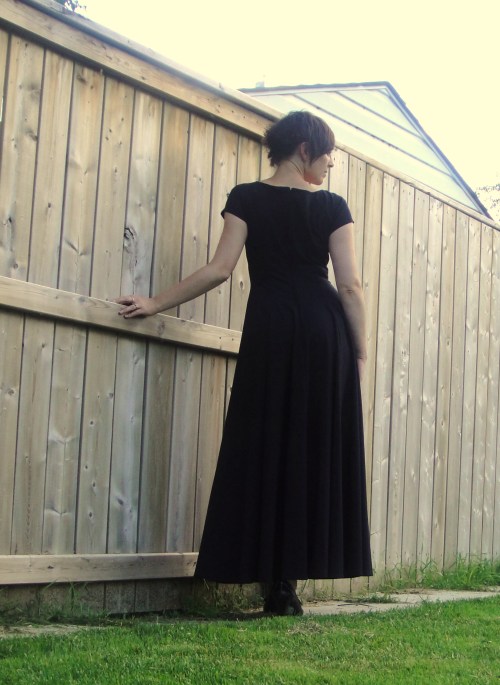 It’s been a long time since I made a Simplicity pattern, what with them not really being available up here any more. It was really nice, especially since the ‘vintage’ pattern (© 1997) has much thicker tissue paper than the current patterns seem to.
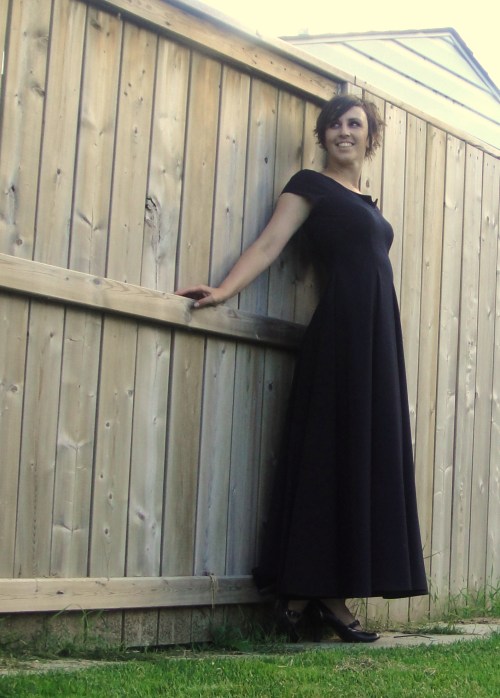
 The skirt is very, very swishy, and the fabric has a great drape.
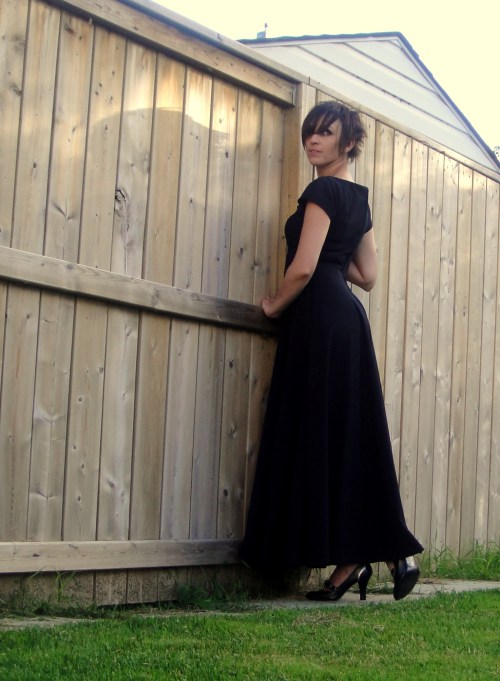
 Can I tell you a secret? This dress reminds me of a mediaeval


 And I didn’t need to be. What a sweet, straightforward sew.
 I’m not sure I did the pleats correctly—I followed the markings but then stitched them down, whereas in hindsight the pattern illustration just shows them being pleated. And my rear pleats don’t meet the way they seem to in the illustration, either. Probably because of the stitching-down thing. I like the stitching down, though, as it controls the fullness right below my waist—I don’t like gathered skirts at my natural waist as they just make me look boxy, and I was a little nervous of the pleats.
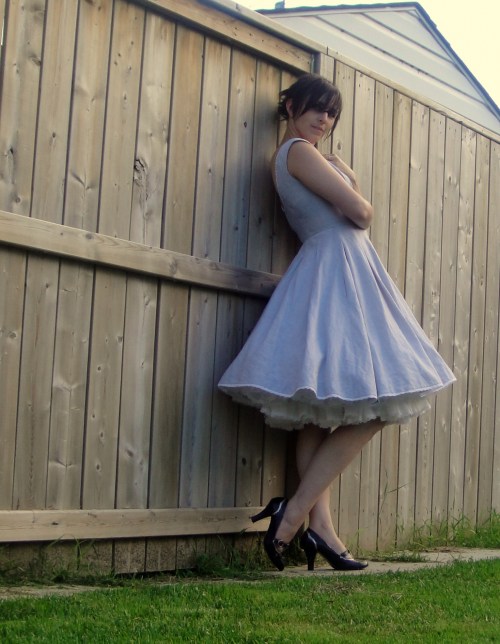 I like the lace at the neckline; I was initially on the fence about the lace at the hem, but I got it as part of the project so I thought I’d better use it, and it’s grown on me.
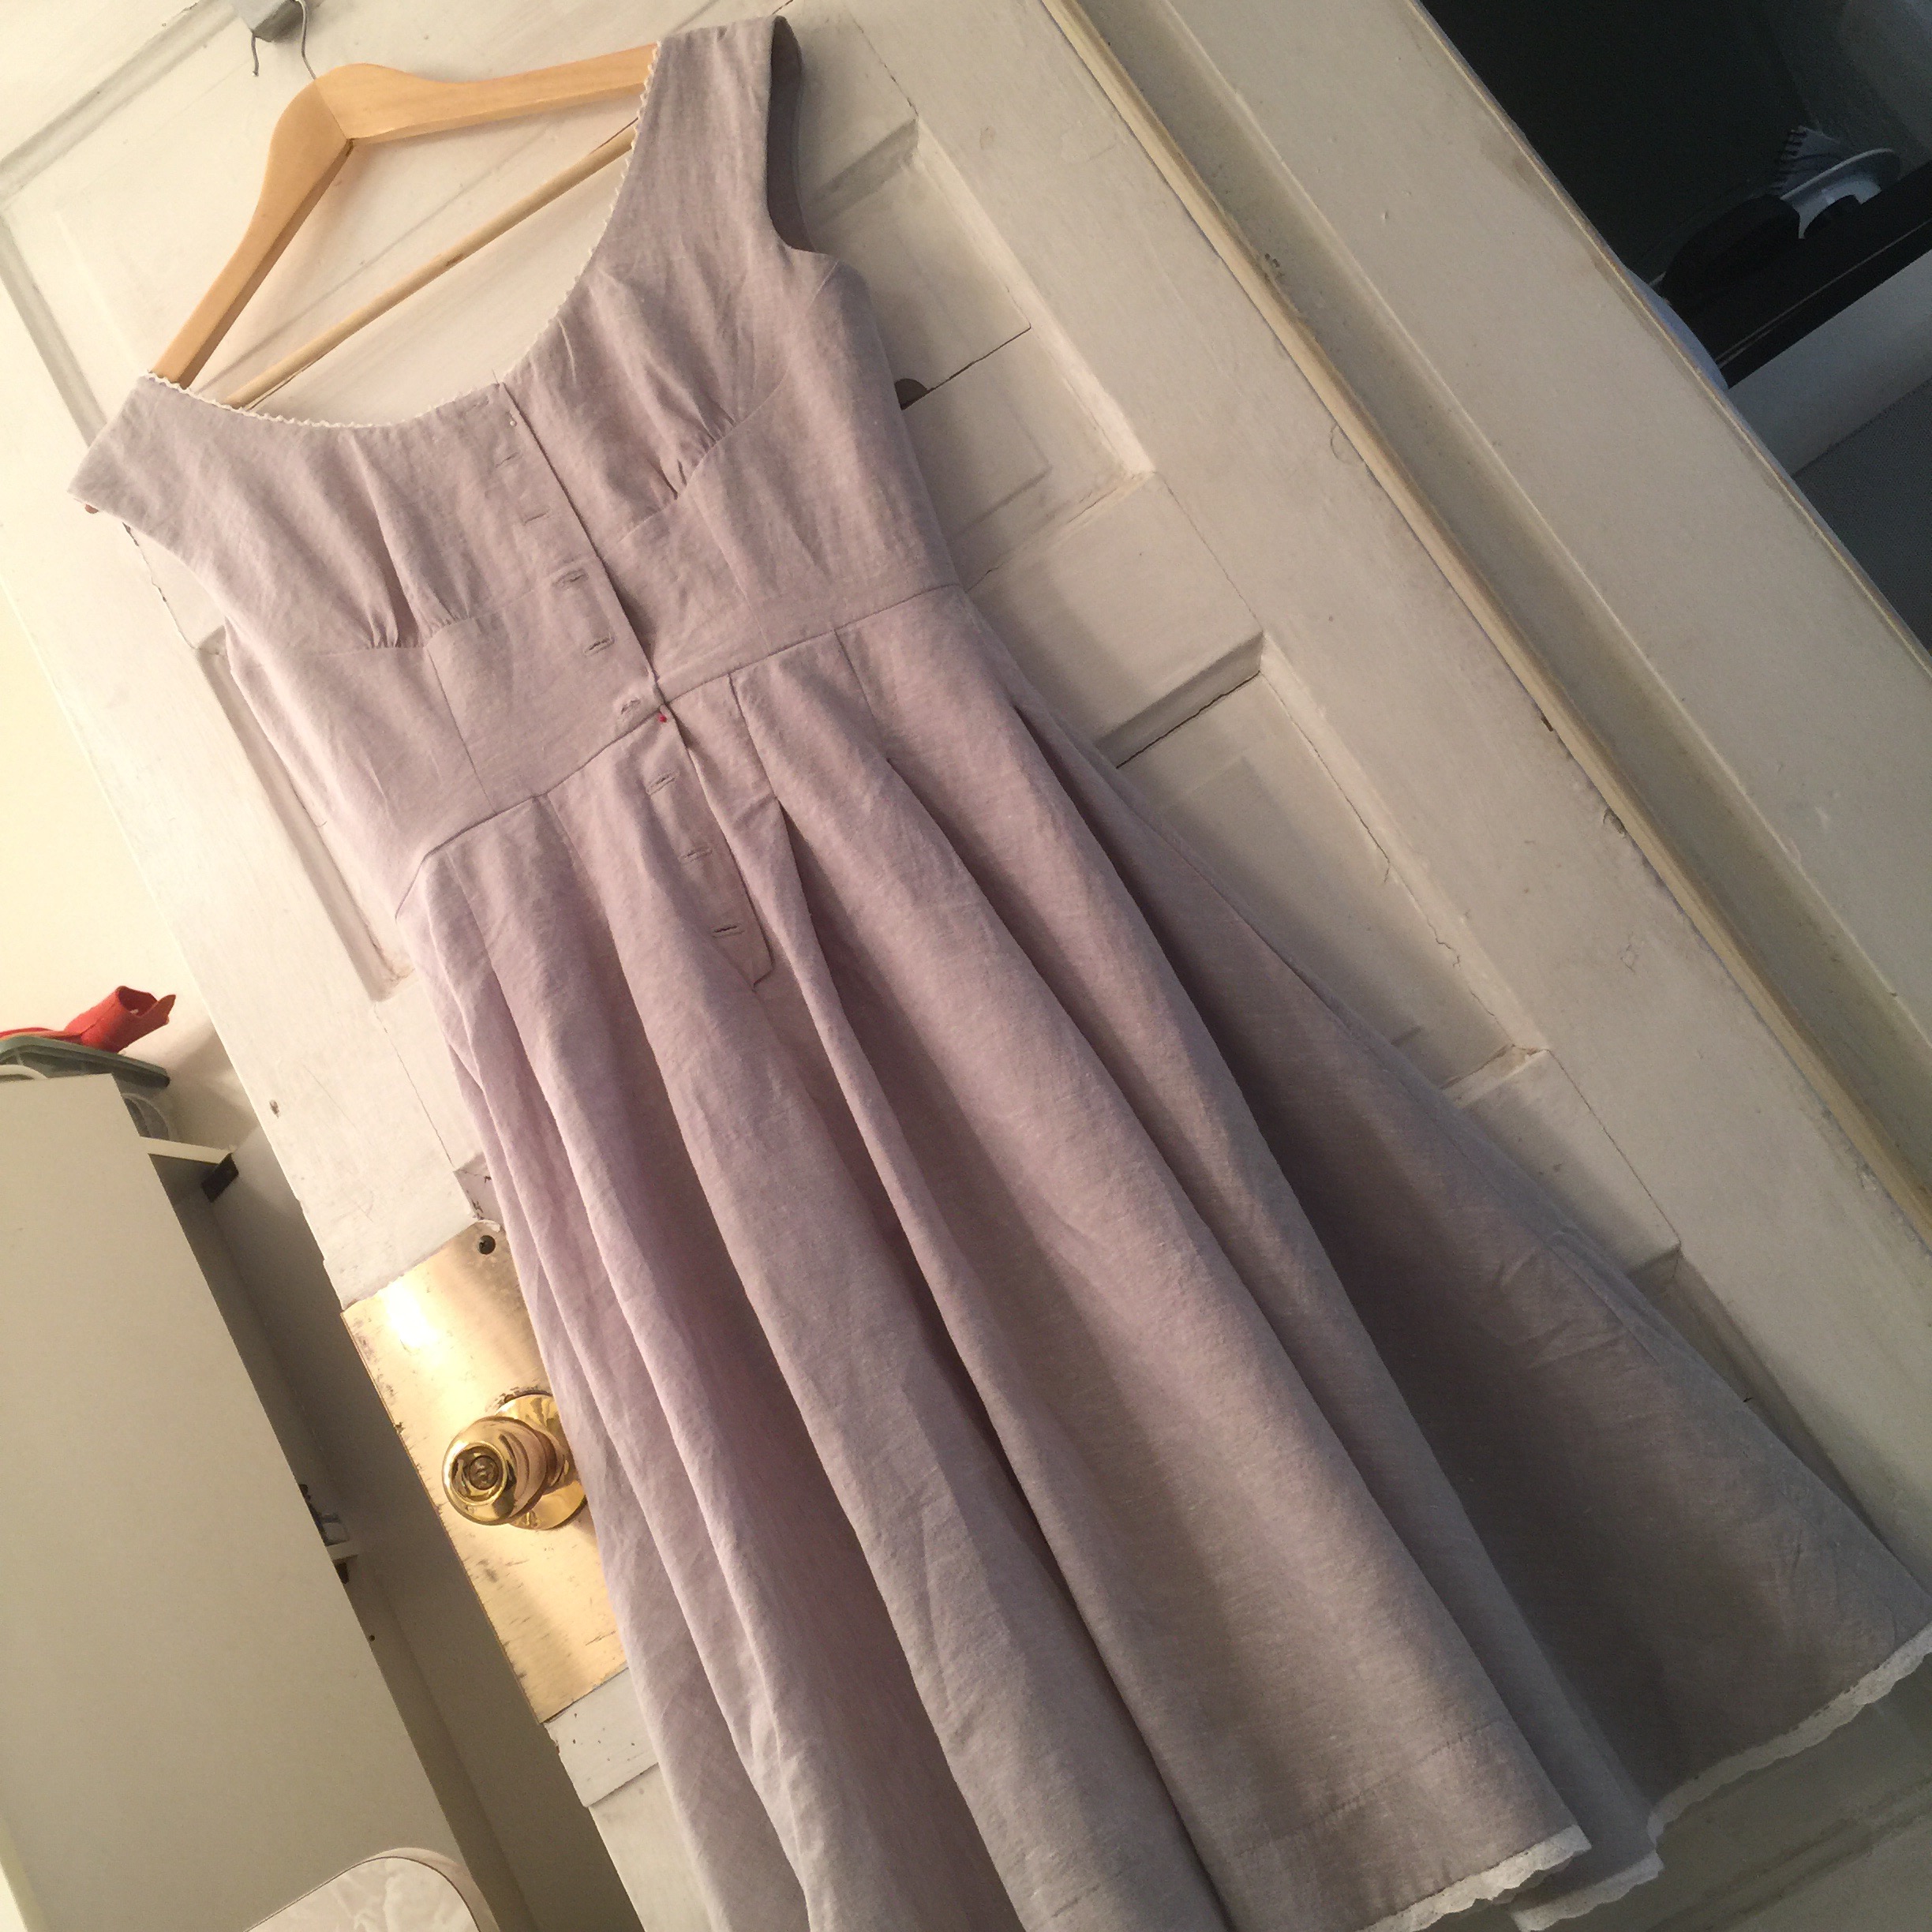
 All in all, this was a nice, quick project with a nice fabric and surprisingly little drama. I’ll take it!