
One of the first times I saw my husband, across a crowded goth club, he was wearing a romantic, slightly pouffy white blouse.
 This was the intended effect, though that was long before cellphone selfies so I have no photographic evidence.
Now, in the early days of this blog, the first shirt I ever blogged about making him was an attempt at recreating that long-lost shirt. But this wasn’t my first attempt.
 A few years before that, shortly after we moved to Cowtown, I had tried to create much the same look, using Butterick 4486. I don’t even know how I came to own the pattern, though it’s still in print.
I didn’t have much success. My fabric was a slippery, textured synthetic that had a vague linen “look” with none of the joy of sewing actual linen. I was completely mystified by the placket construction on the front, and had to bring the half-finished shirt front back to Saskabush to consult both my mom and her best-sewing friend. I was still puzzled. and then, after all that angst and anguish, when giving the shirt a final press I managed to iron a hole right through it. Argh!!! Into the bin.
Needless to say, I was not a fan of the pattern. But I’m also a hoarder-in-training, so in stash it stayed. Until early this spring, when an old family friend contacted me, looking for a vaguely Mediaeval-looking shirt to wear for performances of a choir he’s part of that does Mediaeval and Renaissance style music.
 Well, I hemmed and I hawed and finally admitted to myself that I was intrigued (especially if it meant I could sew with some yummy fabric like linen) and I emailed him back with a price that I was fairly sure would send him packing, but he didn’t even blink.
Next thing I knew we were exchanging inspiration photos and I was building a Pinterest board and a lot of what we were looking at was very reminiscent of Butterick 4486—not overly historically accurate, but certainly fun and evocative. It appeared the pattern would be coming out of 7 or 8 years in the naughty bin.
He found me several links to linen fabrics on Canadian fabric websites I hadn’t even heard of—with reasonable shipping rates! OMG!!! So once we settled on a colour, we were off to the races. (By the way, despite all my camera’s efforts to make it look grey, the colour is a medium muted blue.)
 I feel I need to proclaim right off the bat that this is not meant in any way to be a genuine historical outfit. It’s more 60s-Hollywood-does-Mediaeval. 😉 but I added little “authentic” touches as I could—all the visible stitching (except the felling on the sleeve seams) is done by hand. The buttons are cloth balls, sewn directly to the edge of the cuff.
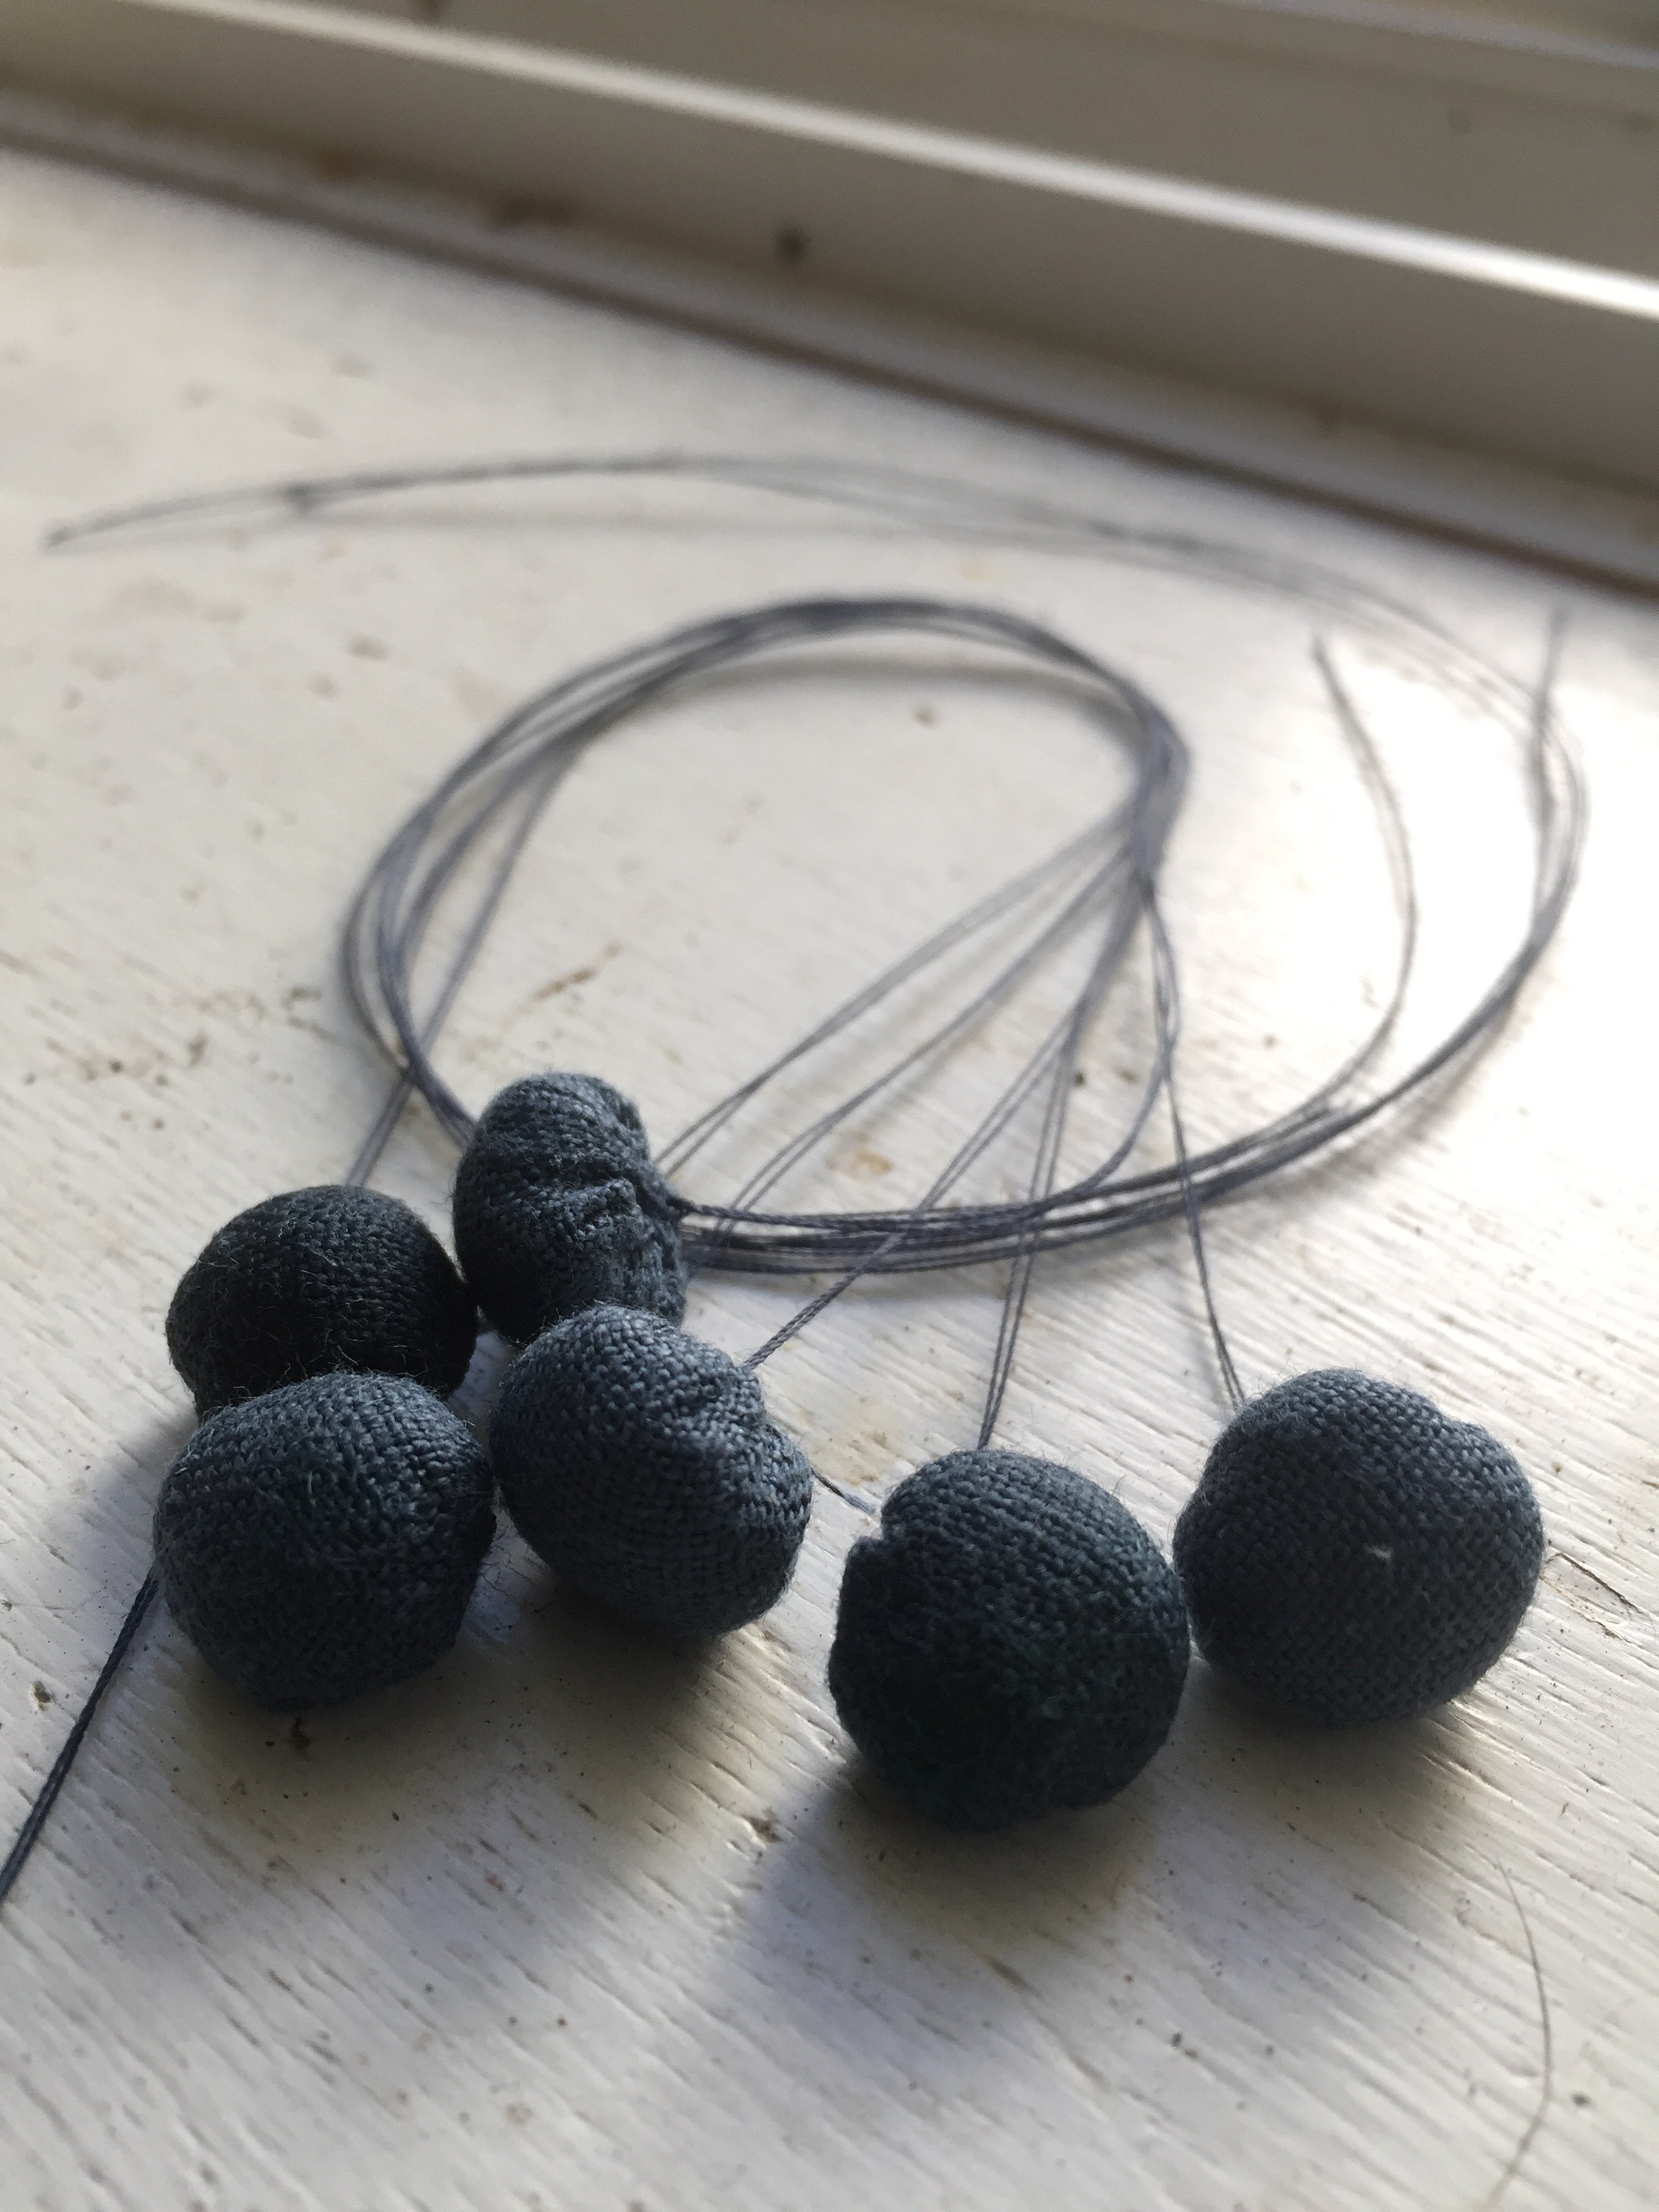 They’re pretty adorable, actually.
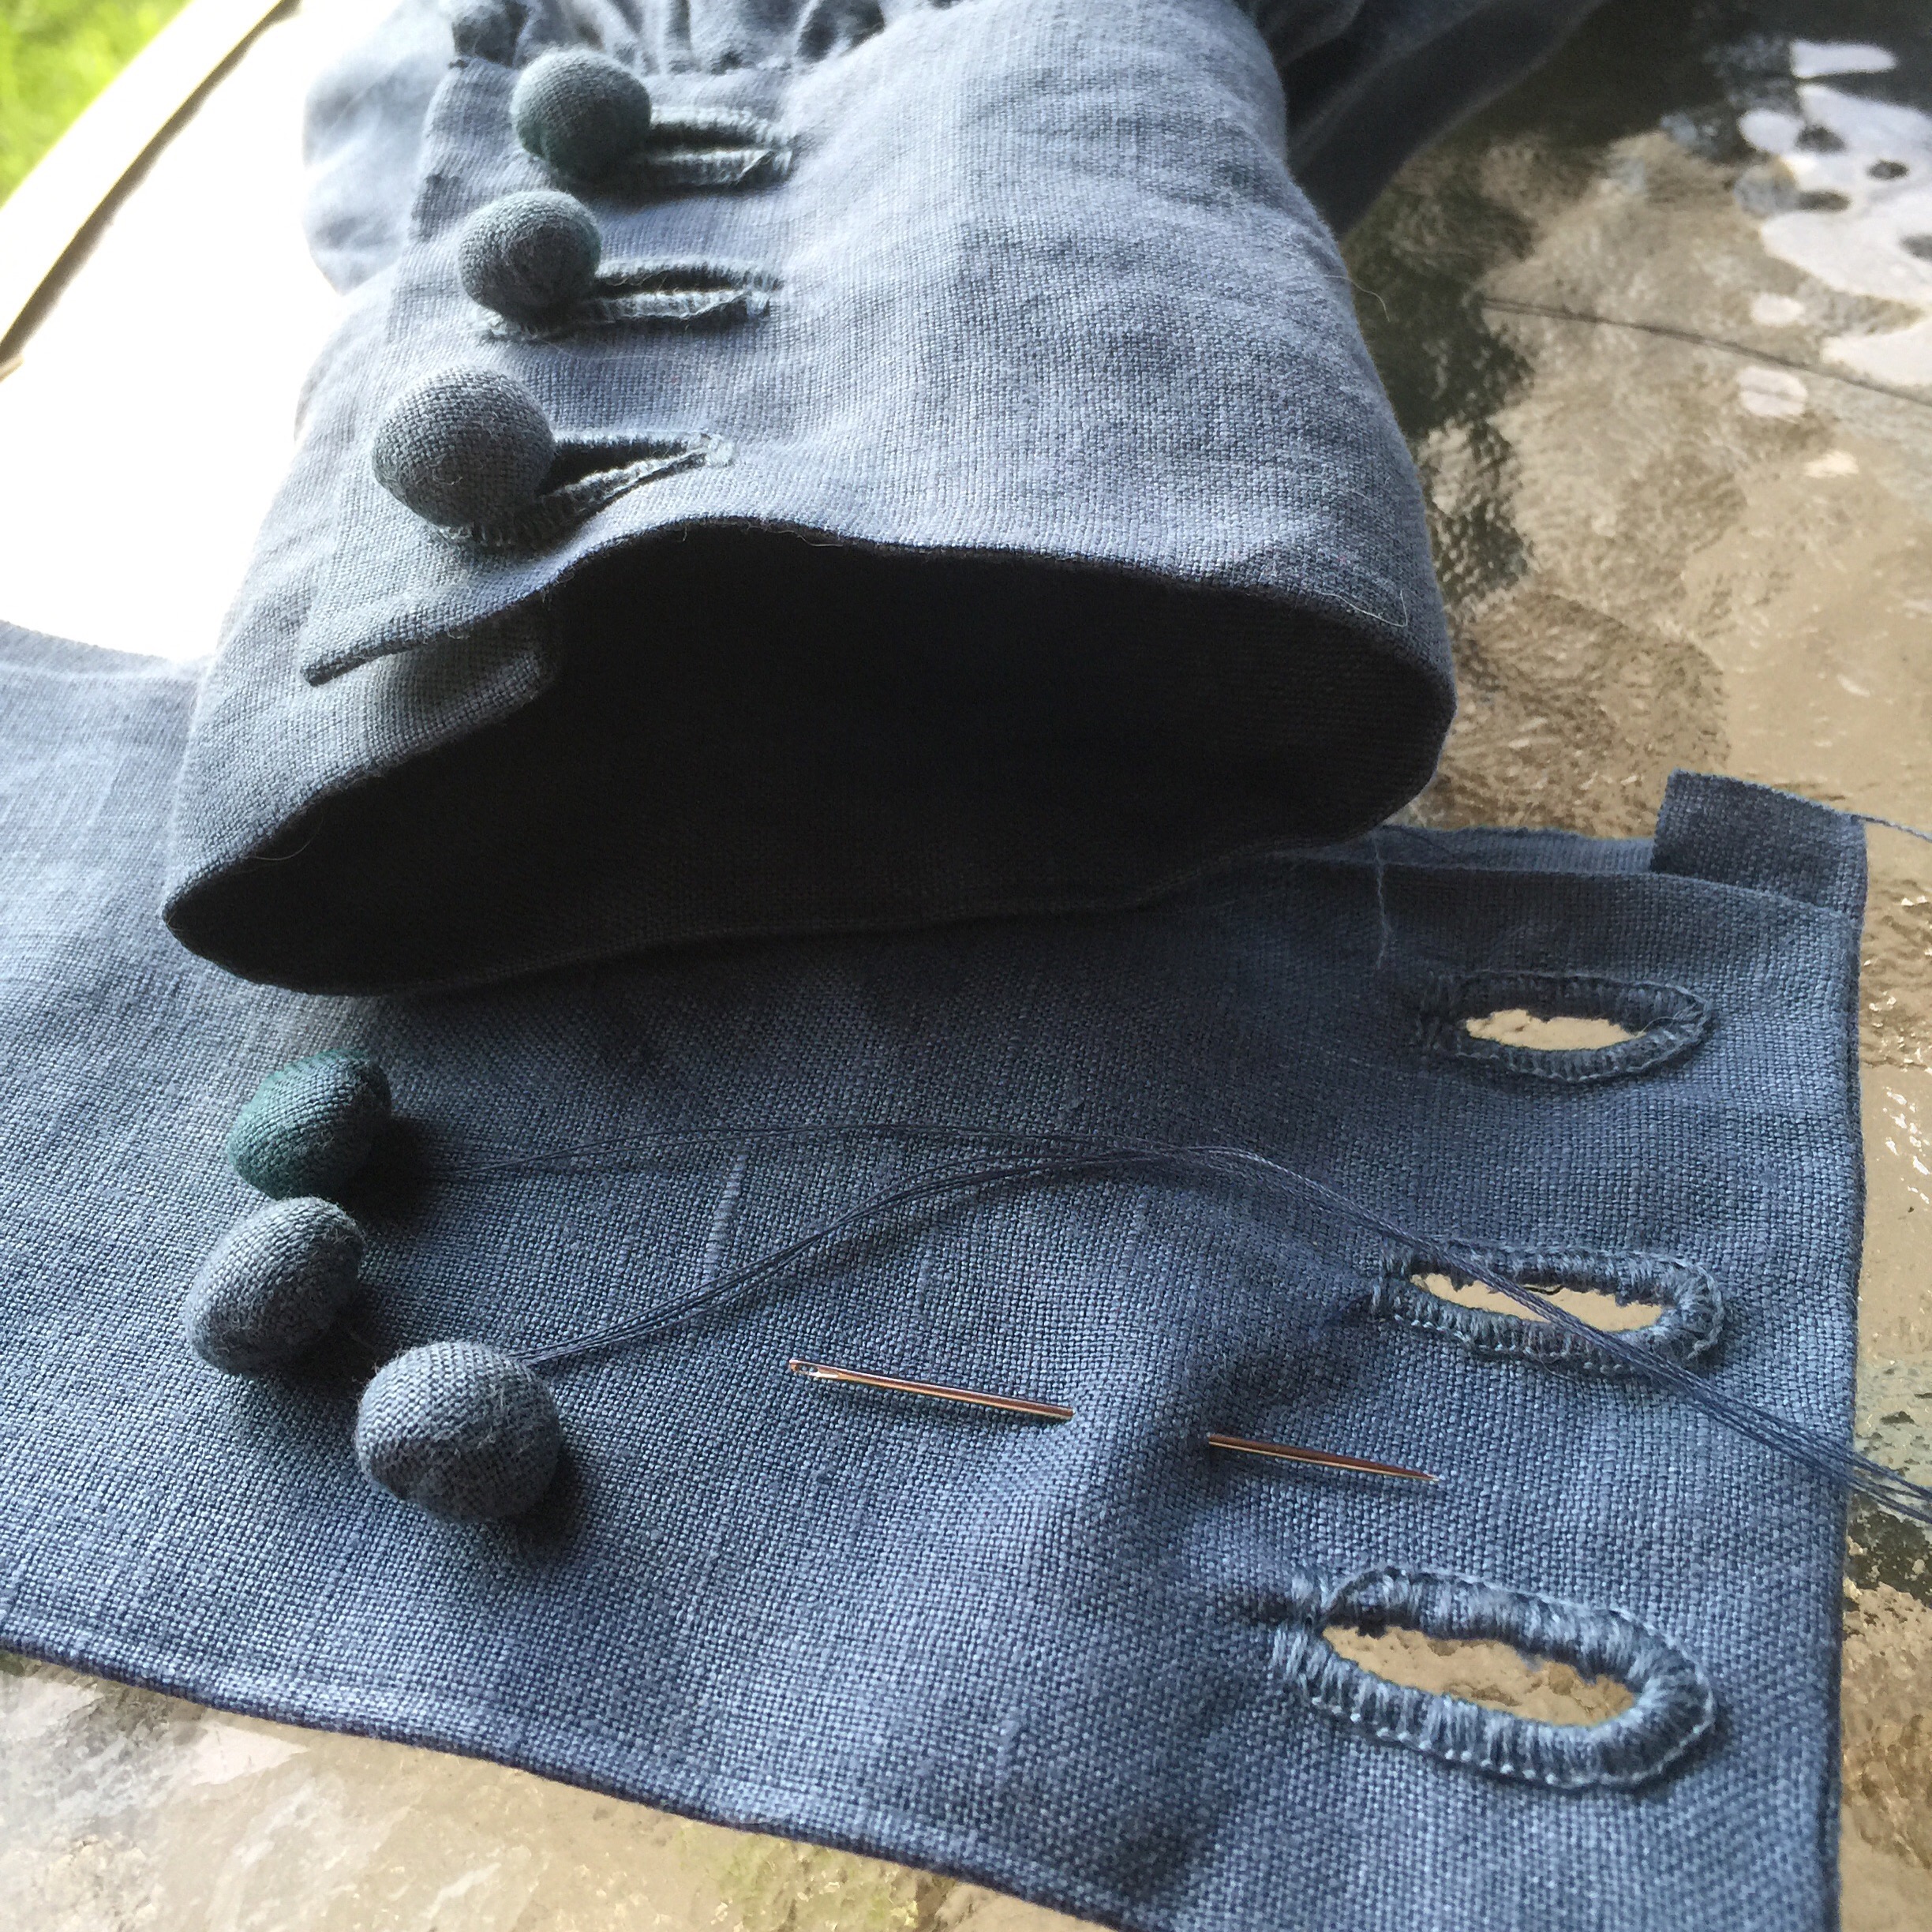 Though I think making more than six would get pretty tiresome. My hand worked buttonholes are… Not as terrible as they used to be? I’m still a little squirrelly about charging someone money for them, but I’m tamping that down hard under the “my time is worth it, dammit!” mantra.
 I had a hard time settling on a seam finish. My first impulse was to flat fell everything. But, I was reluctant to do it all by hand (after all, this is a costume piece, not some intensively-researched recreation.) I tested the machine fell on the sleeves, but that still leaves a line of machine stitching on the outside. Which I didn’t hate enough to rip out, but I wasn’t loving.
 I had plenty of time to ruminate on it, mind you, while sewing the endless eyelets of the placket. (And finishing both placket and cuffs by hand.) I tucked under the end of the placket and hand-stitched it down—not perfectly invisible but all the seams are enclosed! Which is not the case in the instructions. Still not loving the construction, but at least I knew what they wanted me to do this time.
 I hand-felled the shoulder seams, which is lovely and authentic and stuff. For the side seams, I made French seams—maybe less authentic but a clean finish with no visible stitching.
 The hardest decision was how to finish the armscyes. I didn’t think there would be enough seam allowance to fell over the bulky gathers, so I spent a bunch of time researching and dithering, and then eventually just did it.
 I guess there was enough seam allowance after all. It’s a little odd with the gathering but I don’t mind it.
 Then there was the fitting angst, as this is a long-distance project and while I worked from measurements, things like the dropped shoulder and the amount of length that will be lost when the tunic-length shirt is bloused over a belt are wild cards I can’t really predict. And then I realized I had messed up my interpretation of my measurements and had to shorten the sleeves by several inches. Infinitely better than the opposite, of course, but it meant taking off the cuffs. Which I then proceeded to sew back on inside out. Twice. Kill me. Please.
 But the linen was a hell of a lot of fun to sew with! And it’s done, after a month of faffing around and endless hand-sewing. I’m in the middle of way too many intensive projects, by the way, mainly for other people. Blerg!


I love this project and the fact that there are others out there who can’t pass up a good challenge. Nice job!!!
Thank you! It was, ah, a bit more of a challenge than I originally planned, but I think it was worth it. 😀
So much handiwork in such a simple skirt! Love it!
Thank you!
You have to charge. You have to keep receipts and charge for your time. Of course you’re not going to charge him for all the time on the buttons and their holes, and that lacing wasn’t a quick walk either, but you could have probably done them faster and less fun, so maybe that’s one for you. But you have to charge. It keeps him AND you honest about what work you’ve done and how much materials are, and when he’s still wearing the same shirt ten years from now and it still looks great (albeit a trifle faded from the sun at outdoor RenFaires), he will know it was a worthy investment.
I am giving you this lecture because I am not charging for a costume I am working on and I should be. I am 90% certain this will get me a lot of work later (burlesque!) that will pay, and it is fun sewing and figuring it out BUT I am setting a bad precedent. I am charging her for materials (because they are mounting up). Did I mention I am having fun?
So don’t do what I’m doing. Except for the fun part.
LMAO! Oh, I am charging—this ate up WAY too many of my weekends to be a freebie, however awesome the experience. 😉
I am doing some other family-favour projects at the moment, too, and they are exhausting!
(Also, Burlesque costuming would be totally fun, I think… Here’s hoping your investment pays off!)
OK, you can’t drop a bombshell like ‘Canadian sources for linen with reasonable shipping’ and not name names – please? Where are these magical places?
LOL! Ok, I meant to but forgot! This was ordered from Fridaysoff.ca, but it looks like most of what was there at the time has sold out. It’s mainly a quilting site, but hopefully they get more! Shipping was only $5.95 (the linen was $25/m, though, so maybe that balances it out.) sure nice not to have the shipping double the price, though!!!
Thank you! Now I just have to wait and see if Canada Post actually goes on strike next week… 😦
Yeah that will blow big holes in all “affordable” shipping! ;P
It’s a beautiful shirt. I’d steal it in heartbeat.
Thank you! It was fun to make (and man that fabric was yummy!)
Oh the ol’ casual-wearing-a-pouffy-shirt-in-a-goth-club lounge look. I know it well. 😀
You did a marvelous job on the shirt, and I’m incredibly impressed with how much hand sewing you were willing to do on it. I think my favorite details are the fabric ball buttons and hand-sewn buttonholes.
Those were the days, right? 😉
The ball buttons were pretty fun—I think they look really cool all on their own. 😀
Oooh this really looks great! I’m sure your recipient will be thrilled with it. So much hand stitching… those eyelets and button tufts are my favorite details. 😀
Thank you! He is pretty happy—so that’s awesome! 🙂
So consumed with envy! Love!
Thank you!!!! ❤
I love all your handstitching details…I wouldn’t do them myself, but I can admire yours!! The buttons are especially awesome.
Wow, you did a great job. All that hand-sewing….
And I am actually quite familiar with that pattern. It was also the first shirt I made for my boyfriend many years ago. I, too, was very confused by the instructions for the front placket and ended up just winging it. I made it from cotton though, so that must have been a bit easier.
I think the shirt is still somewhere in the back of our wardrobe. It very occasionally comes out for costuming purposes.
I think your buttonholes are upside down … the row of knots is supposed to lie along the lip of the buttonhole, to provide extra layers of thread where the most wear will occur. Putting them along the outside of the buttonhole makes it look neat, but use will cut through the stitches a lot faster the way you’ve sewn these. That’s the reason to use a buttonhole stitch and not a blanket stitch in this application.
Not a disaster, and no reason at all to re-sew anything until it comes time to mend — just a consideration for the next time you make a hand-sewn buttonhole.
I don’t want to sound like a whiney old nagger. It’s just that I’ve learned this through sad experience.
Pingback: That Mediaeval Shirt | Tanit-Isis Sews
I am working on this pattern. I am confused in doing the front opening. Is piece 5 to be sewn to the wrong side, and stitching done in the front? Can you help describe how they are to be done?
I wish I could be more help but I’m afraid I don’t really understand it either. Basically the pieces wrap around the side of the opening, the bottom of the opening folds to the inside, and somehow you figure out how to finish the inside off. 😂
Glad to know I am not the ONLY ONE who is having a hell of a time with that part. As many other shirts I have made, this one is driving me nuts!