
 God this fabric is gorgeous. The composition tag says “linen and rayon”—I’m thinking it’s rayon embroidery on linen background.
Sometimes a project is just fun to do. Not perfect, by any means, not at all flawless—but man it felt great.
The pattern I picked was the newish McCall’s 7339, mainly to be trying a new corset. It has some cute features, namely cup sizes and a raised back. Also, it doesn’t require a busk—Handy for a shop project since we don’t carry busks.
 The materials I chose were affected quite a bit by this being a shop project. Aside from the busk, I used ticking instead of coutil, and tried substituting Bosal in-R-form (a bag making product) for the poly laminate foam the pattern calls for for the cups. What I didn’t make do on was the boning—I used my usual 1/4″ spiral steel, double boned at each seam. I kinda construct all my corsets the same way—one trick pony, I guess. I know it’s not he strongest way, but it makes them easier to adjust and alter, as you go or after the fact. And I haven’t had a seam split on me yet.
I found the finished sizing measurements a bit confusing. The size 10 was listed as having a 36″ bust and 23″ waist. Does this include lacing gap? How much of one? 5″ of waist compression is not realistic for me—but a 36″ bust is a little on the large side. (And that was the smallest cup size.)
 No way I was going to skip a mockup, so that was the first order of business. I traced off a size 12 body with some minor grading down to the size 10 A/B bust pieces. I made only two preemptive fit changes, shortening below the bust 1/2″ and adding a small swayback adjustment. I don’t always need to shorten McCall’s patterns as much as other companies and I didn’t want to overdo it.
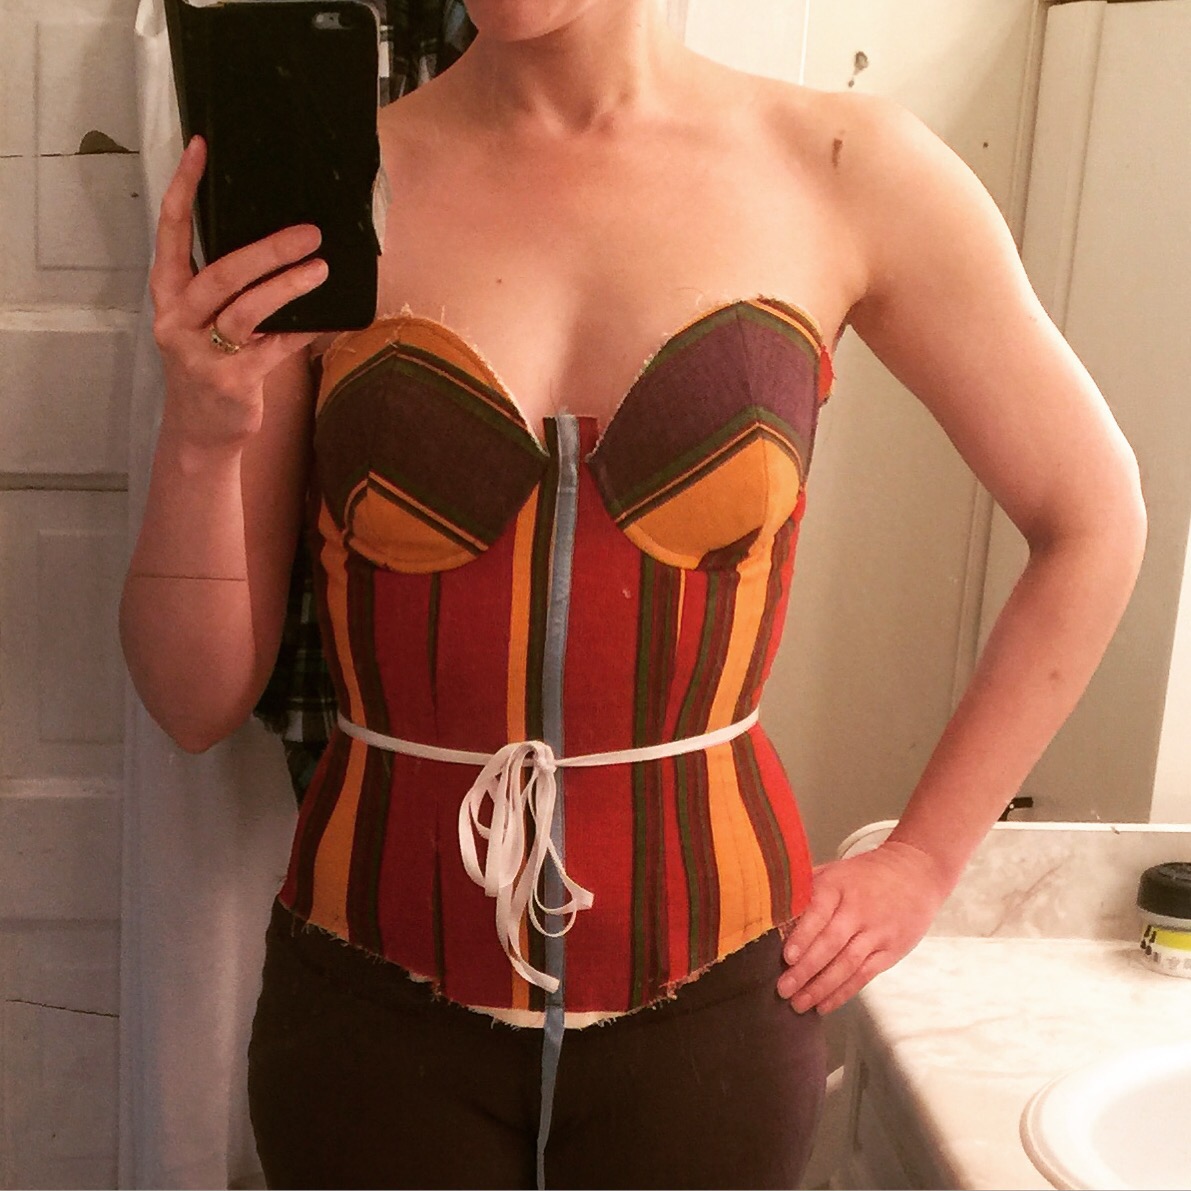 It turned out the size 12 was a bit big, as I wound up taking it in 1/4″ all along the side seams, plus a bunch in the upper back and lower tummy. The waist seemed essentially perfect. The result is a corset that fits beautifully slimly, but doesn’t exactly add to my meager curves. I am really tempted to try again starting with a size 10 and see if I could make it fit while keeping more of the original curves.
 I did all my fitting in the mockup in this one, starting with just bones front and back and adding more as I went (once I was satisfied that length was going to be ok.
 The bust cups affect the fit a lot, too, incidentally, so don’t take your fitting too far without them, if you’re going to use them. I don’t think I’ve really nailed the bust fit. Even downsizing to a 10 in those pieces the cups were a bit large, though with the foam lining it doesn’t show so much in the photos. I made some minor tweaks to the shape to round the bottom a little more smoothly and bring in the top 1/8″, and I played around with making some little chicken fillet push-up pads.
 I do like how the pads turned out. Once the lining was in the cups they look and feel almost exactly like a pre-formed foam cup. (I know that’s not a pro to everyone, but it’s what I am going for here. 😉 ) I do think the polylaminate foam would be more resilient and less likely to be damaged by crushing.
By some miracle the size of underwire I prefer also fitted the cups perfectly, without needing to be trimmed or anything. So really, a lot of wins. But. In the finished corset, the cups don’t sit right. The gore doesn’t tack (it doesn’t in the cover photo either, but she’s a much bustier lady than I.) and somehow the front is too wide apart while the back doesn’t reach to where the side of my breasts end on the side of my body.
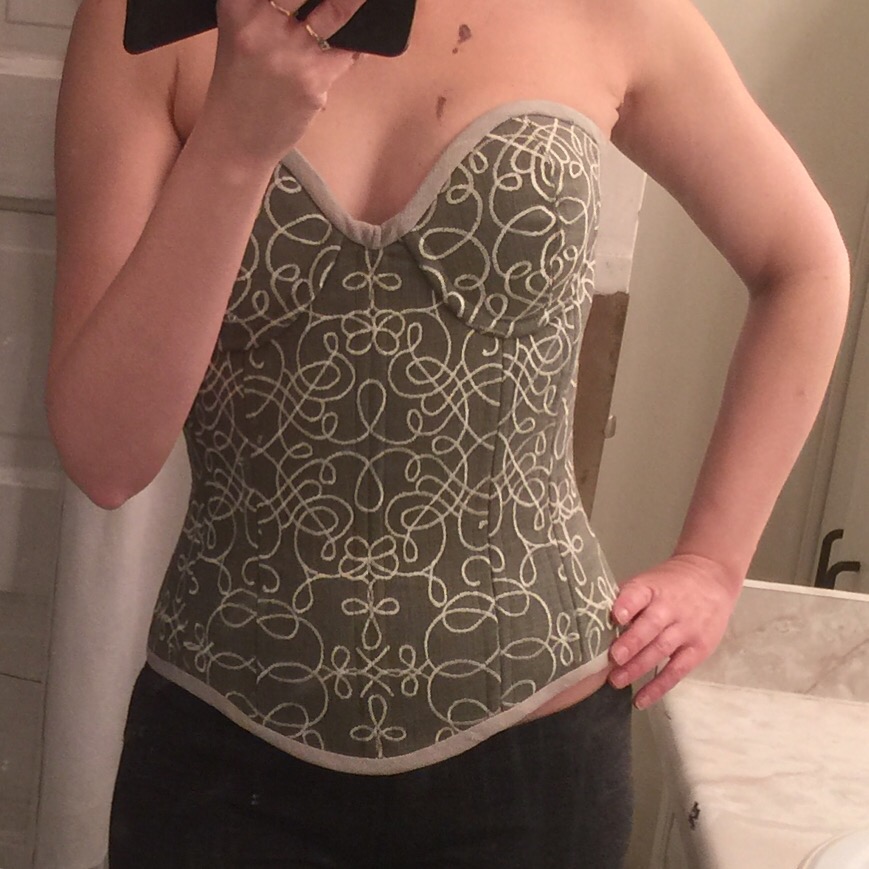 It looks fine, from a visual if not an actual bra making perspective. I just have this nagging feeling that the cups could sit better.
 Oh, and here’s a thing I tried: accommodating turn of cloth at the seamlines in my pieces. So though I cut them the same, when I serged the edges of all my pieces (I am stuck on the mode of construction where I basically treat all the layers as underlinings) together I folded the piece in half when I serge the second side, and just cut off the excess on the inner layers with the serger blades. So when my pieces were still flat, the outer layer bubbled up kinda conspicuously, but now they’re all sewn together with the seam allowances pressed open they sit nicely flat. That’s my story and I’m sticking to it.
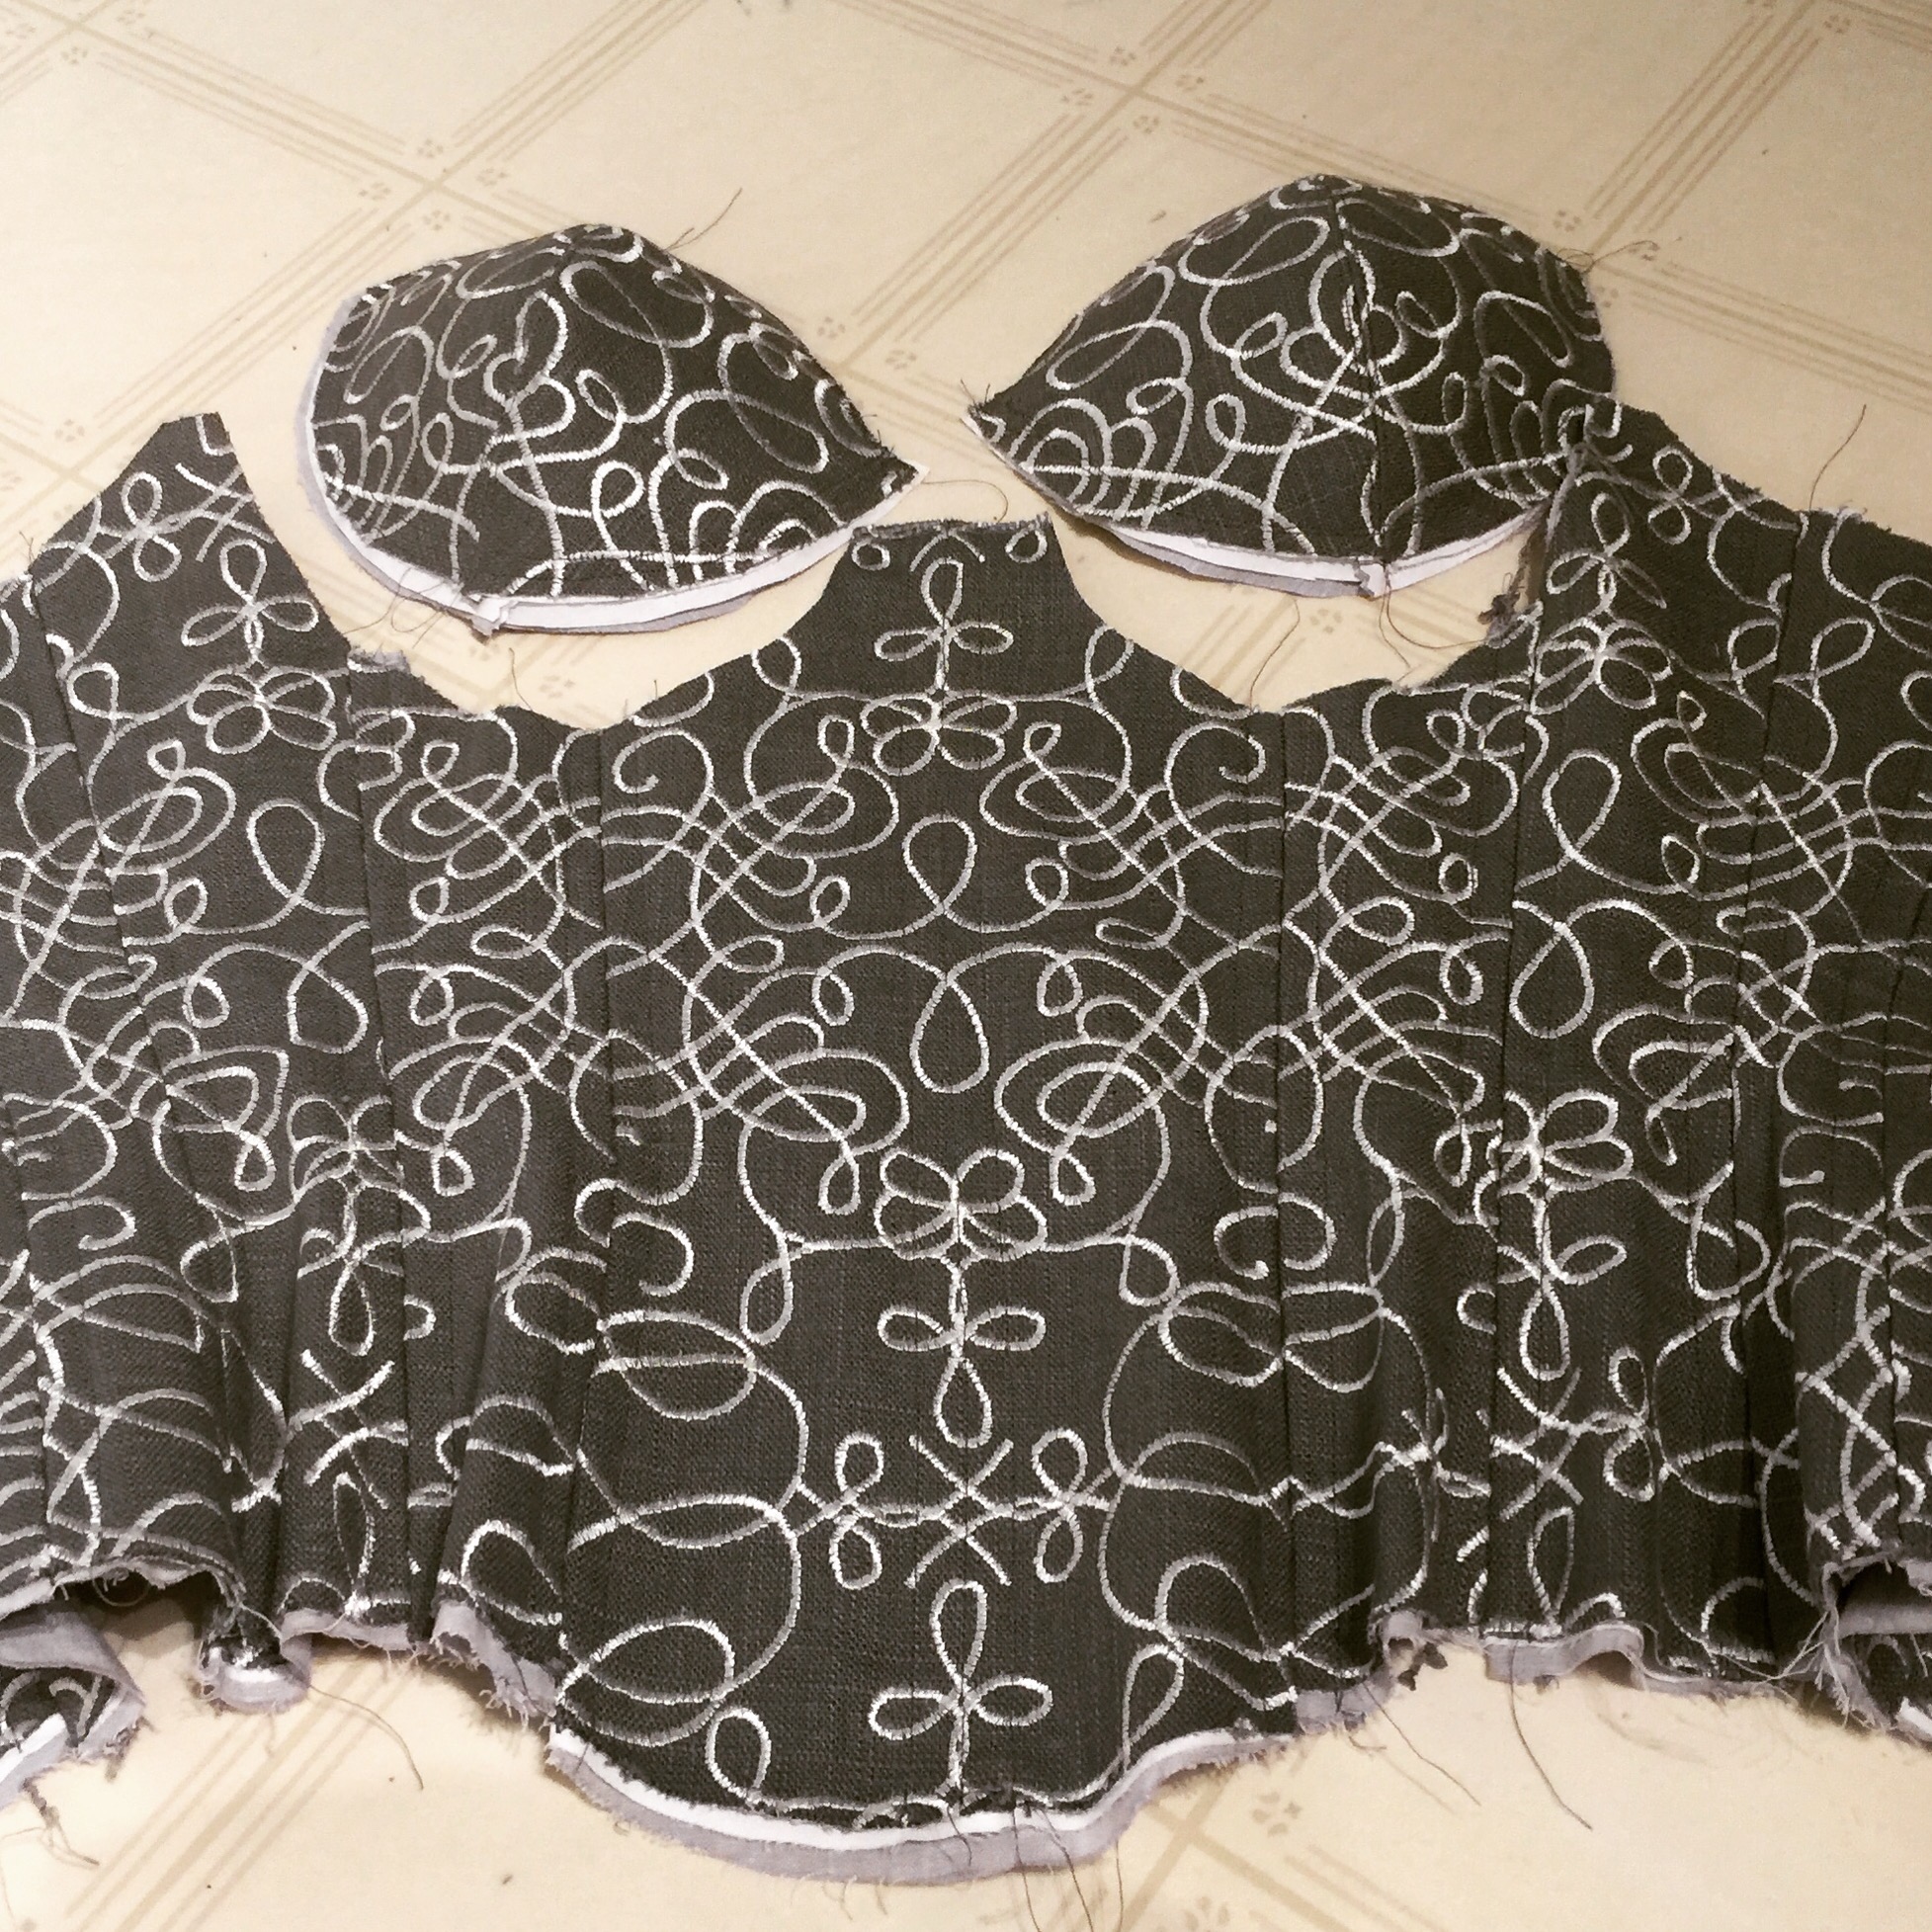 The pattern is drafted with a front seam (so you could add a busk if you wanted) but since I wasn’t, and I wanted my embroidery motif to match flawlessly, I cut it on the fold. In hindsight I may have stuffed that up, actually, and added the seam allowances to the front width. This would explain why my front gore looked extra wide compared to the mockup, and also how my lacing gap is so much narrower in the final corset than it was in the muslin. I did trim down the gore so it was more reasonable width before I added the cups, but it’s still quite wide. I think there are also some cup/bra making subtleties I haven’t fully grasped at work, to do with the difference between cups where the seam allowance goes up as it does here (and as in partial-band bras) vs where it goes down, as in the full band bras I’ve ever made.
 The biggest problem is that the back and sides, now they have a firm binding on, are apparently a little high and cut in under my arm.

I feel like the corset is trying to crawl up under my shoulder blades.
 The inside is nothing special, but the lining fabric is the same linen-cotton as my Vogue dress.
 All in all it’s very pretty, and feels very sleek and smooth, so that’s nice. It makes me think of an elven princess. Probably some delicate silver jewelry would be in order.

We’ll talk about the skirt next time!
(And my apologies to everyone who got a half-finished version of this post on their feeds months ago—I went to hit “save draft” and hit publish by mistake!)


gah. I want to make a corset! And yes, you need some silver wire jewelry with that outfit.
They are pretty fun to make, and not really hard (fitting on the other hand is a different story. 😉 )
… Sigh… Pretty sure Robin will not be impressed if I decide to take up another hobby! 😉
Lovely job, looks fab on, I’ve only attempted a corset once and failed (miserably) kudos to you
Aww, that sucks! My first one was kinda fatally flawed, too—pretty but not actually functional. >_<
First – it looks fantastic and the work is lovely! You are so sexy fairy! I suspect that the reason that the wire isn’t sitting right at the inframammary fold is because the lower cup is a smidge too shallow for you and the cups are a bit too tall. The other thing is that padding will always require you to conform to it. It can’t move the way you do so it, in conjunction with other factors, can lead to a more bottowm-shallow fit. Also, I think the design of the gore is a bit wider than you require. In short, I think it’s a case of mild shape mismatch. Having said this, the corset really works. The only reason I notice this is because you’ve pointed out your concern (and I’m the crazy bra lady). The fit through the waist is superb and you could construct the cups slightly differently next time to maximize compatibility.
I was actually hoping for your bust-fit input! 😉 that sounds reasonable. I still have a lot to learn about bust fit. 🙂
I normally read blogs on my phone, which is not conducive to commenting, but I *had* to actually open up my laptop to say that that is hands-down the best strategy for avoiding roll-pinning I’ve ever heard! I am totally going to do that from now on!
Despite all your cup/gore issues (which I can’t say anything about since I know nothing about making bras), I love love love the look of this corset on you — that embroidery is fantastic and with the skirt the whole look reads like battle elven princess.
Yeah, I had read about roll pinning and it sounded very, um, laborious. This might not be as precise, but it seems to work (I also used it on a vinyl corset I made for a friend, unblogged, and while that’s far from perfect it seemed to work there as well.)