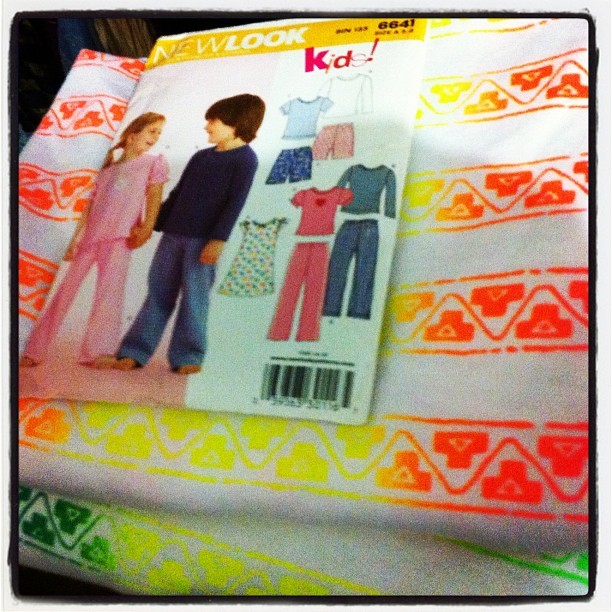
New Look 6641
I salvaged this pattern from an assortment of sadly bedraggled sewing paraphernalia that belonged to the late grandmother of a friend of my husband’s. Let’s just say that it was a bit of a sobering look at what I don’t want to leave behind for my heirs to deal with when I go. This pattern was one of the few that was reasonably intact (actually, completely unused) and not 80s-old-lady-esque. It’s also size 3-8, which puts it borderline small for my children but pretty much perfect for Stylish’s.
The fabric, on the other hand, is one my aunt offloaded kindly donated to me a year or so ago. It’s a polyester sweatshirt knit of, yes, unmistakable 80s vintage, and I’m pretty sure I remember my cousins wearing properly oversized unisex sweatshirts out of this exact fabric in the closing days of that nefarious decade. It’s really not the right material for the pattern, but it’s fuzzy, soft (at least for a few more launderings), and was a handy stable knit for Stylish’s first stab at knit sewing. And free and taking up space. And her girls thought it was ace for nighties. Kids these days.

The Waif Models
Stylish did this one all on her own—the most I helped with was a bit of the pinning. Oh, and on the construction order. I had her put the sleeves in flat. Much, much easier. Although she is understandably annoyed about how I keep making her read pattern instructions, and then telling her to ignore them.
I had her trace the size three (smallest in the pattern), with the expectation that it would be a bit roomy on the Waif (who is currently four and a half with the chest-diametre of a kids size 1.) The sweatshirt material is not as stretchy as called for on the envelope stretch gauge. A pro for this pattern is that the neck band is nicely shorter than the neck opening (although the length difference was too big for this particular fabric and Stylish wound up with some little tucks that I did not make her fix). A con is that the neck band is way too wide. One of those things where the proportions are just off, in a way that screams “home sewing.” (Yes, another of those legitimacy things. I kind of love cataloguing them.) The fabric choice doesn’t help with this. The Waif is not at all bothered, however. In fact, the only one not happy with the situation is the Waif’s older sister, Fyon (five going on six), who has had to wait impatiently a whole three days now for her mother to make one for her. It’s a harsh and untenable situation. Probably there’s something in the UN Convention on the Rights of the Child against it.
Also, Stylish used the rolled hem foot on the sleeve ruffles, and turned up the bottom of the dress hem using my hem gauge, and stitched them both with a precision that is entirely disgusting and uncalled for in a second project. We didn’t try to match the stripes on the side-seams, but were fairly careful about the placement along the sleeves. And neck band, but then we put it on (and I did the pinning so this is actually my fault) inside out so our nicely-aligned stripe is totally invisible.
What I didn’t have her do was any really knit-specific techniques, other than using a lightningbolt stitch for stretchiness (her fancypants machine has all kinds of stitches to choose from.) I think I’m afraid she will want to steal my serger, which really only came to me because Stylish didn’t seem likely to use it (it was originally her mother’s machine.) Not that I wouldn’t mind a serger upgrade, but that really, really, really isn’t in the budget at the moment.
Anyway, the most important people in the equation—Stylish and her Waif—are happy. So all is well in Sewingland. Except with Fyon; hopefully she’ll get her 80s nightie soon. Somehow the long weekend got away from us…
(To those of you wondering at the degree of Stylish’s sewing addiction commitment… while I can’t, of course, guarantee the future, she has purchased several patterns of her own, plundered my stash, and bought fabric for a winter coat. So at least for the short term, I’d say she’s hooked.)
(In my own sewing news, I am wearing a very comfy pair of fleece Jalie yoga pants I’ll write up as soon as I can blackmail a child, or sister-in-law, into taking photos. I miss my photo-spot in our old basement. I also miss my tripod and my camera charger. /sigh.)