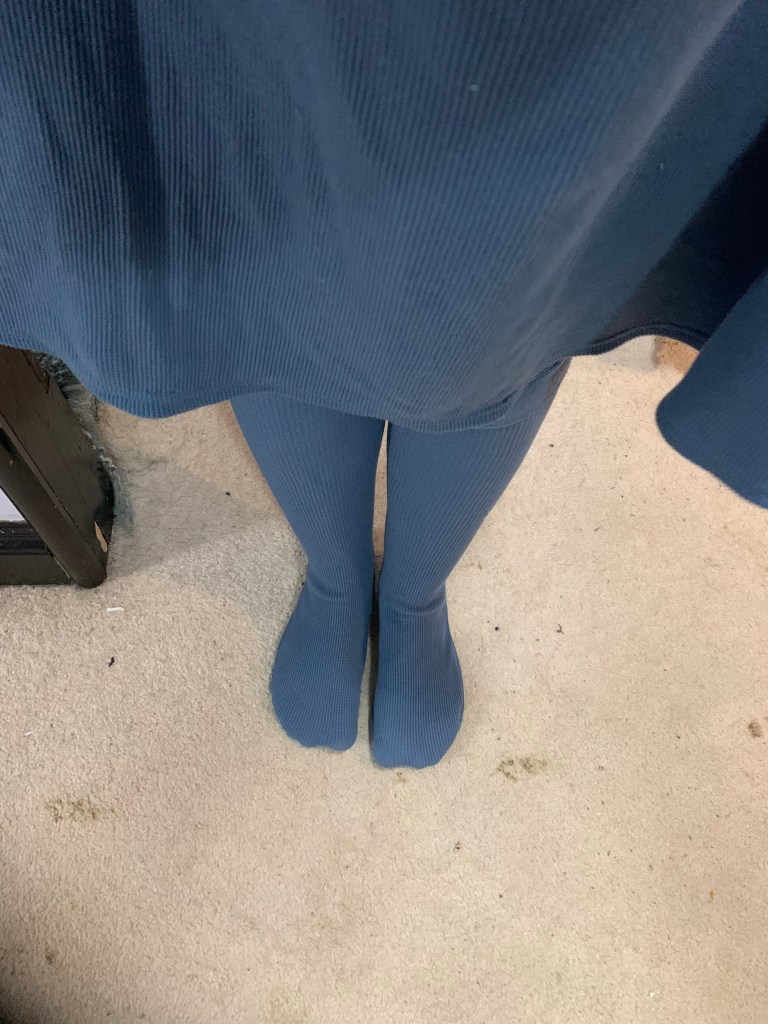
A couple of years ago I acquired 2m of this waffle-knit in my favourite muted blue colour
I then waffled (hah!) about what to do with it. I should maybe have gone for 3m as that would’ve given me more options for cozy-wrap-blanket-clothing, but it was full price and I’m cheap so I didn’t.
Anyway, since the twins started preschool this past fall, they and I have basically been sick the entire time. I think we have this in common with most of the country (don’t get me started on the great Tylenol shortage of 2022), but it really highlighted the limited nature of my casual/comfy wardrobe. I’ve run into this issue in the past, because frankly I’d generally rather sew (and wear) fancier stuff, and I haven’t really spent a lot of time at home lounging around in the last decade. Except for my maternity leave three years ago, but I didn’t have a lot of sewing time at that point.
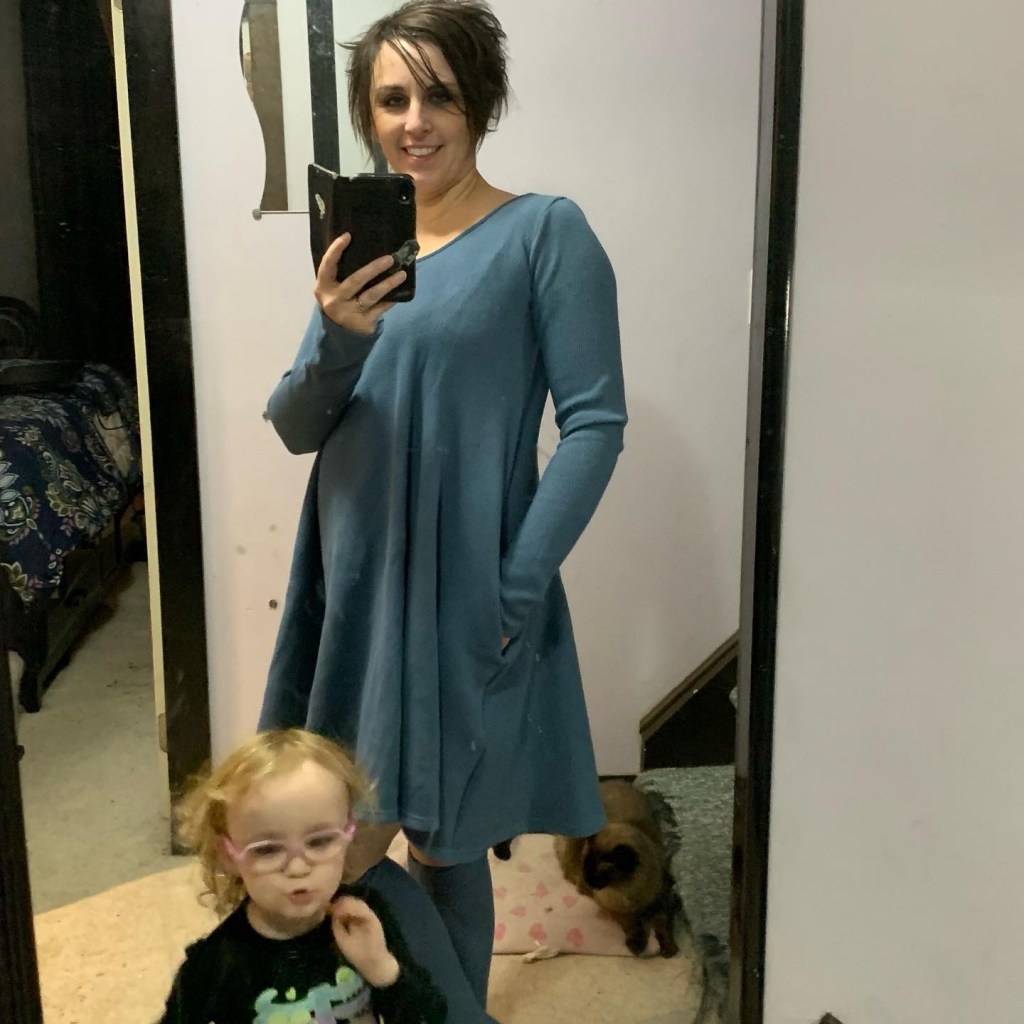
So I was determined to get this fabric sewn up. To do so I finally caved and went the easy route—my much beloved McCall’s 7622. I have made this pattern at least five times before, and it does nicely straddle the line between cozy comfort and the drama that I crave in my wardrobe. Even if I almost always make the boring scoop-neck-and-long-sleeve version.
I should mention that my main hesitation in using this pattern for this fabric is that I already have a version of this pattern in a stretch velour of the EXACT SAME COLOUR. So technically I don’t need another one. But that version has some issues around the neckline that keep me from wearing it for much except bumming around the house, so, um, still justified?
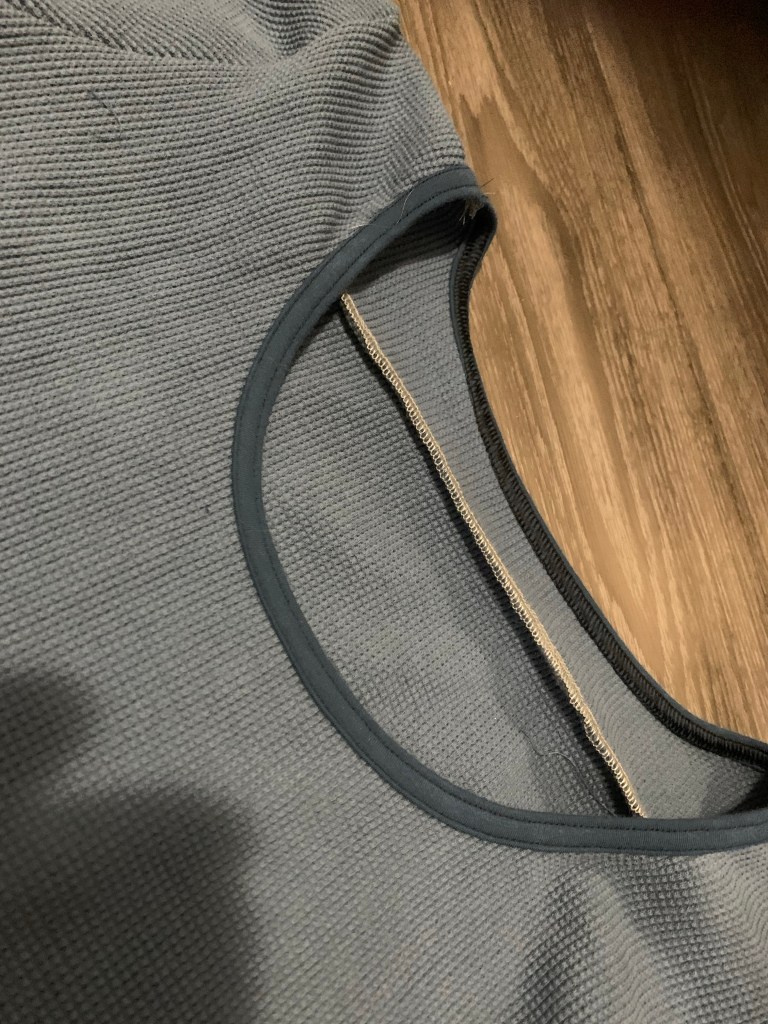
Anyway, this pattern is a bit of a fabric hog and I wound up needing to add a narrow yoke to the back piece to get everything to fit. I also used a lightweight cotton spandex knit in a complementary blue to do the neck binding and make the pockets.
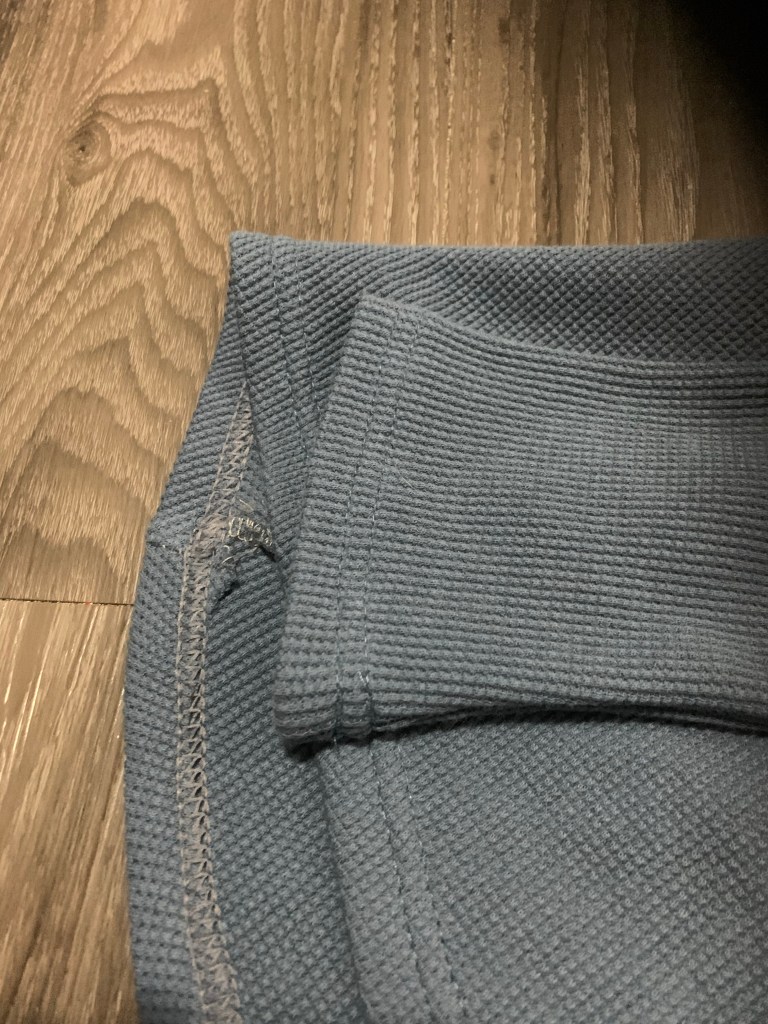
Pockets, incidentally, aren’t the best idea in a knit dress of this style, as they inevitably pull and drag on the side seams—but this is also clothing for function and I require pockets in pretty darn near everything these days. I did use 1/4” clear elastic to try to minimize how they stretch out the seam, which does help a bit but it’s pretty easy to go the other way and get wrinkly side-seams. So damned if you do, damned if you don’t. I shall wear it regardless.
I am quite happy with how the Euphoria handled coverstitching the hems, which I was a bit worried about. I just turned up the differential feed, and then the pressing after took care of the small amount of rippling. I haven’t actually used any seam stabilizer for hemming since I got the Euphoria!
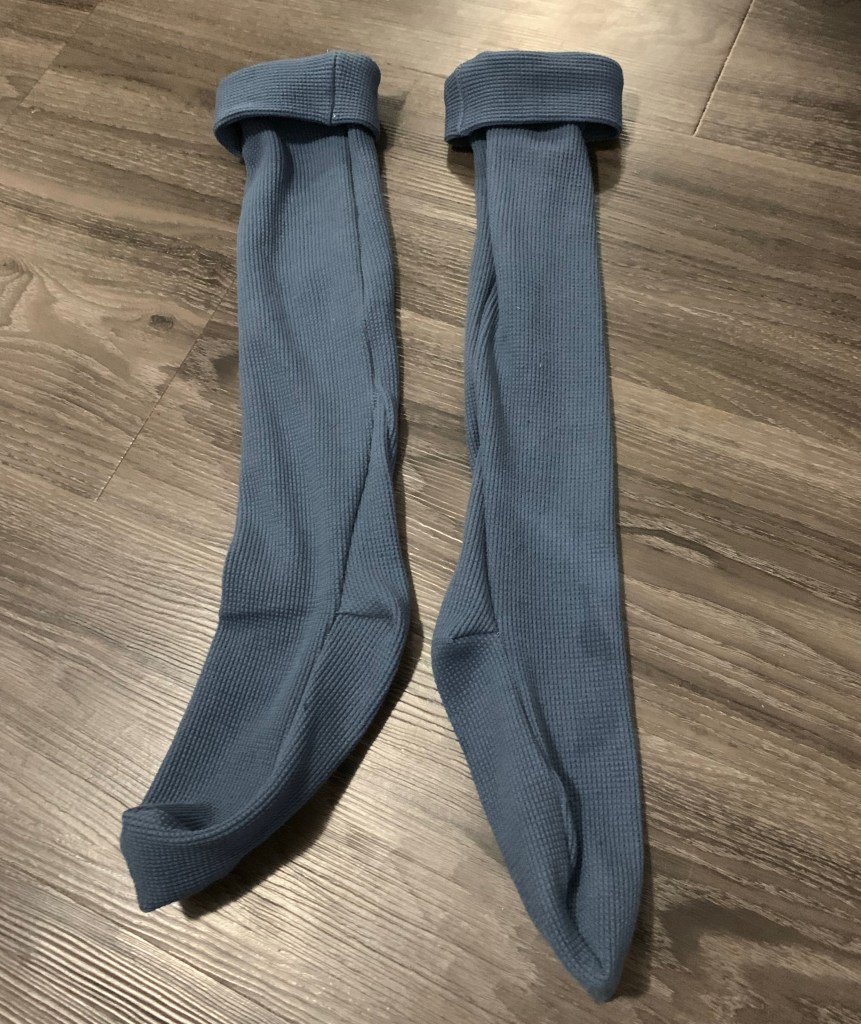
Oh, and I had just enough scraps left to squeak out some matching Rosalie Stockings, cut down to knee length. They are cute and comfy, and adding more clear elastic to the junction of the cuff seems to keep them up. I could maybe take them in around the ankle a bit, but I probably won’t
So yeah, not much to say, but it’s warm and cozy and exactly what the winter has called for.
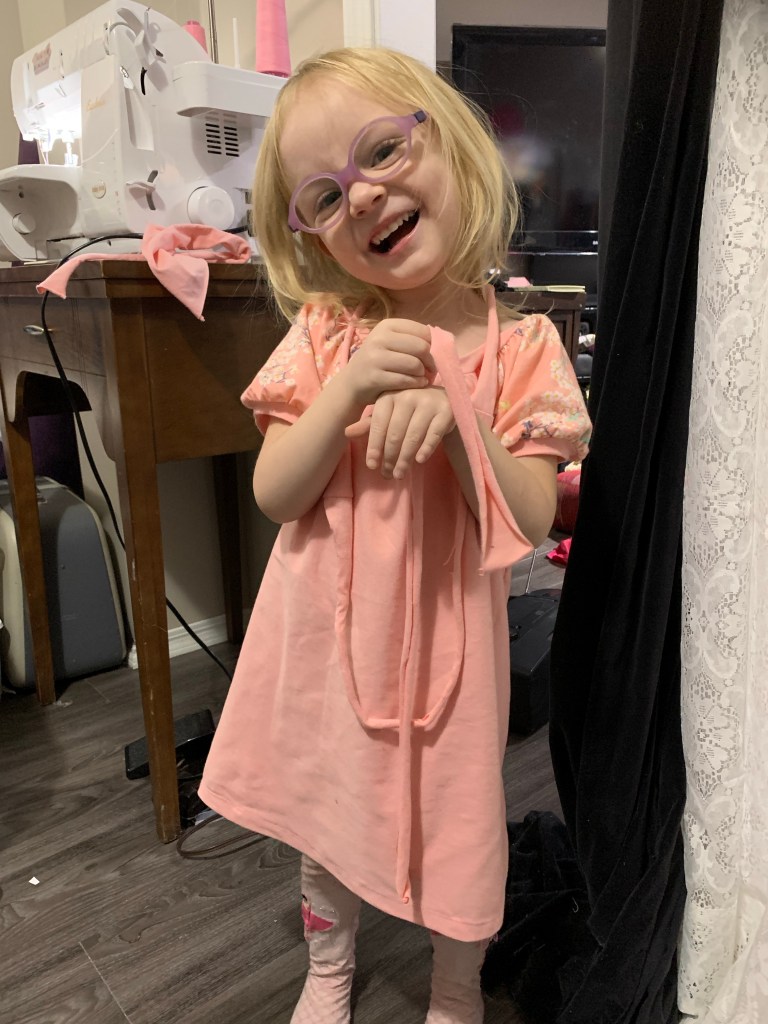
Lately, the twins have had a breakthrough realization—Mommy MAKES clothes.
Which means she can make dresses
All dresses must be PRINCESS dresses.
Which means she can make PRINCESS dresses.
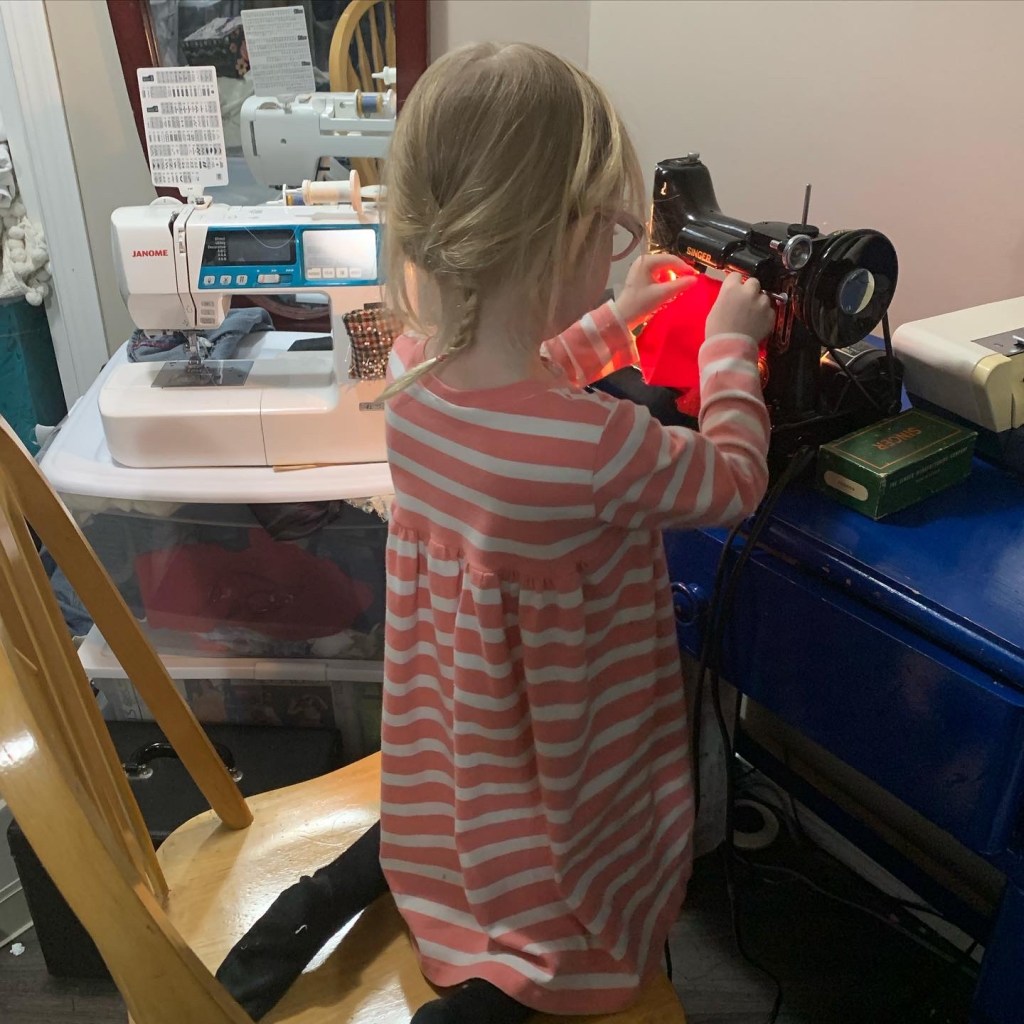
Tris in particular is super keen to sew by herself, diligently selecting a fabric (anything pink… yes, we’re in THAT phase) and shoving it through the under-arm space of the sewing machine in the hopes that it will magically come out the other side a dress. I also need to double check all my machine settings every time I sit down (we won’t go into the time she somehow changed all my server’s tension settings to 0 WHILE I was sewing with it)
Anyway, the result is that instead of a measured progression through my sewing queue, I keep getting side-tracked by adorable and insistent requests to make dresses out of THIS fabric. And they’re so excited it’s difficult to resist, and all of a sudden I’m highjacked.
It doesn’t help that my friend Temperence Swimwear Intimates, gave me a bunch of kid-print knit remnants, that I really need to use promptly lest they linger in stash beyond the twins’ interest in them.
Of course, the twins’ sense of what a suitable amount of fabric for a princess dress is a bit, ah, flexible. There was the day Tris was determined to make herself a pink princess dress out of a single small mitten. I was able to divert her only by digging out some of the fabric for Temperance (and I don’t have a lot of pink fabric at all, by the way…) It was really just scraps I think were supposed to become undies.
That resulted in the first highjack dress, a revisit of the same pattern I used for the little ghost girl dresses last summer. If this version looks more like a shirt in flat-lay, it’s because I decided to use a band for the neckline and then, instead of gathering the neckline and sewing it to the band, tried to rely on the band’s own recovery for the gathering. It’s a pretty beefy cotton-spandex with great recovery, but even so there are limits. As a result, the neck is pretty large. But she’ll be able to wear it as a shirt until she’s ten or something.
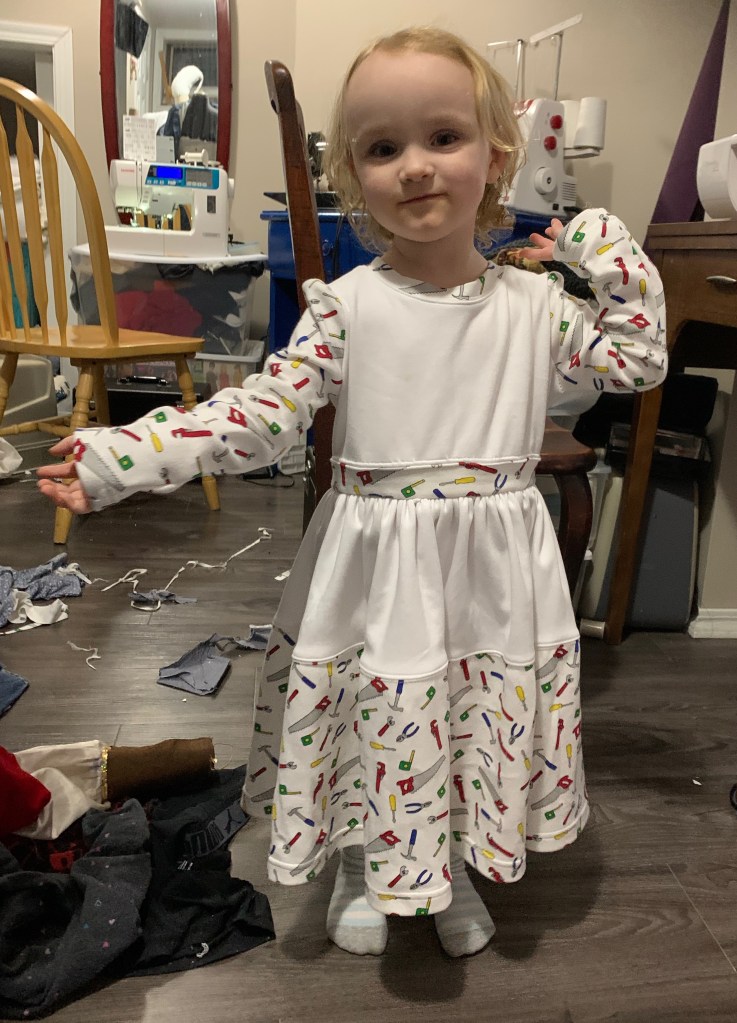
I did irresponsibly dodge my parental obligation to make River a dress next, well, until a couple of days ago when they were digging through the fabric again and she spotted this tool print cotton interlock… of which there was a scant half-mètre or so.
I did, however, also have plenty of plain white interlock, purchased in the days when I was fantasizing about making my husband T-shirts. I figured I could eke it out.
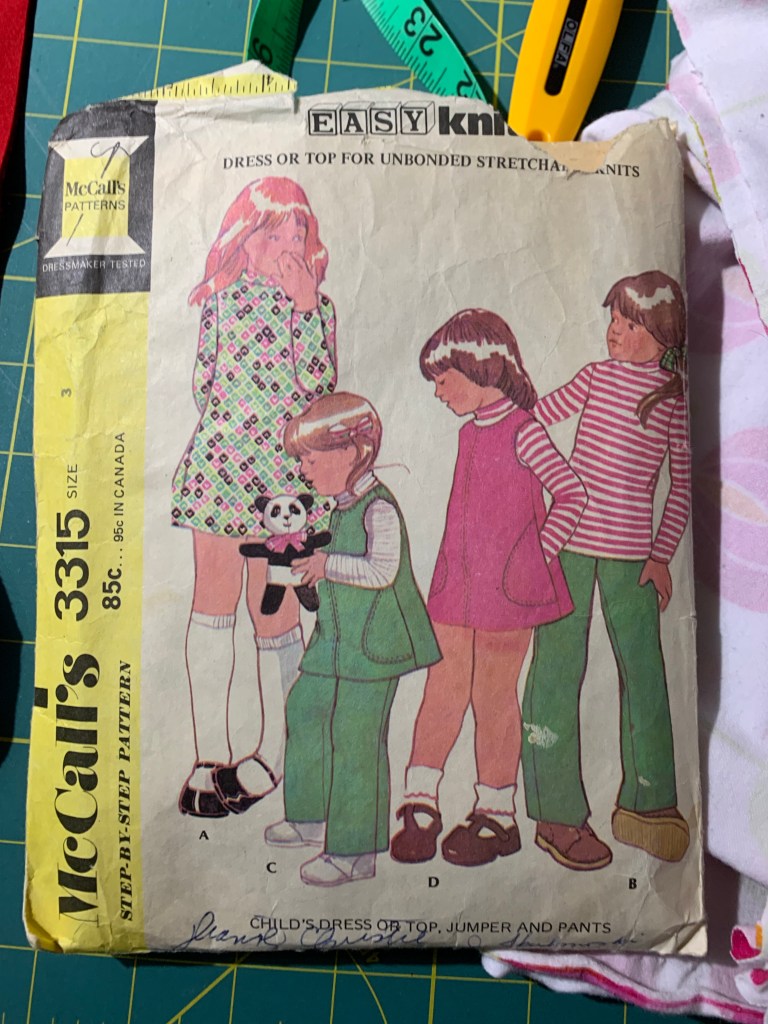
Now, long and long ago I made these cute little dresses for the twins, which are basically just a long-sleeve tee pattern, slightly cropped, with gathered skirt attached. And I really think that’s the best basic style for making a winter-friendly dress for a smallish kid. These are long since outgrown, and frankly were outgrown far too quickly, so I didn’t want to make anything that fit “just right”. My go-to pattern for kids tees is Jalie 2805, but I didn’t really want to use the size I traced out for these tees last year and I was much too lazy to trace a new size, so instead I dig through the mass of un-filed patterns sitting on my basement counter until I settled on the fairly forgettable McCall’s 3315, which stood out only in that it was a single size, 3, and was “for unbonded stretchable knits”.
Actually it’s a pretty cute, slightly flared turtleneck dress pattern with a non-knit jumper to go over top, but it’s also an early 70s knit pattern—designed for stuff without too much stretch, and with way too much ease in the sleeve cap. But, I wanted roomy, and a bit of a puffed sleeve cap just adds to the princess cred of the dress, so I went with it, or at least the portion above the waist. Since I didn’t want a turtleneck style, and did want to add a band, I cut the neckline down a good 3/4”. I ended my use of the pattern at the lengthen/shorten line, which created the slightly cropped length I was going for, and omitted the CB seam since no I’m not going to put a zipper in a knit.
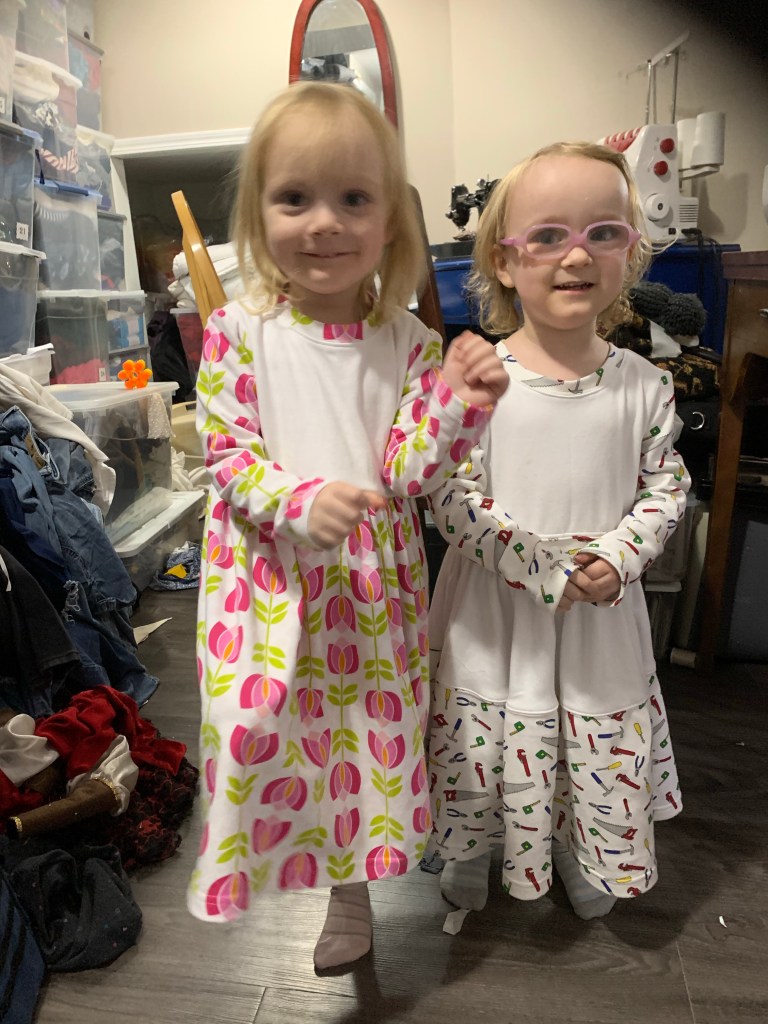
For River’s dress, we had extremely limited print fabric. After I had cut the sleeves, I had wanted to use the remaining print for the square skirt, but it would’ve made a very scant, not very twirly princess skirt. So I cut the piece in two to make a bottom tier, and cut the upper tier out of the white interlock. I added a print “waistband” to the top, too, to break up the white, using a bit more of the stuff I had cut off for the band at the neck. I had been envisioning two gathered tiers, but it turned out that my two lengths of print put together was only slightly longer than the single length I had cut of the white. I could of course have reduced the amount of white in the skirt, but instead I just eased the two together. You can see that it gives a slightly more flared shape to the skirt. The most important part is that it twirls, though. I used a fair bit of coverstitch topstitching to flatten down the extra seams in this dress; this worked well for the tiers of the skirt, but I don’t like how it turned out on the waistband so I will likely rip that out.
I asked them for Princess poses. Apparently this meant standing on one foot.
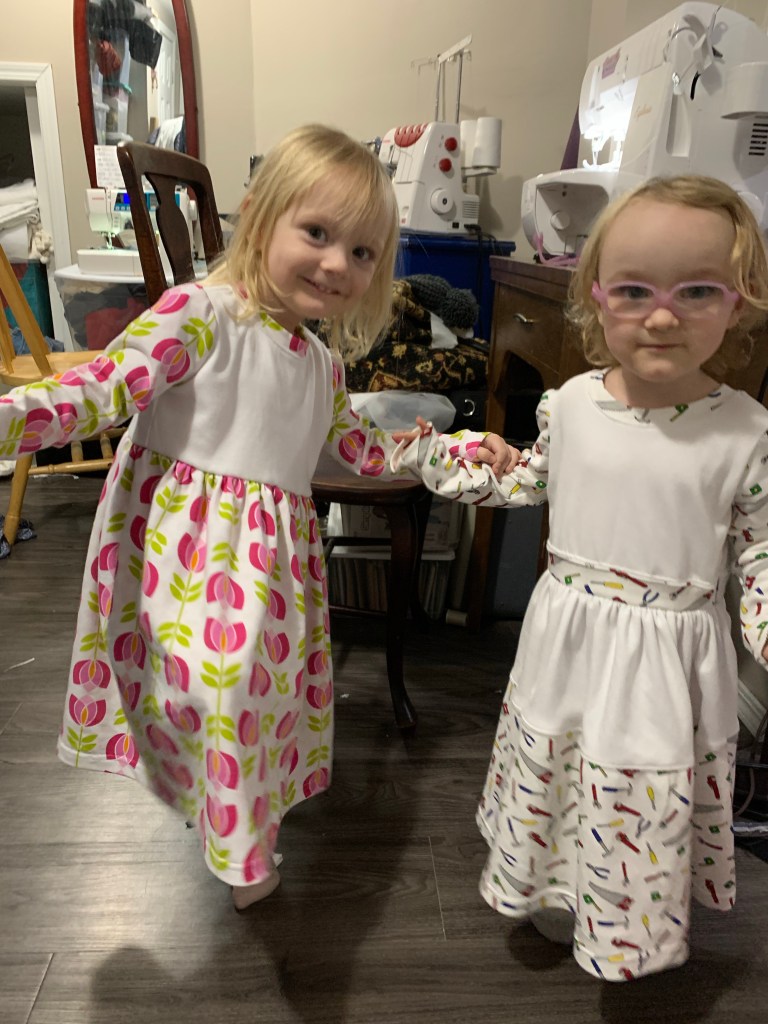
Tris’s second dress was made after (trying to take turns) and under no such fabric limitations as I have a full 2m of this abstract rose print in stash, purchased way back when my nieces were small enough to enjoy it. I’m happy to get to use it on the twins, though this project didn’t come close to using it up. I did want to harmonize with River’s dress, though, so I asked Tris if I could make the bodice white like River’s, and she agreed. Part of me wishes I had done the tiered skirt part as well, but also that adds a butt ton more time to the project and this is cutting into my me-sewing time already, dammit. As it is, Tris’s dress came together in just over an hour thanks to all the machines being already set up (give or take having to check all the settings and occasionally rethreading things, thanks to my very helpful helpers.)
In the end, it was pretty fun to see these come together quickly and how excited the twins were by them. I didn’t really sew when my older girls were in the twirly-dresses stage; I did sew a few twirly dresses for my nieces when they were young, (like this one) but they were done as presents, not collaborations where they got to pick the fabric and “help” with the sewing.
I’m also wondering if this is the end of the era of twinning outfits. Since starting school the twins are much more vocal about their sartorial preferences, and they’re rarely wanting to wear the same thing at the same time. I already mentioned how Tris wants EVERYTHING pink right now. And thank goodness for the plethora of hand-me-down tights they’ve finally grown into because it’s all dresses all the time right now, so their adorable overalls and jeans and flannel shirts are getting less than no love.
Ultimate Princess Level unlocked.
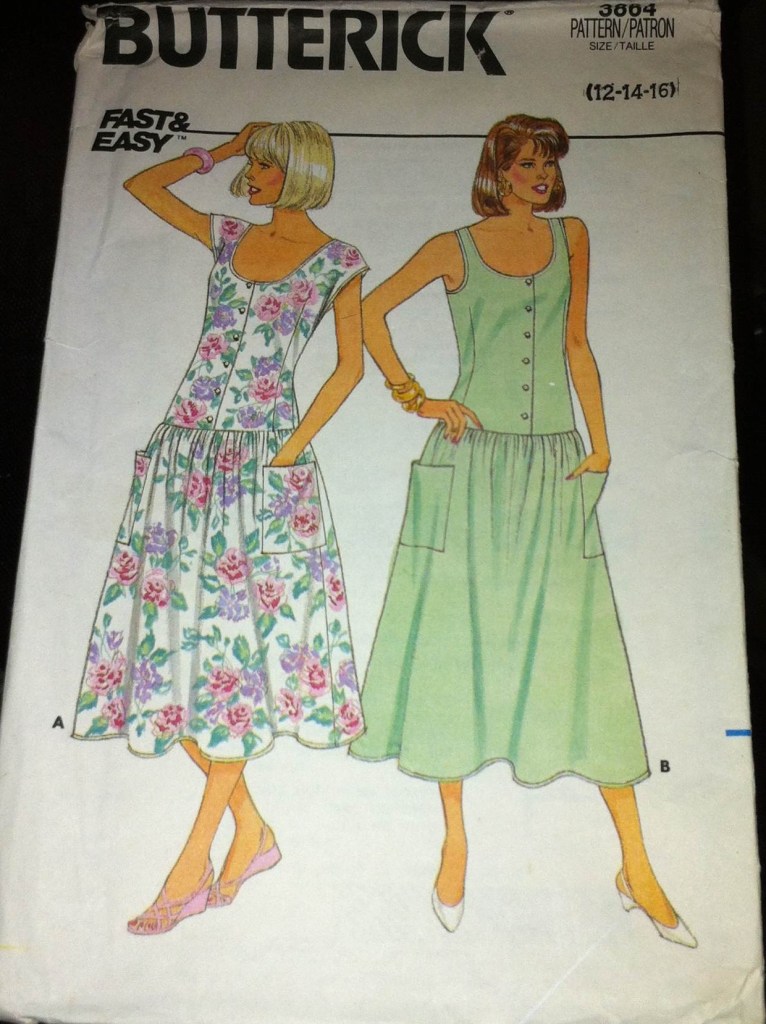
So now I can get back to finishing boning my Victorian bodice. Except, um… I stumbled on this Butterick pattern while looking through the mess. Have you ever seen a more ultimate princess dress??? I’m loathe to give the decade of my birth credit for much, but they could do a princess dress like nobody’s business. Anyway. I’m exhausted just looking at it… but also… can I not? Maybe I’ll just read the instructions…
Somewhere around a decade ago, when blogs were shiny and new, a dear online sewing friend sent me a gift of some fabrics she didn’t think she would get to use. It’s perhaps a little embarrassing to admit that I, also, went on to not use them for, y’know, a decade, but anyway. That coating is earmarked for the Next Coat when my grey coat wears out, which is on its way but not quite yet.
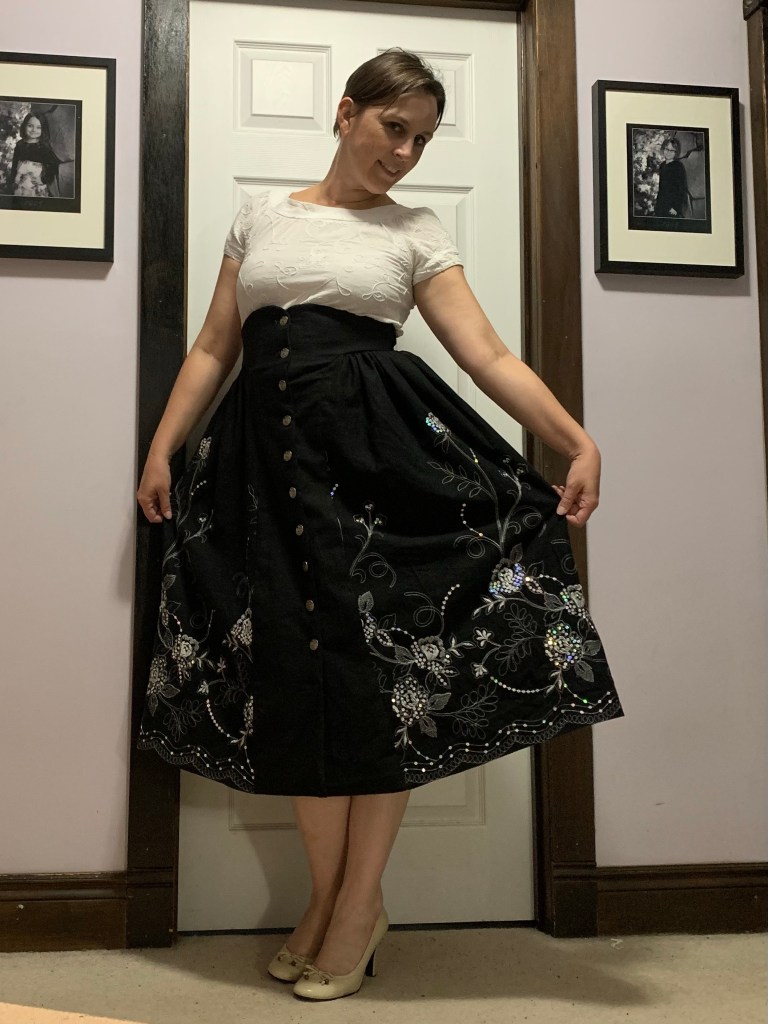
And then there was the glorious, sequined, black linen border embroidery. One of those fabrics relegated instantly to the “too good to cut” pile. I’ve fantasized about making it up many times over the years, but kept waiting on the perfect plan, or the perfect moment. Needless to say, such a moment did not arrive. It didn’t help that in addition to being exquisite, there was a scant two yards there. I don’t often think too much on the difference between a yard and my native mètre, but when you’re trying to eke a garment out of only 2, that extra 8” of fabric can make or break.
Anyway. Last spring, when the Leslie Skirt by Wearing History came out, I was blown away. I have a bit of a thing for front buttoning designs, and her sample in linen just ticked all of my boxes. Despite the skirt featuring that most dreaded of features in my wardrobe—waist gathering. But I instantly purchased the pattern, and started going through fabrics I had on hand (and more importantly, in sufficient quantity) to give it a go. And I thought of this long-languishing border embroidery.
But no. On further inspection of the pattern, the gathering was limited to a tiny section at the side of the front. The skirt as a whole is A-line (which is great for me in general), with a very curved hem. Completely unsuitable for a border embroidery. Not to mention, the part where there was only two yards, and the pattern calls for a minimum of 3 1/4.
But, my brain couldn’t leave well enough alone. Especially once another piece of linen-type fabric turned up, a remnant from a shirt I made my husband once, of an almost identical colour, weight, and weave. Enough there to make the waistband/buttoned front piece, preserving all the precious embroidery for the skirt itself. Surely two yards is enough circumference for a skirt hem? Surely?
So I dove in.
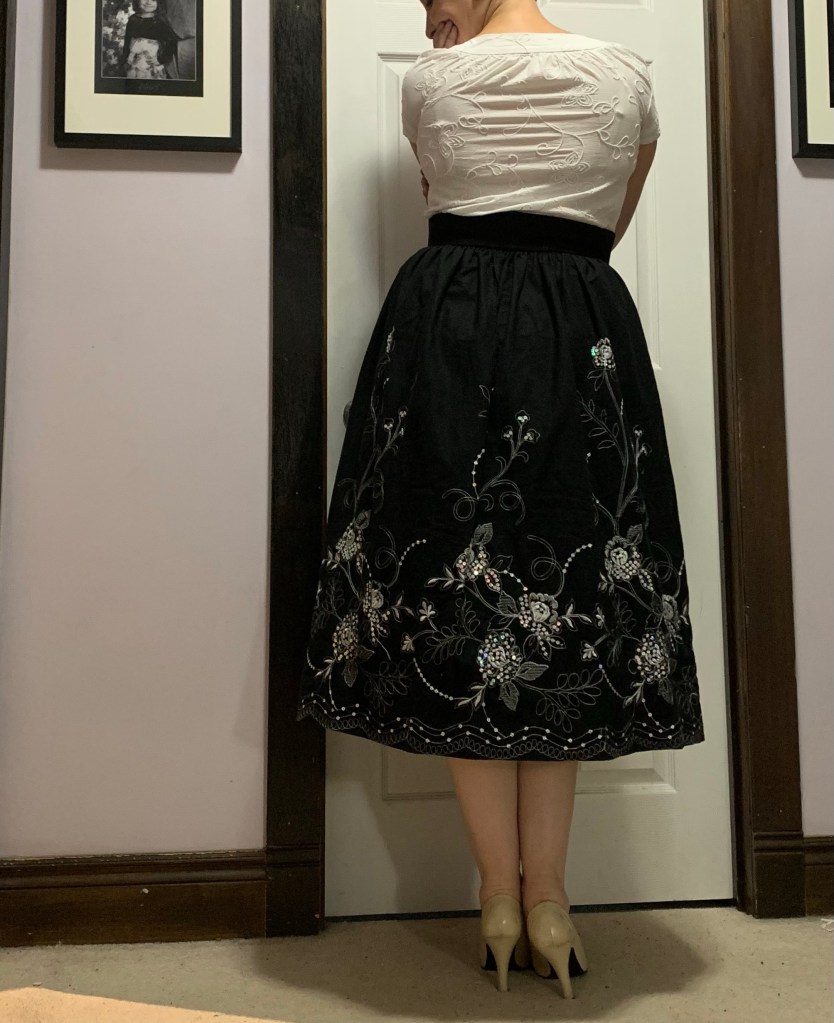
The pattern calls for interfacing in the waistband segment, but nothing down the front where the buttonholes are. This seems suspect to me, so I wound up adding strips of knit interfacing down my button bands, while I used a beefy twill fused to armoweft for the waistband interfacing, and added little plastic boning stays in several places to support the raised waistband. It’s possible I went overboard, but I regret nothing. (Except that some of the bones are a tiny bit too long.)
Should have at least one more button, but somehow my brain told me 5 cards x 2 buttons/card=12 buttons. Bad brain.
The waistband and front button panel were all cut according to the pattern, but to make the border embroidery work went pretty far off road. Basically I took the front edge of the skirt pattern, with the curve where it gathers into the waistband, and put that along the cut edges of my fabric, while I used the length of the centre back pattern to get the right “height” at the back fold, and drew a line connecting the two. I think it might be slightly longer in the back, which accommodates booty? Anyway, I cut this and just extended the gaaa an athers all the way around, gathering my fabric to fit. And while I would love it if I had, oh, an extra yard of fullness for that skirt, it’s pretty darn fine just as it is.
I had meant to finish the edge of the border embroidery nicely and trim it around the scallops, but I wound up just folding it under and hemming instead. I think the more structural nature of the folded edge works better with the weight of the front button placket anyway. Or something.
The pattern calls for quite a deep hem, which is great, but it also has the same amount of hem at the bottom of the button placket, which just seems odd. I didn’t trim the excess away, but it does make the bottom of the placket/front panel a bit odd and bulky. We’ll call that vintage pattern oddities.
Anyway! It’s a skirt! It worked! It’s a garment which does challenge me on a few levels. I don’t usually care for anything gathered at my waist, ever. The length is a bit odd, too, although that weird midi length seems to be popular of late. Most notably, it doesn’t have pockets, which may be an issue if I ever try to wear this to work.
I don’t regret overengineering the waistband, and would (will) do it again, as I’d still really like to try a true-to-pattern version of this skirt. The design does put a lot of stress on that second buttonhole, and I’m tempted to add a hook and bar to support the waist there, with the buttons just keeping things closed. You do definitely want to be aware of where you want the pattern to sit and make sure your size works, as you don’t have a lot of room to futz with the button positioning without changing the look of the overlap at the top of the shaped waistband. That being said, I did find it true to size. Also, if you’re shortwaisted like me, it will look a lot different than on the drawing where there appears to be about 4” between the top of the waistband and the bust—for me, there is no such space, and depending on the look you want you might want to adjust for that.
Anyway, it’s made, and fun, and I am so happy to have finally used that fabric!
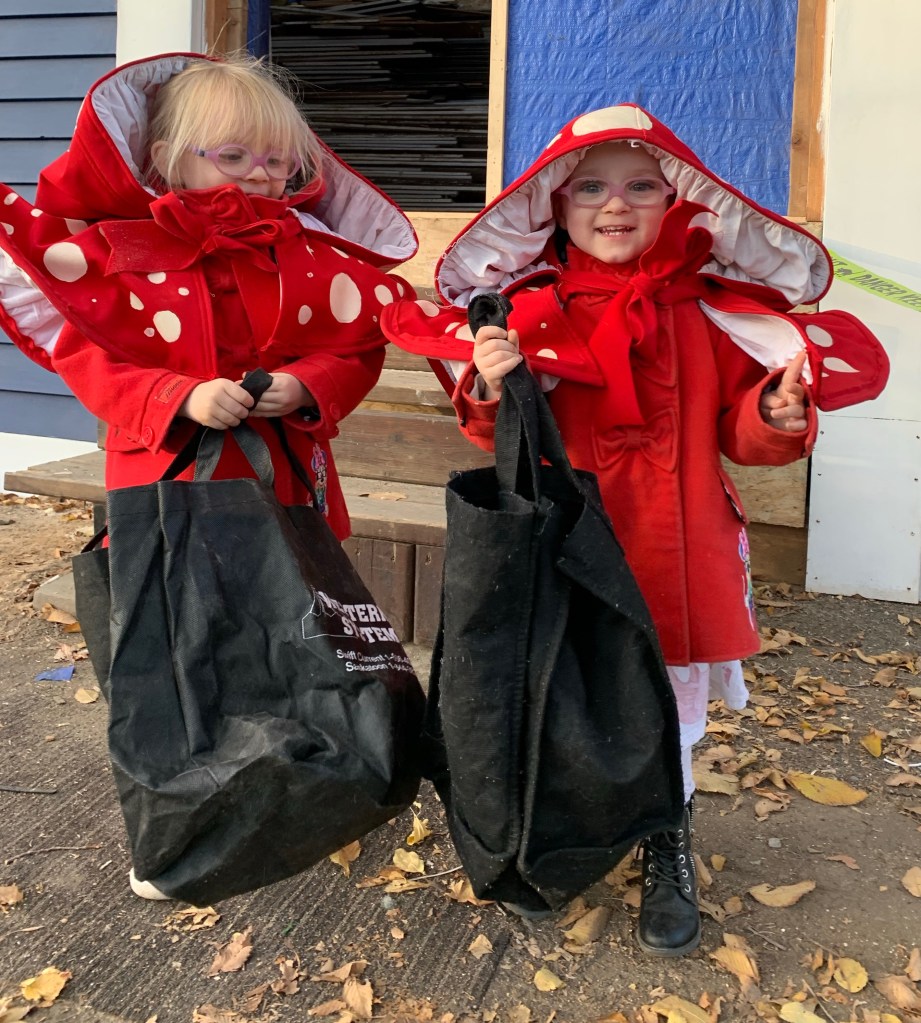
Sometime around the end of September, a costumer on Instagram I happen to follow, Ariel, posted pics of a red with white spots mushroom capelet she had made. Now, hers contains LEDs making the spots light up and various other fanciness, but I was struck by the sheer adorableness of it. The various algorithms which govern our lives may have thrown a few other mushroom hats into my feeds as well, but I really loved the capelet idea.
Anyway, this was right around the time where the twins started talking non-stop about Hallowe’en (that would be courtesy of the YouTube algorithm), and Tris declared vehemently that she wanted to be a princess. I carefully suggested the wonderful idea of… a mushroom princess!
And, as a great miracle, they both went with it.
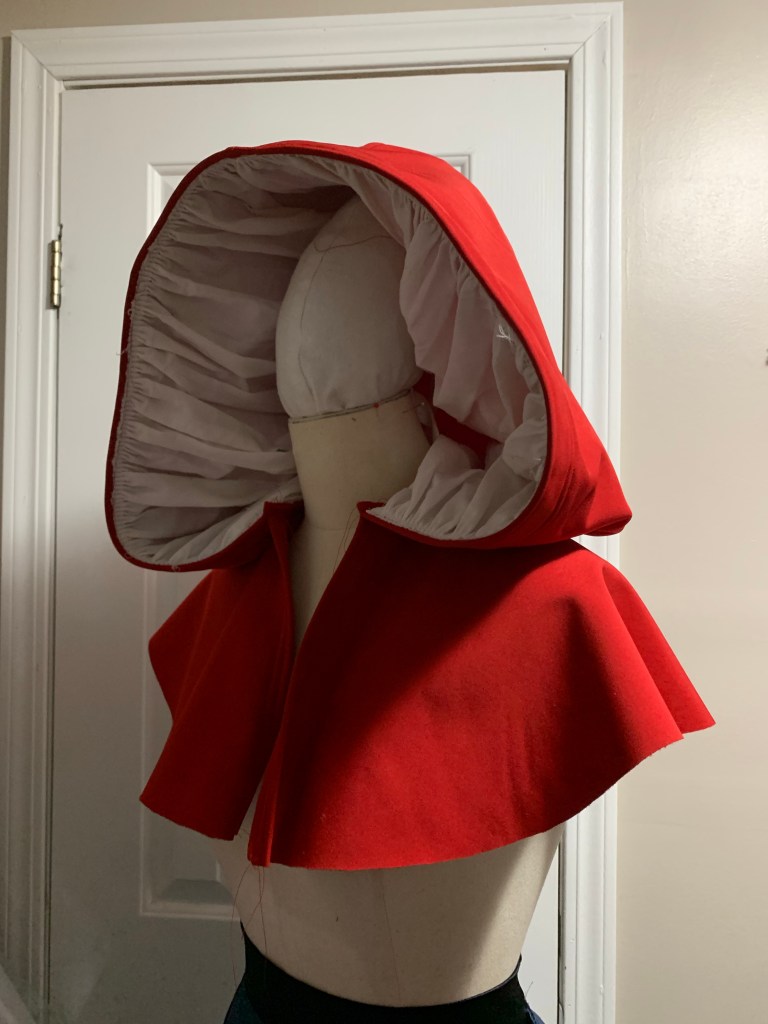
Beyond the initial inspiration, this was a fairly basic costume. We picked up some discounted red softshell (fleece on one side, windproof on the other), and I used old bedsheet for the pleated white lining. I drafted up the capelets as a near-circle, and the hoods as excessively gigantic. I did end up cutting my first hood down a bit, if you can believe it. They’re still a little excessive.
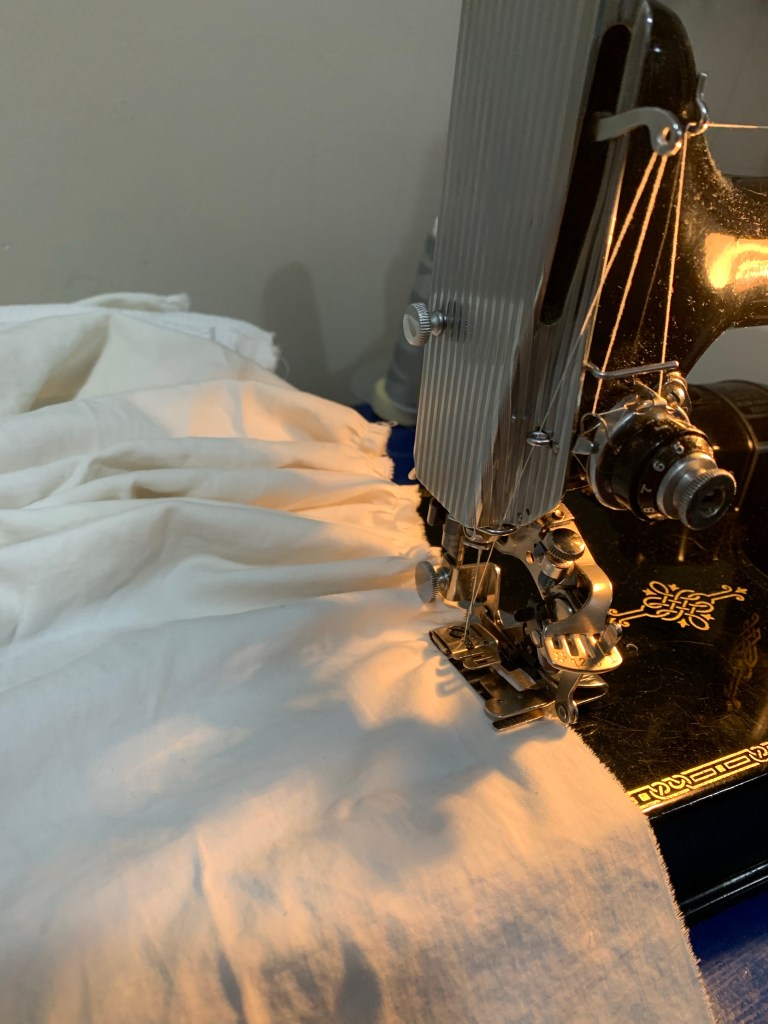
The construction is nothing to write home about—lots of raw edges, even (especially) on the edges of the bedsheet. I could’ve planned it better if I’d been a bit more intentional, but a) it’s a Hallowe’en costume for three year olds, and b) I’ve been sick for the entire month, so I really didn’t have a lot of brain-cells to apply. I used the ruffler foot for my Featherweight to pleat up the lining to resemble mushroom gills. No way would I have been able to make this work with my available time and energy without that. Though I still did have to do some hand-pleating and hand-sewing to get the lining to fit the neckline.
All the lining portions were just rectangles, pleated at both edges. So the back of the hoods is bare, while the inner edge of the capelet lining required extra pleating to fit the neckline. I had some vague preliminary thoughts of adding tea stripes to the lining gills but didn’t follow up (see above about limited time and mental energy.)
I bound the edges of the capelets with straight strips. This didn’t work super well as the fabric had very little stretch and I really didn’t want tension on the edges anyway, so there’s a fair bit of puckering. A walking foot would have been a smart idea. I did use the binding to enclose a lightweight wire for more support for the capelet edge, but I’m not sure it really improved the look. Plastic boning of some kind might have worked better. In any case, I can remove it if I want.
The final stage (which wound up taking almost as much time as all the rest of the construction) was painting the spots on. This was a lot more labour-intensive than I expected, which I guess says something about how little I paint fabric, especially off-white on a red background which took three coats or so to get opaque.
I love the painterly look of Ariel’s capelet, but with my plasticky material (that didn’t really like the fabric paint, either) and making for preschoolers and lack of energy I found myself leaning towards a more cartoony treatment, so I didn’t try to do any shading or fancy edging of the mushrooms. I think they’re still pretty adorable.
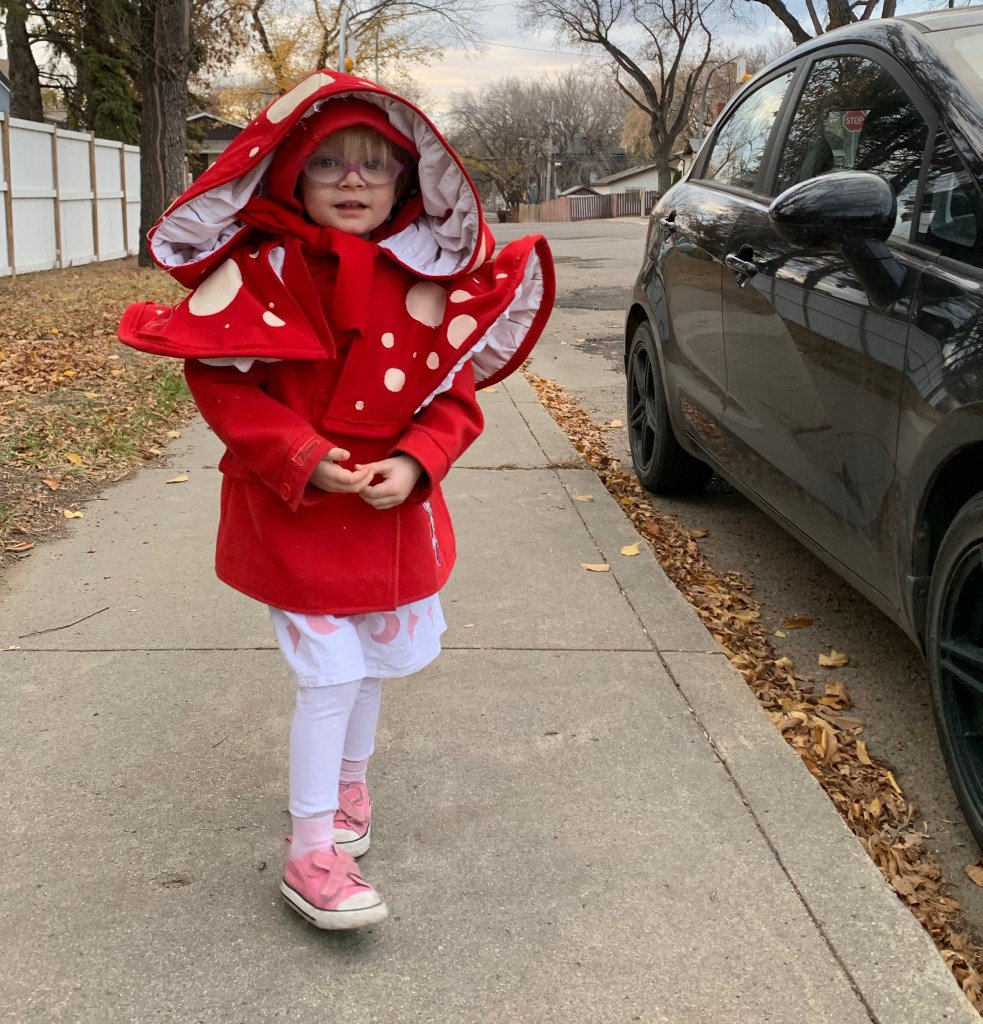
I originally planned to have them wear the capelets over white or off-white clothes as the mushroom stem (even fantasized about mushroom-coloured princess dresses for underneath, which obviously did not happen), but the fact is we live in Canada, and not in one of the parts known for its nice weather. The weather on Hallowe’en was about as nice as it could ever be here, by which I mean about 8C when we started trick-or-treating and getting colder as the night went on, but jackets were still going to be a requirement. The twins already have these red jackets, which worked well enough underneath the capes and hopefully didn’t detract too much from the mushroom vibe.
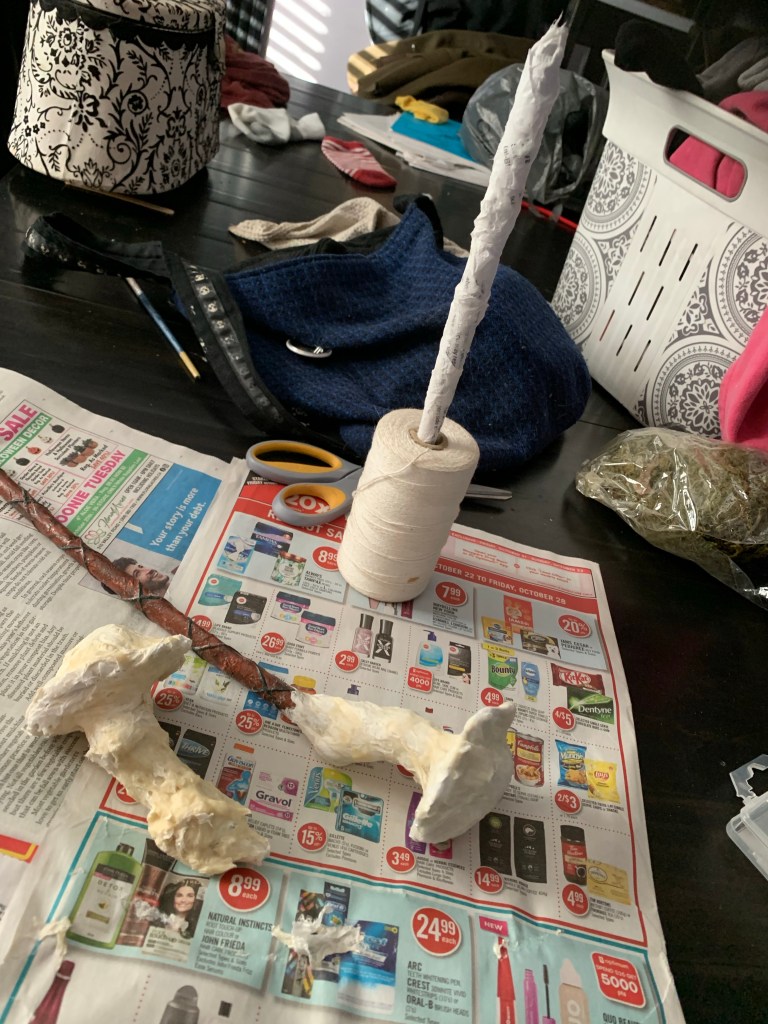
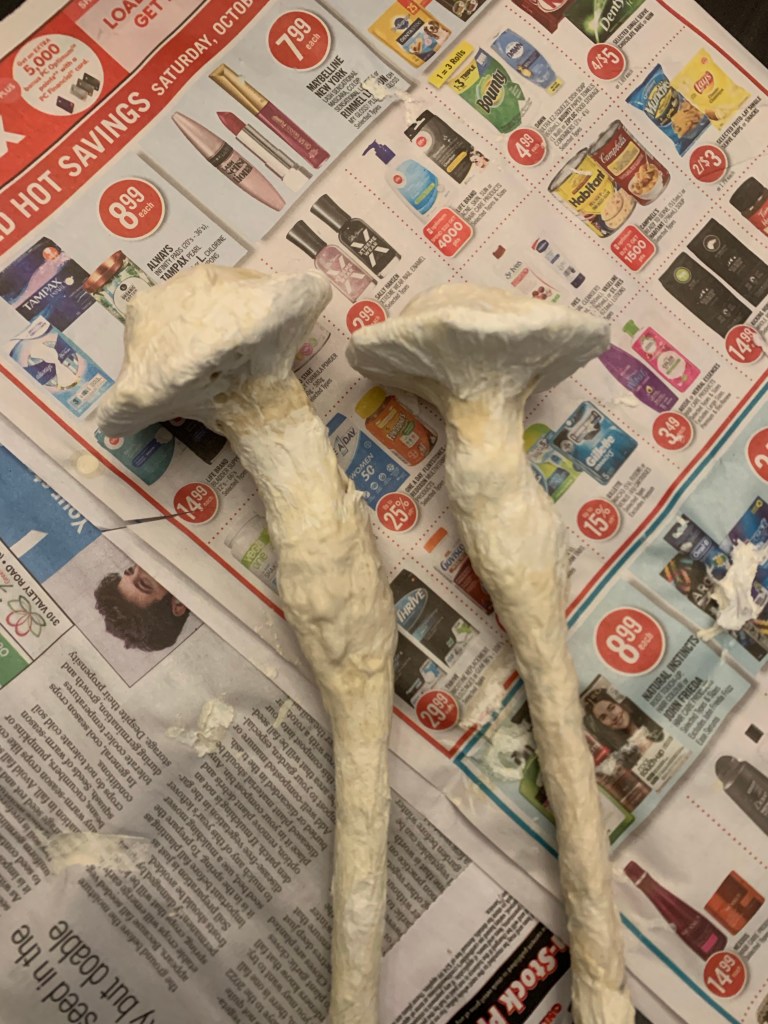
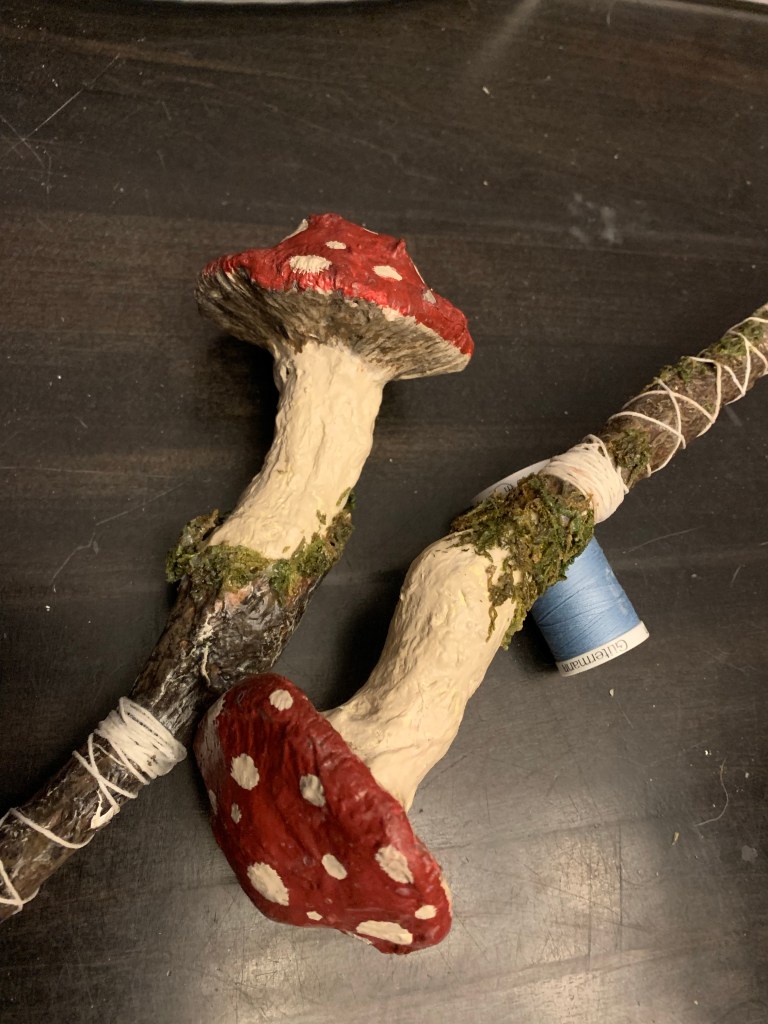
I was, however, a little worried the twins would call me out on a lack of “princess” elements to the mushroom costume. A mushroom crown would’ve been the logical thing, but I wasn’t sure how that would work with the hoods. On the other hand, the boundary between princess and fairy is a little vague at the twins’ age, and I was pretty sure mushroom WANDS might seal the deal. So I recruited Tyo, who has dabbled in wand-making before, to spend a good chunk of her Hallowe’en weekend creating some papier-mâché wands.
I sculpted the mushrooms, using tinfoil for a base and then toilet-paper papier-mâché, while Tyo worked on the wand portions. I think she was a little dismayed at how big I wanted the mushrooms, but she was a good sport. I must admit there were points in the process where I thought I was in way over my head, having done most of my papier-mâché work back in elementary school, but it was fun once I got a feel for what I was doing.
I mean, they’re a little lumpy, but so are mushrooms, right?
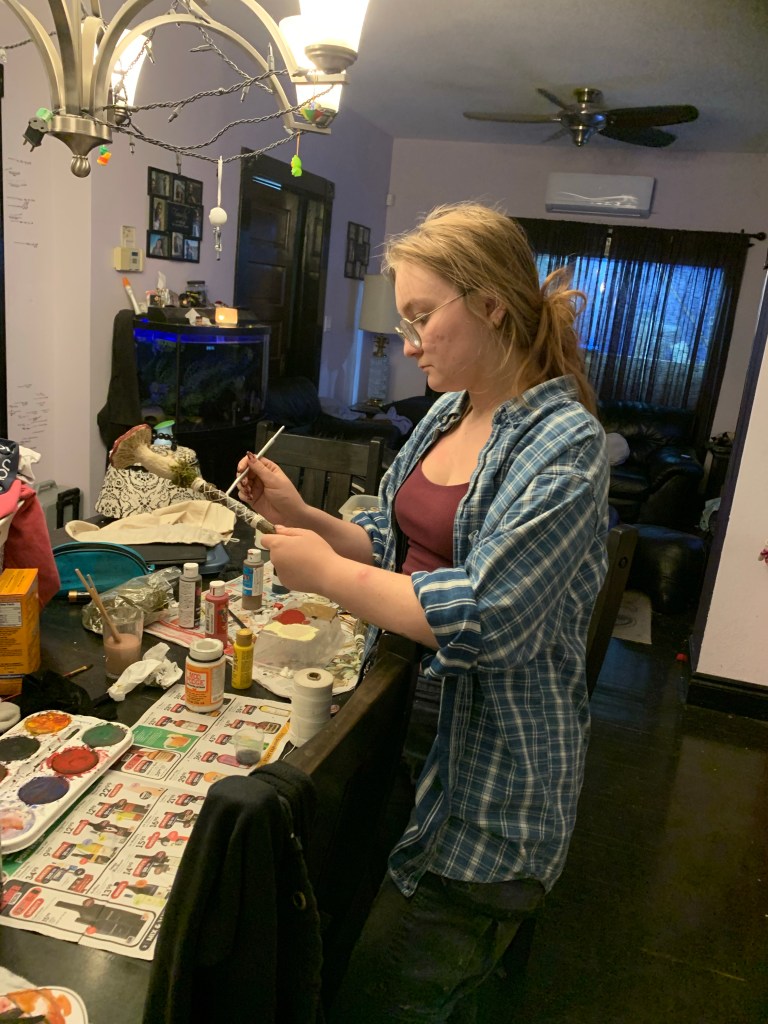
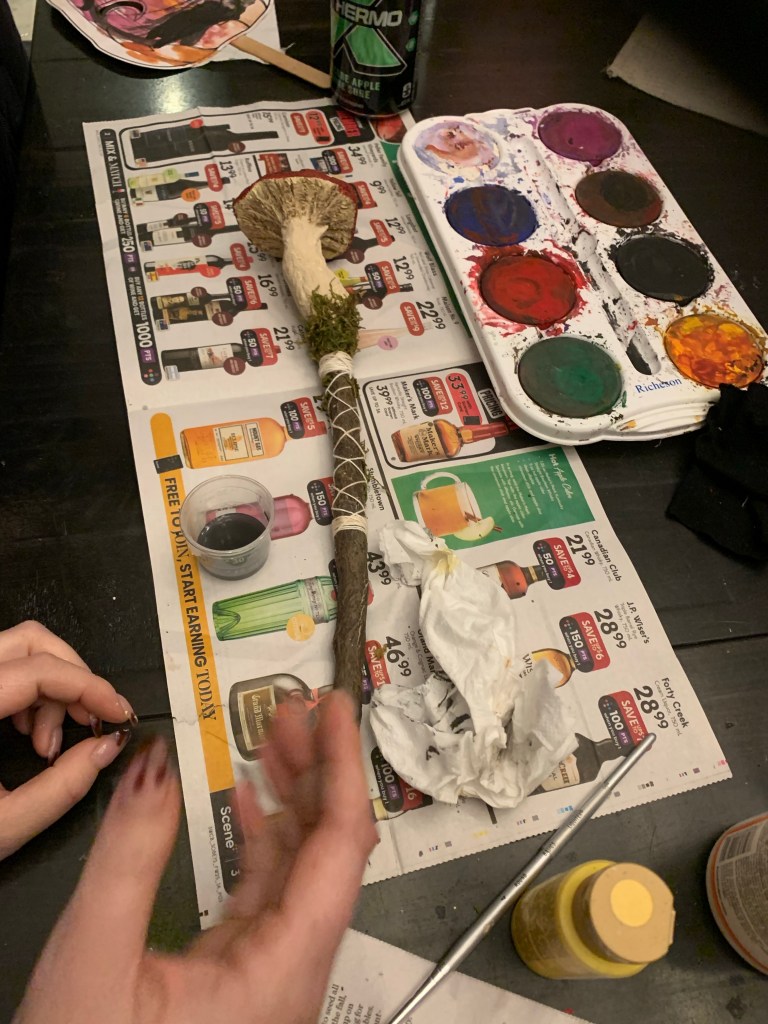
Tyo did the lion’s share of the painting and other finishing details, though, and I really think she knocked them out of the park.
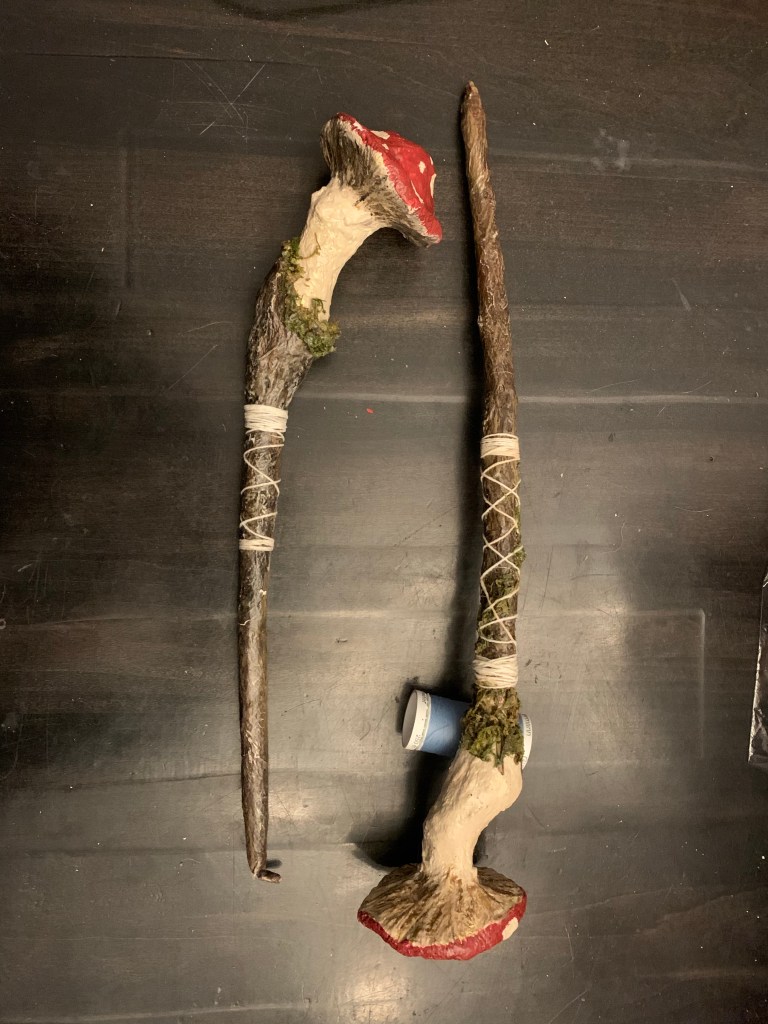
Honestly, they deserve their own photo-shoot.
Moss. She added real moss. And string.
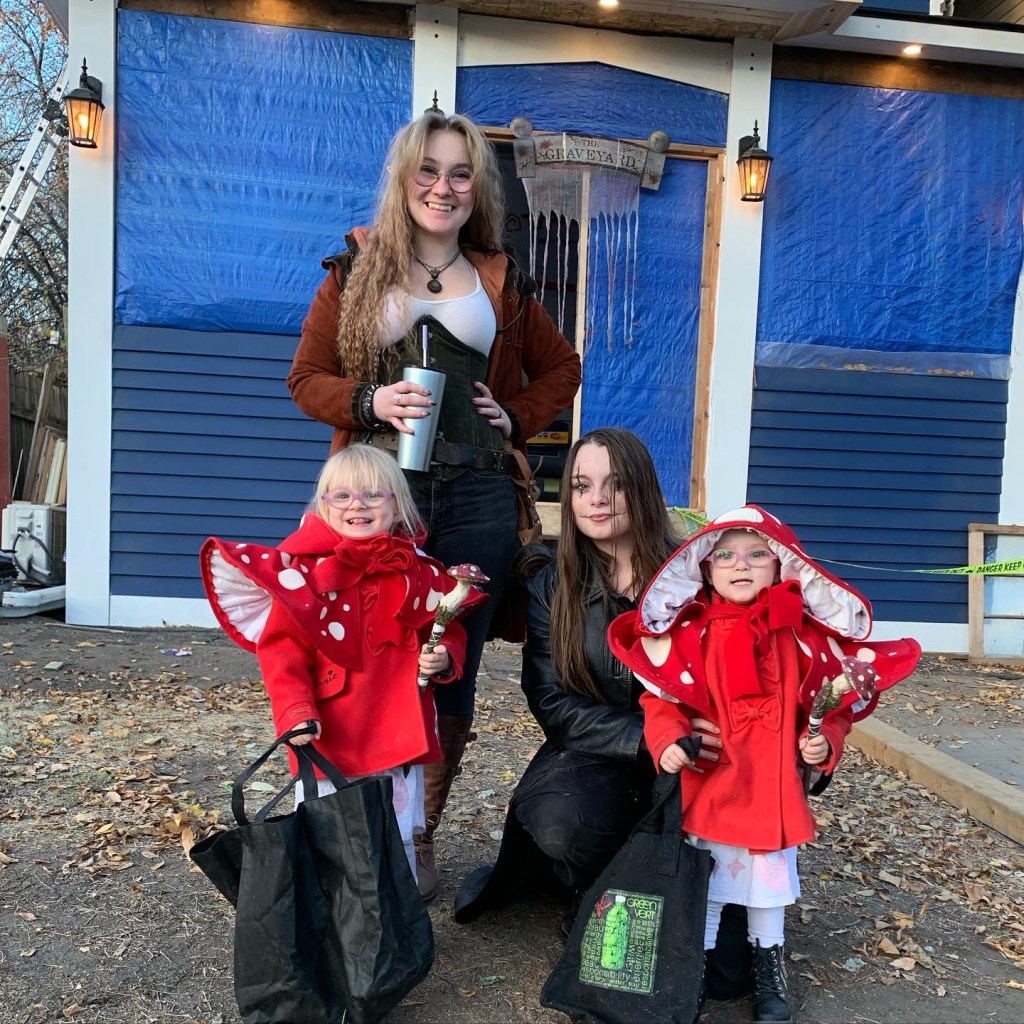
And the twins were actually really good about carrying them while trick-or-treating, which takes some skill navigating steps with a treat bag in one hand and a wand in the other. Though they did take enough tumbles that both wands will need some touching up, alas.
Anyway, that was our Hallowe’en. I’m just glad the twins got to go out and try their hands at trick-or-treating.
Unlike the subject of my last post, jeans are arguably something I need, um, pretty badly. I have technically three me-made pairs still in rotation, but two of those have been out for mending most of the last year, and the remaining workhorse pair is of a fairly thin super-stretchy denim that’s rapidly approaching widespread systems failure. And at both of the perpetually-mending pairs are getting snug.
Now, two of those pairs are Closet Core Ginger jeans (the high-waisted, skinny version). But I was pretty sure it was time to up-size my pattern (and pretty sure I had mislaid some if not all of the pieces of my old printout anyway). So I dutifully got it reprinted… but then thought, why not make up the other view?
Back when I bought the Ginger Jeans pattern (not long after it first came out, if I recall correctly), view A was exactly what I was looking for in a pair of jeans—low-rise waist, stovepipe leg. But by that point I had already modded the snot out of Jalie 2908 to get that fit that I wanted, so I just kept on using that pattern. When I did finally try out the Gingers, it was to test out the high-waisted view… which worked fairly well, but both versions were made in extra-super-stretchy fabric (which really minimizes fit issues, at least), and the high waist, while more fashionably appropriate these days, doesn’t give me that nipped-in, round-butt look that makes them so cute on other people. I just look like I go straight up from hip to waist, like a cylinder.
Now, the biggest factor in my cooling relationship with denim has been that as my body has changed over the last ten (and especially last three) years, I haven’t been able to find a style that makes me feel cute the way they used to. I have too much muffin-top these days for the low rise (which is terribly passé, too, don’t you know), high rise just makes me look like a box… oh, and mid-rise, on my body shape, just rides down to sit in the “low rise” position. Much easier to just find a cute dress or skirt.
Anyway, I decided, since I wasn’t really excited about ANY style of jeans, to go back to my old standby. Low-rise; at least it can be covered by shirts, and the stovepipe legs seem like they would go well with the modern looser jeans aesthetic. (Also, as low rises go, I’d call this one pretty moderate, which is what I suspected. The fly zip is at least 4” long!)
So I put on my big girl pants, re-measured myself, didn’t quite faint at the pattern size that number put me into, and then went to work.
A dig through my stash turned up this piece of really nice stretch denim, already pre-washed. Sturdy (about 10oz at a guess), but very stretchy. I BELIEVE it’s the Cone Mills denim I got from Closet Core as a jeans kit ages ago. Perhaps it wasn’t wise to cut into it for a project I was, frankly, kind of dreading, but there it is. It also wasn’t doing me any good sitting in stash, and it promised to be pleasant to work with even if I wasn’t thrilled with the results.
I made three pre-emptive changes to the pattern: lengthened the leg by 1” (to go from a 32” inseam to a 33” inseam), raising the back rise height by about 1”, and taking some tucks in the shaped waistband to make it more strongly curved, particularly in the back portion, where I tend to be most curvy. It’s still not as curvy as the modified one I used before, but it seems to work. These are most of my “standard” fit alterations, but I didn’t make them on my previous Gingers (except for the leg length anyway) because of the high waist and the extremely stretchy denim I was using.
I also took the time to cut out all the leg pieces in a single layer. I’ve ignored this advice countless times, and almost always had one twisting leg on my jeans, and just endured it as the price of laziness. It’s early days yet, but I’d say they do, in fact, twist very little, at least.
I followed the pattern instructions to fully baste it together to try on, and I’m glad I did as it let me make some major changes to the crotch curve: mainly, I needed a MUCH curvier front crotch to avoid camel-toe (also an issue in my high-waisted versions, but less intense because of the super-stretchy fabrics), and I took in the CB seam about 1” at the waistband, tapering to nothing at the bottom of the curve. If I do another version, I would curve the yoke as well by adding some little darts like so:
Man I miss having the time to make helpful diagrams like this for my blog posts.
Which is exactly the same thing I did, extensively, to the yoke of my Jalie Jeans pattern, actually. So it’s nice when things are consistent. I might add a bit more height to the back rise, as well—but maybe through the yoke since I’ve already added 1” to the lower piece. I could’ve recut the yokes but I just decided to ease them in to the waistband, which also works.
Basting first let me make these tweaks, which was great. It’s not hard to tweak the side-seams at the end of jeans construction, but at that point you’ve got two rows of topstitching in the crotch and inseams and those are not going anywhere.
Construction wise, I did most of the sewing on my mom’s Featherweight machine (long story, but the short of it is that her machine is at my house and mine is not. This was not on purpose). I got it into my head to try doing the topstitching on my coverstitch, which was a mixed bag. It was nice to do long straight sections with the twin needles, but it’s hard to go slow and I didn’t like the lack of reverse. So I did the pockets, fly, and waistband topstitching on the Featherweight as well. I did a not-terrible job of matching my stitch length, but there are definitely some subtle differences. It also made for a LOT of rethreading, especially since I only had two spools of topstitching thread (this was just Guterman extra-strong, I didn’t want to complicate things by using actual topstitching thread) so one of them had to keep going back and forth between the coverstitch and the Featherweight. I only broke out my modern Janome (which needs a spa day BADLY) for the bar tacks and buttonhole at the very end. For that part I used a coordinating regular thread, though it’s not quite a perfect match so maybe I should’ve gone for a contrast.
I actually liked the pockets better pre-bar tack.
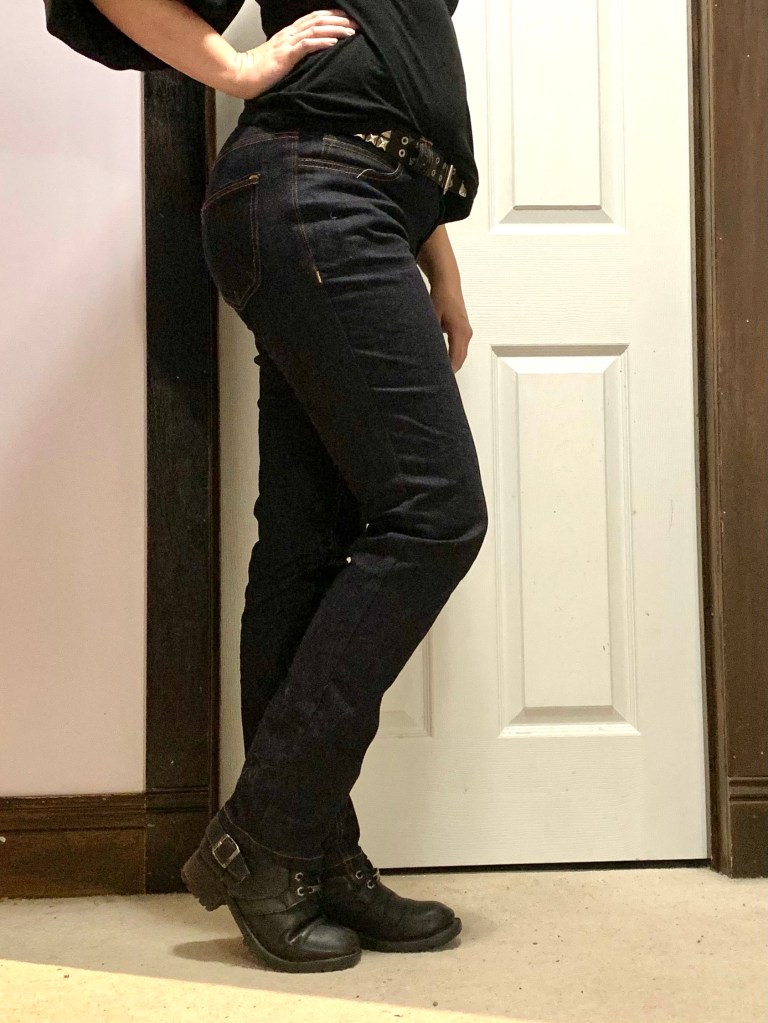
I sewed the side-seams with a fairly generous seam allowance, and wound up taking them in 1/4” more after that—and I’m fighting the urge to take them in more, telling myself we’re going for a slouchy boyfriend aesthetic as opposed to the sprayed-on-skinny look I’ve been pursuing since I got my first pair of stretch denim jeans in 2000.
I did interface the waistband, but I used a knit interfacing. So a belt is definitely a necessity for wearing with them.
And… I don’t know if I feel cute in them, but the process was pretty satisfying especially considering what a tragic mess the last pair I did was, and I did wear them for basically a week straight after finishing. I didn’t feel rushed because I wasn’t super excited for the end product, so I guess that was a win? I was also stupidly sick while making these, so they got worked on in five to fifteen minute bursts between lying down while the twins watched obscene amounts of questionable kids YouTube programming.
I do think I could’ve taken in the hip and thigh another 1/4” or so on each side, but I don’t know if I will now that they’re completed. I do, however, think that I’ll wear the snot out of them—my casual wardrobe hasn’t been strong in the last ten years, but it’s particularly terrible right now.
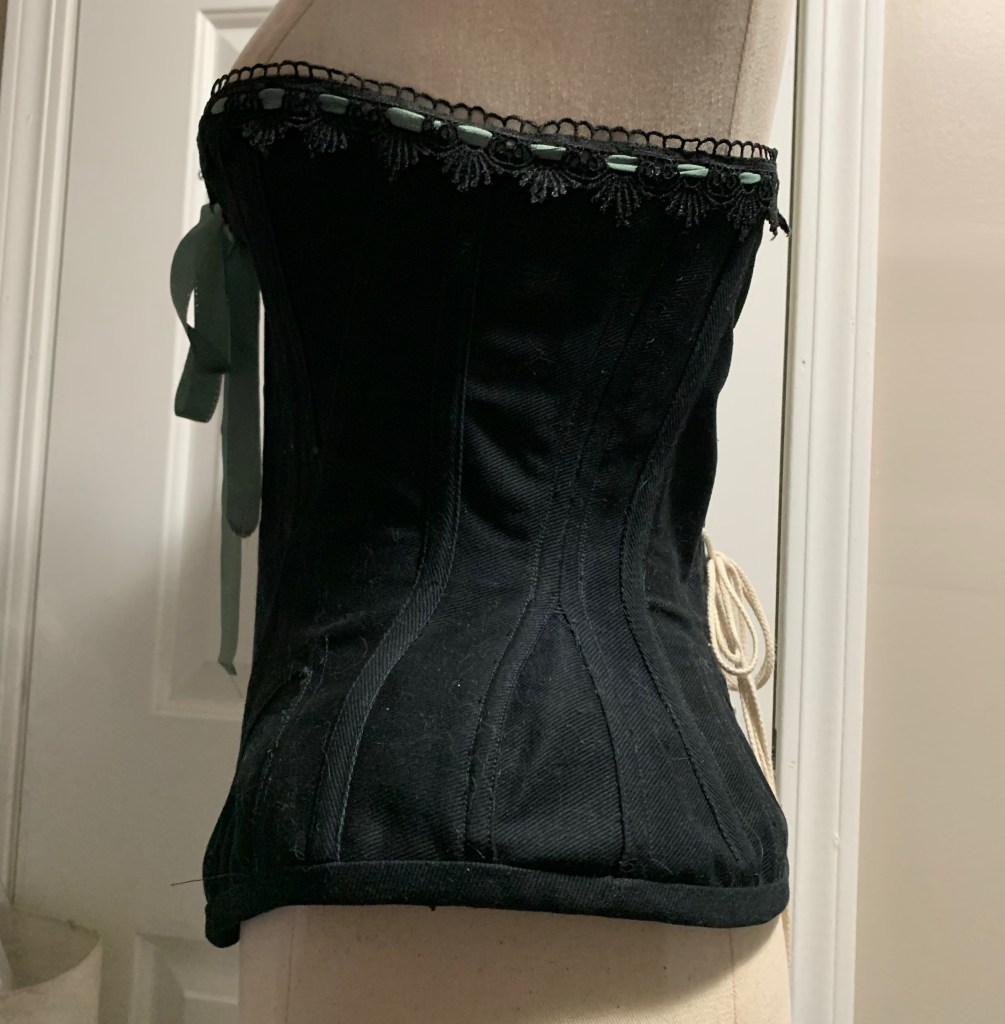
Of all my wardrobe “needs,” one could, very reasonably, argue that another corset should not be at the top of the list. My one pair of jeans has a rip in the knee and recently blew the topstitching around the fly (something I’ve never experienced before, by the way). My underwear drawer is just, well, sad. I have almost no leggings left.
But no, we’re resuming (after a three year hiatus!) the Victorian Sewing Circle, and my old corset is Too Small. I mean, so is the rest of my 1885 outfit, and I will have to restart the bodice I’d been working on for the “new” outfit to make a bigger size (and not accidentally use ticking for the lining. Ticking is great for many things, because it is very stable. It is not great for lining clothing that you need to move in.) But one must begin with the corset.
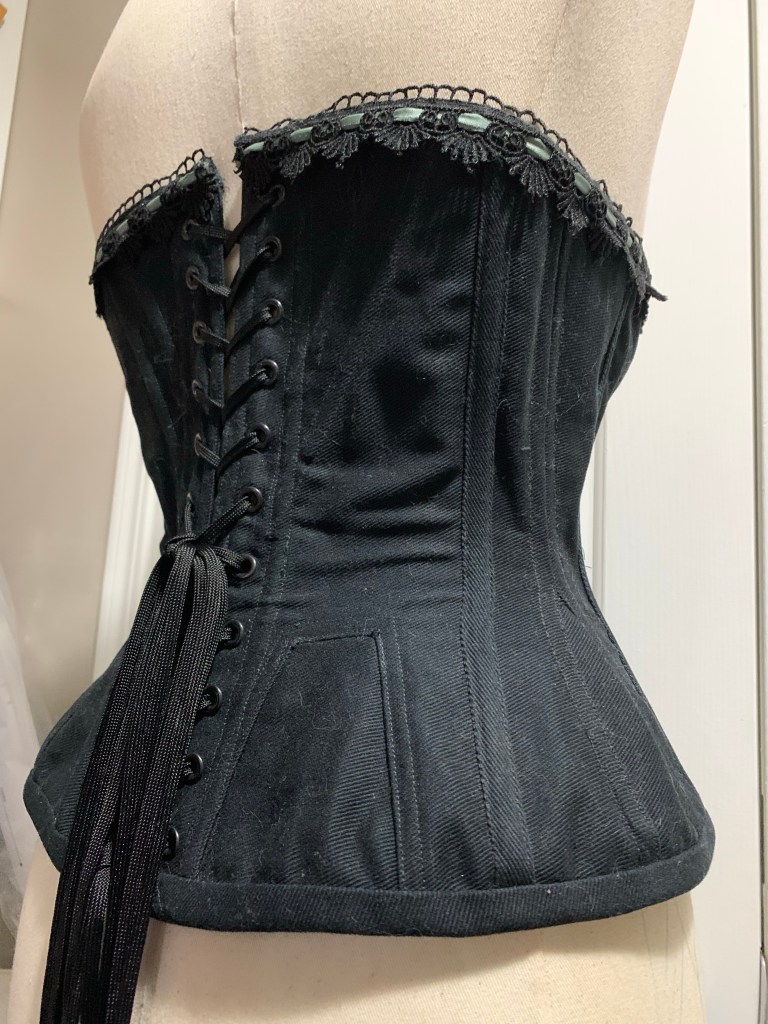
Black grommets, because apparently I ordered a 10-pack of antique brass busks but no matching grommets?!?
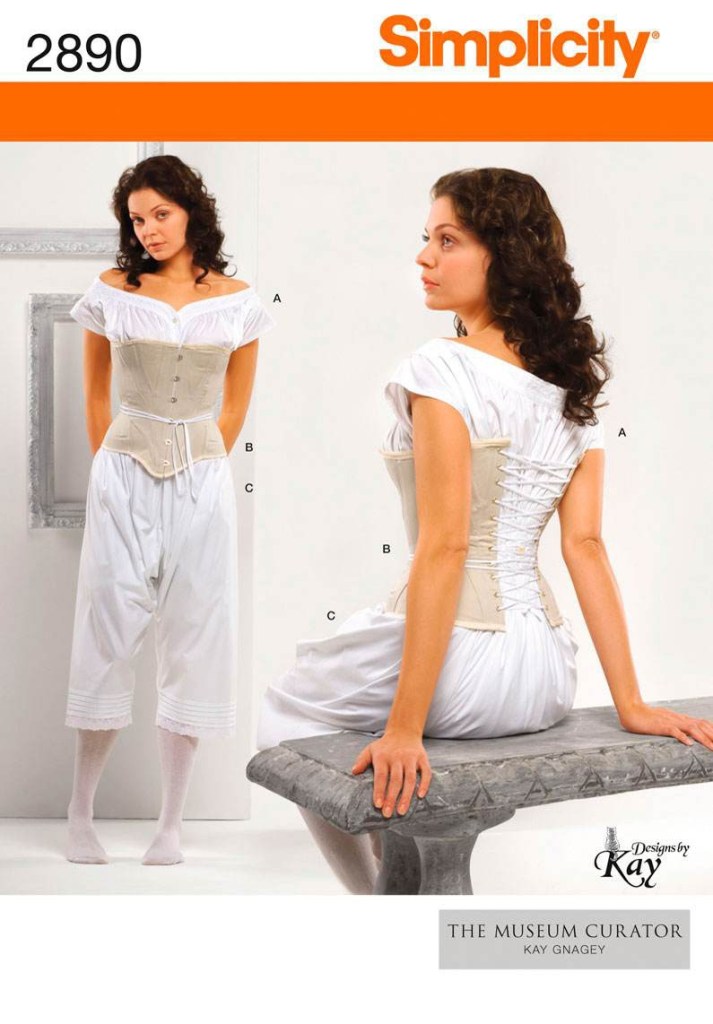
I have quite a few corset patterns roughly suited to the period, although most of my previous versions were based on Butterick 4254, which maybe isn’t the best starting point but that’s where I started and once I had it fitting well you might as well go on with it. Until it isn’t well fitting, of course.
All the “Victorian” corsets I’ve made have been paneled, but I enjoyed the gussets in the two regency style corsets I’ve made and was curious to try a later gusseted pattern. Especially as they’re a handy way to adjust the sizing very specifically.
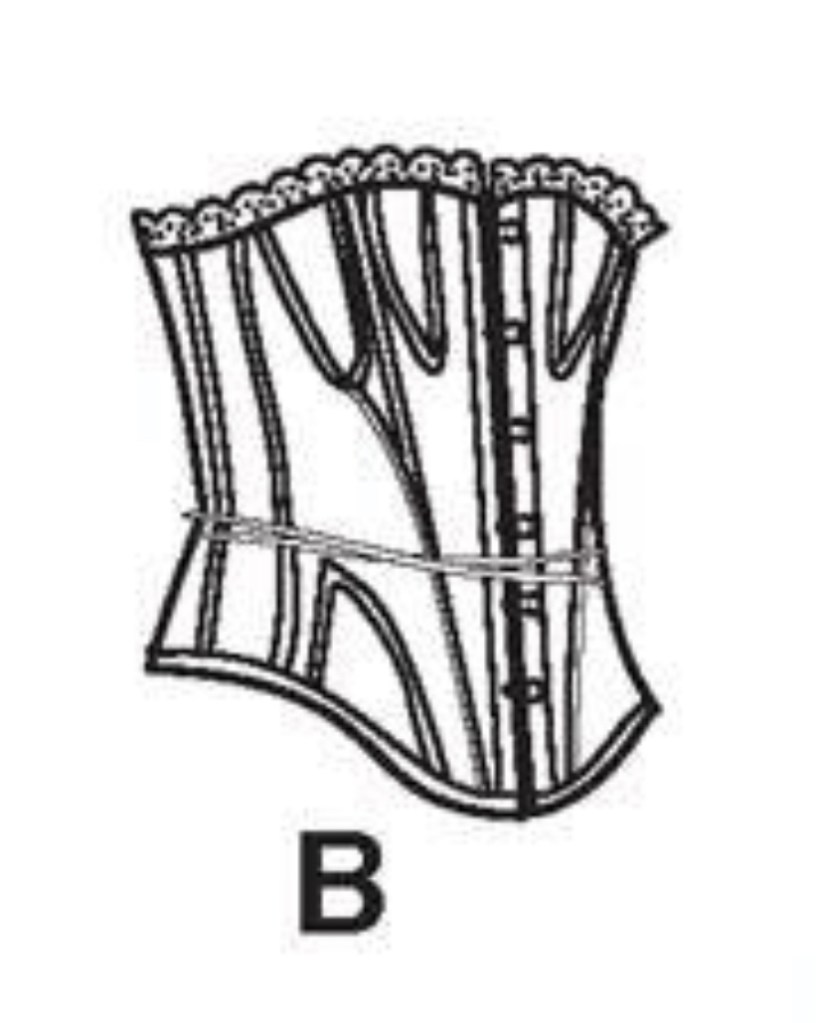
The envelope pic isn’t terribly promising, but it did have gussets. Some internet searching (aka reading the reviews on Patternreview.com) revealed that it is in fact based on an original historical corset pattern from 1872 (despite the more 1860s vibe of the chemise.) This blog has a nice discussion of it. The internet also agreed that the pattern was lightly boned, short-waisted, and ran small.
Tech drawing, poor resolution. Back view of technical drawing. Possibly even worse resolution.
Short waisted was fine by me. Lightly boned, I wasn’t too concerned about, as I’m looking for a comfortable rather than tight-lacing corset.i added 1/2” to each side-seam to hopefully make up for the “runs small” part (not adequate, by the way), and dove in.
My mock-up seemed promising, but some extra room in the hip would be helpful. However, I didn’t fully appreciate the issues of my mock-up fabric (which really wasn’t stable enough) and the fact that it wasn’t fully boned. When I tried it on, it seemed like opening up the front hip gusset gave me the extra hip spring I needed. But this was actually my too-flexible fabric “borrowing” the width from the front—-where I needed the width was right at the side seam. Since I didn’t realize this until my “final fabric,” version, I wound up doing most of my fit-futzing on the final version, removing a lot of the width I had added to the front hip gusset, and ripping out the side-seam to insert a gusset in the hip there.
Hip gusset in side seam. It looks thrown to the back here because the dress form is very small—on me it is indeed at the side.
This greatly improved the hip shaping, so I proceeded with construction.
I will say, I definitely prefer to topstitch my gussets in place as opposed to constructing them “normally” as the pattern instructed. There’s a fair bit of fraying around my gussets already from futzing with the seams to get them smooth with the “regular” method, which I will have to zig-zag over at some point.
So let’s talk about this pattern. What a weird, weird pattern.
First, it’s only two main pieces; almost all the shaping comes from gussets. This made the only other preemptive fit change I would’ve made, a swayback adjustment, impossible as without a side-back seam to absorb the angle change it would leave the CB line not straight.
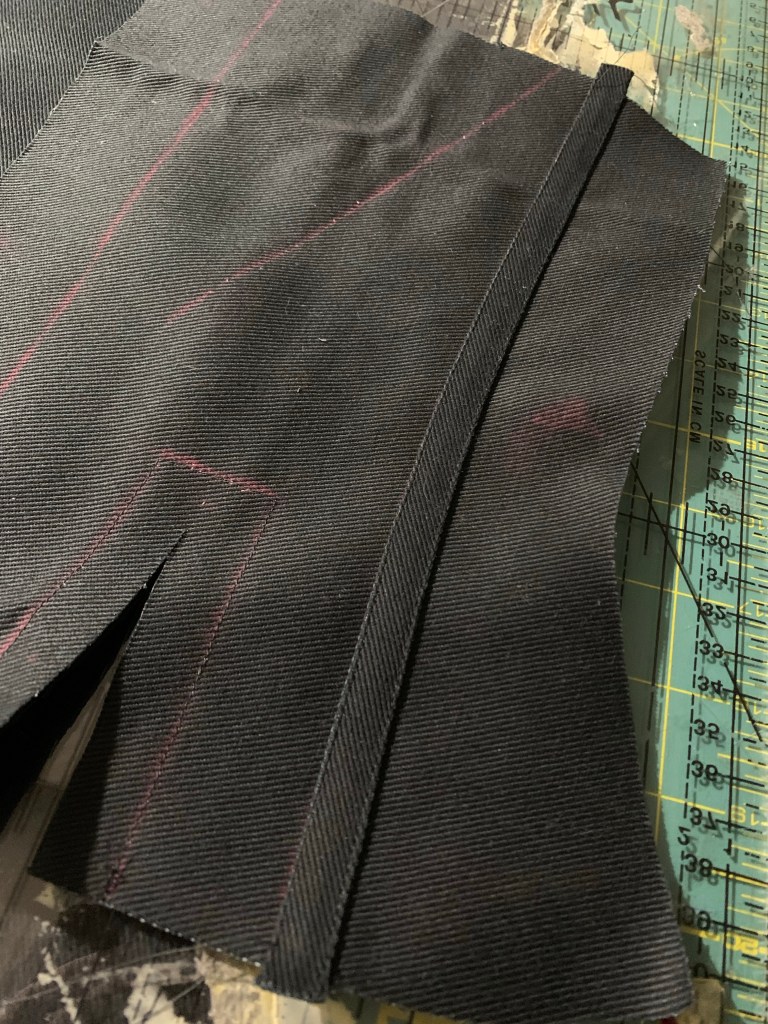
Can you see how the bone casing stitching crosses the weird front seam line?
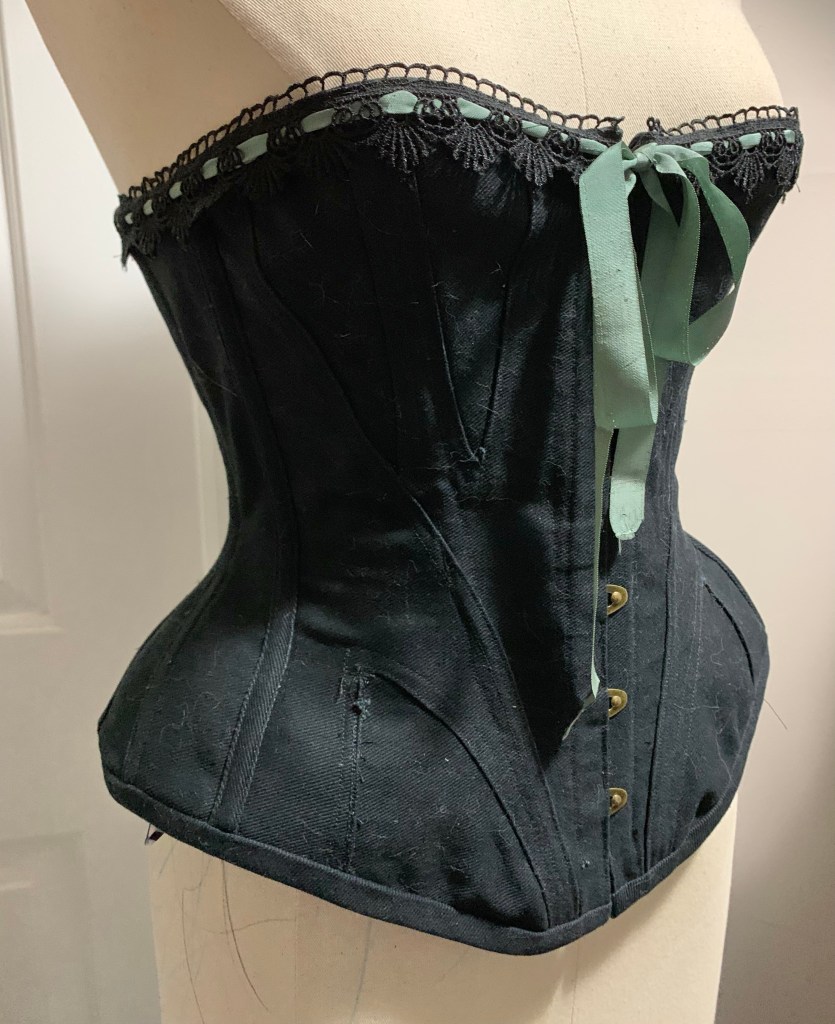
The single weirdest thing is that curved seam in the front. It isn’t a seam—it’s a tuck. A long, curved, narrow tuck. Why is it there? Does it add shaping? No. It does make it slightly easier to sew the gusset that emerges from it, but the other bust gusset doesn’t have one.
It does create a very attractive curving line across the corset front, which may be the only point of its existence, but then the bone casing runs straight up the front, crossing it, and at least partly diminishing its effect. Weird.
The other oddities may be effects of grading—I didn’t love how close the back hip gore is to the back boning, for example.
This was my first time, believe it or not, doing applied boning casings—Butterick 4254 uses the seam allowances for all its boning casings. I just cut 2.5 cm strips of my fabric (a bull denim, not a proper coutil as the sewing room gnomes have absconded with my coutil) and then ran the strips through my bias-tape maker and pressed. They are meant to be applied on the inside but I accidentally stitched the first one on the outside and I really liked the look. However, you can’t really apply ALL of them on the outside, as the end of the angled casing on the back is covered by the facing folding to the back, and the front boning casing crosses over that decorative front tuck so if you stitched it on the outside it would obscure that feature even more.
The pattern doesn’t call for a waist stay, but I added one, and I’m very glad I did as I think the waist shaping would be a lot mushier without it, especially in my not-coutil fabric.
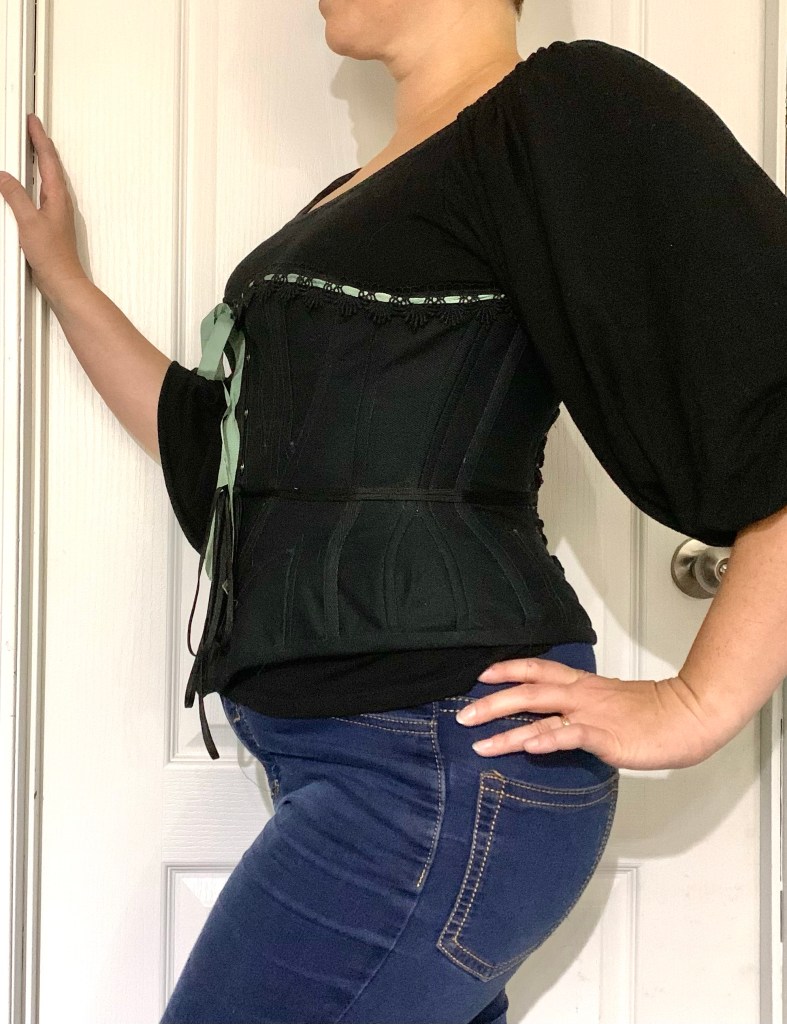
Lacing gap is still wider than ideal.
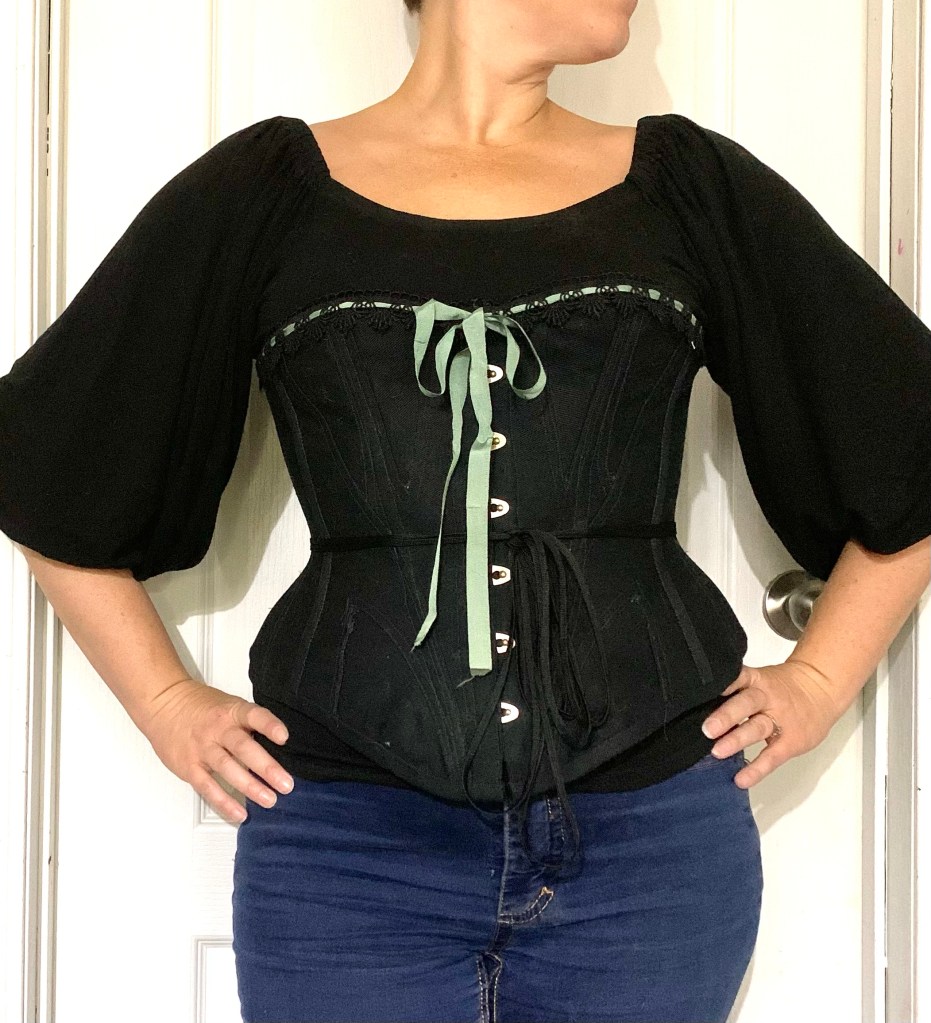
While it gives a stronger shape than indicated by the cover model, it’s not a particularly extreme corset. The hip-spring before I added the gussets there was very gentle. I could probably have enlarged the bust gores a wee bit, too—I did sew them with narrower seam allowances to add a bit more room. The light boning gives it a less cylindrical, more organic shape than my other corsets. At least when it’s on me—not so much on the dress form.
I didn’t have to put much thought into the lace and ribbon selection as I only had two pieces of non-stretch black lace, but I love it. The lace is just a guipure from Fabricland. The “ribbon” is a rather battered chunk of vintage rayon seam binding that came from inherited deep stash—I should probably tidy up the ends, but it was the perfect addition, I think, to relieve the sheer black.
On the whole it was a fun experiment, anyway. It may not hold up very well, not being coutil, but I don’t exactly wear my corsets heavily either. And if it does fall apart, well, with any luck by then the sewing room gnomes will have returned my coutil and we’ll just call this version the mock-up.
Since the twins were born, a large chunk of my previous wardrobe has been inaccessible—either not fitting any more or not compatible with breastfeeding. (At least one of those will resolve itself… eventually) And I’ve missed it. In particular, the fluffy vintage fifties style dresses and skirts have been almost completely cut out.
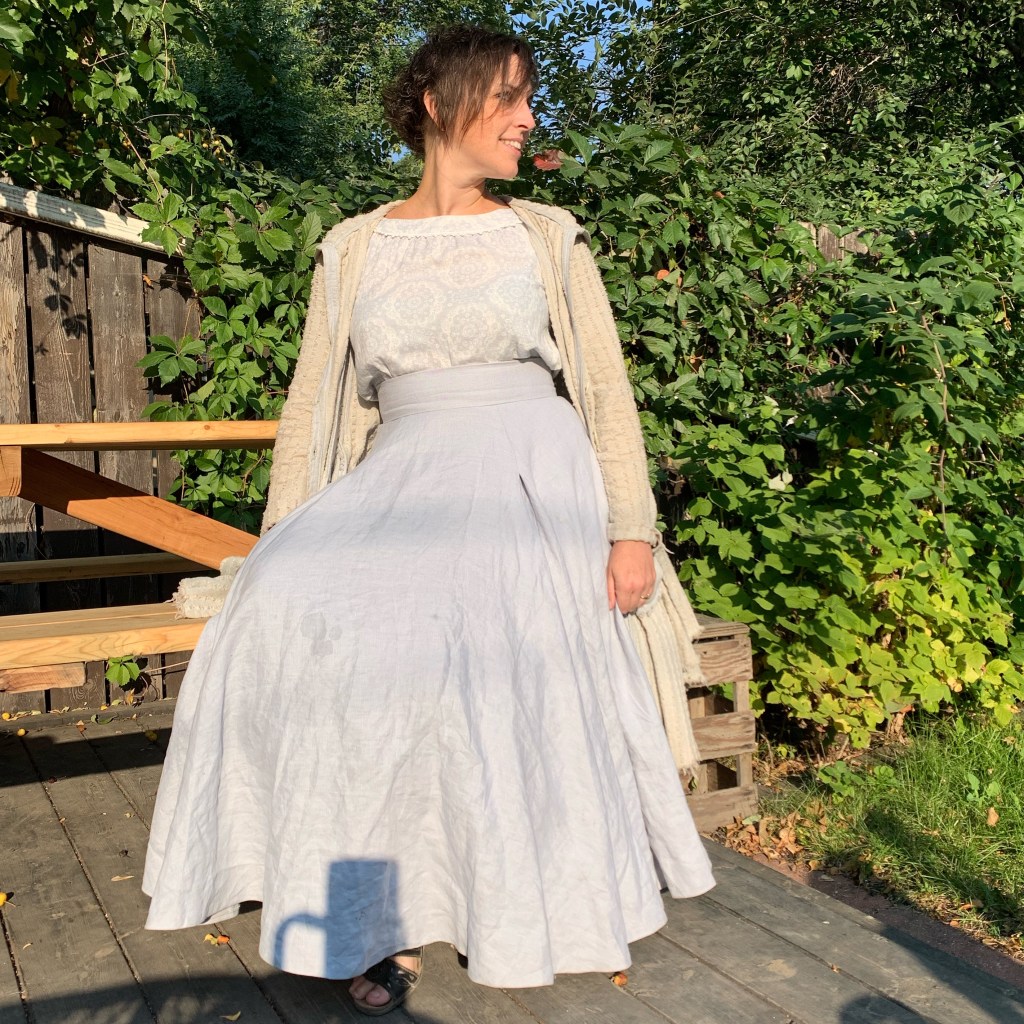
Disclaimer: skirt is worn with a moderate crinoline in these photos. A circle skirt is always improved by the addition of a crinoline.
I made two versions of Vogue V8882 as Fabricland projects back in the day, and they remain some of my favourites, or would if I could still wear them (ok, I can usually still get into the plaid version, at least in the morning). There’s something about the circle skirt silhouette, with those additional little tucks fancying it up just the tiniest bit… anyway.
And when I splurged back in August and ordered myself a bunch of linen from Pure Linen Envy, the icy-blue heavier piece obviously wanted to be a skirt or bottom of some kind.
So really, it was a match just waiting to be.
As with my plaid version, I added some length beyond the original pattern, to get that sweeping midi length. I had ordered 3m, which allowed me to add 4.5” to the length, and to preserve as much of that length as possible I did a tiny 1/2” hem, and hand-stitched it, at least in part because my brother had been visiting from Australia the last couple of weeks and it’s much easier to visit while doing handwork. I would’ve done a bias-faced hem if I’d had enough scraps left over, but there was no way, and I was too in love with this scrumptious fabric to introduce a different fabric to the project (although in hindsight I definitely have some lighter weight cottons in an almost identical colour and texture that would’ve worked…)
I made the size 14, and the waistband is comfortably snug—but be sure to check because my waist is SIGNIFICANTLY larger these days than the 28” the size 14 officially lists.
The waistband of the pattern is a simple rectangle, and quite wide. This works ok for me, with my cylindrical torso, but if you have a rib cage that actually tapers to your waist a shaped band would be better. I wanted to make sure this waistband didn’t end up a crumpled mess like the waistband of my Adventure Skirt has, so I added two layers of (admittedly lightweight) armoweft interfacing, and stitched little casings to the inner part of the sides for small plastic bones. I would’ve used hair canvas and steel bones, but I wanted the skirt to be more or less washable. So here’s hoping that my efforts are enough; it’s doing fairly well through the initial couple of wears anyway.
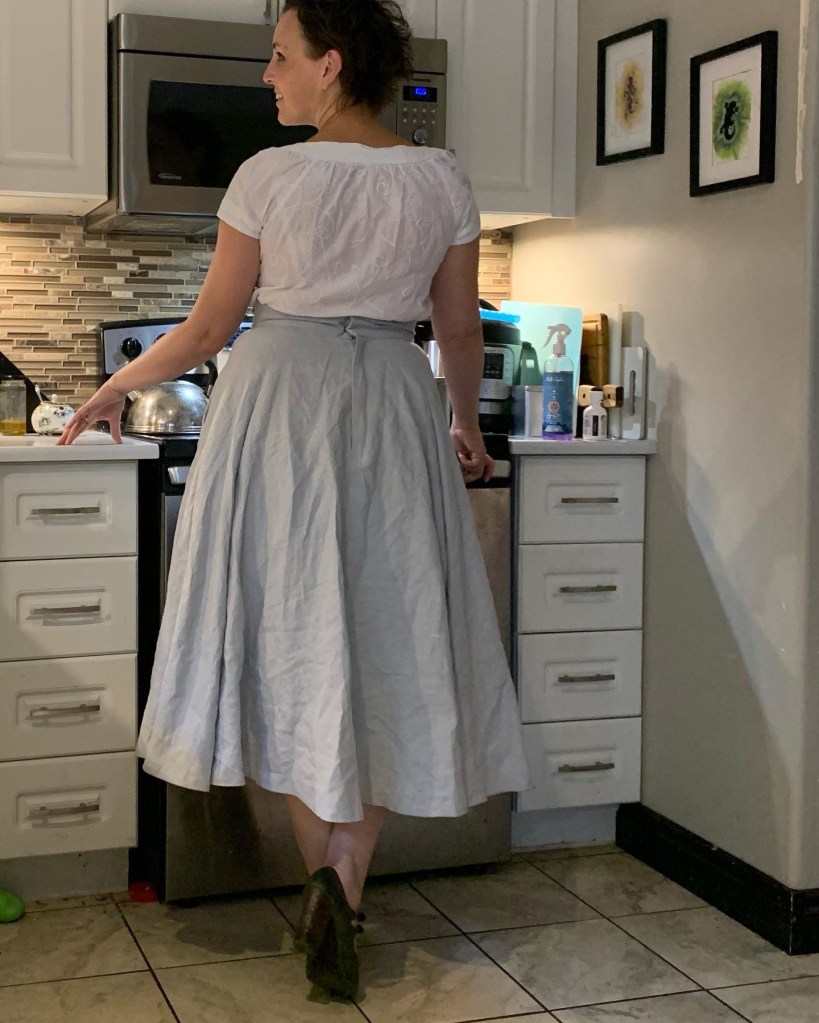
The small hooks and eyes I had lying around definitely aren’t perfect, though, letting the back gape, but if I manage to pick up some proper bar hooks I can add those on later. I’m prone to one of two mistakes with closures like these—either putting the hook too far in so that the edge curls out or, as in this case, putting the hooks right at the edge (so it can’t curl out) but then the eyes/bars underneath show. Oops.
The lapped zipper in the back was the first I’ve done in ages, and would probably have benefited from reviewing the method—it wound up pretty wide, and I had to add a facing piece on the fly. It looks ok, but is definitely more in jeans-fly territory than “delicate vintage style closure.”
Also like my plaid version, I added pockets to the side seams, although these ones are much roomier so I don’t have to fight to get my phone in.
I’ve been guilty of skipping the hanging stage when making circle skirts in the past, but I’m definitely glad I didn’t try with this fabric, as it grew a good couple of inches in some places. I’m not convinced my results are particularly even, but I’m calling it good enough.
In the end, I’m super excited to have another skirt for my fall wardrobe. Though if I’m going to use this for actual homemaker cosplay (aka cooking), I had better make myself an actual apron, too…
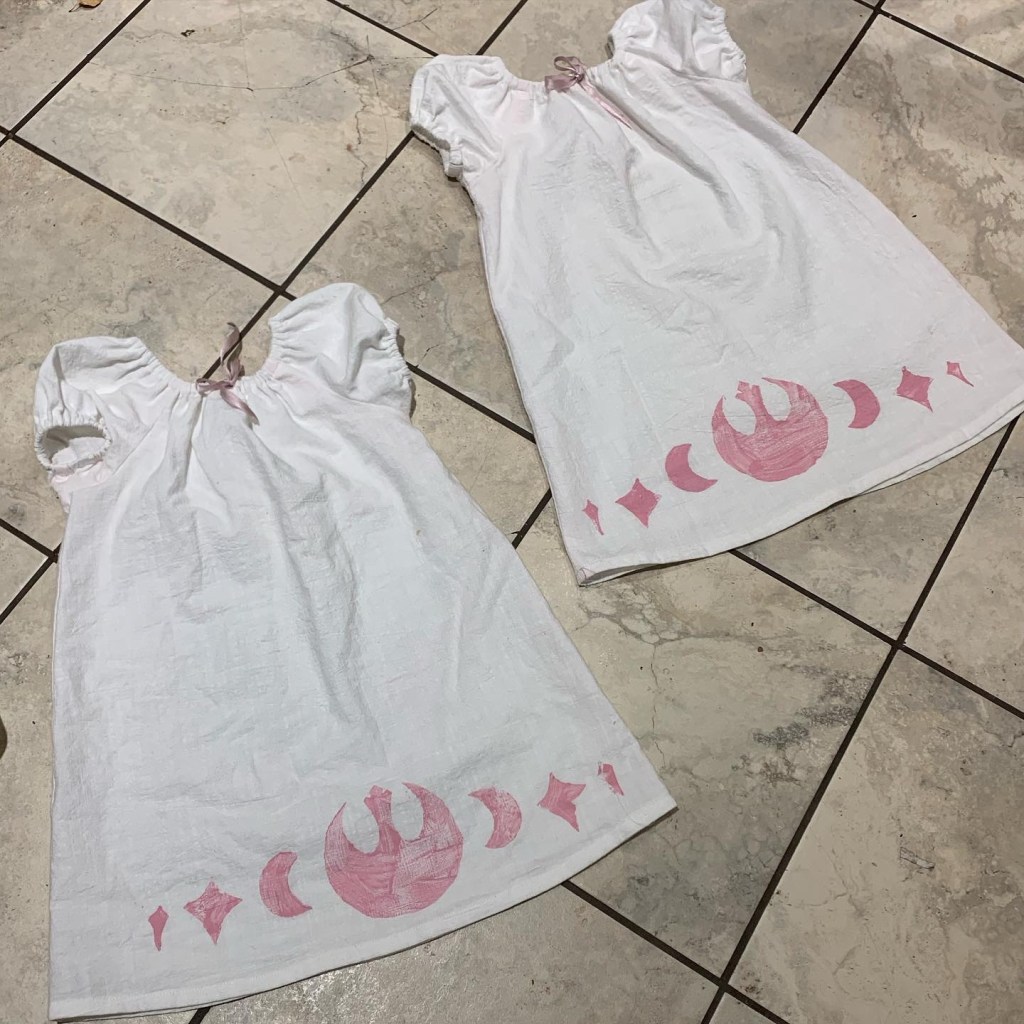
I’m not sure I can capture the train of thought that led to these little dresses. The pattern is the free Peasant Dress pattern from Scattered Thoughts of a Crafty Mom, which I acquired and printed out a while back after the twins got some hand-me-down dresses made from it by a friend who also sews. It’s been sitting waiting for a while while I fussed around with other things.
I wanted to make white shifts to go under their little regency dresses from last year… but then I wound up pulling out this wonderful textured white cotton (left over from a shirt I made my huband eons ago) and just went with it, except it was far too thick to fit under those little regency dresses, not to mention the neckline would have been wrong. But somehow I decided to go ahead and make up little white dresses anyway.
I cut the size three dress, which is different from the size two only in having an inch or so more length. They’re a bit long but our sundress season is coming rapidly to a close and I wanted to be sure they’d still fit next year.
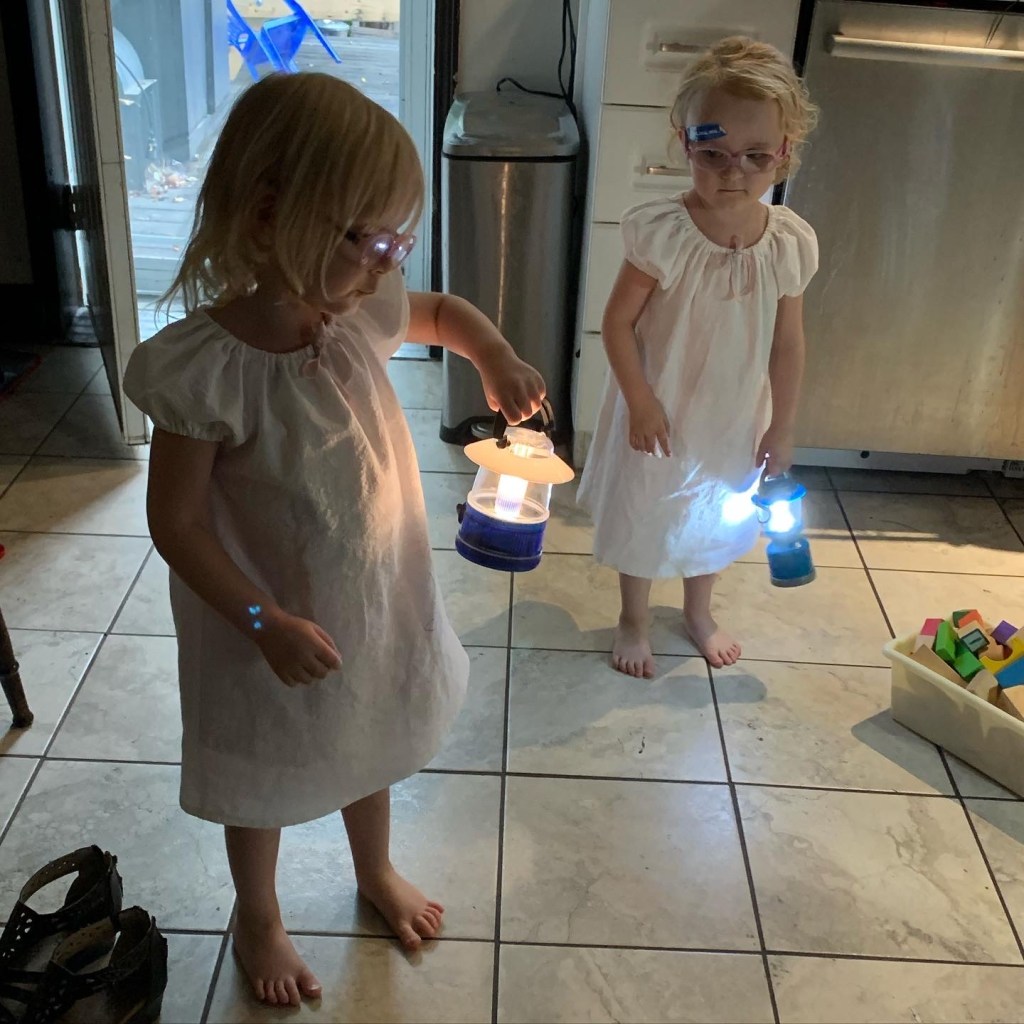
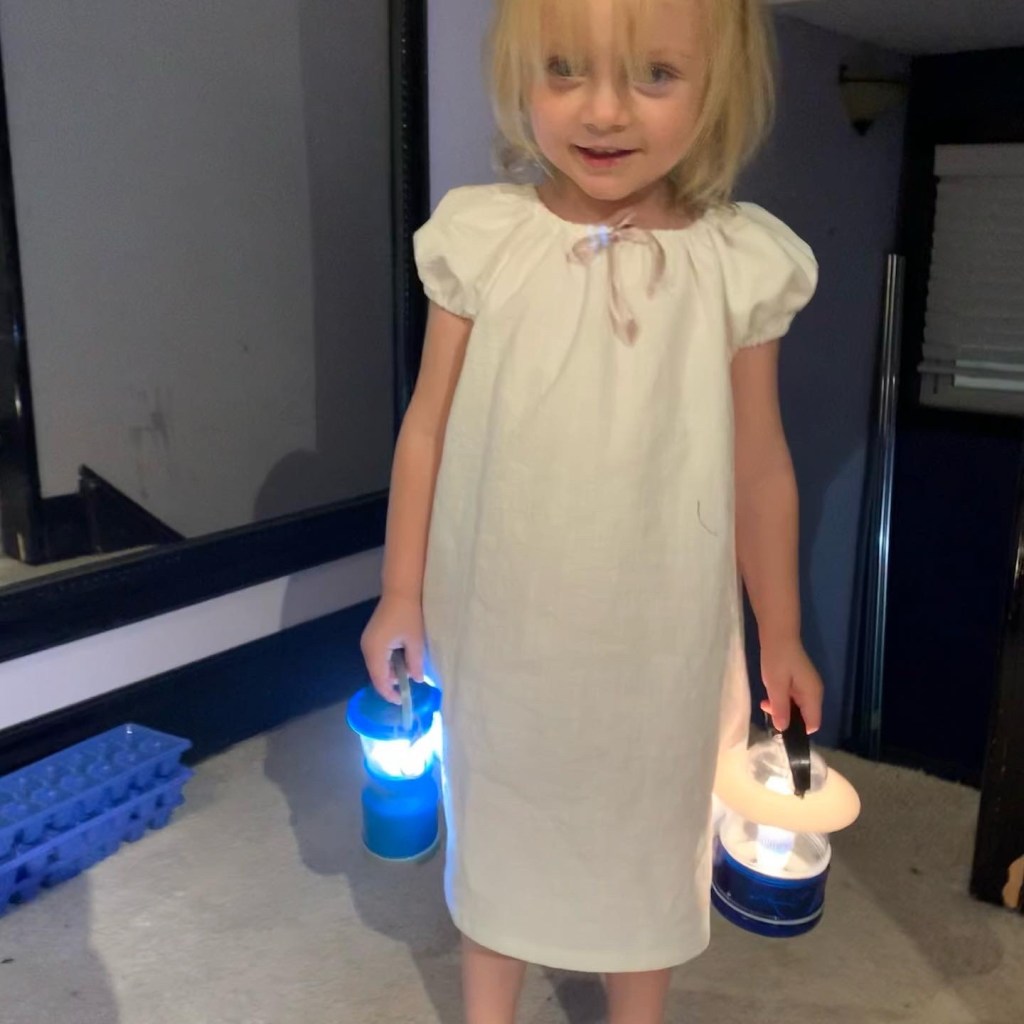
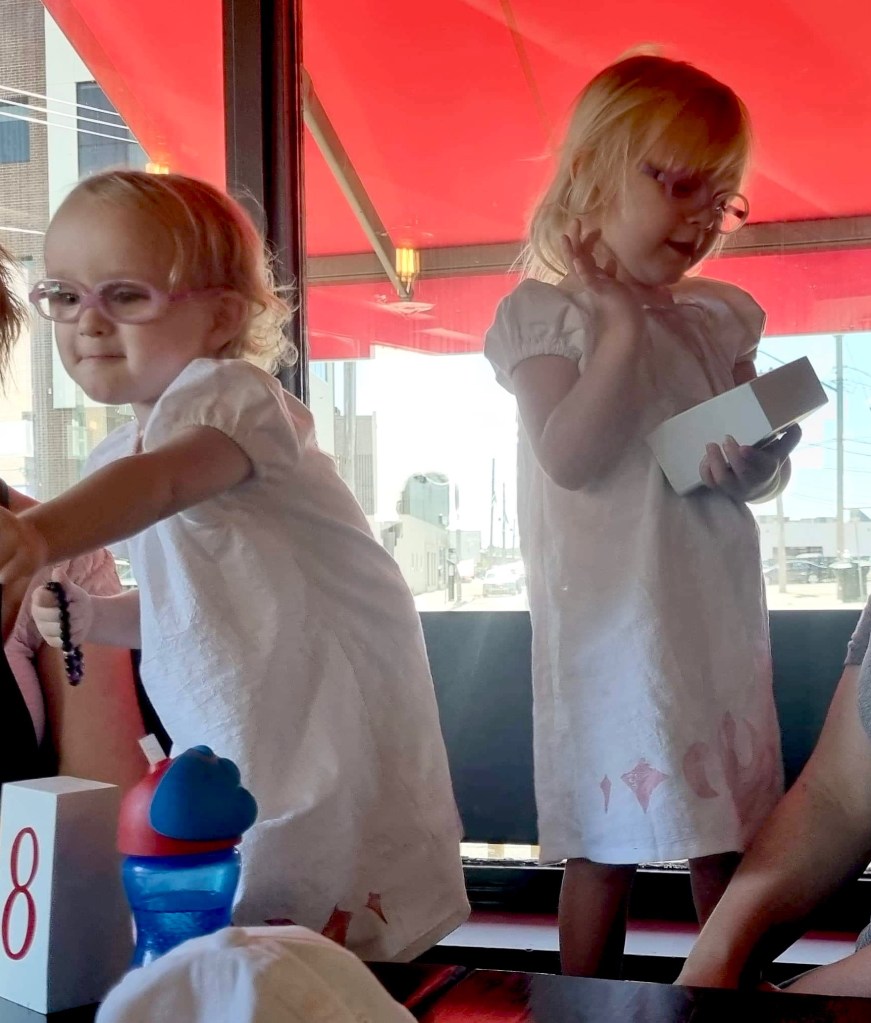
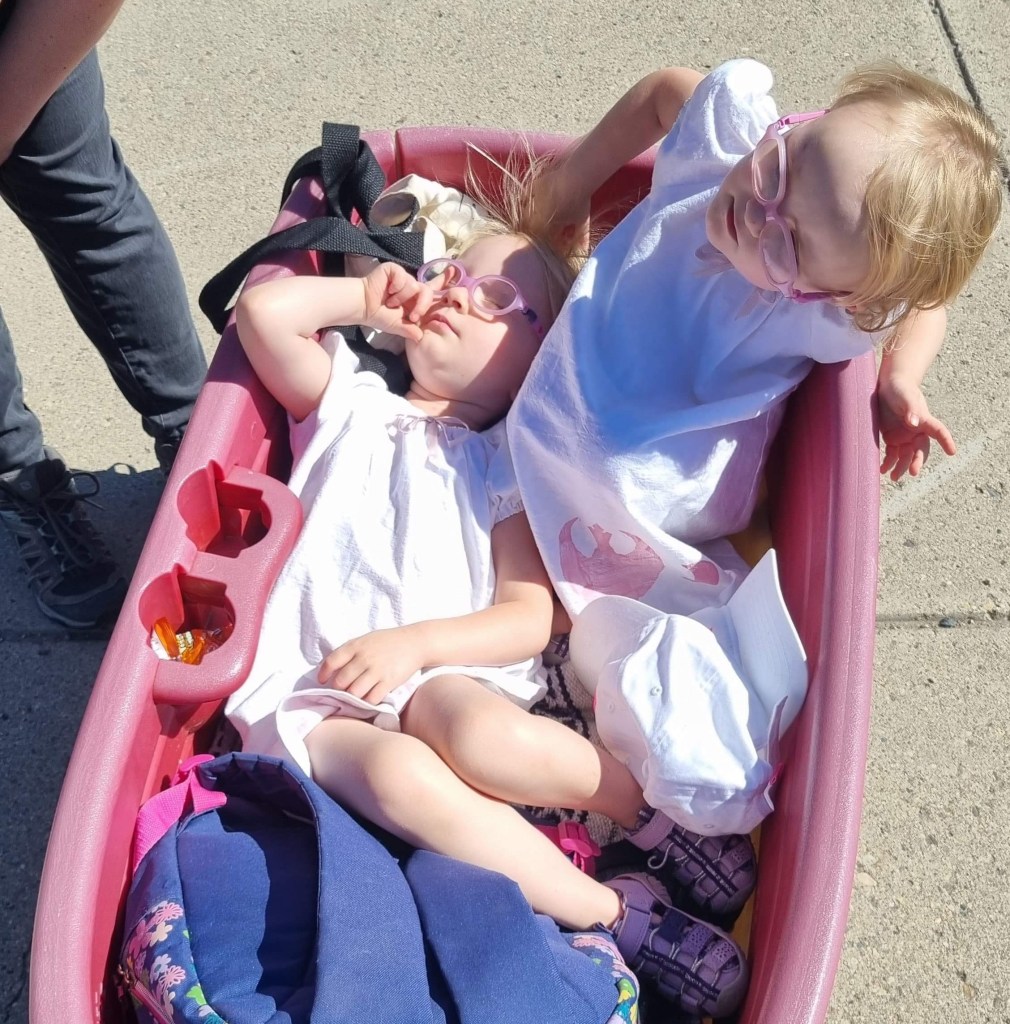
The twins had a lot of fun wandering the house with their lanterns looking like little lost ghost girls.
There’s really nothing to these dresses, except for the time it takes to thread the elastic through the casings at neck and sleeve. I added some vintage ribbon to make little bows at the neck, but they were still quite plain and nightshirt-y.
Not creepy at all. Nope.
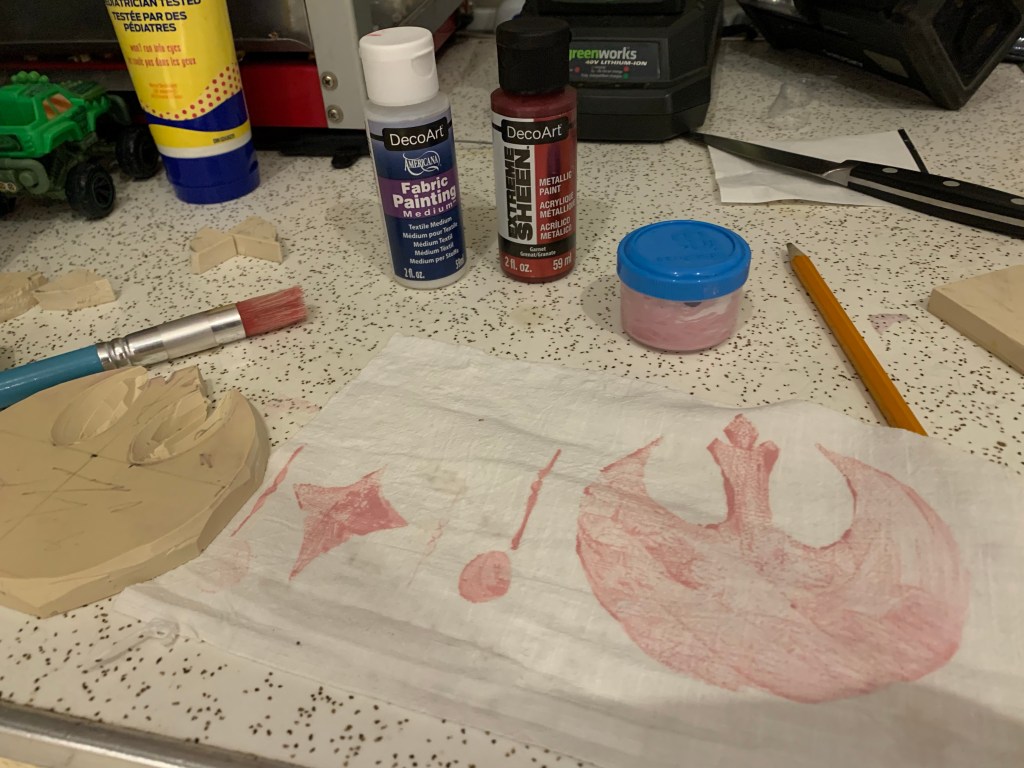
So to spruce them up, I pulled out some lino blocks and acrylic fabric paint and fabric medium (that you mix with the paint to turn regular acrylic paint into fabric paint) and played around until I got a result I liked.
And yes, the uneven, “home printed” look was intentional. And yes, I did geek out a bit and put my Rebel Alliance block front and centre.
So now my just-turned three year olds have, not only more white dresses, but white Star Wars dresses.
So yeah, now I want to block print everything. We’ll see. (And as usual I wish I had better pictures of the dresses being worn, but getting two three-year-olds to pose for anything but the goofiest pictures is pretty near impossible so, it is what it is.)
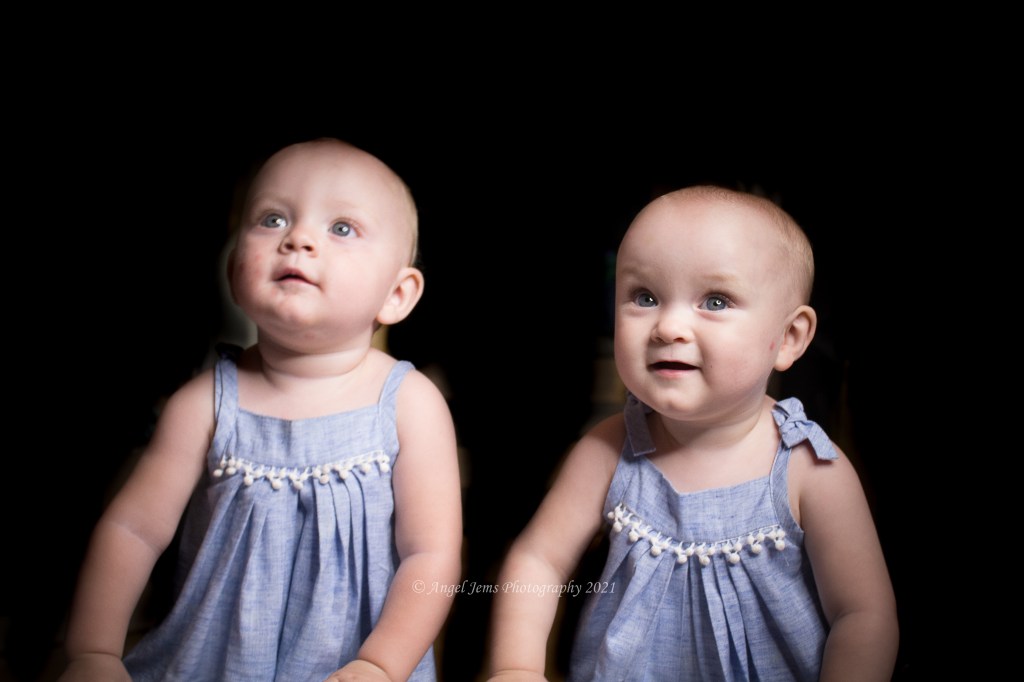
I’ve slowed down on sewing for the twins, if only because they really never need clothes and my sewing has been intermittent this year at best. But when I finished the 80s dress, I still had a bunch of the fabric left over. And I have been missing a pair of dresses I made for them their first summer, a no-pattern, pillowcase style with pleats and a wee bit of lace in the front and bias tape finishing the armscye and turning into shoulder ties.
Original dresses, long outgrown
The original pair was pretty much my favourite thing I made the twins ever, but unlike some of the dresses I made them that summer, weren’t wide enough to transition into tops as they grew taller.
Shot of the twins in the original dresses, from their first birthday.
I actually have lots more of the original fabric in stash, so it would’ve been perfectly possible to recreate them in the original blue fabric, but using this style with the border embroidery fabric was just too tempting.
Determined not to run into the same issue, I made sure the armscye width and depth on these new dresses was ample. Maybe you’ve noticed they look a bit wide? No? Well, yeah, I overshot massively. Actually, the first one I cut might’ve been fine, but when I cut the second I had a brain fart and cut the armscye about 3 cm deeper, and then dumbly re-cut the first one to match… anyway, as soon as the twins tried them on I realized I had to take a massive tuck in each side to make the armscye work even a little bit. Which isn’t a bad look in a pleated dress, but definitely annoys me.
There isn’t a whole lot more to say. I made these dresses each 50” at the hem, and wider might’ve been nicer. I made them long so that they will still fit next summer. They took longer to sew than they should have due to “help” from the twins, but that still isn’t exactly long in the grand scheme of things.
I just love the combo of the pleats with this cotton pom-pom trim. My trim was white and the embroidery is distinctly ivory, so I did the fastest possible tea dye on the lace to get the colour at least a bit closer, and I think it worked.
I’m kind of in love with these dresses, I gotta say, more than I am with my own version of this fabric. And there’s just a little bit left and I have plans!
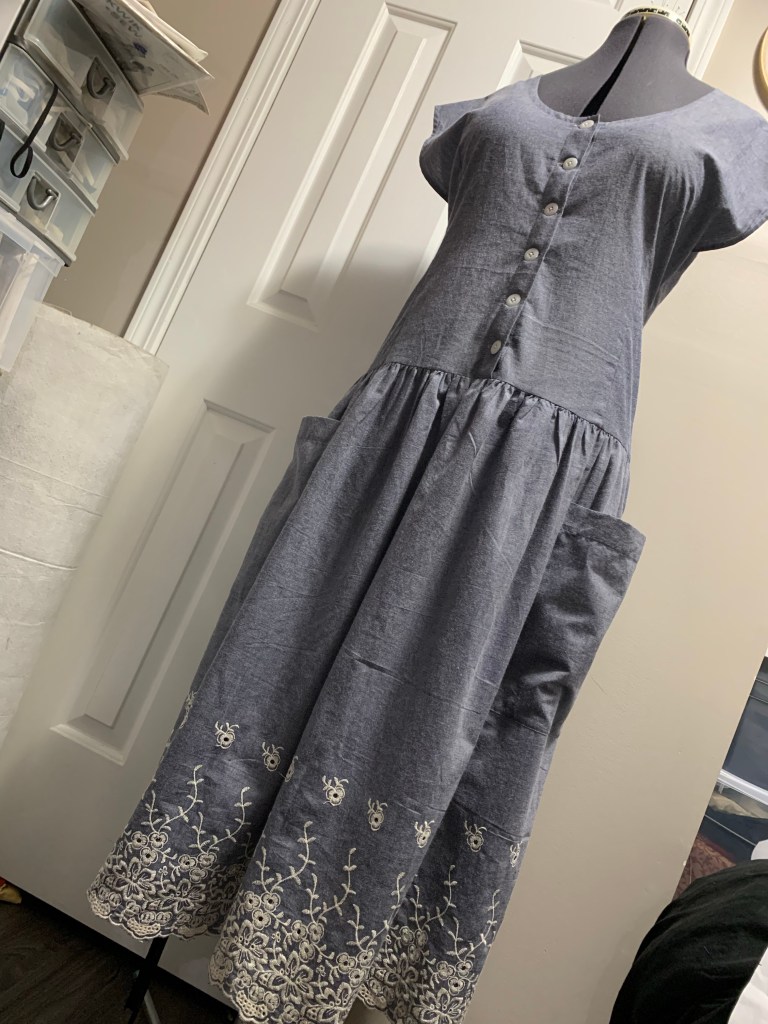
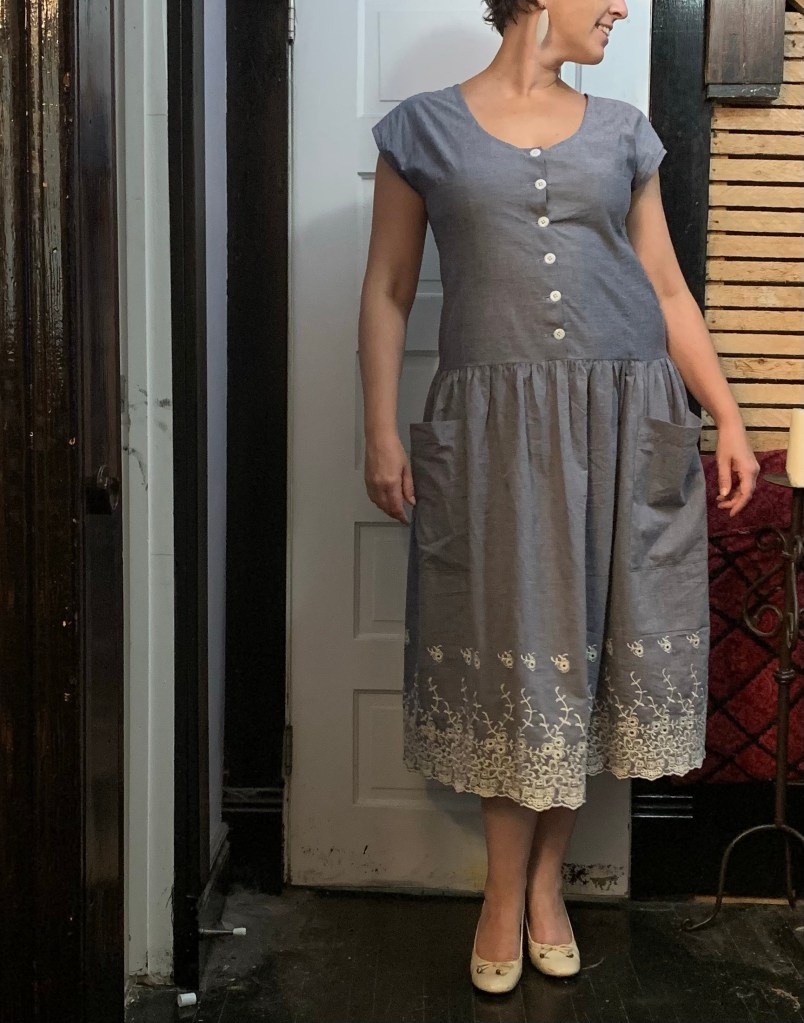
The 80s wasn’t my favourite fashion decade even when I was growing up in it. But every once in a while, an 80s pattern sneaks its way into my head, and that was definitely true of Butterick 3864.
The dropped waist of the pattern, Butterick 3864, has always appealed to me, and for once (at least in the illustration) the 80s seemed to have hit the perfect balance of body-skimming ease without looking like a sack. I was particularly fond of the cut-on sleeves of view A, and it’s been kicking around my “maybe make this soon” piles for literally years now.
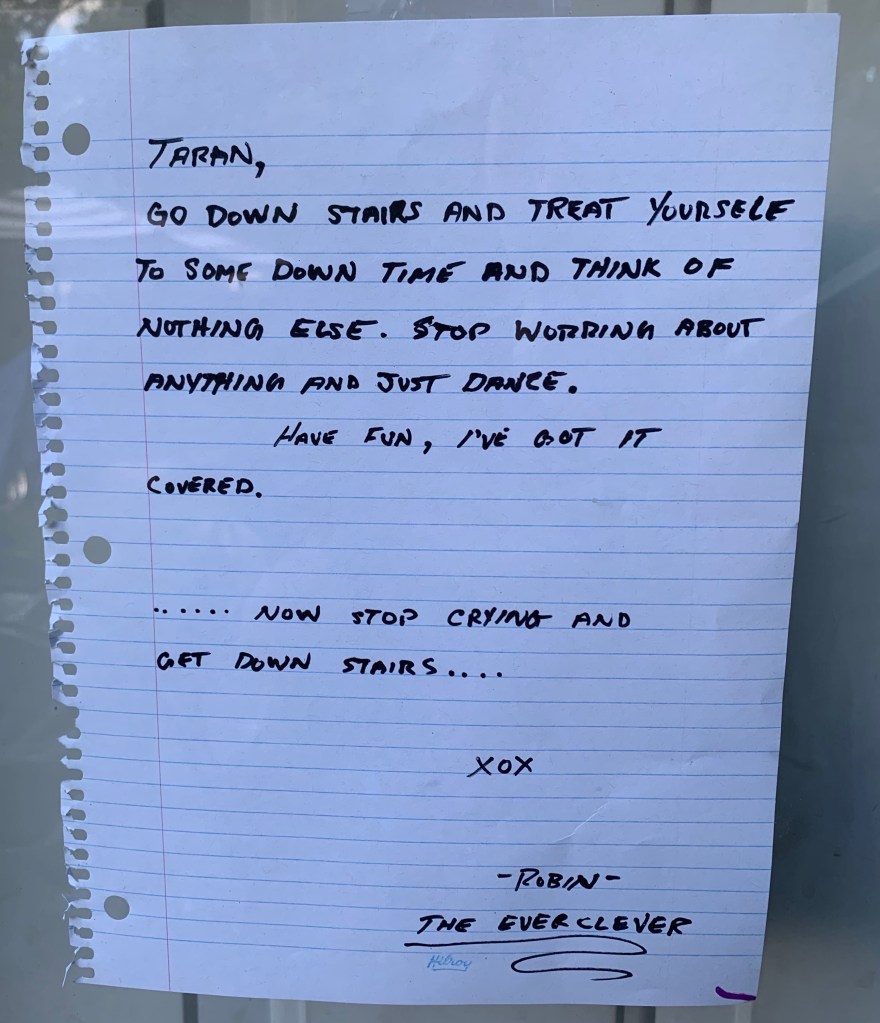
Well, I haven’t had much time to sew (or do any of the things that feed my soul) lately, which does result in a crabby and emotionally unstable Tanit, but last week I came home from work to the following sign on the door:
The house was empty and clean. The pattern was easily found, and this light-weight blue/grey border embroidered fabric was out and waiting. It was time to seize the day.
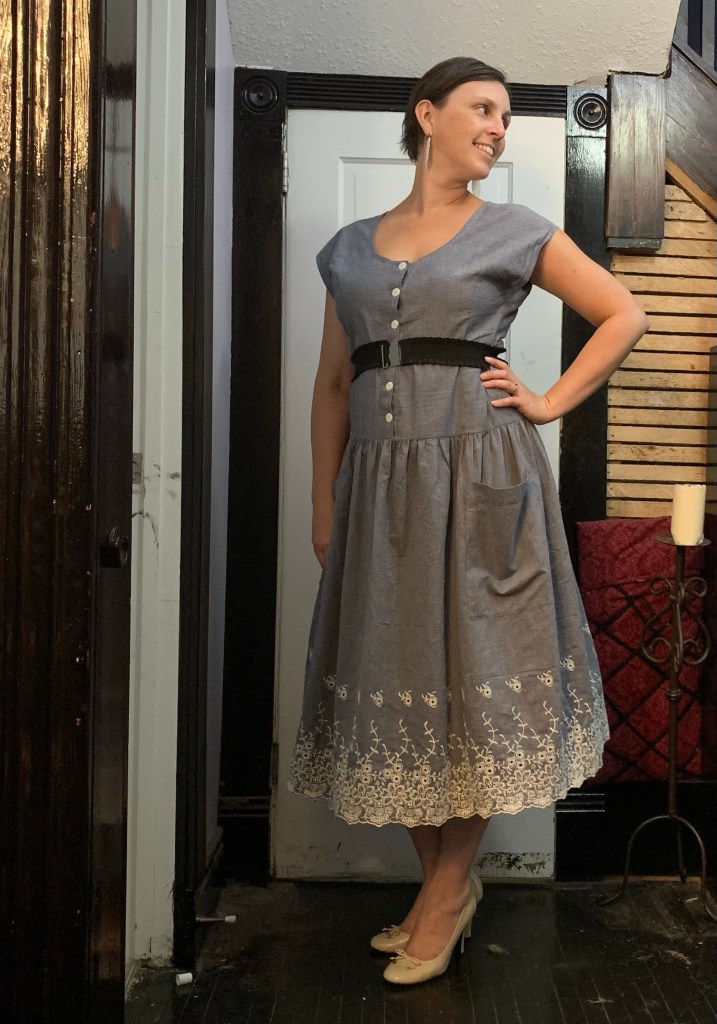
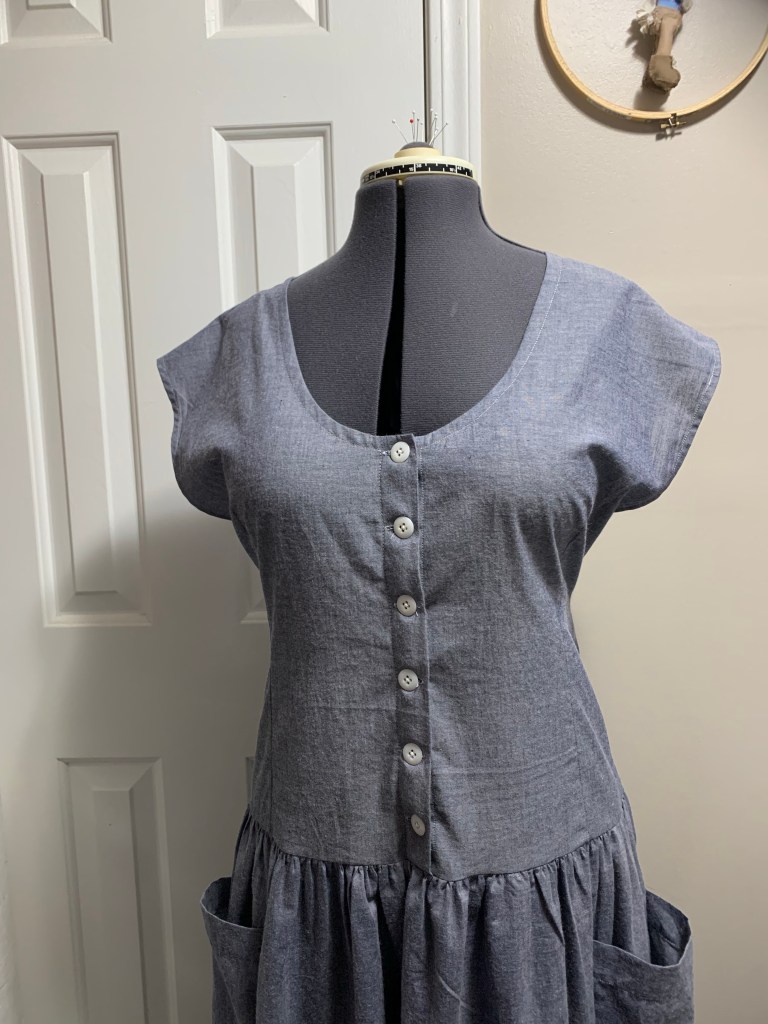
The pattern inside had been cut to the size 14, which seemed pretty much perfect, especially once I looked at the finished bust measurements given. The skirt pieces were rectangles, which absolutely cemented my choice of the border embroidery, although rather than use the actual pieces I just took the measurements and cut/tore a rectangle of appropriate size from the embroidered portion of the fabric. The only pattern piece missing was the pockets. By adding a back seam (which I wanted to anyway to facilitate a swayback adjustment) I was able to fit the bodice pieces onto the strip left from tearing the skirt, and then I cut rectangles for the pockets and bias strips for the neckline finish from the bit remaining. Not quite a zero-waste pattern, but pretty darn close.
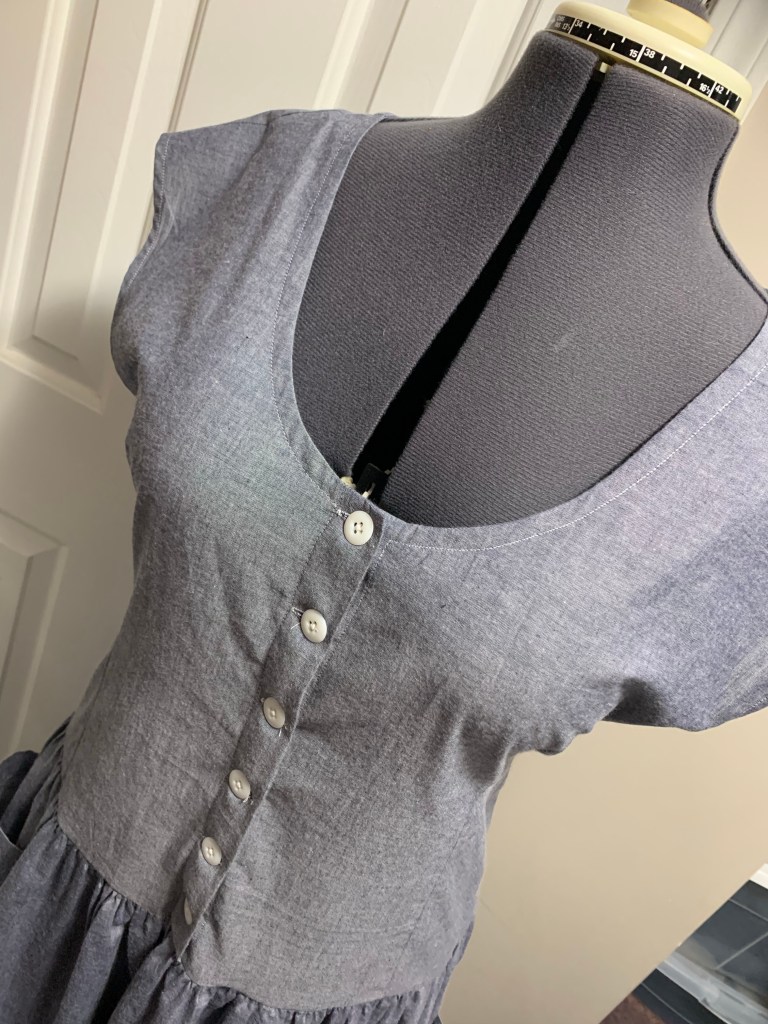
The instructions are printed on a single not-very-large sheet, and while this isn’t a complicated dress, I’d say they are an example of everything that made people frustrated with sewing patterns. No mention of interfacing for the button band, or stay-stitching the neckline. Not a whisper about seam finishing. Purchased bias tape was called for for the neckline. (Obviously I made my own. This fabric is the perfect lightweight, crisp weight and hand for bias tape.)
Also, given the half-inch bias tape called for, I’m not sure how you are supposed to get a neckline topstitched at the same distance from the edge as the sleeve hems, as the pattern images show… I guess technically someone might turn 1/8” of an inch under to topstitch a 1/2” hem from a 5/8” seam allowance, but I can’t. I don’t mind the different widths, but the drawings definitely suggest more similarity.
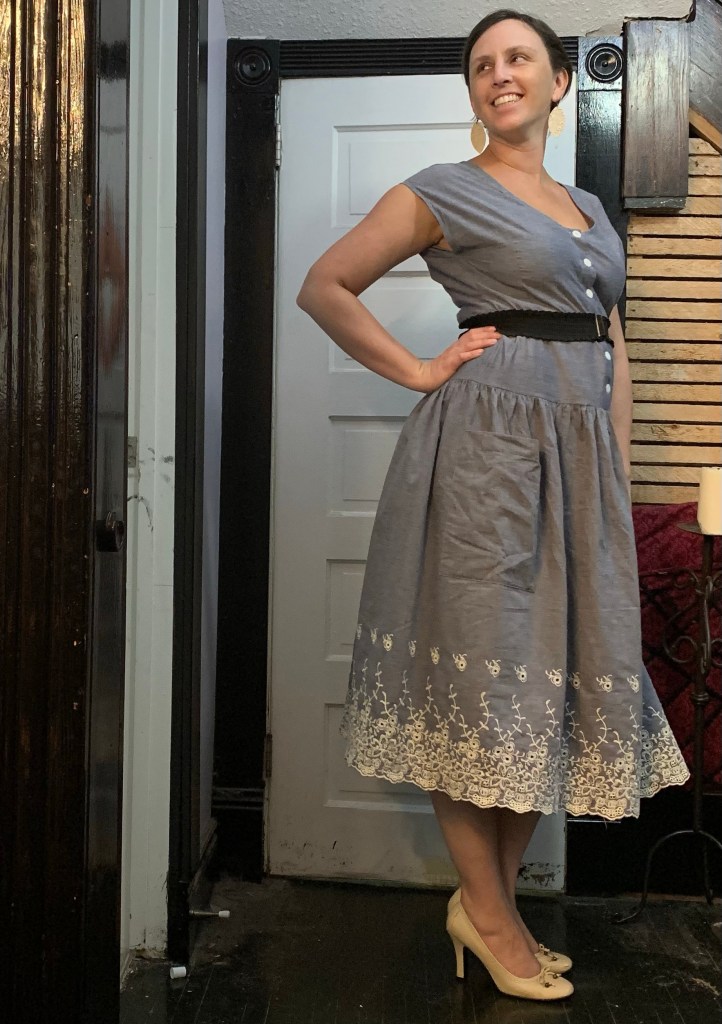
I looked at the skirt pattern pieces for pocket placement marks in the hopes of finding out the size of the intended pockets, but was unable to make sense of the few cryptic markings. (I could probably have tried harder, admittedly.) Looking at the picture now, I think my size and placement is reasonable but probably slightly further forward than intended. The pockets in the picture seem to overlap the side seam by an inch or two; I aligned mine so the back edge is right where the side seam would’ve been. The tops are a bit floppy, as happens with rectangular pockets on gathered skirts, but they function just fine.
Fortunately for my rusty sewing brain, the placket and neckline finishing method used was the exact same as for the Robin dress I just finished, so I really didn’t need much from the instructions. I did opt to stay stitch the neckline.
Upon try-on, it became clear that while the bust ease may have been ample, the ease at the high hip, which was not indicated on the pattern, was not. (I did not help myself when, cutting the back pattern piece not on the fold, I forgot to add the seam allowance. I sewed with the smallest seam allowance I could, but still. I could’ve had an extra half inch of ease.)
(Dress without crinoline)
I let out the side seams below the waist as much as I could, and re-sewed the back darts to take out nothing at the seam line, (as indicated on the pattern they would each eat up about 1/2” at this point.) On trying on the final dress, I then went back in and took in from waist to underbust.
I would’ve liked a touch of narrow lace or something at the neckline to echo the fancy-ness of the embroidered hem. But, all the cotton lace I have is bright white, not the distinct ivory of the embroidery.
On wearing, the bust darts are set quite far out, which is odd. I almost wondered if it were a grading error, but the darts in the pattern pic are very far out, too, so I suppose it’s a design choice. They’re also a little tall on me, but, well, the ladies aren’t as perky as they were before the twins came along so we won’t blame the pattern for that. I did do my usual square-shoulder adjustment, just by taking off about 1 cm along the neckline tapering to nothing at the outer edge.
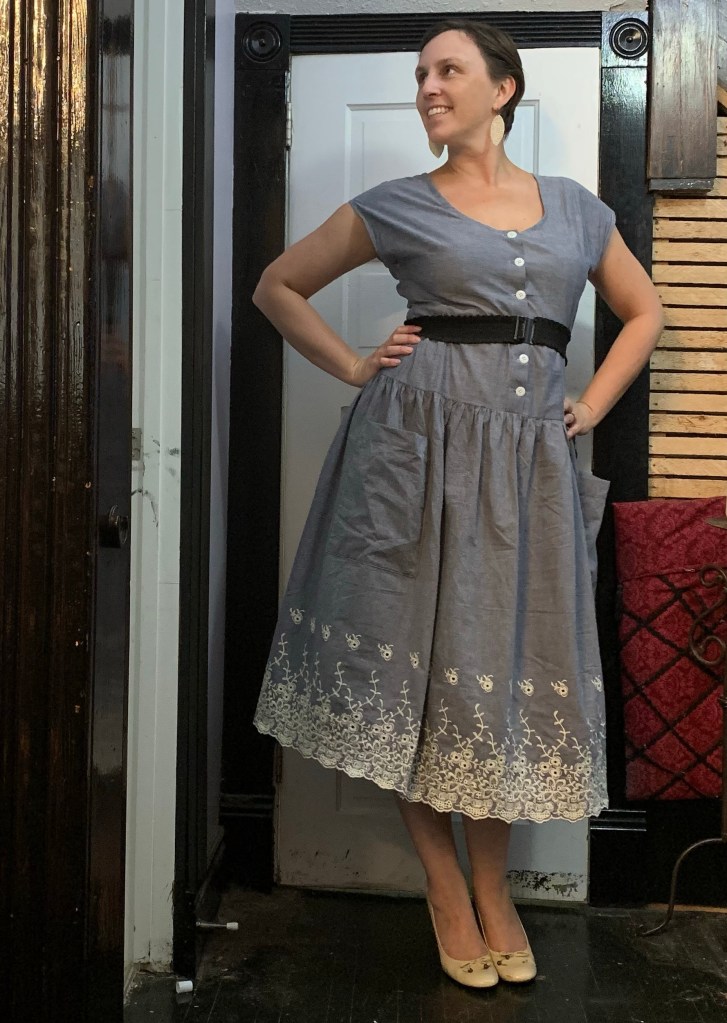
I’m a little more “meh” about the finished dress than I hoped I would be, honestly. I kind of wish the skirt were a little more full. It feels fairly rectangular, whereas I was hoping for more dramatic swoosh given the length of the skirt. Maybe I’d like it better with a slightly shorter skirt? Maybe the dropped waist is a little too dropped for my taste? In most of these pictures I’m wearing it over one of my smaller petticoats, to give the skirt a bit of oomph, and I do like that. I also like how it looks with a belt, although I don’t own any that would be properly 80s-narrow.
I find the silhouette rather fascinating, though. The pattern pieces remind me very much of a 50s house-dress. The final silhouette almost feels early 1920s (well, without the belt). And, at the least, it’s a wearable addition to my work wardrobe, which has been feeling pretty stale.