 I’ll do proper pictures when I get a chance, but I wanted to throw this up before I forget everything. Like much of my recent sewing, this project draws on my desire to wear historical clothing, except not actually be in costume.
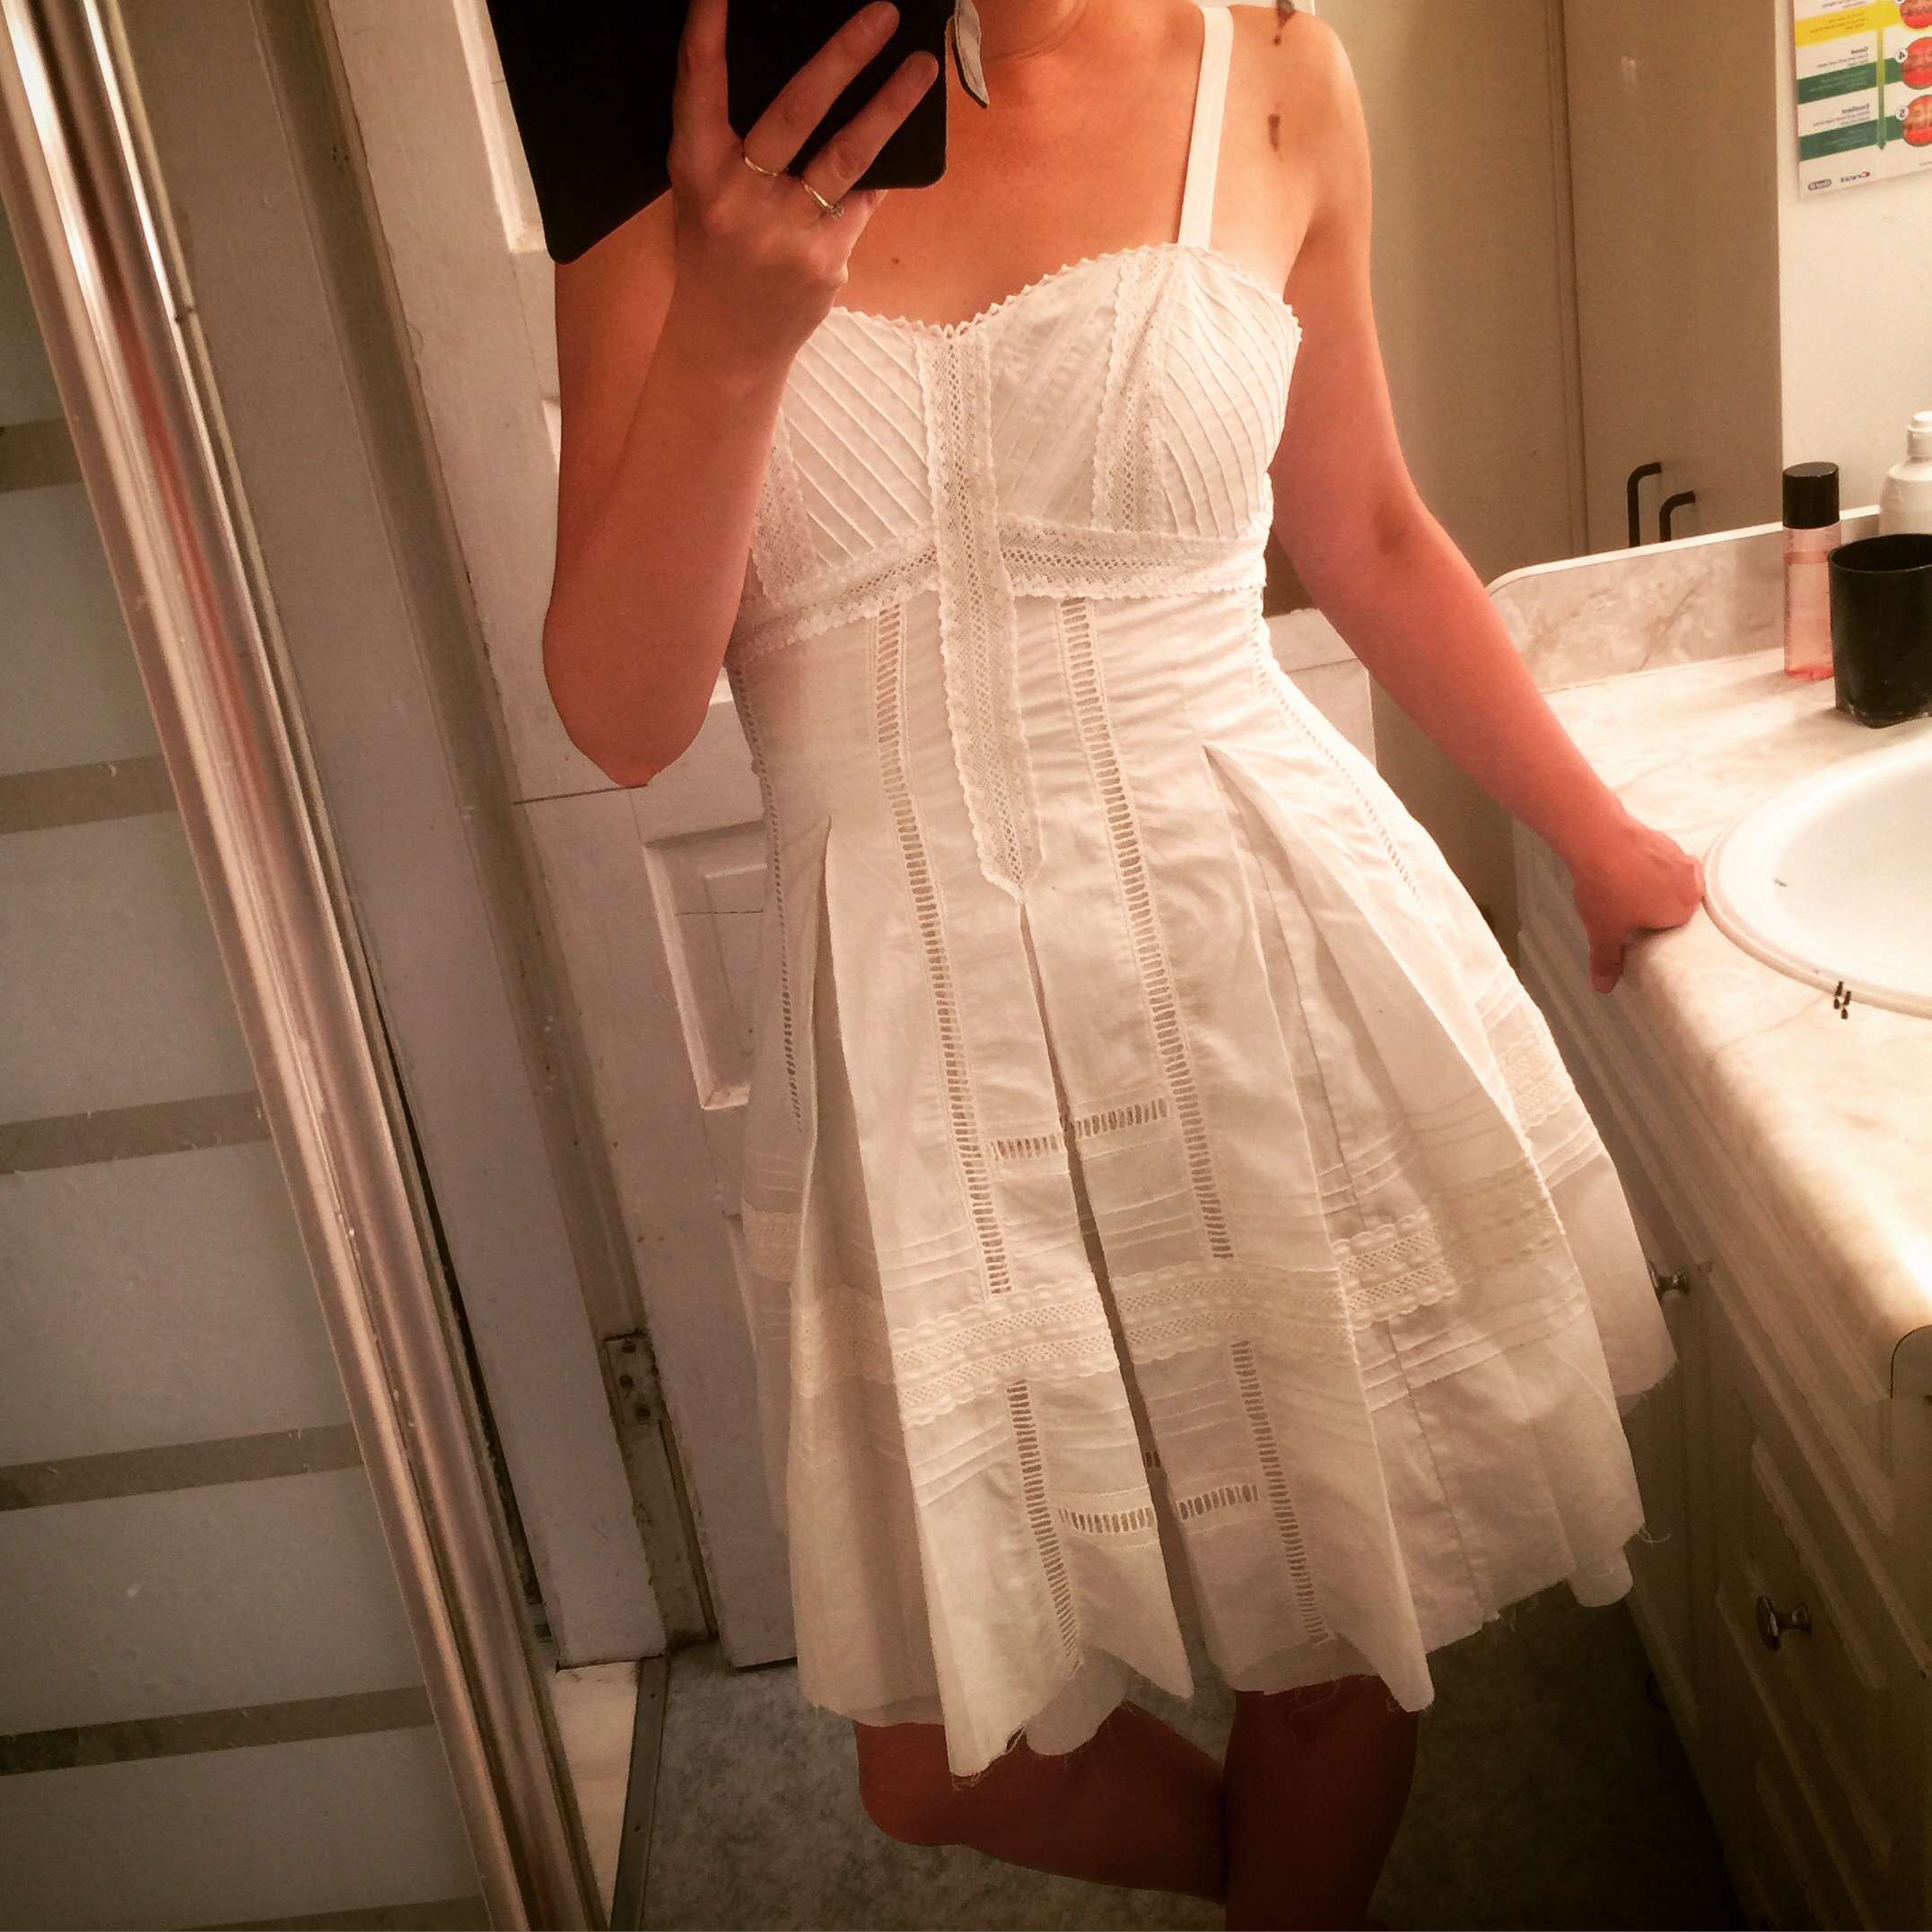
I first fell for McCall’s 6956 back in the spring. The Plucky New Girl at work had taken it out as a project, and, well, kinda bit off a bit more than she could chew, what with never having sewn from a pattern before. Since this was pretty much my entire approach to sewing from about 1989 up to, oh, 2010, I give her full credit. I just hope she wasn’t too traumatized. Anyway, me (and some other ladies) got to play angel and help her finish it off, and in the process I got to try it on and was, well, thoroughly charmed by it.
Also, I am so deep in sundress mode right now, I can’t even. ALL THE SUNDRESSES!!!
 Anyway, it’s that awkward seasonal changeover at Fabricland where the old fabric is on the way out but the new stuff hasn’t much arrived so project pickings are slim, and it’s best to focus on the small core of non-seasonal fabrics that are always in stock.
And did I mention sundress mode? Also, I was still craving DETAIL after the fun of the Gabriola skirt and its bodice.
So I doodled up a picture something like this:
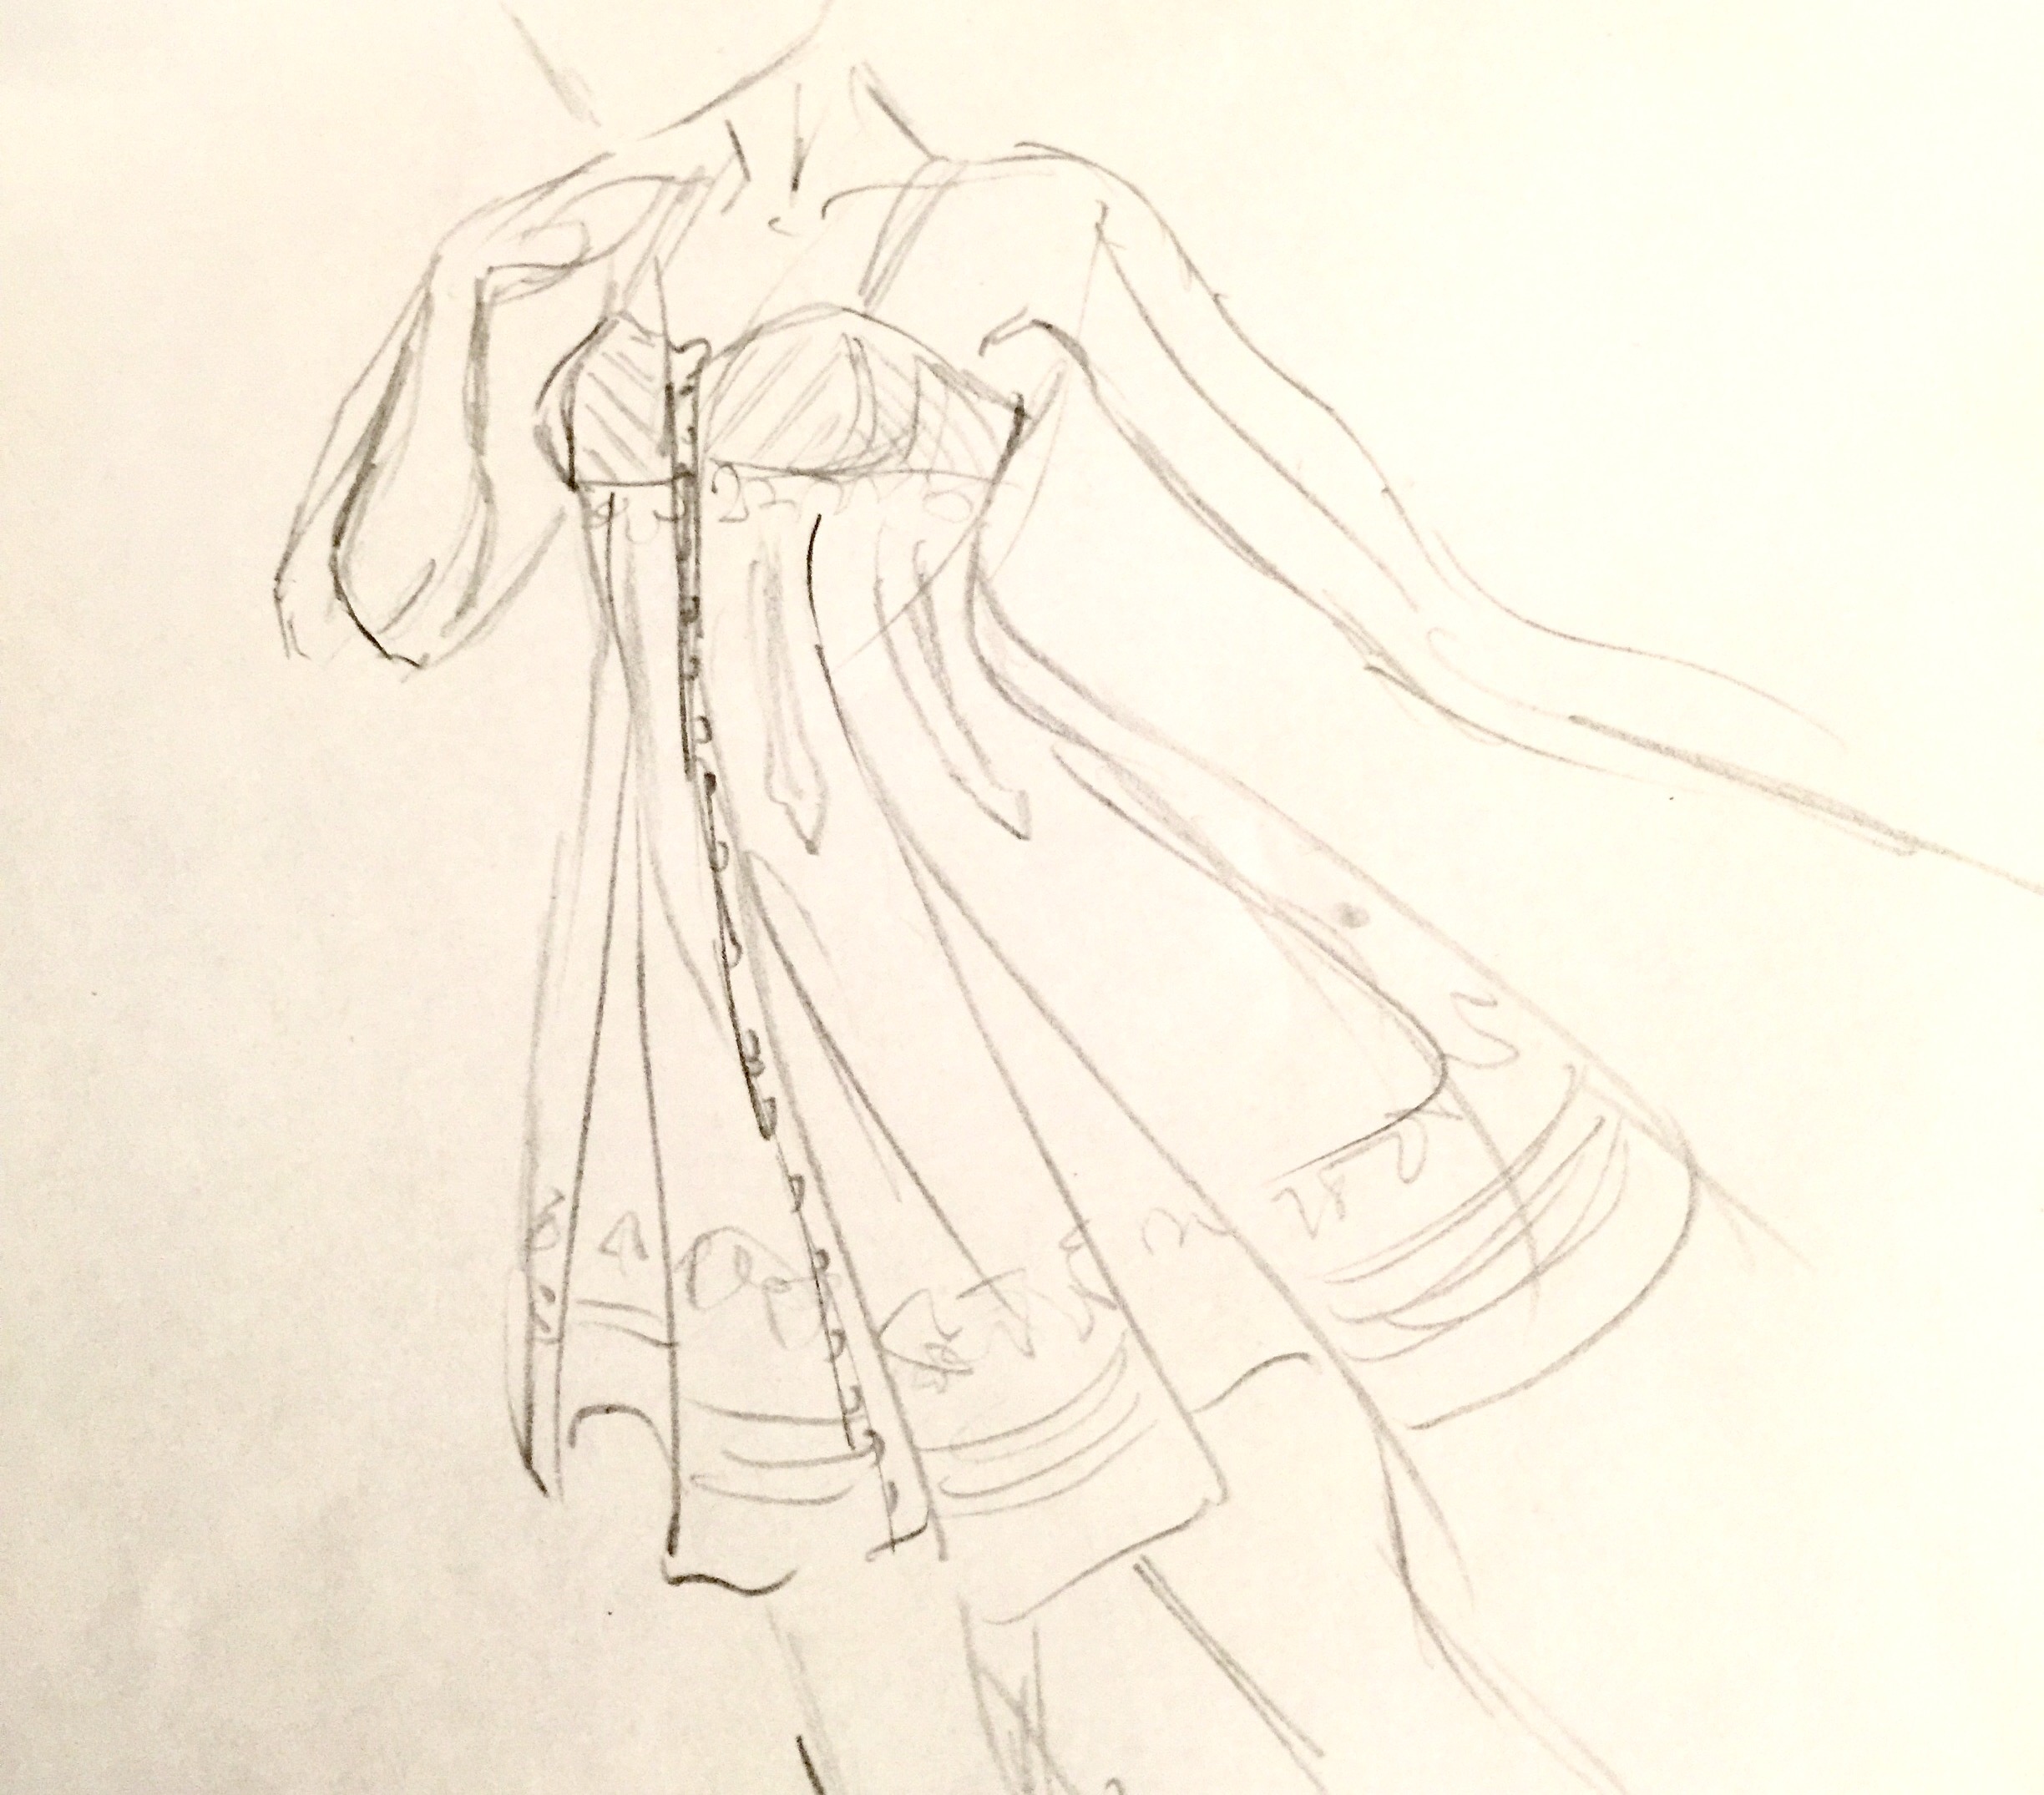
To be made out of our always-in-stock cotton batiste. And then I went looking for a pattern that sorta fit, and ended up with McCall’s 6956.
 And then I went half-ass-heirloom insane.
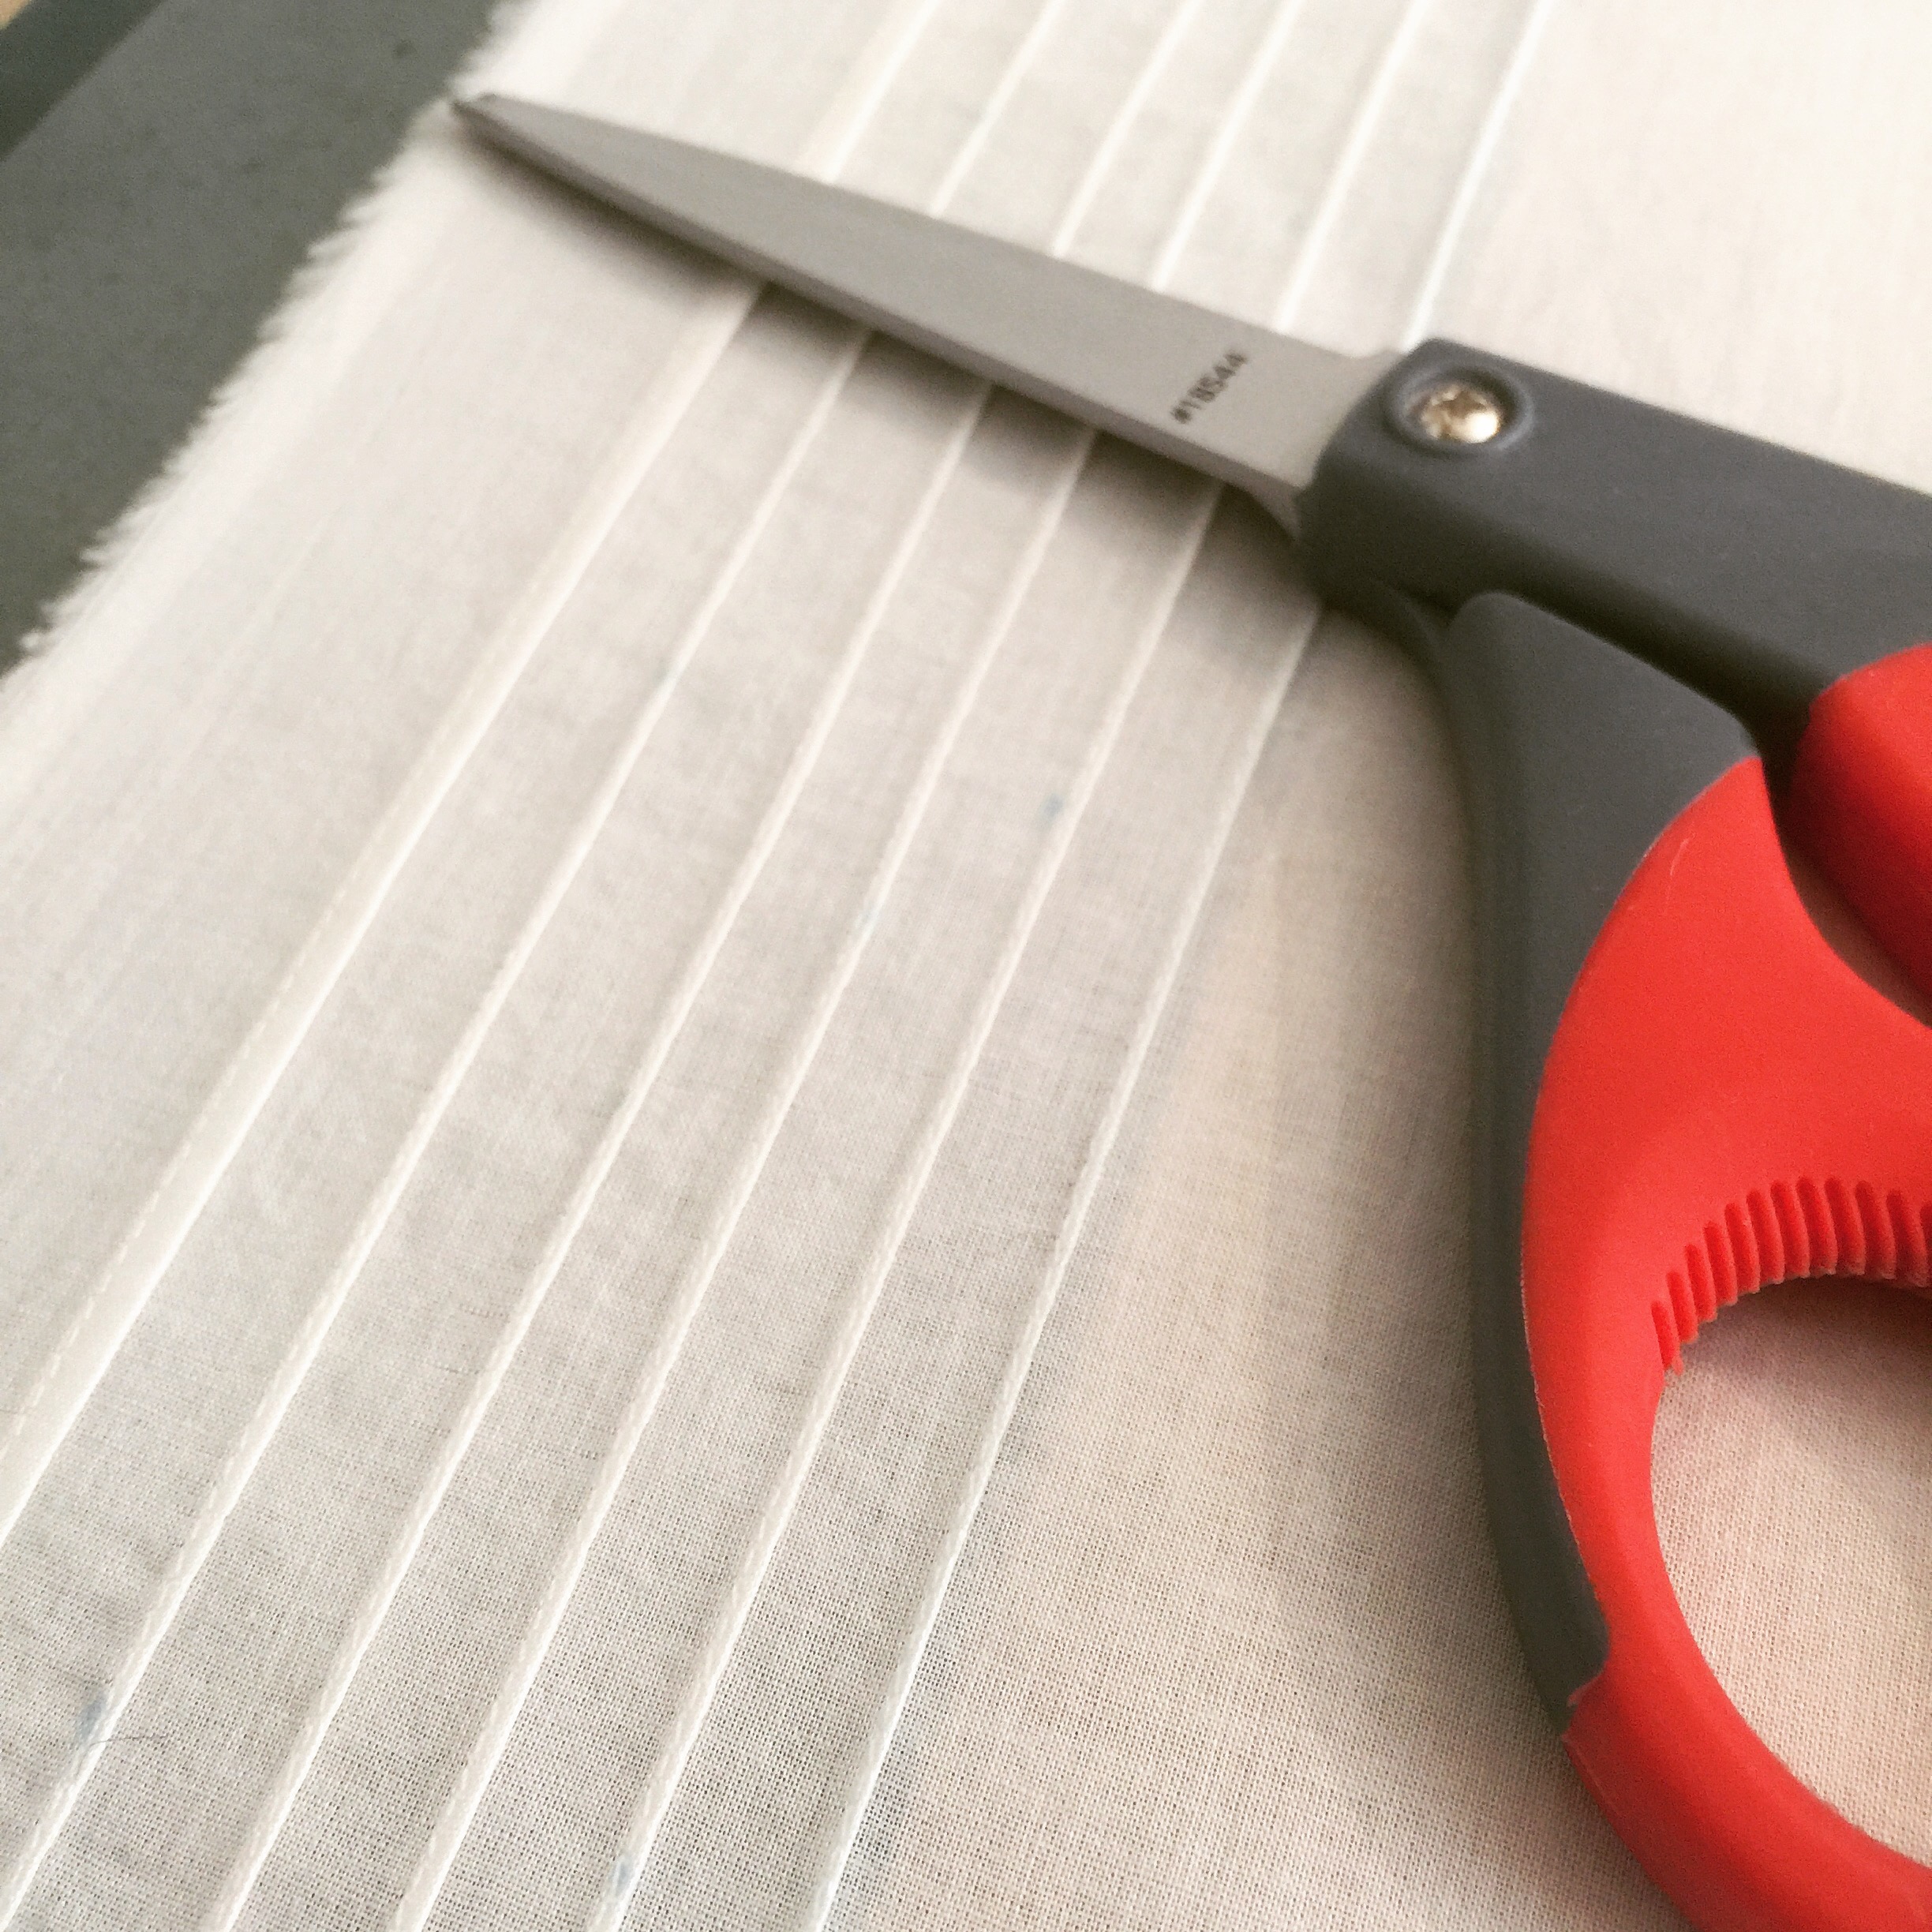
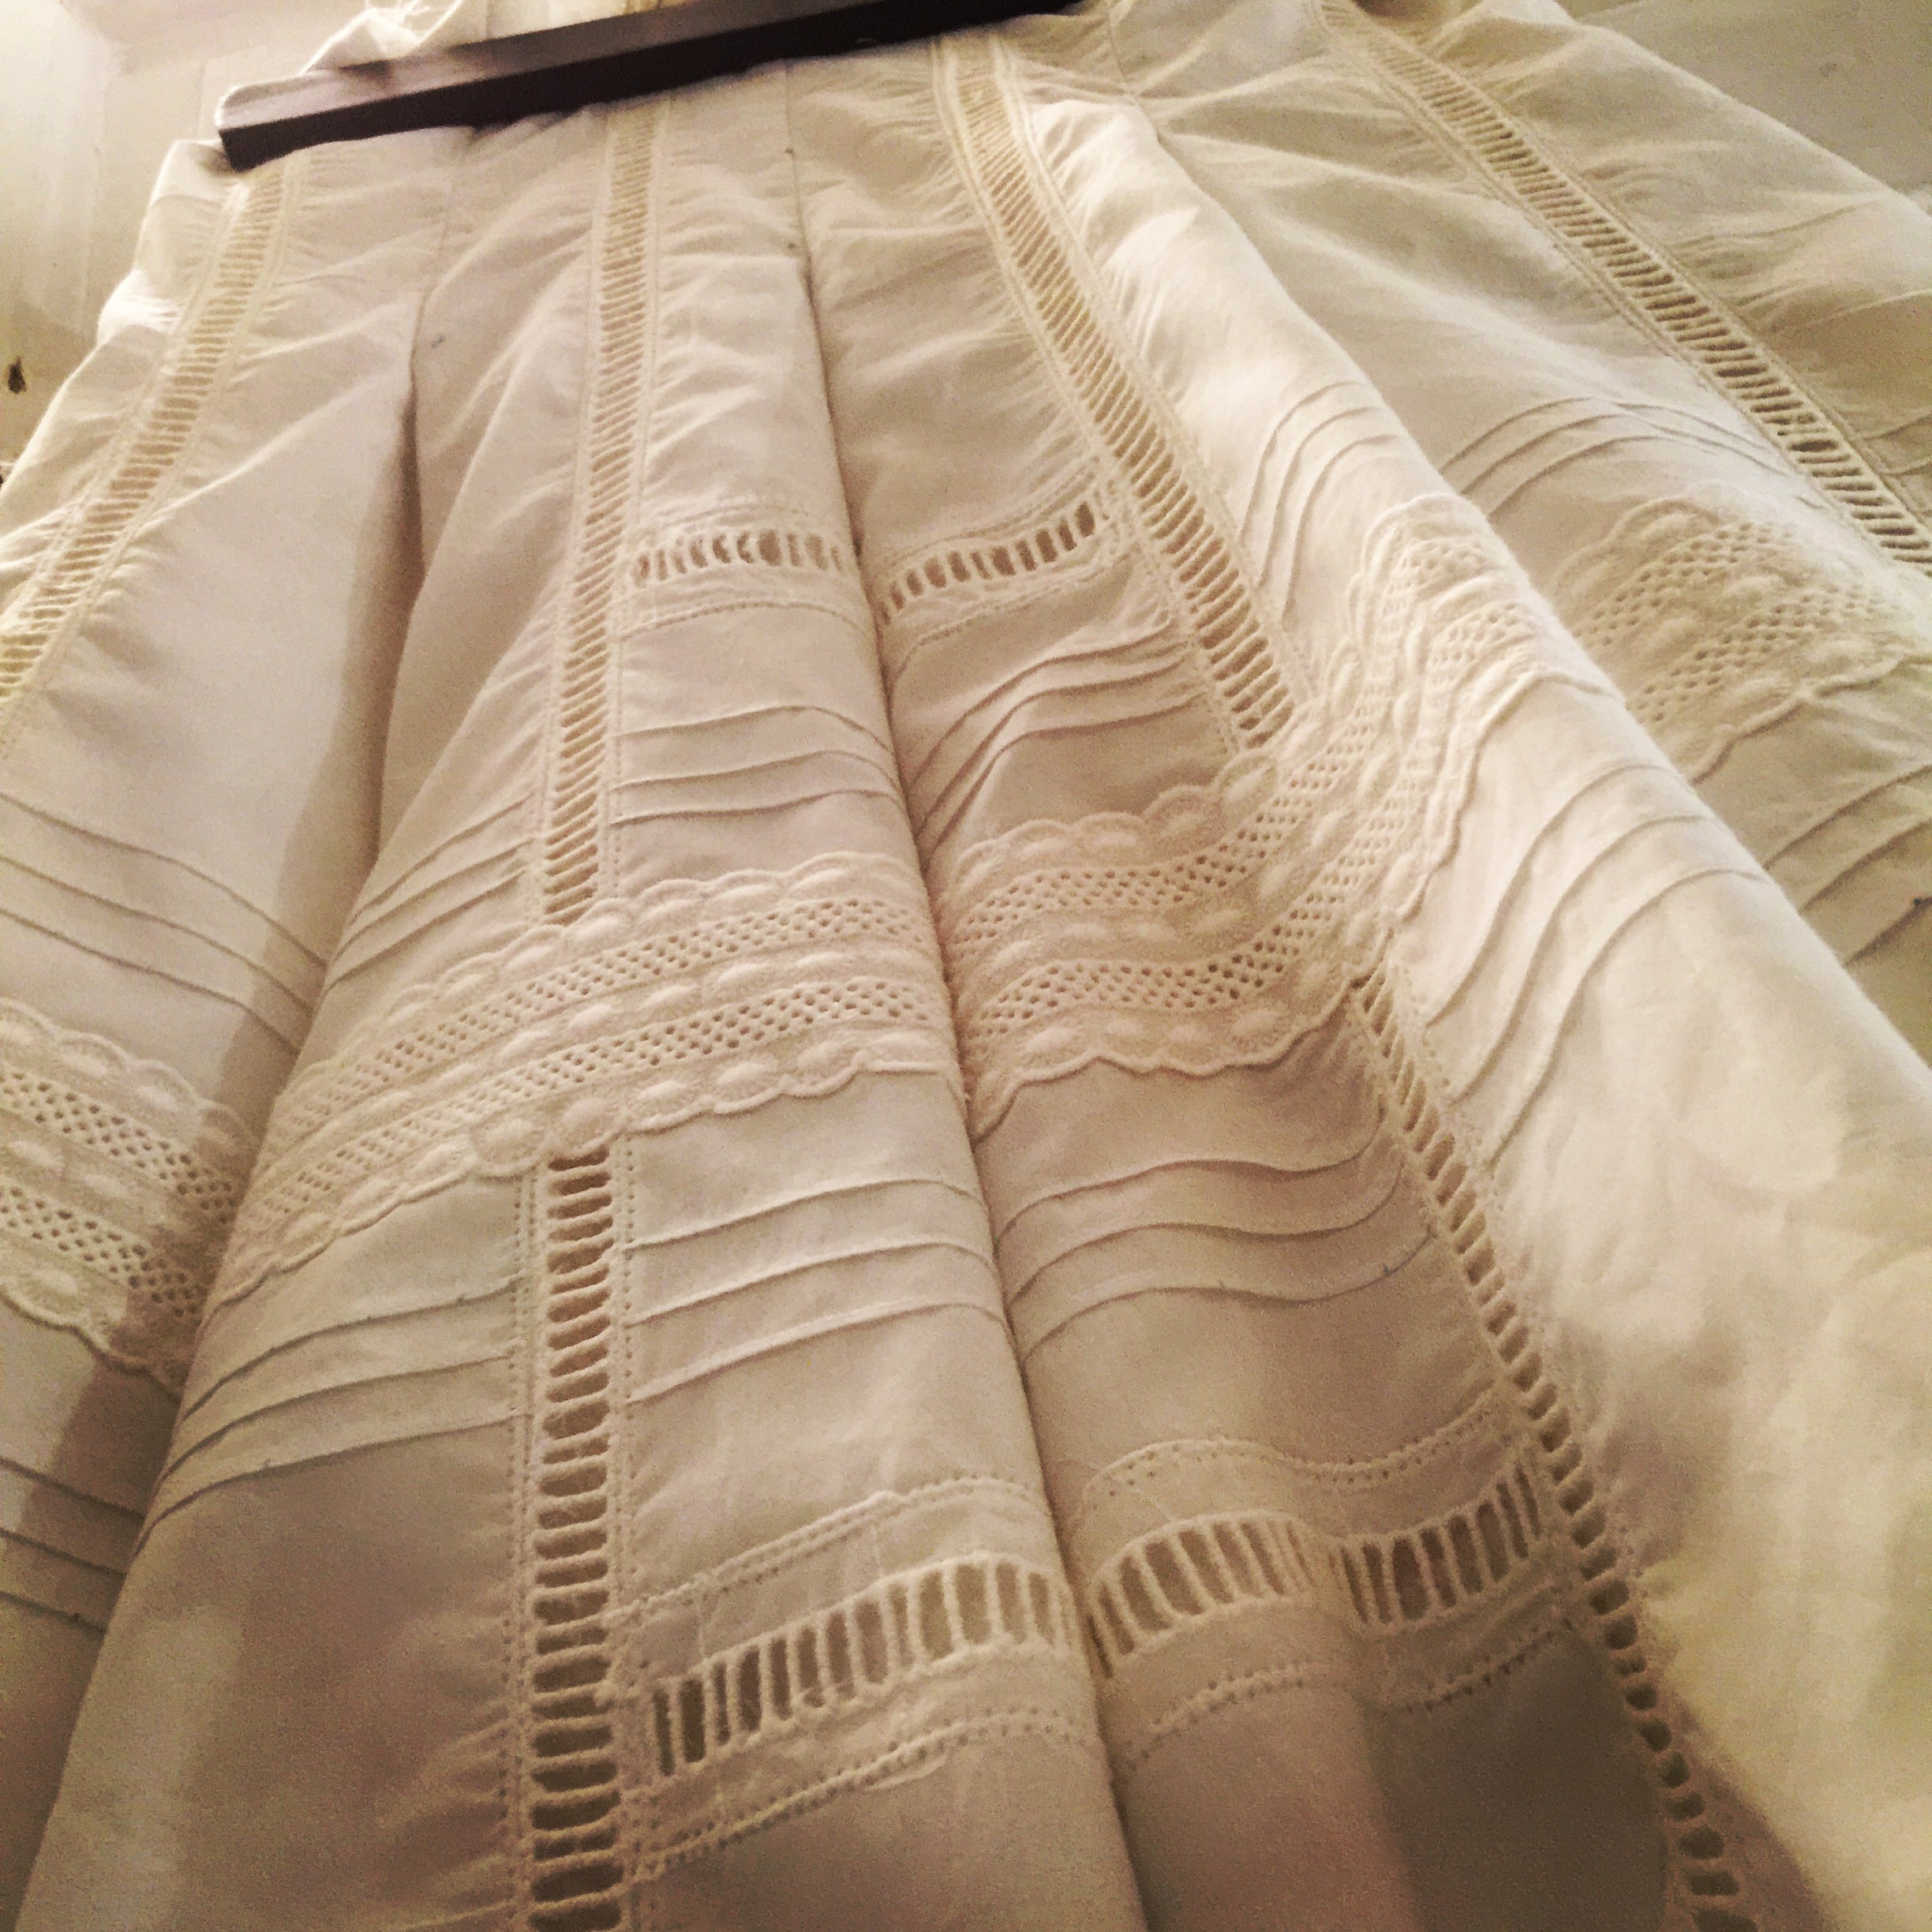
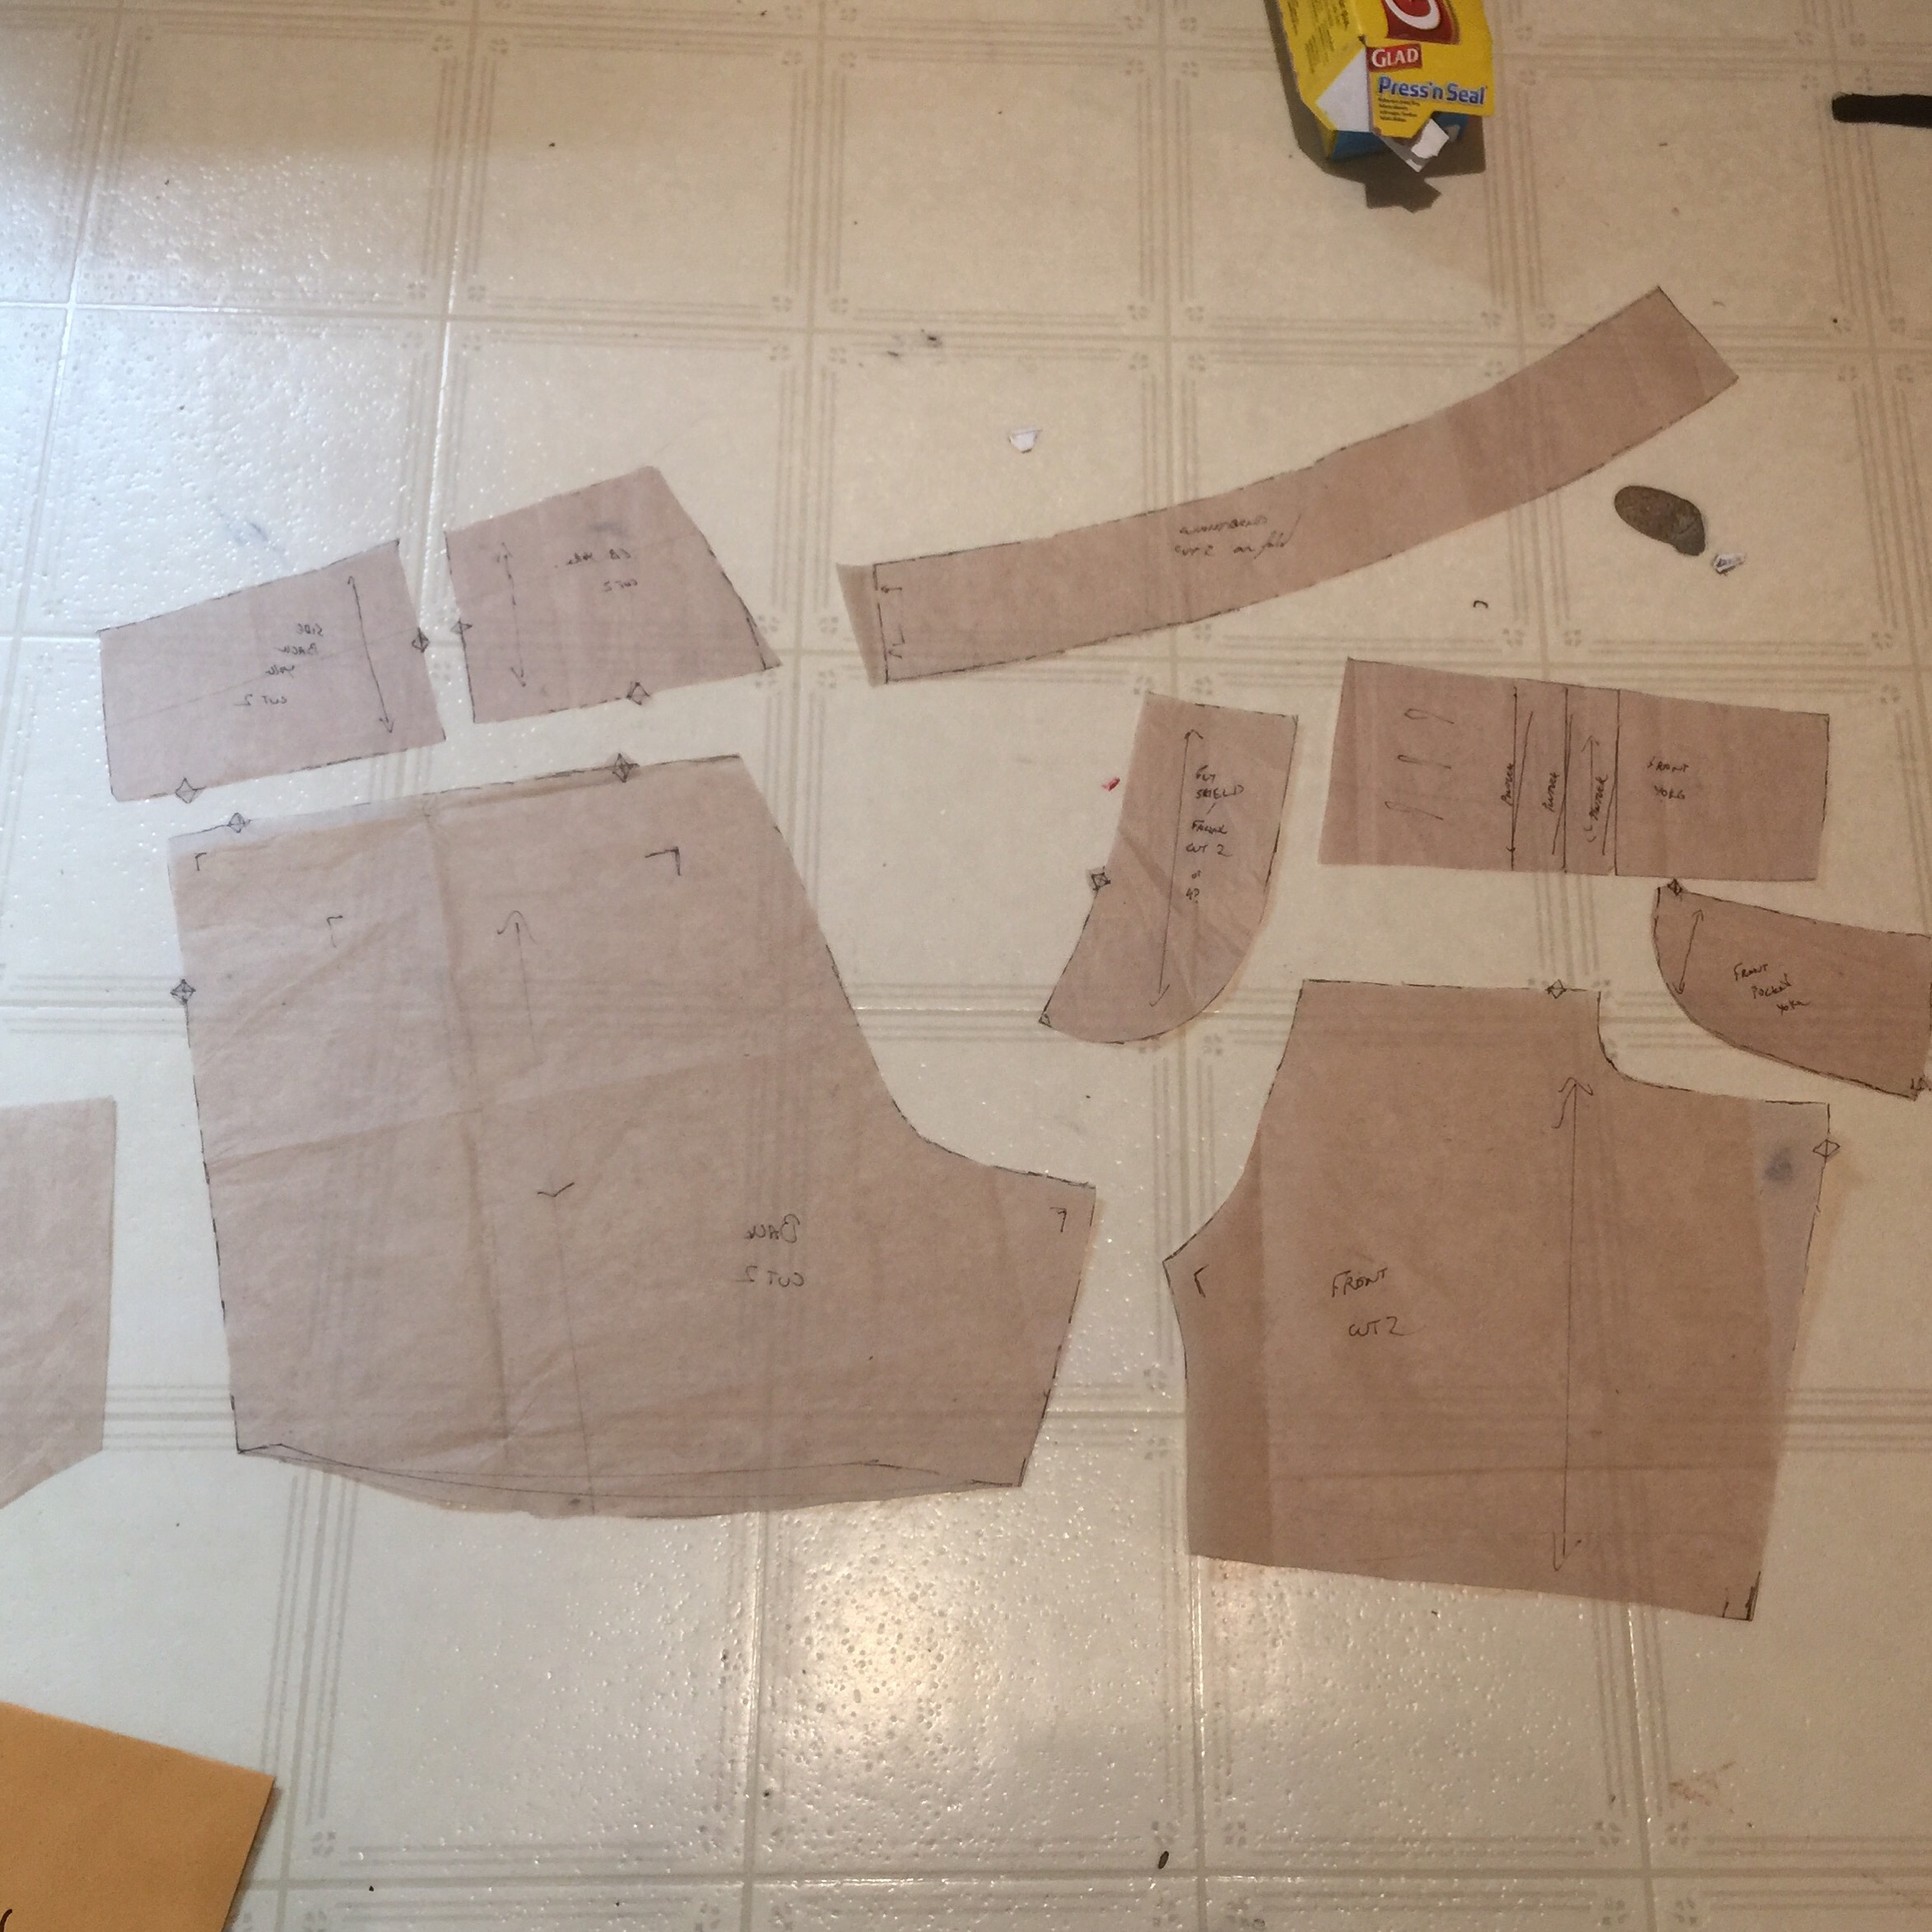
OK, so I am not totally clear on the exact definition of “heirloom sewing”. I’ve read a few old Threads articles, and a lot of Victorian sewing manuals that describe the techniques, but not under that name. Anyway, what I’m basically saying is I experimented liberally with pin tucks, lace insertion, and faux-hem-stitch using a wing needle.
 The pin tucks took the longest, partly because pin tucks take FOREVER and partly because I had a friend over so my sewing setup was optimized for hanging out rather than for quick changing between machine and pressing. No regrets. I tested out the cheater-pin tucking with a twin needle, but while I have a pin tuck foot for my Janome, I didn’t have a real twin needle, and while I can put two needles in the Rocketeer at what would be a perfect distance for twin-needle pin tucking, the foot won’t fit that machine and when I tried with other feet everything just went wonky quite easily. So all the pin tucks were done the old fashioned way—measure, mark, and stitch. I switched the Rocketeer to straight-stitch plate and foot for this, which I think helped me get the teeny tucks I was going for. (Oh, and I also wasted quite a few hours on quarter-inch tucked panels, too, before deciding I wanted a more delicate look. Hopefully I can use those for something else later.)
I cut the pieces for the bodice out of pre-tucked fabric (pintucks taken at 1 cm intervals, by the way), but did the tucks on the skirt after cutting. There was a lot of laying things out on the floor to make sure the tuck-lines matched up. (Mostly they do.)
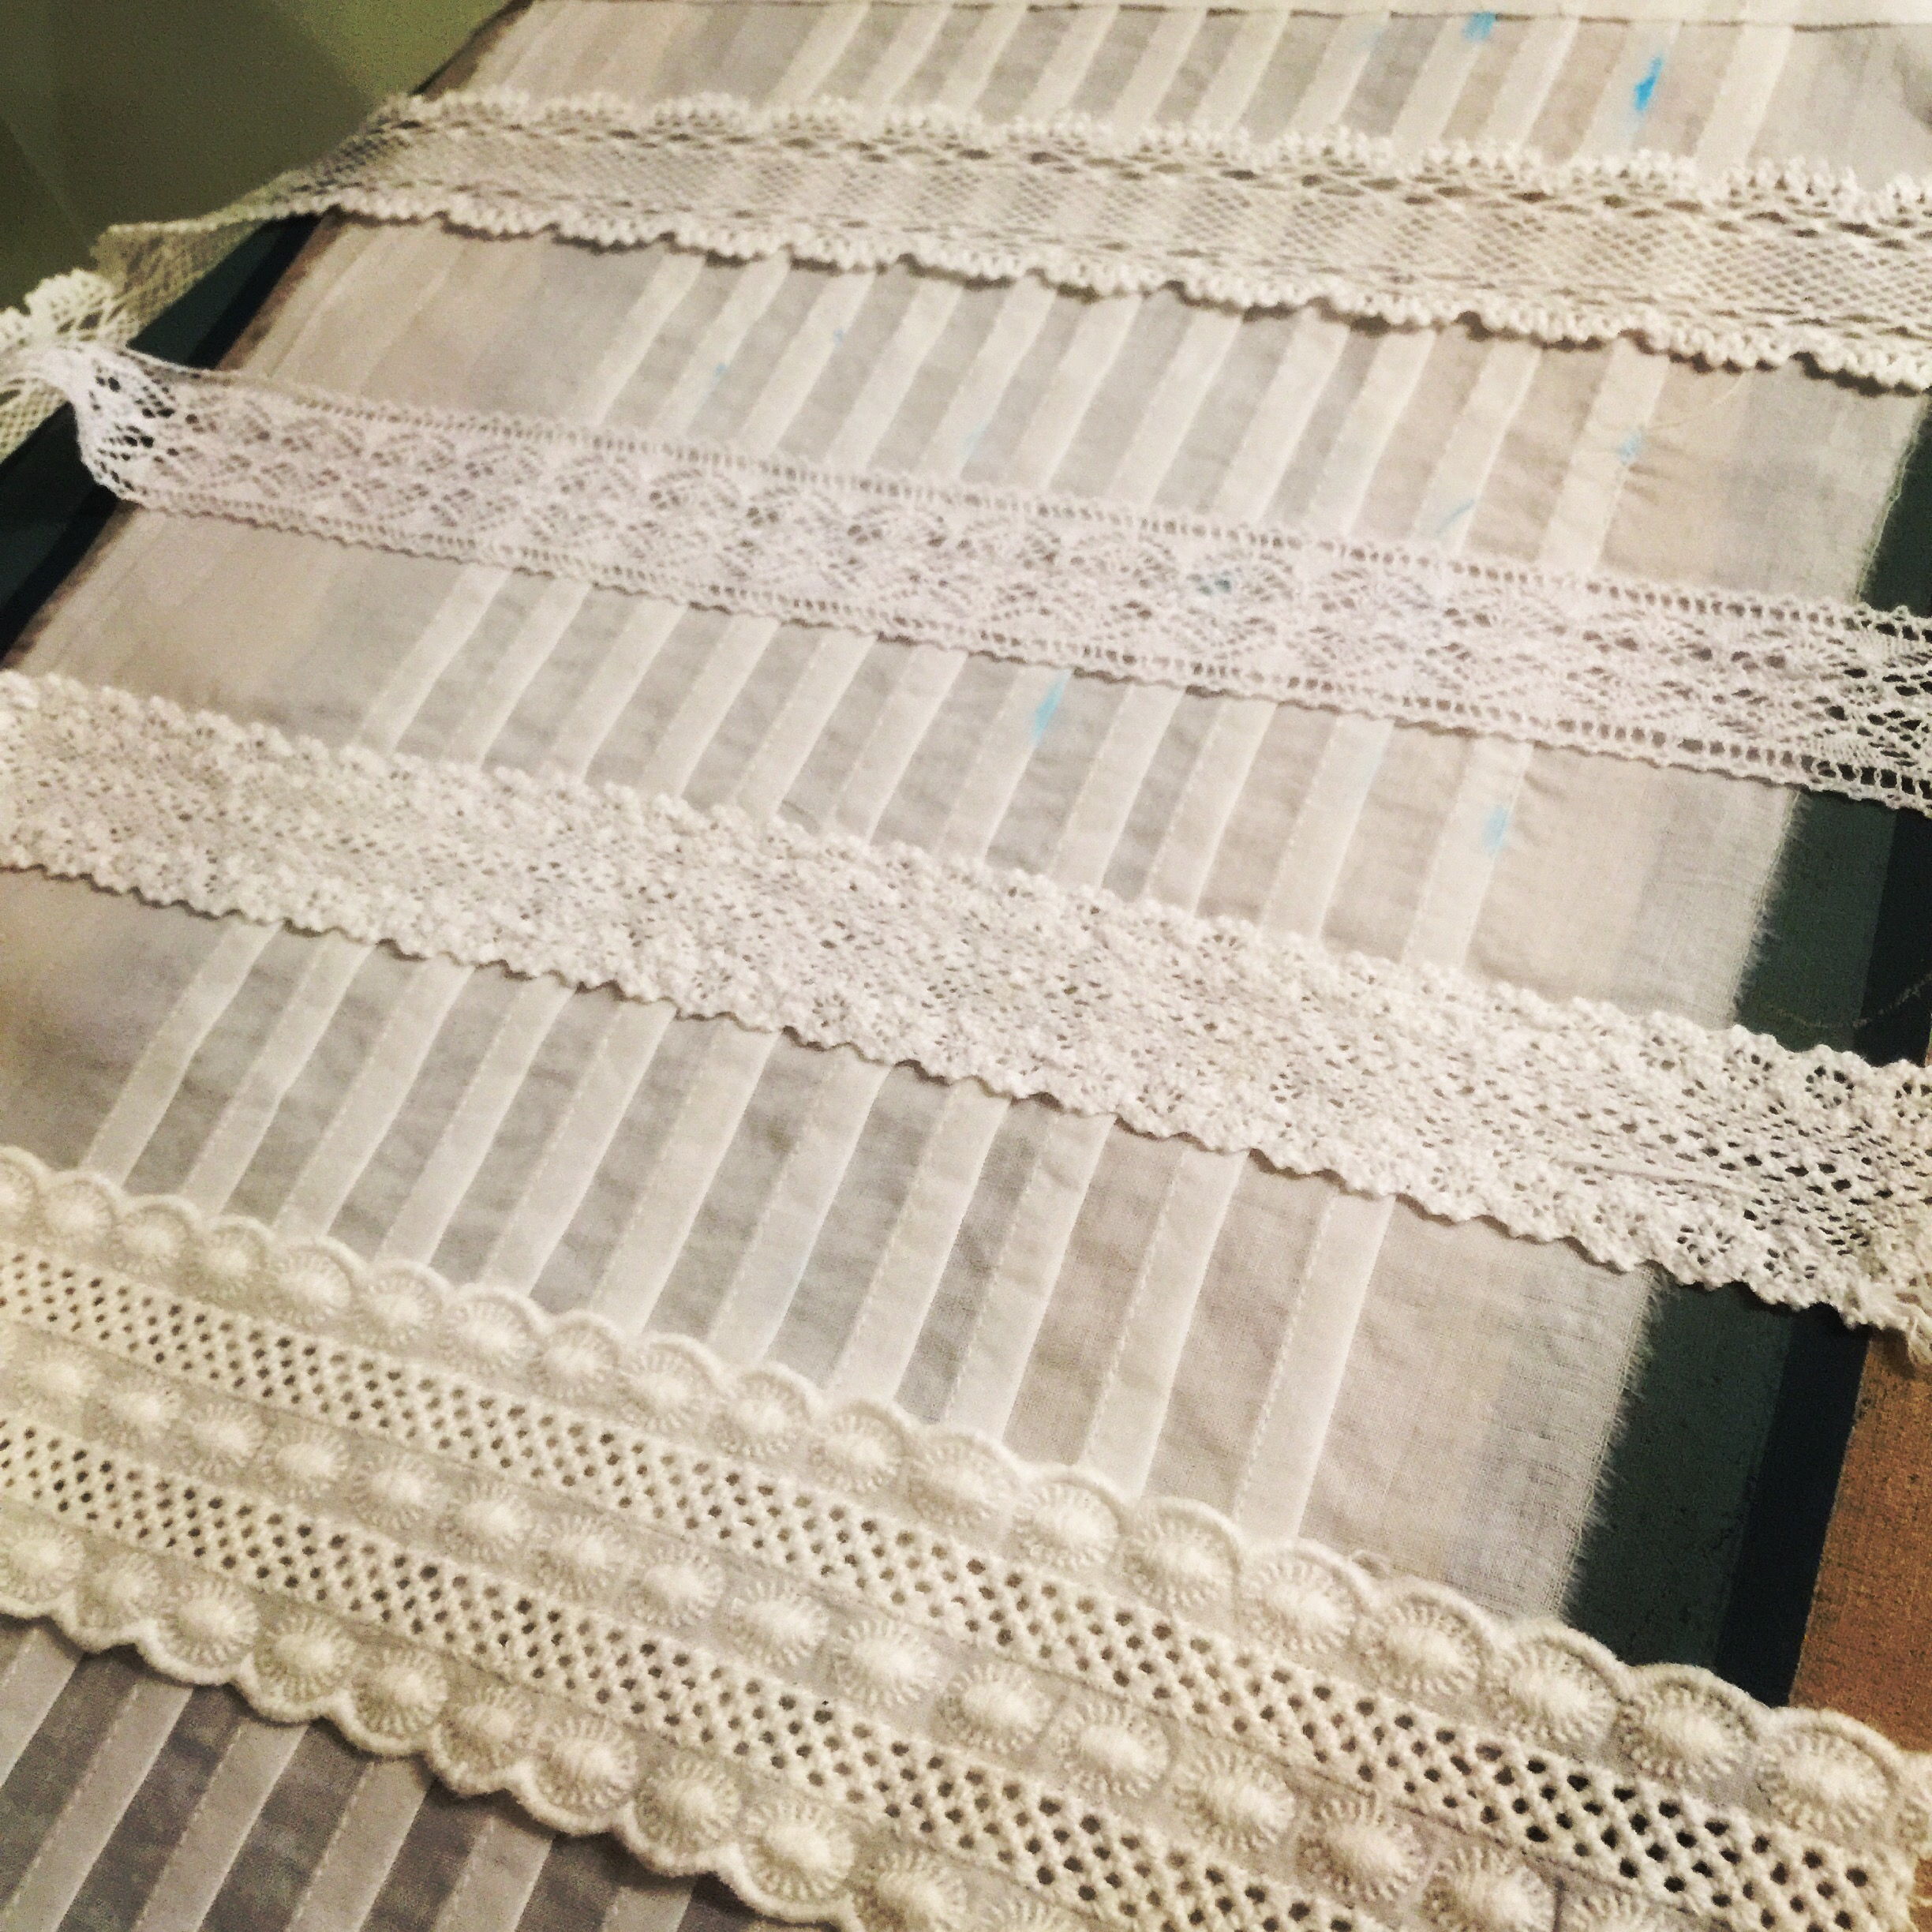
 Everything else blurs into a haze of lace-insertion and indecision. I had gotten a bunch of this ladder-type insertion trim on deep clearance, and wound up going to town on that. I ran a strip down every panel except for the centre back ones (and I would have gotten them too except I ran out of trim.)
 I put the skirt all together.
I pulled it off again.
Twice. That’s how long it took me to figure out the lining needed to be completely free from the outer dress, otherwise it just looked stupid. Eventually I figured out how I wanted the dress constructed. Then I started adding lace.
And cutting out the fabric behind it.
And, let’s just say I had better be damn careful when I wash this thing.

When the lining was incorporated into the pleats, it was way too puffy.
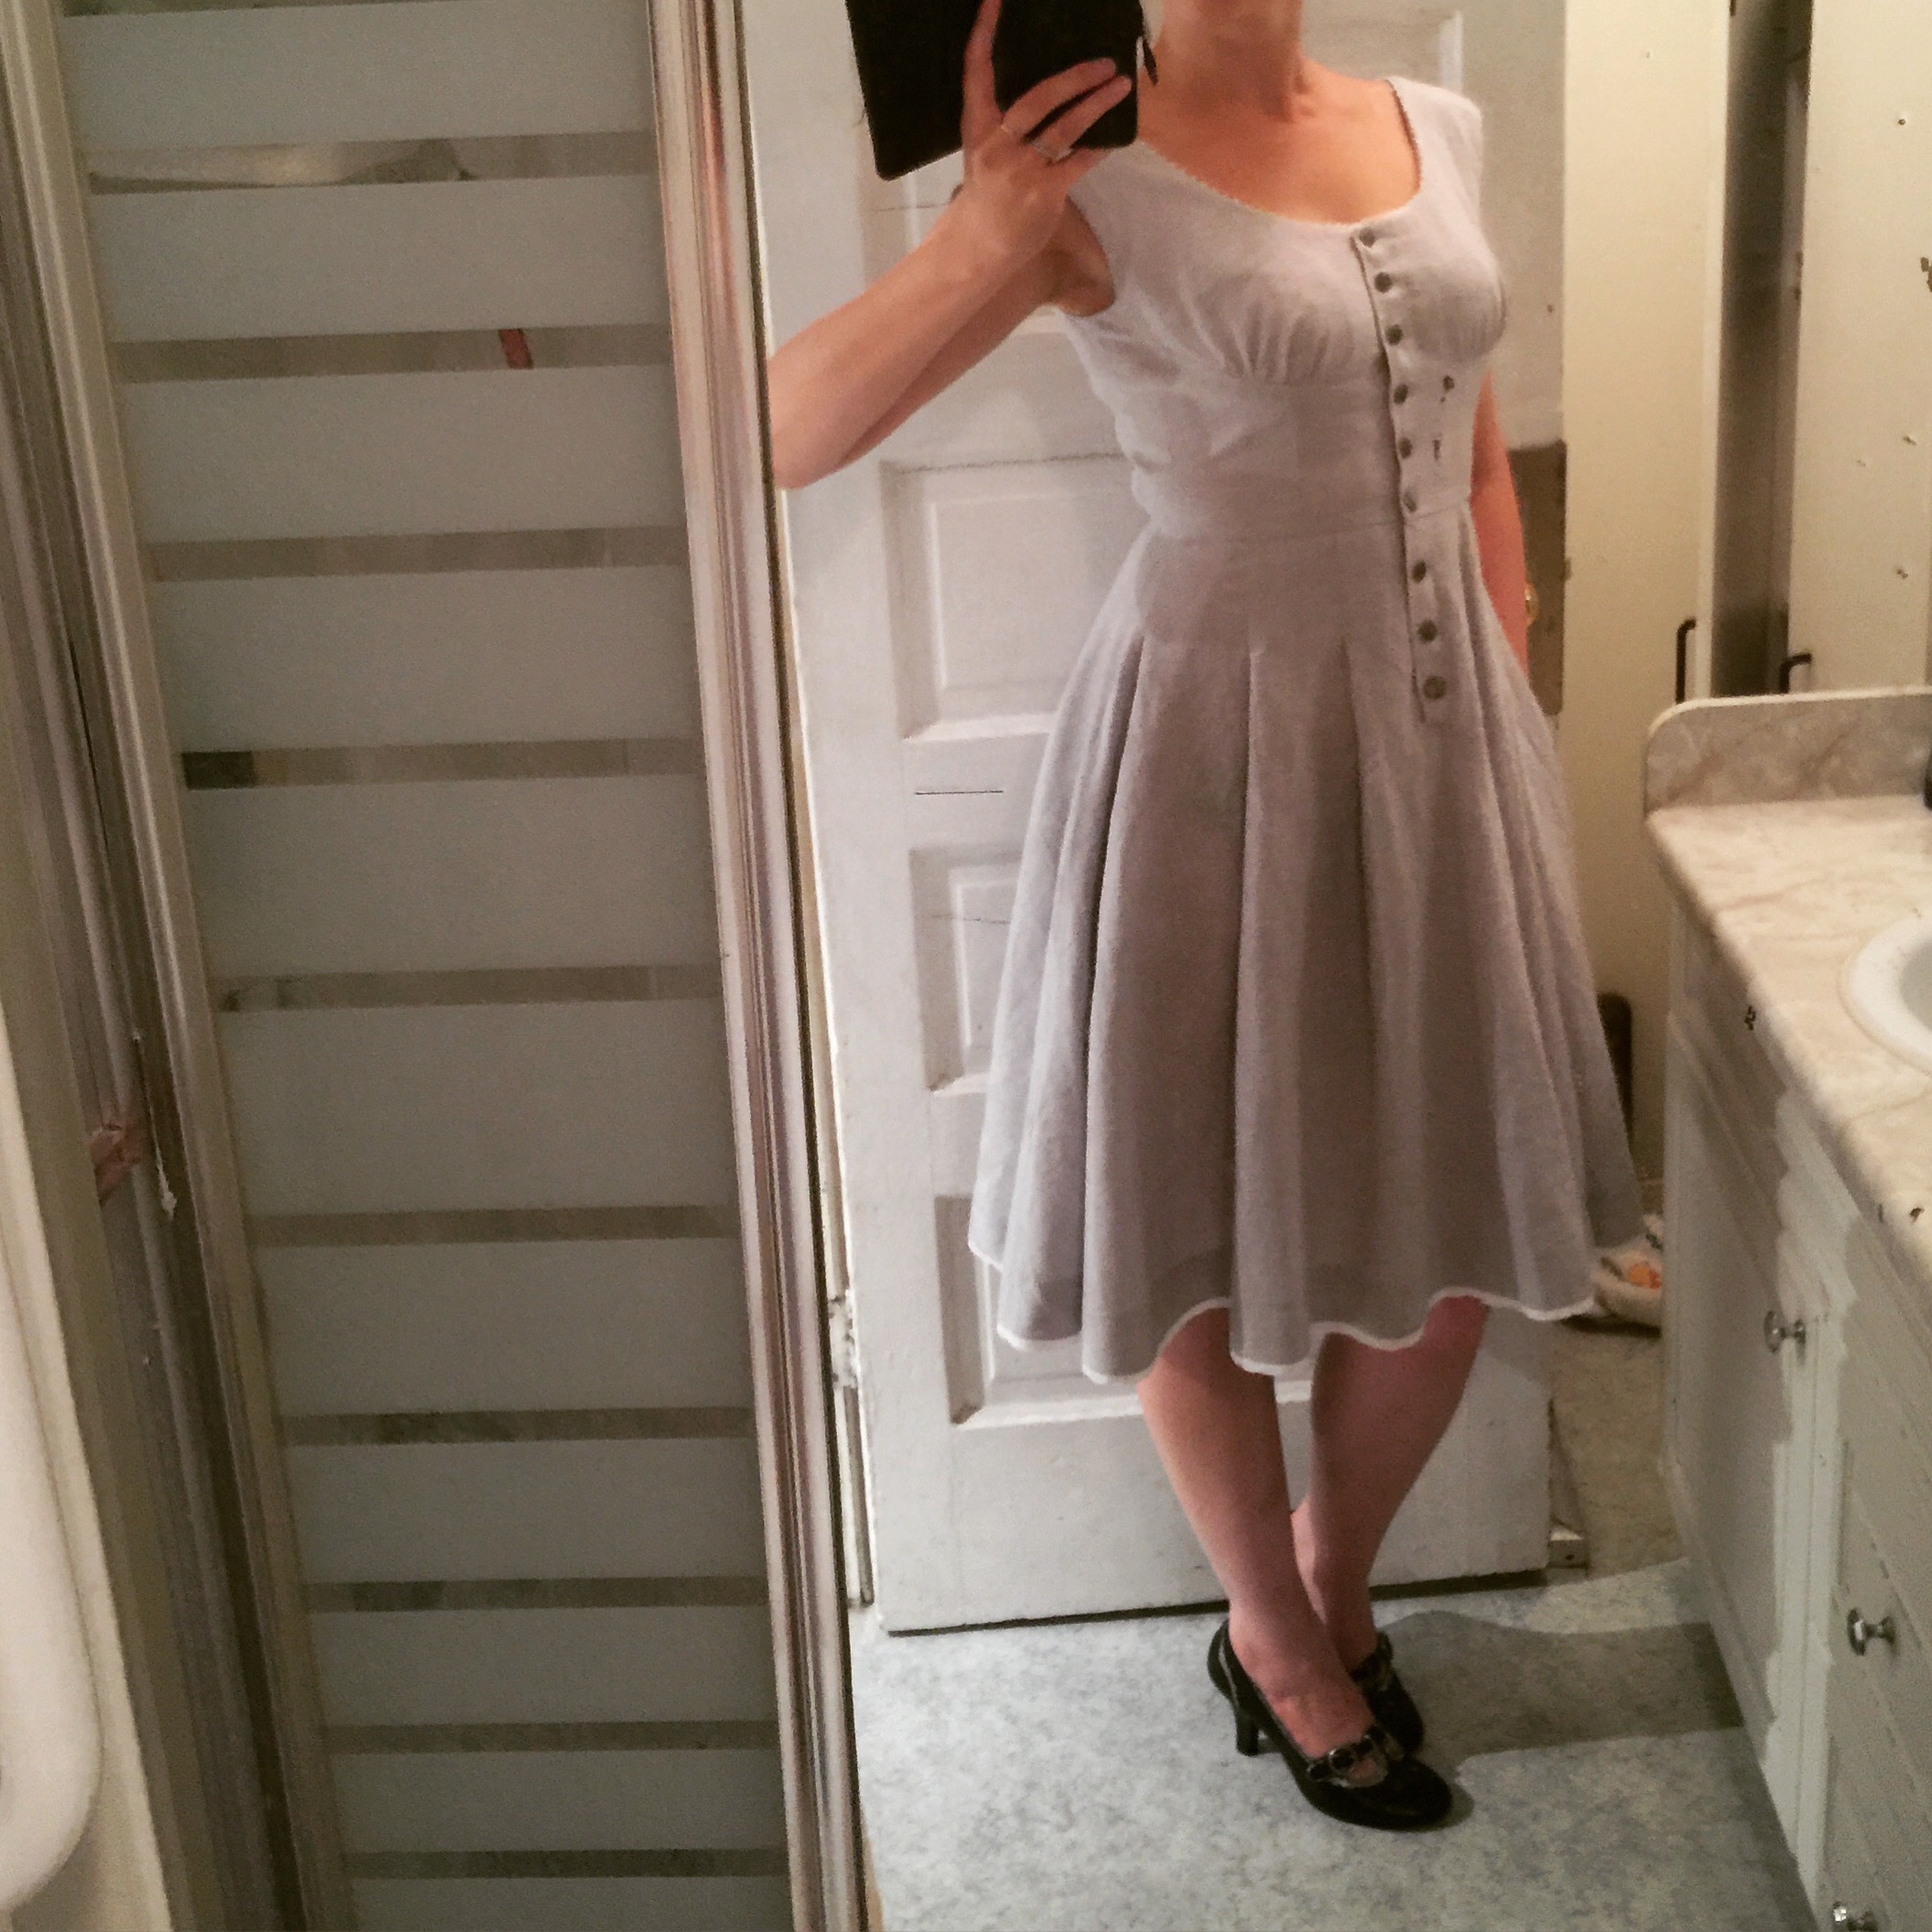
Oh, the tucks in the front are not as long as the pattern dictates, partly because that’s the look I wanted and party because I cut a size 10 and the waist was, um, snug. This fabric has a lot less give than that glorious grey linen-cotton. The bust fits perfectly though.
Batiste is not really the right fabric for hem stitching, but it was still fun to do. I spent quite a bit of time (how many times have I said this about this time-suck of a project?) experimenting with how different stitches looked, but in the end one of the nicest was a simple zig-zag. Which is good because I used that lots of places. Whether it was a good idea, will remain to be seen…
My initial concept sketch buttoned up the front, but when I started working with the pattern I decided I liked the centre front tuck too much to get rid of, so while there are still some buttons, they are strictly decorative. And I have no photos of them because I actually sewed them on right before I hung the dress at work.
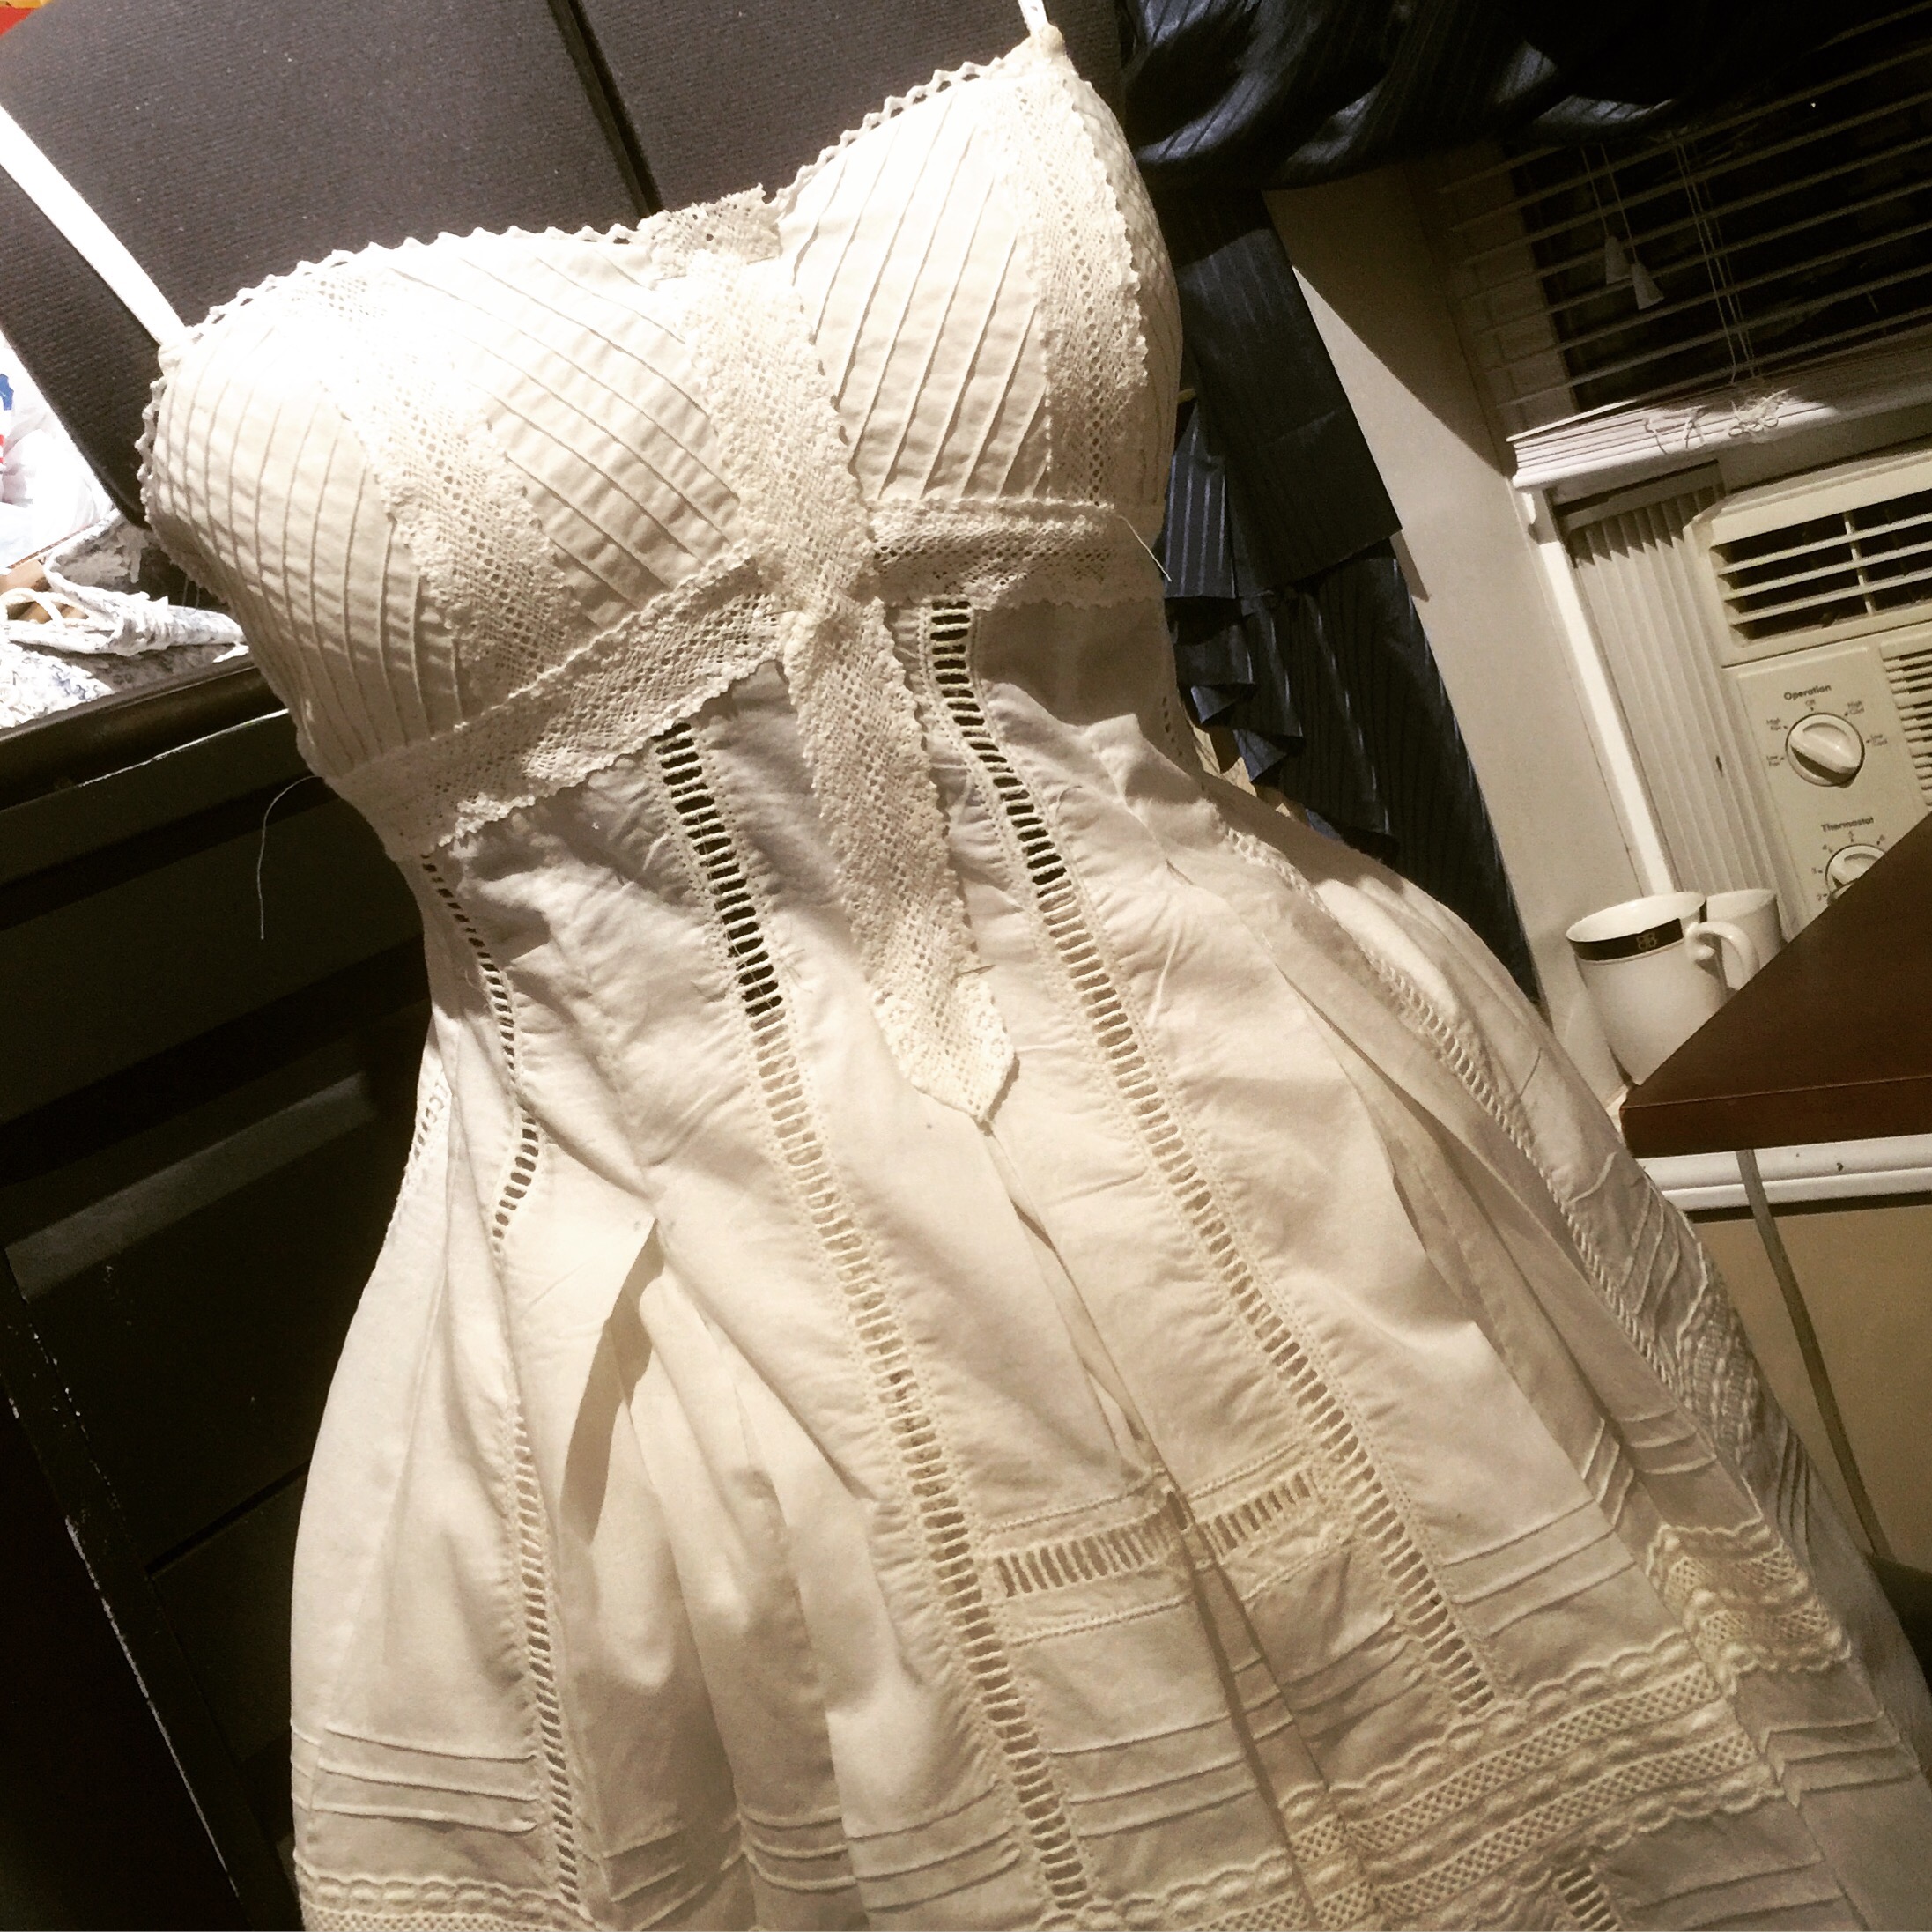 There are millions of mistakes, flaws, and other irregularities that I won’t go into. The only one that’s really bothering me is that the front isn’t quite symmetrical. My best guess is that this happened when I was inserting the ladder-trim—I think when I cut the piece in half to sew the insertion in, I didn’t line it back up perfectly (since the top edge is slanted this is a bit tricky, I should’ve worked from the hem.) And I didn’t realize until well after everything was topstitched and lace slapped on and fabric underneath cut away and, well, crud. It is what it is (and, if you didn’t notice anything until I said so, well, hey, what’s that over there? No, pay no attention to the rest of this paragraph…)
Anyway. Finished the hem with zig-zag faux hem stitch, and the lining hem with the last of my lace. Seriously, I had like six inches left over. Whew!
And then I raced off to work to hang it, so I didn’t even get any decent finished pictures. Which means they’ll have to wait for their own post after I get it back at the end of August… Basically, after sundress season is over. Um, not my best planning ever. 😦
 Oh, well. I should really be making Tyo that birthday flannel she wants, anyway. 😉
 I’ll forgive you if you don’t remember


 The buttons are all mother of pearl, from the Antique Button Stash—they roughly match, except for the big one at the top.


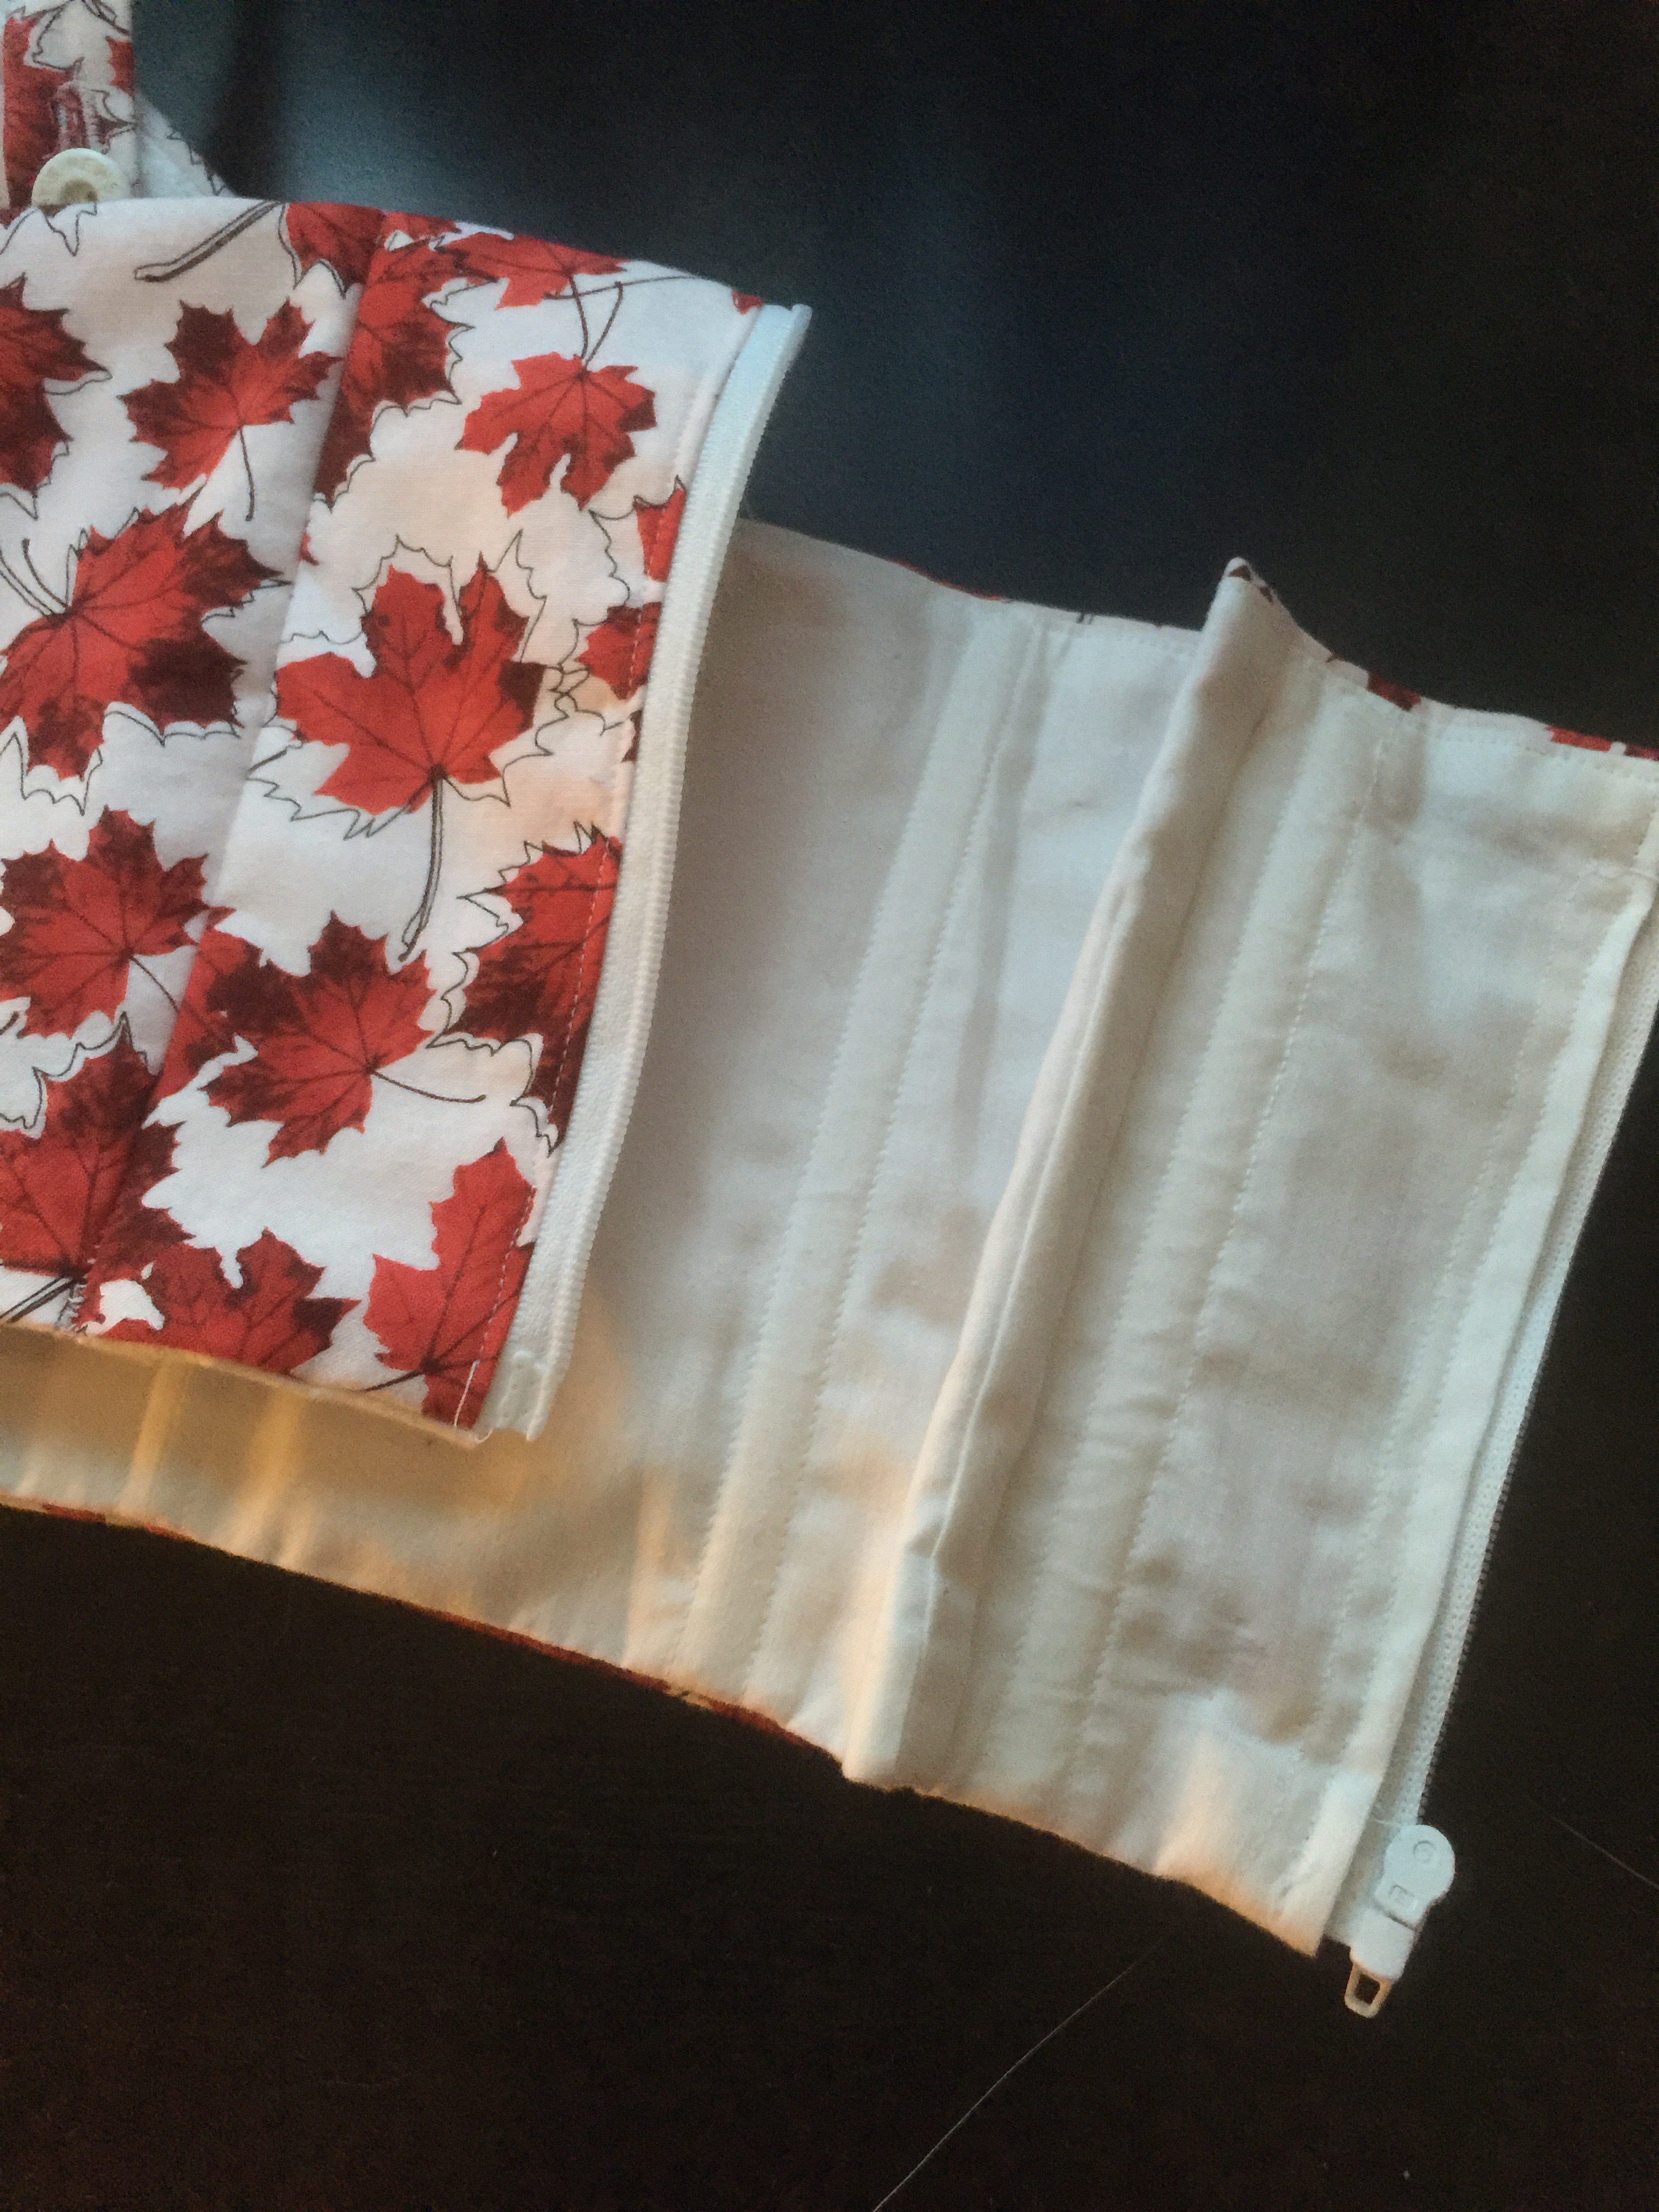
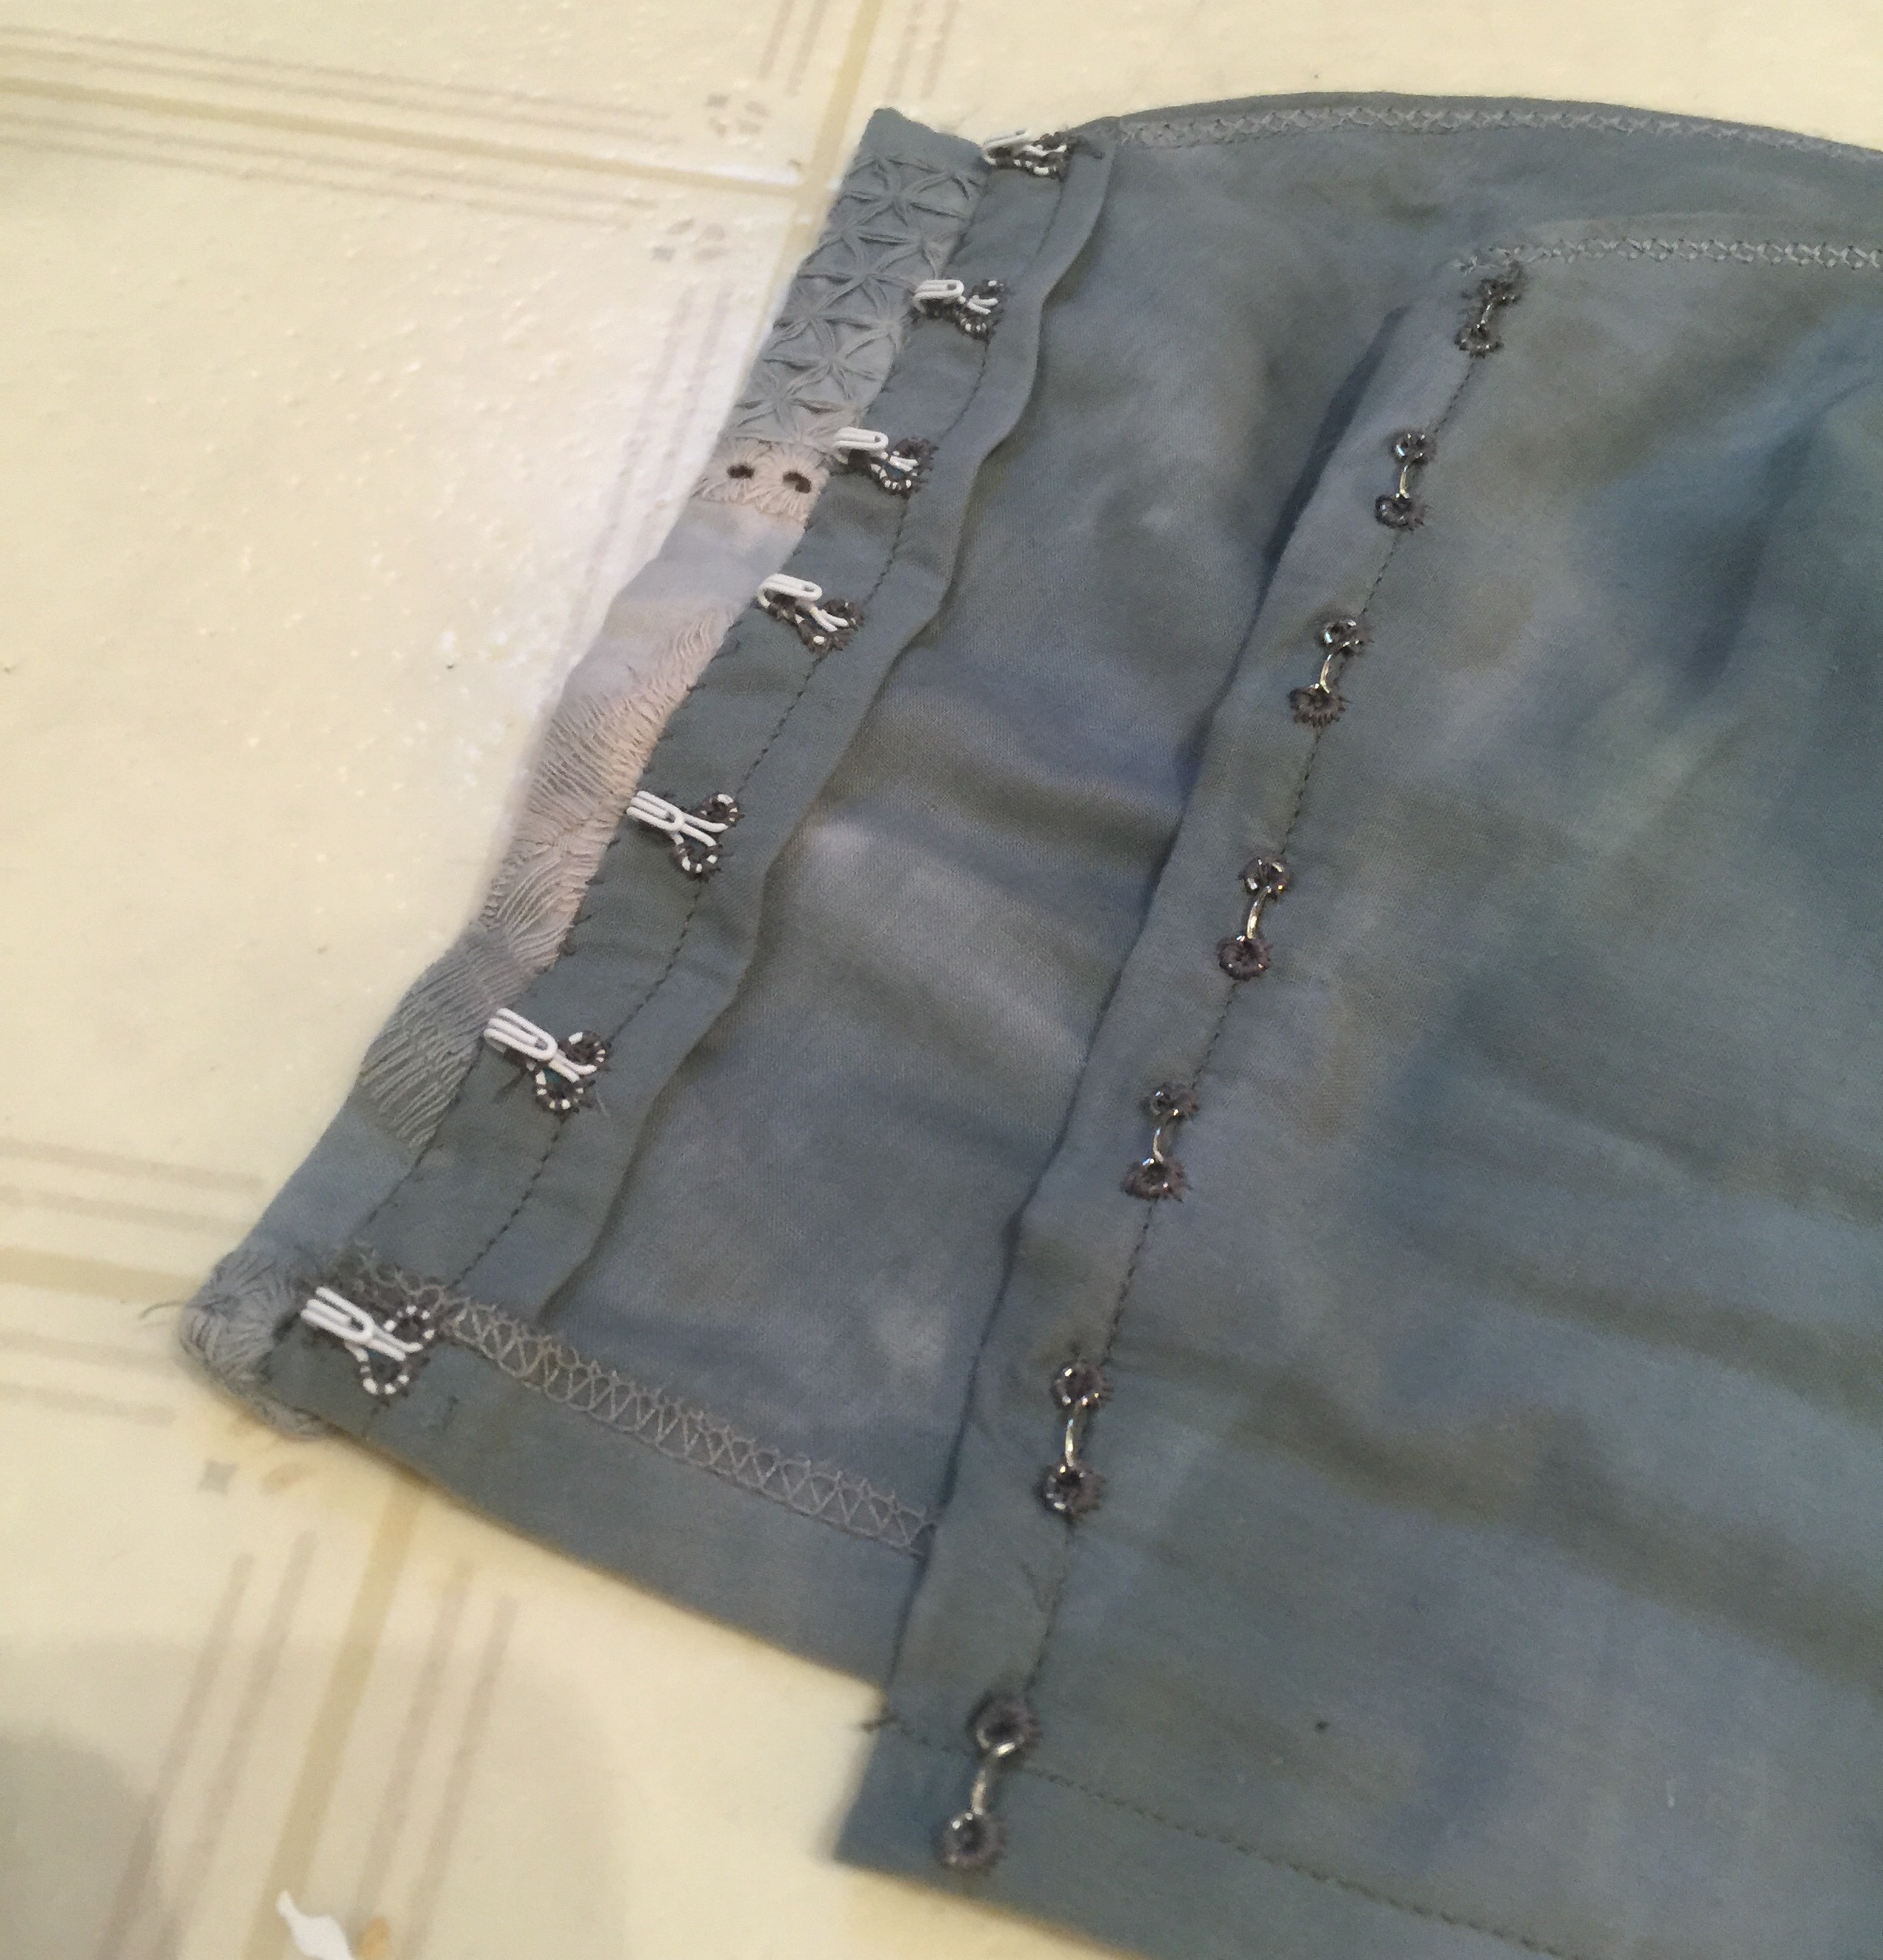
 The materials I chose were affected quite a bit by this being a shop project. Aside from the busk, I used ticking instead of coutil, and tried substituting Bosal in-R-form (a bag making product) for the poly laminate foam the pattern calls for for the cups. What I didn’t make do on was the boning—I used my usual 1/4″ spiral steel, double boned at each seam. I kinda construct all my corsets the same way—one trick pony, I guess. I know it’s not he strongest way, but it makes them easier to adjust and alter, as you go or after the fact. And I haven’t had a seam split on me yet.
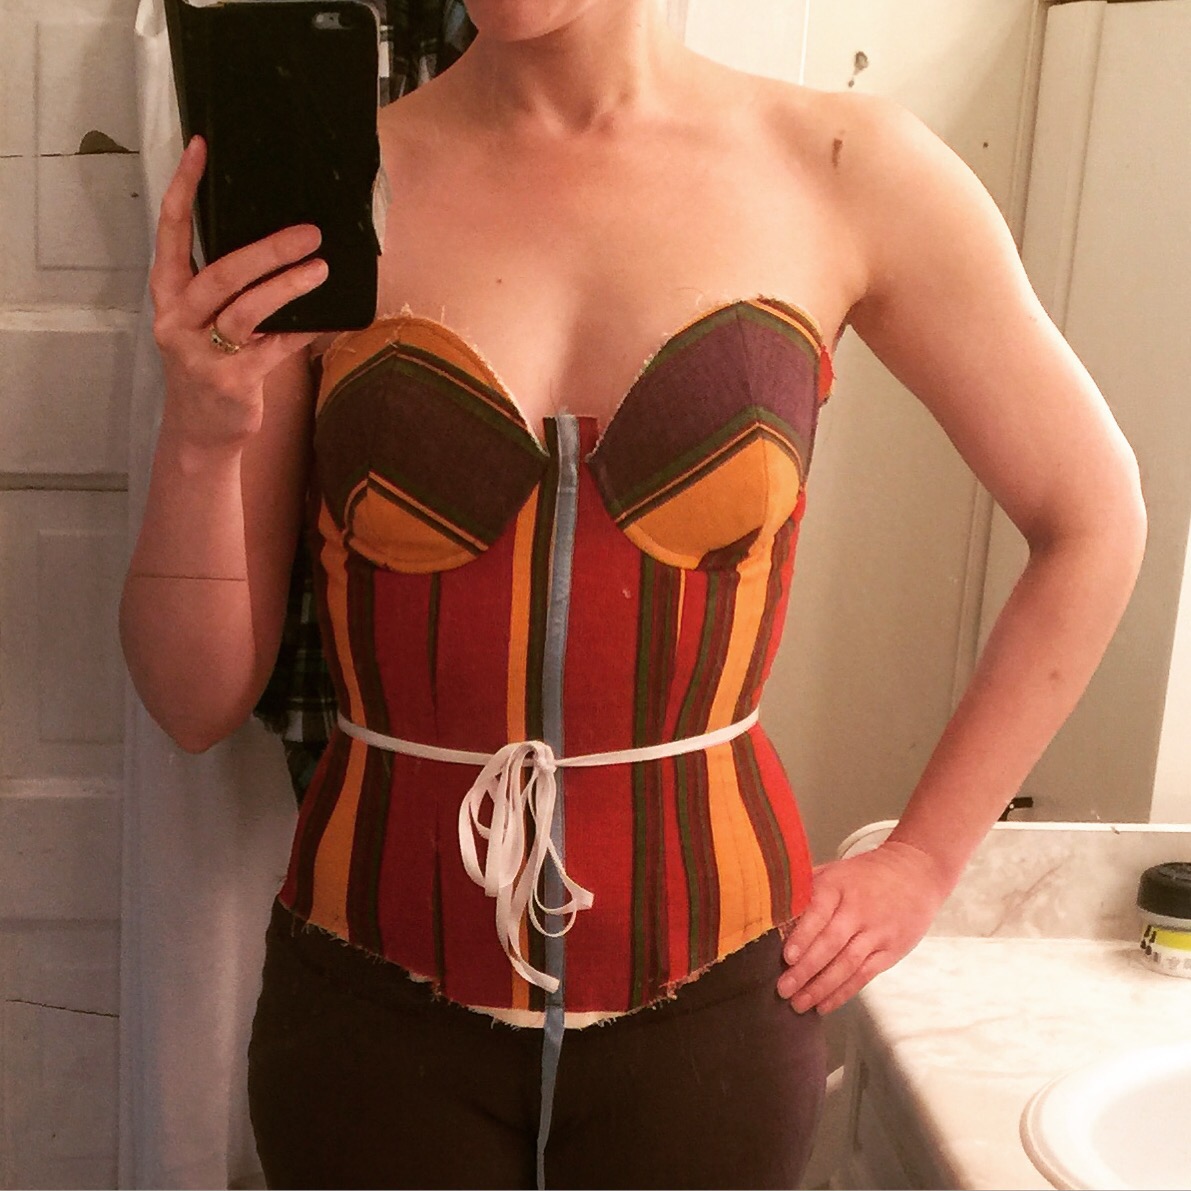

 The bust cups affect the fit a lot, too, incidentally, so don’t take your fitting too far without them, if you’re going to use them. I don’t think I’ve really nailed the bust fit. Even downsizing to a 10 in those pieces the cups were a bit large, though with the foam lining it doesn’t show so much in the photos. I made some minor tweaks to the shape to round the bottom a little more smoothly and bring in the top 1/8″, and I played around with making some little chicken fillet push-up pads.
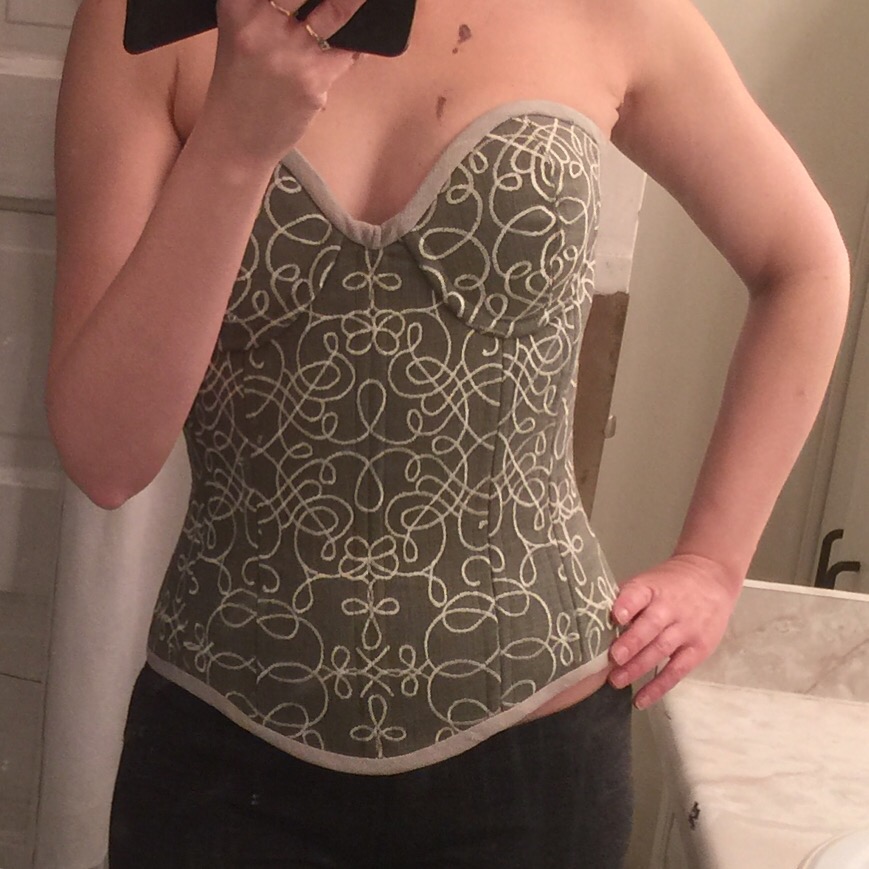


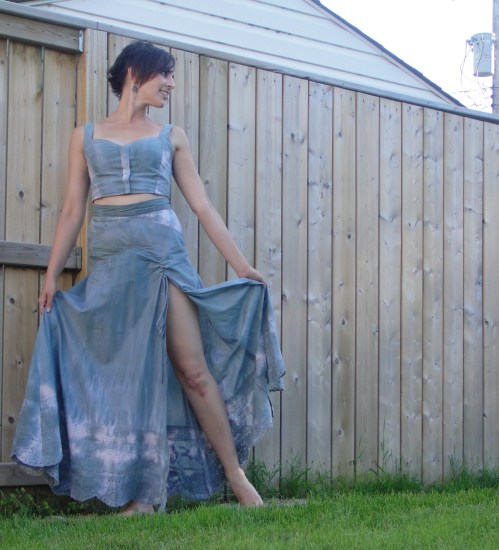
 All in all it’s very pretty, and feels very sleek and smooth, so that’s nice. It makes me think of an elven princess. Probably some delicate silver jewelry would be in order.

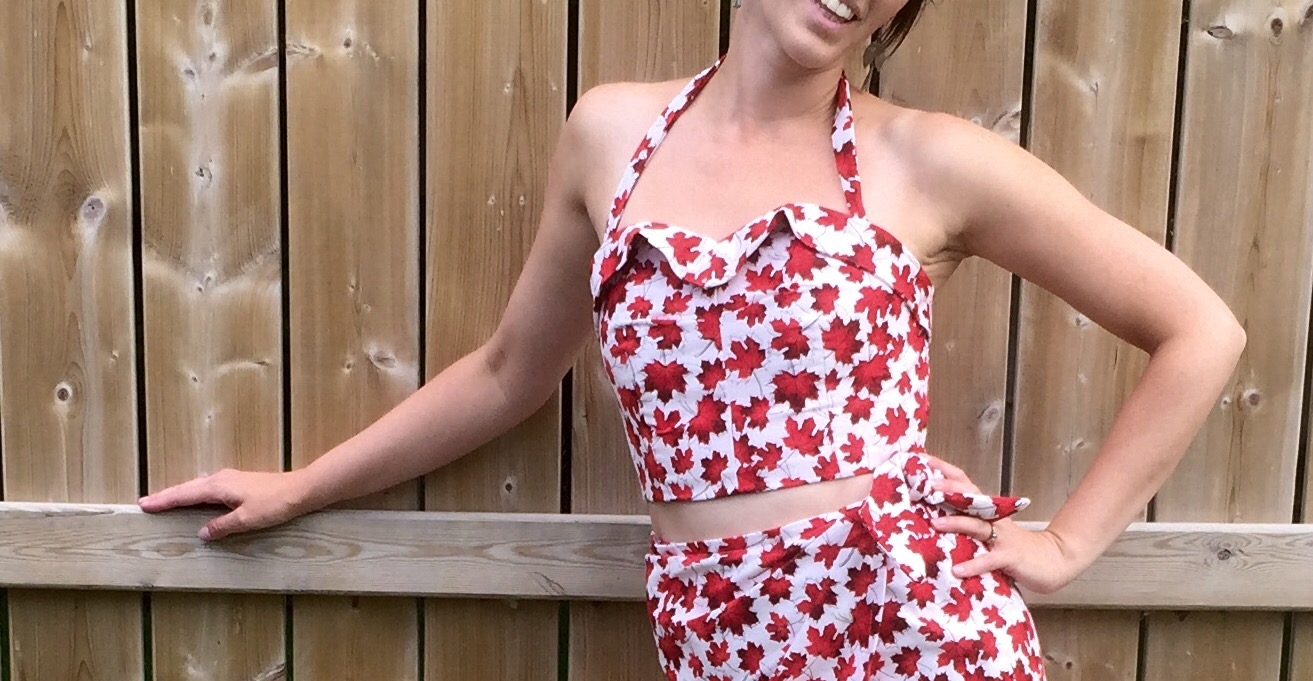
 Hey, a girl can dream. I can also wear it swanning around the house (as I did the day I wrote this). I’m getting to like this crop-top-with-high-waist thing. (It only took me what, three years, to wrap my head around it? Bear with me, I’m well past the prime age for adopting new styles.)
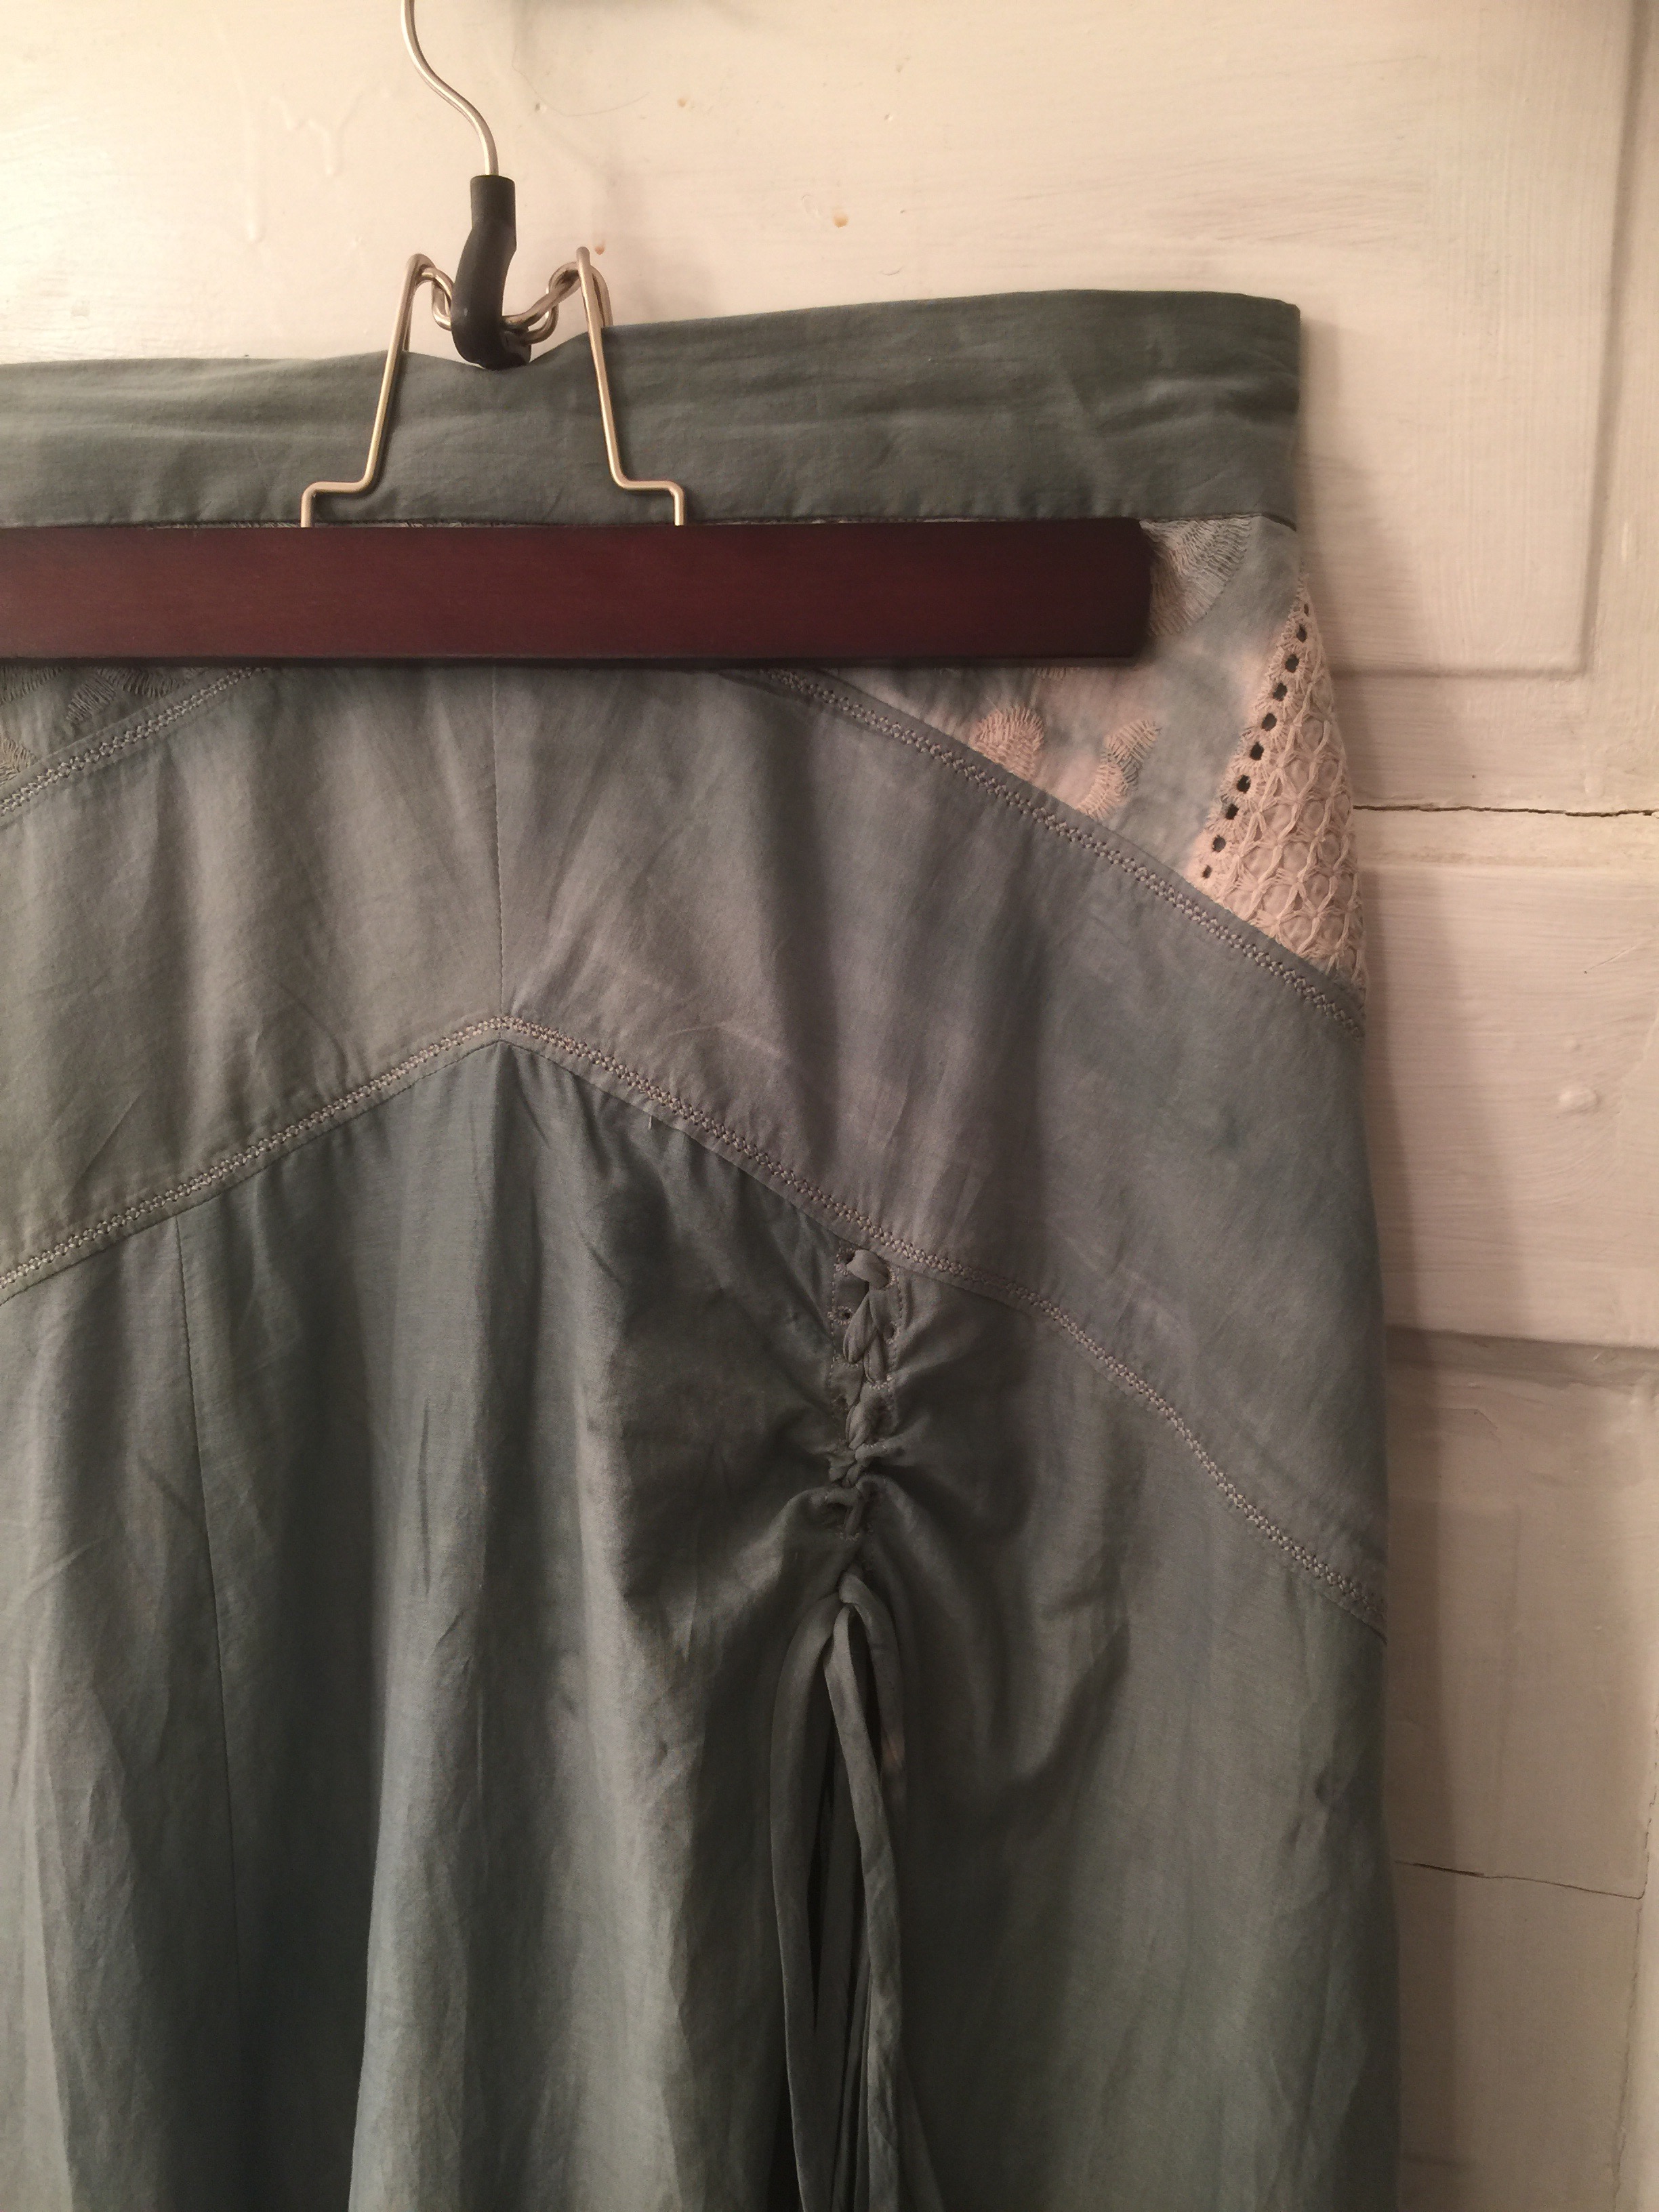
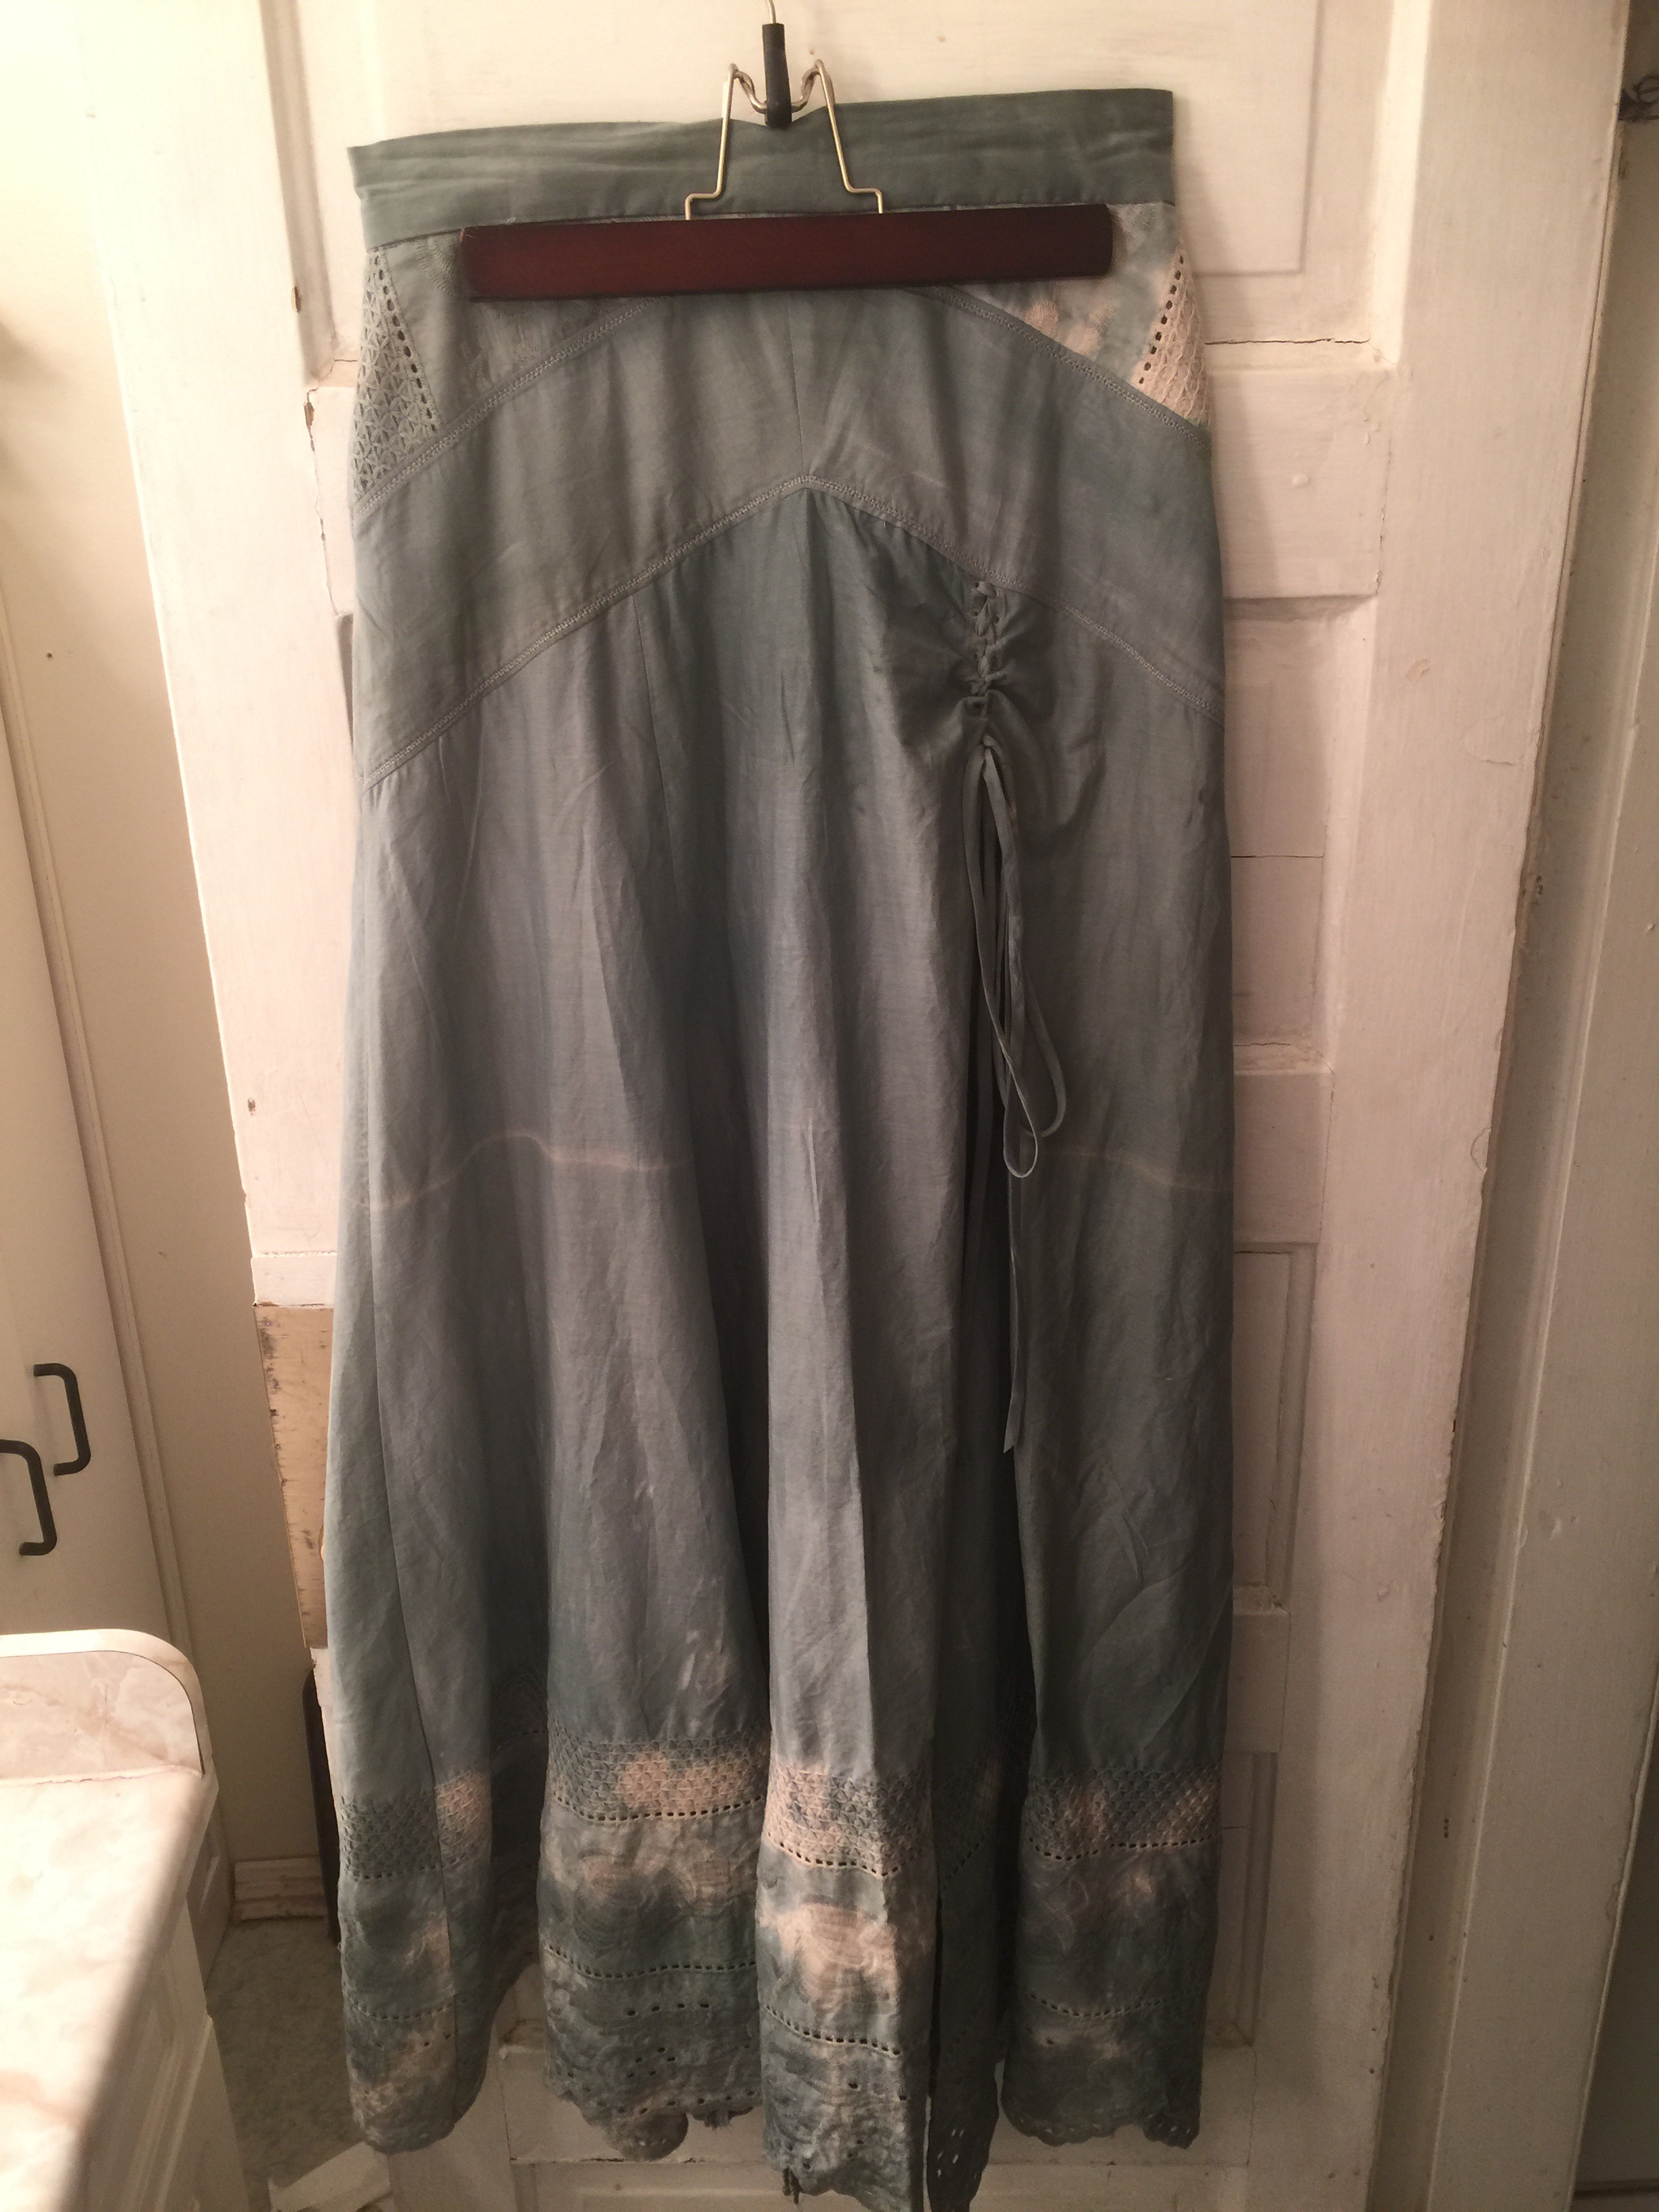
 I had hoped to cut the centre front panels from the last “large” scrap of the embroidery, but alas it was too small—I had to settle for just making that the lower portion of the side fronts.
 This left the front rather boring, so I ended up hand-stitching a little embroidered bit in place over the closure.
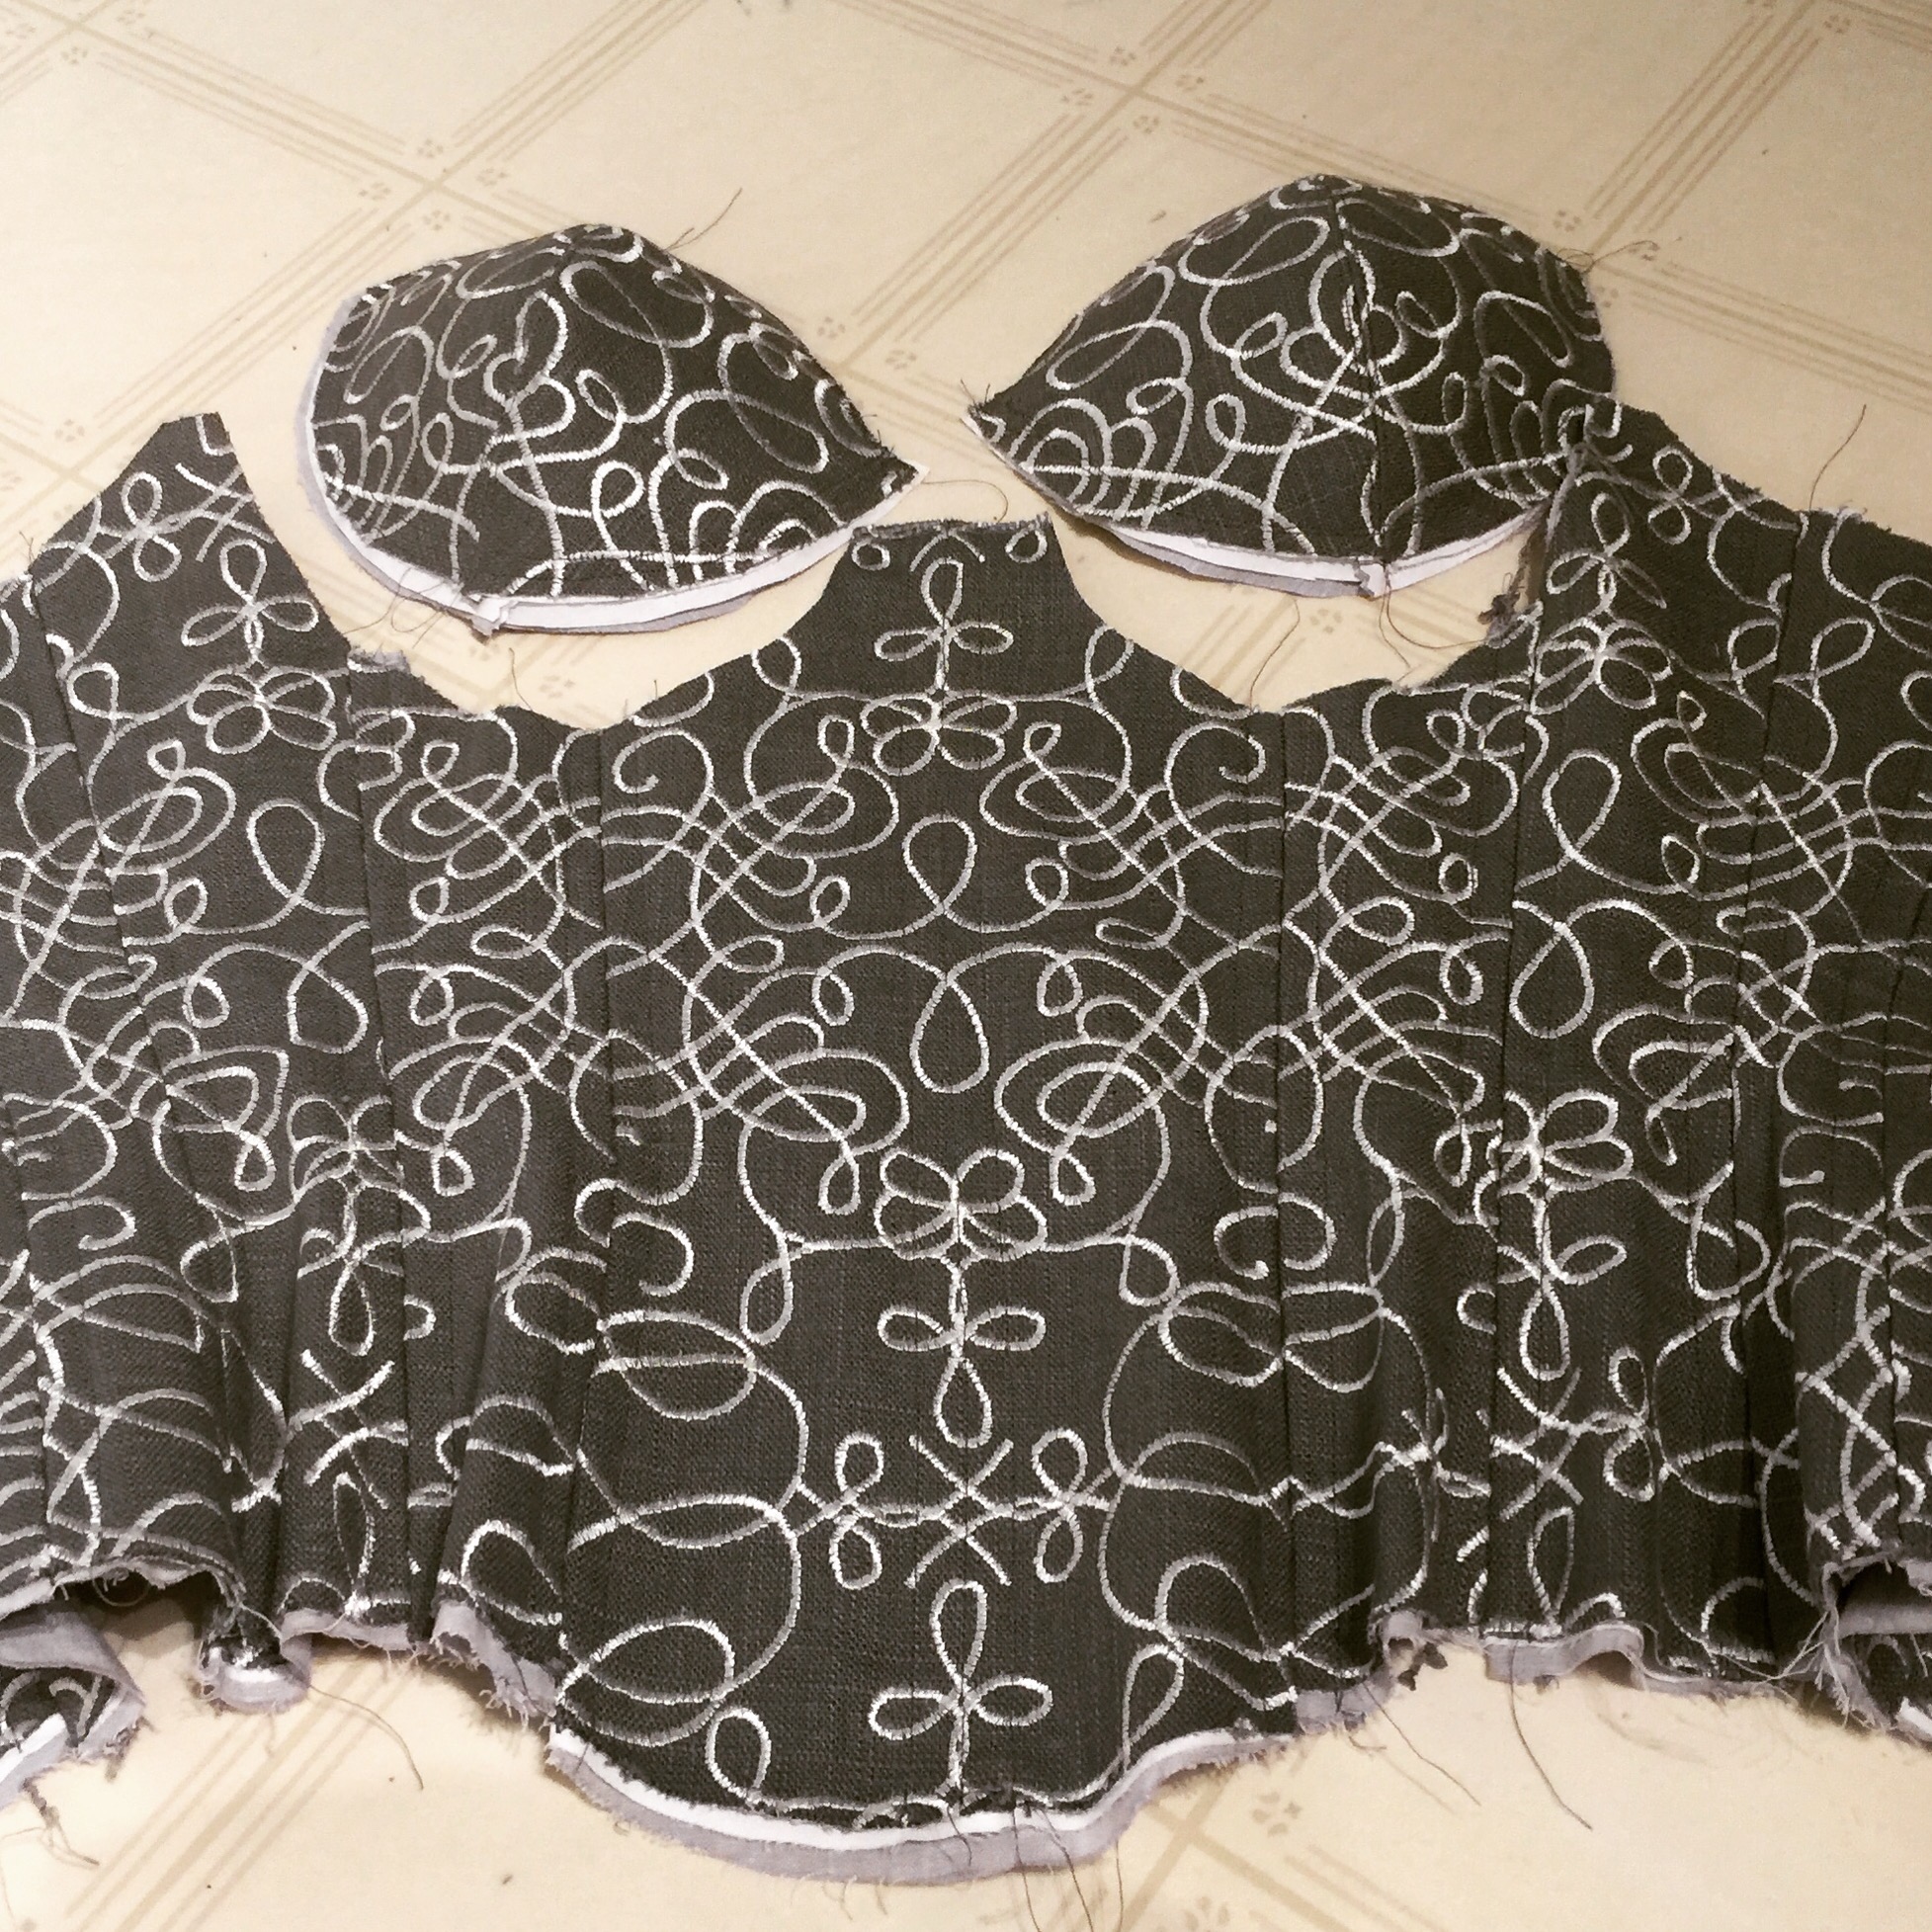
 I had a lot of fun with the construction; everything is clean-finished inside and out except the bottom hem. I wish I could describe all the inside-folding-burrito shapes I got this thing into, but words fail me.
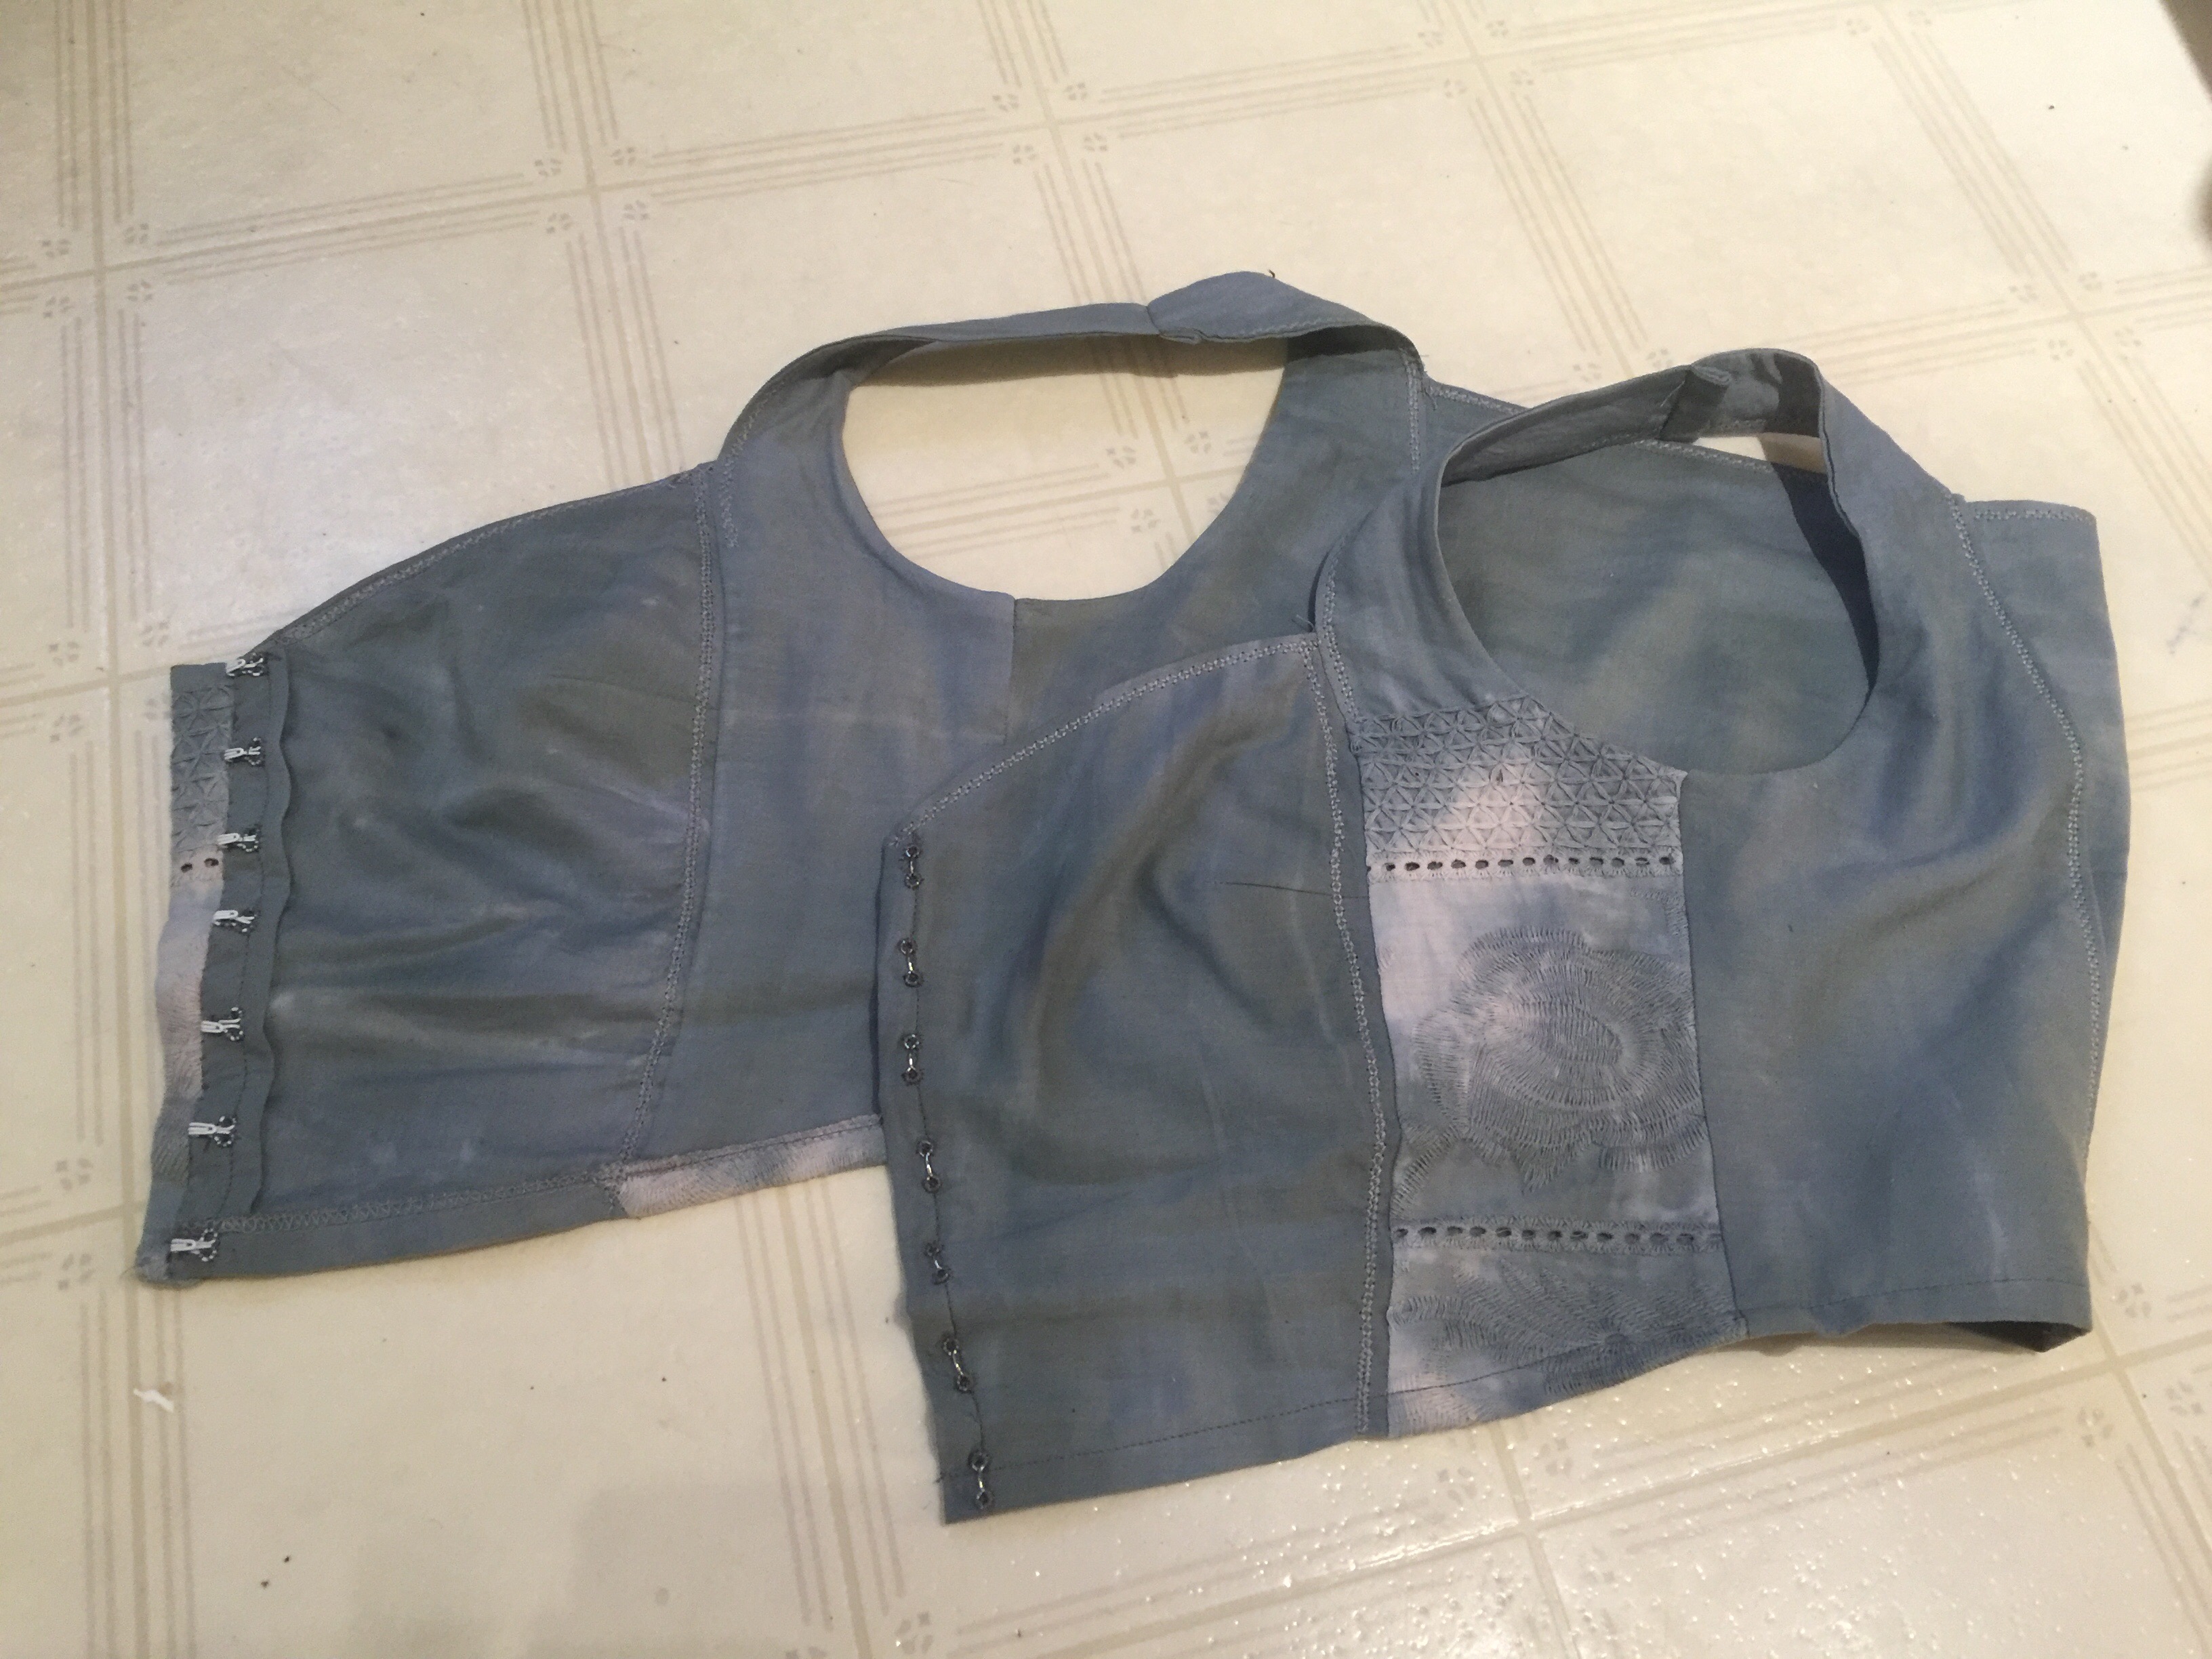
 I initially skipped my usual petite alterations (not sure why), but then I wound up taking in the shoulders and cutting off a good 1/2″ from the bottom (more like 1″ at the back), so I probably wound up in much the same place. Ah, well.

 The whole outfit feels wild and wood-witchy and mysterious to me, which I am enjoying immensely. (And if you don’t think so, well, feel free to keep it to yourself. I’m having fun here 😉 ) Now if only I could be taking photos in an ancient oak grove, maybe with a few standing stones kicking around for ambiance…


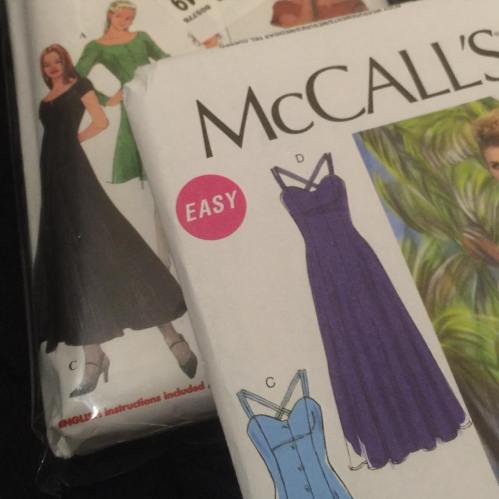
 And, well, it ain’t Simplicity 7514. I did more fit-fiddling on this damn thing than I have in quite a while. At least that’s easy with all the different seams on this pattern.
 I’m not sure how entirely I can blame the pattern, however. I cut a size 12 knowing it would probably be large, but that was the largest size in my pattern envelope and I was too
 AND the pattern was meant to be lined, so doesn’t have facings or any other nice way to finish the top, and again I was too

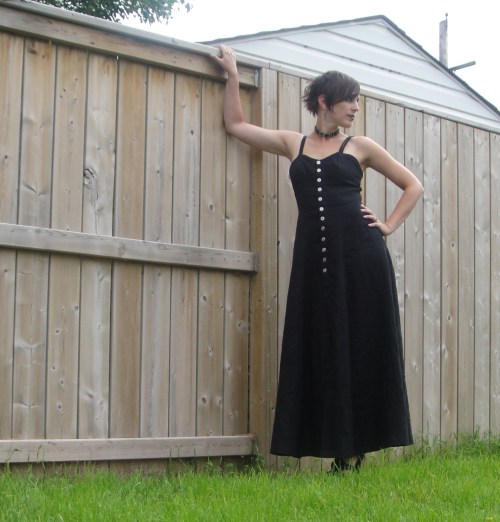
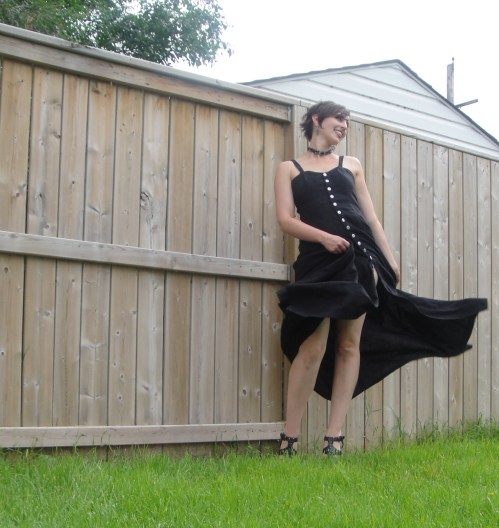
 So a few years ago I got this nice, substantial, shiny black linen with the plan of making a shirt for my husband—but it’s a bit heavy for his taste in linen shirts, so it has languished. And it surfaced during some recent stash diving, and I realized that there’s way more than the two-ish metres I had thought I’d bought—more like four or five. Yowza! And I was suddenly seized by the need for a swishy long black linen sundress. I dug up some options and posted them on Instagram, and the chorus was in favour of McCall’s 7640. And it did seem like it would be a really great linen sundress.
 But I still REALLY liked the idea of a long black version of Simplicity 7514. So I dug around stash some more, and stumbled upon this piece of black bargain centre fabric ($4.00/m tag still attached) that I didn’t have earmarked for anything. (I didn’t recall right off the bat but as construction, especially ironing, went on, I remembered the reason I picked it up. 100% wool, in what I suspect they would call a tropical weight.
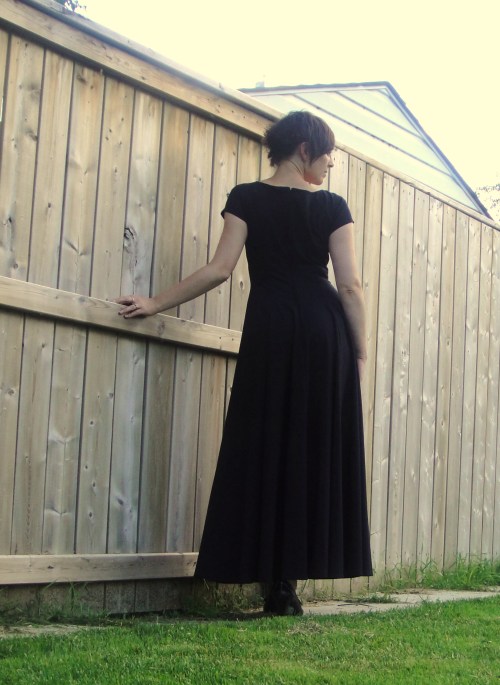 It’s been a long time since I made a Simplicity pattern, what with them not really being available up here any more. It was really nice, especially since the ‘vintage’ pattern (© 1997) has much thicker tissue paper than the current patterns seem to.
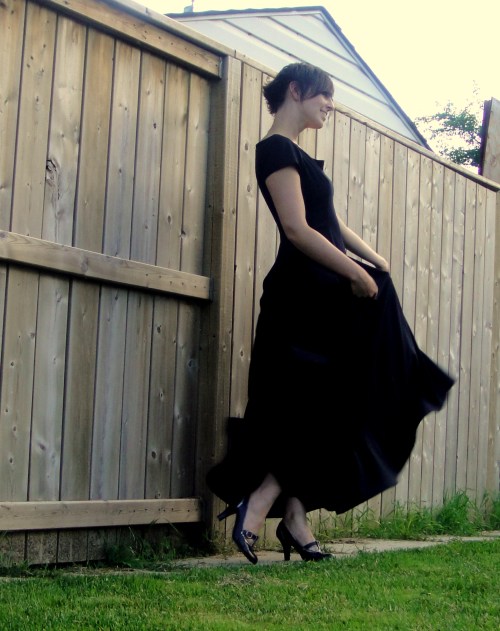 The skirt is very, very swishy, and the fabric has a great drape.
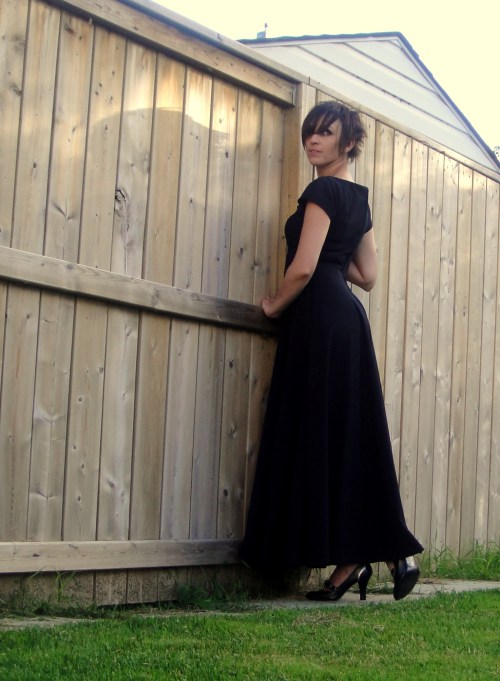
 Can I tell you a secret? This dress reminds me of a mediaeval


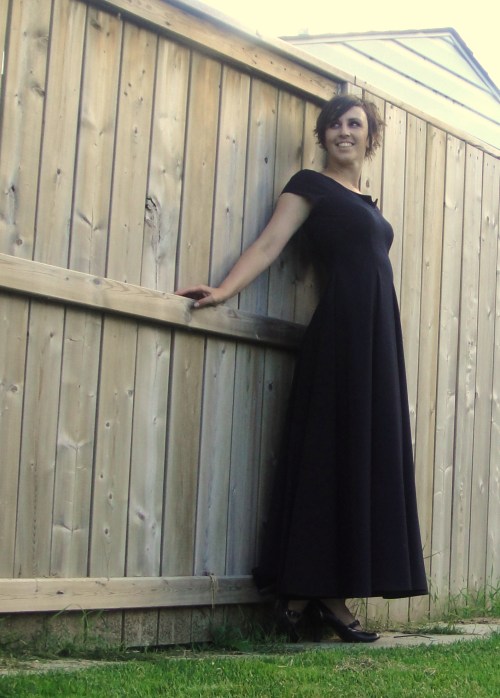
 And I didn’t need to be. What a sweet, straightforward sew.
 I’m not sure I did the pleats correctly—I followed the markings but then stitched them down, whereas in hindsight the pattern illustration just shows them being pleated. And my rear pleats don’t meet the way they seem to in the illustration, either. Probably because of the stitching-down thing. I like the stitching down, though, as it controls the fullness right below my waist—I don’t like gathered skirts at my natural waist as they just make me look boxy, and I was a little nervous of the pleats.
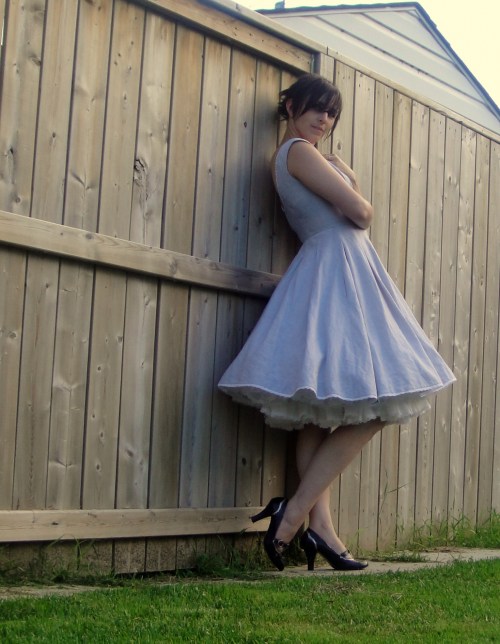 I like the lace at the neckline; I was initially on the fence about the lace at the hem, but I got it as part of the project so I thought I’d better use it, and it’s grown on me.
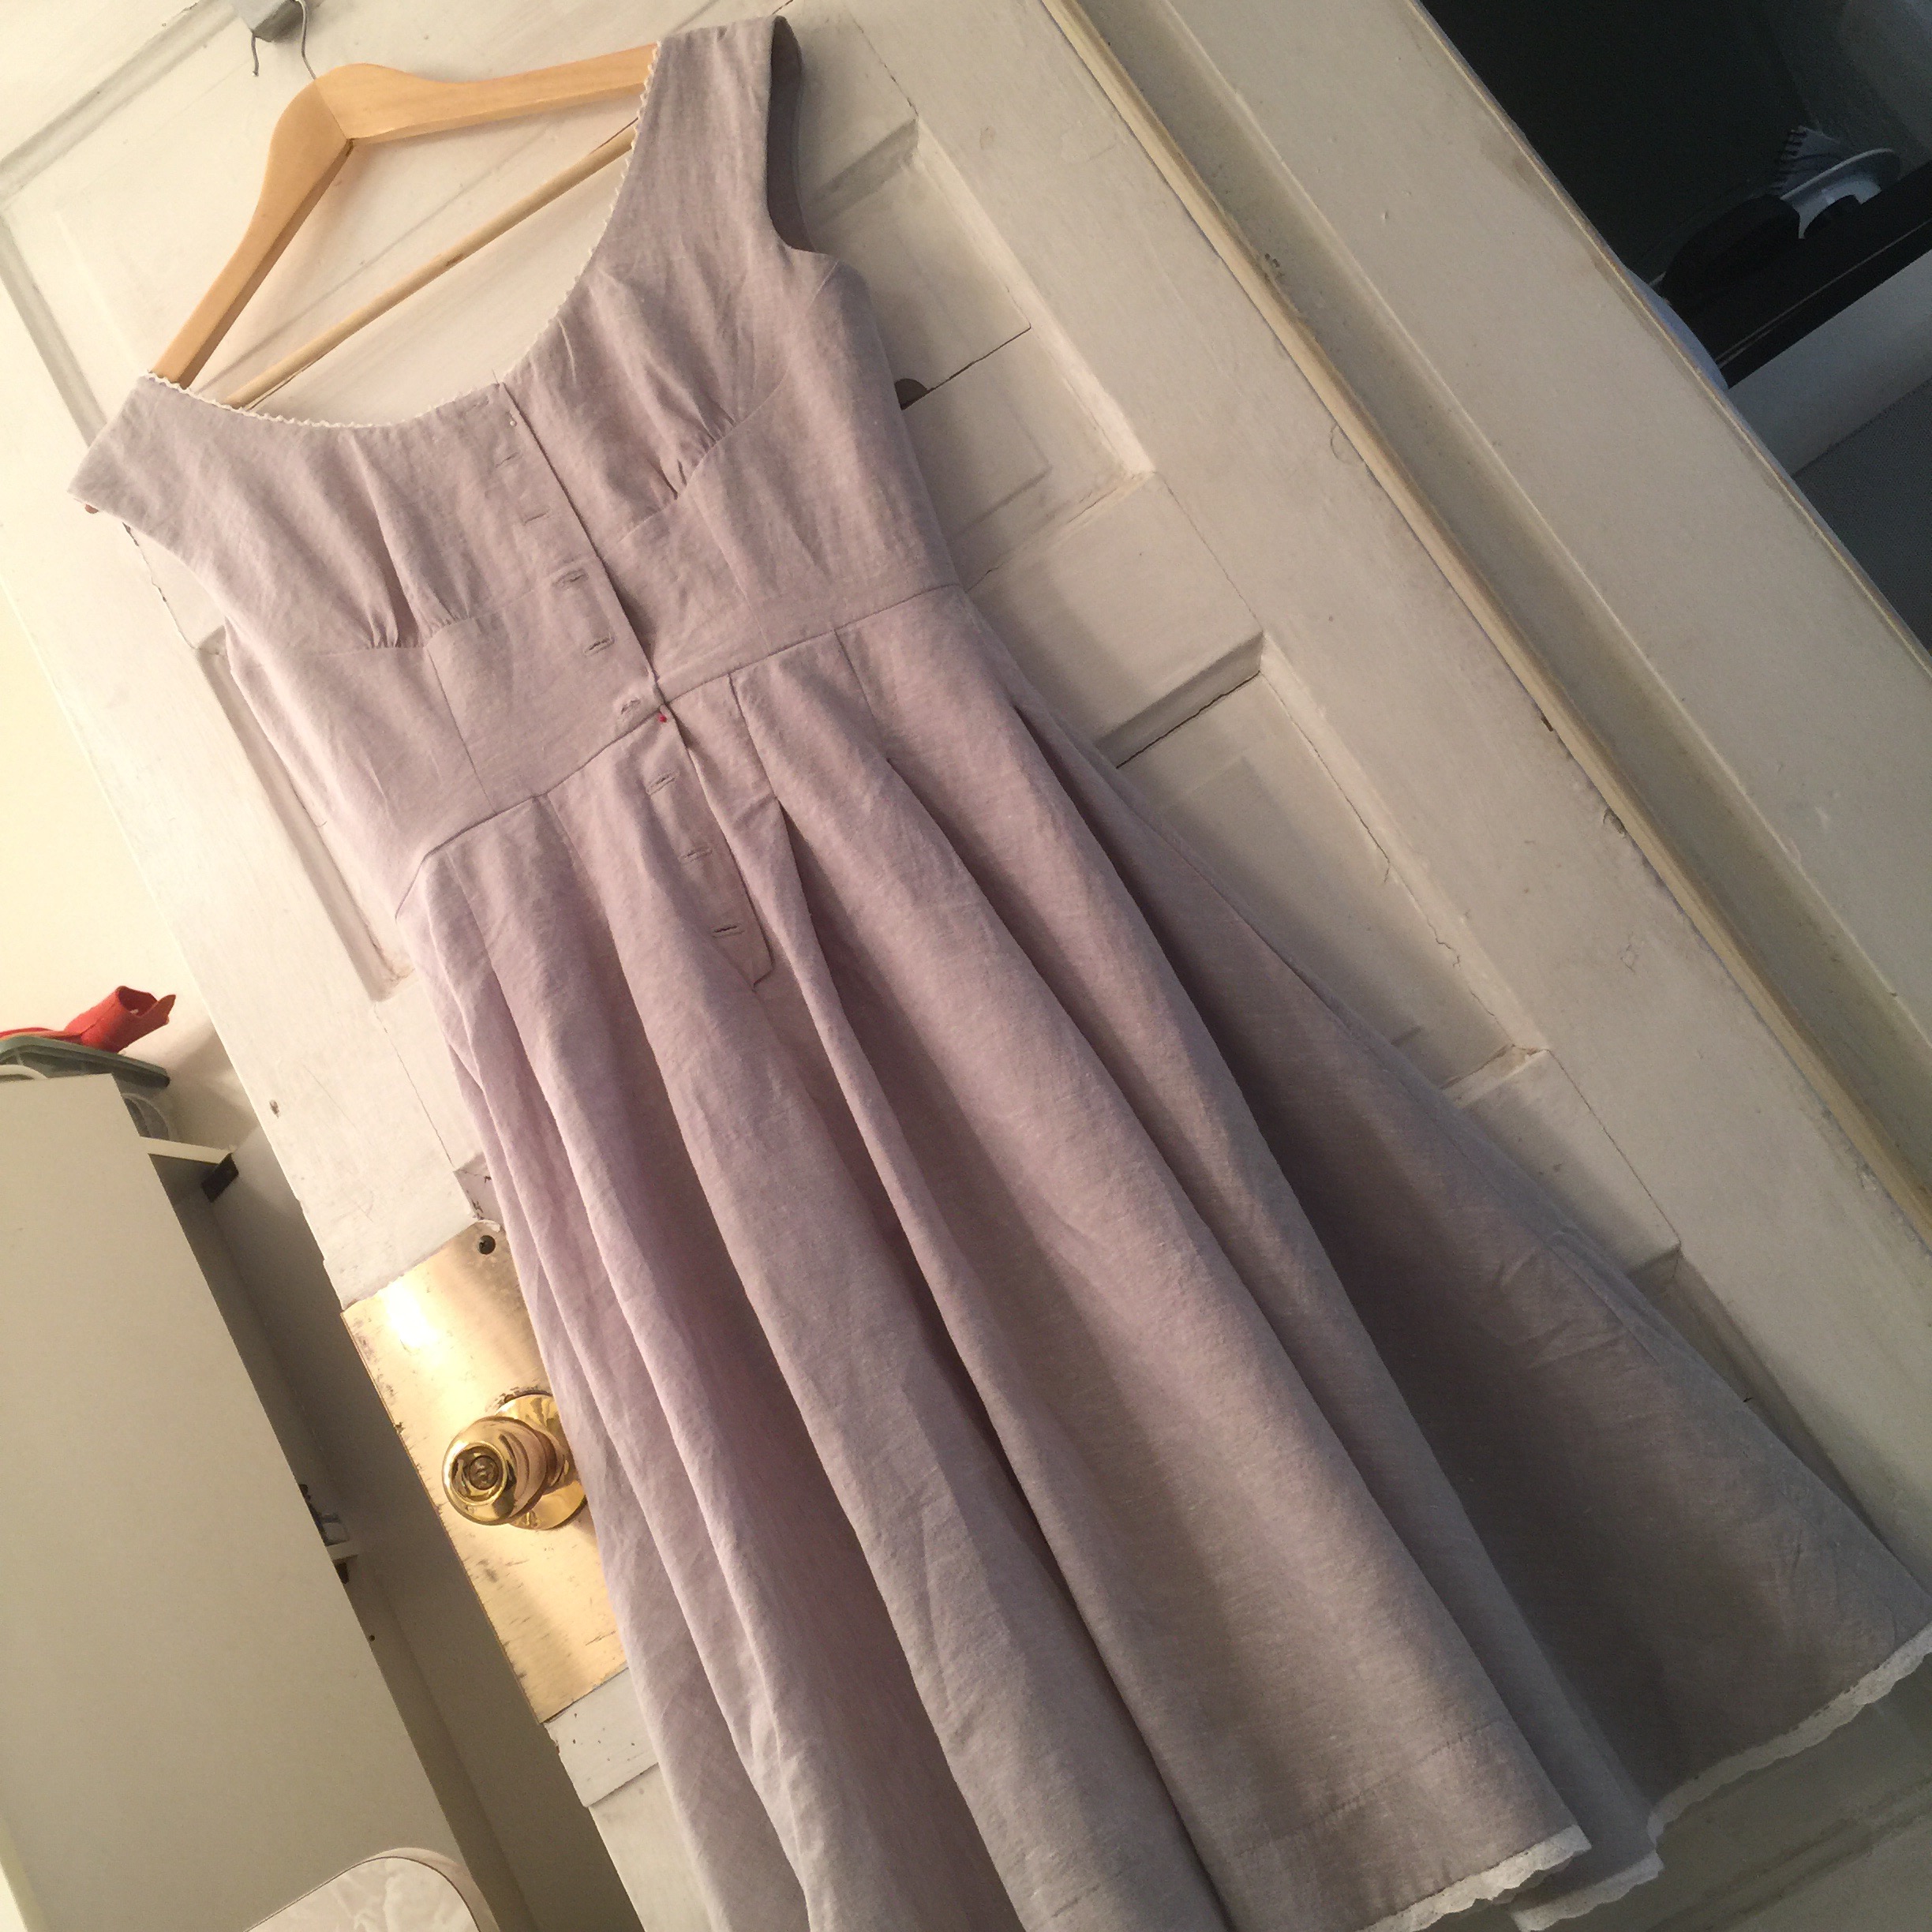
 All in all, this was a nice, quick project with a nice fabric and surprisingly little drama. I’ll take it!