

>_<

… Now if only I didn’t have to do all that inconvenient sleeping.

The Mass
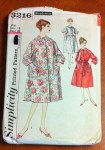
While Home this past weekend, my crafty sister-in-law took me down to the Value Village thrift store there, which is much bigger than the one by my house. And apparently has fewer vintage pattern aficionados haunting it, because there is a huge pattern section, and it was well-stocked with vintage. Of course, the patterns are more expensive, 99¢ rather than 49¢ for the individual patterns. And they do indulge in the obnoxious practice of bagging some of them (usually the best of the vintage, although there’s a fair bit of vintage in the individual patterns, as well).
Despite these disadvantages, I had very little restraint. Something about being home and not having the option of coming back next week.
For those who are actually interested in the nitty gritty, please flip through the gallery. For those who are merely shaking your heads in dismay at my wholesale descent into pattern-hoarding, well, my husband shares your pain. At least I didn’t buy fabric.


Now if only I can snatch a few minutes to actually sew one of these days…
Filed under Sewing

Adorable fabric.
Unfortunately (or fortunately, depending on your perspective), it’s already been fashioned into a dress. An adorable little full-skirted sundress, in fact. Are you surprised?

Pre-stitched Sundress
We are back in our hometown for the weekend, and my hometown Sewing Friend suggested that we check out a new vintage clothing shop in her neighbourhood. So we abandoned our spouses with the children and dashed off for a few minutes of precious child-free time at Tikkityboo Vintage, a teensy tiny, exquisitely elegant little store in a sadly-dilapidated stretch of minor commercial real-estate. It’s one of those areas that looks just like that really cool, chic part of town with all the nifty boutiques, about ten years before everyone realized how nifty and chic it really is. Except in this case, it’s been like this for as long as I can remember. Which is a pity, because the other street of chic, stylish boutiques in town has long since lost most of its eclectic charm under a swarm of high-end clothing shops and hair-salons.
Amidst the racks of gorgeous (and not so gorgeous) vintage dressses, I found a lovely flocked-print circle skirt, unfortunately with a waistband that *might* have fit Tyo, and this cute little dress, which fits me just about perfectly. I’m not convinced it’s *especially* vintage—the label is Made In China and identical to something that you’d find in a modern garment, and nothing about the construction suggests any great age. But it’s cute, the fabric is adorable, and the price was low.

In need of repair.
There’s a tiny bit of discoloration on the sash that hopefully a bit of a soak with some Oxy-Clean will do away with, and it needs a touch of repair at the bottom of the bodice. And while the weather is actually fairly good for May Long*, it’s not quite strappy-sundress weather, so I won’t be wearing it right away.
But I still think it’s really, really cute, and I get to have that warm supporting-local-small-business glow, which I rarely get in my usual haunts, as I live in a fairly modern suburb that is the natural habitat of big box stores and chain everything. Unfortunately I’m not likely to have any sewing to report for several more days, unless Sewing Friend and I manage to dodge our husbands again and duck off to the fabric store…
*The long weekend in May in Canada is officially Victoria Day, when we celebrate the Queen’s birthday, but most people call it May Long. It’s the official (usually miserable) start of camping season, and is generally celebrated with bush parties and snowstorms.
Filed under Sewing

Y1111
OK, I promise this is the last on this little dress. Once again, pattern Y1111 from Young Image Magazine, from their first issue, Summer 2011.

Snug. (and that’s the zipper side! 🙂 )
I made the size 128, as per Syo’s chest measurement, however I did lose a small amount of width due to taking slightly larger seam-allowances on the skirt gores. I don’t imagine it was more than one or two centimetres around the whole dress, though, so the dress is very close fitting to begin with. We can just barely get it zipped up around Syo.

Unfortunately, my old camera didn’t want to focus on anything more than a foot away.
Which, of course, she thinks is absolutely perfect.

Side view
I also lengthened the skirt by about 4 cm. It now comes to just below her knees. If I had been actually trying to fit it to her, a small swayback adjustment would’ve been in order. Or, y’know, a bit more ease for that bottom.

Front
Hmm

The hem.
Ok, I am now officially completely out of things to say about this dress. Definitely time for a dress for me.
Filed under Sewing

Cambie
Tasia loves me, this I know
for the postman tells me so…
I thought these weren’t even shipping until next week. When I got a PayPal notification on Friday that my pattern had shipped, I thought it was probably a glitch.
But no—there it was in the mailbox Monday morning.
Now for the hard questions—which view do I make first? And what fabric?
Filed under Sewing

Oh, no—more toile photos!
So, it’s no secret that I have Issues with waistbands that sit at my waist. Above the waist is great, below the waist is fine, but waistbands that sit right at my waist—these are problematic. Especially if there’s going to be any kind of waist emphasis (like a belt), blousing above the waist, or gathering below. I always end up feeling cut in half, emphasizing both the width of my waist (2-3 sizes larger than the rest of me) and the shortness of my upper body.
Unfortunately for me, this describes roughly 90% of the dress patterns out there, and (even worse) a large percentage of the ones I’m dyingtomakerightnowdammit!
Now, I successfully made a dirndl-skirt sundress last summer by adding a dropped waist to a formerly straight-waisted pattern. And, despite being a fairly extreme example of stunt dressing, it was one of my favourite things to wear last summer. But a) this was a princess-seam pattern, and b) I used a shirred back, which allowed me to really fudge the fitting.
So, it appears, the sensible thing to do would be figure out a bodice template—a block, if you will—that I can morph onto these waist-length patterns to drop the waist slightly. Most of the ones I’m concerned with have a simple gathered or pleated skirt, which won’t be much affected by the addition of a few extra inches (and I’d probably be adding inches to the waist anyway).
When I was musing about this the other day (nothing like beating a topic to death 😉 ) I was thinking I would just try adding on to a pattern I already had—Simplicity 3965, say. Lauriana (one of the more fabulous pattern-drafters out there) sagely commented that perhaps it would be less trouble start with a longer bodice, perhaps a hip-length sloper drafted to my own measurements.
Now, obviously she was right, but my (vast and growing) pattern collection is a bit short on such a basic, at least with the length, fit, and dart positioning I wanted. I was, however, reminded of the fact that I had drafted a “fitted dress block” from the book Metric Pattern Cutting for Women’s Wear, by Winnifred Aldritch, a few months ago, which had languished un-tested on my hard-drive (I like to mess around with pattern drafting in Inkscape, usually when I am supposed to be doing something else). Partly because Aldritch was a bit vague, or at least confusing, on the issue of waist-shaping.
Anyway, with Simplicity 3965 giving me an idea of how much waist-shaping was required (at least above the waist), I set out on an odyssey. There was printing; tracing; tissue-fitting (on me and my dubious duct-tape double). Sway-back adjustments were made. I have confronted the horror of the shaped dart.

Self-drafted bodice
All for… this. /sigh.
Well, perfection has not been achieved, but I think I might be getting into the right ball-park. The shape (and breadth) of the rear darts is truly terrifying, but they are at least approaching doing the job (although it looks from the photos that the back is still a smidge tight—overall the bodice is quite comfortable. I’m not quite sure what to make of the side-wrinkles in the front, exccept that perhaps a bit more bust-shaping is in order. Additionally, the bust-dart is still about 1 cm high, and the side-seam falls a bit towards the back. I might moosh a teeny dart out of the front armscye to bring that in (or play with the shoulder slope some more).
Anyway, despite the imperfections (which are considerably more evident in the photos than in the mirror… not sure if that means it’s actually better in real life or worse than I had thought) I figured I had reached a point where I was ready to try using it on another pattern. I.E. Simplicity 3965.
Premature? Possibly, especially since I was thoroughly befuddled how to relate the narrow back dart of Simplicity 3965 to my wide, angled, and oddly-shaped one on the self-drafted bodice. But I had limited time to sew this past weekend and I have fantasies of wearing this dress for May Long (which is next weekend—yeah, probably not going to happen).

Simplicity 3965 (modified)
So I matched up the waistline, and attempted to add the shaping of the self-drafted bodice on to the Simplicity bodice. This worked fairly well for the front, not so well for the back. My self-drafted back piece is very wide, but then a lot of the width is taken in by the dart. The Simplicity bodice back is much narrower, with a correspondingly narrower dart. I can’t help but think that a narrower pattern overall would be preferable, but obviously the swayback alterations didn’t transfer with their full force. Alternatively, letting out the hips a bit more might be helpful. Part of what’s hanging me up is that “high back hip” which I still haven’t really learned to fit.
Also, in this one you can see the lovely sunburn I acquired on Mother’s Day. This is what happens when I sit back and let other people organize the day’s expedition… my mother’s day brunch turned into a two-hour wander on a new segment of riverbank, with nary a squirt of sunscreen to be seen, on the first really summery day we’ve had so far.
I’m hoping that one more muslin will be sufficient—sewing these up is quick, but annoying, and I’m running out of crappy zippers. 🙂
Filed under Sewing

The dregs.
As I arrived for my weekly thrift-store scour, I saw the thing that most delights and alarms a thrifter: competition. A woman was standing over the pattern section (which was bulging), rifling through the patterns, basket beside her.
And peeps, her basket was full. Of patterns.
I checked out the rest of my usual spots—fabric, books, shoes—and wandered back. She was still there, still going through patterns. I hunted vainly through the bedsheets, but she was still there.
Finally, I gave up and went over and wriggled my way in beside her. She was mostly going through the ones already in her basket. I tried hard not to look at her basket, not wanting the pain of knowing what treasures I had just missed out on.
As I was sorting through the remaining patterns, another lady came and edged her way in beside us. This is a first ever, folks. I wasn’t even sure that anyone else *ever* bought the Value Village patterns—I had gotten practically complacent, frankly.
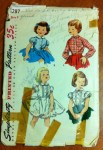
Anyway, despite getting the picked-over remains, I came home with a fairly massive haul. Not a lot of absolute gems, but some fun, quirky ones that I couldn’t pass up. And some more really cute kids’ clothes. The majority of the women’s patterns were in a size 6-8, however, which tempers my enthusiasm a little as that’s a fair bit of grading up. On the other hand, there was a man’s suit pattern (complete with the name of a designer I’ve never heard of), in a size 40 chest, which is my husband’s size—assuming we lived in some alternate universe where he would even remotely consider wearing a 70s-wide-lapel-bell-bottom suit.
I have definitely crossed a perilous threshold, my friends. I am now officially a pattern collector—someone who buys patterns merely to *have* them, even knowing she will likely never make such a pattern (boys suits, eg.) It just has to be the right vintage, the right style.
Well, at least they’re all cheap. And they take up less space than fabric. Now if only I can stay on the right side of the line leading to “pattern hoarder.”
I’m pretty sure she walked away with a basket full of forties and fifties patterns. In factory folds. With a 34″ bust. And probably this one, too.
Filed under Sewing

Twee.
This is a sweet little dress.
A very, very sweet little dress. Too saccharine to have any business anywhere near either of my children, frankly (although Syo will probably bat her eyelashes at you to confuse the issue.)
Once again, this is Young Image Magazine pattern Y1111, from their inaugural issue. My first installation of wittering on the dress is here.
Looking at the photos and the line drawing, one has the impression of a rather complicated dress, but there are actually only four pattern pieces: front bodice, back bodice, skirt panel (gore, if you prefer), and front overlay. And a few instructions for making the ruffle and ties for the shoulders and the drawstring, not that I actually paid attention to them. I will confess, once I had figured out basic things like how many of the skirt pieces needed to be cut out (five pairs, by the way) and where to put the zipper, I didn’t look back at the instructions. I did improvise a fifth piece, for the skirt lining, but in hindsight I could’ve just used the front overlay piece and fudged a normal hem curve. I realized this right after I finished laboriously tracing the skirt panel five times to get a five-gore width. (Then I realized I only needed a two-and-a-half-gore-width if I cut it on the fold. *headdesk*)
As with Burda, you do need to add seam allowances to the patterns. I know some brave seamstresses who just eyeball these, or use little gizmos like the seam-measurers; I am not so brave, and add them on the tissue.

Bodice chevrons (back view)
Being the brilliant thing that I am, I decided I was going to try and do chevron stripes on the bodice. Not being completely idiotic, I decided I would underline the bias bodice pieces with some leftover cotton (lawn? batiste?) cut on grain. This was a good idea since by the time I had the chevroned seams (mostly) matched and stitched the bias pieces, they weren’t exactly the same size and shape they started out as. Seersucker’s kinda shifty at the best of times, and my relationship with precision is, well, hit and miss.
I realized after stitching up the skirt panels, that I’d had my needle set in the left-most position, so each of those many seam allowances (it’s essentially a 10-gore skirt) was just a smidge wider than it should’ve been. Oops. So I did have to shave a smidgeon off the bodice. I cut the size 128, as I was told my husband’s little cousin is a “skinny 8” and that was the size which corresponded with Syo’s bust measurement. Of course, Syo is on the shrimpy side for her age, too, but mostly that’s in height—she’s fairly sturdy and has my broad shoulders. Here’s hoping it fits. If not—I’m sure there’s a niece somewhere it’ll fit. I also added about 4 cm to the length, just at the hem of the skirt.

Can you spot the zipper? (PS the bodice seam is actually matched. I gave up on the chevrons, however. Also the difference in angle/grain between the skirt overlay and the gores at the side seem preclude stripe-matching on the skirt)
The pattern calls for a side-zip, so I pulled out one of my vintage invisible zippers, since I am officially “off” regular zippers after attempting one in the blue tunic. This was my first time installing a metal invisible zipper, and it was interesting. I remembered to stabilize the fabric with a little strip of fusible interfacing before stitching the zipper in, and I’m very glad I did because I think it would’ve driven me nuts. As it is, there’s a bit of poof around it, but not too bad. Anyway. I use Sherry’s method and install it with a regular zipper foot. In some ways this was easier with a metal zip—it’s easier to see the teeth, and they feel a bit sturdier so I was less paranoid about wrecking it. On the other hand, I was terrified I was going to needle down on one of the teeth and have sharp flying metal flying at my eye. It took me a couple of passes to get the feel for how far back to rotate the teeth, and I did nearly sew my fingers a couple of times, but in the end it worked really well, and I even managed to figure out the trick of sewing the lining on by machine this time.

There’s the zipper! 🙂
The combination of a drawstring and a side zip is, um, not intuitive. Basically, I ended up with the drawstring in two parts, both stitched to the zipper tape (if I’d been a little more together they would’ve been attached before I put in the zipper, but anyway)—a short one which goes from the side to the CF opening, and a long one which goes from the side, around the back, to the other CF. Hopefully this’ll work out—it’s mostly decorative anyway.

Front notch with drawstring.
The pattern (OK, the photos from the magazine, again, didn’t look at the instructions) has you leave a gap in the stitching at the CF notch for the drawstrings to emerge. This is easy, but there’s no real good way to finish the edges, and I’m kind of convinced that after a few wearings there’s going to be threads poking out like crazy, barring some hand-stitching. I considered putting a tiny little buttonhole in the front on either side of the notch, but when the chips came down I took the easy route. An eyelet would be cool, too, if you made a punk-y version of the dress. Which would be really fun, actually. Wouldn’t it be awesome made out of old metal-band T-shirts, with exposed construction and some scraps of black lace and studs?
… ANYWAY.
I did the topstitching around the drawstring casing last. It was a little nerve-wracking making sure that I didn’t stitch down the drawstring itself, but it wasn’t as bad as I feared. I did hold the fabric very taut, since I was stitching three layers at that point, the top one of which was on the bias, and I was terrified the fabric was going to move and ripple. It did a bit, but not too much, at least on the outside (the inside, as you can see in the zipper shot above, isn’t lovely, but it’s done so I’m not going to sweat it.
I was going to wait until I could try and shove Syo into the dress to get some modeled shots before posting, but a) mysteriously she didn’t want to get up extra-early for a photo-shoot in the snow (yes, snow) before breakfast and b) I’m not 100% convinced it’s actually going to fit her. Although given that she likes everything skin-tight these days, that might be right up her alley.
Coming soon: more bodice fun!
Filed under Sewing

Peace out, dude.
I tend to use “muslin”, because that’s what the Reader’s Digest Complete Guide to Sewing uses and that was my first sewing text, but I really do prefer “toile”. It’s shorter, for one thing, and doesn’t sound like I’m macerating someone’s religion in the pursuit of better fitting clothes.
Anyway, I made up a quick toile for the bodice of Simplicity 3965. I have decided I need to get my butt moving on this project so I can have it done before the Cambie dress pattern comes out later this month, because when that happens it is totally going to be All Cambie All The Time. Well, probably not, but I will wish it was. And, since I had the excellent example of Tasia’s muslin, I was actually good and thread-traced all my seam allowances and darts and EVERYTHING!
Ok, so, I got a bit ahead of myself, there.
To start with, the pattern ElleC sent me is an old-school size 12, that is for a 32″ bust and 25″ waist. The first is slightly smaller than mine (OK, let’s face it, since this past Christmas it’s a full 2″ smaller, 3″ if I want to wear a bra, which I generally do with wovens.) Having compared the pattern pieces to my body, it actually seemed like the length was going to be all right, and a little bit of pattern measuring suggested that there might almost be enough ease for the bust. The waist, of course, was laughable. Hilarious, really. “Vintage” figure, I do not have. Snerk.
So for the muslin, I added 1 cm to the side-seams of each piece, for a total increase around the body of 4 cm (just under 2″). And then I cut out and stitched up with, as mentioned above, traced seam-lines and everything.
I took proper fitting photos but the combination of a weird camera angle, bad light, and the total lack of makeup and hair makes me unwilling to post the rest of them, sorry. Only the goofy one was entertaining enough to make up for the weird angle, and even then you’re not getting the face. So you’ll have to take me on my word that the fit seemed pretty good overall. The bust was just about perfect, darts pointed where they should, the shoulders etc. look good, but the waist obviously needs a bit more (more) room. At least if I want to, y’know, eat or breathe or anything like that.A small swayback adjustment (raising the rear waist seam in the middle by about 1 cm) will be in order, and a couple more cm ease at the waist, and I think I’ll call it good. Which means I’ve made almost none of my usual adjustments to this pattern. Interesting. (I’ll note that Tasia had to lengthen the waist on hers by a good inch.)
Of course, now I have to face the next stage—the waistline. As I’ve said before, I have a short waist and rectangular figure, and something about this combination tends to make gathered, dirndl-type skirts that begin right at the waist, well, a bad idea. Dropping the waist-seam a few inches gives me the look of a longer body and puts the added bulk of the gathers at my hips—which can always use a boost—rather than at my waist, which doesn’t need any added bulk ever, thanks.
However, for a fitted bodice like this, that also requires a lot more work. For the polkadot sundress, I kind of freehanded the front and fudged the back with a shirred panel. I would have to be a lot more precise for this project. Figuring out the hip curve. Fitting the bottom half of my swayback (without a waist seam). How to continue the shaping of the front darts.

Waistline Placement
Part of me is saying “go for it!”—if I figure this out, I’ll have a basic fitted (albeit sleeveless) bodice I can use to adapt the zillions of waist-seamed dresses that are flooding my fantasy sewing these days. Part of me is saying “Give the gathered-waist look another try. You never know, it might be ok this time. Maybe the problem’s mostly in your head. Everyone else likes those gathered skirts!” On the other hand, looking at my little croquis there (which I traced right off the image at the beginning of the post) I know which one I prefer…
Filed under Sewing
Sewing is what I do when I'm cheating on all my other hobbies...


