
 Leggings are the ultimate quick make. They’re one of the few things faster to sew than to shop for. And while they’re easy and cheap to buy, I almost never get the particular fit I want in bought versions—the length is rarely right and the rise never is.
There are a jillion patterns out there, including free ones, and I’m assuming instructions for drafting your own aren’t hard to come by either. In the past I’ve used two patterns: the Cake Patterns Espresso (disclaimer: I did the digitization work for that one) and the Jalie 2920.
Espresso is basically a draft-your-own where you plot your measurements on a grid and connect the dots. I got a fairly “loose fitting” pattern out of it, which works well when I want to make leggings out of ponte or other less-than-optimally stretchy fabrics. I could obviously make another version with more negative ease but it was easier to just use Jalie 2920, which is nice and snug and has ALL THE SIZES.
 So why branch out? Well, both Espresso and Jalie 2920 are solid basic leggings patterns, a single pattern piece. A nice feature a lot of my kids’ more substantial storebought leggings have is a wide top band. I’ve been winging my own recently with mixed results, but when Helen’s Closet came out with the Avery Leggings last winter, they had this exact feature built in—plus a gusset, which I was curious about, not that I’m flexible enough that I actually need one in my leggings.
 Obviously any of these features you could hack on your own, but we use patterns to make things easier, and easy patterns to make things effortless. When I got offered the opportunity to teach a leggings class at my local quilt shop, Periwinkle Quilting, I jumped at the chance to get my hands on Avery as something a bit more detailed (and maybe something people would like their hands held for) than a basic one-piece leggings pattern.
 We’ll see how that works out, but at the very least I got the pattern and a chance to try out some of the cute knits they’re stocking from Cotton and Steel, which is a lot more swanky than I’m likely to find at Fabricland.
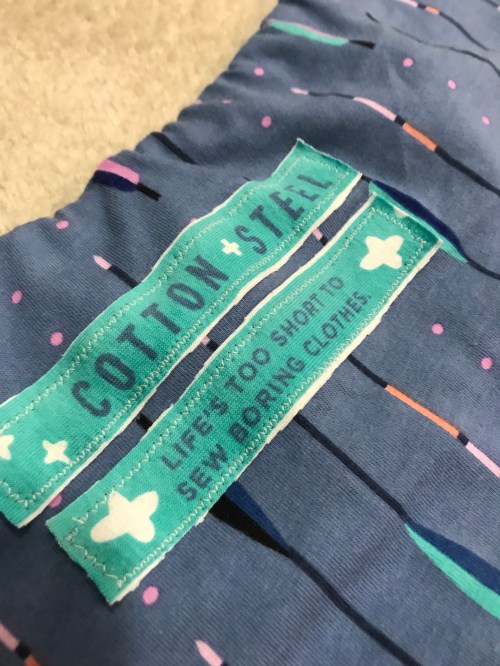 The Cotton and Steel jersey is a bit thin for what I like in leggings, and perhaps not quite as stretchy as the Avery calls for, but I wanted to give it a shot, even though in the grand scheme of things it’s probably better suited for a T shirt. I picked the arrow print mainly because the colour didn’t fade out as much under stretch as some of the other options. Also it’s super cute. And it had the most adorable slogan in the selvedge I just had to appliqué it on the back of the waistband as a label.
 I also used a wee bit of those cute selvedge stars on one ankle, too. I cut the longer length, which is meant to have ankle scrunchies. No ankle scrunchies on me, but they are long enough.
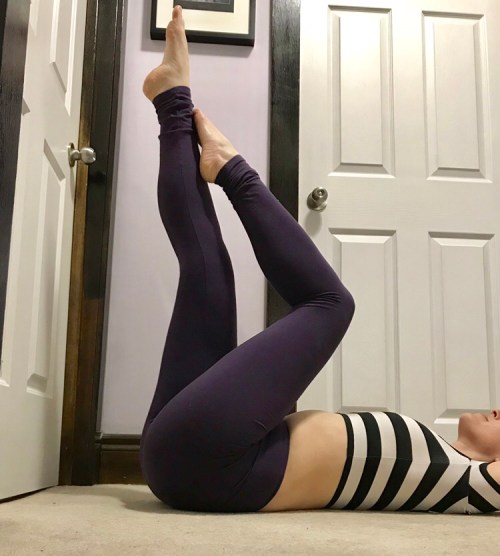 For my second pair I added 3″ in length. Perfect ankle scrunchies!
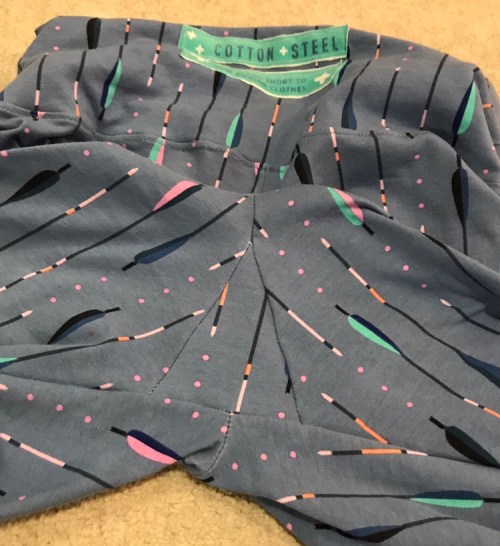 For the crotch gusset, I made it two layers. Even though this isn’t like an underwear gusset, I just felt better with the gusset being thicker. Your mileage may vary.
 I was curious about the construction of the waistband. Turns out it’s much the same as Jalie 3022, if you skipped the contrast band, which I always do. Good instructions.
 I was sewing all these while my basement is under construction and most of my sewing gear is trapped in the depths of a storage container. And I didn’t think to buy elastic, because I always have elastic, but the only stuff that’s not buried is my 1/4″ clear elastic. That makes for a nice non-bulky finish—but maybe not ideal for the whole staying-up part. The pattern calls for 1/2″ elastic.
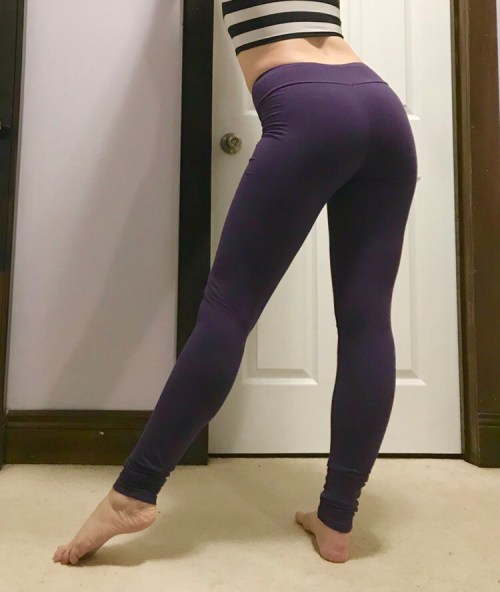
 Partly because of my not-totally-optimal jersey, and because Avery calls for 70% stretch (Jalie 2920 only calls for 60%), I rounded my size up to the Large. This is comfy but may be a bit “big” technically—there are some wrinkles in both pairs, especially around the hips, that maybe don’t need to be there. A quick note on the % stretch—I had always read to measure stretch along a fold of fabric, since the raw edge will stretch out more. But the instructions for Avery don’t mention this. So if you’re measuring the 70% stretch along a raw edge, the actual stretchiness of the recommended fabric may not be much different than the Jalie pattern. I’d compare but, again, all my stuff is buried.
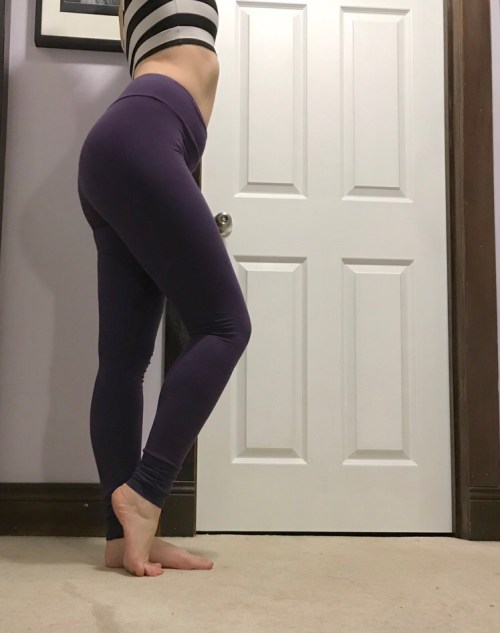
 My second version is in a deliciously beefy cotton spandex knit from the ends at Fabricland. It’s everything you could ask for for a pattern like this. I added a bit more length, as I said before, for ankle scrunchies, and went with the mid-rise version of the waistband. The high rise version I think is actually a little too high for my short body—the mid-rise still comes up to my waist pretty easily, though it does ride down a bit.
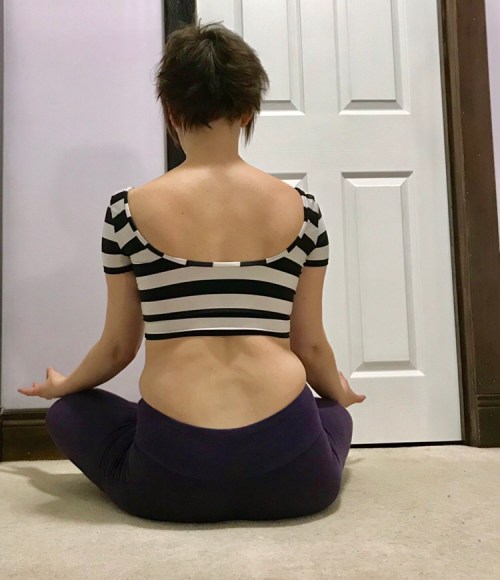 In the mid-rise, I think a little more height in the back could be a good idea—this happens with almost all my pants. I think the correct solution might be to use the high-rise waistband but lower the front rise on the leggings piece a bit.
 But while there’s always room for a tweak or two, I gotta say these are pretty darn perfect.
(Oh, and if you’re local and would like some hand-holding with these, the class will be May 5! Contact Periwinkle Quilting to register!)
 It’s April, and it’s
  My basement got cleared out last week, finally, to make the repairs from our flood in February. I had left careful instructions for the sewing stuff that needed to come upstairs as opposed to going out in the storage cube. And everything did, except the one bag that contained the (prewashed) fabric and pattern for the project.
 So instead, I pulled out a random fabric box that I could reach from the front of the storage cube (which is totally accessible, just very densely packed and I am not going to mess with that), and started rifling through the extremely limited selection of patterns I could get my hands on. (Because they happened to be on the kitchen table not in the basement where they belong)
 And all of a sudden, apparently, McCall’s M7467 is at the top of my list, one final sweater dress for the season. In red velvet, because that was the best option in the box that I could reach. It’s actually good because I’ve been wanting to make this one for a while and it kept getting bumped down the list. And, well, who doesn’t love red velvet?
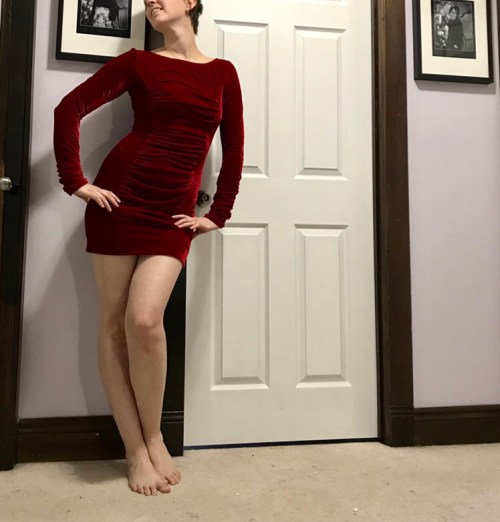 I cut view B, which in the drawing looks like a mini dress but is actually a tunic length, and not a long one. (Keeping in mind my petiting, but still). So when I got to try-on phase, I decided to add a big wide band at the bottom. I like the look anyway.
 I didn’t really think of this sheer rayon-poly blend being a chiffon when I picked it out—technically it isn’t. But it shares all of the qualities that make sewing with chiffon unpleasant—shiftiness, slipperiness, a tendency towards fraying, and sheerness that means the insides have to be as tidy as the outsides. Also, hard to unpick. Yugh.
 This boxy, oversized shirt dress pattern, McCall’s M7713, is really outside of my comfort zone, too. What I like is the lace-up belt. Also it was on the April mailer, so free extra project. Many an unwise project has been spawned that way.
 While I may not be a fan of the boxy shirtdress, my husband is a fan of those scenes in eighties movies where the girl is wearing the guy’s shirt around the house the morning after. So I guess I’m hoping to channel that vibe.
 This pattern does have a really cute little collar, so that was fun to try out. I did not like the instructions for handling the back yoke, though, so I kinda went off-road, and I’m not overly satisfied with my own version either. Possibly some googling would’ve been in order. Or, y’know, pulling out my old Colette Negroni instructions, since it’s basically a funny-shaped camp collar.
 I like the faced hem, and the cute split sleeves, which I shortened to 3/4 length. This photo is of the good side.
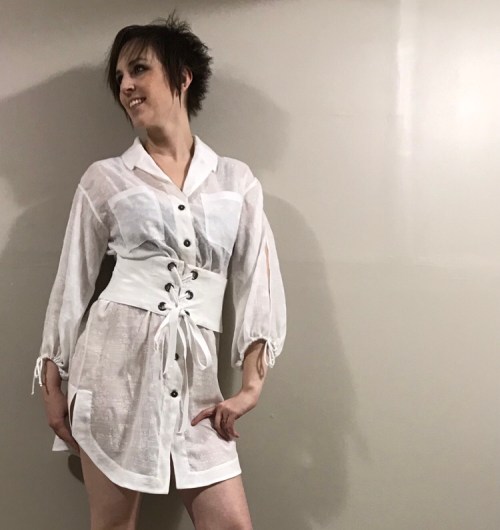 Because the fabric wasn’t traumatic enough on its own, my iron’s tendency to spit yellowish water at inopportune moments is also well displayed over several parts of the dress. I think there’s some chocolate on there too. Just shoot me now.
 On the other hand, I actually like it more than I thought I might. It’s pretty fun. There are a lot of cute details—the shaped faced hem, sleeve splits, obi/cincher belt, and of course the cute collar.
 I made the split sleeves only 3/4 length, as I thought at full length they would be a bit much. I’m very glad I made that decision.
 You may have noticed, as a dress is is SHORT. Especially with those side splits. (Mine might be split a little higher than the pattern intended, as I went a bit off-road from the instructions in that area, too. So it may be destined for tunic-hood. Though black boyshorts underneath would be pretty fun, I have to say.
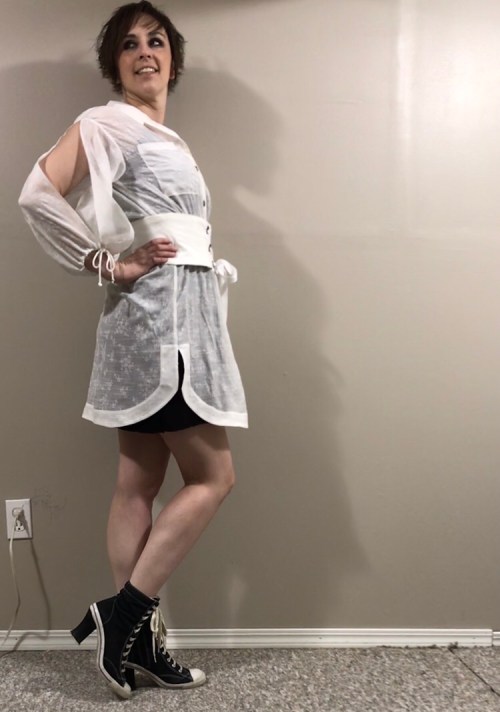 The bottom half feels very narrow compared to the billowy, blousy top, which is interesting since the pattern is more or less straight and I actually graded up a size below the waist. The whole thing feels a bit top-heavy. On the other hand some over-the-knee-hooker-boots might offset that perfectly. Sadly my wardrobe is lacking in that department.
 It was definitely fun to take these photos and try styling it with different underthings.
 Even the unbelted view was fun—a lot more understated than with the belt.
 So all in all, a harrowing process with an imperfect result that actually looks pretty cute in the pictures, if not up close.
 And considering that it’s still firmly winter outside here as I write this on Easter weekend… at least it’s summery. I’ll take it.
 I massively enjoyed following the #nofearjeansmonth and #nofearnewjeans hashtags that Closet Case Patterns coined for February. I like to think of myself as one of the “first generation of internet jeans sexists”, having made
  Enter the high-rise Ginger jeans. I’m not convinced these are working for me, either, but I’m branching out, testing. Seeking.
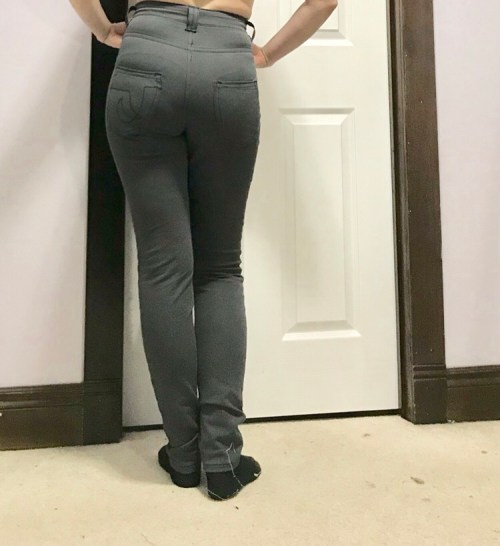 I did my pocket placement more or less as the pattern directed (I think) and I’m not super happy with it. They should be slightly higher and much closer together. (The closer-together part has a lot to do with the extra-stretchy denim, though)
 To make sure the waistband didn’t gape, I actually eased the back yoke onto a smaller portion of the waistband. This worked pretty well. I also interfaced only the front half of the waistband—I’ve gone back and forth on this over the years, as it’s kind of a trade off between comfort and stability. I’m pretty happy with the half-and-half, at least at this early stage.
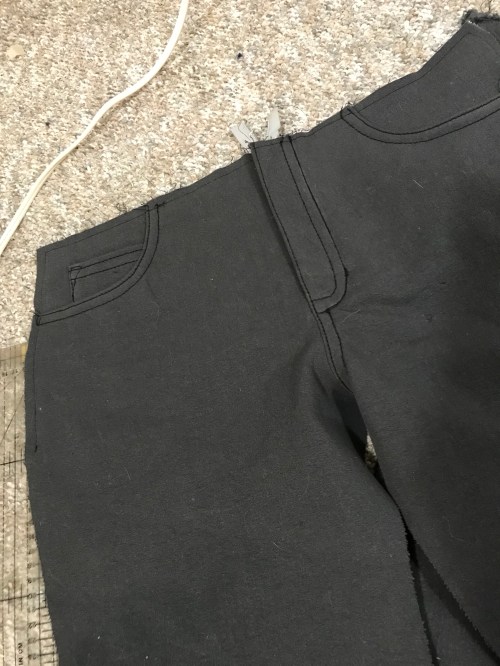 I topstitched on my new-to-me Elna, but I chose to use two extra-strong threads in the needle, and it was kind of a nightmare. Lots of snarling and refusing to penetrate, not to mention skipping stitched at corners and things like that. Eventually I gave up and dropped to one thread, and just topstitched twice all around the waistband and hems. The effect is better than I would’ve gotten with the two threads. So, next time, we won’t do that. I’ve also been experimenting with using Coats’ newish Eloflex thread in the bobbin—it’s stretchy, so hopefully less likely to snap in high-stretch areas than regular thread in the bobbin. I’m hoping, anyway. We shall see.
 They’ve relaxed a bit after a day of wearing and I think that’s helped the fit, which is good. And they’re already letting me experiment with some wardrobe pieces I haven’t been getting much use of lately—mainly shorter tops—so that’s exciting. And the weird charcoal colour goes with some other things in the wardrobe which gives me some new colour combos to play with. So, I think good? I think?
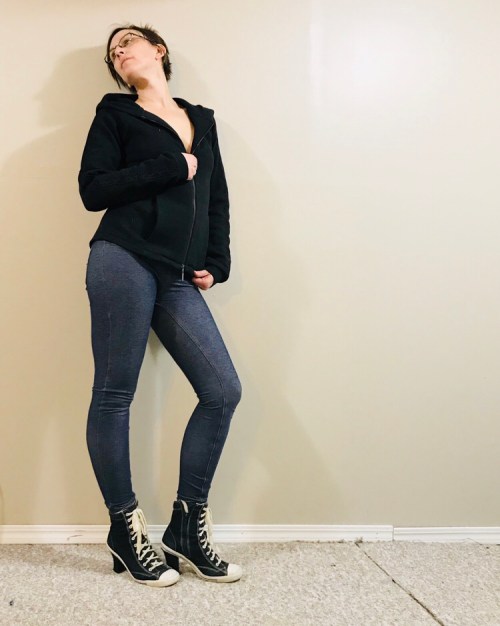 In recoil from the
 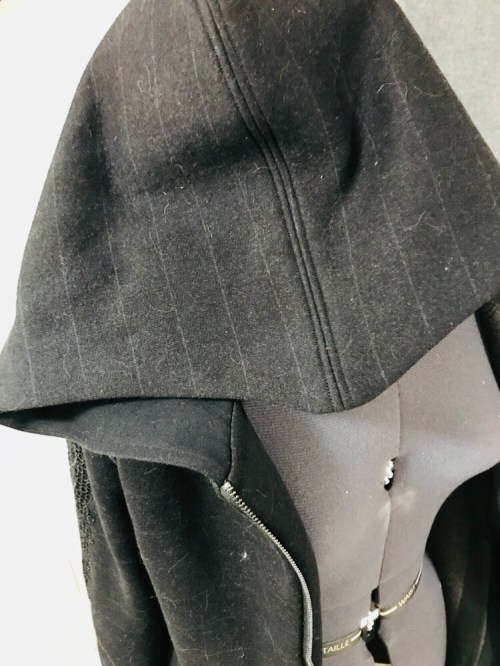 Actually, my co-worker
 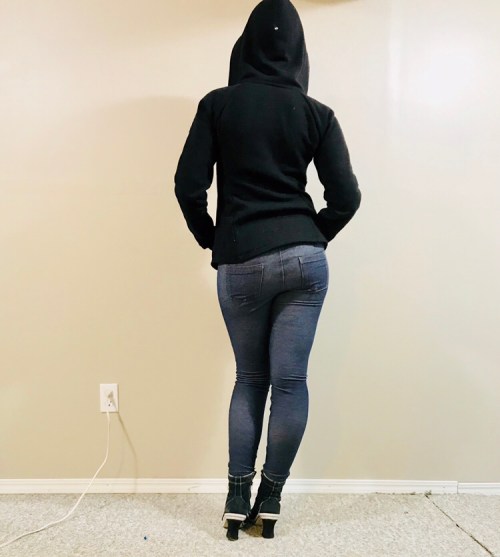 The pattern is McCall’s M6614, which I’ve actually kinda liked for a really long time. I mashed up a couple of different versions as I wanted the princess seams combined with the front zip.
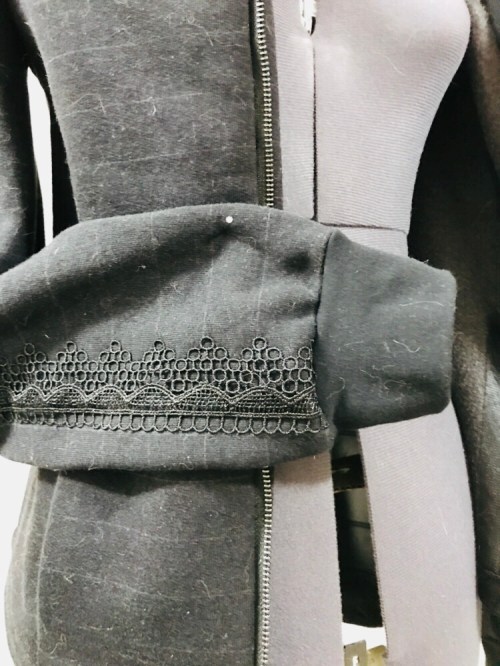 And the lace on the sleeve. That’s a really cute touch.
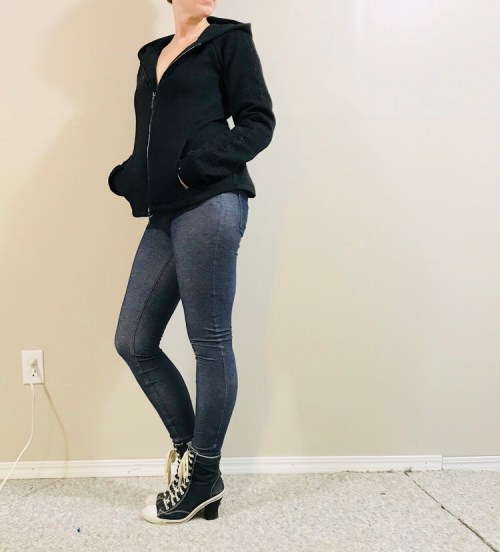 I like the shaped shirt-tail hem, too.
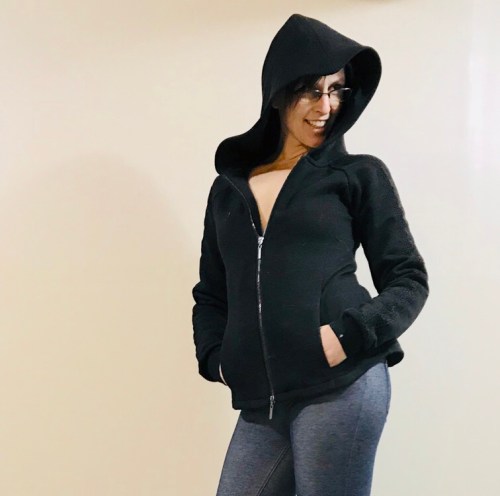 I added a bit of a point to the hood for that Assassin’s Creed vibe, but I’m not sure it really works. This basic hood is a decent size but not nearly as fun as the
  One more thing I’m going to brag about—I used twill-tape on the inside of the neck to cover the seam there and for once it went down super nicely! (The white is wash-away stabilizer that helped me stitch the lace on to the sleeve—I’ll wash it away after this thing is done being a project on show.)
 The jeggings are ones I made a long time ago, but I made the waistband elastic stupidly tight. Today I took that off, added a big ol’ fold-over-jersey waistband, and repaired a bunch of popped topstitching. I’m much more excited about them than I’ve ever been.
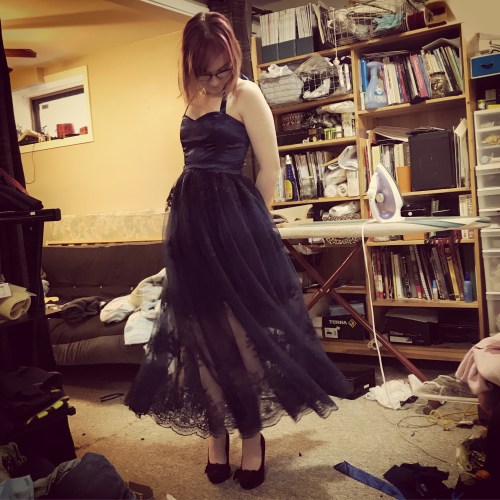 Have I mentioned Tyo is graduating high school this year?
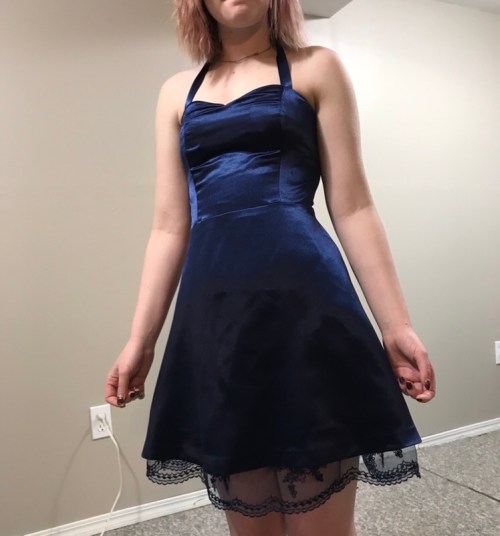 Also she asked me to make her grad dress.
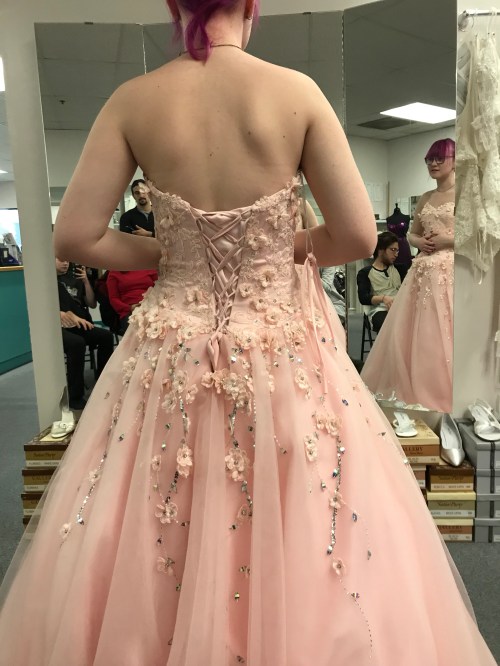 It was also a wise choice, as I can’t afford the $800 dress she fell in love with at the fancy dress shop—but we can put her favourite elements into the dress that we make. Well, some of them. Not all that insane beadwork.
 We settled on McCall’s M7281, as a contemporary pattern with the right lines, despite the not-very-inspiring envelope.
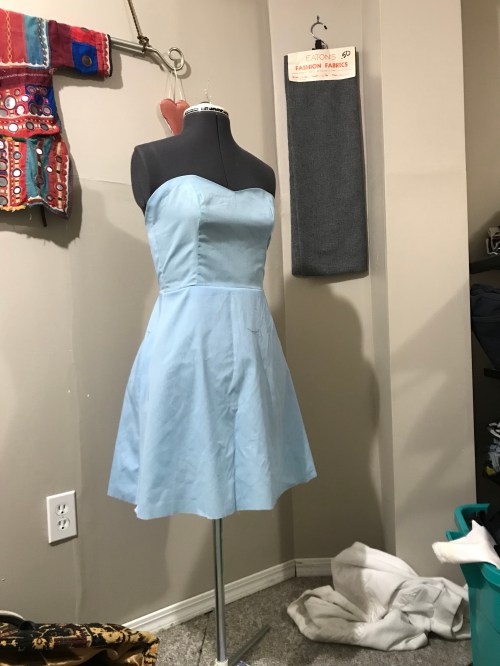 And despite my fears, the muslin process went quite well. Her measurements put her in the size 10 for bust and waist, size 14 for hips. Grown into the pear shape we have been predicting for her! And the sizing was true enough with only minor taking in. We initially muslined the straight skirt—she wanted a slightly flared skirt, but not as full as the one that came with the pattern. I planned to follow
  So in the end I made minor tweaks to the bodice, some more major ones to the skirt (mostly to do with hip curve), and converted it from the straight original shape to the cute little flared skirt above.
 Which makes it approximately the same shape as every other cute little dress she owns.
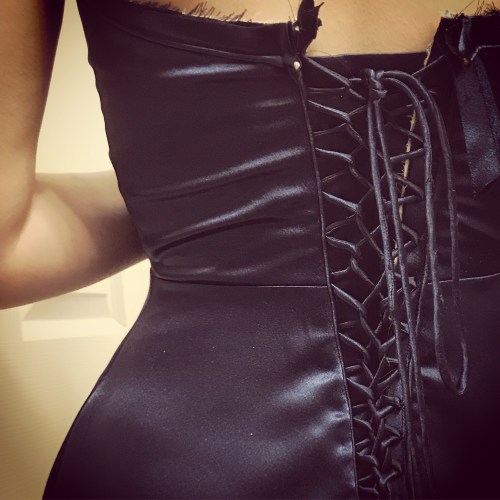 It took a bit of mental rehearsing, but I eventually managed something not too dissimilar.
 The dress has an inner corselet made of ticking, with metal boning. I used the original straight skirt pieces to draft a princess-seamed, hip-length pattern for it.
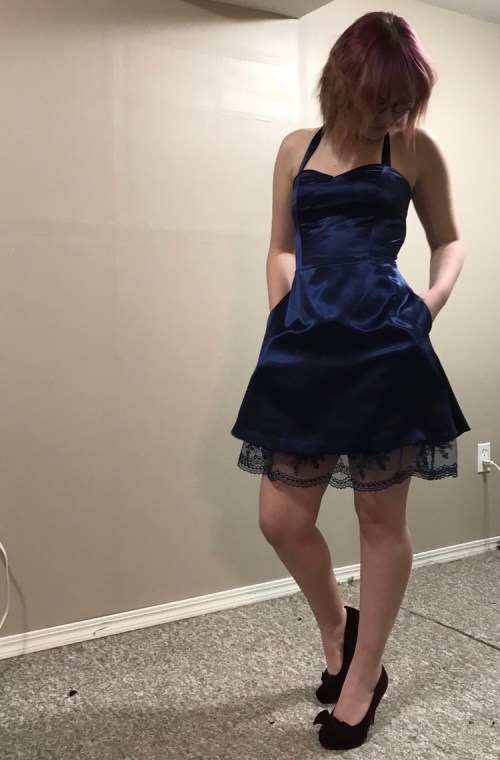 My biggest screw-up is that I didn’t choose to underline my bodice fabric. I thought with the dark fabric and corselet it wouldn’t be necessary. But the bodice could definitely have used a bit more support and smoothness in the outer layer. However, it’s not bothering Tyo, so please don’t point it out to her.
 After some consultation, we added halter straps. They’re not, strictly speaking, functional, as the boning holds the bodice up just fine, but they definitely make her more comfortable—and they’re pretty. This crêpe back satin makes lovely soft bows. And yes, I forgot to attach them before sewing on the lining so I had to rip and insert.
 Tyo was really excited by the idea of having the lace skirt removable. I’m trying really hard not to tell her how much this reminds me of the Teen Sweetheart Skipper doll I had in the 80s with the removable overskirt that could be worn three different ways.
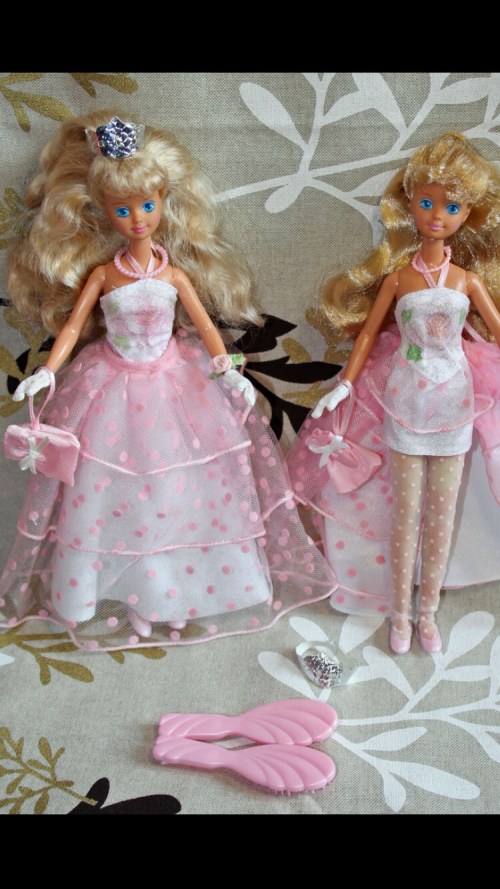 Man I loved that doll. I think she perished in the Great Barbie Massacre of 2003, when I thought it would be a good idea to give the three-year-old Tyo all my old barbies. All of the heads were broken off within two weeks.
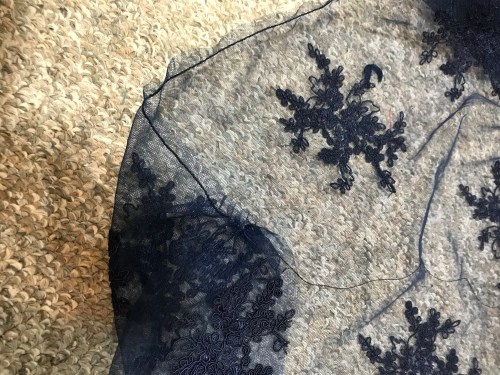 I shouldn’t have been so worried. I used the zig-zag-over-heavy-thread method, which is interesting in mesh because the zig-zag basically shrinks around the centre thread into a fine line, and then it does very little shifting around on its own when you gather it. Also the fine mesh isn’t as bulky as most things, so even with something like four mètres of lace gathered onto a 26″ band it was remarkably well-behaved.
 the waistband is just an interfaced rectangle I gathered the netting on to. We discussed adding another layer of tulle for poof but she says she likes it as is. The waistband closes with some skirt hooks and then a soft, droopy bow covers the attachment. We will have to cut slits in the overskirt so she can access the pockets. Also I’m pretty sure at some point during the night she’ll wear it as a cape.
 Fortunately, I was feeling obsessive on a Saturday night, and set to work messing around with the space piece, some wash away stabilizer, and my machine’s fancy stitches.
 Some key points:
 Baste your stabilizer in place, and then draw the outline of your scallop right on the stabilizer.
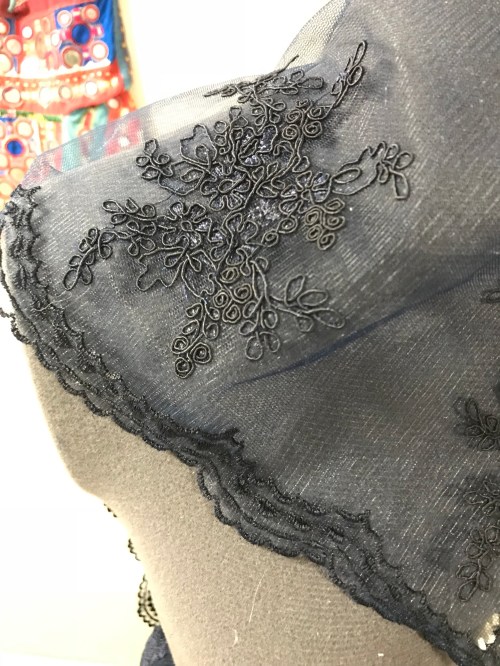 This took kinda forever, but was also weirdly fun, and saved me buying 1.5 more mètres of fancy 60″ wide lace just to use the bottom 3″ of it.
 So this kid, though
 This is done as another shop project, so we had to get to it early so it could go on display. It does feel good to have it done, though, as long as she doesn’t lose weight in the next three months. It also feels good to see how happy she is with it.
 I think I bought the
 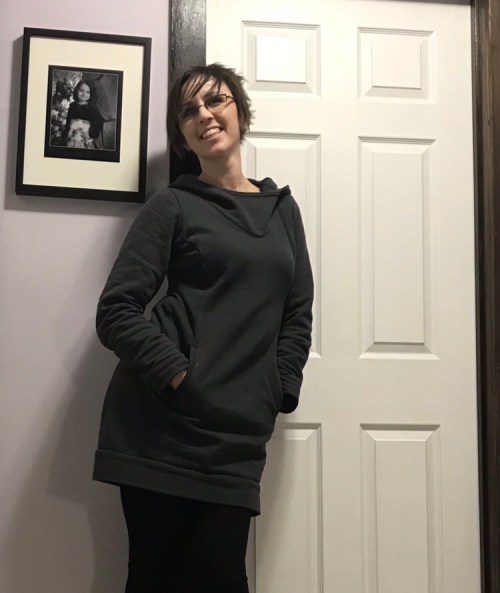 So why did it take me so long to make up? I honestly have no clue except that I’ve been having a hard time with PDF patterns the last year or two. It’s probably more mental than anything else, but the paper patterns have been getting sewn while the PDFs just languish. Having my printer on the fritz for a large chunk of last year didn’t help either…
 Anyway, nothing like a holiday to get you over a hump like that. In the wake of Xmas, I finally got myself motivated to tape the pieces together and make it up. Mainly on New Year’s Eve.
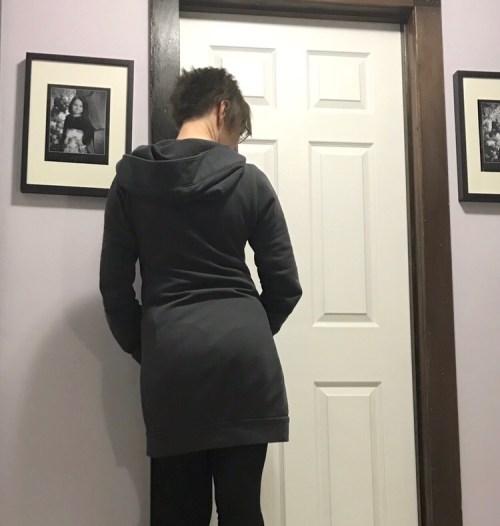 I spent an uncommon amount of time (for me) reading the instructions, since I was clueless about both the front pocket construction and the hood construction. They were great although the hood directions lost me a bit. I still got my hood together, so it’s all good, but I won’t swear there weren’t some details I glossed over. She has a tutorial on her site, so probably I should’ve looked at that. Impatient.
 My new sewing machine let me down, however. It’s really been a trooper, but when it throws a tanty (best Austrialianism ever. I feel entitled to use Aussie slang now that I’m related to one. My brother took his citizenship down under this past fall. Yay him. Boo for us.) it throws it. It would not top stitch the pocket welts. Would not, no way no how. This thing has plowed through five layers of tartan wool plus double-layered leather, but it did not like the layer of cotton spandex under all the layers of fleece. Like, five skipped stitches for every one that took. Next time I will try moving the needle to the side, and maybe also paper underneath.
 I will add one note: the pocket basically makes a separate tube inside the sweater. If you’re putting it on and find it’s strangely tight, you might be on the wrong side of that tube. I kind of burst a lot of stitching figuring that out.
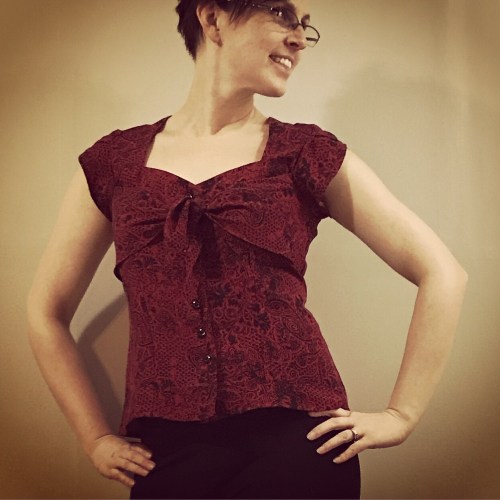
 The fabric is a rayon twill, and while it is just as soft and fiddly as any rayon, it’s really quite glorious. I love the slightly heavier drape of it.
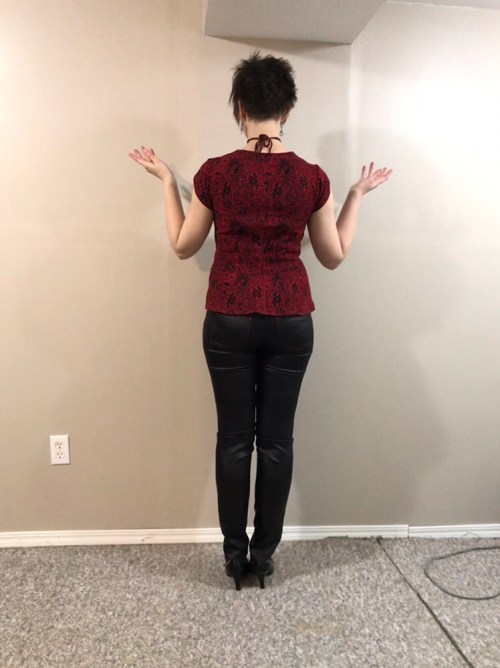 Anyway. The result was pretty good size-wise, I think. Just a tiny bit of taking in here and there. Keep in mind that’s going down two full sizes, given my measurements these days. The back does seem to hang up a bit, so maybe a bit of tweaking there is in order. On the other hand, I don’t have to look at it.
 I used a featherweight knit interfacing for the facings, which was a great idea except that then I went and stabilized the main fabric of the neckline with a heavier knit interfacing for absolutely zero stretch, while the facing had a small amount of stretch, which is a recipe for gaping facing. Not bad, but not perfect.
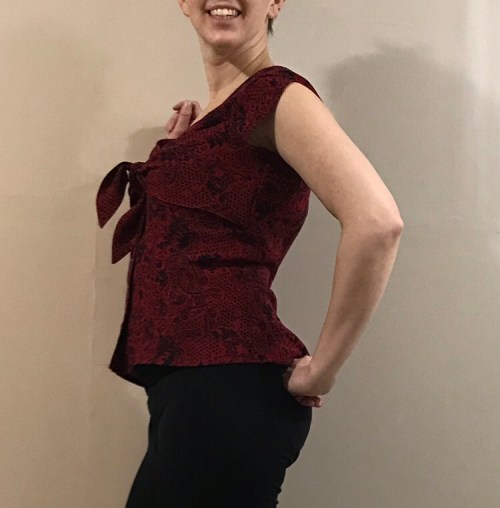
 I do like the pattern a lot—it’s adorable. The bias cut front ties are as much fun as they look. I dealt with the tulip sleeves by the simple method of lining up the underarm seam and sewing up from there, although I did make a bit of effort to make sure the crossover top lined up on both sides. There’s a marking you’re supposed to match but of course I forgot to mark it.
 Whether it’ll become a wardrobe staple is another question, but I’m glad I gave it a try. I’d kinda like to make one with a matching skirt, for a summery-dress effect. We’ll see where I land when it stops being -30C for more than a few days.
 On the other hand, it took the top stitching like gold. That was beautiful. I used a newish-to-me machine, a hand-me-down Elna that a friend insisted I take.
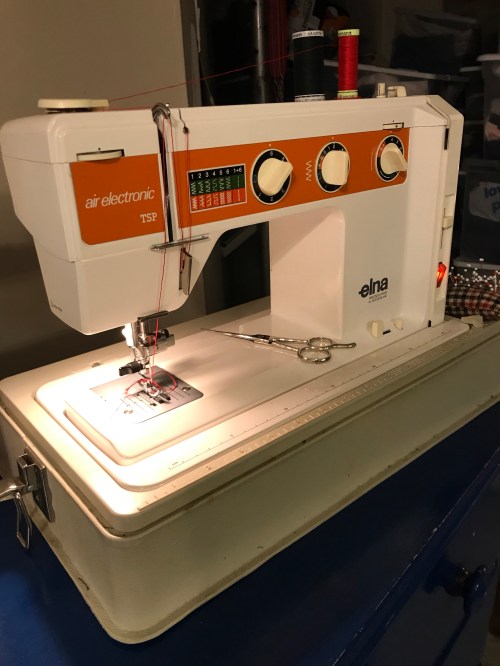 I think I may have found my new favourite topstitching machine. It handled the extra-thick topstitching thread flawlessly, has a speed control, and the weird little bubble foot pedal gives great control. I won’t crown it quite yet—it did struggle and sometimes balk at some of the thicker spots, and this fabric is thinner than most denim—but the signs are good.
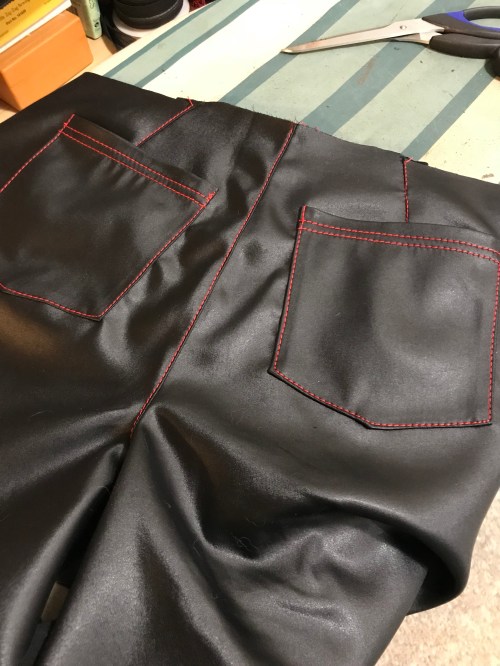 The pattern is Burda 6855, a basic skinny-jeans-styled pattern which differs from classic jeans only in having rear darts rather than a yoke. I actually like that feature as it’s easier to adjust fit on the fly, not to mention faster to sew. I used it last year to make two pairs of jeans for a work project I never managed to blog, that are actually the only jeans in my regular wardrobe rotation right now. And I thought it would suit this slightly-fancier-looking fabric.
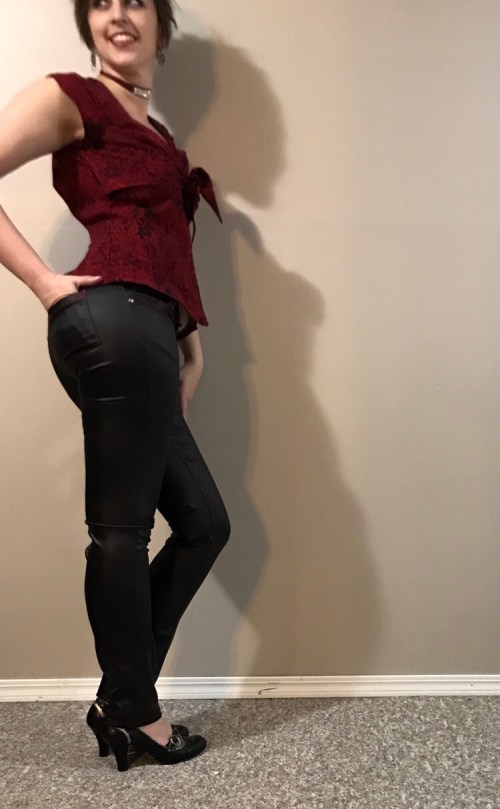 I actually originally intended to try the high-rise view of the Ginger jeans in honor of #nofearjeansmonth, but I couldn’t quite pull it together to get it printed (my printer is detached in the bottom of the closet at the moment since my husband needed more room on the computer desk for cat beds. Don’t ask.) so I settled for a quick and familiar pattern.
 The fit was pretty much as expected though I should have added more height to the back rise—I knew I needed a bit there but even more would’ve been good. I don’t love how this fabric drapes—did I mention that? So I don’t know that this pair is really a successful anything. But they’re not terrible, and I enjoyed the process if not the result. Also I bothered to put in rivets, which I haven’t done in ages. I like it. And it’s a lot easier with my new-ish awl for poking the holes.
 Well, when I made them up today, my kids agreed with me—about the ugliness. Not so much about the wanting them part. So I guess I now have a pair of ugly camo leggings.
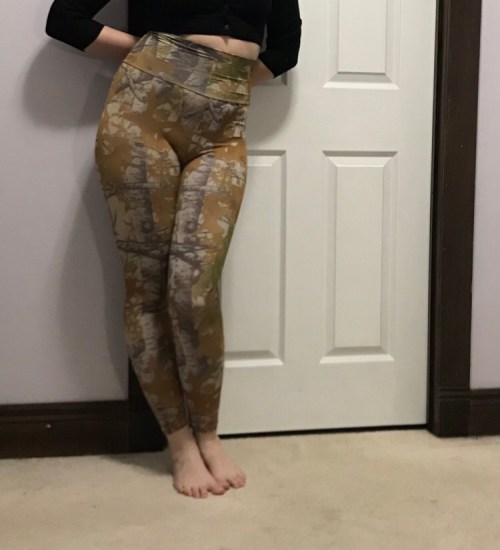 I confess they’re kinda growing on me though. Even though the fabric is the kind where the colour fades as it stretches, it’s silky smooth and feels really nice.
 I modified my trusty old Jalie 2920 by adding a slightly shaped double-layered cloth band at the waist rather than elastic, creating a smooth high-rise effect I’m enjoying. Which probably has everything to do with my changing relationship with my body these days, but we won’t dig too deep into that today. Anyway, so I have a new pair of leggings, and I think I like them. They don’t go with anything, though.


