

In my first two pregnancies I had very little money for specialized maternity clothes, and got by largely on sundresses and gigantic overalls (having summer babies helped). So I never got to try out several popular maternity features—the tall jersey top for jeans and other pants, for one, and this gathered-front style shirt, for another. It seemed like a pretty simple hack, but never having an original garment to examine, I wasn’t sure. But when I read the hack instructions on the Maternity Sewing website’s blog, they were even simpler than I had imagined, and I really wanted to give it a try.
The fabric is a leftover from an old Fabricland project (a Gertie/Butterick B6031 slip) and is allegedly an organic cotton (I say allegedly because the fabric originally arrived labeled as “organic bamboo”, which it obviously was not. We got the correction a few days later but I remain dubious of the supplier’s competence). It’s not very thick, but supremely stretchy and comfy.
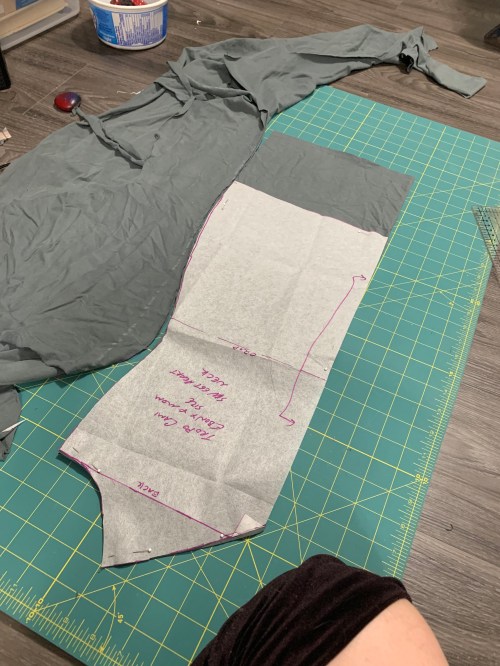 Well, I managed to stuff up the hack: can you see the chalked line where I was supposed to be removing the waist shaping, but just cut along the original pattern instead? The good news is thanks to the wonderful properties of spandex the resultant tank top works just fine anyway; I also didn’t go up a size or two as per the recommendations. My base was the Tuesday Stitches Tropo Camisole (it just occurred to me that Erin of Tuesday Stitches is one of the founders of Maternity Sewing). I just picked it because this has been my go-to tank top/cami pattern since its release last year. So basically all I did was extend the bottom of the front by five or six inches, and gather that to match the back.
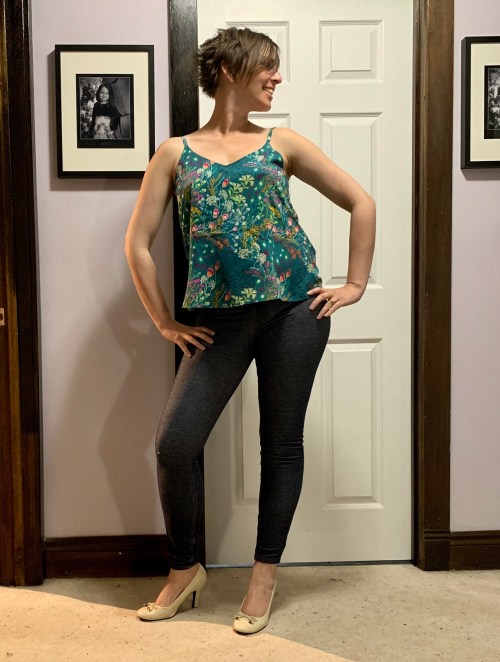
 I did include a simple shelf bra made out of self-fabric. It’s not super supportive (did I mention this is really stretchy fabric?) but in a world where none of my bras currently fit (and I’m not likely to take up jogging or trampoline in the near future) it does the trick. It took a bit of futzing to get the length right, but I’m pretty happy with it now.
 I should confess that it’s not entirely done, and I’ve been wearing it all day anyway. I need to shorten the straps a bit and decide how I want to hem it.
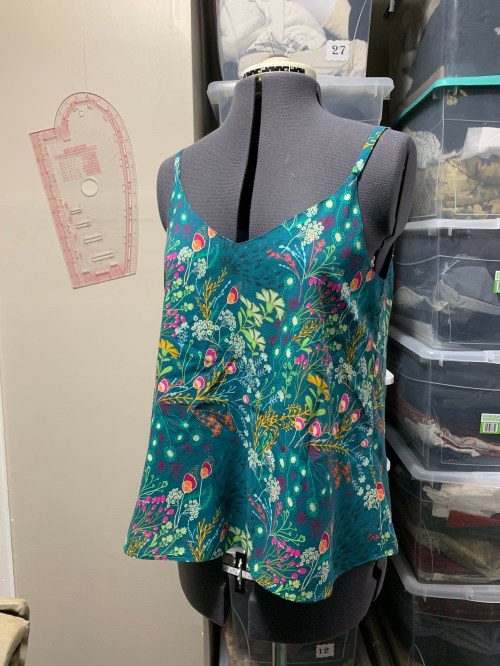
 All in all I’m really happy, though. This was a simple project, a simple modification, and its produced a very comfy, easy-to-wear garment. I don’t know that I need a million of them, but one or two to get me through the summer probably wouldn’t be amiss. I don’t want to create a massive maternity-specific wardrobe that won’t adapt after, but I also don’t want to feel like I’m wearing the same two or three sacks again and again. (See above about my first two maternity wardrobes)
I guess at some point I should try making baby clothes. I’m really not feeling it though.
 Apparently I should’ve pressed a little better, but it’s rayon. It’s going to wrinkle.
 Can you see my French seam at the side? No? Oh well. They turned out very nice indeed. In fact, the only thing I used the serger for on this make was the bottom of the half-lining.
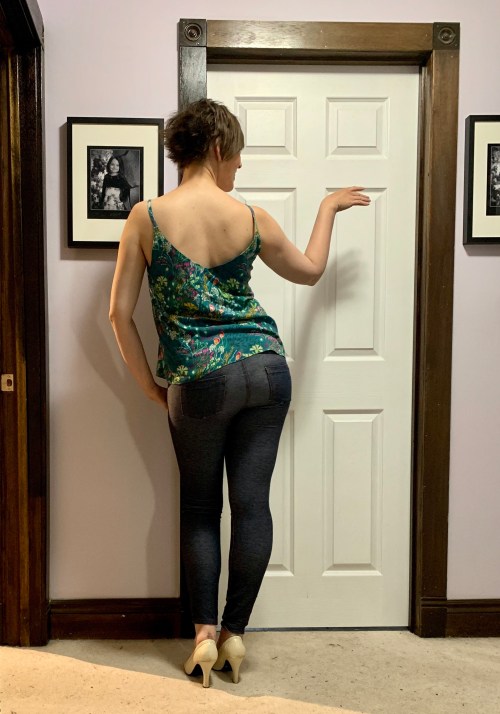 I made a straight size 8, which accommodates both my current bust and my current belly surprisingly well. I didn’t even have to shorten the shoulder straps.
 I did experiment with cutting out the pattern with my rotary cutter, basically my first attempt at such a feat. I am not particularly adept at it, so I don’t think I was really any better off than cutting with scissors, but it’s definitely something I’m willing to play around more with, at least for things that are small enough to fit on my cutting mat. I used a ruler to help me cut out the rectangles for the shoulder straps, and that was definitely a win.
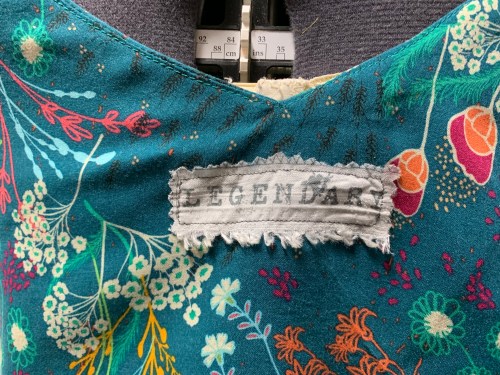 Because it’s virtually impossible to tell the front from the back of this pattern (either in construction or once it’s finished), I hunted along the printed selvedge of this Art Gallery Fabrics rayon for a good chunk, and cut out the bit that said “Legendary” to make a tag. My pinking shears are terrible and kind of made a mess of the edges, but I’m sure after a wash it’ll all be much the same anyway.
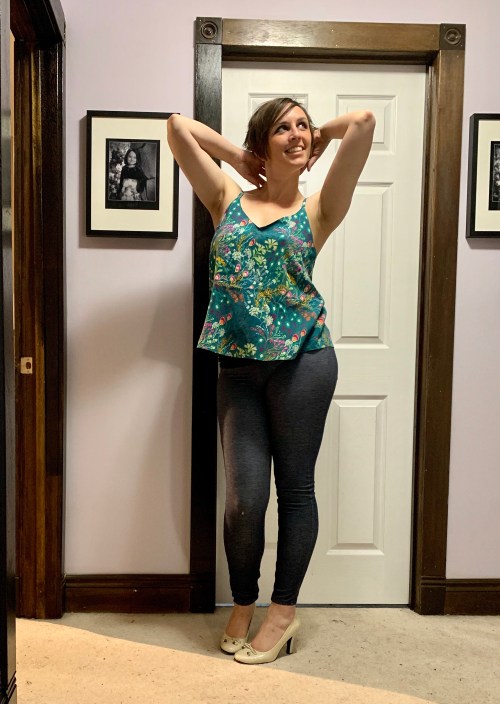 Anyway, I’m definitely charmed by this pattern, and excited to be teaching a class on it this summer. It’s simple enough for a beginner, but also a great opportunity to level up your skills working with fine finishes or a trickier fabric. I’m very tempted to go digging through my seldom-touched “fine fabrics” for the next version….
 I gotta tell ya, there’s a level at which I REALLY enjoy the few moments of life when that isn’t a relevant question. Because quite a few of my favourite styles of clothing, um, make me look pregnant. Even when I’m not. I love empire-waisted dresses, including ones with gathered skirts. So, while pregnant seemed like the perfect chance to indulge that love.
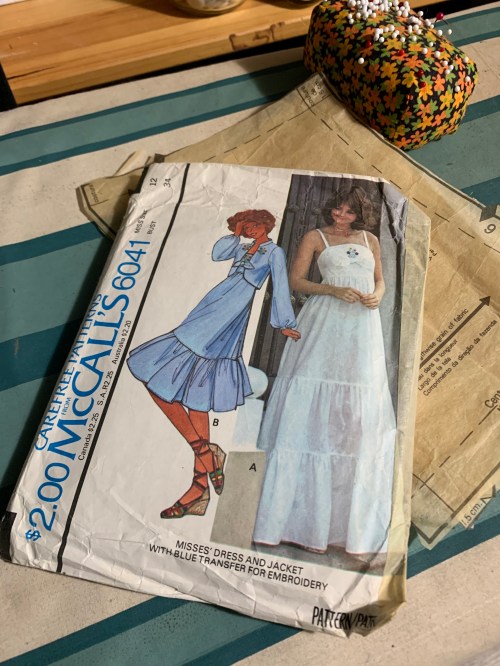 This pattern was a recent donation(among many, many others) from a friend of my mother’s. Thank you, Bernie! We all know I’m a sucker for 70s dresses, and I have a bad case of sundress-on-the-brain, so this was an easy thing to gravitate towards. I have had NO energy for the last several months, but finally just in the last week or so I’ve had a tiny bit of extra jam in the evenings, enough to very, very slowly piece this dress together over the course of the last couple of weeks.
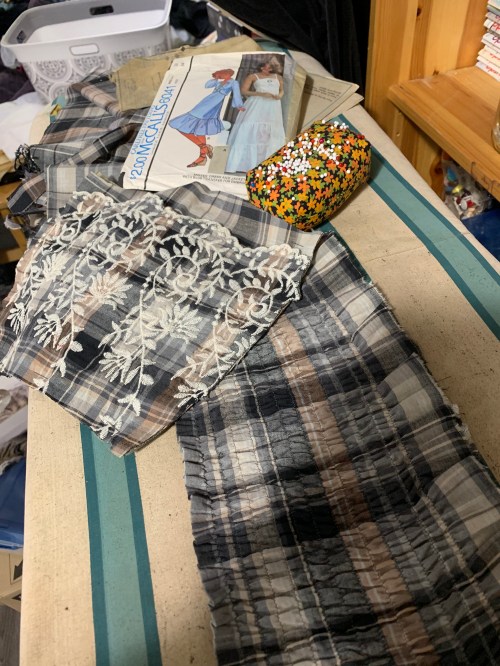 The pattern is in a size 12, which WAS my size, but is now a good three or four inches small. At its core it’s a simple princess seam empire bodice with a lightly gathered tiered skirt; there are some cute ties across the bust, though I almost skipped them. I made quite a few mods on this first version to be more maternity friendly—I prepped a shirred panel to cut the back piece from, and after some measuring made a small FBA on the front.
 For this particular dress I just used a simple gathered rectangle for the skirt, to take advantage of the border embroidery of my fabric. And it’s probably more full than it needs to be, or would need to be if it weren’t going to be going over twins.
 I thought that the front tie provided an opportunity to try out some kind of a nursing access point for the sundress. I never had any nursing-specific clothing with my first two pregnancies, and I did plenty of nursing, so I’m a bit sceptical about the value of such mods, but I thought I’d give it a try, at least.
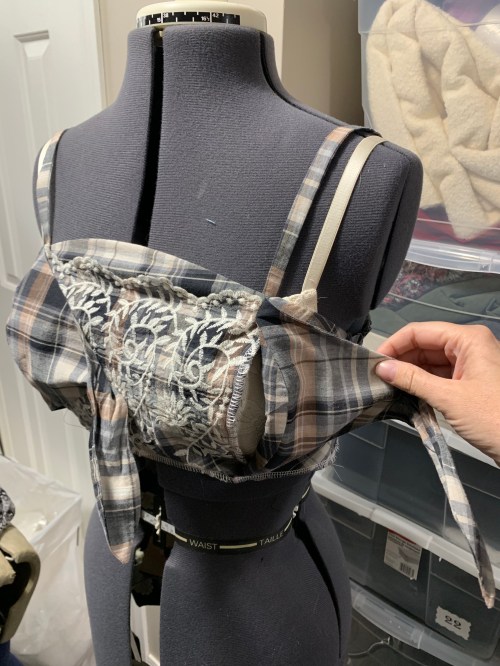 I basically just sewed the CF panel separately from the side front panels + ties, and then lapped the pieces and tacked them at top and bottom. If the ties are tied everything stays securely in place, and if you untie, you can fold it back and access the slit. In theory the other side will stay closed, though if it becomes an issue I can see adding some kind of a belt-loop in the middle to keep the non-nursing side in place. As I said, we’ll see. That particular feature isn’t likely to be tested until next summer, anyway.
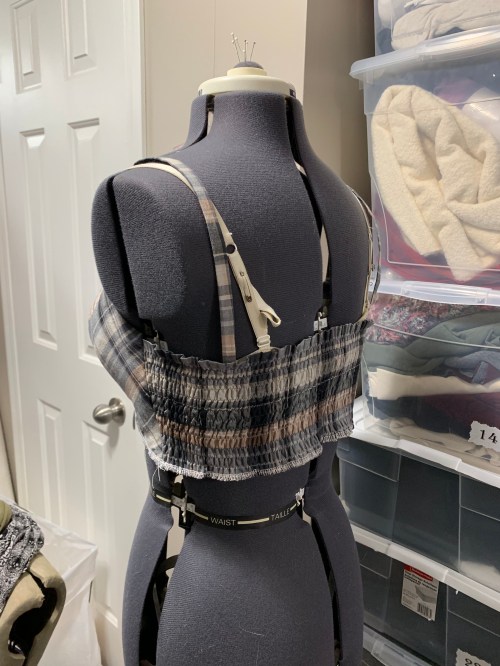 So between the FBA and the little bit I added at the side seam and then the stretchy back, I actually had to take in the side seams, an inch at the under-arm tapering to more like 1 cm at the bottom of the bodice (tricky to do because I made the whole thing very clean-finished inside, pretty to look at but not exactly easy to alter, especially when one of your layers is on the bias. It’s not super pretty up close. I’m very curious to make this without the stretchy back at some point just to see how it would compare. The (2 cm) FBA gave a LOT of projection in the boob area, rather more than I currently need, but it’s somewhat adjustable by tightening the ties, so it seems to work. I’m not sure if I’d do it again, though. And my boobs are likely to get bigger before they get smaller again.
 I used my favourite gathering-with-dental-floss method, using a cording foot from a set I bought last summer to keep the dental floss snug in the middle while I zig-zagged over it. This definitely makes it a more foolproof method. I finished the bottom of the bodice and the top of the skirt separately so I can take the skirt off and re-adjust if I want fewer gathers later, though attaching the gathered skirt to the shirred back was kinda hell so I’m not sure I’ll wanna try that again.
 All in all I think it’s a pretty cute experiment. I feel like the proportions might be better if the bodice was slightly longer, but on the other hand since my belly starts right below my boobs, I don’t think that would really work very well right now. So it is what it is; i may try styling with an elastic belt below the bust to see how that looks. But for maternity wear, I think I’m pretty happy with it.
 I wanted to teach a basic tee shirt class this summer, and Jalie seemed the obvious choice. Their basic fitted tee pattern,
  Speaking of V necks, I’m pretty happy with how it turned out.
 I did the twin needling on the Rocketeer, where I had to relearn the “always test!” lesson again… for only the millionth time. Ah well. After some unpicking and careful testing of stitch length (longer), presser foot pressure (light but not too light or the fabric doesn’t advance well), and tension, I finally got good results. And yes, I used Steam-a-Seam in the hems.


 The timer went off and we rushed into the bathroom. Two lines, definitely.
 On the downside, exhaustion has sapped my sewjo big time. I have barely done anything except occasionally go down to the sewing room to putter. I still have to finish
 Which brings my to my current pledge:
 Given the above, I’ve often been feeling like what I pull out of the closet is either not creating a coherent look, or that the look I’m ending up with isn’t quite what I intended (or that I don’t even know what I intended.)
 On top of that, sewing class samples for my teaching has been putting quite a few pieces into my wardrobe that were picked more with an eye to what can be sewn from the kind of fabrics the quilt-shop where I teach stocks, and to a lesser extent what is “hot”, than to thoughtful wardrobe-building for me. I’m not quite sure how to resolve this conundrum, though I could of course just give myself permission to not wear them. But I do like them.
 So yeah, I need to think. To evaluate. Decide how I feel both about the current trends and how they fit with how I want to look and how I actually look. Me Made May may not solve this for me. But I’m hoping it will at least give me some more information about where I’m at. I’m planning to document on Instagram, probably via stories, and with any luck I’ll manage a summary post here in June.
 So, I’m taking an introductory quilting class at Periwinkle. Kind of a work-perk thing? Anyway, it occurs to me that this is actually the first formal sewing class I’ve ever taken. Bizarre. Well, quilting is bizarre, too, so I guess that works.
 The class is designed to take people from little to no sewing experience all the way to making a decent-sized throw quilt, in a sampler style of about a bazillion different blocks, in just seven weeks. Well, seven plus homework. We’re going to practice quilting and binding on a swatch because I don’t think she figures we can finish quilting the whole thing by the end of class. I’m pretty sure she’s right about that, though I really enjoy the intensity of the class.
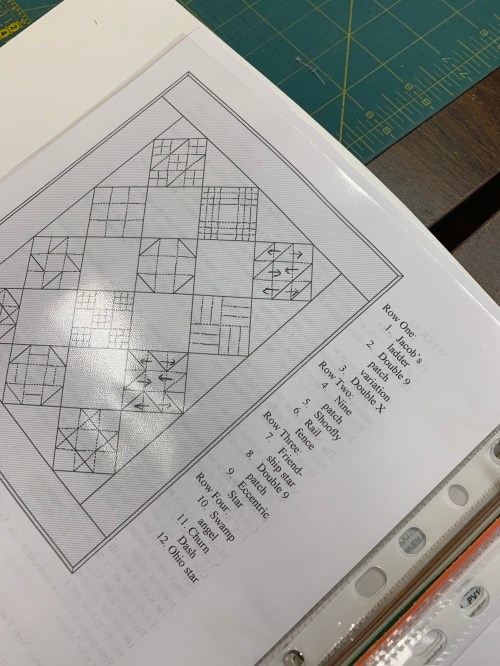

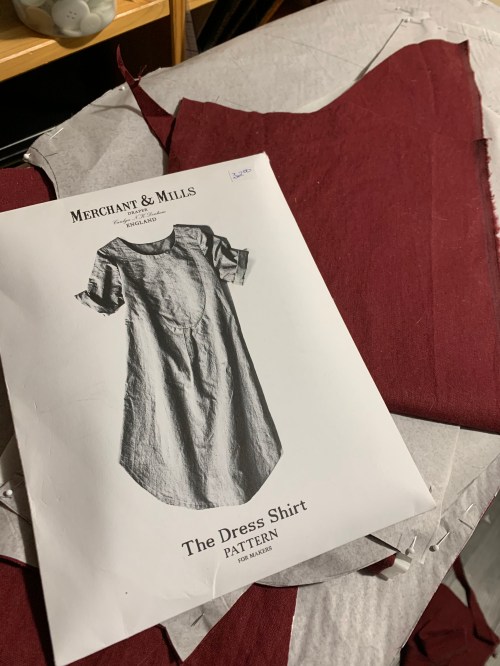 A very eager student asked about a class using this pattern. Curious, I was happy enough to oblige.
 The Dress Shirt is a simple, pared-down take on a shirtdress, and I actually really enjoyed the sewing process, particularly the front bib and how the neckline was finished. Things went a bit awry at the sleeves—my first inclination was to set them in flat, shirt-style, but there’s way too much ease in the sleeve cap for this method—lots of gathers that are difficult to control. So I did the second sleeve in the round, but still didn’t do a great job on the easing. Next time I would pare down the sleeve cap a wee bit.
 On the other hand, the pockets I added worked out fine.
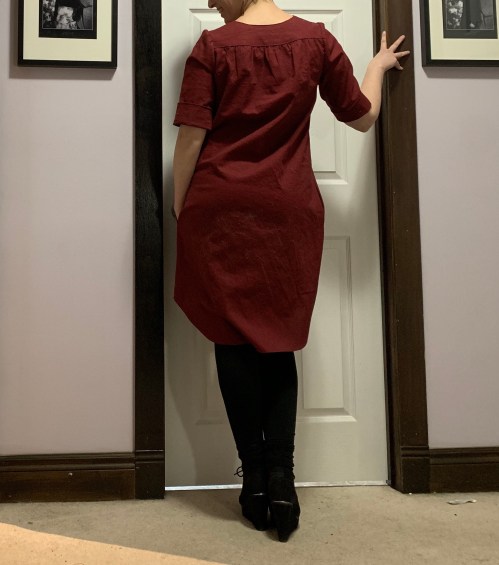 The back view is surprisingly attractive in this picture, at least (these are terrible photos but I had about three minutes to take them in, so it is what it is.)
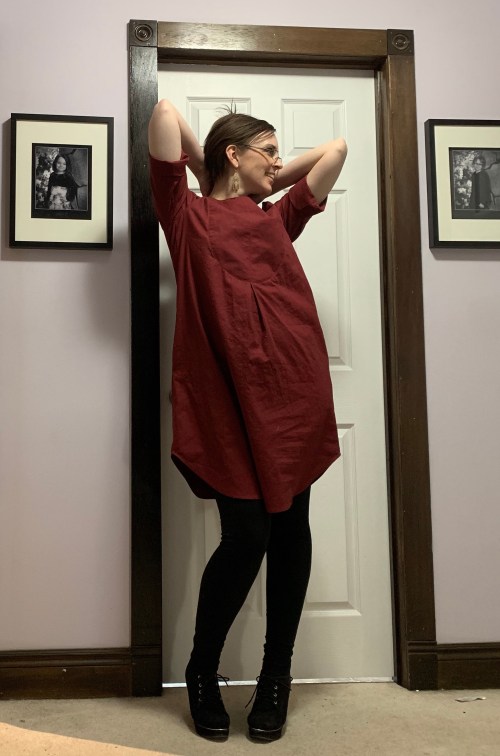
 It’s a bit sweet. And a bit snug right through the bust—I really need to come to terms with my new measurements. But I knew from scouring Instagram that I preferred the “fitted” versions of this dress, so I was at least somewhat intentional in sizing down.
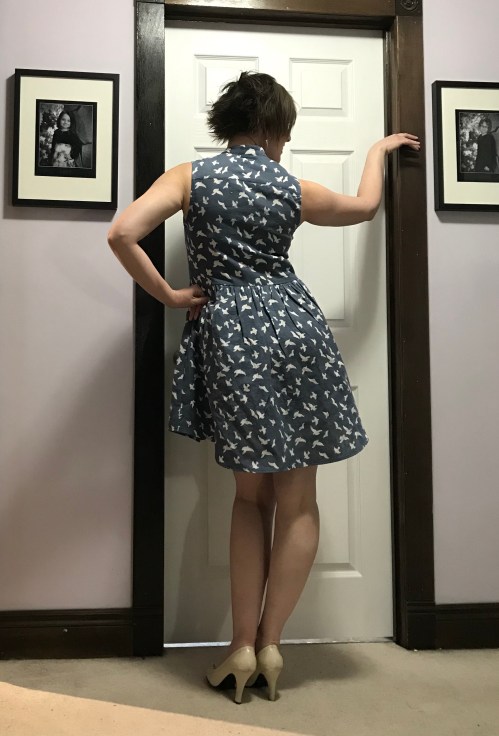
 I went with a mandarin version of the collar. Partly I like them better, partly I’m hoping if I lead some students in that direction it will save some class time. This is only scheduled as a 6 hour class and I’m a little scared. Once it’s don’t being a class sample, I might even cut the neck down to a bound scoop. I’ve seen some hacks like that that I really like. I’m just not really a shirt-collar person, I guess.
 The front patch pockets are teeny weeny. I was a good sample maker and resisted the urge to skip them, but I did add some side-seam pockets, suspended from the gathered skirt seam at the top. This holds them in place a little more nicely than just side pockets.
 The construction went pretty smoothly, without any major and unfixable snafus. Unlike my
  What I completely failed to take was progress and detail shots, except for the one lone pic of the pockets underway. It’s too bad, because I like how the side pockets went together, and I actually managed some very nice inset corners, if I do say so myself. And the hem turned out really nice, too, if I do say so myself. I guess you’ll have to take my word for it…
 I have a complicated relationship with distressed denim. Like most teens in the 90s, one of my main goals in life was to shred my jeans—or at least bust through the knees. However, the romance of the tattered denim faded pretty abruptly when I had to start buying my own jeans—I wanted those to last as long as possible! So I avoided the pre-tattered distressed looks as much as I could. I’ll put my own holes in them, thanks.
 Fast forward to about a month ago, just after making the
  For construction, I used the same method as my
 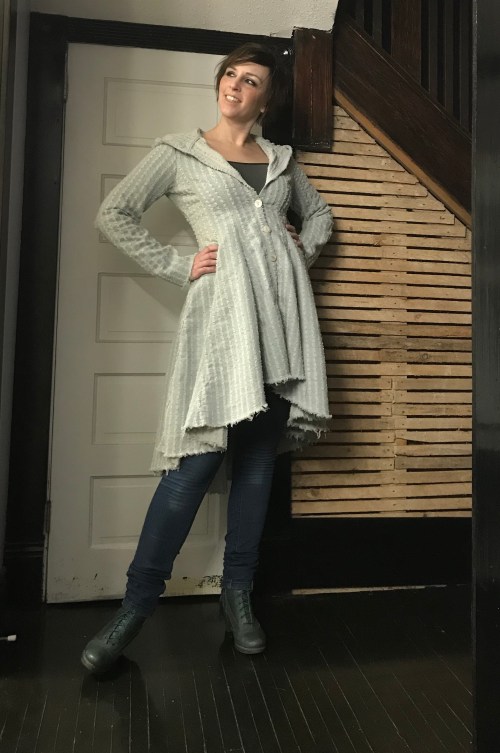 However, Hong Kong binding plus double topstitching does not make for a quick project. I also didn’t go full bore, and had to occasionally interrupt… anyway. It developed slowly.
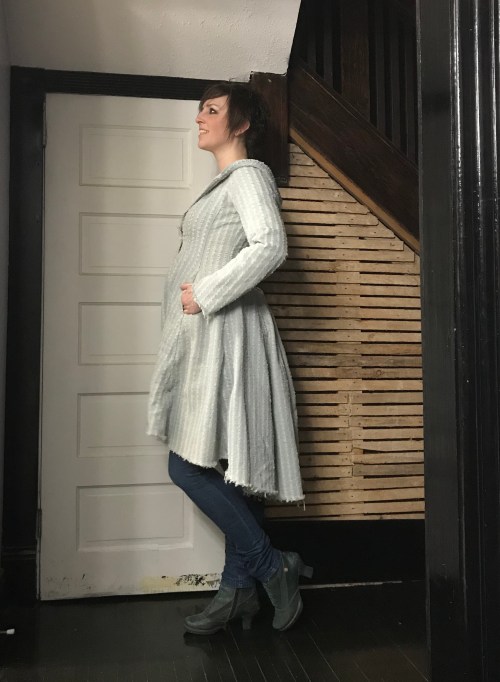 But, it’s finally finished. Or, maybe finished isn’t quite the right word. In temporary equilibrium? Because this piece calls out for distressing. I’m almost tempted to go at it theatre-style, get some patina going. Failing that, the shredded fabric is more-or-less guaranteed to begin failing sooner rather than later.
 I’m already planning visible mending, layering, patching. I don’t really think this jacket is done.
 I think maybe it’s ready to start becoming. Obsolescence is a part of the plan.


