
So Victorian Sewing Circle is carrying on through the summer this year. Hooray! Except. The one Victorian outfit I have at the moment is, um, fairly heavy wool. This is not going to be fun come July. (Hopefully it’s still July when you’re reading this. )
So, I decided to pull the trigger on a project I’ve been halfway planning for a long time. What I’ve mentally dubbed a “Victorian sundress”
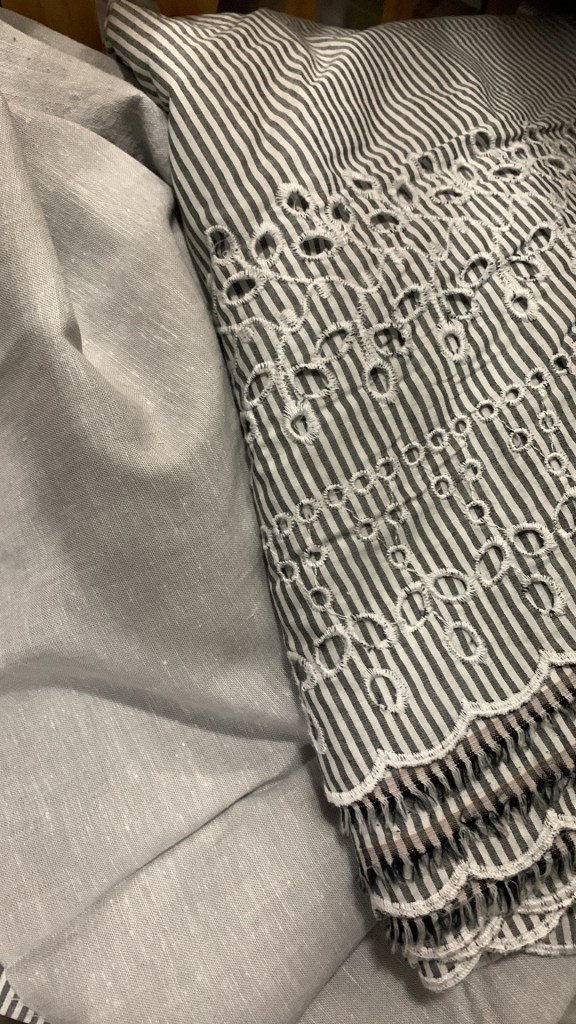
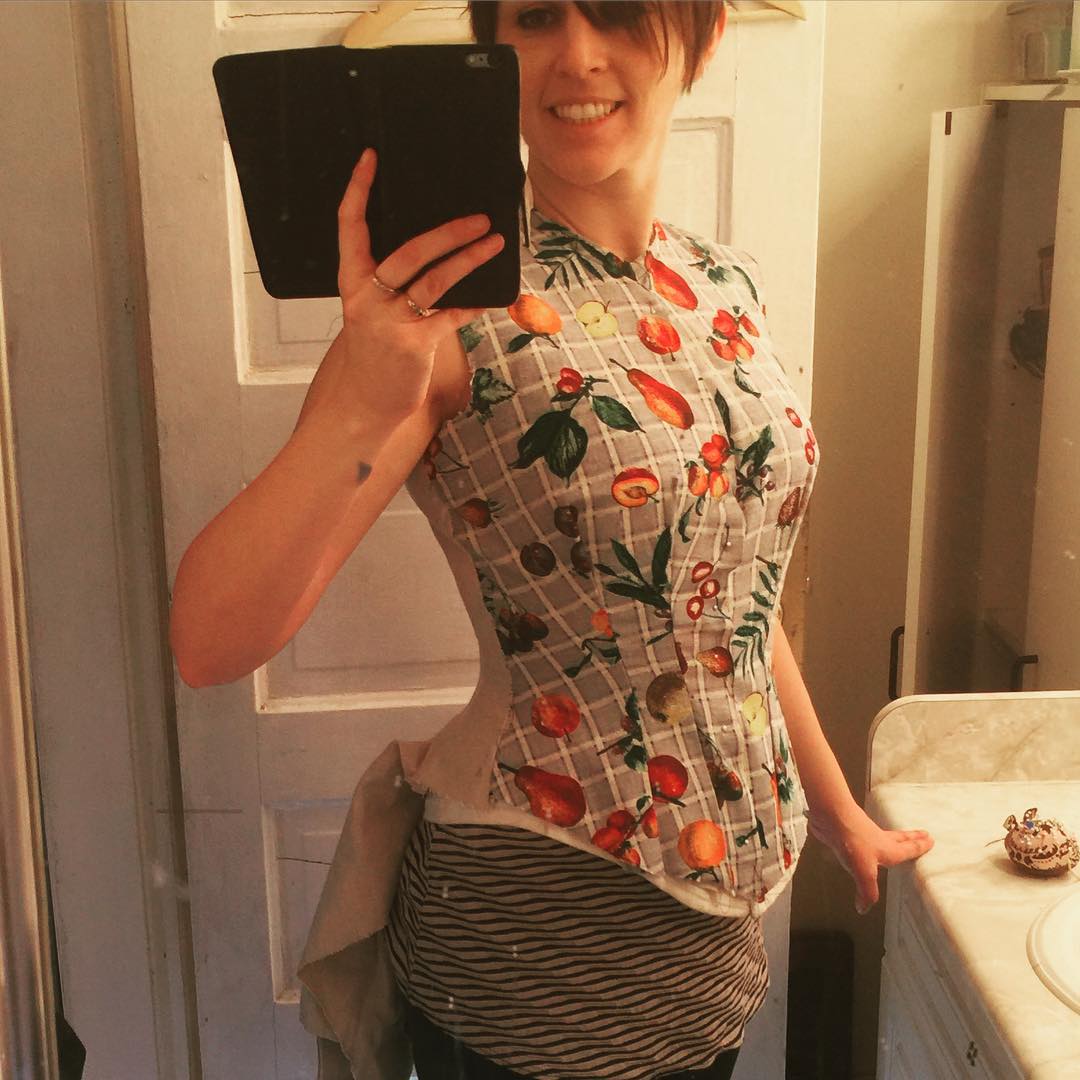
I had picked up this light cotton border embroidery on clearance ages ago when I was working at Fabricland. I actually got several different colours, though previously I have only used a tiny bit of the red to make these dresses for the twins. The most important thing about it though, was that there was something like nine metres of the grey colourway alone. For a bit of interest (and to stretch my fabric as I only had about 9m of the stripe) I decided to pair it with this grey cotton-linen blend, not historically accurate but yummy nonetheless, for the foundation skirt.
I started with the bodice; the skirt will get its own post.
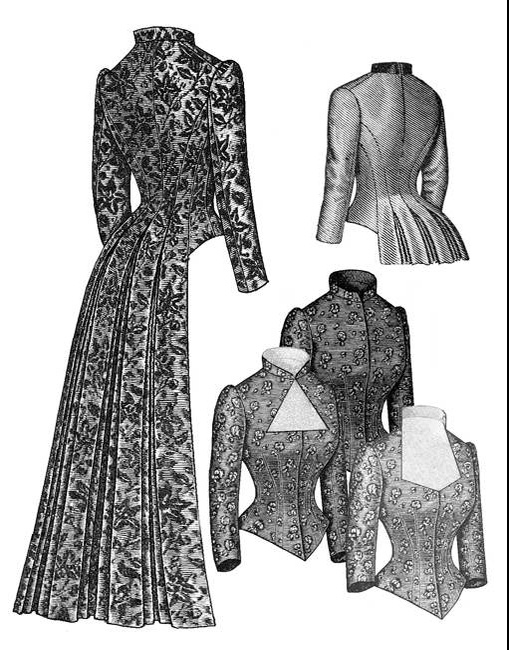
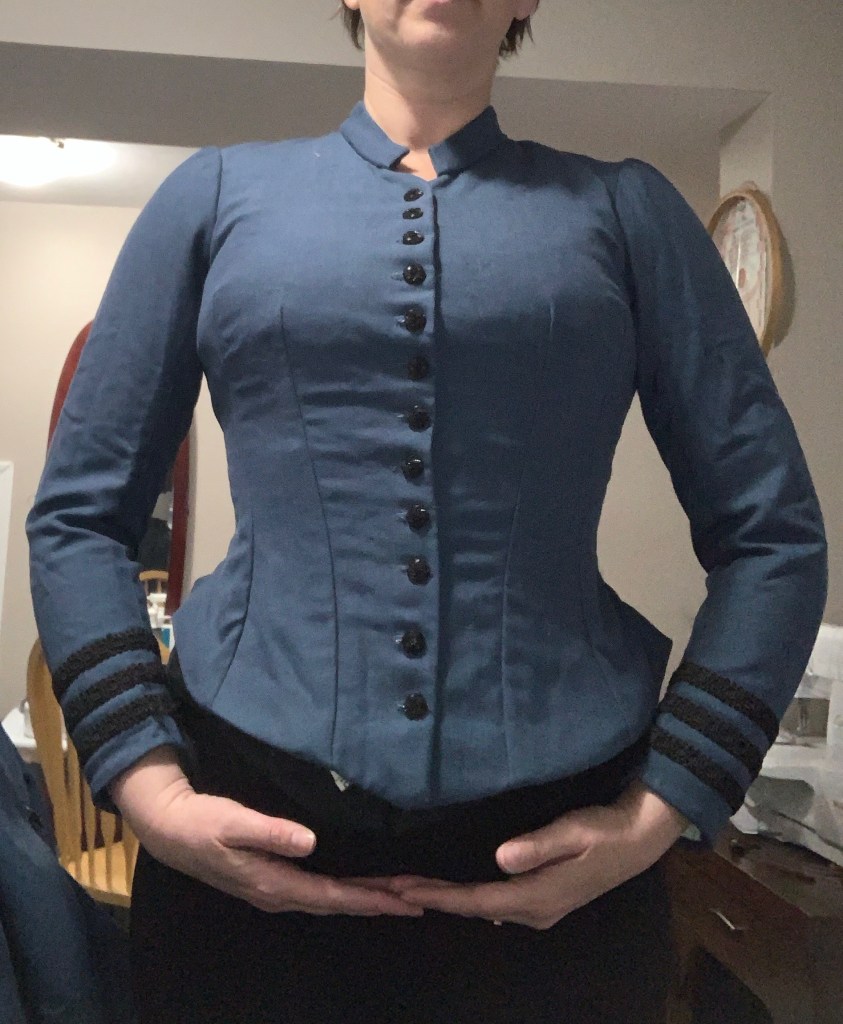
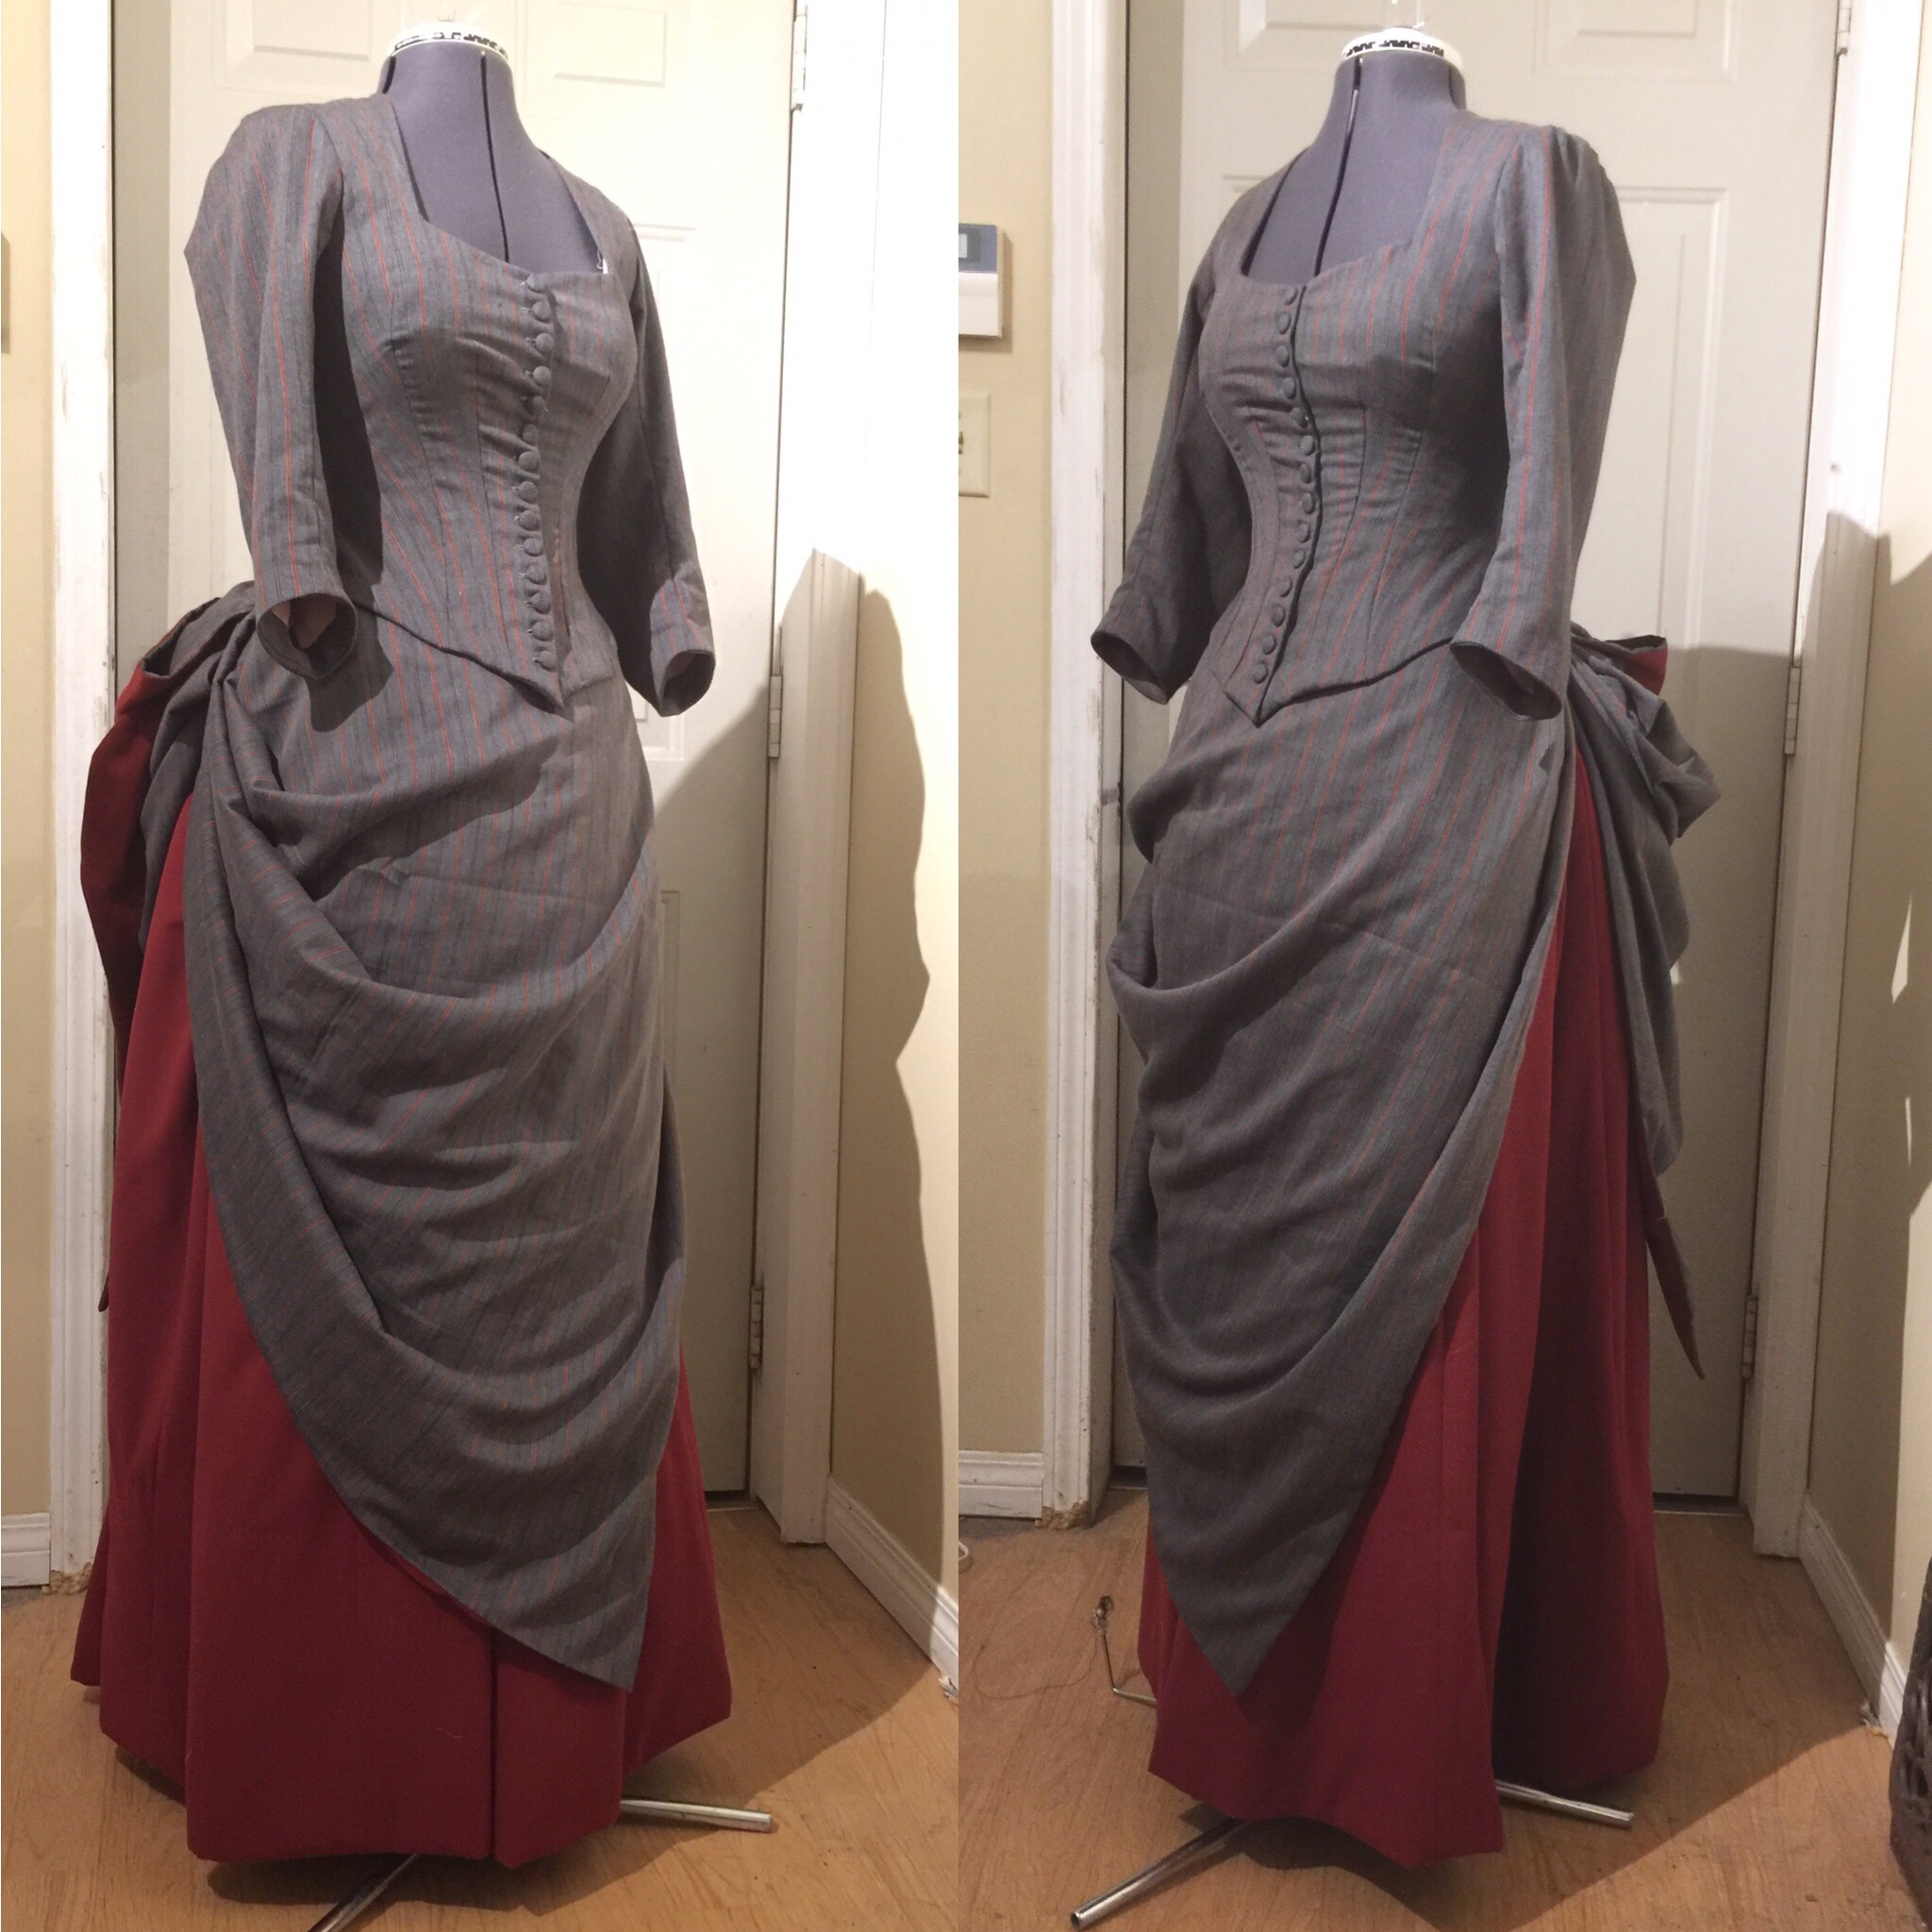
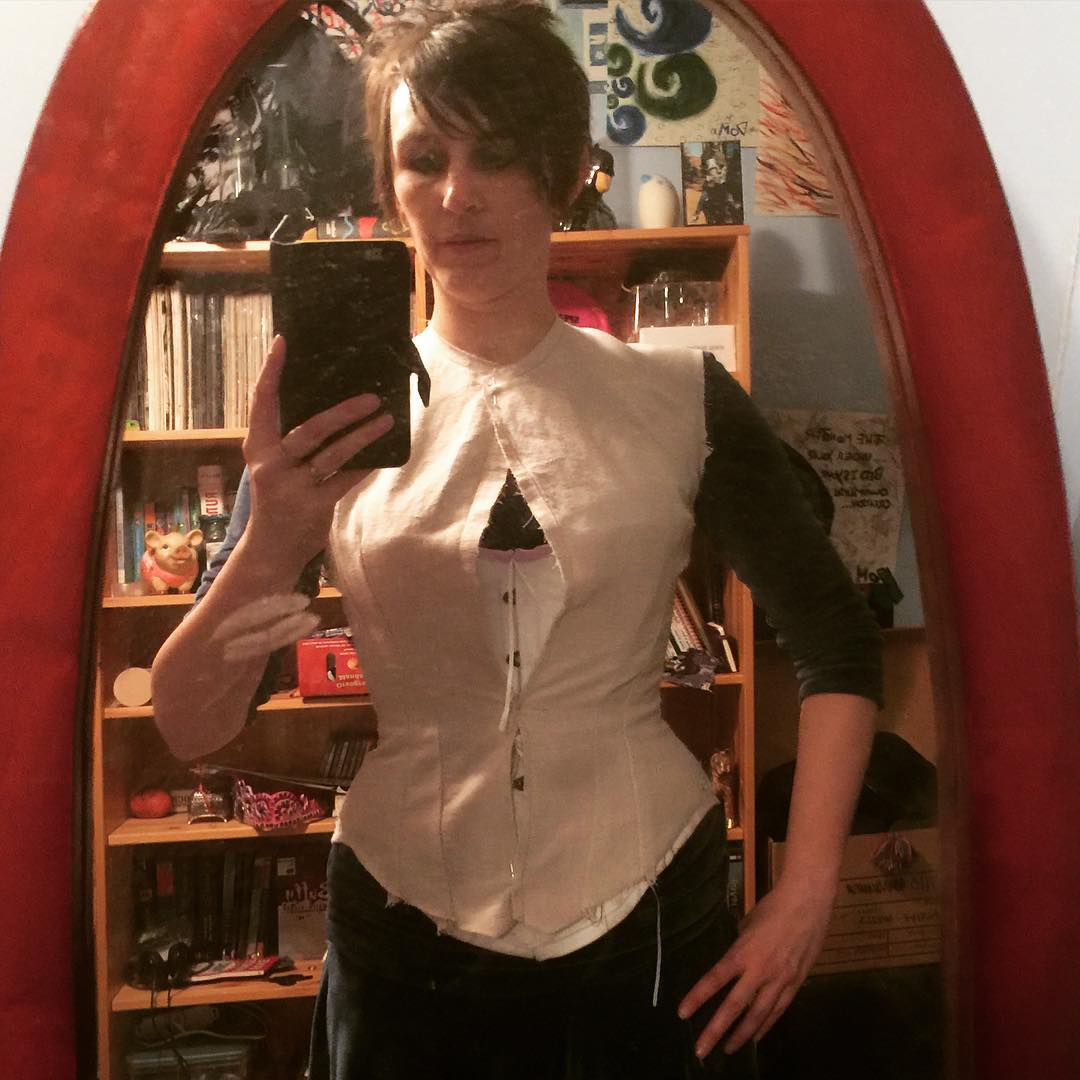
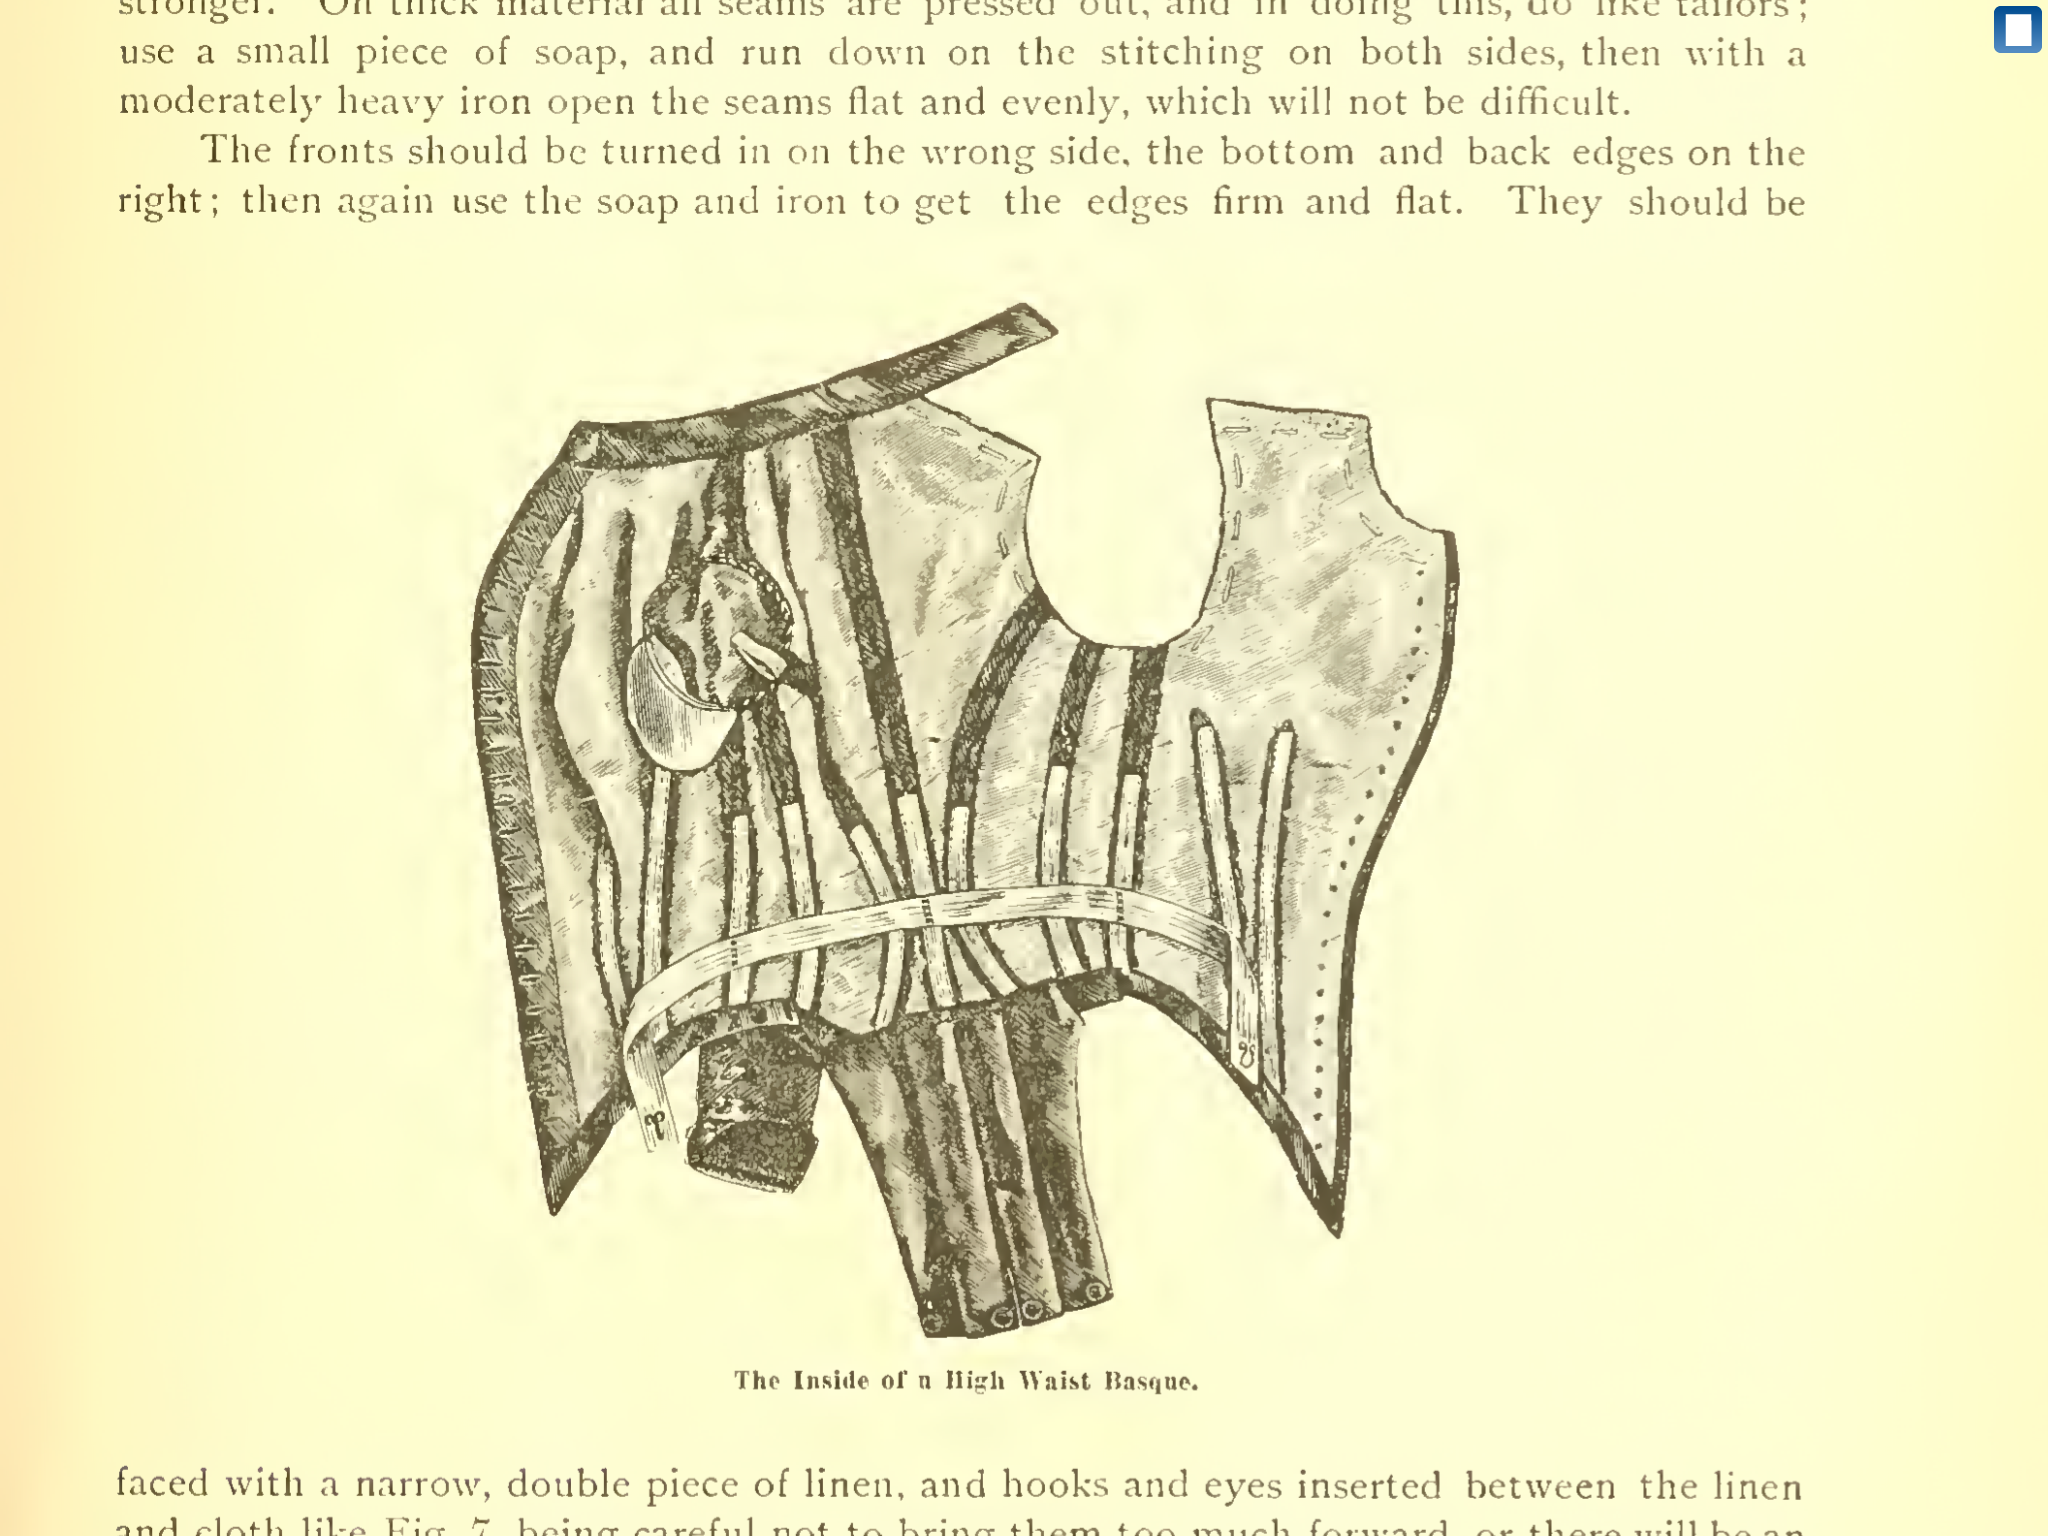
It’s the same pattern I’ve used before, TV 462 although since I’m a very different size than I was in 2016 when I made it the first time, I was basically starting all over again. Which is ok, since I didn’t exactly nail it the first time. I had actually muslined the new size back in the winter. Truly Victorian uses a fairly complicated system of measuring for their bodices where you choose front, back, and sleeve sizes separately and then adjust to make it work. My bust and back were only one size different, so in the end I decided I would make everything the (larger) back size and if I had extra bust room, just pad it out. I still had to narrow the shoulders pretty massively, and I did a lot of vertical length adjustments since these patterns seem to skew long and I have a fairly short torso. I also did my usual preemptive swayback and square shoulder adjustments. When I tried on the muslin I determined that the front was actually pretty darn good, as was the back width across the shoulder area, but there was a lot of extra room in the back waist. I ended up taking 1” out of the side-back piece to get the shape approximately right, which improved the back fit immensely.
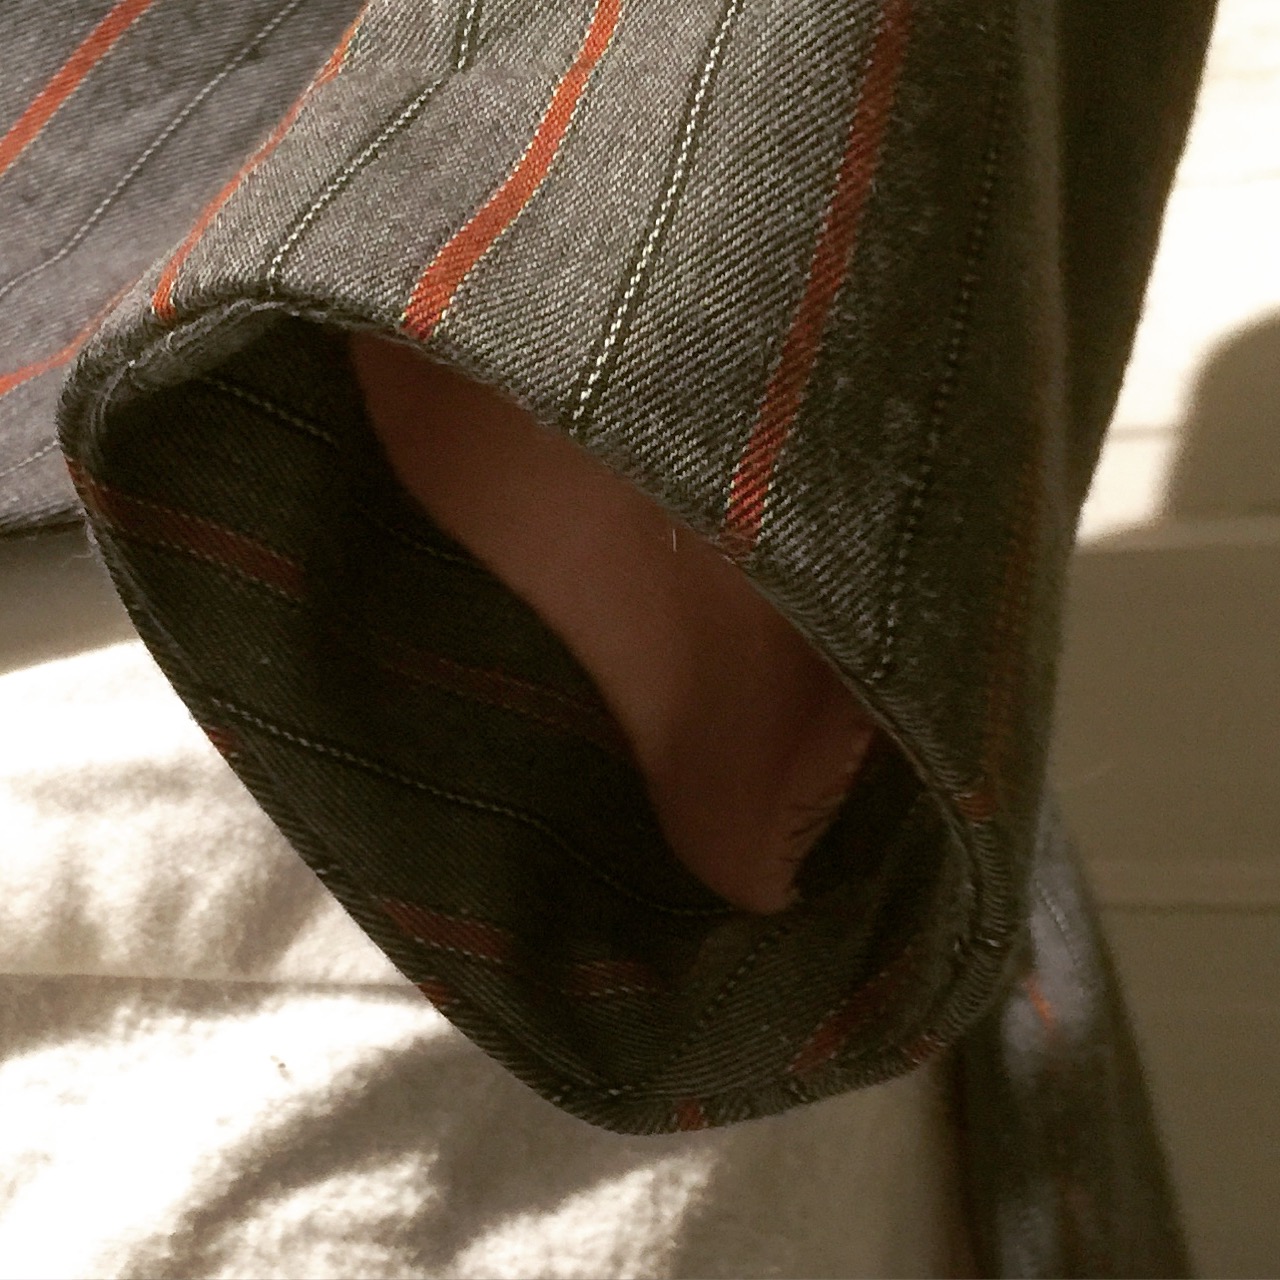
One thing I forgot to consider, since there was a bit of a gap between muslining and cutting out my fashion fabric, was the shape of the back hem of my bodice. My pattern is for a tailed bodice, with a non-tailed lining, and to save fabric I had just muslined the lining pieces. At some point between muslin and final fabric, I’d decided on a different overskirt style that didn’t work with a tailed bodice, so I just went ahead and cut the final fabric with the same hem as the lining pieces, without thinking too much about the final shape it would make. If I had it to do over, I would try to draft a slightly longer, more elegant V point in the back. It’s a kind of short, meh shape on its own.
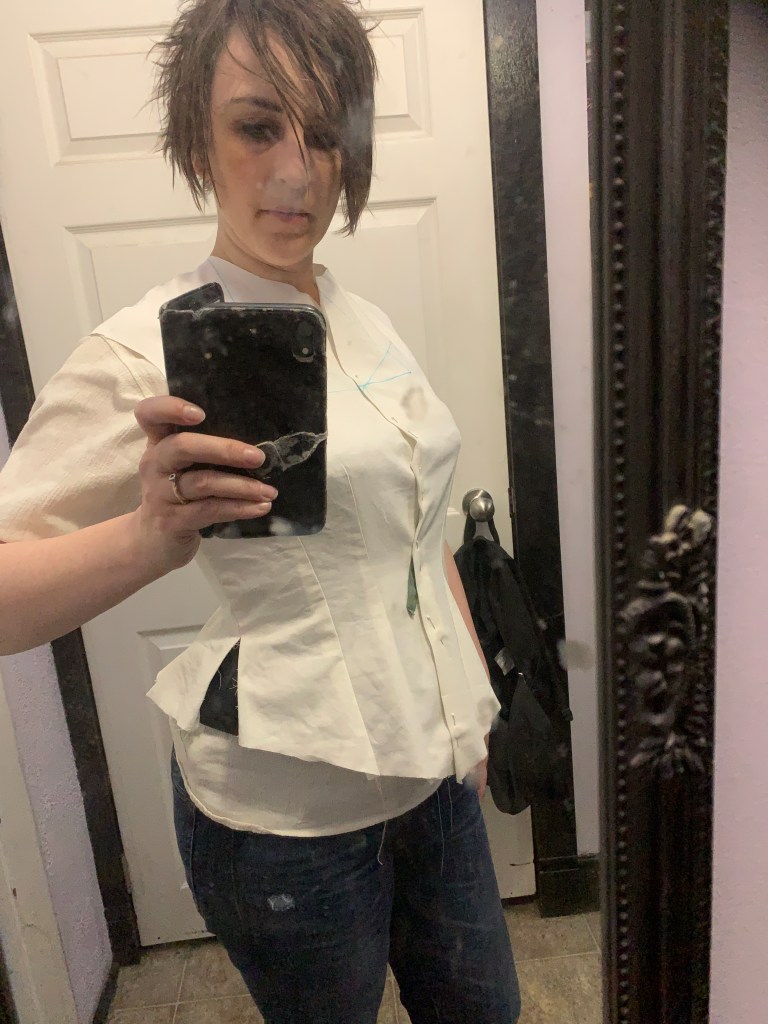
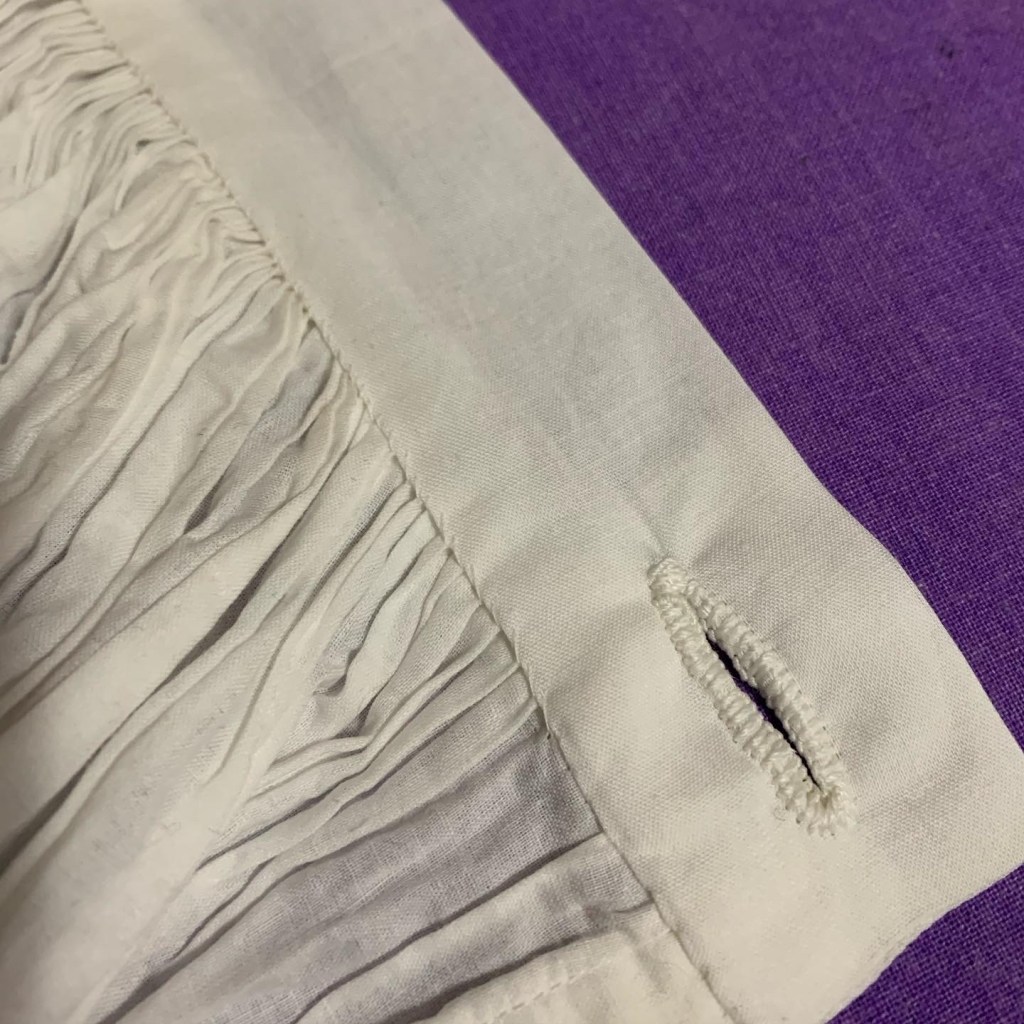
I went for the “closures first” fitting strategy, finishing the front of my bodice with bias tape and then adding the (machine) buttonholes and buttons. This let me try it on without pinning, which makes it a bit easier to fit. I then refined the fit a little, reshaping the side seams (taking in the waist 1/4” on each side and letting out the hips an equal amount.) and also wound up deepening the centremost front darts by about 1/4”. Not unexpected given the size I chose.
I was quite silly about how I positioned the boning in the front darts this time, putting it close to the fold of the dart where it flips around rather than against the stitched edge. But it doesn’t really show in the finished garment.
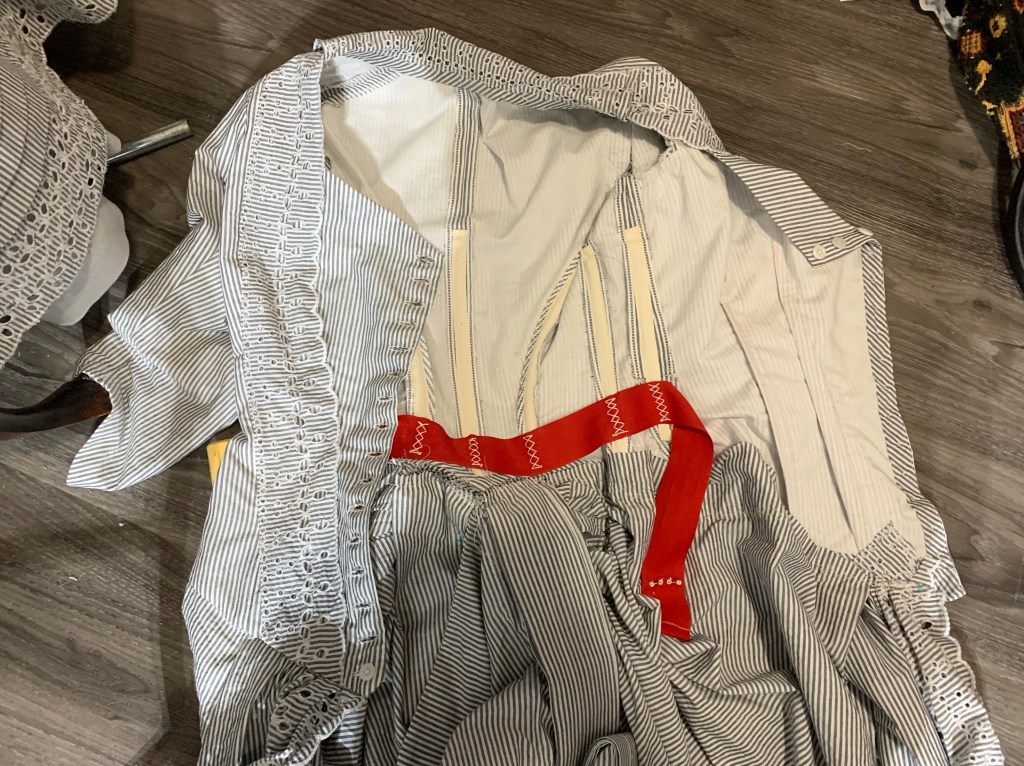
I added a waist stay, of course, using some of a wide red twill tape I got as a hand-me-down last year. It’s perfect for the job. I was a little worried about show-through on my light fabrics, but it seems to be fine.
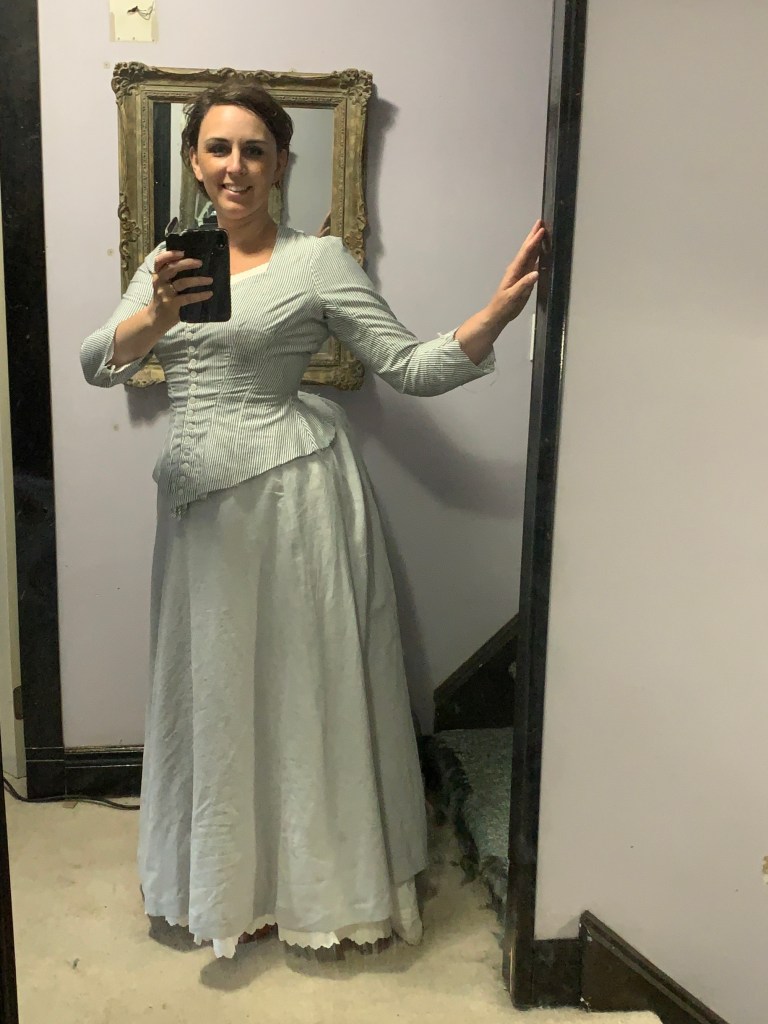
I selected the “dinner bodice” neckline again because it’s both my favourite and maybe more cool than a high neck. However, I think I should probably make a high-necked little dickey to go under it, since this is meant to be a day dress.
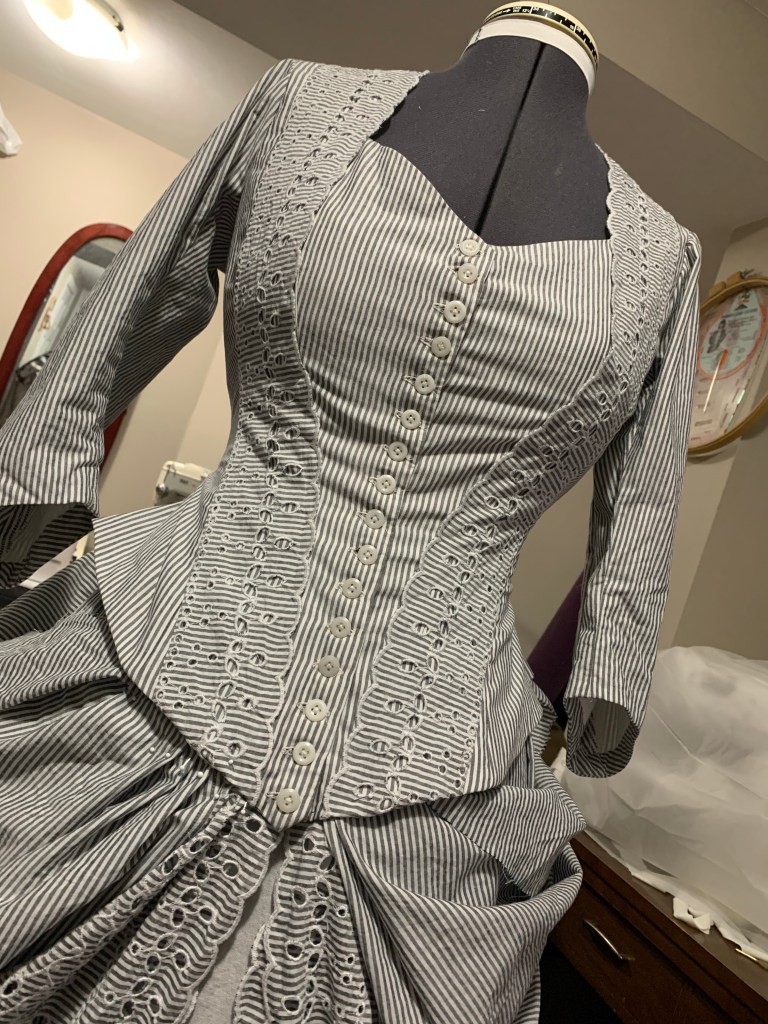
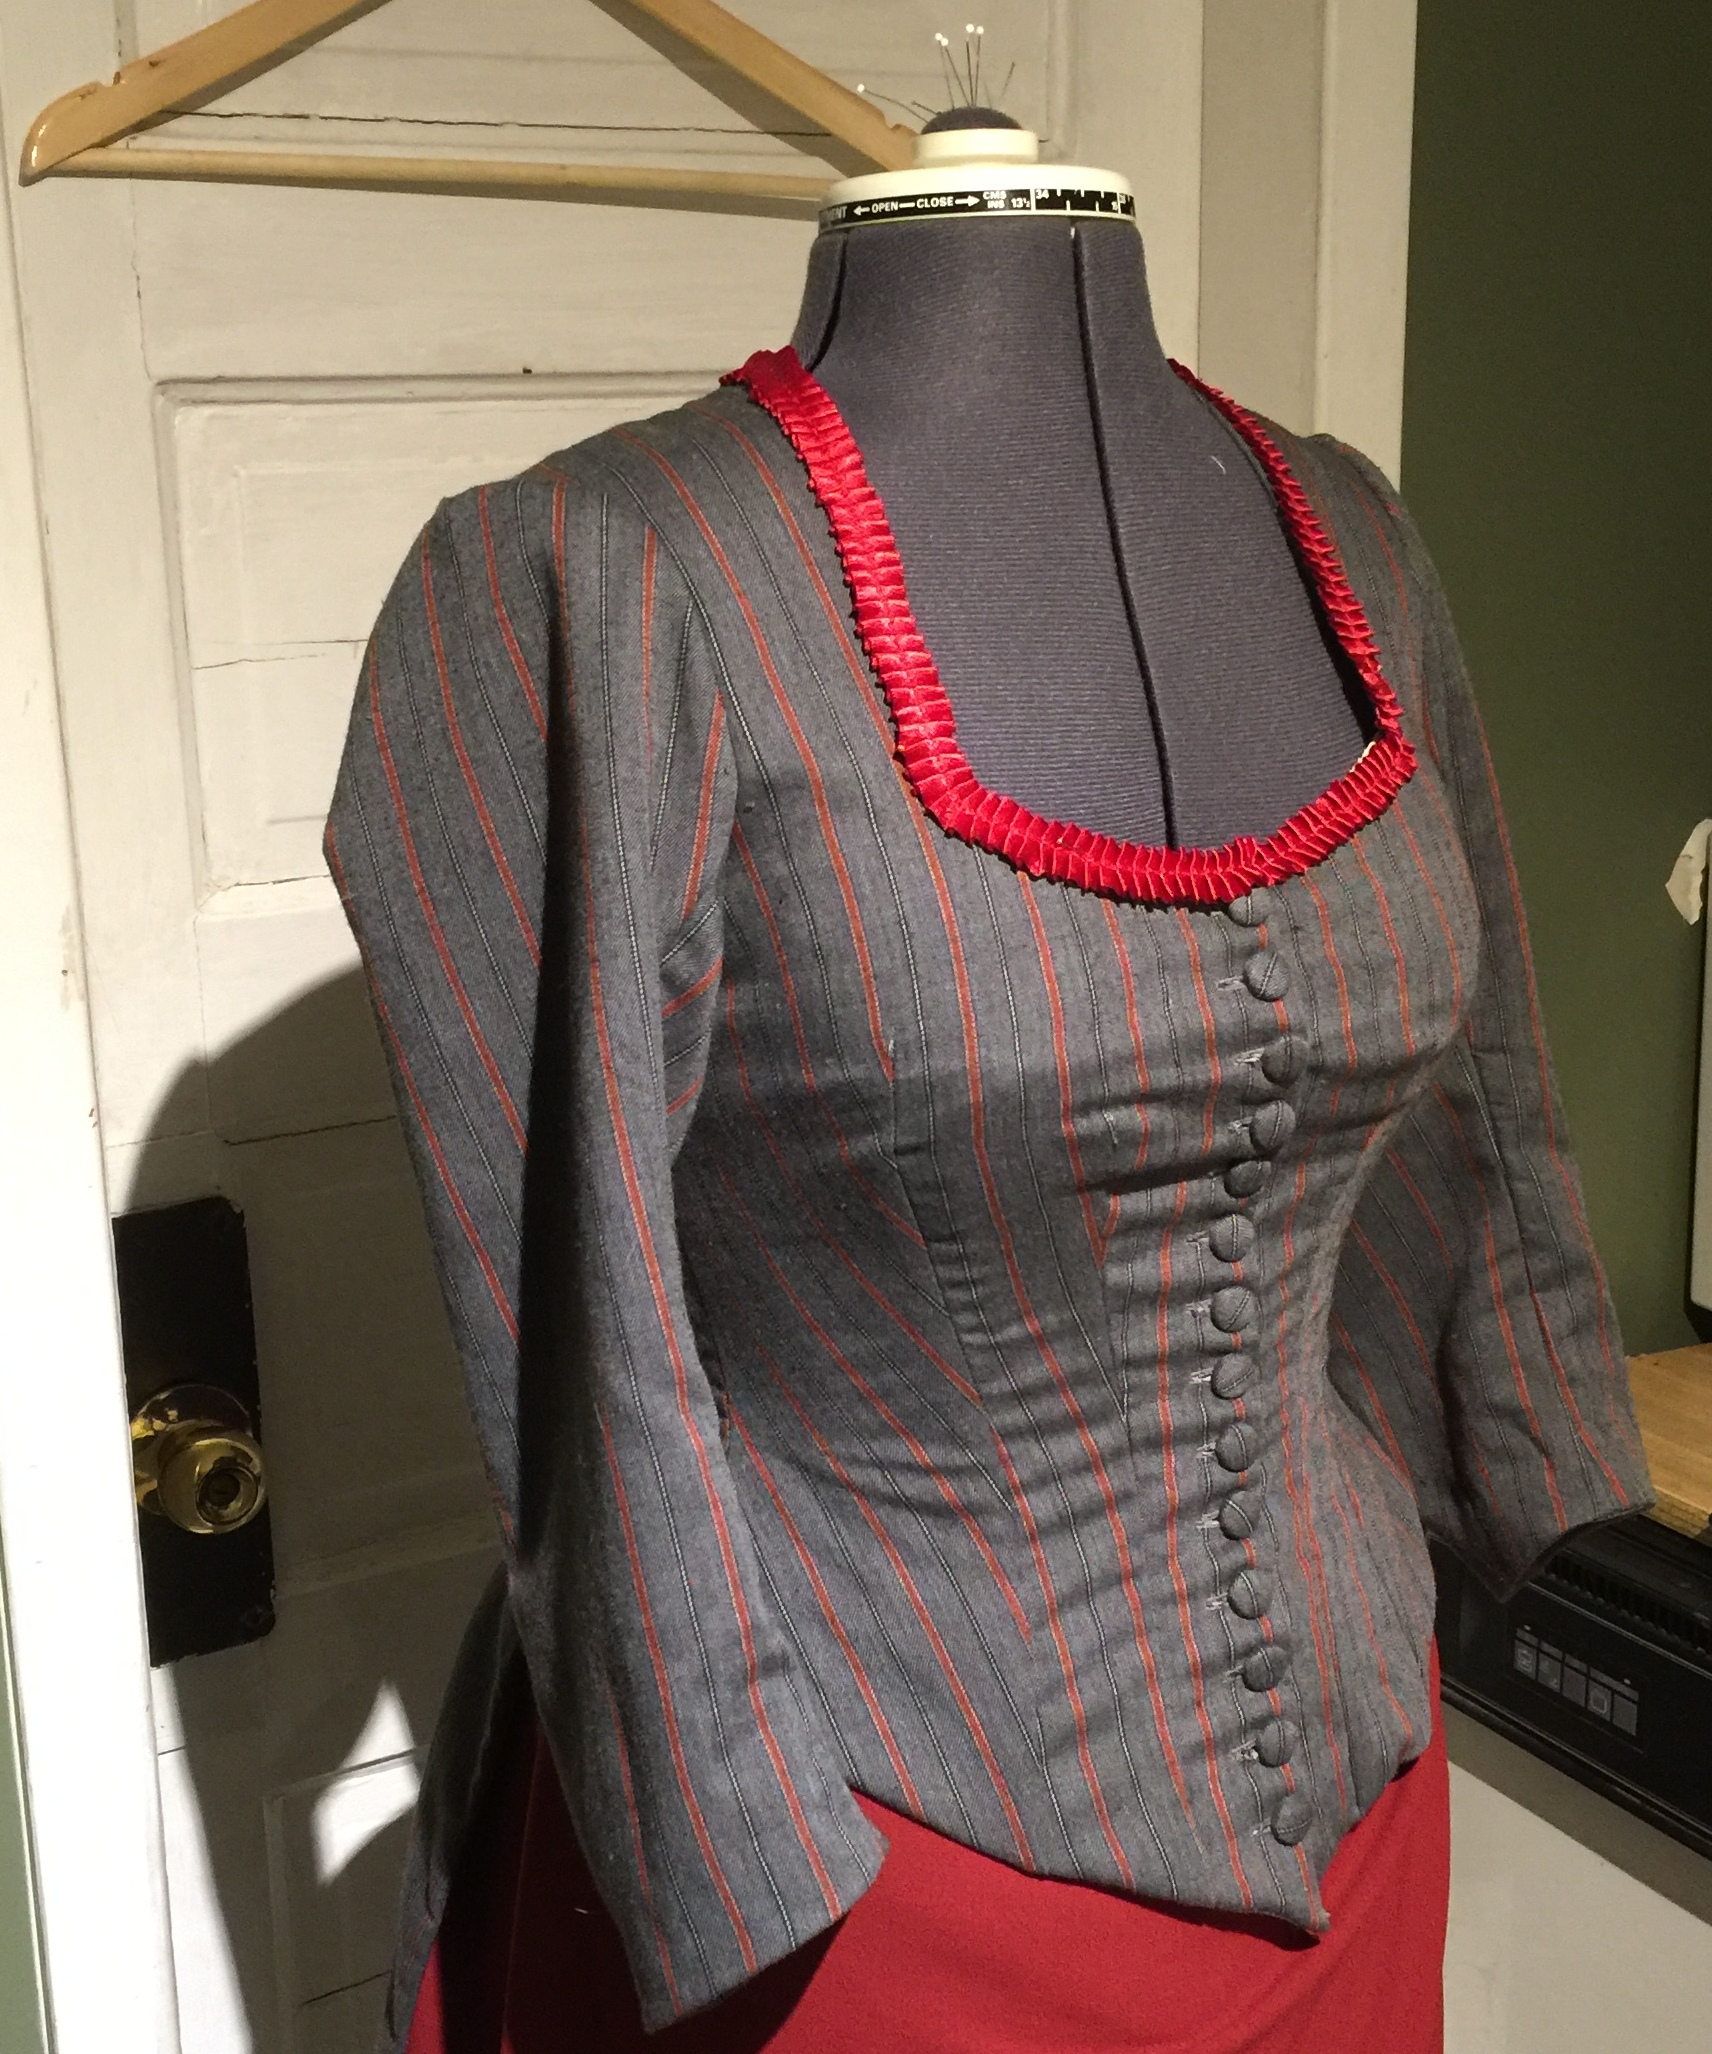
Once the basic construction was done, it was time to consider embellishments. I had a (very limited) amount of eyelet edging left over from the skirt draperies to contribute to the bodice decoration. After some playing around and an abortive attempt at adding it to the ends of the sleeves, I settled on a strip going down each side of the bodice, coming to a V at the front bottom point. This kind of decorative feature is SUPER common in 1880s illustrations, although usually creating a faux-vest kind of look. I don’t think my variation is beyond reason though. I hand-stitched the trim in place, along the whole length at the straight edge, and tacked down between each scallop on the inner edge. I was a little anxious about getting such a wide flat piece smooth on the rather curvy front of the bodice, but it worked out ok. Did I mention I hand-basted it in place? I did more hand-basting on this project than I’ve done in YEARS.

I had one last tiny bit of trim (the piece I started to attach to the sleeve but didn’t like) so I made that into a small standing collar at the back of the neck. I think it’s cute, but I should probably add a little bit of wire to support the ends.

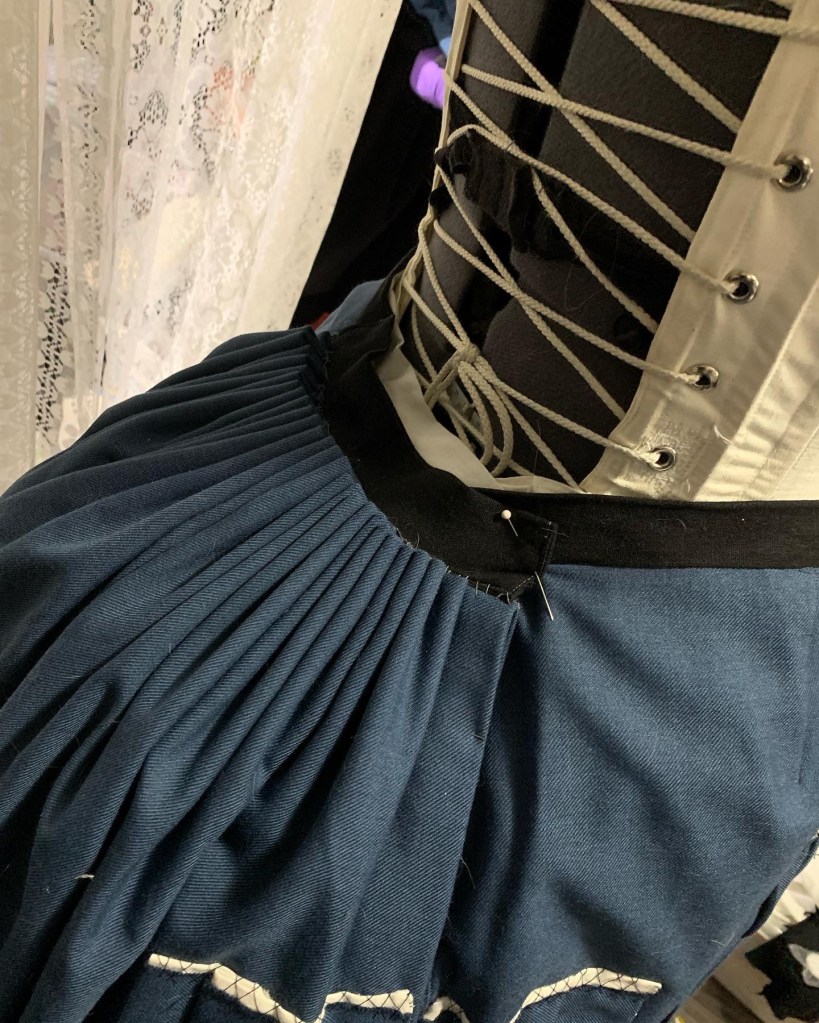
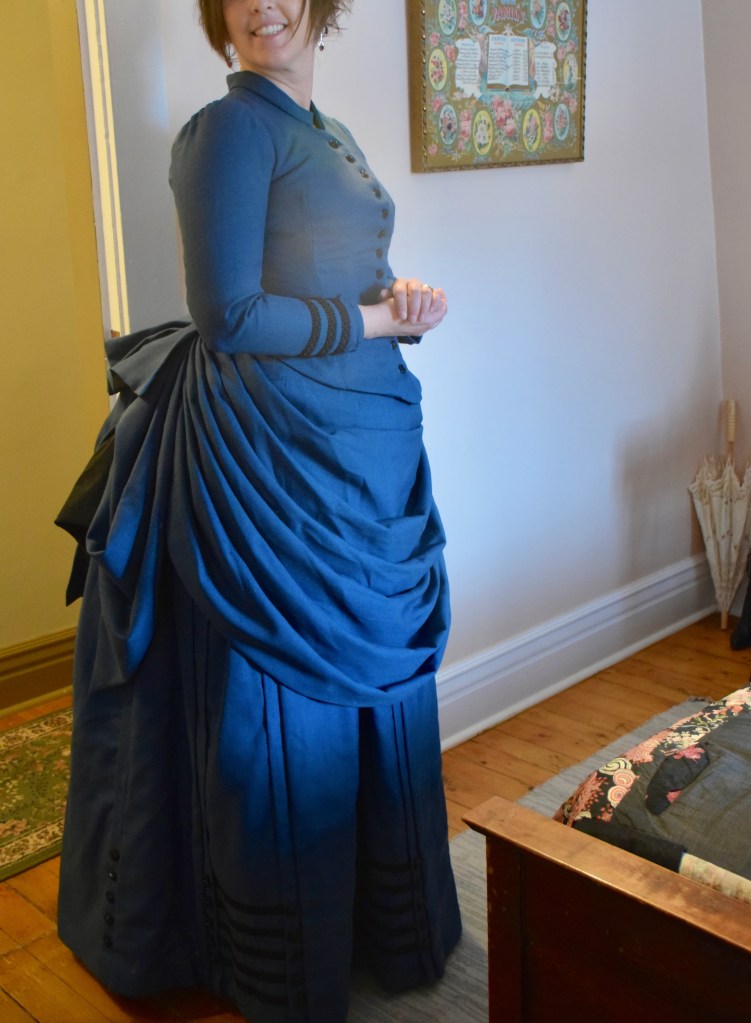
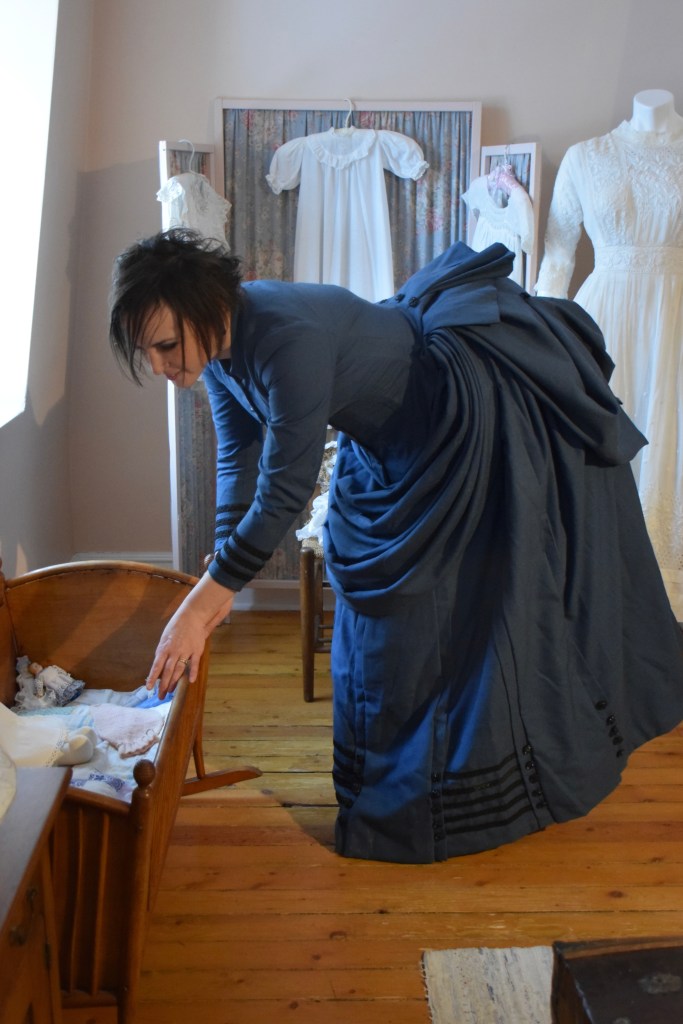
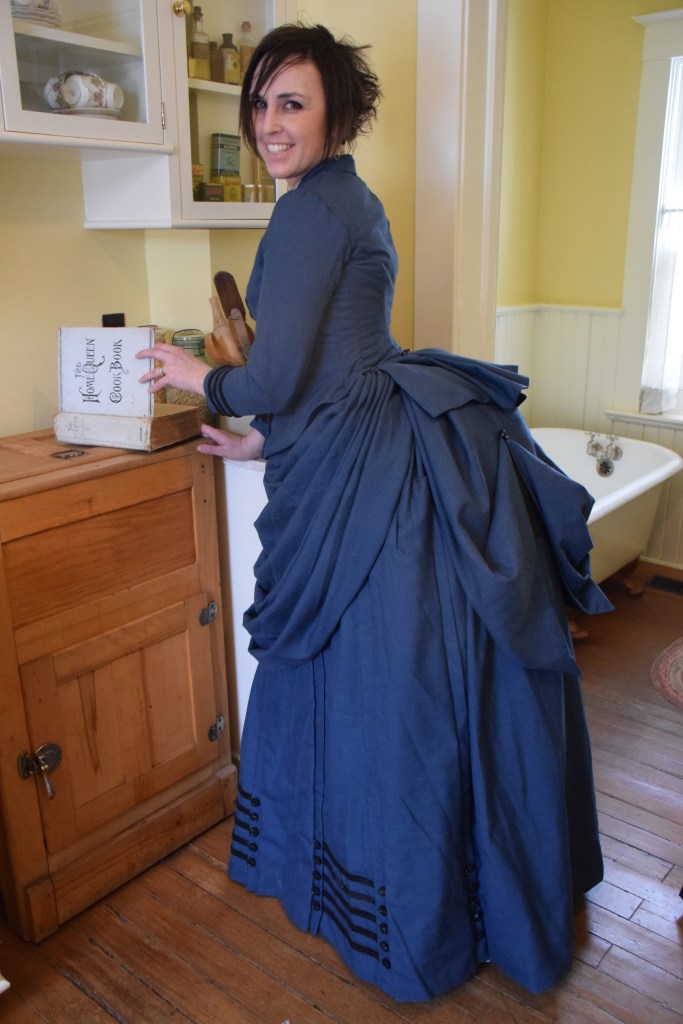
It turned out that the top layer of the skirt is actually sewn directly to the bodice, creating what the pattern terms a polonaise. I hadn’t planned on doing it that way, but I do like the simplicity of wearing that it gives the resulting dress. There is definitely some extra width in the hips, though I think more in the back—I like where the side-seam falls. I’m unlikely to take it in at this late stage, what with the upper layer of the skirt draperies attached directly to the bodice; I might add some padding to the area to smooth it out.
I also want to add a hint of red, to coordinate more with the hat, which will have a post of its own, too… but for now, at least, it’s wearable!


 And then I need to bite the bullet about trim. I have a ton of 5/8″ satin ribbon in the right red, some pleated, some not… But what, where, and how much is enough? Or too much. Is it possible to have too much of anything on a Victorian getup? I think we’re straying into “taste” territory again…
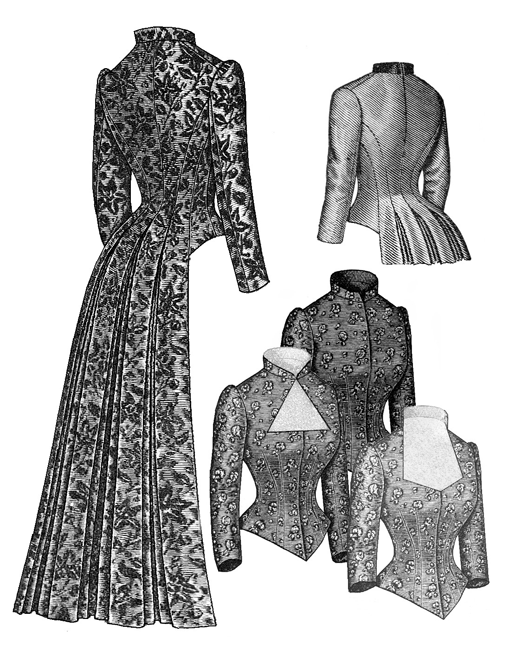
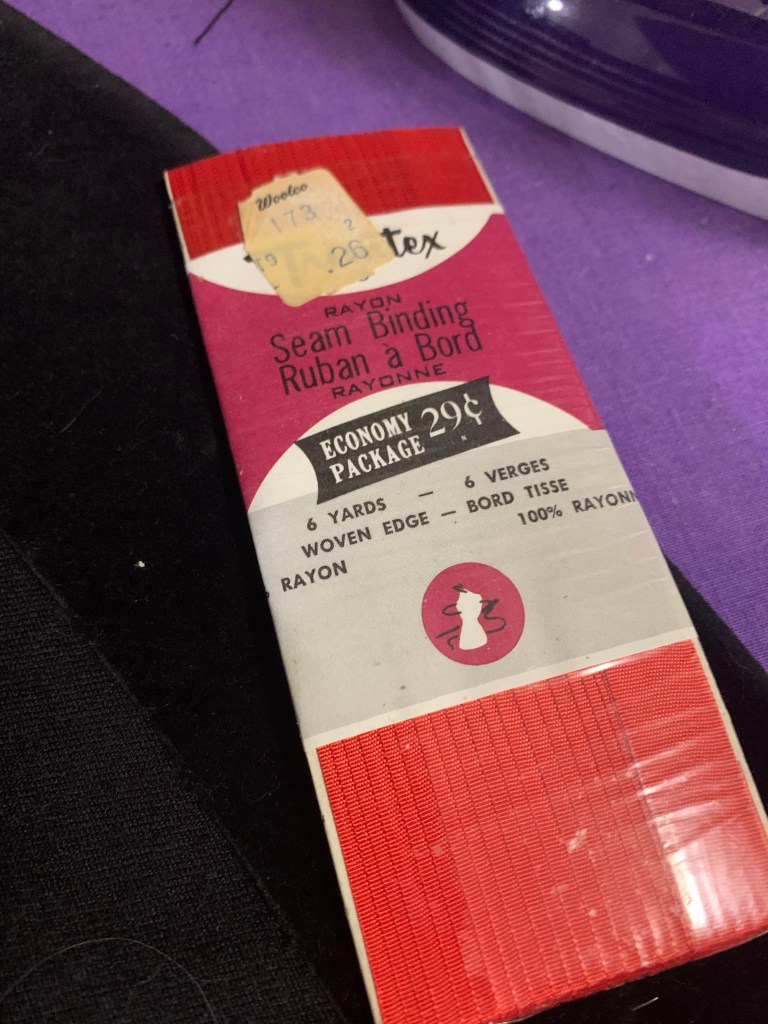
 Especially once I discovered the fabric tag. Yup, this fabric was received at Fabricland on 06/05/85. Over thirty years in stash, people.
 It felt like it took basically forever, though really I got it done in a week so that’s actually pretty fast.

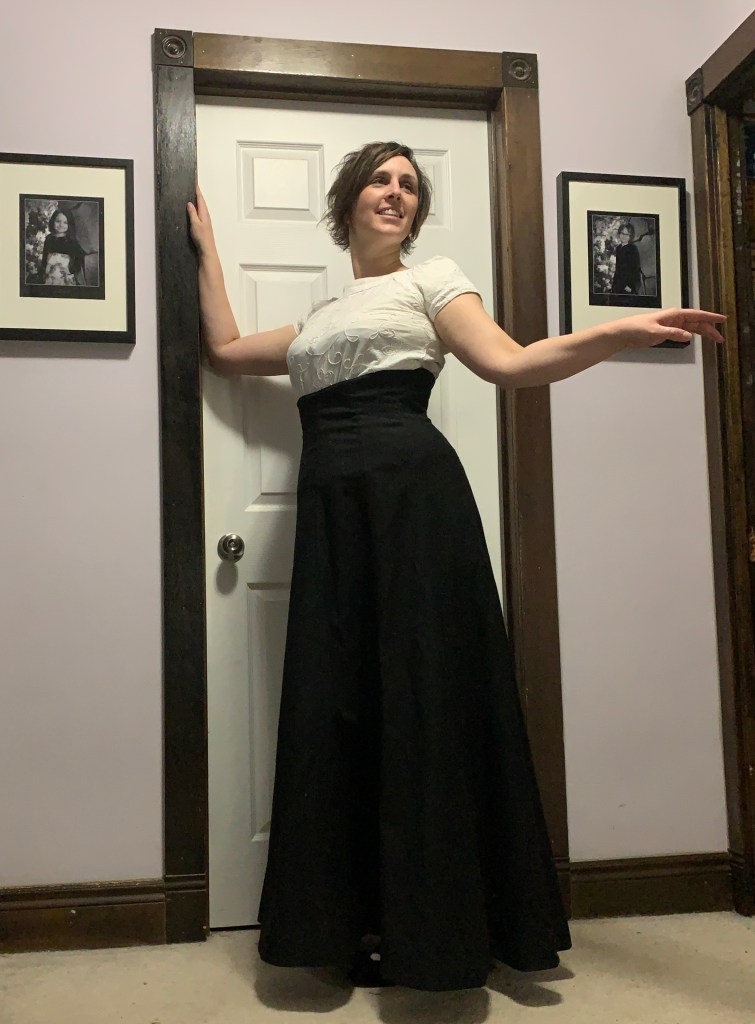
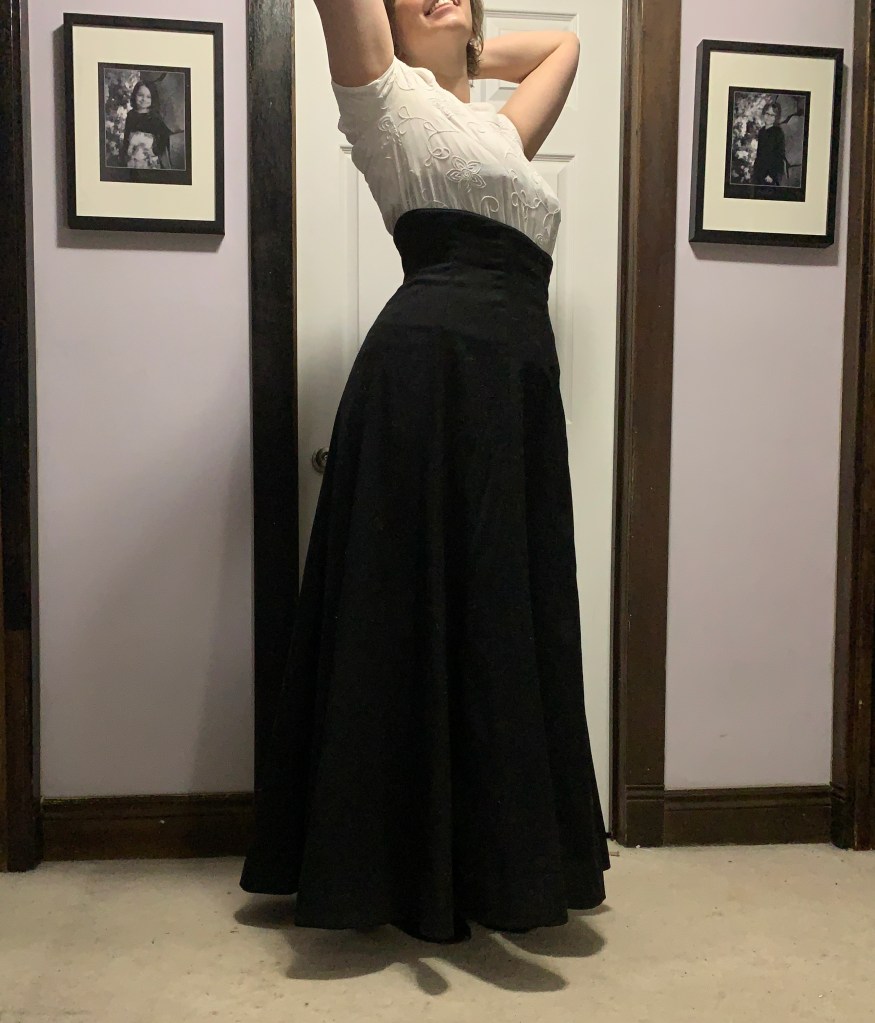
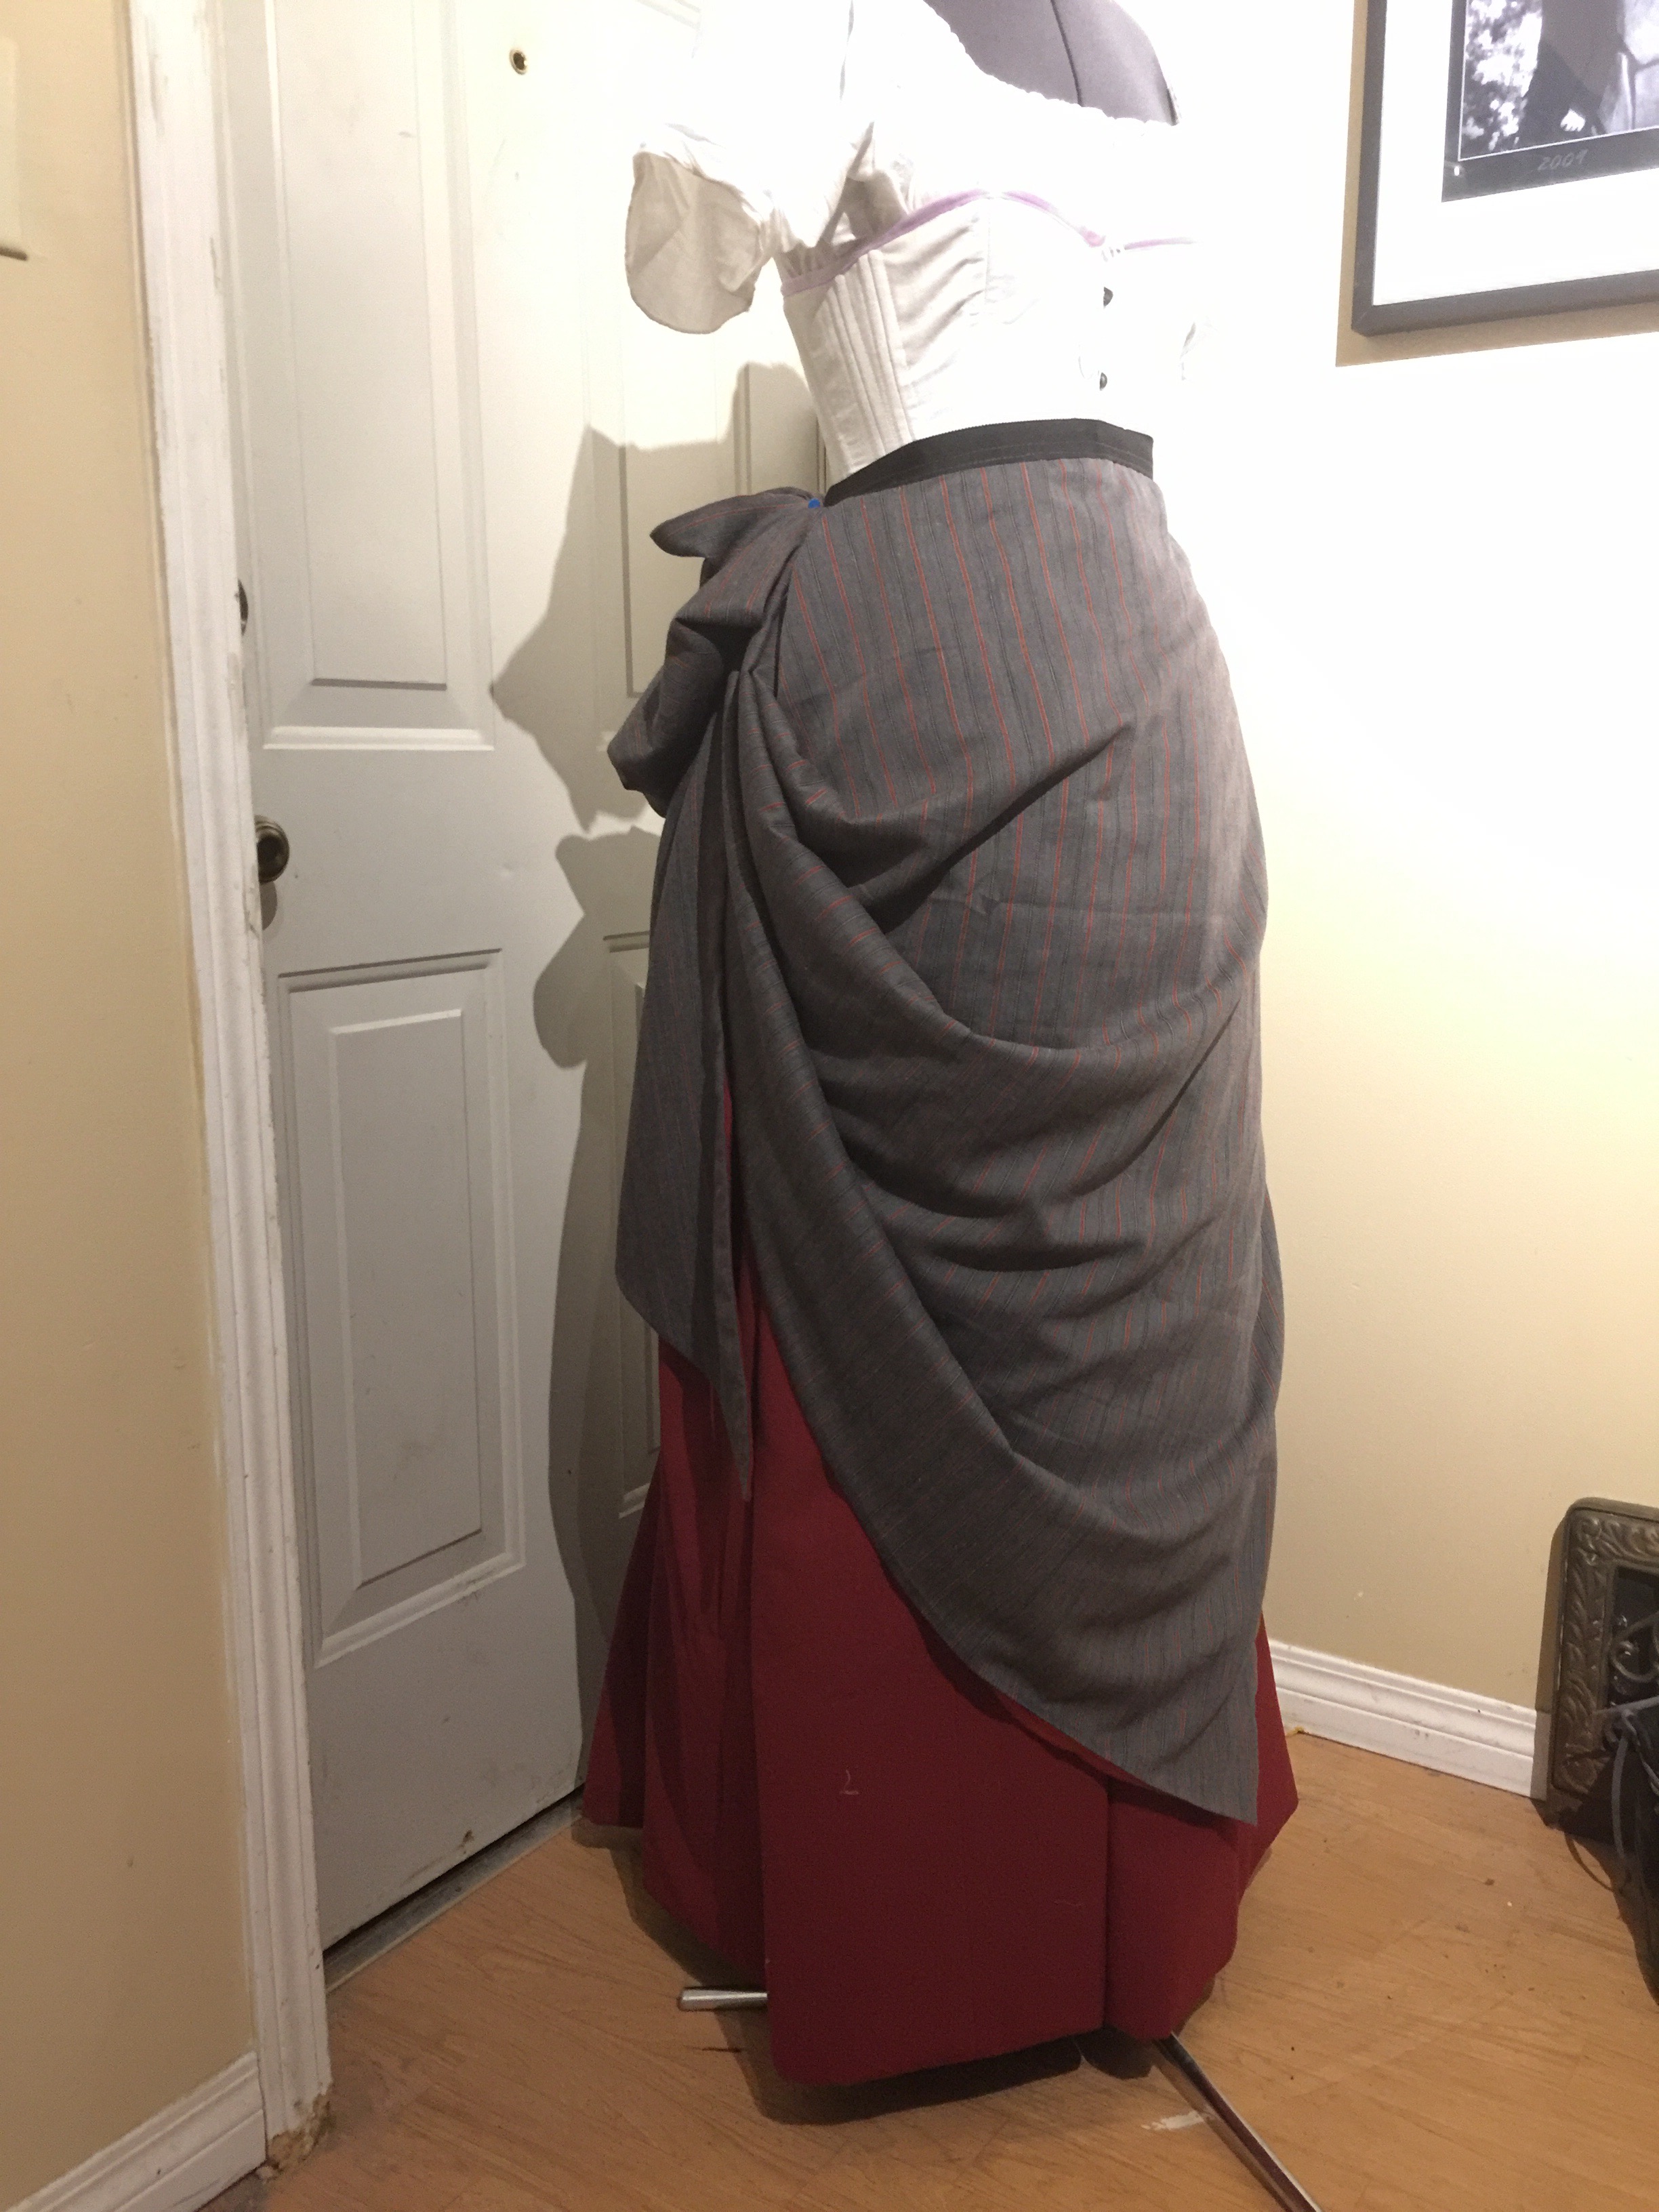
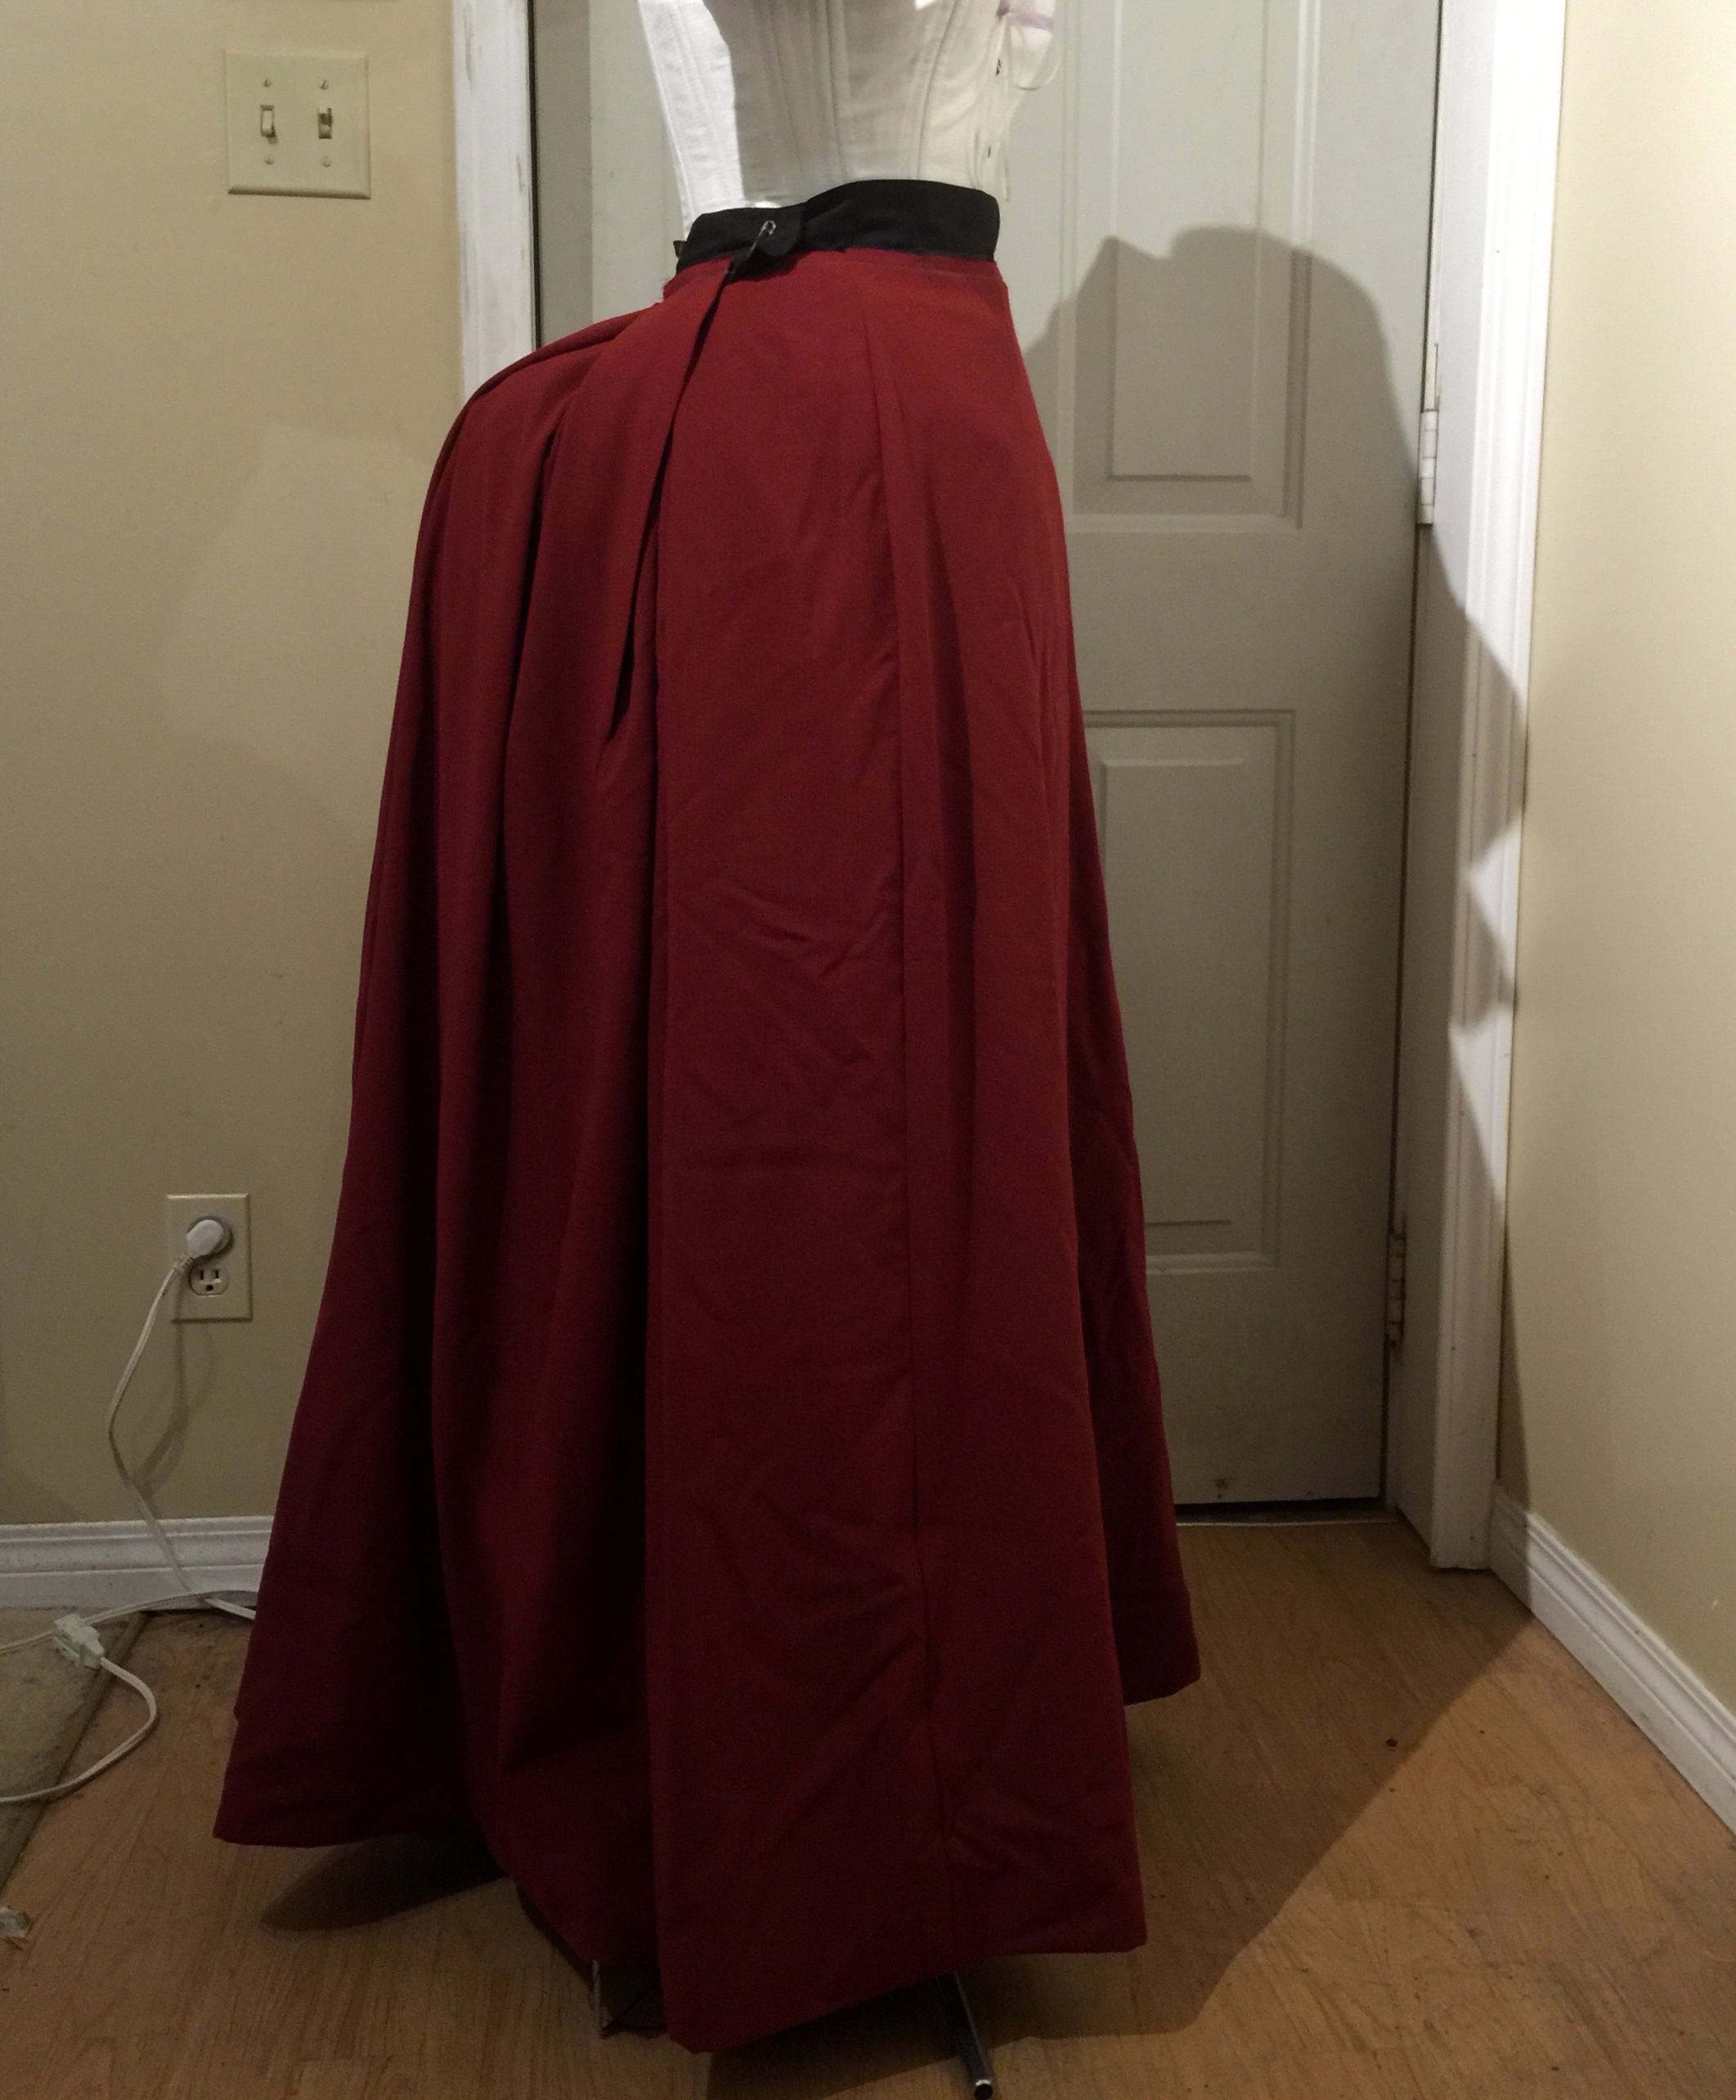
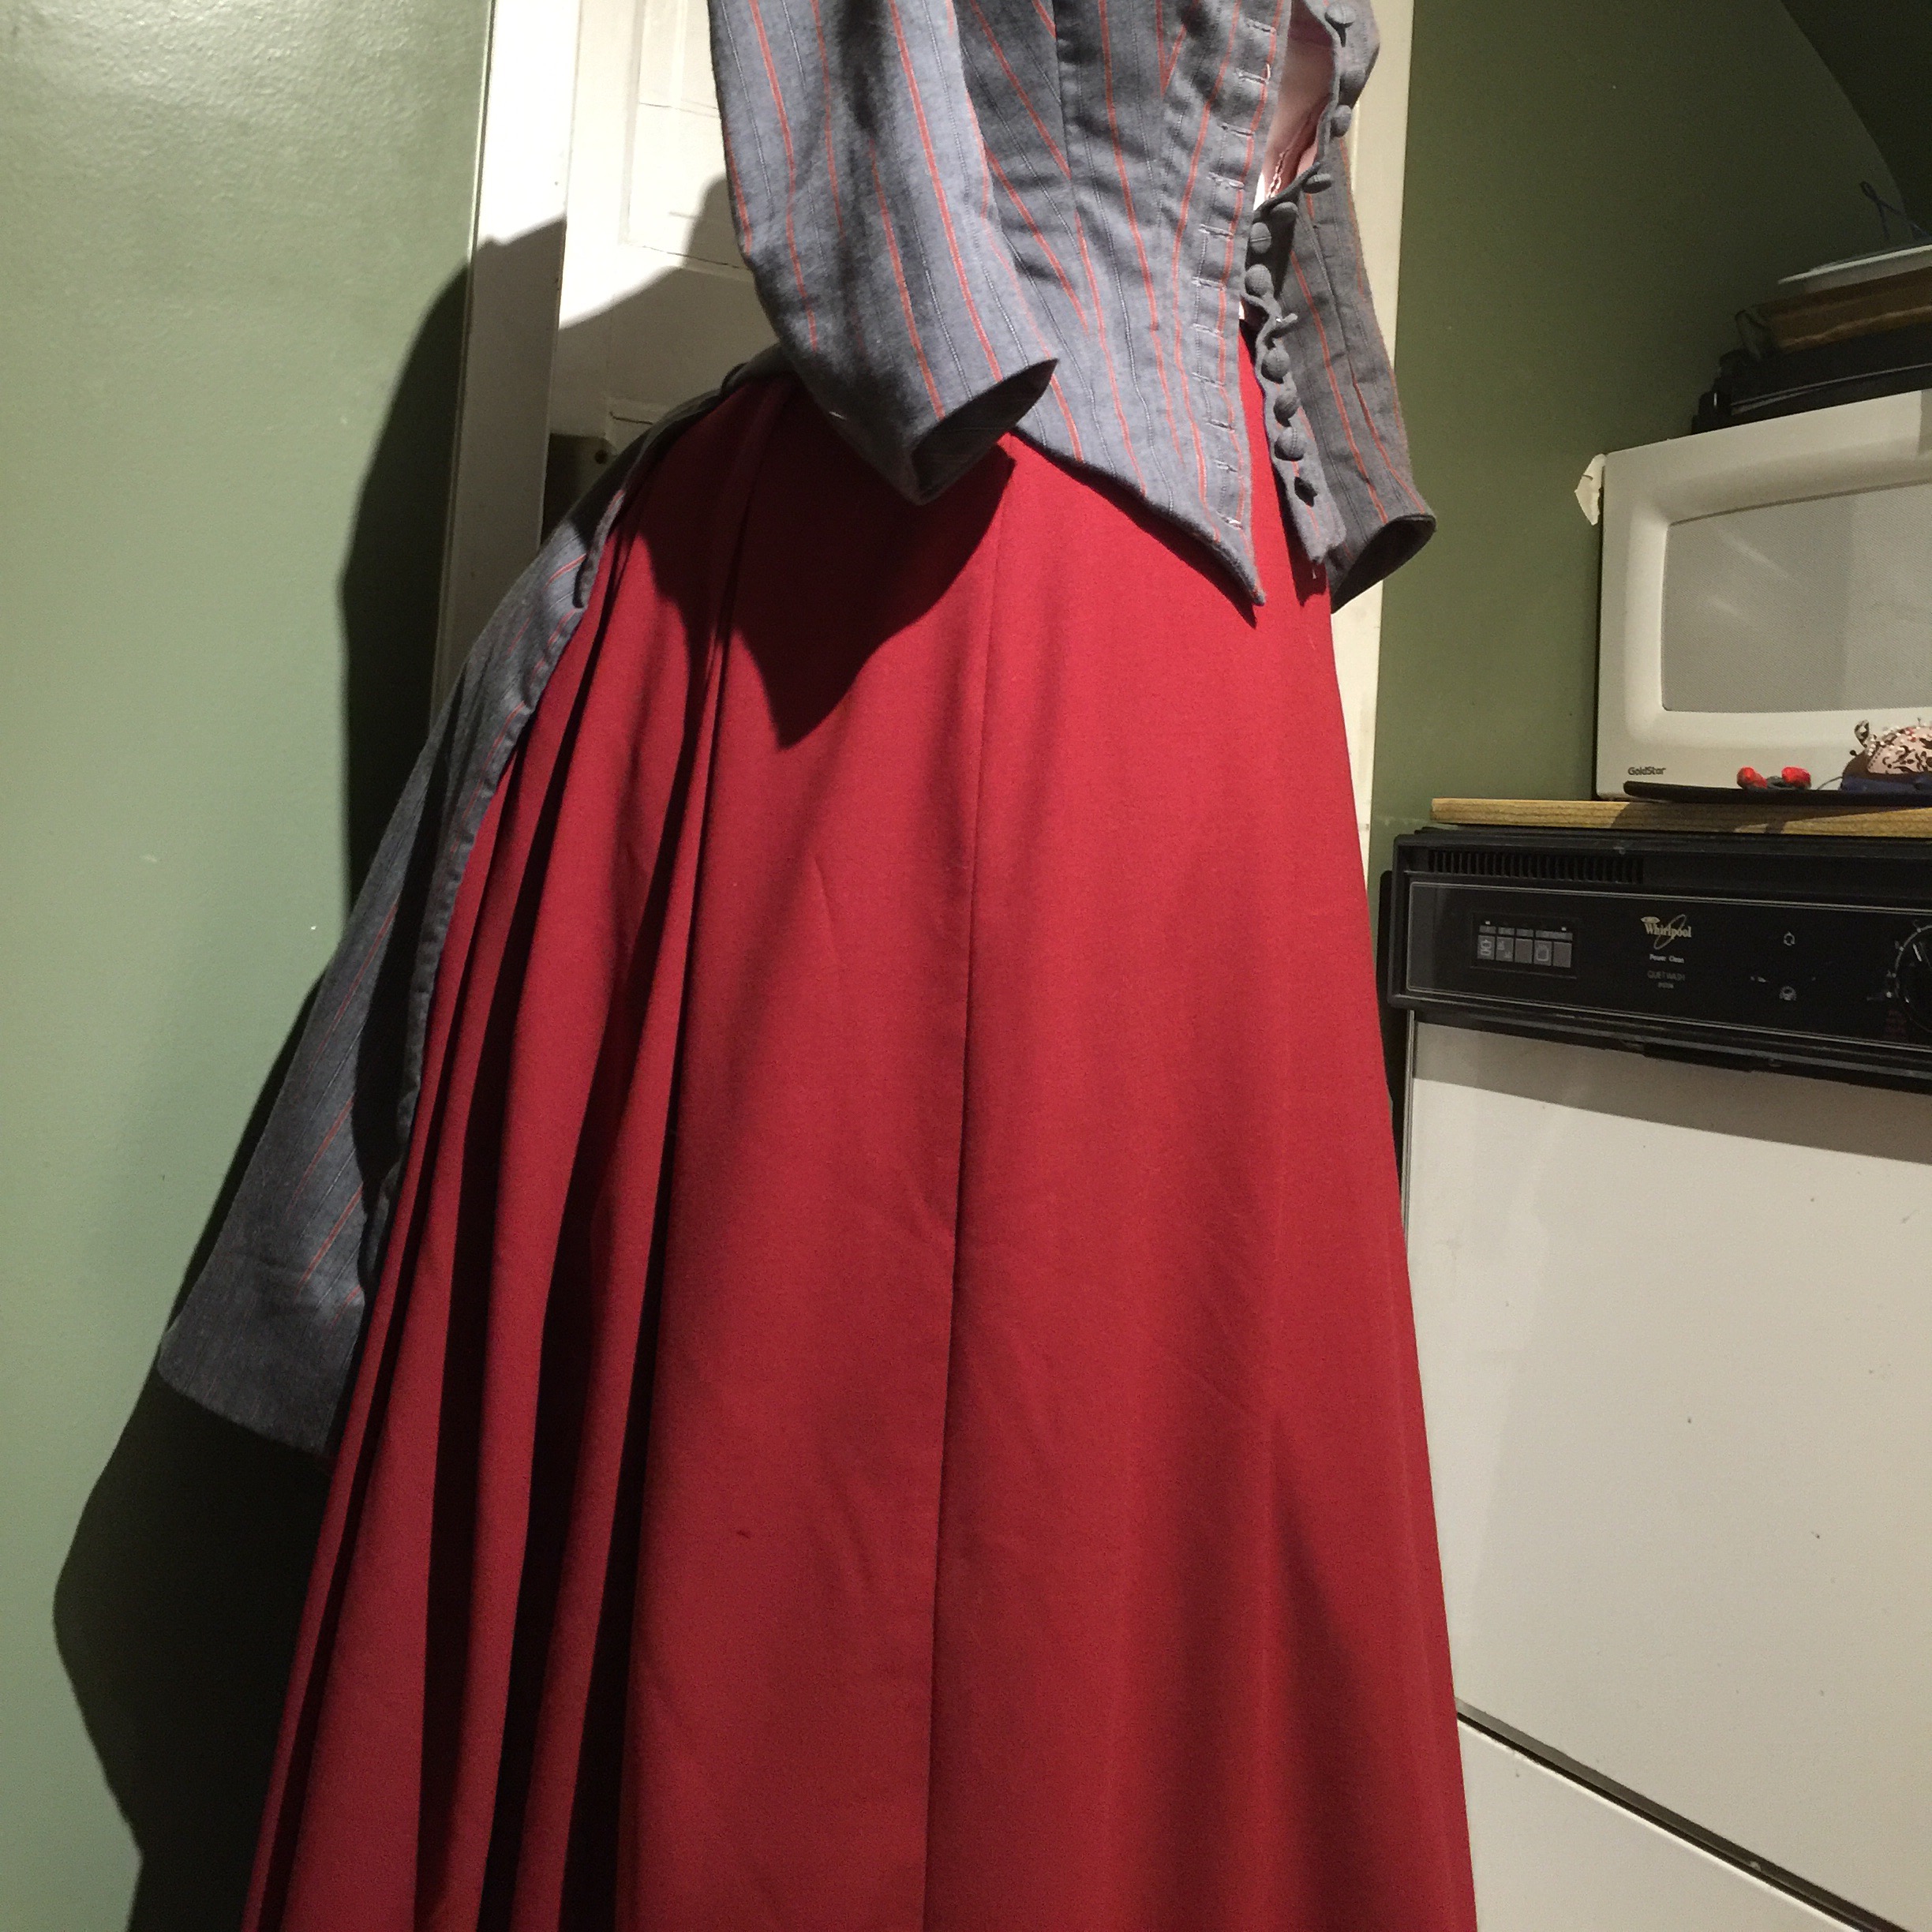 Which brings me to the skirt. Um, yeah. I didn’t have quite enough of the striped suiting for the skirt, or at least not for the skirt plus whatever overskirt draping I might eventually want to do. So I ended up breaking my stashbusting streak and picking up a few metres of this rusy red “wool crepe” (allgedly 65% wool… I am dubious). It was cheap, though, so it’s ok? Anyway, right down to the wire I managed to get it cut into gored panels, mounted on some black broadcloth underlining (salvaged from the same curtain as
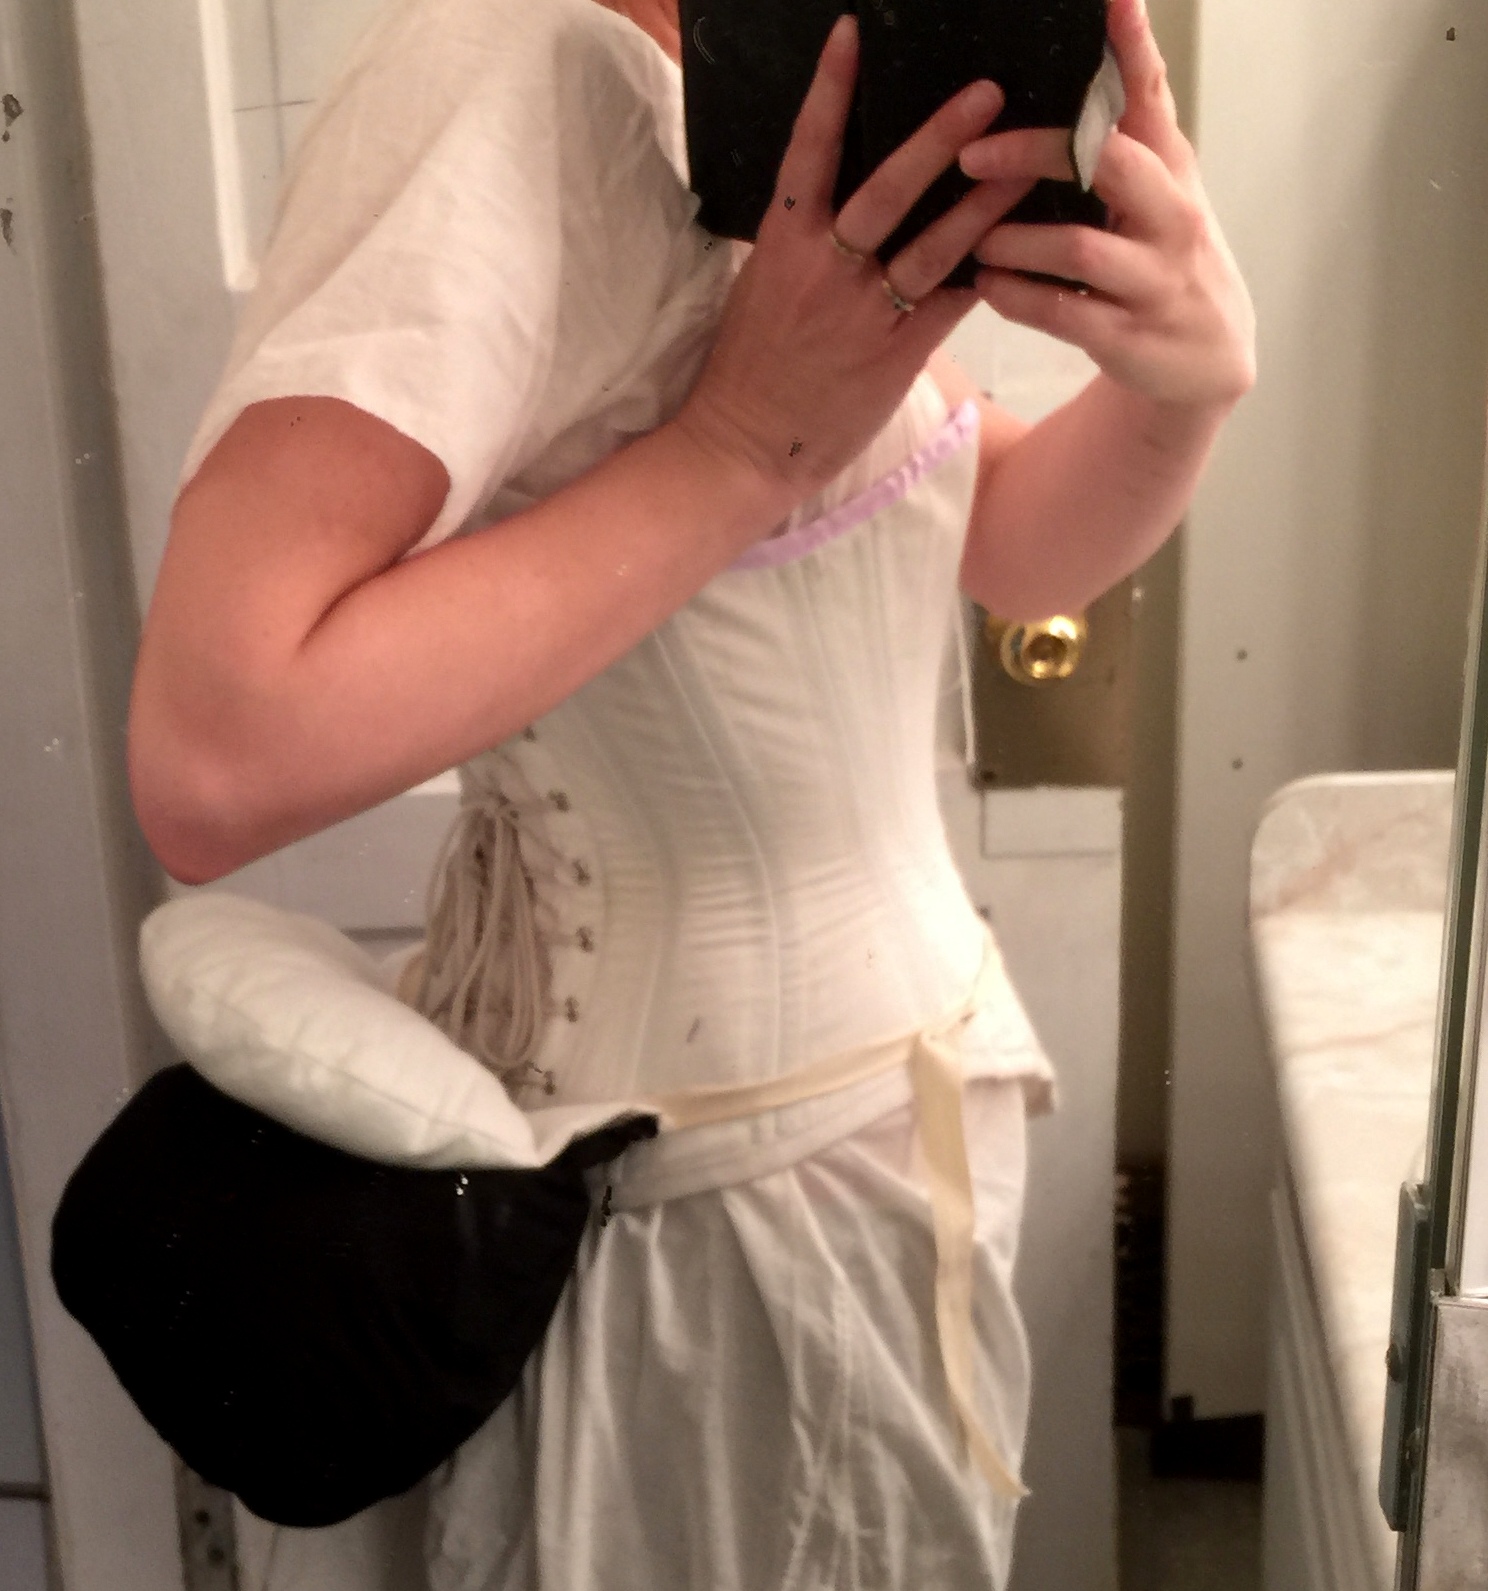 I did have a teeny little bum pad I made last spring, fairly softly stuffed—probably perfect for an 1890s “figure enhancer,” but not what I was looking for here. I decided to amp it up with a bigger cousin to get something a little more satisfactory; I stuffed it with fabric scraps (serger offcuts work well as they’re so teeny) from the sewing room garbage bag and had to largely hand-stitch it to the other as I couldn’t get the seam allowances anywhere near the sewing machine’s presser foot. This is a much heavier and less convenient option than the collapsible wired bustle I made before (especially for driving) but it was definitely functional, and didn’t collapse much, which I’m a bit worried the wired one will.
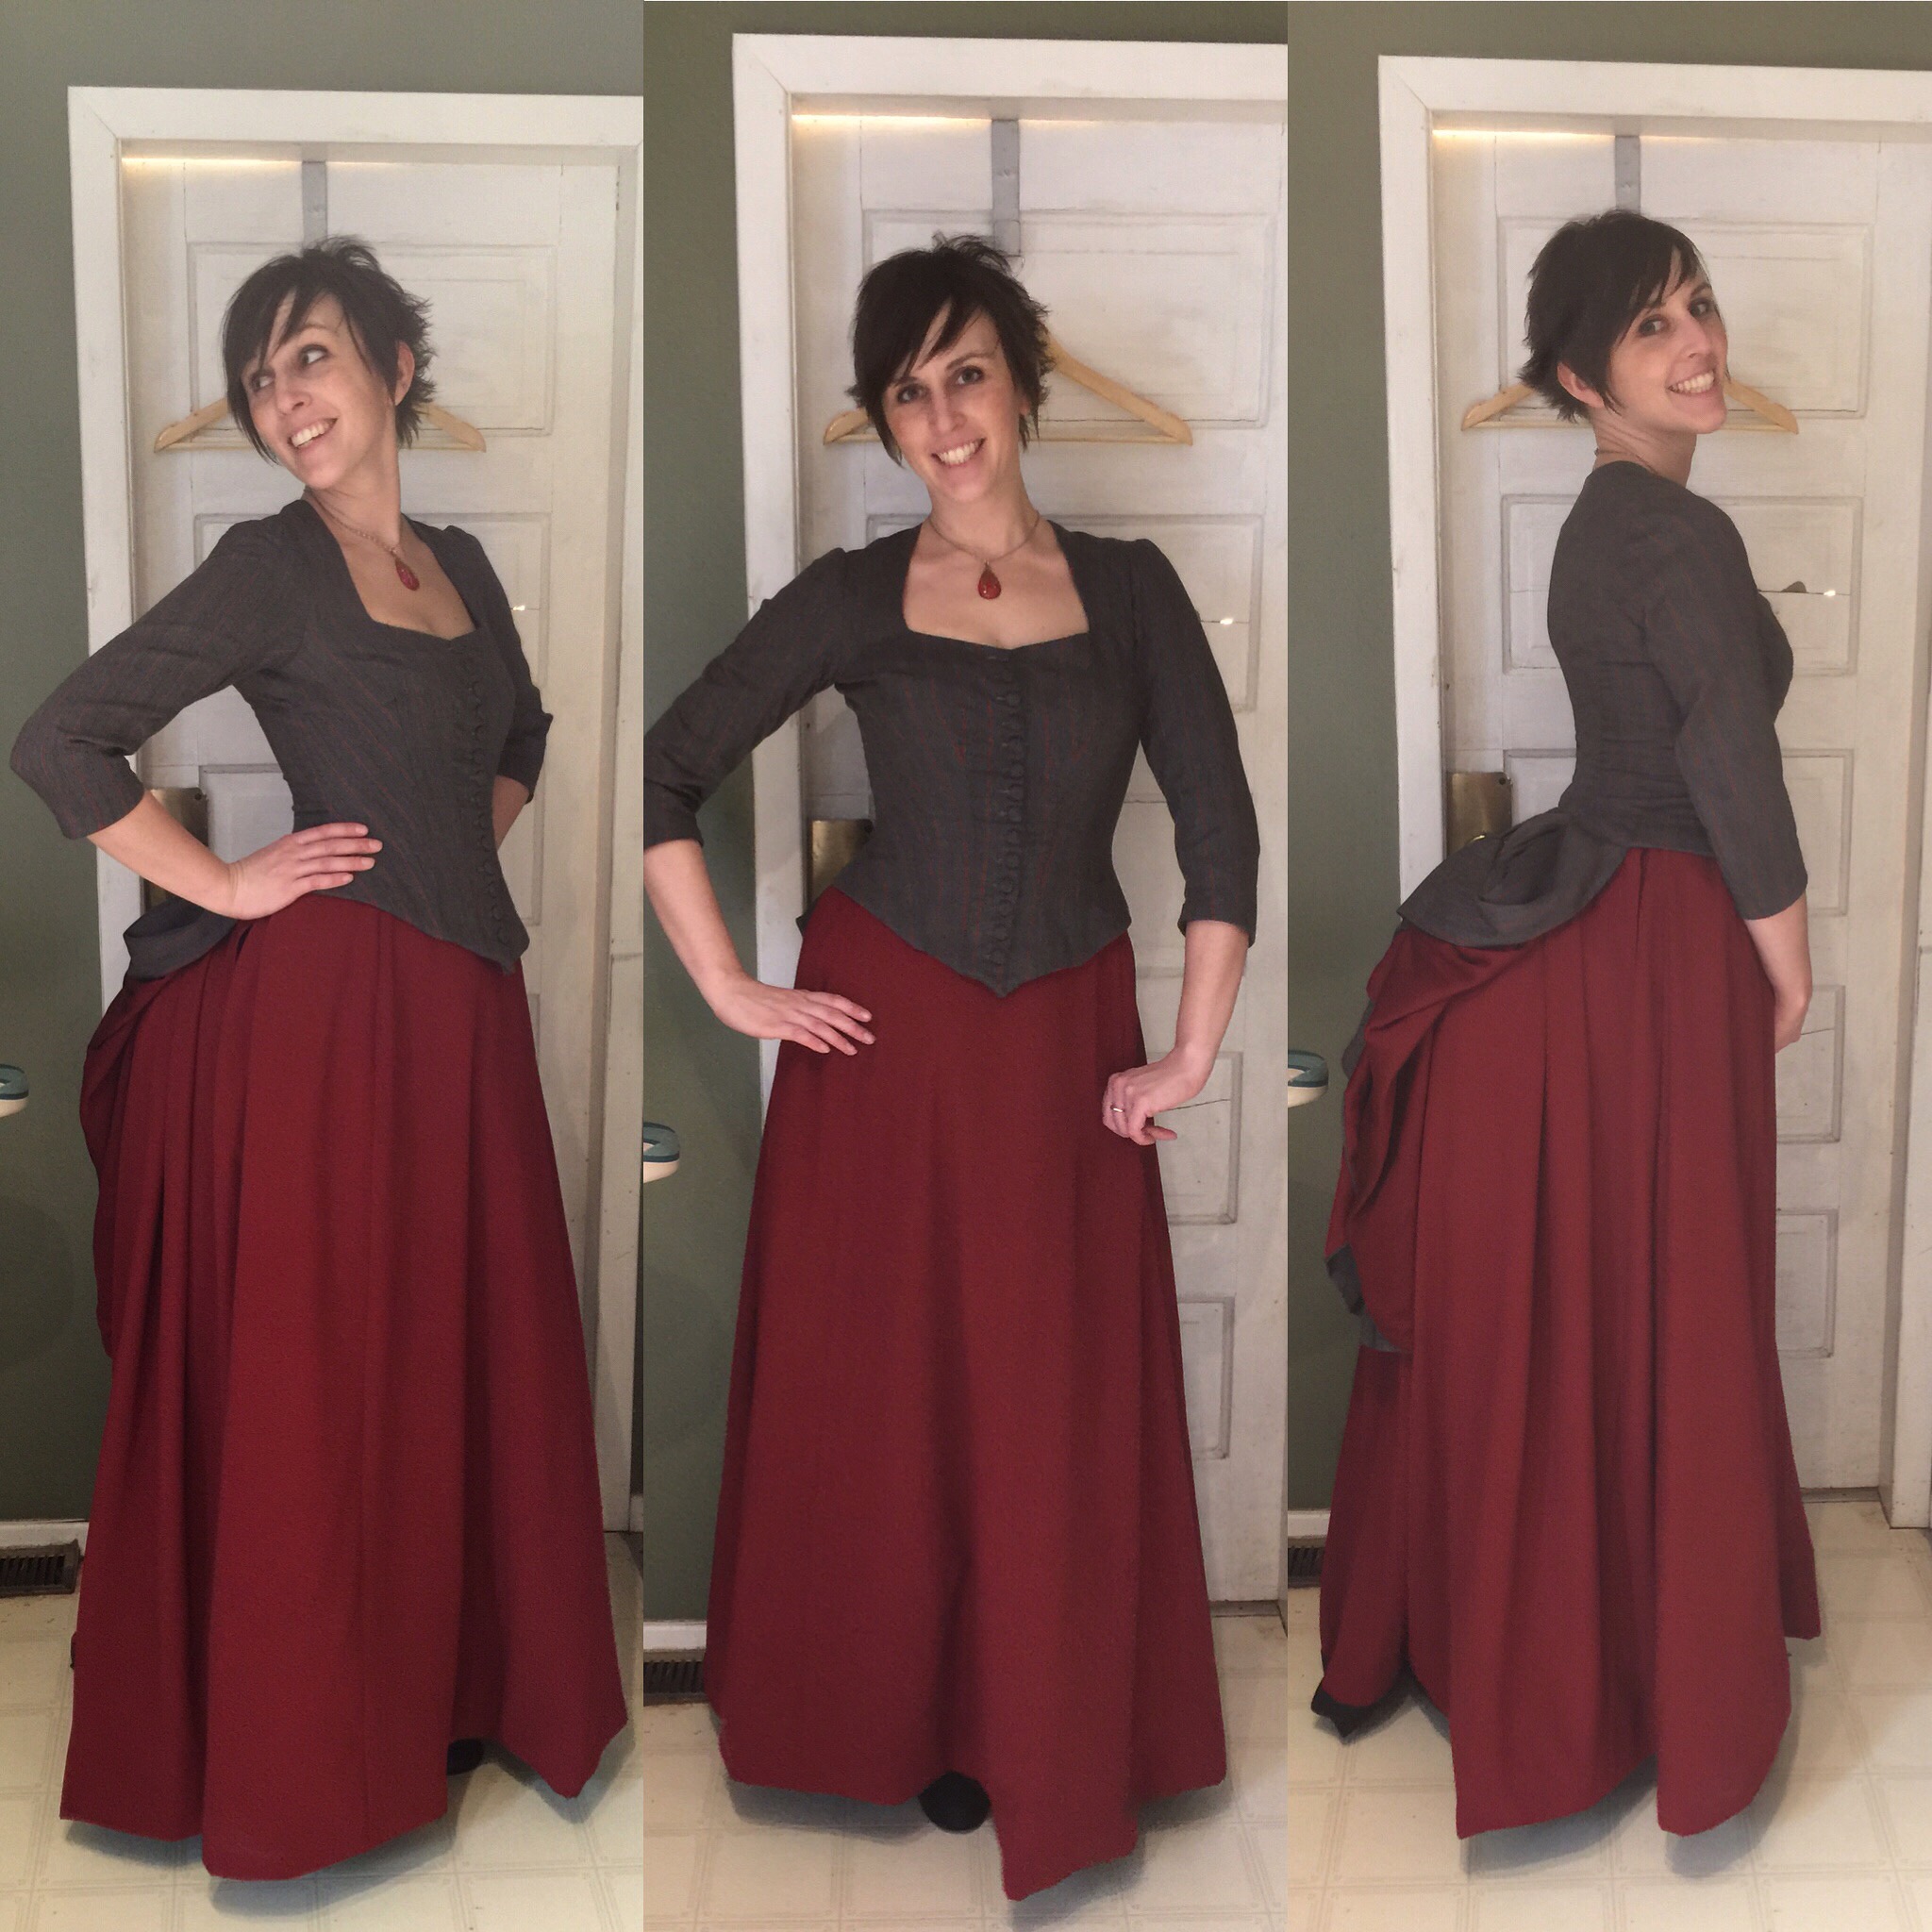


 Why yes, there’s a dress form beside my front door in half-Victorian costume.
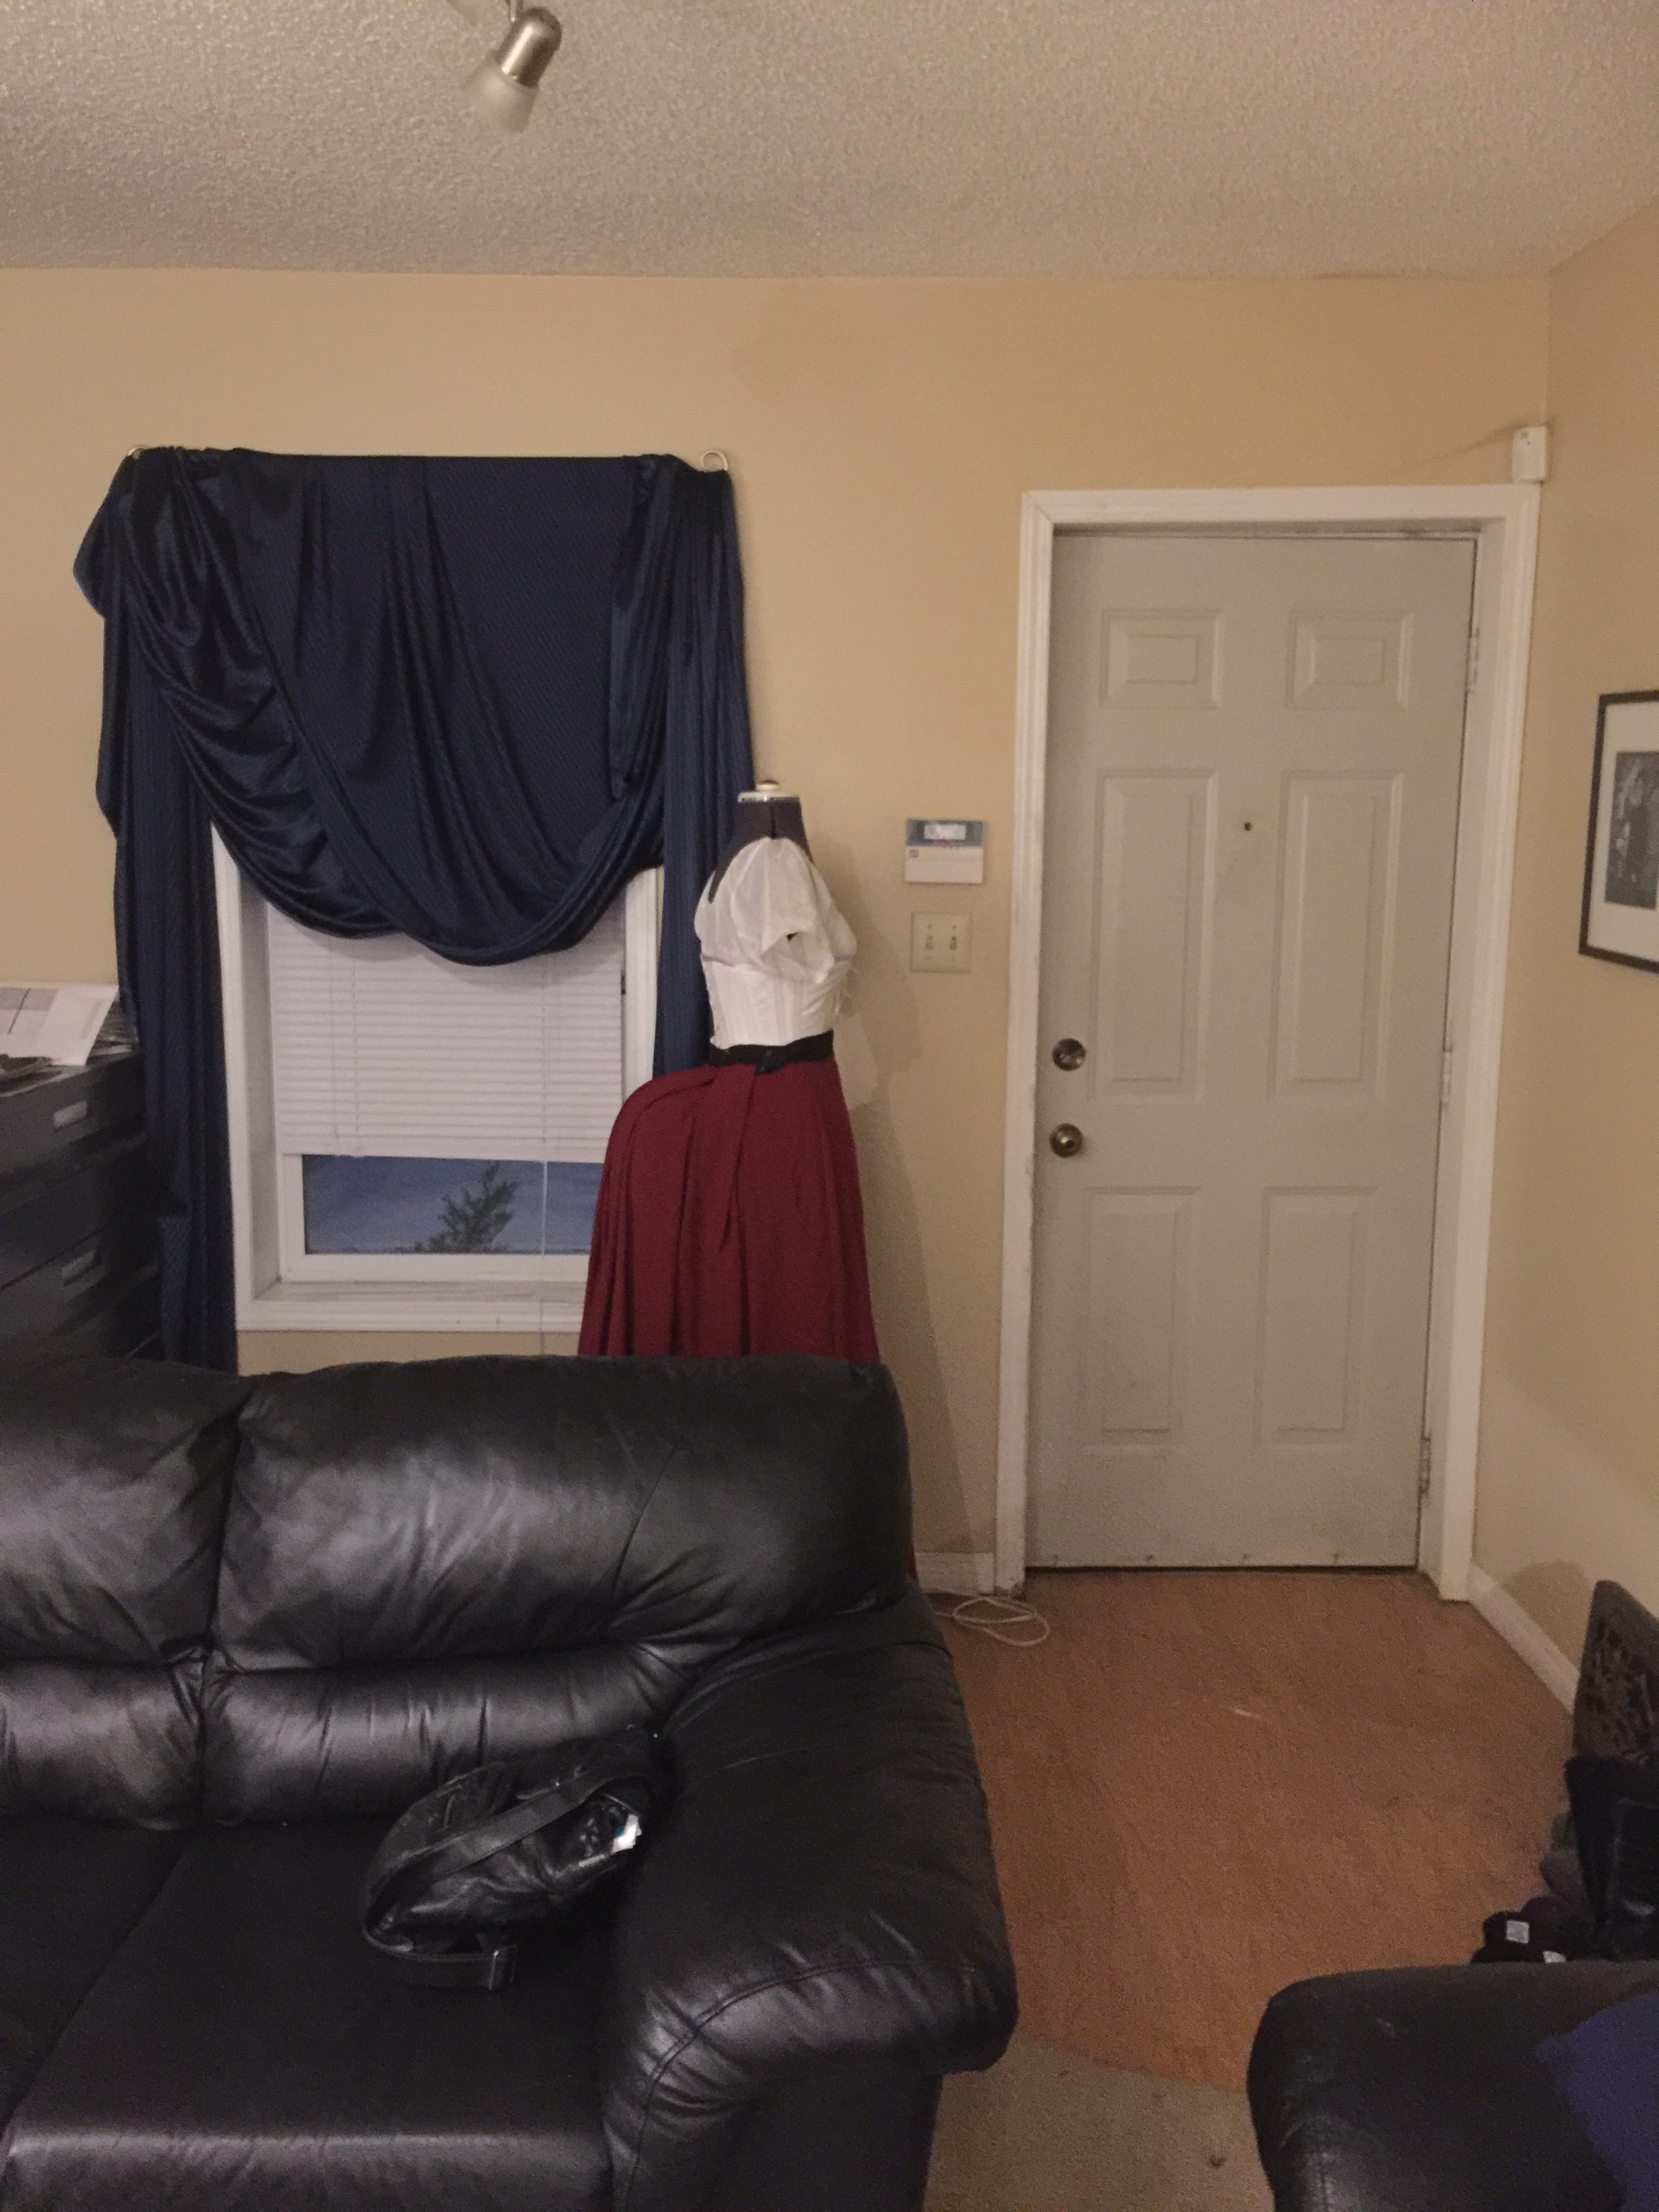 I’m kinda tempted to leave it there all month.


