Tag Archives: kids’ clothes

Attack the pink fluffy bunnies

Attack of the pink fluffy leopard print bunnies

Well, I have started work on the coat for my older niece. This is my first experience sewing with fleece and it’s, well, interesting. For one thing it’s filled my house with tiny pink blobs of fluff, which are getting EVERYWHERE. For another it seems to combine the annoying qualities of knits with the annoying qualities of velvet. Joy.

The pattern is McCalls 3374, a thrift-store find back at the start of my sewing adventure, just over a year ago now. As a bonus it came essentially un-cut, with the size 3 fully traced out and part of a size four. I traced the rest of the size four for Syo’s coat last winter, so this time I have no tracing to do! Whee!

This may be another exercise in “looking past the envelope” as the envelope cover

McCall's 3374

has a lot of fun-fur, fleece, and animal print. Despite the above rant about fleece, the fleece is strictly for the lining. My outer shell is black and sparkly “boiled wool camry blend” (a completely different fabric, however, than the stuff of the same name that the Russian Princess coat and my Czarina coat were made of. They were a knit, dense and felted. This stuff is a woven, tends to fray, and reminds me of boucle in its thick individual yarns.) It would’ve benefited from block fusing, but I am far too lazy to go there in coats for preschoolers. I did preshrink with wet towels in the dryer, which reduced the width by a good 10cm (4″) so I’m glad I did.

Coat shell

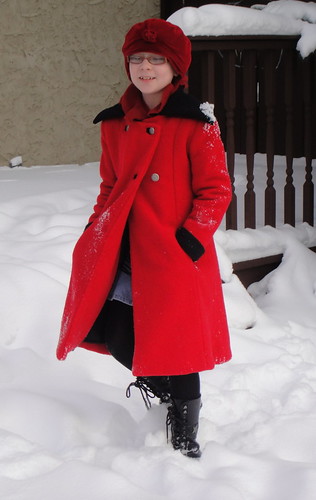
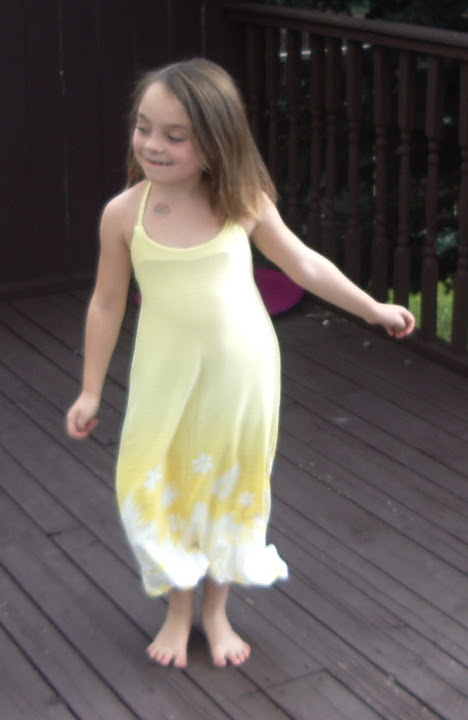
This first coat is for my four-year-old niece (let’s call her Fyon henceforth); she was also the recipient of the twirly Popover Sundress last summer. I decided against cutting out both coats at once as I was pretty sure that would inevitably result in me sewing size 4 sleeves onto a size three front or something. I will note here that the size four still fits Syo fine, so it will be plenty roomy on Fyon, although their size gap is not as extreme as you might expect from the three years between their ages, since Syo is a compact model, possibly even a Smart Car, while Fyon is more

Fuzzy pockets!

of an SUV type.

The best thing about this pattern is that the (very flat) sleeve caps have almost no ease, so they’re a cinch to put in flat. This makes for very quick construction (and I promise I’ll grab a photo of that stage on the next coat.)

I decided to cut the pockets out of the fleece, which will make them absolutely yummy to stick your hands in. This time, I knew enough to make the seam from coat to pockets narrower, so the fleece rolls nicely to the inside, unlike the last time I sewed this coat.

I debated about foldover cuffs, since I’m not overly thrilled with how this part of the pattern is drafted, but they do look so much more finished than just a plain sleeve ending. (Tabs do too, but I’m much too lazy to draft a tab for these coats.) I had considered interlining the coats, as well, but decided the fleece is bulky enough. It was the

Foldover cuffs. I love the texture of this fabric.

thickest, softest stuff we could find at Fabricland’s new-years sale (still expensive even at 50% off). I think there’s enough left over for an itty-bitty scarf, too. I had debated making the collar and cuff-fold out of it, but I really wanted to keep the outside of the coat “serious” (except for that hint of sparkle) (probably I wouldn’t’ve had enough fleece, either). Hopefully the girls won’t find the wool collar and facings too scratchy; it doesn’t feel scratchy to me, but it’s certainly not as wonderfully soft as the fleece.

Note to self: you forgot to cut out the back neck facing. Also, don’t forget to add one of the Bookemon & Ebichu labels and a hanging-loop before you sew on the lining/facings.

The pattern is inexplicably unlined, but I’ve just used the same body pieces for the fleece. I considered adding  a back-pleat, but I don’t think it’s necessary with the stretchy fleece. Next step: assemble the lining and facings (I will just topstitch the facings down on top of the fleece).

One Eyed Jack (left), Bandit (centre), Tigger (right)

In sadder news, we got up this morning and discovered One-Eyed Jack, the smallest and hardiest of our goldfish, was missing from the tank. I soon found him on the floor by the couch, where he had leapt to his doom. The smallest of our fish, he was still a good 6″ long, and had survived the Great Filter Malfunction of 2009, a 600-km migration in a glass jar in 2007, and a brutal cichlid attack that cost him his left eye (and gave him his name) probably sometime in 2006. Not to mention nearly four years of my rather indifferent fish care. I honestly thought he would be the last of our dwindling fish to survive, but I hadn’t counted on his adventurous nature. Usually he was a bottom-hugger, as his one-eyed state made it hard for him to find food until it had settled on the bottom. Tyo was stoic (her best friend’s dog died of an accident on the weekend, so compared to that the loss of a fish may be minor), Syo was stricken and still crying when I put her on the school bus, and I was a lot more freaked out than I should’ve been. Jack is now in a box in a freezer to await burial in the spring. He’s too special to just chuck in the garbage like the other goldfish we’ve lost.

10 Comments

Filed under Sewing

A loud little shirt

I think my eyes are bleeding...

Well, Syo’s request is complete, though I think I’ll be seeing after-images of this print for days. Overall, it went fairly well. Unsurprisingly, the shirt pattern I used as a base had way too much ease. It was designed for wovens, so I did go down a size, but evidently that wasn’t enough. So I took out about an inch of excess from each side and under the arm to get it to a fit she would approve. Fortunately with this design I didn’t need to worry much about what that would do to the armscye.

There were the usual technical glitches that crop up when I wing it. I decided in

Can you spot what's wrong here?

advance that I would sandwich the front of the straps in between the drape and the shirt bodice, so that it would be firmly and neatly attached with the end hidden inside the double-layer drape (I didn’t want to attempt to do the back of the straps this way as I was pretty sure I would mess the length up). However, my first attempt at this fabric sandwich resulted in the picture at the right. That’s the straps peeking out from underneath the drape. Not going to work. So I had to pick them out (which took forever) and re-position.

It turned out that the way things rolled, the under-layer of the drape needed to be shorter than the outer, so I had to trim it off, after.

A satisfied cutie

Then, my first attempt to sew the lower edges of the drape together to make a nice, enclosed piece (except for a small opening that had to be hand-finished) failed, leaving me with a mobius-strip-like wad of fabric that couldn’t be unravelled. So I cut off the seam on that (no way was I unpicking that much), which cost the drape some width. Ah, well.

My next attempt, fortunately, did work. I tried to take a picture of what I did to show it but it made no sense to me looking at it after, so I’ll leave it to your imaginations. Unfortunately, pinning wasn’t really an option for this method, so combined with the somewhat irregular trimming and cutting, the drape didn’t end up all going together as flat and smooth as it might. Ah, well. The look’s not bad (perhaps I should’ve rotated it all an inch, that way the pulling would look more intentional?)

The hems were kind of my waterloo. I used my latest double-needle. Can we say

Side view

“tunneling”? My usual trick of ironing wash-away stabilizer into the hem before sewing failed because the stabilizer would not stick to this slippery swimsuit-feeling fabric. To make matters worse, the serged edge I put on the bottom of the shirt (to neaten the inside of the hem) kept squishing up between the two needles, making the tunneling between them even worse. And while this wasn’t the wiggliest knit I’ve ever worked with, it is the wiggliest slippery knit. So don’t look too close at the hems… it ain’t pretty.

And no, I didn’t make her a matching skirt. That’s Tyo’s contribution so far, turning the remnant of the fabric into a wrap skirt.

Also I couldn’t find my twill tape for putting in the tag, so I substituted a bit of pink seam-binding from one of the vintage sewing notion scores. It seems to be working, though we’ll see how the transfer adheres after washing (I find it sticks better to the textured twill-tape than to the satiny ribbon I’ve sometimes used).

Straps and a cute little label

Now Tyo can’t decide if she wants a shirt like this, or a sweater like my Kimono Lady Grey (which she’s been stealing on me, by the way). I told her I’m not making her any sweaters unless she agrees to hand down some of the myriad of bunnyhugs (hoodies to the rest of the world) she’s been hoarding for the last few years—y’know, the ones that don’t cover more than half her forearm but she somehow can’t quite give up?

The construction is a mix of the old stretch stitches on my regular machine and the serger; mostly depending on how much control I needed at any given point. Perhaps someday I’ll be able to construct things entirely on the serger, but not yet.

Next up: more fun with Lekala patterns (and unfortunate fabric choices… sigh…)

13 Comments

Filed under Sewing

The Russian Princess Coat

The Russian Princess Coat

Girl in a red coat

Full Disclosure Edition

Seems to me like a Russian Princess coat, anyway. Or Madeline, as celkalee said.

Walking

The coat was finished, and not a moment too soon (actually a little late), as winter arrived on Monday with about six inches of snow (and another six on Tuesday, and again Wednesday and Thursday. Friday and today have been snow-light; more is forecast for tomorrow). Also, of course, providing the perfect backdrop for this coat. Snow and spruce trees for the win.

Even after four coats, I still haven’t really got that “facing/hem” thing figured out. I know there’s a way to make it happen really neatly (I’ve read two or three different sets of instructions on it, even), but somehow my pieces never quite line up and I end up fudging and hand-stitching to make it work. Ah, well. If some future couturier in distant decades dissects this coat, they’ll find plenty of other construction quirks to puzzle over (like, oh, how I padstitched the collar after sewing it… yeah, yeah.

Vent being pulled wonky by ining

The only bit I’m really not happy with (other than the sleeves still being uncomfortably tight) is the rear vent. I used the Cupcake Goddess’s instructions and while the basic principal is sound, I can’t figure out how to do it without creating and offset in the lining so you have a seam allowance (or making the cut-out side shorter). This, added to the difference in the length of the lining vs. the length of the back, meant that my vent-extensions lined up really poorly, and while they lie flat when worn, the lining is a bit short and makes the coat hike up if anything goes off of plum. Also the whole thing requires a degree of precision I find difficult to achieve at the best of times, much less when wrestling five pounds of wool coat around my sewing machine.

The rear view

All in all the pattern went together fairly well. My only serious objection with it is the narroweness of the sleeves. I added 2cm in sleeve width after the second muslin, but they are still really snug—it makes an attractively slim line, but not a comfortable coat, and it’s pretty impossible for Tyo to put a sweater under it at the moment. Thanks everyone for their suggestions on this problem, by the way… I’ll probably be tackling it in the next week or so. Or, y’know, tomorrow if I’m a good mom.

Next up: jeans and a stab at Lekala patterns!

Click to go to slideshow!

25 Comments

Filed under Sewing

A sneaky peak

at the progress from the weekend.

Coat, left; lining, right

The sleeves are attached (and still dangerously narrow 😦 ); the lining and facing is sewn (this is the first time I’ve done a lining with a facing at the back of the neck. It was not particularly difficult. I drafted fold-over cuffs for the end of the sleeve… we’ll see how those go on; I used the same idea as the ones for Syo’s coat.

I did some thing to the roll of the collar that I will describe as pad-stitching’s bastard cousin, which did succeed in giving it some shape (at least so far), and only shows a little.

Tyo picked out some silver metal buttons. They’re lovely, although silver buttons really wasn’t what I was envisioning for this coat. She likes them, though.

Label!

But most importantly, I remembered to sew the label to the neck facing already, so I don’t have to hand-stitch it on at the end! 🙂

10 Comments

Filed under Sewing

It seemed like a good idea at the time, or, an assortment of idiosyncratic construction decisions


Catchstitched interlining

I guess I really am a sucker for hand-sewing. If only because I catch much less flack from the family if I’m hand-sewing in the living-room with the rest of them all evening, instead of lurking in the kitchen with my sewing machine.


Warning: what follows is not a description of how one SHOULD make a coat. I am not particularly convinced that all (any) of the construction details I am about to report actually improve the resulting coat in any way, and several of them may have serious unforeseen drawbacks. I accept this. 😉

Friday I got the rest of the coat—lining and interlining—cut out. Hooray! I could not find any more of my space suit interlining at the fabric store, so I had to settle for some (much cheaper) non-foil-backed stuff. I had just enough left from making my coat to cut the two back pieces from the foil-backed stuff, which I figure should be fine since the fronts are double-breasted anyway.

I trimmed the seam-allowances from the interlining. Then, for reasons I am no longer totally clear on, I decided

Underlining

that rather than floating free between shell and lining, it should be sandwiched between shell and interlining. I promptly proceeded to catchstitch the back pieces in place, so they wouldn’t shift despite not being caught in the seams.

Then I said “bugger that,” and skipped the catch-stitching step for the front and side-front pieces. My occasional inability to keep the interlining out of the seams should hold them in place, not like they have anywhere to go.

This fabric is a dream to sew with. It’s squishy, easy to ease, and you can catch stitches on the underside beautifully without worry of them showing on the right side of the fabric. Mmm. I also love my flannel underlining.

1cm seam-allowances may be awesome on jeans, but they’re tricky on a coat. Allowing for turn of cloth, once you go to press the seam open, there’s very little allowance at all. I proceeded to stitch all the seam-allowances open after pressing (hence the marathon of hand-stitching and why my fingers are still sore.)

BUT, LOOK!!!

Tyo refused to brush her hair for the photos, hence her headless state. Also she was making faces.

OMG, is that a coat?

She has POCKETS!

Well, almost.

Yay, smooth back!

For interest’s sake, I re-took Tyo’s measurements (rather than relying on my last set from oh, back in the summer) and compared them to the m-sewing sizing charts. The results may highlight some of the fitting issues we had.

Hips: 81 cm. Her hips are a size 12.

Waist: 58. Her waist is a size 8.

Bust: 63 cm. Her chest is, ah, a size 6.

The coat I made is about a size 11, for measurements bust: 73cm, waist: 63cm, hip: 79cm.  I still think the coat is cut a bit snug for my liking (I added significantly more than 2cm to the ease in the hips), but the disproportion between shoulders and hips is all Tyo.  If Sewaholic Patterns ever puts out a children’s line, Tyo can be their first customer.

Next: assemble sleeves, sew lining, decide whether to add another layer of interlining (this time where the interlining *actually* belongs) as the non-foil stuff is kinda thin, and try to avoid doing any more hand-stitching until at least tonight.

PS. This post would’ve been up Saturday morning, but my camera cable evaporated sometime Friday evening. Despite a thorough house-clean Saturday (my Dad was in town and came to dinner), it has not resurfaced. However, fortunately for me, the card reader decided to read the camera memory stick today—Sony uses an odd format and 90% of the time the computer doesn’t recognize it… but once in a while it does. So, you get a post! Yay for random computer cooperation!


7 Comments

Filed under Sewing

How many ways to bind a buttonhole?

Tyo’s coat is going to have bound buttonholes. There’s only four, surely I can manage that, right? I know the Lady Grey was supposed to be my gentle entry into the world of bound buttonholes, but, frankly, Tyo needs a winter coat more than I need a gorgeous-but-semi-practical-between-seasons jacket right now.

The plan was to make the lips of the buttonholes out of the lining fabric (a sturdy flannel-backed satin) rather than out of the bulky, soft, and flexible fashion fabric. This plan lasted until I actually did some trials, of which I’ll be speaking of shortly. But first… there remains the issue of METHOD.

There is a plethora of bound-buttonhole tutorials out there; I will list only a few

  • Gertie’s
  • Sherry’s
  • Two on Burdastyle, this one which is most like the one in my Reader’s Digest Complete Guide to Sewing, and this one, which is more like (but not exactly like) Sherry’s.
  • Patty the Snug Bug recently reviewed Gertie’s technique and another one from her own sewing books, which is basically the same idea I used for my single welt pockets, but with a welt on each side.
  • No doubt there’s any number of other ones—that’s just what I remember seeing off the top of my head. If you have a favourite (or one of your own), please chime in! 🙂

A lot of VERY bad bound buttonholes

So, this afternoon, I sat down and experimented.

Now, as we all know, bound buttonholes, like welt pockets, are all about precision. Precision is one of those things I, ah, struggle with in sewing. I’m getting better, mind you—my cut pieces of fabric now almost always resemble the pattern they were cut with, I’m much better about getting my grain right, and I press as I sew quite religiously (which gets me a lot of exercise since I sew in the kitchen and press in the basement).

So you will not be entirely surprised to see that exhibit A, to the left, is, well, less than impressive. In part, the satin just wasn’t really working for me—it highlights the flaws, as it were, a little too crisply. (The satin for the final ones would have been the same fabric in black, but I have a ton of scraps left over from my winter coat lining, so I was using some of those. I did manage to achieve passable results with Sherry’s method, but still not to the point where I would be willing to put it in a finished garment (top centre in red wool, bottom left in silver satin). The slippery, fray-y nature of the satin didn’t help, either. Similarly with Gertie’s method. None of the others are even worth talking about (for this fabric and my current skills ;)… there are many sewists out there far more talented and precise than I!)

I had a bit more luck with using the fashion-fabric itself for the lips. It’s a bit more forgiving of my flaws. I was worried that it would be REALLY BULKY. It is. But, it looks softer. However, Sherry’s method is extra-bulky,  so it didn’t work so well with this method, either (centre top… which still looks better than any of the satin-bound ones, I suppose)). Gertie’s, however, did… with the caveat that it’s almost entirely hand-sewn. Only the initial rectangle was sewn by machine (bottom right two buttonholes, one in red, one in black).

This is pretty much par for the course for me. Precision=hand-sewing. I don’t really mind hand-sewing, fortunately (after hand-beading bellydance accessories, anything else is a piece of cake). Still, it would be nice someday to be able to be precise and speedy. Like, say, Sherry ;).

Ah, well. I showed Tyo the buttonholes and she likes the black contrast lips, so I expect we’ll go that route.

7 Comments

Filed under Sewing

Dear Tyo, I foresee…

… a lifetime of narrow-shoulder, wide-hip alterations. You’d better learn to sew.

Girls' Coat muslin I

I may have mentioned before that my sweet little Tyo has the build of all the women in her Dad’s family (and diametrically opposed to the women in mine, I’ll add): she is an incipient pear. Narrow shoulders and BOOTY. This has been apparent since she was, oh, two, but it’s only getting worse as the years go by. Let’s just say I could picture rap videos in her future. And a lot of quality time with the shotgun in her Dad’s.

So, I have to say, the muslin for the coat went together like a dream. The pattern is (surprisingly?) sophisticated, with separate lining pieces for everything. The overall shape looks good, all the seams (that I tested) match up beautifully; the sleeve-cap is drafted with a beautifully small amount of ease, just enough to curve it nicely without giving it any tendency at all to pucker (admittedly, the wonderful old flannel sheet I was using for the muslin was a dream to sew, too, so that didn’t hurt)

Side view

And, as you can see, it’s just a wee bit too small. Everywhere except in the shoulders, which are perfect. (The sleeves are long enough only because I lengthened those pattern pieces BEFORE cutting it out, as I could see they were going to be too short. Unfortunately paper-printout doesn’t lend itself to tissue fitting.)

Now, I can’t be 100% sure this is a problem with the original sizing, as it’s entirely possible my crude efforts at tiling let to some re-sizing of the printout and there’s no handy-dandy scale square to allow me to be sure (actually, according to the tiling program my printout is .01 feet smaller… which I didn’t think could throw it off by this amount, but anyway). But the fact remains that there is definitely not enough ease in the pattern AS I PRINTED IT OUT. Well, there would be if it were a dress. For a coat… not so much.

If it were just the skirt pieces that were the problem, I would just spread them. In fact, before I got the sleeves on, when

Rear view... split to let the side-seams hang straight. >_<

she first tried on the body and it became obvious that the skirt of the jacket didn’t have enough ease for her lovely bottom, I was all set to slash and spread the skirt of the back pieces, just enough to give her a couple of extra inches in the derriere region. But with the sleeves in place, it became evident that some extra ease was required there, as well.

So I’m torn, folks. What’s the best way to proceed? Re-print in a larger size? Slash-and-spread to widen sleeves, armscye, and the lower part of the coat, preserving the fit in the shoulder?

There’s only one part of the pattern that has confused me a little. Along the front princess seam there are two

Front pattern piece: princess seam with ?vent

expansions (places where the seam allowance goes from about 1 cm to 4 cm. The top one is for the placement of the pocket, but below that the seam allowance returns to normal for about an inch, and then widens again I’m not sure what’s meant to go there, as it doesn’t appear to be any different from the rest of the seam on the illustration (or the limited instructions available on m-sewing.)

It does resemble nothing so much as a vent or pleat, though I’ve never seen one in this precise location on a coat. What do you think? Ignore? Make as a vent or pleat? I should add that the lining doesn’t have an opening here and the seam between the CF facing and the lining does not coincide with this princess seam, either. So maybe that eliminates the vent option but still allows the pleat? I dunno. Anyway, if anyone has any suggestions or revelations, I’d love to hear them. Or I can just ignore it ;).

Probably I should go up a size, right? Bigger is always better with kids. (D’oh!)

7 Comments

Filed under Sewing

A coat for Tyo?

So I may have mentioned already that I bought some (other) fabric last week. In fact, it was a bit of a binge-week, fabricwise (gotta love payday), but this is the EXPENSIVE fabric. Not the random metres snagged at the thrift-store, but real, honest-to-goodness expensive bought fabric.

Boiled "wool" camry

As a self-justification (can you tell how guilty I’m feeling about this?) I had a 50% off coupon for Fabricland (up to 5m of fabric) that expired at the end of October. My plan was to finally splurge on some wool melton ($16.50/m sounds much more palatable than $33/m, yes?). Red and a little bit of black. But there was this other fabric, a “boiled wool camry” (all “wools” at Fabricland, incuding the melton, are, in fact, wool blends, as far as I can tell). Its basic price was a little cheaper ($24/m), and it had a really interesting texture to the surface that the melton lacks. It had caught my eye before. It’s also a knit, which is interesting; it has a little give but isn’t what I would call stretchy.

And, this past week, it was on sale for $10/m.

That’s more than %50 off.

So I bought it instead. My precious 50%-off coupon will, it appears, expire, unused. 5m of red wool, 1 of black. The idea was to create something similar to my long-destroyed HBC blanket coat, with pieced-in or applique’d stripes, either for my long-neglected Lady Grey or even a rehash of my Winter Coat pattern (with the standard collar and lapel this time)

But…

But…

I’ve mentioned before that Tyo is in need of a new winter coat this year. And I’ve toyed with the idea of making one (provided I could throw it together quickly enough. But I didn’t think I had a good pattern handy, and am still worried  about whether my construciton techniques will be warm enough to get me through the winter.

Probably I should’ve spent that $60 on a coat for Tyo. Hence the guilt.

Girls' double-breasted coat

Then, yesterday, I stumbled again across this pattern. Cute, no? I originally downloaded it in September off the Lekala website when they were offering free downloads (in limited sizes); it came in a kid’s size 120, a bit small for Tyo.

But, many of the Lekala patterns are available, albeit in limited/fixed sizes, from M-sewing.com. So it occurred to me to check over there.

Now, I have to admit I’m pretty suspicious of these pattern companies. The few reviews of Lekala patterns have agreed that the instructions are useless and some of the measurements perhaps dodgy. More, I just don’t GET it. I don’t know where they come from, why a Russian site and an English-language one are offering the same patterns (albeit with a different sizing system), one for free and one charging. I guess basically, I don’t know where the money is, so I’m wary.

That being said, there are some pretty cute patterns on the sites, and I’m pretty sure I can throw a coat together without instructions at this point. I showed this one to Tyo and she said she loved it. Especially if it were in red. With, say, a black collar.

So I was able to download the coat off the m-sewing site in child’s size 134, which is Tyo’s

M-sewing pattern image

Burda/Ottobre size, and the measurements SEEM compatible (I should probably measure her again, however, to be sure). The other problem with the m-sewing (but not the Lekala) downloads is that the PDF isn’t tiled for printing at home. Apparently newer versions of Adobe Acrobat will tile it for you, but my archaic version won’t, and the built-in tiling software in my printer is limited to set sizes. I could print it at a copy-shop, but that would require spending actual money (as opposed to money on ink and paper, which doesn’t for some reason count), which I’m disinclined to do on a pattern I don’t trust. So I spent some time messing around with some equally archaic software, “poster printer“, and have what I HOPE is a reasonably-close printout.

Next step, of course, will be muslining. I figure whatever fabric I use for my muslin I’ll re-use for underlining, thus alleviating a) waste, and b) warmth worries. Unless of course it’s a total wadder, in which case, well, I get to use my red fabric for ME. Although with 5m of the red I really should have enough for a coat for Tyo AND one for me, even if I can’t use the Lady Grey pattern.

Of course one other big question remains: will I have time to get this done in November?

12 Comments

Filed under Sewing

Mellow yellow

Syo's Yellow Sundress

Back around my birthday, when I was feeling splurgy, I let Syo pick out a metre of fabric from the bargain section at Fabricland. She chose a soft, super-stretchy, lycra-y border-print in yellow stripes trimmed in flowers. We got home, and she picked out a pattern, New Look 6195, a kids’ sundress Ip icked up at Value Village. I settled down and traced out a size 7 (length 8)… and there the project sat, although the fabric got plenty of use as a blanket, veil, fairy wings, shawl, cloak, cocoon, and pretty much anything else a creative seven-year-old could do with it.

Dancing

This afternoon, however, Tyo had a friend over, while Syo did not. This (like most of their interactions) was threatening to bring on World War III, so I suggested we make up the dress. This was possibly even better than pissing off her sister, so Syo agreed.

Now, as usual, I am incapable of actually following the instructions (or good sense). The pattern was for a woven. Syo’s fabric is stretchy. VERY stretchy. On top of that, it is one of those pesky border-prints with the border on, y’know, the side. So the only thing to do was have the pieces go crosswise on the fabric. Creating, y’know, maximum vertical stretch. Exactly what you want in a dress.

Nonetheless, we bravely laid it out (man did it shrink a lot in the dryer, too, this took some ingenuity), cut our pieces, ironed interfacing on to the front facing, made the straps (Syo turned them inside out herself. It’s much easier to do in a knit, isn’t it?), and got to work.

It’s a cute sundress pattern. Simple. Not quite sure what purpose

Twirling

the back seam serves… it has a little shape but really, given the overall A-line of the dress, why bother? They have a very nice technique for sewing the side seams and facing all in one move, which gives you a nice finish and means that there’s absolute no chance to adjust the fit of the elastic before it’s sewn in completely. Which, of course, was too loose being designed for a woven (and probably with too much ease in the original pattern, too) and probably a little big for my rather petite seven-year-old at the best of times.

And then, there is the facing.

Now, I’ve heard facings are a bad idea in knits. As a result, I’ve never done them. This time, I decided to follow the pattern. Well, as you can see, the facing is a problem: it’s showing through like crazy. It was also turning out a bit, though you can’t see this in my rather blurry photos. I have since top-stitched it down at 5/8″ in (to match the elastic casing in the back). This should take care of the roll-over, and I will probably trim the bottom of the facing to match

Front with topstitching

It’s a fairly slapdash effort. Aside from the fudged facing, the elastic back was (inevitably) too long so I took a two inch tuck in it at the centre back, which is kinda bulky but can theoretically be released in a year or two when she grows into it. I left the selvedge at the hem, which has a bit of a lettuce-leaf look that I like. If it doesn’t work out, I may actually lettuce-leaf it at some point, but for now it’s fine. I eyeballed the ties, and it shows, but only if you look close ;). The seams are also a bit puckered, but hopefully that’ll soften up with a wash. The back hem tends to sag quite a bit, I think partly due to the halter cut itself, but certainly not helped along by the heavy, drapy fabric.

Nonetheless, her Sevenness is mighty thrilled. She might even get a chance to wear it, as the forecast is

Sundress back, showing tuck in elastic and the Facing of Doom

looking above-seasonal for the first time since August. We may even make it above 20 for much of the week!

In Self-Stitched September news, the weather has me HAPPY. Syo took the pictures, so they’re not full body, but I promise you those are my blue Jalie capris. Yay! I am getting so darned sick of the two other pairs… 😉

Mmmmmm

Top: Mannequim cowl top
Bottoms: Jalie 2908 capris

Sun, sweet sun

11 Comments

Filed under Sewing

Buttonhole Elastic

Buttonhole Elastic

Because I’m not accomplishing much of anything today, here’s a random post on that miracle of modern children’s clothing… Buttonhole Elastic!

Now, I first met buttonhole elastic when I was pregnant with my second daughter. It featured prominently in the two pairs of maternity pants (real maternity pants! This was a Big Deal!) that I bought that pregnancy. As first impressions go, this was not a big win. The buttonhole elastic is threaded through the back of the waistband, emerging via a buttonhole somewhere around the front hip, where it attaches to a button. You can adjust which of the many buttonholes along the elastic is buttoned, and thus adjust the waistband.

Really it didn’t work so well. Partly because who really wants a bunchy, elasticized waistband at the back of their jeans, and mostly because you can make the waistband of maternity pants as adjustable as you want but when the waist is wider than the hips, the pants are still going to fall down. (I think the current trend for mat. pants is very long, wide knit panels at the top, reaching up almost to the underbust. I haven’t been pregnant in over seven years so I can’t comment on how any of these work, although it seems a lot nicer than having a jeans button poking through your shirt right at your swollen belly-button.)

But, a few years later I noticed them cropping up in the back of kids’ jeans.

Buttonhole elastic threaded through waistband

And it has found its niche!

Elasticized waistbands and kids go together at the best of times—comfort almost always trumps stylishness (for the younger set, anyway), and considering the range of widths vs. lengths in kids, as well as the rapid changes within an individual child, an adjustable waistband is a wonderfully practical idea. An additional bonus for my booty-licious older daughter is that the drawn-in waistband at the back provides better fit for her J-Lo-esque backside.

So when I first made her the Jalie Jeans, back in May, I purchased a ton of buttonhole elastic and made the buttonholes (and attached the buttons) before sewing on the waistband. Amazingly forethoughtful of me, seriously. And then she tried them on—and they fit pretty much perfectly as-is, so I never bothered installing the elastic.

Re-sized jeans!

Well, fast forward three months and, of course, jeans that were perfectly fitting in the spring are WAY too small. Fortunately, I have two daughters, so all that work is not for naught… but the seven-year-old is still a fair bit smaller.

Finally, the elastic comes into its own! These are size K jeans on a size I body (so two sizes too big)

Alright, she probably won’t be wearing them quite yet, as they are also WAY long. But if she

Rear view---elasticized waistband

wants to, she can 🙂

Now, back to tracing up the Size M pattern for the older daughter…

2 Comments

Filed under Sewing