Tag Archives: in progress

A springy little coat

Spring coat front

So I spent some time last night doodling. There was a lot of erasing, and a lot of other little doodles that fell by the wayside as this design emerged. But I think I’m happy with the details—I knew I wanted the empire waist and the princess seams and a thigh-length, but the rest was up in the air. I googled “empire waist coat” and looked through far too many inspiration options before I settled on the inverted box-pleats , high standing collar, and pleated cuffs.

I think I like the idea of the pleat at the upper CB, giving a bit more freedom of movement in what I want to be a fairly fitted garment. This is a spring coat—it won’t (in theory) need to accomodate the bulky sweaters of my winter coats.

So, all that remains is that piddly little problem of a pattern.

Erm.

Coat back

So I have two or three options, all of which promise to stretch my embryonic pattern-making skills to their limits. I have the Lady Grey pattern, which has the right seaming but the wrong kind of sleeve and the giant lapels; I have my Butterick winter coat pattern, which has the right sleeves (sorta) but shoulder rather than arm princess seams. Or, third option (and maybe the one I will go with), the princess-seam fitted jacket pattern from Built by Wendy coats and jackets. This has the right seams and the right sleeve, but I haven’t tried it before. Still, I have the book, I should use it, right?

Spring-coat, side

I’m assuming drafting an A-line skirt with a few pleats won’t be too terrible. Drafting the collar may be a bit more hit-and-miss, but should be good practice, right? πŸ˜‰ …

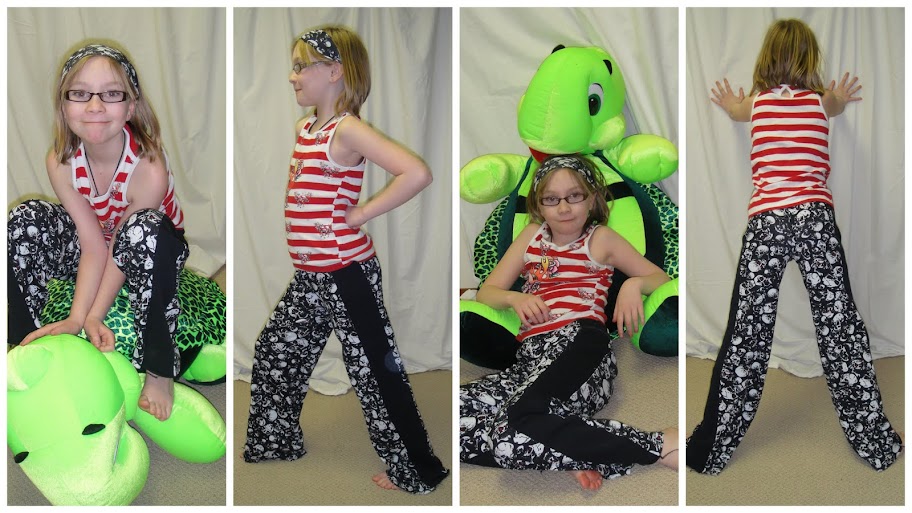
The cuffs are stolen from (or at least inspired by) one of the variations on this pattern that my daughter didn’t choose for her version, though I think I will go with a box-pleat to match the rest of the coat.

I was debating a double-breasted front because, well, I love them, but this will be a spring coat and so often worn open, so I figured a single-breasted front would be better.

I’ve had this fabric probably since sometime last spring; it’s another thrift store mystery, a burlap-weave, quite crisp and rather scratchy. There’s also four or five metres of it, so if I really feel the need I can probably make a full muslin out of the fashion fabric (of course, if I don’t need to, I can make matching separates—it would make a fun skirt, or maybe even a shift-dress or something…

I took advantage of the weekend’s 50% off sale to pick up some Kasha lining for the coat—maybe a bit of overkill for the “spring” weight I’m going for, but I hate the thought of sewing with the regular linings. I still have to decide on underlining or not—I have a feeling it won’t be part of Sherry’s RTW techniques, but my fashion fabric, while heavy, is rather sheer due to its coarse weave. Well, I’m getting ahead of myself—first I need to pattern the dang thing.

I can do that in two weeks, right?

Also, whatever comes, don’t let me forget to add pockets!

Fabric! Right: lining; left: shell

In Me-Made March news,

the weather is gorgeous and I wore my Lady Grey! I was soo close to wearing a circle skirt out, but I just couldn’t commit to it at 6 in the morning (which felt like 5 since the time just changed… I could write a whole blog about how much I hate daylight savings time…)

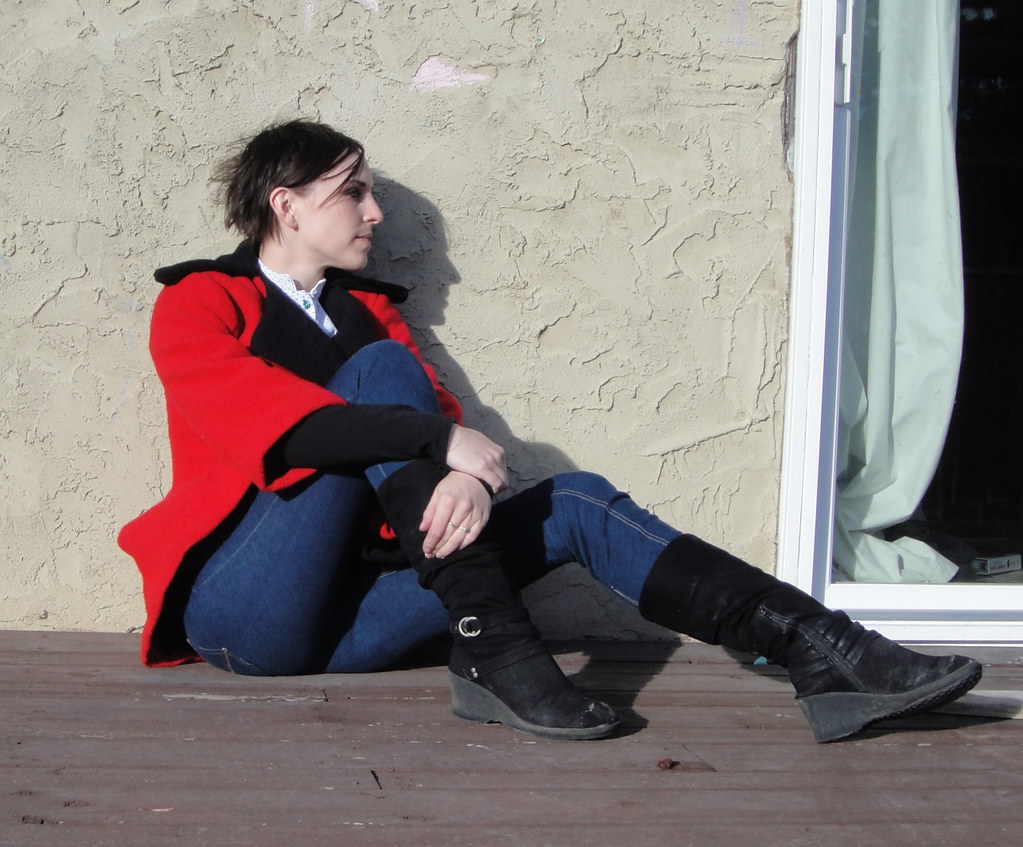
Me-Made March, day 14

Czarina Coat (AKA Lady Grey)
JJ blouse
Long-sleeve T
Skinny jeans

18 Comments

Filed under Sewing

Oi

Life is good. Seriously, it is. Kids mostly healthy again (and shuffled to and from more playdates and parties than anyone should get to pack into a two-day period), had a good hang-out with a girlfriend (and fabric-store trip!), and pre-Valentines dinner and a movie with my sweetie (quite enjoyed The Eagle, despite the complete absence of female characters.) while enjoying a fabulous chinook. Aside from that little looming deadline on Monday and barely having time to breathe, life is awesome.

Sewing… ehm.

Men’s shirt sewalong? zero progress. Jeans for Syo? Zero progress. Skinny cargoes? Zero progress.

What little, incremental progress has been made has been on the next circle skirt, which is slowly (I hope) moving from this:

Circle-skirt, first instar.

Towards this:

Corset-waist circle skirt

I’m actually really excited about how it’s going. But I need to finish off the closure and figure out how to hem it; I don’t have enough horsehair braid left and I pretty much cleaned them out last time I bought it, and I’d really like to try something a bit wider than the 1.5″ braid available locally. I should look into ordering online, but I’m far too impatient for this particular project. I’m thinking I’ll give bias strips of hair-canvas a try, since I have a bunch left over from the Lady Grey coat project.

Speaking of hair canvas, one of the things that had me delay making this particular version of the circle skirt was deciding what to do about the corset-waist panels. I was seriously considering boning them, but I didn’t have any boning and kept forgetting to try and pick some up. So I wound up going with piping (I think I’m officially in love with piping) and some more of that hair-canvas. I think it’s firm enough, although if I decide on boning later I can still open up the lining if I need to. I was terrified during

Hair-canvas interfacing in "corset"

the construction that it would turn out too small, but after I got the full waist-piece to a point where I could try it on, I had to add a second row of snaps (we’ll talk more about the snaps later) to bring it in. Heaven help me if I gain or lose any weight, with all these fitted clothes! Though really aside from pregnancy/nursing fluctuations, my measurements have been pretty steady since I was 18. Muscle tone and skin elasticity… well, that’s another story, but anyway.


12 Comments

Filed under Sewing

MEN!!1!!!

Butterick 3364 muslin---waiting to be fitted.

I ask you, people, if YOU had your very own personal, dedicated seamstress/sex-slave (oops, did I type that out loud?) Β in YOUR house working her poor little fingers to the pin-pricked bone to make you a muslin for a dress shirt with your EXACT FAVOURITE details—band collar, no pockets—fitted to your exact, freakish body, just waiting to be translated into an array of final fabulous fabrics… would you be snoozing on the couch all afternoon while the light fades away? When she actually finished the muslin the NIGHT BEFORE, and you refused to try it on then… and again this morning when you got up… and now it’s almost suppertime and you’re still refusing?!?!

Honestly! Why do I bother again?

… oh, yeah. I’m insanely, madly in love with him. And he’s going to look HAWT in this shirt.

Doesn’t mean I have to like it, though.

I think I’ll go make myself another circle skirt.

Men!

30 Comments

Filed under Sewing

Skully Pants and Sleevy Plackets

Tyo’s pants may now be unveiled! They still need hemming, but taking photos before hemming is practically a tradition around here…

Tyo's Skuly Pants. Poses by Tyo. Guest appearance by Slimer the Turtle.

And, y’know, they turned out ok. Especially considering my various screw ups (the original drafting, and then pinning the two edges of the fronts together instead of front-to-back and not noticing until Tyo had it all sewn up…)

Tyo did all the sewing, on the serger, except for the elastic casing, which I sewed in a stretch stitch on the regular machine. She was really unsure and irregular to begin with but by the last few seams she was getting much more consistent and steady. She threaded the elastic into the casing, too.

May I just say I detest this skull-printed fabric? It’s a thin, stretchy cotton rib-knit with no recovery, and the printed pattern is not as stretchy as the fabric, so it’s already looking worn and crappy anywhere that gets a bit of stretch.

In MPB Sewalong News

Shirt plackets: the ugly truth

I sewed my plackets! Urg. This is the kind of precision sewing I normally resort to hand-sewing to deal with, but obviously that’s not quite appropriate here. I tried using my blind-stitch foot for the topstitching the first time, as it has a keel that theoretically should help guide the stitching. I say theoretically because it’s mounted on a screw and doesn’t stay in place. Ever. Second attempt, I reverted to using my rolled hem foot, of all things. Something about the way the toes of the foot are positioned (not the roll part) works really nicely for guiding the fabric for perfect edgestitching.

Er.

This is me we’re talking about. Perfection and precision are not my strong suits.

I used washable glue-stick to try to hold the triangles in place, which worked better than pins, and might’ve worked better still if I had the patience to let it dry for a few minutes before sewing. I wonder if making a template to press the triangle top around would be worth it…

I made the row of stitches crossing the placket run just above the funny folded part on the inside (bottom right picture), but a quick inspection of my hubby’s RTW shirts shows that they run the stitch about 1/4″ below this. Will keep this in mind for the next version.

Testing my fabric marker

Also, I decided to test out my blue disappears-in-water marker. I’ve heard horror-stories about these before (especially if you press the ink), so I’ve been pretty skeptical about it and haven’t actually used it until now. Well, the fact that it’s a fine-tip and doesn’t really mark most of my fabrics well didn’t help.

Anyway, here you can see on the top, the plain marker, and the bottom which I wrote and then ironed over (with heavy steam on maximum heat, my typical MO as long as the fabric will take it.) Interestingly, even the steam seemed to start to lighten the markings, which could be annoying.

Took the piece to the sink, add water, and—voila!

Just add water!

Anyway, that’s enough for tonight. Tomorrow I will get the yoke sewn up and maybe even rope my hubby into a fitting if I’m extremely-extra-lucky. And Syo is agitating for a project she can help with, so if I’m extra ambitious maybe we’ll start on some skinny jeans for her, as she’s been begging for a pair of those since last summer.

Speaking of Syo, we must keep the post balanced, so I will leave you with:

Syo---yes, she knows exactly how cute she is.

15 Comments

Filed under Sewing

Bits ‘n Bobs

Men's shirt pieces

As usual, the during-week sewing is scant and slow. I did manage to cut out my mens shirt muslin, as the long-awaited MPB sewalong is finally under way. I’ve marked (a lot more than I typically do), with my “allegedly disappears with water” marker, and interfaced half theΒ cuffs and one of the collar bands. I am not going to interface the frontΒ button placket, as per discussions with the Sewista Fashionista.Β I can’t wait to start sewing, but I guess I should keep in step with the sewalong. I’m not doing pockets (today’s post) but maybe I’ll take a stab at the sleeve plackets. Or not, as I’d kind of like to hear what tips the other sewalongers have for them (and if any of the allegedly fabulous Negroni instructions for this area get passed on). I’ve only done continuous lap plackets before. Grum. Maybe I’ll prep the collar band or sew up the yoke (since I now know how to do that!)

I’m still up in the air over whether to bother with flat-felled seams on this one. On the one hand it’s a muslin and if I do need to make fitting changes it’d be much better to not have the seams felled. On the other hand, I could probably use as much practice as I can get my hands on, right? Blargh.

Tyo and her skull-print fabric

Just to keep me on my toes, though, Tyo decided to pull out the skull-print knit she picked out back in the fall. Apparently it needs to become a set of lounge pants. Unfortunately, I haven’t got a pattern for these. Well, how hard can it be to make one up? Just a narrow set of pantaloons, really, right? In a knit, no less.

Er. Well, I should’ve cut them wider. I forgot to add in width for the crotch. I should know better by

Tyo, cutting out her pants.

Β now. Sorry, kiddo. The good news is we’ll add in strips up the outside of the legs and they will look just fine. Intentional even. It’s a design feature, dontcha know? The bad news is she managed to cut one of the strips in half while she was cutting it out. Kid’s got talent, I tell ya. Hopefully there’s enough of the insert fabric (we’re using the remnant from my Kimono Lady Grey) to cut another one…

I did make her sew the crotch seam (on the serger, no less) and will be putting gentle pressure on her to do the rest herself as well. Well, as independently as Tyo does anything, anyway. I suspect theΒ hemming and possibly the elastic casing will fall to me.

Can I blame it on the fact that I was trying to measure Tyo and “draft ” the pattern while cooking supper and supervising Syo, who decided she should cut up the chicken for last night’s supper*?

Oops. Too narrow.

Hmm, in hindsight, I think there probably is a kid’s shorts or karate-gi pattern in the basement that would have a basic, unfitted pants-type-pieces.

Aaargh.

*I hate to discourage her, as the only person in the house who seems to actually enjoy cooking. I have visions of my children turning into culinary geniuses who get home from school, throw me out of the kitchen, and emerge two hours later with a three-course sit-down meal. No? Hey, a girl can dream.

11 Comments

Filed under Sewing

To SBA or not to SBA

All y’all* are a bunch of enablers, you know.

So against my better judgment (and to my hubby’s dismay) I spent the latter part of yesterday evening whipping up a very quick muslin of the Colette Ceylon pattern rather than snuggling on the couch with him watching the last of Mrs. Doubtfire.

Altered bodice pattern pieces

The nice thing about the Ceylon Β bodice is that the pieces are all itty-bitty, so you can squeeze them out of pretty small scraps. I really didn’t think I’d get anything else out of the last few bits of that blue flannel duvet, but I got it all, quite handily. Well, not the sleeves, yet.

Oh, dear. I’m going to have to show you fitting pictures again. Darn it.

Yes, I know this one really provides no fitting information at all. Be patient.

Now, I started slow, with just the midriff-band pieces. I initially traced them in a size 2, grading up to a size 4 at the waist. (According to the Colette size charts, my waist is a size 6 while the rest of my measurements suggest a size 0. However, even with the astounding amount of waist-innish-ness on these pieces, going from a 0 to a 6 would’ve given me a convex, rather than concave waistline. 2 to 4 seemed like a reasonable compromise). I also added a CB seam and did a pre-emptive swayback alteration. The resulting piece turned out just right in the lower back, a little loose above the waist, and a bit big across the front. So I gleefully graded the front down by 1/4″, and the back similarly above the waist. I guess that means my front waist piece grades from size 0 at the top and bottom to size 2 at the waist, while the back goes 0-4-2 top-waist-bottom. Plus whatever distortion the swayback throws in there.

It’s well-known that Colette drafts for a generous C cup, while I am more in the “small

Ceylon muslin 1, front view

end of B but loudly refusing to consider myself an A” territory. Obviously an SBA was going to be in order. Previous experience suggests that some shortening in the upper bodice would be appropriate, as well.

So I started with a horizontal tuck around the bust and mid-back pieces of the bodice, taking out about 2cm of height. This may have been a bit much in the front, but anyway. I played around with a second, angled vertical tuck in the front bust piece, pinned the pieces on my duct-tape double and decided to give it a whirl.

Ceylon, muslin 1, side view

On aesthetic rather than fitting grounds, I also messed with the curve of the front yoke (which seems to stick out a little high on the smaller sizes at least). I cut the upper pieces a size 0 before alteration, by the way.

As you can see, the SBA was a bit, ah, enthusiastic. It still fits, but there’s a certain blousiness to the back that seems to be missing from the front, and I’m pretty sure when buttoned it would end up gapey. Assuming ambition does not desert me, I’ll try a version tonight with the vertical tuck removed, and see where that leaves me.

I like the new shape of the front yoke pieces. I still think the neckline (those gaping, angled pieces of the bodice) needs to come down 1/2″ or so. Some of the gapeyness doubtless comes from carelessly stretching on the bias, but I will have to watch for that in the final construction. Having adequate bust space should help with it, too, I would think.

I’m torn on the horizontal tuck. The front length seems good to perhaps a wee bit

Ceylon muslin 1, back view, slack.

short, the back length still looks a little long. And there are still a few wrinkles in the back midriff piece that I’m not sure what to do about. I’m reluctant to increase the swayback alteration, as it’s already at Sherry’s recommended maximum before you should start looking for other fitting causes (like, oh, a short upper body). Would shortening the upper back pull the midriff pieces higher and let them fit my waist a bit better?

There is a lot of blousiness at the back, some of which is necessary, but it seems a bit excessive. Again, I’m wondering if there isn’t too much length in this section; the width seems good, as it goes comfortably taut when I move my arms forward.

So that’s where I am. I think tonight I’ll re-cut my front bust pieces and mess with the length of the back piece. But now, I must get back to work on the wondrous intricacies of phylogenetic analysis…

*Lest I besmirch the reputation of my fellow Canucks, I would like to point out that I learnt that lovely bit of English in Texas a couple of years ago. We don’t really talk like that up here, eh.

16 Comments

Filed under Sewing

I was going to wait

until the little coat was done. But, as usual, I am impatient. And Syo was eager to model. Really, she twisted my arm.

So here it is, sans lining hem and buttons. With the puffy fleece lining it’s a bit snug on Syo, which is a good sign, although the sleeves, which I folded up a trifle more than strictly suggested by the pattern, are just right, so they will be quite long on Fyon.

Erm. Perhaps next time we’ll comb hair before the modelling sesh…

Also, did I mention I am dreading the buttonholes?

8 Comments

Filed under Sewing

Curveball

Coat, interlining, lining

I feel a little unpatriotic for picking a baseball over a hockey metaphor. Oh well. Progress on Fyon’s coat was continuing incrementally but steadily (holidays are definitely over) until last night I realized that the coating fabric really should’ve been underlined. It lets a bit too much light through to be lined with light fleece. WHOOPS! Fortunately I had purchased just over two meters of black cotton flannelette the other day for a (hopefully) wearable muslin of my sweetie’s shirt. But there was just over 2m left on the bolt, which I was worried would not be enough for a man’s shirt after flannelette’s notorious shrinkage. So I guess it can become girl coat underlining, and I’ll pick up some more. It’s not like it was expensive. Of course, the other problem here is that I have already constructed both shell and lining. So I guess the “underlining” will be more of an interlining. On the upside, flannelette is such a dream to cut and sew that I almost don’t mind the extra work.

One cute little collar, coming up.

The collar is also sewn and steamed, for whatever good that will do. πŸ˜‰ I think I am starting to get the hang of the whole turn-of-cloth thing, for collars like this, anyway. Also getting a bit better at those tight corner curves… A little bit, at least.

I fought off the temptation to try and machine-blind-hem, mostly because I wasn’t confident I could get the crease out after, as I’m trying to avoid hard pressing on this spongy fabric. So it has a hand-stitched outer hem, anyway. I think I will check out Gigi’s post on finishing hem/facings to see if I can make head or tails out of it. Usually my lack of precision is hampering in these areas and I compensate with lots of hand stitching, er, couture detail.

Oh, and I remembered to put in a label and hanging loop! This ribbon is perfect for

Label and hanging loop

the coat—although I’m not convinced how sturdy it will be. Ah well. Odds of small fingers managing to use the loop even if it is there? Minimal, I’d say. Anyway, all that remains is hemming the lining, attaching the collar, and attaching lining/facings to coat. Not necessarily in that order.

I have a feeling my next “for me” project will be the fluffy petticoat. I seem to have fallen off the “practical clothing” bandwagon this year (so far. Maybe because my wearable wardrobe is no longer critically low, or maybe because, like everyone else, I’m just sick of winter sewing (although this

Fluffy petticoat supplies

doesn’t explain the continued coatitis). But the materials have been building for ages—the chiffon (background, left) since Aug. 2009, the idea since sometime in the summer of 2010, and the whole spool of gathered lace (top left) appearing at Value Village last weekend seems to have pushed things over the top. Now, making a tiered skirt is dead easy—this is ultimately just a shorter version of the tiered dance skirts I’ve made several times now, on various scales. But I really like Sugardale’s tutorial because of how she uses ribbon to finish the seams, so I’ll be going that route. Zena has another method that produces nicely-finished results, moreΒ for dance skirts (hers are like better-made, better-finished versions of mine). And I will have to consider how to use the vintage lace with the coral flowers. I would have used it on the lower edge but there’s only 4m, and 4m is not a full enough hem for a petticoat.

Just for the record, I have no skirts at all to wear with said petticoat. Yet. But then I’ve been thinking about a circle skirt since summer and been disinclined to make one because I only like how they look with petticoats under. Chicken and egg. But I’ve decided that the petticoat will be my egg, and hopefully once it’s done chickens will ensue. Yeah. If that makes any kind of sense at all.

But first… I have a little coat to finish.

5 Comments

Filed under Sewing

Attack the pink fluffy bunnies

Attack of the pink fluffy leopard print bunnies

Well, I have started work on the coat for my older niece. This is my first experience sewing with fleece and it’s, well, interesting. For one thing it’s filled my house with tiny pink blobs of fluff, which are getting EVERYWHERE. For another it seems to combine the annoying qualities of knits with the annoying qualities of velvet. Joy.

The pattern is McCalls 3374, a thrift-store find back at the start of my sewing adventure, just over a year ago now. As a bonus it came essentially un-cut, with the size 3 fully traced out and part of a size four. I traced the rest of the size four for Syo’s coat last winter, so this time I have no tracing to do! Whee!

This may be another exercise in “looking past the envelope” as the envelope cover

McCall's 3374

has a lot of fun-fur, fleece, and animal print. Despite the above rant about fleece, the fleece is strictly for the lining. My outer shell is black and sparkly “boiled wool camry blend” (a completely different fabric, however, than the stuff of the same name that the Russian Princess coat and my Czarina coat were made of. They were a knit, dense and felted. This stuff is a woven, tends to fray, and reminds me of boucle in its thick individual yarns.) It would’ve benefited from block fusing, but I am far too lazy to go there in coats for preschoolers. I did preshrink with wet towels in the dryer, which reduced the width by a good 10cm (4″) so I’m glad I did.

Coat shell

This first coat is for my four-year-old niece (let’s call her Fyon henceforth); she was also the recipient of the twirly Popover Sundress last summer. I decided against cutting out both coats at once as I was pretty sure that would inevitably result in me sewing size 4 sleeves onto a size three front or something. I will note here that the size four still fits Syo fine, so it will be plenty roomy on Fyon, although their size gap is not as extreme as you might expect from the three years between their ages, since Syo is a compact model, possibly even a Smart Car, while Fyon is more

Fuzzy pockets!

of an SUV type.

The best thing about this pattern is that the (very flat) sleeve caps have almost no ease, so they’re a cinch to put in flat. This makes for very quick construction (and I promise I’ll grab a photo of that stage on the next coat.)

I decided to cut the pockets out of the fleece, which will make them absolutely yummy to stick your hands in. This time, I knew enough to make the seam from coat to pockets narrower, so the fleece rolls nicely to the inside, unlike the last time I sewed this coat.

I debated about foldover cuffs, since I’m not overly thrilled with how this part of the pattern is drafted, but they do look so much more finished than just a plain sleeve ending. (Tabs do too, but I’m much too lazy to draft a tab for these coats.) I had considered interlining the coats, as well, but decided the fleece is bulky enough. It was the

Foldover cuffs. I love the texture of this fabric.

thickest, softest stuff we could find at Fabricland’s new-years sale (still expensive even at 50% off). I think there’s enough left over for an itty-bitty scarf, too. I had debated making the collar and cuff-fold out of it, but I really wanted to keep the outside of the coat “serious” (except for that hint of sparkle) (probably I wouldn’t’ve had enough fleece, either). Hopefully the girls won’t find the wool collar and facings too scratchy; it doesn’t feel scratchy to me, but it’s certainly not as wonderfully soft as the fleece.

Note to self: you forgot to cut out the back neck facing. Also, don’t forget to add one of the Bookemon & Ebichu labels and a hanging-loop before you sew on the lining/facings.

The pattern is inexplicably unlined, but I’ve just used the same body pieces for the fleece. I considered adding Β a back-pleat, but I don’t think it’s necessary with the stretchy fleece. Next step: assemble the lining and facings (I will just topstitch the facings down on top of the fleece).

One Eyed Jack (left), Bandit (centre), Tigger (right)

In sadder news, we got up this morning and discovered One-Eyed Jack, the smallest and hardiest of our goldfish, was missing from the tank. I soon found him on the floor by the couch, where he had leapt to his doom. The smallest of our fish, he was still a good 6″ long, and had survived the Great Filter Malfunction of 2009, a 600-km migration in a glass jar in 2007, and a brutal cichlid attack that cost him his left eye (and gave him his name) probably sometime in 2006. Not to mention nearly four years of my rather indifferent fish care. I honestly thought he would be the last of our dwindling fish to survive, but I hadn’t counted on his adventurous nature. Usually he was a bottom-hugger, as his one-eyed state made it hard for him to find food until it had settled on the bottom. Tyo was stoic (her best friend’s dog died of an accident on the weekend, so compared to that the loss of a fish may be minor), Syo was stricken and still crying when I put her on the school bus, and I was a lot more freaked out than I should’ve been. Jack is now in a box in a freezer to await burial in the spring. He’s too special to just chuck in the garbage like the other goldfish we’ve lost.

10 Comments

Filed under Sewing

SFOs (Semi-Finished Objects)

Zena of Blood, Sweatshop, & Tears once commented that “wearable is climax. Done is denouement.”

She is so right.

Lekala twist-top, v. 2

In that spirit, I give you my second take on the Lekala 5675, a.k.a. the twist top. The hems are serged but not completely finished, and it’s been like this most of the week. I am disinclined to fuss with trying to stabilize them for topstitching. Bleh. This red knit is wiggly, super-stretchy, and much more like the kind of fabric I imagine the shirt was designed for than my last attempt. It’s also an amazing example of the difference fabric choice can make for the exact same pattern (only difference is I added perhaps an inch more extra length to the red version, just in case, bringing the total increase to about 3-4″ in the sleeves and 4-5″ at the hem. The first version was roomy and sweater-like, with a surprisingly perfect fit in the shoulders. This version is second-skin tight and the shoulders look really narrow. Although about the same as they look in the pattern illustration, actually.. The twist still doesn’t pull naturally into the kind of tight twist the illustration suggested. This might be a drafting problem (maybe they should just have widened the upper front piece a bit so that a full twist was required), or it might just be that my doubling of the front (makes the finishing easier and never a bad idea in a thin knit) gives it a bit too much body. I think in my head the slit below the twist should be wider, but again it’s actually quite comparable to the illustration. Some day I shall use Sherry’s post to attempt to reduce a swayback in a knit. Someday.

Simplicity 5728

Simplicity 5728

In a similar vein, my (wearable muslin?) version of Simplicity 5728 is at a try-on-able phase in construction. Yay!

This is such a peculiar fabric. I would’ve sworn it

Simplicity 5728, side view

was a diagonally-ribbed knit, but it frays like a woven. It’s stretchy, very slightly in length, significantly in cross-grain, but fairly stable. It does have that cling-to-every-lump-and-bump quality of a knit.

In the stretchy (whatever the heck it is), I should probably have used the original bust-length, as the extra length doesn’t seem to be necessary. I had narrowed the bodice sides 1/4″ on the pattern, since it seemed a bit roomy under the arm,

Back (lightened to show lack of swayback wrinkles!)

tapering to nothing at the waist, and I took it in another 1/4″ here after trying it on (adding up to a substantial 2″ reduction in the total bodice width). I did a swayback alteration as per Sherry’s instructions (sooo easy when you have both waist and CB seams), taking off about 1/2″ (12mm) both above and below the waist seam. I gave the CB seam of the skirt a bit of an S-curve to it as my swayback seems to be rather below my waist in this area. And then I cut, inserted zipper, and hoped. And—well, look!

Can we say, happy customer?

Also, like what I did with the back neck? I did a brutal job of finishing the top of

Simplicity 5728, full back

the zipper, but otherwise it’s snazzy! Er, and yeah, the zipper’s pink. I thought it coordinated/contrasted nicely with the muted purple of the fabric, but probably it’s just too light. But the only other zipper I had of suitable length was white, and an invisible one, which I don’t actually know how to install. It’s vintage and metal, though, so it’s cute enough to deserve to be looked at.

Simplicity 5728, front closeup

You will recall that I received excellent advice from Kay and others on my sleeved muslin to raise the bottom of the armscye to improve my sleeve mobility. So I raised it a full 2cm, on the principle that it’s easy enough to lower it after the fact if I need to.

(It occurs to me that I probably annoy nearly everyone with my flitting back and forth between metric and imperial measurements. Can I call it a Canadian thing? I prefer to do my seam-allowances in metric because the metric markings are at the front of my sewing-machine face-place, making them easier to see than the imperial markings, which are at the back. On the other hand the width of the regular foot is definitely 1/4″, so I tend to do things like small alterations in this increment. It also depends on which ruler or measuring tape comes to hand first…)

I should also mention that I added 5″ (and we’re back to the imperial) to the hem of the skirt to get it to this luxuriously long length. That’s supposed to include 2 1/4″ of hem, which would bring it to a perfectly respectable heel-length, I think, although I’m not convinced a 2″ hem will be desirable in this fabric. I’m wearing a 3″ heel in the photos. I love these crazy-long 70s skirts.

Coming soon: the great sleeve adventure!

19 Comments

Filed under Sewing