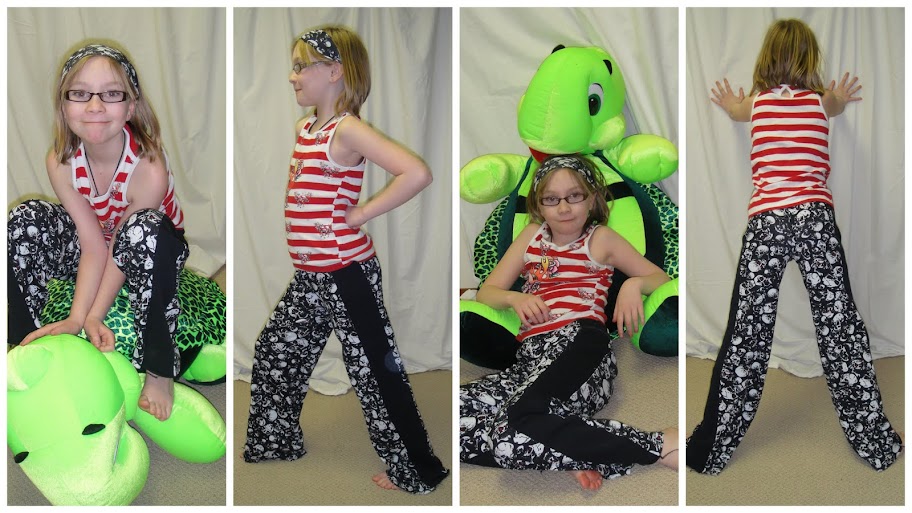
Tag Archives: For Tyo

Capri-cious Camo

The Capri Girl

Tyo’s camo capris are finished. It’s been rainy so I’ve been carless* and hence unable to make it to the fabric store for the finishing touches (buttonhole elastic for the waistband and twill-tape for the leg drawstrings), so I had to improvise. I found the missing black thread under the couch, bought shoelaces at the grocery store for the drawstrings, and liberated the buttonhole elastic from the fishtank, where it has been holding down our improvised fish-tank-cover** for the last several months.

I must say, these were really fun to make. The fabric was cooperative, and just the right weight—heavy enough to feel sturdy, without being so bulky as to give my machine fits.

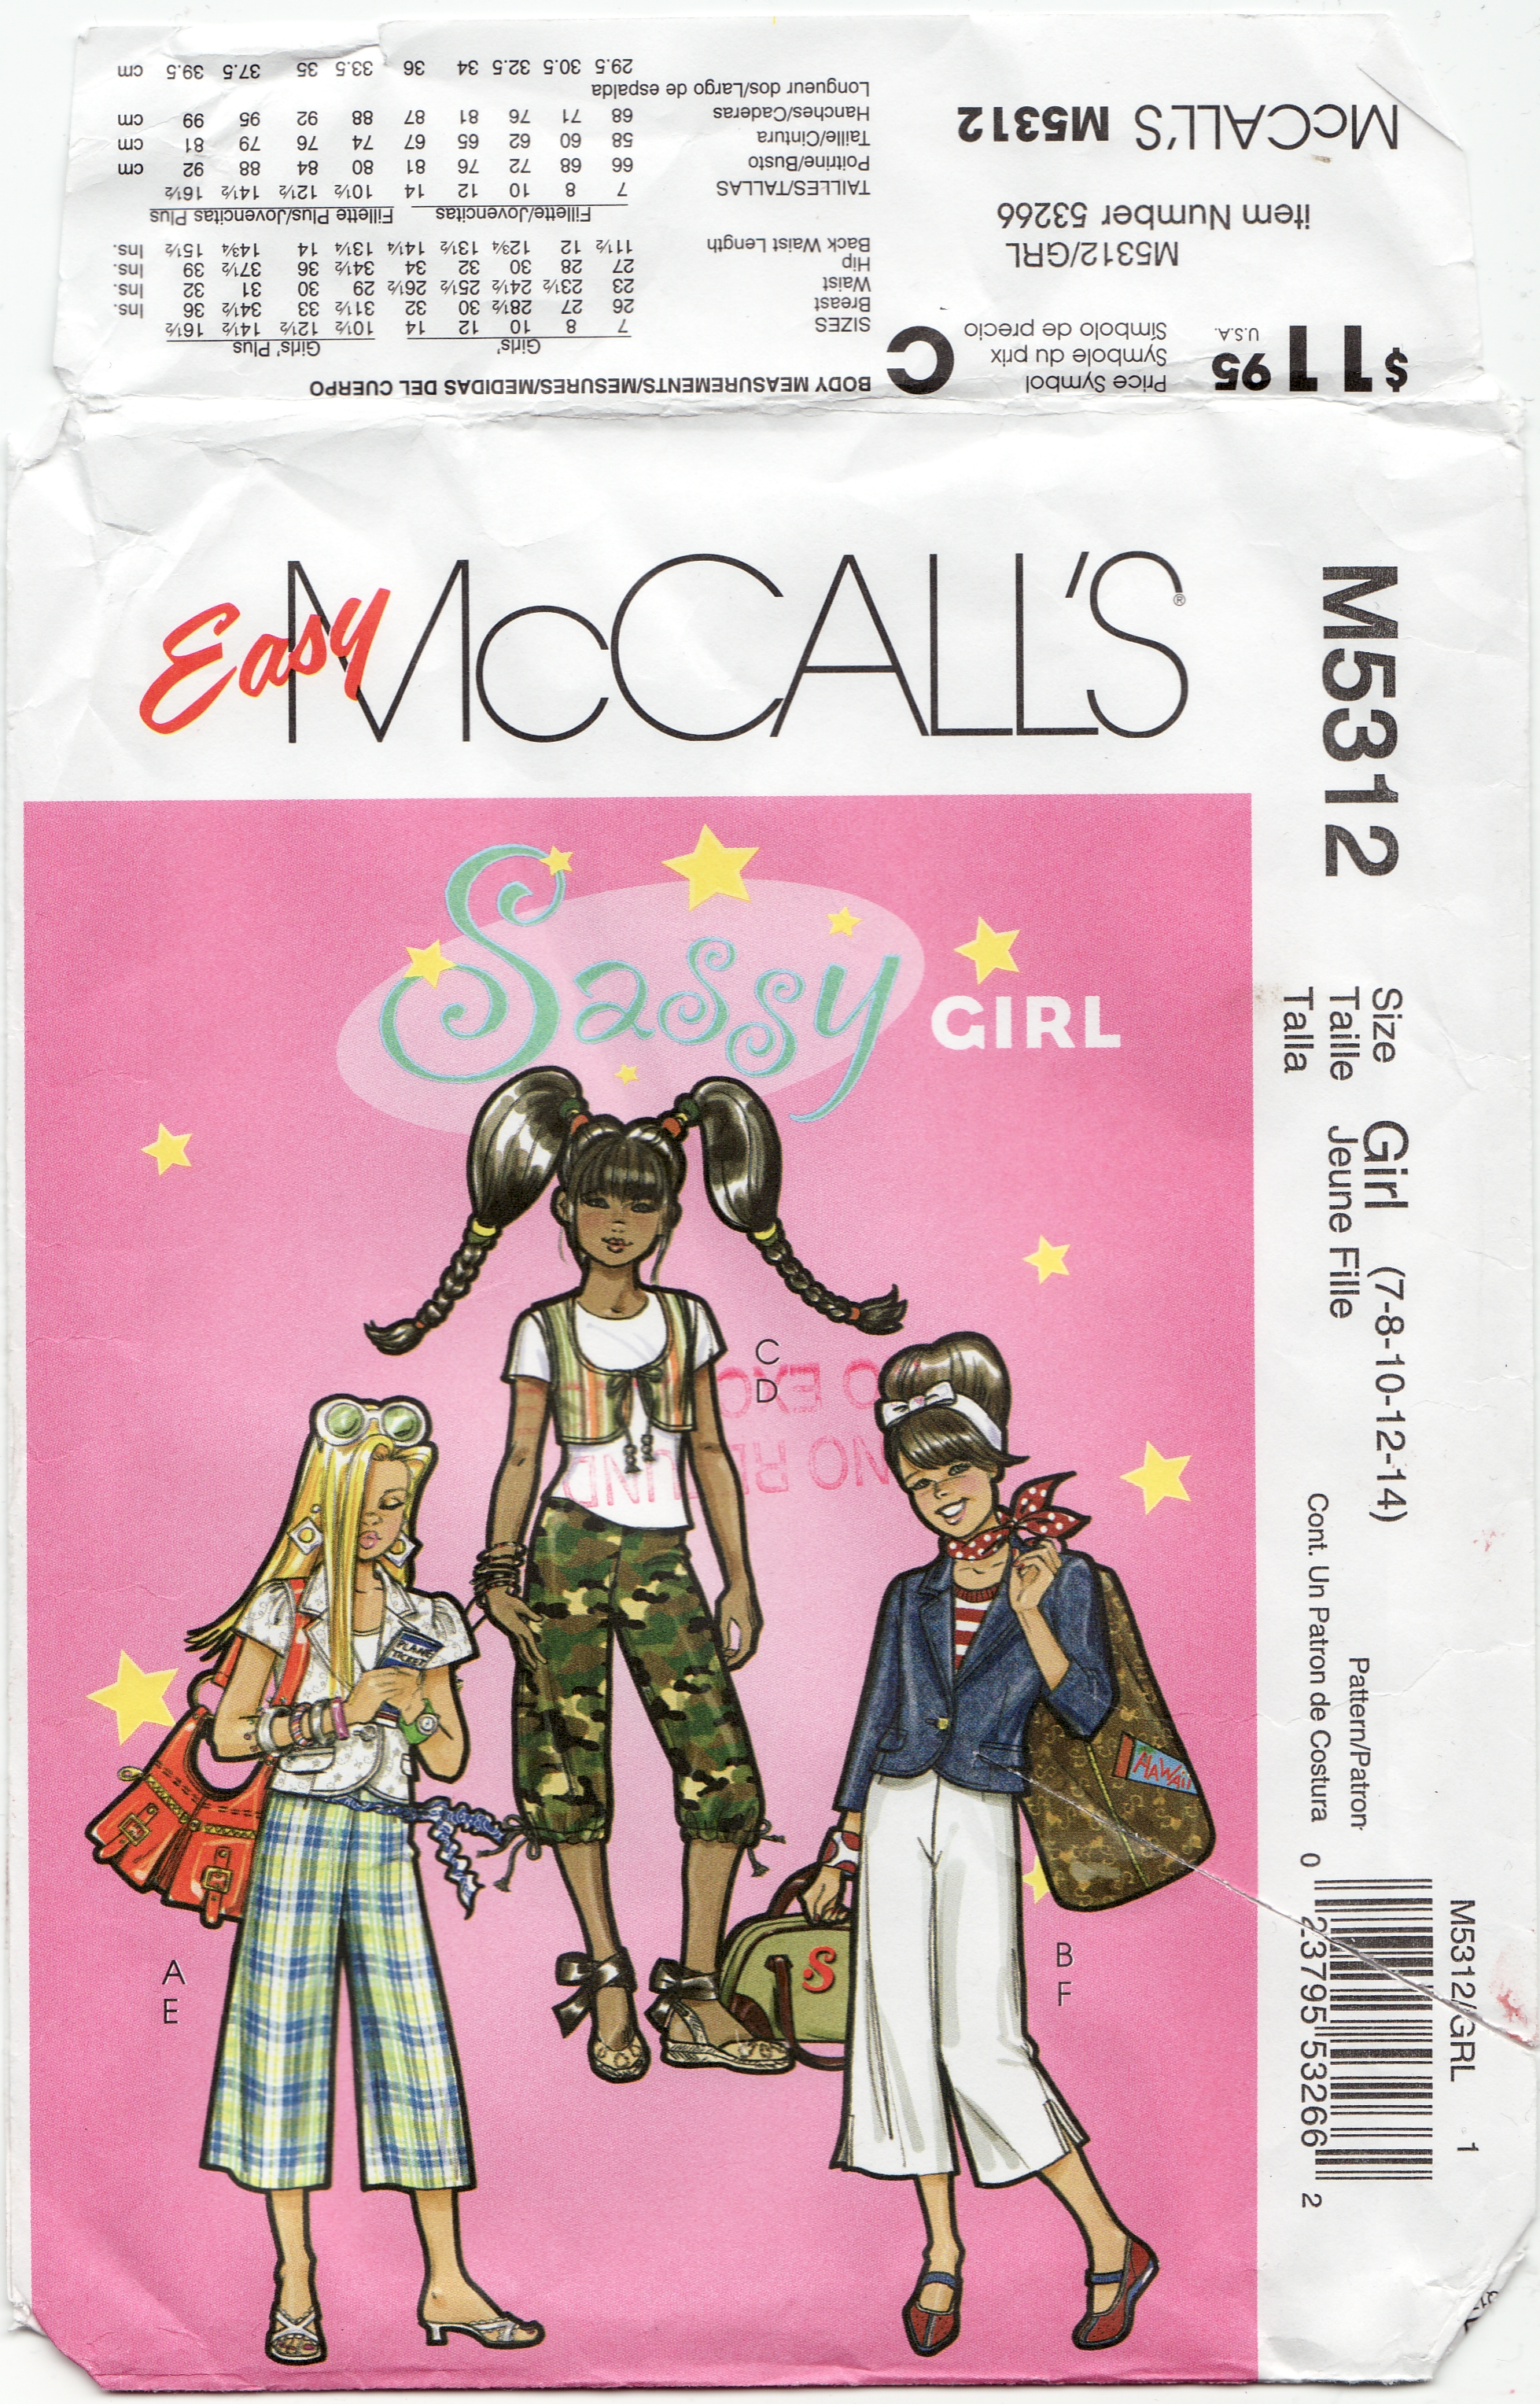
The pattern, as I mentioned before, is from a 2009 Patrones children’s issue. It features five pocket styling (I made six by putting a change pocket on each side… oops!), funky-shaped rear pockets with nifty-shaped flaps, and a waistband designed for buttonhole elastic.

Elastic back waistband

Now, adding buttonhole elastic to a kids’ waistband is easy as pie, but it’s kinda nice to have it marked on the pieces so I don’t forget, since you have to work the buttonholes and ideally attach the buttons before putting the waistband on.
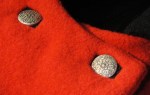
Look, ma! Rivets!

I used my triple-stitch (aka straight stretch stitch) for the topstitching. This is nice because it doesn’t upset my machine the way topstitching thread often does, but it can be a little feisty and you have to pay attention to where you are in the three-stitch cycle when turning corners. It worked quite well on this fabric, though. If you click through to the full size photo, you will also see that in addition to double-topstitching the inseam, I did a single row of topstitching along the outseam! This is much trickier, as you have to do it once the pantlegs are already tubes, and involves sewing down the inside of the inside-out leg, bunching the fabric up around the needle as you go. Slow and fiddly, but I figured these were short and loose enough that I had better try it here, as I might not ever try it again. 😉

Interior waistband finish

Another touch I tried is a bit of a cheater finish—I used some of the bias left over from my 70s jacket to bind the inside of the waistband. I feel justified in this finish because I recently got a pair of (thrifted) RTW jeans that have the same finish. It makes for a super-easy waistband; you just topstitch from the right side, not worrying about catching the underside at all because there’s plenty to catch. Also this is the same fabric I used for the pocket-lining and the underside of the flaps.

Of course, it's all about the shoes.

I cut a Patrones size 10, the smallest the pattern came in. According to her measurements Tyo is a Patrones size 8 on the bottom and six on the top, but with the wonders of  buttonhole elastic, they fit fine. The pattern is cut very wide and flat on the backside, relying on the elastic for any fitting. I took it in a couple of cm at the CB seam, to give Tyo a bit of extra shaping in this area.  My only complaint is that the rise is quite low. Really low, for a kids’ pattern. Especially considering Tyo, ah, needs a bit more coverage in the rear. If I make this again, I’ll add a generous wedge to the CB.

Back pocket with patch

Although I made buttonholes in the rear pocket flaps, I haven’t cut them or attached buttons. We’ll see if I bother or not. I did decorate one rear pocket with an embroidered patch Tyo had purchased at a street fair last summer. It was originally intended for her jean-jacket, but since that’s still sporting its punk/zombie patches from last Hallowe’en, we decided to use it here. I like contrast of camo fabric with hippie/Buddhist patch.

Have I ever mentioned my daughter is way cooler than I ever was?

I can’t wait until these have been washed about a dozen times and get that worn-in-faded-camo look. In fact, I like them so much I might have to think about making myself some. I haven’t worn camo regularly since my feminazi/survivalist-lookalike phase back in Uni.
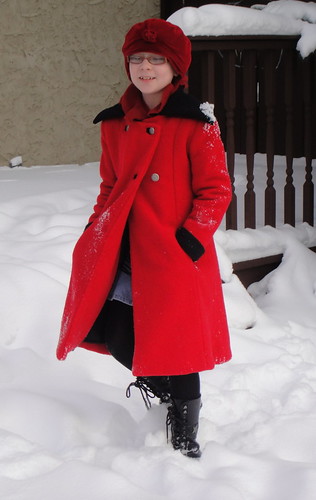
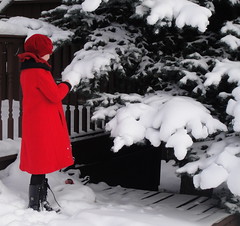
Tyo's Toque

Also you may have noticed one other hand-made item in these photos. The blue tasseled toque Tyo is wearing was knitted by my mother, for me, when I was about kneehigh to a grasshopper. Isn’t it cute? It has a matching sweater somewhere, too, although that was only finished in time for my little brother to wear it.

All righty, I think that’s more than enough sewing for the house apes (thanks, Katie, for that one!). Time for something for me!

*Our second vehicle is a motorcycle. This is not nearly as practical as a second car (especially in our climate) but is definitely WAY more fun. Except when it rains.

** Instituted after the tragic leap of the much lamented One-Eyed Jack. (scroll down)

18 Comments

Filed under Sewing

Unintended stitching

I didn’t plan on spending this weekend sewing for my children. But no sooner had I finished Syo’s stretchy outfit (yes, there’s a shirt to go with the bike shorts, but frankly it didn’t work out so well and I haven’t even bothered hemming it. Which isn’t stopping her from wearing it, but anyway.) then Tyo had to assert her requirements.

Denim

You see, the other week Tyo and I found ourselves on the far side of town, in proximity to Fabric Depot, a large independent fabric store I hadn’t yet had the occasion to check out. So we did. Their website boasts that they are one of the largest single fabric stores in North America. Which may be true. I had high hopes of finding some good-quality stretch denim, having largely given up on my local Fabricland for this.

Initial impressions were quite promising. A whole room of zippers. Another of lace and elastics. Beaded and sequined panels and appliques to outfit a thousand bellydancers.  An entire upstairs devoted to home-dec fabrics—not what I was looking for, of course, but impressive and some very attractive.

Downstairs again, a series of crowded warehouse-type rooms, fabric bolts stacked on shelves all the way to the fifteen-foot ceilings, often wrapped in plastic to protect them from dust. And there were truly gorgeous fabrics in there, too. The problem was finding them.

There seemed to be, again, a lot of home-dec. A fair selection of swimwear/dancewear lycra knits. I don’t even kinow what else, really. Not only was the seleciton overwhelming, the layout wasn’t condusive to finding anything. Eventually I had to ask to be directed to the denim section.

It was a single shelf on a single unit. The denim range, though small, was gorgeous—a lot of lovely finishes and weights—but none of it was stretch. Not one bolt.

Tyo's pants---centre

My fantasies of sturdy denim in an interesting wash (or even RED!) with just the right amount of lycra came crashing down around my ears. However, the price was right, and we were on the far end of town, so I selected a lovely indigo wash with great texture (and a soft enough weave that there’s a hint of stretch) and Tyo picked out a metre of camo print.

Of course, Tyo could think of nothing for her camo but the centre pants from this pattern—draw-string-bottom capris. She was terribly excited until she realized that the pattern lacks the other attributes necessary of camo pants—waistband, belt-flaps, POCKETS.

So, we went back to our mainstay of kids’ patterns, that gorgeous Patrones Niños I got from Her Selfishnesslong and long ago. It has any number of jeans patterns, including a varietyof capris, including drawstring capris. However, the ones Tyo

Tyo's eventual pattern selection

eventually settled on (perhaps without too much thought, but anyway) were this pair. Which you can see almost nothing of except that they  have a loose, below-the-knee leg. The line drawing reveals slightly more (although it’s not actually accurate about the change pocket, if you look closely at the photograph…), including some nifty back pockets.

Line drawing

With terrifying, tightly-curved flaps.

Ulp.

Camo pockets

Anyway, we spent yesterday evening tracing the pattern (I remembered to add seam allowances this time!) and cutting it out. I even managed to track down a zipper of the kind I use for jeans—I thought I was out. We debated the merits of topstitching and settled on black. And this morning, I started merrily stitching away.

And now I’m out of black thread.

Back pockets, with flap

Somewhere in this house, I’m quite certain, is a massive jumbo spool of black thread. But can I find it? There’s plenty of serger thread, but I’ve been suffering catastrophic failure on the jeans I made last summer that I used it on, so I am reluctant to use it for regular stitching. And, of course, it’s May Long (aka Victoria Day) so nothing is open, plus it’s pouring. Which may not deter those of you from soggier climates, but I don’t even own an umbrella, much less a rain-coat.

So instead I’m blogging half-done kids’ jeans, and debating what I should do with my gorgeous non-stretch denim.

I’m thinking bell-bottoms.

14 Comments

Filed under Sewing

An edgy little vest

Vest---closeups

One cool kid.

Tyo wanted to make her Patrones vest out of the same fabric as her lounge-pants. This was not ideal, but when has an inappropriate fabric choice stopped us? 😉 So I interfaced the skull print pieces with an iron-on knit interfacing, used scraps of sweatshirt-knit left over from the Kimono Lady Grey for the rest, and went to town. Tyo did much of the cutting out, but I did all the sewing. Mostly because I haven’t done many shawl-collars and was kinda winging it and didn’t want to confuse her and screw her up. It was also my first time making a lined vest since learning about the trick where you sew the neckline and the arm-hole edges before the side-seams so you can pull them right side out without hand-finishing. So I wanted to try it myself. I did manage to sew one of the side-seams with the front twisted around the first time… have I mentioned how much I hate picking out serger seams? And I managed to pick out half the front princess seam first, by mistake. *head-desk*

I did a particularly poor job on the little belt at the back, which I really should have interfaced, too, but fortunately it really doesn’t show (it does need a buckle still, but anyway). I wish I’d had enough of the skull stuff left over to do the front side panels in it, too, but it was touch-and-go as it was.

A stylin' girl

Her one request (besides the fabric) was the little pocket inside the front. Just the right size for her MP3 player.

Other than the little belt, I think it turned out really cute!

Also, nothing like a quick before-bedtime photo-shoot to bring out the silliness:

Stylin' Syo

But the Badass Badguy takes her down!

Even bad guys like to chill with their tiger.

Just for the record, I’m pretty sure that’s the only toy gun we have in the house. Toy swords… plenty. Guns… not so much. We are not really gun people.

12 Comments

Filed under Sewing

Skully Pants and Sleevy Plackets

Tyo’s pants may now be unveiled! They still need hemming, but taking photos before hemming is practically a tradition around here…

Tyo's Skuly Pants. Poses by Tyo. Guest appearance by Slimer the Turtle.

And, y’know, they turned out ok. Especially considering my various screw ups (the original drafting, and then pinning the two edges of the fronts together instead of front-to-back and not noticing until Tyo had it all sewn up…)

Tyo did all the sewing, on the serger, except for the elastic casing, which I sewed in a stretch stitch on the regular machine. She was really unsure and irregular to begin with but by the last few seams she was getting much more consistent and steady. She threaded the elastic into the casing, too.

May I just say I detest this skull-printed fabric? It’s a thin, stretchy cotton rib-knit with no recovery, and the printed pattern is not as stretchy as the fabric, so it’s already looking worn and crappy anywhere that gets a bit of stretch.

In MPB Sewalong News

Shirt plackets: the ugly truth

I sewed my plackets! Urg. This is the kind of precision sewing I normally resort to hand-sewing to deal with, but obviously that’s not quite appropriate here. I tried using my blind-stitch foot for the topstitching the first time, as it has a keel that theoretically should help guide the stitching. I say theoretically because it’s mounted on a screw and doesn’t stay in place. Ever. Second attempt, I reverted to using my rolled hem foot, of all things. Something about the way the toes of the foot are positioned (not the roll part) works really nicely for guiding the fabric for perfect edgestitching.

Er.

This is me we’re talking about. Perfection and precision are not my strong suits.

I used washable glue-stick to try to hold the triangles in place, which worked better than pins, and might’ve worked better still if I had the patience to let it dry for a few minutes before sewing. I wonder if making a template to press the triangle top around would be worth it…

I made the row of stitches crossing the placket run just above the funny folded part on the inside (bottom right picture), but a quick inspection of my hubby’s RTW shirts shows that they run the stitch about 1/4″ below this. Will keep this in mind for the next version.

Testing my fabric marker

Also, I decided to test out my blue disappears-in-water marker. I’ve heard horror-stories about these before (especially if you press the ink), so I’ve been pretty skeptical about it and haven’t actually used it until now. Well, the fact that it’s a fine-tip and doesn’t really mark most of my fabrics well didn’t help.

Anyway, here you can see on the top, the plain marker, and the bottom which I wrote and then ironed over (with heavy steam on maximum heat, my typical MO as long as the fabric will take it.) Interestingly, even the steam seemed to start to lighten the markings, which could be annoying.

Took the piece to the sink, add water, and—voila!

Just add water!

Anyway, that’s enough for tonight. Tomorrow I will get the yoke sewn up and maybe even rope my hubby into a fitting if I’m extremely-extra-lucky. And Syo is agitating for a project she can help with, so if I’m extra ambitious maybe we’ll start on some skinny jeans for her, as she’s been begging for a pair of those since last summer.

Speaking of Syo, we must keep the post balanced, so I will leave you with:

Syo---yes, she knows exactly how cute she is.

15 Comments

Filed under Sewing

Bits ‘n Bobs

Men's shirt pieces

As usual, the during-week sewing is scant and slow. I did manage to cut out my mens shirt muslin, as the long-awaited MPB sewalong is finally under way. I’ve marked (a lot more than I typically do), with my “allegedly disappears with water” marker, and interfaced half the cuffs and one of the collar bands. I am not going to interface the front button placket, as per discussions with the Sewista Fashionista. I can’t wait to start sewing, but I guess I should keep in step with the sewalong. I’m not doing pockets (today’s post) but maybe I’ll take a stab at the sleeve plackets. Or not, as I’d kind of like to hear what tips the other sewalongers have for them (and if any of the allegedly fabulous Negroni instructions for this area get passed on). I’ve only done continuous lap plackets before. Grum. Maybe I’ll prep the collar band or sew up the yoke (since I now know how to do that!)

I’m still up in the air over whether to bother with flat-felled seams on this one. On the one hand it’s a muslin and if I do need to make fitting changes it’d be much better to not have the seams felled. On the other hand, I could probably use as much practice as I can get my hands on, right? Blargh.

Tyo and her skull-print fabric

Just to keep me on my toes, though, Tyo decided to pull out the skull-print knit she picked out back in the fall. Apparently it needs to become a set of lounge pants. Unfortunately, I haven’t got a pattern for these. Well, how hard can it be to make one up? Just a narrow set of pantaloons, really, right? In a knit, no less.

Er. Well, I should’ve cut them wider. I forgot to add in width for the crotch. I should know better by

Tyo, cutting out her pants.

 now. Sorry, kiddo. The good news is we’ll add in strips up the outside of the legs and they will look just fine. Intentional even. It’s a design feature, dontcha know? The bad news is she managed to cut one of the strips in half while she was cutting it out. Kid’s got talent, I tell ya. Hopefully there’s enough of the insert fabric (we’re using the remnant from my Kimono Lady Grey) to cut another one…

I did make her sew the crotch seam (on the serger, no less) and will be putting gentle pressure on her to do the rest herself as well. Well, as independently as Tyo does anything, anyway. I suspect the hemming and possibly the elastic casing will fall to me.

Can I blame it on the fact that I was trying to measure Tyo and “draft ” the pattern while cooking supper and supervising Syo, who decided she should cut up the chicken for last night’s supper*?

Oops. Too narrow.

Hmm, in hindsight, I think there probably is a kid’s shorts or karate-gi pattern in the basement that would have a basic, unfitted pants-type-pieces.

Aaargh.

*I hate to discourage her, as the only person in the house who seems to actually enjoy cooking. I have visions of my children turning into culinary geniuses who get home from school, throw me out of the kitchen, and emerge two hours later with a three-course sit-down meal. No? Hey, a girl can dream.

11 Comments

Filed under Sewing

The Russian Princess Coat

The Russian Princess Coat

Girl in a red coat

Full Disclosure Edition

Seems to me like a Russian Princess coat, anyway. Or Madeline, as celkalee said.

Walking

The coat was finished, and not a moment too soon (actually a little late), as winter arrived on Monday with about six inches of snow (and another six on Tuesday, and again Wednesday and Thursday. Friday and today have been snow-light; more is forecast for tomorrow). Also, of course, providing the perfect backdrop for this coat. Snow and spruce trees for the win.

Even after four coats, I still haven’t really got that “facing/hem” thing figured out. I know there’s a way to make it happen really neatly (I’ve read two or three different sets of instructions on it, even), but somehow my pieces never quite line up and I end up fudging and hand-stitching to make it work. Ah, well. If some future couturier in distant decades dissects this coat, they’ll find plenty of other construction quirks to puzzle over (like, oh, how I padstitched the collar after sewing it… yeah, yeah.

Vent being pulled wonky by ining

The only bit I’m really not happy with (other than the sleeves still being uncomfortably tight) is the rear vent. I used the Cupcake Goddess’s instructions and while the basic principal is sound, I can’t figure out how to do it without creating and offset in the lining so you have a seam allowance (or making the cut-out side shorter). This, added to the difference in the length of the lining vs. the length of the back, meant that my vent-extensions lined up really poorly, and while they lie flat when worn, the lining is a bit short and makes the coat hike up if anything goes off of plum. Also the whole thing requires a degree of precision I find difficult to achieve at the best of times, much less when wrestling five pounds of wool coat around my sewing machine.

The rear view

All in all the pattern went together fairly well. My only serious objection with it is the narroweness of the sleeves. I added 2cm in sleeve width after the second muslin, but they are still really snug—it makes an attractively slim line, but not a comfortable coat, and it’s pretty impossible for Tyo to put a sweater under it at the moment. Thanks everyone for their suggestions on this problem, by the way… I’ll probably be tackling it in the next week or so. Or, y’know, tomorrow if I’m a good mom.

Next up: jeans and a stab at Lekala patterns!

Click to go to slideshow!

25 Comments

Filed under Sewing

Frustration…

A finished coat... missing only one ten-year-old girl

… is a finished garment and no good photos to show it off. Nature has graced us with the perfect backdrop for the coat (six or eight inches of snow in the last two days), but by the time the buttons were on this evening the light was gone, so pictures will have to wait until tomorrow at the earliest. However, since I’m dying to show off just a little bit, here’s some flat shots and details, not that most of my details are worth ogling ;).

I’ll do a full write up with the last of my construction woes when I get some decent pictures… by which time I’m sure you’ll be as sick of this thing as I am (if you aren’t already 😉 )

And now the big question: will she actually be able to wear it “for everyday” or will this become the dreaded fancy coat? It’s supposed to be -21C here tomorrow (about five below zero F… somehow that sounds warmer 😉 ), which will be a big test for my winter coat, as well.

16 Comments

Filed under Sewing

A sneaky peak

at the progress from the weekend.

Coat, left; lining, right

The sleeves are attached (and still dangerously narrow 😦 ); the lining and facing is sewn (this is the first time I’ve done a lining with a facing at the back of the neck. It was not particularly difficult. I drafted fold-over cuffs for the end of the sleeve… we’ll see how those go on; I used the same idea as the ones for Syo’s coat.

I did some thing to the roll of the collar that I will describe as pad-stitching’s bastard cousin, which did succeed in giving it some shape (at least so far), and only shows a little.

Tyo picked out some silver metal buttons. They’re lovely, although silver buttons really wasn’t what I was envisioning for this coat. She likes them, though.

Label!

But most importantly, I remembered to sew the label to the neck facing already, so I don’t have to hand-stitch it on at the end! 🙂

10 Comments

Filed under Sewing

It seemed like a good idea at the time, or, an assortment of idiosyncratic construction decisions


Catchstitched interlining

I guess I really am a sucker for hand-sewing. If only because I catch much less flack from the family if I’m hand-sewing in the living-room with the rest of them all evening, instead of lurking in the kitchen with my sewing machine.


Warning: what follows is not a description of how one SHOULD make a coat. I am not particularly convinced that all (any) of the construction details I am about to report actually improve the resulting coat in any way, and several of them may have serious unforeseen drawbacks. I accept this. 😉

Friday I got the rest of the coat—lining and interlining—cut out. Hooray! I could not find any more of my space suit interlining at the fabric store, so I had to settle for some (much cheaper) non-foil-backed stuff. I had just enough left from making my coat to cut the two back pieces from the foil-backed stuff, which I figure should be fine since the fronts are double-breasted anyway.

I trimmed the seam-allowances from the interlining. Then, for reasons I am no longer totally clear on, I decided

Underlining

that rather than floating free between shell and lining, it should be sandwiched between shell and interlining. I promptly proceeded to catchstitch the back pieces in place, so they wouldn’t shift despite not being caught in the seams.

Then I said “bugger that,” and skipped the catch-stitching step for the front and side-front pieces. My occasional inability to keep the interlining out of the seams should hold them in place, not like they have anywhere to go.

This fabric is a dream to sew with. It’s squishy, easy to ease, and you can catch stitches on the underside beautifully without worry of them showing on the right side of the fabric. Mmm. I also love my flannel underlining.

1cm seam-allowances may be awesome on jeans, but they’re tricky on a coat. Allowing for turn of cloth, once you go to press the seam open, there’s very little allowance at all. I proceeded to stitch all the seam-allowances open after pressing (hence the marathon of hand-stitching and why my fingers are still sore.)

BUT, LOOK!!!

Tyo refused to brush her hair for the photos, hence her headless state. Also she was making faces.

OMG, is that a coat?

She has POCKETS!

Well, almost.

Yay, smooth back!

For interest’s sake, I re-took Tyo’s measurements (rather than relying on my last set from oh, back in the summer) and compared them to the m-sewing sizing charts. The results may highlight some of the fitting issues we had.

Hips: 81 cm. Her hips are a size 12.

Waist: 58. Her waist is a size 8.

Bust: 63 cm. Her chest is, ah, a size 6.

The coat I made is about a size 11, for measurements bust: 73cm, waist: 63cm, hip: 79cm.  I still think the coat is cut a bit snug for my liking (I added significantly more than 2cm to the ease in the hips), but the disproportion between shoulders and hips is all Tyo.  If Sewaholic Patterns ever puts out a children’s line, Tyo can be their first customer.

Next: assemble sleeves, sew lining, decide whether to add another layer of interlining (this time where the interlining *actually* belongs) as the non-foil stuff is kinda thin, and try to avoid doing any more hand-stitching until at least tonight.

PS. This post would’ve been up Saturday morning, but my camera cable evaporated sometime Friday evening. Despite a thorough house-clean Saturday (my Dad was in town and came to dinner), it has not resurfaced. However, fortunately for me, the card reader decided to read the camera memory stick today—Sony uses an odd format and 90% of the time the computer doesn’t recognize it… but once in a while it does. So, you get a post! Yay for random computer cooperation!


7 Comments

Filed under Sewing

Poppies

Red and black, two of my favourite colours. Speaking of which, the buttonholes have been bound.

Buttonholes on the coat. Poking the "organza" squares through.

Then, I tack them down (after judicious ironing) in the back.

Buttonhole frames tacked open

Gertie suggests using silk organza that matches your fashion fabric. I have no organza (as far as I know), and I’ve never sewed with silk in my life. I also didn’t have anything light and crisp in red. So I used this off-white (chiffon? I really suck at the names for these floaty fabrics, as I tend to avoid them like the plague. But I salvaged a crapload of this stuff after a wedding last summer. It’s gone to make the sheer JJ, and the rest will someday become a tiered petticoat.) I suspect silk organza would be a lot stronger, and maybe a more firm weave?

Don't they look nice from the front?

You can see a tiny bit of the chiffon from the front. I made extra sure when sewing on the strips that none of this showed through.

The basted strips in position

As you can see, my strips are kinda massive. (They’re also interfaced, and I added an extra layer of white interfacing to the inside of the front mostly so I could see my markings better.) I am debating whether to trim them down or leave them that way—if anyone has strong opinions I’d love to hear them.

And stitched in place by hand.

Don’t they look lovely? I will leave them basted for now (at least until we go buy buttons). Now all I have to do is get the facings to line up. Oh, and did you notice my lovely iron-mark on the front of the fabric? *headdesk* Mostly I remember not to do this. Mostly.

Anyway, back to the poppies. Are we all marking Remembrance Day today? I am lucky enough not to have any family members involved with wars of any kinds (even my grandfathers sat out WWII). I’m also not organized enough to get to any of the various ceremonies they have around. So consider this my little moment of silence.


In Flanders Fields

By: Lieutenant Colonel John McCrae, MD (1872-1918), Canadian Army

In Flanders Fields the poppies blow
Between the crosses row on row,
That mark our place; and in the sky
The larks, still bravely singing, fly
Scarce heard amid the guns below.
We are the Dead. Short days ago
We lived, felt dawn, saw sunset glow,
Loved and were loved, and now we lie,
In Flanders fields.
Take up our quarrel with the foe:
To you from failing hands we throw
The torch; be yours to hold it high.
If ye break faith with us who die
We shall not sleep, though poppies grow
In Flanders fields.

Lest we forget.

14 Comments

Filed under Sewing