Tag Archives: For Syo

Not Worth Blogging About?

Hrmm.

Ever make things you’re just not sure are worth writing about? I like to document my flops alongside my successes, (although I’ve noticed that it often takes me a while to realize what is actually a flop vs. a success), but I’m talking about throwaway pieces. Stuff you just knocked together because it would serve a purpose (or because your kids were bugging you, as the case may be). It’s sloppy and half-ass, simple, and maybe the fabric just drives you nuts.

No? Just me?

More excessive cute

This pair of tops for Syo falls into that category. I’m writing about them only because, well, I have nothing much else to write about right now (unless you want me to start in on the weather again 😉 ). I keep looking at my Lonsdale pattern. I ALMOST got the pieces laid out yesterday, but ran out of time. Anyway.

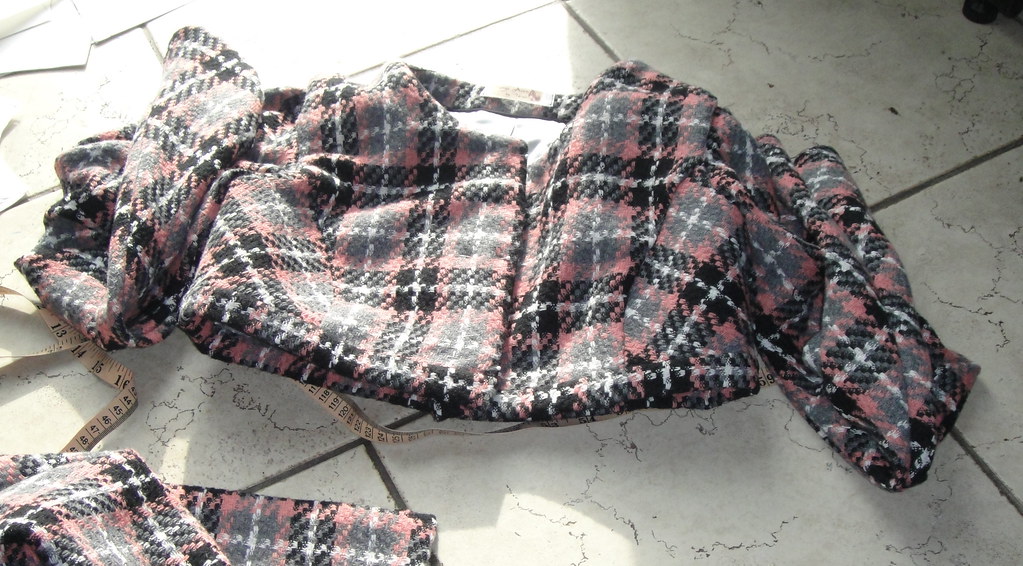
This fabric is left over from one of the cowl-neck iterations. It’s got a lovely, soft drape, an interesting knit stripe, is wriggly as hell to cut out (we pinned it to the carpet), tends to grow like crazy when handled, and a dull colour that just irks me. It looks like the colour the block of white paint turns when everyone’s been mashing other colours into it. Hmm, I may have been spending too much time entertaining small children lately…

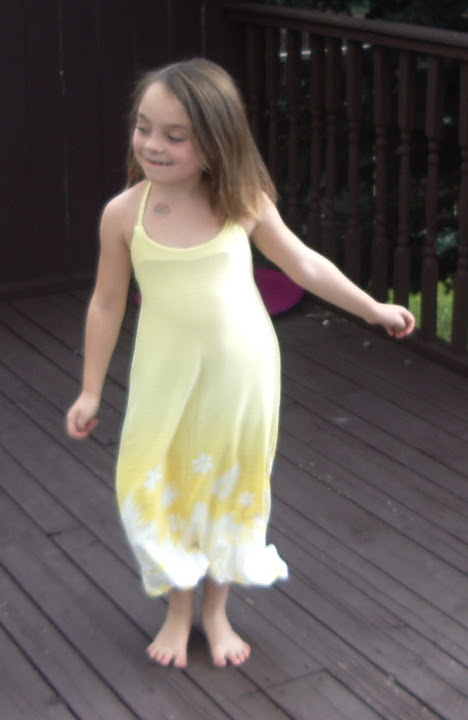
Syo was inspired by the fabric (she does love wriggly knits >_<) and Babydoll’s dance-rehearsal outfit from the movie Sucker Punch. Yes, we probably do have questionable taste in what we let our children watch. At least it’s with parental guidance.

There were actual patterns involved!

In particular, McCall’s 4821 (View B, the one-shouldered top) and Kwik Sew 2448, the long-sleeved tee from view A. What do you mean it doesn’t look anything like it? Both of these are thrift store finds, although I don’t think I’ve blogged either of them before.

Sassy Girl

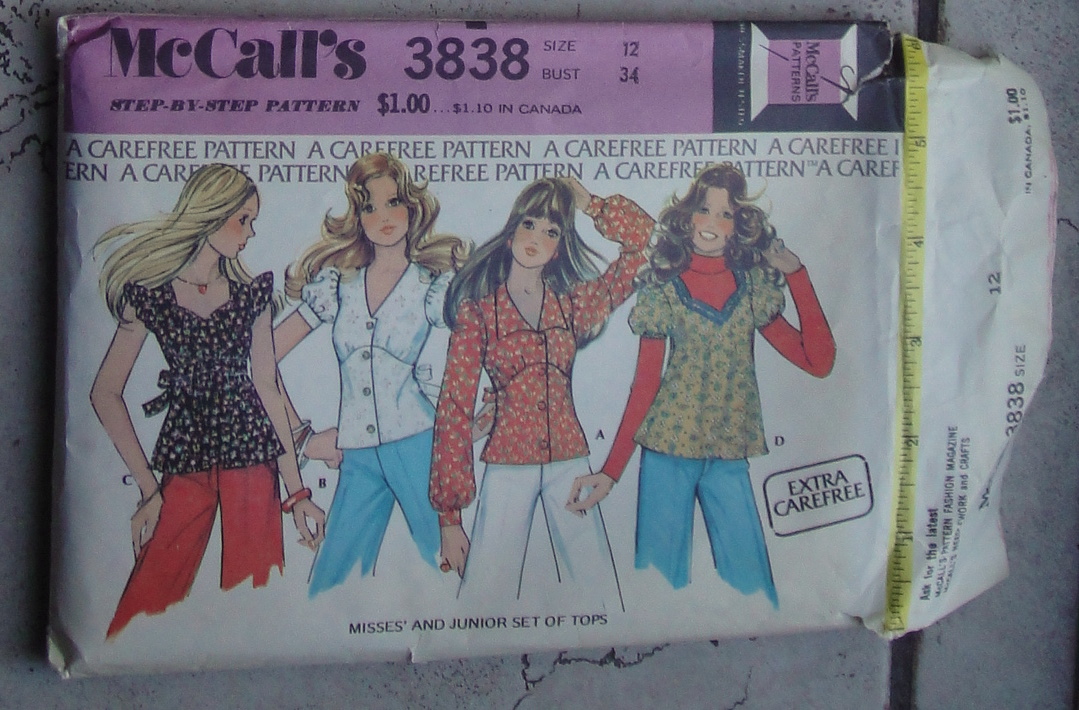
Ok, so let’s start with the McCall’s pattern. This is another of those “Sassy Girl” brand of patterns, illustrated to pique the imagination of any little girl. I used another of these for Syo’s vest. They’re adequate patterns, I guess, but I find them really simplistic, to the point where I suspect the final result is likely to be compromised. I haven’t read the instructions, so I can’t really comment on them. For a simple knit top like this, though, I guess there’s not going to be much to the pattern in any case. The smallest size in my envelope was a 7, which is borderline too big for Syo; given what I know about this fabric—it GROWS—I figured we would need to narrow it a fair bit.

McCall's 4821

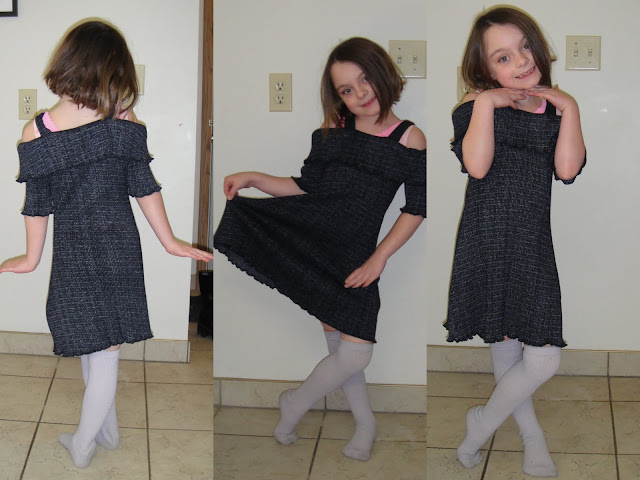
I took out something like 4cm of width and then re-drew the front and back top curves. I didn’t adjust the length at all and it’s a bit short, but that may be a) deliberate and b) an effect of the prodigious width-wise growth of this fabric. Because the fabric was so thin, we double-layered it, which made finishing the top easy. I used clear elastic to reinforce the neckline side of the strap, and the small shoulder seam, but not the arm-hole seam. I’m glad I did, as I think it would be quite saggy without. We haven’t done the hem yet, but probably will at some point, although I don’t think twin-needling will hold up terribly well on this fabric.
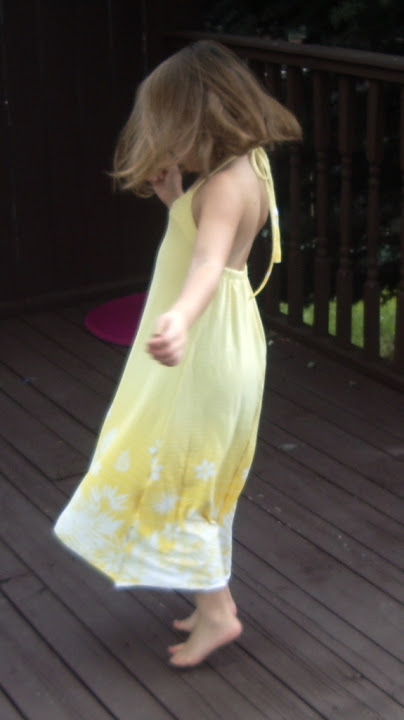
Back view

My serger tends to turn soft, light fabrics like this into ruffles, so we sewed it all on the newely-serviced Janome, which worked like a dream. Syo would’ve stitched the entire thing if I let her, but I’m not quite sure she’d be up to keeping an eye on the seam allowance width and the clear elastic at the same time. She did quite well on the armscye seam, though, even without pins, and would’ve done the side-seams but it was the end of the night and we were in a hurry.

Side view

I think we just about nailed the sizing, actually. Which means if I use any other fabric in the world it’ll be way too small.

Little tie-sweater

Kwik Sew 2448

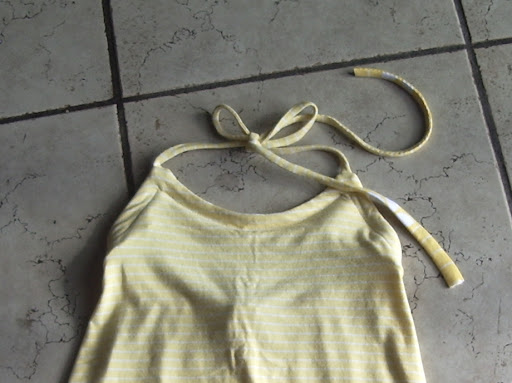
The little tie-sweater is based on Kwik Sew 2448. What, you don’t see the resemblance? Use your imagination! Actually, I traced off the pattern pieces for the long-sleeved version of the top, which is an utterly ordinary knit tee pattern. I cropped it short at the “lengthen and shorten here” line, which wound up being a bit short (but again that might just be the fabric), and turned the cut-on-fold of the front into an extended tie.

Syo originally wanted 3/4 length sleeves, so I shortened the length of the arm to a size 4 (I was tracing the size 6). They still turned out mostly full-length, which she says she is liking for now, but we may very well shorten them in the future.

Tee front pattern piece, altered to tie. We are so precise in our cutting around here...

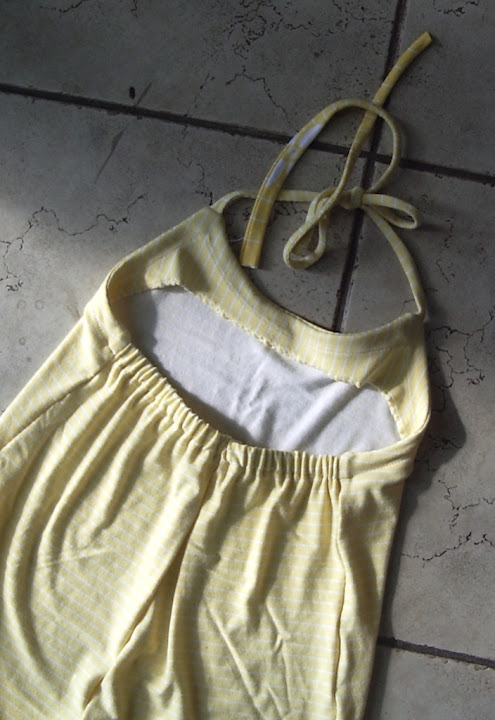
I’ve noticed in my one Kwik Sew pattern that has an adult-sized tie top, the ties angle down considerably, and looking at how it sits on Syo it seems like this would probably have been a good idea to emulate. (I might have paid closer attention but on inspection the only pattern pieces actually in the envelope of the adult pattern are for the leotard. Poop! So I’m going by the illustration of the pieces on the instructions)

Syo stitched the underarm seams for this one. Kwik Sew uses 6mm (1/4″) seam allowances, which are a bit harder for her to maintain, at least in this fabric, than the wider ones on the McCall’s pattern. I used clear elastic to stabilize the shoulder. Considering how this fabric grows (especially as I didn’t use anything to stabilize the neckline) this seems like a very trim-fitting tee pattern. Which I guess makes sense for something meant to go under a dress.

In any case, Syo is, at least momentarily, satisfied, and this godawful fabric is out of my stash. There was a very tense moment while sewing when Tyo nearly started WWIII over the fact that Syo was getting two tops in a row, but it was headed off (grudgingly) when I pointed out that these two tops together, including tracing, are still less time-consuming than Tyo’s last shirt.

I think it’s time to make something for me, don’t you? I do like sewing with my kids (as opposed to for my kids), but I think I’m ready for something for me. 😉

15 Comments

Filed under Sewing

Happy Birthday to Syo!

Syo's dress, by Tyo.

Technically, I guess today she should become Eyo (the Eight-Year-Old). But for the sake of continuity, not to mention because Tyo will become the Eleven-Year-Old in another month, I’m going to stick with the nicknames as is.

Relatively little has been cleaned up from the birthdays (to my husband’s dismay), but sewing has happened! Tyo put the final touches on Syo’s present and we wrapped it up.

The kids have also been stitching madly away at these:

Pouches!

They are almost done. Whew! It would’ve been so much simpler to do them all on my own. But that would be defeating the point, etc. etc. Syo decided she wanted the blue and pink flannel fabric (top left) for the outside of hers; it’s lining the others.

What, Syo modelling her dress? Well, if you insist!

A well-dressed child

The fringe along the bottom is a length that appeared in one of the Value Village baggies. I stitched it on for Tyo… it was just less of a headache that way.

I am disappointed to report that she is less than thrilled with the dress. The reason? “It’s not tight enough. Tight is cute.”

Ah, yes. I had forgotten that.

Erm, she may have picked up that perception from me. Ooops.

Anyway, I think the dress is adorable.

In Me-Made June news:

June 27

Yup. Still lounging amid the remnants of the kids’ birthday party on the weekend.

I was (perhaps overly) excited about the weather forecast today and dressed for SUMMER. Of course, I spent most of the day in the chilly indoors freezing my legs off. My bad.

70s Tunic
Lekala sailor shorts Which you can’t actually see, but I promise you they’re there.

6 Comments

Filed under Sewing

Loved Ones and Little Things

MMJ 17.

Today’s Me-Made June Friday Challenge was a photo with loved ones. I hereby submit my paltry effort. I spent the day at home taking care of a sick hubby (which is considerably more onerous a chore than taking care of sick children, I’ll add), which leads to less than glamorous photo-taking. I am limping along with my self-imposed 70s week, although the weather has not been cooperating so I may have to call it off early without wearing my two remaining (very summery) 70s dresses. Poop. For what it’s worth, I’m wearing the bellbottoms (again) with one of the several JJ blouses. Although a contemporary pattern, I think the JJ fits stylistically quite well with the 70s patterns I’ve been collecting, with the ruffles and little puffed sleeves.

Syo's Vest (waistcoat, not tank-top)

In between making toast, iced tea, and “just being there” (because apparently me sitting in the living room while he sleeps on the couch half the afternoon is much better than him sleeping on the couch while I’m off doing something, oh, productive), some little bits of sewing has gotten done. The finishing handwork on my niece’s little coat, of course, but also a little vest for Syo from this nefarious pattern, made from the scraps from my niece’s coat. This pattern is one of those depressingly dumbed-down patterns, the kind that makes you feel embarrassed about being a home sewist. Although the instructions are to line the vest, there’s no lining pieces or even facings. So of course the lining is bound to peek out. Especially when it’s a knit and the shell is a woven. I cut the shell a bit bigger to attempt to give it some turn of cloth allowance, and topstitched after, but the fleece still peeks out a bit. Naturally I could’ve drafted a lining and facings, but that would’ve been work, as well as probably used up more scraps that I actually had. Anyway, Syo is very pleased with it, despite putting it on the first time and declaring: “It’s a bit loose.”

I have concluded this is Syonese for “It’s not skin-tight.”

She sewed the shoulder-seams herself, but chickened out on the other, highly curved seams. Also, grading seams makes a big difference when your fabrics are this bulky. I should do it more consistently.

Tyo's Bear

Tyo, on the other hand, finally got back to work on her teddy-bear, which has been languishing as isolated head and arms since well before my sewing-room migration, and we finished it. She did fairly well, considering the 1/4″ seam allowances and sharp curves. I had to do more than I really wanted to (including hand-stitching all the bits together), but less than I had feared, so I guess it’s all right. It’s stuffed with rice, so it can be microwaved to serve as a hot-pad. It’s cute, in a rather floppy way.

I think I’m starting to wrap my head around the idea of actually teaching my kids to sew. Not having been actively taught myself, it’s hard to figure out what to teach. What needs to be said, what they’ll figure out on their own through trial and error. But progress is being made, and I guess that’s what matters.

Oh, coincidentally the girls are both wearing shirts I made, neither of which have been blogged, due to generally shoddy half-ass construction and lack of interesting or meaningful detail. I’ve noticed that I tend to make some pretty half-ass things for my kids. Mostly when they’re picking something I don’t much want to make, or I’m getting annoyed with the fabric of their choice. Both shirts are getting worn a fair bit, though, despite their inferior construction. My children have not yet learnt the stigma of “home made”. Tyo gets more flack, apparently, for wearing her (very expensive) Harley Davidson jacket. Go figure.

70s blouse pattern

I did get started on a 70s blouse (well, more of a tunic, View C on the left) for me, out of some white cotton gauze. I hope to get it done this weekend,  if I can wrest control of the sewing machine away from my children long enough. Although probably not in time to save 70s week. I’m sad to say I think there’s probably more kids’ sewing in the immediate future, too. Tyo has fabric and pattern for a shirt picked out, and I got some really cute sundress patterns I’ll talk about another day…

21 Comments

Filed under Sewing

‘Tis the season…

Bike shorts!

To make bike shorts, apparently.

For once, I was not planning on jumping on the bandwagon. Beangirl made them for her kids. Joy made them for hers. But I was strong! I had no particular desire at ALL to make such a simple, prosaic item. Besides, my kids have lots of shorts and leggings.

But this weekend it was Syo’s turn to get a garment, and Syo wanted, of all things, bike shorts.

This is a piece of fabric that she picked out, herself, several months back, and has been patiently waiting for me to make up. “How about a nice dress?” I suggested.

“Bike shorts,” she said.

“A twirly skirt?”

“Bike shorts, mom.”

“It would make a really nice T-shirt.”

“MOM!”

Bike shorts it was…

First problem, of course, is that I don’t have anything resembling a children’s leggings pattern. Obviously I could’ve gone and found/bought/downloaded a kids’ leggings pattern, or just traced off an existing pair, but what fun would that be?

Enter Metric Pattern Cutting, a copy of which I tracked down in my panic after the disappearance of Modern Pattern Design. Although it doesn’t have quite as many nifty vintage details as Pepin’s, this book is amazing in its own way. All the usual dart-manipulation stuff. More blocks than you can shake a stick at. Information on standard sizing and grading, as well as drafting custom blocks. And it has directions for drafting knit blocks, including leggings.  Now all I need are the menswear and childrenswear versions, but anyway.

I managed to wrangle Syo into letting me take a ridiculous number of measurements, and then trotted off to attempt to draft up the shorts. The MPC draft is, of course, intended for an adult. Using it for a kid-size pattern is  not the smartest course, but I figured for something as simple and forgiving as leggings I would risk it. It wasn’t too hard to figure out where I needed to reduce the suggested measurements.

Leggings block and shorts pattern

Anyway, it took perhaps half an hour to draft up the pattern (including time to hunt down my yardstick, which had vanished behind the livingroom bookshelf). For once my square and French Curve were where I left them, which is a minor miracle. And, in comparatively short order, we had a pair of bike shorts. I did have to lower the waistband by a good inch/inch and a half, as the draft makes it at the natural waist, and my children will have none of that.

Of course, the evil monkey had to dash off to a sleepover before they were quite finished, so I don’t have pictures of them actually on her yet… Grrr… But from the in-progress fittings, I promise they fit very, very well.

In other news, I’ve been messing around with computer pattern drafting, too, (there is THIS free program by a Burdastyle member, which is all right but a bit fiddly, but you can do a fair amount just with Inkscape or Illustrator) and have been thinking of sharing some of the patterns I’ve come up with that way, as it’s a lot less work than trying to scan and trace patterns I’ve drafted on paper. Would anybody be interested in some of that? My big weakness, of course, remains grading, but I’m hopeful that Metric Pattern Cutting will help with that…

22 Comments

Filed under Sewing

A cute model…

…Makes up for many shortfalls.

Some people can just wear anything...

Should I feel guilt about convincing Syo that this totally crappy fabric was a good choice for the sweater-dress she wanted, based on the same pattern as this shirt? It’s (finally) almost all gone. Aside from my distaste for the fabric (and sewing it—it grows under the needle) the dress was really simple. The only tricky part was sewing an elastic into the neckline to keep it from becoming absolutely jumbo-esque. I had to pick out my first try because I hadn’t pulled the elastic taut enough. Argh. As with my sweater in this fabric, I ducked the aggravation of hemming by doing a half-ass lettuce hem, which is just a standard serged edge with the fabric pulled taut as it feeds through. Don’t look too closely at the strap placement or the straightness of the side-seams, but the sprout is happy, which is the main thing, right?

What I've been working on

My efforts towards drafting the Springy Coat pattern have led me astray. Or rather, I figured I should try a full jacket using my fitted pattern, so I’m in the process of working on this. I’d been hoping to have it finished today but that doesn’t seem likely at this point. I’m excited, though… 😉

3 Comments

Filed under Sewing

The jeans of many sizes

Possibly subtitled “the best laid plans…”

Instructions: "Look cute."

In a fit of obsession yesterday afternoon, Syo and I decided to tackle her jeans. The project was simple; all the materials were on hand: one traced version of Jalie 2908, size K (aka 7); one metre of dark blue stretch denim; gold jeans topstitching thread, and a little metal zipper.

The pattern is the same size I traced out for Tyo’s jeans last spring, which she had outgrown by August. Syo is now wearing these jeans, quite comfortably, so I was feeling pretty confident about the fit. They would probably be a bit long, but otherwise shouldn’t be problematic.

Syo required only one, simple alteration. Tyo’s jeans had been flares, the pattern’s basic shape. Syo’s must be skinny. Yes, my seven-year-old is much more on-trend than my ten-year-old. Which probably says everything you need to know about their respective personalities. So I measured what seemed like a reasonable distance out from the midline of each ankle, drew a line that angled out to the knee, and we folded the pattern in along that line. Just in case Syo wants a pair of flares in the future (not likely, but this is how I roll). Oh, yeah, I double-checked my reduced width with the circumference of her pointed foot, to make sure she could still get her feet through. All seemed good, so we set to cutting it out.

Syo really wants to be able to sew. And cut out fabric. Unfortunately, the fabric shears

The back

are still too big for her little hands. This didn’t stop her from doing her best with the embroidery scissors on the pocket lining, and she actually did an excellent job, but man, it took forever.

Pocket closeup, with fancy stitching.

After much discussion, we settled on stars for the back pockets. The first pair I made Tyo has stars on the back pockets (stars are nice and easy to embroider on stretchy denim when you don’t have an embroidery machine and are too lazy to stabilize your fabric).

This is the first pair of jeans I’ve made since I got my serger back in order, so it was my first chance to remember to serge seams after sewing, but before  topstitching. I mostly managed this. (Note: this pattern only has 1 cm seam-allowances, so you need to serge without cutting anything off or your second row of topstitching may not catch the seam-allowance.)

I like the Guterman jeans thread; it’s not as heavy as their topstitching thread, so

Side view

doesn’t require dirty tricks to get the upper tension high enough on my machine. Still, I can tell that my newish Janome doesn’t quite have the balls of the Grand Old Dame when it comes to stuff like this. The Dame would eat projects like this for breakfast—the Janome I have to baby along here and there. And this is with really thin denim.

I only hit one hitch in the construction, when I realized I’d cut the size Q back yoke (my size) rather than the size K. I think the size K yoke piece may have evaporated… oops. Another reason why I love tracing my patterns. However, I was pretty sure the outer width of the yoke was pretty close, so I just trimmed the wide, inner portion to fit. If there is any actual difference in the size, it’s well within my usual cutting-inexactitude; the side pieces went together just fine.

Calf detail

Oh, yes, and I added in a detail on the back lower legs ripped off from some RTW skinny jeans owned by one of Tyo’s trendier friends: basically a long, thin topstitched dart with a stud at the top of it, forming a very small amount of shaping below the calf. I keep meaning to do this on jeans for myself, but forgetting as it has to be done quite early in the process. It wasn’t as hard as I thought it might be, though, though I suspect my studs are not perfectly aligned.

With the aid of Debbie Cook’s tutorial, I once again achieved near-perfect fly insertion. I actually had double-sided wonder-tape to use to stick the zipper down this time, and it was very nice indeed, although using pins instead really isn’t that terrible either. I did manage to put it in backwards (so girl-version, as opposed to boy/jeans version), but in my defense this is because I was matching the topstitching direction of the crotch to the one I’d already done on the rear of the pants, and I find it pretty much impossible to think that far ahead. The moral of this story is that I should probably construct the jeans front and fly before the back.

My straight-stitch topstitching is getting so good!

Fly... almost perfect.

My around-pocket and around-fly stitching… not so much. Perhaps I am sloppy because they’re for the kid… I’d like to think I wouldn’t wear such shoddy work.

I can’t promise anything, though. I’m pretty lazy about un-picking.

I sewed up the outer sideseams, and Syo came to try them on…

and they were HUGE.

Now, I don’t want to repeat my mistake with Tyo and make pants she’ll outgrow in three months. But these are supposed to be skinny jeans, not tapered-but-baggy jeans. I took in the side-seams by a cm on each side (so 2cm off each leg).

Better, but not perfect. Take another cm off. Hrrm. Well, maybe that’ll do. Keep in mind this is the same pattern as the other pair she’s wearing that are actually getting a wee bit tight. The only thing I can think of is that the first pair shrunk, which isn’t impossible, but I have a pair of my own out of the exact same “denim” that I’m still wearing just fine, and I promise you I definitely haven’t shrunk.

CB belt loops. Can you spot the booboo?

Putting waistbands on kids jeans is so much more relaxing than putting the waistband on a pair for me. For one thing, I use the pattern’s straight waistband piece, instead of my own contour band (coopted from the Ellen pants, if you must know). I also didn’t bother with interfacing. The only thing to remember was to put in buttons and buttonholes for the attaching of the buttonhole elastic. I did have one problem with the sizing, as my waistband wound up being too short to centre the CB seam on the back and cover the fly-extension. Maybe I’m doing something wrong with the fly extension, although what I end up with seems to be the same as what I see on my storebought jeans, so I don’t know what. Rather than fuss around, I gave in and put the CB seam of the waistband about an inch off of the true CB seam. It’s a problem, but it’s mostly covered by the belt-loops anyway.

Her coolest pose.

Finally, all that was left was to hem them to an appropriate length. This is always dicey with children, and skinny jeans are even worse than flares in this department. In the end I opted for a length that would be floor-brushing in socks if they weren’t being pulled up by the front of her feet, and just folded the excess 2″ of fabric under, topstitching three times to make sure it’s well in place (this mimics the three rows of topstitching on the top of the pockets, so it’s a design feature, right?). In theory this means that when she hits her next growth spurt and grows three inches by summer, I can let out the excess length. In practice, we know this’ll never happen, but hey, allow me my fantasies, all right?

Also, Syo was very helpful in the hammering of rivets, and only hit my thumb once. And Steph, the awl from your sharp and pointy giveaway kit is divine. How on earth did I live without it?

So that’s one more project down on the “madly off” list. Which leaves, mainly, shirts for my hubby and those skinny cargoes! If I can get the neck alteration figured out for the hubby’s shirt before he abandons me, I can putter away at that until he gets back. And I think I’ll take a stab at the drafting for the cargoes this weekend, if I can find paper I like for it. I’d rather use craft paper than tissue paper for stuff like this.

14 Comments

Filed under Sewing

A loud little shirt

I think my eyes are bleeding...

Well, Syo’s request is complete, though I think I’ll be seeing after-images of this print for days. Overall, it went fairly well. Unsurprisingly, the shirt pattern I used as a base had way too much ease. It was designed for wovens, so I did go down a size, but evidently that wasn’t enough. So I took out about an inch of excess from each side and under the arm to get it to a fit she would approve. Fortunately with this design I didn’t need to worry much about what that would do to the armscye.

There were the usual technical glitches that crop up when I wing it. I decided in

Can you spot what's wrong here?

advance that I would sandwich the front of the straps in between the drape and the shirt bodice, so that it would be firmly and neatly attached with the end hidden inside the double-layer drape (I didn’t want to attempt to do the back of the straps this way as I was pretty sure I would mess the length up). However, my first attempt at this fabric sandwich resulted in the picture at the right. That’s the straps peeking out from underneath the drape. Not going to work. So I had to pick them out (which took forever) and re-position.

It turned out that the way things rolled, the under-layer of the drape needed to be shorter than the outer, so I had to trim it off, after.

A satisfied cutie

Then, my first attempt to sew the lower edges of the drape together to make a nice, enclosed piece (except for a small opening that had to be hand-finished) failed, leaving me with a mobius-strip-like wad of fabric that couldn’t be unravelled. So I cut off the seam on that (no way was I unpicking that much), which cost the drape some width. Ah, well.

My next attempt, fortunately, did work. I tried to take a picture of what I did to show it but it made no sense to me looking at it after, so I’ll leave it to your imaginations. Unfortunately, pinning wasn’t really an option for this method, so combined with the somewhat irregular trimming and cutting, the drape didn’t end up all going together as flat and smooth as it might. Ah, well. The look’s not bad (perhaps I should’ve rotated it all an inch, that way the pulling would look more intentional?)

The hems were kind of my waterloo. I used my latest double-needle. Can we say

Side view

“tunneling”? My usual trick of ironing wash-away stabilizer into the hem before sewing failed because the stabilizer would not stick to this slippery swimsuit-feeling fabric. To make matters worse, the serged edge I put on the bottom of the shirt (to neaten the inside of the hem) kept squishing up between the two needles, making the tunneling between them even worse. And while this wasn’t the wiggliest knit I’ve ever worked with, it is the wiggliest slippery knit. So don’t look too close at the hems… it ain’t pretty.

And no, I didn’t make her a matching skirt. That’s Tyo’s contribution so far, turning the remnant of the fabric into a wrap skirt.

Also I couldn’t find my twill tape for putting in the tag, so I substituted a bit of pink seam-binding from one of the vintage sewing notion scores. It seems to be working, though we’ll see how the transfer adheres after washing (I find it sticks better to the textured twill-tape than to the satiny ribbon I’ve sometimes used).

Straps and a cute little label

Now Tyo can’t decide if she wants a shirt like this, or a sweater like my Kimono Lady Grey (which she’s been stealing on me, by the way). I told her I’m not making her any sweaters unless she agrees to hand down some of the myriad of bunnyhugs (hoodies to the rest of the world) she’s been hoarding for the last few years—y’know, the ones that don’t cover more than half her forearm but she somehow can’t quite give up?

The construction is a mix of the old stretch stitches on my regular machine and the serger; mostly depending on how much control I needed at any given point. Perhaps someday I’ll be able to construct things entirely on the serger, but not yet.

Next up: more fun with Lekala patterns (and unfortunate fabric choices… sigh…)

13 Comments

Filed under Sewing

An introduction, and more fun with drafting!

My machines

I would like you all to meet my long-neglected serger, Janomelock JL-603A, to be precise.

She is no beauty. She has neither the range of features of a new serger (4-thread setup, differential feed, easy to thread) nor the charm of a truly vintage machine (though as sergers go, I guess she’s pretty vintage). I’m guessing she dates to the late 80s or early nineties, when my mother-in-law used her to create figure-skating costumes for my sister-in-law . I wrangled her out of my mother-in-law five or six years ago (possibly to my sister-in-law’s disappointment, although she got the regular machine and doesn’t use it as far as I can tell). Whatever manual she came with has long since been lost, and my efforts at finding one online have come up completely bust, so I really have only the sketchiest idea of how to use her. In her favour, she serged just fine for me for the first three or four years I had her, even though I didn’t even know how to thread her properly for most of that time.

Then, about two years ago, I tried serging without the blade. I can’t even remember why, except that I knew the blade could flip up and I wanted to see how it would work. It worked fine, although there’s not a lot of room to the right of the needle/blade to maneuver fabric, so it’s really not much use. Then I went to put the blade back down and serge something normally.

The blade is stiff and kind of fiddly. I somehow put it down halfway.

Everything locked up in a terrifying grinding machine-screech.

I freaked out, ran around the room, eventually figured out the problem and got the blade in place properly, but the damage had been done. Everything sewed just fine—but the loops didn’t form. One of the loopers was hopelessly out of position.

And there she sat for about two years. Intermittently I’d take her out, vainly hoping that by re-threading yet again she’d magically recover. It didn’t, of course, work. Finally, a few weeks ago, I bundled her up and trotted her down to the sewing-machine repair shop. And there, for the low, low price of $100, they not only revived her, they threw in a package of needles.

This would be a bit more thrilling if I hadn’t seen a nearly-new, barely-used serger on Kijiji a little while ago for only $150. But anyway—

I can has serger! Now I have no excuse not to finish my seams. My knit tees can be

Syo's shirt

that much closer to the holy grail of “Ready To Wear”. And, I have the perfect project to try her our on:

Syo wants a shirt like my Frankenpattern shirt. I was not super-keen on the off-the-shoulders look for a seven-year-old (ok, largely because she wouldn’t be able to wear it to school), so with some back-and-forth, we settled on the design on the right, which is off the shoulders but with wide straps. She requested the short sleeves, as she always gets too hot with long sleeves (weird child).

I hunted through my rather limited stash of children’s patterns and found an early 90s-cum-50s ensemble that includes a fairly basic shirt to use as the block. Drafting the “cowl” wasn’t too tough (just a bunch of measuring off the block), assuming it ends up looking vaguely like the picture. The fabric will be this crazy print (to the left in the picture) that Syo picked out from the bargain section a while ago.

Syo's cowl pattern

In sick-baby news, Syo is much recovered, Tyo is sick and moping but not actually vomiting, my stomach is unsettled but that might just be from sympathy. So aside from cramping my style, all is well.

21 Comments

Filed under Sewing

Mellow yellow

Syo's Yellow Sundress

Back around my birthday, when I was feeling splurgy, I let Syo pick out a metre of fabric from the bargain section at Fabricland. She chose a soft, super-stretchy, lycra-y border-print in yellow stripes trimmed in flowers. We got home, and she picked out a pattern, New Look 6195, a kids’ sundress Ip icked up at Value Village. I settled down and traced out a size 7 (length 8)… and there the project sat, although the fabric got plenty of use as a blanket, veil, fairy wings, shawl, cloak, cocoon, and pretty much anything else a creative seven-year-old could do with it.

Dancing

This afternoon, however, Tyo had a friend over, while Syo did not. This (like most of their interactions) was threatening to bring on World War III, so I suggested we make up the dress. This was possibly even better than pissing off her sister, so Syo agreed.

Now, as usual, I am incapable of actually following the instructions (or good sense). The pattern was for a woven. Syo’s fabric is stretchy. VERY stretchy. On top of that, it is one of those pesky border-prints with the border on, y’know, the side. So the only thing to do was have the pieces go crosswise on the fabric. Creating, y’know, maximum vertical stretch. Exactly what you want in a dress.

Nonetheless, we bravely laid it out (man did it shrink a lot in the dryer, too, this took some ingenuity), cut our pieces, ironed interfacing on to the front facing, made the straps (Syo turned them inside out herself. It’s much easier to do in a knit, isn’t it?), and got to work.

It’s a cute sundress pattern. Simple. Not quite sure what purpose

Twirling

the back seam serves… it has a little shape but really, given the overall A-line of the dress, why bother? They have a very nice technique for sewing the side seams and facing all in one move, which gives you a nice finish and means that there’s absolute no chance to adjust the fit of the elastic before it’s sewn in completely. Which, of course, was too loose being designed for a woven (and probably with too much ease in the original pattern, too) and probably a little big for my rather petite seven-year-old at the best of times.

And then, there is the facing.

Now, I’ve heard facings are a bad idea in knits. As a result, I’ve never done them. This time, I decided to follow the pattern. Well, as you can see, the facing is a problem: it’s showing through like crazy. It was also turning out a bit, though you can’t see this in my rather blurry photos. I have since top-stitched it down at 5/8″ in (to match the elastic casing in the back). This should take care of the roll-over, and I will probably trim the bottom of the facing to match

Front with topstitching

It’s a fairly slapdash effort. Aside from the fudged facing, the elastic back was (inevitably) too long so I took a two inch tuck in it at the centre back, which is kinda bulky but can theoretically be released in a year or two when she grows into it. I left the selvedge at the hem, which has a bit of a lettuce-leaf look that I like. If it doesn’t work out, I may actually lettuce-leaf it at some point, but for now it’s fine. I eyeballed the ties, and it shows, but only if you look close ;). The seams are also a bit puckered, but hopefully that’ll soften up with a wash. The back hem tends to sag quite a bit, I think partly due to the halter cut itself, but certainly not helped along by the heavy, drapy fabric.

Nonetheless, her Sevenness is mighty thrilled. She might even get a chance to wear it, as the forecast is

Sundress back, showing tuck in elastic and the Facing of Doom

looking above-seasonal for the first time since August. We may even make it above 20 for much of the week!

In Self-Stitched September news, the weather has me HAPPY. Syo took the pictures, so they’re not full body, but I promise you those are my blue Jalie capris. Yay! I am getting so darned sick of the two other pairs… 😉

Mmmmmm

Top: Mannequim cowl top
Bottoms: Jalie 2908 capris

Sun, sweet sun

11 Comments

Filed under Sewing

Photodump

The kids’ jean jackets are done! In all their pain-in-the-butt imperfect glory. Be amazed. Be awed. Rejoice (with me) that my fingers survived all that snap-setting.

1 Comment

Filed under Sewing