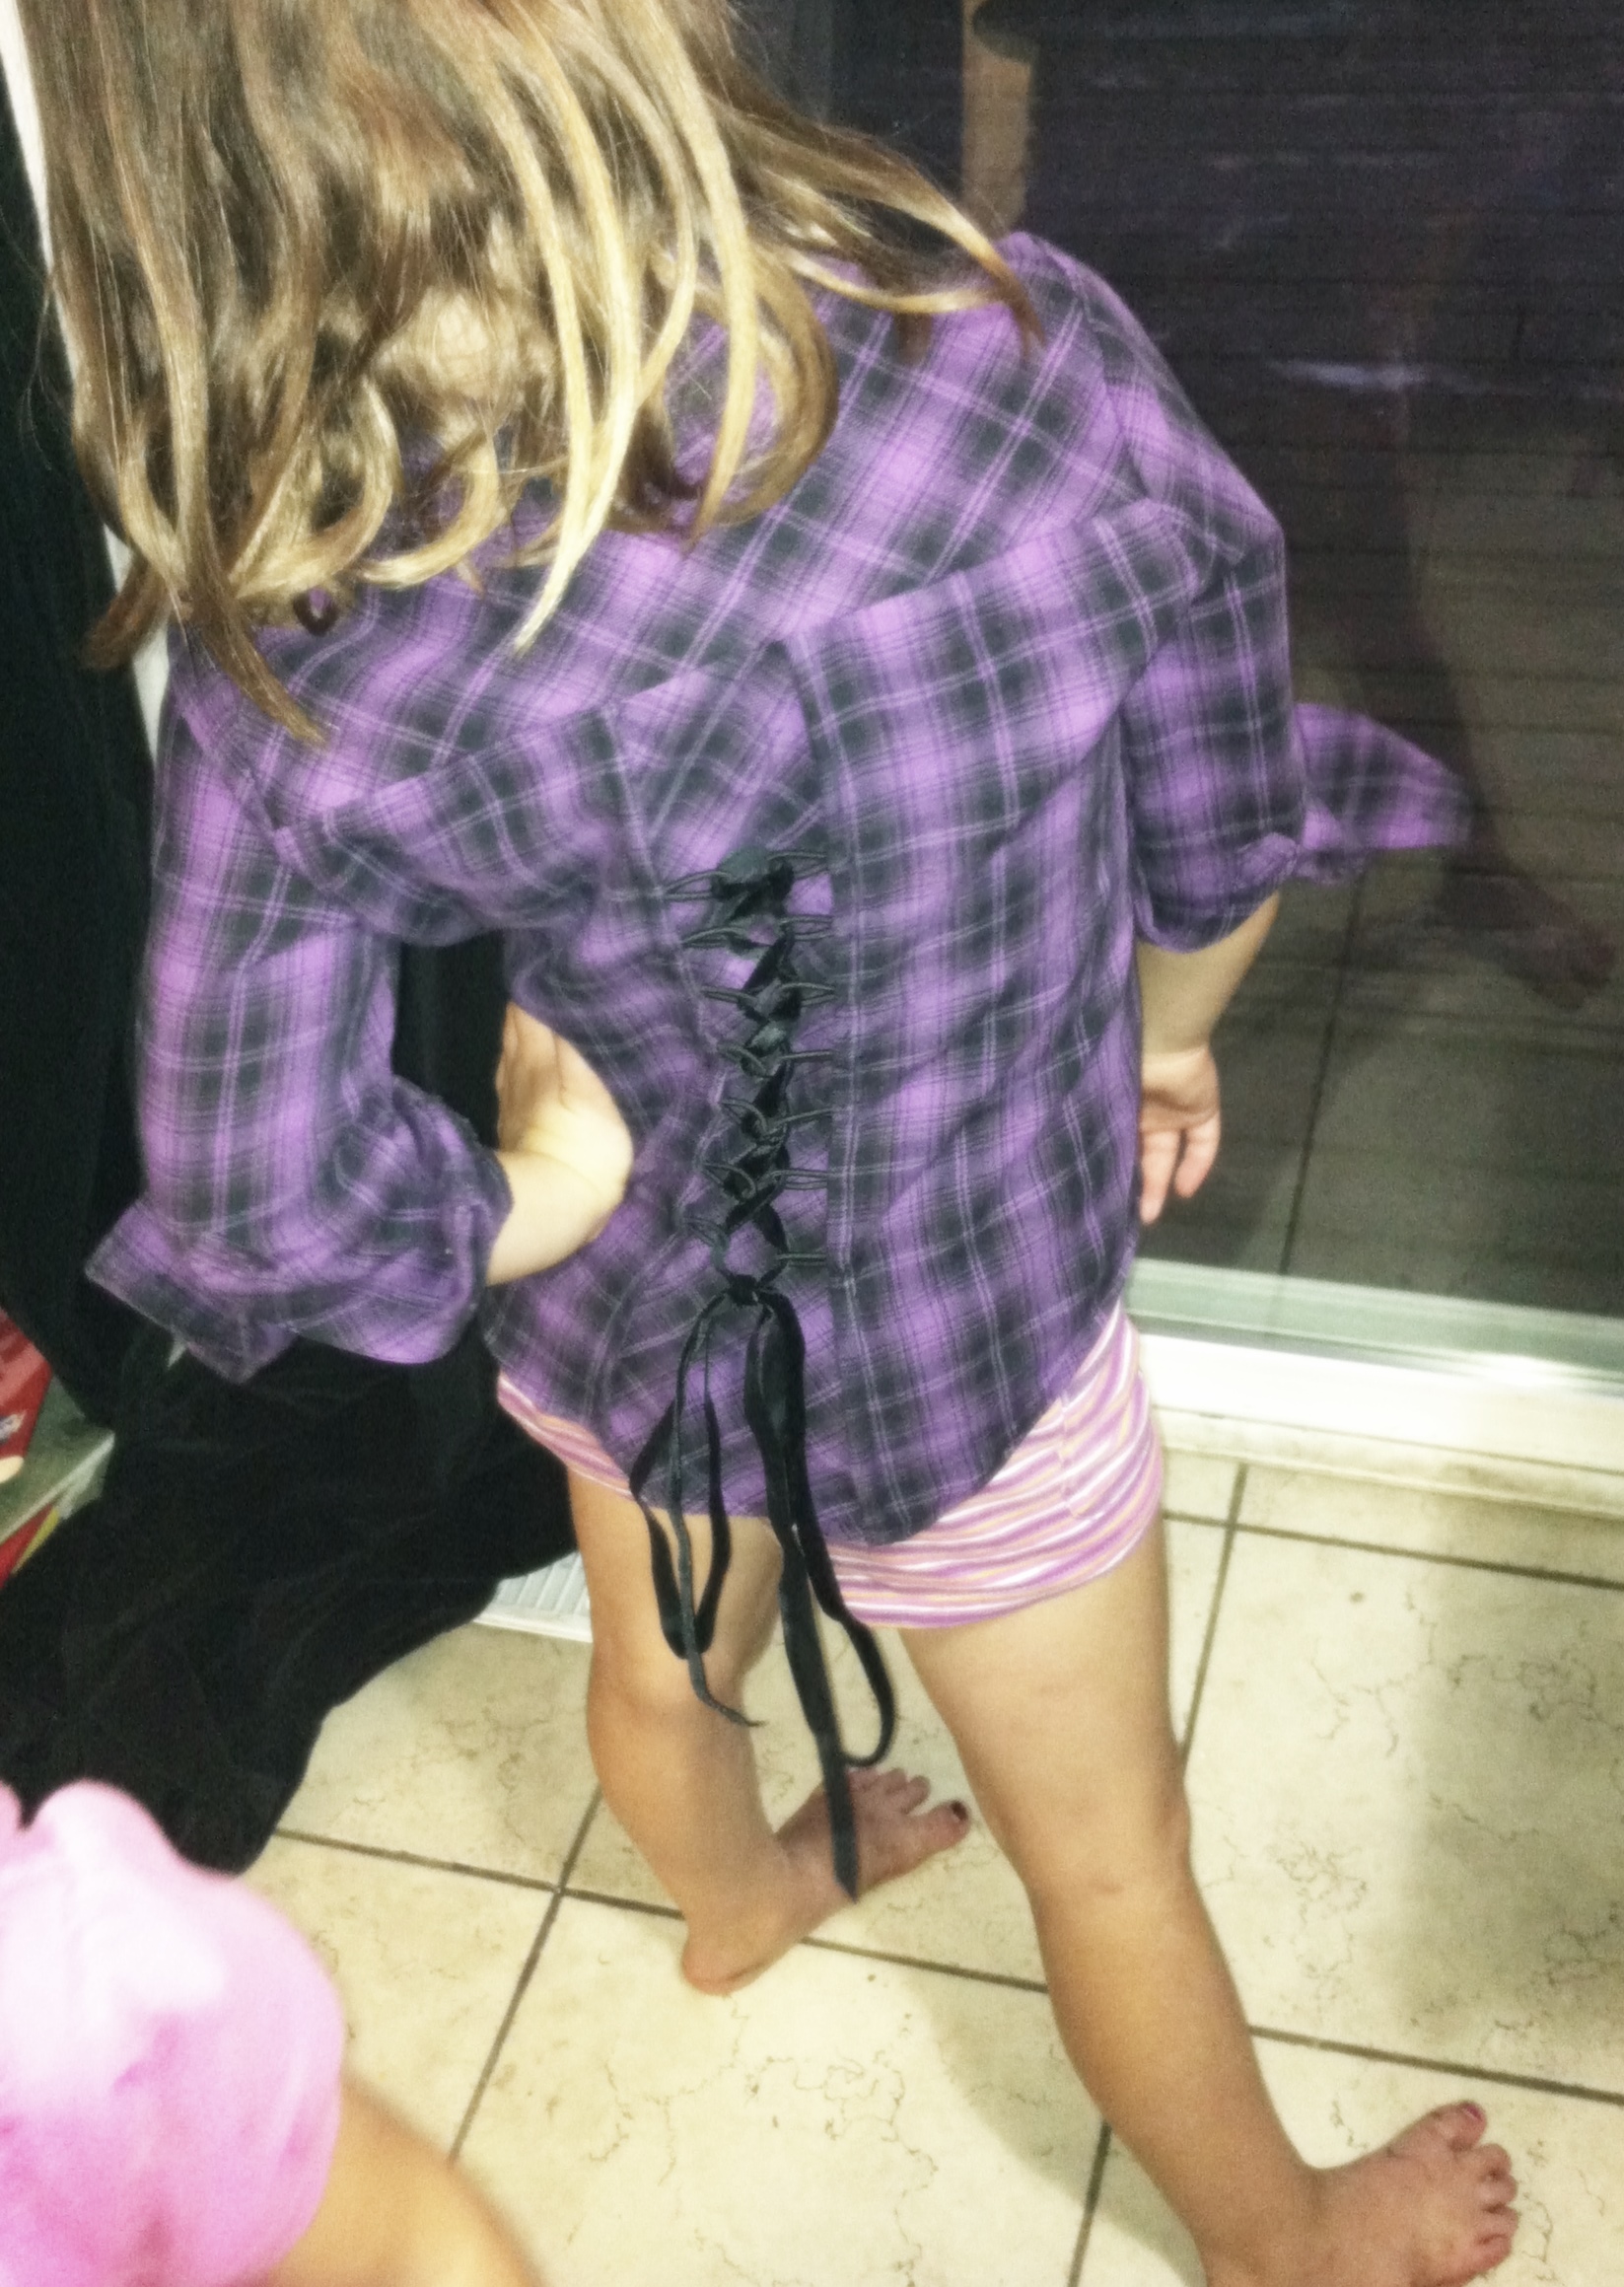
Tag Archives: finished projects

Not Worth Blogging About?

Hrmm.

Ever make things you’re just not sure are worth writing about? I like to document my flops alongside my successes, (although I’ve noticed that it often takes me a while to realize what is actually a flop vs. a success), but I’m talking about throwaway pieces. Stuff you just knocked together because it would serve a purpose (or because your kids were bugging you, as the case may be). It’s sloppy and half-ass, simple, and maybe the fabric just drives you nuts.

No? Just me?
More excessive cute

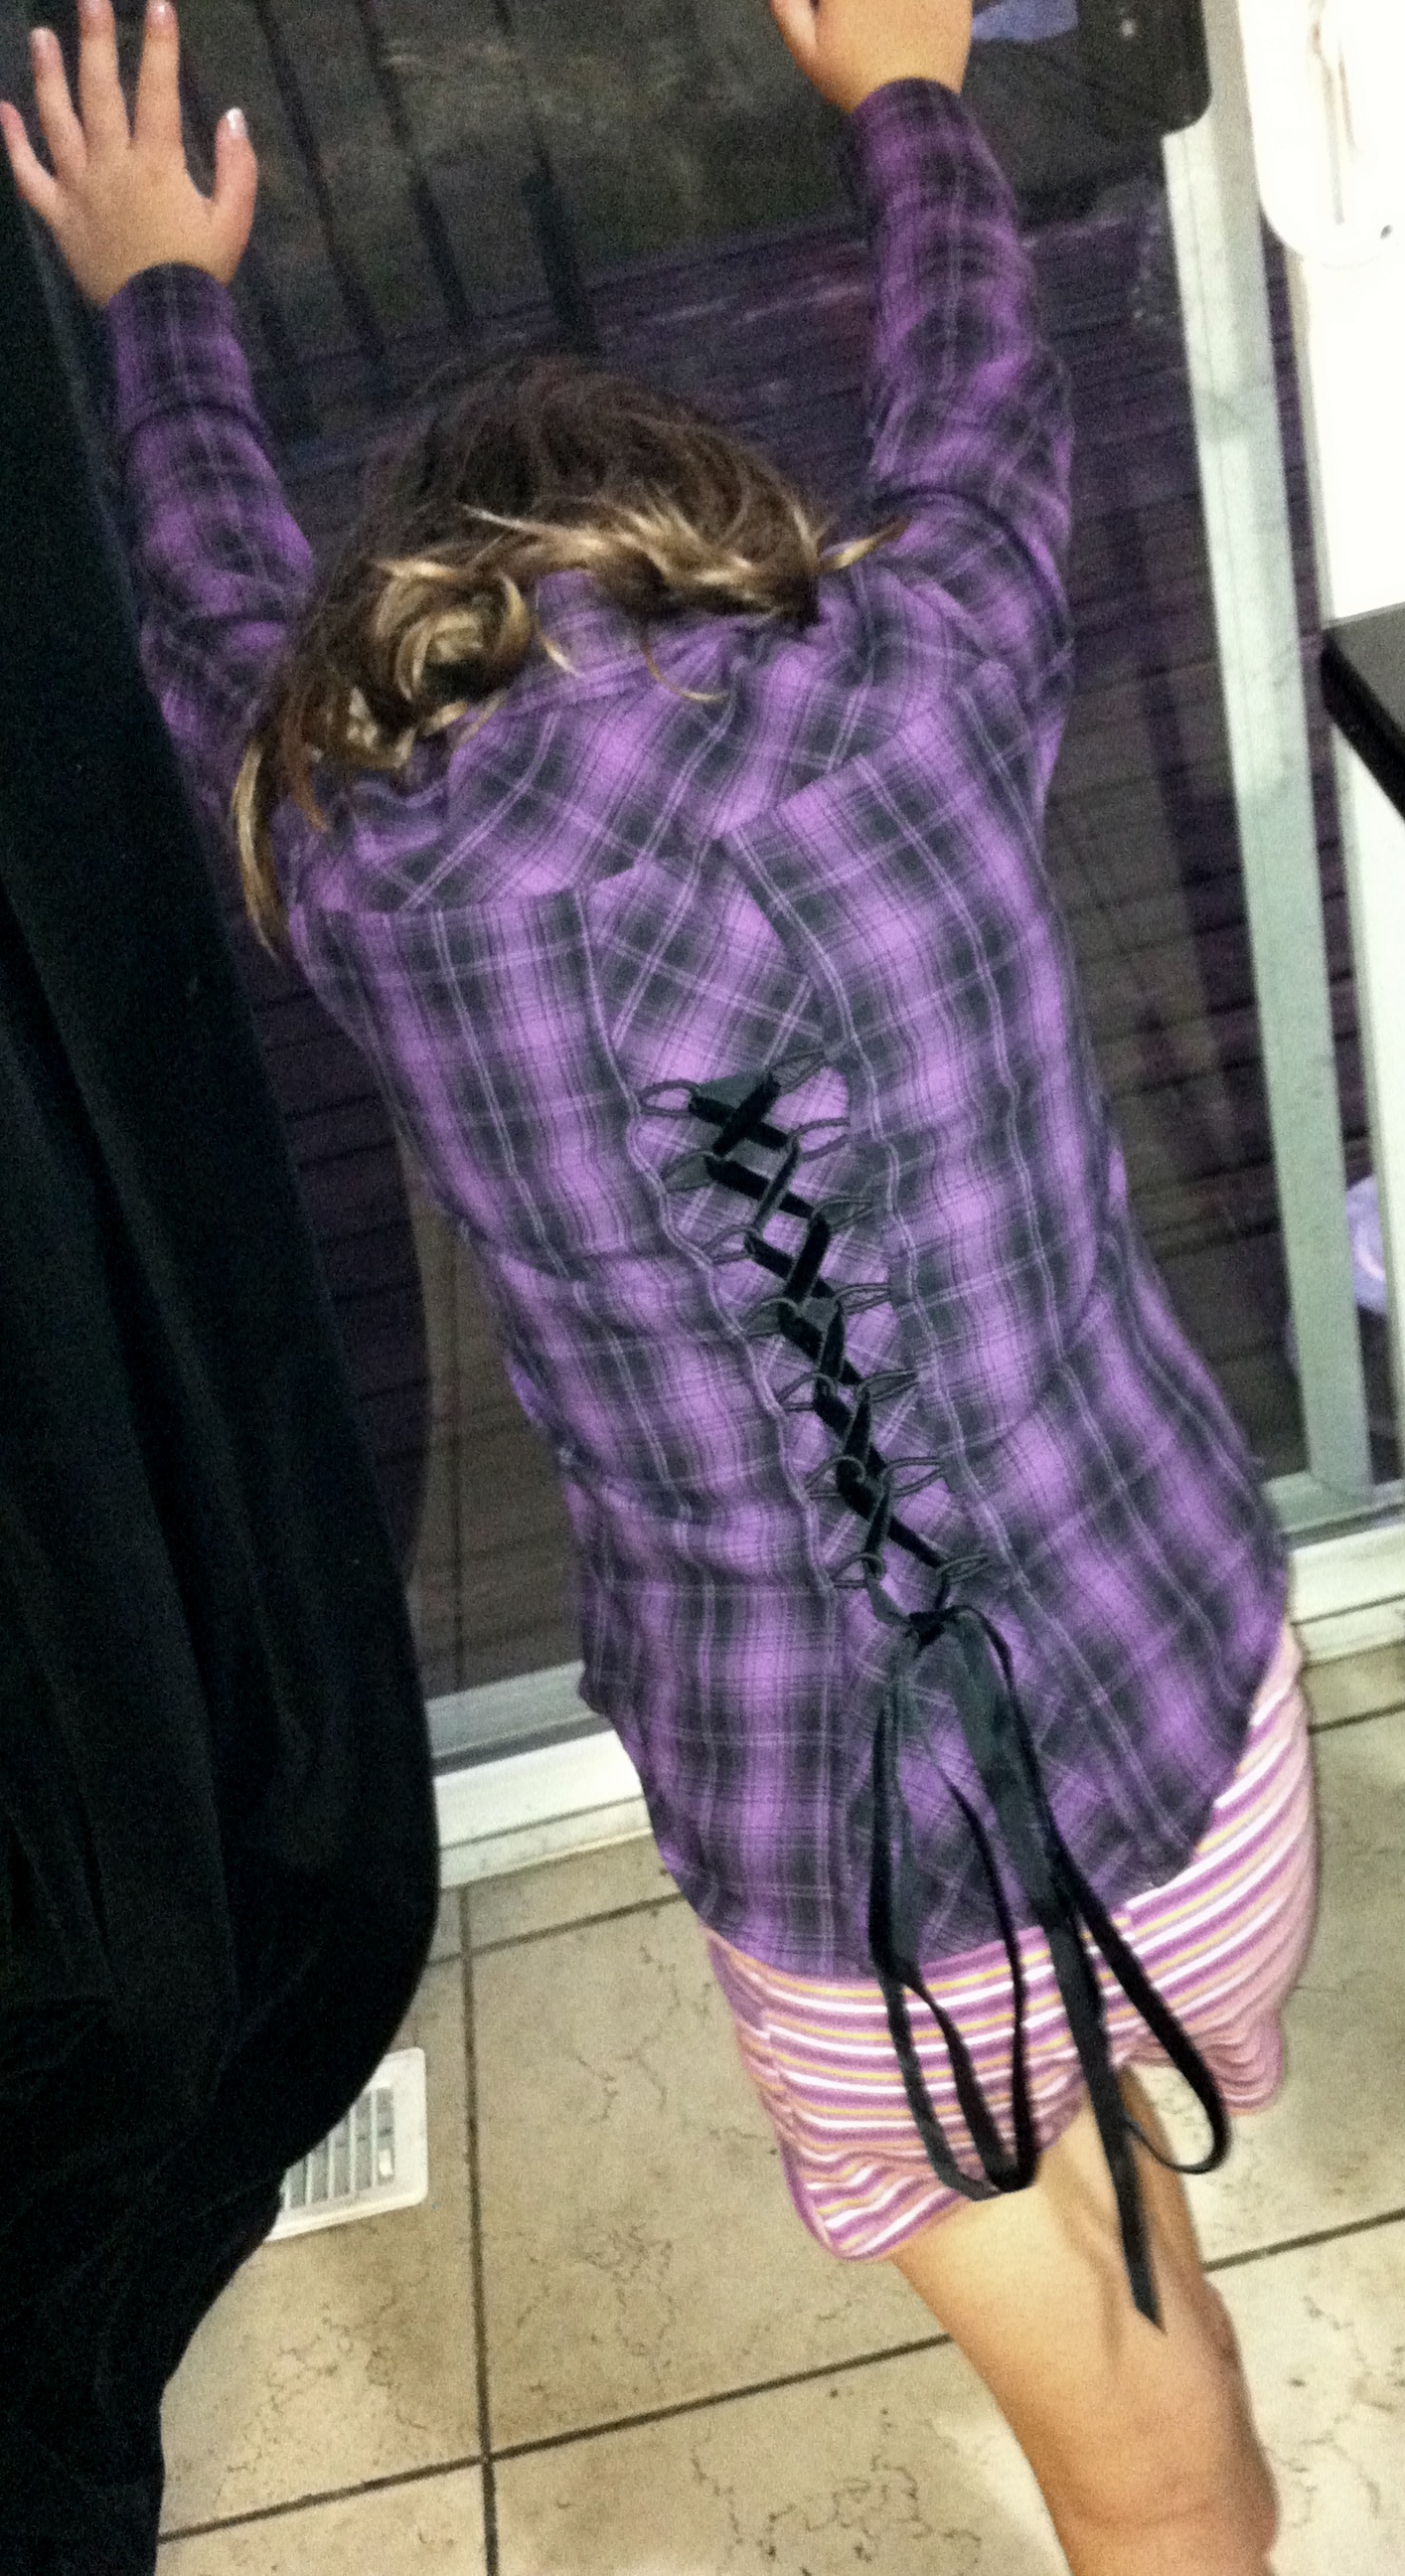
This pair of tops for Syo falls into that category. I’m writing about them only because, well, I have nothing much else to write about right now (unless you want me to start in on the weather again 😉 ). I keep looking at my Lonsdale pattern. I ALMOST got the pieces laid out yesterday, but ran out of time. Anyway.

This fabric is left over from one of the cowl-neck iterations. It’s got a lovely, soft drape, an interesting knit stripe, is wriggly as hell to cut out (we pinned it to the carpet), tends to grow like crazy when handled, and a dull colour that just irks me. It looks like the colour the block of white paint turns when everyone’s been mashing other colours into it. Hmm, I may have been spending too much time entertaining small children lately…

Syo was inspired by the fabric (she does love wriggly knits >_<) and Babydoll’s dance-rehearsal outfit from the movie Sucker Punch. Yes, we probably do have questionable taste in what we let our children watch. At least it’s with parental guidance.

There were actual patterns involved!

In particular, McCall’s 4821 (View B, the one-shouldered top) and Kwik Sew 2448, the long-sleeved tee from view A. What do you mean it doesn’t look anything like it? Both of these are thrift store finds, although I don’t think I’ve blogged either of them before.

Sassy Girl

Ok, so let’s start with the McCall’s pattern. This is another of those “Sassy Girl” brand of patterns, illustrated to pique the imagination of any little girl. I used another of these for Syo’s vest. They’re adequate patterns, I guess, but I find them really simplistic, to the point where I suspect the final result is likely to be compromised. I haven’t read the instructions, so I can’t really comment on them. For a simple knit top like this, though, I guess there’s not going to be much to the pattern in any case. The smallest size in my envelope was a 7, which is borderline too big for Syo; given what I know about this fabric—it GROWS—I figured we would need to narrow it a fair bit.

McCall's 4821

I took out something like 4cm of width and then re-drew the front and back top curves. I didn’t adjust the length at all and it’s a bit short, but that may be a) deliberate and b) an effect of the prodigious width-wise growth of this fabric. Because the fabric was so thin, we double-layered it, which made finishing the top easy. I used clear elastic to reinforce the neckline side of the strap, and the small shoulder seam, but not the arm-hole seam. I’m glad I did, as I think it would be quite saggy without. We haven’t done the hem yet, but probably will at some point, although I don’t think twin-needling will hold up terribly well on this fabric.

Back view

My serger tends to turn soft, light fabrics like this into ruffles, so we sewed it all on the newely-serviced Janome, which worked like a dream. Syo would’ve stitched the entire thing if I let her, but I’m not quite sure she’d be up to keeping an eye on the seam allowance width and the clear elastic at the same time. She did quite well on the armscye seam, though, even without pins, and would’ve done the side-seams but it was the end of the night and we were in a hurry.

Side view

I think we just about nailed the sizing, actually. Which means if I use any other fabric in the world it’ll be way too small.

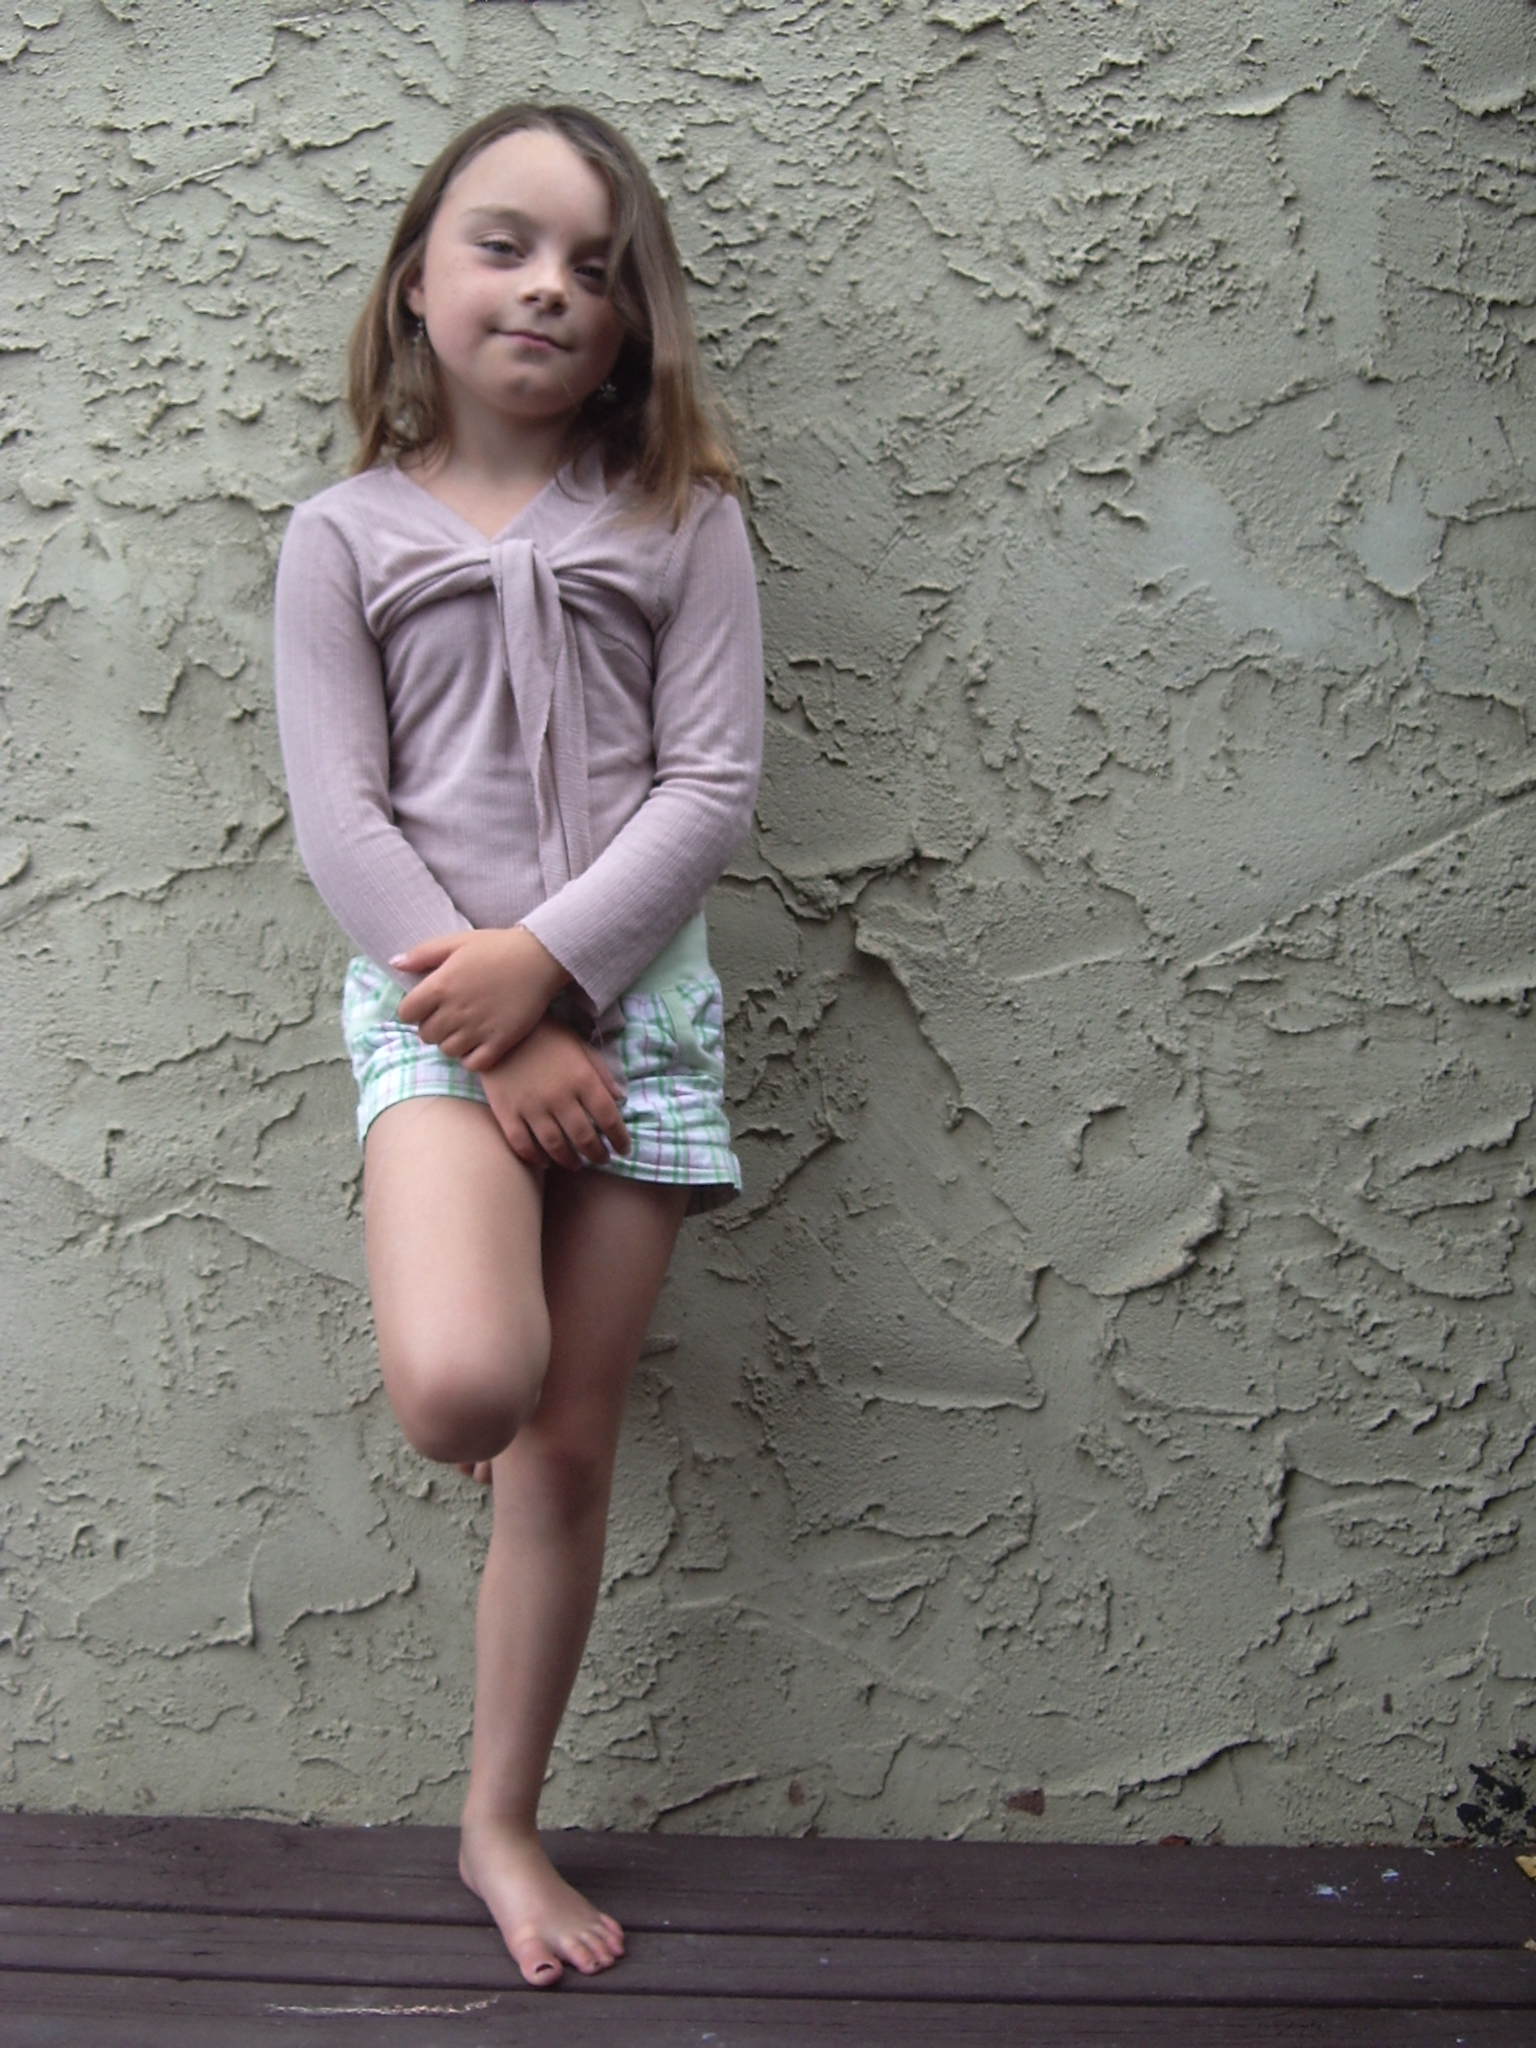
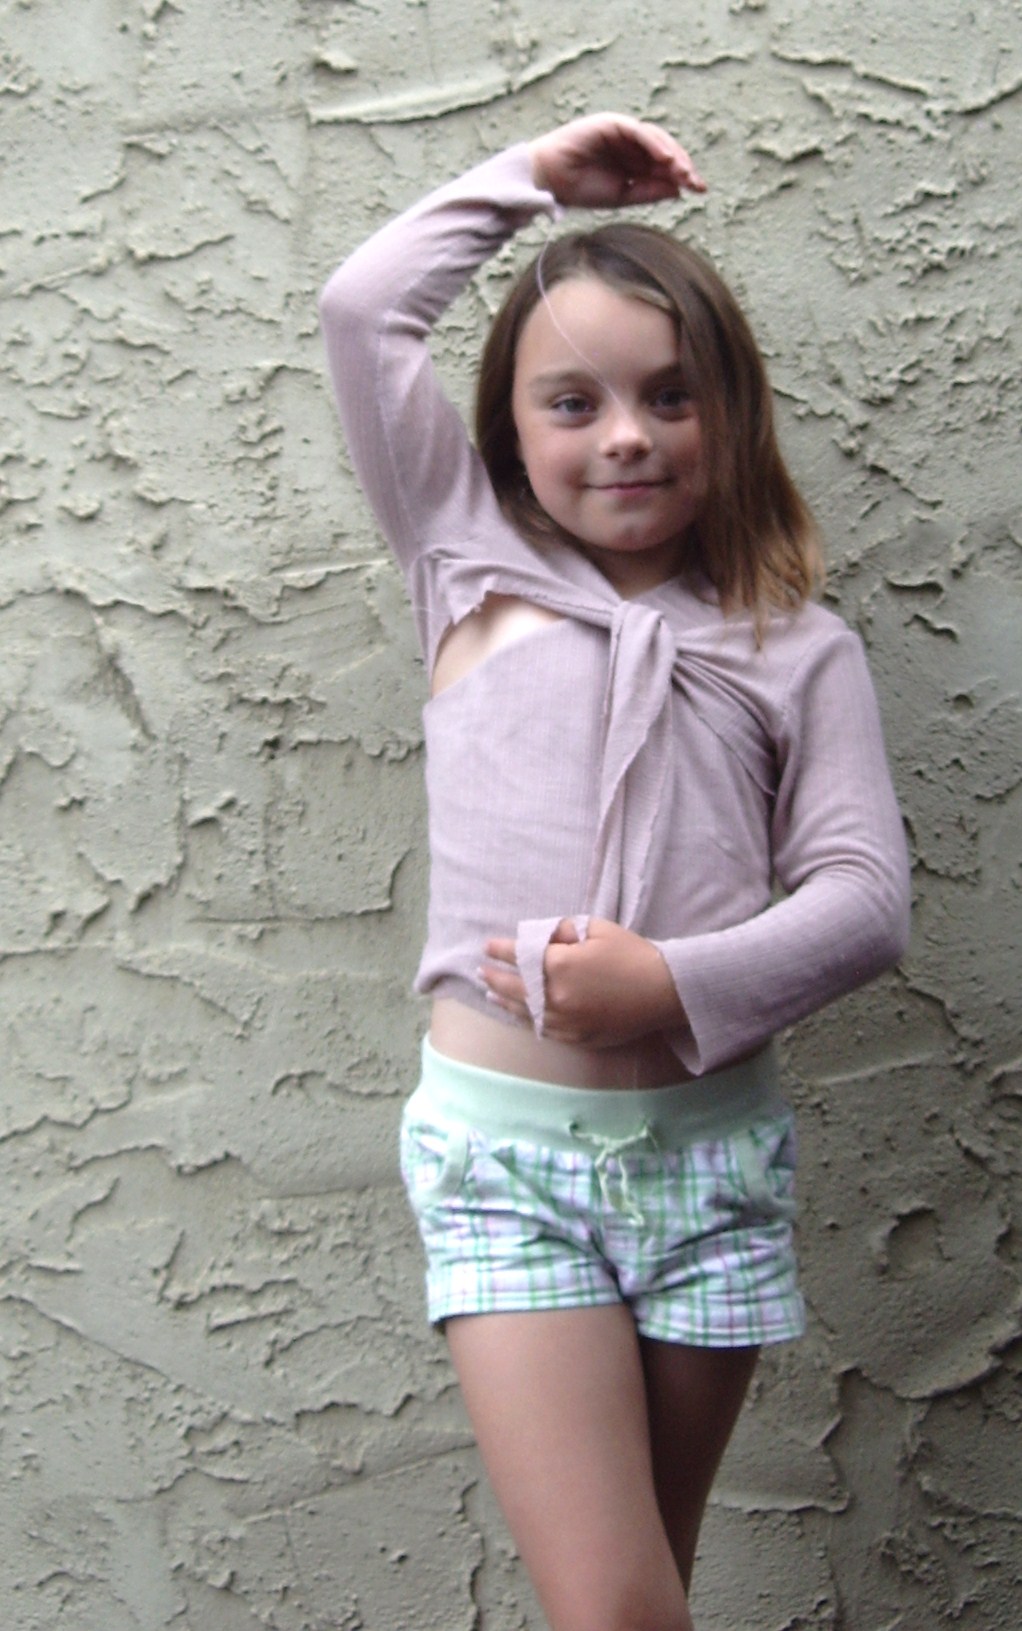
Little tie-sweater
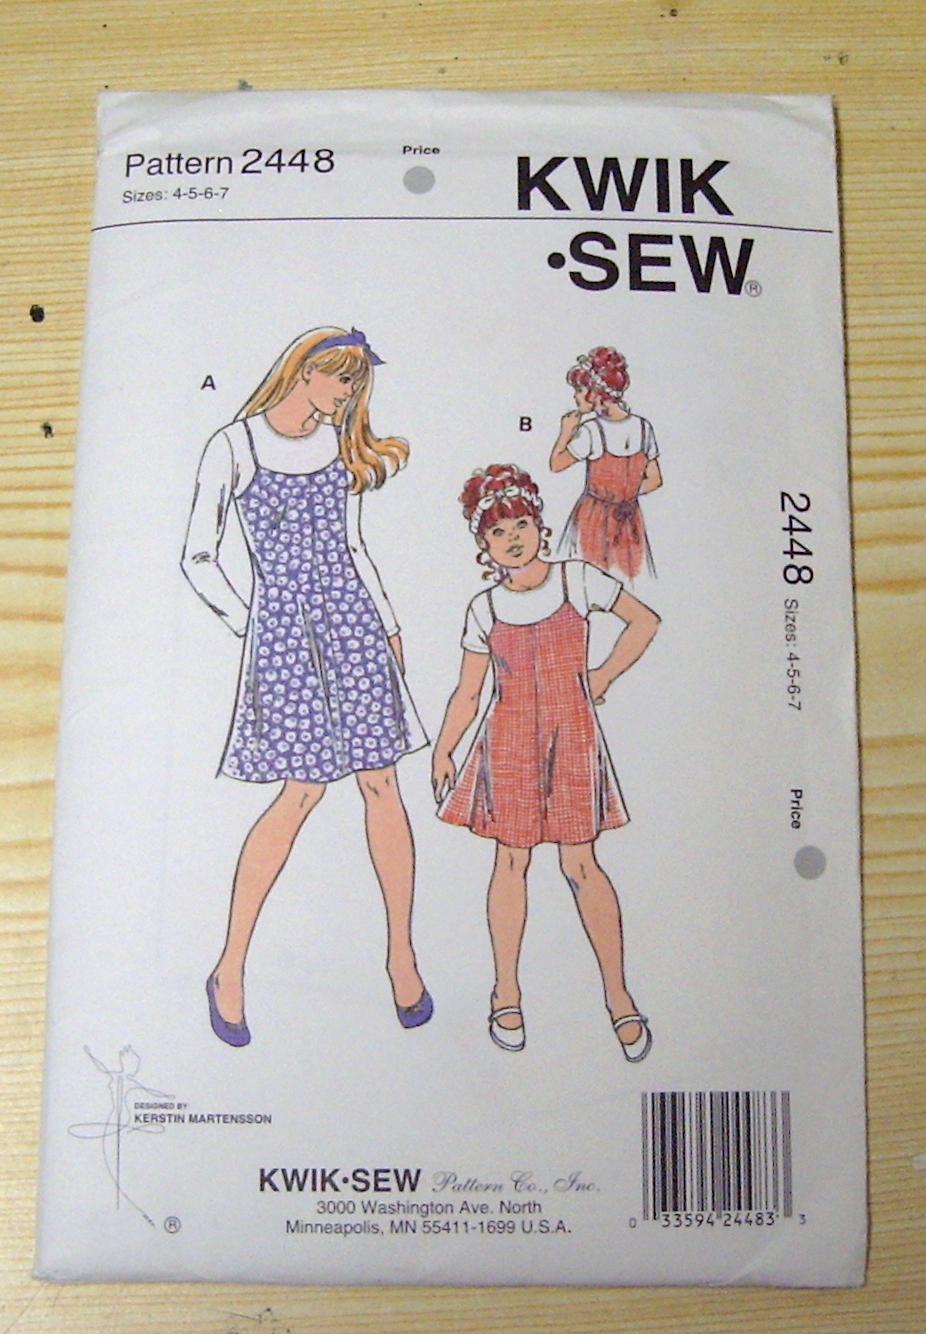
Kwik Sew 2448

The little tie-sweater is based on Kwik Sew 2448. What, you don’t see the resemblance? Use your imagination! Actually, I traced off the pattern pieces for the long-sleeved version of the top, which is an utterly ordinary knit tee pattern. I cropped it short at the “lengthen and shorten here” line, which wound up being a bit short (but again that might just be the fabric), and turned the cut-on-fold of the front into an extended tie.

Syo originally wanted 3/4 length sleeves, so I shortened the length of the arm to a size 4 (I was tracing the size 6). They still turned out mostly full-length, which she says she is liking for now, but we may very well shorten them in the future.
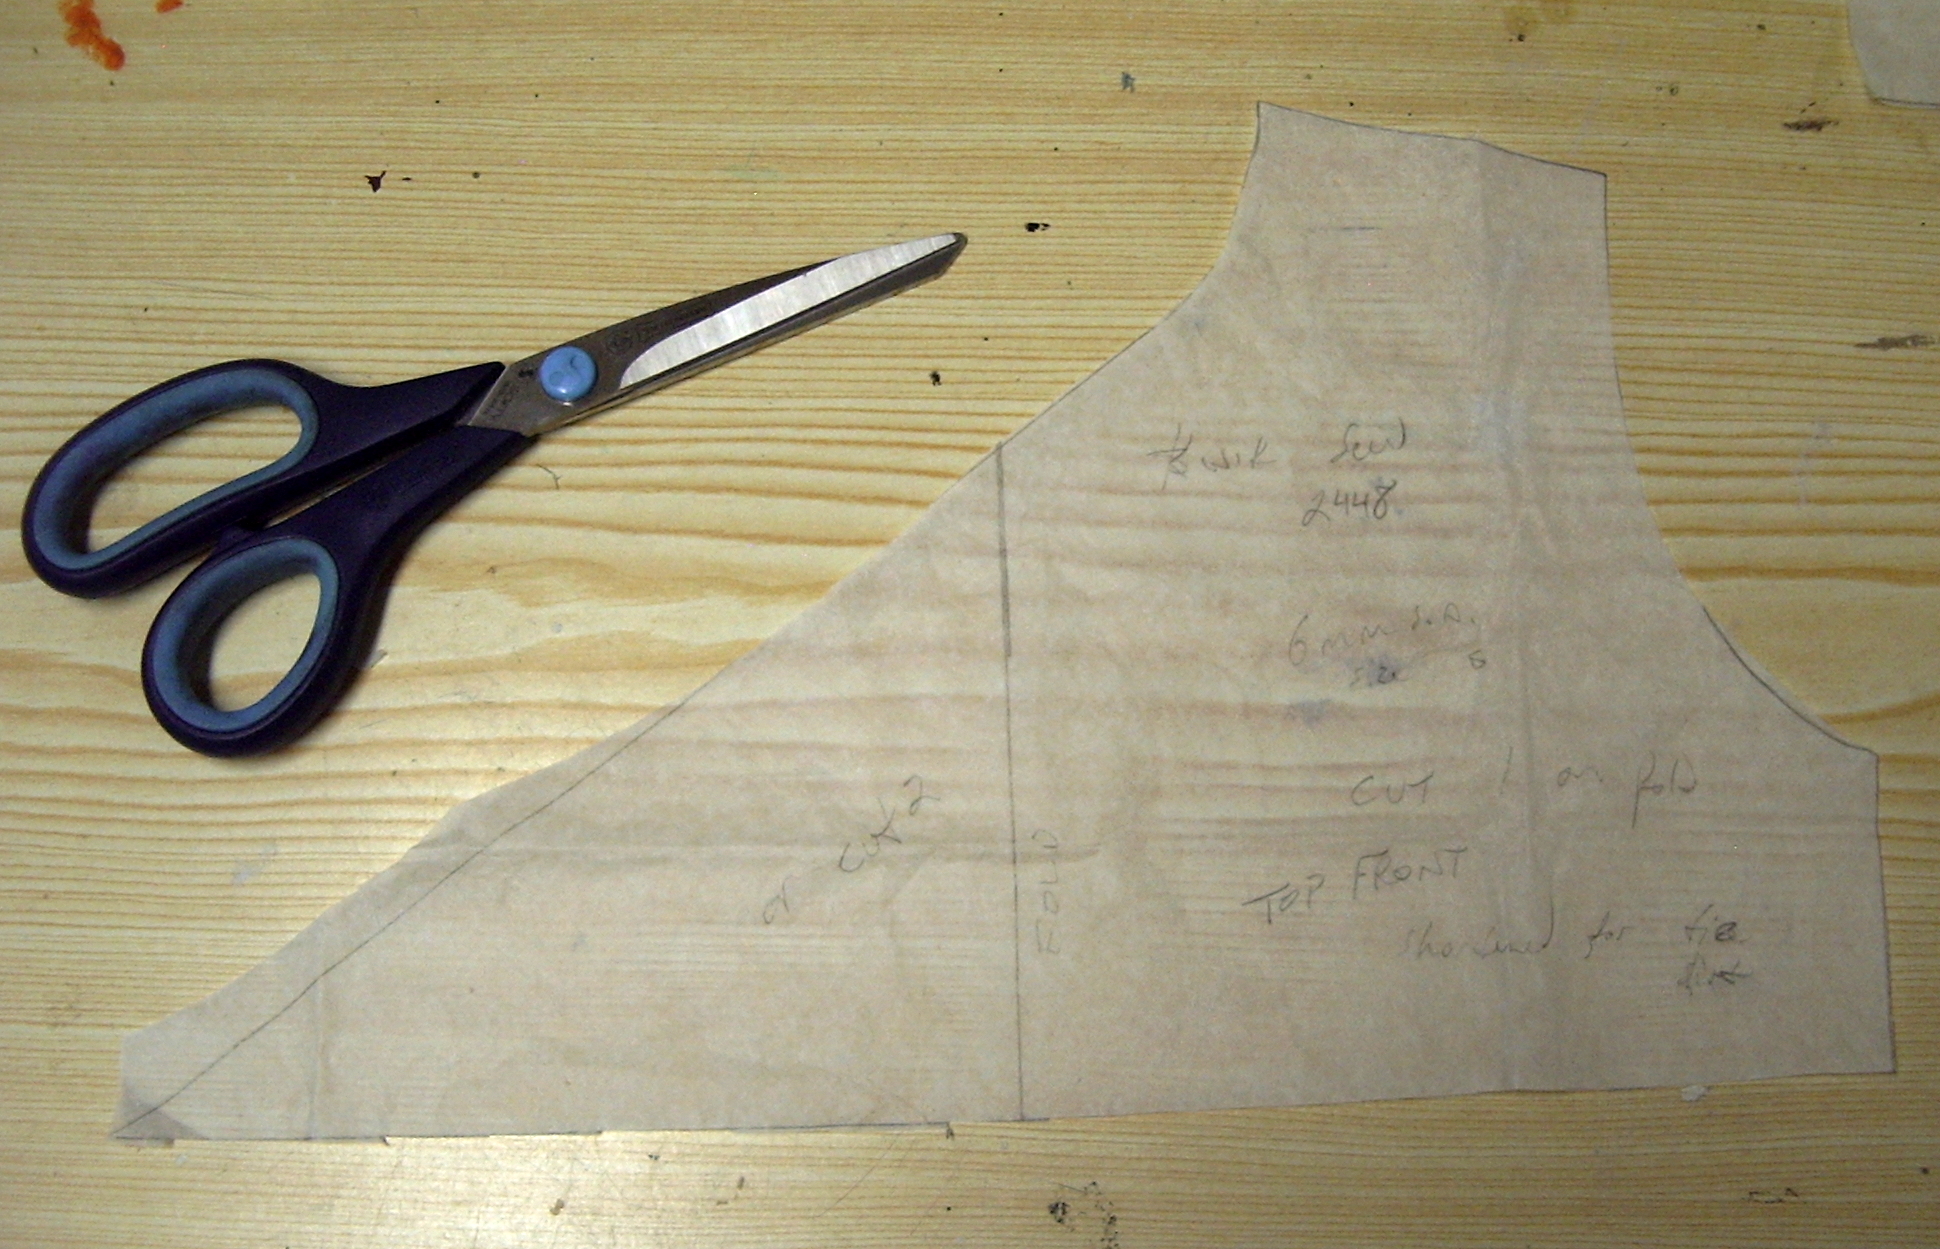
Tee front pattern piece, altered to tie. We are so precise in our cutting around here...

I’ve noticed in my one Kwik Sew pattern that has an adult-sized tie top, the ties angle down considerably, and looking at how it sits on Syo it seems like this would probably have been a good idea to emulate. (I might have paid closer attention but on inspection the only pattern pieces actually in the envelope of the adult pattern are for the leotard. Poop! So I’m going by the illustration of the pieces on the instructions)

Syo stitched the underarm seams for this one. Kwik Sew uses 6mm (1/4″) seam allowances, which are a bit harder for her to maintain, at least in this fabric, than the wider ones on the McCall’s pattern. I used clear elastic to stabilize the shoulder. Considering how this fabric grows (especially as I didn’t use anything to stabilize the neckline) this seems like a very trim-fitting tee pattern. Which I guess makes sense for something meant to go under a dress.

In any case, Syo is, at least momentarily, satisfied, and this godawful fabric is out of my stash. There was a very tense moment while sewing when Tyo nearly started WWIII over the fact that Syo was getting two tops in a row, but it was headed off (grudgingly) when I pointed out that these two tops together, including tracing, are still less time-consuming than Tyo’s last shirt.

I think it’s time to make something for me, don’t you? I do like sewing with my kids (as opposed to for my kids), but I think I’m ready for something for me. 😉

15 Comments

Filed under Sewing

Tyo’s Too-Tight Top

Tyo's Too-Tight Shirt

So, just for the record, when you have a child who’s 140 cm tall, and the pattern is for a child 120 cm tall, even if the chest measurements match, it’s still going to take more than just lengthening the sleeves to get it to fit.

Just so you know.

Tyo being Tyo, the shoulders fit pretty much just right.

Now, before I get into the details too far, you will have noticed that the exuberant photo above is, above all, of craptacular quality. Guess what didn’t make it home from vacation? Yup, my camera charger. Blog, meet iPhone photos. IPhone photos, meet blog.* Here’s hoping my inlaws are better at mailing stuff than I and can be bothered to mail it back to me before we go back for Christmas…

Tyo's shirt. She is sad it doesn't fit the way it's supposed to. She'll probably wear it anyway.

For this reason I haven’t got much in the way of detail shots. I took them, they just didn’t turn out.

So, I’m feeling brutally mixed emotions about this project. Mostly because it didn’t fit. Mostly because the pattern wasn’t the right size in the first place (see first paragraph). Tyo’s also, to her father’s dismay, begun increasing in the chest measurement recently, so that may be playing a role here, too. On the other hand, it’s a pretty fun pattern (Lekala 7171), I think, a simple shirt with a striking detail on the back. Everything went together well, and having the MPB Men’s Shirt sewalong to reference pretty much makes up completely for the lack of instructions.

Collar

The execution is far from flawless, but it’s reasonable, I think. Topstitching on the Featherweight remains fun (although I’m using regular thread, not topstitching thread, so it wasn’t as fun as it could have been). I re-did the entire collar and stand, widening it by about 3cm and cutting out each side individually so that I could (almost) perfectly match all the stripes. Yay me.

Pockets

I used cardboard templates for shaping both the pockets and the sleeve plackets. Getting and keeping the bias-cut pockets square and even was quite a pain. Washable glue-stick was helpful. On the other hand, all the stripes make for super-easy positioning on the front, so it’s not all bad. Oh, and you can just about see the minute side-bust dart in the pic above, to the left of the pocket. This took in about 1 cm total of width. The original pattern had vertical, double-ended darts below the bust, too, but as they were about .5 cm at their widest point, I chose not to bother with them.

Placket (not an iPhone photo)

The plackets. This is only my second set of plackets, and thus far both have been made out of flannelly material, which is probably not the easiest stuff for it. I’m reasonably happy with how they turned out, however, despite a certain amount of user error. This is the little-house-on-the-placket style of placket, I think. I say I think because instead of the little house with an addition on the side shape of the other pieces I’ve seen, this one had a double peak to the roof (AA instead of A_ if that makes any sense… I’m too lazy to make a real diagram). I managed, by re-reading Peter’s post, to refresh my memory enough to put the plackets on the right side facing in the right direction (although it was a bit chancy). The user error came in in not allowing enough extra length at the top for the little house-roof-thingy. If I’d paid more attention and made my slash the length recommended by the pattern, it would’ve been fine. It’s still fine, except the opening is about an inch too long (note I didn’t lengthen the placket when I lengthened the sleeve—although looking at the technical drawing I suspect that they just didn’t change the length of the placket when they graded the pattern, so it’s a bit long for the shirt to begin with) so the opening goes clear to the elbow. Also it could really use a button halfway along, but I forgot when I was putting in the buttonholes.

Back view. Very glad I added that extra width at the bottom.

The back looks pretty spiffy, if I do say so myself. As you can see, the fit across the shoulders is pretty good in the back, even though it won’t quite close in the front.

The back on Syo

It felt really good to do some real sewing again finally. I spent most of the morning (whatever wasn’t spent ferrying my father-in-law around and mediating among four little girls. Who don’t actually seem to fight any more than two little girls do, but man those preschoolers can CRY) in the sewing room. With a lot of company from my four-year-old niece (of the polkadot sundress fame) telling me about how she’d love to have this and this and that sewn for her.

Weird flash-face. Note horizontally-matching stripes on the front.

Out of curiosity, I got Syo to try it on (she is roughly 120 cm tall). It’s none too spacious on her either, although it does close, at least. The shoulder-fit is remarkably similar to on Tyo, though. It’s pretty obvious which of my kids got my broad shoulders.

Side view on Syo

Syo likes to flex and show off her muscles. They are pretty impressive, frankly.

Syo

Gratuitous pics, I know. But I couldn’t resist the weird foreshortening in this one.

Sleeve rolled up

Both kids agree that the sleeves are better rolled up, anyway. They just possibly might have inherited this from their father.

Sorry if the post is a bit incoherent and disjointed. The shock of going from zero to four children (two of them now on antibiotics) in the house in under a week still has me a bit flattened. Though I’m glad to have mine back and to have the chance to spend some serious time with my nieces. I just wish I could’ve spent more of the week enjoying them, rather than trying to work in, around, and between interruptions.

Oh, and just for the sake of completeness, the pattern is Lekala 7171, and here’s the technical drawing again:

Technical drawing

*My camera is a Sony point-n-shoot, which is the only calibre of camera I’m qualified to manipulate. Interestingly, my friend’s Sony smart-phone takes awesome pictures. Obviously Apple has not completely cornered the market on awesome. Which does little to reduce my overall iPod addiction, but anyway.

21 Comments

Filed under Sewing

The Mini Minnie Dress

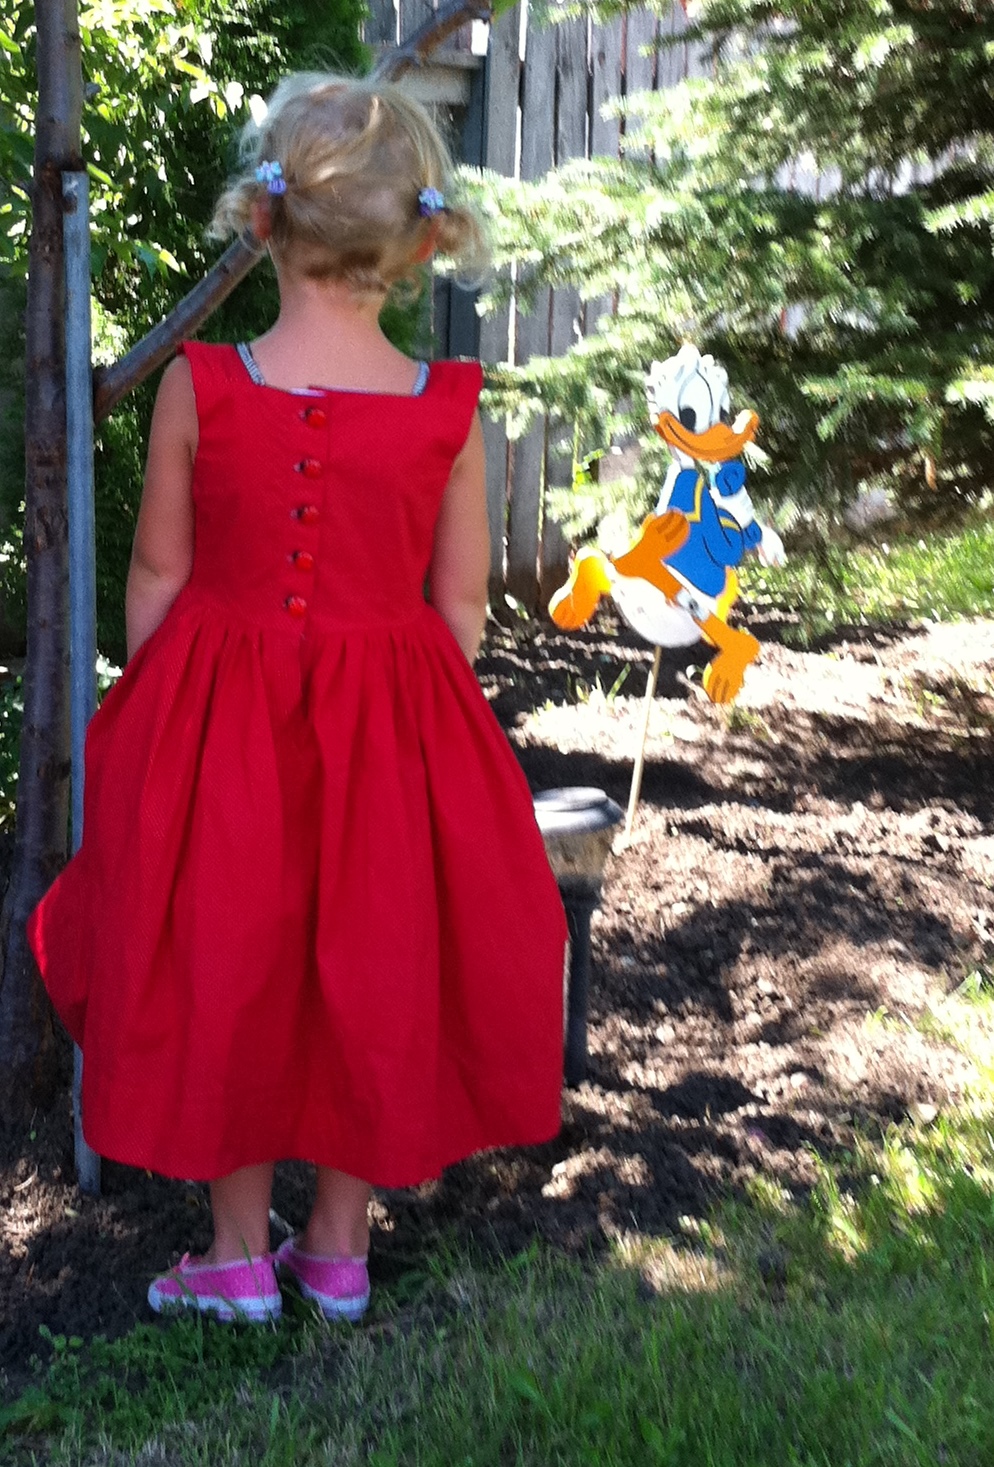
Fyon's Mini Minnie Dress

I firmly maintain that Minnie Mouse has no monopoly on red with white polkadots, any more than Miss Piggie has a monopoly on pink. Nonetheless, this is the thing I have heard second-most-often about this dress, in either of its iterations. Sheesh. Fortunately, the most-often-heard thing has been random, awesome compliments. And despite being first on the list to make the Minnie Mouse crack, my ever-sweet husband has also requested specifically that I wear my version several times, so it must be a winner. Sigh.

This is the version created for my four-year-old niece, who requested it last month, with much batting of eyelashes and many applications of  “Auntie, I love you!” Let’s just say that as long as the cute holds out, she should do well in life. You may have to click through to the full size version to see the polkadots on this one. They are small, but I promise you they are there.

Young Image Summer 2011 patterns

The pattern I used as a base is Y1109 from the Young Image Magazine Summer 2011 issue (third down on the left in the image above). You can browse through the whole magazine here, but it won’t let me link to a specific page; there’s a good view of the dress on p. 19. It had the right general lines, in particular the centre-front bodice panel.

I made the size 104, the smallest for this pattern; my niece is 106 cm tall, although her bust and hips were a little narrower than the 104 called for. Still, I’m glad I used the 104 rather than a smaller size (had one been available)—the amount of ease is fine but definitely not excessive.

Naturally I couldn’t just make it up as is. So this is not really a fair review of the pattern or the magazine, although I did use all of the pattern pieces provided. The instructions are, well, distinctly translated, and in so many languages it can be a bit tricky to figure out where the information you want is; it’s mostly segregated by language, but not entirely. Also, the pattern pages are only marked in two languages, neither of them English (my guess is Dutch and German, but I confess I didn’t actually pay attention), so be prepared to do some translating. That being said, they’re not nearly so over-crowded as Burda pages and each pattern has its own colour, so that part was not bad at all.

Dress back

The pattern calls for a rear zipper in the bodice (not extending into the skirt as far as I can tell), but I opted for buttons, instead. You do have to add seam allowances. They may tell you that somewhere, but if so I didn’t find it. I just figured that all the European pattern magazines (maybe European patterns in general?) don’t have seam allowances, and an examination of the size/shape of the pieces will confirm that.  If I’d been less pressed for time I would’ve read up a bit more on how much to add for a centre button placket, but I was in a hurry, so I winged it. It’s not exactly ideal. I should probably have drafted facings or used a self-lining (which I think is what the pattern calls for), but I didn’t. And I’m balls at understitching, so my white cotton lining peeks out a fair bit. Ah, well. I also put the straps on the wrong side, I’m pretty sure they are supposed to angle with the shoulders, not puff up the way they do, but they look cute anyway.

Underskirt for dress for niece.

The skirt in the pattern has a slightly-gathered, shaped upper portion and a ruffled lower portion. In the photo (page nineteen of the magazine, again, but I can’t do a direct link and I don’t have the physical magazine with me to photograph), the dress has quite a deep ruffle on the lower part of the skirt; it looks much shorter on the technical illustration, which I found rather confusing. There’s no pattern piece for this, which is fine as it’s just a rectangle, but I couldn’t find the information on how deep it should be, either, just how wide it should be at the different sizes. My original dress had a simple dirndl skirt, so I did that for my niece’s version, too, but I used the pattern-piece provided, plus a lower ruffle tier, for the underskirt. I was winging it for the length at that point—I did a quick comparison with some dresses from Tyo’s closet that I thought were in the right ballpark length—overshot, and wound up hacking about four inches off the top of the underskirt. Ah, well. It all gathers to the waist, anyway ;). For extra flouff, I gathered some tulle onto the underskirt. I should’ve used more. I also couldn’t use my favourite gathering technique, the zig-zag over a supplementary thread, as my zig-zagger was frozen at this point (she’s in the shop as we speak), so that was a wee bit annoying. Yes, I used the gathering foot, but getting the precise length was not happening so I wound up hand-basting and gathering it that way anyway. *headdesk*.

Dress

Instead of little ruffles on the centre front panel, I made an altered, double-length version of the CF piece to create the ruching. Gather it to the side-front pieces, construct bodice as usual.

Buttons closeup

I was a little concerned about the button-placket not extending into the skirt. After all, even on rectangular little children, you want to be able to open it a little below the waist, right? So after some cogitation, I decided to add in an extra-wide continuous lap placket at the centre back to finish off the button placket. Of course, for these to work properly you really have to fold the outer edge of the placket to the inside, which I completely forgot to do. So it’s a bit wonky in that area. Fortunately it’s pretty much hidden in the gathers, anyway. And cute ladybug buttons make up for all manner of flaws.

I have been having some fun being the sewing fairy, I must admit. I have been refusing to sew for my adult relations (well, unless they come to visit me for fittings, which, considering we live 600 km away, is a bit of a deterrent), but this summer I dared to hand down a couple of pieces. My stylish sister-in-law had greatly admired this sundress last year when I wore it, and after thinking about it, I decided to give it to her. I still like it a lot, but it feels like a lounging-by-the-lake (or in the back yard) kind of dress, something she does a lot more of than I (which is not to say she is lazy, quite the opposite, but she is currently at home with small children in a house with no AC, rather than spending her days in an overly-cooled lab like I do). Rather more recently, I made a tunic cloning a RTW one that I absolutely love. I liked the clone, too, but it was a bit too short through the body. So with some trepidation, I handed it over to my going-on-fourteen-year-old-niece. I am absolutely terrified of trying to sew something for anyone in this age-set without their direct input, but figured it had a better chance of working for her than for me and was reasonably stylish reasonably recently, and she steals lots of clothes from my stylish sister-in-law (I should perhaps clarify that my stylish sister-in-law is the mother of the four-year-old who received the Minnie dress, but NOT of the fourteen-year-old), who I feel pretty comfortable about guessing styles for. Anyway, she claims she likes it and as she’s only 5′ 1″, the length issue is rather less on her. So we’ll see. I still need to make the longer version…

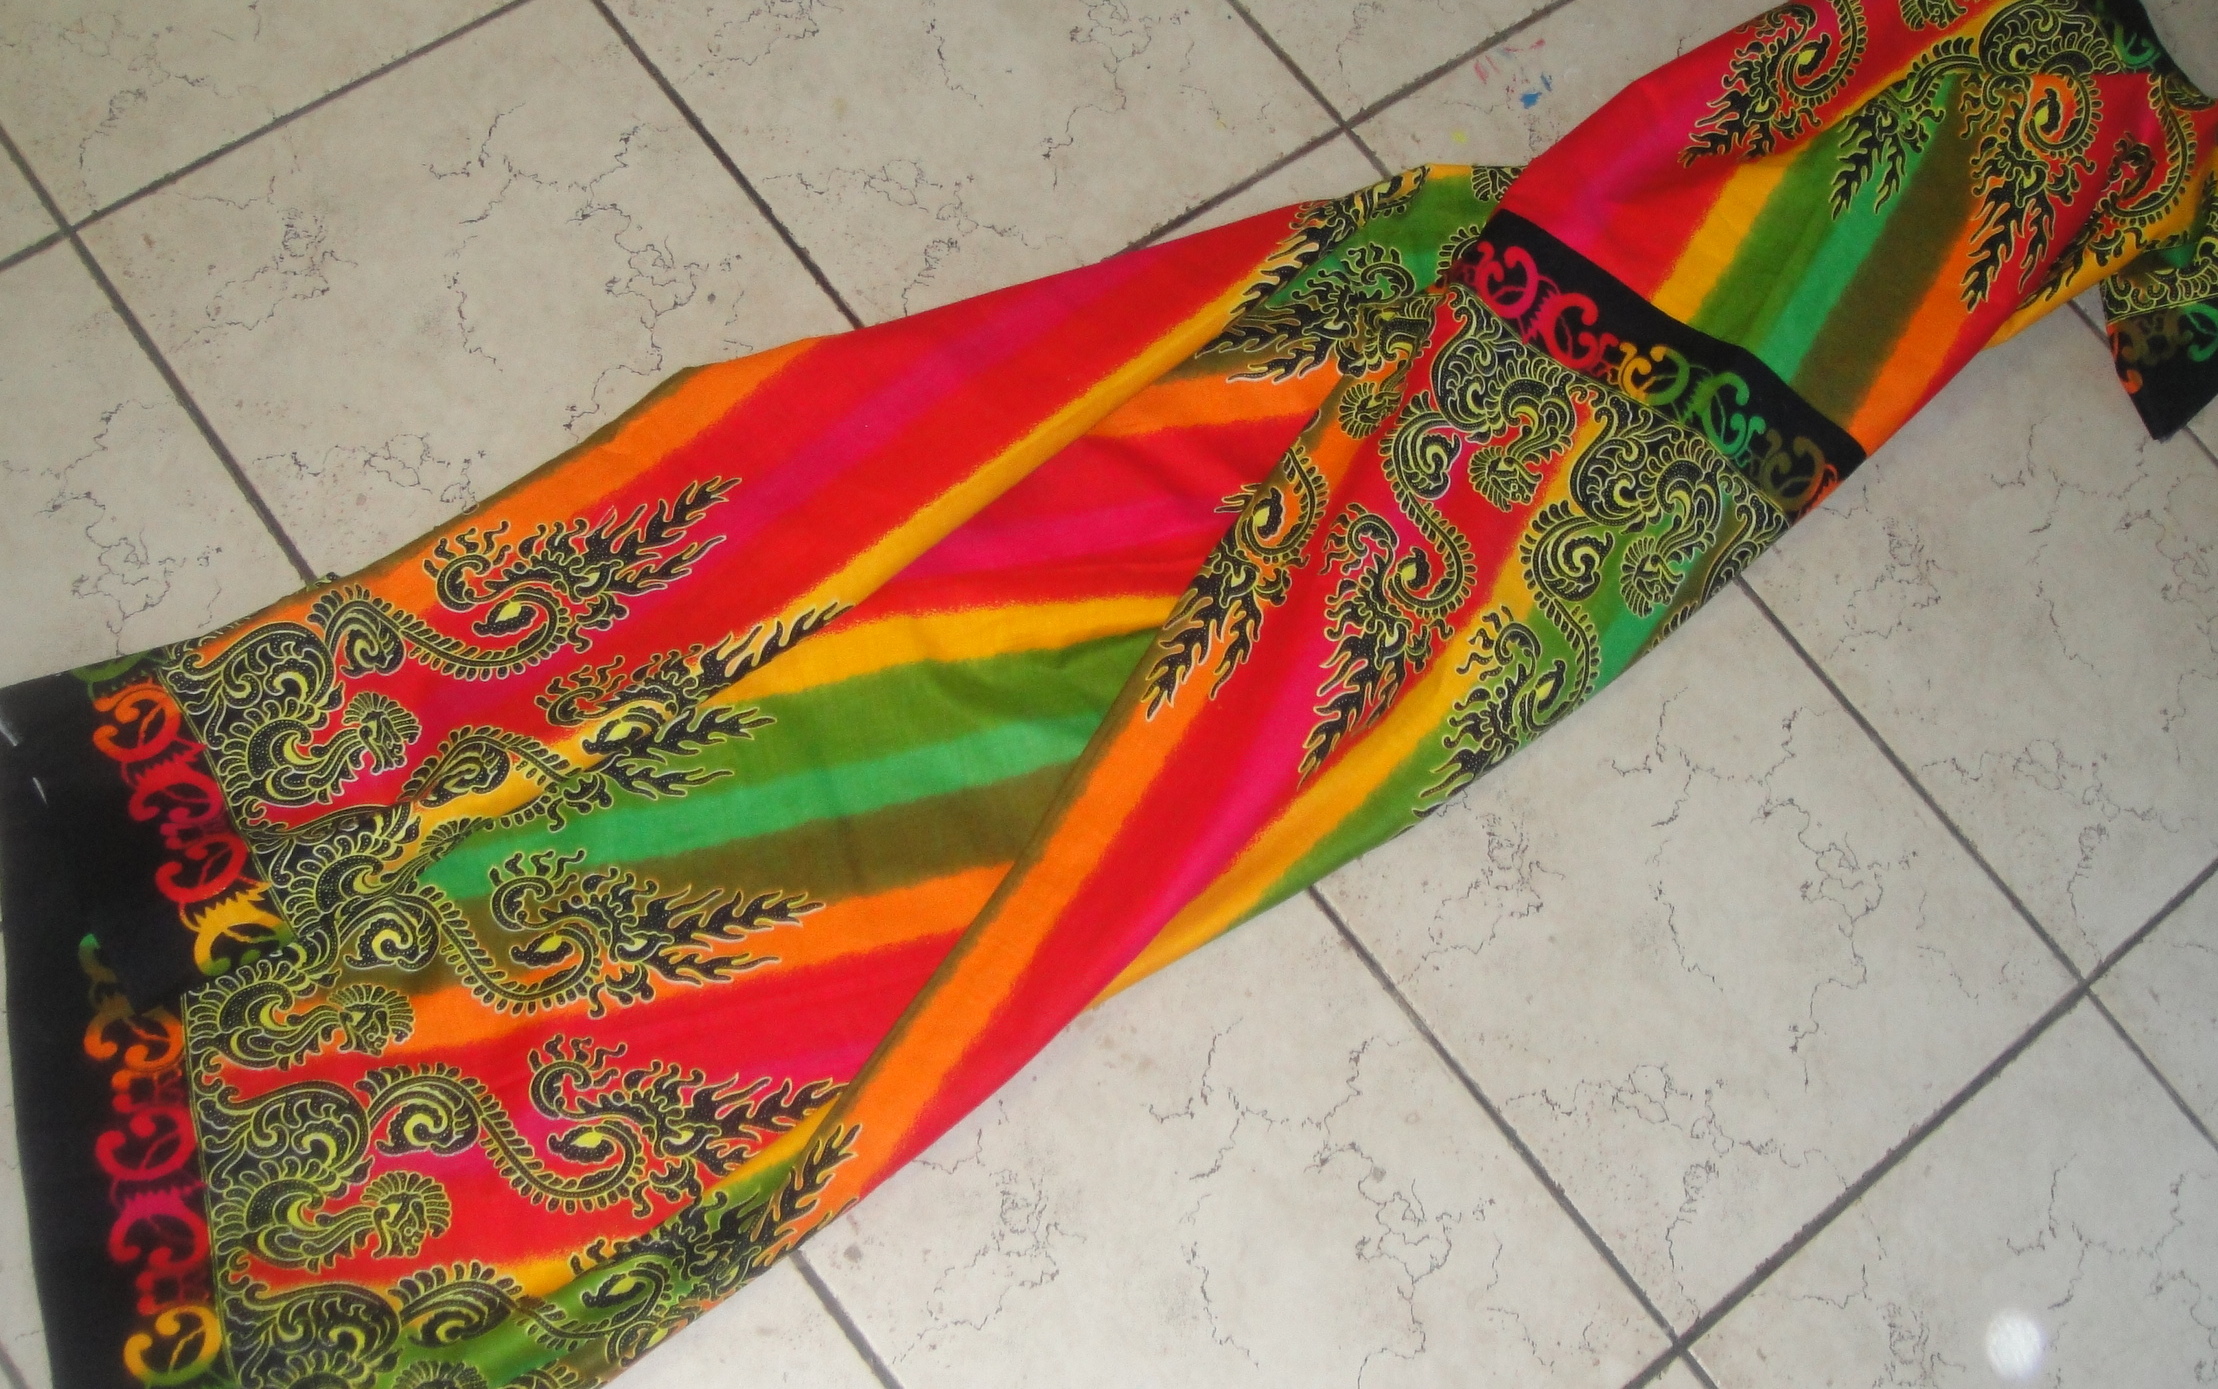
Oona, this one's for you

Before I left on vacation, I did bring home one more piece of thrift store fabric: this crazy border-print. There’s only about a metre, but it’s very wide. Whatever it gets made into will obviously be dedicated to Oona of the Carnival Stash.

Whew! I must now return to hanging out with my in-laws, soaking up the sun, and wrangling somewhat obscene numbers of small children. Gotta love vacation…

21 Comments

Filed under Sewing

Something small

Lace panel from thrift store

In between unpicking the skirt from the halter sundress and procrastinating, I did actually (almost) finish one rather small piece. You may (or may not) recall a large piece (several metres) of starched white cotton I found at the thrift store back in June. It was the kind of lovely, plain, basic fabric you rarely find at the thrift store, so I would’ve picked it up just for that, but one end had also been worked with the most amazing panel of handmade lace I’ve ever seen.

Now, admittedly I don’t know much about lace-making. I have no idea what techniques are employed, except that it looks to have been done by hand, with gorgeous patience and precision. I assume this is some kind of heirloom stitching taken to an astounding extreme. It’s one of those pieces that makes you wonder about the person who had the fabric before you, though. What kind of piece was this worked for? Was it meant to be the yoke of a shirt? Part of a Christening gown or something? Why would someone put all that work into making the lace, and then never make the final garment? (The shape and positioning on the fabric suggests garment to me, but I suppose I don’t really know even that).

Anyway, obviously it needed to become something that would showcase the beautiful lace. After some hemming and hawing, I made my decision, and cut out a second version of my sundress bodice, with the lace in the centre front panel. I toyed with the idea of putting a coloured fabric behind, to show through at the lace, but the white cotton was too sheer to hide it, so I just lined with another layer of the same fabric.

The top. Unfortunately this was the only shot where the light didn't totally wash out the lace.

It still needs straps. I had some cut out and pressed and ready to go, but somewhere between bringing it upstairs to do the handstitching I mislaid them. It actually stays up remarkably well, with that large shirred back, but I’ll feel much happier with straps anyway. I used the facing piece to make the little “collar” top, which I really love, although since I forgot to add a seam-allowance to the CF, it wound up not reaching quite to the side-seams. I hand-stitched the bottom of the bodice front together for a nice finish that doesn’t show on the front. I maybe should’ve put some interfacing strips along the V-point in the front, as it’s a bit wavy and floppy, but it’s not awful.

It looks good with shorts, but wouldn’t it be perfect with a full, puffy skirt? 🙂

25 Comments

Filed under Sewing

Sometimes you just have to walk away.

Hmm

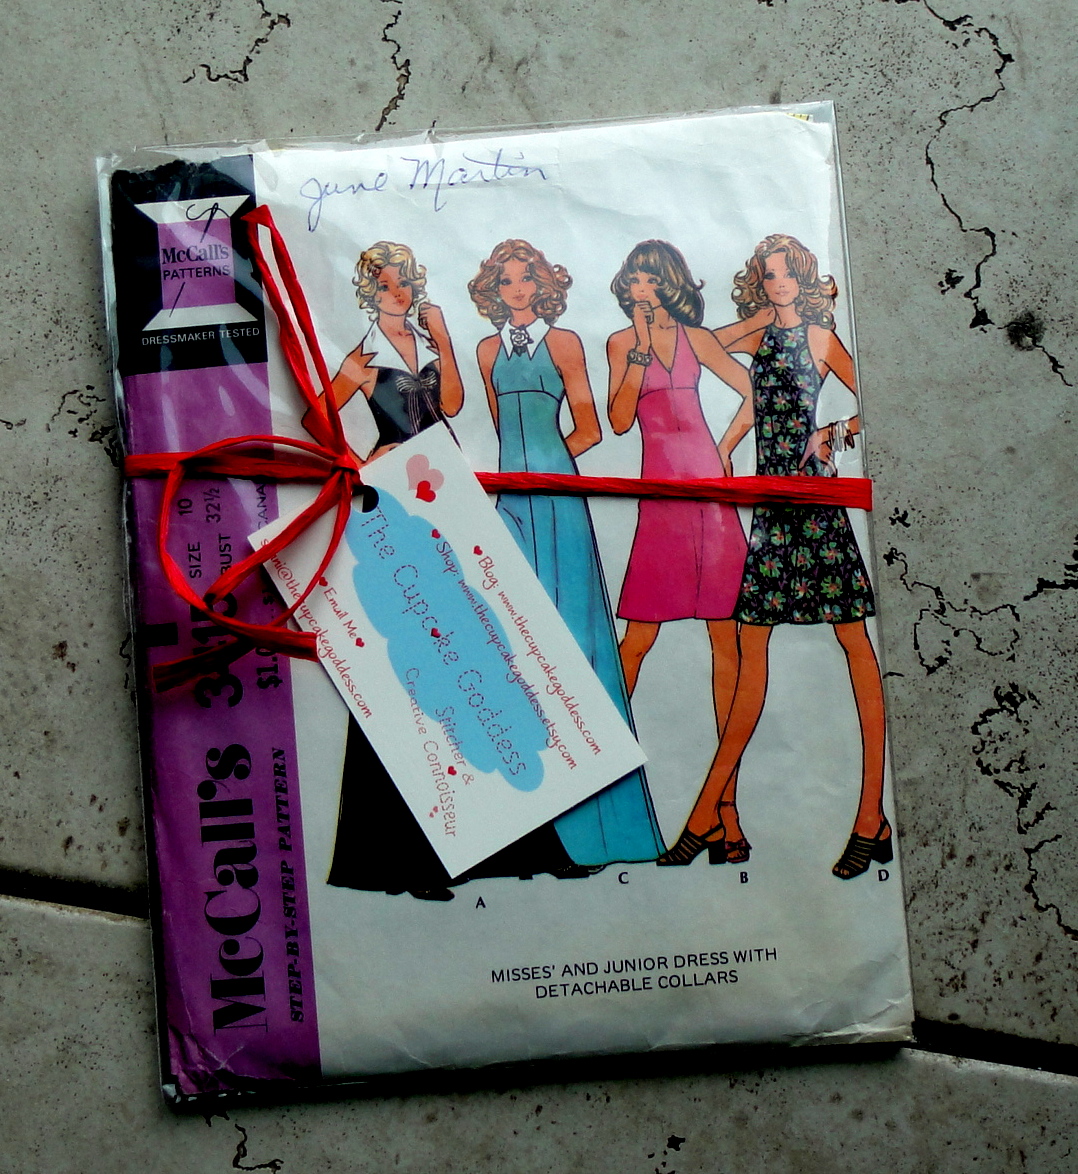
McCall's 3415

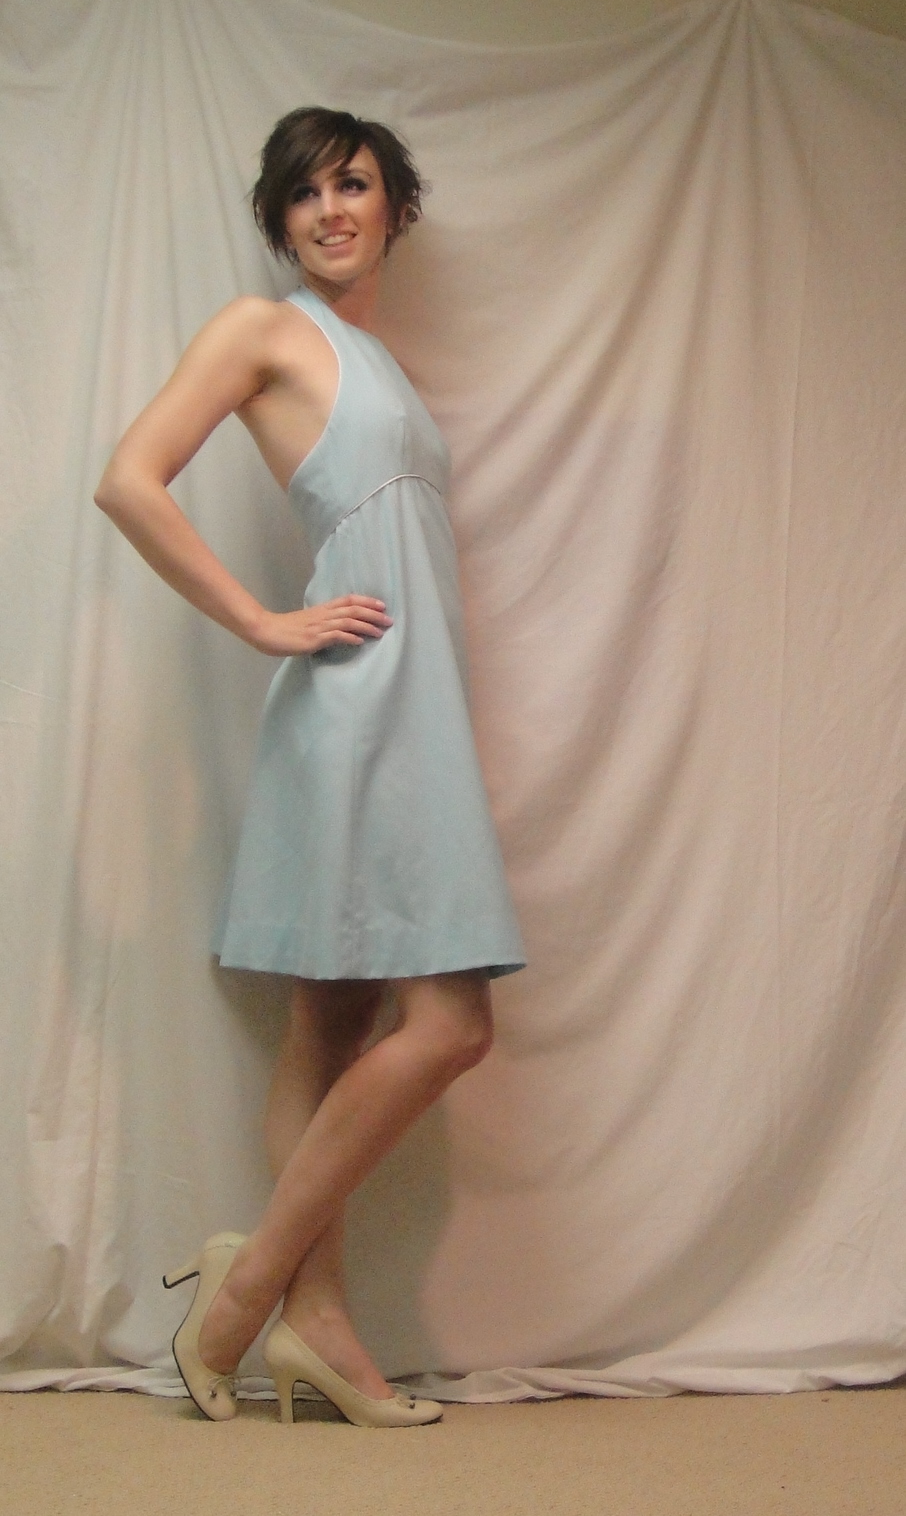
I have a feeling this dress is going to spend a little while in the Magic Closet.* You know when you reach that point when you’ve unpicked a seam so many times the whole thing just starts to look mashed and no matter how well you re-stitch it it’s still going to be a bit wonky? Yeah. I’m there.

That being said, I think once I’ve had a little bit of space I’ll quite like this dress. We just need a bit of time.

Front view

So, after all y’all’s** sage advice last week, I put on my big girl panties and unpicked the skirt (yes, removing zipper in the process), and made Alterations.

Specifically, I lopped 15 cm (about 6″) off the top, re-cutting using the top of the pattern but blending out to a wider width quite quickly (maybe a little too quickly…). In my paranoia over having enough ease I actually made the skirt a bit wider even at the top, electing to ease that in.

Side view

This fabric doesn’t ease so well, did I mention? Well, I mean, it does—there’s no pleats in the seam—but it sure shows the puckers. Not even going to go into how many times it took me to get the zipper straight and smooth and matching up, either. On the up side, I did get it smooth and relatively straight (and relatively invisible!) eventually, so I shan’t whine too much. And I did a slightly better job stitching on the bodice lining on the inside this time, although with all the grading and clipping and fraying from being unpicked so many times it still doesn’t look peachy. But I think I have the theory down, anyway.

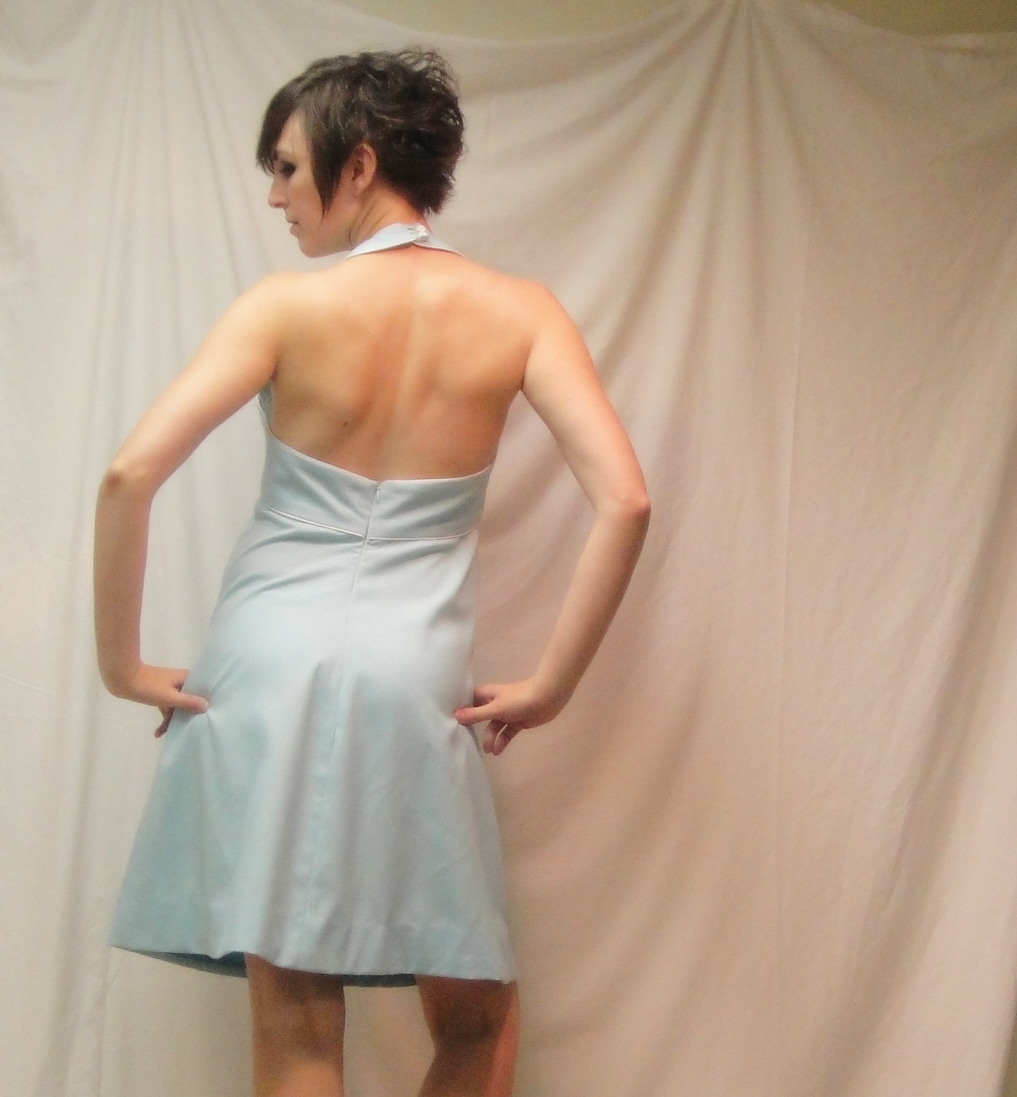
Back view

There are still some issues with how the back hangs—I think somewhere in my alterations the grain got a bit skewed—but at least it’s not straining over my hips and making my belly look like a stuffed sausage anymore. (It actually looks way better in this pic than when I’m just standing straight.  I miss the pockets, though. I wonder how much more work it would be to put them back in, now there’s enough ease for them… (walk away, Tanit, walk away…)

Hem facing

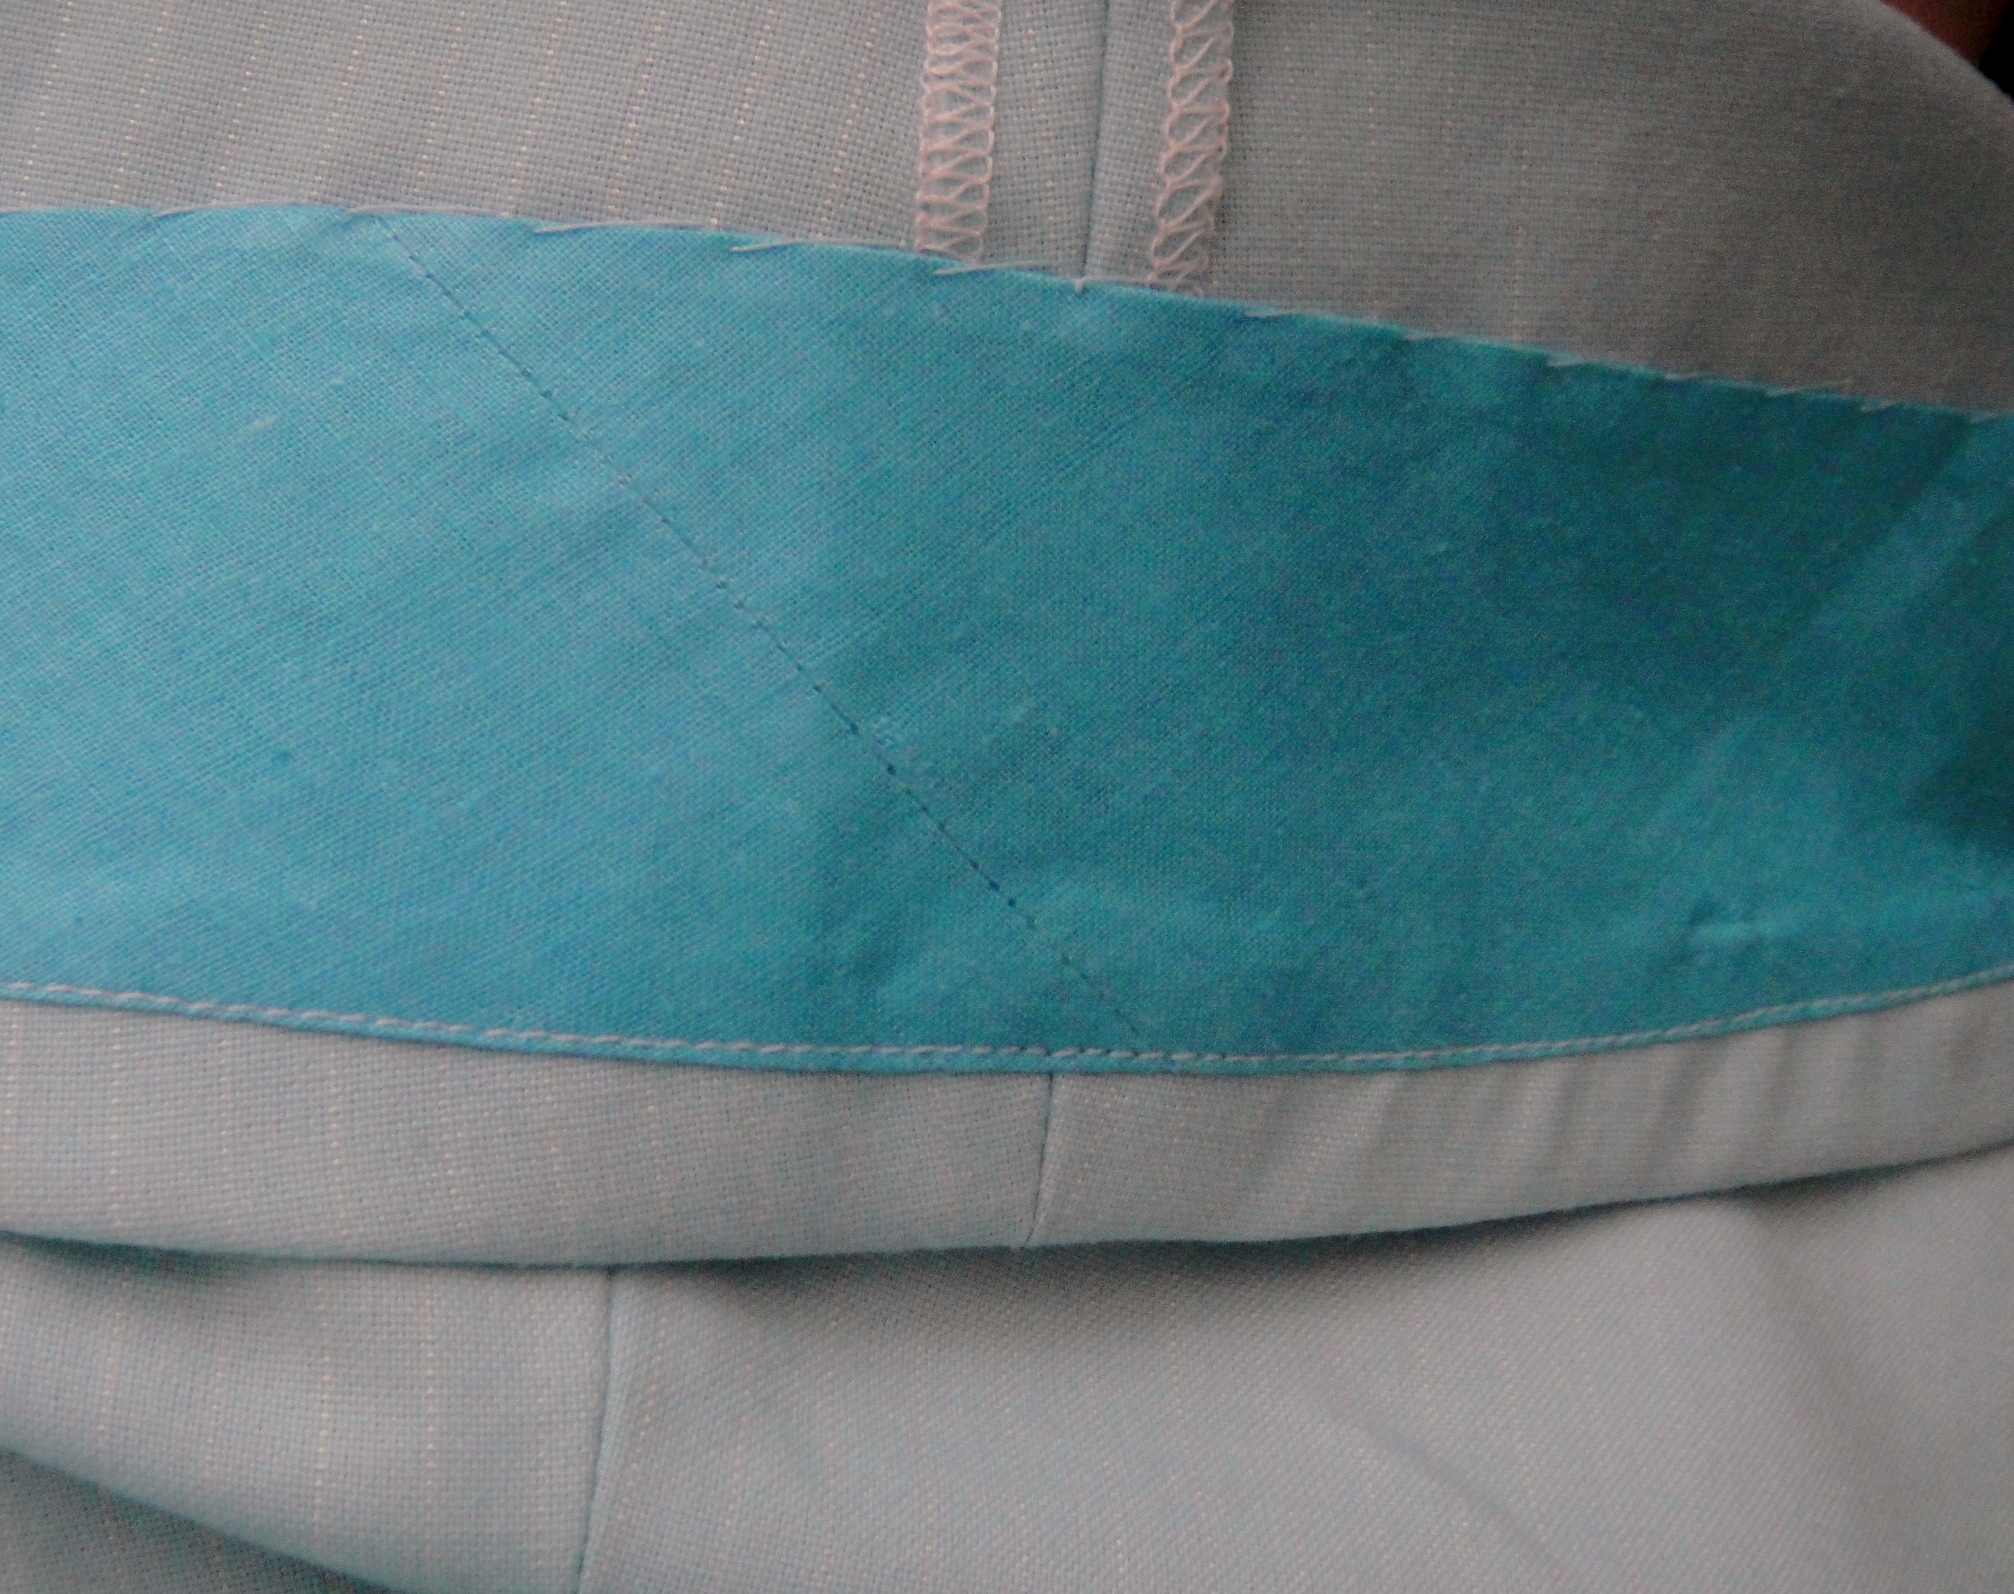
Having removed six inches in length, I didn’t really want to lose much more in the hem, so I put back the hem lace I’d been planning to use and dug out a package of teal hem-tape from one of my thrift-store scores that’s probably been in its package since about the time this pattern was new. I actually really like using a bias facing in curved hems like this. It works a bit better if you “circle” it first—iron it while stretching it into a curve.

Hem facing

Plus after thirty-odd years in the package it really needed to be ironed. Fortunately the skirt is quite narrow, as it was only a 1.85m package, and I had to discard about eight inches at one end where the tape that held the end in place all those years had turned yellow and marked up the fabric. I had just enough. The hem facing is a fair bit darker than the rest of the dress, but I think it’s a fun flash of colour. And it gives me the feel of a full, yummy 2.5″ hem without losing more than about 2 cm in length.

Having said all that, I have to admit something.

Halter styles are something I have a problem with. Meaning, I like them. I love the exposed back, I love how they look on other people and on pattern illustrations. But somehow when I see them on myself, I always feel line-backer-ish. Like they just emphasize the breadth of my shoulders. I keep making them because I really like the idea. And I keep thinking that next time, it’ll look “right.” There probably should be a name for this kind of stylistic insanity. On the other hand, I am actually liking the photos a lot better than I like the reflection in the mirror, so perhaps its one of those things where my brain exaggerates what I’m seeing beyond all reason.

Anyway, I’m hoping that some time in the Magic Closet will help me forget about most of my issues with the dress. Although the halter one’s probably there to stay. Next up: jackets in summertime. Unless the Lonsdale pattern arrives, anyway ;).

*You know. Where self-made pieces go to wait out the period while you forget all the stupid mistakes and messes you made.

**I don’t actually talk like this, but it sure is fun to write sometimes. Also my town is infected with cowboys at the moment, so it would be surprising if I didn’t have at least a few symptoms.

34 Comments

Filed under Sewing

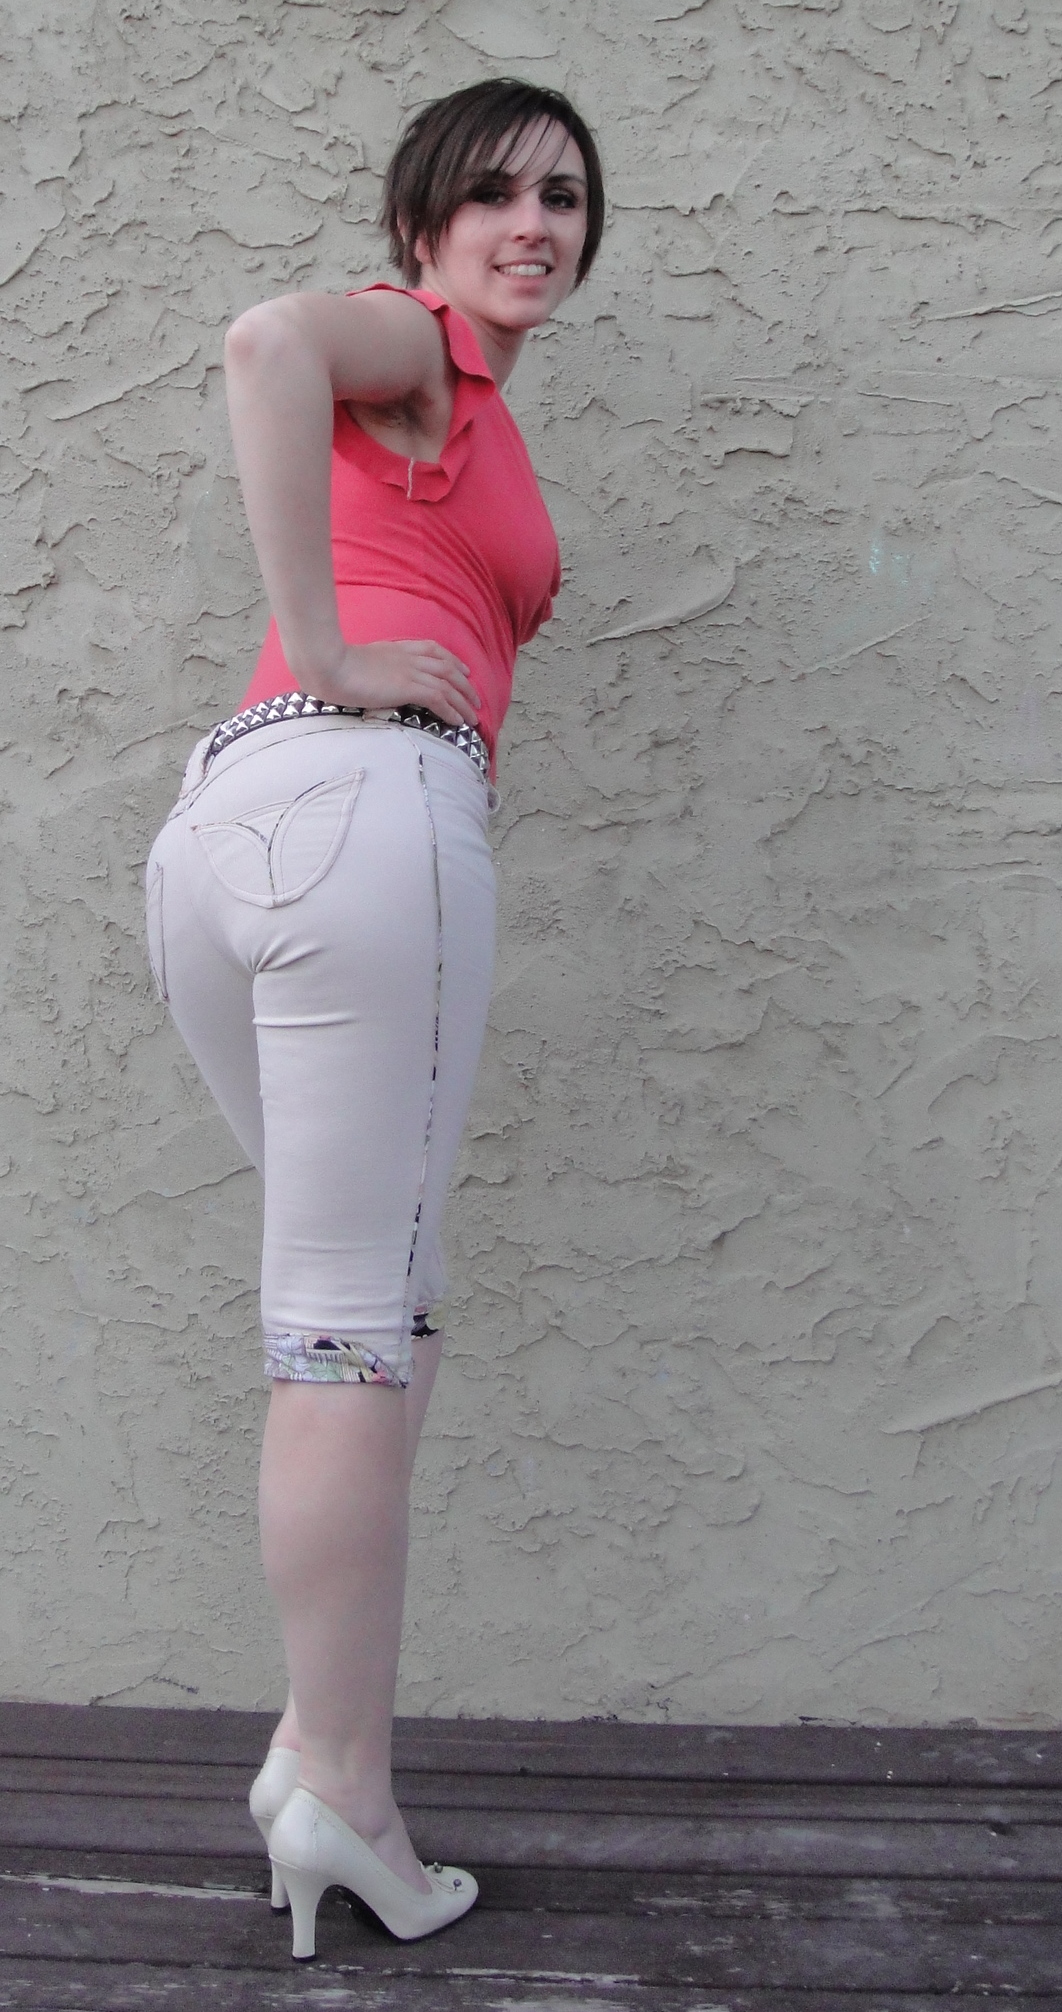
Cream Spice Capris

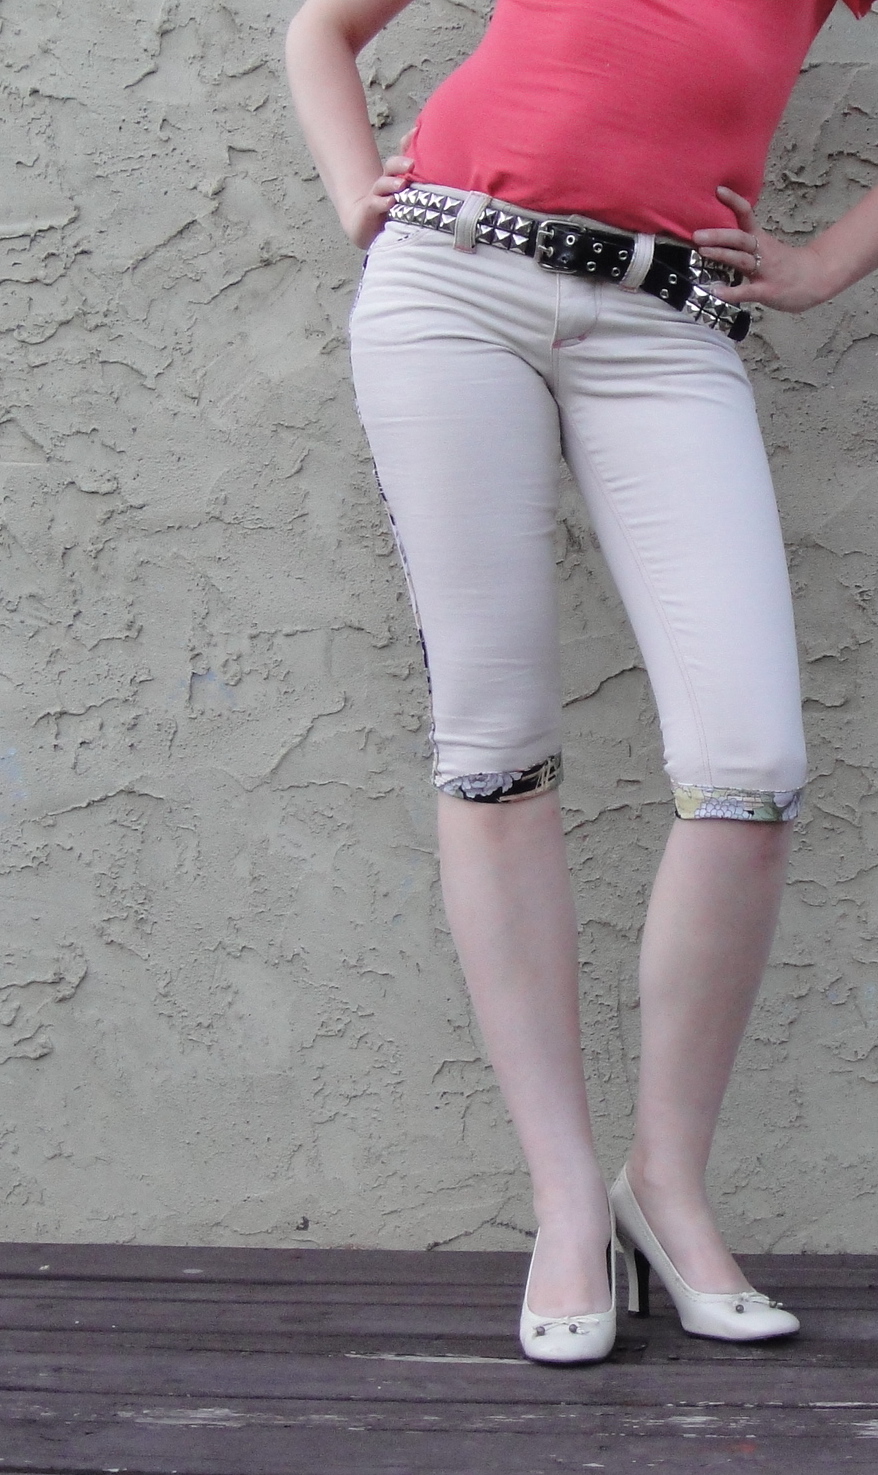
Cream Capris

I love that I was able to take these photos at 10:00 pm at night, outside, without a flash. Now if that doesn’t scream summer, what does? (This is where someone who’s from the real “up north” chimes in with a comment about the midnight sun. /envy.)

Superfluous shot

So, the capris are done. And they are fun, although as usual there are a couple of issues (beyond my indifferent topstitching). The biggest one is simply the fabric—although a lovely and stretchy cream denim colour, and heavier than some of the jeans I’ve made, the fabric is a bit thin for jeans. Meaning while it stretches nicely to fit, it, ah, hugs all the lumps and bumps rather than smoothing them. When you add portions like the pocket and the rear yoke, that don’t stretch nearly as much, it also creates a few lumps and bumps that wouldn’t be there all on their own. Tucking in tops CAREFULLY and choosing the right pair of underwear are also going to be important (VPL in jeans, who knew?)

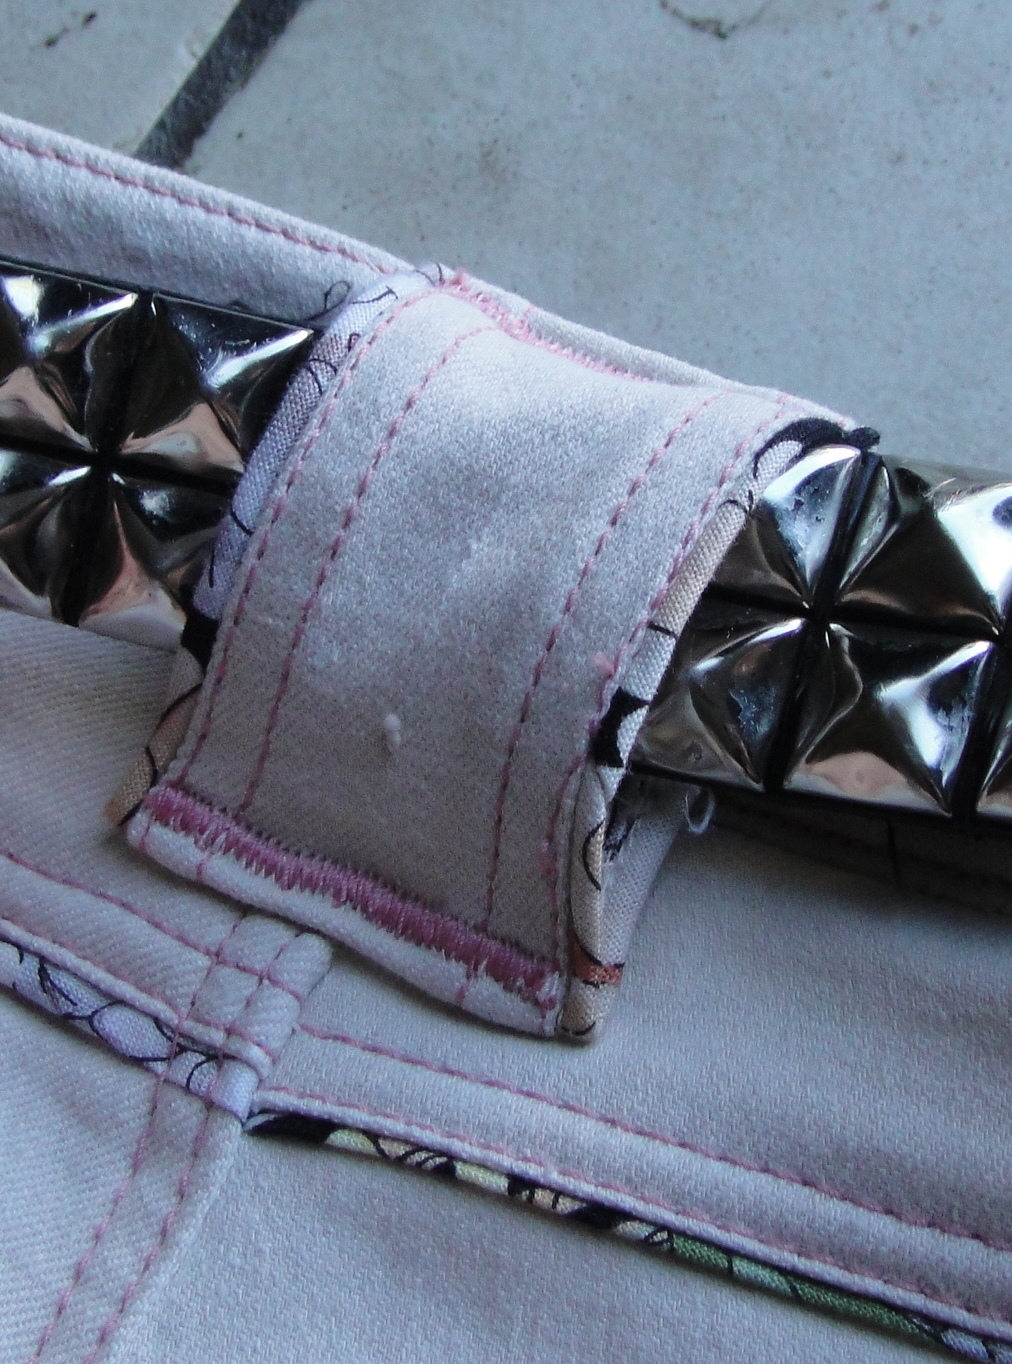
Other than that and the Featherweight Tragedy, I’m pretty happy. The piping is nice, the wonky topstitching is fading from memory (fortunately it’s on the butt where I don’t need to look at it), and I finally remembered to make my belt-loops wide enough for all my belts (although it’s the narrow one I’m wearing in the photos).

Rear View

If I were to do it again I would place the pockets higher or make them a little taller. The dip between the petals in the top eats up a surprising amount of space, both visually and practically.

Front view

I like it with the cuffs turned up. Although, the non-stretch lining of the cuffs doesn’t interact especially well with the stretch denim when putting these on. we’ll see how that goes.

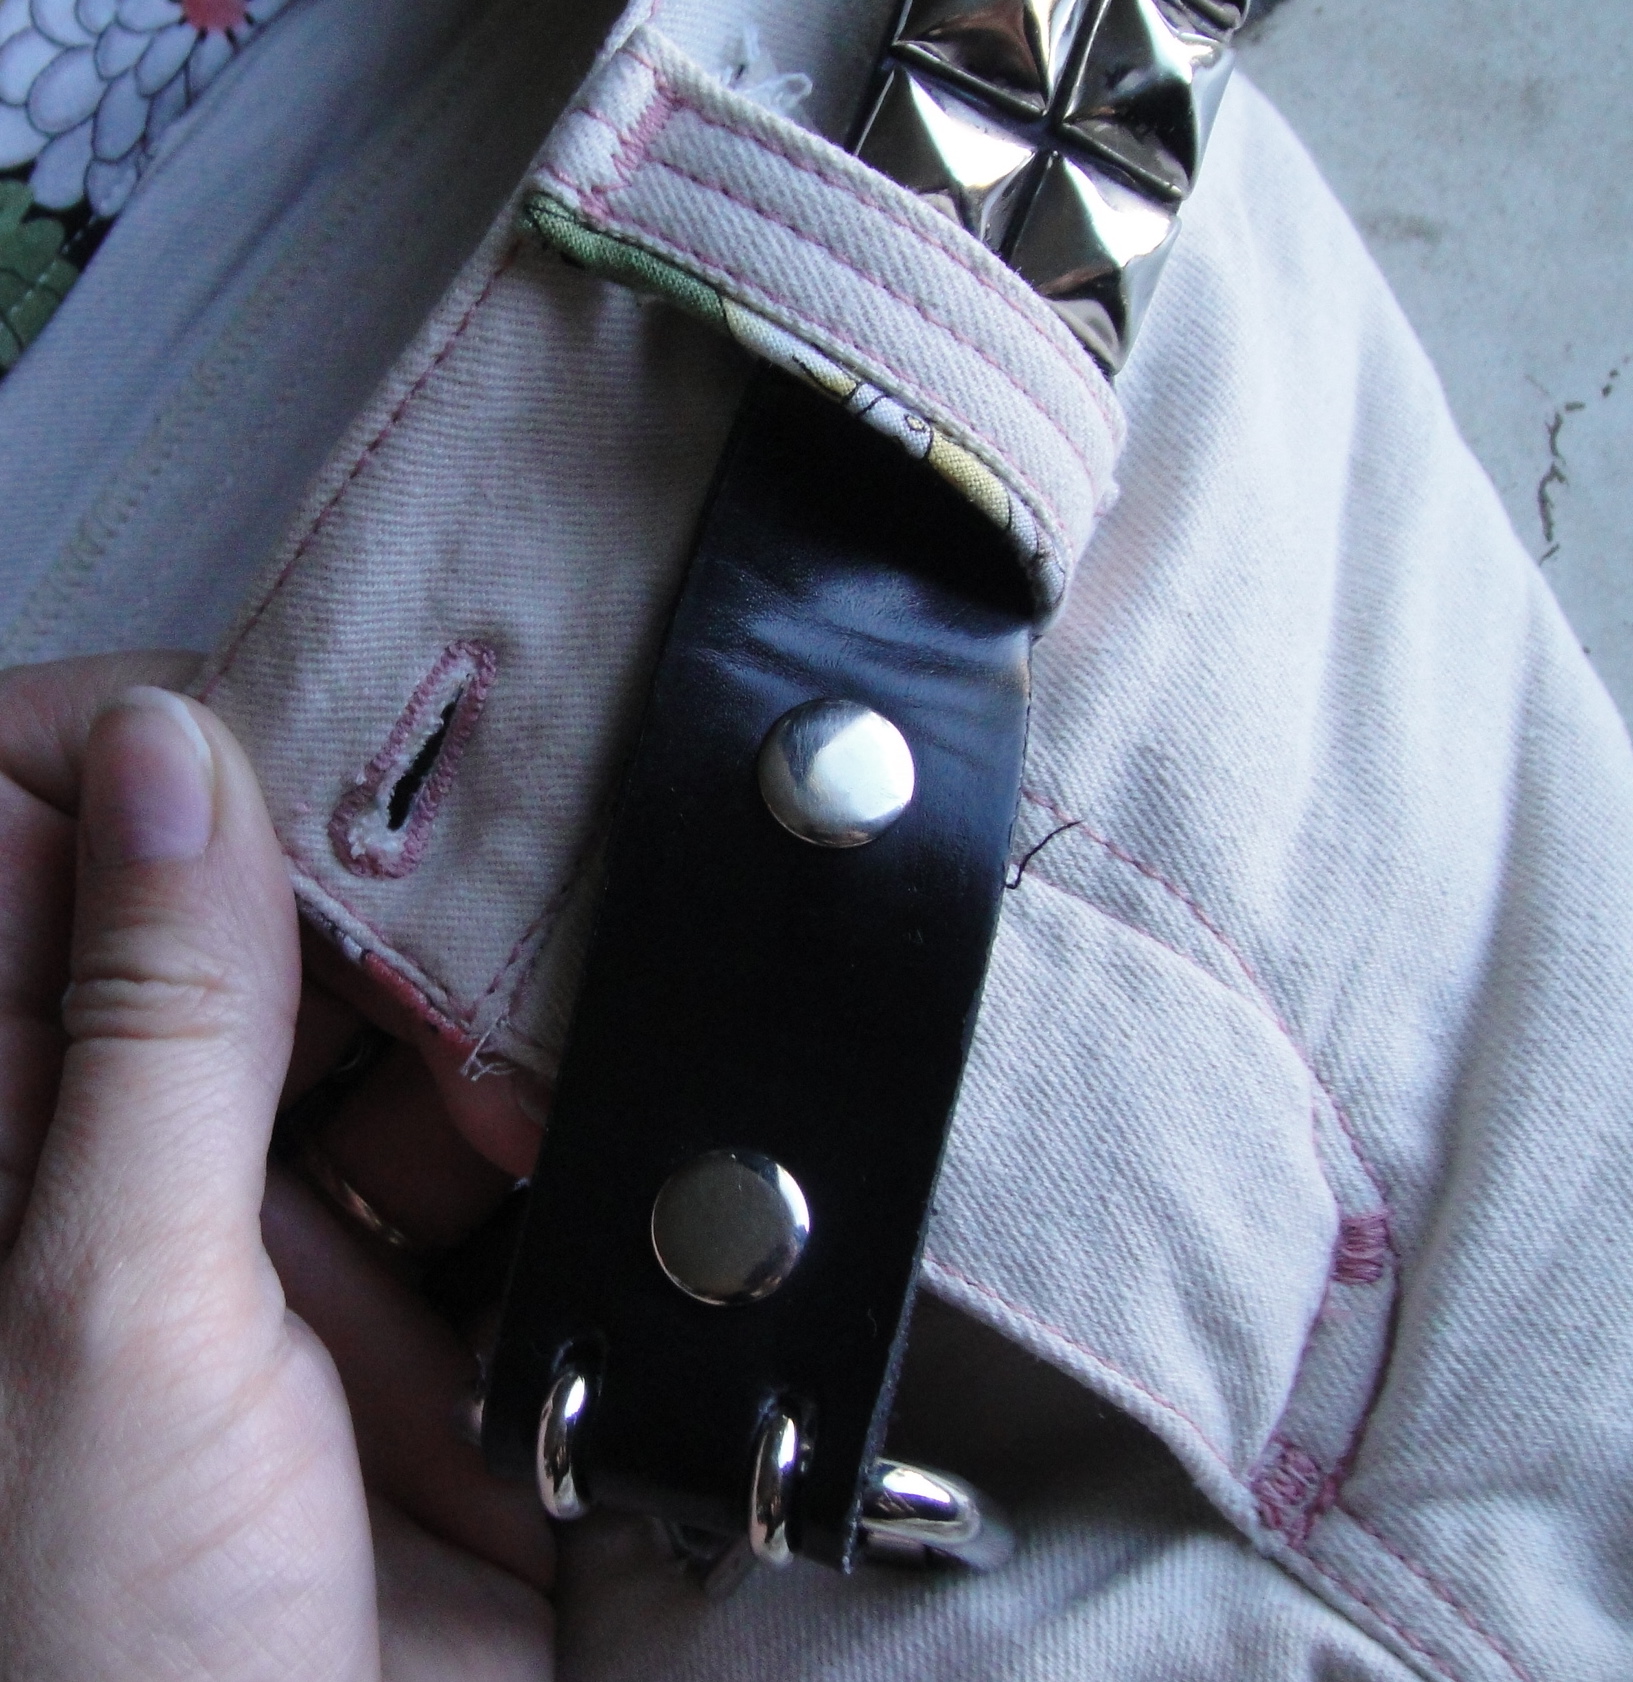
Centre-Back belt loop

I put a lot of strain on my belt loops, especially at the centre back, so I like to elaborate them in some way. Often I use three instead of just one at the CB. This time, I made one giant one with piping on both sides. I just piped both edges and topstitched to keep the bias on the inside. Super easy, and a nice finish to boot.

Belt-loop and button

For the other belt-loops, I wanted them more narrow, so I put piping on only one side and just folded the other side under and topstitched.

Vintage buttonholer buttonhole!

This is the first truly successful jeans buttonhole I’ve done—made with the vintage buttonholer and one of my new templates, the short keyhole. It’s the perfect size for the jeans buttons I have (which are admittedly a little wimpy. One of these days I’ll order some genuine good all-metal ones. /sigh.) I will note I find it quite odd that when sewing straight lines on the Janome with heavier thread, I have to turn the tension way up (and often do some other jiggery pokery) but then when zig-zagging I have to turn the tension way down.

You can just about see my neat feature on the fly where I had the two lines of topstitching criss-cross halfway down. This has nothing to do with the fact that my zipper was placed a little too far out from the centre front and couldn’t make the stitch line right where I wanted. Nothing at all… (I find it interesting that some people, who are following the exact same tutorials I do for fly zipper insertion, find that their zipper is still too close to the CF line and tends to gape. I have the opposite problem, with my zippers ending up tucked too far under the fly and often interfering with my ideal topstitching line (the Jalie pattern doesn’t leave you much room for error in this, either, as there’s not a huge fly extension).

Fun pants!

This pink thread is Coats & Clack Heavy Duty XP Dual Duty, or something like that, not the super-fat Guterman topstitching thread. Janome actually likes it fairly well, meaning all I have to do it turn the tension way up, not some of the other finnicky workarounds I’ve come up with for the topstitching thread. But for some reason it all goes whack when zig-zagging—whether with the buttonholer (in which the machine is still set on straight) or the zig-zag stitch. Featherweight handled either flawlessly, although she needed a bit of a tension boost too.

Featherweight afficionados, I have a question: I have generally been advised to use regular thread in the bobbin with my topstitching thread up top. Despite the annoyance of winding extra bobbins, there are times when it would be nice to have topstitching thread on both sides (turn up cuffs, come to the front of the class). Also I can’t help but think it might be sturdier (I have had a fair bit of topstitching failure on some of my earlier jeans where the bottom thread has broken). Can the Featherweight handle this? Any particular pros and cons?

My favourite feature is the piping, I think. I may have to add that to more jeans in the future. But then, piping is kinda addictive at the best of times…

Other things to try in the future:

  • change up the front pockets. The Jalie pocket line manages to be both distinctive and boring. I love the double pockets on Patty’s pair (pattythesnugbug.com is transitioning platforms while I write this so I can’t do a direct link, but looks up her pants posts, she has lots of great musing on fitting and styling)
  • something with lots of rivets. Lots and lots of rivets. I love hardware as much as the next crypto-Goth.
  • distressing. I generally like my jeans fairly crisp and dark wash (obviously these are not dark, but you know what I mean). I lost my taste for buying pre-worn-looking denim right around the time I had to start paying for my own clothing. When you have a $90/pair jeans habit and are on welfare home with a small baby*, you need your jeans to LAST, because you’re probably not getting another pair for a long time. That being said, since I’m making my own, it would be ok to have some more casual pairs with a more RTW look. Just no pre-made holes and paint splatters, please.
  • I have had fun messing with the back pockets on these last few pairs, too. It’s the little details that really make (and distinguish) jeans.
  • draft and make a pair for my husband. Yes, I’m a sucker for punishment. I’m also seriously considering using a women’s draft for him (don’t tell him) as he really fits the women’s measurements considerably better than I do (don’t tell him that either). Boy got back. Which is where Tyo gets it, of course.
*This situation lasted precisely one year. I am profoundly grateful for the social safety net, even gutted as it was after the 90s, as my hubby and I would not have been able to make it through the transition from goofy teenagers to responsible parents without this government aid.** And I would rather shoot myself in the foot than go on welfare again. It SUCKED.
**and considerable support from both our families. I don’t once regret having my children when I did (especially as my field, like most academic ones, doesn’t really put you in a good position to have a family often until your late thirties), but it was HARD. I suspect it’s always hard, but I know we couldn’t have done it—certainly not nearly as well—without our extended families. So on the off chance of any of them reading this

34 Comments

Filed under Sewing

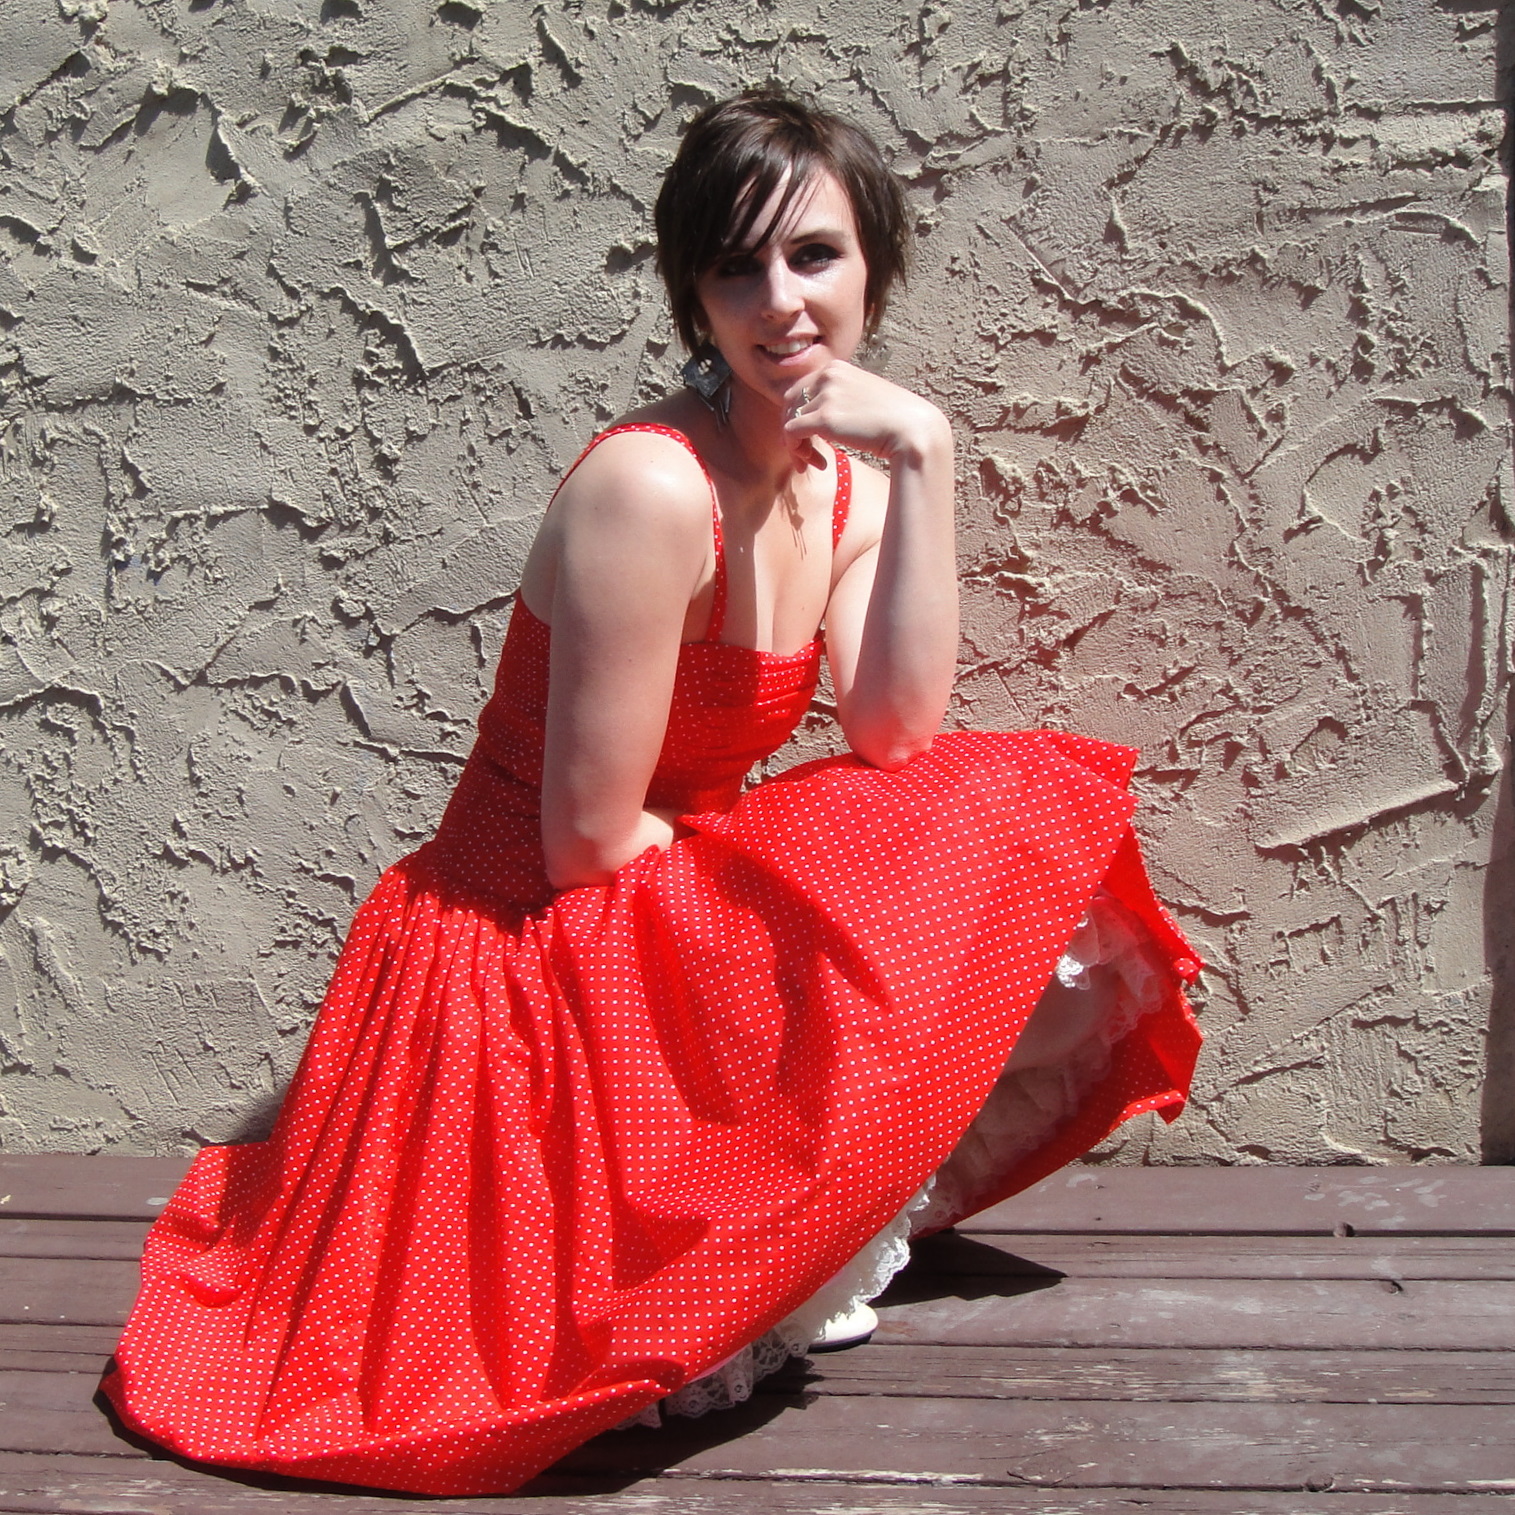
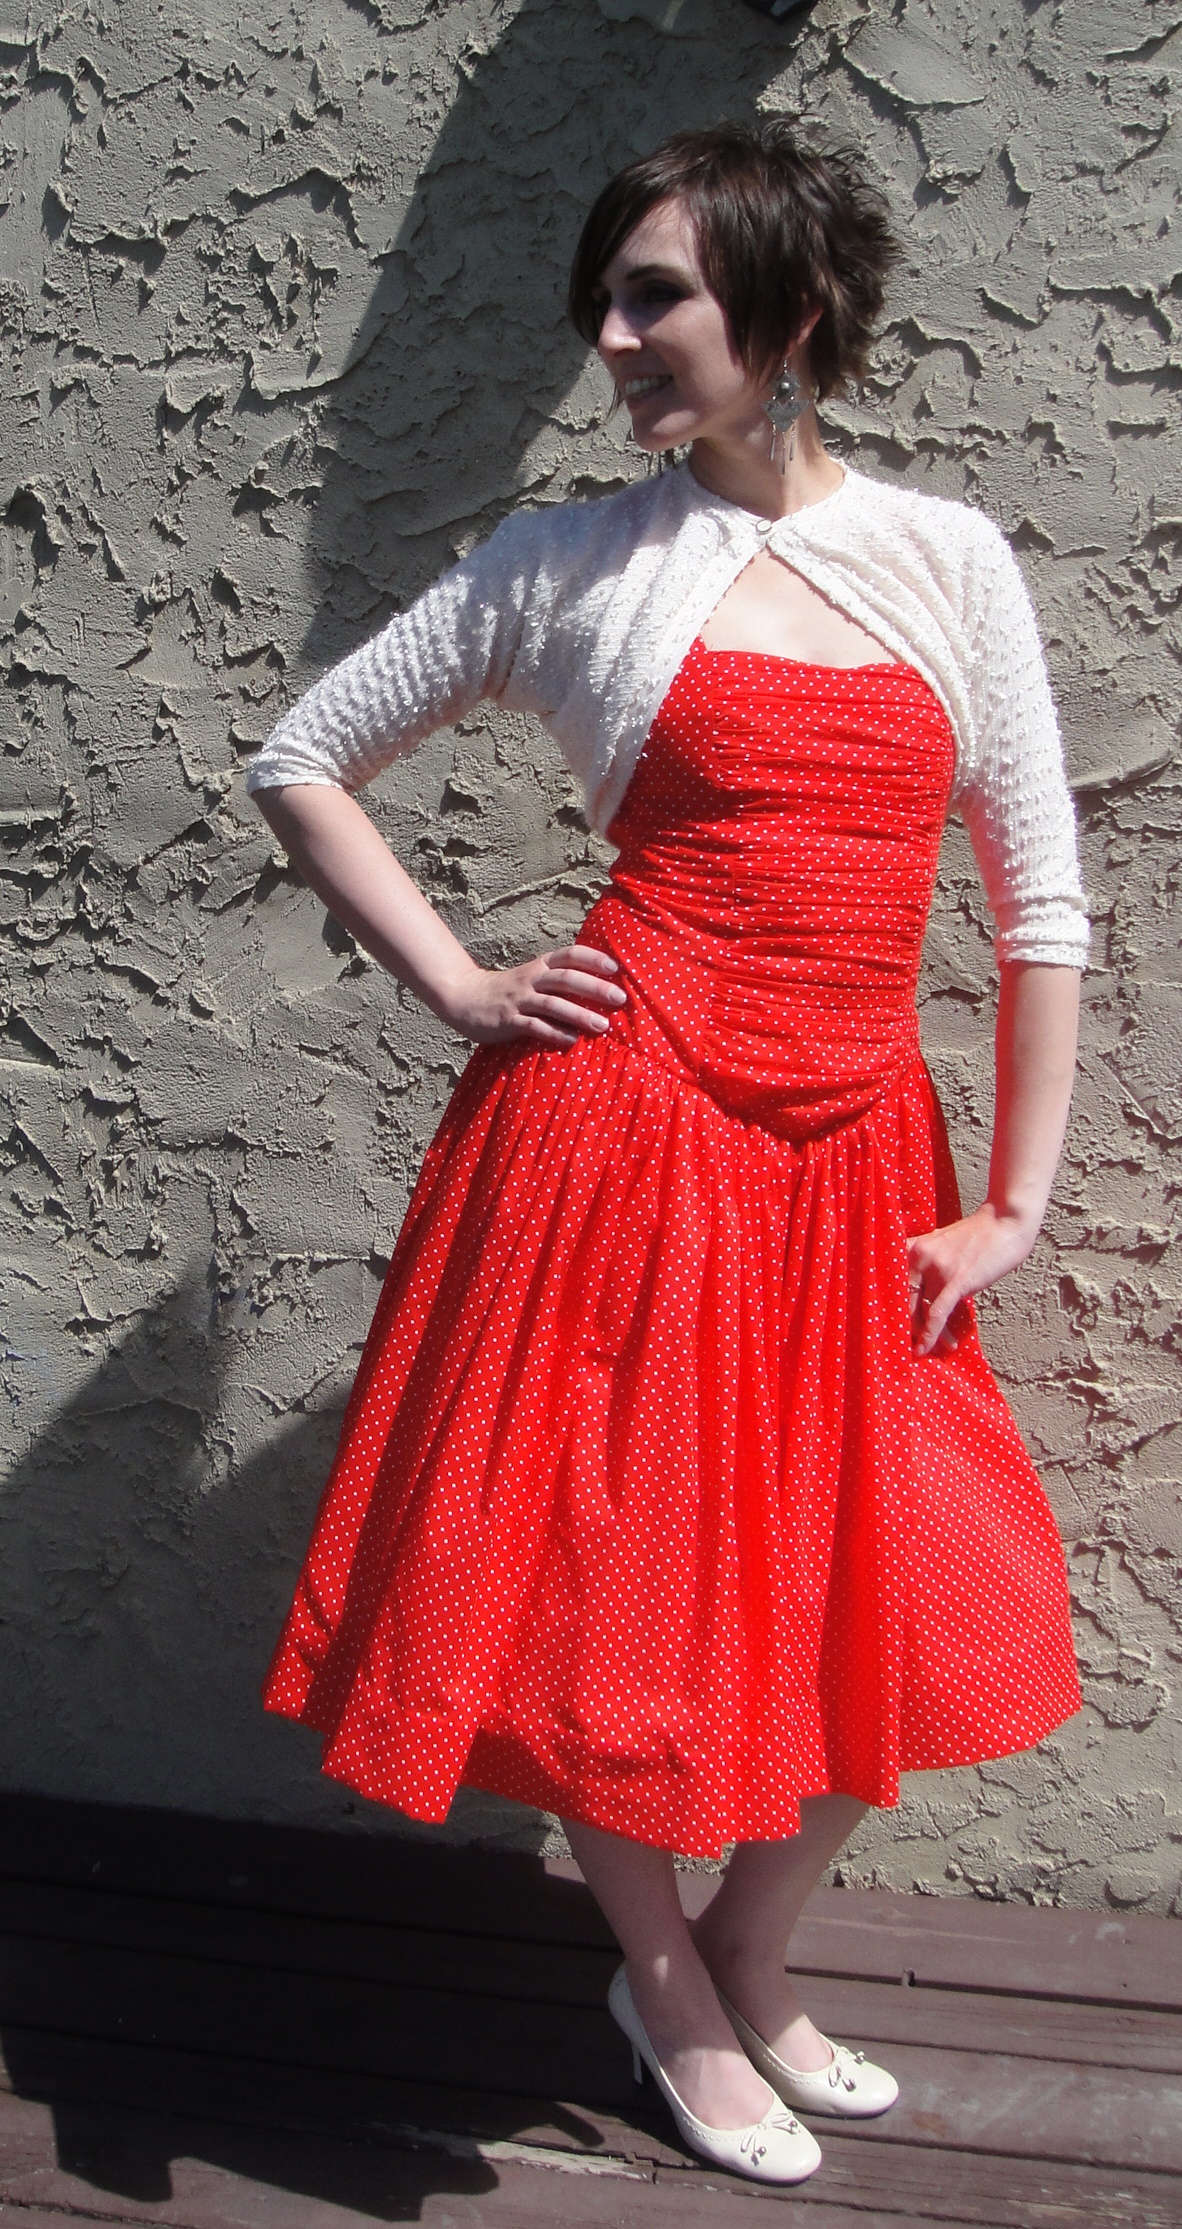
The Red Polkadot Dress

Lady in a Red Dress

Some people can wear cinched waistbands. Some people can wear big shoulder-puffs. Some people can wear dirndl skirts.

Generally speaking, these people are not me. This is really too bad, as I like many of these looks on other people. And I’ve tried them on myself time and again over the years, only to go “ah, yes, that’s why I don’t wear this.” (with the possible exception of pouffy shoulders, which I like enough that I tend to ignore the linebacker effect.)

I really like the idea of dirndl skirts. They’re both ridiculously simple (gathered rectangle—can’t get any more basic than that) and economical of fabric, unlike my preferred circle skirts. But they generally sit right at the waist (not a good spot for me) and add a lot of visual bulk in that area.

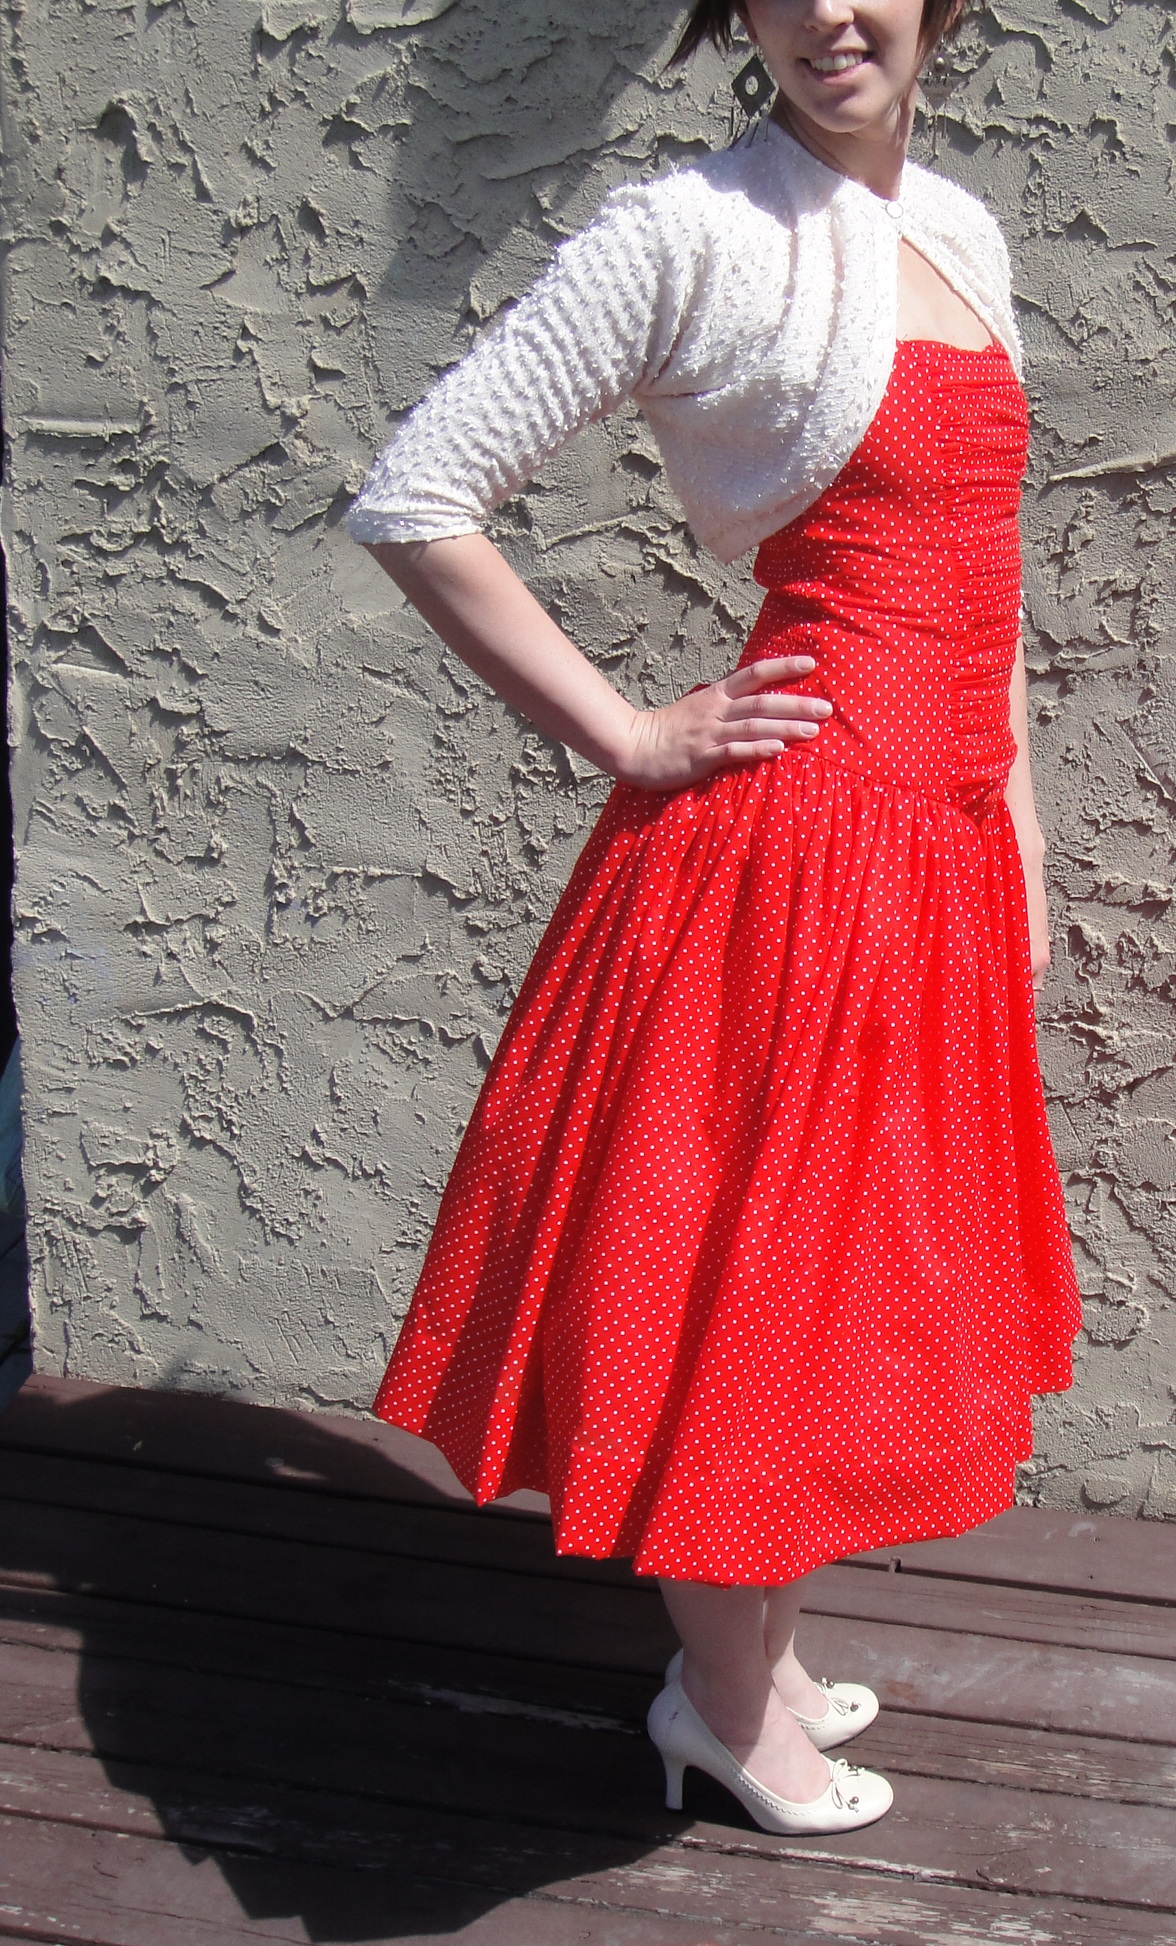
With the shrug. There’s a bit of pooching out of the ruching at the bottom of the front panel, where the outer fabric is looser than the lining. Presumably I goofed my seam allowances slightly or something.

However, as I’ve observed before, something magical happens when I slide the “waist” of my garment up or down a few inches. I can wear empire waists or dropped waists until the cows come home. Now, I believe another term for “empire-waist dirndl” is “maternity wear”, but what about a dropped waist dirndl?

Well, apparently that’s just fine.

I wrote a bit here about the bodice construction and my fitting challenges process. Having largely taken care of that, I came to the next stage in construction. The skirt.

Easy, right?

I had initially planned to do a gathered circle-skirt, like the original Katjusha pattern that was my inspiration. But on examining the amount of fabric I had left after I finished the bodice, it seemed like to get the gathering I wanted at the waist (er, hip) I was going to end up with an extremely SHORT skirt.  Whereas if I went with a dirndl style, there would be plenty of fabric for whatever length I opted for. Some quick and dirty measuring (aka holding the fabric up to my hips), and I was happily ripping away. Four panels of full-width (45″) fabric, a little below knee length plus a bit for hemming.

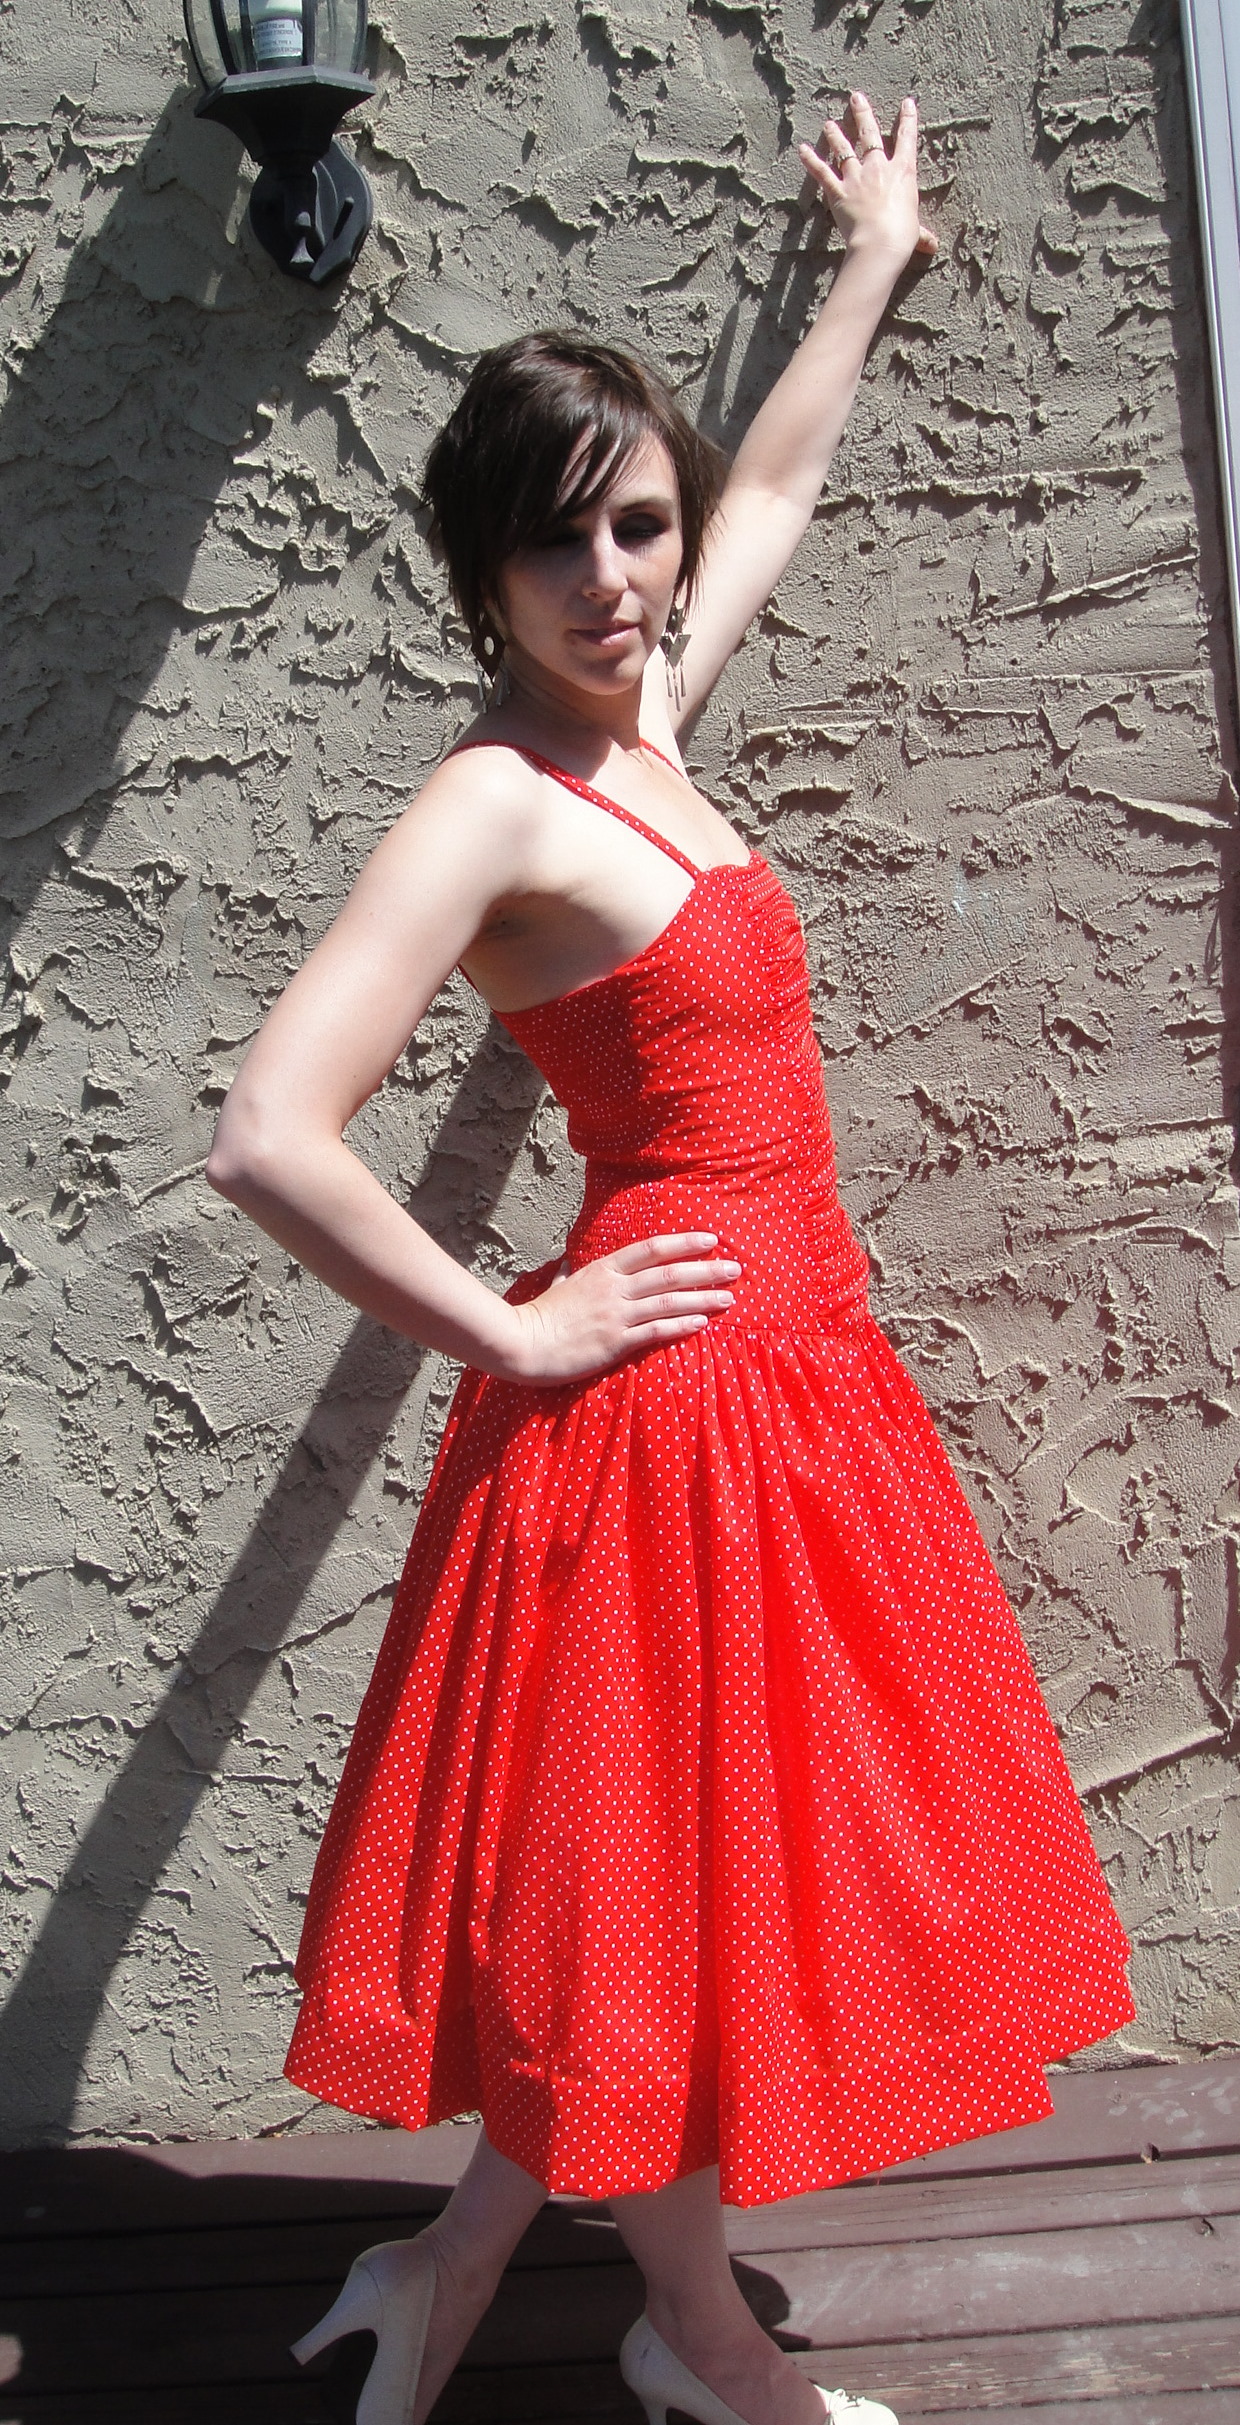
Red Dress

Confessions of a lazy seamstress: I didn’t even trim off the selvedges. I just tucked them inside the french seams I used to join the four widths. When they pucker up and throw the whole skirt off after the first washing, you can all laugh and point.So, I had settled on my width for the outer skirt, but my voile (or whatever this fabric is) definitely needed a lining. Back to my white cotton (yes, the stuff with the laceworked panel. Don’t worry, I’m moving from the opposite end of the length and there’s a ton of it.For my lining width, I used the width of the shirred back-panel, stretched out. It would’ve been smarter to determine this width before I did all the shirring, but I wasn’t sure it was going to shirr up the right amount at that point. Shirrly* you understand my quandary? Anyway, I decided to use this width for both the front and the back of the lining. I would gather the front to the bodice front, and sew the back flat to the stretched-out bodice back. But, you really want something underneath to give a dirndl (or any full skirt, really, IMO) a little oomph. I decided to make my lining skirt tiered. So I cut it approximately half the length I wanted, and then cut four more pieces of similar length for the bottom tier, and broke out the gathering foot.

Now, this is not my ruffler, with whom I have a passionate love-hate relationship. I wasn’t willing to deal with his idiosyncracies for four measly widths of lining. (If that sounds like a lot of gathering to you, please understand that I got the ruffler foot in the first place to make tiered skirts for tribal bellydance. The first such I made had 32 fabric widths in the bottom tier. And nine tiers, although I think only seven of them ended up being ruffled. So from my rather warped perspective, this is hardly any gathering at all

Red Dress

So I decided to play with my new, inexpensive, and untested gathering foot (Here’s a post contrasting the two). I popped it on, measured some 10″ lengths on scraps of the cotton, played with my stitch-length and tension settings, and after about three tries managed to get a gathering ratio approximating 2:1. Good enough. I began gathering.

I think I’m not going to become a huge fan of the gathering foot. It’s not awful. In fact, compared to some of the shit fits my ruffler has thrown, it was possitively easy to use. But the resulting gathering is not particularly even; it’s highly susceptible to the slightest difference in how I hold the fabric in front of the foot (crowding the needle vs. letting the fabric lie flat). The main thing I like about mechanical gathering with the ruffler over my preferred semi-manual technique (where you zig-zag over a supplementary thread… the zig-zag acts as a casing for the thread drawstring which you can pull up later) is that you don’t have to futz over the gathering being even, even if it may not be the exact ratio you wanted it to be. The gathering foot didn’t seem to have this evenness, and even worse it was pretty tricky to try to re-distribute the gathers after the fact. For the lining, I didn’t care, but I wasn’t enthused about using it for something that will actually be seen. It did turn out about the right length overall, so that’s good anyway, and it was quite fast.

I did give myself one further complication, which is that I had designed the bottom front of the bodice to dip down to a V. I love this feature a ridiculous amount, but it takes a bit of mental gymnastics to figure out how to reflect this on the gathered side of the skirt. At least, without sitting down and making an actual pattern and spreading it the required amount, which sounds suspiciously too much like work. Instead, I roughly measured the depth of the “V” (minus seam allowance) down from the top of skirt centre front, and free-handed an arch going from the skirt CF to side-seam. Good enough for government work, as my mother says.

For the outer skirt, I used my preferred semi-manual gathering method, mentioned above. I use this for “moderate” amounts of gathering, or larger amounts (like this) where I value precision of the resulting dimension over precision of every little gather. I gathered the over-skirt to match the width of the underskirt, and stitched them together. Really, fairly easy peasy.

Twirling

Then, I did something I haven’t done since Tyo was a baby. I hand gathered the entire skirt front (both layers, and hand-basted it to the bodice. WTF? you are asking. I agree. But we were watching Sucker Punch with the kids last night and I could do the gathering and basting by hand without totally ditching the rest of the family. Normally I’d prefer to be hemming in such a situation, but I wasn’t quite sure of the finished length so I didn’t want to get ahead of myself and hand-hem four widths of fabric to the wrong length. I wound up shortening it by several inches, so it’s just as well I didn’t try this.

Possibly I should also have hand-basted the back to the shirring, as that was a beast to do accurately and took a couple of goes. But, water under the bridge. Man, I’m just full of platitudes today. If I can throw “a stitch in time saves nine,” in before the end of the post, I’ll be flying. Well, except that that’s one I rarely follow. It’s still good advice, though.

Red Dress

I am a little concerned that the combination of the front ruching with the full skirt have pushed this past “sundress” territory into the hinterlands of “something to wear to a summer wedding.” Since I don’t expect to be attending any weddings this summer, this would be unfortunate. I may just have to suck it up and be ridiculously overdressed (after all, it wouldn’t be the first time).I wasn’t actively going for a “vintage” look when I made this dress. Although maybe that’s an inevitable reference for any full-skirted, tight-bodiced dress these days. Anyway, pairing it with the shrug just turns the “vintage” look up to eleven. It goes, though, doesn’t it? This shrug is ridiculously versatile. Seriously, I wear it with EVERYTHING. I need about five more.All that gathering in the skirt interacts a bit oddly with the back bodice, despite my best efforts to reinforce the bottom of the shirring with some sturdier elastic, but it’s probably not something most people would notice (dazzled as they will be by the swishy, full skirt, right?)Incidentally, the length is only sightly below my knee. Tyo was standing on the picnic table to take the photos, so they’re from more of a downward angle than usual. I’m wearing the fluffy petticoat as well as the tiered lining.And obviously I need some red heels.

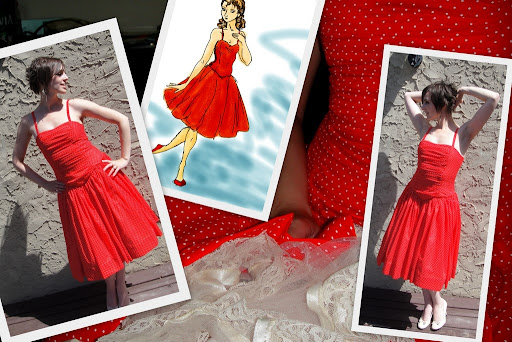
Final project and inspiration. I think I need a fluffier petticoat.

*I normally try very hard to resist the obvious sewing puns. I have never intentionally substitued “sew” for “so”. This one slipped through. I humbly apologize.

48 Comments

Filed under Sewing

Happy Birthday to Syo!

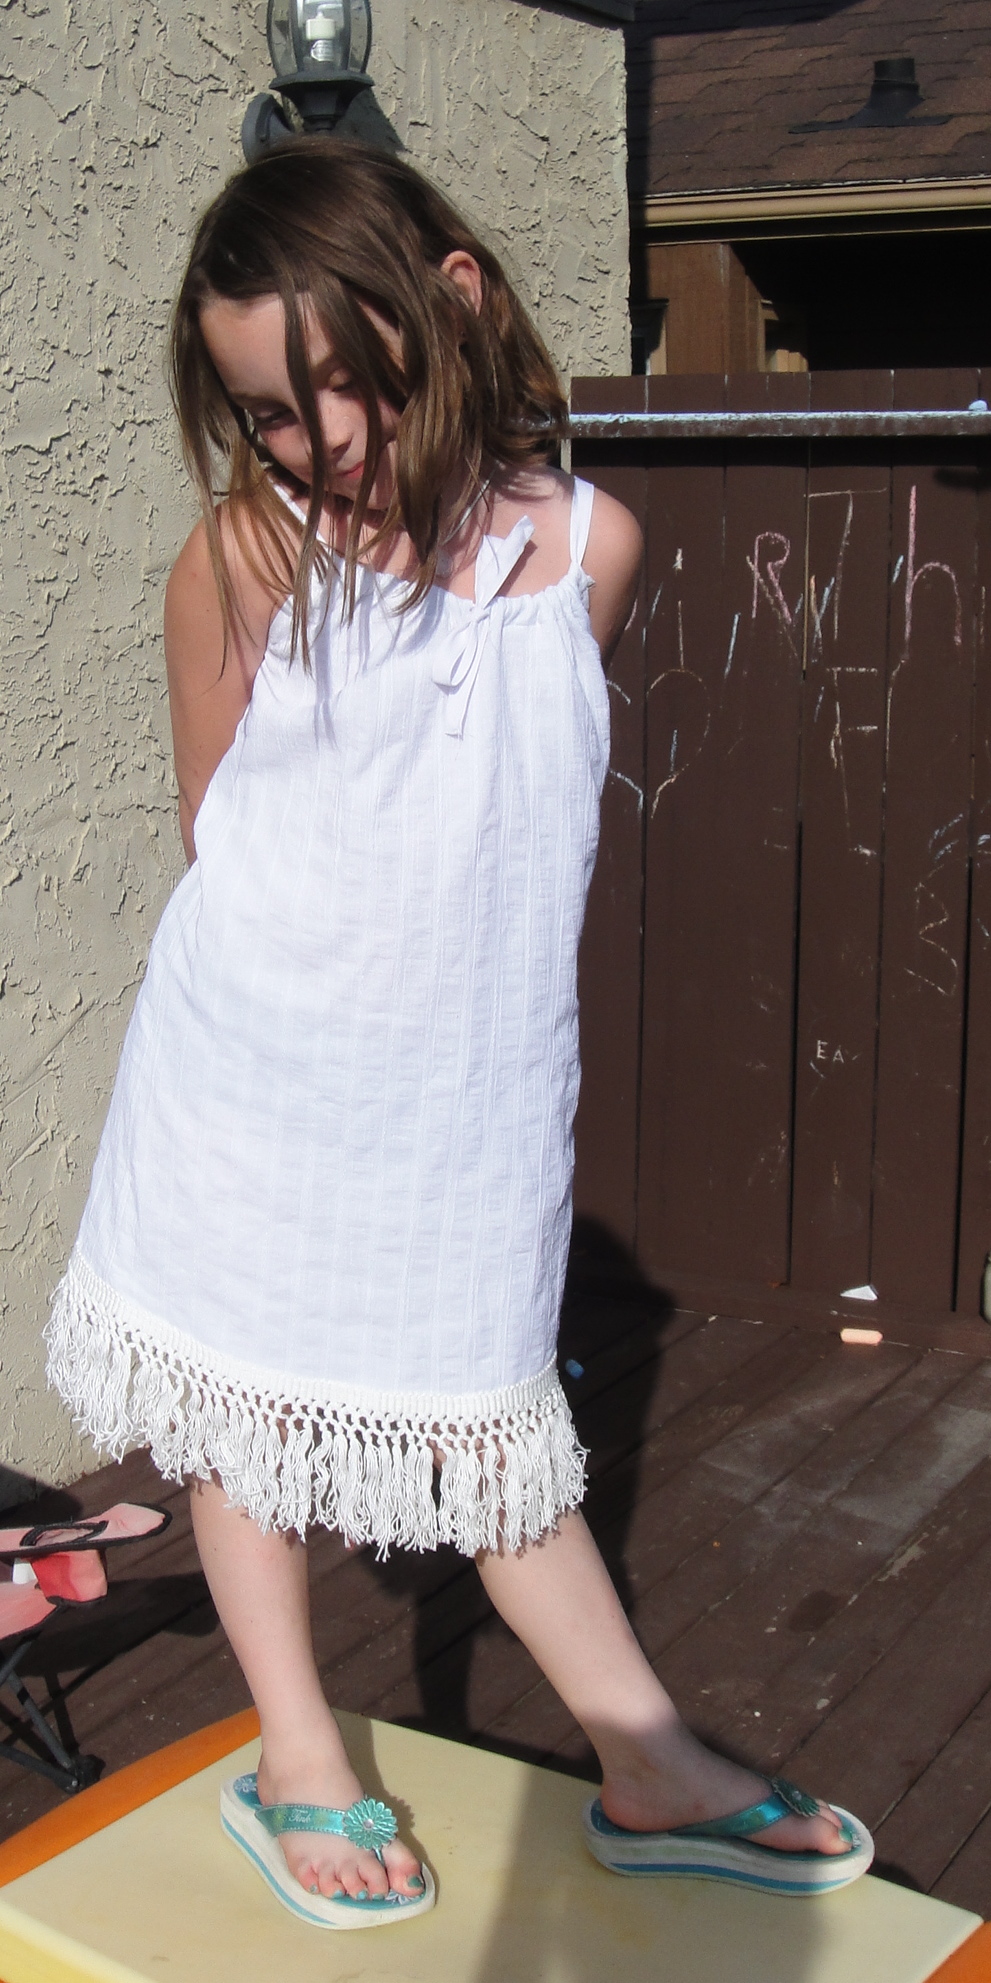
Syo's dress, by Tyo.

Technically, I guess today she should become Eyo (the Eight-Year-Old). But for the sake of continuity, not to mention because Tyo will become the Eleven-Year-Old in another month, I’m going to stick with the nicknames as is.

Relatively little has been cleaned up from the birthdays (to my husband’s dismay), but sewing has happened! Tyo put the final touches on Syo’s present and we wrapped it up.

The kids have also been stitching madly away at these:

Pouches!

They are almost done. Whew! It would’ve been so much simpler to do them all on my own. But that would be defeating the point, etc. etc. Syo decided she wanted the blue and pink flannel fabric (top left) for the outside of hers; it’s lining the others.

What, Syo modelling her dress? Well, if you insist!

A well-dressed child

The fringe along the bottom is a length that appeared in one of the Value Village baggies. I stitched it on for Tyo… it was just less of a headache that way.

I am disappointed to report that she is less than thrilled with the dress. The reason? “It’s not tight enough. Tight is cute.”

Ah, yes. I had forgotten that.

Erm, she may have picked up that perception from me. Ooops.

Anyway, I think the dress is adorable.

In Me-Made June news:

June 27

Yup. Still lounging amid the remnants of the kids’ birthday party on the weekend.

I was (perhaps overly) excited about the weather forecast today and dressed for SUMMER. Of course, I spent most of the day in the chilly indoors freezing my legs off. My bad.

70s Tunic
Lekala sailor shorts Which you can’t actually see, but I promise you they’re there.

6 Comments

Filed under Sewing

Who wears short shorts?

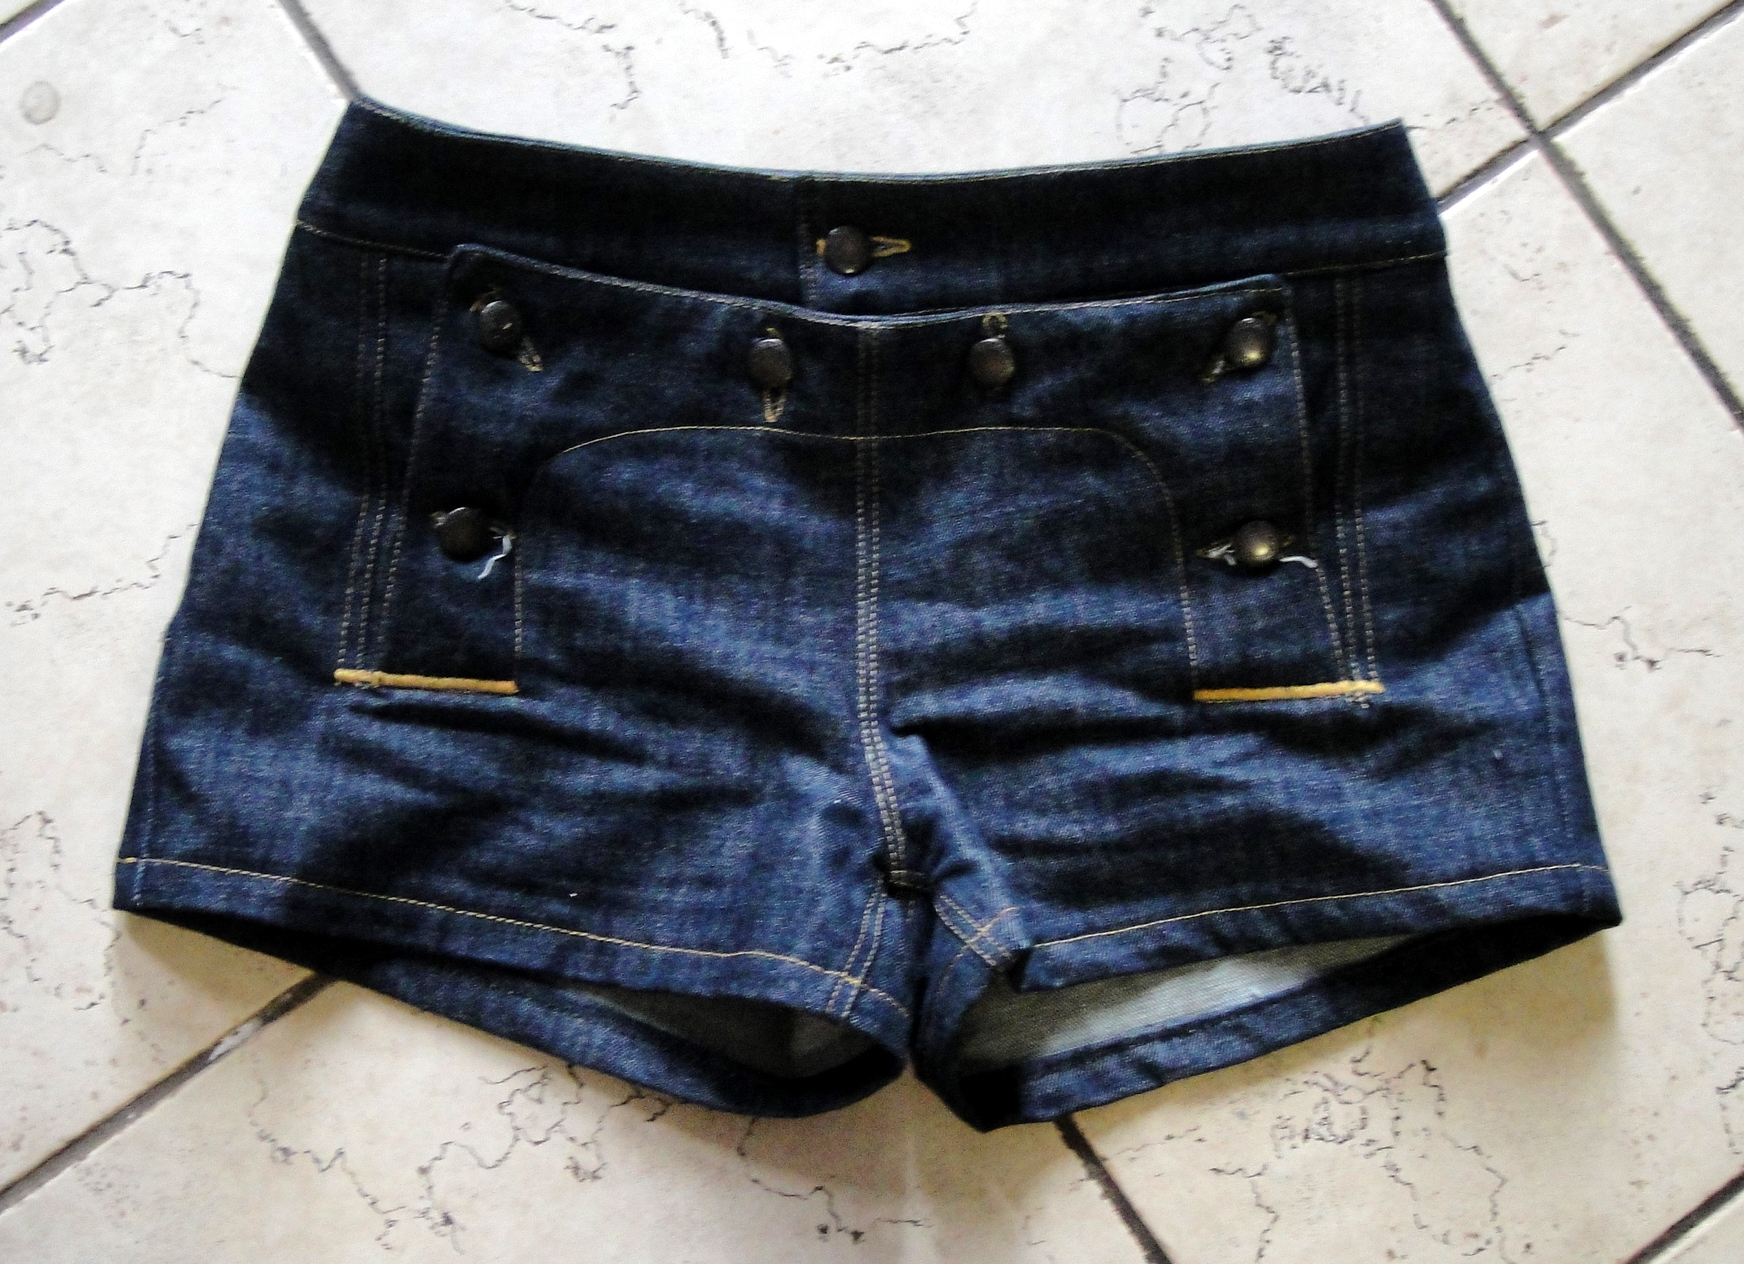
Shorts! ...ulp.

Um, I do. For a very long time a 1″ inseam was my standard. And while I’ve gotten considerably more shy about my midriff over the past decade, my legs have stood the test of time up much better. They remain one of my favourite physical features. (Not to toot my own horn)

Of course, the last few years I haven’t had much opportunity to wear shorts, period. The summers here are, well, chilly by my standards (blame elevation or proximity to the mountains or just a run of bad luck); it only broke 30C once last summer. Add that to spending my days in an air-conditioned lab and, well, shorts just kinda got left for weekends and visits home. (The two or possibly three people reading this from my home town can protest all you like that your summers have been beastly the last couple of years. They were still better than the summers here.)

Lekala 5465 Sailor Shorts, pattern here.

Anyway, my shorts history aside, this seemed like a good way to tackle the fit of the Lekala pants block without sacrificing a huge amount of fabric (obviously I was not thinking in terms of topstitching- and machine-rethreading-time). I may also have been feeling kid-project-ed-out. Or possibly crack smoking was involved*. Anyway. For whatever reason (reason really played no role in this decision), the other day I found myself printing out the pattern (only nine pages!) and laying out the pieces on the denim remnant left over from my bellbottoms.

One bonus to this particular set of pants is that the directions on the Lekala website have, in fact, been translated to English. Now, I think translating sewing directions has to be one of the hardest things in the world, as the technical terms are both a) highly specialized and b) unique to each language (translating scientific stuff, on the other hand, is much easier, since most of the important words come from Latin anyway. I don’t speak a word of German but can still often pull the major details I need out of a German research paper. Not so a German issue of Burda.) All that being said, I made it to about halfway through step 6 before my brain blew out. I had no idea what they were trying to get me to do.

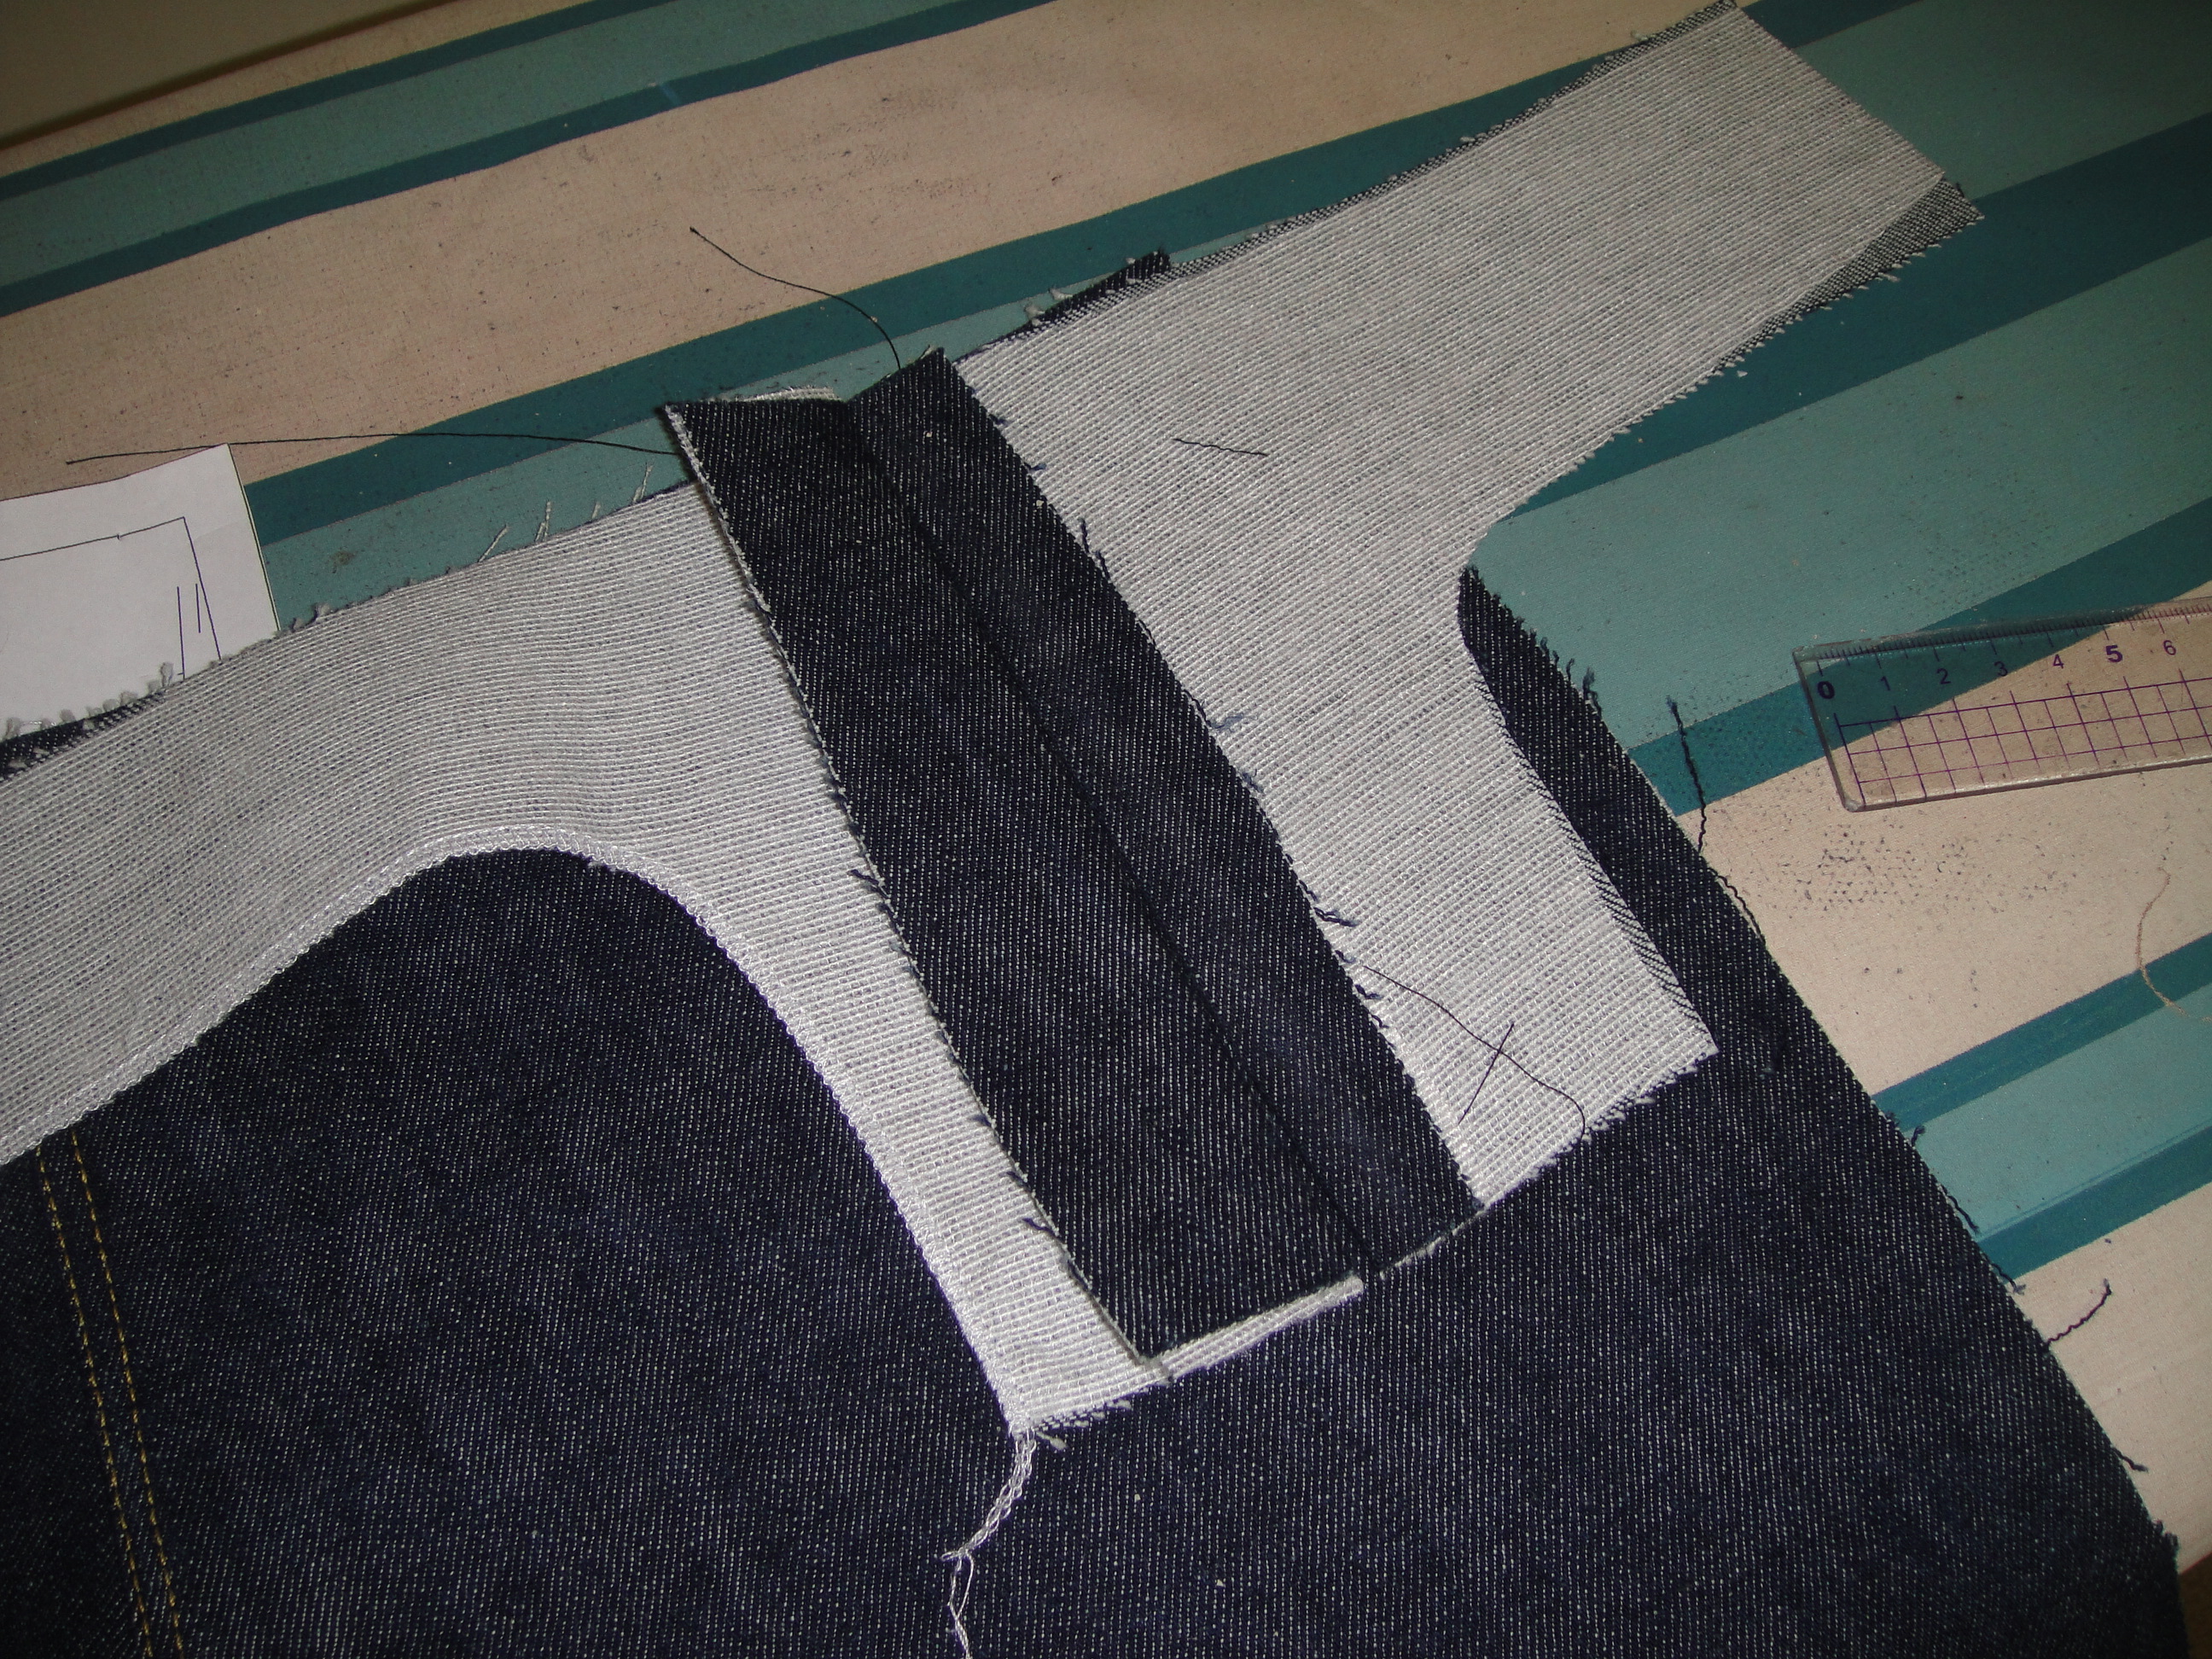
What exactly are you telling me to do?

So I stood there with my pieces, laying one on top of the other, this way up, that way up, trying to figure out what to do.

There was a slit involved. I knew that much.

In the end I didn’t do it exactly right—the piece which they call the “Fly Panel Facing” (this would’ve been more helpful if the names of the pieces on the pattern hadn’t still been written in Cyrillic) is supposed to lap out and make a little overlap on the front, which I didn’t get. I’m still not sure how you would make the bottom of that neat, by the way, without adding a crapload of bulk, anyway). But I did manage to get the fly panel and the four “inner front parts” together. I am too lazy to actually put together a tutorial for how I did it—if you really feel the need to make this pattern, I can do one, but I’d really recommend you make the 5742 pants into shorts instead. Or use this tutorial for creating a sailor-button look with a continuous lap placket. Or even pay for the Hot Patterns pattern (which I haven’t used but have seen some very nice pairs made up). Or, y’know, email me and I’ll do my best.

WTF?

What it basically came down to, though, is that you end up with a slash down the middle of each front piece, with the “Fly Panel Facing” making a facing for the inner side of the pants and the “Inner front parts” sandwiching the edge of the slit, some frighteningly narrow seam allowances (I had to re-stitch several of mine), and nothing but a bit of fusible interfacing reinforcing the bottom of the slit. And I’m not convinced there’s anything at all you can do about this with this kind of pattern, unless you incorporate a front seam (as they did in the 5742 pants) or add a seam from the bottom of the slash over to the side, maybe with a pocket in it. Maybe I’ll try something like that next time.

So that’s my issue with the pattern itself. On to my own failings.

Crappy topstitching AND buttonholing!

Partly because I was really unhappy with the slit feature, and partly because I was trying to slug away at the piece and get it done before I had to reathread the machine for a kajllion kids’ projects, I sorta gave up trying hard. My topstitching around the inner part of the front fly panel isn’t symmetrical. I didn’t place my buttonholes properly, AT ALL (at least the topstitching I can fix if I come to my senses). My machine really doesn’t like zig-zagging with the top-stitching thread, so the buttonholes themselves are pretty dodgy as well (I tried buttonholer attachment, machine’s proper attachment, and manual—it just really doesn’t like to zig-zag with heavy thread). I added patch pockets to the rear, mostly on the principle that my butt needs as much decoration as it can get. Those are actually all right, although I forgot to do any topstitching designs before I sewed them on, so they look a little plain.

So those are my issues, purely self-inflicted. I should’ve taken more time, been more careful, not expected to bang out a pair of jean-shorts in a couple of hours. One thing the instructions do emphasize is topstitching carefully and evenly.

On me: front

And in the end, I don’t really like the shorts at all, for a reason that has nothing to do with the design features, the construction quality, or the instructions.

I don’t like the rise.

Now, the pattern illustration shows a moderately low rise. It’s hard to gauge things like this from illustrations (or even other peoples’ bodies, rise being a fairly individual thing). And I like low rise. The problem is, I like low rise.

These are more like mid-rise. They fall just below my navel. This is at least an inch or two above where I like my waistbands to fall, as it hits right in the middle of my jubbly bits. I’d rather have my waistband lower, where my hip gets bony. I realize that this isn’t most people’s preference, but it works for me, with my particular narrow-hipped, short-waisted body.

On me: side view

The bright spot of light in this is that the fit itself is more-or-less perfect. I didn’t even have to make any kind of gaposis adjustment to the back, which I had to in both the Ellen pants and the Jalie 2908 jeans (granted I think the Jalie pattern is drafted to the flattest common denominator, possibly because they figured this was an easier adjustment to make than the flat-butt adjustment). The only alteration I made upon trying them on was to take in the outseam of the leg a little bit below the hip, so they are not quite so loose around the thigh.  Which is more of a style issue, again, than a fit issue. The illustration shows quite loose, slouchy shorts, rather than my sturdy denim version (and the fabric they call for is “sheer flax”, by which I assume they mean a lightweight linen. They use the word “linen” for fabric.)

I also used a smaller number of buttons than called for, because it “looked right” and I thought it would be okay on the denim. So there’s a bit of gaping that shouldn’t be there. Lesson learned.

Oh, and in case you were wondering, the finished inseam wound up being about 2.5″.

Finished interior, with bonus threads. I'll snip those some time when I give a shit.

I don’t even know for sure that the rise will be an actual wearability problem, since I wouldn’t normally tuck a shirt into these anyway.

Oh, yeah… the pattern also calls for a zipper. I have no idea where this is supposed to go or why it would even be necessary.

In Me-Made June news, here’s yesterday’s outfit.

Me-Made June 23

This photo was taken in the glorious sunshine about five seconds before the clouds rolled in and the winds picked up. I was expecting one of our June thunderstorms, but it never quite materialized. Maybe today (if not tomorrow in the midst of the kids’ birthday party).

70s Tunic
Jalie 2908 CaprisHmm, tired of these yet? Obviously I need some other pairs… (and it just so happens I got some summery cream stretch twill at the Fabricland Canada Day sale yesterday…)

Oh, the earrings are a pair my mother and I put together back when we were making jewelry when I was in high-school. The bottom is a little malachine elephant a friend brought back from Zaire.
*Disclaimer: I do not now, nor have I at any point, smoked actual crack. Or been been in a room where crack was being smoked. Or seen crack, except on a movie. I didn’t even smoke pot in high school, which is practically a rite of passage.**

**largely because my friends all smoked pipes and I was too embarrassed to admit I didn’t know how to use a lighter. Yes, those cheap Bic lighters. It wasn’t until I had been married to a smoker for several years that I learned how to use one. Mostly by practicing when he wasn’t around.

29 Comments

Filed under Sewing

California dreaming…

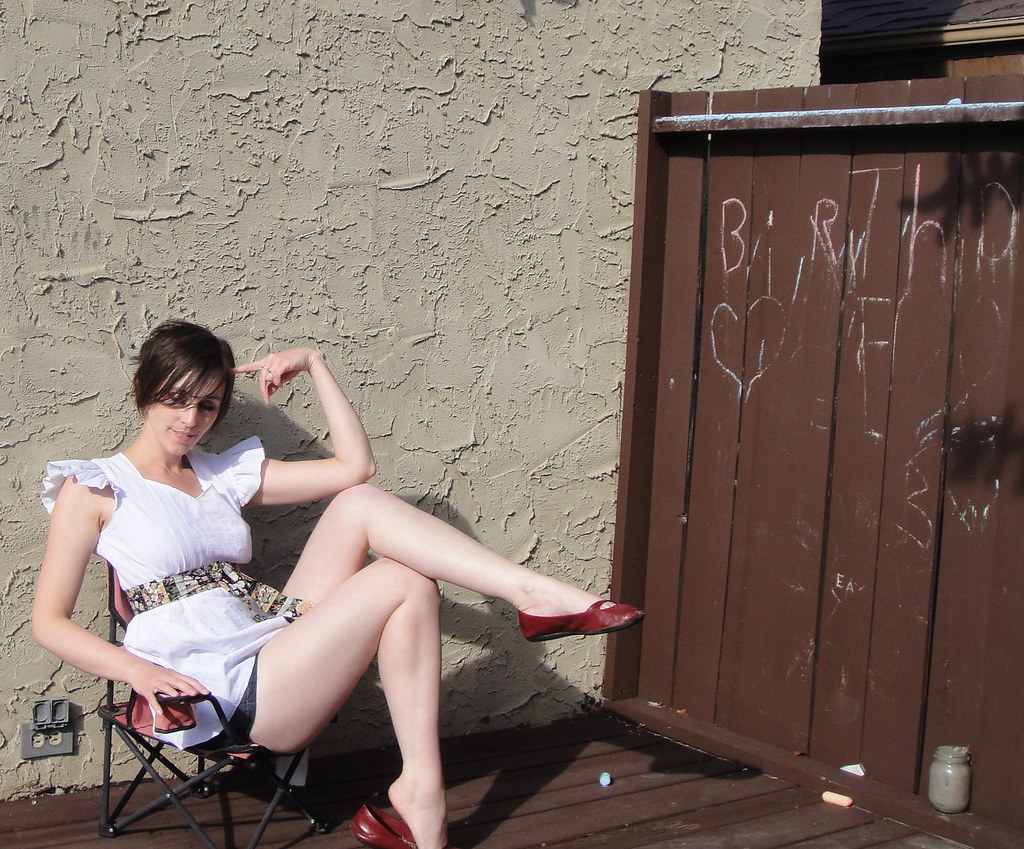
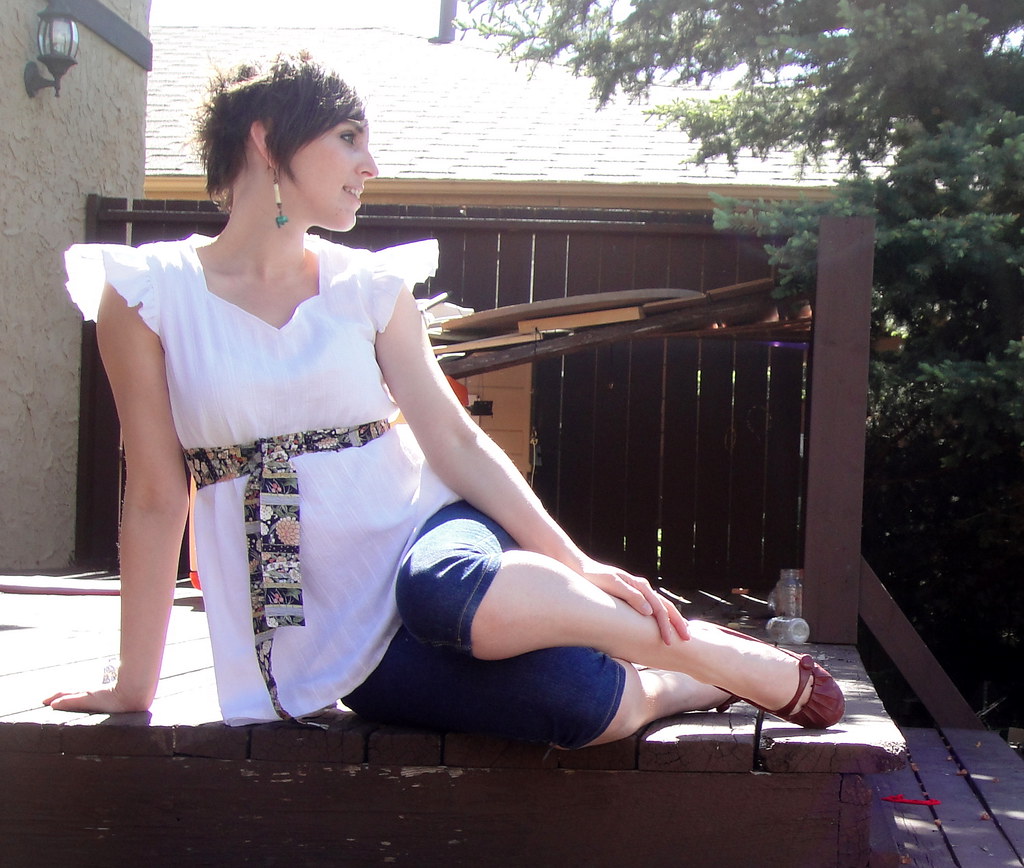
New tunic!

… on such a winter’s day…

Ok, not really winter. It was raining (again), which in these parts denotes NOT winter about as strongly as anything. Yay, liquid water!

But definitely not as summery as I’d like.

Still, I continue to sew hopefully, so today I plugged away with my gauze 70s tunic, trying not to mutter about how much I prefer nice, heavy coating fabrics. Cotton gauze and voile don’t rate too high on the scale of difficult fabrics, but you have to be so careful about the finishing, especially in white. Things I usually ignore, like how evenly I grade my seam allowances or whether my tail threads are getting eaten by the feed-dogs, stick out like a sore thumb.

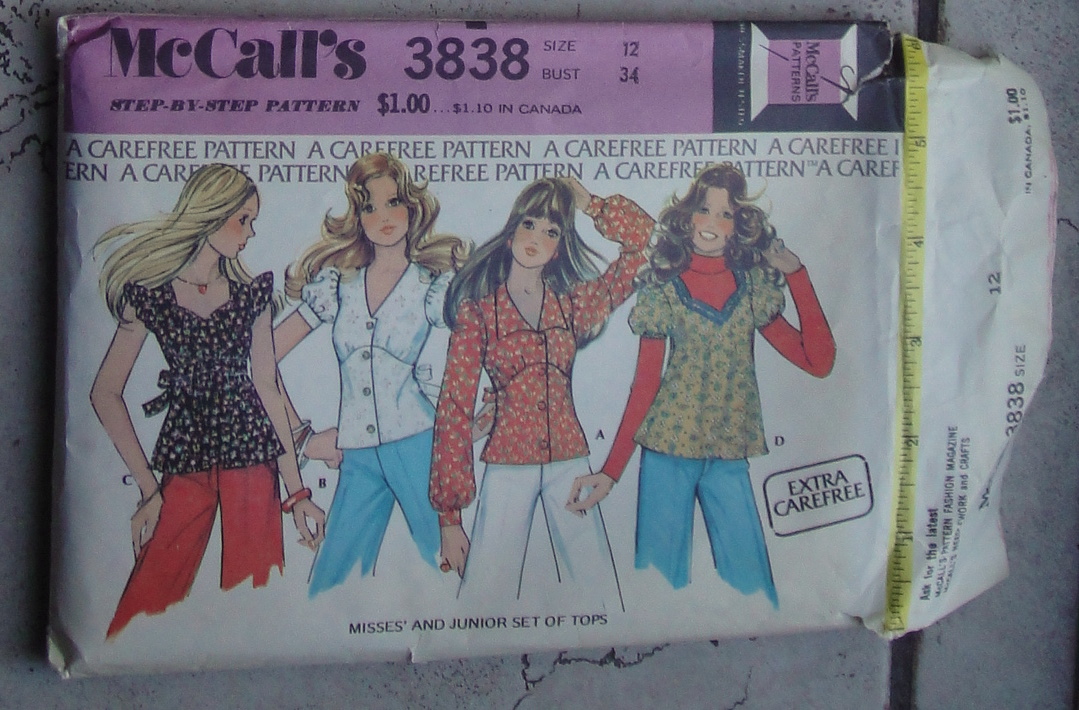
McCall's 3838

Now, I was aiming for view C, the left-most on the pattern envelope. Since it was a sleeveless (essentially), un-fitted pattern (and I don’t know how McCall’s patterns fit me yet anyway), I omitted my usual swayback and petiting alterations. Instead, I opted for a square shoulder alteration, which I’ve been pondering on my last few tops.

Front view

And I’m quite happy with the results, although I should probably have lowered the neckline the same 1.5 cm I lowered the centre edge of the shoulders. I did that for the back neckline, but didn’t think to do it for the front. If I make this view again (which isn’t certain, as there’s lots of options) I’ll lower the whole neckline at least an inch, anyway.

After some consultation with mommy dearest, I did some seam-finishing experimentation and settled on the lazy stitcher’s French seams, which is where you serge the edge on your first pass, then press and encase the serged edge within the French seam for the second pass. Basically it adds the serger thread, but saves you the trimming stage. I pretty much blow at trimming seams evenly, so this let me get a much narrower French seam than otherwise, so despite the extra thread I end up with less bulk. Although my serger, despite being serviced just at Christmas, has tension issues when dealing with light-weight fabrics; there doesn’t seem to be any middle ground between ultra-loose and loopy and too-tight-and-ruffling. I’ve discovered that if I leave extra-long tails I can usually work the thread in so the thing lies evenly afterwards, but it’s a bit of a pain nonetheless.

Back view

Yes, it’s time for a new serger. One with all the bells and whistles.

Anyway.

I was really, really scared of the sweetheart neckline. Mostly because I felt the fabrics were too light to interface or reinforce, other than stay-stitching. So I stay-stitched, and handled as little (and as carefully) as I could. It did wind out a smidge stretched out, but… decent. And mostly symmetrical, my other fear. Although I used the lining as my facing for the neckline, for the armscyes I bound with bias-tape made out of the voile, and pressed to the inside. I used my machine’s lone decorative topstitch (OK, the only one I like) to topstitch around the neck and the armscyes. Patty is making me very jealous with her decorative topstitching.

Aside from the shoulder alteration, the only other change I made was to add 13 cm (aka 5 inches, but I’m trying to be a good metric girl these days. The search for a metric gridded ruler continues, and I am consciously teaching my kids to sew in metric.), to the hem, bringing it from a blouse length to a tunic length. Somehow when I was thinking about this pattern, the outfit I conceived of was this tunic-almost-dress worn over cutoffs you almost can’t see are there. Voila. Although maybe for the full illusion I should’ve made the top a couple of inches longer still.

Side view

I’m quite satisfied with the fit—none of that bunching up behind my neck that I often get, so I presume the square-shoulder thing did its work. Other than that there’s not much to fit or not fit ;). Side-bust darts might improve the shape a bit, but aren’t actually necessary.

View C has a self-sash stitched in place at the centre front, and I even cut one out, but then I couldn’t resist trying it with my Japonesque fabric sash, and I love it, so I’m going to leave it changeable for now. We’ll see how it stays in place when I ever get a chance to actually wear it.

But all in all, super happy fun!

There’s a bit of the inevitable pregnant pouf that is going to accompany pretty much any take on this style, but this is a look I’m resigned to, as it’s pretty much my natural figure anyway.

This is “officially” my second piece for the Summer Essentials Sewalong. Now, excuse me while I go fantasize about hot, hot sun…*

*I think I should apologize about the amount I whine about the weather. I’m not sure if it’s human nature or a Canadian specialty, or just that I’m a wimp (I am a major weather wimp, especially about the cold). The weather we are getting right now is a kajillion times better than what I was complaining about in, say, March. So really I should STFU.

32 Comments

Filed under Sewing