 Did I mention lately that I don’t need any clothes? I really really don’t. My husband, on the other hand, is in dire straits. Since he hasn’t needed a professional wardrobe for years now, and he hates shopping and is super picky, everything in his closet is ancient, worn out, and often ill-fitting.
 And guys, he’s hard to sew for. Lord knows I’ve tried over the years, and sometimes I’ve succeeded (most often with loose overshirts.)
 But did I mention he’s picky? Nothing gets a “oh, that’s perfect!” Everything gets criticism that at best is constructive but at worst is just demoralizing. He’s fussy about fit, fussy about fabric, fussy about style.
But I really don’t need clothes, and he does, and he won’t go shopping (nor do we have a lot of money for that, see the part about where my second job just went away)
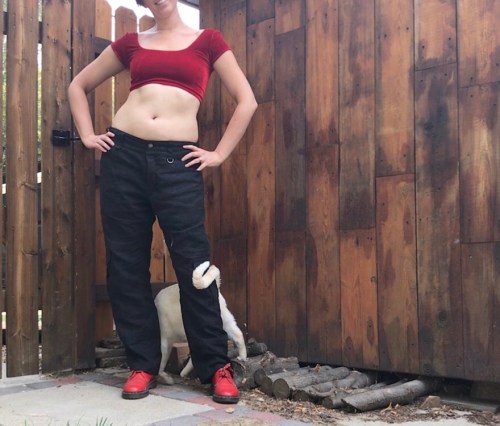
 Anyway, he needed some cool pants for the summer. He won’t wear shorts (see the part about picky) and while he couldn’t quite articulate it, I was pretty sure some casual linen pants would fill the slot.
Fortunately, I had just enough of the black linen I used for this dress for a good sized pair of men’s pants.
 I was initially thinking very plain and simple, as much of a fit test as anything else. Then I made the mistake of telling him what I was making.
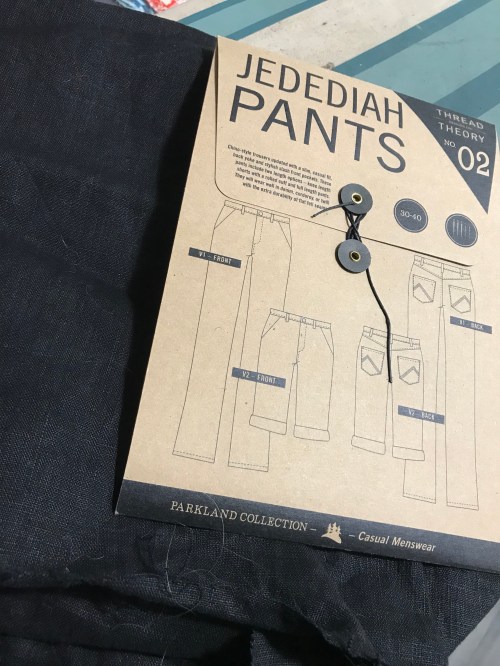 I had picked the Thread Theory Jutland pants, a fun pattern with great workwear details. I liked the combination of jeans style pockets in the front and darts in the back, which make for easier fitting on the fly. I was a bit worried about the slim fit of my other option, the Jedediahs. I was going to save the cargo pockets and reinforcement details for a future version, though. I planned to size up and add elastic to the back waist to allow for his highly-fluctuating waist size.
 The first mistake was letting him see the pattern. Not that he didn’t love the details (the ones I was going to skip, you recall). He just wanted even more. Zip off legs! Accordion pleat in the back!
I protested, and the whole procedure nearly halted right then.
 But I really don’t need more clothes, and he does. So I took a deep breath, and “compromised” by doing the added details as per the pattern, but not doing stupid zip off legs that he’ll never actually unzip because he only ever does that while wading in water fishing and if he takes his black linen pants fishing I’ll kill him. I don’t think he considers this a compromise.
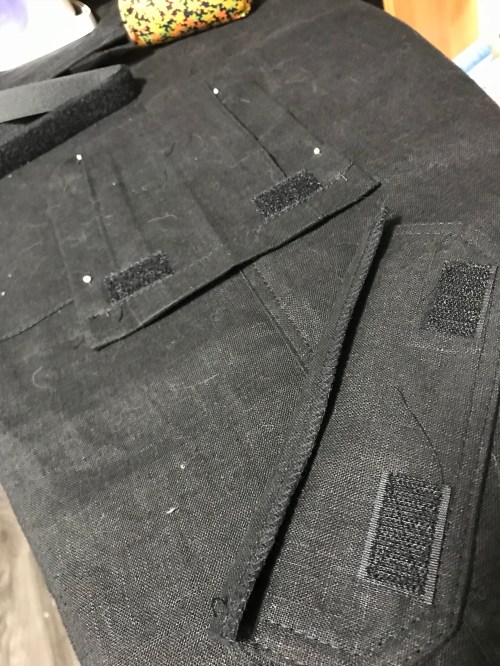
 Anyway, I don’t actually mind the process of constructing cargo pockets and the other reinforcements were very simple. (And frankly as cargo pockets go, the ones in this pattern are pretty Lite(TM). Just a couple of pleats. Not really 3D at all. I was actually a wee bit disappointed.) I did the pleats a wee bit too deep so the pockets are a bit small for their flaps. This turned out to be the least of my worries, however.
The problem is, this was my first time making up this pattern, and the details really pin down certain things. Where the knee should be. Where the hem should be. And it turns out, I kinda fucked those positions up.
 When I traced out the pattern, I added length. My husband isn’t that tall, but he does tend to be long-legged and too- short jeans are a common issue.
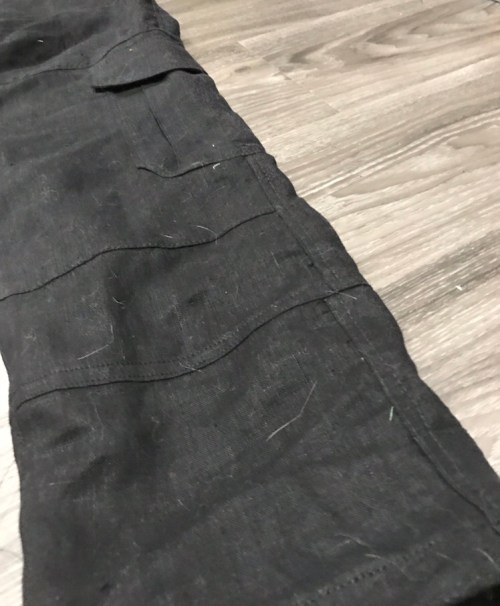
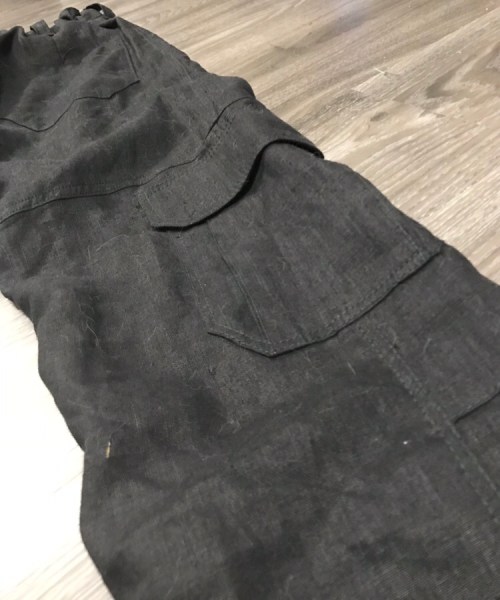 Let’s just say they would not have been an issue as is. There seemed to be about 6″ of extra length on each leg, and I only added about 2″. I wound up making a 1″ tuck above the cargo pocket (topstitched down) and adding a seam to take out about 5″ more between knee and hem. Edit: and it turns out that was a little too much now that he’s actually sitting down in them. FML.
 Because when worn “high” (aka as they should be) they’re way short even on me. But when we tested the length he had them slung low. Argh!!!
 I also discovered when I went to sew them up (AFTER the cargo pockets were all in place, of course) that I must’ve screwed up my tracing, because my front and back inseams are about an inch off. WTF? Side seams match fine. Anyway, in the end I eased the extra length in. This will probably cause problems at some point, but linen eases pretty nicely.
They were also quite a bit fuller than he likes. Some of this is because I sized up, but some is just the style of the pattern, which is quite loose in the leg. So I wound up taking in the inseam (remember, outseam is fixed at this point by the cargo pocket on top of it) by about 3cm on each leg. That’s over 2″ off the circumference of each leg, guys. And I had already topstitched inside the tube to finish off the inseam. Rookie move on my part. I was a little cranky.
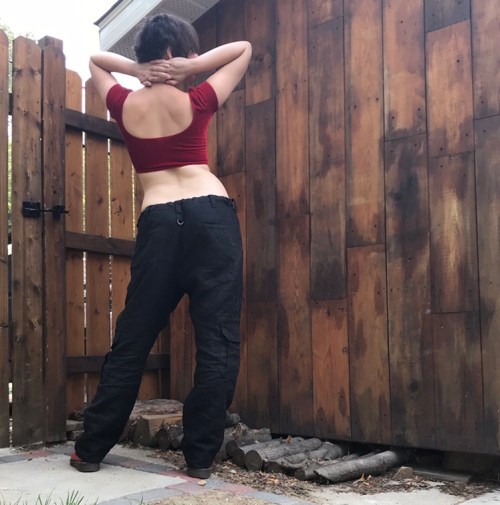
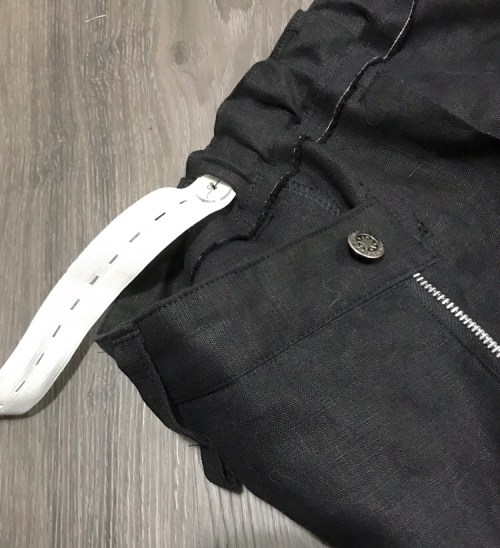 I wanted an elasticised waistband to accommodate his wildly fluctuating waist, and after some thought decided to go with the old buttonhole elastic. Maybe overkill in this situation, but the oversized pants would’ve been beyond wearable without it. Hopefully the convenience of the adjustability will outweigh the weirdness of the finish to him. What I didn’t do (which I would have in more fitted pants) was add some height to the back rise. I assumed the over-sized-ness would compensate. I was wrong. So they’re a little low for his taste back there.
 I probably overdid it on the sizing up. Next version, I will size down, add height to back waist, and reduce the length a couple of inches.
Or just say fuck it and make something for me!
(Confession: I felt pretty goofy taking these pictures, but I haven’t worn pants this loose since the 90s and even then I only did it so they would hang low on my hips. So I had to style them as I would’ve in 1996, with a crop top and Docs, because sometimes you just gotta!)

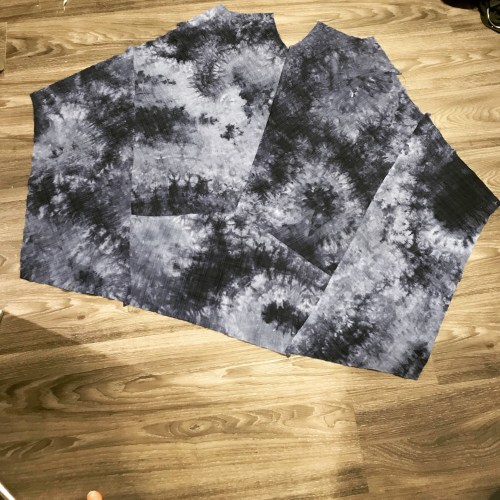
 After the Great Linen Pants Debacle, I needed a palate cleanser. And, as it just so happens, after looking for it all summer my copy of Jalie 3246, my go-to maxi dress pattern, finally showed up. Right in the drawer where it was supposed to be, so I guess I’m blind. The only question was, which of the several fabrics I have mentally earmarked for maxi dresses should I use?
 The pattern is dead simple, although I complicate it slightly by adding a back seam, for fit and fabric frugality. And I add a much wider flare to the skirt, because the skirt as drafted is too narrow for proper walking, which adaptation I actually haven’t put on the pattern—I draft it out on my fabric every time. I should really change my pattern. Someday.
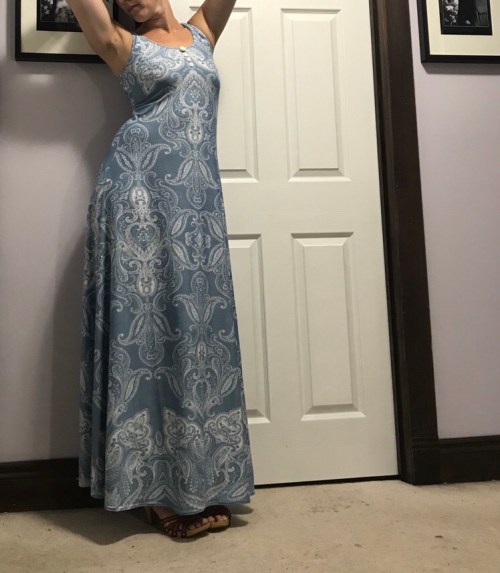 I was very careful about centering the large motif on the front. Less so about where the parts of the motif would fall—maybe not the most flattering arrangement over the bust. On the other hand the design was a bit of a border print so I was running my pattern pieces on the cross-grain, so any wiggling up or down would’ve required piecing or shortening.
 I’m pretty happy with how my bindings at arm and neck worked out. I was a good girl and did lots of testing. It’s the same triple-fold binding I almost always use, with the inclusion of 1/4″ clear elastic for stability because my non-elasticated tests tended to go wavy when stretched. I did not test my hem and it is not nearly as nice. Should’ve used steam-a-seam.
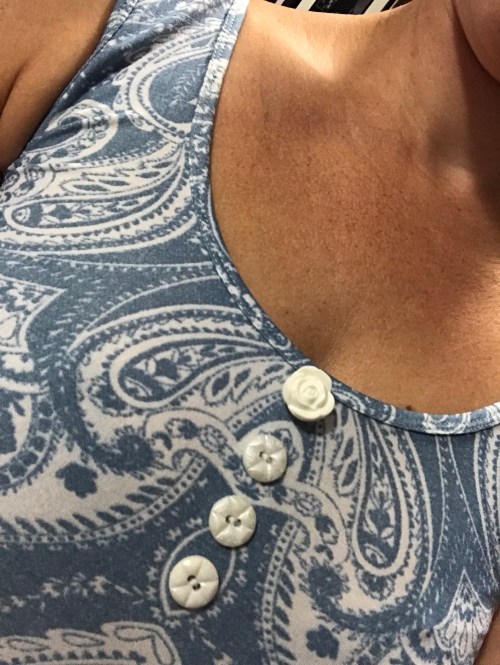 I’m kinda bored with this modestly scooped neckline after my four other versions of this dress, so I really should’ve changed it up. A square would’ve been nice, or maybe a V in the back. Anyway, so I added some decorative buttons. A lace-up détail would’ve been nice, too, but would have required more forethought and planning than I had put into it.
 Other than that, there’s not much to say. It’s quite long. It’ll get worn.
 And it’s my last bit of vacation sewing.
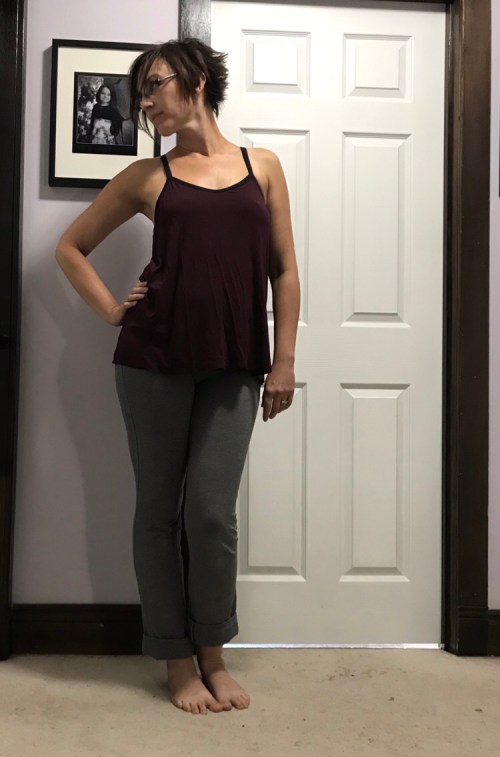 I’m kinda a fangirl for Jalie Patterns (if you hadn’t noticed, go read every post I’ve ever written about their jeans, or their maxi-dress pattern, or that one with the shorts and crop-top/sports bra.) But given the size of my pattern stash, I REALLY shouldn’t be buying every cute little pattern that wafts itself past my face. So I was trying REALLY hard not to bite when their new batch of patterns came out this spring.
 And then there was
  I love the forward-thrown side seam on the underwear, too. I’m sure no one remembers
 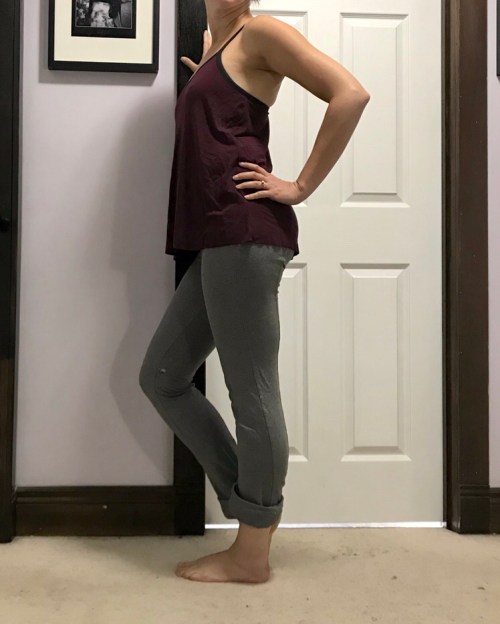 The only problem with a pattern like this is often my versions don’t come back to me after the kids do the wash. I guess it’s a compliment when your teenagers steal your clothes? Well, bralets, anyway. As long as they don’t steal the underwear.
 I’ve been slow to warm up to bralets. I remember a sporty little CK one I got at my husband’s behest in my early twenties—the elastic tended to cut into the underside of my boobs and create, in my head at least, the illusion of sagginess that wasn’t actually there. I made a couple of Watson bralets when the pattern first came out, but the long-line version doesn’t work with my ribcage and the band felt too structured for something that didn’t really do much. But lately I’ve been wanting something a teeny bit more supportive than a snug camisole but without any hard parts, for wearing around the house on days off when I don’t even want to look at an underwire. Julia seemed like it might fit the bill.
 I’m a bit ambivalent about the darts (I keep having to lengthen them, but in one version I just skipped them and eased the extra in and that seemed to work well), and I need to break down and order some metal hardware for the straps (or buy locally but Fabricland doesn’t carry metal rings and sliders), but I think on the whole it’s pretty much what I was looking for.

 I do love the fun racer back. The upper point of the tank is wider than that of the cami, which makes for an interesting bit of fullness when you overlay them. And very soon now I’ll have some days off where I can enjoy it! (Also the pants are
 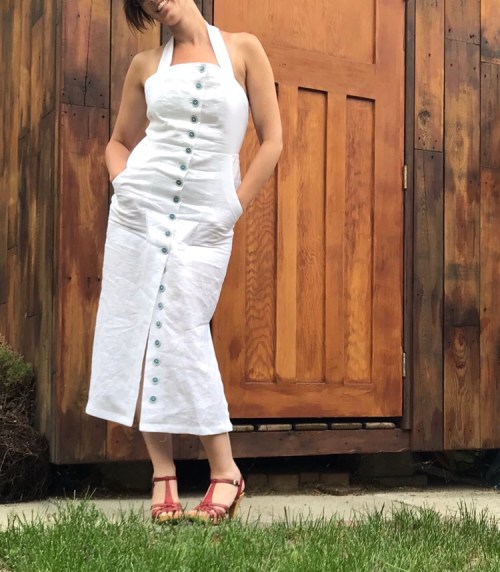 Apparently since all my (minuscule amount of) free time is no longer occupied with Fabricland projects, my vulnerability to the lure of the Shiny New Indie Pattern has re-emerged. Or something. Anyway—first
 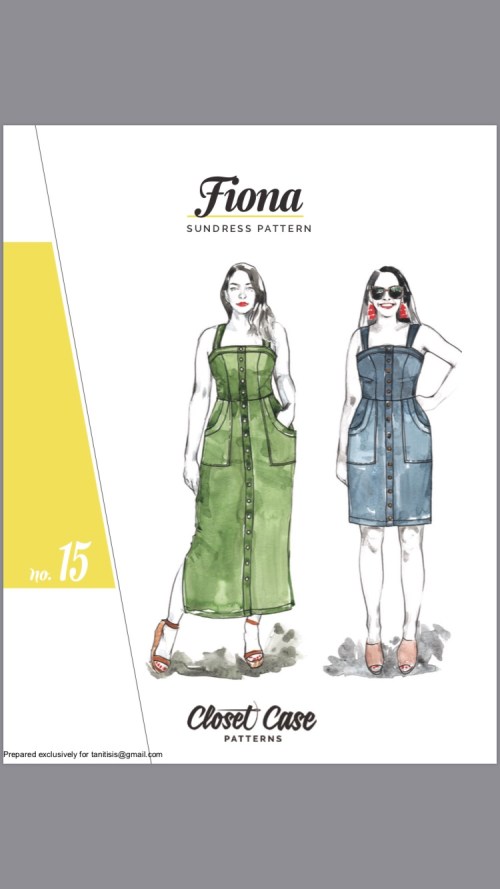 Ok, the Avery was for a class I was teaching, but anyway. Fiona just hit me in all the right places. You may have noticed I have a bit of a thing for button-front sundresses, and sundresses with a band detail across the top. Add in that fabulous low-back option? The only thing I might have changed was a fuller skirt, but on the other hand the columnar shape is one I don’t already have in my wardrobe. And it’s good to try something new.
 Well, high hopes can be a curse as much as a blessing, and I kind of struggled with this pattern. Which is fine since this was meant to be a wearable muslin, but it’s still a fairly intensive pattern. Them’s a lot of buttonholes.
 Anyway, trying to figure out how a button-front bodice with criss-cross straps and a back overlap is fitting before things are all sewn together is pretty tricky. There are a lot of variables. Initially I thought I could take in the waist by increasing the back crossover. This seemed to work, and I attached the straps, trimming about an inch and a half off (as I had expected since I’m fairly short-waisted). But then when I got the skirt on, it was pulling up weirdly at the back. Releasing the overlap to its original amount (and then taking it in at the sides, and then also taking it in at the princess seams over the bust) fixed most of that. But then my straps were too short. So I opted for a halter closure.
 After all that, the skirt itself is pretty much as-is, though I made the rear darts a bit deeper and they could perhaps be a smidgeon longer. The grading to the smaller size at the waist changes the side curve, and I could probably tweak it a bit, but it’s not bad.
 I’ll add a little bit about my construction here. The fabric I picked, which looks like linen, is apparently actually ramie, which is a bast fibre from a different plant (a member of the nettle family, which I always think is neat possibly because I watched
  I did the buttonholes on my grandma’s Singer Rocketeer, which made them largely painless although the metal grip that jerks the fabric around seems to have done some damage to the lightweight ramie. That would’ve been another foot reason to use a wash away stabilizer… note to self.
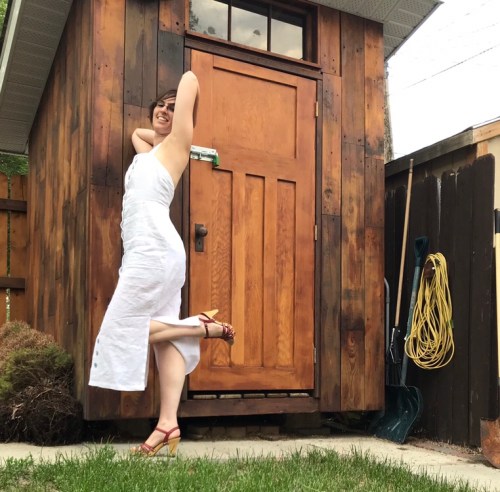 There’s an oddity with mine in that the soft no-slip plastic “shoe” on the foot seems to slip forward and get in the way of the needle. I had to trim parts of it away with scissors to get it to work at all. But once I did it worked really, really well. Just hand-wheel the first couple of stitches until you get really good at gauging where the holes need to be.
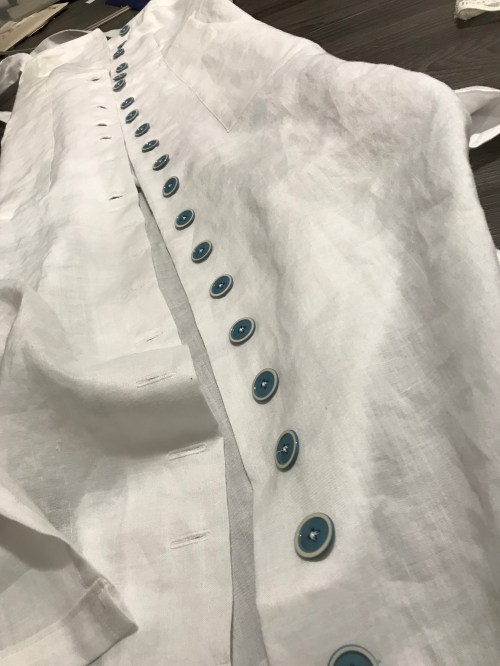 The blue buttons were my kids’ suggestion. Left to my own devices I would’ve gone with white (actually, I would’ve liked metal but I didn’t have twenty random matching metal buttons. These blue ones were just about the only non-white buttons I had in anything like the right quantity and size. )
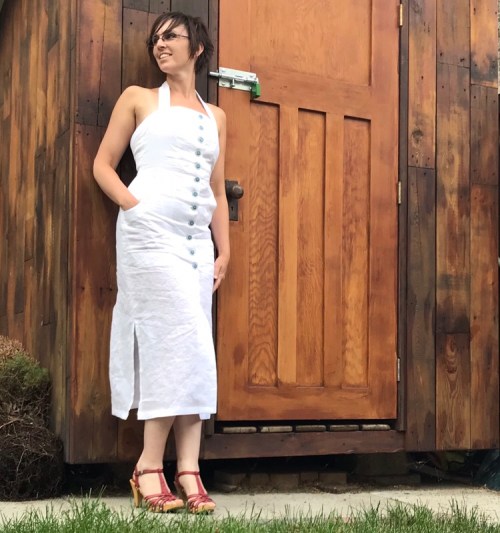 I don’t know if I’m overly in love with this version—I had a hard time getting photos I liked. (On the other hand it was the end of a long hot day where I spent several hours walking, so my makeup was basically gone and the hair was hanging on by a thread). I do think the band at the top is too loose, maybe not enough to show but it doesn’t feel as secure as it might. But it’s still pretty fun and I like the overall look.
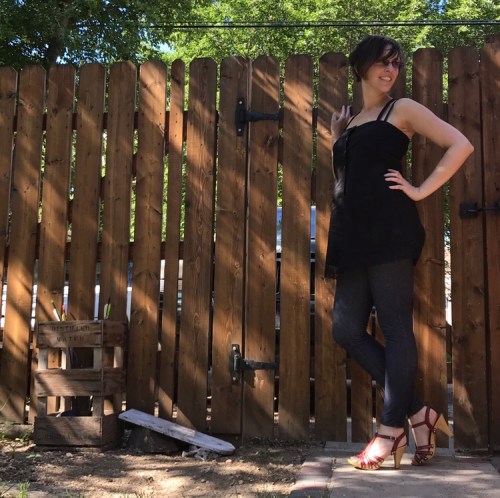
 This version arose out of my intermittent but recurring attempts at scrapbusting. (So far no significant reduction in scrap volume has been observed, but I keep trying.) I had just enough of this lovely textured cotton for the top, spliced in a bit of another lightweight cotton for the bottom, added some lace (as well as some more width at the hip) and, I almost have a little dress!
 I had to take some closeup selfies to get the fabric to show up. I suck at these, by the way.
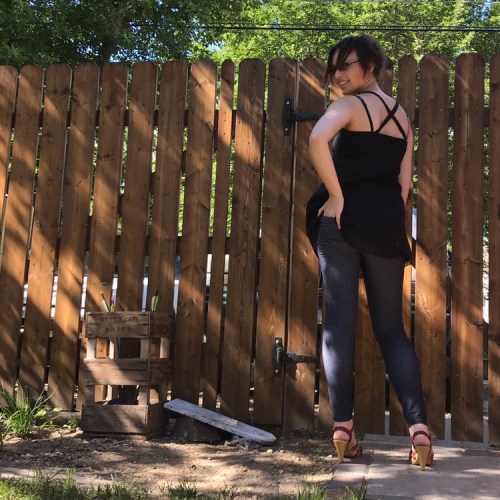 Unfortunately, apparently I have no shorts at all to pop it over. Maybe I need to steal them from my children. I usually have just lopped off old jeans into cutoffs but certain increases in the derrière department mean that my last generation of jeans either doesn’t fit any more or has disintegrated at the thigh and butt rather than just going at the knee. So I might have to make shorts, or worse, buy them. I kinda hate making shorts for shorts sake, I gotta say. They’re just as much work as pants but I only wear them a few days a year. So maybe a good candidate for buying.
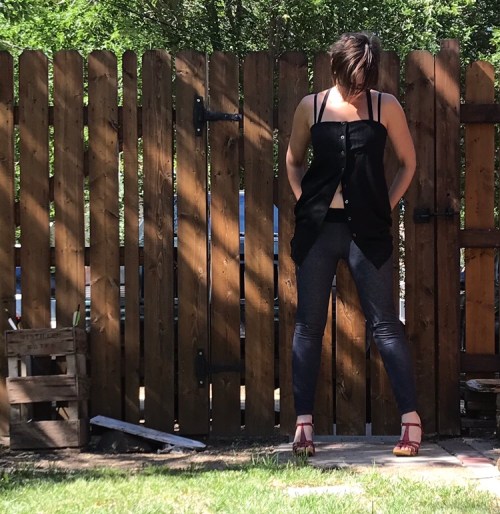 I should mention that I found the bust snug in my first version, but I don’t in this version. I’m guessing the fabric I used this time has more give.
 I’m not super in love with the straps—I could’ve done them thinner and positioned the front wider—but I like the criss-cross in the back. The non-criss-crossy straps are my bra, by the way.
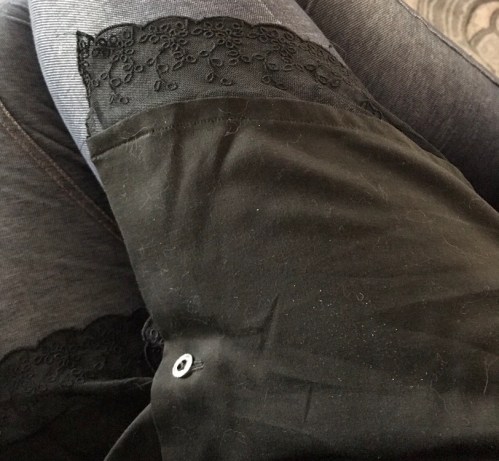 None of my pictures show the lace on the bottom very well. This is some of my favourite lace of all time. I didn’t do a good job finishing the raw edge though. Shhh.
 Other than that I’m pretty happy with the finishing. I finished the top with more single-fold bias tape, and I even remembered to sew on the straps in front first. I did the buttonholes on my modern Janome, which never goes as well as with the vintage buttonholer on my Rocketeer, but I was impatient.
 All in all, I think it’s pretty cute. Maybe needs some teeny little shorts to go underneath. Summery and casual. Well, casual for me. Come on now.
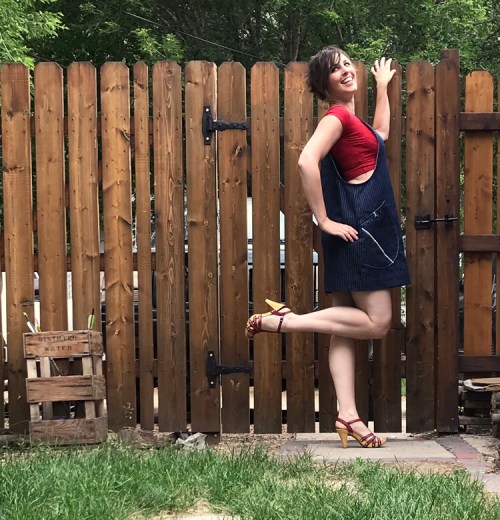 I’ve been vacillating about the pinafore/overall trend that has been bubbling around the sewcialsphere for awhile. I think they’re adorable, but I couldn’t really see myself in them. The last time I wore overalls (the only time I’ve worn them post-adolescence) was when I was pregnant with Tyo, and then only because a friend gave me some giant pairs (since I had no money for maternity clothes) and I felt able to get away with wearing my beloved crop-tops with them. In hindsight it was a pretty cute look, though, and I kinda wish I had pictures but that was long pre-selfie.
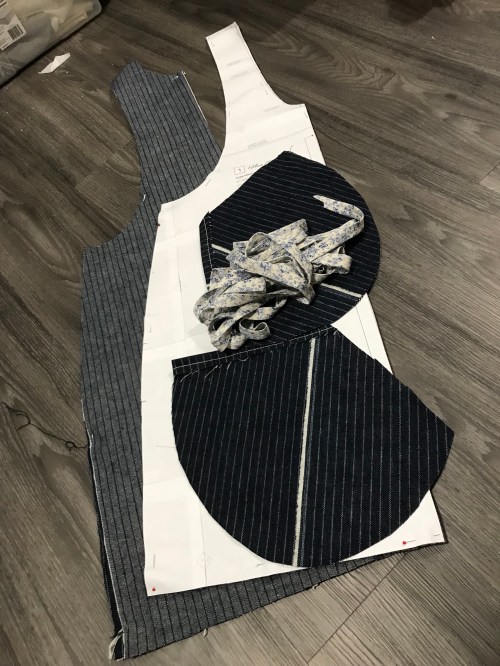 The pattern is kinda stupidly simple, front, back, pockets. No darts, fastenings or anything.
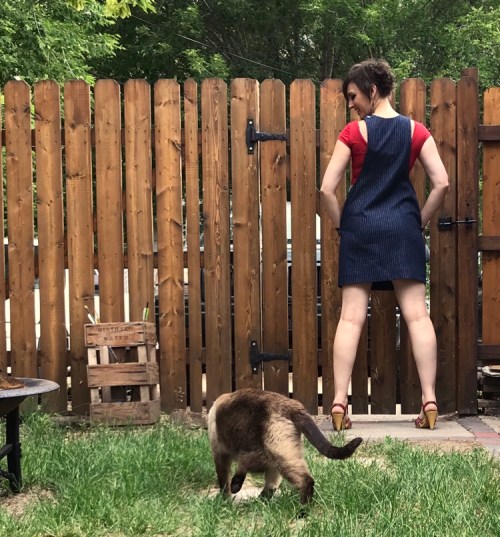 I spent a few weeks dithering over my fabric choice. I liked the idea of denim, but I didn’t really want a stretch denim and I wanted something not completely plain. Then I remembered I still had some pinstriped denim in deep, deep stash, left over from my
 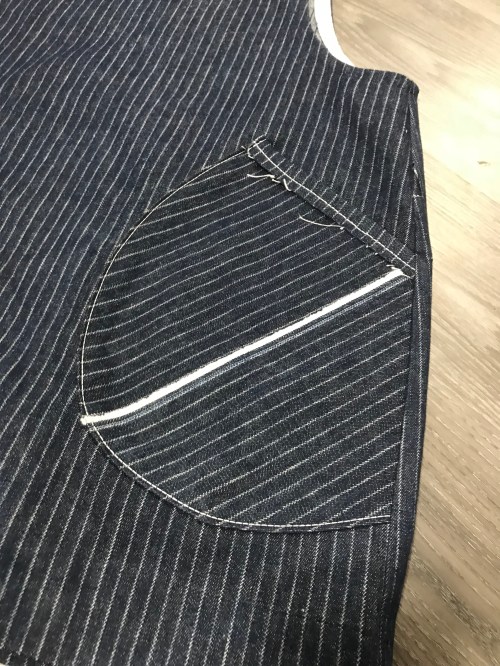 I didn’t have QUITE enough fabric, technically, since my remnant had some odd bits trimmed out of it, but I was determined, so I made it work by featuring some raw lapped edge piecing. Hopefully it looks cool and intentional and doesn’t completely fray away. And of course I had to cut the pockets on the bias, which necessitated some more piecing. I finished the pocket edge with a band of denim on the straight grain, and of course managed to sew one of them onto the part of the pocket that goes into the side-seam, not the actual top. Because I’m that good.
 You can see the pockets have some pretty prominent topstitching, which is cute but not reflected in the stitching on the bias tape finish. That was mostly fear that my first pass at stitching down the tape was going to be all over the place, but now I’m not sure I want more visible topstitching. It’s kinda nice and sleek how it is?
 I made my own tape. Actually, this is tape I made for
 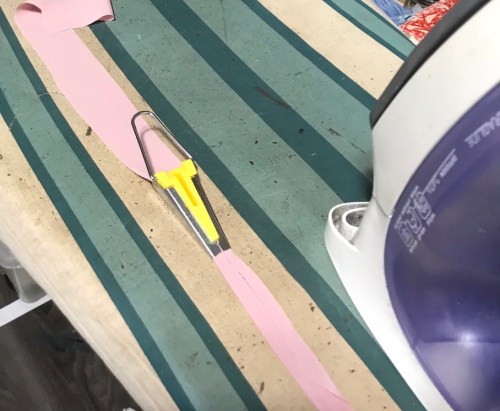 I guess here’s my first issue. I make continuous bias tape, because it’s efficient, but I tend to wing it on the cutting part so my finished tape is often pretty uneven. That’s not a big issue for most of the things I use it for—Hong Kong seam bindings, corset edges, finishing the edge of the inside waistband of jeans—but it gives the bias tape folder doohickey fits. For this particular tape, I had actually marked and cut quite a bit more carefully than other times, and the width was pretty good for my 1/2″ folder. The second problem was that this fabric is a lightweight twill. Still lighter than my denim, so this was a good project for using it, but heavy enough that getting the seams through the folder took a bit of finessing.
 Then there was the application. Before applying your bias tape to a curved seam like these ones, you should really press it into a curve. The curve doesn’t have to match your finished one, but it gets you into the right ballpark, shrinking one edge and stretching the other. But for some reason I thought I could skip this step. I could not. If you look real close in the pic up above you can see two seams where I had to add in 1″ of tape at the center front because I didn’t have enough tape there to stretch the outer edge round the curve. I’m not even going to complain about the not so even folding to the right. Once I curved the bias tape, the rest of the finishing was much less harrowing.
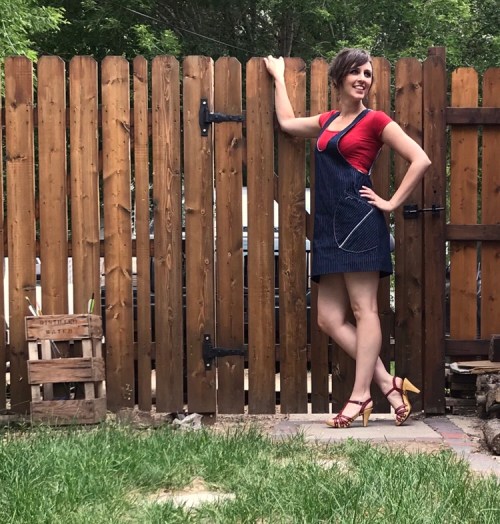 Helen spends quite a bit of time in the instructions on fit (aimed at beginners) and I did absolutely none of it. Other than combining the pockets from one view and the length from the other, I made no changes at all to the pattern—I even did the specified 2″ hem. (Actually, on re-reading, the hem should’ve been 2″ total, 1/2″ folded over and then 1.5″… so mine is 1/2″ shorter than intended. And I’m quite satisfied, though a version with a deeper side scoop might be nice.
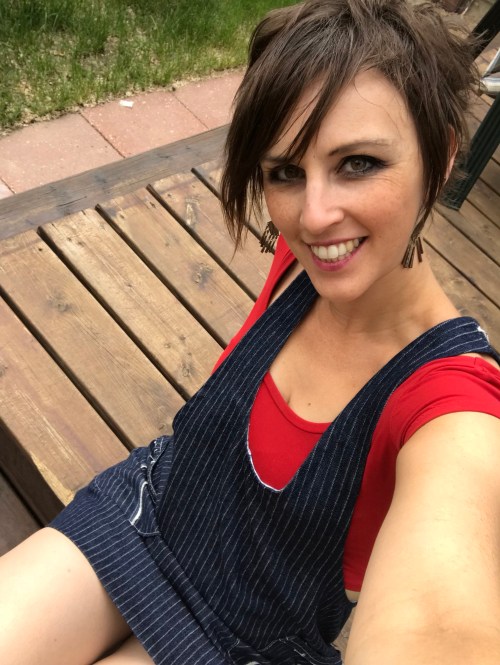 It feels fun but bordering on cartoony—I’m very curious if it’ll be something I reach for or something I only pull out for novelty value. On the other hand if it lets me wear my crop tops more, that’s a big reason to wear it because otherwise why do I even have them? So I guess I’m not certain, but hopeful.
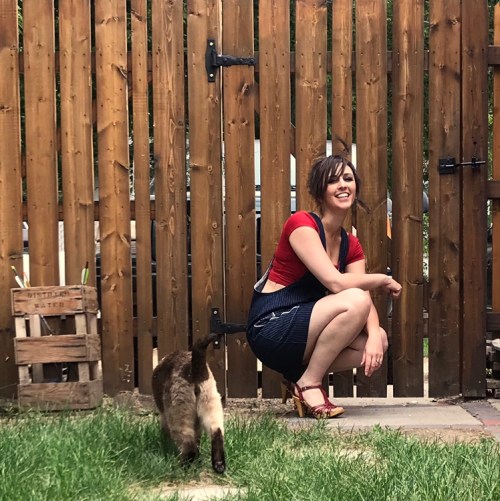 And on that note, let’s finish with some cat butt!
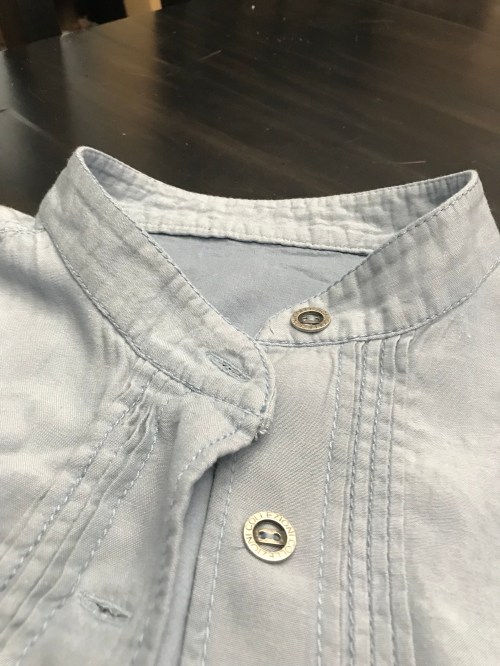 The plan was to make Burda envelope pattern
 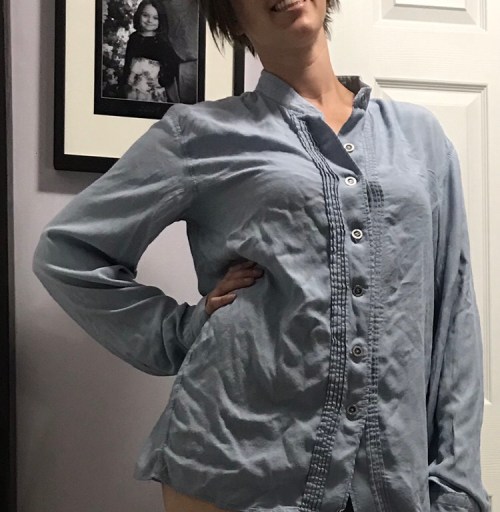 Let’s be honest here—he needs clothes about as badly as I don’t. If he were a little more fun to sew for, I’d just make them, but he’s wildly picky so anything I make (including this shirt) is a big risk.
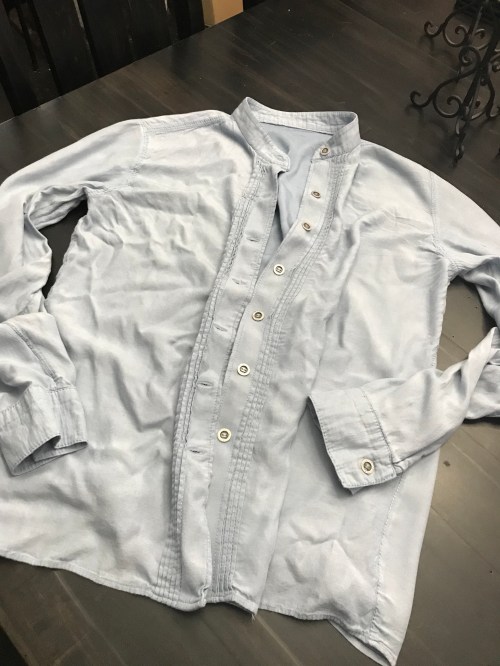 However, for Father’s Day I couldn’t quite resist trying a slouchy, comfy, yet tux-inspired style using this pale rayon “denim”.
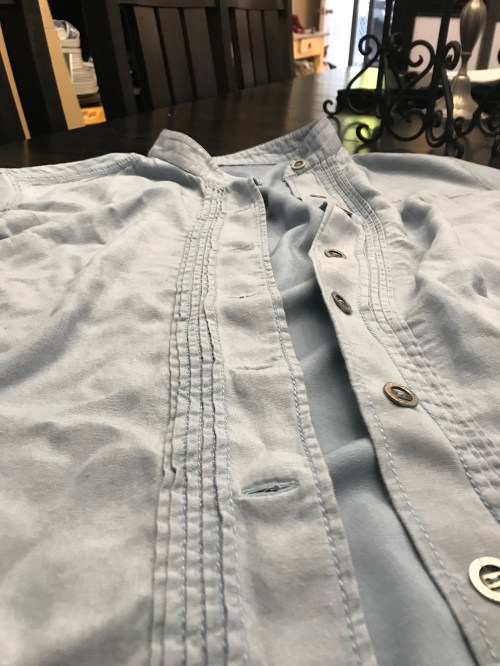 This would’ve worked very well for the pintuck topstitching, except that I wanted to sew them on my new-to-me Elna, which handles topstitching thread better than any of my other machines. However, I don’t have an adaptor to use my edgestitching feet with her, and getting high precision pintucks without precision feet is tricky for me. If your sewing skills are up to it, I salute you! Mine fall short. The resulting pintucks were very far from as neat and regular as I would’ve liked. I could only hope that once they were washed and slouch-ified all would be forgiven.
 I was, however, dispirited, and a few other things that irked me about the pattern didn’t help: there was no separate back yoke, and the cuff placket was made with just a simple bias strip rather than a tower placket.
 I realize these are stylistic decisions that probably say more about my own prejudices about a “proper shirt” than anything else. Regardless, my enthusiasm had distinctly waned, and there were other projects with more pressing deadlines.
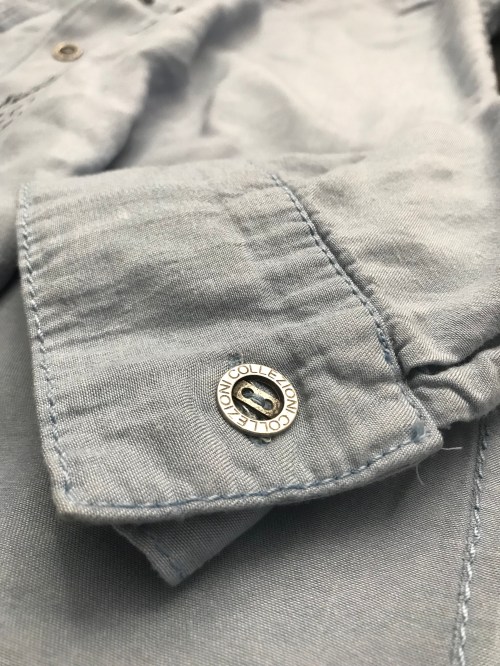 So the whole thing languished for several weeks waiting on a hem and buttons because I just couldn’t stand it. But finally, just in time to be late for Father’s Day (and for no particular reason except that I didn’t have enough time for a serious project and had run out of other quick things I could tackle), I found the motivation to finish it off.
 So anyway, at the end of the day I like it and I think it fulfills the vision I had in my head. Let’s just hope it also works for my husband.
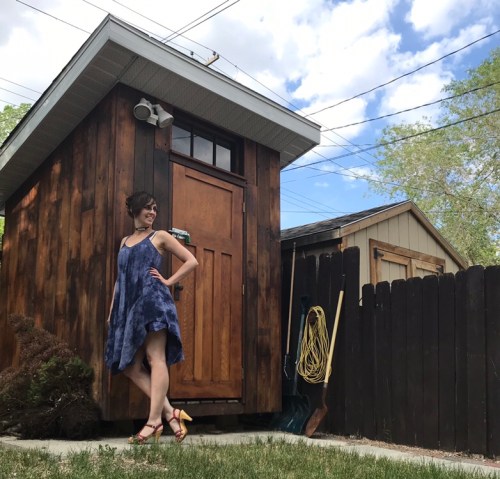 This sundress was supposed to be done a LONG time ago—it was supposed to be the one project I kept out while everything else got packed up for the basement reno. That was back at the beginning of April when it was basically still winter. Unfortunately, packed up it did get, so things got delayed.
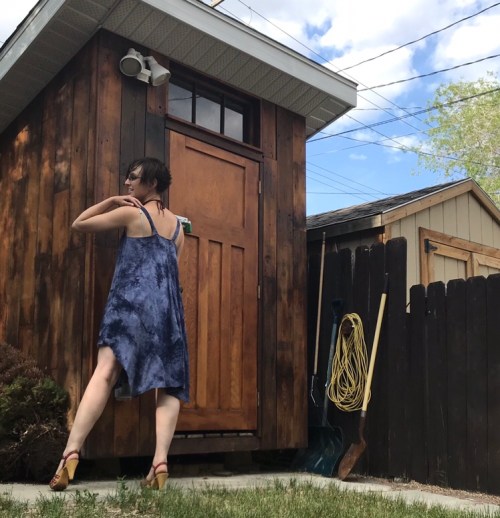 Anyway, the dress, (
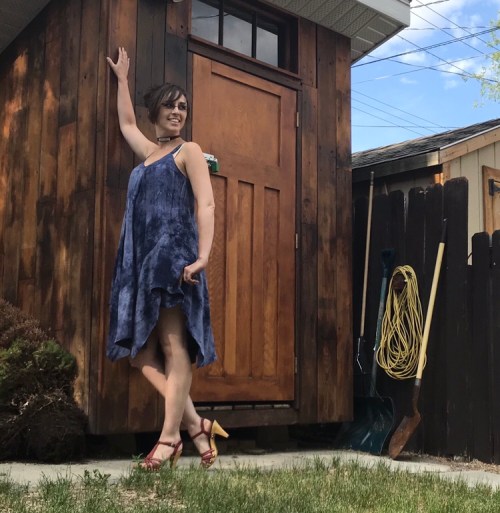
 I didn’t help myself by deciding that my fine fabrics deserved the special treatment of French seams.
 And I decided to change the hem border construction to double-layered to add heft and swish. Not a bad idea in my fabric of choice—but the way I went about constructing it was very far from the easiest it could’ve been, especially considering how soft and easily distorted the fabric was. I ended up topstitching with an embroidery stitch to make sure I caught all the backside of my double layer to hold it closed. A cute detail in the end but very far from the quick and simple I was going for.
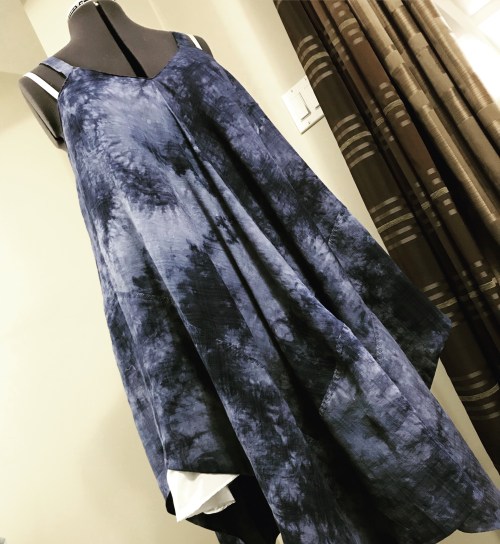 Then there was the bit about the lining showing. See it in the photo above? Well, in the pattern instructions there was a mysterious band of outer fabric facing the outside of the lining hem. How odd, I thought. What a strange feature. I want things simple so I’ll skip that. Well, little did I realize that the lining actually SHOWS quite prominently at the sides. The handkerchief upper layer is knee-length in places but quite scandalously short at the sides. After some thinking I concluded that I actually love the depth and complexity the double-layer gives the design—but it definitely needs that hem band. So I had to back and add that in after the fact.
 Considering how frustrating the actual make was, I’m pretty charmed by the dress. It’s another foray into tent-shapes, which I realize everyone else has figured out but I’m still a bit hesitant about. I did try taming it with a belt:
 But I actually think it’s mainly at its best flowing free. In particular it’s relaxed enough that while I’m happy to wear it to the office, I think I’ll be equally happy to toss it on for a Sunday at home, which isn’t the case for much of my wardrobe.
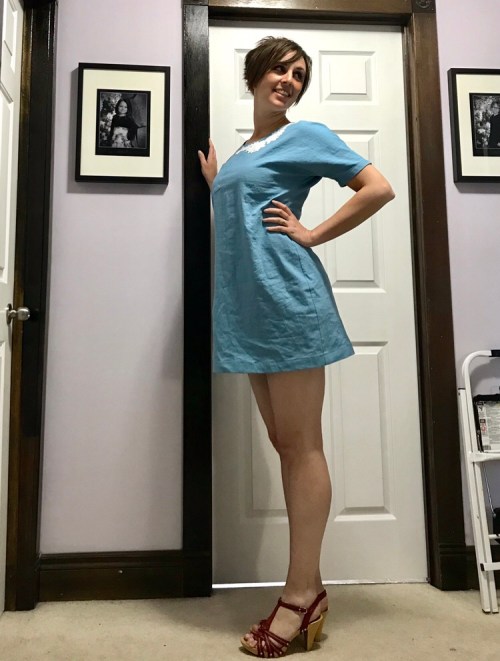 I didn’t really think the
 Until last winter when I went looking for a basic dress to teach a beginner garment-making type class at
 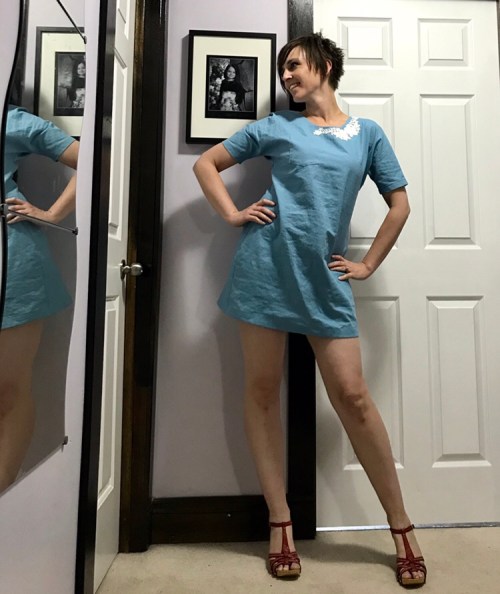 I’m a little less at ease with my choice of fabric. It’s a muted greeny blue that I LOVE but combined with the simple cut it reads dangerously close to hospital gown, which is not helped by the fact that the fabric (a cotton-linen blend) really has a bit too much body for the design. But I’m a sucker for linen.
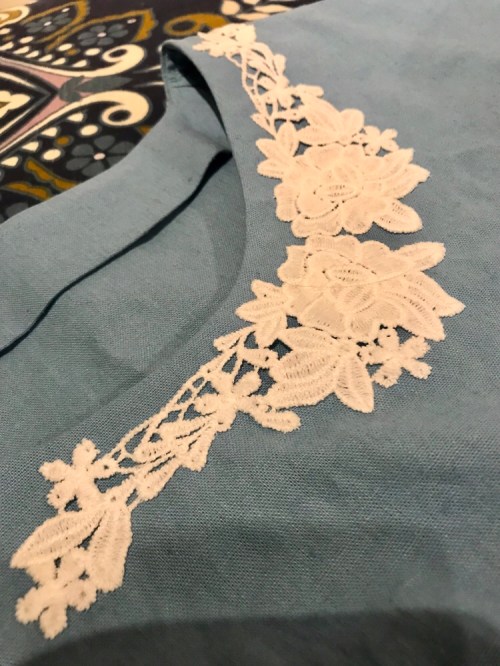 I added some lace motifs at the neck to hopefully distract from this.
 I blended from a 38 in the upper body to a 40 at the hips, and did a swayback adjustment, which I think helps but it’s a bit hard to assess given the loose shape.
 I have mixed feelings about the dolman sleeves. On the plus side they’re super simple and quick—on the minus I think they’re a bit low under the arm (duh, that’s how sleeves like this work). I might try playing around with raising them and adding a gusset in the future, but I didn’t want to go too far off the grid with a class sample.
 Also did I mention it is SHORT? Ok, again in the pattern’s defense I did a one inch hem instead of 3/4″, so it might be slightly shorter than intended, and I am technically taller than most patterns are drafted for… but I rarely have to add length to skirts. It’s technically mini length, but because of the style of sleeves it comes up quite a lot when you raise your arms.
 In the meantime I might have to try another. It was seriously quick and fun to put together.
 One of my final projects, taken out right before the news about our store closing dropped, was Butterick B6556, a newish pattern from Gertie. It’s a cute retro style and I loved the square neckline. And it was PERFECT for this linen-rayon blend border print.
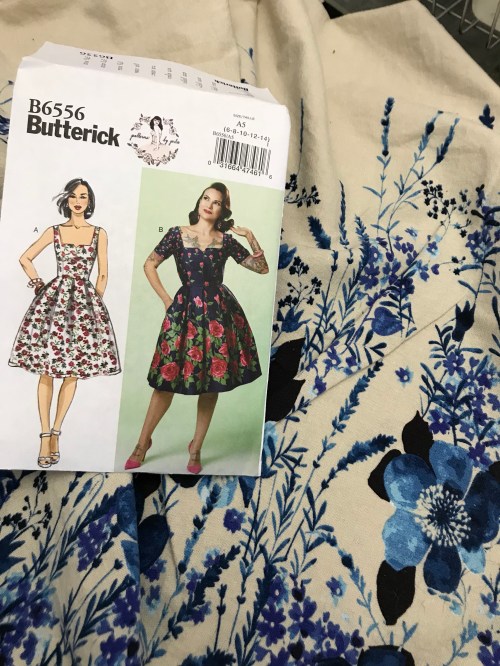 I often struggle with gathered skirts on me, but pleats can be an ok substitute when you still want a straight edge to use with a border print.
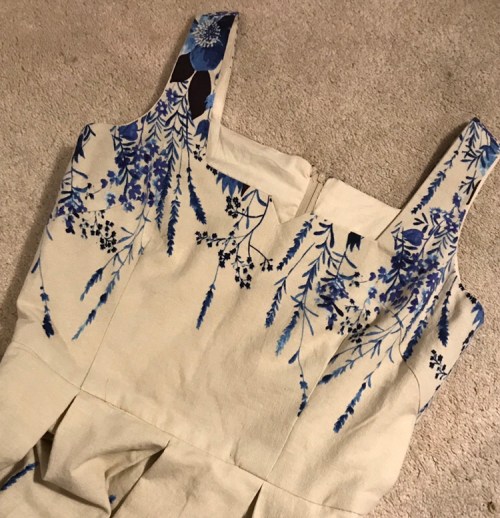 It was fun to tackle a VERY limited amount of pattern matching—just at the center back of the bodice. I used the print upside down in the bodice so the flowers would trail down from the neckline; a bit more flower might’ve been nice though.
 I ended up with a serviceable lapped zipper in the end, but it was a struggle. I should’ve interfaced the area to stabilize it—with the fabric cut on the cross-grain, it stretched out like crazy! And then there wasn’t enough fabric for the overlap I wanted, so I added a little facing piece to the upper edge. And THEN when I was topstitching somehow things got misaligned and the whole bottom half got stitched closed. Grr. Not aided by being in a hurry, of course. Hand-picking it might’ve been faster.
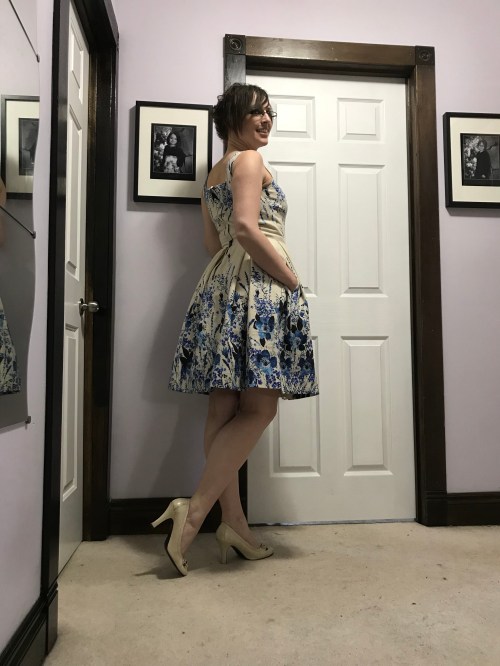 And yes, it has pockets!
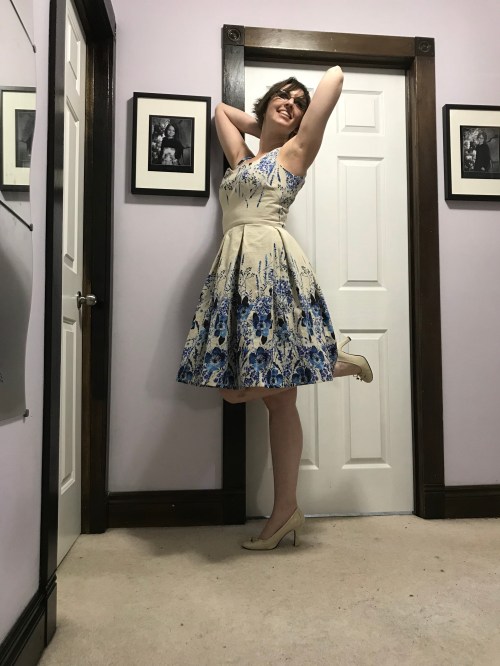 The pleated skirt is too narrow to go over my crazy crinoline! I’m wearing it here with my “everyday petticoat”which is fine but not crazy exciting. Maybe I should have a “mid crazy” petticoat. Actually, I do but it’s black and a little bit longer, so not right for this dress. And I’m not inclined to find space to store another one!


