
 I’ve been vacillating about the pinafore/overall trend that has been bubbling around the sewcialsphere for awhile. I think they’re adorable, but I couldn’t really see myself in them. The last time I wore overalls (the only time I’ve worn them post-adolescence) was when I was pregnant with Tyo, and then only because a friend gave me some giant pairs (since I had no money for maternity clothes) and I felt able to get away with wearing my beloved crop-tops with them. In hindsight it was a pretty cute look, though, and I kinda wish I had pictures but that was long pre-selfie.
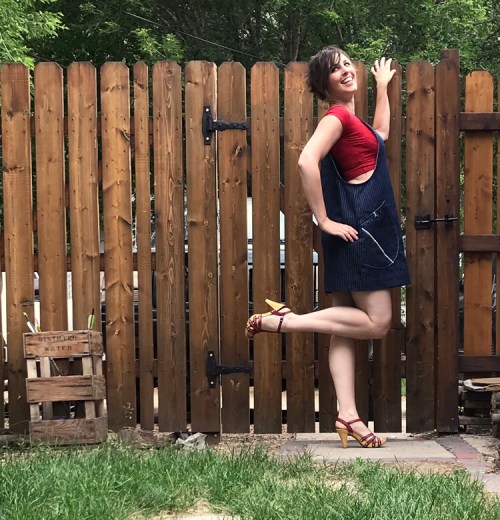
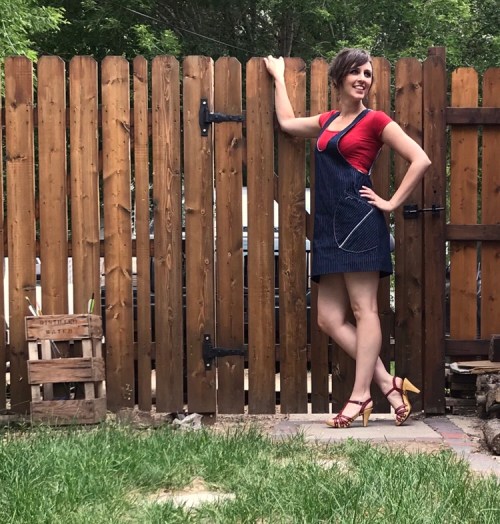
Anyway, it wasn’t until Helen came out with the York Pinafore this spring that a pattern really clicked and said “yes! This is you!” Maybe because of the stripped down, no-hardware style, but largely because the exaggerated hip curve reminded me of the strange shape I loved so much in my striped sweater-dress from this past winter. Anyway, it suddenly struck me again as a perfect vehicle for getting away with a crop-top when I once again find myself in a physical state where I don’t feel comfortable with my belly hanging out. (And yes, there’s a whole other conversation about body positivity and acceptance, and I’m all about that, but anyway.)
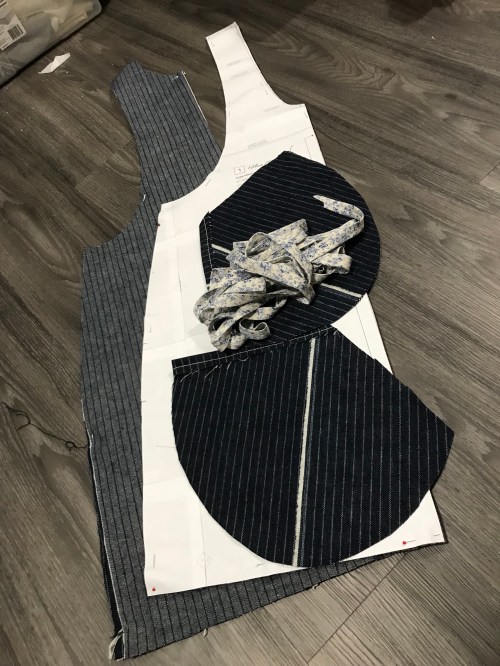 The pattern is kinda stupidly simple, front, back, pockets. No darts, fastenings or anything.
 I spent a few weeks dithering over my fabric choice. I liked the idea of denim, but I didn’t really want a stretch denim and I wanted something not completely plain. Then I remembered I still had some pinstriped denim in deep, deep stash, left over from my Kasia pencil skirt. (Wow, was rereading those posts a walk down memory lane! That was from my first summer of blogging, way back in 2010.) Anyway, my Kasia is long gone (it was cute but every time I wore it I ripped the back seam while walking), so another straight-ish skirted thing in this fabric seemed ok. I was a little apprehensive about the width though, since I have issues with narrow skirts (see above comment about my poor Kasia).
 I didn’t have QUITE enough fabric, technically, since my remnant had some odd bits trimmed out of it, but I was determined, so I made it work by featuring some raw lapped edge piecing. Hopefully it looks cool and intentional and doesn’t completely fray away. And of course I had to cut the pockets on the bias, which necessitated some more piecing. I finished the pocket edge with a band of denim on the straight grain, and of course managed to sew one of them onto the part of the pocket that goes into the side-seam, not the actual top. Because I’m that good.
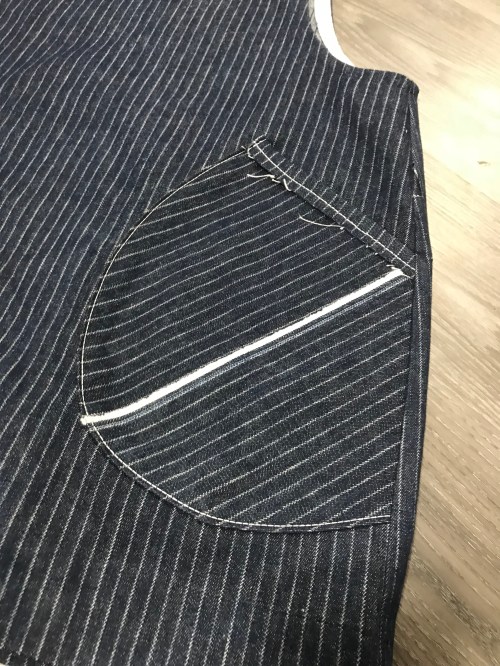
 You can see the pockets have some pretty prominent topstitching, which is cute but not reflected in the stitching on the bias tape finish. That was mostly fear that my first pass at stitching down the tape was going to be all over the place, but now I’m not sure I want more visible topstitching. It’s kinda nice and sleek how it is?
The pattern as a whole is super simple, but the bias tape finishing, on the other hand, is not the easiest technique ever, in my opinion. I know how to do it—it’s actually a bit of a motif in my summer sewing this year—but applying everything I know in theory is the trick.
 I made my own tape. Actually, this is tape I made for my first corset way back when—I have a whole box of leftover bias tape from various projects. I ran it through the bias-tape folder doodad.
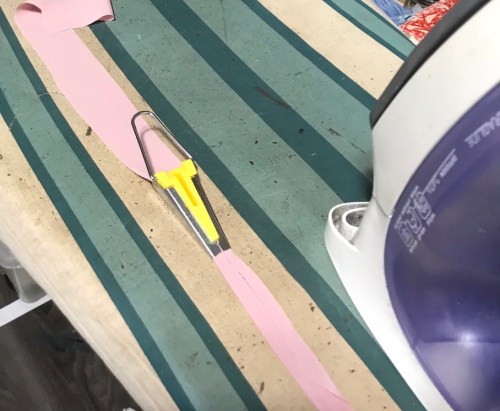 I guess here’s my first issue. I make continuous bias tape, because it’s efficient, but I tend to wing it on the cutting part so my finished tape is often pretty uneven. That’s not a big issue for most of the things I use it for—Hong Kong seam bindings, corset edges, finishing the edge of the inside waistband of jeans—but it gives the bias tape folder doohickey fits. For this particular tape, I had actually marked and cut quite a bit more carefully than other times, and the width was pretty good for my 1/2″ folder. The second problem was that this fabric is a lightweight twill. Still lighter than my denim, so this was a good project for using it, but heavy enough that getting the seams through the folder took a bit of finessing.
 Then there was the application. Before applying your bias tape to a curved seam like these ones, you should really press it into a curve. The curve doesn’t have to match your finished one, but it gets you into the right ballpark, shrinking one edge and stretching the other. But for some reason I thought I could skip this step. I could not. If you look real close in the pic up above you can see two seams where I had to add in 1″ of tape at the center front because I didn’t have enough tape there to stretch the outer edge round the curve. I’m not even going to complain about the not so even folding to the right. Once I curved the bias tape, the rest of the finishing was much less harrowing.
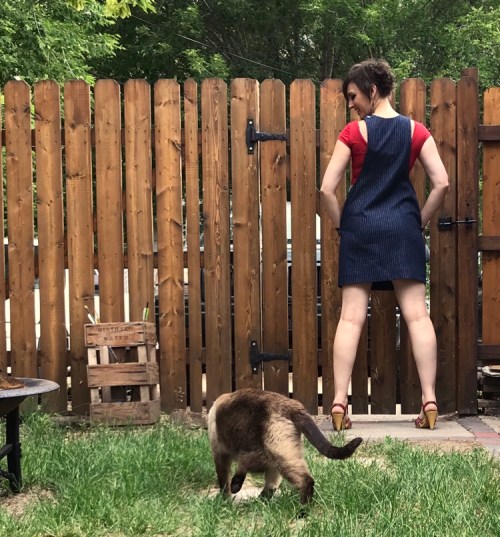
I was pleasantly surprised that the walking ease in the skirt seems to be quite adequate.
 Helen spends quite a bit of time in the instructions on fit (aimed at beginners) and I did absolutely none of it. Other than combining the pockets from one view and the length from the other, I made no changes at all to the pattern—I even did the specified 2″ hem. (Actually, on re-reading, the hem should’ve been 2″ total, 1/2″ folded over and then 1.5″… so mine is 1/2″ shorter than intended. And I’m quite satisfied, though a version with a deeper side scoop might be nice.
 It feels fun but bordering on cartoony—I’m very curious if it’ll be something I reach for or something I only pull out for novelty value. On the other hand if it lets me wear my crop tops more, that’s a big reason to wear it because otherwise why do I even have them? So I guess I’m not certain, but hopeful.
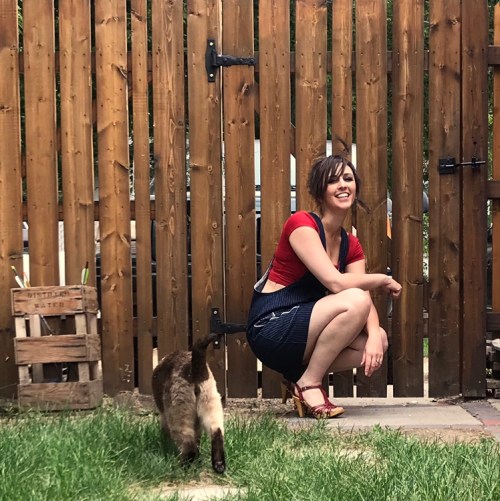 And on that note, let’s finish with some cat butt!


The York is right in my wheelhouse (I could embiggify the pockets which would be super useful for work right now), and did anyone say cartoony? This is the sort of thing I’d draft from my block for me, and then later buy and never print out, making sure I at least paid if forward for the idea. And I may. I love your use of the selvage across the pocket. I’ve been jonesing on Ben Viapiana’s bespoke jeans IG account, and he’s a selvage guy. It’s a sweet detail.
My question is: is it useful for you to iron the bias tape? Do you uniron it when you use it? That’s been my use, so I don’t bother with the tool. It’s one level of work too far.
No, I don’t un-iron it. I open up the one side to stitch it down (I guess if the doodad didn’t iron that side it would be ok) and then when I fold it to the inside the other edge is all nicely folded under already and, most importantly, it’s a nice even distance from my seam, so I can topstitch it close to the other edge without my seam wandering around. I could do the pressing by hand but I end up with burnt fingers and it’s not nearly as tidy. For this kind of a finish ;)—as I said for a lot of things I don’t press it at all.
Oh I hope this becomes a regular for you! It’s the best iteration of the jumper/pinafore/overalls trend that I’ve seen. A smidgen sexy, utilitarian but not frumpy at all! And your bias with selvage pockets really make this thing terrific! Yay!
Thank you! I feel a bit like a kindergarten teacher—but maybe in a good way?
Pingback: The first Fiona | Tanit-Isis Sews
So not cartoony at all and not at all kindergarten teacher-ish either! I hope you do wear it – cool and funky it is. Plus you get to wear your crop tops 🙂
Pingback: Cogitation | Tanit-Isis Sews
Pingback: Camouflage pinafores | Tanit-Isis Sews