An interview

My mom and I, Fall 2009 (in Cambridge, UK, of all places...)

This is an interview with my mother, inspired by numerous discussions we’ ve had about ‘sewing—then and now’. All the in-person sewing instruction I’ve had came from her, and it made me curious about where and how she acquired it. My mother grew up in rural Saskatchewan in the 1950s and 60s, and learned to sew in part in the home and in part through 4-H and high-school (Grade 9 Home-Economics, after that she took Typing.) She never was a professional seamstress, but she knows her stuff, and I think her experiences are probably typical of the home sewists of her generation, at least in our area. I know I love talking with her about it, and comparing how things have changed—or not.

I’ve inserted a few of my own observations in italics where relevant :).

Were you exposed to sewing in the home growing up?

Yes, my mother sewed. She sewed clothes for my sister and I. I remember plaid skirts,when we were about 4/5/6, which I think she sewed, Hallowe’ en costumes (a leopard for me and a white rabbit for my sister, age 5/6), ‘ Davey Crockett’ jackets out of a light tan, light-weight twill, complete with ‘ fringes’ cut from light-brown vinyl (about age 7/8), ‘ sailor’ dresses of mid-blue cotton, with white sailor-collars with embroidered red anchor accents, white cuffs on the short sleeves (age 8/9) (I think those dresses are still in the tickle trunk at my Grandma’s. We wore them when we were kids, too, for dress-up), rag-dolls, complete with clothing (when we were very young, pretty much babies). She must have done most of it on a treadle machine.

How did you and your peers view sewing? What about the older generation?

I think we viewed sewing as a way of acquiring items that were considered ‘ not essential’ . We purchased everyday clothing, usually from a mail-order catalogue (Eaton’ sor Simpson’ s-Sears), or on a late-August-before-school-started, one-day shopping excursion to the nearest city, an hour’ s drive away. We purchased winter outerwear,although I think my mother sewed me a wool coat with a rabbit-fur collar and matching leggings, when I was about 2. (I have seen the photos of me wearing it. I think she had made it). If we wanted a ‘ special’ dress to wear to some event, or if we wanted to alter anarticle of clothing, we sewed.
I think that my mother’ s generation embraced ‘ ready-to-wear’ clothing, although theycontinued to sew those items considered non-essential. They also did a lot of mendingand patching to keep every-day clothes wearable.

How, and from whom, did you learn to sew?

My sister and I must have learned to sew from our mother, who would have taught us the basics, (eg. seams, seam allowances). We received a hand-cranked, child’ s sewingmachine one Christmas (age 8/9), and used it to make doll’ s clothes. I don’ t know if wehad patterns, or drew them up ourselves. I remember my mother saying that her mother, years before, had drafted her own patterns. I started 4-H at age 10, and that first year, took the ‘Let’ s Entertain’ project, where we sewed and embroidered a cotton ‘ tea-apron’ ,
fringed the edges of a small ‘ tea-cloth’ , learned to set a table, and made ‘ tea-sandwiches and dainties’ . This would have been my formal introduction to sewing.

On what kind of machines?

I remember learning to sew on a treadle machine. To be most effective, you place one foot ahead of the other on the treadle-plate, and alternate foot pressure back and forth(a bit like riding a bike), rather than rocking both feet back and forth. It makes it easier to keep a steady pace. The little child’ s machine sewed with a chain-stitch, so one had to remember to pull the tail end of the thread through the loop, or it would un-ravel (I remember playing with this machine, too. I don’t think my grandma gets rid of anything!). My mother got a ‘ White’ portable about 1963. It was a straight-stitch model, which she used for everything, including mending denim work clothes, and stitching up my brothers’ hockey skates (by guiding the needle, carefully into the original holes). That is the machine I did my sewing on until I left home (and my mother still uses it!). I recall that it had a button-hole attachment that clamped the fabric, and moved it from side-to-side, tocreate an overcast stitch for the button-hole.

Where did you get your fabric, patterns, other supplies? Do you think it’s easier tofind good sewing supplies now than it was?

Our fabric, patterns and notions we usually purchased at a large department store in the nearest city (forty miles away). Some basic notions, like threads (black, white, brown, blue), buttons, maybe even elastic, was available in the general store in the nearest village (seven miles away), or perhaps in the nearest larger town (twenty miles away). One could also order fabric, etc, from the mail-order catalogues, but one could not really tell what one was ordering, other than the type of cloth (eg. cotton, print or plain, pillow ticking, woven wool – coat weight, dark red, green or black.)
With specialized stores dedicated to fabrics, patterns and supplies, it is so much easier to find what you want, in the colours and styles you want. And with the improvements in roads and vehicles, people are much more mobile, and even those living outside large cities have easier access.

What kind of finishing/techniques did you use? How do you think they have changed, if they have?

Because we sewed mostly with woven fabrics, often the only finish on a plain seam would be a pinked edge. We used French-seams on sheers, and flat-felled seams on heavy-weight fabrics where extra strength was needed (eg. work clothes). With a straight-stitch machine, there weren’ t a lot of options. We didn’ t sew with knit fabrics, perhaps because they weren’ t as available to home-sewers, or perhaps because we couldn’ t, with the machine we had. Once I bought my zig-zag machine (the Grand Old Dame), I could finish seams with a zig-zagged, overcast edge.

Did you learn about fitting?

In 4-H dressmaking, and in Grade 9 Home-Economics, we learned the basics of fitting, and of altering a pattern, based on one’ s measurements. We never got into making muslins (although, maybe we would have if we had been making something really expensive), because it was viewed as a waste of fabric and thread, as well as time. I always had a hard time with fitting, especially pants, as I always had a very short torso, with very little definition at the waist. Some of our methods for altering/fitting were rough-and-ready. For bust-line darts that didn’ t hit the right spot, we simply took up the shoulder seams (and then tried to alter the sleeve so we could set it in). For pants, we tried to fit the waist, and then tried them on inside-out, and pinned the crotch and inseams, or side seams until the fit was close enough.

Did you, at any point, feel like part of a sewing community, or was it a very solitary pursuit?

When I was growing up and learning to sew, it was more like taking classes, so there was a sense of competition, and of having to take things apart and redo them until they were right. After inserting, and re-inserting my first zipper (about 9 times) in an A-line skirt (no waist-band, faced top edge at hip-bone height), for 4-H, the fabric, a soft-pink twill, looked so dirty and bedraggled, that I don’ t think I ever wore the skirt much. When I was sewing for my own children, and my house, I had some friends who sewed, but it wasn’t exactly a sense of community. We could trade some suggestions, and did, but it was pretty minimal.

What inspired you to sew in the first place?

I don’ t think I was really inspired until I started sewing things for my own children and my home. When I first learned to sew, it was ‘a good thing to know’ , much like typing, or cooking. It was a way of acquiring items that would have been very expensive to buy, for a lesser cost. Even later, that was always there; I wouldn’ t buy brand-name blue-jeans for my toddlers, but I could sew them ‘Levi’s’ by mimicking the pocket stitching, andsewing on labels salvaged from worn-out adult jeans. And making a child’s parka and snow pants lined with ‘ Thinsulate’ was experimenting with new technology (although Inever really knew if the stuff was warm enough, since I never sewed anything from it for myself.) (I always thought it wasn`t warm enough, but then I don’t recall ever thinking my winter stuff was warm enough. It was Saskatchewan after all.)


How has your interest in sewing changed over the years? (off, on, what kinds of items, etc.)
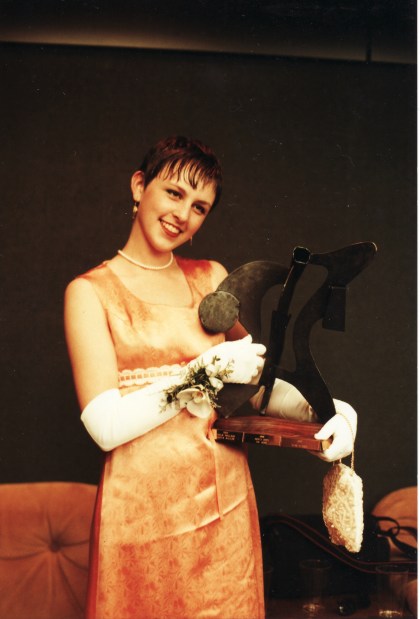
The grad dress she made. Yup, that's me wearing it. What a classic! 🙂


The things I remember sewing, at home, were the 4-H projects: the tea-apron and fringed tea-cloth, pink A-line skirt (and perhaps some kind of top?), and the graduation-dress I made in Grade 12,and which I got to wear to the Provincial Dress Review, in Regina, that summer. (They tried to teach us how to walk down a cat-walk. I would have rather goneto camp, like my sister!). Also, the cotton shift dress in Grade 9 Home-Ec. which I never got to wear, since we cut them out in the fall, sewed intermittently all winter, and by spring I had outgrown mine.

After I left home, and bought my own machine, I did sew for myself, including a long, billowy ‘garden-party’ dress, out of a yellow, dotted-Swiss fabric (I wonder where it went?), a tunic top (of unbleached cotton) which I decorated with multiple bands of machine embroidery around the neck (I think my kids have this one in their dress-up stuff), hem and short sleeves (thanks to the Grand Old Dame)-–-a reflection of my ‘wanna-be Hippie’ years, drapes for apartment windows, a long-sleeved, button-front tunic and matching gored skirt, in a rust-peach print double-knit, for my wedding ensemble. Throw pillows, place-mats with matching, mitered, hemmed napkins, sheer sash-curtains, baby and kid items, including shaped flannel diapers, blue-jeans and aforementioned parka and snow pants, sundresses, Hallowe’ en costumes (thankfully, you were never into figure-skating!) I also sewed an Edwardian Walking Skirt, from a Folkwear pattern, as an interpretive costume for a historic house-museum I became involved with, as well as those ‘ Prairie-Girl’ (Folkwear) dresses and pinafores for you. The last thing I ever sewed for you was a ‘little-house’ inspired skirt and blouse combo, in a blue-and-white flowered print, which I
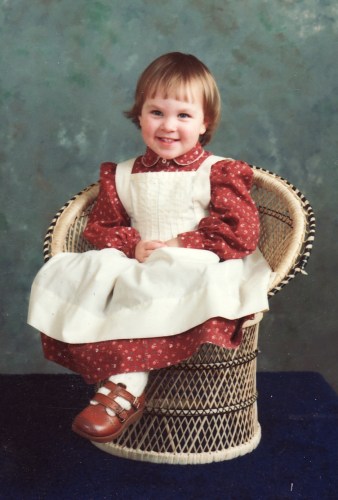
Me in the `Prairie Girl`dress, age 3 or so.

cut out, but which you outgrew before I could get it sewn.
I interspersed sewing with crocheting, knitting (remember the fisherman-knit sweater that I started for you, your brother wore it, and your girls) and other crafts. I have a small collection of antique apparel, including a man’s shirt, girl’s night-dress,women’s blouses, Edwardian white summer dresses in small child and small woman sizes, shoes and boots. It is amazing to look at the detailed work that was created from very fine fabrics, with pin-tucks, lace insertions and embroidery, by hand and treadle-sewing machine. I also have a collection of antique/vintage photographs (other people’ s ancestors, as well as mine) showing clothing from about 1890 to about 1929, and several reproduction catalogues which illustrate clothing (and household goods).

Why did you ‘give it up’?

I think the main reason was that I got too busy with other things, including gardening, heritage research and interpretation, local community concerns/activities. Also, I had no dedicated place to set up a ‘sewing corner’ where I could leave everything out. The computer took over the dining room, and one really can’ t sew on the kitchen table when people want to be fed. Also, I never mastered the art of fitting, and was frustrated with not being able to produce wearable clothes that fit. I am inspired by your sewing activities, almost enough to try again. Or maybe I will teach myself how to cane chairs, or to use the ruffler-foot to make an Edwardian petticoat. (I say go for it, mom!)

Thank you, Mom, for taking the time to answer these questions and for letting me post them. I hope they’ve been interesting for the rest of you. I know some of you have probably been sewing for as long—or longer—than my mom, and have seen all the changes for better and for worse. I’d love to hear your take as well!

20 Comments

Filed under Sewing

I want horsehair braid.

In real life, this is another muted purple. Apparently my lighting completely fails to capture this colour.

I think this is the fabric that will become my first skirt for the petticoat. It’s a thrift-store find, yummy purple herringbone wool (I seem to be on a purple kick here.) But now, ah, now I am torn. So many decisions. Do I want to cut the skirt in a single piece? Do I want to try and have front and back seams on the bias, matching the herringbone? How will I mark the hem before I hem it? How do I want to hem it? Narrow hem, hem facings… horsehair braid. Sigh. I want horsehair braid. I haven’t seen it at Fabricland but it’s certainly possible I missed it.  I *really* love the look and hang of the skirts I’ve seen (pictured) using this. Second best, I guess, would be a hem facing, but it always seems like that would just take up an obscene amount of additional fabric. And then there’s a lining. I really don’t have anything on hand that would work. Do I need a lining for a skirt I’m going to put a petticoat underneath? Maybe I don’t.  Will I ever want to wear the skirt without the petticoat? Doubtful. I much prefer how they look with some pouf. Grum, grum.

On the Men’s Shirt Sewalong front,

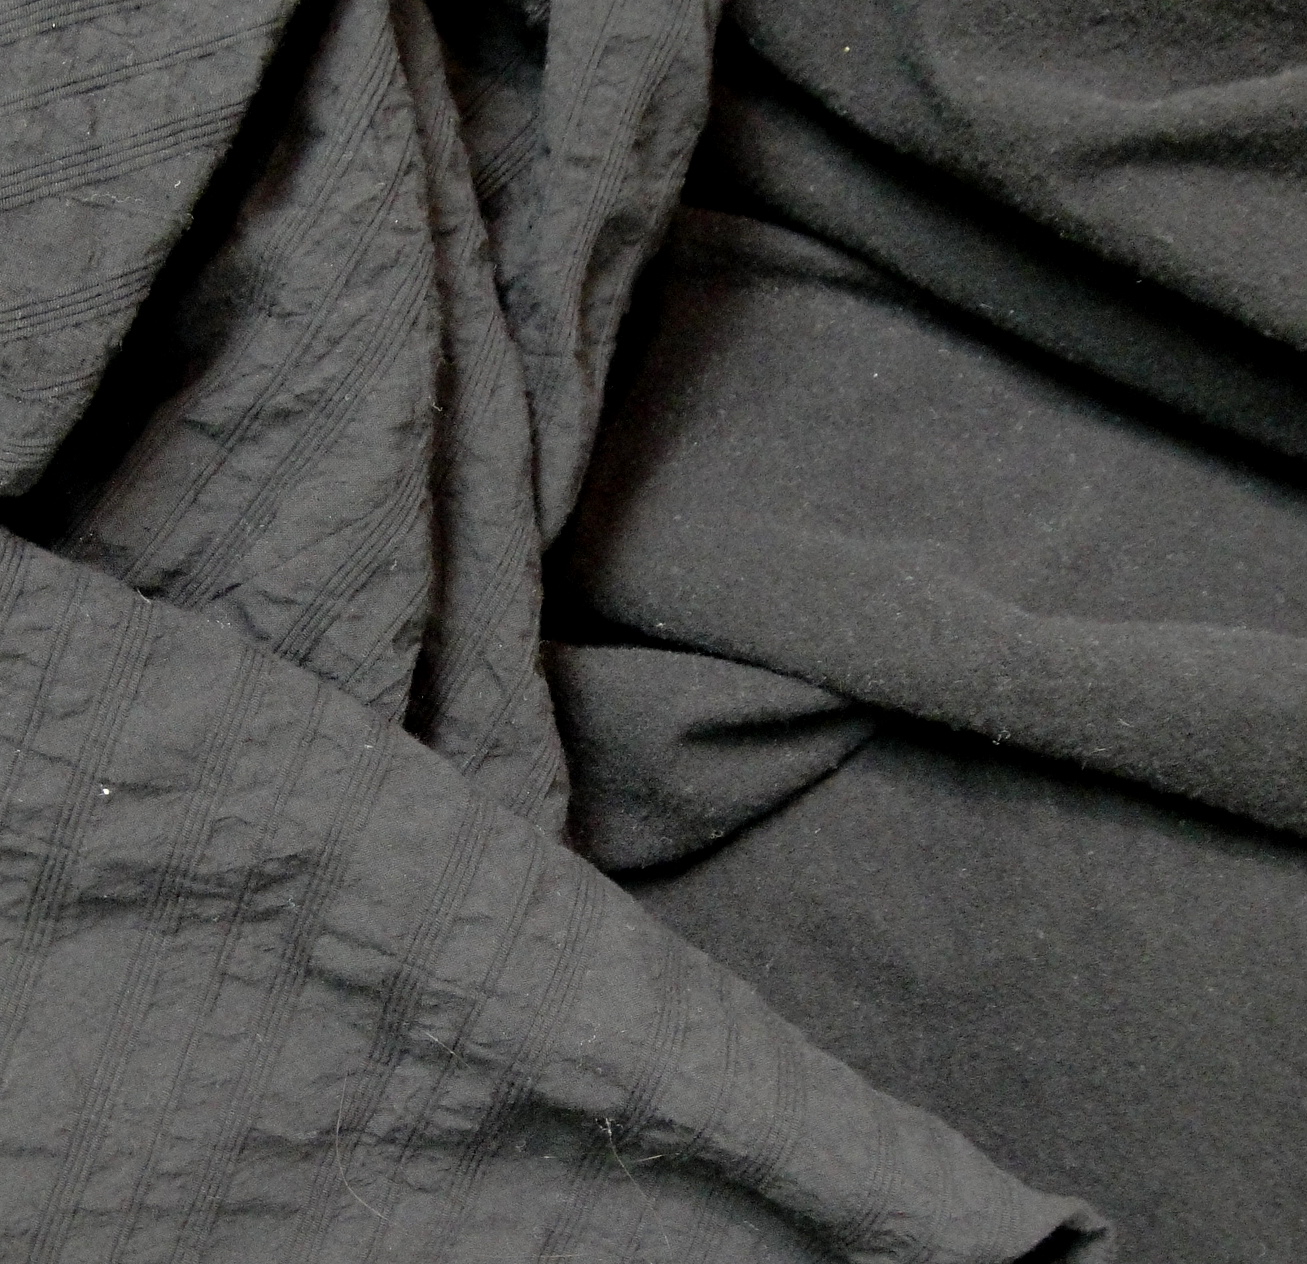
Left, woven-stripe cotton; right, black flannel.

I have two fabrics picked out and pre-washed, though I suspect the flannel, at least, should be washed a couple more times to make sure all that pesky shrinking is taken care of (I hear flannel’s a progressive shrinker.) Both of these fabrics are black*, and by some miracle I managed to capture the texture, if not the colour, of both. The woven-stripe stuff on the left would appear much smoother if it were ironed, but to be honest, my inclination to iron my hubby’s shirts is about on par with my inclination to run a marathon. I keep thinking that it would be a worthy goal, but there are far too many more immediate and rewarding things to spend my time on. Fortunately his work supplies his uniforms, so any clothing I make will just be worn to and from work and around the house, so a slouchy, casual shirt is fine (Yes, I will press while sewing, I promise. Just maybe not ever again, after). I will make my first try from the black flannel, as it was significantly cheaper.

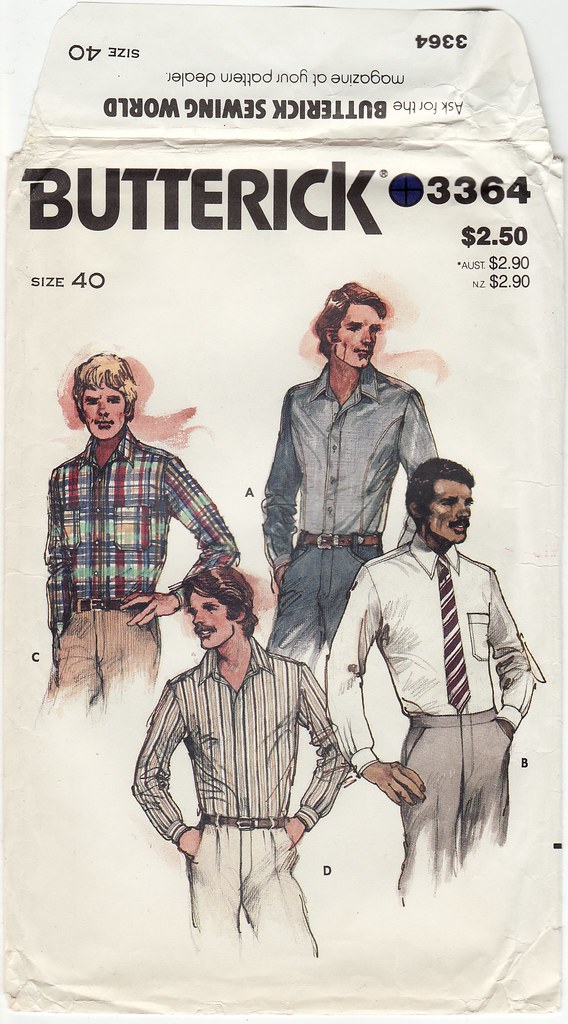
Butterick 3364

I’m thinking I will go with view A for the first shirt after all, as I think the seaming would spice up an otherwise terribly plain shirt. Also I noticed some hand-topstitching on a male co-worker’s shirt (anyone else in this sewalong, are you ogling menswear around you as badly as I am?) today that looked really nice. If it turns out well I might consider something like that—again, it could be a subtle way to jazz up the flannel without trying to appear formal.

I guess I should really get on, y’know, tracing the darned pattern before I get too far ahead of myself, eh?

And on that note, what I thought was going to be a super-quick fabrics post turned into half a book, so I’ll end it here.

*here’s the problem. My hubby, the light of my life, a funny, insane, delightfully stylish man, wears only three colours. Black, white, and denim**. Occasionally a small amount of red or purple, as an accent, is tolerable. Although he really doesn’t like red. He doesn’t even wear grey.

**for him, this is a colour.

10 Comments

Filed under Sewing

Frivolity

Fluffy!
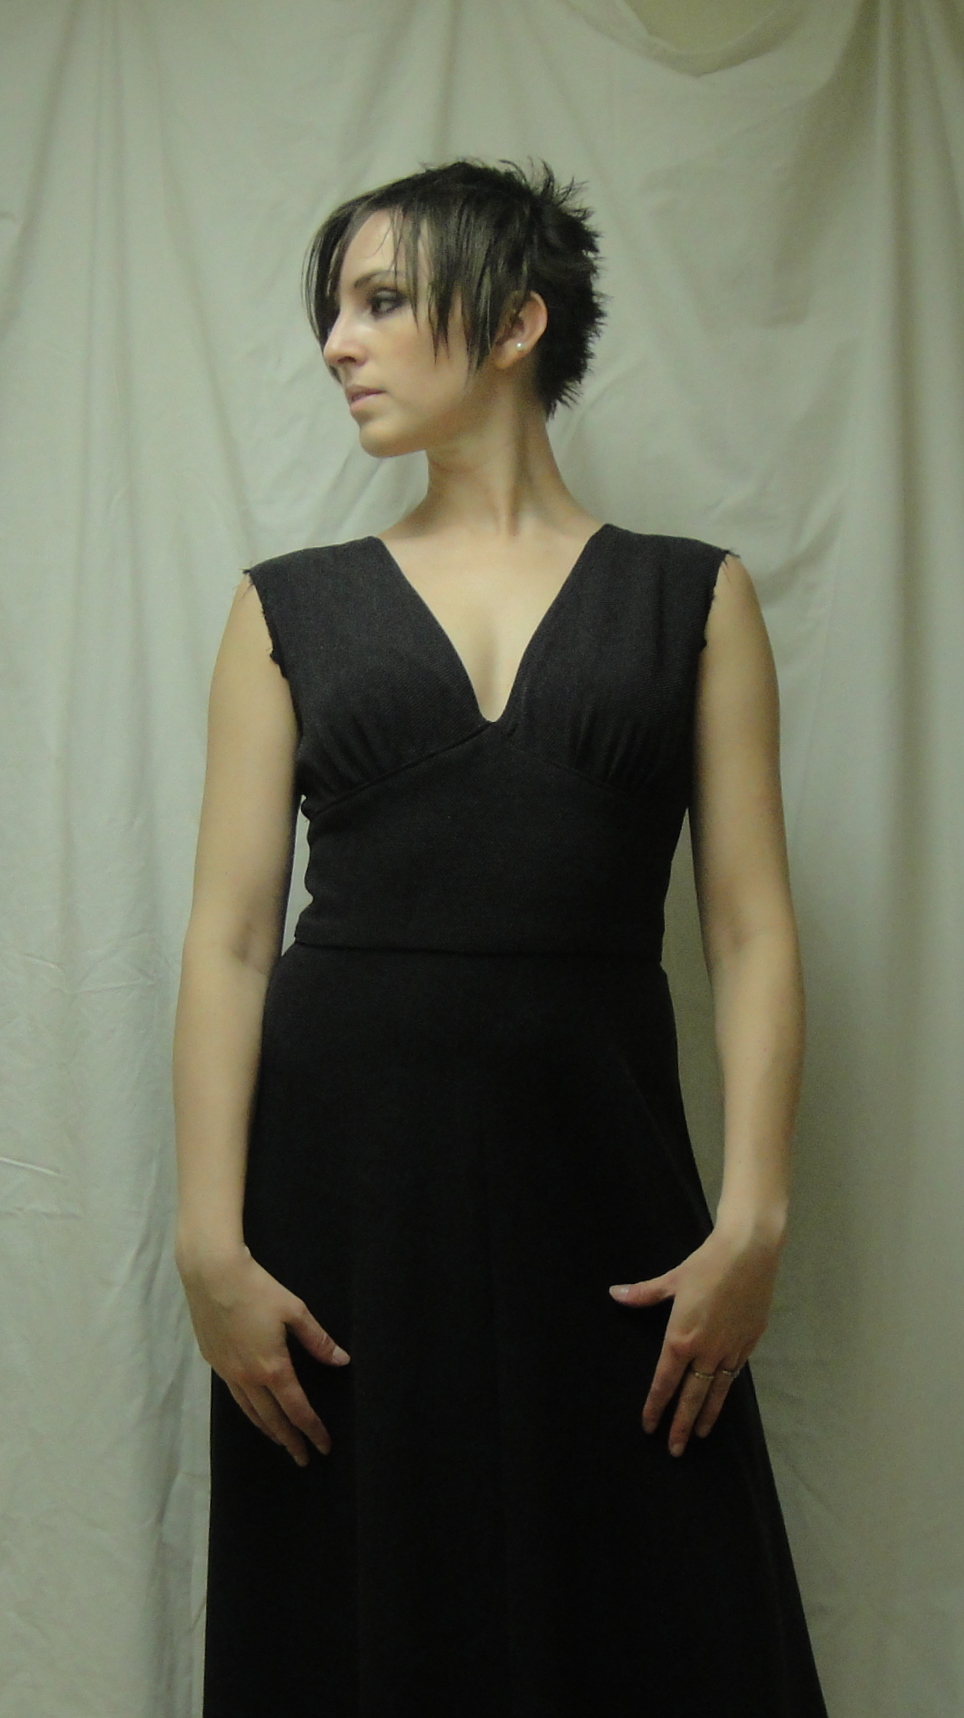
There’s room for a little silliness in life, right? (And considering what some of you out there are going through right now, there’s room for a LOT of silliness in my life.)

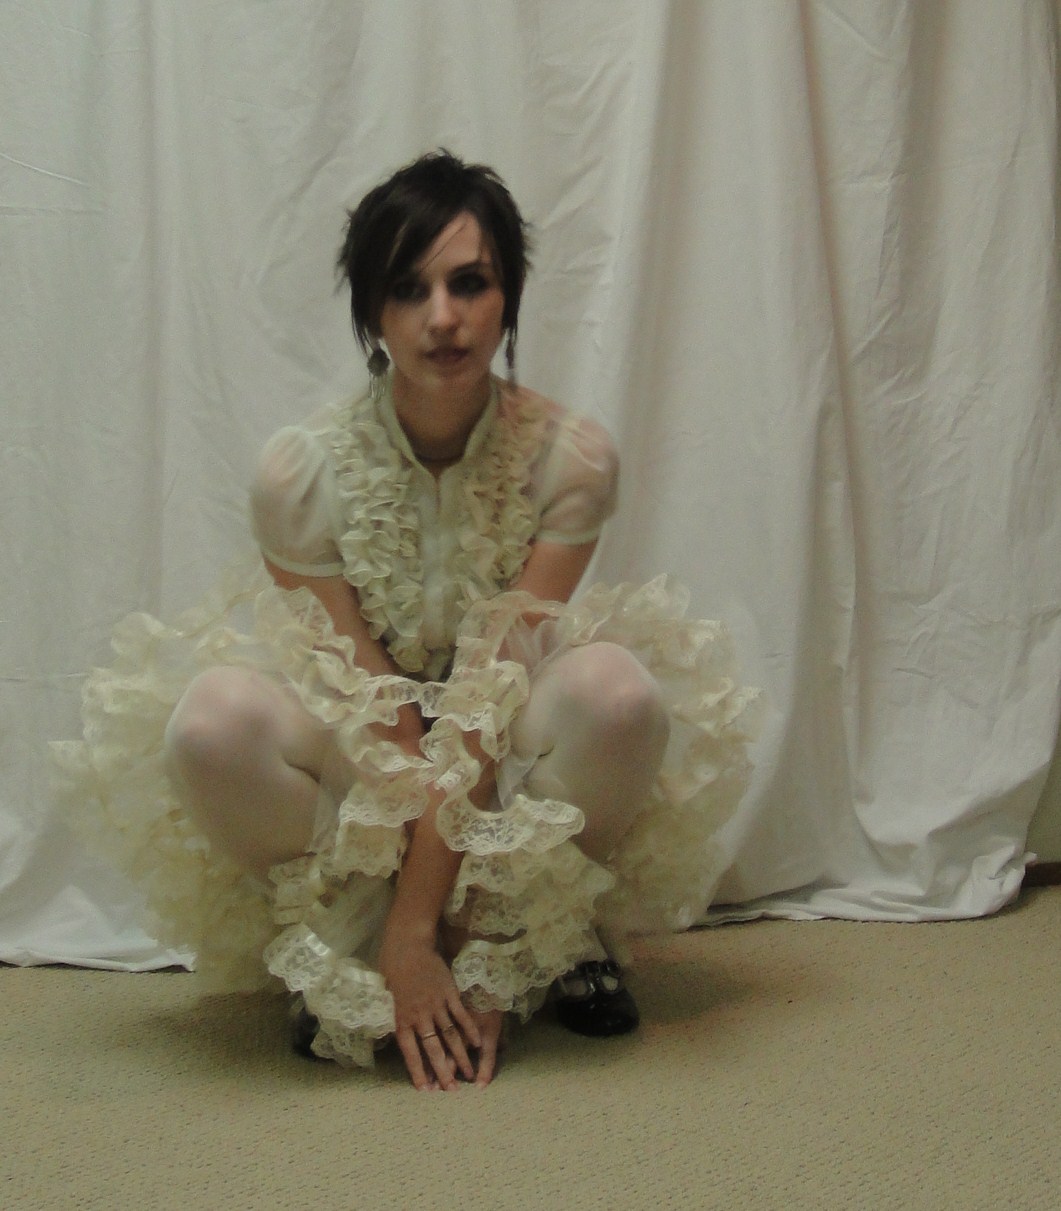
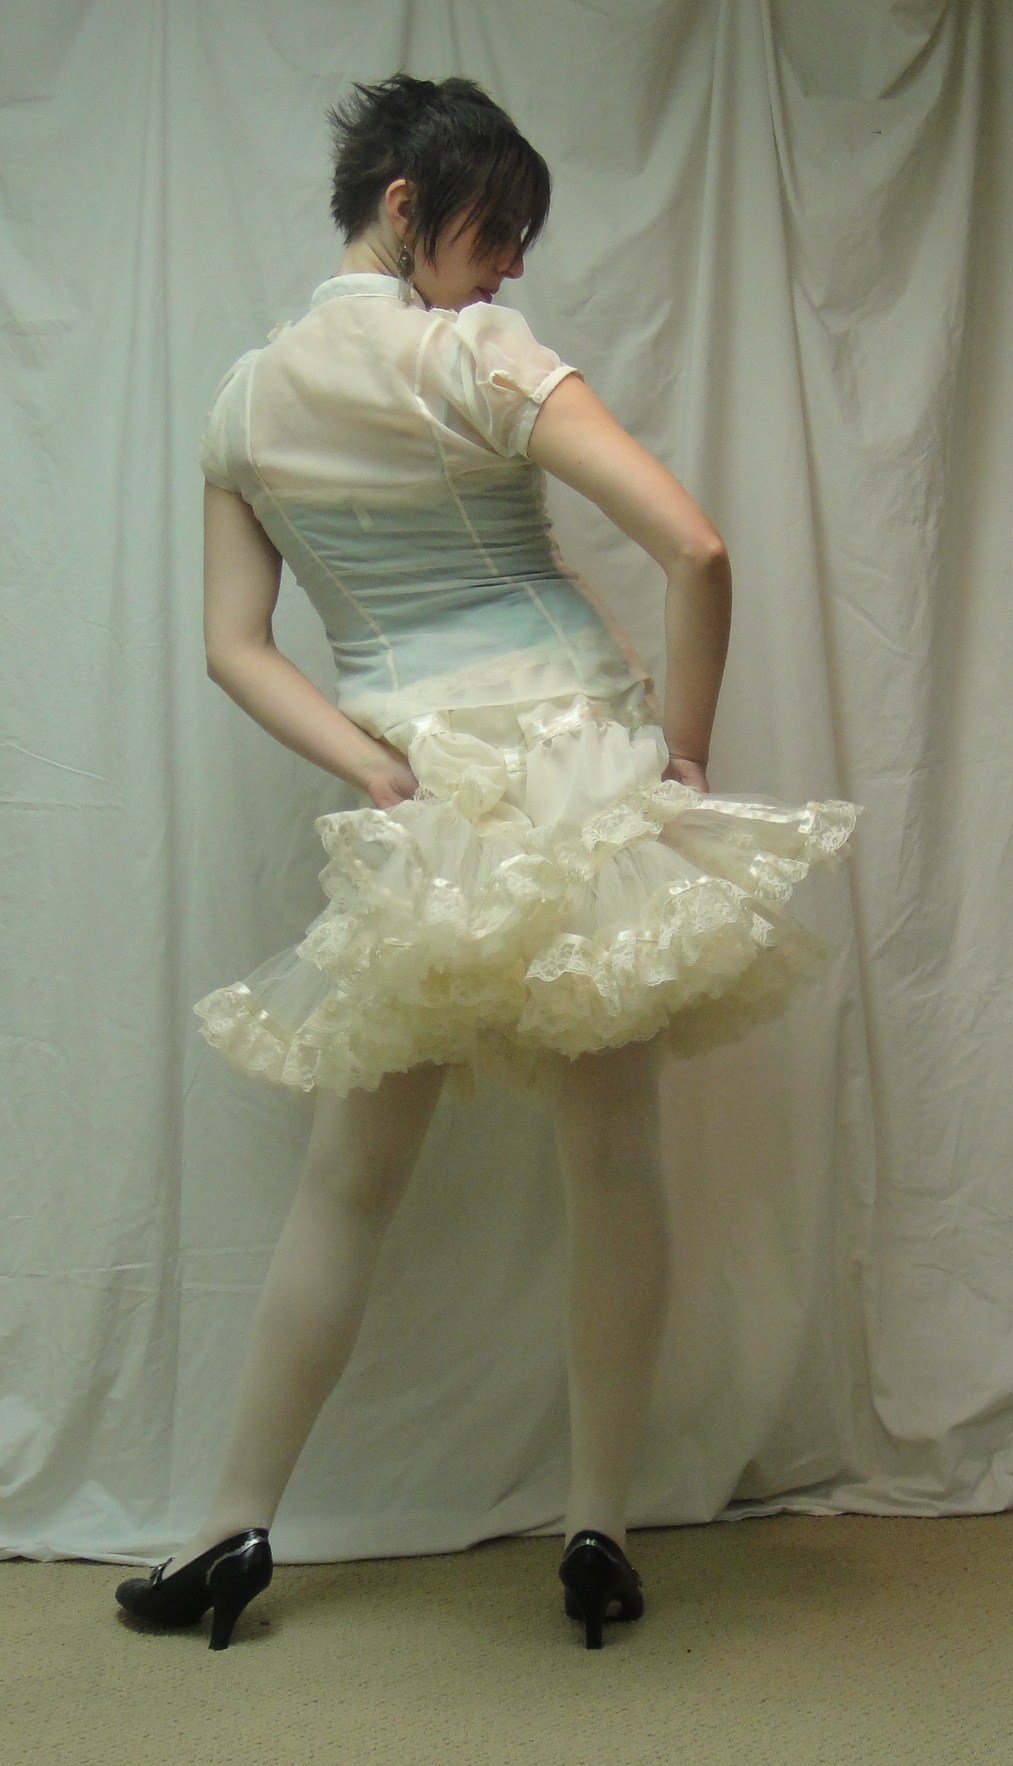
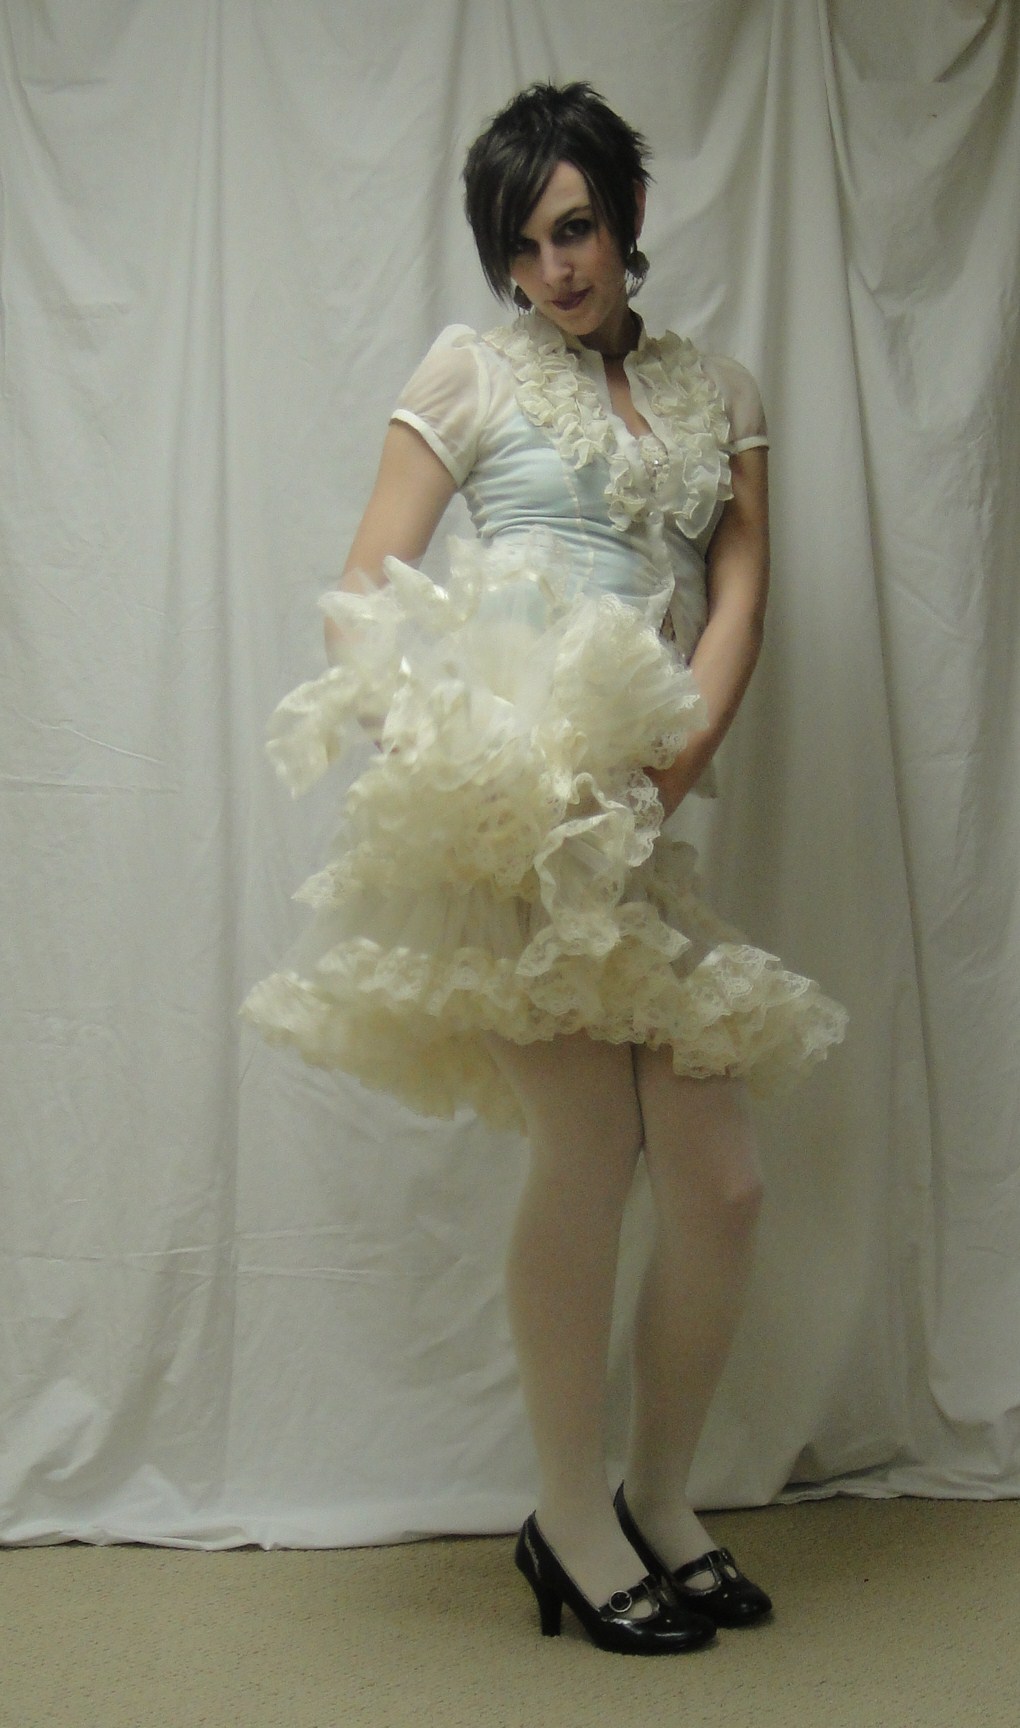
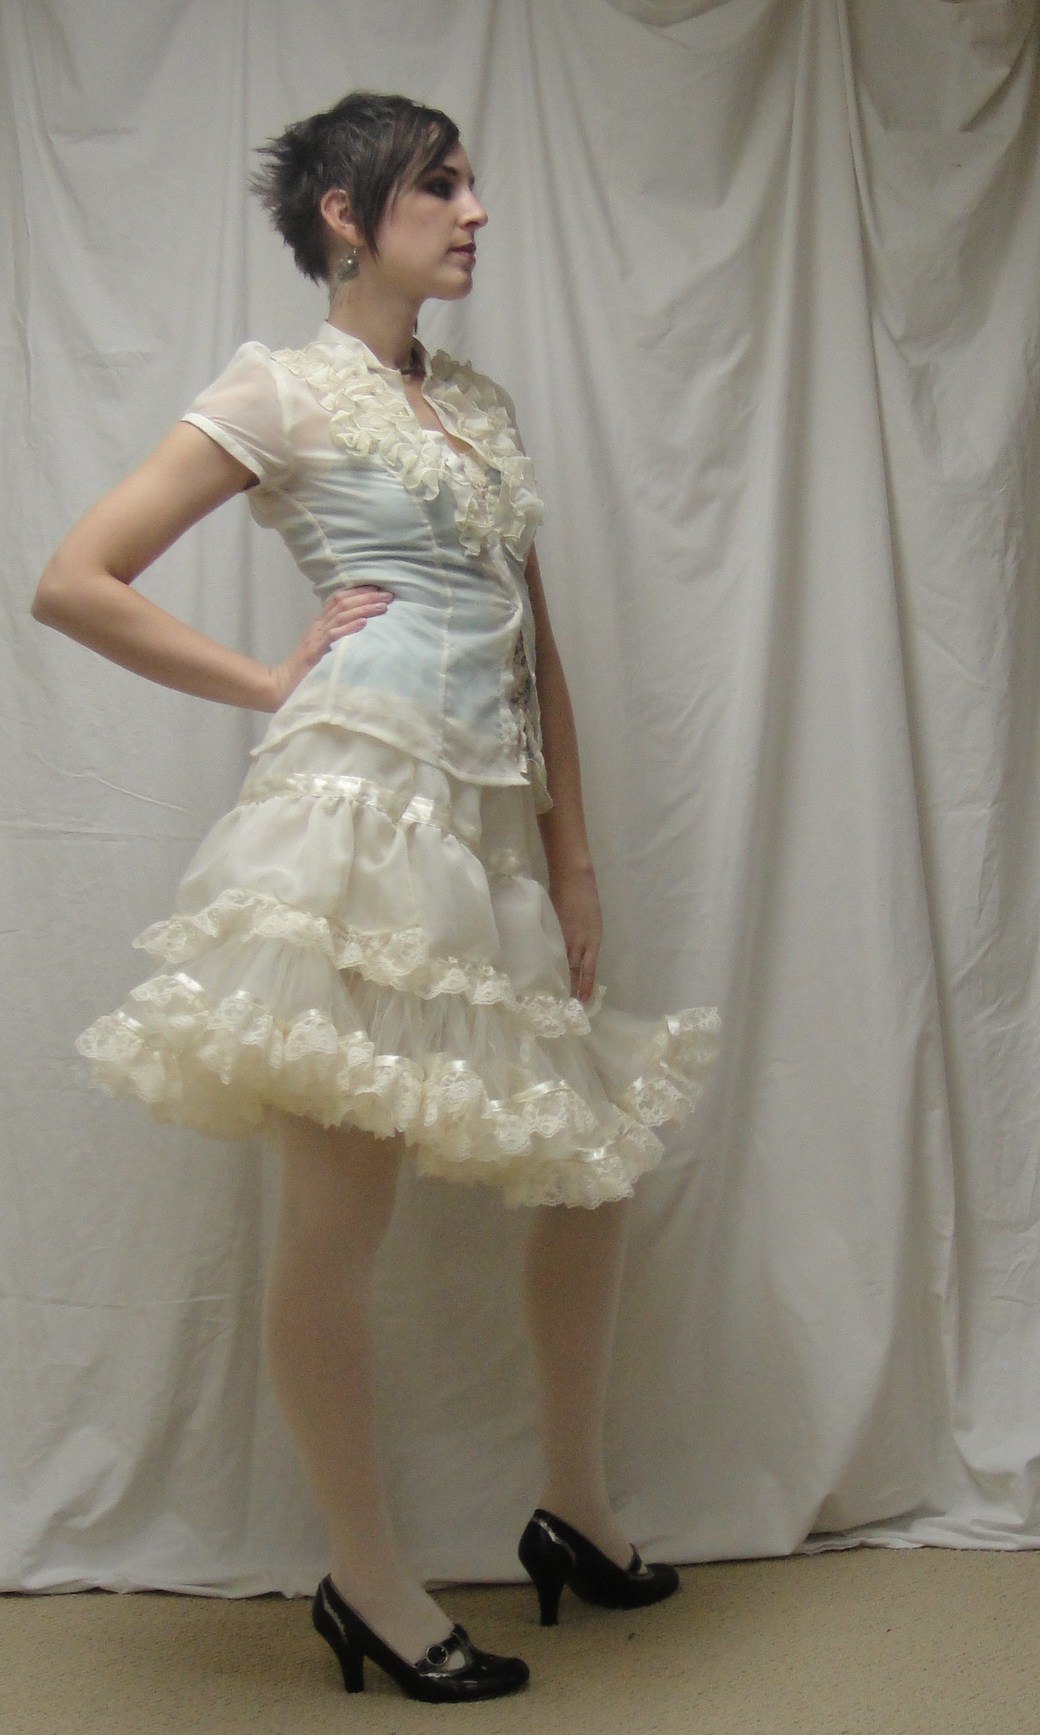
This petticoat is in clear and present violation of the mission I set myself when I began this blog, which was to create clothing that I would wear on a daily basis.  At the moment, it will join several other cream and lace pieces in the side of my closet that holds the “fun clothes”. Y’know, the old clubwear, goth gear, formal attire, stuff that gets an airing once or twice a year at most. (This doesn’t even count the actual dance costumes, which are all in the basement.) The best I can hope for is that its presence will spur me to create some circle-skirts or things of that nature to wear it with. Once, y’know, it stops being winter. Well, serious winter. Skirts can still be worn in mild winter, but it takes greater fortitude than I possess to wear them in real cold.

So, construction. Erm. I had, y’know, mentioned Sugardale’s tutorial. Which is a great tutorial. I used, well, the part where she uses ribbon to cover and finish her seams.

I started with the same basic measurements she used—22″ finished +2″ SAs=24″ skirt /3 tiers = 8″/tier.

Then I looked at my tulle, which I knew I wanted to be the bottom tier. I had enough for about four 8″ strips, each about 2.5m long, I thought. Which would give me enough for 10m on my bottom tier. It didn’t seem unreasonable as Sugardale suggested 8m for the bottom tier. (A basic tiered skirt for tribal bellydance is a 10-yard skirt, that is, like mine, it has 10 yards/m at the bottom. Yes, I know that a metre is longer than a yard, and the difference adds up to quite a bit once you have 10 of them. Hush, this conversion is the least of my problems. Of the two full-size ones I’ve made, one is about 22 metres at the bottom, the other is probably around 40-some… it is very, very, very, very full)

To start I edged the bottom of the tulle with ribbon and my “new” gathered lace. This took forever. The key to tiered skirts is to always start with the bottom tier—not only is it easier, but you will never have the stamina for that massive tier if you start at the top. Once I had the lace attached, I realized that my tier was more like 14″ than 8″.

So I decided to fold it over and have a double-length for the bottom. Extra fluffy!

Then, I broke out the ruffler foot.

I have mentioned this contraption briefly before, but I don’t know if I’ve ever gone into the full, detailed complexities of my relationship with this particular sewing machine foot.

To begin with, it is, quite simply, the most terrifying foot concoction imaginable. I suspect that those vintage buttonholer attachments are more frightening in their inner workings, but at least they tend to have it all neatly contained within that plastic casing.

Once you figure out how to attach the ruffler foot to your machine, it’s actually relatively simple. The up-and-down motion of the needle drives a sharp bit of metal back and forth, causing fabric threaded through a particular part of the foot to bunch up. How much it bunches per stitch is controlled by a little screw; another little lever adjusts whether the gathering takes place on every stitch, or only once per so many stitches. This means you can technically use the foot for making pleats as well, and control your gathering ratio quite precisely. Fabric tension and stitch length also play a role.

In practice it is… fiddly.

Now, I first wrestled the ruffler foot on my mother’s machine, which, I have

come to realize, is a prince among ruffler feet as well as a prince among machines. With a certain amount of experimentation I determined the settings I wanted, and, based on a foot-long sample, figured I had the ruffle ratio set to 2:1.

When I finished ruffling the first tier of my first tiered skirt, I realized the final ruffle ratio was more like 4:1. As a result several of the nine tiers in that first skirt (never let it be said that I’ve shied away from complex projects!) have no gathering at all. Still, I managed to pull the skirt off and was quite thrilled with it. Here’s a pic in action. And anything beats trying to hand-gather 40m+ of fabric

When I moved away from my hometown, my mother generously bought me my sewing machine as a going-away/Master’s degree present. The one attachment I requested was a ruffler foot to go with it.  As I discovered when I made my second tiered skirt, the differences between a vintage, quality attachment and a cheap modern generic version are subtle but substantial. The metal is just that little bit thinner, the edges sharper (which tends to cut fabric and threads when things get the least bit out of alignment. And something about the vibrations it generates (maybe because they aren’t anchored by the massive weight of my mom’s old machine?) makes things come loose. Like the needle. Or even the whole foot (at the part that screws on to the leg, not the little snap-on part). I’ve never been able to make my ruffler foot do anything other than gathers, and the control on the amount of gathering is rudimentary.

Apparently in tulle, it’s nonexistent. To ward off the machine’s tendency to eat the tulle, I gathered it to a length of ribbon. Once I figured out how to arrange this properly it wasn’t so bad, but for whatever reason the stitch-lengths were minute, and completely insensitive to my twiddling with the set stitch length. So instead of gathering at a nice 2:1-or-thereabouts ratio, it gathered my entire strip of doubled tulle into just over 2m. Not the 4-5m range I was looking for.

D’oh.

I had originally intended to have the top tier be about 2m, attached to an elastic casing of similar size. Obviously not going to work when I need at least one more tier in there.

A completely inadequate attempt to demonstrate this gathering method.

So I made a second doubled tier, in the hopes that it would fill out the second tier a bit above that crazy-full bottom tier, added more lace, and used the zig-zag-over-supplementary-thread method to gather it. This is the absolute best method available (to me) for gathering moderate to large amounts of fabric where you still need a fair bit of control over the ratio. (The ruffler foot is wonderful for doing the gathering for you—evenly—but limits your control. Or my control, anyway.) Note: I don’t have and have never used one of those “gathering feet” so I can’t compare. Maybe it would kick my method’s butt. Anyway, all you do is zig-zag OVERTOP of another thread (I like to use dental-floss), and then afterwards gather up your other thread/floss; the zig-zag acts as a kind of casing. Unfortunately, on this sheer fabric I decided to try using a clear monofilament-type thread for the supplementary thread, since the only dental floss we have right now is the psycho-expensive stuff the kids like and I’m not using that for sewing. While it works fine, it’s too slippery, so the gathers slide around and don’t stay put as well as I’d like. Only exacerbated by my fabric, which for the upper tiers was this godawful poly-chiffon stuff that I scavenged from my step-brother-in-law’s wedding decor summer before last. It’s the same fabric in the ruffly sheer JJ.

I really liked using my smocking-stitch on top of the ribbon when securing the seams. It gives it a nice, lacy texture, as well as finishing everything off nicely.

I’m realizing belatedly that I should’ve gotten more close-ups illustrating the way the tiers are doubled, which is a little nifty, if I do say so myself, but it’s late and this post is already hella-long and I’m too tired to bother right now. Sorry :(. Also, do you note the total lack of my vintage lace on the finished project?!? I didn’t have enough for the hem yet I didn’t want to attach it higher up where it would never, ever show. So now I don’t know what to do. Maybe save it for finishing a skirt lining that would go over the petticoat?

28 Comments

Filed under Sewing

I was going to wait

until the little coat was done. But, as usual, I am impatient. And Syo was eager to model. Really, she twisted my arm.

So here it is, sans lining hem and buttons. With the puffy fleece lining it’s a bit snug on Syo, which is a good sign, although the sleeves, which I folded up a trifle more than strictly suggested by the pattern, are just right, so they will be quite long on Fyon.

Erm. Perhaps next time we’ll comb hair before the modelling sesh…

Also, did I mention I am dreading the buttonholes?

8 Comments

Filed under Sewing

Curveball

Coat, interlining, lining

I feel a little unpatriotic for picking a baseball over a hockey metaphor. Oh well. Progress on Fyon’s coat was continuing incrementally but steadily (holidays are definitely over) until last night I realized that the coating fabric really should’ve been underlined. It lets a bit too much light through to be lined with light fleece. WHOOPS! Fortunately I had purchased just over two meters of black cotton flannelette the other day for a (hopefully) wearable muslin of my sweetie’s shirt. But there was just over 2m left on the bolt, which I was worried would not be enough for a man’s shirt after flannelette’s notorious shrinkage. So I guess it can become girl coat underlining, and I’ll pick up some more. It’s not like it was expensive. Of course, the other problem here is that I have already constructed both shell and lining. So I guess the “underlining” will be more of an interlining. On the upside, flannelette is such a dream to cut and sew that I almost don’t mind the extra work.

One cute little collar, coming up.

The collar is also sewn and steamed, for whatever good that will do. 😉 I think I am starting to get the hang of the whole turn-of-cloth thing, for collars like this, anyway. Also getting a bit better at those tight corner curves… A little bit, at least.

I fought off the temptation to try and machine-blind-hem, mostly because I wasn’t confident I could get the crease out after, as I’m trying to avoid hard pressing on this spongy fabric. So it has a hand-stitched outer hem, anyway. I think I will check out Gigi’s post on finishing hem/facings to see if I can make head or tails out of it. Usually my lack of precision is hampering in these areas and I compensate with lots of hand stitching, er, couture detail.

Oh, and I remembered to put in a label and hanging loop! This ribbon is perfect for

Label and hanging loop

the coat—although I’m not convinced how sturdy it will be. Ah well. Odds of small fingers managing to use the loop even if it is there? Minimal, I’d say. Anyway, all that remains is hemming the lining, attaching the collar, and attaching lining/facings to coat. Not necessarily in that order.

I have a feeling my next “for me” project will be the fluffy petticoat. I seem to have fallen off the “practical clothing” bandwagon this year (so far. Maybe because my wearable wardrobe is no longer critically low, or maybe because, like everyone else, I’m just sick of winter sewing (although this

Fluffy petticoat supplies

doesn’t explain the continued coatitis). But the materials have been building for ages—the chiffon (background, left) since Aug. 2009, the idea since sometime in the summer of 2010, and the whole spool of gathered lace (top left) appearing at Value Village last weekend seems to have pushed things over the top. Now, making a tiered skirt is dead easy—this is ultimately just a shorter version of the tiered dance skirts I’ve made several times now, on various scales. But I really like Sugardale’s tutorial because of how she uses ribbon to finish the seams, so I’ll be going that route. Zena has another method that produces nicely-finished results, more for dance skirts (hers are like better-made, better-finished versions of mine). And I will have to consider how to use the vintage lace with the coral flowers. I would have used it on the lower edge but there’s only 4m, and 4m is not a full enough hem for a petticoat.

Just for the record, I have no skirts at all to wear with said petticoat. Yet. But then I’ve been thinking about a circle skirt since summer and been disinclined to make one because I only like how they look with petticoats under. Chicken and egg. But I’ve decided that the petticoat will be my egg, and hopefully once it’s done chickens will ensue. Yeah. If that makes any kind of sense at all.

But first… I have a little coat to finish.

5 Comments

Filed under Sewing

Attack the pink fluffy bunnies

Attack of the pink fluffy leopard print bunnies

Well, I have started work on the coat for my older niece. This is my first experience sewing with fleece and it’s, well, interesting. For one thing it’s filled my house with tiny pink blobs of fluff, which are getting EVERYWHERE. For another it seems to combine the annoying qualities of knits with the annoying qualities of velvet. Joy.

The pattern is McCalls 3374, a thrift-store find back at the start of my sewing adventure, just over a year ago now. As a bonus it came essentially un-cut, with the size 3 fully traced out and part of a size four. I traced the rest of the size four for Syo’s coat last winter, so this time I have no tracing to do! Whee!

This may be another exercise in “looking past the envelope” as the envelope cover

McCall's 3374

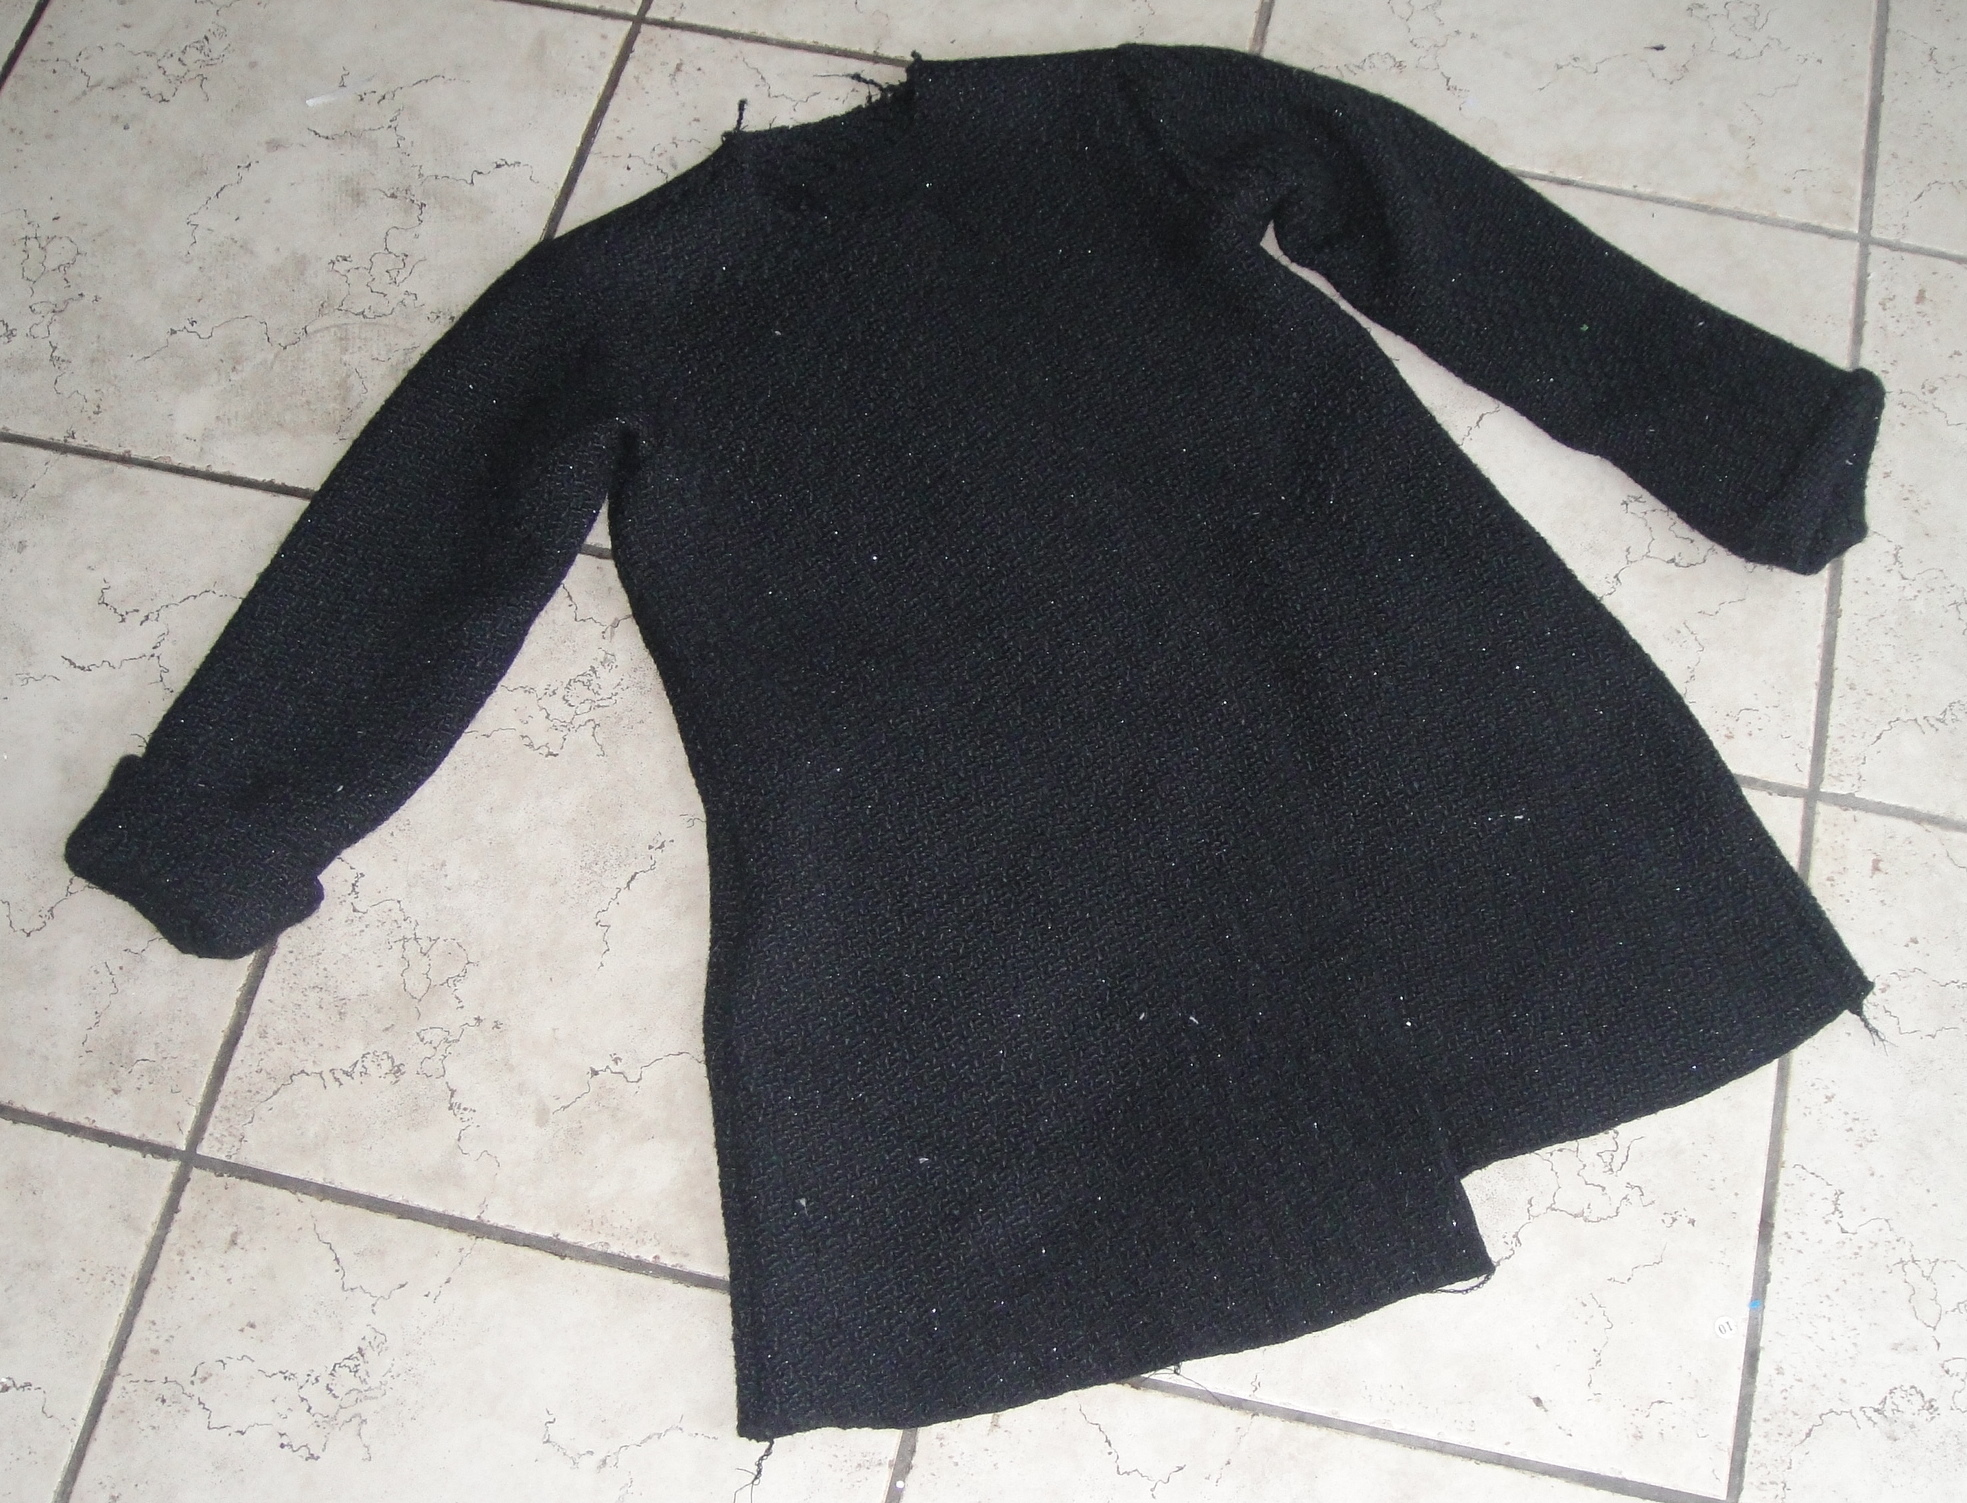
has a lot of fun-fur, fleece, and animal print. Despite the above rant about fleece, the fleece is strictly for the lining. My outer shell is black and sparkly “boiled wool camry blend” (a completely different fabric, however, than the stuff of the same name that the Russian Princess coat and my Czarina coat were made of. They were a knit, dense and felted. This stuff is a woven, tends to fray, and reminds me of boucle in its thick individual yarns.) It would’ve benefited from block fusing, but I am far too lazy to go there in coats for preschoolers. I did preshrink with wet towels in the dryer, which reduced the width by a good 10cm (4″) so I’m glad I did.

Coat shell

This first coat is for my four-year-old niece (let’s call her Fyon henceforth); she was also the recipient of the twirly Popover Sundress last summer. I decided against cutting out both coats at once as I was pretty sure that would inevitably result in me sewing size 4 sleeves onto a size three front or something. I will note here that the size four still fits Syo fine, so it will be plenty roomy on Fyon, although their size gap is not as extreme as you might expect from the three years between their ages, since Syo is a compact model, possibly even a Smart Car, while Fyon is more

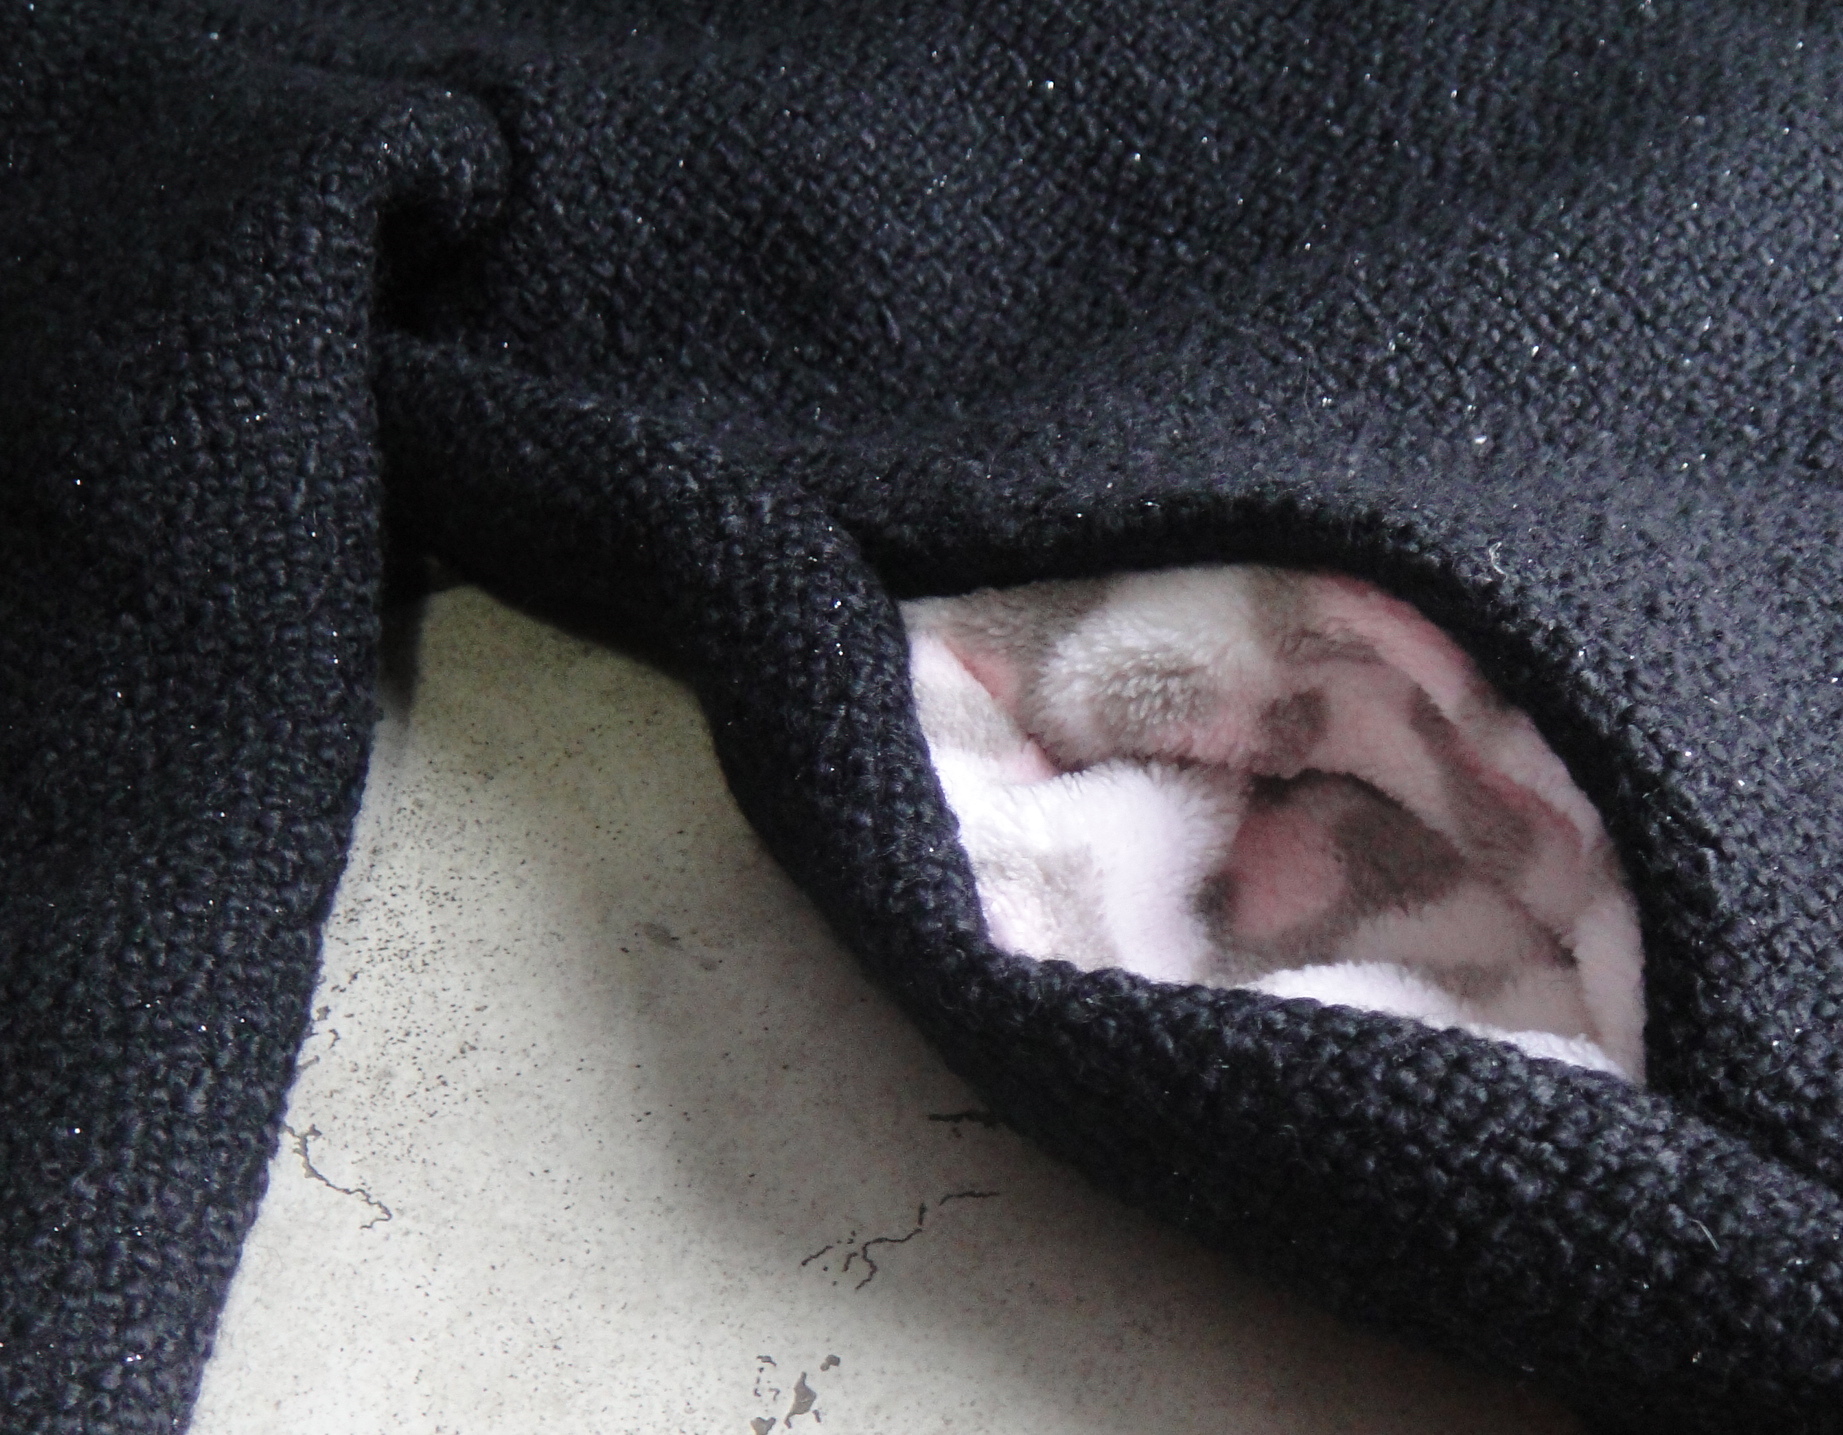
Fuzzy pockets!

of an SUV type.

The best thing about this pattern is that the (very flat) sleeve caps have almost no ease, so they’re a cinch to put in flat. This makes for very quick construction (and I promise I’ll grab a photo of that stage on the next coat.)

I decided to cut the pockets out of the fleece, which will make them absolutely yummy to stick your hands in. This time, I knew enough to make the seam from coat to pockets narrower, so the fleece rolls nicely to the inside, unlike the last time I sewed this coat.

I debated about foldover cuffs, since I’m not overly thrilled with how this part of the pattern is drafted, but they do look so much more finished than just a plain sleeve ending. (Tabs do too, but I’m much too lazy to draft a tab for these coats.) I had considered interlining the coats, as well, but decided the fleece is bulky enough. It was the

Foldover cuffs. I love the texture of this fabric.

thickest, softest stuff we could find at Fabricland’s new-years sale (still expensive even at 50% off). I think there’s enough left over for an itty-bitty scarf, too. I had debated making the collar and cuff-fold out of it, but I really wanted to keep the outside of the coat “serious” (except for that hint of sparkle) (probably I wouldn’t’ve had enough fleece, either). Hopefully the girls won’t find the wool collar and facings too scratchy; it doesn’t feel scratchy to me, but it’s certainly not as wonderfully soft as the fleece.

Note to self: you forgot to cut out the back neck facing. Also, don’t forget to add one of the Bookemon & Ebichu labels and a hanging-loop before you sew on the lining/facings.

The pattern is inexplicably unlined, but I’ve just used the same body pieces for the fleece. I considered adding  a back-pleat, but I don’t think it’s necessary with the stretchy fleece. Next step: assemble the lining and facings (I will just topstitch the facings down on top of the fleece).

One Eyed Jack (left), Bandit (centre), Tigger (right)

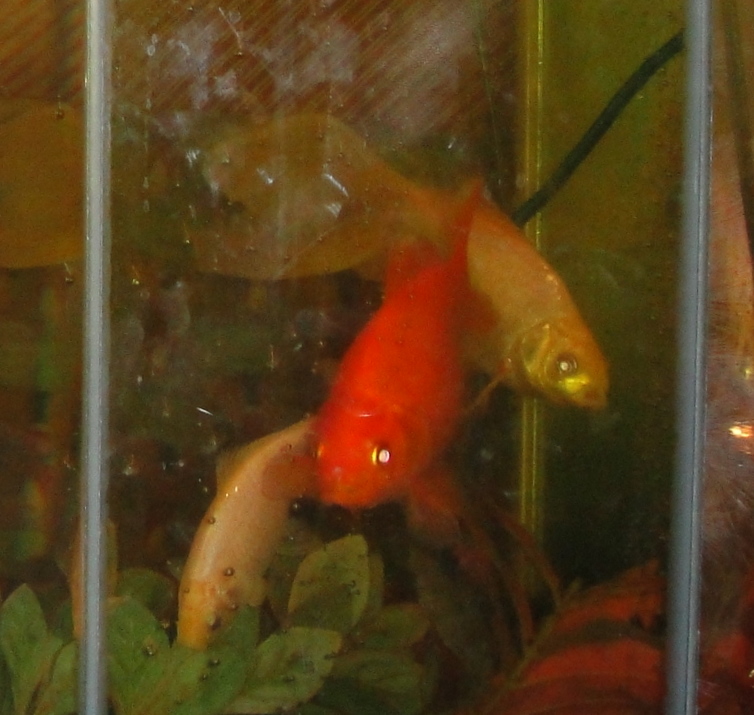
In sadder news, we got up this morning and discovered One-Eyed Jack, the smallest and hardiest of our goldfish, was missing from the tank. I soon found him on the floor by the couch, where he had leapt to his doom. The smallest of our fish, he was still a good 6″ long, and had survived the Great Filter Malfunction of 2009, a 600-km migration in a glass jar in 2007, and a brutal cichlid attack that cost him his left eye (and gave him his name) probably sometime in 2006. Not to mention nearly four years of my rather indifferent fish care. I honestly thought he would be the last of our dwindling fish to survive, but I hadn’t counted on his adventurous nature. Usually he was a bottom-hugger, as his one-eyed state made it hard for him to find food until it had settled on the bottom. Tyo was stoic (her best friend’s dog died of an accident on the weekend, so compared to that the loss of a fish may be minor), Syo was stricken and still crying when I put her on the school bus, and I was a lot more freaked out than I should’ve been. Jack is now in a box in a freezer to await burial in the spring. He’s too special to just chuck in the garbage like the other goldfish we’ve lost.

10 Comments

Filed under Sewing

That 70s Dress

Simplicity 5728

A(nother) 70s dress

Now there’s a way to begin a post, by referencing a TV show I never even watched…

Anyway, despite my complete disinclination to do anything yesterday other than read through one of the novels I picked up at VV a couple of days ago, I did manage to get the sleeves on and hem the Simplicity dress. Raising the armscye worked like a charm—it’s lovely, high, and mobile.

As you can see, I opted (after the debate between long and short) for 3/4 length sleeves. This was initially inspired by the fact that as I was cutting there was a perfect spot to cut the sleeve out—but one side was a couple of inches too short due to the uneven cut end of the fabric.  But I’m really glad I went for it—warmer than a short sleeve*, but (I think) dodging the school-marmish/little-house-on-the-prairie potential of a full length sleeve with a full-length skirt.

Simplicity 5728

Curse that indoor light...

Since this blog is the closest I get to taking notes on my pattern alterations, I’m going to point out a few things about the sleeve again. I lengthened the full-length sleeve 2″ total, one inch above the elbow, one inch below. After doing this, I’d like to add, the elbow dart is in exactly the right position. Hooray! When I converted it to the 3/4 length, I cut off at the upper edge of the forearm “add length here” section. I felt like the sleeve was quite roomy in the muslin, even for a non-stretch sleeve (which obviously can’t be as snug as the knits I’m used to wearing), and when I decided on my stretch fabric I decided to narrow it: 5mm off each side, mirroring the 1/4″** I took off the sides of the bodice, and then I took a tuck of about 1/2″ out of the middle of the sleeve, all the way down. I figured there was more than enough ease in the sleeve cap to do this without messing with the length of the sleeve-cap, and there certainly still seemed to be plenty of gathers to go around. So in total the finished sleeves are about 1″ narrower than the muslined ones. This is perfect for my fabric, but might be a little too narrow for a non-stretch sleeve.

Simplicity 5728

Lots of sleeve mobility!

I do feel like the sleeves sit a little far out on my shoulders (possibly exacerbated by my alteration to the back neckline), although if I tug them up higher on my shoulder it seems to push out the sleeve oddly, so I’m not sure which is preferable.

I made the front midriff piece double-layered, to give it a bit more stability and make for a nicer finish inside. It is a nice finish, but it makes for a lot of layers of this fairly thick fabric, especially right under the bust where it encases the gathers. Possibly I should’ve graded the seams in this area. I’m also debating the merits of a waist-stay.

I decided to try a machine blind-hem on the grounds that a) this fabric is quite thick, and b) it hides the thread so well that it would be unlikely to show even if I did a whack job, which I basically did, and c) it just seems odd to hand-hem a stretchy. And it worked out pretty well, so long as you don’t look too close. The nice thing about such a long skirt is that the hem is a long way from anyone’s eyes, too ;). Well, except for the under-2-years age set, but presumably they won’t tell on me. The hem is the 2 1/4″ specified in the pattern, which brings it up to a length which is just shy of floor-skimming when I’m in bare-feet, which seems about right looking at the pattern illustration. Again, this is after I lengthened the entire skirt 5″. Which tells you everything you need to know about how my height is distributed (I know, cry me a river, right?)

Simplicity 5728

Finally, a smile!

I feel like it may be important to highlight a few lessons learnt from this pattern:

1) I really am short in the body. It’s not just in my head. Junior Petite, people, and the only bit of lengthening I did in the bodice I kinda wish I’d skipped out on.

2) especially in the armscye.

3) apparently I like 70s fashion, or at least the dresses. The only vintage patterns I’ve sewn for me this past year have been 70s dresses, and I have another one in stash, too. This is a little hard to wrap my mind around given that I grew up in the 80s and couldn’t even stomach the sight of bell-bottoms until well after their return to popularity in the late 90s.

4) I have neither the right hair nor the right shoes to go with this dress. Well, technically I have the right hair, but not the right hair-cut (nor am I likely to have it again. I love long, straight hair. Just not my long straight hair.). The shoes thing is unforgivable. How can I have no cute, delicate platform shoes? All I have for thick soles is my kick-ass boots, which would be fun but are not exactly period.

Simplicity 5728

Nice dress!

All in all? pretty happy camper! Though I’m still not convinced the dress will become part of my everyday wardrobe.

… now to fight down the urge to start working on a fluffy petticoat…

Oh, yes and a few more photos in the Flickr Gallery

*yay! The weather, which has been relatively clement since before Christmas, is reminding us that this is still Canada and winter still has a good two months to mess with us before spring will even begin to get a finger in the door. Today was  a virtual blizzard.

** very glad to hear that I’m not the only sewist who flits randomly between measuring systems. Canada officially went metric in the 70s, but somehow it’s never completely taken hold. For the longest time I did outdoor temperatures in Celsius, but indoor temperatures in Fahrenheit, for example.

36 Comments

Filed under Sewing

SFOs (Semi-Finished Objects)

Zena of Blood, Sweatshop, & Tears once commented that “wearable is climax. Done is denouement.”

She is so right.

Lekala twist-top, v. 2

In that spirit, I give you my second take on the Lekala 5675, a.k.a. the twist top. The hems are serged but not completely finished, and it’s been like this most of the week. I am disinclined to fuss with trying to stabilize them for topstitching. Bleh. This red knit is wiggly, super-stretchy, and much more like the kind of fabric I imagine the shirt was designed for than my last attempt. It’s also an amazing example of the difference fabric choice can make for the exact same pattern (only difference is I added perhaps an inch more extra length to the red version, just in case, bringing the total increase to about 3-4″ in the sleeves and 4-5″ at the hem. The first version was roomy and sweater-like, with a surprisingly perfect fit in the shoulders. This version is second-skin tight and the shoulders look really narrow. Although about the same as they look in the pattern illustration, actually.. The twist still doesn’t pull naturally into the kind of tight twist the illustration suggested. This might be a drafting problem (maybe they should just have widened the upper front piece a bit so that a full twist was required), or it might just be that my doubling of the front (makes the finishing easier and never a bad idea in a thin knit) gives it a bit too much body. I think in my head the slit below the twist should be wider, but again it’s actually quite comparable to the illustration. Some day I shall use Sherry’s post to attempt to reduce a swayback in a knit. Someday.

Simplicity 5728

Simplicity 5728

In a similar vein, my (wearable muslin?) version of Simplicity 5728 is at a try-on-able phase in construction. Yay!

This is such a peculiar fabric. I would’ve sworn it

Simplicity 5728, side view

was a diagonally-ribbed knit, but it frays like a woven. It’s stretchy, very slightly in length, significantly in cross-grain, but fairly stable. It does have that cling-to-every-lump-and-bump quality of a knit.

In the stretchy (whatever the heck it is), I should probably have used the original bust-length, as the extra length doesn’t seem to be necessary. I had narrowed the bodice sides 1/4″ on the pattern, since it seemed a bit roomy under the arm,

Back (lightened to show lack of swayback wrinkles!)

tapering to nothing at the waist, and I took it in another 1/4″ here after trying it on (adding up to a substantial 2″ reduction in the total bodice width). I did a swayback alteration as per Sherry’s instructions (sooo easy when you have both waist and CB seams), taking off about 1/2″ (12mm) both above and below the waist seam. I gave the CB seam of the skirt a bit of an S-curve to it as my swayback seems to be rather below my waist in this area. And then I cut, inserted zipper, and hoped. And—well, look!

Can we say, happy customer?

Also, like what I did with the back neck? I did a brutal job of finishing the top of

Simplicity 5728, full back

the zipper, but otherwise it’s snazzy! Er, and yeah, the zipper’s pink. I thought it coordinated/contrasted nicely with the muted purple of the fabric, but probably it’s just too light. But the only other zipper I had of suitable length was white, and an invisible one, which I don’t actually know how to install. It’s vintage and metal, though, so it’s cute enough to deserve to be looked at.

Simplicity 5728, front closeup

You will recall that I received excellent advice from Kay and others on my sleeved muslin to raise the bottom of the armscye to improve my sleeve mobility. So I raised it a full 2cm, on the principle that it’s easy enough to lower it after the fact if I need to.

(It occurs to me that I probably annoy nearly everyone with my flitting back and forth between metric and imperial measurements. Can I call it a Canadian thing? I prefer to do my seam-allowances in metric because the metric markings are at the front of my sewing-machine face-place, making them easier to see than the imperial markings, which are at the back. On the other hand the width of the regular foot is definitely 1/4″, so I tend to do things like small alterations in this increment. It also depends on which ruler or measuring tape comes to hand first…)

I should also mention that I added 5″ (and we’re back to the imperial) to the hem of the skirt to get it to this luxuriously long length. That’s supposed to include 2 1/4″ of hem, which would bring it to a perfectly respectable heel-length, I think, although I’m not convinced a 2″ hem will be desirable in this fabric. I’m wearing a 3″ heel in the photos. I love these crazy-long 70s skirts.

Coming soon: the great sleeve adventure!

19 Comments

Filed under Sewing

Shiny Happy Things

Sharp 'n Pointies

Sometimes, wonderful things happen.

Over the holidays, several actually have, and I thought I’d mention them all here before getting to the buttons post.

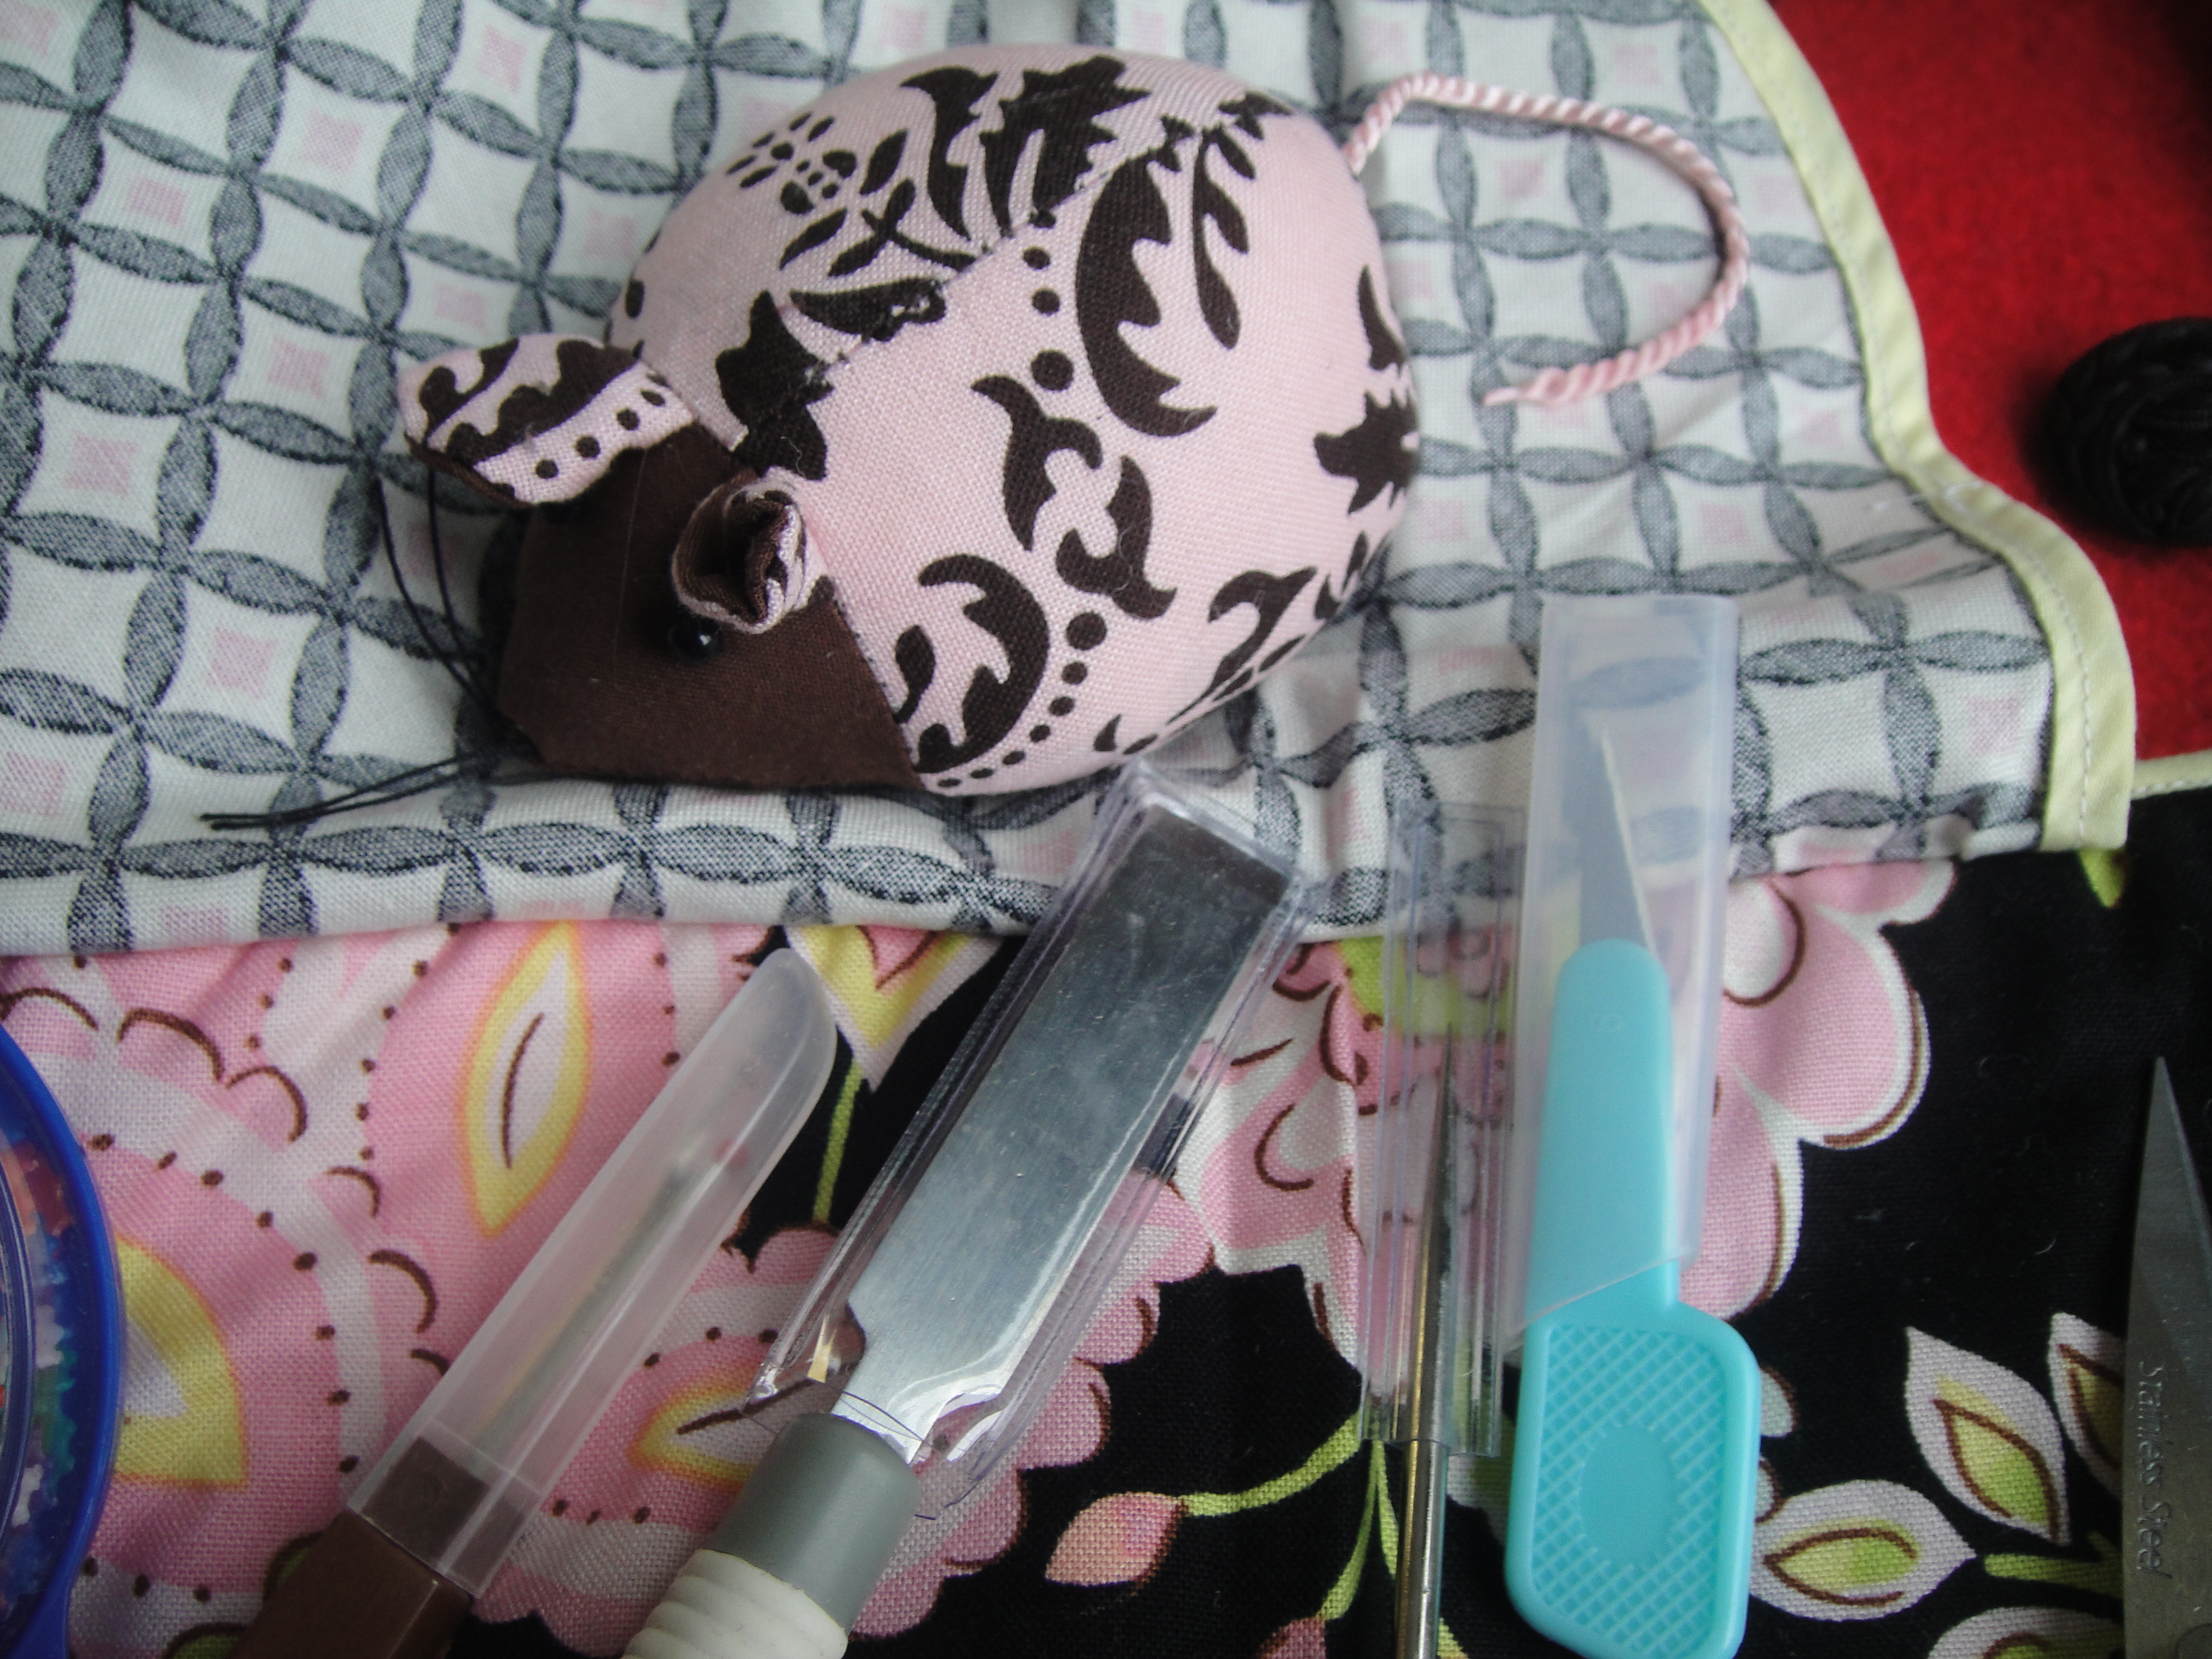
Back before Christmas, I won Steph’s Sharp and Pointy Giveaway (my first giveaway win and probably the one I’ve *most* wanted to win ever) Yay, sharp and pointies! And they arrived today. Now I have a pin-cushion (a cute little mouse), pins that aren’t from the dollar store, and some other neat little sharp things like

Cute little sharp and pointies!

a buttonhole chisel and an awl. All of which are things I’ve though “gee, that would be nice to have,” but been too lazy/broke/disorganized to acquire myself. Yay! And it came with this adorable little case, too.

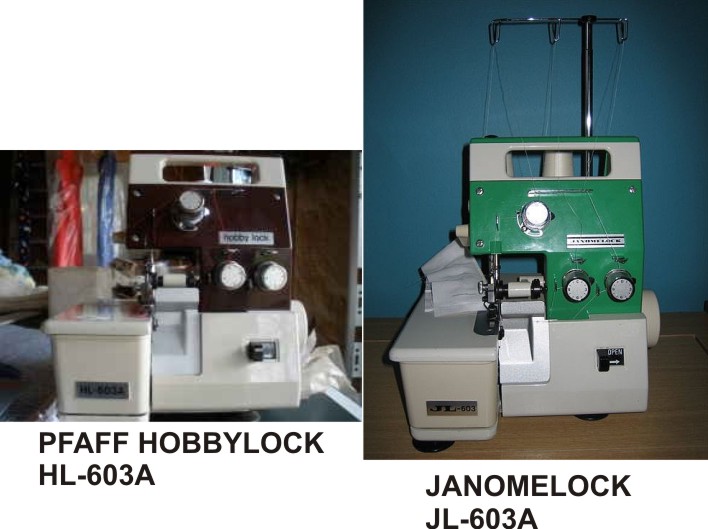
Around the same time, Claire a.k.a. Seemane, who’s been one of my favourite commenters since back in June when I got like 30 views a day and usually no comments at all, emailed me out of the blue after reading my lament about my lack of a manual for my serger. Not only had she happened to notice that my Janome JA-603A was identical to the Pfaff Hobbylock HL-603A, but she had tracked down a pdf manual to the Pfaff… and then bought it for me!!!!!! So I now have a manual for my machine (cue

The curious case of the 603A

choirs of angels), which details a number of nifty things it can do beyond basic serging. Some of them require more intensive adjustments than I’m likely to bother with, or different face-plates which I just don’t have, but at least I have a place to start. Thank you Claire!

To make this even better, Claire’s finally posting to her blog, Sew, Incidentally! So head on over and check our her progress on Sunni’s Trouser Sewalong. And whatever else she may get up to—I know I’m excited.

Speaking of Sewalongs, Peter’s going to be hosting a men’s shirt sewalong! And I have just the pattern in mind, of course. My only worry is fitting—as far as I can tell Peter fits his patterns straight out of the envelope, which my hubby decidedly does not. Fitting someone else is always a bit nerve-wracking, isn’t it?

On the up (or down?) side, several friends and relations got to try on my “Kimono Lady Grey” over our quick little holiday, and not only did they all love it, it was remarkably flexible in its fit, considering the sash isn’t adjustable. Although those blasted pear-shapes look good in darn near everything as far as I can tell. 😉 My SIL suggested a full-length version for a house-coat. Which would be fabulous, wouldn’t it? (can you imagine how much fabric that would take, though?!?)

Clockwise from top: diagonal-striped jersey; blue and cream stretch lace; blue and pink leopard fleece

I also took my sisters-in-law out to Fabricland for the New Years sale, and scored some fabric for some upcoming projects. The leopard fleeces are for lining little coats for my nieces (aged 2 1/2 and almost 4); I have some black textured wool flecked with sparkles for the outside of the coats already). At some point I’ll have to make something for my 13-year-old niece, too, but, well, between the hazards of trying to fit someone who lives 600km away and trying to hit the right style with a teenager, well, I’m hesitant. I was thinking of using the jersey for my 70s dress, but while it’s relatively stable, it still stretches nearly 20% across the width. Jersey is a listed fabric, but… well, I’m not sure. I’m sure it can be something else if necessary; I loved the muted purple colour and the nifty diagonal ribbing/stripe (and at $2.50/m, I’m not going to complain.) The blue and cream stretch lace has no particular plan in mind yet, but it was too gorgeous to pass up for $2/m. Maybe I’ll go scout out Carolyn’s blog since she always has such gorgeous lace pieces :). I probably will need some kind of thin knit underlay for it, though, which could easily cost considerably more than the lace did…

So those are my wonderful things. How about you? Has life given you any wonderful little gifts lately? Or are you just gritting your teeth to get through? (believe me, I do my share of gritting…)

13 Comments

Filed under Sewing

A little bit of history

I’ve got Canada in my pocket
a little bit of history
a penny and a nickel and a quarter and a dime mean a lot to you and me…

Oops, sorry. Channeling the children’s lit (or in this case, songs) again there.

The Box

The Box

Sometime in the early seventies, as I understand it, my mother attended the auction of the estate of an elderly relative. One of the things she bought was an old wooden box full of buttons, which had belonged to the wife of this elderly relative, my grandmother’s great aunt (great-grandmother’s aunt?)
Even at this time, the little stash was “vintage”—the newest buttons were probably added sometime in the 40s, and most of the collection dates to much earlier. Put it this way: although there are plastic buttons, the majority of the collection is shell, metal, horn, and even glass. There are a lot of boot buttons—the tiny toggle buttons you see on Victorian and Edwardian women’s footwear.

My mother and Syo hard at work

My mother and Syo hard at work

Although I’ve been familiar with this collection all my life, when we went to visit my mother this weekend she had pulled it out, so I got the chance to document some of it for your (I hope) viewing pleasure. We also, as one must when playing with button stashes, did some sorting, as well as some unraveling of matted clumps of button-groups. Unfortunately my camera battery was dying, so I didn’t get to take as many photos as I would have liked, but I hope I got most of the highlights. Fortunately, my mom’s checked tablecloth is a perfect 1/4″ grid for scale. 🙂

Buttons and jewelry

A wide assortment

Everything from giant coat buttons to tiny shell buttons are represented. There are a lot of fabric-covered buttons, including some “homemade” ones which are just regular buttons with fabric sewn around.

Buttons

Assorted buttons

More doodads

Assorted not-buttons

There are also a number of inclusions of buckles, garter clips, screws and other bits of hardware, and even two little spigots.

Buttons

Shell, cloth, plastic

Since there are SUCH a lot of photos, I’ll leave you to peruse the flickr gallery for the most part.

The Box

Halfway through. Chalk drawing on the box courtesy of me, aged 3 or 4.

I love pawing through this stash, but I don’t think I could ever actually bring myself to take anything out of it. To me (and I’m known to be sentimental about such matters, so your mileage may vary) this collection has gone from stash (to be used) to time-capsule, to be cherished, curated, and preserved for future generations. I suppose realistically there isn’t a huge amount of historical data in a bunch of buttons—or is there? Considering that most of these buttons were probably cut off clothing on its way to the rag bin, perhaps you could perform some kind of an analysis—proportions of shirt buttons to boot buttons to coat buttons? Dating the various buttons would be interesting, though I don’t know if carbon-dating is feasible at this age (it would work on the wood and horn buttons, potentially. Is there enough carbon residue in shell?). Stylistic dating would probably be more useful. Isotope studies on the shells could probably shed light on their origin, and maybe highlight trade/manufacturing pathways in the early 20th century.

… okay, pulling back from the brink of madness. What would you do with a treasure trove like this? 🙂

11 Comments

Filed under Sewing