Your Grandma’s Slip

20140331-205709.jpg

Kwik Sew 717

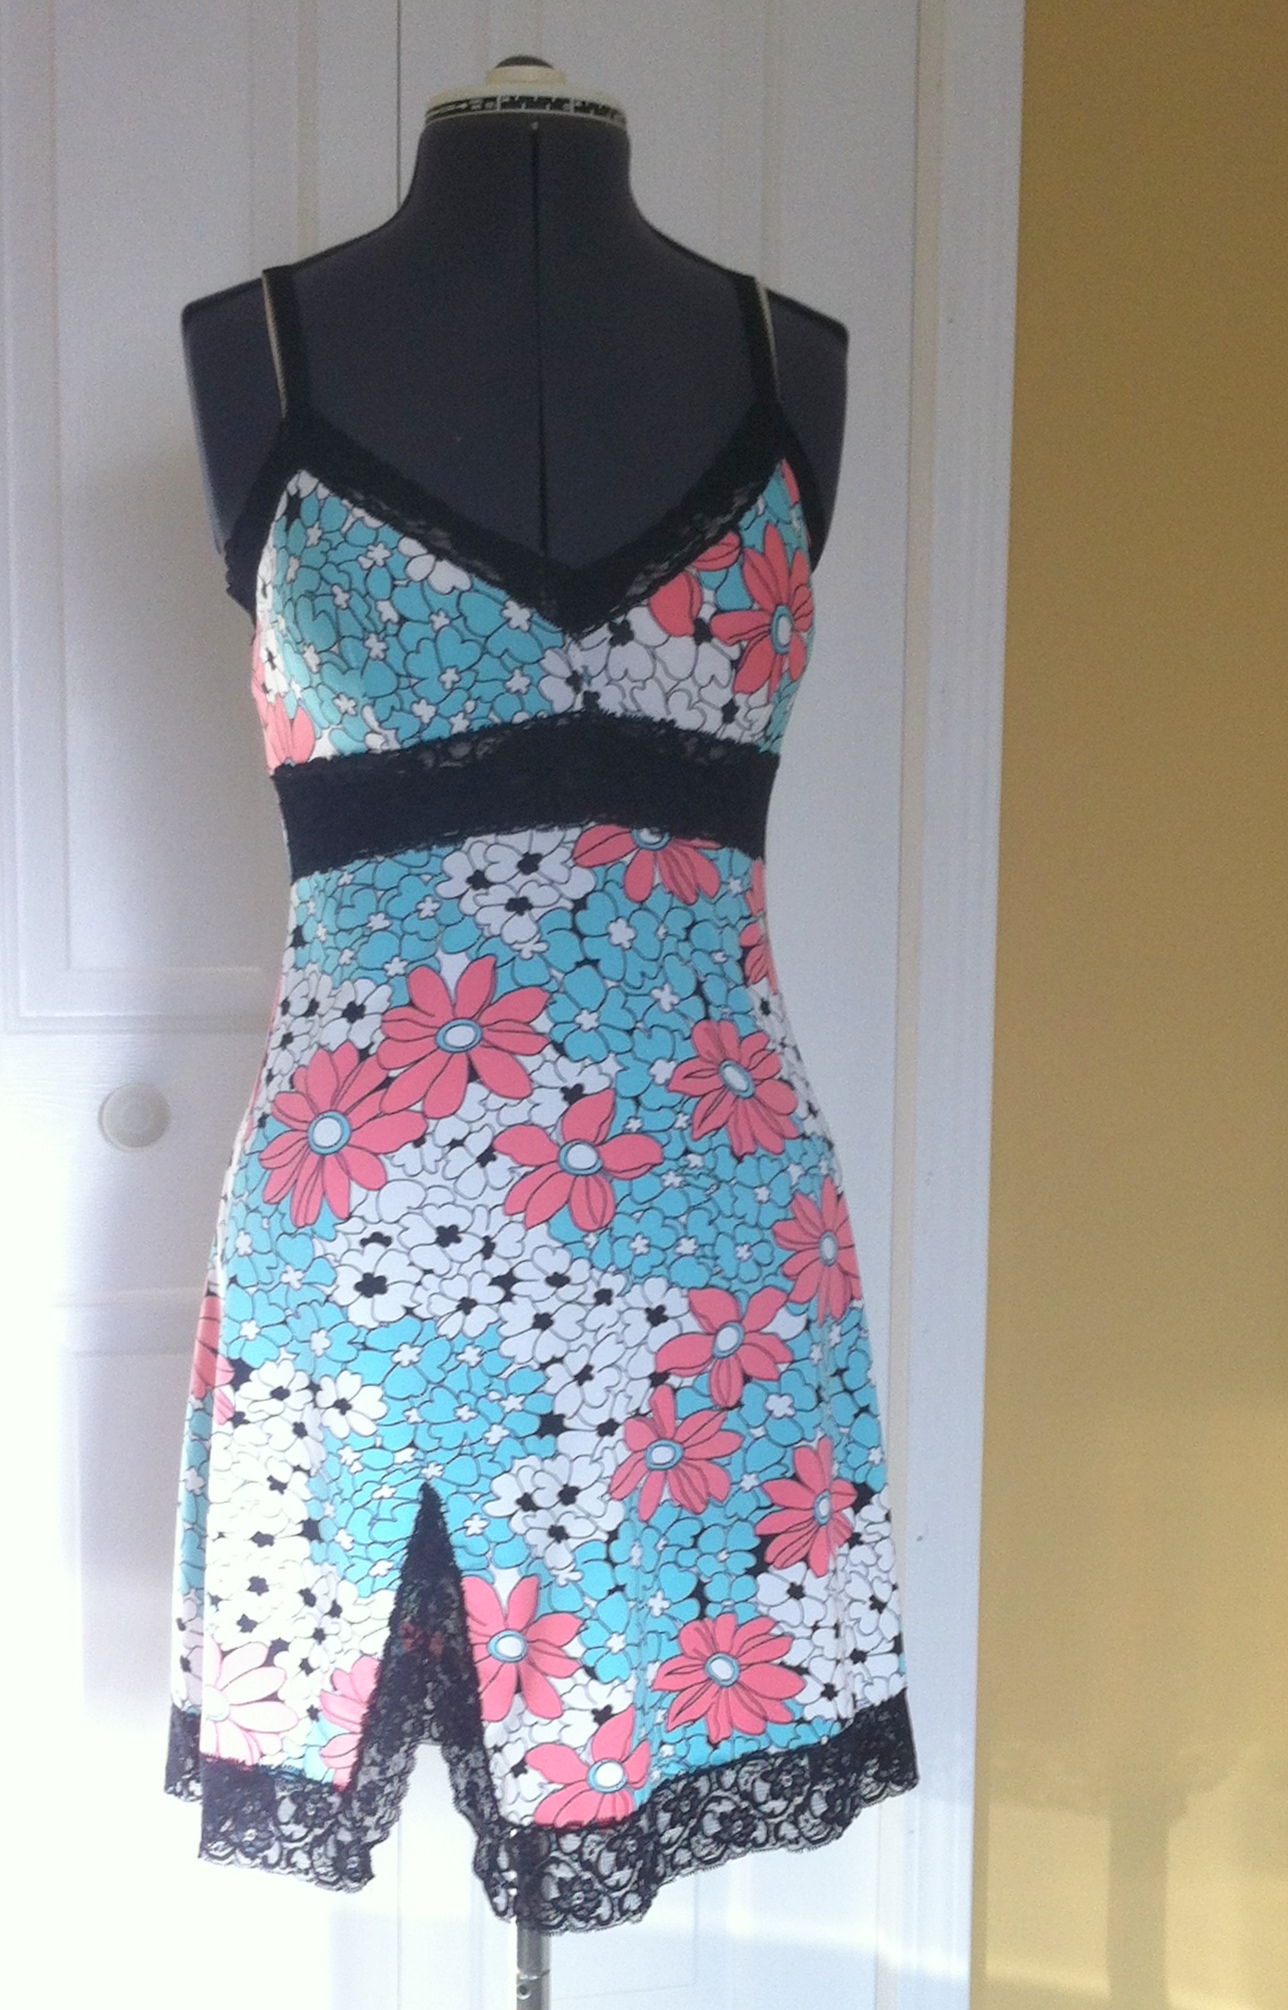
So if Butterick 6031 is not your grandma’s slip, Kwik Sew 717 totally is. Or at least, your mom’s. Ok, my mom’s. “Designed for knit and stretch fabric, nylon tricot” as the pattern proclaims. I eventually settled on this one out of the several stash contenders for my ivory “vintage” slip. However, I was also determined to use the 2m of lovely wide stretch lace I got at the same time, rather than just making the pattern up as-is. I think I like the result, but it definitely added another layer of complexity to a project that already had plenty of unknowns. First I decided I wanted to use my lace for the cups. This required some piecing, since the cups are one-piece and I wanted the scalloped edge of the lace to follow both the upper edges of the cups. I wouldn’t say I’ve done a lot of lace piecing, but I did a wee bit on Gertie’s slip (and more last summer, by hand), so I felt comfy stretching myself just a little bit more.
20140331-205728.jpg

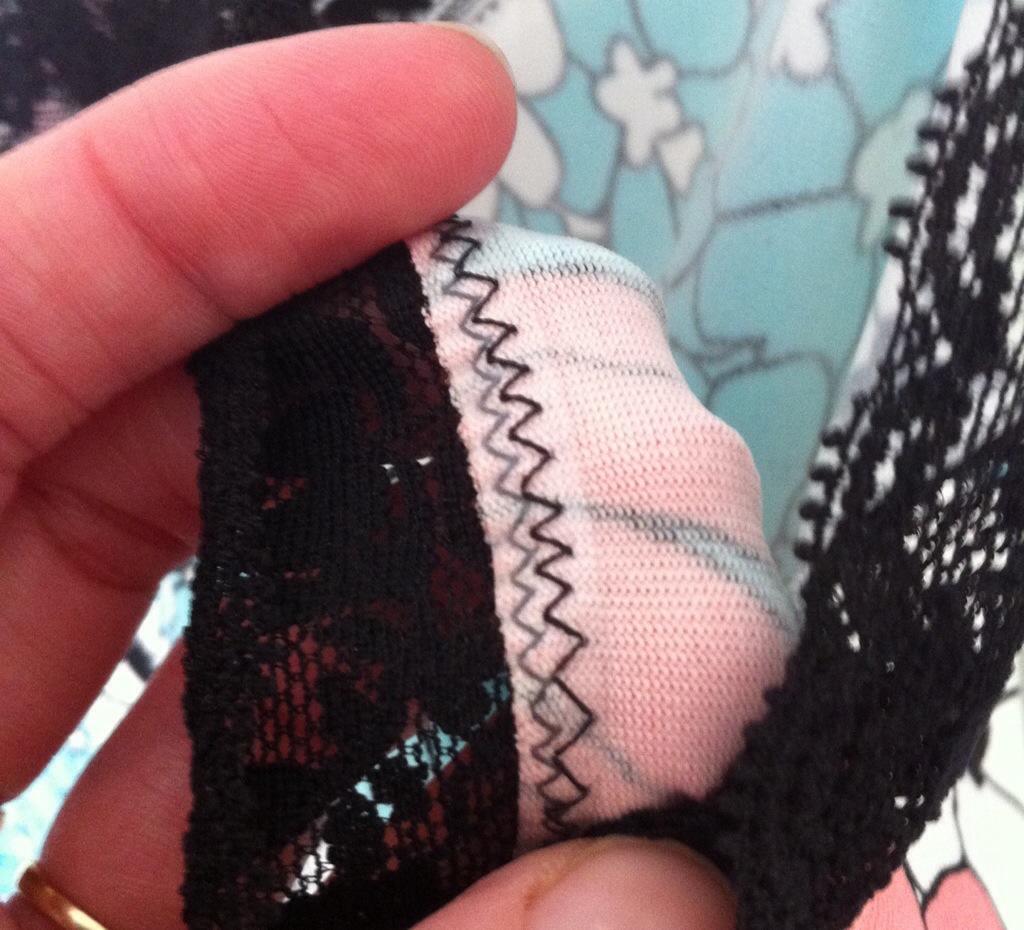
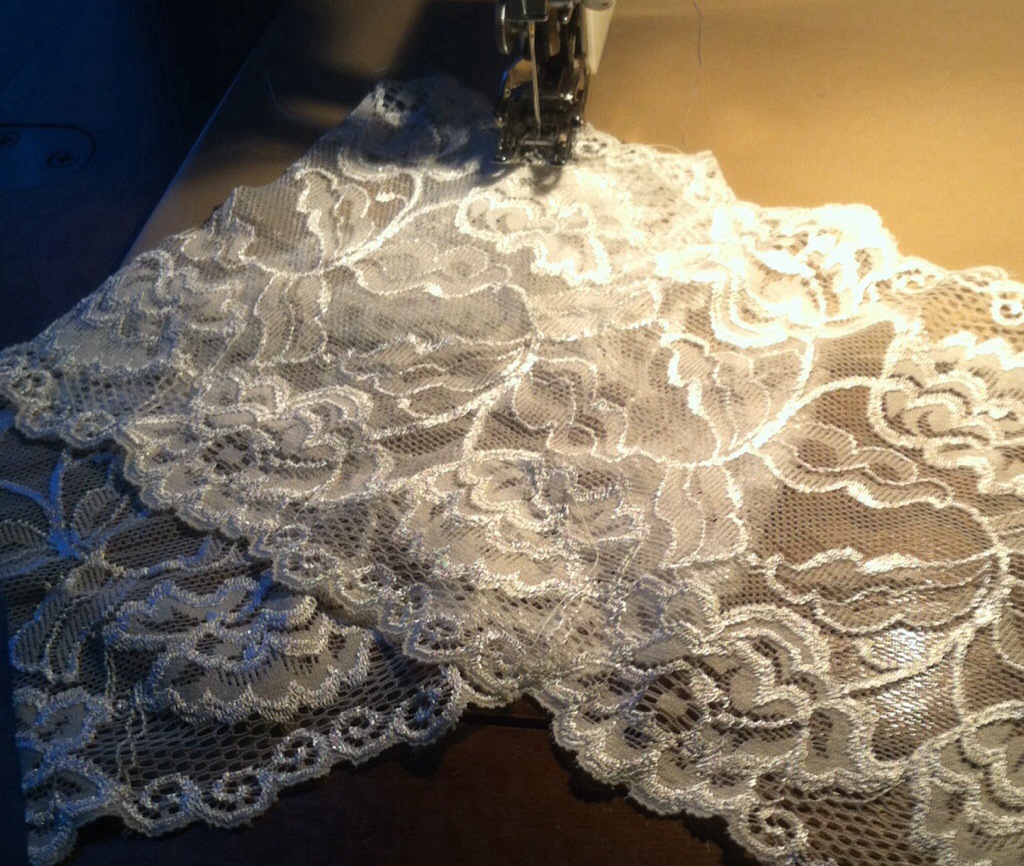
Lace piecing, with a narrow zig-zag stitch.

I cut chunks of lace long enough to overlap at the right angle and cover as much of the pattern-piece as possible. I pinned them in place at the correct angle so the scalloped edge would follow the top edges of the cup pattern piece. I put some tissue paper underneath for added stability, and then zig-zag stitched across the pieces, starting at the top point, to join them.   I quite like it, lining up the pieces and zig-zagging along the edge of this motif or that—it’s kind of like a maze, finding your way across the fabric to where you’d like to end up. Excpept for the part where, on my first cup, I did an awesome job of following the outline of a rose which, it turned out, was on the side of the zig-zag that needed to be trimmed off, leaving some distinctly nonsensical and not-terribly-invisible zig-zags. I contemplated re-doing it, but at this stage in construction I wasn’t sure if I was even going to end up with a wearable garment, never mind a pretty one, and also THIS THING IS TOTALLY SEE-THROUGH NO ONE BUT ME AND OSIRIS IS EVER GOING TO SEE IT. Well, and now half the internet, but y’know.

20140402-174808.jpg

See my awesome nonsense zigzag?

I made skinny self-straps, as suggested by the pattern. Oh, and they instructed you to use the bobby-pin method for turning! ACE!

With a bit of alteration, I figured I could make the upper back piece out of lace as well. The slip has an odd back with a curved seam partway down—interesting, and it gave me the opportunity to do some swayback altering, so that was nice, but it’s a bit random, especially since it’s not like the upper back piece is terribly fitted. But it looked nice out of lace.

The fit of the cups was interesting. There are two small darts on either side of a gathered portion along the top. And the sizing is about right for me in a bra (it takes a bit of padding to bring me up to standard pattern bust size), but the shape fits actually much better “au natural.” I do think the sizing would be better in the fashion fabric—the lace is pretty stretchy. A little too stretchy, really, but again. Experimentation and learning.
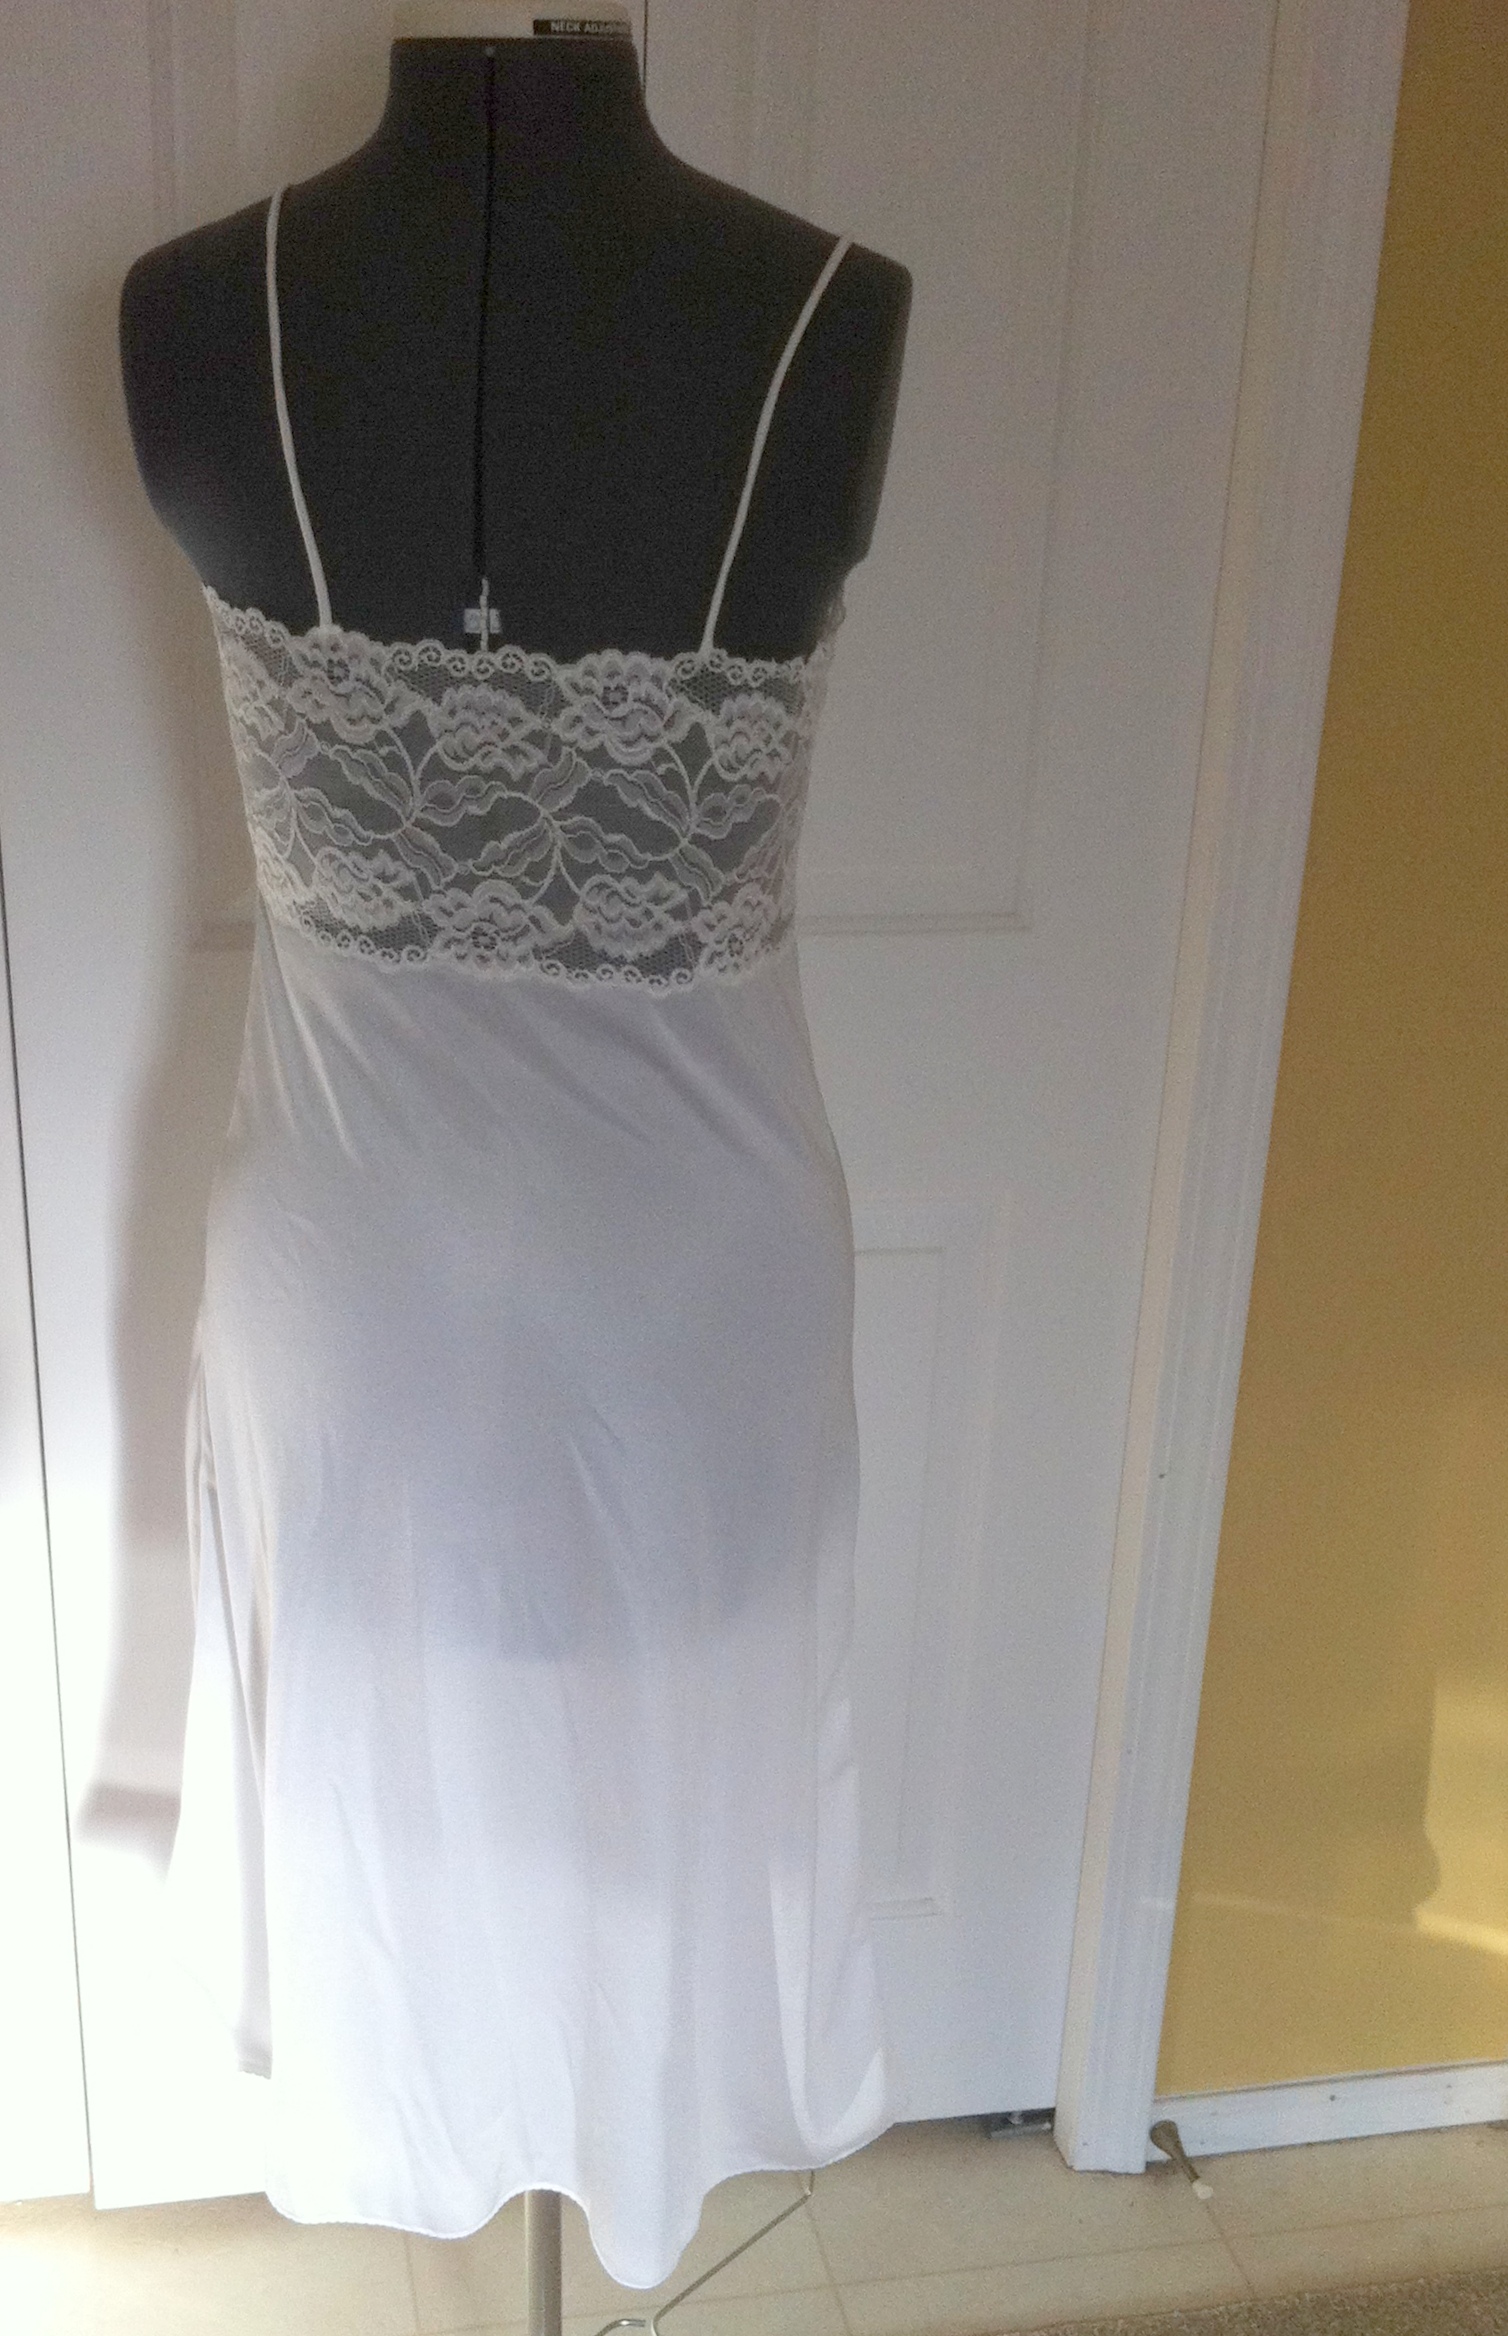
Back view, with lace panel

Back view, with lace panel

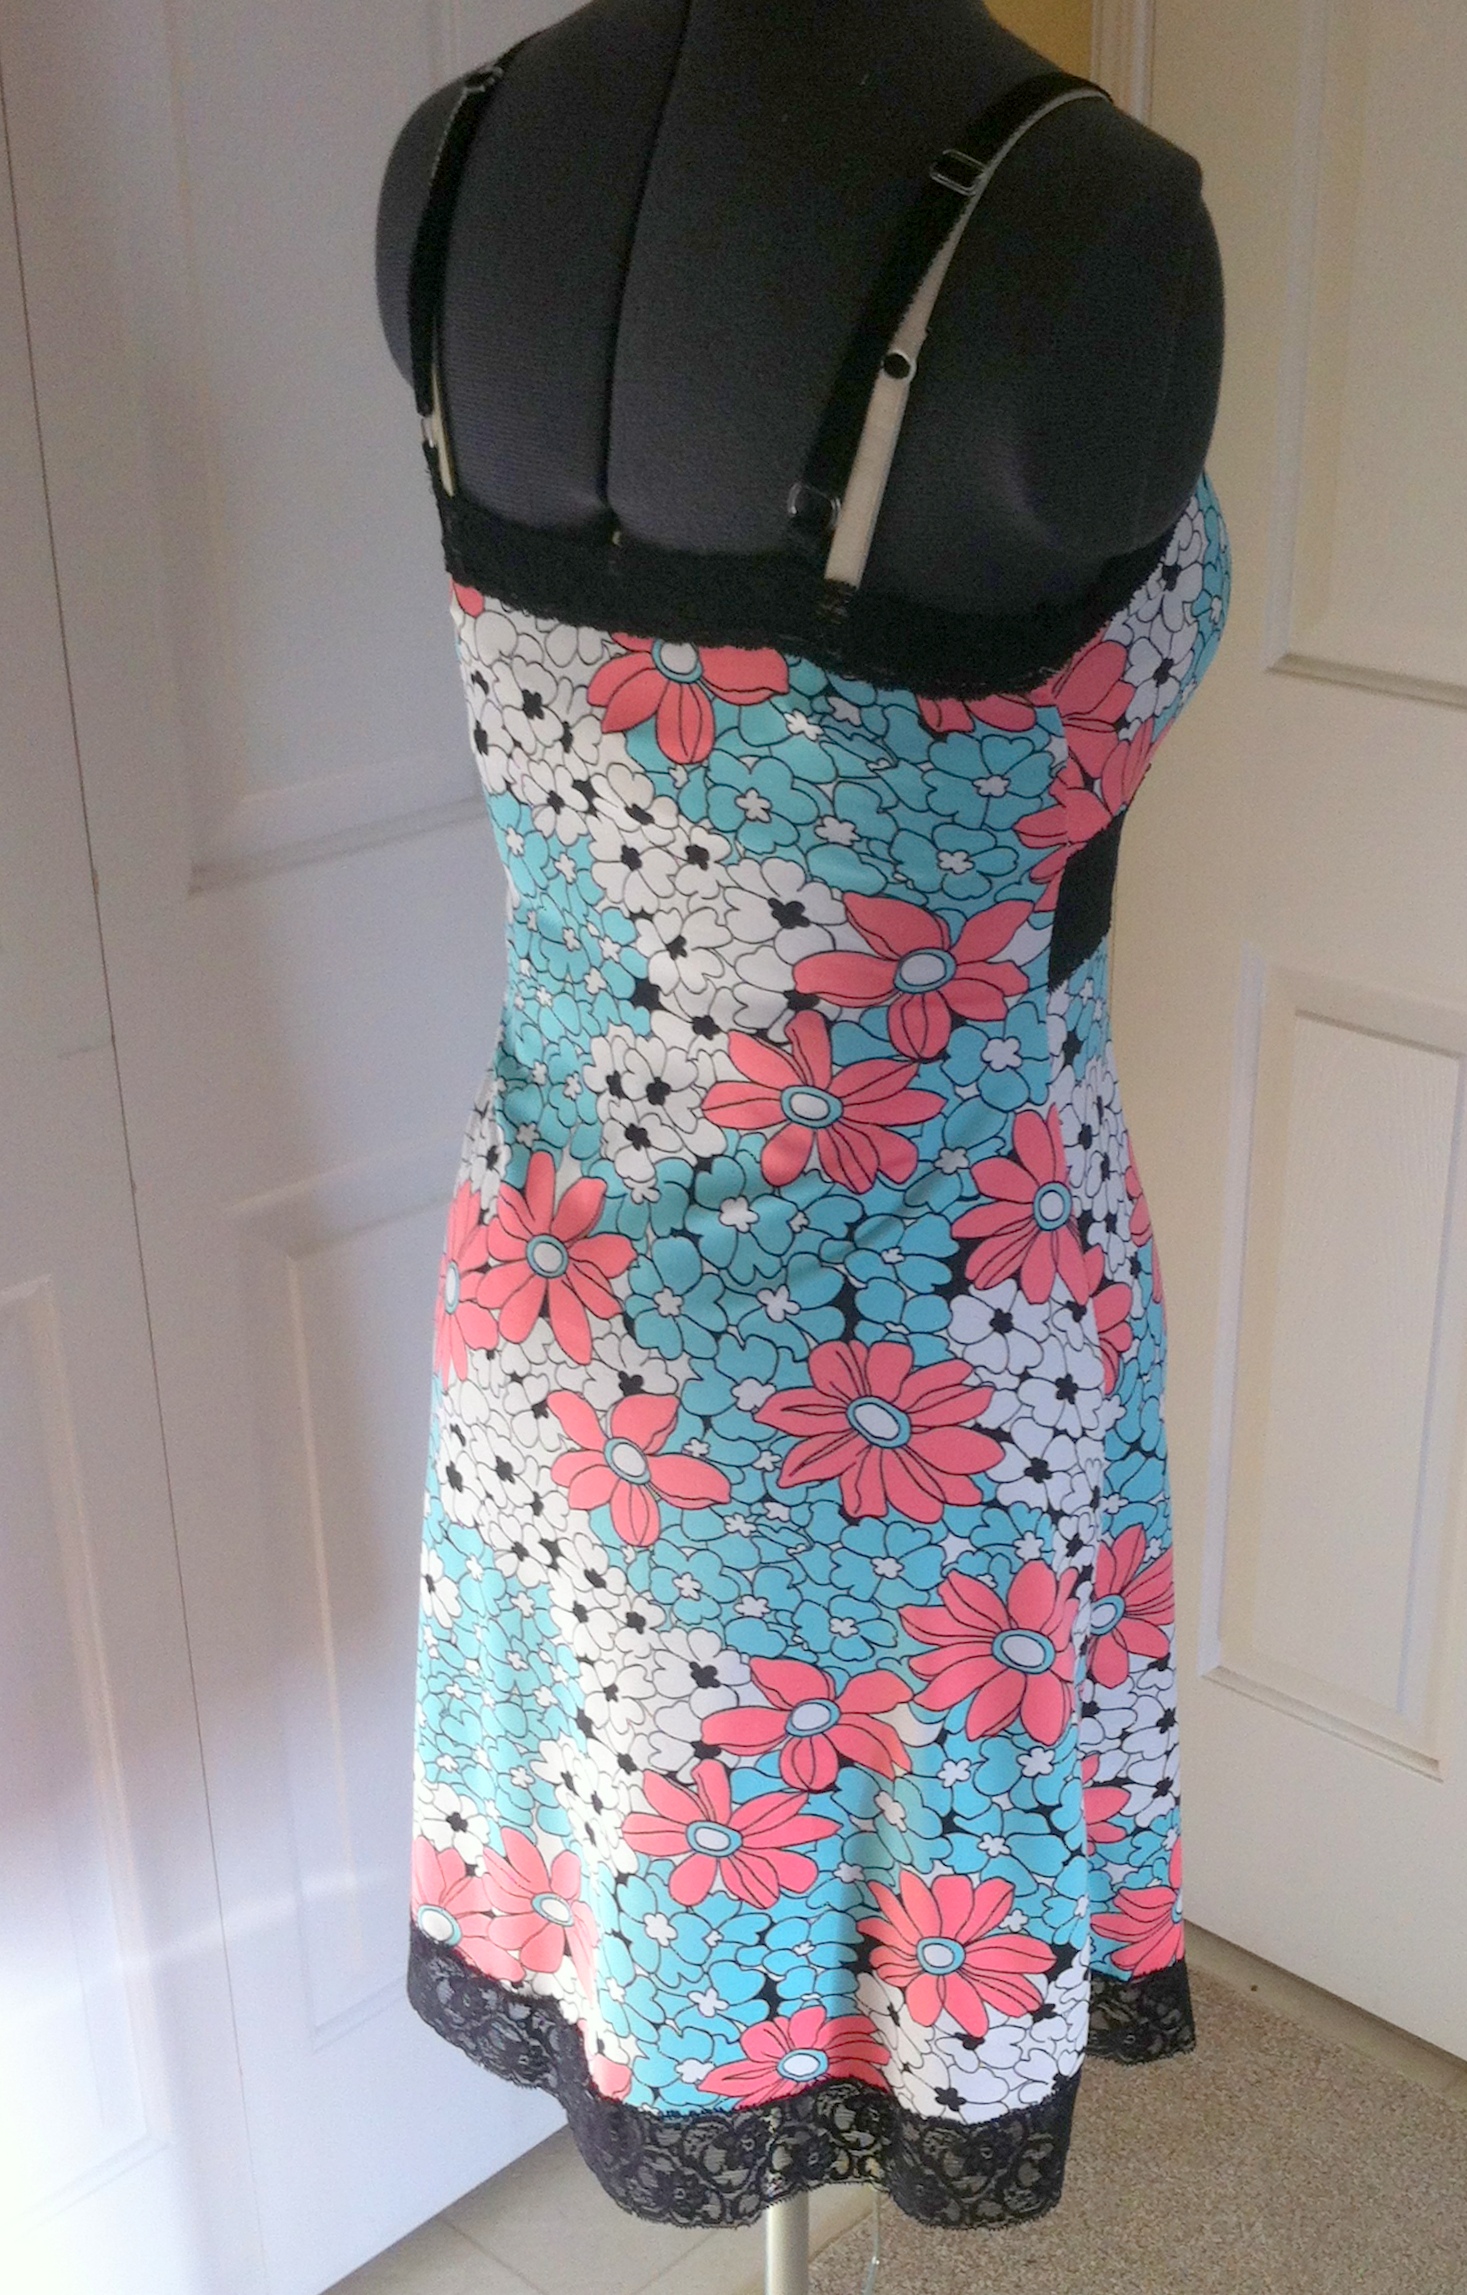
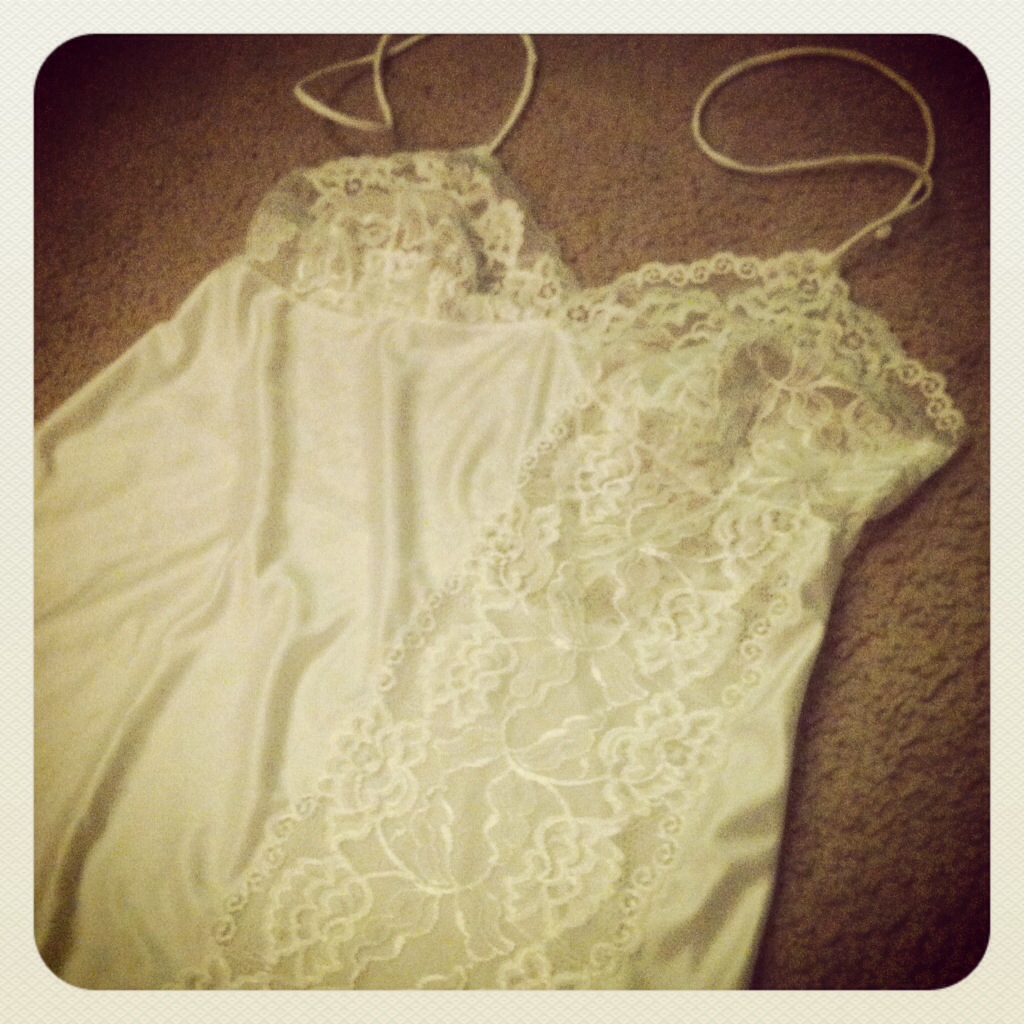
Anyway, once I had the cups pieced and the back cut, I still had quite a bit of lace left over, so I thought it would be a great idea to add a wide lace panel down the front. Gorgeous, right? 20140331-205742.jpg   Well, yes. Aside from the bit where the lace stretched more than the nylon and despite all my careful pinning there’s a bit of puckering that just won’t go away. And the width of the panel seems to alter the drape of the skirt, which isn’t entirely awesome. I’m hoping that the gorgeousness of the lace itself will carry it.
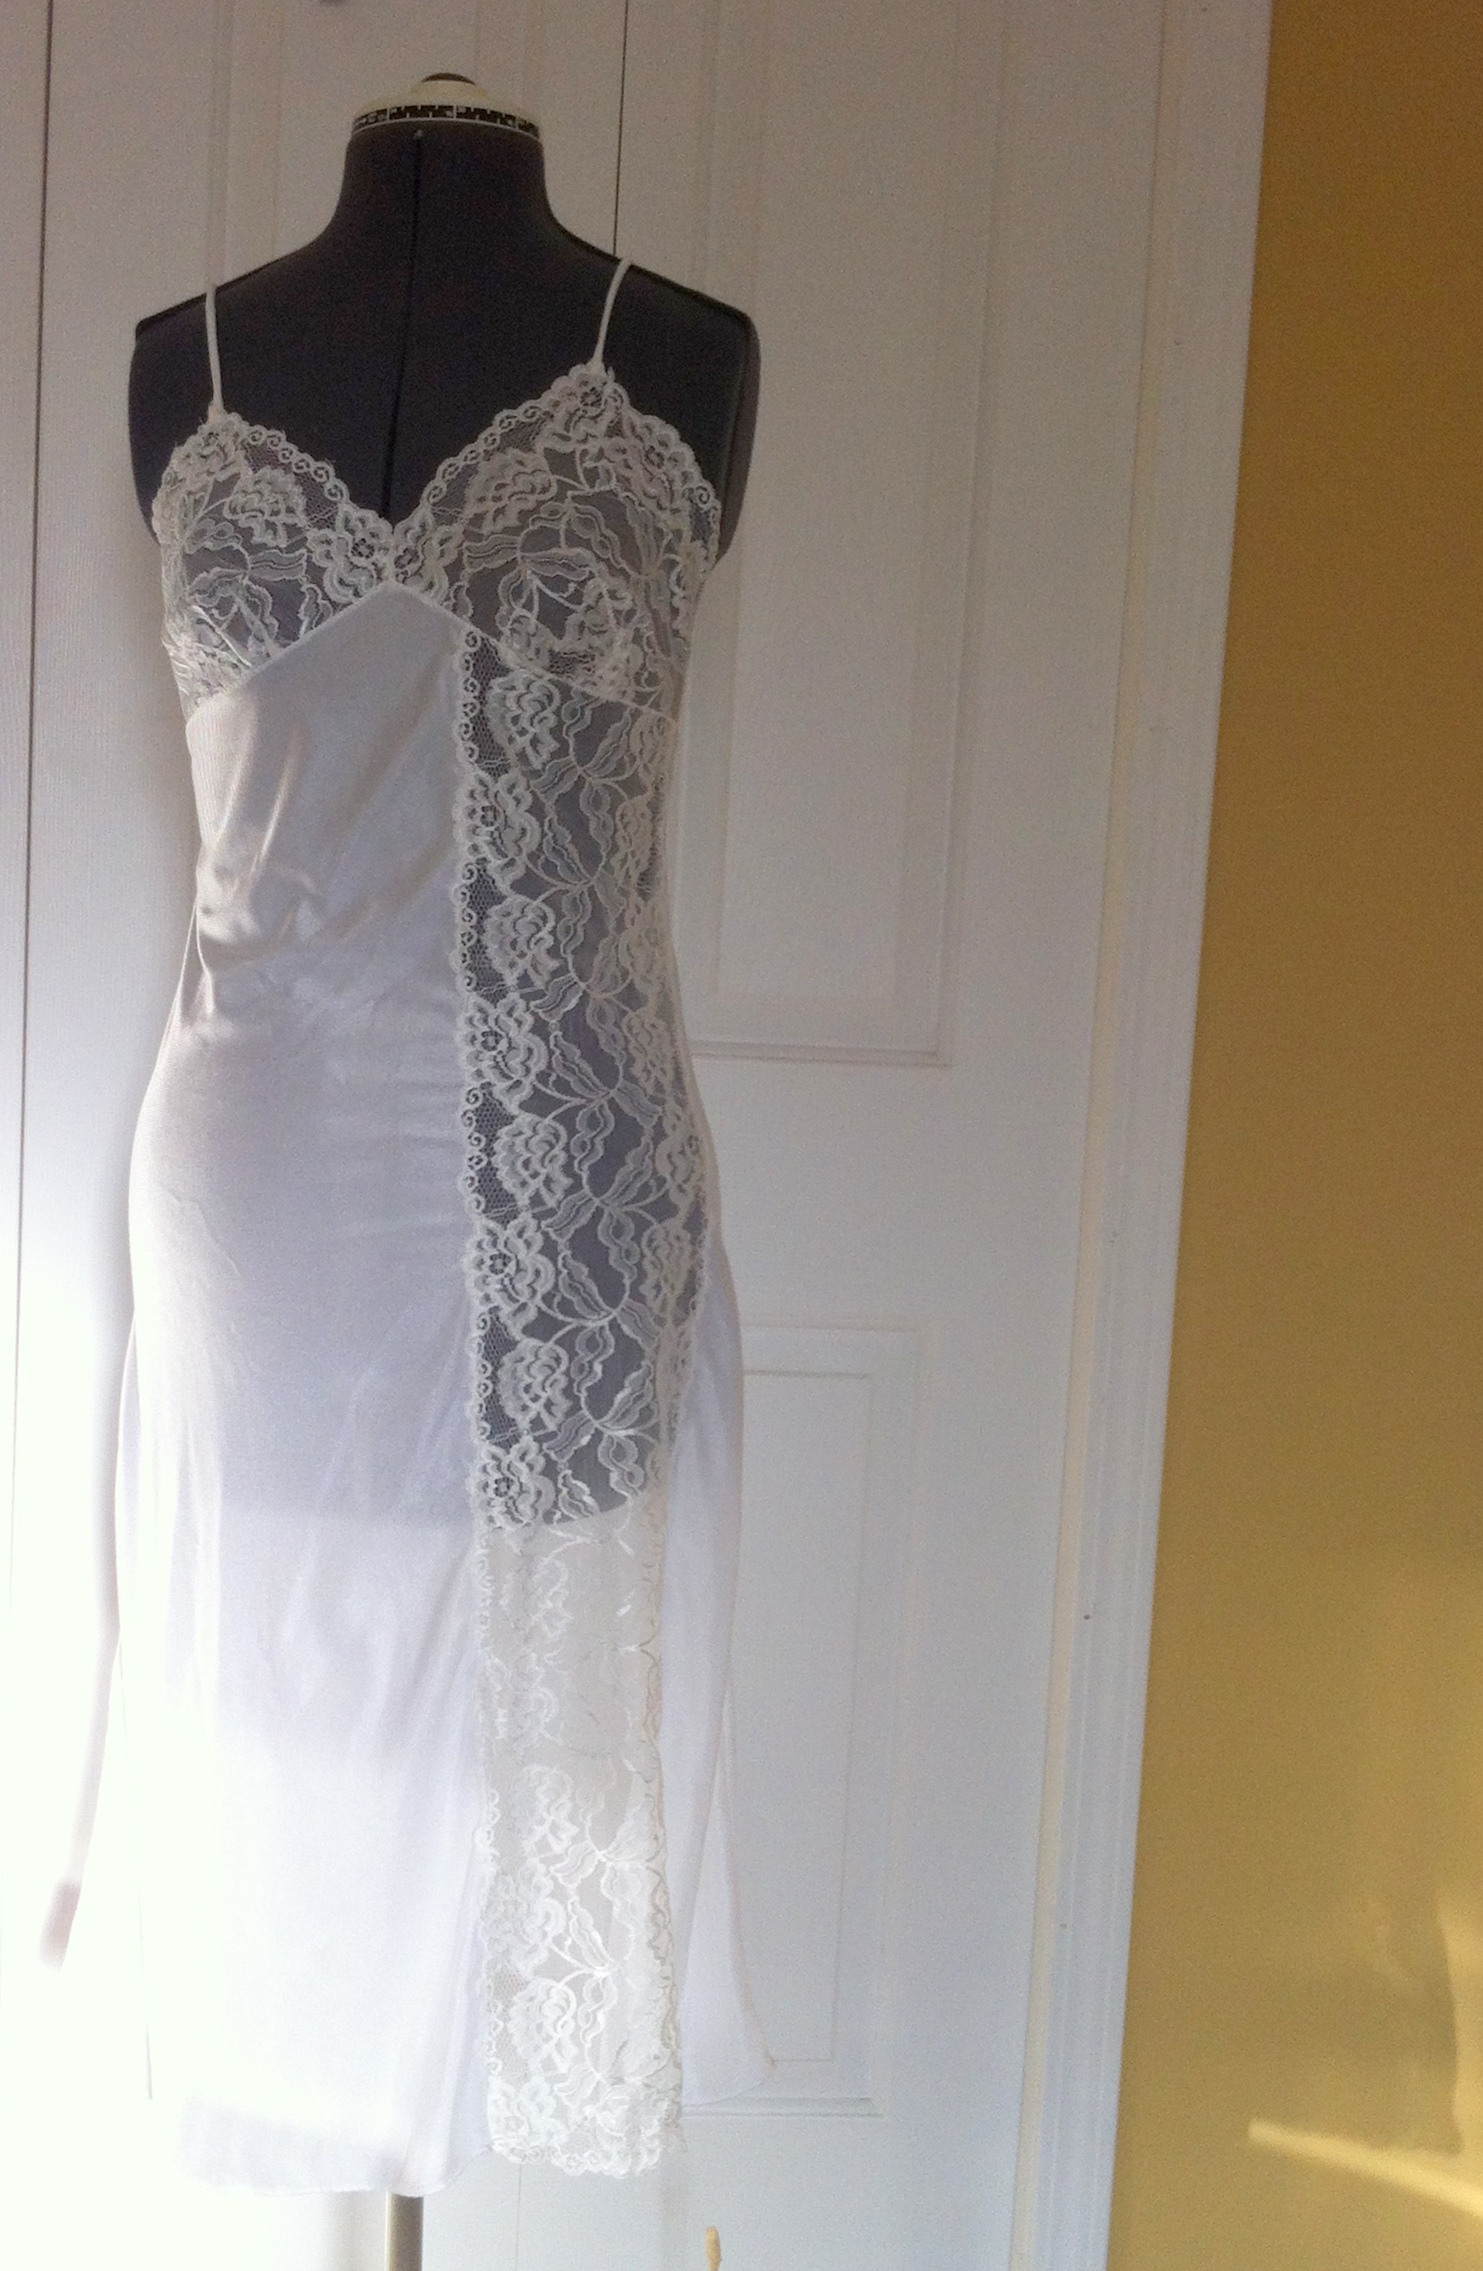
Slip front, imperfect drape

Slip front, imperfect drape, also not positioned on the dress-form terribly well.

Oh, wait. NO ONE’S GOING TO SEE THIS. This is the thing, every time I hit a snag or a problem with this piece, this kept occurring to me. Even if this is the most barely-wearable of wearable muslins, it’ll probably be a usable wardrobe staple. I should maybe also mention that I really struggled with the side-seams for this piece—they kept puckering. Eventually (the third time I redid them!) I stretched the hell out of the nylon tricot while I was sewing and that seemed to do it. The opposite problem of what I’m used to with knits. I should perhaps clarify here that I made this slip entirely on the standard sewing machine (going retro, natch). I used a narrow, short zig-zag (1.5 length, 3 width, if you’re interested) for pretty much everything. The Rocketeer’s manual recommended this, and also topstitching with the zig-zag after as a neat finish on lingerie. Then I trimmed any seam-allowances down to pretty much nothing. We’ll see how that holds up, anyway—it certainly looks nice for now. I wasn’t surprised, being a Kwik Sew, that the seam-allowances on the cups were only 1/4″, but I was a bit startled that the side-seam allowances were only 1/8″. That’s, like, barely there. Seriously. So no trimming was necessary down the sides. (This turned out to be a good thing, since I cut them off and re-sewed three times. I only lost a teeny bit each time.)

20140402-174738.jpg

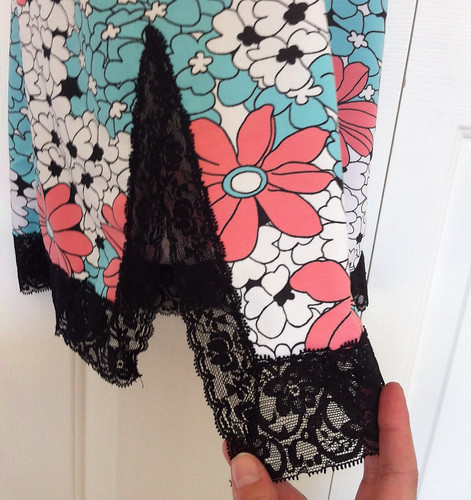
Pieced lace scallop along the hem.

I did a little more lace-piecing along the bottom of the lace strip, to get a nice bottom edge. Stretch lace is not the easiest for this kind of piecing, I think—I could’ve had a bit more tension on my pieced in bit. But, it looks pretty nice, and I don’t know how else I could’ve finished the edge.
20140402-174747.jpg

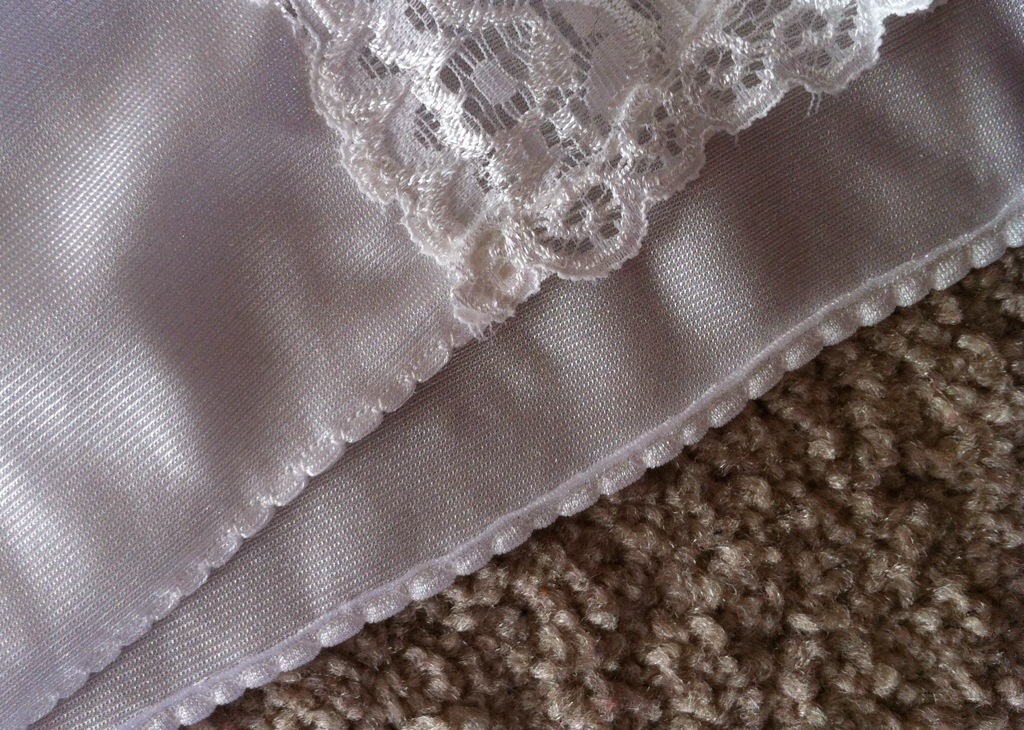
Shell hem.

I played with a couple of hemming ideas—I had originally gotten a “matching,” somewhat narrower lace for the hem, but once I got it home it became obvious that it was much less shiny and much more white than my main lace. Not right. The pattern suggests a lettuce-edge (which is just a tight overcasting zig-zag while stretching the fabric), but I couldn’t get it to work without my fabric scooting to the side, so that wasn’t in the cards. So I settled for a shell hem, once I had looked up the settings on the Rocketeer and played with the stitch length. This fabric is absolutely made for a hem like this, I have to say. I’ve never had such a nice, even result. It’s a bit low-key compared to the crazy lace, but I think it works. OH AND NO ONE WILL SEE IT.
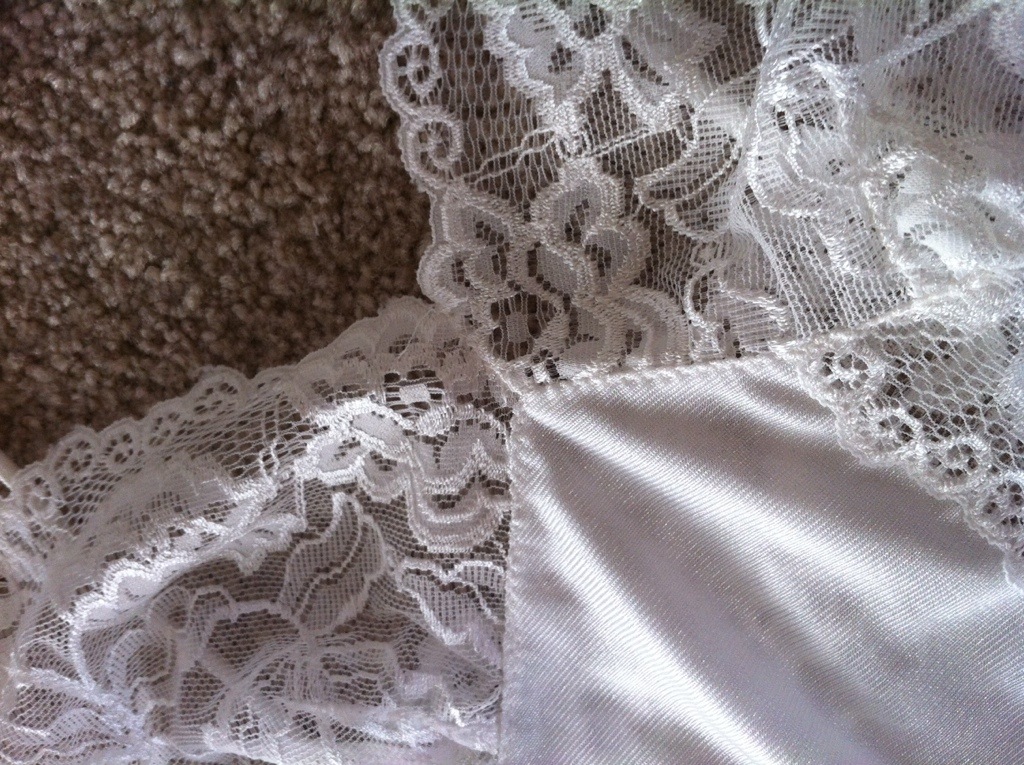
 

20140402-174818.jpg

Random detail closeup. You can see my topstitched seamline.

So really, this slip was a learning experience, more than anything else. Practice with techniques and fabrics I haven’t used much. Fun, and weirdly low-key BECAUSE NO ONE WILL SEE IT. I actually want to do it all over again, right away, without the lace, just to see how that compares. And because I’m not entirely convinced the lace will work really well for under the white dresses. Being see-through ‘n all. And without all the fussing with lace-piecing, I think this would be a really quick, easy make.


Vogue 8912

I think slips might be a bit addictive, though. Aside from wanting to do this one all over again, I really want to try Vogue 8219 now, but it’s for a bias woven, and while I have a bit of ivory charmeuse kicking around somewhere, I don’t really think it’s enough. I love those seam-lines, though…

23 Comments

Filed under Sewing

Gertie Slip

20140331-205230.jpg

Gertie’s Slip Pattern—Butterick 6031

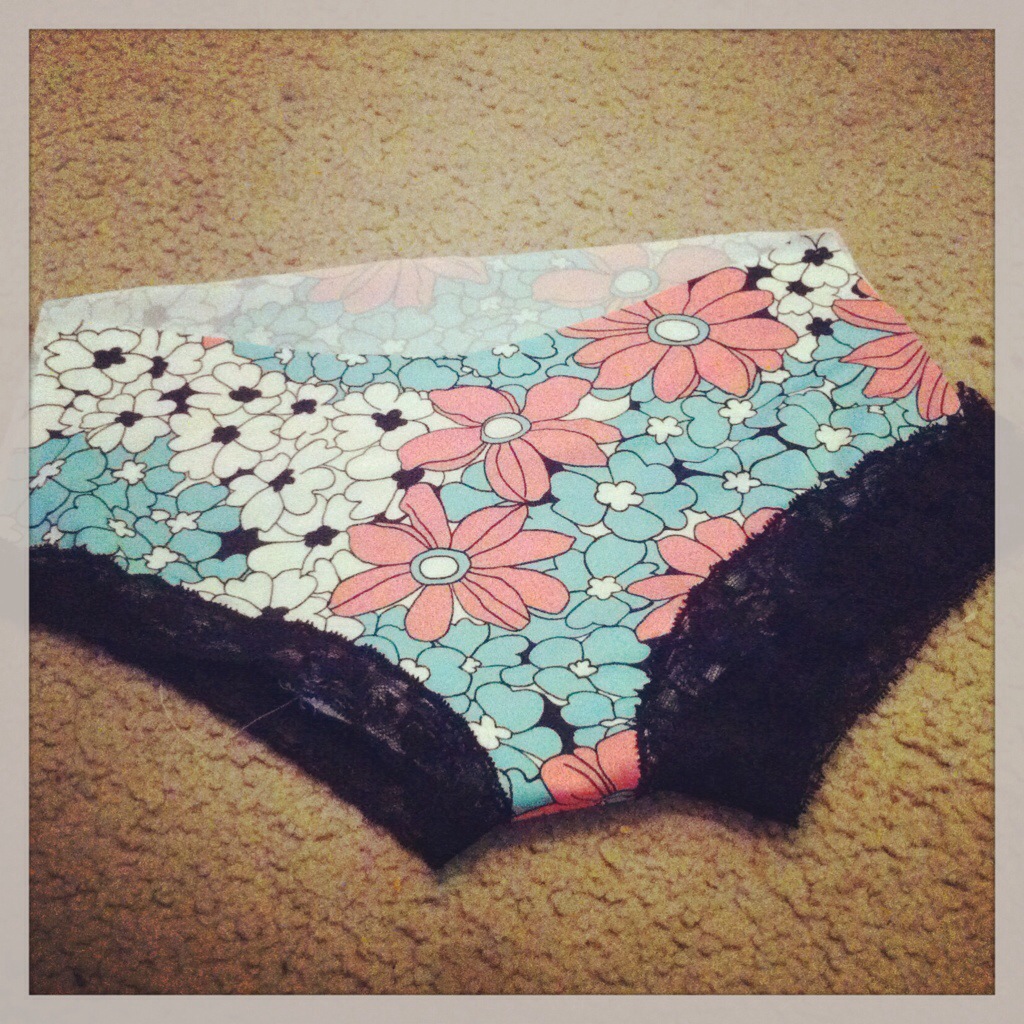
So I wanted to make a slip. OK, frankly, I’ve needed a new one for a few months now. The beat-up old blue storebought one I have (which I’ve had longer than  I’ve had my husband, having purchased it in the golden age of vintage shopping, aka the 90s) broke a strap not long after Christmas, and I’ve just been pinning it in place for lack of a better option. Because if one wants to wear a dress, in the winter, in Canada, a slip goes a surprisingly long way towards making a ridiculously-not-warm-enough outfit just borderline wearable. Especially when it facilitates the wearing of thermal tights. And I really, really, really wanted to make Gertie’s new slip pattern, because, well, ERMAGERDCUTE. Confession: I really really wanted to make it just exactly like the cover, in black with cream lace. Although I knew I needed a light-coloured slip, badly, too.

Well, Fabricland had absolutely no plain, black, slippery, stretchy knit fabric. They did have the old-fashioned nylon knit (the stuff your grandma’s slips were made of. Ok, the stuff my dying blue slip is made of), but I didn’t think that would work for this particular pattern (I think I was right, by the way.) So instead I walked out with some ERMAGERDCUTE nylon swimsuit fabric, and half a metric ton of black stretch lace. And some ivory old-fashiong lingerie knit, but that’s another story.

20140331-205244.jpg

So, you may have noticed how Gertie’s selling kits for her slip? That’s SUCH A GOOD IDEA. Because figuring out everything you need from the bloody teeny text on the back of the envelope is not. easy. I read it fifteen times and still missed half of it. Like the 1/2″ lace for making the front half of the straps. It turned out all right because I found a really nice lingerie elastic I wanted to use for the whole straps, but still.  I did remember the strap-sliders kit. I messed up on the lace pretty badly, but we’ll get to that.

20140331-205259.jpg

Once I cut everything out, I decided to start with the briefs, since that seemed a little simpler (and easier to recut if I really screwed it up.) Which, by the way, I did. I wasn’t paying too much attention when I grabbed my lace—I knew it called for a couple of different widths, and just grabbed one wider and one narrower that I liked.

Tanit-Isis Fail.

The wider lace was about 2″ wide. The pattern called for 1.5″. That 1/2″ is a big deal, as you can see above. On the left—great. On the right, um, not quite such a good look. Yes, I sat and picked that out. A frickin’ teeny little zigzag in swimsuit fabric. Did I want to kill myself? Only a little. On the plus side, once I had it all fixed, they fit like a dream; I did lower the front rise about an inch (a personal preference, I think), but the rear coverage was just right.

(PS, any of you who remember my last attempt at lace-trimmed undies, remember how wide I found the crotch after? You will not have that problem with this pattern. Teeniest little skinny crotch ever. Very comfy, although I wouldn’t recommend wearing pads with these. Also, the crotch-liner piece ends up pretty funny looking. Yeah, I also forgot to buy any cotton jersey for that. Fortunately I’m a fabric hoarder stasher and have enough white cotton knit bits kicking around for a small army of undies.)


20140331-205347.jpg

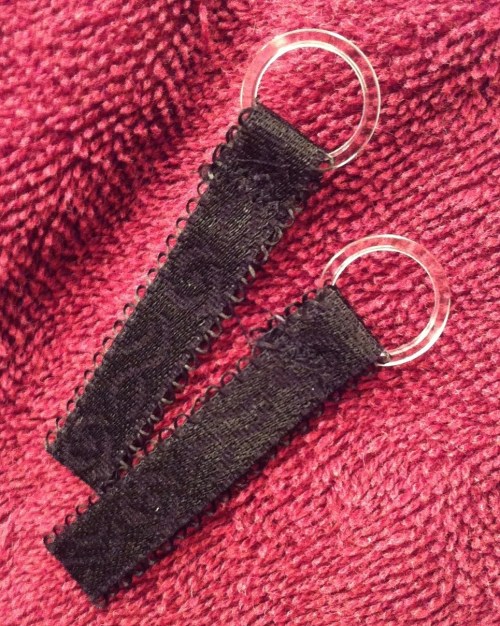
I like Gertie’s option for using lace for the front of the straps (though I wouldn’t use a stretch lace, and I’m not sure this is specified, and the rest of the lace in the pattern has to be stretch), but I have been lusting after this lingerie elastic since it came in to my local Fabricland last fall sometime. You can just about see, in the photo above, the cool shiny/not shiny designs on it. I like. And clear plastic sliders and rings, because that’s really all Fabricland has. Silver would’ve been perfect.

20140331-205333.jpg


Figuring out how to thread a slider for an adjustable strap always takes me a few tries and a lot of looking at an existing bra for reference. I started by sewing the rings on the back (opposite of how Gertie’s instructions have you do them, solely because I didn’t have the ornamental separate front portion of my strap.) But, I managed to get them on and the fancy side facing out. Also, starting at the back makes it much easier to get the strap length right when fitting on yourself. Although that’s not nearly as important for adjustable straps like these, anyway. I sewed my straps in two places, at the top of the lace and where the lace joins the main fabric.

I did the vast majority of the construction (everything but the side-seams) on my regular sewing machine using a zig-zag. The only thing I don’t like is the black zig on the white fabric on the inside—kinda highlights every little inconsistency in stretching, stitch-speed, and trimming. I considered using a white bobbin thread, but that might have shown on the outside unless I fiddled with the tension, in which case the black would still have shown on the inside. So I am sucking up the black. I won’t give a flying anything once I’m wearing it.


20140331-205316.jpg

Fortunately, the way the pattern is designed lets you swap in pretty much whatever width of lace you like, because you apply the lace then trim away the fabric behind. I had to get more of my “narrow” lace (because that was working much better for most of the pattern), but I was still able to use the wider lace in a couple of places—under the bust and along the hem. I will note—there are a lot of different seam allowances in this pattern—none, 1/4″, 5/8,” and I think maybe a 3/8″ as well. I forgot to double-check and sewed my front cup pieces together with a 1/4″ seam allowance that should’ve been 5/8″. So my top front was too wide for my bottom front. Not figuring out what was going on until after, I just eased this in and went with it (which is easy with such a stretchy fabric), but it means my straps and darts fall just a little wider than they should. Not a big deal for me, but if you had narrow or sloping shoulders I bet it would not be great.

Lace finishing

I had a lot of fun piecing the lace for this. It’s very basic. Overlap the lace in the shape you want. Zig-zag it down. Trim off the bits you don’t want on either side. (Optional: follow the pattern of the lace so your zig-zag almost disappears).

I didn’t do much to tweak the pattern, other than my reckless use of inappropriate lace. I made a slight shortening adjustment to the length between underbust and waist. I didn’t even attempt a swayback alteration on the back (it would essentially have ended up being a wedge taken off the top of the back piece anyway). I did grade out to a size 14 for the back skirt, because I often find the side-seams trend to the back for me (this is another side-effect of swayback, more than the actual size of my butt), and this did help a lot with the problem. To the extent that it is a problem, anyway.

Slip: back view, with lace.

Slip: back view, with lace. If you wanted to continue the lace panel on the back, you could just mark where the front lace would match up with it, sew the lace on top, and trim away the slip fabric behind it.

I really did want to add lace across the upper back, however. As drafted the pattern is kinda coffin-clothes, with all the lace (except at the hem) on the front. I just  removed the seam-allowance from the top of the back piece, placed and zig-zagged down the lace, and removed the fabric from behind. Now, stretch-lace does not make the sturdiest of finishes, as we’ve discussed before, which I’m sure is why Gertie didn’t put it all across the back. For a modicum of extra elasticity, I added some clear elastic right at the join of the lace to the back piece. I also chose to live dangerously and skip the really-skinny elastic supporting the edge of the stretch lace in the front. Probably not a good idea for the longevity of my slip, but I can always add it in later, when I learn the error of my ways. So I tell myself.


20140331-205400.jpg


So, can I just say, I love this pattern just as much as I thought I would have? In particular, it’s drafted with the perfect amount of negative ease! (For my fabric, anyway.) As I said, I made my usual size 12, and I put it on, fully expecting to have to take in the side-seams (as one normally does with Big 4 knit patterns). NOPE! PERFECT! Snug through bust, easy skimming through the hips. YAAAAY!

It looks better on me

It looks better on me

And if I do say so myself, it looks considerably cuter on me than on my dress-form. The only problem is, it may be too cute to put clothes over top of. In which case I suppose I’ve made myself a new nightie, not a slip. I guess I might just have to make another…

23 Comments

Filed under Sewing

That 70s Dress: Cream & Red edition

Because I am creative with titles.

.20140324-205652.jpg

This isn’t the dress I wanted to make. That is, I figured I would make this other dress: (yes, just exactly like the envelope) but I couldn’t find the pattern. It’s around somewhere. >_<

20140324-205707.jpg

So, fall back. Simplicity 7806 from 1976. Equally cute, and almost as high on the (admittedly rather dusty) “must make” list. The fabric is deep stash, an ivory-coloured stretch suiting bought from a thrift store in my first year of blogging. (I just totally missed my fourth blogiversary last week, by the way.)

20140324-210400.jpg

I think it looks kinda Regency. Which is pretty fun, actually. The pattern is a size 10, a size smaller than I usually make. Since my fabric has a fair bit of stretch (although I didn’t notice until after I had cut it out that there was a lot more stretch lengthwise than widthwise… headdesk), I figured it would be workable. I made my usual bodice-petiting and swayback alterations, and added some extra width on the side-seams of the skirt. I love these 70s A-line skirts, but they need to skim, not cling, and last time I made a size 10 there was, ah, clinging.

Anyway, I got the waist in the right place, but arguably it might’ve been better had I taken less height out of the yoke (which is a single piece that wraps from front to back—now that I’ve made it it’s pretty simple but I was having a hard time visualizing how to alter it beforehand) and more height between bust and waist. Although I think I like where the underbust seam sits, even if it technically is a bit high. It’s hard to say with that curved seam, though—it feels perfect in the middle, high at the sides. But if it were perfect at the sides, it would probably seem too low in the middle? It’s a funny shape, anyway.

20140324-210515.jpg

I paid a bit more attention to fitting the back than I sometimes do; I wound up taking in the back waist by over an inch on each side of the zipper. It clings fairly well, now, and then skims, although the bottoms of those darts could probably use a bit of fussing over. Hard to say—this fabric is heavy on the polyester, and while it presses fairly well, it does love to pucker.

20140324-210530.jpg

I got lazy gave the blind hem stitch on the Rocketeer a try. As with everything on this damn machine, you have to look up the settings—intuitive it is not—but once I figured out the recommended setup it was pretty easy. Although not particularly invisible in this fabric. Except in the places I completely missed the hem. /sigh Wel, it was fast. I love how the manual assures us that the blind stitch is “comparable to hand-finishing.” The hand hem is the gold standard. As it should be. 😉

20140324-210543.jpg

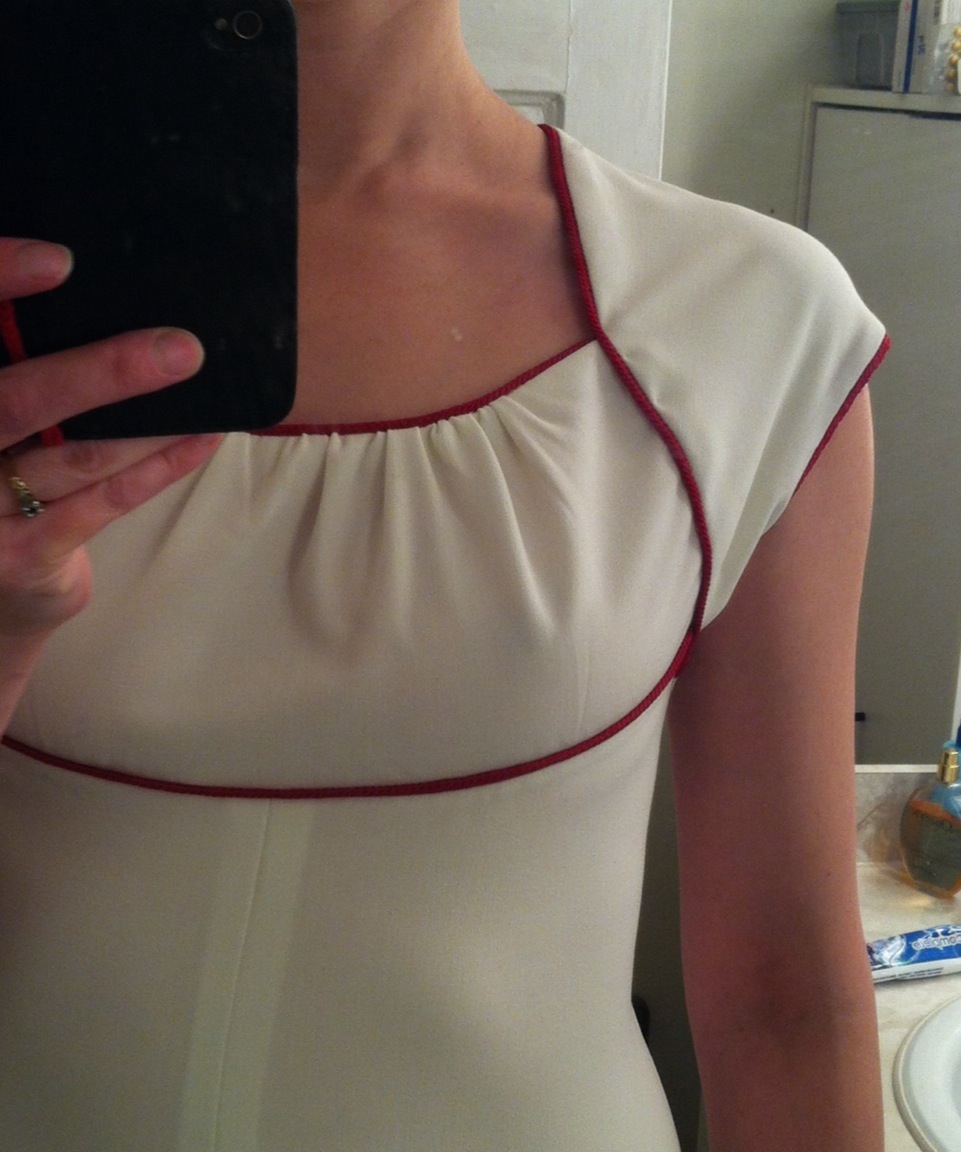
In this photo you can see (maybe) the main fit issue with this dress—pulling across the shoulder. When I saw this my first thought was “I overdid the petiting,” which is certainly possible, but I think actually this is a problem of either a) my size 12 shoulders in a size 10 shoulder-piece, or b) that I didn’t bother with a square shoulder adjustment. I generally try to avoid them in these sort of cap-sleeve styles, especially since I couldn’t really visualize how to do one, but now that I have it finished I think cutting a slash along the shoulder line of the yoke (once I determined where the shoulder line should be) and then adding in a wedge at the outer edge, narrowing to nothing at the neck, would’ve been just what the doctor ordered.

Overall, I’d say this was the perfect fabric for this dress—drapey, with lots of polyester ;). The spandex may not be period, but the pattern does suggest lightweight knits as an option. I used the piping to finish the upper central neckline and back; below you can see my overlocked edges, and the hand-finished interior of the yoke. Overlocking anywhere near the red piping may turn out to have been a really bad idea, as that stuff frays like (words I won’t say on blog). Fray Check was my friend. I didn’t notice the problem so much on the Butterflied dress, where I used the same piping, but then that was more short, straight seams and it all ended up lined anyway. I don’t think I did much grading of seams, which I had to do lots of here.

20140324-210630.jpg

The biggest problem I have is that, being white (ok, ivory), my fabric isn’t, um, quite as opaque as another colour in the same weight would be. I think a white or nude slip is going to be in order before this one leaves the house. Which is too bad, because it really deserves better than headless bathroom selfies. And I will be really pissed with myself if I’ve made another dress I can’t wear, just for lack of proper undergarments.

Of course, now I need more cream stretch suiting, for when that original pattern turns up…

17 Comments

Filed under Sewing

The Jeggings That Could Not Be Photographed

20140316-165001.jpg

Ok, actually some of the close ups turned out really nice. But anything like a full body shot (or half body, since it’s a lazy Sunday and neither hair nor makeup happened) ? Black blob. Sorry.

20140316-165012.jpg

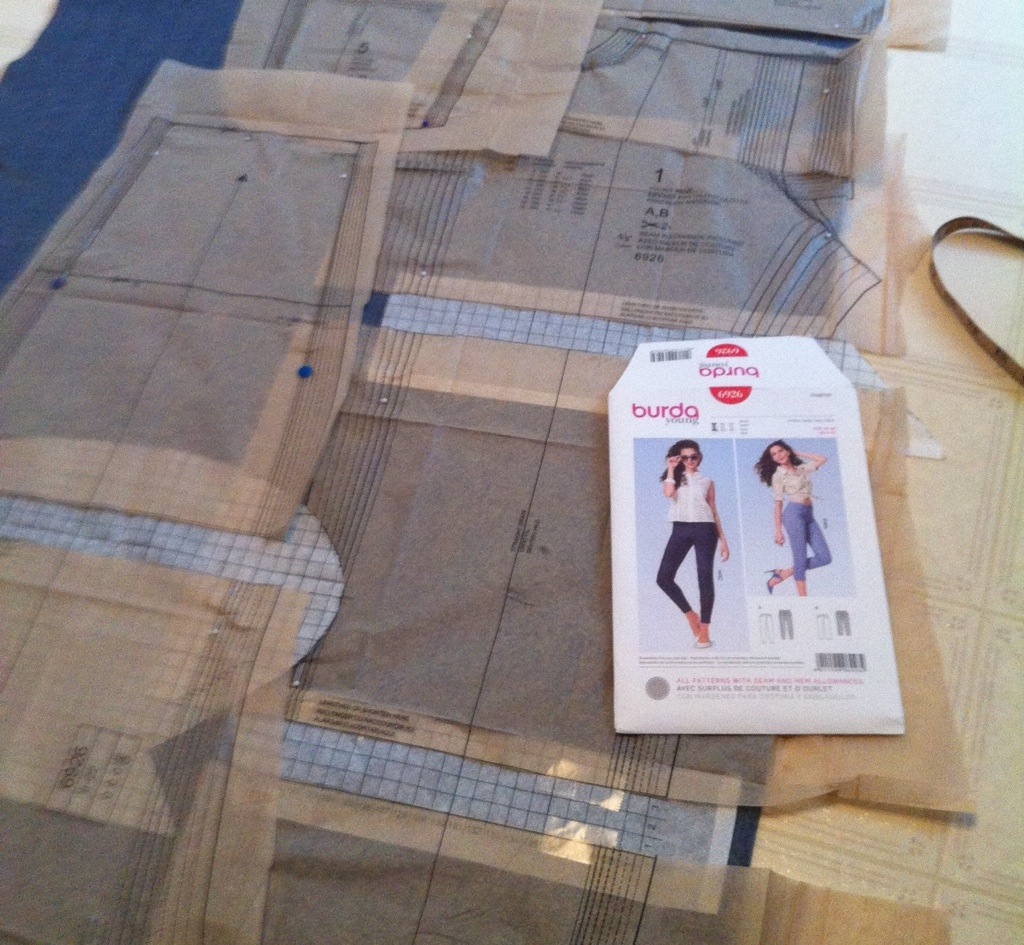
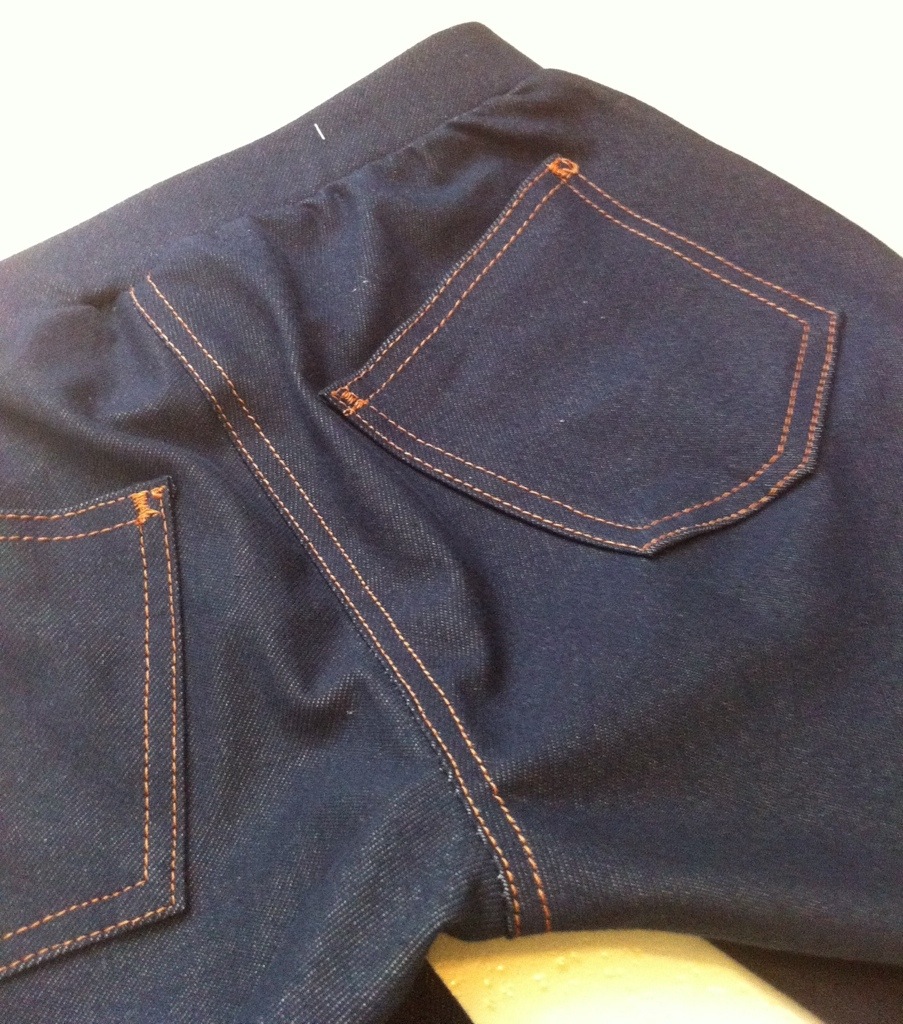
So the pattern is Burda 6926—JEGGINGS. I wanted jeggings to go with my scrunchy top. I can’t quite articulate why, since I’ve lived thirty-mumble years already without jeggings and gotten by quite well (arguably I need another pair or three of REAL jeans, but I’m not sure these will really fill that slot)… but anyway. The fabric and the pattern both hit me at just the right time.

20140316-165029.jpg
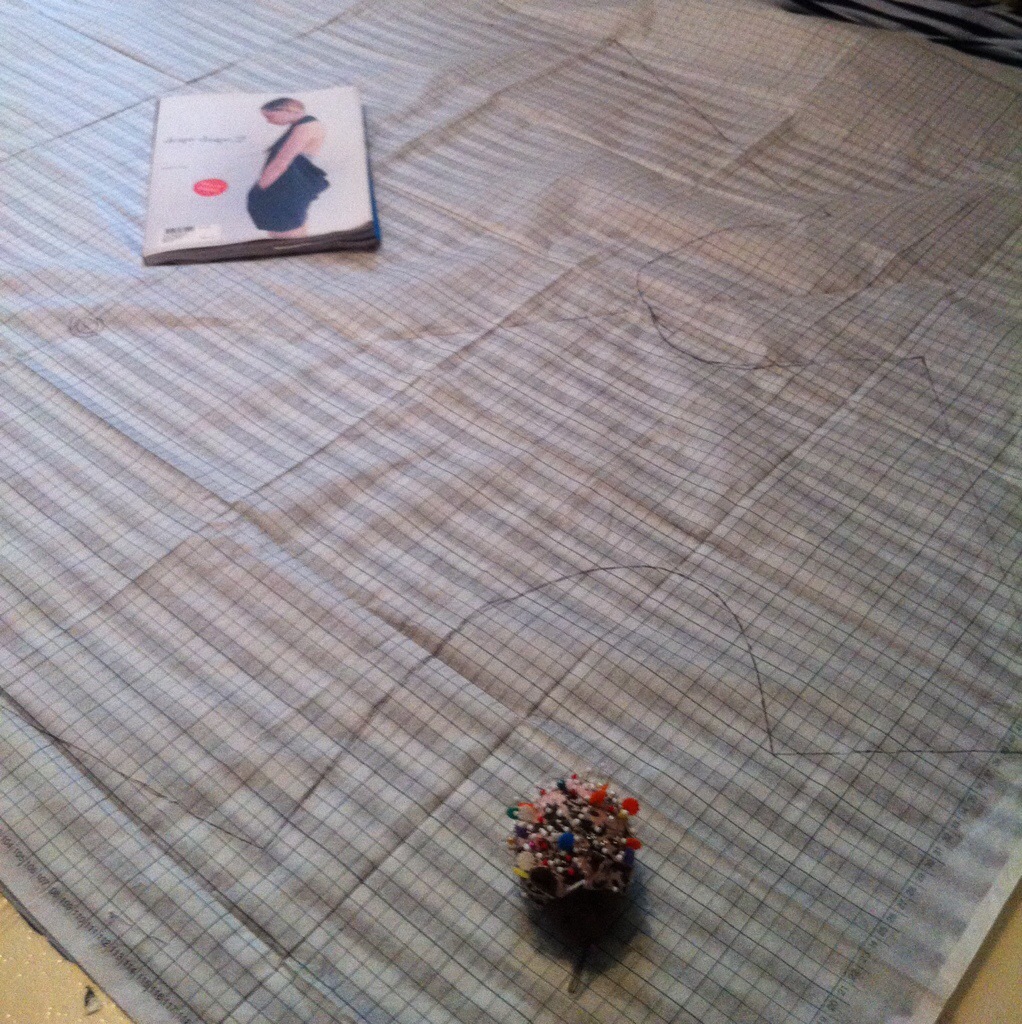
So, let’s start with fit. I could tell from the photo (or guessed from the photo) that the front rise was going to be excessively high, but I figured I like a bit more coverage in the back so I’ll leave that. I cut the front pattern piece along the lengthen/shorten line and hinged it down, pretty much as far as I could without obliterating the fly. You can see the wedge taken out towards the top of the picture above. This is not really the best way to make this alteration, but I was feeling too lazy to attempt to do it “properly”, which would involve tracing the front with the pocket-yoke in place, adjusting the rise, and then removing the pocket-yoke again and adding all those seam allowances. I figured this would get me into the right ballpark. I also measured the inseam (going for the longer version), which was around 29″ (actually probably a bit less since I don’t think I subtracted hem). Now, leggings don’t need as much inseam as regular pants, and skinnies don’t need as much as flares if they’re stopping at the ankle (though I will admit that I love that excess-fabric-scrunched-up-at-the-ankle look Tyo always gets, with the same kind of envy that I once had for people who got to walk on the backs of their flares). But 29″ is not quite flood-pants length, plus these are contoured both above and below the knee. So I added 3cm at each lengthen-shorten line, coming to a total of 6 cm, just over 2″. 31″ is in the right ballpark for me, at least for leggings.

20140316-165208.jpg

I should mention before I get ahead of myself, there are no front pockets in these jeggings. There is a separate pocket yoke piece, which you just sew to the front and topstitch down. A little silly, but it gives you the look. It would be easy enough to add pockets to them, but I think the outline of the bags would probably show through.

In the picture above, you can see a blue chalked line running and inch or so below the waist. When I got to try-on stage, I had good (barely) coverage in the back—a bit of a dip there, actually—a little high in the front, and REALLY high at the sides. Which is a really weird look, by the way. I put them on, pinned the elastic around my hips where I wanted the waistband to be, and chalked out my changes. Unfortunately, this cut off most of my “pockets”. Not a practical problem for this pair, but not quite the visual I’d been hoping for.

20140316-165106.jpg
As you can see, not much pocket. I didn’t do much topstitching on the waistband, nor did I add a decorative button as the pattern suggested. Really, this bit isn’t going to fool anyone—nor, frankly, is it likely to be seen at all since I’m well past my crop-tops phase. /sigh.

I do think I did pretty well on the topstitching—topstitching a fly is extra easy when there’s no actual zipper underneath to work around!

20140316-165126.jpg

Although, I completely failed at getting my topstitching to go the right way front-to-back. Fortunately, no one else should ever be looking at my crotch like this.

20140316-165052.jpg

Which brings us to the back. There is no yoke, which I guess is fine for jeggings? It certainly speeds up the sewing. It made positioning the pockets a little odd, though (what, you say I could’ve used the pocket placement from the pattern? Heresy!)

20140316-165139.jpg

I quite like the size of the pockets, though. I opted for plain, mostly since I don’t trust the straight topstitching to hold up over time on this stretchy fabric.

Speaking of which, I determined on testing that my fabric had about 25% stretch crosswise and 50% lengthwise. Weird! So I cut them on the cross-grain, to get maximum stretch going around me. Then I wound up having to take in the jeans at the side-seams by a good 1/2″ (so a total of 2″ around) each. So maybe 25% stretch would’ve been fine. Anyway, 25% stretch is well within the capacity of normal stretch-denims, so you could maybe even try this pattern with regular denim, not just a denim knit like this. Although I feel like the waistband would be a bit weird. I dunno.

20140316-165149.jpg

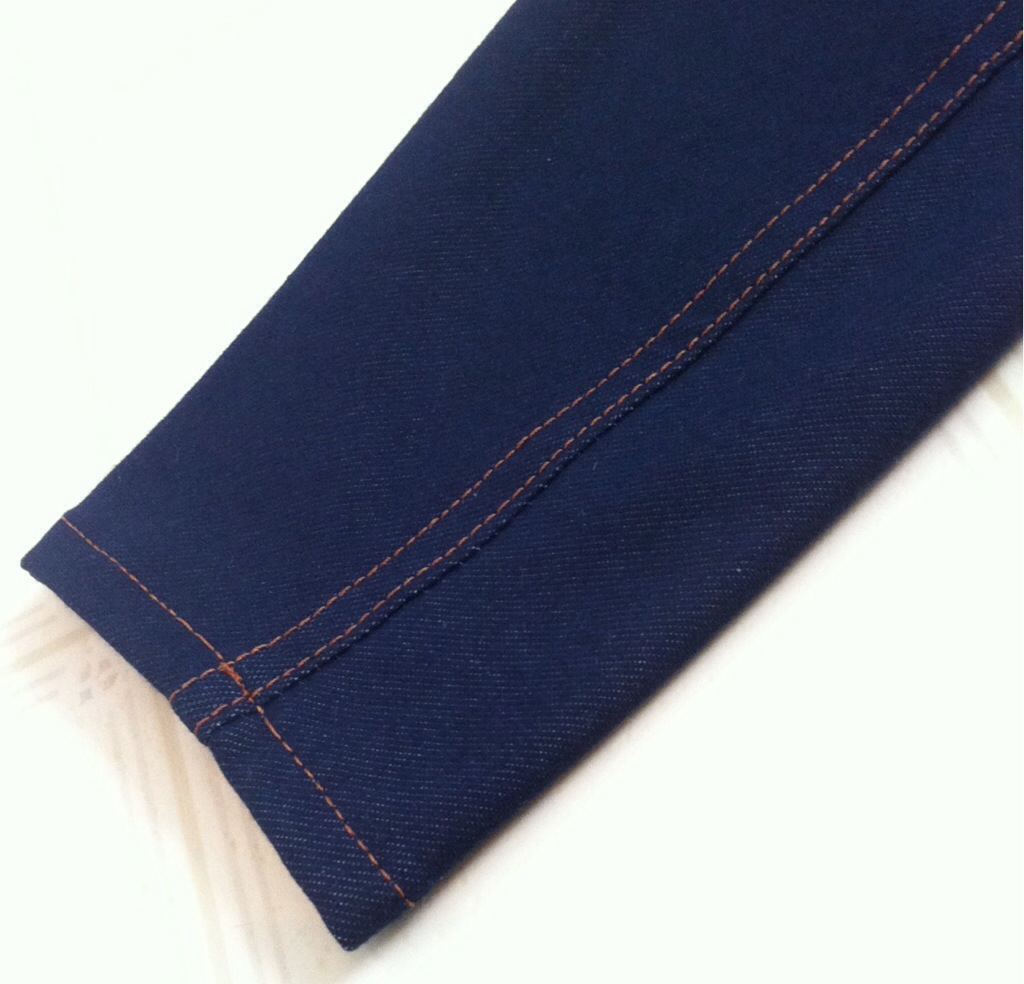
This is the better of the two hems. 😉 Nearly perfect! I was trying to do the construction on my Grandma’s machine and the topstitching on my White, since a) Grandma’s machine already had a bobbin wound in the right thread, and b) last time I did topstitching on Grandma’s machine, it pitched fits and had terrible tension issues (I also didn’t have a topstitching needle, which doubtless contributed to the problem. This time, I have a whole package). Well, the White wasn’t too in love with the topstitching, either, so finally when I was fighting with the last hem I switched over to Grandma’s machine and it was—well, not exactly a breeze, but about a jillion times better. And no tension issues. So maybe it was all in the needle.

20140316-165258.jpg

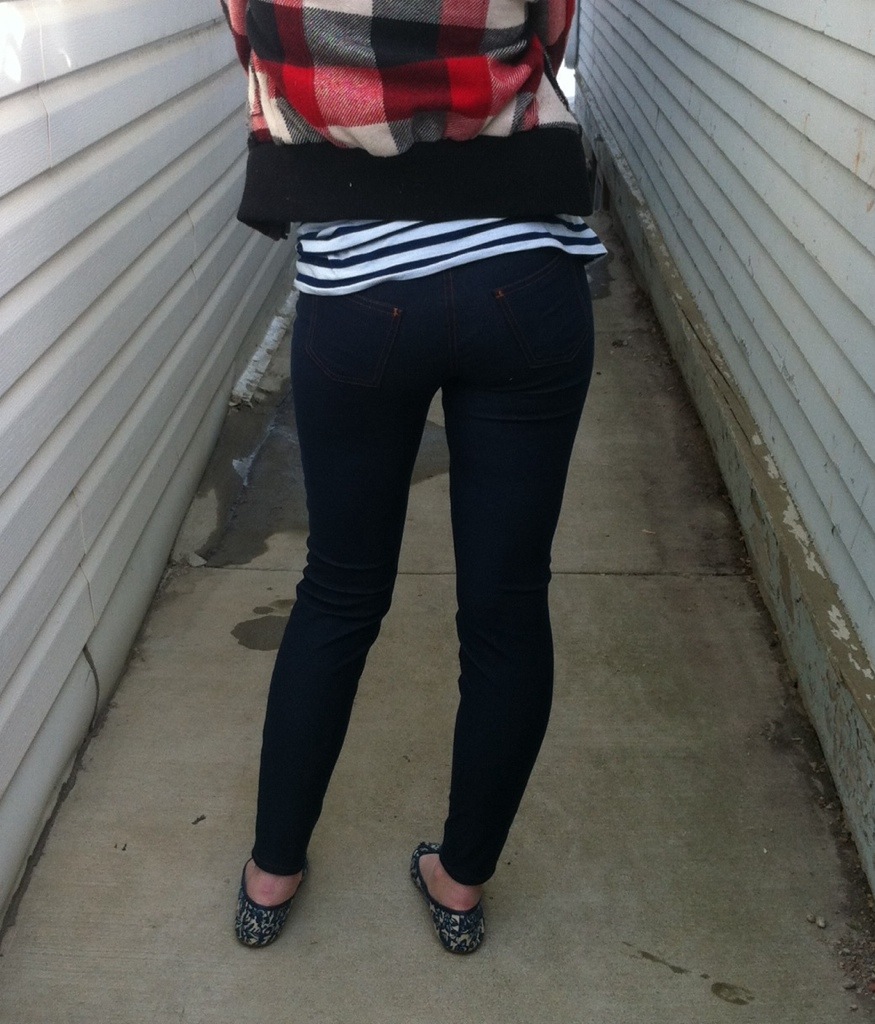
Anyway, weirdnesses aside, I think they will serve. (See, we even tried outdoor photos! Also, do you see that wet pavement? Spring is coming! And, yes, the house next door is ridiculously close to ours.

26 Comments

Filed under Sewing

Draping for Spring

20140315-224335.jpg

I had a few scant hours this morning to spend sewing. In search of something quick, but more exciting than yet another pair of leggings, I pulled out Drape Drape (vol. 2).

20140315-224624.jpg
I have been wanting to make top # 4 since I got the book, a year and a half or more ago. I actually attempted it last winter, but made the mistake of using a border-print knit with almost no stretch at all, and didn’t modify the neckline, despite reading warnings of its depth. The result was too low for decency (and I am not shy of cleavage) and way too tight in the hips. It gets worn to bed once in a while, but otherwise was basically a waste of a really cool fabric. Bah.

20140315-224358.jpg
Anyway, take two is in a much more suitable lightweight knit, which claimed to be a cotton but I think has a fair whack of rayon, or maybe just a nice polyester.
20140315-224509.jpg
Either way, it’s soft, drapey, and just right for this pattern. I re-traced (man is that a big pattern-piece!) and tried again, raising the neckline by two inches and widening the scoop of it a bit more. I also added a tiny bit of width to the hip, straightened the hem (since I figured this would look better than the curve with the stripes) and straightened the hem of the left sleeve, again to look better with the stripes.

20140315-224611.jpg

I tried to take my time with the construction, reinforcing the shoulder seams with strips of fusible knit interfacing and taking time to press my neck band and twin-needle my hems (after reinforcing them with steam-a-seam).

20140315-224413.jpg

I am not a big fan of the double needle for knit finishes, despite it’s superficial RTW look. It tends to tunnel, often doesn’t stretch enough, and, most importantly, I tend to kill the needles quickly. This one bit it right as I was finishing the neckline. I had to do two lines of straight stitch across the back of the neck. BLERG.

20140315-224455.jpg
I wasn’t sure, given the odd shape of the pattern, that matching the stripes across the seams would be possible, so I didn’t try too hard. This is kinda too bad, because it turns out they actually could mostly have matched up really well, if I had tried a little harder. They’re not terrible, but definitely not awesome.

So, summary? Quick, a little crazy, comfy, and most importantly, done!

20140315-224443.jpg

Now if only that spring weather would come along to go with it!

20140315-224542.jpg

24 Comments

Filed under Sewing

Butterflied

Side view. Spot the tummy poof!

I shouldn’t really have made this dress. In a world where my sewing time is numbered in hours per month, where every precious drop of needle-time needs to count, this was not really the right choice. It’s impractical, non-seasonal, and doesn’t even have charming geeky pop-culture references. Sigh.* When I sewed this last weekend, we were suffering through wind-chills into the -40s. It’ll be weeks, more likely months, before this dress sees action. And I could have been sewing zebra print fleece! But, the choice was made, so let’s try to blog it, shall we?

So, I made Vogue 8916. Why? Well, I think I mostly felt challenged by the sheer butt-ugliness of the envelope photos, frankly. The model looks about as thrilled with the shapeless potato-sac outfits masquerading as Chanel chic as I would be, frankly. And yet, there’s this possibly-really-cute-dress-with-neat-seaming in there at the same time. So I made it. In this really neat abstract-butterfly-wings print whose cuteness almost makes up for its %100 polyester composition and the part where the (slightly glittery) black print melts when you iron it (all over my new-last-summer iron with the spanky extra-slidy sole, I’ll add. The press-cloth was my friend).

I’m almost as over apologizing for bad photos as I am over winter, so, they are what they are, which is grainy and not-very-in-focus. My “good” camera did not do a whole lot better than the iPhone (we tried both)—the culprit is simply inadequate lighting. Which, given my husband’s abhorrence of light in most forms, isn’t likely to change until I can go outside to take photos. In, y’know, a month or three. And I do better with a tripod than a photographer, just because I find it easier to let loose and be goofy. Although Tyo, my photographer, thought I was being plenty goofy enough.

Bodice details

Anyway, so the dress. I like the idea. I like the silhouette. I like the details. I did a decent job on the execution. But there’s a couple of things in the fit that I think are going to, well, irk me.

Front view, with tummy pooch

I haven’t made many straight skirts. Ok, I made one, a long time ago, when I was a baby stitcher, and I’ve only worn it about three times. More because I tend to destroy the back-slit every time I’ve tried to wear it than anything else, but the fact remains. I do have a couple of storebought (hand-me-down) pencil skirts of some kind of stretch fabric that are cute and I wear them a bit now that I have this staid little office job (though they still annoy me when going up and down stairs.) Anyway, the skirt features the very typical-of-straight-skirts front darts.

So I can kinda, if I squint right, see how these darts are right for most people. I mean, I’ve got some tummy pooch, especially the last couple of years (hello, mid-thirties!). But, for the most part, my stomach goes out in a smooth curve, sticking out furthest at my bellybutton, unless I’m carefully sucking things in for, oh, blog photos and whatnot. Anyway, it’s not so much the fit at the tummy that bugs me, as right below. My hips go back, and the skirt does not. Those storebought skirts just kinda suck in in this area—this non-stretch one doesn’t. If I’m standing straight, it’s not bad, but from certain angles it just looks poochy. Which I guess is cute. Also, while the curve of the hip isn’t as off as I was afraid it might be (my hips don’t curve out quite the “normal” amount, or so the vast majority of pencil skirts I’ve ever tried on have informed me) it’s not in quite the right place. It hits much higher than my widest part, like a good three inches higher. So yeah, I guess I’m short in the waist and long in the hips. I guess if I made more high-waisted stuff I would know this by now. This excess width at the high-hip also contributes to the pooch, I think. And then it’s quite snug over the widest part of my hips, which falls in the part where the pegged skirt is starting to taper in toward the hem. /sigh. So note to self—in future, add whatever length you take off above the waist on below the waist. Or maybe some more—I only shortened the bodice by about 1 cm (and yet, it does hit at my waist, at least when I stand straight.), and I think the “widest part of hip” needs to come down at least a couple of inches.

Back view, with blur.

All the back photos came out blurry. Which is too bad, because I really like the back view. My swayback adjustment worked quite nicely, here. I may not need it in things with flared skirts, but I definitely do in something like this.

Piping intersection

I spent a lot of time agonizing over how and where I was going to do the piping. I knew I wanted to highlight the interesting front seams, but just how? In the end, I went for minimal—just the front princess seams, and that under-bust cross-seam. Part of me wishes I’d done the waist, but I don’t like highlighting my natural waist, so I am content with how I did it. I’m a little disappointed that the under-bust seam is only in the front of the bodice, though—if I’d had more time/ambition I would’ve added it to the back and piped all the way around. In the past I’ve usually made my own piping, but this time I tried out this squishy-braided-flexible stuff from the store. I think the shininess works well with the fabric, more than, say, a broadcloth piping would’ve, and it was certainly less fussy than homemade satin bias piping. Anyway, it worked nicely, and I like the look and texture with this fabric. Incidentally, look at my piping intersection there! That was probably the most nerve-wracking moment of sewing the whole thing, so I definitely did a happy dance to the sewing gods when I got it just right. Also, this is the only photo where you can see the more subtle jaquard swirls in the fabric, as well as the black butterfly-wing bits. Cool fabric, no?

Hem, with grosgrain ribbon finish. You can see the underlining above the hem.

Other construction details? I underlined my fashion fabric, which was fairly floppy, with broadcloth. I also used broadcloth for lining, so this is really a fairly substantial-feeling dress. Unfortunately, the broadcloth lining doesn’t work with tights (especially lacy tights) so the photographed combination won’t work in real life. *pout* (I may pull off the skirt lining and replace it with a proper, slippery lining. I think the skirt-fit-issues would bug me less if the dress skimmed more anyway.) I finished the hem with some saddle-stitched grosgrain ribbon (off a spool from the dollar store—man, those don’t have much on them!) I love how easy underlining makes invisible hemming. I’m now officially terrified to wash this dress, though—red piping and red dollar-store ribbon on a white dress? I’d say disaster waiting to happen, wouldn’t you?

Really blurry pic of the bust padding

I added bust padding a la Tasia’s tutorial, much as I did with the picnic dress. Unfortunately, my only pic came out really blurry, but they do the job, which is basically just to add a bit of smoothness and structure to the bustical area if I don’t wear a bra. My bras are all padded in varying amounts, so my “size” without them is, um, a bit smaller. I made a size 12 for this, and it’s a bit roomy in the top, so maybe I really should be making a 10 in the bust for Vogues. I should also have done more stay-stitching or something around the top of the bodice, as it gapes a bit (and that’s after taking a bit off from the top of the princess seams.)

So, overall, I don’t really know about this dress. From some angles it’s great, from others the little things bug me to all hell. I probably do need to bite the bullet and play with the skirt side-seams, and replace the broadcloth skirt lining with a slippery one. In, y’know, a couple of months. On the other hand, I can see myself wearing it to work with a shrug or something to dress it down a bit (and to keep me from freezing!). I don’t have any glam-requiring events in the foreseeable future, so dressing it down will be a necessity. I suspect it’ll all come down to how it feels to wear it—and I won’t know until I try.

In a few months.

Instagram makes everything better.

*I know there are plenty of people who love to sew nothing but the fun and frivolous, preferring to buy (or just ignore) the mundane and everyday. And I get it. But personally, I find it frustrating and disappointing when I can’t wear something I make. Like, right away. Preferably to death.

28 Comments

Filed under Sewing

Camo & Lace

The Coat

The Coat. Yes, I added lacing at the back.

I’m kinda torn. I almost don’t want to post about this at all, and wait until spring when I can get better photos. But I’m also afraid if I do that it just won’t happen. And I’m impatient. And I really, really like this jacket.

Coat.

Thingy.

Ralph Lauren Duster

Inspiration: Ralph Lauren Duster. Don’t see the resemblance?

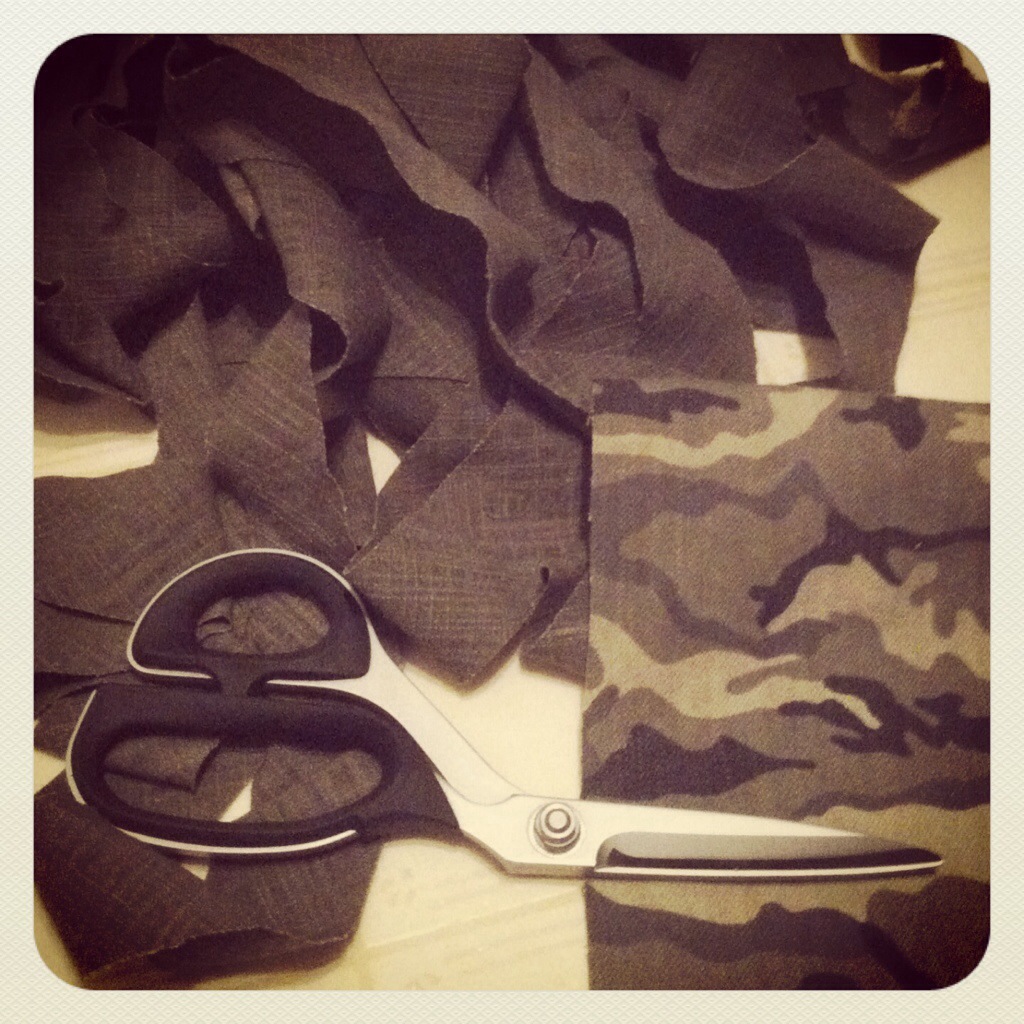
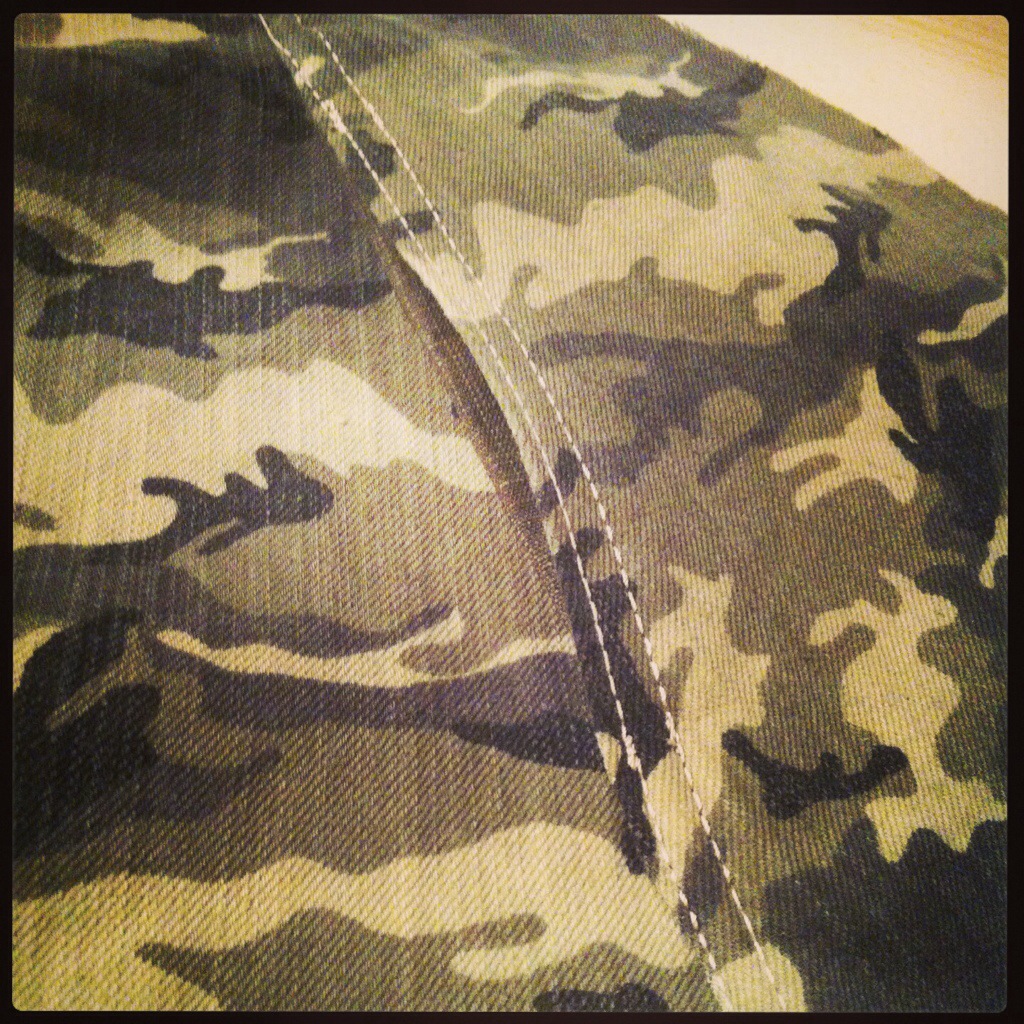
So, way back in the day, Lady Katza of Peanut Butter Macrame posted about this (already-not-news) “duster” coat-dress-thingy. It’s apparently Ralph Lauren. I don’t know. All I know is I agreed with her about its general fabulosity. Anyway, memory morphs, as it does, so what I remembered was a long, swingy denim coat trimmed in lace. And somehow when this drab camo twill showed up at my local Fabricland (which has been a pathetic, camo-less wasteland for over a year, I will point out), well, it seemed like the perfect riff on this idea. Especially matched with McCall’s 6800, which I have had a crush on since it came out.

McCall's 6800

McCall’s 6800

In fact, it’s pretty much everything you could want in a swishy coat pattern. Princess seams (two sets). Two-piece sleeve. Lapelled or standing collar options. Detachable hood. Detachable fur collar, if that’s your style. It even had the high-low hem option ready-made! And I will make a real wintery-coat-version someday, but it was a great starting-place for the image in my head.

DSC08117

Front view. Ok, I’m a little surprised at how short it ended up. The pattern photos made me think it would go from just above the knee in the front to mid-calf in the back.

Curiously, the really ugly greige-colour of cluney lace at Fabricland looked perfect with this fabric. Unfortunately, they don’t have much selection in that colour, and and this was the only one that was the right kind of edge and scale. And all they had was four metres. Which seemed like plenty at the time, but as it turned out, was just enough to go around the hem once. My dreams of lace frothing at throat and cuffs were dashed. Maybe I’ll add it in later.

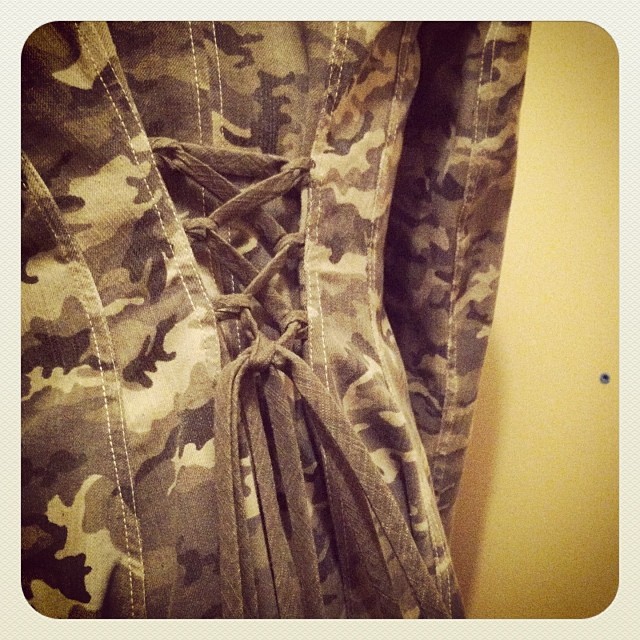
back lacing

back lacing

After checking the finished measurements, I figured I’d be safe to go down a size, with the possible exception of the waist—so I made part of my usual petite alteration right at the waist, figuring that would shave off the narrowest part. Then, I figured I’d add lacing in the back, for some extra fit insurance. Because who doesn’t love lacing? And it turns out I’m glad it’s there, so I probably didn’t need to worry about the waist being too narrow. I’m glad I made my usual petite alterations, though I could’ve skipped the swayback. I think I don’t need it in full-skirted things like this, hard as that is to wrap my head around. I added 4cm length to the sleeves, divided between upper and lower (and there was a lengthen-shorten line in each! This was enough added length, but definitely not excessive. 5 cm (2″) would probably be perfect, especially in a bulkier fabric. I did find the sleeves quite full when I first tried it on. Of course, I had already topstitched the outseam, but I was able to take it in fairly satisfactorily at the under seam. By 1/2″, so a total of a full inch per sleeve. Of course, if I were making a winter-coat version, I would probably want that fullness. While I’m talking about the sleeves, I shaved down the sleeve-heads by about 1/4″ and could probably have taken off more, considering cotton doesn’t ease well. In wool, I think the amount of ease would work. The shoulders are nice and narrow, maybe because I went with the size 10. They’re perfect for this, but I wonder if they wouldn’t be a little narrow for a winter-coat version with shoulder pads (yes, you do need shoulder pads for a tailored coat. Not thick ones, but *something*)

Innards

Innards

I showed you my bound seams before, but here you can see (however blurrily) the pockets. I made a little support running between the pocket bag and the facing, so it doesn’t flap around. Speaking of the facing, that’s one of the two (maybe three?) things I didn’t like about this pattern. There is no separate piece for the facing—they just tell you to cut four of the CF pieces. Well, I did that in my Winter Coat and I can’t help but suspect that it was a contributor to the mysterious front-flaring-out that almost killed the coat at the final stages—only major hand-stitching (basically padstitching the two layers together) saved it. Anyway, when I went to cut my second pair, I skipped the flare. For this topstitched design, I wasn’t concerned about turn-of-cloth allowance on the lapels, but if/when I make a proper version, I’ll be over at the RTW Tailoring Sewalong posts, where Sherry went over all the necessary changes for drafting a lining and facing properly. Such a good sewalong.

DSC08121

Buttons and buttonholes. If you look close, you can see where I ran out of topstitching thread SIX INCHES FROM BEING DONE!

Of course I had to use jeans buttons. Of course, I couldn’t find ANY of my handy-dandy little thingies that hold the two bits in place while you hammer, nor could I find my awl. Let me just say, those two gadgets make life a lot easier. I made the buttonholes with a vintage Singer buttonholer.

Buttonholer. First use.

Buttonholer. First use.

I should perhaps mention it was the first time using this particular buttonholer; in the past I’ve used my Greist one. I did not notice a measurable difference between the two (and they both use the same templates, which means my little extra kit that has the short keyhole template works in either). I did NOT try to use the topstitching thread for the buttonholes—I have come to the conclusion that this is just asking for trouble. They look just fine in regular, matching thread.

measury-gadget

measury-gadget

I used 8 buttons, which felt like quite a lot, but I like the closely-spaced look. Also, less gaping if when I lace things up really tight. And my nifty-measury-gadget only does 8 holes. Probably that’s enough for most things.

DSC08120

Neck yoke, with hanging loops. Also, I love binding.

There was no rear neck facing piece (another boo—basically there were no proper lining pieces, though there was a proper undercollar). So, I made my own. I’d go into my process, but a) Sherry covers it really well, and b) I totally didn’t follow her advice and just kinda laid some tracing paper over the half-finished jacket and traced out the shape. I am glad I remembered a hanging-loop, even if I didn’t think to add it until after.

Chillin

Chillin

So, I’m pretty happy with the outcome. And even Osiris approves, which is pretty rare, although he wondered why I didn’t use more lace. Sadly, the weather being what it is, this jacket won’t get much wear for a couple of months. What can I say? I was, ah, inspired. Which is a great feeling to follow, isn’t it?

Now I had better go be a good girl and make a onesie for Syo next…

63 Comments

Filed under Sewing

Somebody Else’s Handmade Dress (II)

20140215-195907.jpg

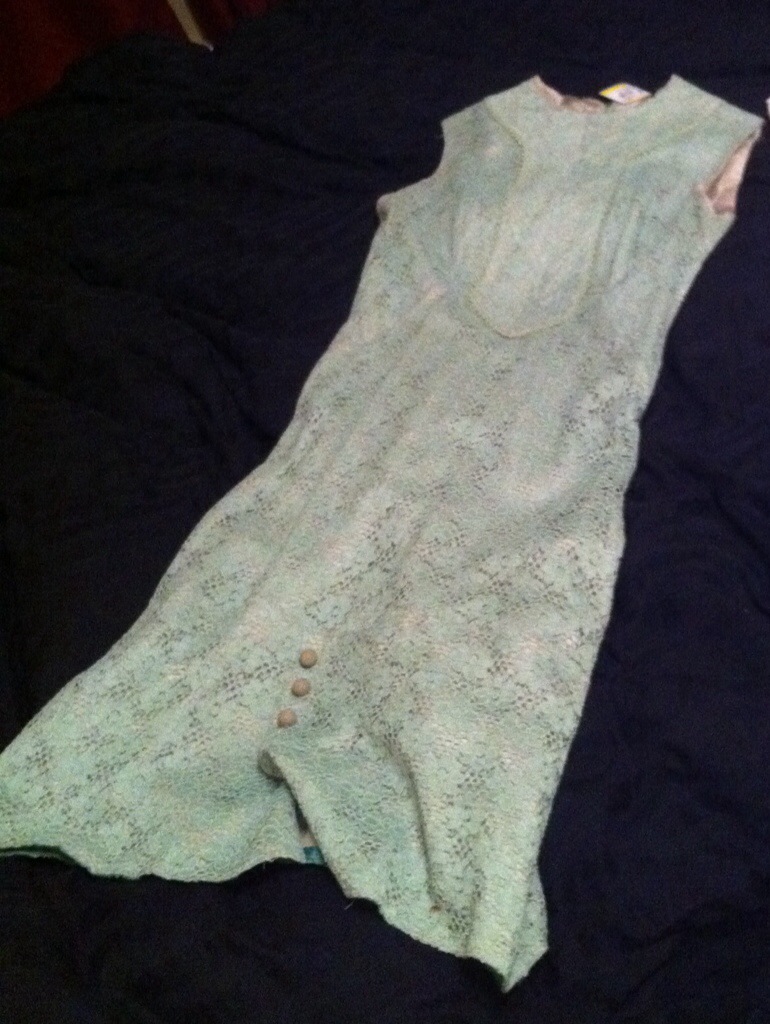
I bought an old dress.

Apparently, my Value Village now has a “Vintage” section. Apparently I am a sucker, and bought a dress, which I may well not wear. Because it was nifty, and handmade. And it makes me think about the kind of blog post whoever it was sewed it, might have written, had there been sewing blogs back in the 60s. Finds like this always make me want to trot over to the Vintage Pattern Wiki and hunt down the pattern. Unfortunately for you guys, all the photos were taken by Syo on the iPhone, so are pretty much terrible (more to do with lighting and iPhone than Syo). I miss the days when I had time and space to take actual good photos (and then edit them properly), but at this point it’s largely iPhone photos or no photos.

20140215-195921.jpg

Woo crazy hair

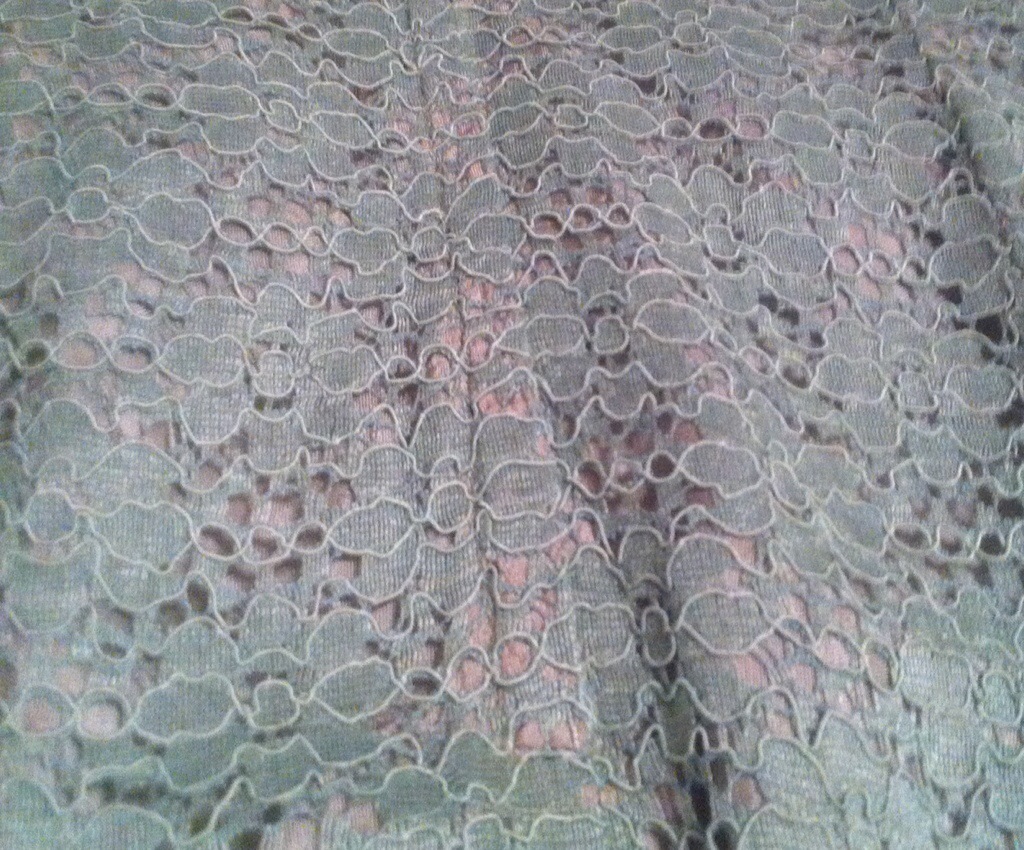
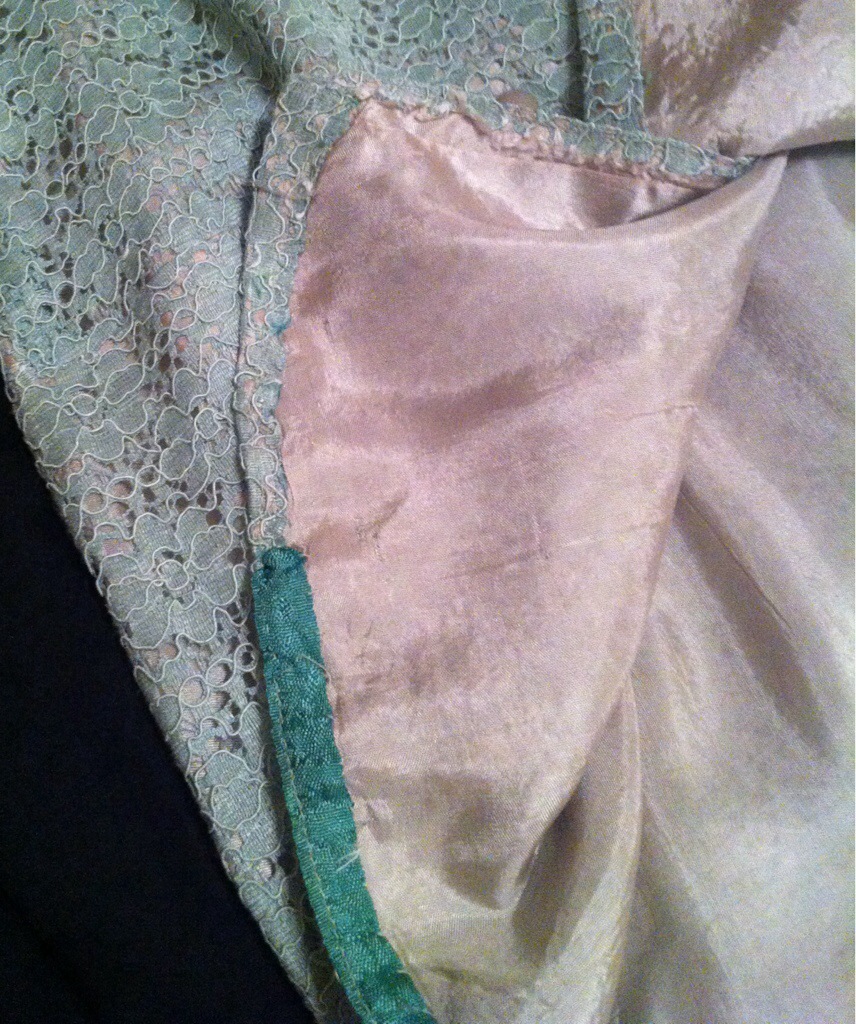
I assume it’s 60s. The construction is straight out of the Reader’s Digest Complete Guide to Sewing. It’s a green lace underlined with what is currently a rather beige lining (either rayon or a much nicer species of polyester than I’m used to.) I love the hem detail with the buttons (is that a flounce at the bottom or an extra-extra dropped waist?), not so much the high neck with the placket-yoke-thing.

20140215-195936.jpg

Problems with the facing rolling out.

Despite her careful understitching, the facings have a tendency to roll out. Obviously they’ve been doing this a long time—she hand-stitched around below the understitching to try and keep everything in place. She even went as far as to handstitch much of the facing down to the underlining.

20140215-195948.jpg

Side-ish view

It’s a classic 60s sheath, high cut neckline, straight profile, with steep, curving French darts that reach the side seam somewhere around my hips. The dart placement is pretty good on me, but the tips are a little high. Presumably whoever made it was a shorty. Or very perky.

20140215-200011.jpg

French darts

It’s a touch roomy in the bust, and a touch tight through the hips. Although possibly that’s just from all the chocolate I ate over Christmas.

20140215-200021.jpg

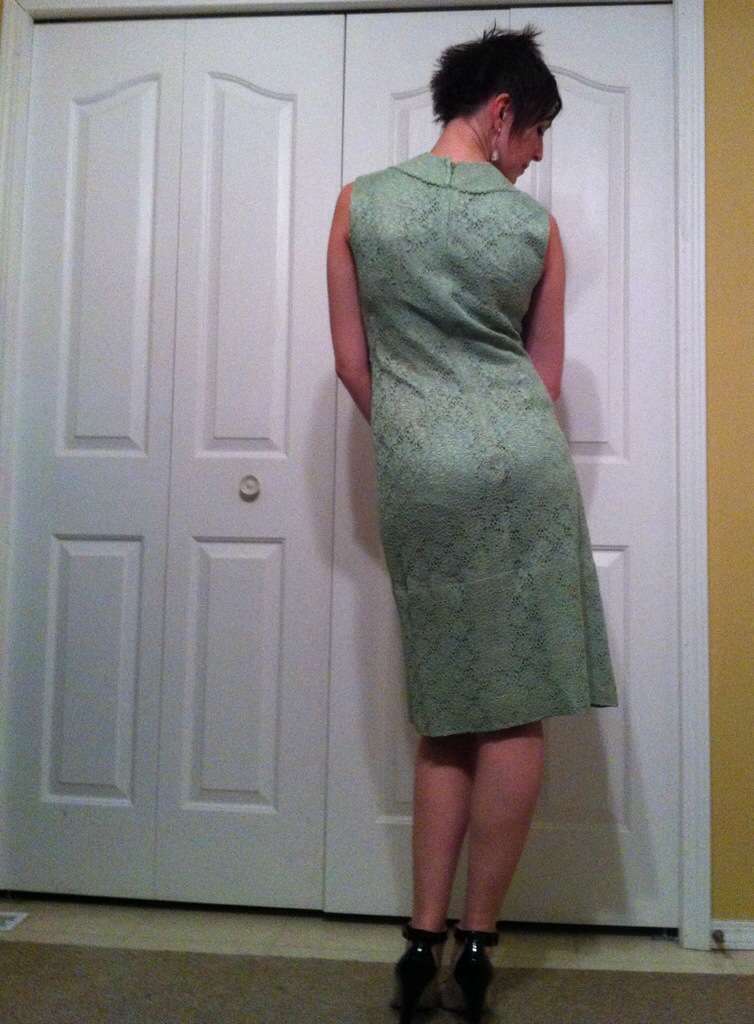
Back view

The yoke wraps around to the back of the neck. I bet there was a version on the pattern image with big buttons on the front.

20140215-200058.jpg

Front placket

It’s trimmed in lace, which just barely stands out from the rest of the lace texture. I guess she was going for subtle. I do wonder how the colours have faded over time. Did it originally match better? Was the lining always a pale, nude under-layer, or did it used to be a brighter, seafoamy colour?

20140215-200132.jpg

Lapped zipper

Our unknown seamstress did a killer lapped zipper. Teeny and neat!

20140215-200202.jpg

“Design feature”

Maybe the coolest feature is this little wedge pieced in at the side of the skirt. My first thought was that she needed a little extra room in the booty, but the piece is only on one side and doesn’t extend into the flounce, so my next thought is that she either was trying to squeeze the pattern out of too little fabric or, had it folded to cut and didn’t notice that a little wedge was missing on the under-side. C’mon, I know you’ve done that too. Can you imagine how much she swore when she figured that out? Or maybe she was an old hand, and just sighed and pieced it in and trusted the texture of the lace to keep anyone from noticing. Although I notice the lace is running in the other direction—which makes me think she was probably short of fabric.

20140215-200221.jpg

Bottom “flounce”

Look at that bright green hem-tape! Did the dress really fade that much? Or was it always meant to be a fun flash of colour?

20140215-200235.jpg

Hemming with seam binding (and handstitching)

The edges are tucked under and hand-stitched to the underlining, so the finishing is invisible on the right side. Also those buttons are great.

20140215-200255.jpg

Running out of hem tape.

But look at the other side of the hem—d’oh! More swearing, echoing down the decades. Running out of that perfect colour of hem-tape just a few inches from the end! Obviously, she made do. One does.

20140215-200111.jpg

Happy. Grainy, but happy.

I love examining vintage construction (when I run across it, which admittedly isn’t often). There’s one more weird feature, that I didn’t get a good picture of—the inside of the front, under the yoke, has a big slash cut in it. At first I thought the lining had just given out from age, but the cut goes right through the lace, which is quite sturdy, and is very straight in the lace (more frayed in the lining). So maybe the yoke is a cover-up for some earlier mistake? Or maybe there was the option of an opening in the placket, and our seamstress decided against it mid-construction? (There’s a centre seam down the middle of the yoke that makes me think an opening option would be likely. Unless she really was just that short of fabric.) Or maybe it was cut into at some later date… the neatness with which she hand-finished all the other mods makes me surprised she didn’t at least overcast or otherwise neaten those raw edges.

I love these little mysteries. Problem solving, or design feature? We’ll never know…

26 Comments

Filed under Sewing

In Progress

20140207-221519.jpg

McCall’s 6800.

20140207-221537.jpg
But first, bias tape.

20140207-221550.jpg
Lots and lots of bias tape.

20140207-221608.jpg
Sandpaper for distressing seams before topstitching.

20140207-221628.jpg
Topstitching. Also lacing loops in back. Because everything is better with lacing.

20140207-221654.jpg
Bound seams.

20140207-221710.jpg
Sneaky pocket topstitching.

20140207-221741.jpg
It’s coming together! Also, full circle skirt. Also, I got 4 metres of that lace, and it’s all laid out there.

Tomorrow, I put in sleeves! And maybe buy more lace. And more fabric for bias tape. I’m going to run out.

29 Comments

Filed under Sewing

Pikachu: the Epic.

PIKACHU!

Tyo’s Pikachu onesie is finished.

So, this thing was a lot of work. Probably more than I was expecting. It was the face that put it over the top. And the zip-off feet. I don’t have a lot of spare brain-power these days, figuring those out (or, as the cae may be, not figuring them out) took a lot out of me.

It’s kinda hard to know where to start. Did it begin a week and a half before Christmas, when Tyo hit upon the idea of a Pikachu onesie for herself, and promptly found five eBay sites all ready to sell her one that she wouldn’t shut up about? Did it begin when someone gave her a yellow Pokemon stuffie for her third birthday?* Did it begin when she was a baby and I decided for a year or so that footie pyjamas were my favourite thing? (I had a couple different pairs, storebought, so apparently I wasn’t the only person who thought that in the early aughties. The problem turned out to be that the legs were always too short and so they tended to make my toes go numb. Poo.)

Anyway, let’s just say that it was an idea whose time had come. So I’ve basically heard nothing for the last three weeks but PIKACHUCHUCHU. I had to scrap my previous onesie plans (PANDA FABRIC!) and buy a whack of yellow fleece.

Fortunately (?), I had ordered Jalie 3244 in the nick of time. It arrived literally the day before Christmas Eve. GO JALIE, and hooray for in-Canada shipping! So the kids got boxes of fabric each and a wrapped pattern for the both of them. I know, not the best “Christmas sewing”, but what I could manage this time-starved year.

Excited child.

Now, the Jalie pattern is (I think) a good starting place. It has footed and foot-free options, and, of course, every size in the book. Plus different-coloured lines! Which makes the tracing just a little bit easier. 🙂 Although, there is some piecing to be done during the tracing. The front and back piece are actually the same piece, except for the top neckline portion that you have to trace on to each piece. This mean the front and back crotch-curves are identical, but I’m somehow thinking this is not a huge deal for a glorified sleep-sack.

I was rather bemused to realize that Tyo is officially a size R. That’s the size I use to make my jeans, people. Which makes sense considering she’s been stealing my jeans since last summer, but anyway.  (I should note I’m not really a size R, more S or even T** on the bottom half, but I like my jeans closer-fitting than Jalie 2908) Although, having put the onesie on her, I wish I’d gone a size up, and lengthened a bit. This is not a voluminous onesie. And Jalie patterns do not, as a rule, run large.

In any case, we traced off the pattern and got started. By which I mean, I traced off the pattern and Tyo bounced around excitedly, and then got bored and went off to facetime*** her friends.

And then things slowed right down.

Largely, it’s because it’s a project I needed to think about. While Jalie 3244 may be a great onesie pattern, it doesn’t have a hood, and a Pikachu onesie would hardly be Pikachu without a hood to put the face and ears on. I took some measurements and drafted a rough hood pattern. Jalie 3244 has feet, but not with a zip-off closure. So I had to think about (and procure zippers for) that.

The stripes and tail

The first (easiest?) problem I tackled were the stripes and the tail.

Stripes and tail

I was really at a loss about the tail—looking at a stuffie doesn’t give you much idea of size. How long should it be? How sharp and big should those zig-zags be? How far our should the brown base extend? In the end, I’m pretty happy with my first attempt, which is good, because I didn’t have enough extra fleece to do a bunch of test versions. Once we figured out where the tail should attach on her butt, (and I added some extra stitching and elastic to support the seam in that area) the next problem was the stripes. Tyo wanted the stripes to extend around onto her sides. This caused me to alter the construction order; I sewed the back pieces together and then the front pieces to each side, so I had one big onesie-piece to applique the stripes onto. There was just barely enough space to fit the two stripes between the tail and the bottom of the armscye.

The Hood

First, I drafted a hood. I started by carefully measuring the neckline of all the pattern pieces, and then measuring roughly how humongous Tyo wanted it to be in terms of height and depth. The resulting pattern piece looked pretty ridiculous, and was really long. So I wound up cutting about four inches off the bottom of it. Which totally messed up my careful neckline calculations, by the way. Fortunately, fleece is exceptionally forgiving.

Pikachu Face. And my other helper.

I spent quite some time looking at pictures of Pikachu’s tail and back-stripes, and even more time looking at pictures of the face. I’m not a Pokemon afficionado, so I needed to do some research to get the details right. Tyo assured me that the red cheeks on her stuffed Pikachu are actually far too small, so I should make them bigger; as it turns out, I made them the same size as the eyes. I discovered (very carefully!) that you can use steam-a-seam on fleece. Very carefully! I experimented with applique stitches and scoured my scraps for the right fabrics. I spent a LONG time laying out that face. And I made ears. Deciding how big to do the ears was nerve-wracking (Based on most of the online examples, mine are a bit big. I think they’re cute that way, though.) Laying out the face was worse; Pikachu has a very high bar of cute to attain, and I was terrified of falling short. I would not want to produce some lame, un-cute Pikachu knock-off. We aim for only the best knock-offs here at Tanit-Isis Sews. 😉

Completed hood.

Pikachu’s face, as it turns out, is a bit too big for the hood. Or something. It looks good from the front, but there wasn’t much space across the back to put the ears in. The result, I think, looks a bit microcephalic, but it will have to do.

Zip Feet

Zip-off feet. I went with black grippy-fabric for the bottom.

Tyo’s other request that took some thought was for zip-off feet. I was secretly hoping she would opt for the footless version, but really, is it a real onesie without feet? Or is it just a baggy jumpsuit? But she wanted to wear it to school, and out and about, so zip-off feet were a necessity.****

I looked at a pair of my husband’s pants, which zip off just below the knee, for inspiration, but there was still a bit of learning at the school of hard knocks, which is always my favourite kind:

1) Put the zippers in in the round. It’s tempting to try to do them in the flat, as that’s easier but it works much better for the final flap-over if they’re done in the round.

2) allow more overlap than you think you need. Fleece puffs up and doesn’t cover as much as you wish it would.

3)attach band (I added a band above the ankle-seam as part of the foot unit; in the Jalie pattern the foot unit stitches directly to the bottom of the leg-piece) to foot-piece AFTER sewing the zippers in. This would’ve made the Tragedy of the Backwards Foot much easier to prevent.

The Tragedy of the Backwards Foot

Wait, did I mention the backwards foot? Yes, despite all my attempts at spacial reasoning and careful paying of attention, when I went to zip the feet on, this is what happened. If you look up at the picture above, you’ll note that there is an extra seam between zipper and foot. Slash, reverse, re-stitch. Much better than trying to unpick fleece. We’ll call it a design feature. I really don’t have it in me to do a full tutorial on adding a zipper to pants (or footies, as the case may be), although Google seems to be well-supplied with them. Anyone reading have a tutorial they like

Pikachu

Closing thoughts

Did I mention this was a lot of work? More than I really thought it was going to be. I don’t think I was thinking about the face.

Back view

I’m glad the ears are big and the tail long.

Footies

It is very warm and cozy. Also slightly grubby because it took me a while to pin her down for pictures, and the onesie has been worn to school once and around the house more or less constantly. Tyo’s teacher thought the onesie was pretty cool, but then he has a Tardis onesie.

Pikachu is small, but fierce!

I do kinda wish the whole thing was baggier, but that would’ve taken even more fleece. I used up a whole three metres on this project as it is, just of the yellow fleece.

Sad face.

She does not like taking it off.

There are a lot more things I could say, about binding zippers and seams finishes and changing the pockets, but at this point, I think I just need to hit publish. This is already well into too-long-didn’t-read territory. And, I’m tired. I think I want to go make fleece socks.

*I actually have absolutely no recollection of how the Pikachu stuffy came into our lives. I certainly didn’t buy it, so it must’ve been a gift. Tyo never particularly played the card game, nor am I aware of her watching it on TV. (Is there a Pokemon TV show? I sorta assume there is but I’ve never seen it.) And yet, Pikachu.
**Post-Christmas
***My children don’t phone their friends. Like, ever. But they do facetime, Skype, and text. Constantly.
****to those bemoaning the sad state of the world, that kids are wearing giant baby clothes everywhere, I can only say, at least it’s a warm trend. As a Canadian, I’ll take those whenever I can get them.

28 Comments

Filed under Sewing