Sew All The Red Things

That way you don’t lose time changing thread.

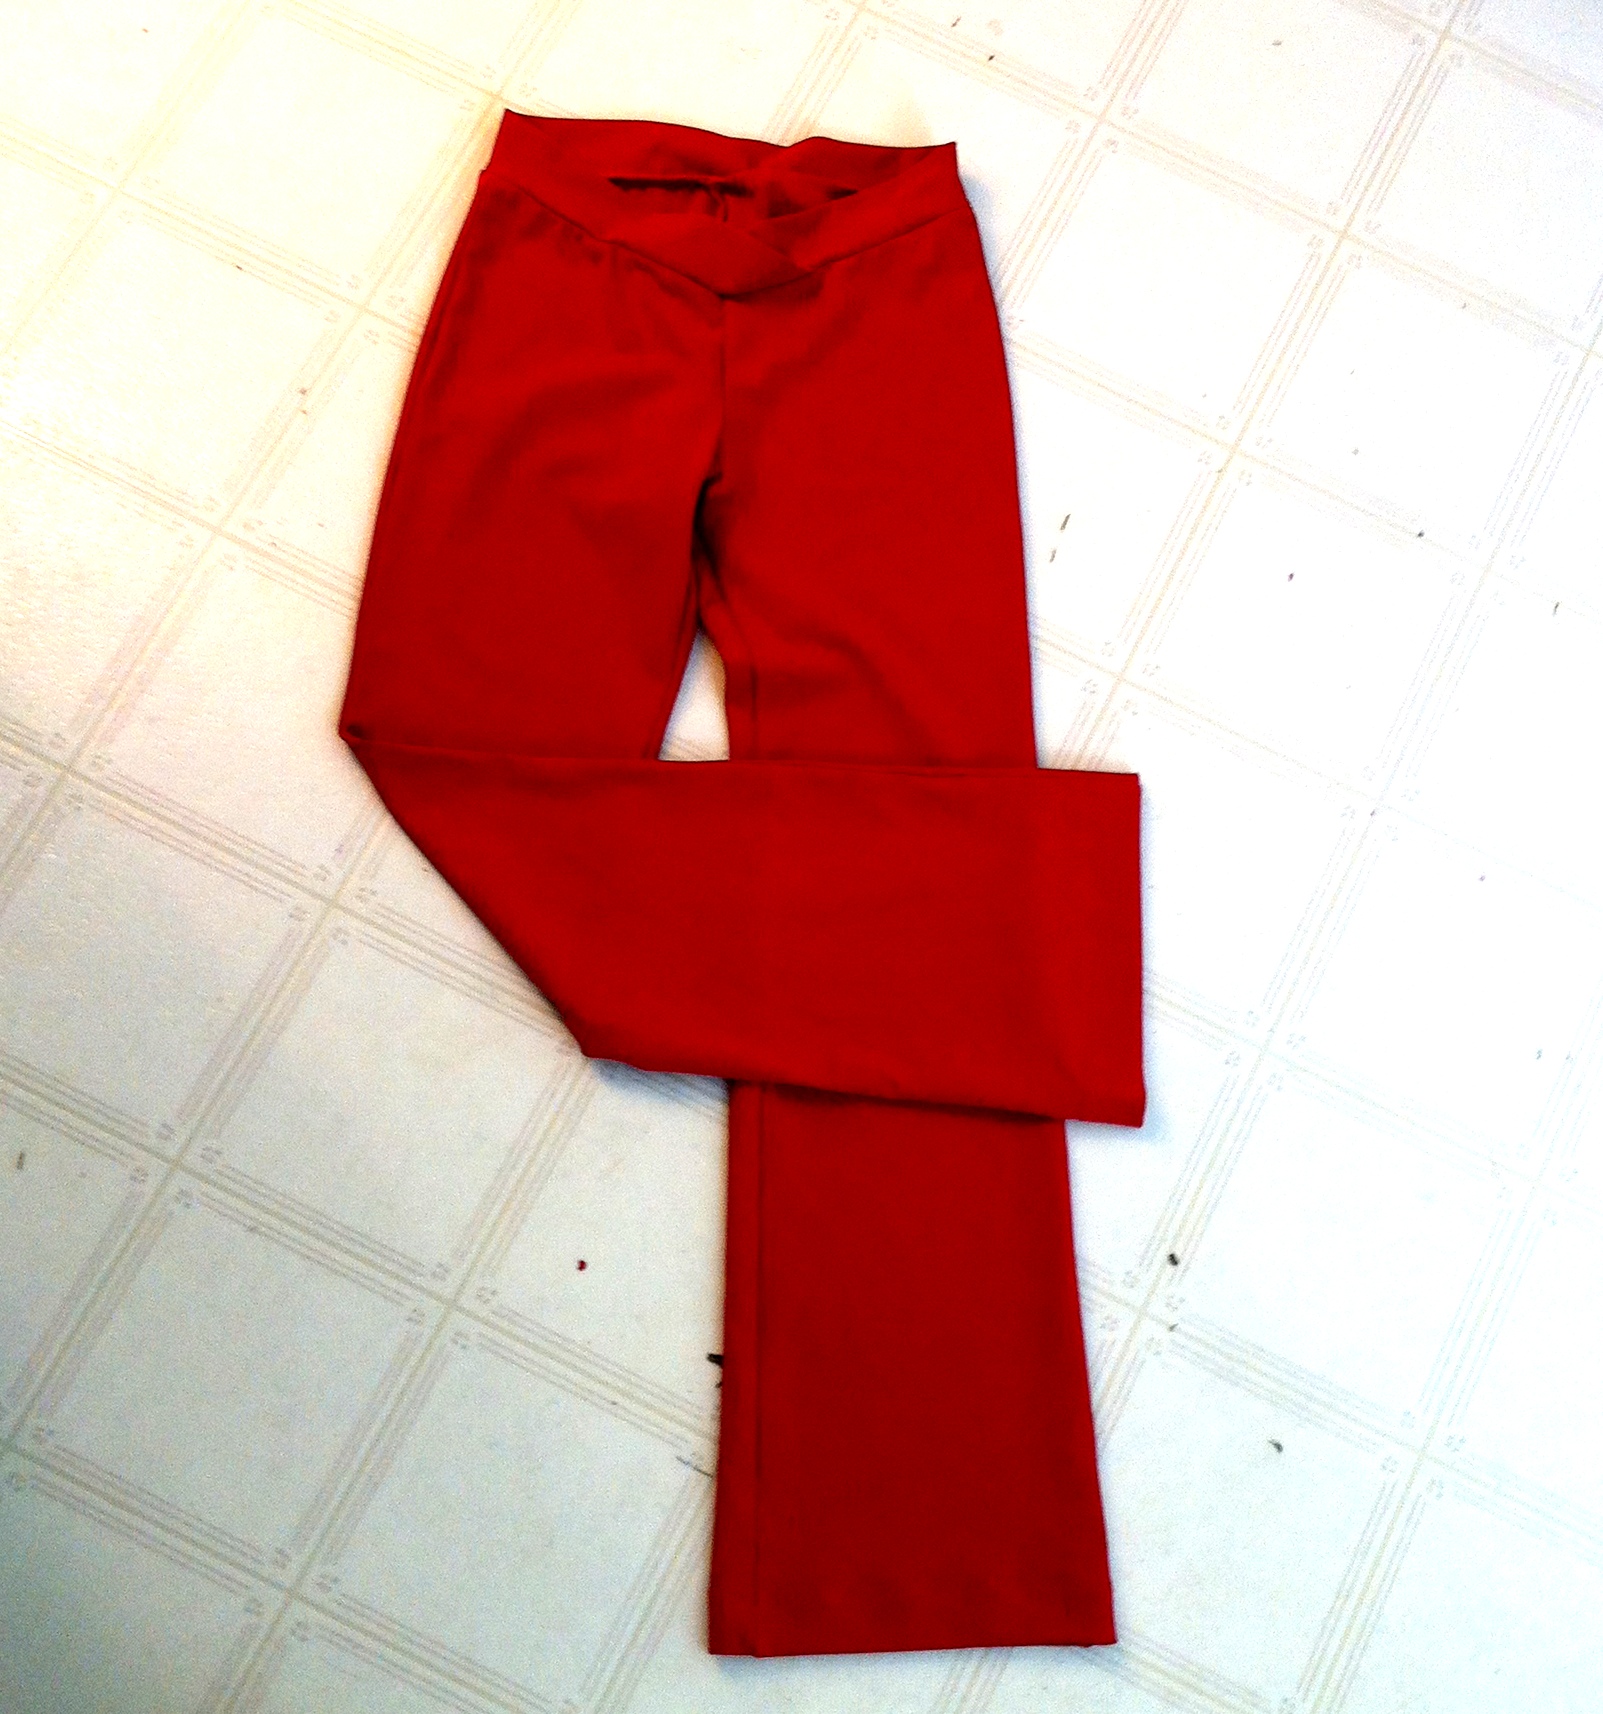
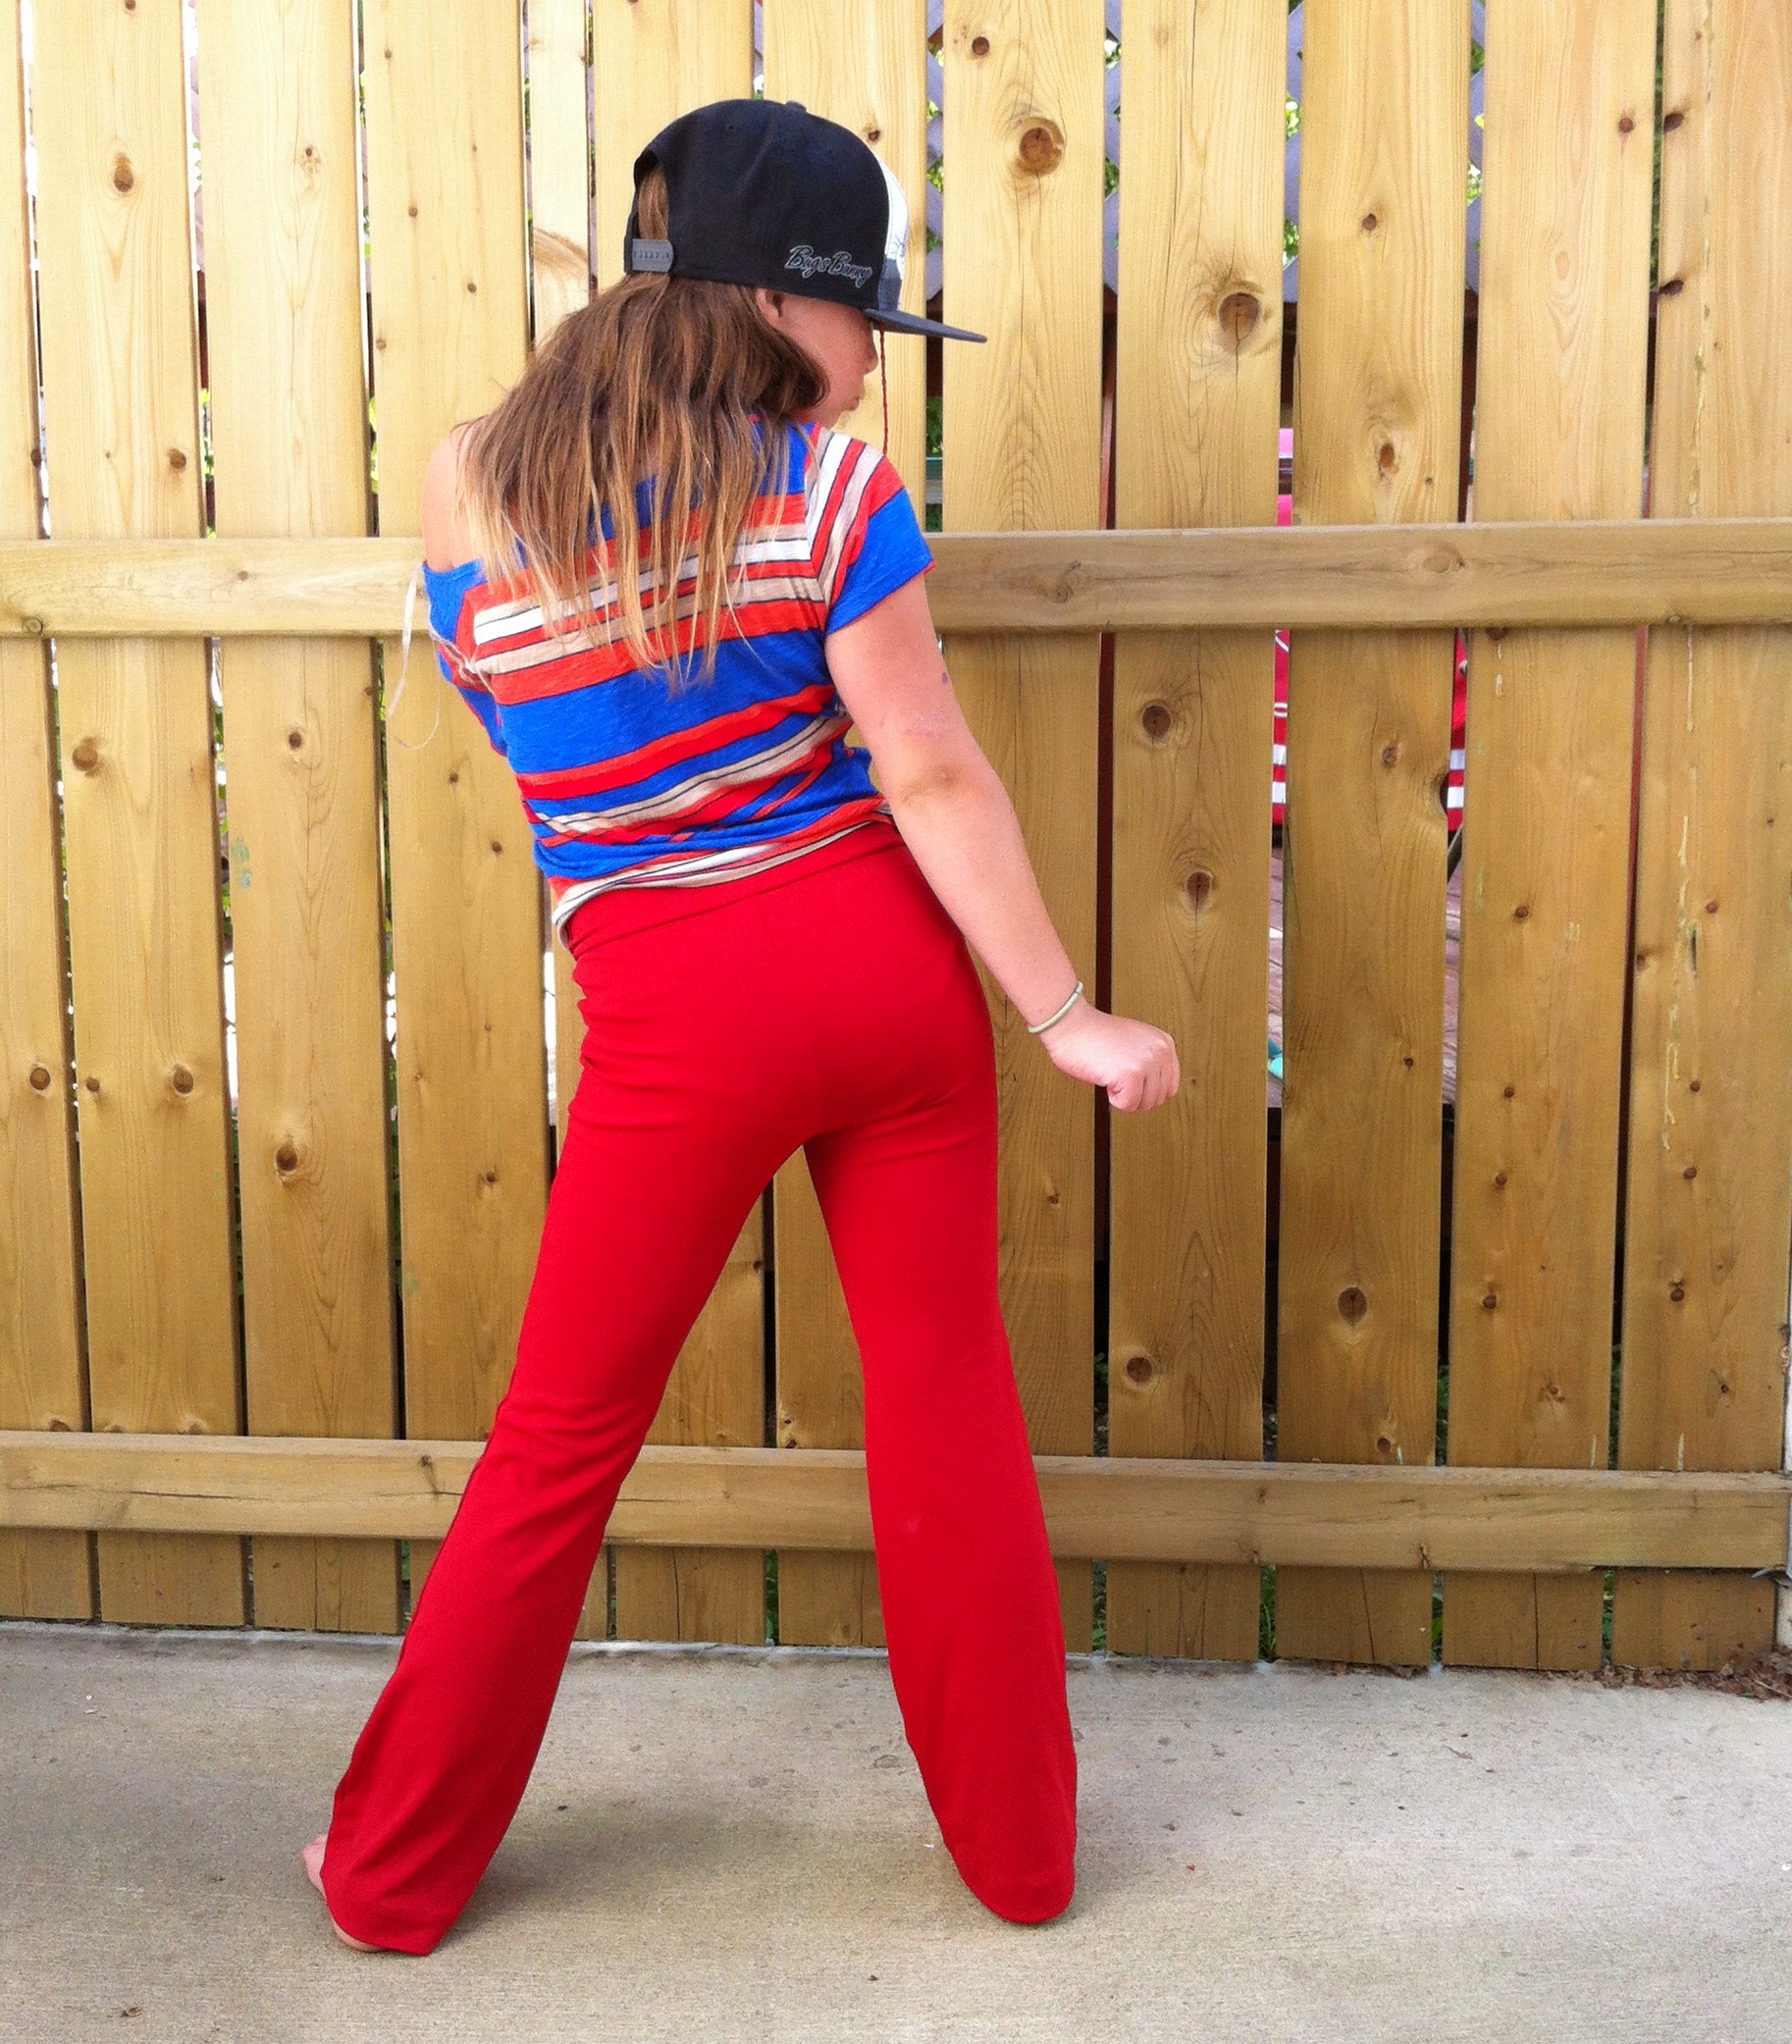
You may have noticed I’ve been making a lot of things in red. There’s at least one more in the works, too. It’s convenient, I guess.

Red.

Red.

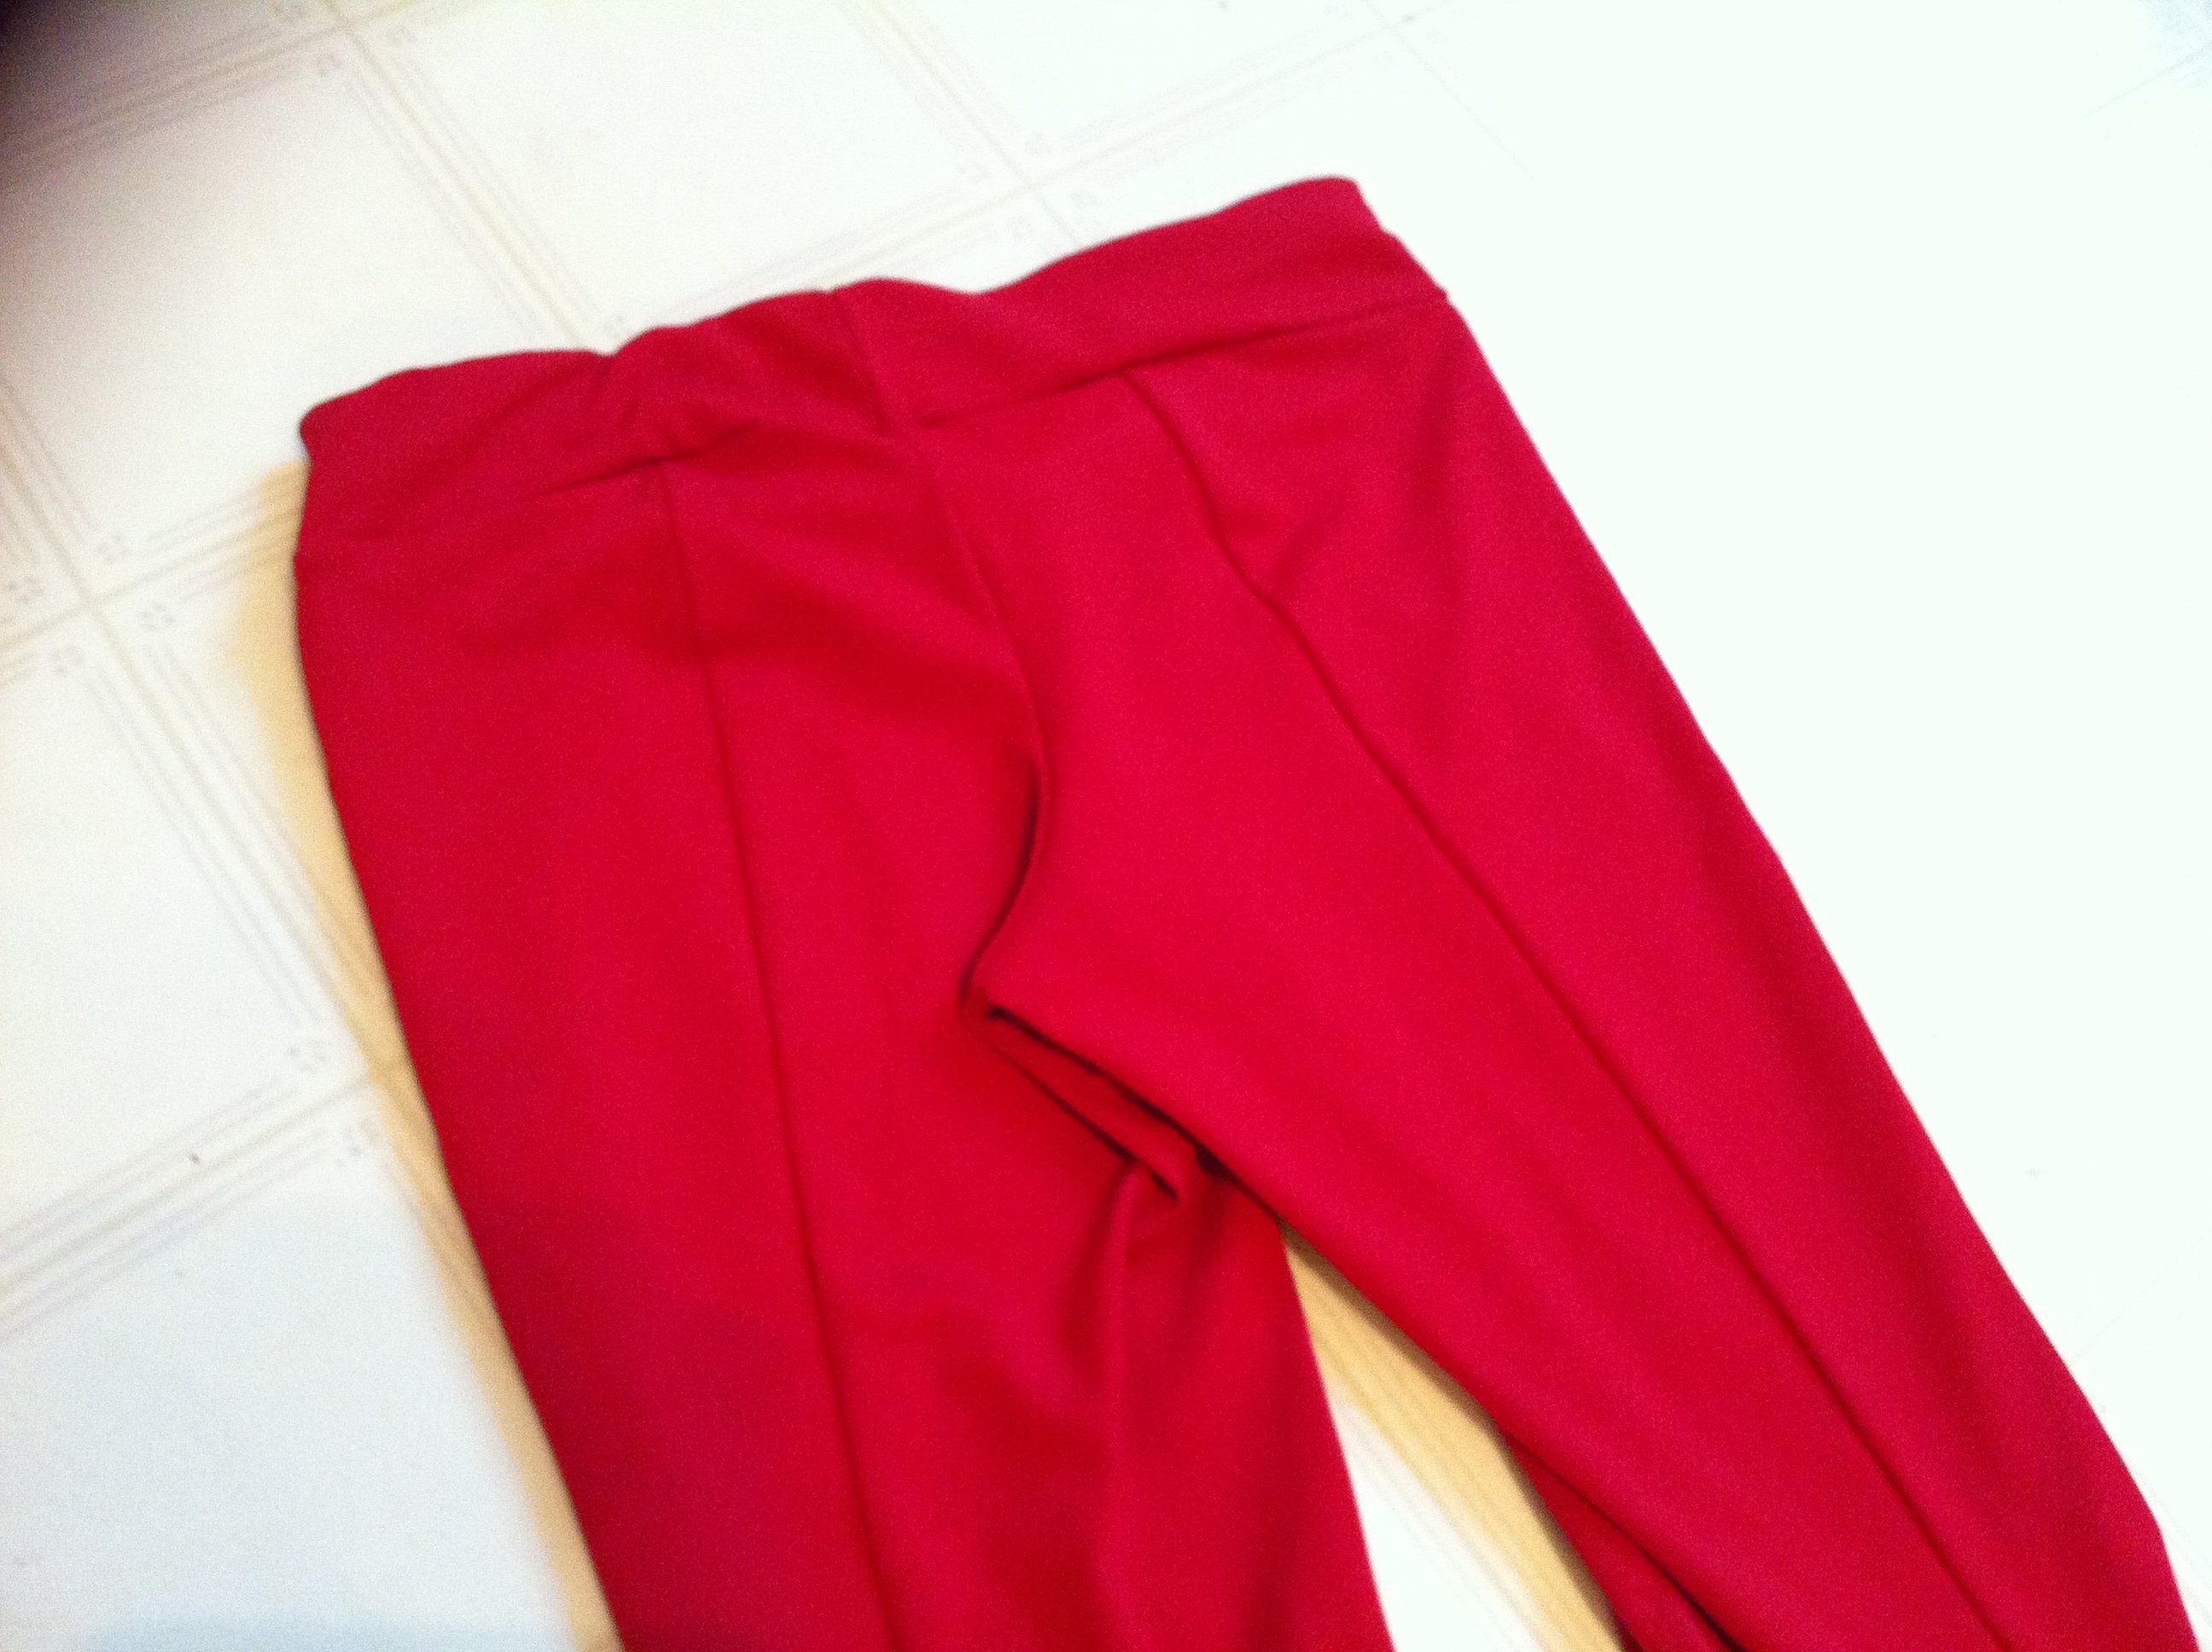
I’ve been petting this dense, glowing, glorious stretch velvet at my local Fabricland since, oh, last fall sometime. But even marked down to half price, it was still $11.00/m, which while not expensive, is still a little richer than my impulse-buy limit.

But then I saw another lady carrying it around the store, matching it up with drapery trims and talking curtains. There was plenty left on the bolt, but CURTAINS? That can eat a lot of fabric.

She put the bolt down and said she would come back later. I pounced, and made off with about three metres.

At least I had a project in mind already.
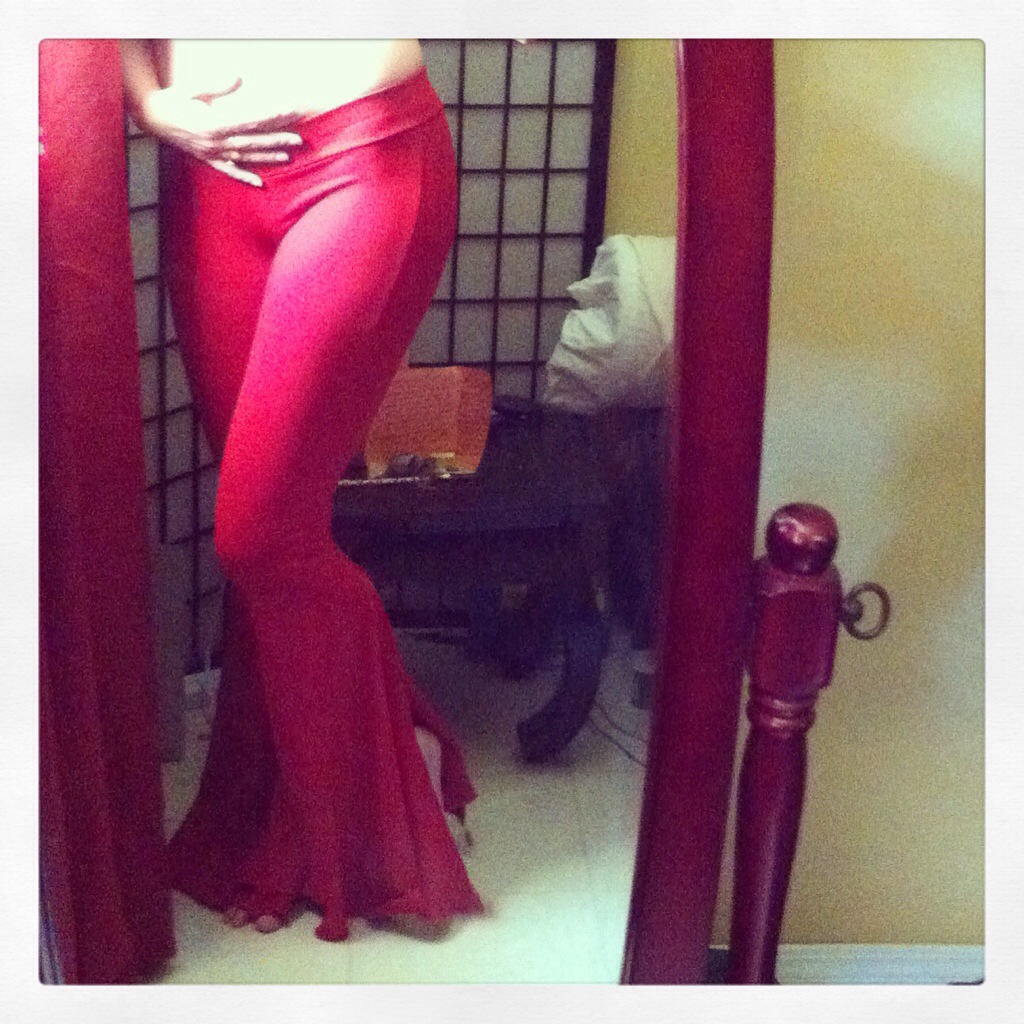
Pattern hack.

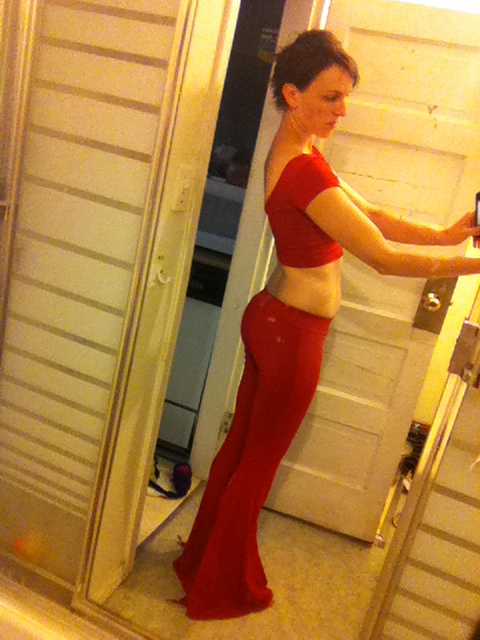
In regular life, I really don’t have any use for red stretch-velvet (especially in July), but one of my dance teachers had made a request that we attempt to acquire under-bust velvet dresses, for dance performances where tummy-cover is appropriate but you still want to wear a snazzy belly dance bedlah (highly decorated bra & belt) set. Most people are doing this via the thrift store and a bit of hacking, which is almost certainly cheaper, but, well, I was in love with this velvet already. And I like sewing more than I like altering.

I realized going through my pattern-stash this morning that I didn’t have a good, basic knit maxi-dress pattern of the kind that’s basically a tank-top extended into a skirt with a nice sweep. Lots of fancier ones, but not this basic style.  And I have about three other pieces in-stash, beyond this red velvet, that are begging to become maxi-dresses this summer. I promptly ordered Jalie 3246, because impulse, but that wasn’t going to help me this morning.

Bring on, once again, my long-suffering Nettie pattern. Please note (or maybe don’t) that I still haven’t actually made a bodysuit version of this pattern. >_< But it sure is useful as the basis for about a billion other things…

I basically traced off the top of my Nettie, measured the length I wanted the dress to go down from my shoulder, and guesstimated a width that looked good. For this particular dress, I wanted a fairly narrow skirt to the knees, with a bit of a mermaid-flare below that. Rocket science, this was not. I also pulled out my copy of Kwik Sew 1288, which has a super-cute cap-sleeved leotard pattern, and morphed the cap-sleeve on, because while I didn’t want full sleeves on this one, I wanted something to pull the Nettie shoulder-straps out, because the Nettie shoulders are WAY narrower than my shoulders (this is why there is that fold toward the armpit in these makes, by the way. It’s probably something I should actually alter for, but the miracle of spandex makes it not a huge deal.
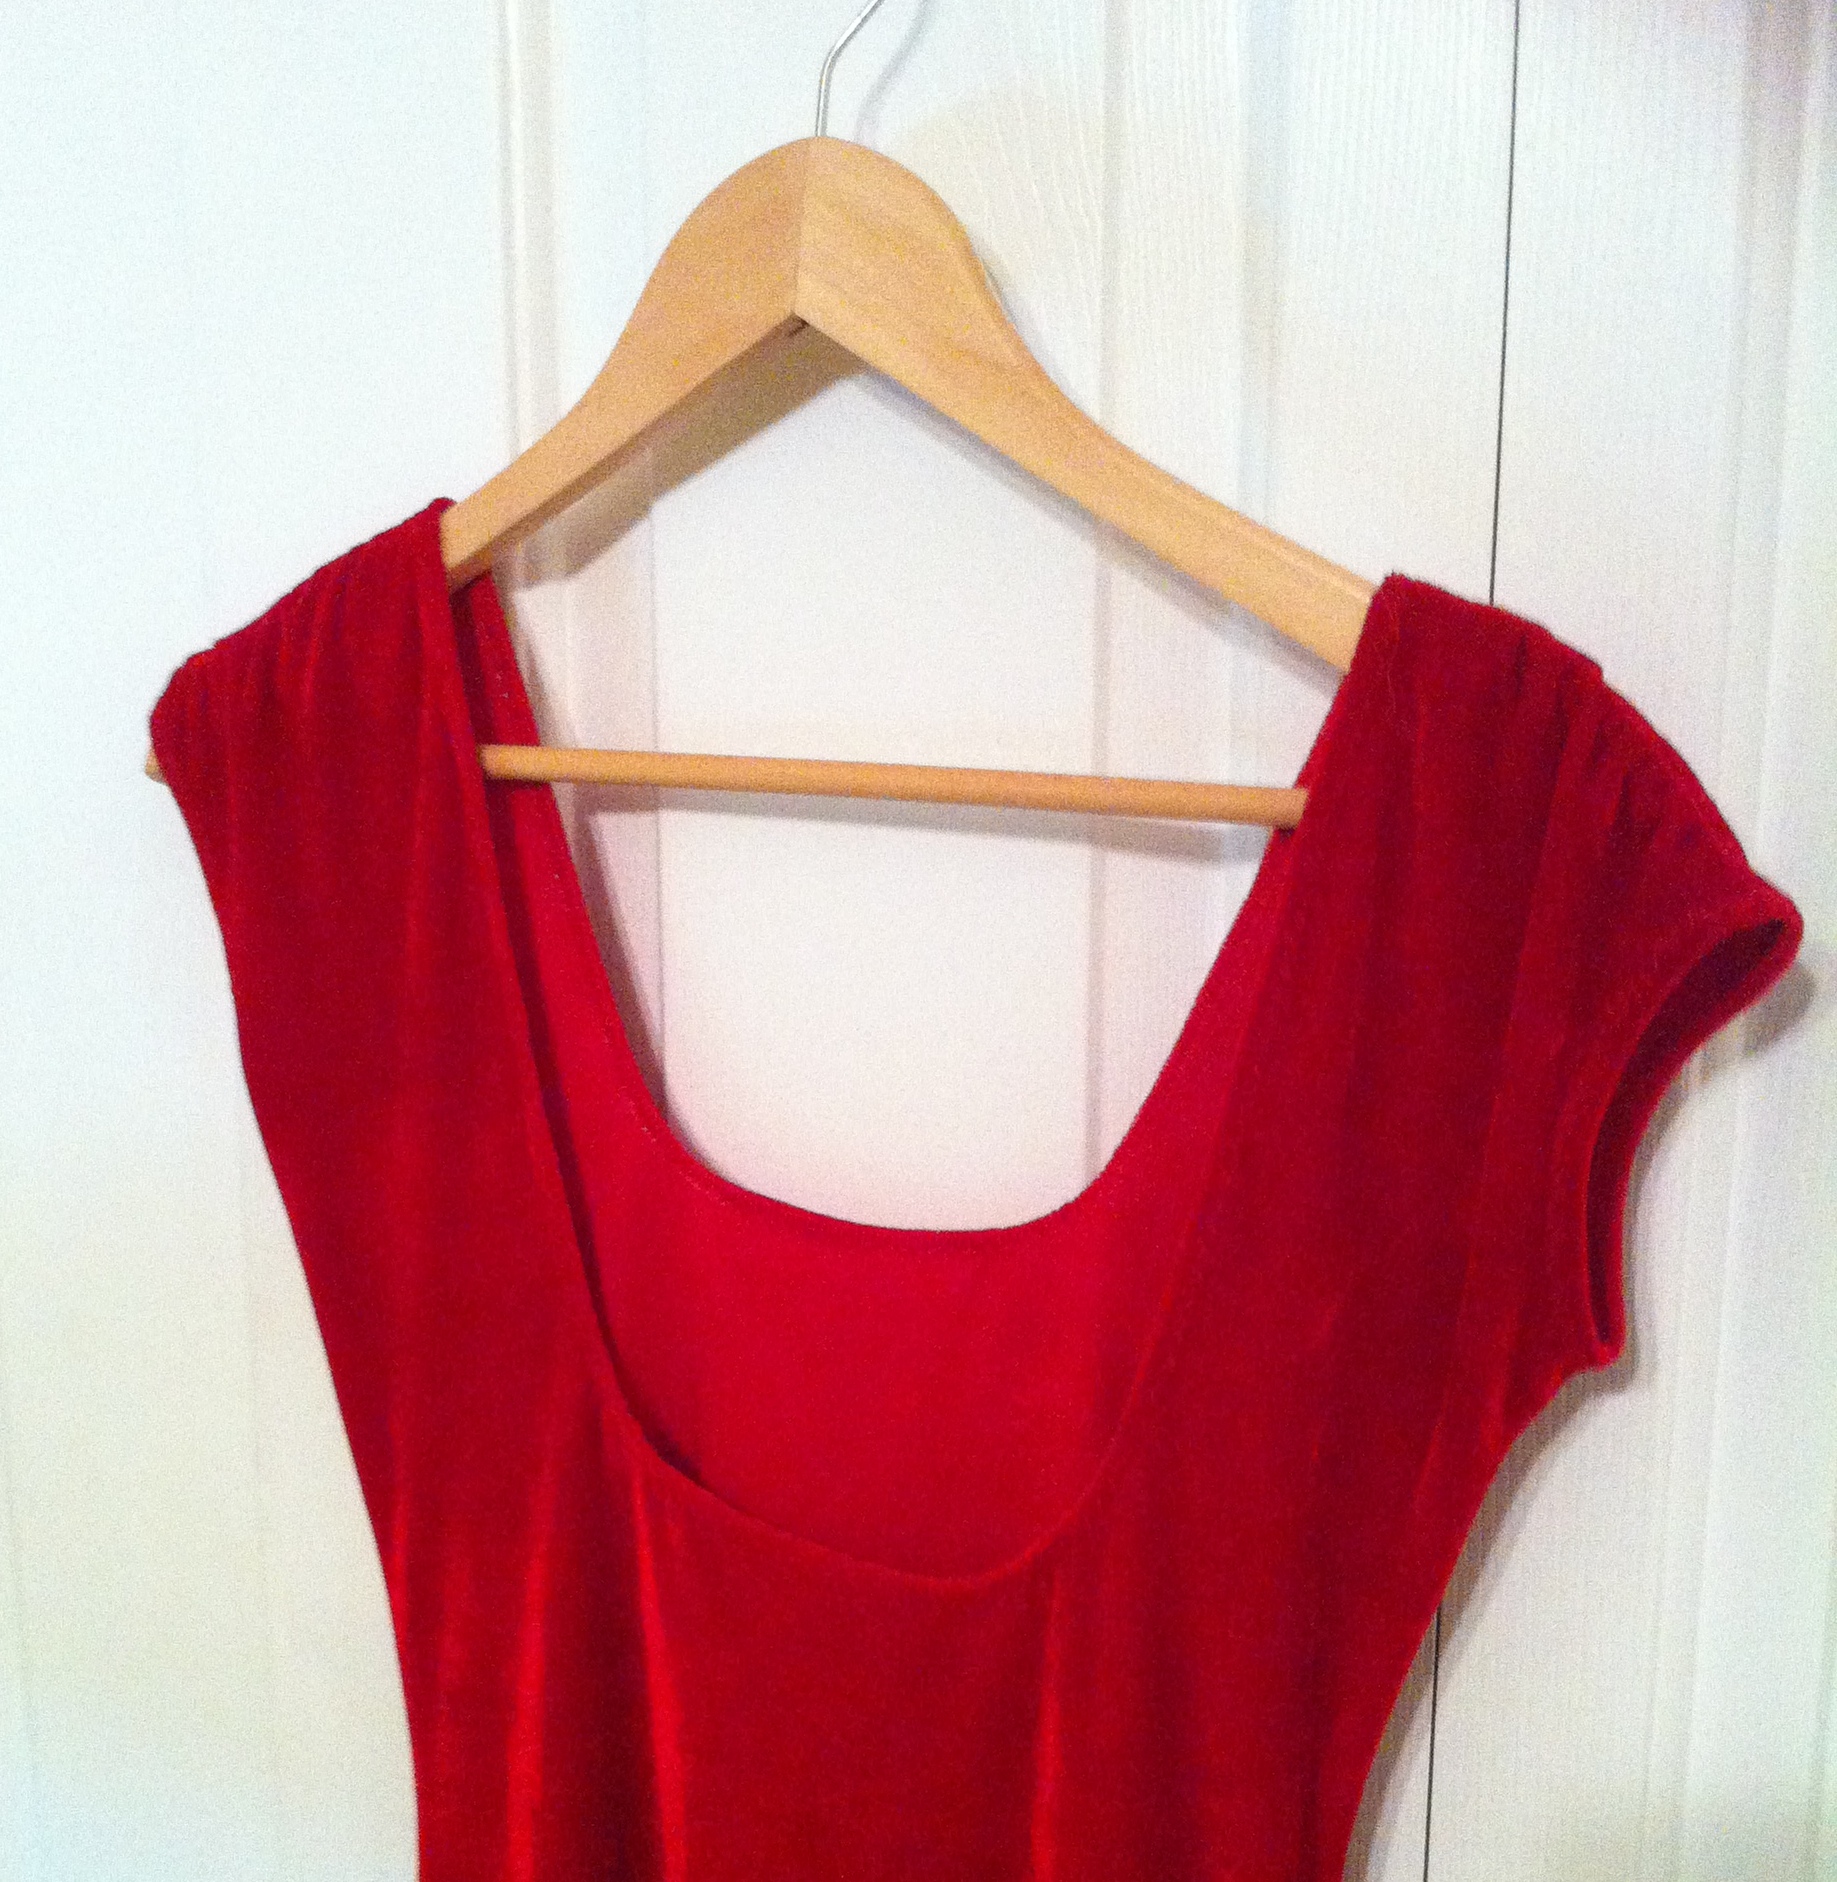
Over bust.

Over bust.

You may be thinking, now, that I had mentioned “underbust” dress before, and this dress is definitely over-bust. You would be right. I wanted to have a wee bit more versatility in the dress (because, y’know, there might be some possible universe where I would need a slinky red velvet dress for a non-dance-related purpose), so I traced front and back the exact same pattern (not that there is much difference between the upper body of the Nettie, front vs. back, except for the neckline); I made one side the standard Nettie scoop-neck, and lowered the mid-back-scoop-depth a further 4″ cm on the other side. (That is, 4 cm lower than the back in this version, but not as deep as the backless Nettie version.) So, if I want to wear the dress over (or under) a dance bra, I can wear the low scoop in the front, and if I want it for something a little more mundane, I can put the regular scoop in the front.

Closeup

Closeup

I’m quite happy with how the cap-sleeves turned out, really—it’s probably my favourite length.

Side view

Side view

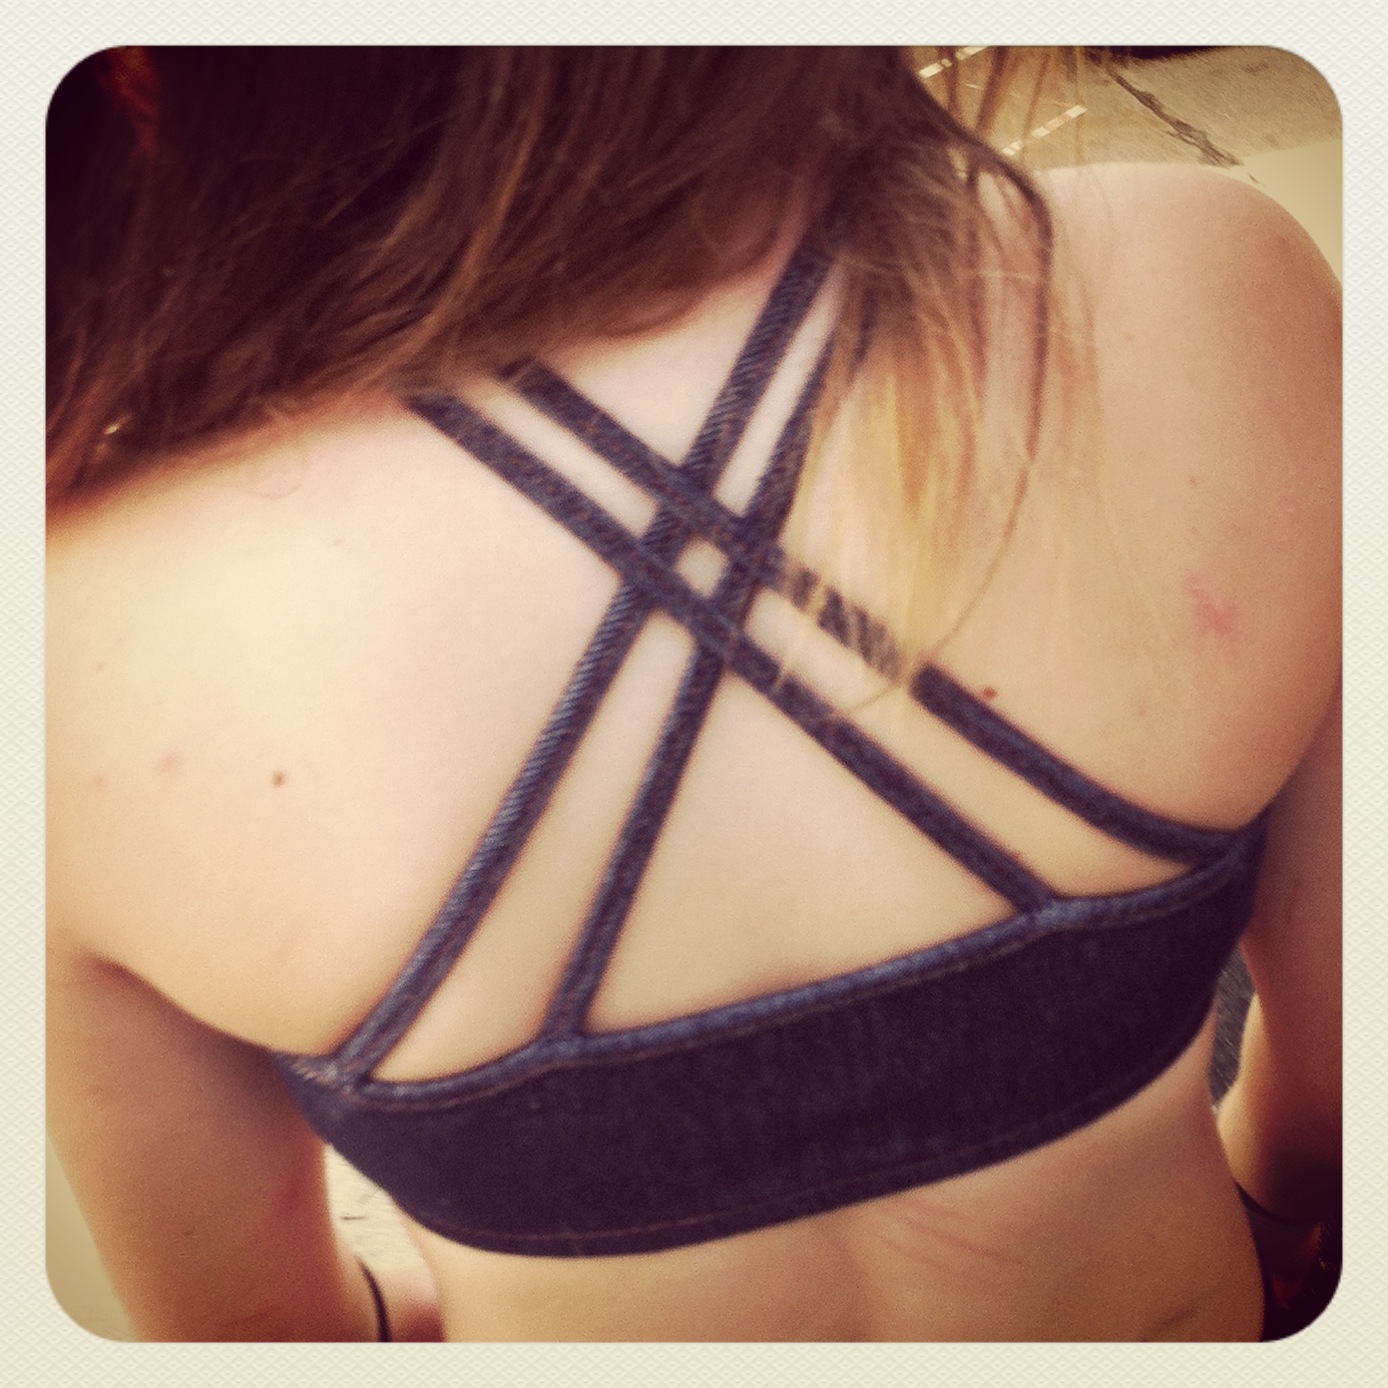
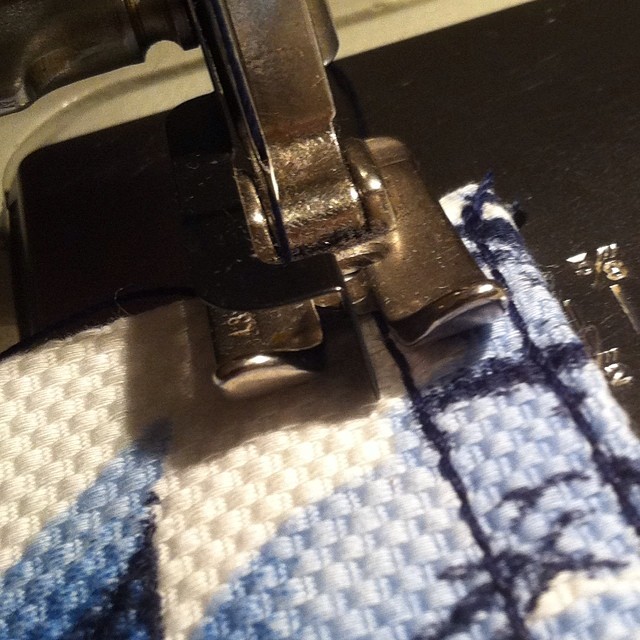
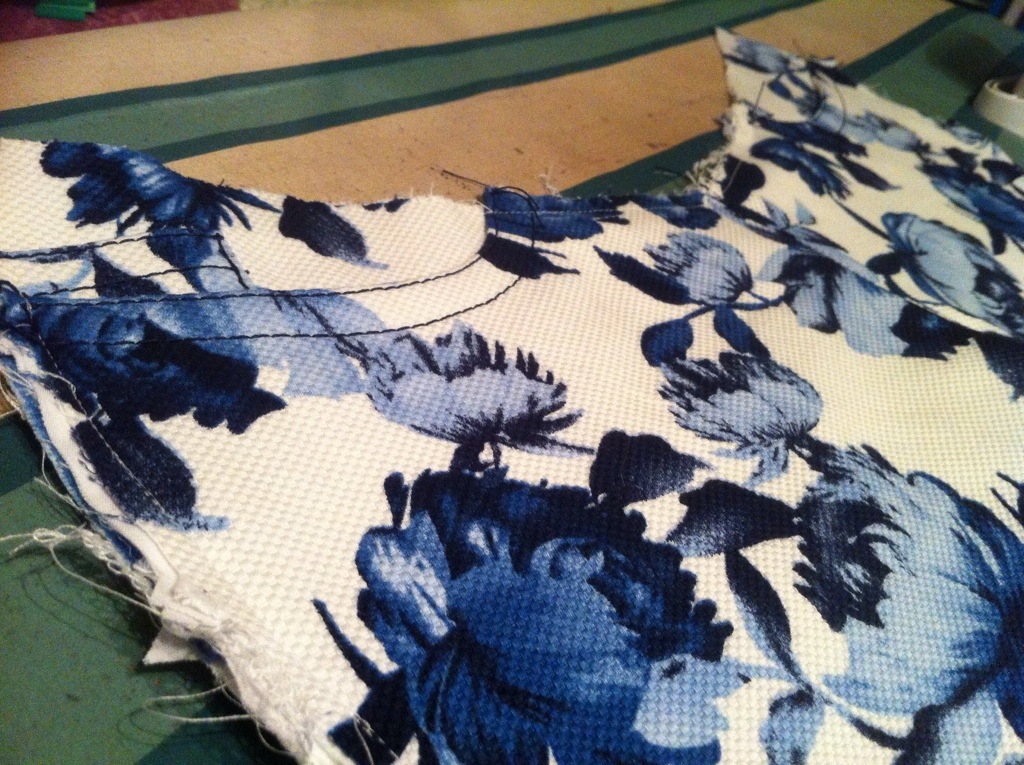
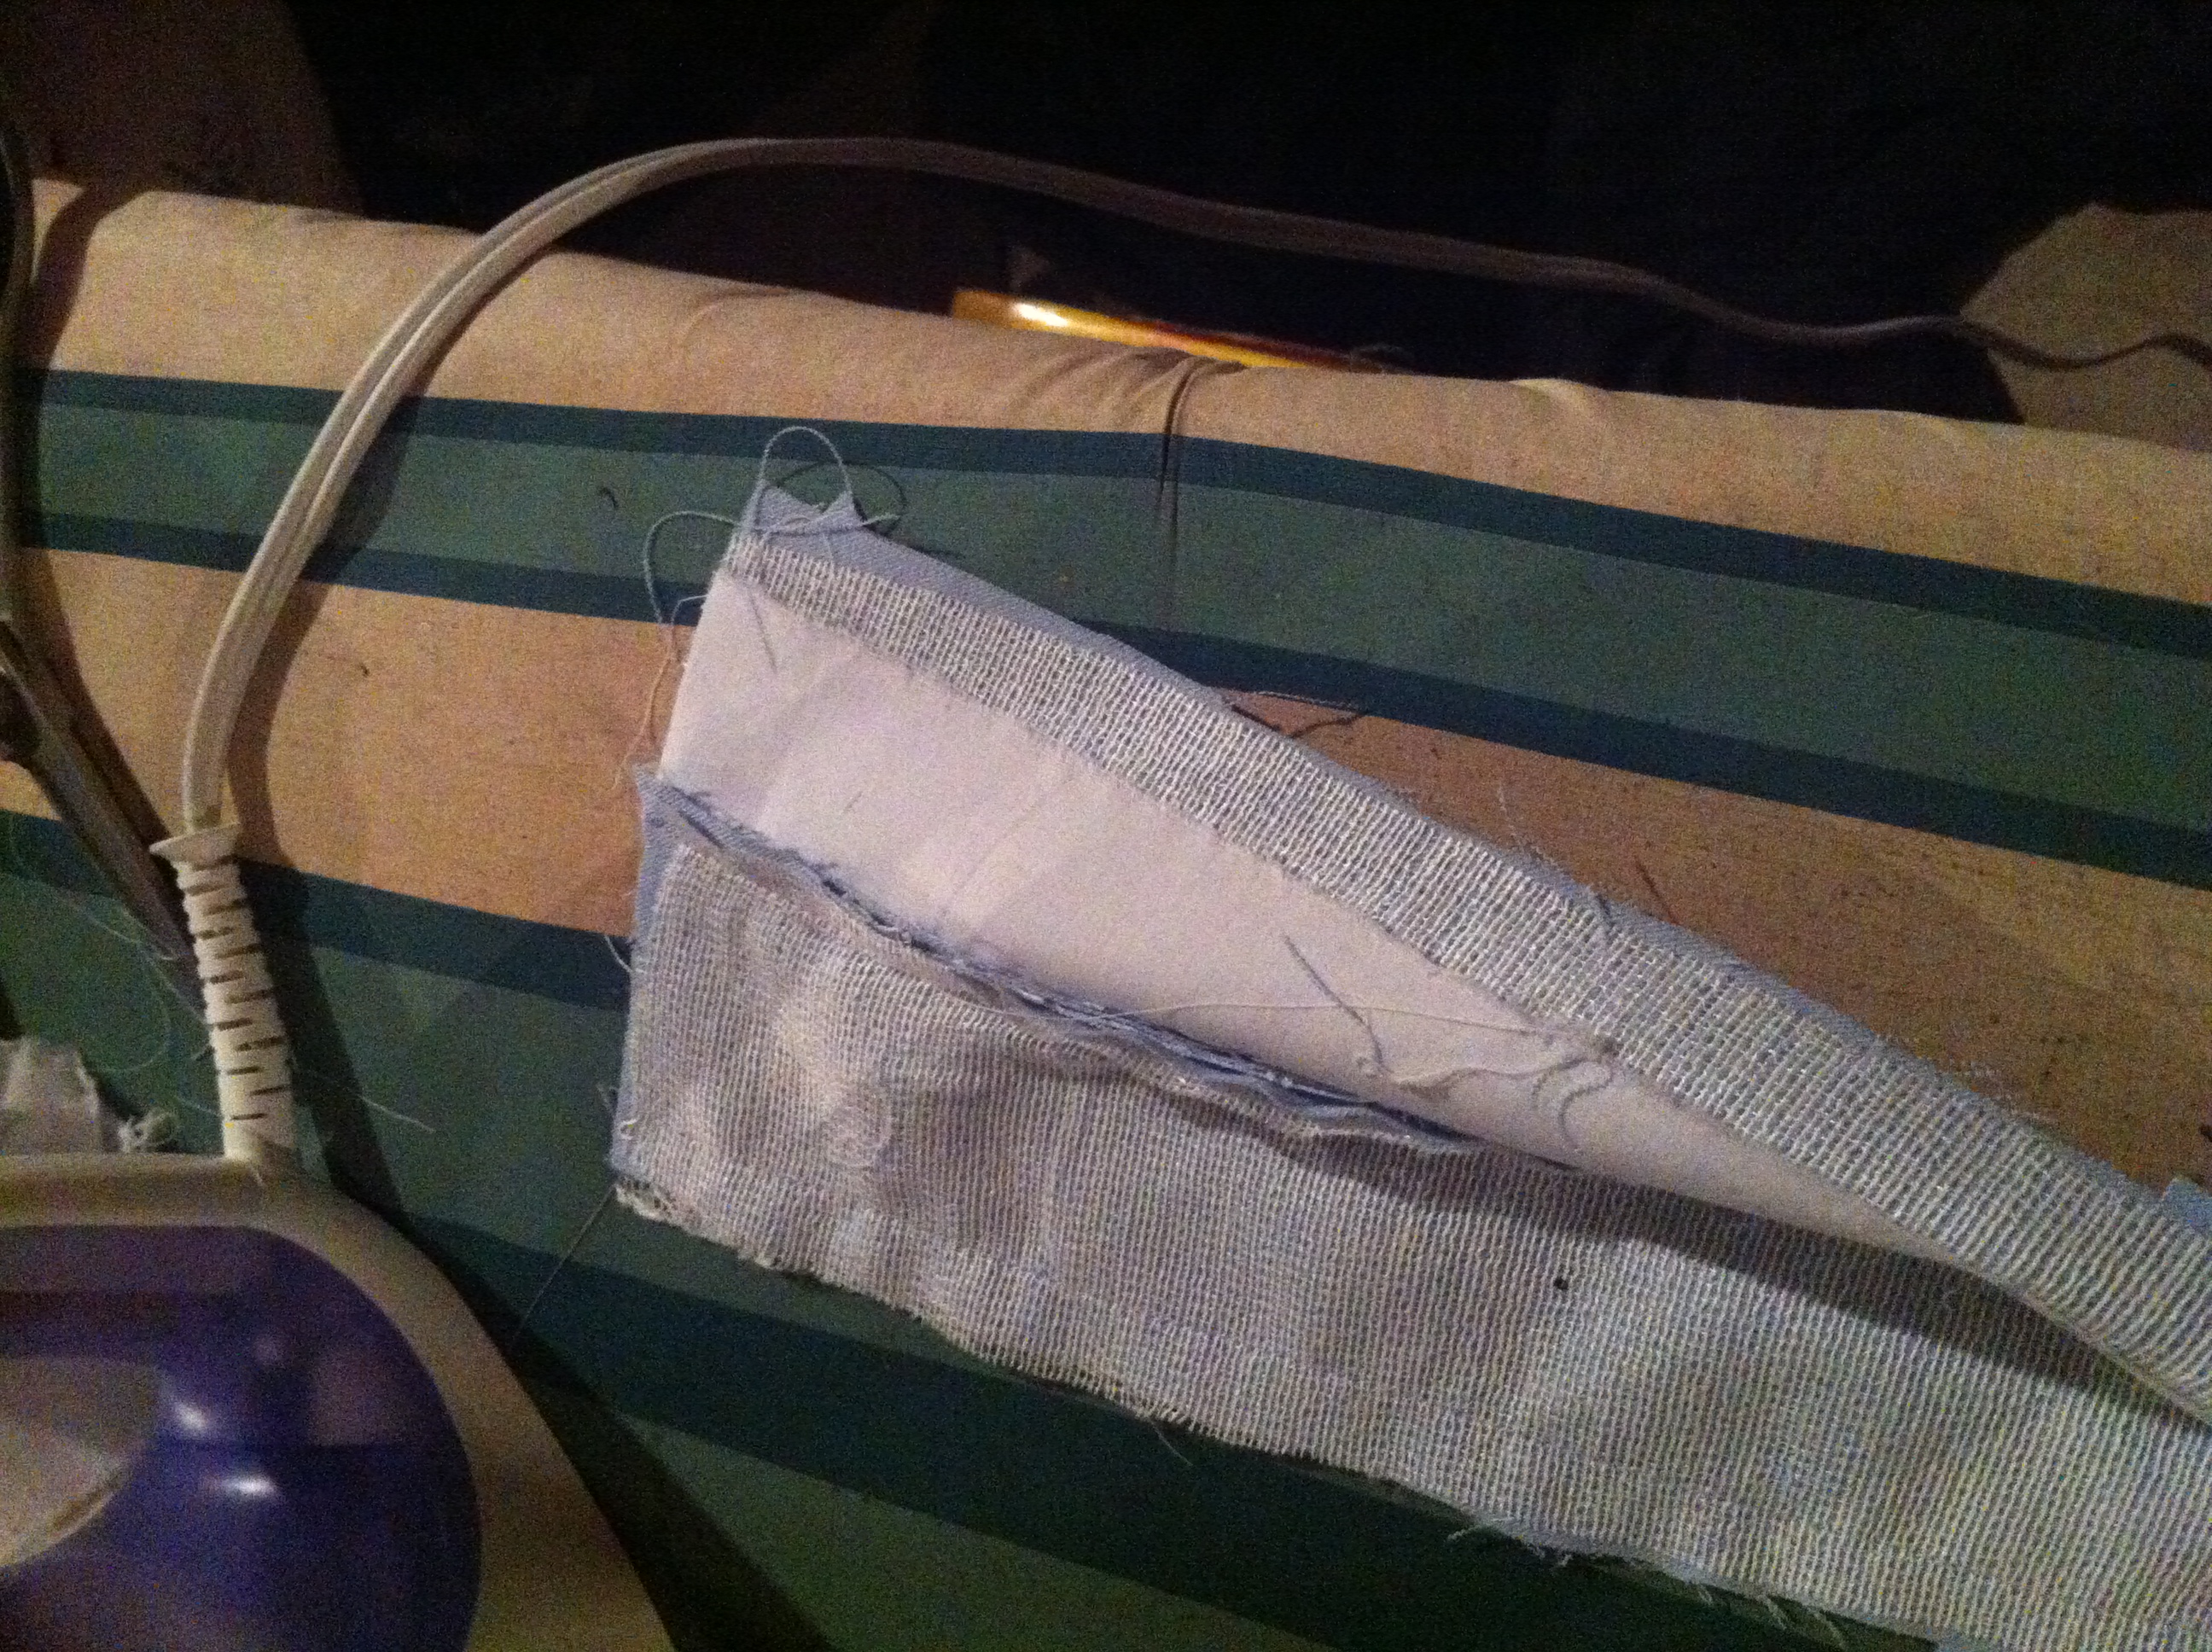
I have precious little to say about the construction of this dress, because there is precious little to actually construct. Two pattern pieces; not even bands for neckline or sleeves. I am a little in love with that differential feed thingy on my serger—a bit of twiddling the settings on some scraps and I went from having a bit of a wavy seam to one that was totally, perfectly, professionally smooth. WIN! Why can’t regular machines have that?
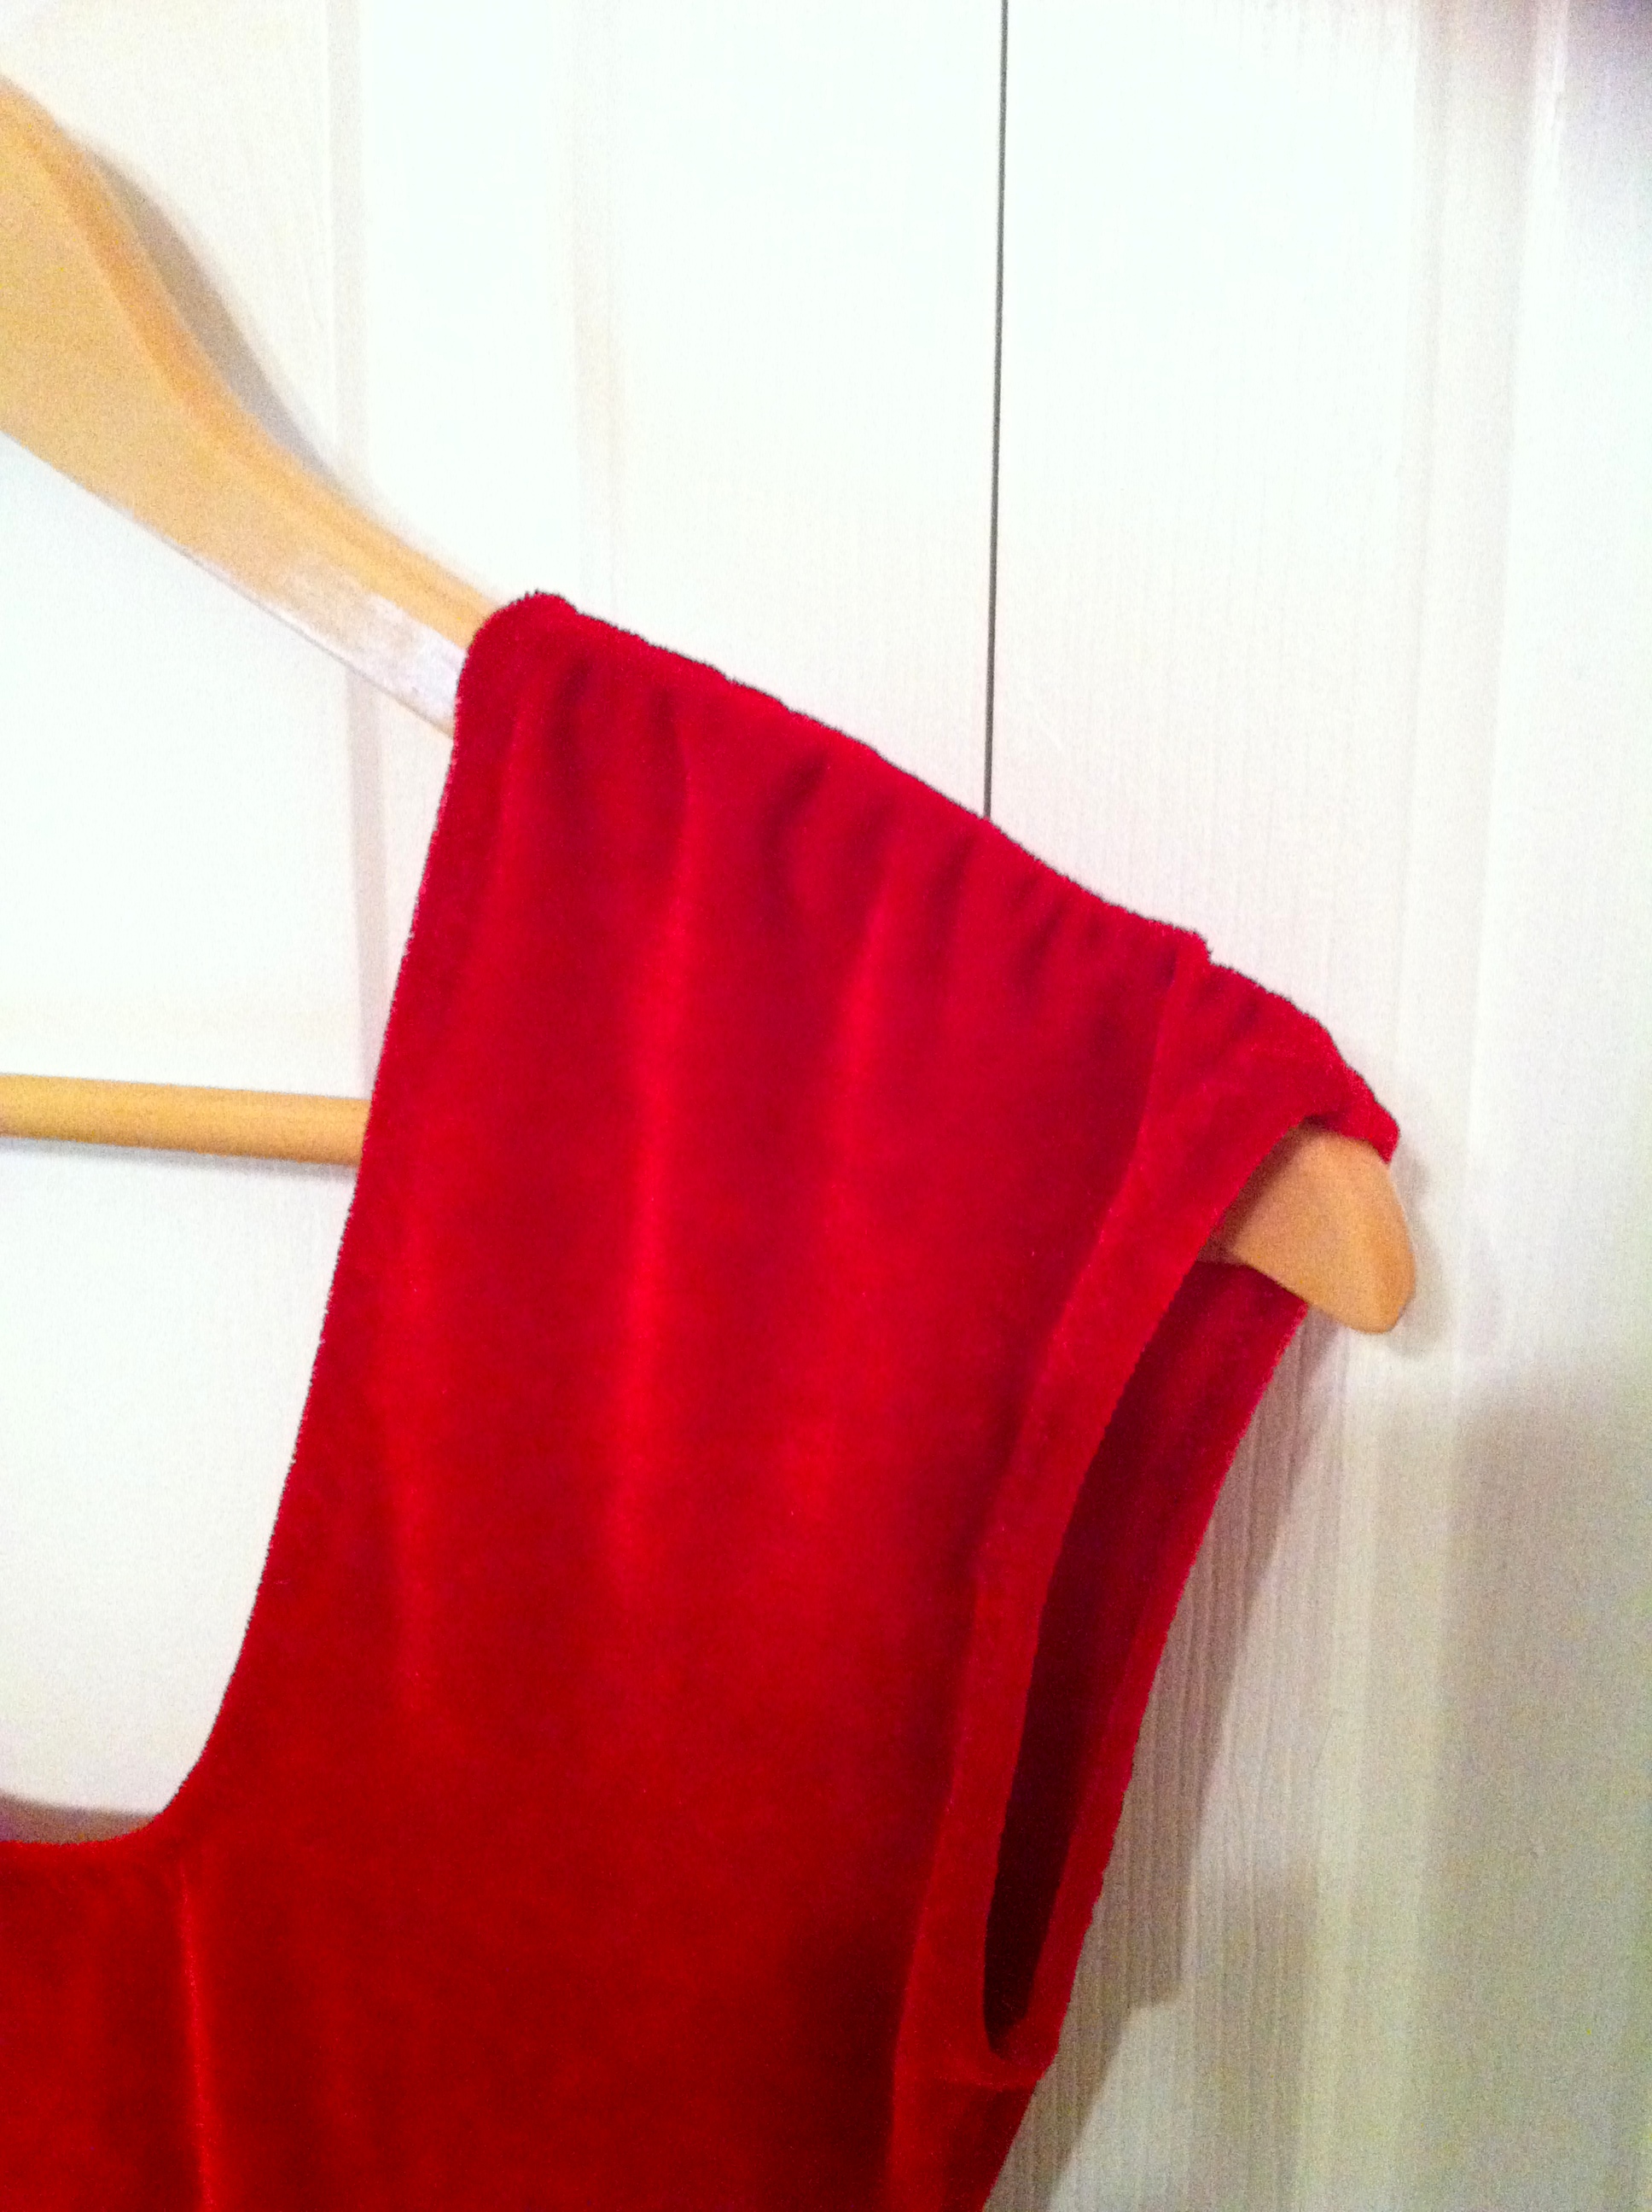
Shoulder

Shoulder

I used clear elastic to stabilize the shoulder seams; however, I put a wee bit too much tension on it so there’s a bit of a gathered effect. I kinda liked it, though, so I wasn’t going to be bothered to pick out serging plus elastic. (Also, my camera hates red, these were the best closeup shots I could manage. Terrible. Not that there’s much to see. For the neckline finish I serged clear elastic onto the edge (carefully using less tension this time—with the feed dogs set, no added tension was needed), then folded it under and topstitched with a triple zig-zag on my regular machine. For the armhole, I did the same thing except without the clear elastic, as I didn’t think I’d need the added stability.

Back view

Back view 

For dance purposes I wanted it slim through the hips, but for a real dress more ease around the derriere would definitely be a bonus, so I’ll be tweaking that for the next version.

Hmm

Hmm

I am also pleasantly surprised that the length turned out more-or-less bang on. I haven’t hemmed the bottom yet—torn between trying a rolled hem and just leaving it.

Most practical make of the season? Probably not. But it was fun, and fudging up the pattern took more time than the actual sewing did. And now I have the pattern I can use for some more, mmm, every-day versions.


17 Comments

Filed under Sewing

Dancy-pants Jr.

Kwik Sew 3498

Kwik Sew 3498

Syo also wants Fauxlodias. For whatever reason, I didn’t want to make her some just like mine, from Jalie 3022, so I looked around and eventually went out and bought (!) Kwik Sew 3498. Because, apparently there is a pattern-style out there that I don’t already own.

Kwik Sew 3498

Kwik Sew 3498

Not being as trusting of Kwik Sew patterns as Jalie (I just haven’t made quite as many, and some people report them being oversized, although the pattern reviews for this pattern were reassuring on that front), I wanted to make a trial version before I went all crazy ruffly. So I used up much of the last of my supplex making a plain-Jane version. Syo isn’t thrilled about this, but she will survive—although whether this pair ever gets worn again remains up in the air. Personally, I think they’re a great style, the sort of thing you can wear to dance practice or around the house or even to school without looking out of place, but I’m over thirty so my opinion doesn’t count. 😉

Attitude

She is not as in love with them as I am.

I made the size L (10), which is a smidgeon larger than Syo’s hip measurement. After measuring her inseam, I added 3 cm to the length, which I have to say was not an alteration I ever expected to make for a child who was never over the 5th percentile for height. Having compared the pattern with the Jalie 3247 shorts I made Syo for her birthday, I thought the rise in the KS pattern was a bit high (actually, I thought that just looking at the envelope models—it’s sitting in a good spot on them but it looks like they have pulled the crotch down to somewhere it wouldn’t normally sit). I removed 1.5 cm from the front, and took a wedge out from nothing at the CB seam to 1.5 cm at the side-seam (the exact opposite of what I usually do to Jalie patterns, by the way. 😉 ) They are still plenty high enough.

Pose

Pose

The length is ample but not really excessive—for dance pants I don’t regret adding it (although it occurs to me that I will probably have to shave it off in the flare version since that will probably have rolled hems), and it gives her a bit of room to grow. Assuming she ever voluntarily wears these. But if she doesn’t, I can still hope that Fyon will. Or the Waif. The great part about having a string of girls in the family.

Waistband

Waistband

The coolest feature of these pants (aside from the “basic stretch pants with side-seam” that I was looking for), is the V-option front waistband. I made it up exactly as directed. I’m not sure if that little dip-down is me or the pattern or just a natural feature of this kind of finish when it’s slack; it’s much less evident when she’s wearing them, which you can kinda-sorta-see if you scroll down to the last picture in this post. I added (or tried to add) clear elastic into the seam where the band attaches, to give a bit more stay-up-oomph to the pants. This worked OK where I didn’t slice half the elastic off with the overlocker. There is apparently an elastic-applicator foot for my new serger. I want.

Back View

Back View

There is plenty of length, but they don’t drag on the ground (and that’s in bare feet.)

Hemz

Hemz

The pattern calls for one-inch hems, which I gave a try at. I hate hemming knits—none of my machines are particularly good at it. This is the triple-zig-zag stitch on the White, and at the presser-foot-pressure-setting (say that ten times fast, I dare you.) that doesn’t produce ripples, it also barely feeds the fabric through, so it’s really hard to keep the stitch-length even. However, they’re not overly visible so I’ll call it a win, for me if not for home-sewing-is-as-good-as-storebought. While I’m fantasizing, someday I will have a coverstitch machine. Someday.

Side view

Side view

There is plenty of coverage for her round derriere. Although Syo has my broad shoulders, she also appears to be getting at least a modified version of the Gigi butt.

Numba 1

Numba 1

She is very disappointed that this version didn’t have a knee-high slit. Also I was making her pose in full-length pants (wicking material or no) on a hot day right before going to her friends’ house for a sleepover. So maybe she’ll feel more enthusiastic about these later. Maybe?

Hey, a mom can hope. I guess at worst, I could cut them off into short shorts. She wears the snot out of those.

12 Comments

Filed under Sewing

Faux-lodias

Melo-Phoenix, batik

Melo-Phoenix, batik

Have you heard of Melodia Designs? No? Where HAVE you been? She only makes some the best dance/yoga activewear on the internet, duh. In particular, she pioneered (revolutionized?) the tribal bellydance wardrobe with her richly flared, side-slit dance pants, which in certain circles are the standard for awesome, high-quality dancewear, for practice or performance.

Icarus Melo-Phoenix Dance Pants

Icarus Melo-Phoenix Dance Pants

I have a single pair, a style which arose from a collaboration between Melodia Designs and Phoenix Rising (an equally cool dance/yoga/activewear line), Icarus-patterned Melo-Phoenixes. DIVINE. Here’s the current lineup, although it looks like Icarus is still available in their standard yoga-pants style. This pair of pants is probably one of my most-prized (and most expensive) possessions. And they are very well-made, with the kinds of materials and workmanship (hello, coverstitch) I can’t nearly match at home. If this kind of gear suits your lifestyle or tickles your fancy, I totally recommend it. In fact, looking at the websites just now I’m feeling all twitchy and consumeristic in a way that I rarely get over cut & sewn fabric these days.

I only have one problem—I don’t fall really well within the size vs. length ranges of these pants. For my Melos, I had to size up to a medium to get a 32″ inseam, which is tolerable but doesn’t give the kind of floor-swooshing grace that really knocks ones’ metaphorical socks off (since really, this kind of pants look ridiculous with socks.) And, while not loose, they’re not as form-hugging as they might be.

And, well, why would I buy when I can make?

Enter Jalie 3022. I was probably thinking of this pattern hack as soon as I saw the fun back-seam that makes this otherwise basic yoga-pants pattern unique—don’t ask me why it took three or more years to actually get around to it.


Melodia vs. Fauxlodia

Melodia vs. Fauxlodia

I traced my flare off the side of my originals (I don’t have time to reinvent the wheel, or the flare, in this case. Yes, I do feel a little guilty about that.), and super-imposed it on the rear seam of my Jalie 3022 pattern. The best part was that, since the flare is a bit short for my legs, it sits lower on my really-long pattern, so the flare starts below the knee, not above, a sleek look I really like (although there’s less skirt-like movement this way than with pants that flared from above the knee.)


Jalie 3022, with back-seam

Jalie 3022, with back-seam

My fabric of choice here is red supplex, a wicking fabric that Fabricland used to carry, long and long ago. I found a single languishing bolt at my local store, and managed to follow it along through the mark-downs until it was finally at a price I could afford, and nabbed the last three metres. These took about two and a half, which tells you everything you need to know about how much fabric those flares eat up. Nom nom nom.

Flares from the back seam

Flares from the back seam

I did all the construction on my spanky new serger, and finished the back slits and the bottoms with a rolled hem, with my differential feed cranked up to lend a bit of a lettuce-y effect; the stretchy, dense fabric doesn’t ruffle overly well, but I think it gives a bit of a hint. The only topstitching I did on this pair was on the inseam, where I used a triple zig-zag, for added strength. I will probably need to reinforce the seam at the top of the slit, too.

Nettie crop-top to go with

Nettie crop-top to go with

And, of course, what to go with my cute and fun pants, but another Nettie crop top. I haven’t managed to make a fully-fledged bodysuit yet (partly because it’s summer now and not really body-suit weather, so I haven’t felt terribly inclined to try), but I am loving the crop tops for dance practice.

The outfit

The outfit

I confess, I am all squeally over how they look—better than I had hoped. I was secretly sure that the swoop would be disproportionate, or fall strangely, or something. It was a little long (my altered-for-me pattern is ridiculously long, but I like it that way.)

A different crappy mirror shot

A different crappy mirror shot

I don’t think any of my photos really do them justice, but if I wait for great photos it’ll probably be next year sometime, so here we go. I just can’t wait for dance class next week. 🙂

13 Comments

Filed under Sewing

Can’t blog…

20140710-193528-70528730.jpg

Busy sewing.

20140710-193621-70581271.jpg

I’m having a bit of a Jalie binge.

20140710-193732-70652912.jpg

1 Comment

July 10, 2014 · 7:39 pm

And something for Syo

Syo was a bit put out with all the work on Tyo’s grad dress. She didn’t even get her onesie yet (I know, major mommy fail.) and here I am working on another big project for her sister? (To be fair, Tyo doesn’t wear leggings or most of the other quickie-type makes that Syo benefits from, so over the course of a year it really evens out. Somehow this does not satisfy either of them.)

This little birthday suit (haha) doesn’t really make up for it, but maybe it’s a start. I took the day of Syo’s birthday off work (calloo callay!), and asked what she would like to do.


Jalie 3247

Jalie 3247

Since she knows me, she suggested I/we make her something. We spent most of the morning digging through my horrifically disorganized stash, and eventually settled on some denim knit remnants for the fabric, and Jalie 3247 for the pattern. I’m also planning (hoping) to make her a swimsuit with this pattern, but on this given day (which was, after all, her day) she wanted shorts and a sports bra.

We’ll start with the shorts, because I did make them first. I made the size 10 (N), the only alteration to make the back rise a teeny bit higher. I just added on at the top, but I think my usual Jalie alteration—adding a little wedge to the CB curve—would’ve been better, even if it’s a bit of a pain in a pattern with no side pieces.

Jalie shorts

Jalie shorts

Because we were using a denim knit (left over from the jeggings), and because Syo has no concept that leggings are not pants (one I struggle with myself, I confess.), I figured some topstitching was in order. There’s also an underlay below the mock fly, just like on my jeggings, which gives this bit a bit more substance. I used Gutermann jeans thread, a narrow zig-zag, and a long stitch. It’s not quite stretchy enough for around the leg, I thought, but should be fine for the vertical seams. I didn’t go as far as to add pockets, however.

The top

The top

If it looks like the binding is a slightly different colour, that’s because it is. I had only the teeniest scrap of the darker blue denim knit left (hence the centre-front seam, too), so I had to use my other jegging knit for the back and bindings. I don’t think it’s super noticeable in real life. I actually had to cut the two halves of the front on the diagonal to make them fit, and because the denim knit has a bit of a twill-looking thing going on, one of them actually has its twill “rib”, that usually goes diagonally across the fabric, going straight up and down. The other has it going roughly the opposite way. Not perfect. Although the stretch and everything is just fine, so I’ll be grateful for that at least.

Back Interest

Back Interest

Syo picked the view with the criss-crossy spaghettie straps at the back. It is the most exciting view, I will admit. The pattern suggests you make skinny straps and turn them (with a bobby pin! GO JALIE!), but I made these the same way I make belt-loops for jeans, only skinnier—serge the edges, fold under, and topstitch. At this width the serging actually made it much easier to get the folding evenly, although having both edges serged also added some bulk. I wish I had thought to inter-weave the straps at the back where they criss-cross but I didn’t. Next time.

Hard to photograph

Hard to photograph

As with the jeggings before them, getting good photos of this little outfit was not easy. Every photo here had to be lightened to get any kind of visibility, hence the washed out grass above.

Especially on a child who will only give you action shots.

Especially on a child who will only give you action shots.

Also, don’t ask me why a barely-a-step-up-from-a-swimsuit play outfit should be styled with mukluks. But apparently, this is how this outfit should be worn.

But she is definitely happy with them.

Tree climbing? Check.


6 Comments

Filed under Sewing

A dress to end an era

The Avengers (not the Emma Peel variety) grad dress is done.

Quirkyy? Maybe.

Quirkyy? Maybe.

Of course, it’s been ALMOST done since early May, just waiting on the zipper and hem. My motivation to finish anything so unselfish ahead of time? Zilch. But, with the grad only days away, I got it done.

Almost done (back in May)

I’m not sure how much resemblance my final product has to the original pattern—I replaced most of the details that make that pattern cute and unique with my own. But I do think it’s a reasonable take on what Tyo wanted.

Hmmm

Hmmm

Quick recap:

1) cut size 8; narrowed darts towards waist to increase waist size. (sewed the pleats on the skirt a teeny bit narrower to compensate)
2) removed fold-over “collar” bits, replaced them with bias “collar” strip.
3) added length at front waist, removed at back waist.

Pockets!

Pockets!

4) I added pockets. I just made up a shape, and tucked them in the side-seam. Tyo was VERY happy when she found them. It does take a bit of hunting, since they’re within a seam that’s covered by a pleat, but they’re there.

Skirt

Skirt

5) I made the skirt straight (or rather, smoothly curved) along the hem, not petaled. I just cut off the bottom curves of the petals; it becomes really short if you do this, by the way. I took the teeniest hem with a facing, and it is none too long on my daughter, who is none too tall. It’s not a full circle as cut but once it’s pleated up it might as well be.

Grum!

Grum!

6) black piping along both edges of the straps and around the “collar” strip—I imagine it’s like the black frame around a comic-strip panel.

Lapped zipper

Lapped zipper

7) I attempted to print-match only along the back bodice seam. This was generally successful, although not as impressive in a lapped zipper as an invisible zipper would’ve been.

Happy child.

Happy child.

Looking at photos, I can see a few tweaks I might make, but on the whole, the aim of the project was a happy teenager, and this was achieved.

Faced hem, my favourite kind.

Faced hem, my favourite kind.

I am, I think, out of things to say. But not out of pictures, so bear with a couple more.

Captain Wolverine

Captain Wolverine

Tyo would like to draw your attention to this accidental bit of print-not-actually matching.

Happy dance

Happy dance

Tyo would also like to do a happy dance, which means that I, as a mom, am doing my own happy dance x1000!

22 Comments

Filed under Sewing

Interlude

Tyo’s grad dress is finished, worn, and a great success. Someday, I’ll manage to blog about it. In the meantime: Syo made a rice-stuffed teddy bear.

20140625-215300-78780546.jpg

Aside from the rice all over the kitchen, I’d say it was a reasonable success. 🙂

1 Comment

Filed under Sewing

Attack of the blue roses

Blue. Rose. Pique.

There are few prints that make me as weak in the knees as blue florals. I talk myself out of buying them all the time. (I should perhaps note that most of the ones I haven’t talked myself out of buying, I also haven’t sewn up yet. I think this is the first blue floral that has made it onto the blog.) I’ve also been loving the wild print jeans that have been on trend. Actually, maybe that trend is past now? Oh, well.

So, since I actually had an entire weekend free last week (enough time to tackle a serious project), well, I finally succumbed to this blue rose stretch pique that has been taunting me at my local Fabricland for a couple of months now.

I’ve never used (heard of) pique before, but the waffly texture is neat and the weight and stretch seemed about right for jeans, although the stretch was on the low side of what I like. Being rather paranoid of white jeans (I have to be very careful underwear wise with this pair, for example), I wanted to line, or rather underline, them. Fortunately for me, there was also stretch cotton poplin available at Fabricland (not always the case)—so away I went.

So, it’s been a while since I sewed jeans. And there’s been a reason for that. Namely, that the Jalie 2908 pattern I traced off years ago now, and have used for every single pair of jeans I have made for me ever (OK, except one.), was getting pretty tattered. It had also always had some issues—notches that didn’t line up, alteration after alteration, some of them to fix previous alteration mistakes (all of which were my fault, I hasten to add, not Jalie’s). And, in a coup de grace, I had cut it intentionally small, for fabrics with c. 25% stretch. This fabric was in the 10% stretch range, tops—so I figured it was high time to trace off a new version that would work for low-stretch fabrics. And this time, I wanted it to be durable.

Freshly-traced pattern

So, I shelled out four whole bucks for a couple of metres of “Trace-A-Pattern,” which is basically a wide, non-fusible non-woven medium-ish weight interfacing. I did have to re-create my personal alterations, which I did rather differently this time, although the goal was the same; the first time I did a lot of switching between sizes at different lines; this time, I traced “my” size and just altered that. I made six changes:

  1. lower front rise only, c. 1″ (this “simple” change actually involved changing five pattern-pieces, making it the most annoying one to actually do.)
  2. raise rear rise, c. 1 cm
  3. shave off 5mm at front crotch
  4. curve in yoke by c. 3 cm.
  5. add 5″ of length, distributed both above and below the knee
  6. instead of the flares, make the legs go straight below the knee.

I also use a curved waistband, self-drafted with no particular method, but I didn’t actually redo that piece.

Underlining

I cut pretty much everything (except the waistband… we’ll get back to that) out of both the pique and the poplin, slapped the two together and treated them as one. Which made for a nice, beefy fabric, and the poplin is a lot smoother against the skin than the pique would have been. So I call that a win. (Oh, I was also completely Instagram-happy while sewing these so the construction process is remarkably well-documented. Well, sorta.)

Rear view

Rear view

So, pockets. In my previous pattern, I used a really tiny, child-sized pocket, in the theory that small pockets make your butt look bigger. (Yes, this is a goal in my world.) But, I thought a bit bigger wouldn’t hurt. I still cut a couple of sizes smaller than my “official” size. I didn’t try to print-match their position on the butt, but I did cut them out singly, trying to get one nice, big flower sorta-semi-centred on the pocket. Since I was lining everything, I figured I’d take the opportunity to to try making my pockets lined patches, so I didn’t have to fuss with folding the edges under evenly or making a template.

Lined patch pockets

Lined patch pockets

Seems very simple in theory, right? Stitch wrong sides together, leave a little gap, turn. Except, I knew I didn’t want the lining to show on the outside. So, trim the lining a little smaller, plus a good bit shorter so the 1.5 cm seam allowance at the top of of the pocket will be folded over. And, then you go to sew it and you have to ease the pique to the lining and oh, crap, those didn’t line up and what was my seam allowance again? And, let’s just say it was a nerve-wracking ten minutes until I got them turned right-side-in and realized they were, pretty well, still symmetrical and the same size. Whew. So in the end I’m actually really happy with how they turned out.

Turned pockets

Turned pockets

pockets

Back detail

Back detail

I had a lot of fun topstitching these on my Pfaff. I usually use my Featherweight, but it’s been living at my sister-in-law’s since last fall sometime, which is tragic but really useful on the rare occasions we do manage to get together to sew over there. (I don’t invite people to come sew at my house, the setup is kinda ridiculous. There’s machines in the computer room, one in the living room, cutting must be done on the kitchen floor, and the ironing board generally lives in the basement, although I did bring it up to the kitchen for this project, once I had the cutting-out done.) Anyway—I use a minimum of three machines when I’m making jeans, one for construction, one for topstitching, and the serger for finishing.

Topstitching

Topstitching the waistband

Normally I follow Peter’s advice and use a straight-stitch foot for topstitching. But, the Pfaff has this really cool edge-stitching blade that just slips in onto the presser foot, and its regular zig-zag presser foot has a really great shape:

Pfaff presser foot

It all comes down to the shape of the toes: the inner sides go straight front and back, which means you can follow a line of stitching right up them, as I’m doing in the photo above. My biggest problem in topstitching is usually “falling off” the edge of the seam, usually due to small variations in how tightly I’m holding the fabric. Using the stitch-in-the-ditch attachment, with the needle set off-centre, made it really easy to stay “on track” during that first edge-stitching pass. Of course, the fabric was lovely to handle, too, but then most denims are.

Front detail

I went for quite a wide spread between the lines, rather than my usual 1/4.” I really like it, although I did occasionally “fall off” the seam allowance, since this pattern only has 1 cm seam allowances. I did three lines of topstitching on the top of the pockets (because it looked cool) and on the belt-loops; I’d like to say I did it on the belt loops to echo the design detail on the pockets, but actually my edge-stitching wasn’t catching the edge of the folded-under fabric, leaving me with floppy serged edges on the underside of the belt loops. I really like the three lines, though. I may do that always.

Fit?

Fit?

Fitting is the eternal question, especially since in jeans you can’t try on until you’re pretty far along in the process, and I was re-vamping my pattern. And with stretch jeans so much comes down to the individual fabric and construction. I was pretty worried about whether this pique would have enough stretch. On the other hand, on the waistband of the last jeans I made, I intentionally made the waistband non-stretchy, but I didn’t stretch the pants beneath when putting the waistband on, so the waistband is kinda uncomfortably tight. (though it stays up without a belt, which is nice.) This time, I think I went too far the other way—I didn’t do any stabilizing to the waistband, though I did cut it with a back seam, so that the front portion would be on the cross-grain. This = maximum stretch. As a result the jeans are very comfy, but will need a belt to stay up. Which means I’ll have to find a belt that works with them—all of mine are pretty scruffy-looking. I may end up moving the button over some more, too—as it is the stretchiness allows the the fly to gape a bit.

There’s no gaping at the back, but I feel like I could still add a bit more height; it still seems like there’s just a little bit of a dip at the middle back.

Mini-flares

Mini-flares

As I said, I traced my pattern with legs straight below the knee, but what I actually wanted (which I tweaked in the cut fabric) was a bit of a skinny taper with a mini-flare at the bottom. Also slouchy ankle wrinkles. I always envy other people’s slouchy ankle wrinkles, but when I’m making skinnies for myself I keep cutting them off to the “proper” height, = no slouchy ankle wrinkles.) It took some serious self-control not to do that here, too, especially as when I first tried them on the legs were too wide and the mini-flare didn’t really show at all. Once I got it taken in along the outseam, from just above knee to the ankle, though, life got much better. And I *think* I quite enjoy the slouchy-ankle-slipping-over-my-shoes look, although I’ll get back to you after they’ve been worn out and about more.

Happy.

Happy.

All in all, I’m going to call these a success, although they were bloody hard to photograph for everything but the fine details. The trick is going to be wearing them—I think I like them with a white top, but I don’t have that many options. I’m not loving it with the navy stripes in the photo above, although the colours are ok.

Styling?

Styling?

Still, they were a fun experiment.

21 Comments

Filed under Sewing

This is going to be way too much fun.

20140607-230159-82919136.jpg

9 Comments

June 7, 2014 · 11:00 pm

Spring Demands Lace II

I’ve been flicking through my photos for over a week now, and I keep thinking “I can do better!”

But the question, really, is will I do better? Or will that perfect photo-op keep receding into tomorrow, next week, next month?

Sewaholic Gabriola Skirt

Sewaholic Gabriola Skirt

So, in the interest of removing obstacles, to blogging and sewing, here is my sweet and lovely, if not particularly well-photographed, Sewaholic Gabriola skirt.

So, I like sweet. I do. I’m good with cute, too. But I may have overdone it a bit with this project. This skirt is so sweet it almost makes my teeth hurt. It’s also a bit fancy, to the point where I kinda wonder where I will wear it, as my summer is surprisingly wedding-less thus far. I’ll have to get back to you on that front. I was going to wear it with a lacey Nettie, but that’s been put on hold while I contemplate a) whether I actually can (will) wear anything high-waisted over something tucked in (even a bodysuit) and b) whether I can figure out the stretch-interaction of two layers of body-suit fabric. (Because so far this is eluding me.) In the meantime, I really like it with my lace-fronted bodice, though, which has largely languished for lack of appropriate bottoms in the two years since I made it. So it’s successful on the front of helping wardrobe orphans.

rear view

rear view

Arguably the scariest part about this project was grading between sizes so that something by Sewaholic would actually fit me. Especially with all those different pieces at the hips. However, it turns out this is really simple, and Caroline even has a post all about it on their Sewalong (which I did not follow in the least, by the way, /sniffle. I’m sure it’s excellent, though.) I needed to go from a size 2 at the hips (rounding up) to a size 6 at the waist (rounding down.) Now if you follow the link, she shows how to grade across both the lace pieces and the upper hip yokes; I did all my grading on the upper hip yoke only, none on the lower lace bits; your mileage may vary. Regardless, it was very simple. I also lengthened the snot out of the pattern—3 cm at the lengthen-shorten here line, and then cutting all the way to the longest size at the bottom. In the end I cut off pretty much all that bottom extra, so I suspect that the 3 cm was more than enough on its own; although, as you can see in the shots with the heels, I could’ve hemmed it longer if I just wanted to wear it with heels. I want to be able to wear it with flats, as experience has shown that heels-only clothing does not get worn around here, so shorter it is.

Matching up the points

Matching up the points

The second-scariest part was matching those lace points at front, back, and sides. Some unpicking was called for, although I allowed myself only one un-pick per point, otherwise madness was a real possibility. As it is, I think the un-picking contributes to a bit of unevenness in the side-seams—probably a wee bit of hand-basting would not have gone awry here. Ah, well.

Waistband construction

Waistband construction

I should perhaps mention that my fabric is a suit-weight, rayon-poly blend with a bit of lycra. I loved the weight and the drape of it—swishy rather than floaty, without being too heavy for summer. I should, however, have stabilized the waist of the skirt pieces a bit more (like, at all). As it is, with handling it grew to the point where I had to take the side-seams in an inch on each side, and the waist was still a bit big for the band, leading to not-enough-overlap in the button area (and a button that is strictly for show.)

Stitching in the ditch

Stitching in the ditch

After hand-picking the zipper (see below) I got lazy and did everything else by machine: stitching in the ditch on the waistband, hem by machine. The ditch-stitch actually turned out not too ugly on the inside! OMG! … and of course I forgot to take a photo. I love the stitch-in-the-ditch attachment for my old Pfaff. It’s not even a whole foot, just a little keel that fits into the regular presser foot, and it is the awesome.

Decorative button, not much overlap on the waistband.

Decorative button, not much overlap on the waistband.

I was going to do a functional button. But there wasn’t enough underlap for it to really look good, and also it was going to be tricky to do a nice buttonhole in my bulky waistband. Speaking of which, you can see here the biggest change I did make to the pattern: instead of doing a simple one-piece fold-over waistband, I added a top seam so I could have the lace overlay only on the outside. I thought it would be bulky and scratchy against the skin on the inside. Though the waistband is still kinda bulky with the seam.

Hand-picked zipper with imperfect fold at the bottom.

Hand-picked zipper with imperfect fold at the bottom.

As I mentioned above, I hand-picked the zipper. It worked pretty well except for that little ripple at the bottom. Fortunately I don’t have to look at it myself. 😉

Machine-stitched hem. Boo, couture fail.

Machine-stitched hem. Boo, couture fail.

The zipper exhausted my couture-juice for this project, so I wimped out and did the hem by machine, using blind-hem technique with the same stitch-in-the-ditch foot, but just using the longest zig-zag the Pfaff can handle since it doesn’t have a proper blind-hem stitch and I was too lazy to swap it out with the White, which does but isn’t nearly so much fun to sew with.

Voila!

Voila!

All in all? Fit is good (would’ve been better if my waistband were the intended size and not rather elongated); skirt is pretty. Wearability has yet to be determined.

12 Comments

Filed under Sewing