Category Archives: Sewing

Back to the Future, Jalie Style

Despite my inclination to plunge headlong into another coat—my long-neglected Lady Grey, say (I bought hair canvas! I bought hair canvas!)—I need to do some practical sewing. My favourite pair of Jalie jeans has developed some issues (mostly due to my own shoddy construction decisions… the sort of thing, it appears, I have to learn for myself, because no amount of good advice seems to get through my thick skull), rendering them currently unwearable, though a bit of mending should get them back in the rotation. Am I the only one who’d rather  make a whole new pair of pants than sew a belt-loop back on? Well, that and the pockets (which I made out of cotton from an old duvet I’d retired because of all the holes it was developing… stupid, stupid) are full of holes, which is causing stress in the pocket topstitching, which has broken some of the topstitching threads… so yeah, they are in some trouble. Not to the point of being unwearable (at least once I get the belt loop sewn back on… this is why you attach them with zigzag bars, not just straight stitch). For those of you who weren’t around back in the summer when I began my Great Jeans Odyssey, my pattern of choice is the infamous Jalie 2908, altered based on becca a’s instructions into a low-rise, straight-legged jean and tweaked for maximal skinniness.

Embryonic jeans

Anyway, yesterday I laid out my remaining length of black stretch denim. Apparently I had enough left for two pairs of pants, instead of just the one I’d thought. 3 pairs of pants from 4m of fabric, not bad. If, y’know, I needed three pairs of black jeans… but anyway. I cut merrily away, even remembering to undo my disastrous alteration of last summer.
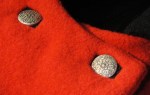
Pocket closeup

I made some construction breakthroughs. I “fused” washaway stabilizer to the wrong sides of the pockets so they wouldn’t stretch out when I did the embroidery on them. I’m really happy about this… not only does it keep the pocket stable, when you fold the sides under and press them, it melts just enough to really grip the edges in place, so they don’t pop up! And unlike the interfacing I’ve used before, they’ll wash away so that when I finally wear my pants the pockets can stretch with the rest of them! And it didn’t even stick to the iron, which was my main fear.

I remembered to sew the yoke pieces on in the back before the centre seam. I did my topstitching in a regular red thread, using my triple-stitch (the straight stretch stitch) like I did in Tyo’s jeans. It looks great! So much more relaxing than wrestling with the topstitching thread, and I can use the same thread for constructing the seams, plus it slows the machine right down, which is good for topstitching (my Janome does not like to go slow, normally)

And then… I realized… I had sewn the yoke pieces on the wrong sides. The narrow ends were in the CB, the wide ends at the sides.

I had to pick out… two rows of stretch topstitching, the regular stitching, AND my triple-zig-zag seam finish. Yes, I was being all fancy and finishing my seams for once!

This kinda set me back.

then, having recovered from that, I went merrily on my way starting the fly construction…

And forgot that I need to attach the front pockets, first, since I’ve drafted pocket extensions that run into the fly. This makes for a nice, smooth finish on the front of the jeans and helps stabilize the fly… but only works if I actually remember to do it *before* I sew up the CF. So now I’m on the fence whether to rip that (probably only the basting where the fly opening will be, and a single bit of topstitching, need to come out) or just cut off the pocket extensions. Grrr.

This is why we follow instructions, /sigh.

Tyo’s coat continues to elude photography, mostly because with the grey weather we’ve been having, by the time she gets home from school the light’s already going. Hopefully we can get some good ones on the weekend. The sleeves are a real problem, though. With a sweater underneath, she can’t even bend her arms enough to button the thing closed. I’m going to have to open it up and pull out a layer or two in there. *headdesk*

On the up-side, it was -20 this morning and my coat performed adequately, at least for walking the kids to the bus stop. I was getting a mite cold by the time I got home, but nothing that long-johns and a proper hat (I just had my sweater hood up, silly me) wouldn’t’ve fixed. So I think it will be adequate, at least. The next test, of course, will have to be wind chill.

I still want a winter coat that’s both stylish and -50C-worthy. I have a feeling it’s going to take a) a less fitted style, b) a lot of research into materials, and c)more money. Not that this one was cheap, by the way.

In other news, I splurged and took my long-ailing serger in to get serviced (finally… it’s been about two years). The guy at the sewing-machine place confirmed my thought that the problem is the timing, and hopefully nothing else is wrong with it. It still runs fine… the loops just don’t form.

So in a couple of weeks I may have a serger again! Yay!

11 Comments

Filed under Sewing

Frustration…

A finished coat... missing only one ten-year-old girl

… is a finished garment and no good photos to show it off. Nature has graced us with the perfect backdrop for the coat (six or eight inches of snow in the last two days), but by the time the buttons were on this evening the light was gone, so pictures will have to wait until tomorrow at the earliest. However, since I’m dying to show off just a little bit, here’s some flat shots and details, not that most of my details are worth ogling ;).

I’ll do a full write up with the last of my construction woes when I get some decent pictures… by which time I’m sure you’ll be as sick of this thing as I am (if you aren’t already 😉 )

And now the big question: will she actually be able to wear it “for everyday” or will this become the dreaded fancy coat? It’s supposed to be -21C here tomorrow (about five below zero F… somehow that sounds warmer 😉 ), which will be a big test for my winter coat, as well.

16 Comments

Filed under Sewing

A sneaky peak

at the progress from the weekend.

Coat, left; lining, right

The sleeves are attached (and still dangerously narrow 😦 ); the lining and facing is sewn (this is the first time I’ve done a lining with a facing at the back of the neck. It was not particularly difficult. I drafted fold-over cuffs for the end of the sleeve… we’ll see how those go on; I used the same idea as the ones for Syo’s coat.

I did some thing to the roll of the collar that I will describe as pad-stitching’s bastard cousin, which did succeed in giving it some shape (at least so far), and only shows a little.

Tyo picked out some silver metal buttons. They’re lovely, although silver buttons really wasn’t what I was envisioning for this coat. She likes them, though.

Label!

But most importantly, I remembered to sew the label to the neck facing already, so I don’t have to hand-stitch it on at the end! 🙂

10 Comments

Filed under Sewing

It seemed like a good idea at the time, or, an assortment of idiosyncratic construction decisions


Catchstitched interlining

I guess I really am a sucker for hand-sewing. If only because I catch much less flack from the family if I’m hand-sewing in the living-room with the rest of them all evening, instead of lurking in the kitchen with my sewing machine.


Warning: what follows is not a description of how one SHOULD make a coat. I am not particularly convinced that all (any) of the construction details I am about to report actually improve the resulting coat in any way, and several of them may have serious unforeseen drawbacks. I accept this. 😉

Friday I got the rest of the coat—lining and interlining—cut out. Hooray! I could not find any more of my space suit interlining at the fabric store, so I had to settle for some (much cheaper) non-foil-backed stuff. I had just enough left from making my coat to cut the two back pieces from the foil-backed stuff, which I figure should be fine since the fronts are double-breasted anyway.

I trimmed the seam-allowances from the interlining. Then, for reasons I am no longer totally clear on, I decided

Underlining

that rather than floating free between shell and lining, it should be sandwiched between shell and interlining. I promptly proceeded to catchstitch the back pieces in place, so they wouldn’t shift despite not being caught in the seams.

Then I said “bugger that,” and skipped the catch-stitching step for the front and side-front pieces. My occasional inability to keep the interlining out of the seams should hold them in place, not like they have anywhere to go.

This fabric is a dream to sew with. It’s squishy, easy to ease, and you can catch stitches on the underside beautifully without worry of them showing on the right side of the fabric. Mmm. I also love my flannel underlining.

1cm seam-allowances may be awesome on jeans, but they’re tricky on a coat. Allowing for turn of cloth, once you go to press the seam open, there’s very little allowance at all. I proceeded to stitch all the seam-allowances open after pressing (hence the marathon of hand-stitching and why my fingers are still sore.)

BUT, LOOK!!!

Tyo refused to brush her hair for the photos, hence her headless state. Also she was making faces.

OMG, is that a coat?

She has POCKETS!

Well, almost.

Yay, smooth back!

For interest’s sake, I re-took Tyo’s measurements (rather than relying on my last set from oh, back in the summer) and compared them to the m-sewing sizing charts. The results may highlight some of the fitting issues we had.

Hips: 81 cm. Her hips are a size 12.

Waist: 58. Her waist is a size 8.

Bust: 63 cm. Her chest is, ah, a size 6.

The coat I made is about a size 11, for measurements bust: 73cm, waist: 63cm, hip: 79cm.  I still think the coat is cut a bit snug for my liking (I added significantly more than 2cm to the ease in the hips), but the disproportion between shoulders and hips is all Tyo.  If Sewaholic Patterns ever puts out a children’s line, Tyo can be their first customer.

Next: assemble sleeves, sew lining, decide whether to add another layer of interlining (this time where the interlining *actually* belongs) as the non-foil stuff is kinda thin, and try to avoid doing any more hand-stitching until at least tonight.

PS. This post would’ve been up Saturday morning, but my camera cable evaporated sometime Friday evening. Despite a thorough house-clean Saturday (my Dad was in town and came to dinner), it has not resurfaced. However, fortunately for me, the card reader decided to read the camera memory stick today—Sony uses an odd format and 90% of the time the computer doesn’t recognize it… but once in a while it does. So, you get a post! Yay for random computer cooperation!


7 Comments

Filed under Sewing

Poppies

Red and black, two of my favourite colours. Speaking of which, the buttonholes have been bound.

Buttonholes on the coat. Poking the "organza" squares through.

Then, I tack them down (after judicious ironing) in the back.

Buttonhole frames tacked open

Gertie suggests using silk organza that matches your fashion fabric. I have no organza (as far as I know), and I’ve never sewed with silk in my life. I also didn’t have anything light and crisp in red. So I used this off-white (chiffon? I really suck at the names for these floaty fabrics, as I tend to avoid them like the plague. But I salvaged a crapload of this stuff after a wedding last summer. It’s gone to make the sheer JJ, and the rest will someday become a tiered petticoat.) I suspect silk organza would be a lot stronger, and maybe a more firm weave?

Don't they look nice from the front?

You can see a tiny bit of the chiffon from the front. I made extra sure when sewing on the strips that none of this showed through.

The basted strips in position

As you can see, my strips are kinda massive. (They’re also interfaced, and I added an extra layer of white interfacing to the inside of the front mostly so I could see my markings better.) I am debating whether to trim them down or leave them that way—if anyone has strong opinions I’d love to hear them.

And stitched in place by hand.

Don’t they look lovely? I will leave them basted for now (at least until we go buy buttons). Now all I have to do is get the facings to line up. Oh, and did you notice my lovely iron-mark on the front of the fabric? *headdesk* Mostly I remember not to do this. Mostly.

Anyway, back to the poppies. Are we all marking Remembrance Day today? I am lucky enough not to have any family members involved with wars of any kinds (even my grandfathers sat out WWII). I’m also not organized enough to get to any of the various ceremonies they have around. So consider this my little moment of silence.


In Flanders Fields

By: Lieutenant Colonel John McCrae, MD (1872-1918), Canadian Army

In Flanders Fields the poppies blow
Between the crosses row on row,
That mark our place; and in the sky
The larks, still bravely singing, fly
Scarce heard amid the guns below.
We are the Dead. Short days ago
We lived, felt dawn, saw sunset glow,
Loved and were loved, and now we lie,
In Flanders fields.
Take up our quarrel with the foe:
To you from failing hands we throw
The torch; be yours to hold it high.
If ye break faith with us who die
We shall not sleep, though poppies grow
In Flanders fields.

Lest we forget.

14 Comments

Filed under Sewing

How many ways to bind a buttonhole?

Tyo’s coat is going to have bound buttonholes. There’s only four, surely I can manage that, right? I know the Lady Grey was supposed to be my gentle entry into the world of bound buttonholes, but, frankly, Tyo needs a winter coat more than I need a gorgeous-but-semi-practical-between-seasons jacket right now.

The plan was to make the lips of the buttonholes out of the lining fabric (a sturdy flannel-backed satin) rather than out of the bulky, soft, and flexible fashion fabric. This plan lasted until I actually did some trials, of which I’ll be speaking of shortly. But first… there remains the issue of METHOD.

There is a plethora of bound-buttonhole tutorials out there; I will list only a few

  • Gertie’s
  • Sherry’s
  • Two on Burdastyle, this one which is most like the one in my Reader’s Digest Complete Guide to Sewing, and this one, which is more like (but not exactly like) Sherry’s.
  • Patty the Snug Bug recently reviewed Gertie’s technique and another one from her own sewing books, which is basically the same idea I used for my single welt pockets, but with a welt on each side.
  • No doubt there’s any number of other ones—that’s just what I remember seeing off the top of my head. If you have a favourite (or one of your own), please chime in! 🙂

A lot of VERY bad bound buttonholes

So, this afternoon, I sat down and experimented.

Now, as we all know, bound buttonholes, like welt pockets, are all about precision. Precision is one of those things I, ah, struggle with in sewing. I’m getting better, mind you—my cut pieces of fabric now almost always resemble the pattern they were cut with, I’m much better about getting my grain right, and I press as I sew quite religiously (which gets me a lot of exercise since I sew in the kitchen and press in the basement).

So you will not be entirely surprised to see that exhibit A, to the left, is, well, less than impressive. In part, the satin just wasn’t really working for me—it highlights the flaws, as it were, a little too crisply. (The satin for the final ones would have been the same fabric in black, but I have a ton of scraps left over from my winter coat lining, so I was using some of those. I did manage to achieve passable results with Sherry’s method, but still not to the point where I would be willing to put it in a finished garment (top centre in red wool, bottom left in silver satin). The slippery, fray-y nature of the satin didn’t help, either. Similarly with Gertie’s method. None of the others are even worth talking about (for this fabric and my current skills ;)… there are many sewists out there far more talented and precise than I!)

I had a bit more luck with using the fashion-fabric itself for the lips. It’s a bit more forgiving of my flaws. I was worried that it would be REALLY BULKY. It is. But, it looks softer. However, Sherry’s method is extra-bulky,  so it didn’t work so well with this method, either (centre top… which still looks better than any of the satin-bound ones, I suppose)). Gertie’s, however, did… with the caveat that it’s almost entirely hand-sewn. Only the initial rectangle was sewn by machine (bottom right two buttonholes, one in red, one in black).

This is pretty much par for the course for me. Precision=hand-sewing. I don’t really mind hand-sewing, fortunately (after hand-beading bellydance accessories, anything else is a piece of cake). Still, it would be nice someday to be able to be precise and speedy. Like, say, Sherry ;).

Ah, well. I showed Tyo the buttonholes and she likes the black contrast lips, so I expect we’ll go that route.

7 Comments

Filed under Sewing

Almost progress.

Holy off-grain fabric, Batman.

Left margin is folded on-grain.

Very glad I took the time to thread-trace along a rib. Presumably this stuff was knit in the round and then sliced. I really wish they’d just leave it in the round. So many more options that way.

Thread-tracing along a rib of the knit to find the grain.

I also took the lining pieces and compared them to the shell pattern pieces to see which adjustments I needed to make to them. The coat body lining was pretty easy, but the sleeves were weird. I have always been under the impression that lining pieces should be, if anything, a tiny bit smaller around than the shell pieces, since they go inside—turn of cloth and all that. With the exception of the back pleat, I know. Well, the sleeve lining pieces were wider. Or at least, they were until I added the 1 cm width to each sleeve piece. Now they’re pretty much (I would say) bang on. Am I missing something? Are they just oddly drafted?

And here’s another question for those of you who actually know what you’re doing! The under-collar (separate pattern piece) is drafted to be cut in two pieces, with a seam down the middle. Now, it was my understanding that you do that when cutting the under-collar on the bias (the grain-line shown is straight). So I was thinking about cutting it on the bias anyway. But then I remembered that my fabric is a knit, which doesn’t need bias to stretch/drape nicely. So maybe it doesn’t matter. So—can anyone enlighten me on exactly WHY one cuts the undercollar on the bias, and whether one would bother in a knit, and if one didn’t bother, would there be any point to cutting the under-collar in two pieces, or should I just cut it on the fold?

Tomorrow: Cutting, interfacing, and how much couture does one kids’ coat need?

12 Comments

Filed under Sewing

I can’t believe…

I made three muslins for a kid’s coat.

However, I do believe we have achieved “fit.” Maybe not perfect fit, but enough for a growing child who will be handing it along to someone else (likely several someones if it holds up) in a few years anyway.

Both the side seams and the centre-back seam have been flared out from waist down to give more ease; I also added an extension on the CB for a vent; hopefully the Cupcake Goddess’s instructions on sewing a vent in a pencil skirt will be applicable to a vent in a coat. I added 2 cm ease (one to each sleeve piece) to the sleeves to give a bit more room there, as they still seemed really slim. I made a small narrow-shoulder adjustment (1 cm narrower). I will still add in a shoulder-pad, but they do look surprisingly better this way. Now I need to go and make the same adjustments to the lining pieces (sigh).

In other news, Syo is prancing around in Muslin #1 (the smaller size), which fits her remarkably well (although I still think the sleeves are far too narrow for a coat).

Tyo’s about to head off to “Outdoor School” (aka camping in November… what are these people thinking?) for three days. Who knows… maybe she’ll get back to a nearly-completed coat.

Or, y’know, not. The kids do have both Thursday and Friday off school for Remembrance day, so I may save it for then.

2 Comments

Filed under Sewing

A Coat for Tyo—Muslin #2

On Tuesday when I tried to print out the pattern in a larger size (140 instead of 134 height), my printer was out of ink.

Thursday night, despite me doing ABSOLUTELY NOTHING to fix this, it was willing to print.

Muslin #2 Front

So I pieced together the pattern (again) and compared it to the smaller version. The length of the sleeves on the larger pattern was just slightly longer than the length of the sleeves on the smaller after I had lengthened them to fit. Perfect. The width of the back piece was almost the same as the width of my alterations to the back piece. Good so far.

Muslin #2---Side

The shoulder was a whole cm longer. Ah, well.

So, here it is. Much better all around, except for those pesky shoulders.

It’s still catching the slightest bit on her bottom, so I think I will still do a small swayback adjustment. I’m thinking I’ll add a rear vent, too, just to make it a bit more practical for an active child. I’m also going to add 1 cm  to the undersleeve (and maybe flatten the sleeve-cap a tiny bit to compensate?) just to get a bit more ease there. The width they are now would be fine for a jacket, might be still a bit snug over sweaters, once all the layers are in place.

What do you think of those shoulders? If it were just for her alone, I would definitely alter them, but this coat will probably be handed down eventually to Syo, who is built much more like me, i.e. with broad shoulders and a narrow, compact bottom. And they are designed for a shoulder pad, too, although I wouldn’t want a large one. Anyone have a favourite narrow-shoulder adjustment tutorial out there?

Muslin #2---Rear view

On the fabric front, I washed the red fabric. It shrank. No big surprises there. I will wash the black, too. The downside of this fabric is a peculiar strong, plasticky odour (possibly the reason it was on sale). The store assured me several times that this will go away when the fabric is dry-cleaned. I hate dry-cleaning, so I just washed and dried it. I figured it couldn’t hurt a semi-felted fabric too much. Aside from the shrinking, it seems fine. The smell, though fainter, is still there. After several days of lying spread out in the basement, it seems hardly noticeable… I’ve now folded it up and we’ll see if the smell comes back. If I do need to dry-clean it to get rid of the smell, well, that’ll be another thing to wait on money for :P.

Syo's purse

In other news, Syo cut out and sewed a little purse for herself tonight. I did nothing but tie off a few knots (she even threaded the needle herself.) Meanwhile, Tyo is plotting making cloth dolls for her cousins. The basement is currently strewn with an assortment of doll-pattern-pieces. Also, I’d just like to point out that those purple striped socks Tyo is wearing, are mine. *grumblegrumblegrump* She’s starting to steal my shirts, too. The end is nigh, people, the end is nigh.

16 Comments

Filed under Sewing

Retail therapy, thrift-store-sewing-notions style.


A consolation score


The school bus schedule changed today, and according to Tyo the bus would be coming five minutes later as they are now the last stop to get on before the bus goes to the school. So we went out five minutes later than our usual time.

And, naturally, the girls missed the bus.

Now that the weather is no longer motorcycle friendly, we are back to being a one-vehicle family, which means my hubby takes off at 7:00 am with the car. Which leaves me with two kids and a complex web of public transit between us and the school. It’s not actually that far as the crow flies, but the buses and train just don’t connect well.

So we trudged off towards the nearest city bus stop. While I was inside the 7-11 getting change to get the girls on the bus (I have a pass as I take public transit to work), the bus came and went (not one that would take us right to their school, but within about a 10-minute walk at offpsring-speed). So, swearing quietly (me, not the kids), we trudged the block further to the train station. The train doesn’t go to the school, but it does go to a stop that has other buses that go by the school. We caught the train, although each of their tickets cost me extra because I still didn’t have quite the right change. We went to (what I thought) was the stop. We waited. Eventually the bus with a number we wanted came. We got on the bus.

The bus proceeded to toodle around in exactly the wrong area for about 40 minutes, before dropping us back where we started. Apparently it had the right number, but the wrong name underneath (usually this means that it’s going along the same route in the opposite direction, so it’ll still get you there EVENTUALLY. Apparently not in this case). It’s really embarrassing getting off a bus at the exact same stop you got on at. Ah, well. At least it gave us a chance to drill Syo’s spelling. She managed to score 0/10 on her last weekly spelling test. I think that takes talent, don’t you?

We started walking.

It takes about 20 minute to walk from the train station to the kids’ school. It only takes about 45 minutes to walk all the way from our house to the school. Granted speeds with offspring in tow are still a little less than optimal, but they’re not that bad. I got the kids to school an hour and a half after they first missed the bus.

Should’ve just walked the whole way.

So on the way home (walking) I stopped at Value Village to console myself. I staunchly resisted the several colours and weights of denims, and some rather interesting brocades. I did succumb to this rather lovely grey/cream wool (on the left in the top photo—would’n’t that make a lovely spring jacket?) and two packages of vintage zippers, still in their little paper cases. Including a bunch of invisible zips, which I don’t have any of. And a bleached old blue flannel duvet cover that will do nicely for the next round of muslin/underlining for Tyo’s coat (on the right).

Whenever I can get the pattern printed.

These zippers are really darling.


Regular zips


Most are in the 7 to 9″ range, good for skirts or pants. One’s a pink 14″ regular, and another’s a white 18″ invisible. I guess I need to make a white dress for it :).


Some invisible zips


And don’t they come in the most adorable little packages, complete with instructions inside?


More zips... the oldest, if price is a guide.


I really do hope I can convince myself to use them. Something about that old packaging is so precious…

Also, it occurs to me that I somehow missed out on the obligatory “Hallowe’en Post”. So here’s a picture. The only actual sewing I did was Syo’s red gauntlets (well, and the jacket Tyo used, but that was last summer and thoroughly blogged already). Syo’s costume wasn’t really warm enough… I should’ve made her put another layer underneath the shirt, even with the very mild weather we had on Sunday. She was pretty cold and grumpy by the time we got home, which is when this picture was taken.


The Zombie Punk and the Fire Fairy


11 Comments

Filed under Sewing