Category Archives: Sewing

How do you say…

Kimono-inspired Lady Grey

Lady Grey in Japanese?

The kimono-styled Lady Grey is finished (for a given value of finished, anyway). And it is warm and cozy, for a given value of cozy.

I was up half the night with a vomiting Syo, followed by home with the same recovering child today, which does not make for a glamorous day. Therefore you will have to deal with headless, as well as grainy and dark, photos. Sorry.

This was overall a fairly quick ‘n dirty effort. There are no facings, no lining, I narrow-hemmed the front opening and bottom, did a wider but not particularly tidy hem on the sleeves (I’m not convinced they’re perfectly the same length, either >_< ), and one shoulder is stubbornly pleating despite my redoing it. However, there are a couple of features that are worthy of mention:

I drafted a shawl collar!

I am particularly proud of how this worked out. Probably it would not work in a neater, less slouchy fabric, but the result is exactly what I was going for. I measured the length from my back neck to the bottom of the collar, and drafted out the following pattern piece:

Shawl collar pattern piece; cut two on fold

The long straight side is the collar length; the short straight side is the fold at the back of the neck. I sewed the two layers together, turned right side out and pressed, and stitched it to the collar, then graded the seam-allowance and top-stitched it down so that it wouldn’t flip out, since there’s no facing. This seems to be working better than I would have thought.

The collar, waiting to be turned right-side in and sewn on

I also topstitched both sleeve seams.

Yes, look at that (if you can see it):

Sleeve, showing both topstitched seams

This required a little bit of sneaky sewing I’d read about but never attempted before. I don’t think I’d want to do it on anything much longer or narrower than these rather wide, short sleeves, however it actually wasn’t too tricky and worked out fine.

Topstitching inside the tube

You turn the sleeve inside out, and basically sew down the inside of the tube. Yes, everything ends up bunched around the needle, and you can only sew about two inches at a time before you need to re-arrange your bunches.

Finally, there was the “obi”

This is lifted generally from the Kimono-Style Bunnyhug, although hers was

actually attached to one side of the front. Mine is not, because I have fantasies of making other, coloured versions to spice up the plain black. In some of my fantasies about this sweater, I actually sewed the buttons on to the front of the sweater (so it could close without the sash, too), but then the buttons would have had to go through not only the coat front, but two layers of “obi”. And I would’ve had to sew twelve buttonholes instead of four. So I didn’t. We’ll see if I come to regret that or not. Also I was worried that the front of the coat wouldn’t be stable enough—the sash itself is double-layered and I put a bit of knit interfacing at each end, beneath the buttons and the buttonholes, whereas the coat fronts are a single layer with a narrow hem along the edge. And yes, as in the photo above, the buttons are very slightly green. This may have compromised my attempt to make a neutral sweater I can wear with anything. We’ll see.
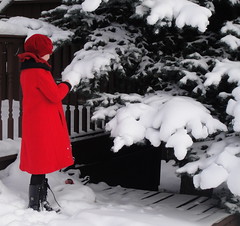
Back view

Here’s the back view, highlighting the unevenness of the peplum (this is the part where the S-curve of the swayback actually takes up more fabric length than my comparatively straight front, shortening the back). There’s some funkiness in the upper back, I think having to do with my seams stretching somewhat as I sewed, but again I’m not overly broken up about it, and it may even smooth out in the wash.

The sash nicely takes care of all that pesky lower-back fitting, too. 🙂

Front view

And here’s the front version. Unglamorous, as most straight-on shots of my front are. I don’t do cinching well, but I’m theorizing that if I cinch from right below my bust down to my natural waist (as here) it may actually work. What do you think?

The shoulders are a tiny bit wide, but that’s probably just because there are no shoulder pads in this version.

Did I mention how much I love that collar?

And just so you can trace the evolution from concept to reality, here’s the line drawing again:

Fantasy jacket, side view

front view

38 Comments

Filed under Sewing

Haphazard progress

Lady Grey---side view

So, I have now stitched up the bodice of my mutant Lady Grey. In a way, it’s good, as it works something like another iteration of muslin for the pattern. In particular, it’s highlighting how my severe swayback alteration is playing havoc with the peplum (and still needs tweaking), but anyway.

Lady Grey---Back

I opted for topstitching. Lots of topstitching. This adds a bit more structure to the sweatshirt material, and will also (theoretically) make the inside a little neater since I’m not planning on lining it at the moment and my serger is still MIA. Lining would probably have been a good  idea, but I don’t have any fabric suitable for a stretch lining in the stash.

The lumpiness in the upper back is mostly show-through from the layers underneath; there might still be a bit of extra fabric there, but I think it’ll be fine for this version. As you can see the upper part of the swayback is fitted very nicely, but it all kinda goes to hell below the waist. I suppose the peplum is designed that way, but I feel like a gentler flare at the back would work better for me. However, it won’t be happening in this version as I did all the topstitching before I sewed the side seams to try it on, and I’m not particularly inclined to pick it out at this point

Bust curve, with topstitching

Almost as an afterthought when I was mussing with the pattern, I flattened the bust curve a little bit (very unscientifically) and I’m quite happy with the result. I don’t have quite the cups Colette is drafted for.

(Also, doesn’t it look cute with a contrast puff and then a narrow sleeve? Kinda Shakespearian…)

Speaking of Colette’s draft, I was ogling my Ceylon pattern again the other night. I have a sinking feeling, however, that it’s going to require some serious muslining, as it will need both a major swayback and, I’m rather sure, a small-bust adjustment.  Again, I’m torn whether to make the size 0 (which matches my bust and hip sizes), or go up to a 2 and do an SBA. Which didn’t seem to work particularly well for this coat. Grumph. Maybe I won’t tackle that until after I have a duct-tape double to do fitting tweaks on. Also, I was planning to grade the waist panel from 0 (or 2) at the top up to my actual waist size (6) at the middle, but looking at the pattern pieces that would actually give me a convex waist! I’m rectangular, but I’m not literally apple-shaped (yet, anyway). The waist-curve on the pattern is definitely a bit extreme, but I don’t think I can go up more than one size. And then there’s the darts to think about (ugh) and whether to add a center-back seam (I’m told that’s the way to go when swaybacks are in the air). /sigh. Anyway, a lot to think about for that pattern.

Why, yes, I will cheerfully insert fly zippers ’til the cows come home, but double-ended darts send me running for the hills.

Next step: collar (I think I’m going to cheese out and do a straight band, like a traditional kimono collar), “obi” wrap, and how to finish the #%$# hems.

10 Comments

Filed under Sewing

Coats for Kids

It is possible I have a (doubtless seasonally affective) problem with coat-making.

At least, this is the best reason I can come up with to explain why I suggested to my husband, this morning, that perhaps I should make coats for our nieces for Christmas. If I do this, it would bring my year’s tally of coats to 7 (not counting the Lady Grey, which is technically “in progress”). These are the same cuties that last summer received the Oliver & S Ruffle Halter top and Popover tiered sundress.

Yet another kids' coat pattern

I’m thinking of reiterating the same McCall’s pattern I used for Syo’s first coat, made last winter before I’d even thought of starting a sewing blog. It’s a cute little pattern that can be either fun or classy, depending on how you make it. The only downside is that it’s not lined (WTF… why would you make a kids’ winter coat pattern, with specific instructions for making it in fun fur and not include lining/interlining instructions??!?), but I fudged a lining for it last time without too much trouble, so I’m not overly concerned.

I’m not actually intending these to be winter coats, at least not of the roll-around-in-the-backyard-in-minus-30-weather type. But they could well be look-nice-for-Christmas-at-Gigi’s-house (Gigi is my mother-in-law. Momo is my mother. Grandma belongs to the assorted great-grandmothers, except for Kokum-Nana.), and I’d like to think that my sister-in-law is chic enough to dress her kids in super-stylish coats once the weather warms up a smidge. I’m dreaming of a nice black wool melton, with suitably bright preschooler linings, but we’ll see what sales are (or aren’t) on at Fabricland this weekend. Hrrm, maybe I should call my sister-in-law and quiz her about the idea. Even better, there’s already a size 3 traced out by the pattern’s former owner :), and I made Syo the size 4. (Hmm, I must’ve nabbed the above picture off the internet. My pattern has sizes 3-6)

Syo's cute coat

Yes, I know, more theoretical sewing. I think I’m chicken to tackle the alterations necessary for the franken-lady-grey. Or maybe just burnt out from the preposterous write-a-thon that was Tuesday. And tomorrow’s parent-teacher interviews (ulp) AND dentist appointments, Saturday’s Christmas pictures AND a birthday party, so I don’t really see getting anything done before Sunday at the earliest. And there’s a rumour my brother-in-law and my hubby’s step-dad are coming into town for the weekend, and will want us to drive across town to visit them at the hotel rather than come to visit us, which could well kill Sunday as well.

Whew. I’m tired just thinking about it.

12 Comments

Filed under Sewing

Dunnit

That is all.

I wrote 15,000 words today, to make 50,000 in the month of November.

Let’s not do that again, kay?

And now, off to bed.

6 Comments

Filed under Sewing

Theoretical Sewing

Fantasy jacket, side view

If I may steal a phrase from Elizabeth.

My goal this weekend is to see if I can, somehow, catch up on my much-neglected NaNoWriMo novel (if you scroll down to the bottom of my sidebar, you will see on my widget that I am sorely behind, while the month is nearly done. I blame this squarely on sewing. In my non-sewing (or at least, non-sewing-obsessively-except-when-thinking-about-sewing-obsessively) days I had no trouble pumping out my 2k words a day. This year, it’s been a struggle. Grr. Not helped by the fact that my main character has two small kids and over the course of the story so far has acquired a third, and getting your character to do anything with three kids under the age of five is almost as hard as actually doing anything yourself with that many small children. Who knew? Anyway. So I’m trying to not sew this weekend. Despite that, my brain is fluttering with things I’d like to make. In particular, this jacket-cum-sweater thing. I’ve been thinking that I love the idea of a blazer for everyday wear, but in practice I find them restrictive and end up reaching for my bunnyhug (hoodie to those of you who don’t hail from central Saskatchewan). It’s the bastard lovechild of the Lady Grey and the Kimono-Style Bunnyhug on Burdastyle. In particular, I want to make it out of sweatshirt-material,

front view

with a shawl collar. Which will require—yes, you guessed it—drafting. Ulp. So naturaly, I spent a chunk of time yesterday when I should’ve been writing, looking up how to draft shawl collars. And then working up these sketches. And now, when I should be writing, I’m making a blog post. *headdesk*

I’ll get to it right away, I promise. No tea until I start writing. Ok, no more tea.

Also, my sketching is sooo out of practice. Not surprising—I’ve done very little figure drawing, none of it life-drawing, since Tyo was born—but painful, still. The side view above is decent but the front view is indifferent at best. Bleh. I always did like profiles (you don’t have to get both sides symmetrical! 😉 ). I’ve done scientific illustrations out the wazoo the last several years, but those don’t really use the same skill-set. I love drawing fabric, though. I love drawing clothes. I always have. My main annoyance with most of the figure-drawing I did in early Uni was that it was all nudes. Which are interesting in their own way—once you add clothes you are no longer drawing “a person” but drawing a particular kind of person; the figure acquires layers of connotation that were absent from the nude—but I wanted to practice drawing clothes as they fit around a person.

Anyway, I’m obviously stalling. Off to write!

19 Comments

Filed under Sewing

Finishing Ellen

Ellen Pants, with button and belt-loops

I pretty much finished the Businesswoman Pants back in October, shortly before I embarked on the coat for Tyo. And I was pretty happy, but after a day of wearing them two things were obvious. First, the little metal pants-hook and bar I had sewed were not in any way, shape, or form sturdy enough to keep these pants up (in fact, by the end of the day the metal bar was a twisted remnant of its former self). Second, the lack of belt-loops was driving me nuts, because they kept sliding down (increasing the strain on the hook and bar). I don’t know if this is a side-effect of the dropped waist or the slippery lining or just the generally rectangular shape of my hips, but it was still annoying.

Anyway, it was clear that the pants needed a button and belt-loops. And today,

Rear, with belt-loops

while I waited for my laptop to defrag and otherwise soothe its booboos (it’s been cranky lately), I decided to tackle these minor finishes. So I made a button hole (successfully, by machine!!!! … on the third try. Fortunately this wool is highly forgiving of needle-holes), and cut, interfaced, ironed, and topstitched (as subtly as possible) the belt loops. I didn’t want to topstitch the belt-loops in place, either, so that took a bit more thinking. You can do this without too much trouble, I think, if you apply the belt-loops while you’re constructing the waistband, but once it’s done it takes a bit more finagling.

I ended up sewing the bottom ends, folding them up and over to the inside of the waistband, and hand-stitching there. Me and my hand-stitching, I know. Also, figuring out how to distribute your belt loops when none of your seams line up is a pain in the ass.

Fancy button

I was going to attach one of my usual jeans buttons, but (perhaps fortunately) I couldn’t find the little doohickey for hammering them on, so I went through my buttons and found this black plastic shank button with a rather battered “jewel,” that arrived in a small and generally unremarkable baggie of buttons from the thrift store a few weeks back. I’m not convinced that the plastic shank will be tough enough either, but it’s not as if it’s an overly precious button. But it’s cute, and where else am I going to use a rather tacky plastic-gemstone unique button? It will get scratched up and hidden by belts, but it’s already rather battered, so whatever :).

I’m not convinced that I totally love these pants—my hips definitely benefit from the pocket and yoke detail on jeans—but they’re warm (which sounds really good right now) and will definitely come in handy when, y’know, I don’t want to look like a total schlub.

8 Comments

Filed under Sewing

Knit Tops: the Raglan Experiment

First of all, before I forget, thanks everyone who said they liked the new theme! I finally found one I can customize the way I like, and I get a header! yay!. Though I’m still getting used to the new colour scheme. I’ve been in such a “red and black” mode lately, the blue and cream feels odd.

Lekala raglan tee pattern illustration

So this past weekend, in between madly sewing jeans and bullying Tyo into posing for pictures in her coat, I spent some time sniffing around the Lekala website. In particular, I discovered their “knittings” section. There are some pretty groovy patterns there. Importantly, they have a link to a sample PDF of the patterns (conveniently tiled for home printing, albeit for an A4 size paper. I wonder if I could find A4 paper here if I looked?). EVEN more importantly, that PDF pattern is in a small adult size, for someone with an 84cm bust and 92 cm hips. Which happens to be about as close to my actual measurements as any non-custom pattern ever is (we’ll ignore the 64cm waist, AKA 25″ waist. Haven’t had one of those since I was 14.)

Anyhoo, I cheerfully went along downloading every pattern that caught my fancy, and decided in a fit of mad bravery to sew up my single remaining remnant of white cotton knit into this pattern (#5672, about halfway down the page). Don’t you love their foxy artist illustrations? I especially like that a lot of them are plus-sized (though not this one, obviously)

This is the line-drawing:

Lekala raglan top 5672 line drawing

Lekala raglan top 5672 line drawing

which shows what it is a little more plainly: a simple raglan-sleeved top with a gathered drawstring placket in the front.

I’ve been wanting to try a raglan-sleeved basic tee for awhile. Well, basically since this one appeared on Burdastyle. Obviously there’s some differences (no underbust seam here), but the basic shape’s the same, both have bust gathers, and this one is free!

I printed the pieces out and compared them to my much-laboured-over Lydia pattern. Almost a perfect match, aside from some subtle differences in the waist curve—the sizing was spot on, as was the sleeve length. The bodice of the Lekala top was quite short, as you can see in the pattern illustration, so I extended it by a good 10cm; as I no longer have the firmness of tummy the model does, I try to avoid that sliver of low-belly nowadays. I also added my usual extension to the arm as well.

Lekala raglan tee, V. 1, front

And I got sewing. Since the knit I had on hand was white and a bit sheer, I tried out Sherry’s double-layer, folded hem, enclosed seam technique. This worked really well, though I wasn’t quite clever enough to get the sleeve seam enclosed between the two bodice layers. Next time. Only downside—it’s awkward to take in after construction. Which is why Sherry made a muslin. I didn’t bother, despite remembering clearly that the white Lydia I made from this same fabric needed to be taken in, as the fabric has little to no recovery. So the bodice wound up a bit looser and bulkier than I might have liked… but still wearable. It also looses length significantly as it stretches in width; I should’ve added more length to the sleeves.

I had the most trouble with the neckline. I was quite worried about it stretching out of

Lekala raglan-sleeve tee, slightly better shot of the body

shape (see above about the recovery of this fabric). Initially I went to bind it with a a strip of self fabric cut on the lengthwise grain (as I’ve done with all my Lydias; the technique is the same as Sherry uses in her tank-top post, minus the serged edge and precision). However, I remembered (as I was sewing it on) that this fabric has no lengthwise stretch. The resulting binding looked great and didn’t sag, but when worn it pulled the neckline very high, making the whole shirt very tight through the armpits, but most importantly not providing that lovely almost-off-the-shoulder sweep of skin. So I cut it all off, went back, and sewed 1/4 clear elastic along the wrongside, and then just folded this under and topstitched. I started out the topstitching with a double needle, but one of the needles snapped within the first four inches of topstitching (first time using that needle, too… #$$%#%$@#@$), so I did two rows of single stretch straight stitching. Grrr. Well, it looks all right from a distance, anyway. In hindsight I could’ve been a little more aggressive snugging up the clear elastic; it flares out a bit more than necessary especially right at the sleeve seams.

The pattern called for a drawstring placket to make the gathers at the bust. I had no idea how to do this, the

Lekala raglan-sleeve T

instructions were less than edifying (I’ve never applied a surface placket like this before), and I didn’t have anything  I thought I’d want to make drawstrings out of anyway, so I used the same method I did on my blue tank top and sewed a stretched elastic on the inside. I could’ve made it a bit longer, but on the whole the detail worked.

I definitely want to repeat this in a nicer fabric (this isn’t an awful knit, it’s reasonably stable to cut and sew, but the lack of recovery, lack of vertical stretch, and boring colour irritate me). And maybe stick a big floppy collar like the Manequim Cowl on top.

I wish all the nice knits at Fabricland weren’t so frickin’ expensive. I know, I know, buy online… /sigh.

Here ends part 2 of my Lekala odyssey. I’m pretty sure there will be more in the future…

23 Comments

Filed under Sewing

My sewing library…

My first sewing text.

I’ve mentioned before I’m a self-taught sewist. For a long time I figured that anything I couldn’t sort out on my own, I’d ask my mom. This worked well when I lived in my home town, but started to become problematic when I moved out of province. Especially about a year ago, when I was starting to entertain notions of learning how to sew well. One thing I did was do some quick internet surveys of recommended texts on sewing. The idea of actually studying sewing had never occurred to me before, but since I’m a researcher by trade it really was a natural progression. And then, one day around last Christmas, I stumbled on a copy of the “Reader’s Digest Complete Guide to Sewing” at the thrift store.

This was on the short list of recommended texts. I snaffled it up, read through voraciously, and went on to make my daughters some coats. Then I discovered the world of sewing blogs, and the forums on PR, and Burdastyle.com, and, well, I was off.

Well, a few weeks ago, a number of volumes of the Singer Sewing Reference Library showed up at my local Value Village. And I resisted. Probably most of the information was already in my Complete Guide. Probably it was all super-dated, anyway.

And then Cidell went and reviewed one of the volumes. Interestingly, Carolyn also listed the series among her favourite sewing books, but none of the volumes she has are ones that were available to me. And there’s a whole one on tailoring, apparently. D’oh!

My new sewing reference library!

Anyway, yesterday I was feeling a little foolishly flush, and they were still there and, well, they’re only three bucks each, and it’s five for the price of four, and… well, I came home with five of the set.

I did not buy the home dec volumes. Sorry. Maybe I will be more interested in home-dec sewing when I a) don’t live in a bleak rental house decorated in a scintillating palate of cream, ivory, and ecru. And b) can afford to decorate with the kinds of sumptuous fabrics my imagination demands. In the meantime, home-dec sewing = meh (which hasn’t stopped me from sewing my own curtains, or curtains and bed-drapes for my kids, but I’m not going to spend money learning to do it.)

So… Cidell talked about the Activewear volume already. Sewing Essentials seems to cover the basics, which I think I mostly have down when push comes to shove but hey, pictures are always great. Sewing Specialty Fabrics has to be good to have on hand, and covers everything from silk to bouclé to gabardine to lace to fur (fun or otherwise). The Perfect Fit is considerably more detailed than the five or so pages on fit in the Complete Guide, and has a small bit on swayback alteration, although it’s in the pants section, which isn’t was usually gives me the most trouble. I was a bit concerned over Sewing for Style (which style? 80s?), but it’s got a large chunk on tailoring, so I decided to go for it (but see above about the actual tailoring volume). I’d still like to get a real tailoring book at some point, but every little bit helps.

And, there was about 2 yards (just shy of 2m) of this lovely wool tweed. Isn’t that a great heathery-grey-mauve colour? At least half the nice fabric I’ve ever found at Value Village has been lovely wools. I hypothesize that people buy them and then are too intimidated/lazy to actually make the coat, and they end up in the thrift store alongside the godawful polyester and that “what was I thinking?” print. I wish there was enough to make this my Lady Grey Fabric, but even if I used something else for the facings, collar, and belt, I think not. Maybe a nice little blazer instead.

Me and my fantasy blazers. /sigh.

Syo's Pillows

In other news, Syo has been working hard on her hand sewing. She has now learnt to cut her own thread, thread her own needle, and even carefully marks out her stitches on the fabric beforehand. She has been putting these skills to good use creating an assortment of little pillows for the toys of the house.

Her knots, however, leave a little to be desired, as you can see.

We also (sigh) bought Tyo a “play coat” at the thrift store. It’s big, poofy, ugly, water- and wind-resistant, and most importantly easy to move in. Well, easier. There’s always going to be a certain amount of restriction when you look like a marshmallow. Ah, well. At least this way the Princess coat won’t be coming home soaked with muddy slush when the chinooks hit.

14 Comments

Filed under Sewing

Winter sucks

Or, The trouble with photographing black jeans indoors.

Jalie Jeans, v. 4

Most of the following pictures are lightened. Severely lightened. The jeans in reality are a dusty black , although the ones I made last summer, of the same material, have faded, not unexpectedly, to a dark grey.

First up, I have apparently gotten fat. Well, rather, when I first went to try them on (before attaching the waistband), I could get

Jalie jeans, v. 4: front

them on but couldn’t get the fly closed. Keeping in mind that I have made this pattern in this size three previous times, including once in this *exact* fabric. WTF? I went and narrowed the seam allowances just at the hips—letting it out about .5 cm (they are only 1cm seam allowances, after all) for an added 2cm around the hips. Phew, now I can close the fly. Also keeping in mind that the first pair in this fabric mysteriously grew about 2cm around after I washed them the first time and I had to take them in. So I’m kinda hoping these ones do that and then I can at least restore the seam allowances to where they should be. But jeez.

Pockets and belt-loops

Otherwise, there’s not too much to say. I was quite happy with the wash-away stabilizer on the pockets. My topstitching is not nearly as porn-worthy as Peter’s. The fly topstitching sucks. The nice thing about using the same thread top and bottom is that you can do the pocket embroidery from the wrong side, and so draw your design right on the pockets. I free-handed this particular one, and had a bit too much fun with the smocking stitch, which is the only decorative stitch my machine does that I actually like.

I decided to go a bit wild with the belt-loops. They’re

Belt-loop closeup

extra wide, with extra fancy stitching. Hopefully this will mean they’re extra sturdy, too, especially the three at the back (I’m really liking a triple-loop at the back, although maybe not as much for these wide ones. Oh, well).

The leg length is okay but I could probably still lengthen it a little. If these were flares, they’d be driving me nuts with their shortness, and I’d still kinda like that “slouchy around the ankle” look. Something to think about for next time. Or maybe next time I should do real skinnies… I could even stretch myself and attempt an exposed zip in the lower leg. Wouldn’t that be fun?

In other news, we re-watched the Teen Wolf movies last night (gotta share the eighties with the next generation, after all) and I was struck by how tight all the girls’ jeans are. About as tight as mine, really… without the benefit of lycra content. It makes me wince just looking at them. Although if I’d been a teen in the eighties, I’m sure I’d have been wearing them that tight. And wondering how to get rid of the big flapping wings and the hips. And why the waistbands were so flipping tight.

… anyway. One more pair of pants for the rotation, check :).

Now, do I have the energy to put gussets in Tyo’s coat…

17 Comments

Filed under Sewing

The Russian Princess Coat

The Russian Princess Coat

Girl in a red coat

Full Disclosure Edition

Seems to me like a Russian Princess coat, anyway. Or Madeline, as celkalee said.

Walking

The coat was finished, and not a moment too soon (actually a little late), as winter arrived on Monday with about six inches of snow (and another six on Tuesday, and again Wednesday and Thursday. Friday and today have been snow-light; more is forecast for tomorrow). Also, of course, providing the perfect backdrop for this coat. Snow and spruce trees for the win.

Even after four coats, I still haven’t really got that “facing/hem” thing figured out. I know there’s a way to make it happen really neatly (I’ve read two or three different sets of instructions on it, even), but somehow my pieces never quite line up and I end up fudging and hand-stitching to make it work. Ah, well. If some future couturier in distant decades dissects this coat, they’ll find plenty of other construction quirks to puzzle over (like, oh, how I padstitched the collar after sewing it… yeah, yeah.

Vent being pulled wonky by ining

The only bit I’m really not happy with (other than the sleeves still being uncomfortably tight) is the rear vent. I used the Cupcake Goddess’s instructions and while the basic principal is sound, I can’t figure out how to do it without creating and offset in the lining so you have a seam allowance (or making the cut-out side shorter). This, added to the difference in the length of the lining vs. the length of the back, meant that my vent-extensions lined up really poorly, and while they lie flat when worn, the lining is a bit short and makes the coat hike up if anything goes off of plum. Also the whole thing requires a degree of precision I find difficult to achieve at the best of times, much less when wrestling five pounds of wool coat around my sewing machine.

The rear view

All in all the pattern went together fairly well. My only serious objection with it is the narroweness of the sleeves. I added 2cm in sleeve width after the second muslin, but they are still really snug—it makes an attractively slim line, but not a comfortable coat, and it’s pretty impossible for Tyo to put a sweater under it at the moment. Thanks everyone for their suggestions on this problem, by the way… I’ll probably be tackling it in the next week or so. Or, y’know, tomorrow if I’m a good mom.

Next up: jeans and a stab at Lekala patterns!

Click to go to slideshow!

25 Comments

Filed under Sewing