
Almost a corset.
Remember when I did a mock-up for a corset? Yeah, me neither (well, barely.) I think it was last spring sometime? Anyway, finally this past weekend I had—wait for it—leisure time! Nothing that needed to be made with an instant deadline! (And my husband wasn’t playing Final Fantasy 14, which is also sapping the sewing time these days. I’m not gonna apologize for that, though, down-time is down-time and I love back-seat gaming.)
So, after spending most of my Saturday puttering around tidying the perpetual mess that is the sewputer room and finishing the odd UFO and repair, I finally got the itch to pull out the altered pattern for Butterick 4254 and bash out a second toile. (swayback adjustment and a variety of take-a-bit-out-here, add-a-bit-there-type alterations.) And then made some alterations to that, and then finally bit the bullet and started in.

Pretty details.
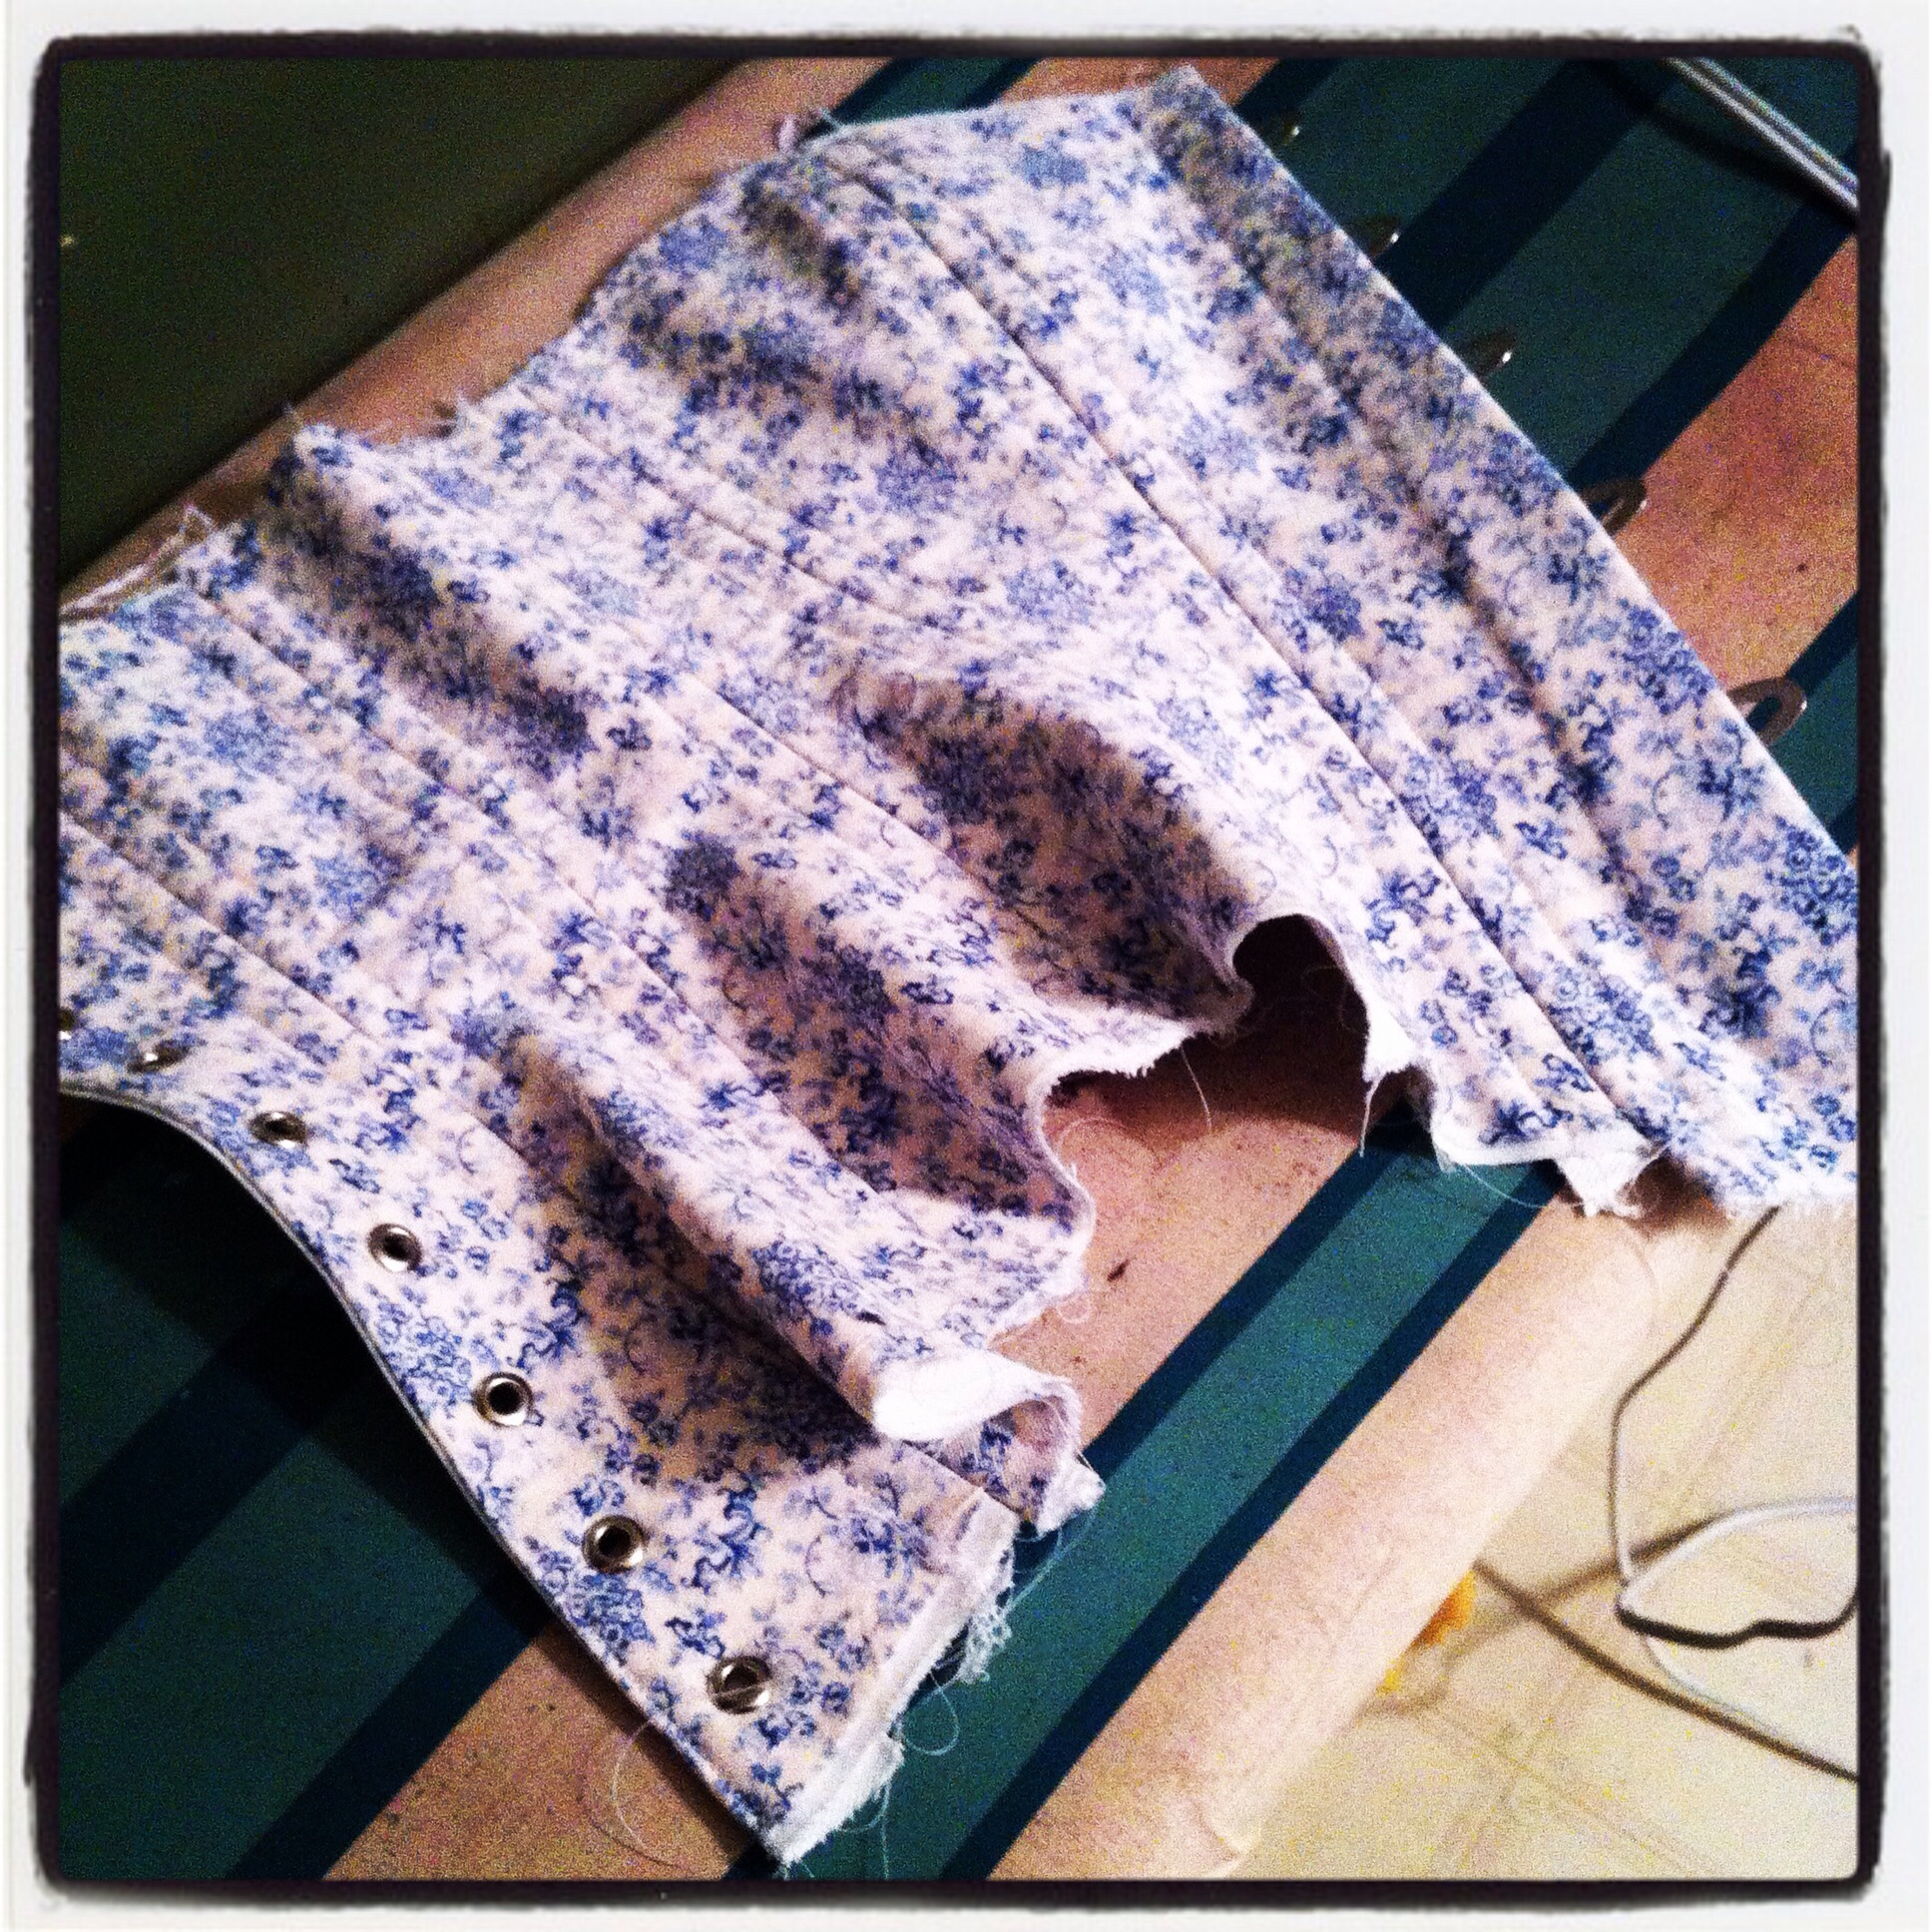
The fashion fabric is a lightweight twill with a toile-ish print that I spent ages ogling at my local Fabricland about two years ago. It was 70% off, but I was dead broke and couldn’t justify a random purchase, especially since I didn’t have any idea what I would make with it. Then it sold out, and I was sad. Then, one day, I happened to be at the *other* Fabricland in town (which never happens), and guess what I found… in the bargain centre for $2.00/m.
At that price, even stone-broke me could justify it. The last 2m came home with me… and have sat taking up space in my basement ever since, although I did hit on the idea of using some for a corset a year or so ago.
I chickened out on using my precious coutil (ordered along with spiral steel boning and grommets from Farthingales corset in Ontario) for this first run, instead using a sturdy white twill I got as a hand-me-down from a friend’s de-stash. We’ll see if I regret this later on.
Guts.
For my instructions, I pretty much followed “The Basics of Corset Making,” for a double-layer, alterable corset. As per the pattern, all the bone casings are on the seams of the panels, and I just serged the edges before topstitching them down, so historical this is not (even though I’m going for a fairly traditional sort of look. I think. >_<) The only other place I added a casting channel was beside the grommets in the back, as I thought it would need a bit more support in that area. Having a channel on each side of each seam makes for what seems like a LOT of bones, but I guess that’s not a bad thing?

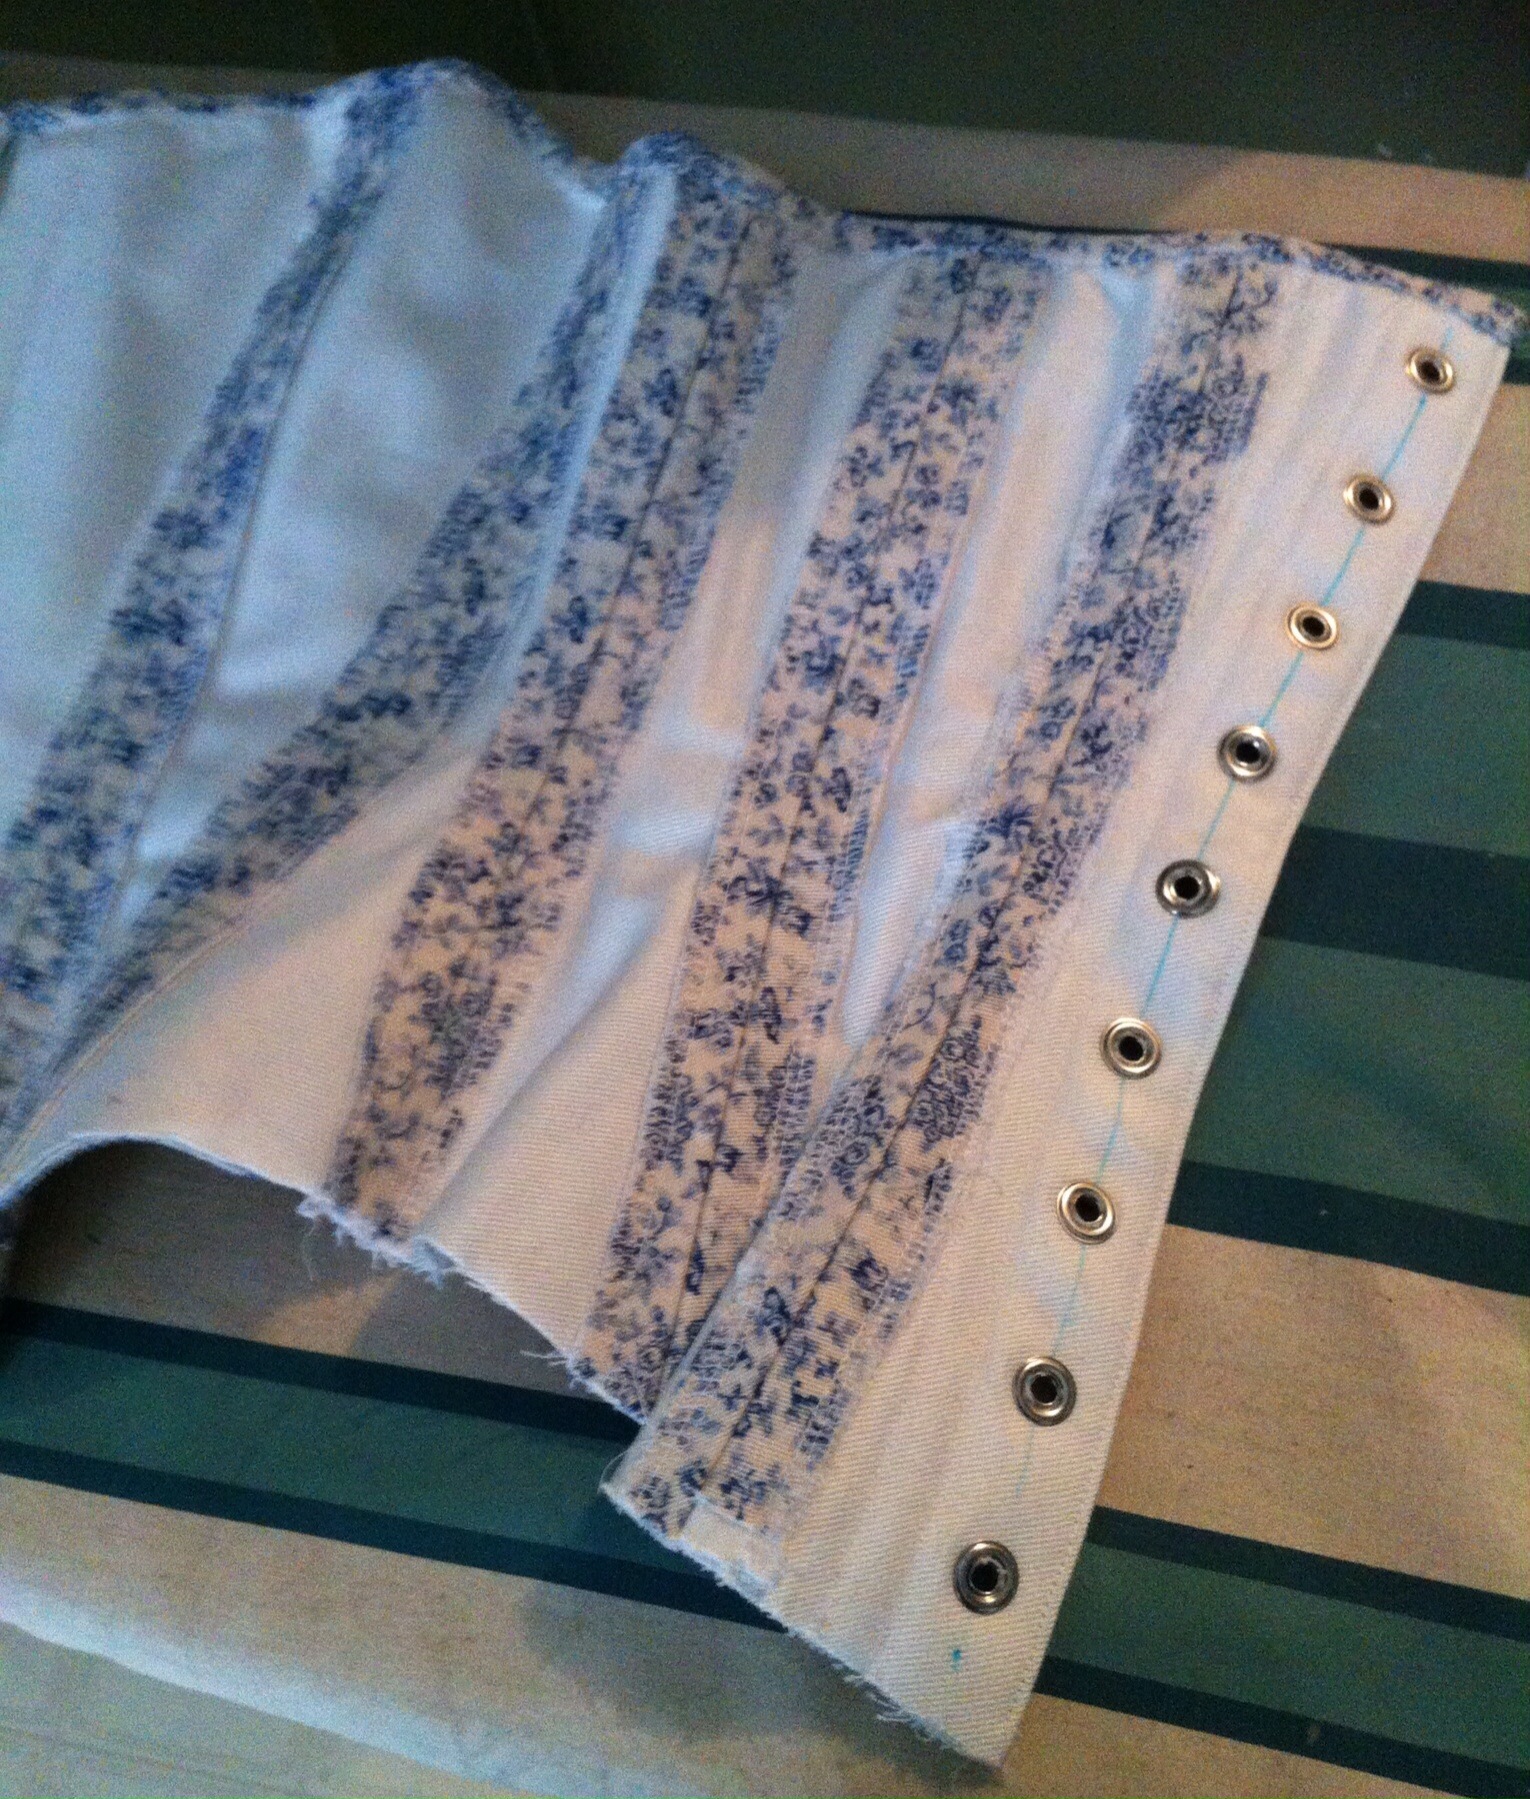
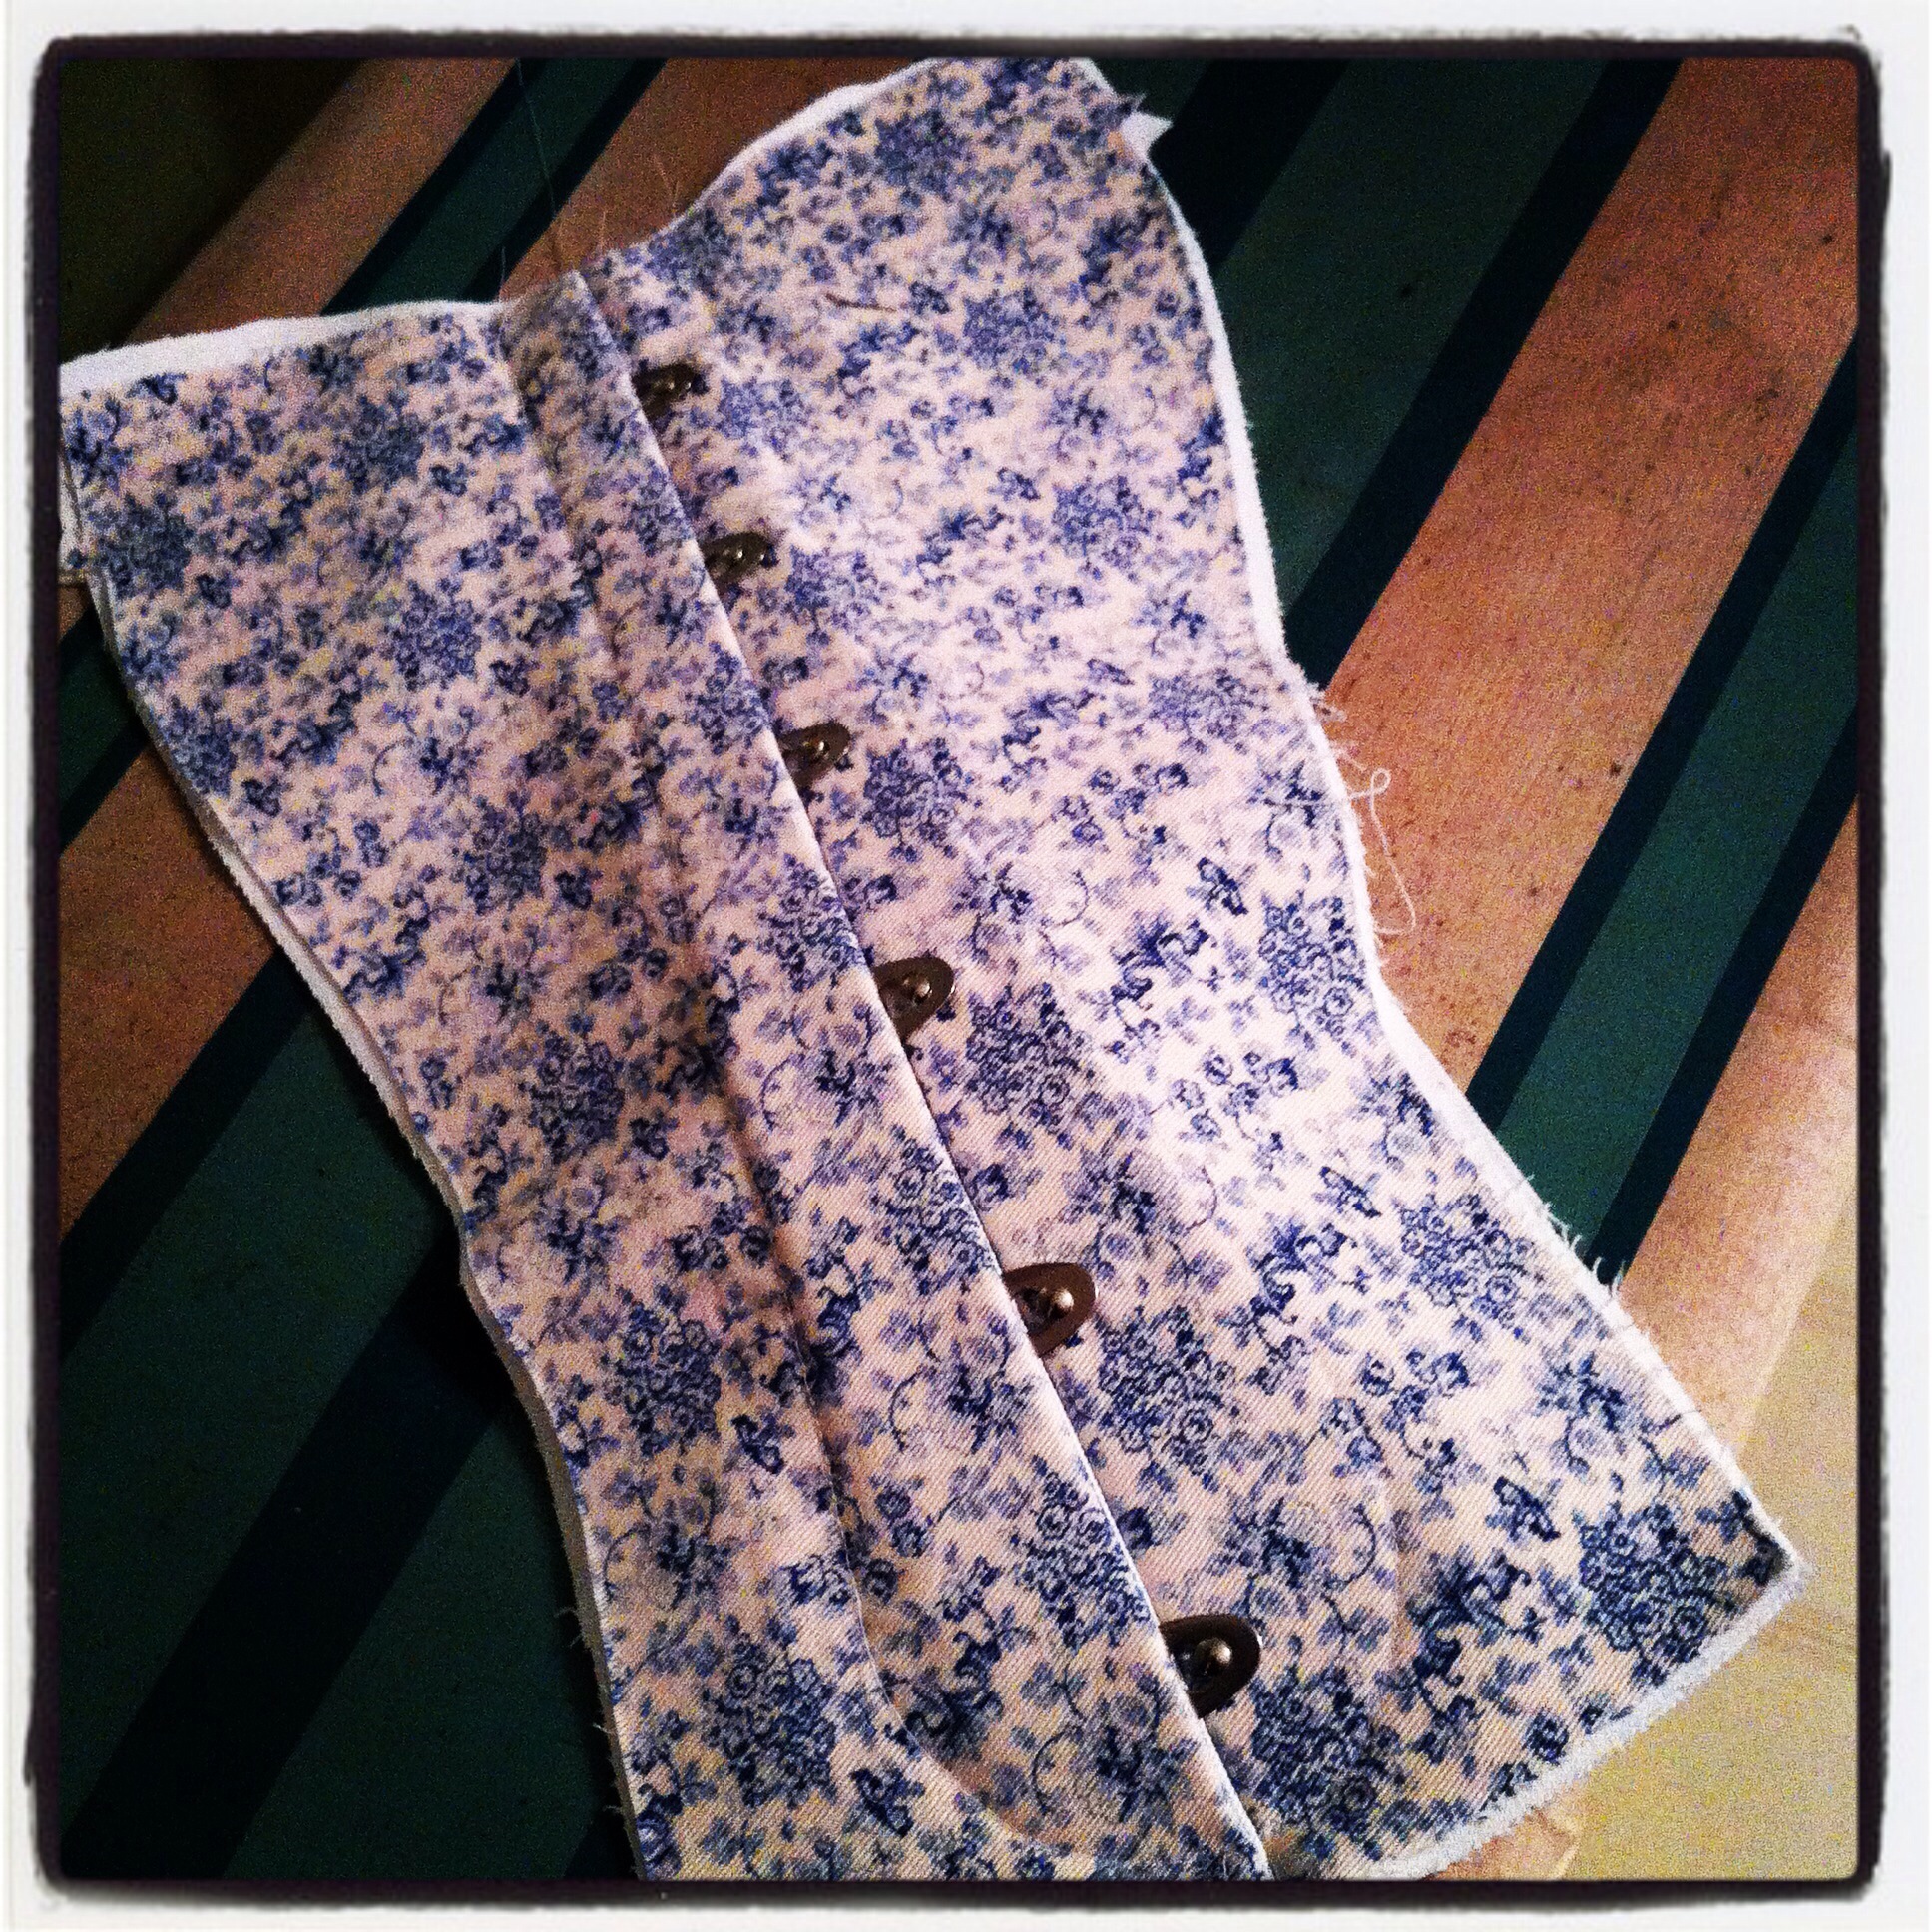
Grommets & setting tools
I think my least favourite part of the whole construction was setting the grommets for the back lacing. I ordered grommets, as I said, from Farthingales, just to see how they compare to the ones available at Fabricland. The Farthingales ones have a much wider rim compared to the hole size, which makes them look larger and seem much more substantial, so that’s nice. The setter that came with them (and I don’t recall if it was separate or included), though, was identical to the Unique-brand one I have from Fabricland… that I’ve always used for grommets the next size up. The cupped base fit the wider rim of these grommets nicely, but I found the upper part, that you hammer on, was just too wide to fit in the small hole—I wound up using the upper part of a grommet-setter I already have, for the smaller size grommets. This worked quite well, but if all I’d had was the one that came with, I would’ve been unhappy. It’s not even the hammering that I dislike, (I can say this because I only hammered my fingers once this time.), it’s the poking-hole-and-then-working-grommet

Set grommets. (Baggie to the left is Unique-brand eyelets with the same hole-size, but much narrower rings so they look smaller.)
I haven’t been able to do a proper try on, since I’m still lacking a real lacing cord (I thought I had ordered one when I ordered the grommets and coutil but, um, apparently I forgot to change the “1” metre measurement to the 8 I was intending to order, so, um, one metre of lacing does not do me a hell of a lot of good.) and none of my piddly little wire-cutters are really up to cutting the spiral steel. I did manage to pick up a more robust wire-cutter after work yesterday, and spent the evening merrily cutting and tipping bones, but I won’t be able to get lacing cord before tomorrow at the earliest.
ANYWAY, I was startled how much waist reduction I did get just as a quick, bone-free try on (before my cotton string “lacing cord” broke)… well, reduction for me, anyway. I have very little space between my ribcage and hips, and my ribcage is tubular, or maybe just barrel-shaped. As in, doesn’t taper towards the bottom. Let’s just say I’m not expecting dramatic results.
Corset front with spoon busk.
I did have to un-bend the curve of the spoon busk, as it doesn’t fall in the right place for this style (it was that or replace the busk. >_<) I’m a little disconcerted how hard that wasn’t. And I may yet have to take apart the front bustline seams as I’m not convinced the bust curve is in the right place, but I don’t want to make that call until I can do a proper try-on, which won’t happen until I can get some approximation of lacing cord, maybe later this week.

Looking curvy! (by my standards.)
I kind of got ahead of myself in the finishing department, adding lace and binding to the top of the corset. I will probably regret that when/if I do have to re-shape the bust seams. Oh, well. The lace was one of those random remnants that floats about a stash, but there was just enough to do the top of the corset—perfect. (OK, with five flowers left over. I’ll call that perfect.)
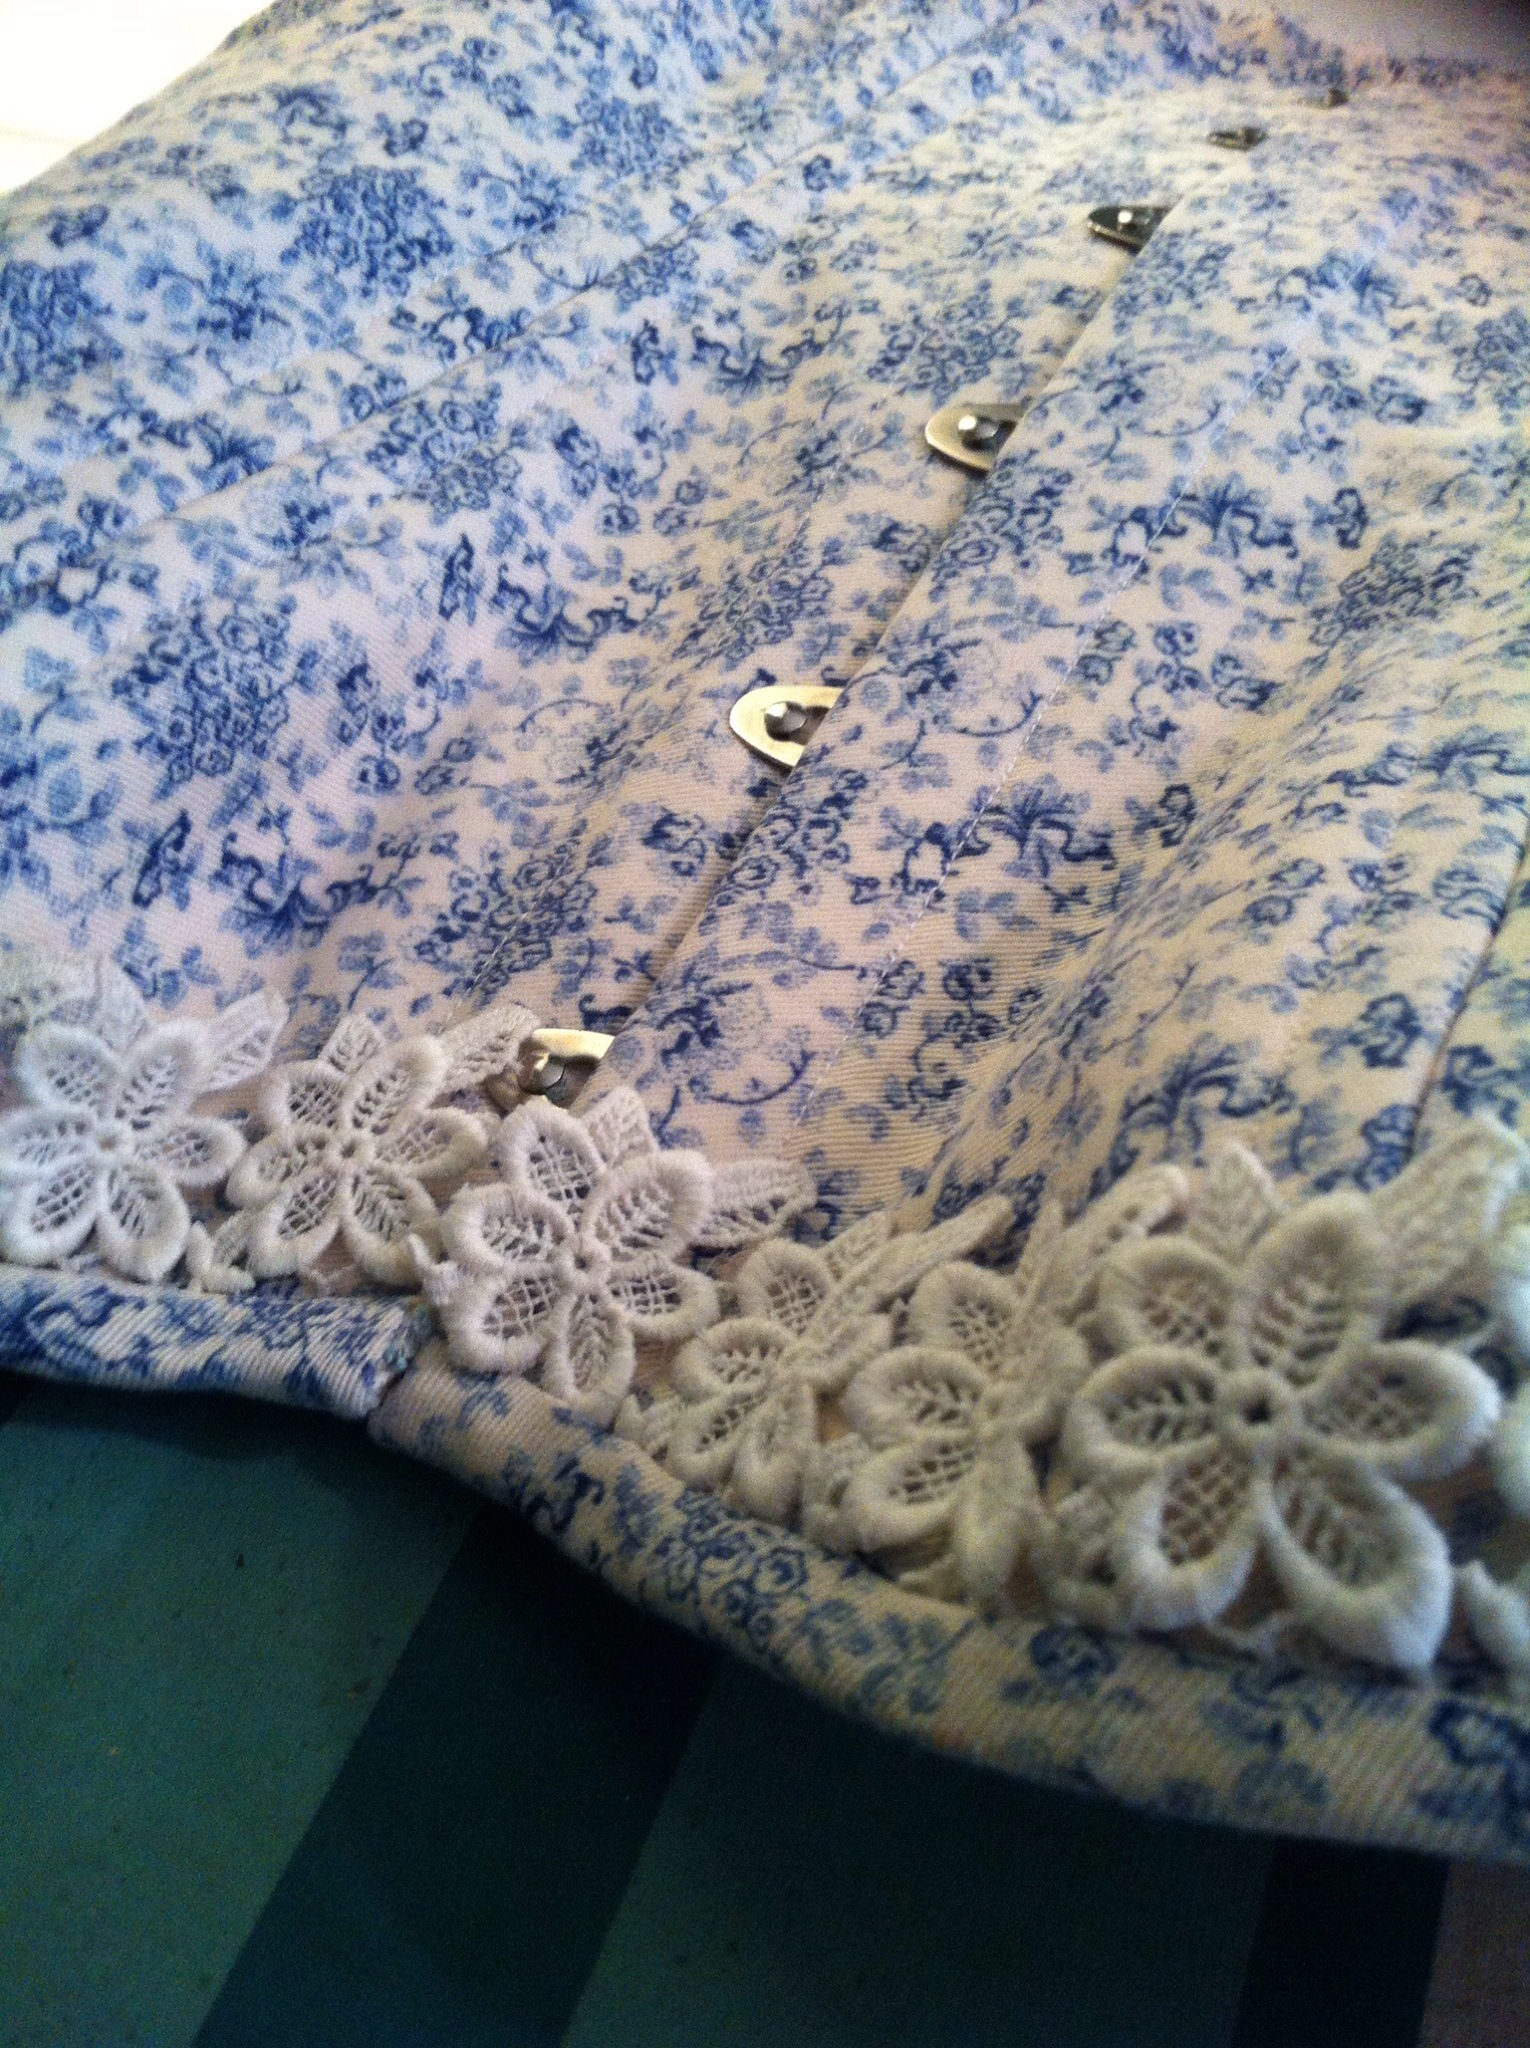
More pretty details.
I hope I can make it work once I get to try it on, because I think it’s really pretty right now…


Oh, so cute! I hope you will show us the finished piece. I love your fabric. You have (almost) inspired me to finish mine. I took a class a few months ago to make one and the class ran longer than originally anticipated and started to get expensive. We made a mock up out of denim and twill for fitting sake. Then we began using our real fabric (I picked a light green silk for the outside) and got as far as putting in the busk. That is where I have stopped. all the pieces are sitting in a bag, in my sewing room, waiting. All of our steel stays were ordered to measure. Thank you for the inspiration. Yeah, I think I should get back to work on that!
What is it about those bags of cut fabric, that they just sit and sit and sit? It sounds like it would be lovely. It does take the right mindset to work on, though, because it’s not a project of immediate usefulness, is it? Just pure fun. 😀
This is looking really pretty. Can’t wait to see it on you.
Wow, how beautiful. Its going to be such a polished piece when finished.
Wow, it’s looking really good so far! I like your choice of fabric and I think you should be alright with twill. In theory, that weave has some stretch but coutil has a herringbone weave, which is kind of similar in that regard. It’s often recommended if you can’t get twill.
When I made my first corset (which used flat steel boning throughout, not recommended), I bought a really heavy cutter for the boning. It wasn’t cheap but it works really well. I was using the simpler Simplicity or Butterick pattern and I did and un-did a lot of alterations. It was a long time ago and the end result was far from perfect (I made it in plain un-bleached canvas and later put red stains on it for a a horror-themed costume party). Since then, I’ve made lingerie and an underbust corset (raw silk lined and underlined with twill) for a friend but I have yet to get back to making a corset for myself. Not that I haven’t been thinking about it but it’s not like I have much chance to wear it….
So, this is a really inspiring post to me 😉
From your pictures, I first wondered if I should point out the need for boning along the grommets, but then I read that you didn’t have the right cutters so there was no boning in there yet. I always used flat steel bones at either side of the grommets and I think my RTW corset has the same treatment.
For the grommets, I never punched the holes using the setting tool but pricked them with an awl. Some corset making manual I had recommended that because you won’t cut so much thread that way (and really, the threads of the weave have to stay strong because no matter how impressive the boning may seem, it’s the fabric that will do the hard work). If nothing else, for me it made for easier hole poking.
And the lacing… I know they sell special corset lacing but you don’t have to use that. Ribbon works just fine. It may seem to delicate but after all, this is a continuous length of fabric, woven at that narrow width with finished sides. It’s strong enough (I’ve used this quite a lot for laced backs on wedding gowns…). Usually a width of about 1.5 to 2 cm works well and, of course, you have to finish the ends either by melting them or with fray-check.
Oh, and did I mention I’m really curious to find out how that spoon busk works for you? I’ve only ever used straight ones myself.
Oh, your blood-stained corset sounds like fun! 😉
Yeah, I do think more boning along the grommets would have been a good idea… I have added in as much as I’m able to at this stage (and, well, if it doesn’t work (or doesn’t last), it was still a good learning experience. Flat steel at the back would also be a good idea—I only have spiral on hand, so that’s what I’ll be using at least this time, but I definitely think more support in that area would be better.
I use an awl/pokey thing (since my awl is always disappearing) to make the holes, too, but I’m always trying to make them as small as possible, as you said, to minimally disrupt the fibres of the fabric, so it always seems like there’s a lot of wrestling to get the metal through.
I have now managed to pick up some cheap polyester cord that should do the trick for lacing… but I took the corset itself to work today to show a co-worker, and left it there! Aaaargh! Ribbon would have been a good idea, though, I wish I had thought of that.
Two steps forward, one step back… 😉
Snag the bootlaces out of a pair of workboots and try it on! Dying to see how this beauty fits! 🙂
Hehe… I need at least five metres of lacing, I did actually seriously ponder some boot laces I have kicking around, but they just aren’t long enough! >_<
Now I've managed to pick up lacing, and leave the corset at work! Here's hoping for better luck tomorrow…
Your choice of fabric is beautiful and everything looks great. I’m glad you were lucky enough to find your fabric crush on sale – love when that happens! I can’t wait to see how it looks on. That being said, every time I hear the word “corset”, I’m reminded of the one I made in a class that looks beautiful but does nothing but make me look even flatter than I am–stupid corset.
I remember you talking about that one—it would make me sad, too. 😦 I have added some extra bust ease in this one (maybe too much) in the hopes of avoiding that, since I’m not exactly busty either… but I figure if all else fails, there’s always “bust improvers”. 😉
It’s so beautiful!
fantastic so far!!! I’m curious to know how the fitting turns out and whether you find it quite wearable. I’m gonna be finally delving into a pretty heavy corset project soon, so it’s nice to know someone is forging the path ahead of me! ^_^ I have a short space between my ribcage and hip as well, which means pre-made corsets have always been particularly uncomfortable for me, so it’ll be a fun adventure to see if I can make one that fits/flatters a bit better 🙂
Try narrow ribbon for temp lacing – you can get it from Fabricland pretty cheap, and it’ll hold up for try-ons at least 🙂
LOVE THIS! Great job—- I have a few corset books, I’m very corset obsessed, yet I still haven’t attempted them. I have a few patterns, and I actually started to pattern my own once….I’m determined one day to make a blue jean corset….just haven’t gotten to yet….:)PS—Lace it up with some ribbon to try it on??? Even if you don’t have a full 8 yards…if you have 4 plus 4 of something….lace 4 yards down from the middle, and then 4 yards up from the middle to the top. Tie at the top and the bottom….JUST FOR FITTING until your lacing comes in. 🙂