Tag Archives: in progress

A ruby in blue

Creek Springtime

I didn’t get a lot of time to sew this past weekend. We spent much of the weekend at the creek, checking out the changes winter has wrought (not to mention the changes between Saturday and Sunday!). But I did, in snatches here and there, get started on my (long awaited) Ruby Slip.

Lace

After searching high or low, I was singularly disappointed in the lace available to me. (I thought this would probably be the case, but I hadn’t done a truly intensive lace-hunt before, so I was hoping that perhaps I had just overlooked some fabulous finds.)

Cute Slip Pose

Apparently, not so. For the record, I carried a bolt of silk charmeuse around Fabricland for some time, looking for lace worthy of it, but how can you possibly sew a silk & lace slip when the only lace available is scratchy, crappy polyester?*

So, in the end, I went with some 4″ wide stretch lace from this thrift store lace bundle, (this pattern is not recommended for stretch lace, nor for such narrow lace) and for the skirt, decided to sacrifice some of a beautifully-coloured (if not so beautiful-feeling) polyester crepe, snared at a thrift store back home last spring. It’s probably not any good for an actual slip, but, well, it looks nice and has the right drape.

Em. So, this is my first time sewing with lace (other than as a trim), and my first time sewing with crepe, and my first time sewing something cut on the bias.

I’ll start with the sewing bits. As I mentioned, my lace was a wee bit too narrow. Fortunately, Sherry on the sewalong linked to this post on piecing your lace if it’s just slightly too narrow. Which is what I did. It’s a bit trickier on stretch lace, which wants to, well, stretch out on you, but by backing everything with tissue-paper (my new favourite trick; just like what Steph does in this post) I got it to work quite well, especially on the White. Unfortunately, something went kfzzzt in the foot-pedal halfway through and I had to switch to my modern zig-zag machine, the Janome. Funny, the Janome has better stitches overall, but I really like how the White handles delicate (and stretchy) fabric with its adjustable presser-foot pressure and semi-drop-able feed dogs. As I understand it replacing foot pedals is dead easy, so I’m not panicking quite yet. For a thrift-store gamble that didn’t initially impress me, I’ve actually gotten quite attached to it, so I hope I can resurrect it without too much trouble.

ANYWAY, so I squeezed the bodice out, and while the join isn’t invisible, it’s subtle enough that I don’t even notice it any more (did you? it’s on the side-front bodice piece. 🙂 )

I had a hard time matching the notches on the skirt, although it’s hard to say if that has more to do with my sloppy cutting (I am better than I used to be, but that’s a relative improvement and I usually avoid slinky fabrics like the plague 😉 ) or with the weirdness of bias. The side-seams are a bit woobly, mostly where I narrowed the seams (at the top) and then tapered back to the original seam.

Fit photos.

I cut the size 8, which according to the sizing chart should’ve been a bit snug in the chest but spot-on in the hips; I figured my ill-advised stretch lace would probably make up for the difference. As it turns out, it’s snug/fine in the bust, and a bit too tight in the hips. If there is a next time, I will cut a 10. I made a small swayback adjustment (shaved of 1cm from the CB of the bodice, and 1 cm from the CB of the skirt, curving to nothing at the side-seams), but there’s still quite a bit of pooling/puddling above my bottom—which I think would be be fine if the skirt were wider. Look at that backwards-slanting side-seam.  And this is after I released the side-seams as much as I could…

Random Creek Shot, for interest.

The appropriate thing to do, of course, would be to unpick it all, and slice off and re-shape the top as I did for this dress last summer. (I’m not too fussy about the length.) I’m not sure if I have the oomph, though as the seams are already serged and topstitched. We’ll see where my mojo is at in a day or two, because I am really not liking the back view. I’m glad I took the modeled photos, though (even if they required photoshop de-niplifying) because it really brings home the back-tightness issue. And now I can see that the  front of the skirt is definitely hanging lower than the back, something that wasn’t obvious when it was hanging on my dressform. Yes, the dubious duct-tape double got some use, although again, her usefulness appears to have been limited. I think in this case because the direction she hangs naturally isn’t quite the direction I stand in. I think the width in the front is fine, it’s just the back which is too narrow.

Anyway, that was a lot more than I was expecting to write about something that’s not even finished yet (and really requires some re-working). At least the bodice (which I had sort of thought would be the worrisome bit) is pretty much perfect.

So, fix the damn skirt, Tanit, and then you can obsess over bows and other pretty finishing details…

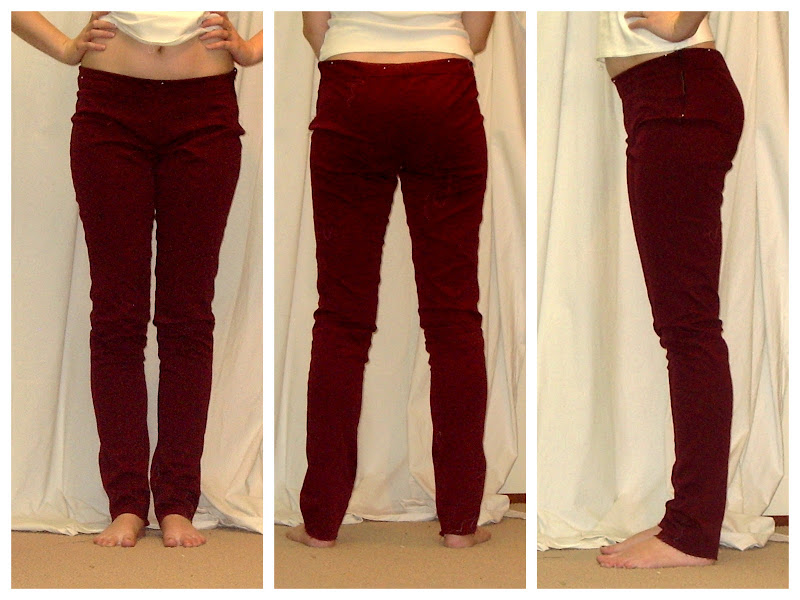
And, just because she’s wearing jeans I made her, I’ll leave you with a picture of Tyo re-arranging rocks at the creek.

Rock work

*Disclaimer: there is, in fact, a very high-end bridal fabrics store in town, which I have not scoped out. I have no doubt they have all the lace and silks I could possibly want. However, they are a) located downtown, where I never go, and b) would no doubt break the bank, so would probably not be the best choice for a first trial of the pattern anyway.

40 Comments

Filed under Sewing

Disaster!

Desperate piecing

So, remember when I posted how I’d finished cutting out the last bits for Tyo’s bunnyhug and had enough fabric left for her pair of shorts?

Well, as soon as I finished cutting them out, I had a little niggle. What if. What if I messed up one of the pieces? What if I have a serging accident? I just officially used up all but the smallest scraps of my matching fabric, with no hope of replacing any of it.

Well, when I finally started tidying up, guess what I discovered?

One more pattern piece for the bunnyhug, which I hadn’t cut out.

Not only that, the single longest pattern-piece in the entire pattern, the sleeve sides. Of which I need not one, not two, but four copies.

I think there’s a sequence to this, kind of like the stages of grief. Denial—maybe I took the pieces off the pattern and they’re kicking around somehwere? Anger—how could I do this? Oh, I’m so stupid. Bargaining—maybe I can match in some other fabric? What about the scraps from hubs’ coat? no?

Fortunately with sewing, at least, there’s the potential for action, not just acceptance.

I gathered up my largest remaining scraps (most of which weren’t more than 6″ in any given direction.

I roughly, ever so roughly, matched the grain-lines.

And I pieced them together, using the same serge & topstitch methodology I used on Tyo’s shorts.

This was a wild affront to the sewing gods, peeps. If I die in a freak serging accident next week, you’ll know why.

And I cut out not one, not two, but four side-sleeve pieces.

Whew.

Nothing like a new design feature or two 😉

Pieced sleeve (almost finished)

I’m actually pretty satisfied with how they look. Not exactly intentional, but not exactly unintentional, either. I used some black twill tape to cover over the seam on the top part of the sleeve, which echoes the topstitched ridges in the black nicely, I think. This is the same method I used for Syo’s hoodie here.

For the other sleeve, I decided to add a little pocket just above the top-sleeve seam.

Pocket sleeve

I even *almost* managed to match up that one piecing seam. So close…

So I think it’ll work. But I still don’t recommend it. Now tell me your latest offence against the sewing gods (intentional or otherwise) to make me feel better! 🙂

28 Comments

Filed under Sewing

Red Leaf Clover (Round two)

Clover---round two

Grum.

So. Still not the best photography, but at least it’s not the iPhone. I lightened the crap out of things to make the wrinkles etc. show better.

So, at this point I have lowered the rise in the front 5cm, tapering to 2.5 at the hip and zilch at the centre back. And this time (yay!) the zipper held out long enough to take some actual photos.

So at this point I’m seeing two major problems, aside from generalized looseness:

1) wrinkles at side-seam along hip. Several of you in the last post (thanks so much, everyone!) attributed this to excess hip curve, and you’re probably right. On the left side the zipper has forced this extra length into a single large fold at the bottom of the zipper, on the right side it’s more distributed.

2) bagginess at front crotch. I obviously need to research this. These aren’t strain wrinkles—it’s more like there’s just too much fabric here.

Minor problems include

3) dip at CB still there. If I lower the sides more, this may help, but really a bit of extra height in the back will be a must for next time.

4) wrinkles and looseness along legs. There’s some width that can be taken out here, I think.

Next up, I did what I should’ve done before I ever cut, and dug out my pattern for the Burdastyle Ellen Pants. This is the one that created the Businesswoman Pants, and while the fit isn’t totally perfect, it’s hella better than this pair, at least so far. The only reason I didn’t before, aside from laziness, was that the Ellen isn’t drafted for stretch fabric, so I wasn’t sure how precisely comparable they would be.

Crotch Curve Comparison:

Ellen vs. Clover

So this was the REALLY interesting part. I overlaid the two patterns. The solid paper is the Ellen pants (cut to a size 34 rather than my usual 36 as they run large). The tissue is my tracing of the Clover (size 2 grading to size 4 at the waist).

The biggest single difference is the rise in the front. It’s more than an inch higher at the centre front, and substantial. The rear rise is almost identical—a smidge lower at CB, a cm higher at the sideseam. There’s a slightly greater curve to the hip in the clover. The back piece is slightly wider in the Clover, but then the front piece is slightly narrower, so I think the overall width is very similar (and Ellen is non-stretch!). The spookiest thing is that the diference in rise doesn’t even out at the side seam—the rear side-seam is higher, when the crotch curves are lined up, than the side on the front, which means that there’s some odd shifting of how the halves are going to fit together. That’s boggling my brain, I tell you.

The crotch curves are almost identical, up to and including the much longer rear than front curve. This is the bit that really threw me for a loop, because I was expecting there to be a significant difference, not just a few mm at the back of the rear crotch curve. Now maybe having the front fly on the Ellen masks certain things, or maybe it’s just that they’re in non-stretch fabrics, but I never saw anything in any of my Ellens like the folds I have in the Clover.

There are a few other differences—the Clover legs are much narrwer, especially as you go down, than the straight-legged Ellens. But on the whole—scary close.

So I think I’m going to cry Uncle, seam rip the entire kaboodle, and recut following the Ellen pattern at the top. And then maybe consider taking in the side-seams until the stretch factor is properly accounted for.

And this, Ladies and Gentlemen, is why I’ve stuck with the same two pants patterns this whole time…

31 Comments

Filed under Sewing

Red-Leaf Clover

Colette Clover pants. You can see from the wrinkles that the waistband at the side isn't pulled as high as it can go.

Or, possibly the worst-photographed post ever.

Did I mention my camera charger didn’t come home with me after the holidays? So yeah, the last few posts have been iPhone photos. Painful, I know. I’m working to get the back-up camera functional again (battery issues, but at least it uses standard AA batteries), but as of this moment you get iPhone photos.

So, after making little jeans for everyone short in the family (or at least that’s what it feels like…), I was in the mood for some new pants myself. And frankly, I’m a little bored of Jalie 2908, although I do have fabric for another pair for myself planned.

So I pulled out this red stretch (?twill? Sometimes it looks like twill, other times not.)

After much hemming and hawing, I cut out the size 2, which is my actual hip size, grading to a size 4 (which is not quite my actual waist size) at the waist. The long view finished inseam is listed at 27″, designed to fall just above the ankle. Dear readers, 27″ is a longish capri length on me.  Since it’s winter and my desire to make a pair of pants that would look funny with socks is at absolute zero, I decided to lengthen them to a more normal, scrunch-around-the-ankle, skinny length. I added 6″ (15 cm.) I had some misgivings about the rise, which some people have reported as a bit high (and we all know I’m a low-rise kind of girl), but figured I would keep it as-is for now, as that’s something which can be tweaked after the pattern’s cut. The crotch-length was a little disconcerting, as the horizontal leg of the back L seemed really long, but the horizontal leg of the front L was really short, so I hoped it would even out. It’s different from most of the other crotch-curves I’ve seen, so I was kind of curious to try.

Clover crotch-curves

And then I took a deep, deep breath, and I cut into my precious* red twill.

It is my intention for these, eventually, to be a sort of wearable muslin. Uncharacteristically for me, I basted them together just to check the fit—I’m planning on completely re-stitching everything once I have them fitting how I like.

I didn’t get any full-length pictures. The legs are pretty much fine—skinny, long enough. I may take in the outseams above the knees about .5 cm on each side—enough to bring me down, basically, to a size 0; I think this fabric has a bit more stretch than the pattern may have been planned for (I wish it had a stretch guide, or at least listed %stretch rather than %Lycra.  % Lycra is not very useful at all in predicting how much a fabric stretches, in my experience.) Alternatively, I may just like my pants tighter than was originally meant. Which is probable, too.

Anyway. The rise in the back is good, although it does that dip-down thing at the middle of the back. I would not want it any lower, that’s for sure.

Front view. You can just barely see that my belly-button is immediately above the waistband.

The rise in the front is a full 5cm (almost 2″) higher than I’d like. The pin in the front shows where I’d like the bottom of the waistband to fall in order to get the rise right.

The size of the waistband seems good as long as I don’t interface all stretch out of the waistband. (Though I suppose this will be different once I change the rise, anyway.) There is not much gaping at the CB, which is a common problem for me, so that’s good.

Unfortunately, the crappy zipper I threw in self-destructed within about 30 seconds of me putting the pants on, so I’m frantically pinching the one hip together in the pictures.

The front crotch seems a bit odd, I think because the curve is so shallow, but I’m hesitant to mess with it at this point. Maybe later. If any of you know what these wrinkles mean (left side of the photo, the right side is being pulled off by the issues with the zipper) please let me know! 😉

Anyway, I think I’ll be able to make some quite nice pants out of these, once I have them tweaked a bit. But some tweaking is definitely required.

And unpicking. And, y’know, reading the actual instructions.

*in the sense that I have been looking for a fabric like this for ages, not in the sense that it was expensive—it was definitely not.

49 Comments

Filed under Sewing

Kimonology

Making Kimono

Tyo wants a new housecoat. Her old one, to be fair, no longer reached her knees and was past due to be handed down to Syo. I had her almost convinced that she could take mine and I would make myself one, but I wasn’t really feeling it (I have a vision of a Lady Grey Sweater-made-full-length insane housecoat, which would be awesome but will require like six bajillion metres of fabric.) And then she found Simplicity 7640, the “kimono” pattern in my box of kids patterns.

This particular pattern has been in the “stash” for a long while. Once upon a time, c. 1988, my mother-in-law used it to sew Karate Kid Hallowe’en costumes for my husband.

Of course, I can’t just whip up a costume-grade Simplicity pattern into a housecoat and leave it at that. That would be too easy. Not when I have “Making Kimono and Japanese Clothes” by Jenni Dobson on the shelf.

This is one of a slew of helpful books I acquired back when we lived in a condo with a communal garbage-house.  Aside from the big trash bins, people were always leaving stuff for others to take—furniture, curtains and, on one notable occasion, a really good selection of books. I wasn’t sewing much at that point, but how could I leave something like this behind? Aside from lots of information on traditional Japanese cloth, decoration styles, and clothing construction, there’s pattern-drafting instruction for a number of garments including kimono. (Incidentally, while the Simplicity pattern describes the blue and white version as a kimono, I suspect Ms. Dobson would disagree. The short, jacket-like garments in her book, though similarly constructed, have their own names.)

I dutifully pulled it out, ogling the gorgeous designs and weighing how much energy I was willing to put into a housecoat for my eleven-year-old. Sashiko? Not happening. Shibori? Ah, no. Applique? … now that might be about my speed. Depending on the applique. Not terribly traditional applique, either.

Which brings us to another book scored at the same time.

I'm scared. Are you?

It’s, um, a little dated. But covers a variety of basic applique techniques, even if the projects make me want to scrub my brain. The big one I hadn’t tried yet? Using a fusible web to stabilize and hold the appliques in place until they’re stitched down.

Apparently this is a big deal.

So I swung by Sewing World on my way home one day, and upon asking for fusible web was handed a metre of 18″-wide Steam-a-Seam Lite.

Yes, the same stuff I’ve been using lo these many moons in my knit hems. Apparently it’s the bomb for the applique. Who knew.

Tyo wanted a lotus.

Lotus Layout (asymmetry and odd numbers are common features of Japanese kimono decoration, according to Ms. Dobson)

Even better. You can make a lotus out of just a bunch of spindle-shapes, which is a shape that I actually CAN zig-zag around without beating my skull in.

So, in a fit of zeal, I set to work one weekend afternoon.

I have to say, I think the White has already paid for herself in just this one project. Dude. First off, the wide-mouth zig-zag foot is EXACTLY what Ann Boyce (and, no doubt, everyone else who does applique) recommends. Win. And there’s no way my light, plastic Janome could’ve kept up the constant, heavy, top-speed motion of doing that much zig-zagging. She would’ve shimmied across the table and un-threaded her bobbin at least once per leaf.

Open-toed zig-zag foot

The White may not straight-stitch well, but she can zigzag like a trooper. The stitches are even and smooth. The bobbin-threading messed up once during the entire marathon applique-session. One other time, the sheer amount of vibration rattled the fly-wheel just loose enough that the stitches started losing power. Other than that—perfect. Smooth, even feed. No complaining about the continual, high pace. The heavy metal machine stays where she’s put, not moving around under her own vibrations.

Just so the Janome’s feelings aren’t too hurt, it was really handy having a spare machine just to wind bobbins. The bobbin-winder system on the White is pretty much the same one as on the Featherweight… i.e. a little primitive. And you go through a lot of bobbins doing applique…

So using  a fusible web totally does the trick. Well, at least for these simple shapes. I still have doubts about my ability to make the stitch turn tighter curves, but for this shape it was easy.

The one other bit of technique I learned from Ann Boyce was about making narrow points. When approaching the point, you start cranking down your stitch width gradually (doing this while still guiding the fabric one-handed is a bit of a trick…) to almost nothing right at the tip. Then you pivot the fabric, start again, and gradually bring the stitch-width back up to full (whatever your full width is. I like 3.)

This is not the most super-easy technique. Sometimes I got it, sometimes (maybe more often) I didn’t. But it was worth a try, and when it did work it looks super nice. When it didn’t, I have clumps and loose threads showing at the points.

Appliques and hem binding.

Still, I’m pretty proud of myself. The print fabric is a Japanese-inspired quilting-cotton that was perfect for the design, plus some black shirting with a textural stripe that looks great in real life but doesn’t show at all in the photos. I wish I’d had enough of the print to bind all the internal seams, but I only did the hems.

I could go on about the instructions, the points of difference (and similarity) between the Simplicity costume pattern and the “traditional” kimono (as described by Ms. Dobson, anyway), and where I screwed up and where I completely abandoned ship. But I think this post is already long and rambling enough, so I’ll end it with a quick sum up:

  1. Random scrounged books finally come in useful. YAY!
  2. Good job, White! (Don’t worry, Janome, I still love you too.)
  3. Applique fusible web for the win!
I’ll get full, finished pictures in a few days when I can wrangle Tyo into modeling. She’s got a bad cold this weekend and is VERY happy to curl up in the half-finished robe as much as I’ll let her, but is understandably unwilling to have photos taken.

20 Comments

Filed under Sewing

On the Vogue Front

The next stage of fitting…

Sleevage. Fitting.

So, I slapped some sleeves onto my bodice-muslin of the Zoe coat, Vogue 7448, to see what they did to the floopyness around the front armscye. And also where the shoulders actually sit and things like that. Oh, and I added facings and the collar.

I think I should just suck it up and do the square shoulder adjustment.

I also think I’ve decided the front floopyness really boils down to my SBA being insufficiently agressive. If I stuff a fist in the side in front of my breast, it fills out the space quite nicely and the wrinkles disappear. (Incidentally, I took this photo wearing my padded bra, which does bring my bust measurement up to a proper size 12—34″. And it’s still floopy.

The only other thing (which doesn’t show in these photos) is how much the low armscye makes the arms bind when I put my hands on my hips. I’ve been trying to talk myself out of fixing it, but I just don’t think I can. Even the front floopyness doesn’t annoy me as much as that binding at the arms. I promise I’ll only raise it a centimetre or so. I’m sure I’ll still be able to get most of my sweaters underneath.

And the wearable muslin…

Vogue 7448 Sweater

Despite the fact that the fit is so-so and the internal finishing is abysmal, I really wanted to get something usable out of this. So, I grabbed some cream rib-knit that just happens to match the cream sweatshirt knit, cut a 3″ wide band (doubled), and added it to the bottom and made cuffs for the sleeves.

Buttons

Although I often really like cropped jackets, something about the position of the band has me not entirely convinced that it’s terribly flattering (maybe I’m just feeling muffin-top-conscious due to winter slothfulness and the depressing length of time since I’ve done a pretty, glamorous basement photo shoot. Oh, well. At least the jeans look good.)

I do quite like it hanging open, which is unusual for a double-breasted garment. The way the front hangs open reminds me faintly of those floppy-front cardigans.

Facing and under-collar

The buttons are cream, leather-covered buttons from one of my old-button thrift store hauls. The leather is pretty dinged up and dingy, but the colour was nice and I was willing to go with it for this particular garment. I decided to bind the inside of the facing and the undercollar with some nice patterned bias binding, which would be a lovely touch if the rest of the seam-finishing wasn’t so godawful. (er, nonexistent.) (Erm, buttonholes in rib knit. Bad idea, basically. Some kind of stabilizer would’ve been a VERY good idea. I thought of it just after I started the first one.)

I’m glad I made the full collar, though. This is the first time I’ve tackled one of those collars with inner corners, and it was a bit brain-breaky and nerve-wracking. I had to actually read the instructions. Definitely worth practicing.

So I guess this is one of those “time will tell” garments. I’ll probably wear it a bit, because I do need sweaters, badly. I may fall thoroughly in love with it… who knows.

20 Comments

Filed under Sewing

The perils of tissue fitting

And other good ideas

Tissue-fitting

Baby steps continue on Vogue, 7448, henceforth to be known as the Zoe Coat. I am *this* close to convincing myself that I can splurge on some really nice wool and thinsulate to make an uber-winter version as my prezzie from Santa, although if I have to order anything online the time-frame is getting iffy. We’ll see.

So, I decided to try and tissue-fit my altered pattern pieces on my theoretically-me-shaped duct-tape double.

Now, I do not wish to completely malign duct-tape doubles. I suspect when done really well, and stuffed with a lot of attention to detail, and treated with appropriate respect thereafter, they can probably be pretty useful. Mine is a bit lacking. Another layer of duct-tape to stabilize would probably have not gone amiss. I should’ve been a little more careful in the stuffing, especially of the shoulder region. The fact that my kids think it’s the cat’s miaou and have had oodles more fun with it than I ever have doesn’t help, either. But it is still generally me-shaped.

So. I pinned my pattern pieces, noting centre front and centre back locations, and tried them on the double.  As you can see above (please ignore the awful background) the main issue seemed to be that the waist (which is supposed to be slightly raised—from past experience this is about 1/2″ above the natural waist) still appeared to be a couple of inches too low. There was also a lot of room in the bust (or rather, a lot more room in the bust than at the waist), so I added another tuck to shorten and did a modest Small Bust Adjustment. This is actually my first formal SBA with a dart, although I’ve smoothed down princess-seams in the bust area plenty. I tend to wear a bra with wovens, and my bras are all psychotically padded, so I’ve mostly been able to get away with the bust as drafted.

For good measure (considering all the height I’d taken out at this point), I shortened the bust dart by a centimetre or so.

Muslin---Stage 1

And moved on to muslin (stage 1). Apologies for the fuzzy photos, I am far too lazy to re-take them. This is what happens when you let your fingers or arm come between the camera and your photo-spot when setting up the self-timer. 😛

Several things became instantly obvious.

Firstly, I had taken out too much length. Obviously my duct-tape is not quite so double. (I suspect she’s compressed in length from being left standing from time to time.) I actually pretty much like where the bottom of the pieces is, but of course there needs to be a seam-allowance below that. /sigh. When I tried it on I thought the back was too short (remember I took 1 cm off the bottom of the back as part of my swayback adjustment), but actually as worn it hangs straight, so that’s a win.

There’s a lot of gaping in the back, at the neck and in the sway-back area.Fairly easy to fix by tweaking the back seam. I’m wondering if the neck-gaping is exacerbated by the need for a square-shoulder adjustment, though. I had hoped that since the pattern is designed for shoulder-pads, I wouldn’t need one, but it would probably have helped.

The front waist seems about right, and shoulder and side-seams fall in pretty good places. The point of the bust dart is high, but I think not problematically so. The big issue in the front is that folding in the front armscye. Those of you who are fit-gurus, please comment! My Singer Sewing Reference Library volume “The Perfect Fit” suggests two fixes for this, a minor one which is basically the same as a sloping-shoulder adjustment on the front bodice piece only(which is pretty much the opposite of what I need), and a major one where you take a dart out of the pattern at the armscye and then kind of smush it flat so there’s no dart there on your final piece. This seems annoyingly imprecise, but would probably work. Of course, these armscye issues are also affected by the sleeve, so I’ll be setting in sleeves before I make a final decision. I find it particularly interesting that the “fold” doesn’t point to the bust, but rather beside it

EDIT: Just a random bit of life I can’t resist putting in. Yesterday our area was in the grip of a fierce chinook windstorm. The wind was breathtaking, but even more amazing was the temperature—even with all that wind, it was WARM (comparatively) outside. Being good Canadians, we promptly kicked the kids out of the house to enjoy the weather.

This morning we turned on the Weather Network and learned that our area had received hurricane-force winds yesterday and that people had been urged to stay inside and away from windows.

Oopsie.

Well, at least they were away from windows…

24 Comments

Filed under Sewing

Baby Steps

Vogue 7448

The other day I stole a few minutes to sort through Vogue 7884 and extracted the bodice front, back, and sleeve pieces. This is not as easy at it sounds, as there are separate, and confusing, interfacing and and lining pieces. I had to actually read the writing on each piece!

As is this my first take on a Vogue pattern, I had some thinking to do.

It’s a size 12 pattern, which is pretty much my standard size, aside from that whole waist issue. Which shouldn’t be a problem in a coat, really.

The back length Vogue lists for the size 12 is 16 1/4 inches. My back length is an even 15″, so that’s the first issue. The coat is drafted to have a “slightly raised waist”, which is a look I love, but I still want the waist to be raised on ME. So I figured I would need to take out at least an inch in height. The question was, where? Typically I’ll take height out through the armscye, as I like a high armscye anyway, but I thought losing a whole inch in that region on a coat might be a bit much.

Armscye comparison (back) (remember the white pieces have no seam allowances)

For comparison, I dug out my tweaked Fitted Jacket block, from Built by Wendy: Jackets & Coats, the base pattern for my wonderful run of little jackets last spring: the cowl-shoulder jacket, the cropped jean-jacket, and the springy coat. Interestingly, while there is indeed a full inch difference in the armscye length (height?) on the back piece, there was considerably less difference on the front.

Front comparison

For a compromise, I decided to remove 1.5 cm through the armscye, and 1 cm at the lengthen/shorten bodice here line. We’ll see how that works out. I also did my usual swayback alteration (1 cm above waist, to be matched by 1 cm below when I get to the bottom pieces), and lengthened the sleeves by 2.5 cm. (It’s my blog and I’ll hop randomly between measuring systems if I want to)

Erm, all these alterations were done as part of the tracing process. Hacking and tucking a vintage pattern (even 70s vintage) horrifies me at a visceral level.

There is a substantial bust dart. It terrifies me.

I am torn between trying to muslin the bodice out of some cream sweatshirt knit I have on hand in the hopes that I’ll be able to wear the result as a sweater, or using some of the awful 80s sweatshirt knit from my aunt and turning that into underlining for the final version (should it work.) I like the idea of a semi-tailored jacket topper made out of a stable knit, but I’m a little worried this outerwear pattern will have too much ease built in for that. On the other hand, Tyo and Syo both adore the godawful 80s knit, and far be it from me to deny my children the opportunity to repeat the fashion disasters of my youth.

I’m also torn on what to aim for for the final project. Me being me, I am powerfully drawn to view A, the crazy long length (which the pattern envelope assures me has a finished length of 57″!), although probably beltless as in view E because me and cinching don’t get along so well. Though it might require a back vent, as the skirt doesn’t seem overly full. However, I only have one or two pieces of coating fabric in stash that would be long enough, and neither are particularly wintry—I feel like a shorter length would be appropriate for a spring-weight jacket. Speaking of which, winter has arrived here, although we’re still a bit scant in the snow department. Last weekend temperatures dipped below -20C and the windchill hit -30C, which to me is legitimate winter weather. It’s warmed up a bit since, but my psyche has officially been switched to Winter Mode. Which means my desire to make a light, springy jacket I won’t be able to wear for months is limited right now. And if I’m going to try to outdo my Great Winter Coat of last year (which is great, but not quite as warm as I’d really like) it will require a significant investment of materials and thought that I don’t really have the resources for right now.

It’s enough to make a girl want to just go sew quick projects for her kids.

17 Comments

Filed under Sewing

Make me one too!

Tyo's jeans, Version II

Or, a further failure of selfishness.

The first pair of jeans I made, a year and a half or so ago, were from Jalie 2908, and were for Tyo. They turned out great (better, in hindsight, than the pair I made myself next), and fit Tyo like a dream.

For approximately a week before it got hot and they were abandoned for the summer, and by the end of her usual summer growth spurt they were thoroughly outgrown. I grumbled, re-measured, traced out her new size, and went on making any number of jeans for myself. In the intervening year and a bit, Syo got two pairs of jeans made just for her, and inherited Tyo’s original pair. So, really, Tyo had a fair bit of leverage going on when I finished Syo’s ruched jeans last week, and she instantly demanded her own pair.

In my defense, I already had these cut when the coat pattern from Zoe arrived. So really I had to finish my currently-underway project. I really did. And given that my sewing is currently of the one-seam-a-day variety, I’m doing pretty well to have these as far along as they are.

As per Tyo’s specifications, I combined the ruching from Syo’s recent pair with the same cut-out-over-plaid detailing of Tyo’s original pair (which was inspired by a RTW pair belonging to Syo… yeesh this gets confusing). And they’re skinny-ish. The plaid is the leftovers from Tyo’s purple shirt, which I also need to re-make in an appropriate size.

I re-measured Tyo and went up a size from the one I’d traced out for her last fall. She’s still closer to the smaller size, but I am not making another pair to be handed down instantly. So they’re not as snug as the RTW skinnies in Tyo’s wardrobe. The length isn’t quite as ample as I’d expected it to be, however, which may be a problem in the “growing into” department.

Anyway.

Pockets

I interfaced the plaid flannel with Armoweft to give it a bit of extra support without having to add a whole ‘nother layer of denim behind it (as I did in the first jeans). I think it’s a good compromise.  The yoke has a layer of flannel sandwiched between two layers of denim (even the Featherweight wasn’t happy stitching that), and once the waistband is in place I’ll snip around the top layer of denim. Once it’s washed a few times it’ll have a great fun frayed look. I suspect some distressing will be in order as well.

Pieced Waistband

As I was trying to squeeze the pair out of a denim remnant (I tend to buy 2 m lengths to make a pair for myself, so this is what’s left of that after I made my own jeans) I cut the waistband on the lengthwise grain (no stretch) and in two halves; again due to fabric shortage, I opted to face it in the flannel. Unfortunately, a quick fitting around Tyo’s hips on the weekend suggested that it was going to be a bit short, so I pieced a further bit on each end.  On the top left corner you can see the buttonhole where the buttonhole elastic will emerge from. At least this time I remembered to bind the edge of the waistband before attaching it. Much easier this way.  I feel like this is going to be a much more substantial waistband than the one on Syo’s pair… we’ll just have to see.

Darting yoke pattern piece. Only with two darts.

I made a couple of fit adjustments, although it’s not entirely clear how successful they were (I’ll get back to you once the waistband’s on). I curved in the yoke by a couple of cm (standard on Jalie 2908 unless you have a really flat butt, I think), and I increased the rear crotch length (height? depth?) by adding a wedge 1 cm wide at the CB seam, tapering to nothing at the side-seam. In theory, this gives Tyo a bit more (much needed) booty coverage.

It’s been nearly a week since my last post. I hate posting so infrequently, but that’s the state of things right now, and not likely to improve until later next year. I’m going to try to keep the blog limping along as long as I can, but at some point in the next few months the thesis s$&t will really hit the time-crunch fan, all semblance of a balanced, healthy lifestyle will go out the window, and I will be reduced to a twitching, zombie-like being stumbling around the house mumbling “cladistics is the answer and the problem!” and “intersubjectivity as a substitute for objectivity is flawed!”.

But in the mean-time, there are jeans.

And, hopefully soon, a coat.

18 Comments

Filed under Sewing

The Pants that Wouldn’t Be

Jeans

I’m never sure if famous Saskatchewan authors are really famous or just famous in Saskatchewan (OK, I’m reasonably certain Farley Mowat is Canada-famous-ish, anyway, as he only lived in Saskatchewan as a child), so here’s the book I’m referencing. It’s set in my hometown, albeit several decades before I got there.

ANYWAY, these jeans for Syo certainly seemed as if they didn’t want to be. I sewed the yoke on backwards. RRRRRIP. I sewed the waistband on inside-out. RRRIP. I forgot to bind the the inner edge of the waistband, which I have decided is by far my fave way to finish it, and had to rip the stitching at the ends of the waistband (RRRRIP), and then started sewing the binding on inside-out, and had to rip that, too. Basically, my head is too full of other things to really concentrate on my sewing right now, and it shows.

That being said, we got through it, so here’s the story of yet another pair of kids’ clothes, and yet another pair of Jalie 2908. For those who read this blog for cute dresses or stylish remakes of 70s patterns, I apologize. Again. (Incidentally, despite paying close to $20 for this pattern once shipping was included, cost per-garment is already barely more than my average thrift-store pattern, and continuing to drop. Win.)

I noticed the other week (as the weather declined to the point where leggings are really not seasonally appropriate any more, at least until we break out the snowpants for everyday use), that Syo is really wearing only one pair of jeans of the fifteen or so in her drawer.

Which, fortunately for her long-term survival, just happens to be the pair I made her last winter. The reason has more to do with them being skinnies than being made by me, but anyway. She needs warm pants, and if they have to be skinnies for her to wear them, skinnies they shall be. (Obviously Jalie 2908 is a flared pattern, not a skinny pattern. To fix this, I just folded in the edges of the flares.)

After some cogitation and contemplation, I decided I could re-use the same size pattern I used last winter. The first pair still fits, albeit more snugly than initially, but I had taken them in at least a couple of cm on each side, in an attempt to reach Syo-approved levels of skinniness. And there’s plenty of length that I had hemmed up in the first pair, too. So this’ll be the third pair I’ve made in this size (size K, not that it’s relevant).

The fabric has been sitting in stash since sometime last winter. It’s a thrift-store find, not exactly stretch-denim, but very stretchy and bottom-weight-y. It’s not a colour I particularly crave for myself, but I was pretty sure one or the other of the kids would like it. One side is severely faded, but the other side is fine (bonus points to the original owner who had it folded right-side-in.)

And so I set to work.

Feature Pocket

Just to be different, I decided to use the pocket I originally drafted up for my sailor pants last spring. Yup, my pocket. I based the size on it on the size of the pocket I use on my own Jalies, which is actually the pocket from the size K pattern, because I like my jeans-pockets small (I have this theory it will make my butt look bigger, which in my twisted little body-image world is a good thing). And I wanted to incorporate some piping, because I have some rather ratty thrift-store piping in a dusty blue that is kicking around the sewing room and the fact that it has stains every four inches along the length wouldn’t bother me on kids’ jeans.

So I planned to add piping lots of places—along the pockets (back and front), the outseam, maybe even the waistband. Then I promptly forgot except for on the back pockets. Oh, well. I really should write up lists of the modifications I’m planning to make. And then follow them.

You may, perhaps, notice that one of the back pockets is a feature pocket. Yes, it’s got topstitching the other hasn’t, and the colour is slightly lighter. This wouldn’t have anything to do with the fact that I pressed and hemmed the top of it inside out. Nothing at all.

Ruched Front Leg

You may (hopefully not) remember that Tyo has a particularly stylish friend, who is embarrassingly close to being my style muse. Seriously, this kid has the best clothes. ALL the time. A lot of this is probably creditable to her mother, who is a good friend, too, but her mom’s style doesn’t particularly speak to me (not that she’s unstylish. Maybe it’s just our different body types). I stole the rear-calf dart from her. I won’t even get into the time we bought the same pair of knee-socks, or the stripey hand-warmers. And a few months ago, I was struck by some jeans she was wearing, which exaggerated that scrunched-at-the-bottom look so many skinny-jeans-wearers seem to go for. (This look doesn’t happen to me, at least with RTW pants, but that’s another issue). Basically, the front pant-leg is cut longer, and ruched to fit the back. Instant scrunch, half the bulk!

I added about 6″ of length, and initially planned to gather from just below the knee, but wound up concentrating the gathers in about the bottom 6″ of the leg as well, so although I was highly unscientific about it, I would guess that my gathering ratio is about 2:1. I tried to leave a bit un-gathered at the bottom for the hem, but I should’ve left a bit more. Gathering denim is about as fun as it sounds, and looks really weird in the process, but with a bit of pressing and perseverance it worked out in the end.

Interior waistband: Bound, buttoned, and elasticated.

I even remembered to put buttonholes on the inside waistband for the buttonhole elastic! Of course, I forgot to sew the buttons on at the same time, which isn’t really necessary but is a tad easier than doing it at the end. Incidentally, I decided to use some blue, sueded knit (left over from this skirt) for the pocket linings, mostly because I liked the colour match. Apparently soft, fuzzy pocket-linings are A Good Thing. Syo approves.

Bar tacks, good and bad (actually, these are all good ones).

For whatever reason, I had zig-zag curse with this fabric. My vintage buttonholer was disagreeing with the Featherweight when I went to put in a keyhole button (not unusual for jeans buttons, but still frustrating since this fabric wasn’t terribly thick). My Janome is never terribly happy with topstitching thread, and this time was no different as I tried to do bar-tacks. One or two would go well, and then something would happen with the thread looping or the bobbin tension and the next one would be truly and utterly hideous. There was also a needle-breaking incident that locked up the entire machine and required turning the machine upside down and shaking it to fix (I think a piece of needle lodged in the mechanism)

And then, in one final curve-ball, as I went to install rivets and a jeans button, I realized I’m out of jeans buttons.

So final, modeled pics will have to wait until I can pick some of those up.

In the mean-time, I’m considering experimenting with some more distressing. I think it would look cool to highlight the ruching, and somehow it’s far less frightening on pants for my kid.

25 Comments

Filed under Sewing